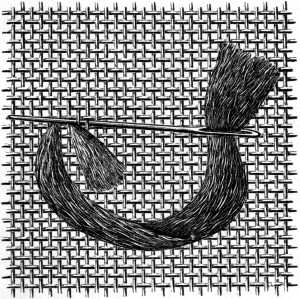
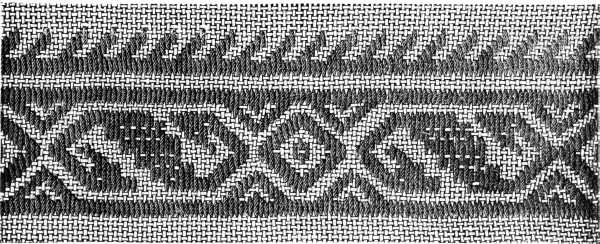
 Appliqué work on satin set with fine cord.
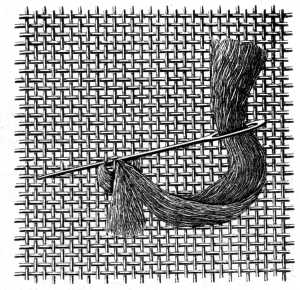
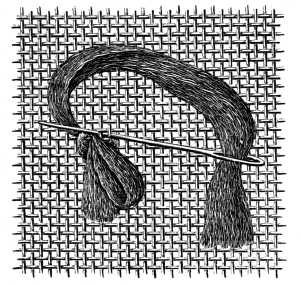
Appliqué work on satin set with fine cord.
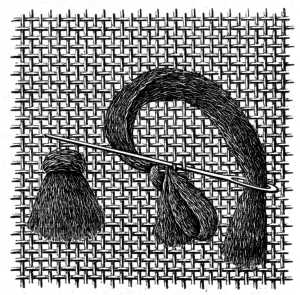
Appliqué work on satin set with fine cord.
As the plan on which this book was constructed rendered a systematic classification of the different subjects it treats of necessary, a certain amount of miscellaneous fancy work, which does not come under any of the previous headings remains to be dealt with in the present chapter. In most cases the illustrations and the accompanying directions are but an application to a practical use of the different kinds of stitches already described in previous chapters and those who are familiar with all these various branches of needlework will have no difficulty in understanding what follows.
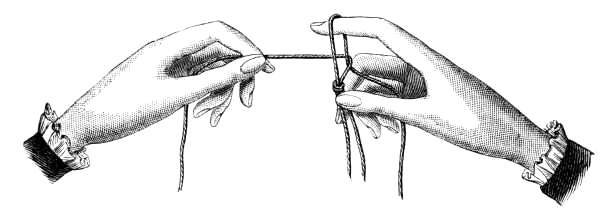
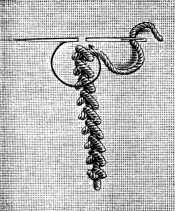
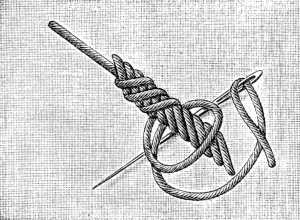
Knotted cord (figs. 831, 832, 833, 834, 835).—The knotted cord referred to in the letter press belonging to figs. 772 and 773 in the chapter on Irish lace, comes under the present heading: in making it, the fingers take the place of a crochet needle.
You tie two ends of thread or braid together, take one thread in the left hand fig. 831, and with the forefinger of the right, pull out a loop long enough for the left forefinger to pass through and hold the end of the thread tight with the little finger of the right hand.
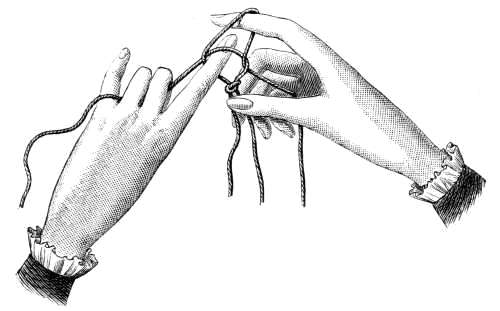
Then draw the left forefinger backwards through the loop and behind the thread that is round the loop and lies in the left hand, fig. 832. As you lay the thread round the left forefinger, you must pass the knot and the ends of thread as well, over into the left hand, and with the right hand pull the thread that lies on the right and draw up the loop, fig. 833.
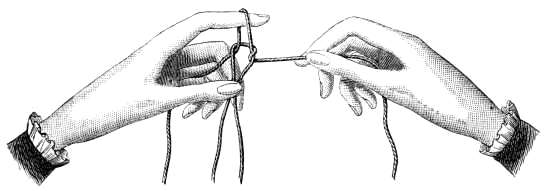
In fig. 834, representing the fourth position of the hands, you are shown how the forefinger of the right hand lifts up the thread and passes through the loop on the left hand; the end will consequently also pass immediately into the right hand and the left hand will tighten the knot.
It is by thus drawing up first a loop on the right and then one on the left that this pretty cord is produced.
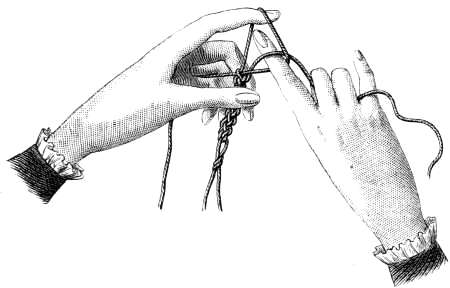
Skilful hands will soon learn to make a cord of the same kind with four threads, as follows: knot the four ends of thread together, make a few knots, using two threads as one, then dropping the loop on your forefinger, put the next one upon it and draw up the knot, passing however the threads over those that you dropped. Then drop the loop you have on your finger again and take up the first loops.
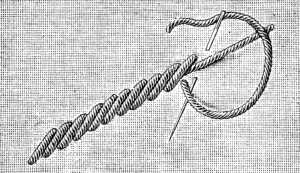
For the cord made with double threads, represented in fig. 835 on a magnified scale, use Cordonnet 6 fils D.M.C or one of the other materials mentioned at the foot of the illustration. Soutache D.M.C will always be found to be very suitable for this purpose.
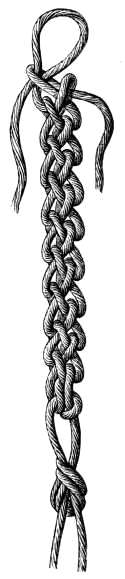 Fig. 835. Knotted cord.
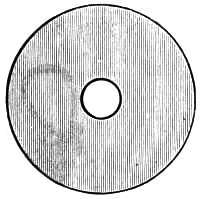
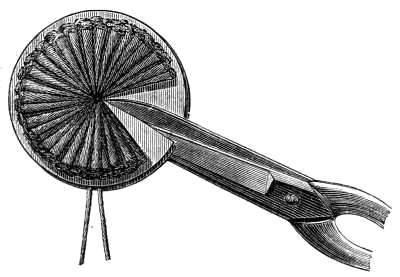
Balls for trimmings (figs. 836, 837, 838, 839, 840, 841).—Amongst the crochet patterns are two that are finished off with balls; to make these, begin by cutting a number of rounds of cardboard, two for every ball, with holes in the middle, fig. 836.
If you have a great many balls to make it is well worth your while providing yourself with a metal die of the proper size, to cut the rounds with.
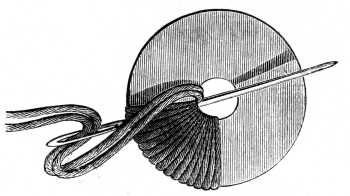
Lay two of these rounds together and cover them closely with stitches, fig. 837, using for this purpose Coton à tricoter D.M.C (knitting cotton) or Coton à repriser D.M.C (darning cotton).[A]
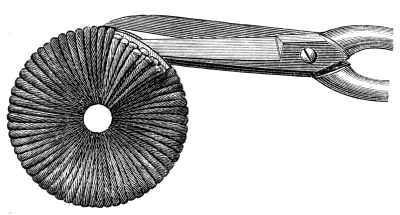
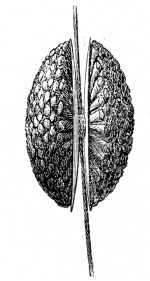
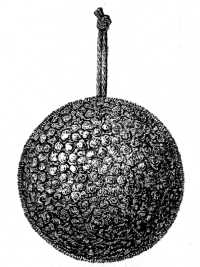
When the round is entirely covered, put the scissors in between the two circles of cardboard and cut open the stitches all round the outer edge, fig. 838; then draw a piece of thread between the two circles and knot it firmly round the stitches that meet in the centre hole, fig. 839; leave sufficiently long ends of thread hanging to form a loop by which the ball can afterwards be fastened to the heading of the fringe; when the stitches are knotted together you cut and pull out the cardboard, fig. 840, and snip the thread with your scissors until it becomes quite fluffy and the ball is perfectly round, as shown in fig. 841.
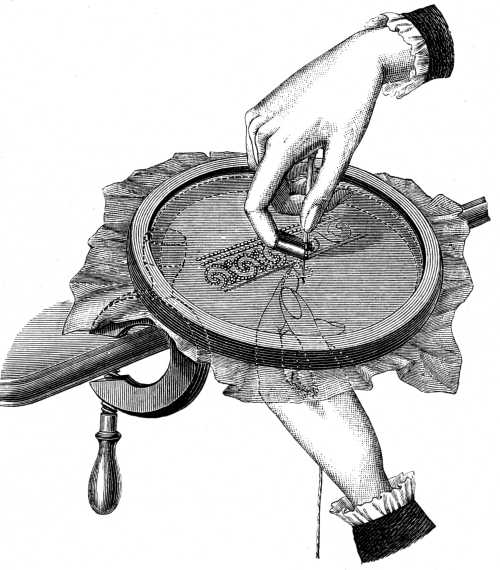
Tambour work (figs. 842, 843, 844, 845).—Since the introduction of the sewing machine, by means of which this charming kind of embroidery can be so quickly and easily executed, it has somewhat gone out of favour. As however, the fine patterns with a good deal of shading in them, can be far more accurately worked by hand than by machine, tambouring, which is in point of fact merely a form of crochet, has lately been revived. The piece of stuff on which the tambour work is to be done must be mounted on a frame.
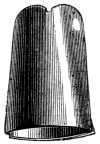
The loops which are made with a small hook, called a tambour needle, form a fine chain stitch and must be regular and even; to facilitate this a sort of thimble, fig. 842, is worn on the forefinger of the right hand, formed of a small plate of sheet brass, rolled up but not joined, so as to fit any finger; it is open at the top like a tailor's thimble and has a little notch on the side which is placed above the nail, and in which you lay the tambour needle whilst you work. From the thimble being cut slightly slanting at the top, it follows that the inside where the two ends meet is a little shorter than the outside.
The thread is drawn through in a loop to the front of the work by means of the hook, whilst it is held at the back in the left hand, and when the needle is put downwards through the stuff, laid round it. The needle in its downward and upward passage, should be kept in the notch in the thimble and the stuff pressed down with the thimble, as the needle is drawn up to the surface of the work, fig. 844.
A little practice is necessary to acquire the right action of the hands, there being always a tendency, the same as in tatting and macramé, to confuse the movements of the two. As soon as you realize that the upward drawing of the needle and the downward pressure of the stuff with the thimble must be simultaneous, you will find that you can work with great rapidity and with admirable results. Thread with a very strong twist, which the hook will not split, is the only suitable kind for tambouring. Of the D.M.C materials, Fil d'Alsace[A] and Fil à dentelle[A] are the most to be recommended.
Numbers of patterns, originally intended for other kinds of embroidery can be executed in tambour work; amongst those contained in this Encyclopedia, figs. 192, 210, 216, 219, and 227 are the ones that are best adapted to the purpose.
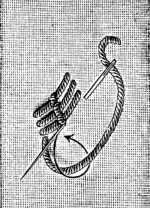
Smyrna stitch worked with a crochet-needle (figs. 846, 847, 848, 849).—In the chapter on tapestry, p. 137 we remarked that Oriental carpets and mats could be worked in different other ways, to be subsequently alluded to at greater length.
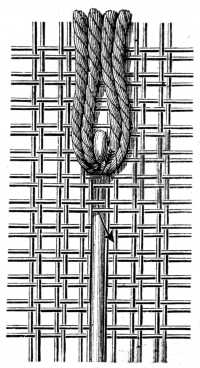 Fig. 846. Smyrna stitch
worked with a crochet
needle. First detail.
Fig. 846. Smyrna stitch
worked with a crochet
needle. First detail.
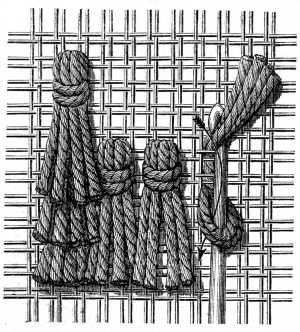 Fig. 847.
Smyrna stitch worked with a
crochet needle. Second detail.
Fig. 847.
Smyrna stitch worked with a
crochet needle. Second detail.
Smyrna stitch requires only a crochet needle and is worked on very coarse canvas or Java linen. You take a coarse mesh of cotton, such as Nos. 6, 8 or 10 of Colon à tricoter D.M.C (knitting cotton), cut it into lengths of 8 c/m., fold two lengths together in half, stick in the crochet needle from above, under two threads of the canvas, take hold of the loop with the hook, fig. 846, and draw it in; then push out the hook to seize the ends of the cotton and draw them through the loop which is on the needle, as indicated by the little arrow in fig. 847. The stitches or tassels should be two or three double threads of the canvas apart. As you finish each row, comb the ends of the tassels out carefully with a fine metal comb. When the whole piece of work is finished shear the entire surface, quite even, with a pair of sharp scissors. Fig. 849 shows a square of the work completed, presenting that warm velvety appearance which distinguishes the Smyrna carpets.
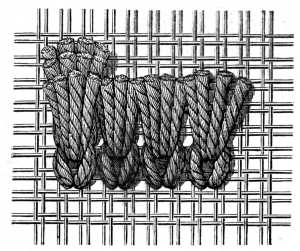 Fig. 848. Smyrna stitch
worked with a crochet needle.
Appearance of the knots underneath.
Fig. 848. Smyrna stitch
worked with a crochet needle.
Appearance of the knots underneath.
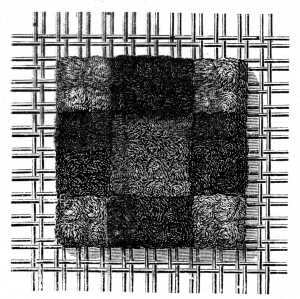 Fig. 849. Smyrna stitch
worked with a crochet needle.
Appearance of the work when finished.
Fig. 849. Smyrna stitch
worked with a crochet needle.
Appearance of the work when finished.
Malta stitch (figs. 850, 851, 852, 853, 854).—This stitch is much used by the Maltese; it is the same as the «point tricot» excepting that in the latter, the loops formed by the return of the thread are open and the stitches packed very closely together, whereas in the Maltese work there is always one close loop and two open tassels.
It is worked as follows: take a thick bunch of lengths of Coton à repriser D.M.C, pass it under two vertical threads of the stuff, from right to left, fig. 850, leaving an end, 1 or 2 c/m. long, lying on the surface of the work; put the needle in again under the two threads that are in front of the first stitch and leave the tassel, formed by the first stitch, above the one by which you bring the needle back between the two stitches.
The needle must now follow the same course it took for the first stitch and the thread must be drawn out far enough to form a loop as long as the tassel; you then repeat the second stitch, carrying back the working thread however this time above the loop, after which you cut the two open ends the same length as the loop. In the Maltese work, three times as many threads have to be left between the tassels as are covered by the stitch.
Thus if your stitch cover 4 threads of the foundation, you should leave 12 threads between the tassels, and if it cover 6, you should leave an interval of 18 threads, that the stuff may always be visible between the little tassels or balls.
Fig. 854 represents a portion of a curtain, embroidered on Flemish linen in the colours indicated at the foot of the engraving; these may be arranged according to the taste of the worker.
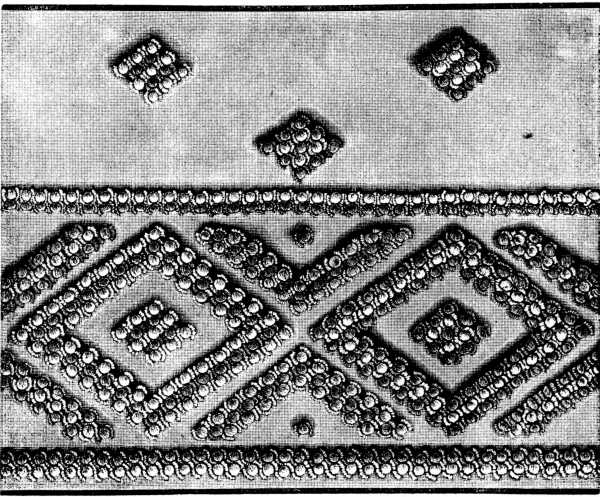 Fig. 854. Malta embroidery.
Malta embroidery is mostly done on coarse coloured linen fabrics or on single thread canvas.
Triangular Turkish stitch (figs. 855, 856, 857, 858, 859). Amongst the many pretty stitches for which Turkish embroideries are distinguished, there is one in particular, which though apparently very difficult, is in reality quite the reverse; it resembles line stitch upon straight threads, only that in the East it is generally worked in diagonal lines, each row requiring two journeys to and fro.
In the first, fig. 855, the needle must always be carried, first over, then under two threads in a diagonal line and so on to the end of the row.
Coming back, you pass the needle under the stuff and the stitch on the right side, and bring it out at the bottom of the stitch; then you make a back stitch over two horizontal and two vertical threads, pass the needle over two straight threads, put it in behind the same, bring it out again near the upper stitch and then insert it near the bottom vertical stitch; after this you carry it to the second stitch lower down and pass it over the same. Four threads should meet in every hole which the needle makes. The third and fourth row should be worked in a colour that forms a sharp contrast with the one in which the two first rows are worked and constitute with these one complete row of stitches, fig. 856.
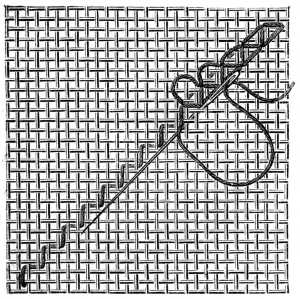 Fig. 855. Triangular turkish stitch
worked diagonally.
First journey completed and second
back, begun.
Fig. 855. Triangular turkish stitch
worked diagonally.
First journey completed and second
back, begun.
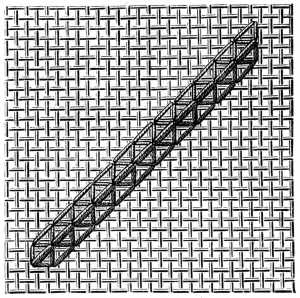 Fig. 856. Triangular turkish stitch
worked diagonally.
Two journeys to and fro forming the
complete row.
Fig. 856. Triangular turkish stitch
worked diagonally.
Two journeys to and fro forming the
complete row.
Figs. 857, 858 and 859 show how the same stitch can be worked in straight, instead of in diagonal rows.
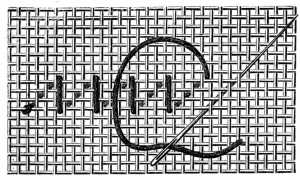 Fig. 857. Triangular turkish stitch
worked horizontally.
First journey.
Fig. 857. Triangular turkish stitch
worked horizontally.
First journey.
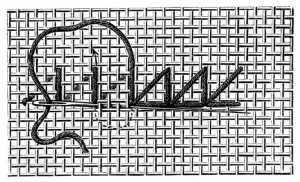 Fig. 858. Triangular turkish stitch
worked horizontally.
First journey back.
Fig. 858. Triangular turkish stitch
worked horizontally.
First journey back.
The dark shade in fig. 859 shows the first row of stitches, the light, the second, or rather the third and fourth, as four rows of stitches are required to make one complete row of triangular Turkish stitch.
Pattern worked in triangular Turkish stitch and Gobelin stitch (fig. 860).—The diagonal lines are all worked with Chiné gold and blue, and gold and red. The stitch we have just described is most effective in conjunction with other kinds of embroidery, as illustrated in fig. 860, where it is combined with Gobelin stitch.
The running foundation is divided into slanting squares; the diagonal lines are all worked in gold and red. The squares number 9 stitches inside, these are followed by a tenth which is covered by the first stitch of the next square. Where two kinds of coloured gold thread are used, one square will be framed on all sides by one kind, say, gold and blue for instance, the next by the other, gold and red.
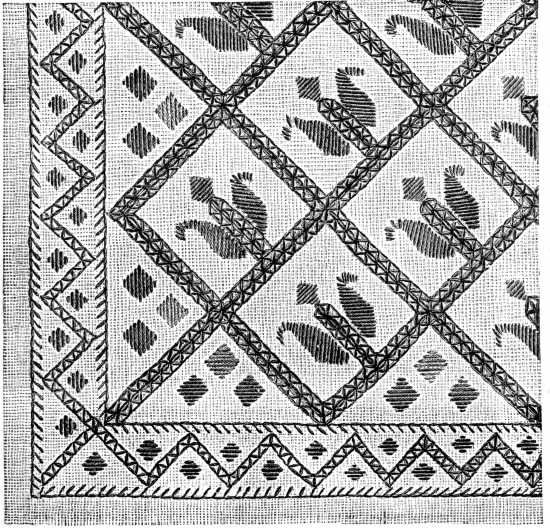 Fig. 860. Pattern worked in triangular turkish stitch.
The stalk that divides the two little leaves and has a small lozenge at the top, is begun above the fifth of the 9 stitches; you make 5 stitches, but in such a manner as to end at the top of these 5 with the stitch that runs in a diagonal direction over the threads, turned to the inside of the stalk, so that the last stitch of the first row may form with the first stitch of the second row, a triangle at the top of the stalk, which is surmounted by the aforesaid lozenge.
The lozenges in Chiné gold and light blue, of which there are three in each of the half squares, besides those that terminate the stalk, consist of 9 stitches, the first, extending over 3 threads, the second over 5, the third over 7, the fourth over 9 and the fifth over 11; the four next decreasing in a similar manner. The leaves in Chiné gold and green, on either side of the stalk, also begin with a stitch over 3 threads of the stuff, followed by 8, each increasing in length by one thread on the side of the stalk, but all equal on the other, the last extending over 12 threads of the stuff. After these 9, the subsequent 8 must decrease in the same manner by one thread on the opposite side; then you make 4 more extending over only 3 threads and set the contrary way to the others.
The zig-zag border and the small squares of 5 stitches within it are worked entirely in Chiné gold and red.
Turkish embroidery (fig. 861).—The powdering of flowers and also the border are worked like the preceding pattern in two-sided Gobelin stitch. Embroidery of this kind looks best on Algerian linen, which is exactly like the Turkish stuff. It is not absolutely necessary to count the threads for the little flowers and stalks, but it is as well to do so for the border, that you may be sure to get the zig-zags perfectly regular.
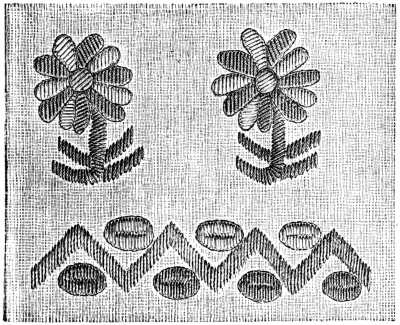 Fig. 861. Turkish embroidery.
The petals of the flowers are worked alternately in Chiné gold and red, and gold and blue, the centre in Or fin D.M.C pour la broderie and the leaves and stalks in Chiné gold and green. The petals are set with stem stitch in fine black Coton à broder and if the embroidery is to be the same on both sides this setting must be repeated at the back.
The distribution of colours in the border is left to the taste of the worker, but we should recommend for the zig-zags Chiné gold and red, as being the most effective.
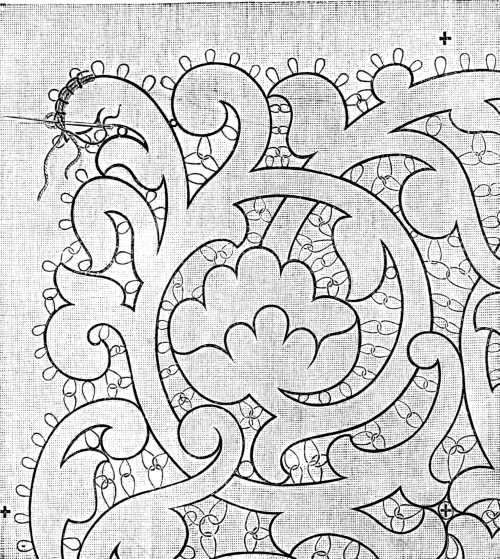
Appliqué work (fig. 862).—Appliqué work means the laying on of pieces of one kind of stuff on to a foundation of a different kind, so as to form a pattern—these pieces of stuff of various shapes and sizes, taking the place of solid needlemade embroidery.
Appliqué work may be done on linen, silk, velvet, plush and leather. The stuff out of which the pattern is cut has, in most cases, to be backed first with very fine tissue paper.
This is done in the following manner with starch paste, which dries quicker than any other. Spread the paste on the paper with a brush, carefully removing all the little lumps; it should only be just liquid enough to make the stuff and the paper adhere perfectly together and above all must never penetrate to the right side of the stuff. When the paper has been evenly spread with the paste, lay your stuff upon it and smooth and press it down with a clean cloth, stroking it out carefully in the line of the thread to prevent its becoming in the least dragged or puckered, or any air remaining between it and the paper.
You next lay several sheets of paper without a mark or a fold in them, on a perfectly smooth flat board, and upon these, your paper-lined stuff, covered in its turn with several loose sheets of paper, all being kept in their place by another board with several stones or heavy weights laid upon it to act as a press. Leave the stuff in the press until it be quite dry. You will find that any kind of fabric, even the slightest, can be rendered available in this manner for appliqué work, not even plush or velvet being in the least injured by the process.
You then transfer the whole pattern on to the foundation, whatever it happen to be, but only the detached figures on to the paper-lined stuff, carefully cutting out the latter with a very sharp pair of scissors so as to avoid unravelling the threads along the edges.
The foundation, stretched in a frame, as described on page 115, fig. 236, is to be placed on a board or table in such a manner that only the stuff rests upon it, whilst the frame projects on all four sides.
Then cover the cut-out figures with paste on the wrong side and fit them into their proper places upon the foundation. In larger pieces of work especially, this should be done as quickly as possible so that a board with weights upon it, to serve as a press, may be laid over them all at once.
The board must not be removed until the paste be dry; then you can begin the needlework, fastening down the appliqué figures and finishing them off round the edges by laying down a fine round, cord, or by flat stitches.
You either sew on the cord with invisible stitches, opening it a little at each stitch so as to slip the needle and thread in between the twist, or else with ordinary overcasting stitches.
In either case it must be so laid on as completely to hide the cut edges and keep them from fraying.
Should you wish to frame the appliqué figures with flat embroidery, you must bring your needle out close to the cut edge and enter it, 1 or 2 m/m. within the edge from above.
Both, cord and flat stitch setting, should be of a subdued shade and if possible, of a colour to match the foundation.
Morocco embroidery (figs. 863, 864, 865, 866).—This work named after the country where it was originated, belongs both to the class of darned and damask embroidery.
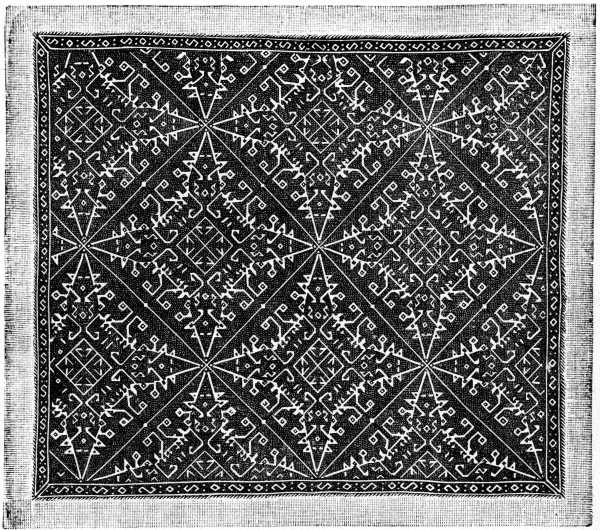 Fig. 863. Morocco embroidery.
In fig. 864, the stitches are formed by passing over 5 threads and taking up the sixth. Coming back you take up the third of the 5 threads first missed and proceed in the same manner over the whole surface of the work, unless the lines of the pattern require you to depart from this rule; as, for instance, in certain parts of fig. 864, where you will notice stitches, carried over 7 or 8 threads; also in the borders, fig. 865 and 866, where the stitches are arranged in a rather arbitrary manner, in order to bring out the pattern more clearly.
Fig. 864 represents the fourth part of one of the subjects that make up the design fig. 863; that is, four such, joined together, form one of the squares of fig. 863.
Figs. 865 and 866 are patterns of two little borders and an insertion, suitable as a finish to fig. 863, which can be enlarged to any size by the addition of other squares to those that are represented here.
Most of the stuffs, already so frequently alluded to in this work, can be used as a foundation for this kind of embroidery, provided the right working materials to go with it are chosen; Coton à tricoter or Fil à pointer should only be used for the coarser stuffs, such as Rhodes linen No. 1, or Russian linen and the different kinds of tammy cloth, whereas the other kinds of D.M.C threads and cottons and especially the finer numbers, are best adapted for embroidery on fine stuffs, such as Rhodes linen No. 2, and Spanish or Algerian linen.
Spanish embroidery (figs. 867 and 868).—Spanish embroidery consists almost exclusively of buttonhole stitch, fig. 171, and flat stitch, fig. 221.
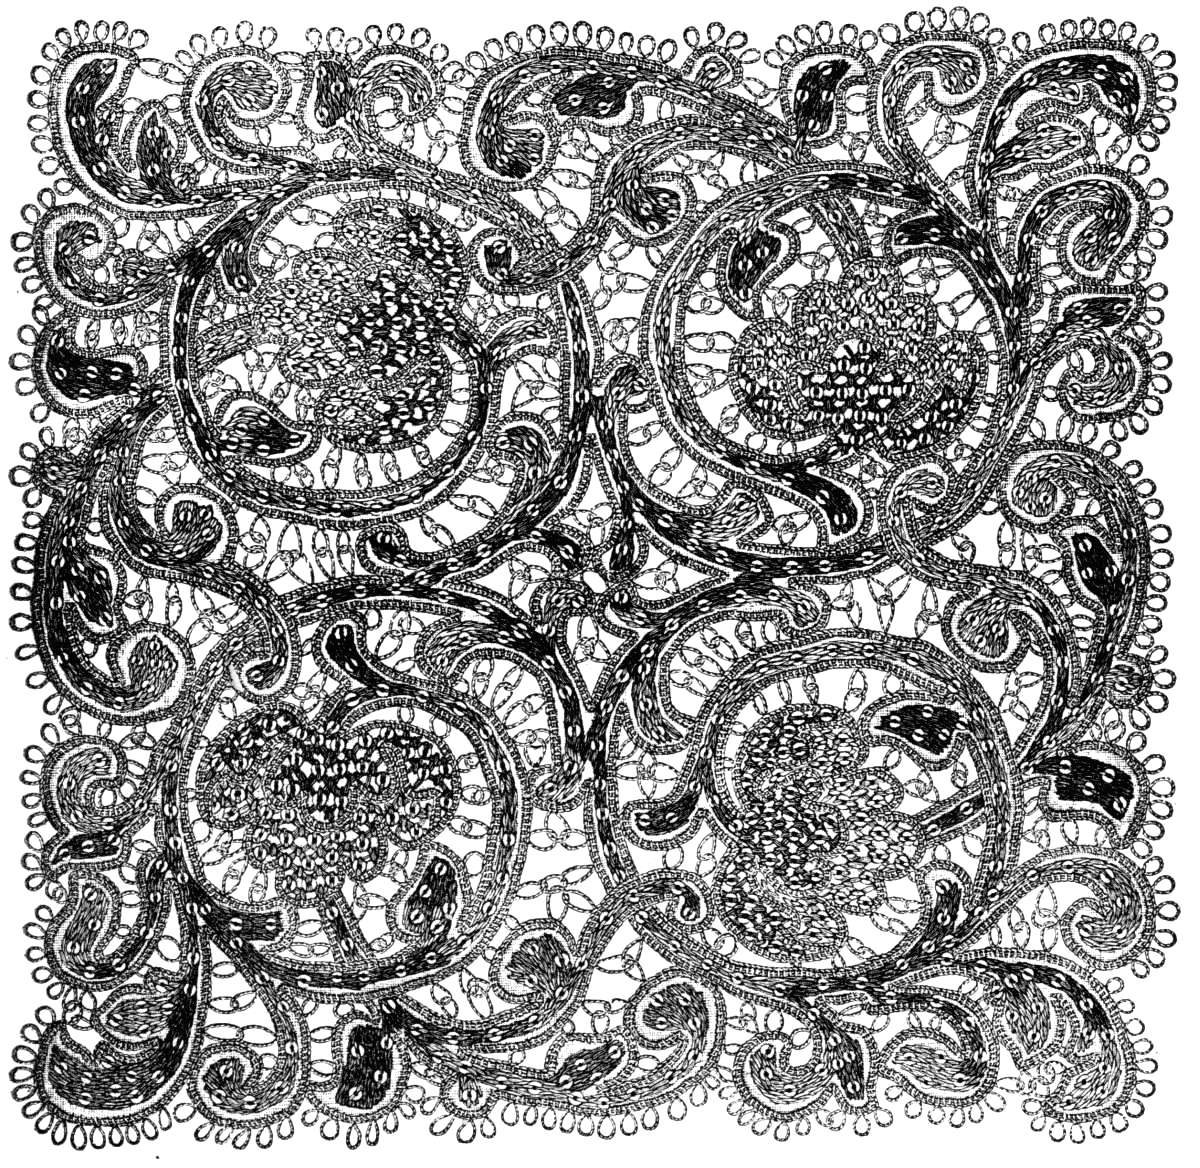 Fig. 867. Square of spanish embroidery.
The buttonhole stitches, for which the more subdued shade of the colours indicated should always be taken, or else yellow, dark or pale, to match the gold thread, are made over two threads of gold and follow the outlines of the pattern, which should be more or less appropriate to this style of embroidery. One of the gold threads always keeps the inside of the line and follows it throughout in an unbroken course, whilst with the second, the outside one, you form picots, folding the gold thread over from right to left and catching down the loop by a buttonhole stitch, which is introduced into the loop itself and carried over the combined gold threads, as shown in the left corner of fig. 868, representing one quarter of the whole design, where the position of the needle and the way in which the picot is secured are plainly indicated.
For the scallops, a round material with rather a strong twist should be used, such as Soie de coton D.M.C No. 100[A] or Fil à dentelle D.M.C Nos. 70 to 100[A], wound on reels.
Where the picots have to fill up empty spaces of a larger size, you can join several together by connecting them each in turn with the first.
When you have bordered all the outlines with buttonhole stitches and picots, fill up the spaces enclosed within the lines, which properly speaking form the pattern, with flat stitch embroidery, worked in Coton à broder or Coton à repriser; after which the whole surface is sewn over with fine little spangles which give the sparkling look that constitutes the peculiar charm of this kind of embroidery. The flowers are covered with a fancy stitch that forms regular little lozenges, and every second row of stitches is hidden under a spangle.
With regard to the colours indicated at the foot of fig. 867, this is how they were distributed in the original, from which our engraving was taken; all the outlines in buttonhole stitch, in Bleu pâle 668; the tops of the flowers in Bleu-Indigo 334; the bottom parts in Bleu-Indigo 332, and all three shades of blue so blended together in the solid parts of the design as to be undistinguishable from each other. It is not absolutely necessary to keep to the colours here indicated; there is no reason whatever why a greater variety should not be introduced, but in every case the more subdued shades should be selected; a pale red, for instance, for the flowers, a green and a brown for the arabesques, will always be found to produce a very pretty and harmonious effect.
When all the needlework is finished, you cut away the stuff underneath the network formed by the picots, with a pair of sharp scissors.
A word remains to be said with regard to the copying of fig. 868.
Our readers will notice that in fig. 867 the flowers and arabesques succeed and grow out of each other; that whilst the four quarters are symmetrical, yet at the same time, the curves in each quarter take a different inclination.
You cannot therefore simply repeat the subject four times; when you have copied the one quarter, given in fig. 868, you must lay this first quarter on again at the cross + on the left side; when the second quarter is finished, you again turn the copy to the left and tack it on at the +; when you come to the fourth quarter the lines of the first quarter must exactly meet those of the last. We beg here to draw attention to the directions, relative to the copying of patterns, given in the subsequent chapter.
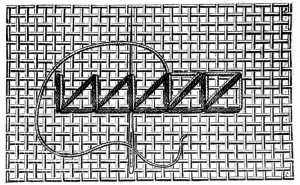
Basket stitch on linen (fig. 869).—This stitch has some resemblance with the Greek stitch, fig. 278, and the Montenegrin, fig. 306, only that it is not crossed like the latter.
Basket stitch can be worked on all kinds of stuffs, on counted threads or on a wide or narrow tracing, with fine or coarse thread, and more or less closely, according to the taste of the worker.
You insert the needle from right, and pass it under, from 3 to 6 threads of the foundation, according to the stuff and the material you are using, then downwards from left to right, and over, from 6 to 8 threads, into the stuff again from right to left; then you push it under the stuff in an upward direction and bring it out on the left in the middle of the space left between the last stitch and the top of the second. The dotted line in the engraving indicates the course of the stitches.
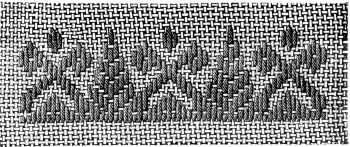
Old German knotted stitch (fig. 870).—This is a stitch often met with in old church and house linen embroidery. A beautiful design worked in this way is given further on.
Contrary to most stitches, this is worked upwards; the needle is put in horizontally under the stuff, the thread tightly drawn, then laid from left to right and drawn through underneath the first stitch and a tight knot made. We find the same stitch, worked in a variety of ways, according to the taste and skill of the worker; for instance the knots may be set slanting, as in fig. 870, or else straight and very close together, as in fig. 873, where they present the appearance of a close string of beads, or again wide apart, as they are in fig. 876.
All these ways are admissible but care should be taken in each case, to make the stitches perfectly regular; it is the direction which is given to the stitch and the number of threads taken up with the needle that changes the appearance of the stitch.
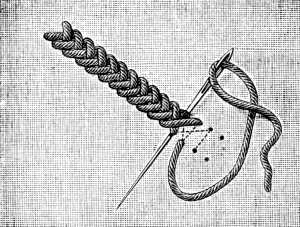
Raised stem stitch (figs. 871, 872).—Take a very thick thread, such as Fil à pointer D.M.C No. 10 or 20, or one of the coarser numbers of Cordonnet 6 fils D.M.C, lay it as a foundation thread along the line of your pattern and work over it wide stem stitches, as represented in figs. 172 and 173, either in the same number of thread used for the foundation thread, or a finer, according to the stuff you are embroidering upon.
You may overcast the same stitch in the manner indicated in fig. 872, using a different colour for the second layer of stitches to produce an agreable variety.
Border in different kinds of stitches (fig. 873).—The straight lines of this border are all worked in old German knotted stitch in écru thread, forming a thick round cord which stands out from the surface in high relief; the flatter outlining of the outside figures is done in basket stitch in soft blue knitting cotton. The little oblong figures within the two inner lines of the border are worked in Gobelin stitch, in red embroidery cotton, and the filling of the figures, outlined in basket stitch, in one or other of the Irish lace stitches, worked in white lace thread, either so that all the stitches enter the stuff, or form a network over it.
The work may be simplified by sewing Soutache D.M.C or Lacet superfin D.M.C along the straight lines instead of embroidering them in basket stitch.
 Fig. 873. Border in different kinds of stitches.
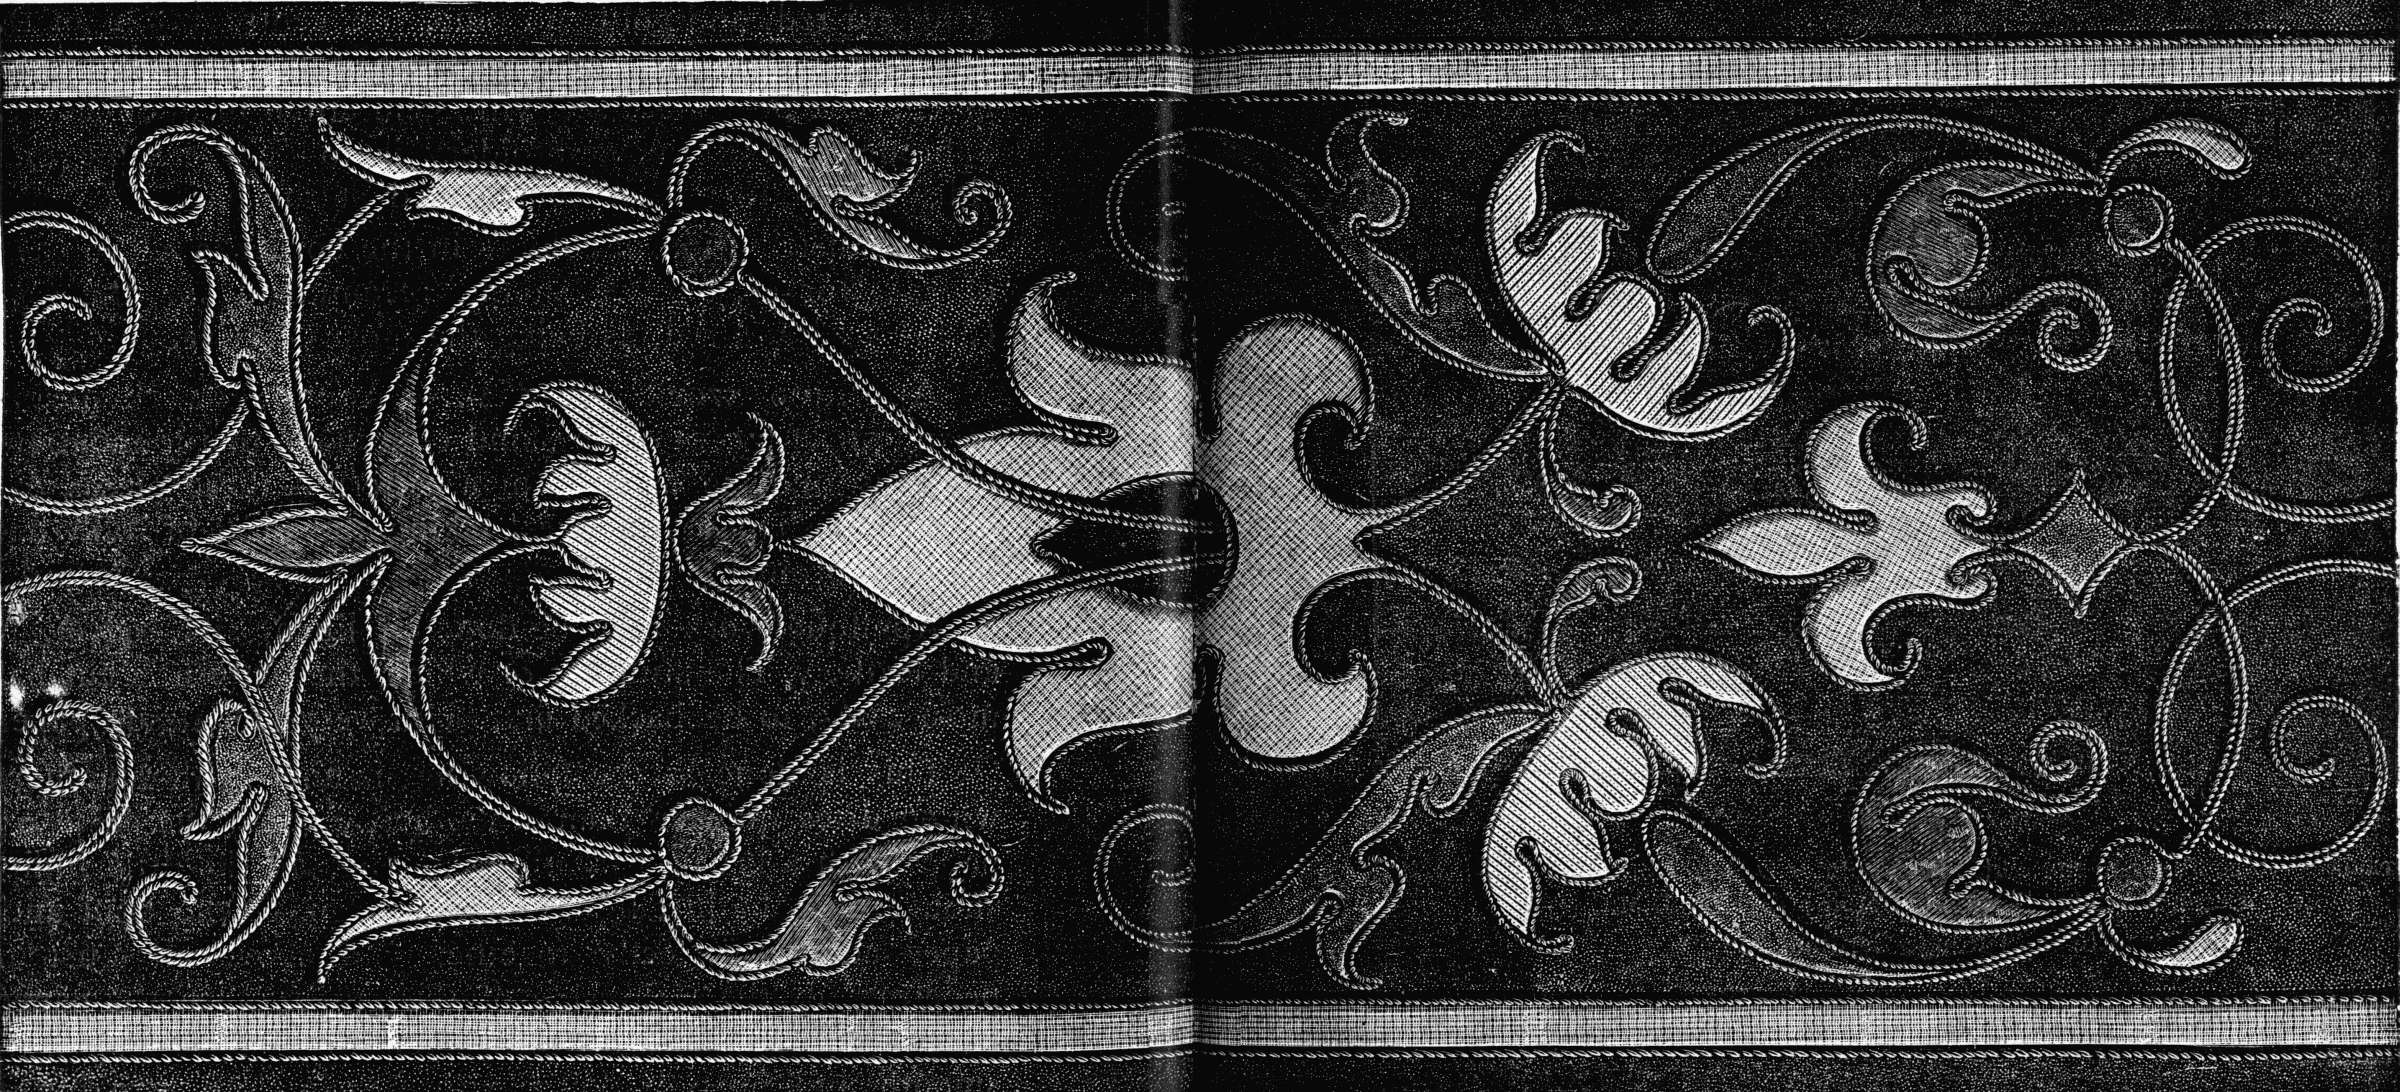
Roumanian stitch (figs. 874, 875).—This consists of stitches that are worked in the width of the stuff, intersected by back-stitches set slightly slanting.
Though the engraving is so clear as to render it hardly necessary, we subjoin an exact description of the way the stitches run.
Bring out the needle on the left, 2 or 6 threads beyond the line your embroidery is to follow; with regard to the number of threads you take up, you must be guided by the quality of the stuff and the material you have selected: put the needle in on the right, the same distance in advance of the line as before and bring it out in the middle of the stitch; then passing the needle over the first stitch, put it in again one or two threads in advance of the point where it came out, and draw it out close to where the first stitch began.
The border, represented in fig. 875, is worked in great part in Roumanian stitch.
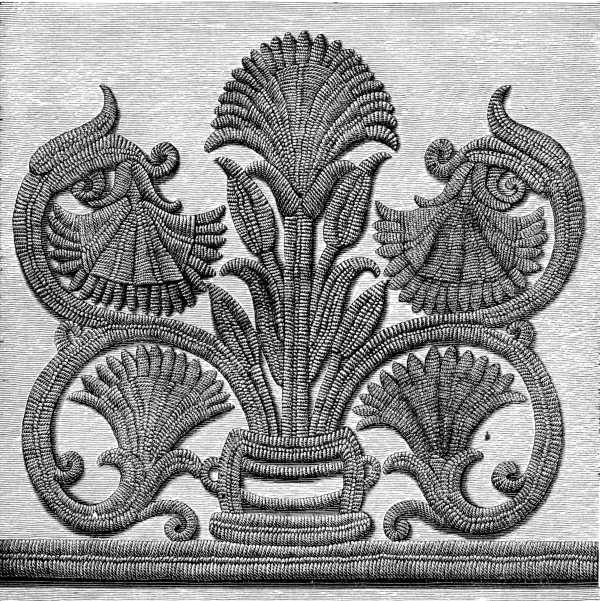 Fig. 875. Border in roumanian stitch.
The original, still very well preserved, notwithstanding its age, is worked in silk of a brilliant red on a stiff stuff which has been coloured by time and use.
Willems satin, Rhodes linen No. 2 and Algerian linen, make very suitable foundations for this kind of embroidery and have that soft tint which is almost indispensable to a satisfactory imitation of old needlework.
Any one of the shades of red named at the foot of the illustration, will be found to be a good match for the original colours.
Roumanian stitch is used wherever the lines of the pattern are widest; there where they narrow, in the indentures of the leaves and the twists of the stalks, flat stitch is used instead.
By the repetition of the detached subject, this pattern may be made to serve either for a stripe or for a grounding; if you use it for a stripe, the centre flower of the principal subject with the stalks lengthened, will look very well worked as a separate subject between the large bouquets. Worked in a double row, base to base, on any stuff and in any material, these large figures form a very handsome border which makes an effective trimming for furniture and curtains.
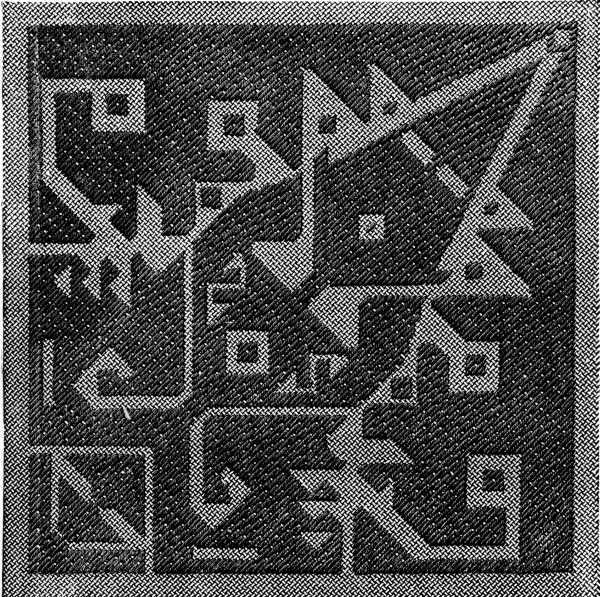
Pattern for piqué embroidery (fig. 876).—The stuff, called piqué, such as it is now manufactured, is simply an imitation of an old kind of needlework, almost unknown in these days, but very popular in the fifteenth and sixteenth century in Italy, for making coverlets and more especially curtains and blinds; the latter being highly esteemed, because without intercepting the light altogether, they tempered it agreably.
 Fig. 876. Pattern for piqué embroidery.
A similar kind of work was common in Bohemia until a recent date for the making of caps. It is done on two layers of stuff, of different kinds, the upper one fine and transparent, the lower, more substantial.
The pattern is drawn upon the fine stuff, because on that side the different kinds of stitches are made.
You then tack the two stuffs together and work all the outlines of the pattern in Old German knotted stitch with écru Fil à pointer D.M.C No. 20; that done, thread a tapestry needle with white Cordonnet 6 fils D.M.C No. 1 or 2, slip it in between the two layers of stuff and secure the end by two or three stitches; then push the twist quite close to the knotted stitch and fasten it in between the two layers of stuff, with small and very regular running stitches, in a fine pliable material, such as Fil d'Alsace D.M.C on reels.
Fill up in this manner all the ground of the pattern, leaving the arabesques and the ornaments plain, or embellishing them with some kind of lace or embroidery stitch.
When these stripes are intended for blinds, you can produce pretty transparent effects in them by cutting away the underneath stuff, in places.
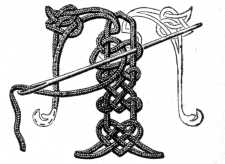
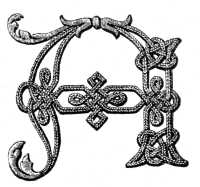
Alphabet in Soutache (braid) (figs. 877, 878, 879, 880, 881, 882).—This alphabet, which is one of the best of its kind, was taken from a work published in Venice in 1662, by Giovan' Antonio Tagliente, secretary and calligraphist to the Republic.
The letters lend themselves, better than any we know, to being executed in Soutache D.M.C.
The sewing on of the braid is done with very small running stitches and the interlacing with a tapestry needle, into which the braid is threaded; both operations are shown in figs. 877 and 880. The embroidery of the connecting bars, and the small leaves and tendrils that complete the letter are explained in fig. 881, whilst fig. 882 represents the letter A in its finished state.
For sewing on the braid, a fine soft material is the best, such as Soie de coton D.M.C[A] and for embroidering the small accessories, Coton à broder D.M.C No. 50[A].
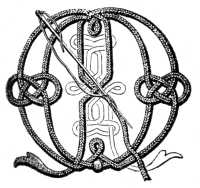 Fig. 880.
Letter M of the
alphabet in soutache.
Mode of sewing on
the soutache.
Fig. 880.
Letter M of the
alphabet in soutache.
Mode of sewing on
the soutache.
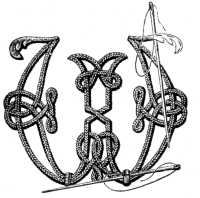 Fig. 881.
Letter W of the
alphabet in soutache.
Mode of placing the
bars and embroidering
the leaves.
Fig. 881.
Letter W of the
alphabet in soutache.
Mode of placing the
bars and embroidering
the leaves.
Flowers executed in Soutache and embroidery (fig. 883). Flowers and sprays, such as here represented, make a charming trimming for summer dresses, sunshades, aprons etc. and can be executed with admirable effect in the D.M.C Soutache, now to be had in all the colours of the D.M.C colour card. A very pretty running pattern can be formed out of the spray, fig. 883, by turning the flowers first to the right and then to the left and making the stalks come out underneath the ears of corn. In order to reverse the position of the flowers thus, you will have to make two tracings of the spray, one negative and one positive.
 Fig. 883. Flowers executed in soutache and embroidery.
For the ears of corn in fig. 883, use either Soutache écru, or Jaune-d'Ocre 677 No. 2; for the marguerites, white Soutache No. 2½ and for the corn flowers, Soutache Bleu-Indigo 322 No. 2. Nothing could be simpler than the mode of working these flowers.
Thread a tapestry needle with the Soutache and draw it into the stuff, and then pass it through from the right side to the wrong at the bottom of one of the petals of the flowers, secure it on the wrong side by two or three stitches and then bring the working thread, which should be of the same colour as the Soutache, out again at the point of the petal, then carry the Soutache back to the bottom of the petal and fasten it down, like the gold threads in fig. 242, by a stitch rather wider than the Soutache, fold the Soutache over again to the starting point, and secure it by a stitch, and so on. In order to give a different character to the flowers, use Soutache of different widths, fold it over more or less closely and lay it down in shorter or longer lengths, as required. The natural irregularity of the petals of a flower can be very faithfully imitated in this manner. Fig. 883 shows the way in which, for the ears of corn, the braid is folded back upon itself and fastened down, whilst in the white flowers the two layers of the braid that form each petal are separated at the bottom.
The stamens of the marguerites are worked in knot stitch with yellow cotton and those of the cornflowers with dark blue.
The other little details are executed in flat and stem stitch in the colours indicated at the foot of the engraving. With the pattern to go by, the distribution of the colours for the different parts can present no possible difficulty.
We need only point out that Rouge-Cardinal 348 is intended for the little knot that connects the stalks of the flowers.
Chinese subject (fig. 884).—This quaint and graceful composition, copied from an interesting piece of Chinese embroidery, gives our readers the opportunity of turning the different damask stitches, already described in these pages, to quite a new use.
 Fig. 884. Chinese subject.
The kind of gauze which forms the foundation of the original work can be replaced either by Spanish or Rhodes linen No. 2, by any stuff, in fact, the threads of which can be counted.
The drawing has to be transferred to the stuff, and the different parts are filled in with the stitches, clearly indicated in the illustration.
By the introduction of several colours, this pattern is capable of being infinitely varied.
Thus, in the model before us, the neck and bulb of the flask, the leaves it stands upon and those attached to the flowers in it, are worked in Vert-Pistache 367, the handles, the ornament on the bottle, and the triangular figure in the centre are in white; the little flower on the left, the second on the right, the straight staff, the upper wings of the butterfly, as well as the three leaves underneath the triangle are in Bleu-Indigo 334; the first flower on the right of the flask, the knot above the triangle, the lower wings of the butterfly and the middle part of the bottom subject on the right of the engraving are in Gris-Amadou 383; and Violet-lie-de-vin and Brun-Caroubier 357 alternate in the pointed leaves that support the flask; the former colour recurs in the ornaments of the staff, and Rouge-Cardinal 347, black and Gris-Tilleul alternate in the other details of the drawing.
For the setting it will be best to take Or fin D.M.C pour la broderie or else Chiné d'or D.M.C, used either double or single, according to whichever the drawing seems to require.