The Project Gutenberg EBook of What a Girl Can Make and Do, by
Lina Beard and Adelia B. Beard

This eBook is for the use of anyone anywhere in the United States and most
other parts of the world at no cost and with almost no restrictions
whatsoever.  You may copy it, give it away or re-use it under the terms of
the Project Gutenberg License included with this eBook or online at
www.gutenberg.org.  If you are not located in the United States, you'll have
to check the laws of the country where you are located before using this ebook.

Title: What a Girl Can Make and Do
       New Ideas for Work and Play

Author: Lina Beard
        Adelia B. Beard

Release Date: February 17, 2018 [EBook #56588]
Last updated: September 25, 2019

Language: English

Character set encoding: UTF-8

*** START OF THIS PROJECT GUTENBERG EBOOK WHAT A GIRL CAN MAKE AND DO ***


Produced by KD Weeks, Chris Curnow and the Online
Distributed Proofreading Team at http://www.pgdp.net (This
file was produced from images generously made available
by The Internet Archive)
It was not possible to always reproduce the flow of text around
the many figures and illustrations. These will appear in
approximately the same arrangement. Occasionally, numbered full
page illustrations appeared out of order in the
original.
On p. 164, the composite illustration includes Figures 312 through
322, and resists any attempt to reproduce the individual components.
It appears as a single image, with the original captions included
in the image itself.
The numbered figures 520, 521 and 522 appear in the text out of sequence,
though all references to them are correct. The sequence has been retained
here.
The single footnote has been moved to follow the paragraph in which
it is referenced.
Minor errors, attributable to the printer, have been corrected. Please
see the transcriber’s note at the end of this text
for details regarding the handling of any textual issues encountered
during its preparation.
Any corrections are indicated using an underline
highlight. Placing the cursor over the correction will produce the
original text in a small popup.
Any corrections are indicated as hyperlinks, which will navigate the
reader to the corresponding entry in the corrections table in the
note at the end of the text.
WHAT A GIRL CAN
MAKE AND DO
New Ideas
for
Work
and
Play
What
A Girl Can Make And Do
Lina Beard
and
Adelia B. Beard
New York
Charles Scribner’s
Sons
Copyright, 1902, by
CHARLES SCRIBNER’S SONS
TROW DIRECTORY
PRINTING AND BOOKBINDING COMPANY
NEW YORK
v
PREFACE
This new century, bringing with it the strong, healthy,
independent, athletic American girl, makes a demand for
new opportunities for the exercise of both mind and body.
Resourcefulness and a wish to do things for one’s self are
American traits strongly developed in the girls as well as
in the boys; and, keeping step with their brothers, our
girls are walking steadily onward, with new hopes and
new ambitions in work and play, and are reaping new
rewards.
This book is the result of the authors’ earnest desire to
be of some assistance to their young friends by encouraging
them in their wish to do things for themselves, and by
pointing out some directions in which they may gratify this
ambition. Within its covers are suggestions for a wide
variety of things, useful, instructive, and entertaining, which
a girl may make and do, with wholesome and genuine pleasure.
The ideas that are worked out are essentially those of
the authors, and are not, as is often the case, derived from
other books. The drawings, too, are all original, as in
“The American Girl’s Handy Book,” to which this is a
companion volume.
In conclusion the authors wish to express their sincere
vithanks to the Delineator and the Woman’s Home
Companion, whose prompt and generous courtesy, in returning
such original drawings and material as were used
in their respective magazines, has greatly facilitated the
preparation of this work and added to its interest.
Flushing, June 16, 1902.
vii
CONTENTS
WHAT A GIRL CAN MAKE
| CHAPTER I. |
PAGE |
| |
| What a Girl Can Make with Hammer and Saw |
3 |
| |
The Workshop, 4; Tools, 5; The Carpenter’s Bench, 9; A Dressing-table, 11; A Wash-stand, 14; A Portable Corner Clothes-press, 15; A Five O’clock Tea Table, 16; A Piazza Flower-stand, 17; A Hooded Chair Made of a Packing-box, 21. |
|
| |
| CHAPTER II. |
|
| |
| Possibilities of an Easter Egg |
26 |
| |
A Frog that Will Swim, 26; Spinning Egg, 30; The Kaleidoscope, 31; Easter Hare, 32; Hares made of Eggs, 33; The Brownie, 34; Fruits, Vegetables, Opera Glasses, and Dishes, 36; The Radish, 37; Watermelon, Plum, Acorn, 38; A Dainty Vase, A Unique Little Teapot, 39; The Sugar-bowl, Egg Dippers, 41. |
|
| |
| CHAPTER III. |
|
| |
| A Paper Easter |
45 |
| |
An Ostrich, Rabbit, Penguin, and Rooster, 45; Changing an Egg into a Rooster, 46; The Butterfly That Will Fly, 51; The Easter Lily, 52. |
|
| |
| |
| CHAPTER IV. |
|
| |
| Vacation Work with Nature’s Material |
57 |
| |
Cone Hanging-basket, 58; Sweet-grass Mats, 59; Corn-husk Basket, 60; Lavender Sticks, 62; Braiding Palm-grasses and Corn-husks, 64. |
|
| |
| viiiCHAPTER V. |
|
| |
| Collections |
69 |
| |
Mounting the Pictures, 70; Splitting the Paper, 72; Hanging the Picture, 73; A Portfolio, 74; Sunshine Diary, 75; A Guest Book, 78; Calendars, 80; Illustrating Books, 82; Colored Pictures and Photographs, 83; A Photograph Book, 84. |
|
| |
| CHAPTER VI. |
|
| |
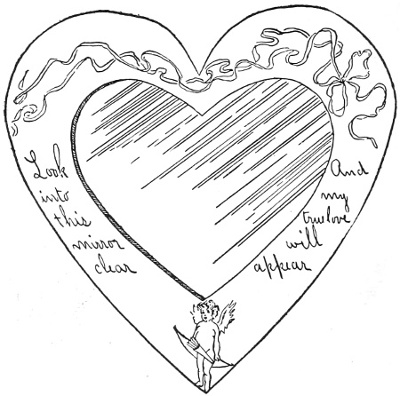
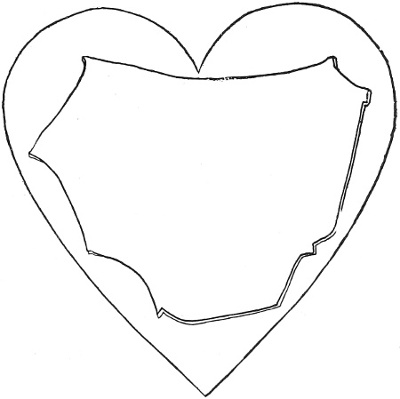
| Original Valentines |
89 |
| |
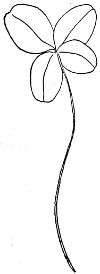
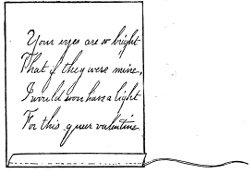
Appropriate Valentines, 90; Four-leaved Clover, 90; Easel Holding a Picture, 91; Heart-shaped Valentines, 93; The Fire-cracker, 94; Pot of Growing Flowers, 95; Valentine for Little Friend, 98. |
|
| |
| |
| CHAPTER VII. |
|
| |
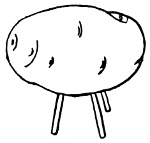
| Vegetable Animals and Fruit Lanterns |
101 |
| |
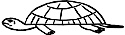
Potato Turkey, 102; A Shoat, 103; To Make a Turtle, Pumpkin Lanterns, 105. |
|
| |
| |
| CHAPTER VIII. |
|
| |
| Pasteboard Models for a Home Drawing Class |
107 |
| |
The Pyramid, 107; Pasteboard Model of a Church, 108; To Make a House, 111. |
|
| |
| |
| CHAPTER IX. |
|
| |
| Quick Ink Pictures |
118 |
| |
Ink Landscapes and Marines, 119; An Ink Butterfly, An Odd Design, The Fantastic Horses, 122; A Pair of Birds, Ink Plant Sketches, 123. |
|
| |
| |
| CHAPTER X. |
|
| |
| Moving Toys |
125 |
| |
| |
The Merry-go-round, 125; The Flag Dance, 130; Button-mould Tops, 132. |
|
| |
| |
| CHAPTER XI. |
|
| |
| Home-made Pyrotechnics |
135 |
| |
Three-story Red, White and Blue Pin-wheel, 135; Fence Pin-wheel, 137; The Sparkling Calumet, 140; Roman Candle, 142; Snap-fire, 142; Rushing Comet, 143; The Pistol, 144; Sky-rockets, 145. |
|
| |
| |
| ixCHAPTER XII. |
|
| |
| Monotypes |
148 |
| |
Materials, 148; How to Paint, 149; To Paint Heads, 149; The Printing, 150; Monotone Monotypes, 151; Suitable Papers, 151. |
|
| |
| |
| CHAPTER XIII. |
|
| |
| Priscilla Rugs |
153 |
| |
Color Schemes for Rugs, 154; The Fire Rug, 155; The Weight, 156; How to Cut and Sew the Rags, 157; Cotton and Wool Rugs, 158; All-cotton Rugs, 158; Warps and Fringe, 159; Dyeing the Cloth, 160; Wool Dyes, 160; Cotton Dyes, 162. |
|
| |
| |
| CHAPTER XIV. |
|
| |
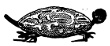
| A Peanut Noah’s Ark |
163 |
| |
How to Make a Pair of Wings, 165; To Make a Spider, 166; To Make Rabbits and Camels, 167; To Make a Chick, an Elephant, 168; an Owl, 169; Storks, Lobsters, 170; Noah, 171; To Make the Ark, 172. |
|
| |
| |
| CHAPTER XV. |
|
| |
| A Flower Feast |
175 |
| |
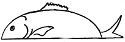
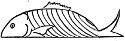
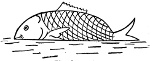
To Make the Pineapple, 175; A Fish, 176; Apples and Fruit Salad, 177; The Cups and Saucers, 178; Snapping Bonbons, 179; Baskets of Green Burs, 180; Dandelion Amusements, 181. |
|
| |
| |
| CHAPTER XVI. |
|
| |
| Basket-weaving |
185 |
| |
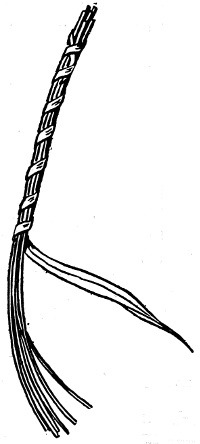
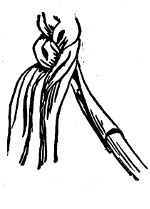
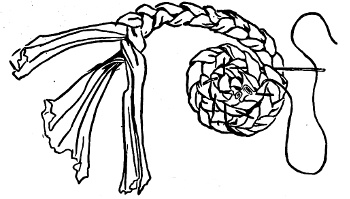
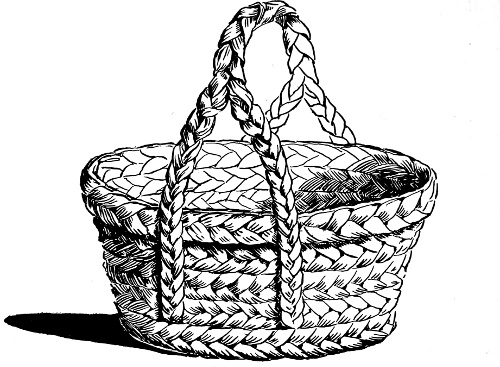
Materials for Weaving, 185; To Prepare the Reeds, 186; Weaving the Basket, 186; Covers and Fastenings, 191; To Make a Hinge, 192. |
|
| |
| |
| CHAPTER XVII. |
|
| |
| An “Abe” Lincoln Log-cabin |
194 |
| |
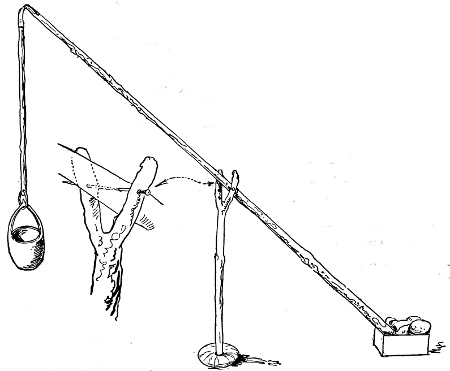
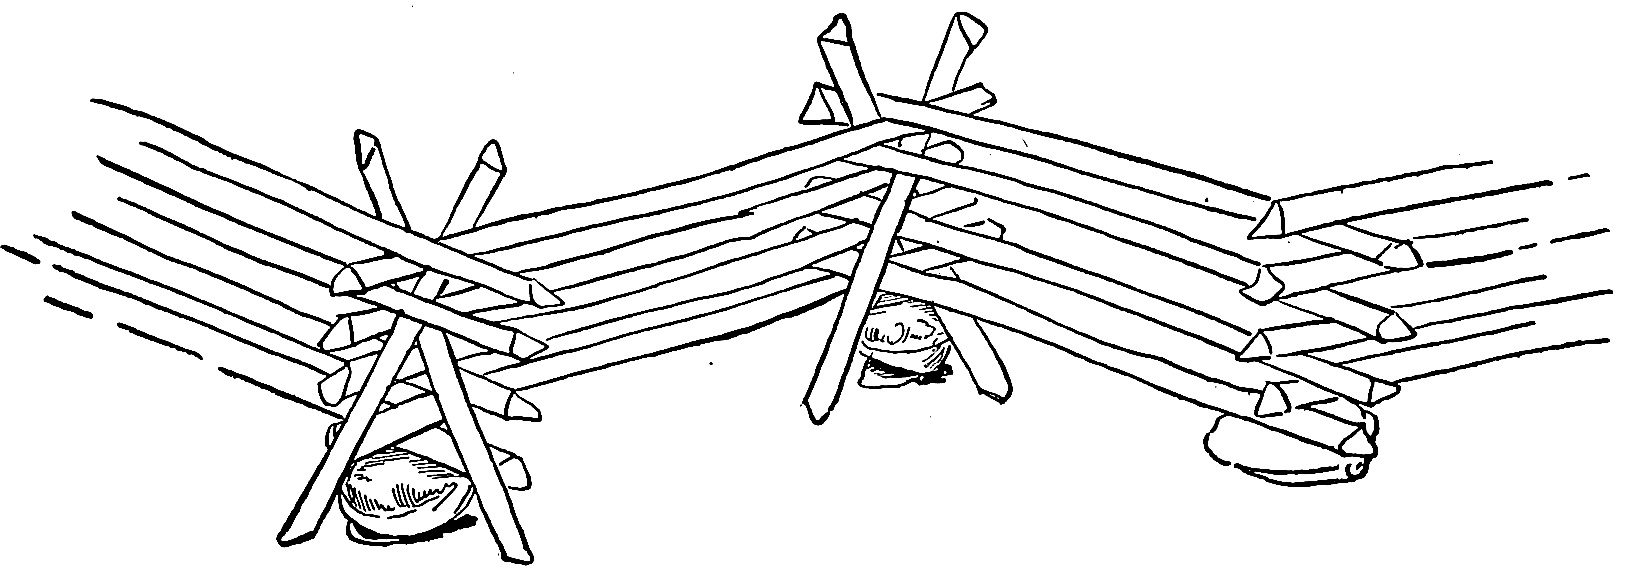
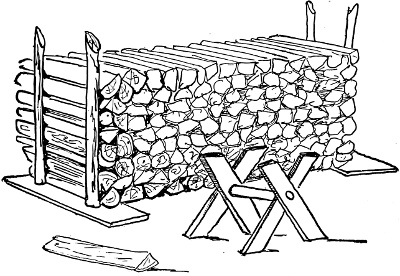
Material, 196; The Door, 200; The Chimney, 201; To Make a Pond, 204; The Walk, 205; A Well, 206; Acorn Bucket, 207; The Trees, 208; The Grass, 209; The Fence, 210; A Little Turnstile, 212; Birch-bark Canoe, 212; Wood-pile, 213; A Sawbuck, 213. |
|
| |
| xCHAPTER XVIII. |
|
| |
| Queer Things on Paper and Blackboard and How to Put Them There |
215 |
| |
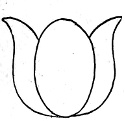
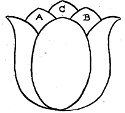
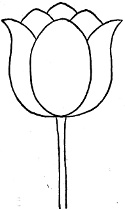
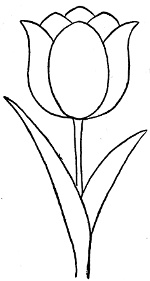
A Funny Little Pig, 215; A Hen, 217; A Rose, 218; A Head, 220; The Three Blind Mice, A Fish, 221; Turtles, 222; To make a Duck, 223; The Tulip, 224; Common Daisy, 225. |
|
| |
| |
| CHAPTER XIX. |
|
| |
| Home-made Musical Instruments |
227 |
| |
How to Make a Harp, 228; A Dulcimer, 229; Music from Finger-bowls, 230; A Willow Bugle-horn, 231; Bones, 232; Crystal Flute, 232; Music from a Comb, 233; Grass-blade, Sea-shells, Musical Fountain, 234. |
|
| |
| |
| CHAPTER XX. |
|
| |
| What to Make of Empty Spools |
236 |
| |
To Build the Parthenon, 236; To Make a Set of Furniture, 238; The Lamp, 239; A Wagon, 239; A Memorial Arch, 240; To Blow Bubbles with a Spool, 241; Cannon, 243. |
|
| |
| |
| CHAPTER XXI. |
|
| |
| Christmas Decorations |
244 |
| |
Effective Portière, 246; Star and Shepherd’s Crook, 246; A Sconce, 248; Tin-foil Christmas-tree Festoon, 248; Tin-foil for Fringe Ruching, 249; Fancy Boxes, 252; Cornucopias, Christmas Stockings, Bobbinet Bags, 253; Holly-leaved Festoons, 254; Pop-corn Balls, 255; Strings of Red Cranberries, Peanuts, 256; Jewelry for the Tree, 257; Gilded English Walnut, 258. |
|
| |
| |
| CHAPTER XXII. |
|
| |
| Christmas Devices |
260 |
| |
An All-day Christmas Pie, 260; The Magic Fireplace, 263; Christmas Tray, 265; A Santa Claus House, 266; Serving Toast, 267; Pièce de Résistance, 268; Jelly, Apples, 269. |
|
| |
| |
| CHAPTER XXIII. |
|
| |
| Picture Writing and Sign Language |
271 |
| |
Symbols, Flower Writing, 273; Indian Powwow, 274; A Letter of Colors, 276. |
|
| |
| |
| xiCHAPTER XXIV. |
|
| |
| Statuary Tableaux |
281 |
| |
The Stage, 281; Lights, Pedestals, and Costumes, 282; Make-up, 284; The Armless Bust, 285; Portrait Medallion, 286; An Egyptian Statue, 287; Pygmalion and Galatea, 288. |
|
| |
| |
| CHAPTER XXV. |
|
| |
| Witchery |
292 |
| |
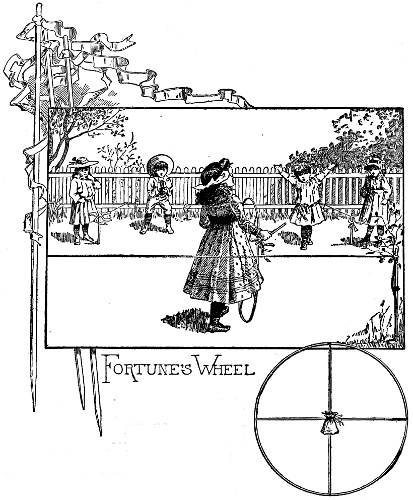
Feather Tests, 293; Touchstone Charm, 294; Naming the Bedposts, 295; Witch Writing, 295; Home or Travel, 297; Dreams, 298; Ghost Ideas, 299; Fortune’s Wheel, 300. |
|
| |
| |
| CHAPTER XXVI. |
|
| |
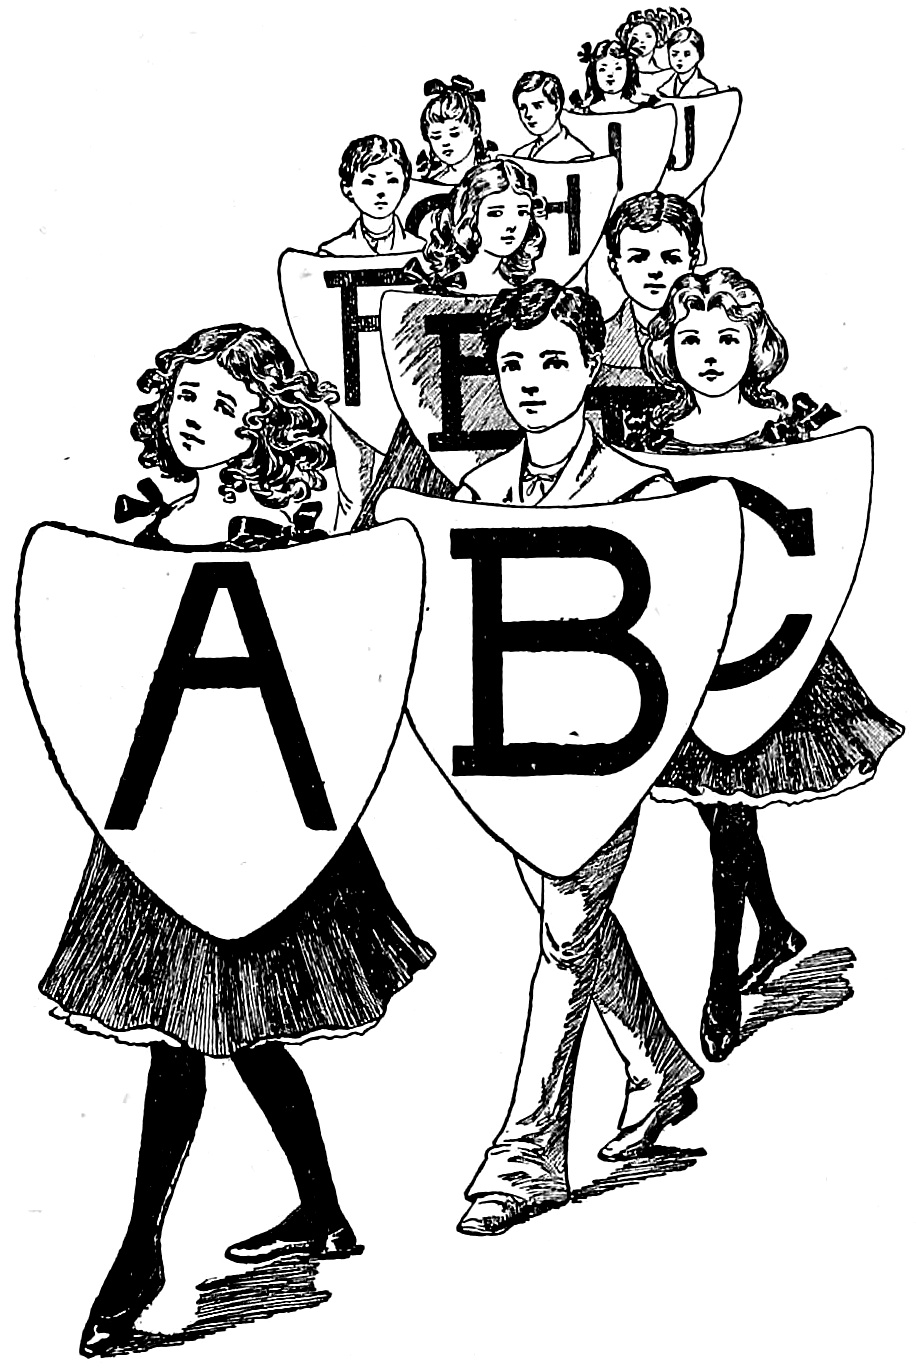
| Living Alphabet |
303 |
| |
Directions for Drill, 308; The Shields, 308; The Letters, 309. |
|
| |
| |
| CHAPTER XXVII. |
|
| |
| Odd Gardens |
310 |
| |
A Country Garden in the City, 310; The Boxes, 313; The Flowers, 313; A Water Garden, 314; The Soil, 315; Water Plants, 316; Simpler Water Gardens, 317; Plants Grown Artificially in Water, 317; The Green Sponge, 318; Vegetables, 319; Friendship Garden, 320; Memory Garden, 321 |
|
| |
| CHAPTER XXVIII. |
|
| |
| Active Games |
322 |
| |
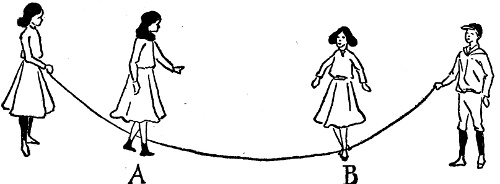
Weavers and Weft, 322; Hoop Dance, 324; The Figures, 326; Hoop Tag, 327; The Circus-hoop Game, 328; Hoop-race Game, 329; Jumping Rope Conquer Game, 330; Going to Market, 332; Passing By, 332; Red, White, and Blue, 333. |
|
| |
| |
| xiiCHAPTER XXIX. |
|
| |
| Expensive Games with Little or No Expense |
334 |
| |
Ping Pong, 334; The Rules, 337; Scoring, 338; Terms Used in Ping Pong, 339; A Make-believe Sewing-machine, 340; A Parlor Croquet Set, 341; Rules for Croquet, 343. |
|
| |
| |
| CHAPTER XXX. |
|
| |
| Basket Ball |
346 |
| |
Cost of an Outfit, 346; Baskets, 348; The Ball, 348; Set of Players, 349; Referee, 350; Umpire, Scorer, 351; Time-keeper, Linesmen, 352; Centres, Forwards, 354; Guard, 355; Rules, 360; General Fouls, 362; Disqualifying Fouls, 363; Playing Suit, 364. |
|
| |
| |
| CHAPTER XXXI. |
|
| |
| Some of Our Out-door Neighbors and Where to Look for Them |
365 |
| |
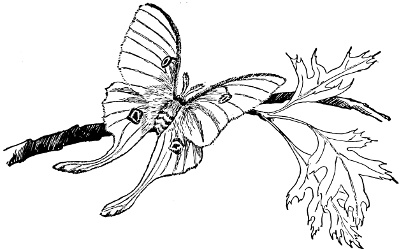
Observation Book, 366; The Squirrel, 367; The Red Squirrel, The Chipmunk, 368; The Weasel, 369; Salamander, 370; The Cicadas, 371; Insect Music, 373; The Indian Pipe, The Moccasin Flower, 374; Engraver Beetle, The ’Coon, 375; The Flying Squirrel, Luna Moth, 377; Woodchuck, 380; The Sea-shore, 381; The Jelly-fish, Sea-anemones, 382; Sea-urchins, 383; Starfish, 384. |
|
PART I
WHAT A GIRL CAN MAKE
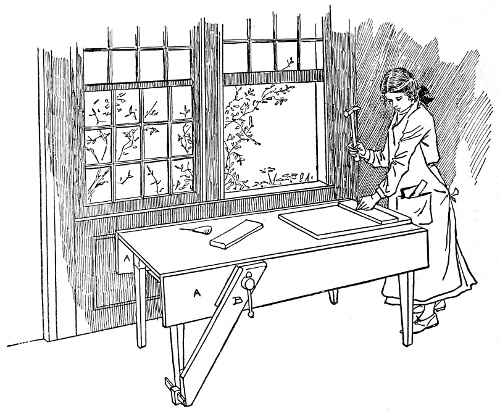
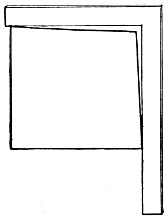
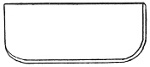
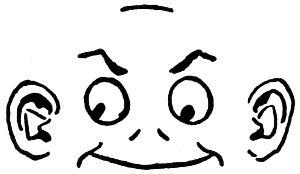
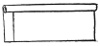
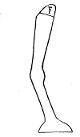
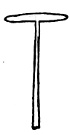
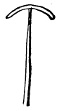
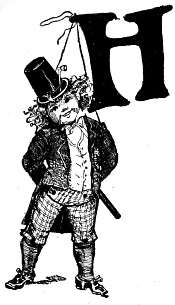
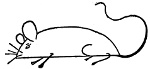
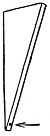
Fig. 9.—The Girl at the Bench.
3
CHAPTER I
WHAT A GIRL CAN MAKE WITH HAMMER
AND SAW
This is an age when girls go to college
and engage in athletic sports;
when they have their manual training,
as boys do and are learning to
use their hands, as never before, in
all sorts of skilful work. The deftness
of their fingers is utilized not alone
in embroidery, or what was once
considered girl’s work, but in the
manufacture of many useful, artistic,
and beautiful objects once thought
beyond their reach. Our girls no
longer resort to the scissors to sharpen a lead-pencil or to
their brother’s chisel to pull out tacks; they are beginning
to know and appreciate the value of tools and are becoming
proficient in their use.
If you are one of these modern girls, girls of the twentieth
century, who like to use both brains and hands, a
little workshop stocked with a few good tools and material
for carpentry work will give you many hours of pure
enjoyment. The tool-chest, denied to girls of the past
generation, is yours for the asking; the manual training in
the public schools has given to many of you the advantage
of learning the use of saw, plane, and hammer, and your
4physical culture has produced the strength and energy for
this active work.
Just a room, any room, that will afford sufficient light
for your work, that is all you need for a beginning. Having
the room you have a place for your first tool, if it is
necessary to collect them one at a time, and it is much
better to do that than to buy a cheap tool-chest. When
you have one tool make a place for it and keep it in its
place. A hammer, a saw, a hatchet, a sharp knife, a
screw-driver, a gimlet, and a rule are the first tools you will
need. The writer once made a very good mantel-board,
cleated at the ends with rounded corners, which has stood
the heating and drying process of many winters over an
open fire, without warping, and her tools were simply a
hatchet, a meat-saw, and a pocket knife. Of course, the
work would have been much easier and more enjoyable
had she possessed the proper tools, but this example serves
to show how few tools are absolutely necessary. A plane,
a chisel, and an auger-bit and brace will be needed later;
after that a gouge, a try-square, and a file. These you may
collect by degrees as your work grows more ambitious and
you feel the need of them. Hooks, nails, tacks, and screws
can be bought as required.
Have a hook for your saw and hang it up, lay your
plane on its side, make a rack for your small tools something
like Fig. 1, and have a box for your shavings. A shelf on
which to keep your boxes of tacks and other small articles
is indispensable; each of these boxes should be labelled and
kept in its place; in fact, to get the full enjoyment from
your workshop you must keep it in order and the tools just
where you may always expect to find them.
5What the Tools are for and How to Use Them
The Hammer.—A carpenter’s hammer is what you want,
not a tack hammer, and it should be of medium weight.
You are to use it in driving nails, in hammering things into
place and in various ways not injurious to the hammer.
The manner in which you hold this tool will make all the
difference in the way you drive a nail. The hammer
should be taken by the end of the handle and the head
brought down squarely on the nail-head, otherwise the nail
will slant to one side or perhaps bend.
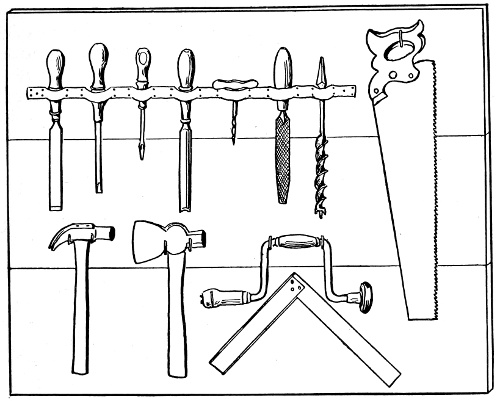
6The Saw.—The panel-saw is best suited to ordinary work,
one having about ten teeth to the inch. Finer saws make a
smoother cut, and you will probably find use for several, but
one is enough to begin with. The saw is used for cutting
large pieces of wood and for cutting across grain, and special
saws serve for special purposes, such as sawing of
curves and cutting out keyholes. With pencil and rule
draw the line you wish your saw to follow. Stand above
your work so that you may see the pencil line; hold the
saw firmly in the right hand and with the left grasp the
board, allowing your thumb to rest on the saw, above
the teeth. This is to help guide the saw and to prevent
cutting your hand. Take light, short strokes at first, then
longer ones, using a little more force, and keep your saw
at right angles with the board. If your material is large
and heavy place it across two wooden horses, if light or
small it is best to use a mitre-box.
The Hatchet.—You will find a good medium-sized hatchet
with a sharp edge very useful, for cutting away or trimming,
but it must be used with care, for to chop too vigorously
will frequently split the wood. See that your hatchet does
not follow the grain of the wood unless the grain runs in
the direction you wish your cut to take.
The Knife.—Not a dainty pearl-handled pocket-knife but a
strong, well-made, sharp-bladed jack-knife, large enough
for all kinds of whittling. The knife is for fine cutting
that cannot be done with the hatchet, and when one learns
to whittle out various small articles much has been accomplished.
The Screw-driver.—It has been said that the feminine mind
cannot grasp the difference between a screw-driver, a cork-screw,
and a gimlet, and it remains with you to prove the
contrary. A poor screw-driver is one of the most exasperating
7of poor tools, and a trial to one’s patience and
temper; besides, it is of little use attempting to “make it
do,” for it seldom will do. The edge is usually
shaped like Fig. 2, and it slides and slips out of
the groove of the screw until it has turned and
worn down its edges and made the screw useless.
Fig. 3 shows the proper shape for a
screw-driver. The use of the tool is, of course,
to put in and take out screws, and it is well to
have two sizes, one for large, the other for
small screws. Remember that in putting in a screw you
turn it to the right, and to the left in taking it out.
The Gimlet.—A medium-sized gimlet will answer your
purpose. Use it for boring small holes and for starting
holes for screws and large nails.
The Rule.—A rule is indispensable for measuring and laying
out your work. A two-foot steel rule is the most
useful, as it can be used both for measuring and ruling
straight lines. A light folding rule is easier to handle in
taking measurements, but you can make the other answer
both purposes.
In taking measurements be as accurate as possible, and
go over them several times to make sure they are correct.
In ruling a line use the bevelled edge of the rule, hold it
firmly in place with your left hand, and with a soft pencil
in your right draw a line close to the edge of the rule.
The wide, rather flat carpenter’s pencils are the best to use,
but any soft lead-pencil will answer.
The Plane.—There are several kinds of planes, but the
smoothing-plane will probably be all you will need, as you
will not be likely to attempt to handle unplaned wood and
will need the smoothing-plane only for finishing and
smoothing off.
8In using the plane hold it back of the iron (or blade)
with your right hand, place your left on the stock (or
wood) at the other end to help guide it, and push it forward
as far as you can conveniently reach, bring it back, tipping
it away from you in so doing, and take another stroke.
The farther the edge of the iron projects through the
stock the deeper will be the cut and the thicker the shaving.
To regulate this, tap on the stock at the forward end
and loosen the iron, then adjust it to suit your work and fix
it in place by driving down the wedge, which holds it, with
a few light taps.
The Chisel.—This tool has a bevelled edge and is used for
paring off the wood.
Unless you are quite careful there is danger of cutting
your left hand in using the chisel, and it is best not to try
to hold the work, but to fasten it in the vice; your left hand
placed on the tool will steady and control it.
Auger-bit and Brace.—For drilling large holes the auger-bit
and brace are necessary. The bit resembles a gimlet in
its spiral edge, but is not wedge-shaped, and the hole it
makes is of unvarying size. You may have several bits for
large or smaller holes. The brace is a handle which fits
on the top of the bit, and makes it quite easy to manage.
The Gouge.—There are several kinds of gouges,
the difference being in the shape of the blade;
their curves vary from the shallow curve, Fig.
4, to the deeper one, Fig. 5. One with a moderate
curve will prove the most useful. As the
name suggests, the gouge is for gouging out
the wood where it is necessary to make a
groove, but be careful not to press too hard
on the tool at first, as one is apt to make too deep a cut,
and do not put your left hand in front of the blade.
9
The Try-square.—The square is a metal strip which forms an
exact right angle and is used to test one’s work and keep it
“square”; it is also used
for ruling square corners.
Fig. 6 shows its
use in squaring off the
end of a board. Figs. 7
and 8 show how the
try-square will fit on an
edge that is perfectly square and will not fit an imperfect one.
The File.—This tool is not indispensable, but is useful for
smoothing off rounding edges and rough corners. Files for
metal and those for wood differ, and should not be used
indiscriminately. Rub the file back and forth over the surface
to be smoothed, but do not press on it too heavily. If
you are to use metal in your work a metal file is necessary.
For wood a slightly curved surface is best.
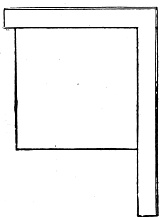
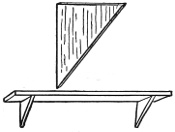
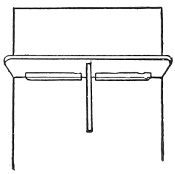
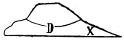
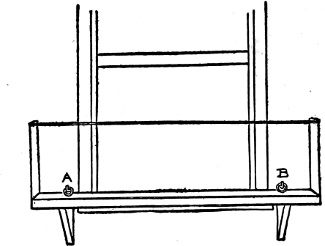
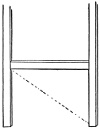
When you can attain to a regular carpenter’s bench you
will indeed be happy, but until then use a strong kitchen
10table that sits firmly on the floor or, better still, is fastened
so that it cannot move. Have a carpenter add sides
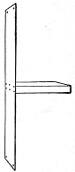
(a, Fig. 9), and a vice (b, Fig. 9). See page 2. You can hardly
get along without a vice, for it is impossible to hold some
of the work firmly enough without it.
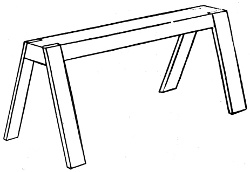
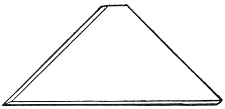
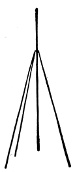
These wooden horses are convenient for holding boards
when they are to be sawed, and for lifting work from the
floor. You should have
two of them, like Fig. 10,
made by the carpenter.
This very useful contrivance
is simply three
pieces of narrow boards
put together in the form
of a box, having two
sides and a bottom, but
no ends or top. Eighteen inches is a suitable length, and
its height should be no greater than the width of your saw.
The mitre-box is used for holding the wood and guiding
the saw at any angle. In the sides of the box are slits running
from top to bottom, some passing diagonally, some at
right angles through the boards. Any carpenter can make
you a mitre-box; do not attempt one yourself, for to be of
use it must be accurately made in every particular.
It is well to know a little about what kind of wood to
select when you are buying your material, for if you wish
to make a durable article, one that will last long enough to
11pay for the making, you should not use wood that will warp
and in a little while spoil your piece of work.
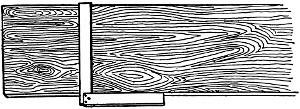
The heart-wood is always the best: this consists of boards
cut from the heart, or centre, of the tree; they are harder,
dryer than others, and less likely to warp or twist. The sap-wood,
which is the part nearer the surface, contains so much
sap it is difficult to season and will generally warp.
Select the boards yourself if possible, and see that they
are planed equally on both sides and have square edges. Do
not take a cracked board, a board with knot-holes or loose
knots, or one that seems damp or musty, and be sure, if you
can, that all your wood is well-seasoned.
Soft woods are best for your purpose at first, and while
pine is very good, white-wood is better, and is easily
worked.
And now that all is ready and the workshop well stocked,
what shall we make? What shall we not make, rather?
Suppose we begin with a few simple pieces of furniture
suitable for a summer cottage, a log-camp, or a play-house.
We will use boxes, clothes-horses, or anything of the kind
that will make a good foundation for the article and save
extra work. When you feel that you can construct a piece
of furniture without such helps, do so by all means, but at
first do not scorn the humble box and barrel, they are excellent
things to practise on.
We will start with
Since the writer made one herself for her room in a log-house
in the mountains of Pennsylvania, she is quite sure it
can be done with very little practice in carpentry or cabinet-making.
12
The dressing-table is made of two pine shelves,
two cigar-boxes, two small brackets, and an ordinary mirror.
For the large shelf choose a board about twelve inches
wide or wider, if you
have one, measure the
space your dressing-table
is to occupy,
mark the size on the
board with a pencil,
using your try-square
to make your line at
right angles with the
edge of your board,
and saw off the board
at the ruled line. If
the room is neither
plastered nor ceiled
and the uprights are
left uncovered, let
the large shelf reach
across from one upright
to the next, and
make the smaller
shelf just long and
wide enough to fit in
between. Saw out
your supporting
braces after the pattern
given in Fig. 11,
with the grain of the
wood running up and down, making six in all; two for the
large shelf, two for the small shelf, and two for the little
side-brackets. Draw a line at each end of your shelf where
13the brace is to be fastened, and on this line bore two holes
entirely through the board. With screws long enough to
reach through the shelf and into
the braces fasten the shelf and
braces together, Fig. 12. Bore
a hole near the bottom edge of
each brace, as in Fig. 13, and
directly over each brace screw
into the top of the shelf, as near
the edge as possible, a screw-eye,
Fig. 14. Cover both shelves with
pretty cretonne, putting a ruffle
on the large shelf and drawing the material neatly over the
edges of the smaller one.
On each end of the large shelf tack a cigar-box,
which you have previously painted white.
These boxes are for holding brushes and combs.
Screw strong hooks into the uprights at the proper
distance from the floor, then hook your large shelf
on by the screw-eyes at the top, and screw the
braces to the uprights through the holes at their
lower corners. The upper shelf, not being so
heavy, needs only the hooks and screw-eyes to
support it, and screws at the bottom of the braces are
unnecessary. Hang this only a little way above the other
shelf. Make the small brackets
of thinner wood and let them be
square, of a size to fit the uprights.
One brace for each bracket is all
that is necessary, and the braces
must, of course, be smaller than
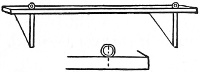
Fig. 14.
those used for the shelves. Paint the brackets white like
the side boxes; enamel paint is the best to use, as it gives a
14hard, smooth surface. Only the hooks and screw-eyes are
required to hold the brackets. Hang the mirror with its
bottom edge resting on the
top shelf, as shown in the
illustration.
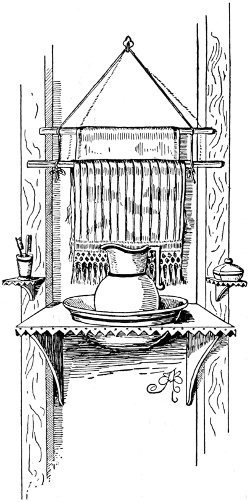
to go with the toilet table is
constructed on the same principle;
the shelf used for this,
however, must be wider in
order to hold the wash-basin.
If cutting a round hole in the
shelf, like Fig. 15, is too difficult,
do not attempt it, but
leave the surface plain and
place your bowl on top.
Make your braces quite
strong and screw them to the
wall. Make side-brackets, as
for the dressing-table, and
cover them and the shelf with
white enamel cloth. Cut the
edge of this in points, turn it
over and tack to the edge of
the shelf with white-headed
tacks. The illustration will give you an idea of the appearance
of this wash-stand. For
use two broom-sticks, cut one shorter than the other, and
paint them white. Fasten them together with strong cord,
leaving a six-inch space between, and hang them over the
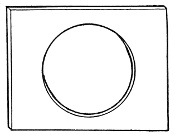
Fig. 15.
15wash-stand as shown in the illustration. Though the top
stick is shorter than the other, both must be long enough
to reach across and rest against
the two uprights of the wall. This
allows space at the back and gives
plenty of room for the towels.
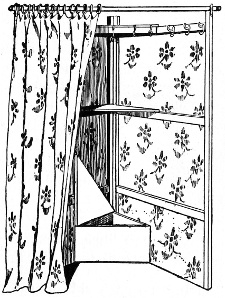
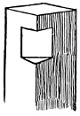
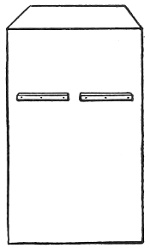
Portable Corner Clothes-Press
A Portable Corner Clothes-press
Use two folds of an ordinary,
large-sized clothes-horse for the
frame of your clothes-press. Make two three-cornered
shelves with back edges at perfect right angles and measuring
half the length of the
cross-pieces of the frame.
These shelves are to rest on
the cross-pieces, therefore
you must saw off the corners
at the back in order to make
it fit, Fig. 16. Across the
outer edge of the top shelf
nail securely a strip of wood
three inches wide, having its
top edge on a level with the
top of the shelf, Fig. 17. Into
this strip, as well as into the
top cross-pieces, screw
clothes-hooks, placing them
about eight inches apart.
With short wire-nails, or
screws if you wish your
press to be very strong, fasten the top shelf on the upper
cross-pieces and the other shelf on the middle cross-pieces
16of the frame. Paint the shelves and the inside of the frame
white, and over the outside tack flowered cretonne or
chintz, remembering to have the right side of the material
turned inward. Fasten a brass or galvanized iron rod to
the top of the two front uprights and from this hang a
curtain of the same material. To fit the holders, or fastenings,
for the curtain rod it will be necessary to cut notches
in the inner corners of the uprights, Fig. 18, otherwise they
will not be at the proper angle to hold the rod. To prevent
dust from settling upon the clothing, tack a three-cornered
piece of cretonne over the top of the frame. The
shoe-box shown in the illustration is not a part of the
clothes press, but is a convenient addition.
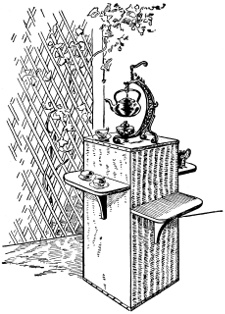
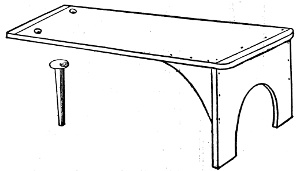
A Five O’clock Tea-Table.
Make this of an oblong box with square ends and of a
convenient height when set on end.
Cover the box neatly with matting or burlap, then make
four shelves long enough to reach across the sides of the
box and about nine inches wide. Round off the corners
of the shelves as in Fig. 19 and make one brace for each
shelf. To each side of the box at varying heights fasten
with screws two narrow strips of wood or cleats, two inches
apart, Fig. 20. Screw the braces to the shelves and paint
all to match the color of the covering used on the box;
17then rest the back edge of the
shelf on the cleats prepared
for it and screw the brace to
the box and the shelf to the
cleats, Fig. 21. Thus securely
fastened the shelf becomes
immovable and there is not
the slightest danger of its slipping
or tipping. The illustration
shows how the shelves
are placed. This little tea-table
is especially suited to
the piazza, which, from your
workshop, you may fit up for
a place to entertain your
friends most delightfully.
will make a charming feature
of your summer parlor, for
flowers are always
needed to give the
finishing touch in
beautifying the inside
or the outside
of a home.
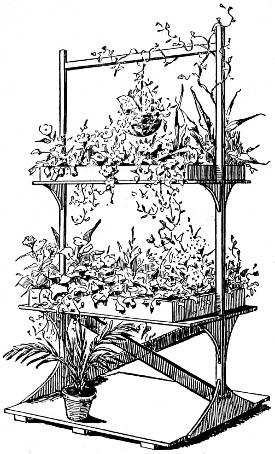
For the frame of
the flower-stand use
one fold of the ever-useful
clothes-horse.
Make twelve three-cornered
braces, cutting
18them out like Fig. 22, four measuring seven inches on
their edges, four nine inches, and four twelve inches or as
long as the width of the board will allow. Saw out four
shelves which will reach
exactly across the frame,
two of them nine inches
and two eleven inches
wide. Screw the smaller
braces to the narrow
shelves, the larger ones
to the widest, making
sure the back edges of
shelf and brace are on an
exact line; fitting them
in your try-square will
assure you of that. To
give additional strength
to the frame, measure
the distance from the
bottom edge of the lower
cross-piece, where it joins
the upright, diagonally
across to the other upright
within one inch of
the floor (Fig. 23), then
take two narrow boards,
say three inches wide
and one inch thick, and
saw them the required
length. Lay your frame down flat, place first one diagonal
in position, then the other, and make a pencil line across
the upper and lower corners showing where they must be
taken off in order to fit inside the frame. A mitre-box is
19very useful here, for by its aid you can saw your boards
Fig. 22.
at the required angle without difficulty. Lacking that, be
careful to have your edges straight. Place
the diagonals in position in the frame and
mark the width of each on the surface of
the other where they cross. Between these
two lines, on the edges of the boards, draw
a line which will divide the edge exactly in
half. Saw along the oblique lines down to
the line on the edge, then with a chisel pare
down to the edge lines, thus “halving” your boards, Fig. 24.
Cross your diagonals at the halving
and with long wire nails, driven from
the outside of the frame, nail them in
place, Fig. 25. Now fit the largest
braces on the front and back of each
upright with edges resting on the floor
as in Fig. 26, and screw them on with
screws near the top as shown by C and
D, Fig. 26. Have the outside edges of
the braces on a line with the outside
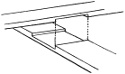
Fig. 24.
edges of the uprights; this will leave a
space of about an inch on the inside of
the uprights. The braces will hold the frame in an upright
position, but in order to support
any weight it must be further
strengthened by adding a platform
to which the braces may be screwed.
Make the platform of a size to fit inside
the uprights and reach across
from end to end of the braces. Two
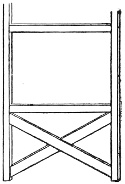
Fig. 25.
or more boards will be required to give sufficient width,
and it will be necessary to stay them by putting on three
20cleats across the under side, as in Fig. 27. These cleats
must be of equal width and thickness and, as in all cleats,
the grain of the wood must run lengthwise.
Cut notches at each end, as shown
in the diagram, to fit the projecting uprights,
then fit the platform into the
frame, and screw the braces on to its
edges, Fig. 28. You have now a firm
foundation and may add your shelves.
The widest shelves are to go across the
frame on either side on a line with the
top of the lower cross-piece,
the narrower
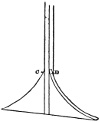
Fig. 26.
shelves on a line with the top of the
middle cross-piece. Fasten these in
place with screws at the lower end of
each brace, and with hooks in the uprights,
and screw-eyes at the top of the
shelves, as in the shelves for the dressing-stand,
Fig. 14.
Instead of four you now have two
very broad shelves, running directly
Fig. 27.
through the frame. Take measurements
of these shelves and
make a shallow box, about seven
inches deep, to fit each shelf.
To prevent the boxes springing
at the seams from dampness, get
a strip of tin three inches wide,
bend it through the middle
lengthwise, and tack it over the
seams, as in Fig. 29. Paint the entire frame and the outside
and edges of the boxes dark green, and then varnish
21them. Of course the paint must be quite dry before the
varnish is applied.
Put a layer of charcoal in each box, then a layer of sand,
and over all a thicker layer of good soil. Fill your boxes
with flowering plants and
hanging vines, and use the
lower platform for potted
plants. From the top cross-piece
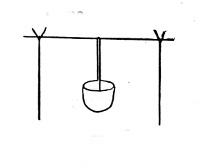
a small hanging basket may be hung, adding its
beauty and sweetness to the rest.
The illustration will give an idea of the appearance of
the flower-stand, though much of the beautiful, luxuriant
growth of plant and vine had to be omitted in the drawing
so that the construction of the stand might be distinctly
shown.
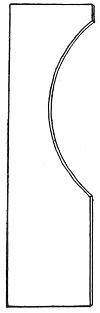
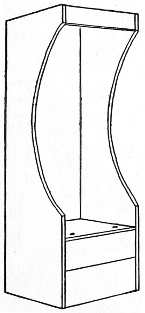
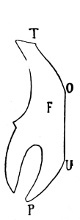
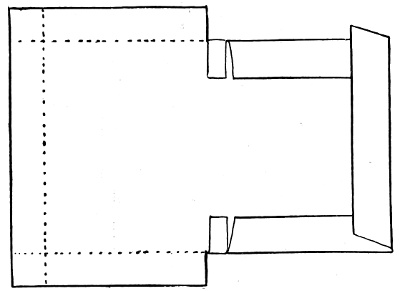
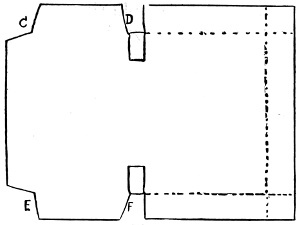
Hooded Chair Made of Packing-Box.
Hooded Chair Made of Packing-Box.
A Hooded Chair Made of a Packing-box
You must select with care the box for this rather unique
piece of furniture, for you will want it to be durable. If you
prefer you may make it altogether of new material after
the same pattern, but a box for the foundation will simplify
the work. When standing on end your box should measure
about five feet six inches in height, eighteen inches in
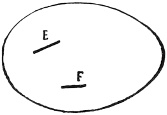
depth, and twenty inches in width. Nail two cleats, each
thirteen inches long, in an upright position on each side
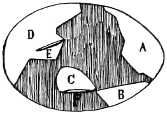
22and at the back of the box, as shown by the letters E, F,
G, H in Fig. 30, placing the front ones, E, one inch back
from the edge as in diagram.
Fig. 30 gives one
side and the back of the
box. Across and resting
on the top of these upright
cleats nail the cleats
I and J. Lay the box on
its side and draw a curve
like Fig. 31, starting the
line four inches from the
top and ending it two
feet from the bottom.
The curve at its greatest
fulness should take in
half the width of the
side. Draw a curve exactly
like the first on the other side of the box; saw carefully
along the lines, following them as closely as possible,
and then take off the remaining rough edges with a chisel.
23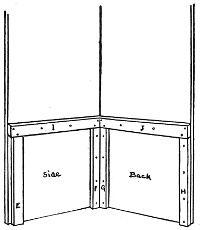
Fig. 30.
Nail a strip of wood four inches wide across the front at
the top to finish the hood, Fig. 32. Box in the lower front
up to the top of the cleats and
there make a seat to fit in the
chair and rest on the cleats,
Fig. 32. You will notice that
in the seat, near the forward
corners, are two holes; these
are for the adjustment of the
rest, which gives additional
comfort to the chair, and upon
which one may stretch one’s self
out luxuriantly. Two boards,
three feet four inches long,
will be required for
the rest, which should
be just wide enough
to fit easily inside the
chair, resting on the
seat. Cleat the rest at
each end and in the
middle, as in Fig. 33,
putting the end cleats
on the edges of the
boards and the middle
one underneath.
Round the corners and
smooth them off with
knife or chisel.
Measure the distance
from the top of
24the seat to the floor and make the end-piece (Fig. 34) for
the foot of the rest exactly that height, for the foot must
be on a level with the other end when adjusted.
Screw the end-piece to the rest
with screws passing through the top of the
boards into the top edge of the end-piece,
and put braces at the corners to keep it
secure, Fig. 35. Bore holes three-quarters
of an inch in diameter at the upper corners
of the rest, making them one inch from the
cleat and two inches from the side edges of
the boards, Fig. 33. Place this end of the
rest on the seat of the chair,
allowing it to lap about four
inches, and through the holes
just made mark corresponding
places for the holes in the seat. Make

Fig. 34.
or buy wooden pegs like Fig. 36, and slip
them through the holes in rest and seat
when you wish to
adjust the rest. The
ordinary wooden
easel peg is about
what you want for
this purpose.
Pad the sides
and back of the
chair with cotton
batting, using only
enough tacks to
hold it in place, then cover the chair inside and out, except
the seat, with pretty cretonne, making a box-plaited ruffle
25for the front, as shown in the illustration. Pad the top of
the rest up nearly to the holes in the end, and cover it with
the cretonne. Use an old feather pillow for the seat cushion,
and another (smaller) for an extra one at the back, and
cover them also with cretonne.
26
CHAPTER II
POSSIBILITIES OF AN EASTER EGG
Throughout the entire United
States Easter eggs are very popular,
and the practice of coloring them is
increasing rather than diminishing.
The stores are full of all sorts of
novelties in real or simulated eggs;
some valued at very large sums have
been manufactured in London, but
Uncle Sam does not raise such costly
varieties. The real fun is in coloring
one’s own eggs, and if the eggs can
be transformed into something else, the sport will be
doubled. To turn an egg into
in the water is a new idea, and one which will furnish no end
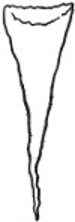
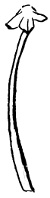
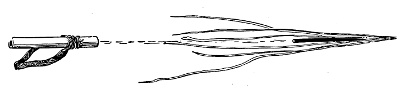
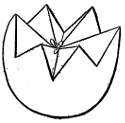
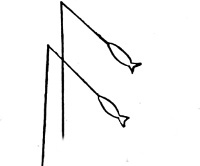
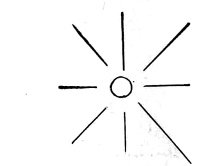
of diversion. Cut stiff paper in the shape of Fig. 37. Make a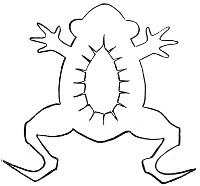
Fig. 37.
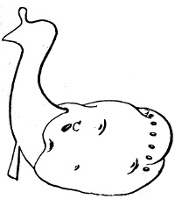
small hole on one side of an egg (Fig. 38, B) and a tiny hole
at one end (A), remove the contents by shaking the egg and
blowing in at the end A. Then fit the shell on a stand made
of a paper box with a hole cut in it just large enough to hold
the egg firmly, and pour some melted wax in at the hole B,
using great care to keep the egg steady, that the weight
may fall exactly in the centre and make a perfect balance.
Paste paper over each hole and fit the frog (Fig. 37) on
the egg, keeping the side of the egg with the covered opening
27B for the top, forming the back of the frog. Remove
the paper frog and cover the slashes cut in the back with
melted sealing-wax, while hot
adjust it on the egg, pressing
the slashes against the shell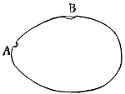
Fig. 38.
before the wax hardens and
holding them in place until
they adhere. When perfectly
dry paint the frog mottled
green on the back and a yellowish
white underneath in
oil colors (Fig. 39). Try to
recall the coloring of a real
frog and make this one as lifelike
as possible. Pour water in a large basin and stir it
around to produce a current. The paint having dried,
place the frog on the top of the water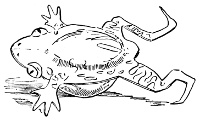
Fig. 39.
and watch it swim. If you would like
to race these queer Easter eggs, make
two or three frogs and start them all
swimming at the same time.
Should oil paints not be at hand, use
stiff brown paper, preferably glazed,
for Fig. 37. Make a hole at each end
of the egg-shell and remove the contents. Drop some shot
in the shell and glue paper over each opening; then fasten
the paper frog, with the hole
in its back (Fig. 37), securely
on the egg. Wait until it is
perfectly dry before placing
the little animal on the water,
where it will look very comical
and lifelike, even though
it is not green in color.
28At break of day on Easter morn the sun dances for joy,
says the old legend, and if you would prove it, arise early
and watch the reflection of the sun as it plays hide-and-seek
on the surface of the clear water which you have
placed in a tin basin where it can catch the first rays from
the “King of Day.” A breath of air will cause the water
to move, and with the motion comes the dance, as the sun
sparkles and glides here and there, glittering and laughing
in its joyous play. The legend is a pretty one and its
meaning deeper than appears on the surface.
Beside enabling one to see the sun dance, being up early
gives time, before breakfast, to help decorate the table as
a pleasant surprise to the family. One of the most attractive
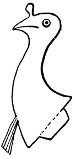
ornaments is the white dove
with its snowy wings spread wide,
while it floats and sways in mid-air
as if it were really flying slowly
and softly through the room. It is easily made. Take a
pure white egg, and empty the contents; then cut from
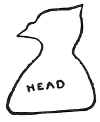
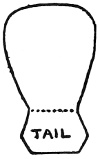
writing paper the wing (Fig. 40), head (Fig. 41), and tail
(Fig. 42). Pin each in turn on a fresh, smooth piece of
cotton wadding and cut the raw cotton out along the lines
of the pattern. Make two wings of the cotton wadding,
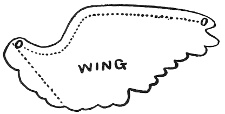
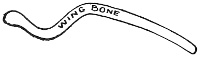
29and cut two wing-bones (Fig. 43) from stiff paper; open
each cotton wing along the upper edge about a quarter of
an inch in depth, according to dotted line O O (Fig. 40),
insert a paper bone in each opening and gum it sparingly
here and there. Smooth up the edges of the cotton wings,
covering the bones entirely; then gum the wings to the
sides of the egg according to the dotted line on one end.
Fasten the tail in place and, last of all, the head; open the
neck a little and paste each side of the open edge on the
egg. Bend the wings out, as if the bird were flying.
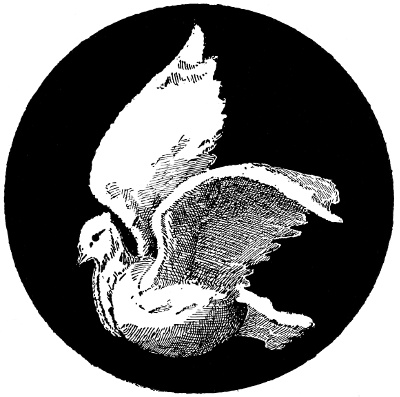
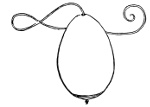
To float the dove in the air, make a knot in a piece of
fine thread and with a needle run the thread through a
small square of white court-plaster; pull the knot up tight
to the plaster, unthread the needle, and with the court-plaster
30over the knot, dampen it and gum the thread down
tight on the back of the dove, something as a leather sucker
is stuck on a brick; it will soon dry. In the morning suspend
the dove over the centre of the table (Fig. 44) by
tying the end of the thread on the chandelier. Let it be
about ten inches above the dishes. If you can handle pen
and ink very lightly, the bird’s eyes and mouth may be
carefully marked, although this is not absolutely necessary,
as the effect is almost the same without the features being
emphasized.
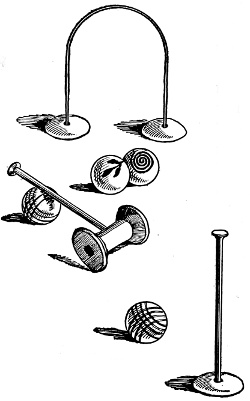
One of the minor sports
now gladly participated in
by the girls, is top-spinning,
and the amount of fun they
derive from the whirling playthings is only equalled by
their skill in the game. All kinds of tops are welcomed and
experimented with but the queerest is the
Easter top (Fig. 45) made of a hard-boiled egg colored
red, with a disk of stiff red paper (Fig. 46) fitted and
glued on with sealing-wax. When twirled by the fingers
the toy will whiz around almost equal to a peg top. Try it,
and try also
31
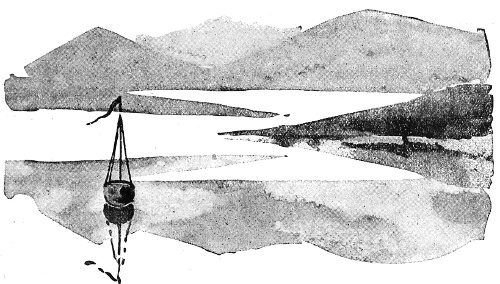
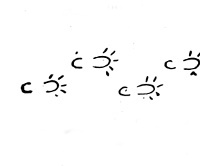
for an egg-shell containing a kaleidoscope is a still greater
novelty. In preparing this it is better to blow the egg
first, then, by puncturing holes, as in Fig. 47, each end of
the shell can be removed evenly. Care must
be taken to thoroughly rinse and dry the
shell, as any moisture from the egg will dim
and blur the glasses, which should be kept
perfectly clear. Fasten with mucilage three
strips of glass, two inches long and one-half
inch wide, to a piece of black paper, as in
Fig. 48. The dark paper left between the
light strips will allow the two end-pieces of
glass to be brought together,
thus forming a triangle,
which is held in place
by pasting the paper extending
beyond the edge of the
last strip of glass over on
the edge of the first piece
of glass. Fasten triangular
pieces of glass, like Fig. 49,
to the ends, in the following
manner:
Cut from paper, not too stiff, a circle
one inch in diameter, out of the centre of
which cut a triangle of even proportion,
just a trifle smaller than the glass, see Fig.
50. Paste the triangular glass, Fig. 49,
over the triangular hole in the paper circle, Fig. 50, then fit
this paper-framed glass to one end of the cylindrical triangle,
and, folding the paper down smoothly, fasten with mucilage,
32to hold it firmly in place. Put several
small pieces of differently colored glass
into the kaleidoscope and close the
other end in the same way as the first.
When this part of the work is finished,
slide it carefully into the shell, and
over each end paste a piece of bright-colored
paper with a triangular hole in
Fig. 52.
the centre, as shown in Fig. 51. A half-yard
of colored ribbon of the same
shade as the paper, tied around the egg,
forms a loop to hang it up by, and also
enhances its appearance (Fig. 52). In
connection with the egg another emblem
frequently found in the shops is the
Why this little animal is associated with Easter eggs no
one seems to be able to tell. There are several legends
which explain the connection, each one different from the
others. This is the prettiest:
"Scarcely had the Winter King left on his way to Northland
when the young Prince, Spring, passed along, bringing
with him delicate flowers and wild birds. The flowers
charmed his senses with their exquisite perfume, and the
birds entertained and delighted him with their sweet songs;
but Spring was lonely and sighed for the children of the
earth, for whom he had brought these fair gifts. Thinking,
perchance, they did not know of his coming, he concluded
to send them tidings, when suddenly a little hare appeared,
and immediately the Prince decided that the swift-footed
animal should be his messenger. The little hare, however,
33begged hard to be spared, as he stood in terror of the dreadful
shot-gun, which had killed so many of his brothers. But
Spring, smiling said: ‘You shall be the bearer of gifts to the
people, then they will not harm you,’ and the hare, calmed
but hardly convinced, consented to do the will of the Prince.
"Then Spring wove a dainty willow-basket and filled it
with pretty colored eggs, which the birds gave him, and this
he handed to the hare to give to the people, with many sweet
messages from Spring.
“Taking the basket in his mouth, the hare trotted off
rapidly toward the nearest village. When he reached
there, however, fearing the grown people, he delivered
the messages to the children and gave them all the pretty
eggs.”
A delightful little legend, isn’t it? And Spring must
have been well pleased with the hare for choosing to deliver
his messages to the children, for on this day it is the young
people who first know of the coming of Spring.
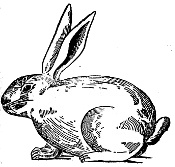
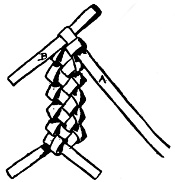
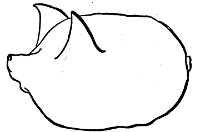
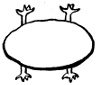
The Easter hares shown in Fig. 53 are made of eggs.
Goose eggs are the best to use—they are so much larger
than hen’s eggs.
Blow the egg if you desire to keep the little hare; if
you wish later to eat it, boil the egg hard.
Take two little tufts of cotton, roll and pinch them in
shape for the ears, then two more tufts for the forefeet;
fasten ears and feet to the shell with gum arabic, in the
position shown in Fig. 53. Remember, the small end of the
egg is the hare’s head; on this end, below the ears, draw
with pen and ink the eyes, nose and mouth, using Fig. 53 as
a guide.
34

If you make two hares, place them together on a fresh,
green leaf of lettuce, and they will look very natural.
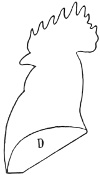
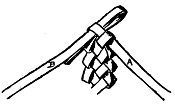
Did Palmer Cox have in mind an egg when he drew the
picture of one of his famous Brownies? This queer little
character certainly suggested one so forcibly that it was
impossible to resist trying the experiment of making his
likeness from an egg,
and
shows the result, see
illustration.
Prepare the shell
of a goose egg as for
the Easter hare, and
follow the directions
given for blowing the
egg. Fig. 54 is the Brownie’s face. Trace this on tracing-paper,
turn the other side and rub a soft lead-pencil all over
the back until that side of the paper is covered with lead,
taking care not to tear it in doing so. Place the face on the
shell, the printed side out, and holding it steady, go over
35the lines with a pencil. This will reproduce the face on
the shell, then with pen and black ink strengthen the drawing.
The small end of the shell is the head and the
face must be drawn well up on it.

Make the Brownie’s costume, cap
and all, of brown material. An old
brown stocking will be just the thing
to use. Fig. 55 is the pattern of the
cap; the dotted lines on the edges
show where the seam is to be taken,
and the dotted line running from side
to side shows where the cap is to be
turned up. Fig. 56 is the back and
Fig. 57 half of the front of the jacket.
Fig. 58 is the pattern of half of the
trousers, which are made in two
pieces cut exactly alike.
Make two little rolls of unbleached
cotton, two inches long, for the arms. Fig. 59 shows how
the muslin is turned up on one edge and then rolled. Fig.
60 gives the roll stitched and complete.
When the jacket is made,
slip the arms into sleeves and
fasten at top of sleeve. Make
the legs just as you did the
arms, but use black cloth for them
instead of white. Finish the trousers
and sew in the legs at
the dotted lines.
When the costume is complete
cut a disk of soft muslin
like Fig. 61, and slip through
it, at the centre, a needle threaded with strong linen thread.
A long darning needle will be the best. Pass the needle
36through the hole in the large end of the shell and up
through the hole at the top. Draw the disk of muslin down
to the large knot in the end of the thread,
then bring it up close to the egg as in Fig.
62 and paste the muslin on the shell.
Dress the Brownie in his clothes; first
his trousers, then his jacket; fasten them
here and there with glue; run the needle
which you have passed through the shell up through the
little cap and out at its point on top. Slide the cap down
on his head and glue in place.
Let the thread be long enough to hold while you dance
the Brownie on the floor.
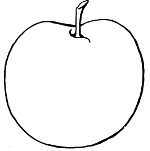
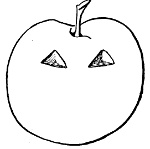
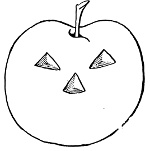
Eggs can also be turned into
Fruits, Vegetables, Opera Glasses, and Dishes
How would you like great, luscious purple plums, watermelons
and fine radishes for breakfast? We can manage to
have them, and at the same time may be served mammoth
acorns—not the kind gathered for cups and saucers, but quite
different. These are as large as eggs and either all brown
or green in color. They taste something like hard-boiled
37eggs, and, what is more strange, the plums, watermelons
and radishes all have a similar flavor. To prepare them,
color some eggs, make the eggs all of solid hues,—a few rich
purple, several red, others brown or light green, one or two
dark green. When the eggs are boiled hard and of the
desired shade change them into the vegetables and fruits.
Begin by making
Gum a number of crisp tissue-paper leaves cut from
Fig. 63 on the big end of the red eggs. Fold each leaf
lengthwise through the centre, according
to the dotted line (Fig. 63); then slip a
hatpin or the back of the blade of a table-knife
tight up in the fold and, holding the
leaf in place with the right hand, gradually
push it up together on the blade with
the left hand; this gives the leaf a natural
crimped appearance (Fig. 64). Take a
small piece of raw cotton and dip it in the dye, or, better
still, color it with a little crushed red crayon; then pull the
38cotton into the form of Fig. 65. Fasten this red point on the
small end of the egg and the egg will be a radish (Fig. 66).
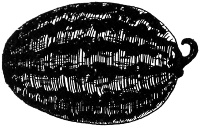
Use a dark green egg to make
the baby
Mark uneven, lengthwise bands
around it with a soft lead-pencil
and fasten in the stem with sealing-wax.
Bore a hole in the large
end of the melon, making the opening
big enough to admit the end of a small
curved twig which must form the stem;
put on enough sealing-wax to secure
firmness (Fig. 67). Convert the purple
egg into
by fastening it on a natural twig in the
same way you stuck the melon on its
stem. Gum two green tissue-paper
leaves to the branch
for foliage (Fig. 68).
The funny big
must likewise be attached
to a stem, and on its small end
Fig. 69.
you should fasten with sealing-wax a
leaf bud from a lilac bush; if that cannot
be obtained, make the little point of
cotton. Let a band of colored raw cotton or crumpled
tissue-paper be glued on to form the edge of the acorn cup
39(Fig. 69). When the fruit is ready for the table, serve each
piece on a separate small plate in which has first been laid
a white doily or a home-made mat cut from white paper.
Fresh flowers always give an added charm to the breakfast
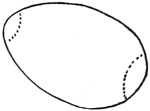
table, and in
their value is doubled. Select three large-sized eggs, bore
holes in the small ends of each, and carefully make the
openings large enough to admit the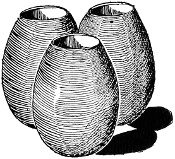
Fig. 70.
points of a pair of small, sharp scissors.
With these cut the holes to a diameter
of nearly one inch, remove the contents
of each and place the shells close together,
as in Fig. 70. Notice where the
sides touch and drop hot sealing-wax
there to fasten the three shells together.
Flower vases are collected by people
whose aim is to obtain as odd and as
many vases as possible. Other collectors delight in teapots,
and you will find on their shelves
all sorts of queer and antique
affairs. If you happen to have a
friend with such a hobby, give
her
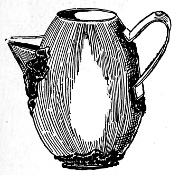
to add to her collection—one from
which the tea can actually be
poured out of the saucy, wee
spout (Fig. 71). Remember, however,
the fragile little affair cannot be placed on the hot
stove. Blow the contents from an egg and, if desired, color
40it. Have the sealing-wax of a broken color, if it is obtainable,
such as soft gray, delicate brown or quiet gray-green.
The work will appear better than when more positive colors
are used. With sharp scissors carefully cut a round
hole in each end of the shell and another
small one in the side, a short distance from
Fig. 72.
the top, as an opening for the spout. Soaking
the shell in
warm water for
nearly half an
hour will render
Fig. 73.
it less brittle. Make the bottom of the teapot of a
round piece of stiff paper; cover the upper side of the
paper all over with melted sealing-wax, and before
the wax hardens set the shell down on it. For greater
security drop melted sealing-wax entirely around the bottom
where it joins the shell. Let the wax splash up on
the egg; it gives a decorative effect. The spout (Fig.
72) should be cut from stiff paper, also the handle (Fig.
73); fasten both on the egg-shell with sealing-wax in their
respective positions, following the dotted lines. When
finished test the teapot to make sure it is water-proof;
then fill it more than half full with water and have the fun of
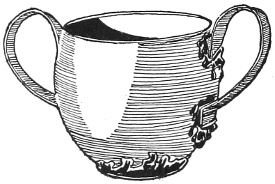
Fig. 74.
pouring the water in a tiny
stream out of the spout. If
the teapot leaks the least bit,
fill the crack with sealing-wax.
Be sure that the little
gift is in perfect order before
it leaves your hands.
Having completed the
teapot, it will be easy work
to make
Use two strips of paper for the handles; fasten them on
with sealing-wax, and set the round bottom of the half
egg-shell in the soft sealing-wax which you have dropped
on a circular bit of paper. The paper being flat will give
the sugar bowl a level stand, enabling it to remain erect
and firm (Fig. 74).
In old-fashioned Southern country-houses there is usually
a pail of clear, cold spring water conveniently near, with a
gourd dipper from which to drink in place of a common
glass. The gourds are interesting, odd-looking drinking
vessels, but cannot compare in quaintness with the little
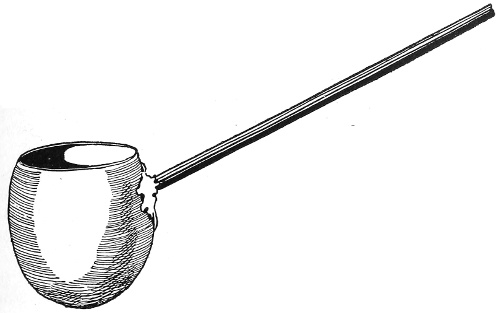
fashioned from egg-shells. A large half of an egg-shell
forms the bowl and a slender stick the handle (Fig. 75).
Bore a hole in one side of the dipper and slide
the end of any kind of a slender stick
through. Fasten this securely in
place with hot sealing-wax both
outside and inside at the juncture
of the bowl
and handle, and
in less time than it
takes to tell it the dipper
will be made. Place all the
Easter gifts you have manufactured
on a table where you may enjoy
them, and in order that you shall get
the full benefit of their beauty, look
at them through a pair of opera-glasses;
but first you must make the
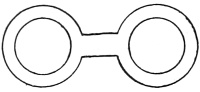
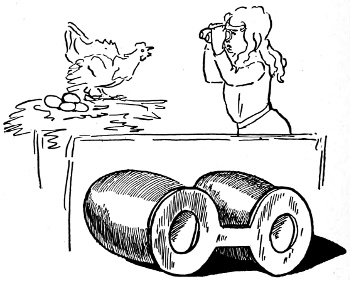
42glasses. Cut Fig. 76 from card-board; then bore holes in
each end of two eggs, remove the contents and cut the
openings large enough to see through (Fig. 77). The egg
after the holes are made is shown in Fig. 78. Attach the
large ends of the shells to Fig. 76 by means of melted sealing-wax;
glue them on tightly, and the opera-glasses will be
ready for use (Fig. 79).
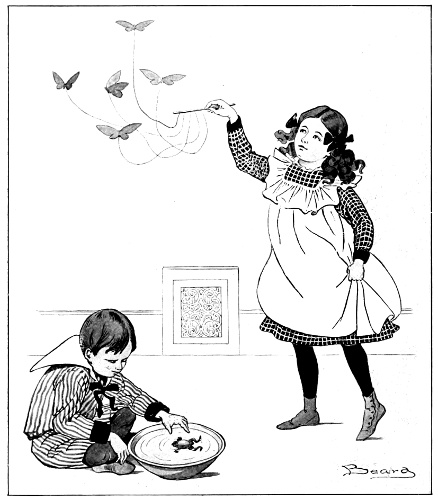
Paper Butterflies that Fly, and Egg Frogs that Swim.
45
CHAPTER III
A PAPER EASTER
Even play eggs manufactured of paper have
many possibilities. Of course, all girls
would rather make these for themselves
than to buy them, be the trifles ever so
beautiful; for, after all, the purchased
eggs can only be looked at and then put
away. You cannot have any real sport
with them; cannot take them apart and
put them together again any more than “all the king’s
horses and all the king’s men” could restore “Humpty
Dumpty” after his fall; nor can you change these designs
from one thing to another, each complete in itself. Only
the home-made Easter egg admits of such manipulation. It
is an Enchanted Egg and from it can be made
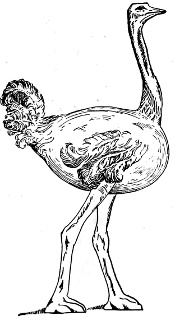
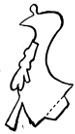
An Ostrich, Rabbit, Penguin, and Rooster
To make the egg, cut from medium-weight water-color
paper two egg-shaped designs, Fig. 80; in one of these
cut two slits exactly like Fig. 81; lay this over the second
paper egg, being very careful to have the two perfectly
fitted, and with a pin-prick mark the ends of the slits of the
top egg into the under one; stick the pin entirely through,
first at one end and then at the other of each slit; remove
the top egg and draw a straight line from pin-point to pin-point
of the upper and then of the lower slit; these lines
46are guides and render it easy to cut the slits to correspond
with those in the first egg. The two eggs must be exactly
alike, as they are in reality the two sides of one egg. Trace
the markings of Fig. 82 on one egg and spread strong paste
sparingly over the darkened portion, not allowing it to
extend in the least across the boundary lines, for the white
spaces must be left free, that they may form openings or
pockets. Again fit the two sides together (the paste will
cause them to adhere), and place the egg under a few books,
or some other weight, to dry, and in a little while it will be
ready for transformation.
Changing an Egg Into a Rooster
Trace the rooster’s head (Fig. 83), his tail (Fig. 84), his
wings (Fig. 85), and his foot (Fig. 86), on the water-color
paper. Make two feet and two wings; either
paint the natural markings
or indicate them
with ink on the different
parts, then slide the
head in the large end of
the egg at D, Fig. 82,
fitting it in between the
two sides according to
the line drawn above
47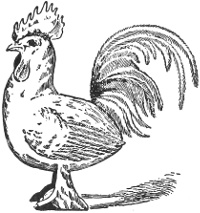
Fig. 87.
the letter D on
neck of rooster.
In the same way
place the tail in
the egg at the
small end, A, Fig. 82; fit
the wings in, one on each
side, at the slit E; notice
that each wing is cut on
both sides of the extension
E, to bring the top edges of
the wings up higher, when they are
in position, than their central top
portions. Slide the feet in the slit
F, one on each side, slightly bending them out from each
other; the rooster (Fig. 87) will then stand alone when it is
placed on a level surface.
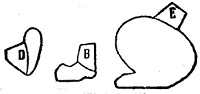
Fig. 89. Fig. 90. Fig. 91
After the rooster has served its day
remove the different parts and leave
the egg as it was at first.
We are now ready to construct
a rabbit. Make the
head (Fig. 88), the tail (Fig.
89), one fore foot (Fig. 90),
and two hind
legs (Fig. 91),
of the same water-color paper. Carefully
slip the head in the small end
of the egg, Fig. 82, A, and place the tail down low in the large
end of D; the piece which represents the fore feet—it should
be painted to look like two, one slightly back of the other—is
48placed at the opening B, and the hind legs are fastened on
each side of the egg in the upper slits E. Bend the hind
legs out a trifle and stand the little rabbit on its feet (Fig.
92). If you wish you can copy the markings on this one
and make your rabbit look as natural as possible. All the
animals that you make should be white, except the penguin,
as the white egg forms the body of each one.
The Egg Develops Into an Ostrich
In order to hatch the ostrich change the rabbit back
again to an egg. Cut from light-weight card-board the head
(Fig. 93), and the
two legs (Figs. 94
and 95); these must
be stiff and strong:
you will notice that
the legs are not bent
alike. Use water-color
paper for the
two wings (Fig. 96)
and a tail (Fig. 97).
The wings and tail
should look as much
like ostrich-plumes
as you are able to
make them. Slide
the extension of the
neck, Fig. 93, D, into
the upper part of
the large end of the
egg, D, Fig. 82, and the extension of the tail into the small
end, A, fitting it in according to the line on the tail drawn
49around A; slip a wing into each side of the egg at the slits
E, and finally fasten the legs, one on each side, in the slits F.
Slightly bend the legs outward and adjust them so they
will balance the body perfectly; the ostrich is now able to
stand alone and will even appear to be walking (Fig. 98).
To Hatch a Penguin from the Egg
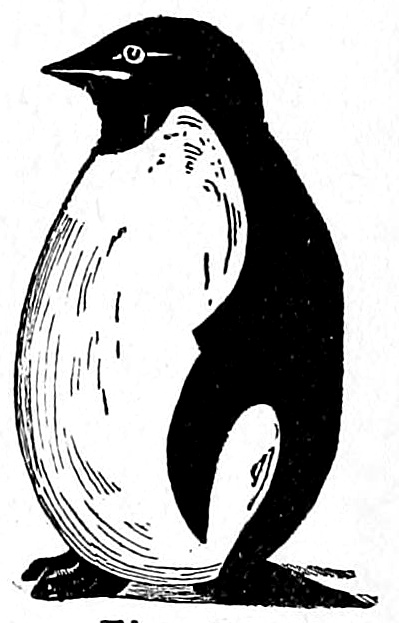
Make the head like Fig. 99. A is the portion which
must be placed in the small end of the egg, A, Fig. 82, allowing
the lower curve of the head, K, to extend down
over the egg. Cut from
very stiff writing-paper a
like curve, and paste it in
position on the other side of
the head, where it should
hang free: only the top
edge of the piece being
fastened on the head in
order that the curve may
easily slip down over the
other side of the egg. This will make both sides of the
bird appear alike. Fold a piece of writing-paper, and from
it cut Fig. 100; the straight fold extends from O to U.
Carefully fasten together the open edges of the back from
T to O and from U to P; gluing them on the extreme
edges, that the pocket thus formed may be as large as
possible. Take stiff paper for Figs. 101 and 102, which
are the feet and tail of the bird, the extension X of Fig. 102
forming the tail. Leave the eyes and mouth white, and
paint the remainder of the head black; also blacken the
wings and back, Fig. 100, and the feet and tail. Place the
head in the small end of the egg, A, with the curves K
down over the white egg on each side; then put on the
50little fellow’s overcoat, or back, Fig. 100, fitting it over the
sides, F, Fig. 81, of the egg; push the egg or body of the
penguin in the pocket formed in the back of the overcoat,
and shove the feet into the large end of the egg, D, Fig. 82.
Hold the lower edges of the egg firmly together while you
bend out the feet sufficiently to enable the penguin to stand
alone, Fig. 103.
These little creatures should be made so carefully that
either side will be presentable. It is always distressing to
know that “the other side” does not look real, and it is a
great satisfaction to be able to show both sides of our work
to our friends and know there is no “wrong side” in what
we do. If you can manage to paint the designs in water-colors
they will look best, but even when marked with
black ink the little animals are charming; no adequate idea
can be gained of this fascinating Easter egg until all the
different parts have been made and the egg changed from
one to another of the various life-like little creatures.
The egg has been so planned that the wings come down
and cover the tops of the legs of both rooster and ostrich;
the penguin and rabbit need no such cover, as the rabbit’s
legs fit in naturally, and those of the penguin merely
slide up in the egg. A little practice will enable you to
perform the work skilfully.
Butterflies are also emblems used for Easter. The beautiful
fairy-like creature changing in its close, gloomy chrysalis
from an insignificant little worm to the radiant winged
creature of the air, fitly typifies the Resurrection. Did you
ever find a chrysalis and after examining it lay it carefully
aside, to await the development of the life within, and some
bright morning discover the shell broken and empty, while
in the room fluttered a brightly colored butterfly? If so,
you will enjoy all the more
51The Butterfly That Will Fly
and which we will manufacture of tissue-paper.
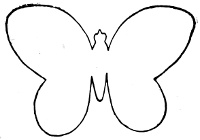
Take four pieces of tissue-paper—yellow, red, blue, and
white—and cut each according to Fig. 104. The shape is
not exactly that of a real butterfly,
but when made of paper it proves
more satisfactory, because such butterflies
fly far better when cut in
this way. Fasten a fine black thread
through the back of each butterfly
(Fig. 105); bend the wings up a little
and tie, or fasten with bits of court-plaster,
the loose ends of the threads on a round stick, placing
them at a distance of about four inches apart. Let the
threads vary in length from six to thirteen inches; this will
bring the butterflies at different distances from the stick.
When all is
ready stand
about forty-five
inches from
and in direct
line with a register
built in the
side wall next
to the floor;
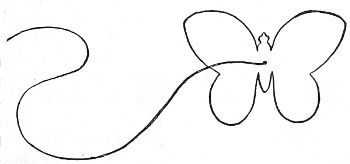
Fig. 105.
hold the stick, with the butterflies attached, up and out horizontally
fifty or more inches from the floor. The gentle
heat will cause the brilliant little things to flutter up and
down, this way and that, in a most natural manner; the fine
black threads being practically invisible, the butterflies
appear as if floating in the air without aid from any
source.
52You might try the experiment of taking them out-of-doors;
if the breeze is not too strong, the butterflies will
behave in the most approved manner, which you know all
about, having so often watched the graceful movements of
the beautiful live insects during the long summer days.
Perhaps the most charming of all Easter offerings is
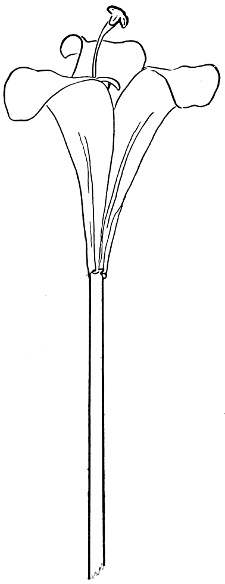
Everyone strives to have a lily on Easter day. If you
are unable to obtain one of the beautiful, fresh flowers, do
the next best thing; make a lily—a stately,
graceful white blossom on a long,
dark-green stalk.
The flower is
lovely even when manufactured of tissue-paper, and can be made
to look so natural that one almost
expects to find the sweet, delicate
perfume of the real blossom. The
paper plant has one advantage at
least over the natural one: it lasts much
longer and needs no care to keep it fresh.
From a new, smooth sheet of white tissue-paper
cut six petals (Fig. 106); fold
each lengthwise through its centre and
bend or curl the top into a slight curve
to take away the stiffness (Fig. 107); then
cut Fig. 108 of unruled white writing-paper.
Paint both sides of the stigma
or top a greenish yellow and the style or
stem-like portion a pale Nile-green. Bend
the style up flat against the scalloped stigma according to
the dotted line in Fig. 108. Allow an eighth of an inch and
53bend the style back again, which will make a little tuck in
the style, bringing it exactly in the centre of the scalloped
stigma when it is straightened out (Fig. 109).
Fold each of the three scallops of the stigma
through its centre and bend them down (Fig.
109); this finishes the pistil.
Make six stamens according to the pattern
(Fig. 110); paint the anthers or tops
orange color on both sides, and the
supports or stems a very light green—as
you remember those in the
natural flower. Bend the supports
in the same way as you did the style of the pistil,
and slightly curve the orange-colored anthers.
These should seemingly balance directly on the
tip-top of the supports (Fig. 111). With strong
paste fasten the pistils and stamens
on the end of a stick which
has previously been covered
with dark olive-green tissue-paper
(Fig. 112); then paste on
three of the white petals (Fig. 113).
Use paste sparingly, and be careful to
arrange the petals evenly before adding the remaining
three (Fig. 114), which should be placed
one over each space between the first three petals.
Fig. 115 will make the idea plainer. The
petals numbered 1, 2, 3 represent the first three;
the other three alternate with these, coming back
of and between them as in the corolla (Fig. 115). Should the
last petals incline to droop, attach them to the inner ones
about midway up with a very little paste.
Take a strip of olive-green paper and cut it according to
54the dotted lines in Fig. 116; slightly curve each leaf in the
hollow of your hand by rolling the round head of a hat-pin
down its centre; when finished wind the strips of foliage
55around the lily stalk (Fig. 114). Have the stalk quite long,

Fig. 115.
Fig. 116.
a short one does not look well. If you desire buds as well
as blossoms, cut squares of
white tissue-paper (Fig.
117); roll each paper (Fig.
118), fold down the top
ends a trifle and pinch up
both ends; then pull the
bud into proper shape (Fig.
119). Paste the pinched
tops together and fasten
the lower end of the bud on a green-covered
wire (Fig. 120).
You can make smaller buds for the top and
have the larger, which represent buds ready
to open and blossom, bent as in Fig. 120. To
make a stalk bearing buds and several blossoms,
instead of building the flowers on the
end of a stick, fasten each blossom and each
Fig. 117.
bud on a separate wire which has first been
covered with
green tissue-paper;
then
bind the small
buds on the
top of the long green stalk
with thread or fine wire.
Next fasten on the larger
buds, afterwards the blossoms,
and when all are arranged
satisfactorily wind
the green foliage around the
stalk (Fig. 114), and it will
56all look very beautiful and natural. The lilies may be
placed in a tall glass vase or the end of the stalk pushed
into the earth in a real flower-pot, and at a short distance
it will have the appearance of a growing plant.
57
CHAPTER IV
VACATION WORK WITH NATURE’S
MATERIAL
Here is a piece of advice for you, girls; possibly
it may not be appreciated, but it is good advice,
nevertheless: While you are away for
your summer holidays, keep out of sight the
fancy work you do at home.
When we drop the work or study that
has employed us during the long winter and
spring months and go off in the summer to
be refreshed and invigorated, do we not say
we go for recreation? If you will stop to
think about it you will see that recreation means literally
re-creating, being created anew; it means the laying
aside of our ordinary habits and thoughts and adopting
entire new ones, for the time being at least. It is this
refreshing change of thought and occupation as well as
change of air that proves so beneficial; therefore, don’t
keep the one little portion of your brain which you devote
to fancy work busy all summer long in the old routine, but
let it have recreation as well as the rest of your mind and
body.
By this I do not mean that the faculty ordinarily exercised
in the interest of fancy work should not be used in
any way, or that the hands which take so kindly to
needle and thread should be always idle. Not at all; but
58there are other forms of work for quiet hours, distinctively
summer work, which with their entire or comparative
novelty refresh the mind and give added deftness to the
hands.
The rainy day comes occasionally and you cannot be
out of doors; then is the time to look over the store of
treasures which you have gathered in your walks through
wood and field and try to devise some
means of preserving them or making them
of use. To begin with, there are your pine
cones, and no doubt you have gathered a
great number of them; everyone does.
Sort the cones and select several of the
largest, most open ones to use as hanging-baskets
in your window next winter, and
if you have an open fire devote the remaining
cones to creating a cheery blaze,
to help disperse the gloom that a northeast
storm in summer is apt to throw over one.
If you are impatient to try the experiment
of making a
you need not wait until winter, for, being
in the country, your materials are all close
at hand, and there is no reason why you
should not start one immediately. Having
selected your cone, shake out the seeds, if any remain in
it, and tie a cord around at about the middle, leaving a
loop on the top by which to hang it, as in the illustration.
Fill the interstices with lightly sifted earth, scatter a handful
of wheat or oats over it, and thoroughly dampen the
59whole. Hang the cone in your window, keep it damp, and
shortly the grain will sprout and the cone will become a
mass of vivid green.
Of course the beauty of the cone hanging-basket does
not last a great while, but a new one can be so quickly and
easily prepared that, with a store of half a dozen cones, you
may have one fresh and green in your window all winter.
Almost any kind of small cereal will sprout if treated in
this way, and each time you can plant different
seeds.
If you happen to have sweet grass in
your collection, make it into
to put in the linen closet or bureau-drawers.
These mats, placed between sheets or clothing,
impart such a sweet, country perfume
you will be surprised and delighted with the
result. Take seven or eight stalks of the
sweet grass, cut off the flower-heads, bunch
the stalks together, and with a long,
strong blade of the grass, wrap tightly
into a rope, as in Fig. 121. Make
several of these ropes before beginning
your mat. Then coil one in an
oblong, and sew it together, as shown
in the diagram, Fig. 122.
Fig. 122.
When the first rope is nearly
used up, wrap the free end
securely to the end of another
rope and continue to coil as
before. When finished, the longest diameter of the mat
should measure about seven inches. You will notice in
60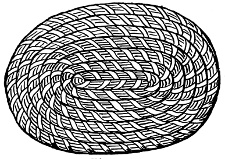
Fig. 123.
Fig. 123, which shows the
sweet-grass mat completed,
that the last end is tucked in
neatly under the coil next to
it, where it is fastened tightly
with needle and thread.
With all the other treasures,
I hardly think it has occurred
to you to collect corn-husks,
and yet many pretty things can be made of them. For
instance, there is the
strong, durable, and useful. For making one of these
baskets select the fine, inner husks, and wrap them in a
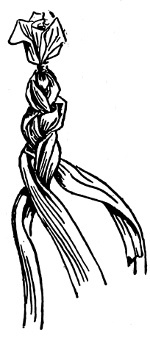
Fig. 124.
damp cloth, let them remain two hours, and then
cut into strips about one inch wide. Take six of
these strips and tie them together at one end with
a strong thread; separate the strips
into three strands, two strips to a
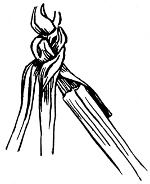
Fig. 125.
strand, and braid as in Fig. 124.
In the beginning do not choose
strips all of the same length,
as they will have to be pieced
out to make the braid the required
length, and the piecing
should not be all done at
the same place. When you
have nearly reached the end
of your shortest strip, open it out flat, lay the end of a new
strip over it as in Fig. 125, and fold together as in Fig. 126.
In this way the piecing goes on as the braid grows in
61length. When you have about a yard of the braid, dampen
and begin to coil it as in Fig. 127, fastening the edges together
with needle and strong, waxed thread. It will require
the whole yard of braid for the bottom of the basket,
which should measure about five inches in diameter. Before
you have coiled quite all of it, piece the strips again
and make a yard or so more of braid. Dampen the new
part and begin to coil once more, this time turning the
braid up on its edge, and running it around horizontally to
form the sides of the basket, widening the sides a little with
each row. Four inches is a good depth for a basket of this
kind. Finish the top of the basket by sewing another row
of braid around the outer edge. For the handle make a
braid twelve inches long, then divide the strands and at
the end of the large braid make two small ones six inches
long. Fasten the ends of the small braids and cut off neatly
close to the wrapping. Remove the thread which holds
the other end of the large braid together and separate the
strips far enough up to make two small braids at that end
the length of those you have just finished. Sew the handle
on the outside of the basket in the position shown in the
illustration, tucking the ends between the bottom and next
62to the bottom row of braids, and fastening them neatly on
the inside.
Like the sweet-grass mats the
are for perfuming clothing and household linen. They are
pretty little trifles, and make most acceptable birthday and
Christmas gifts.
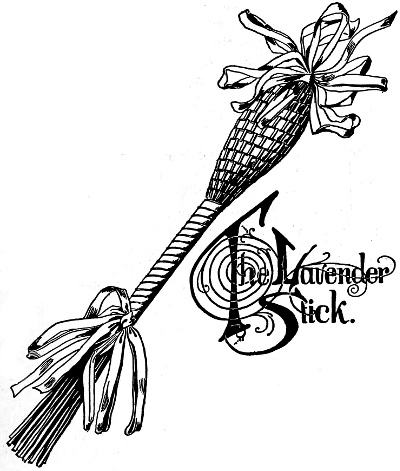
Gather your lavender stalks (each one having a blossomed
top) while they are fresh and green, and use them as
soon as possible after cutting, as they grow brittle when dry.
It will take about twenty-five stalks for a large lavender
63stick, less for a small one, but in both cases there must
be an uneven number. You will need, also, some narrow
lavender ribbon. It is best
to buy the ribbon by the piece,
or roll, as it is not easy to
calculate the exact amount required
for the sticks. Bunch
your lavender stalks together,
with the heads at the top, and
tie securely just below the
blossoms (Fig. 128) with linen
thread. Bend the stems over
carefully, bringing them
down over the blossoms
(Fig. 129). A little raw
cotton may be used to
fill out the bulb or, if
you have them, extra lavender blossoms. Pin one
end of your ribbon at the top
of the bulb, where the stalks
are tied together, pushing the
pin through the ribbon down into
the bulb, then begin to weave
it under and over the stalks as in Fig. 129. Weave about
two inches, widening all the time, then draw the ribbon a
little tighter, bring the stalks closer together, and narrow
the bulb gradually. When the stalks are bunched again,
64stop weaving and begin to wrap,
lapping the edges of the ribbon
as in the illustration. Have the
wrapping tight and firm and,
when about an inch or two from
the ends of the stalks, fasten
with needle and thread, then
tie the ribbon in a bow of
many loops. Finish the top
with a bow also, making it
quite full.
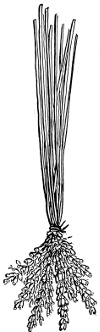
Braiding Palm-grasses and Corn-husks
Away down in Florida, where
the palms and palmettos are
as common as are the most ordinary
trees and shrubs in the
North, most of the children
wear hats made of the strong
and durable leaves of these
beautiful trees; and all the
children know how to braid
the palm in a number of ways.
Indeed, it was a little girl not more than eight
years old who taught me just what I am going to try to
teach you. She was “keeping house” with a number of
other children on one of the fine, shady streets of Daytona,
Fla., and, stopping to watch them at their play, we were
made welcome in their “house,” and one little hostess gave
me the lesson I asked for then and there.
You all know how a palm-leaf grows, tall and straight,
and closed tightly like a fan until it is time for it to open,
65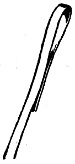
Fig. 130.
when it slowly separates and spreads its fingers
wide. It was the unopened leaf of the cabbage-palm
which was chosen for the braid, and very
pretty the tender leaf is; white, soft, and pliable,
and edged with light green. It is beautifully
adapted to braiding, and the fingers of my
little teacher flew deftly, as the braid lengthened
in her hands, and my mind sped along
almost as swiftly, as I tried to adapt the process
to materials to be found in the North, so
that Northern, as well as Southern, girls might share with
me this little piece of handicraft.
I am sure wide, flat grasses can be braided in this way,
and corn-husks and—well, a number of other things which
you will find if you keep your
eyes open; but I must return to
the palm and tell you just how
I was taught to braid that.
First I tore the leaf into strips about one-quarter of
an inch wide, then taking two strips, I folded one
end of each as in Fig. 130, and lapped the folded ends
as in Fig. 131. Bending the right-hand strip (A),
I pushed it through the loop formed by the other (B)
as in Fig. 132, and pulled B down tightly (Fig. 133).
Bending B, I pushed that through the loop A had formed,
66and drawing A tightly, left a loop of B at the top (Fig.
134). Each time a loop was formed I pushed another loop
through it and drew the first down snugly,
and so braided a strip like Fig. 135.
My little teacher forgot to show me
how to piece the strips,
and I was obliged to
work out the problem
for myself and for you.
When one of the strips
had dwindled down and
grown too narrow, I cut it off, leaving
a little
over an inch
below the
loop. I then
inserted another strip over B,
pushing it under A, as in Fig.
136, bringing it over the B loop
and again under A on the other
side, pulling it down until the two short ends were even.
After that I continued to braid as before, the first two B
loops being double, of course.
It is not well to have the piecing of both strips come
together, therefore one should be longer than the other at
the start, and the strips should be always of the same width
in order to make the braid uniform and even.
This is regular hat braid you have learned to make, and
perhaps having done so much you will feel inspired to continue
the work and make a hat, if not a large one, at least
one for your own or your younger sister’s doll. Or you
can make it into a basket by sewing the braid together, lapping
one edge over the other.
67The braid should be back-stitched for both hats and
baskets.
Most materials require damping before they are braided,
for even when soft and pliable they are apt to separate
when dry, unless they have first been soaked for a while in
water.
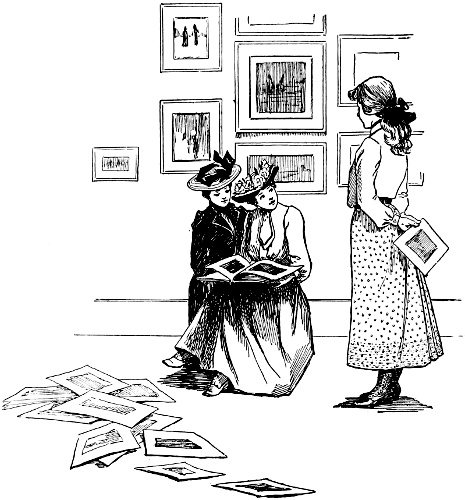
Fig. 144.—A Girl’s Collection of Pictures.
69
CHAPTER V
COLLECTIONS
Every girl can have her own
gallery of famous artists’ pictures,
and the searching for and finding
of treasures to form a home art
collection are a constant source
of interest. When once the supply
is started it grows rapidly, for the fascination increases
as the work progresses, and the nucleus of a fine assortment
is soon gathered. Daily papers furnish valuable material
in this line through their reproductions of paintings, and
the market is flooded with beautifully illustrated magazines
giving the art of our own land and that of foreign countries;
then there are unmounted photographs of masterpieces
which may be purchased for a very small sum; many can
be bought at a penny each.
If new magazines are not to be had, old ones can be
found at bookstalls for low prices, which contain reproductions
of paintings and excellent accounts of them. Carefully
take the magazines apart, removing the wire fastenings
by straightening and drawing them out before attempting
to separate the leaves; then cut out the chosen pictures,
allowing as wide a white margin as possible. Only those
prints which represent the work of eminent artists should
be selected.
70Decide upon some definite line of art, for the field is
a large and varied one. Better results can be obtained if
you devote your efforts to the paintings of only one nation,
such as American, English, French, or Flemish art. Again,
the collection might embrace the works of but one artist or
school of painting, or be restricted to famous caricaturists
or mural decorators. Having made your choice and collected
two or three designs, buy low-priced medium-weight
card-board for

Select a kind not brittle or liable to tear; get either a soft
gray tone or white, the former often harmonizing best with
black and white pictures. Your material being ready, turn
the pictures on the wrong side and mark the
centres. The easiest way of doing this is by
laying a ruler diagonally across the back of
picture, Fig. 137, and drawing a line on the

Fig. 138.
paper along the edge of the ruler. Be sure to
have the ruler precisely at the corners; if
placed either to one side or the other, the centre
will not be found. Fig. 138 shows the first line
drawn; cross this line by another running from
the remaining two corners which will give Fig.
139; the point where the lines intersect is the
exact centre of the picture. Cut the
mounting board in portions large enough to
allow a surrounding margin of four or five inches

Fig. 139.
on each picture; then mark the centres on the
right, not wrong, side of the mounting board.
It will be unnecessary to extend the line from
corner to corner of the mounting board; lay the ruler across
and mark it merely at the centre, Fig. 140. Take the print
71
Fig. 140.
you intend to mount first and carefully place it upon the
blank piece of paper so that the centre of the picture will
be exactly over the centre of the blank
paper; lightly mark a line in lead-pencil
around two corners of the picture, remove
the print and the blank paper resembles
Fig. 141. The last markings
are a guide in pasting the picture on
the sheet of paper. First dampen the
wrong side of the print with a wet
sponge. Have ready some strong paste
and spread it lightly on the wrong side.
Be careful not to get too much paste
lest it smear the mounting-paper. Lay
Fig. 141.
the mounting-sheet upon a perfectly
clean, level surface and place the print
on it according to the guiding marks.
Have the picture absolutely smooth,
without a suspicion of a wrinkle or
blister, and with a clean cloth again
smooth it gently, pressing it down here
Fig. 142.
and there as seems necessary to make it
adhere firmly (Fig. 142). Then place
a weight upon the mounted picture
and leave it to dry. After having
been successful with one picture no
difficulty will be found in mounting
the others.
It often happens that it is impossible
to separate a picture from the
article treating of it, for the reason
that one side of the page gives the print and the other
side the description. This difficulty is remedied by
which will give two layers of uniform thickness, and if
there are pictures on each side of the paper they may both
be preserved. Cut two pieces of perfectly smooth muslin
a little larger all around than the sheet of paper to be split.
Dampen one of the pieces of muslin and lay it out smooth
on an even, flat surface; cover one side of the paper to be
split with a thin layer of very strong paste or glue and
carefully place the paper, paste-side down, on the muslin;
lay it out flat and be sure it does not wrinkle; then cover
the other side of the paper with paste and place the
second dampened piece of muslin over it. Be certain that
the muslin adheres over the entire surface of both sides
of the paper. Should it fail in places, the spots of paper
not clinging to the muslin will tear out during the splitting.
See that the paste extends to the outermost edges of
the paper, and do not forget that muslin, paper, and paste
must all be smooth. Use a rolling-pin to secure uniform
adhesion. When the pasting is done, let it dry, and after
it has dried perfectly, separate the two pieces of muslin at
one corner, and the paper will begin to split if the work
has been properly done. Continue opening the edges until
all four sides are partially separated, and the fission of the
paper just beginning; then a firm pull will entirely separate
the two pieces of muslin and, at the same time, split
the paper. If you experiment on a small piece of paper
before attempting the picture you will better understand
the process. To remove the muslin from the paper, soak it
in hot water; place the water in a basin large enough to
admit of the muslin lying out flat. Let the paper side be
underneath, so that the muslin may be easily removed
when it detaches itself from the paper. Should any bits of
73paste remain on the paper, soak them off; move the paper
gently in the water back and forward, until the paste is
washed away; then lift the paper from the water by placing
a thin stick of wood under one edge and carefully
drawing the wet picture out; it will hang like a curtain
from the stick. Let the water drip off; then lay the
paper down flat and smooth on a piece of blotting-paper,
picture-side up. When nearly dry, place the picture
between two sheets of pasteboard, and leave it under
a weight until quite dry. Mount split pictures on white
card-board; gray will show through the thin paper.
On the back of each mounting-board fasten two small
brass rings by which
Slide a ring on a short piece of tape and glue the ends
of the tape at one side on the back and near the top of the
picture to form a hook (Fig. 143, H).
Do the same with a second ring and
tape. When both tapes are securely
fastened on the mounting-board, paste
over each a strip of tough paper or
muslin (Fig. 143, P). If a wire be
fastened on the rings, the pictures
may hang from the picture-moulding
around the room, or the collection
can depend upon nails for support.
If desirable, the rings may fit over
tacks driven in the wall.
Fig. 144 at the beginning of the chapter gives a girl’s
collection of reproductions from famous paintings. The
pictures can be kept in
made expressly for the purpose, should there be no wall-space
on which to hang them. Make the portfolio of two
strong, stiff pieces of pasteboard, cut large enough to extend
one inch beyond each of the four sides of the mounted designs
so as to preclude all possibility of damage to the edges
of the work. Sew a length of brown tape at each corner of
the two sides of the portfolio, making in all eight pieces of
tape, four on each pasteboard; then lay each cover down
on a piece of denim and mark four spots on the cloth, corresponding
to the places where the tapes are fastened on
the pasteboard.
Remove the denim and punch holes through the cloth at
the four places designated on each piece; button-hole
stitch the openings, and run the tapes through, drawing
the cloth down tight and flat upon the pasteboard; smooth
the brown covering out evenly and turn the four sides
neatly over the edges where they can be securely fastened
by long stitches of strong thread taken from edge to edge
of the cloth. Cover the wrong side of each piece with
heavy, rough, brown paper; paste it on carefully and put
them under weights to dry; the paper forms the inside and
the cloth the outside of the portfolio. In such covers any
number of mounted pictures can be kept secure from harm.
It is only necessary to pile them up evenly on one cover,
lay the other cover on top, and tie the two together over the
pictures by means of the tapes at the four corners. The
portfolio is not intended to stand on edge; it must be laid flat.
Another and different collection is very precious, though
the best part is not visible. It is a collection that is sure to be
always a comfort, and one with which the more familiar you
grow the better you will feel. Such a collection is called the
75

The book may be one of the usual styles of diaries sold
in the stores, or an ordinary blank-book; better still, a
home-made book. The latter requires forty-six sheets of
writing-paper (Fig. 145), and for a
cover stiff brown paper or card-board—the
kind used for making
passe-partouts and which comes in
all colors—will be excellent. Cut
the cover a trifle longer and broader
than the writing-paper, so that it
may extend beyond the leaves of the
book on the sides, protecting the
edges (Fig. 146). Fasten all together
by means of a strong brown or yellow
cord laced through holes made
in the cover and book (Fig. 147).
Fig. 146.
Should you be unable to cut the holes as neatly as you desire,
send the book to
a shoe store or a harness-maker’s
to have
the holes made.
Decorate the cover
in gilt. Make a circle
for the sun and use a
ruler in marking the
rays. Draw the top
and bottom rays first.
Begin at the top of
the centre ray and run
the lead-pencil down along the edge of the ruler as far
as you wish the ray to extend; then raise the pencil, but
76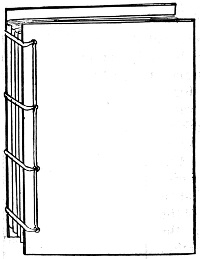
Fig. 147.
not the ruler. Hold that down
firmly with the left hand, while
you again place the pencil
down below the circle and
draw the lower ray. Make
the two horizontal rays in the
same way (Fig. 148). After
this it will be easy to draw
the remaining rays by laying
the ruler diagonally between
the top and bottom and the
side rays. Beneath the sun
mark the title in plain lettering
(Fig. 149). If you cannot
make the letters even and
straight, do the best you can,
and they will look very well—better, in a way, than if another
had made them for you, because that will be your own

Fig. 148.
work. When the design is
finished in pencil go over it
with liquid gilt, painting the
sun a solid gold disk, the rays
mere lines of gold, and the lettering
slightly heavier. On the
first page of the diary write in
ink your age and full name and
under this the year and day of
the month. Then turn over the
leaf and on the right-hand page
rule a line exactly across the
centre with red ink. At the
top of the page write in red
ink the day of the week and
77month and under the red line write the next day of the
week and month (Fig. 150). Put down all dates and divisions
in red ink. The book is
now ready for the record of
January 1.

Before making any entry
try to think of the kindest and
pleasantest things said to you
and done for you during New
Year’s Day, and with black ink
write these, and these alone,
for each day must reflect only
beautiful thoughts and acts—nothing
else is allowed in the
“Sunshine Diary.” On the
second day of the month make
a similar record on the lower
half of the page; the third day
turn over the leaf and carefully rule the next two pages as
you did the first, which will make four equal divisions for
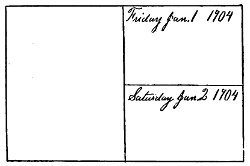
Fig. 150.
four more days. Date each
half of the page correctly
and proceed with the journal.
Continue in the same
way until the end of the
year and you will have a
treasure well worth keeping
all the days of your life.
The very act of carrying
out the “sunshine” idea
will tend to strengthen all kindly feelings and cause you
to be on the watch for happy items to jot down in your
book.

Another work is the “Guest Book”—one in which
each friend who calls to see you can write his name, with
the date and a few remarks. One boy might
draw a simple little pencil sketch under his
name; another could write a joke in reference
to some mutual experience. From one
of the girls might come an apt quotation;
from another an original rhyme—in fact,
anything that would be interesting. Let the
grown people also have the privilege of leaving
their autographs with a few remarks in
the “Guest Book,” for they, too, are your friends. The
book itself should be at least seven inches long and five
broad; larger would be better. The common blank-book
of good paper will answer the purpose; it can be covered
with stiff linen,
which is sold for
dress lining and
may be found in
the shops. Cut
the cover to extend
beyond the
book two or three
inches (Fig. 151).
The dotted line
indicates the
book. Adjust the
cover evenly and
crease it slightly along the edges of the book in order to
know exactly how it will fit. Still holding the book in the
left hand, carefully cut two flaps, in the extension at the top
79and bottom of the back. Remove and unfold (Fig. 152, A
and B); turn down the flaps as in Fig. 152, and again place
the linen on the book. Fold over the linen at the top and
bottom of one side of the book binding (Fig. 155); do the
same with the other side, then turn in the outer edge (Fig.
154). Again remove the cover and, after creasing the folds,
80cut the four corners
out, as in Fig. 155, C,
D, E, F. Keep the
flaps (Fig. 152, A and
B) folded in, and place
the cover on the book
(Fig. 156). Paste the
corners G and H firmly
to the underlying
piece of linen, do the
same with the other
side and the cover will
be finished.
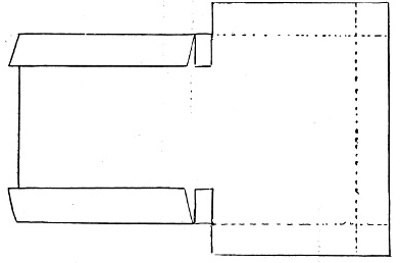
Letter the outside in
deep, rich red, using
paint and brush. If you
cannot print the letters,
write the title “Guest
Book” in a bold hand
with the brush.
Calendars are always welcome
and appropriate on New Year.
Make yours of twelve pieces of
heavy unruled, tinted writing-paper.
Decide upon twelve persons whom
you would like to think of often and
cut twelve slips of white writing-paper
of exactly the same size.
Send one to each chosen individual
and ask that the friend’s name and
some sentiment be written on the
81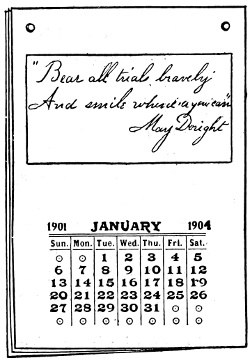
Fig. 158.
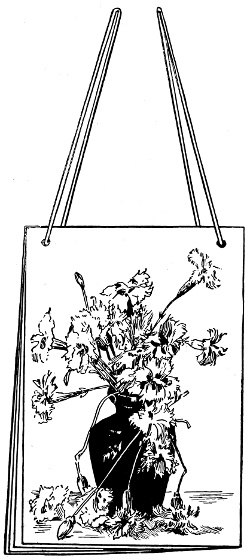
Fig. 159.
paper and that it be returned to you. Having received all
the slips, paste one near the top of each sheet of writing-paper
(Fig. 157); below
paste one leaf of a printed
calendar representing one
month (Fig. 158). Use a
Christmas card for an outside
cover and through the
two top corners of the calendar
make round holes
large enough to allow a
silken cord, matching in
color the tint of the paper,
to pass through. Then
fasten all the pieces of the calendar together in order,
January being the first and December the last (Fig. 159).
82As each month passes by slide that leaf back on the cords,
bringing after January, for instance, February to view.
Hold the two loops of cord together at the top and hang
the calendar where it may be readily seen.
You can also
Do not be surprised! No knowledge of drawing and painting
is necessary in order to illustrate in the new, easy
fashion. Decide upon some short story you wish to
embellish; then look among your scraps for appropriate
pictures. Should you not find exactly what you want,
make the pictures over to suit.
If the story introduces a jolly little maiden full of fun,
and describes her as feeding her pet dog and laughing at
his antics, and there is no such maiden in your collections,
look for one with the style of face you think the girl in the
story ought to have. When this is found and the body
is not satisfactory, cut off the head and hunt up an appropriate
body to fit it; that obtained, paste the pretty head
on the new body and cut out the entire figure. Find
a dog, in the correct position, in some old magazine or
newspaper, cut out the animal, and before pasting the
group in place try the effect of both on a blank piece
of white paper. Slide the figures together and apart
until you have them where they look best; then paste
the girl and dog neatly in position on the white paper,
and the full-page illustration is ready for insertion in the
book.
Always leave a wide white margin on all illustrations;
never crowd the picture up to the very edge of the page if
you desire it to look well, and be sure to dampen the wrong
side of each picture before attempting to paste it in your
83book, that it may be smooth and not wrinkle. The new
leaf for the picture should be cut wide enough to allow a
quarter-inch projection or more over on the opposite page,
as in Fig. 160, OO, where
it can be pasted down on
the inner margin of the
other leaf. The dotted
line indicates the centre
of the book.
Bound books will not
admit of many extra
leaves being inserted, so
you can select only a few
of the incidents in the
narrative for illustration.
Use care that the picture
shall express your idea of the event or place you desire to
represent. Sometimes it may happen, by lack of suitable
material, that you cannot finish certain pictures for days or
weeks after they are begun. In such a case bide your time
until the wished-for designs appear, and in the meantime
go on with the other illustrations.
If the book is paper-covered, you can take it all apart,
insert as many pictures as you desire and fasten it together
again. When obtainable use
Colored Pictures and Photographs
as illustrations. You may chance to find appropriate
colored reproductions from water-color sketches, that will
serve the purpose without alteration. Such would give a
fine appearance to your book. Unmounted photographs
can also be employed, but, if possible, avoid different styles
of pictures in the same work. Keep the colored designs
84for one book, the prints for another, and the photographs
for a third. Bear in mind that, whatever the nature of the
illustrations, you are to use only such as appeal to you and
express your ideas; the scheme will lose individuality—that
is, it will not represent your choice—if you select what
others may deem best in preference to that which you
would have chosen if left unmolested. It is the individuality
which gives value to the work.
Never attempt to illustrate a valuable book in this new
way, though it would not injure the volume if you found a
good unmounted picture of the author and pasted it on one
of the fly-leaves in the front of the book. The portrait
would add to the value and interest of the volume, as
would also items of information on the subject of which
the book treats, if pasted on an extra loose leaf and left in
the back of the book.
When you have a collection of snap-shots that you wish
to preserve, make
in which to keep them. Cut two pieces of stiff pasteboard,
each 6¼ inches wide and 5¾ inches high. Use strong
paste to fasten
these on one
side of a strip
of heavy linen
of a soft green
color, 14¼
inches long by
6¾ inches wide.
Leave a space
of uncovered linen three-fourths of an inch wide in the
centre, Fig. 161. This will give the foundation for the
85cover of your book. Draw the linen tightly over the edge of
the card-board at the top and bottom, paste it down smooth
and even; then paste the two end-pieces over, thus binding
the four edges of the book. Cut sixteen leaves from heavy
Fig. 162.
dull-surfaced
paper, matching
the green
linen in color,
make each
leaf 6¾ inches
wide and 5½
inches high.
Two of the
leaves serve as lining for the cover, leaving fourteen leaves
or twenty-eight pages for the unmounted photographs.
Paste the first leaf on the left-hand side of the cover, let it
fit over the turned-in border of linen and extend across the
centre onto the edge of the other card-board, LL to KK,
Fig. 163.
Fig. 162; the dotted
lines indicate the
turned-over linen underneath
the paper
leaf which is used as a
lining. Take a second
leaf and turn down the
left hand edge to a
depth of ¾ of an inch, leaving the leaf 6 inches wide. Cover
the ¾ of an inch extension with paste, then lap it over on
the left-hand side of the centre and paste securely. The
place where the side of the leaf should be fastened down to
the lining of the cover is represented by MM in Fig. 162.
Fig. 163 shows the space MM covered by the side of the
leaf, the diagram giving two leaves properly glued together,
86the dotted line indicates the centre of the book. As each
leaf is fastened in, turn it over and paste the next one on it
as in Fig. 163. Continue adding leaves,
always allowing the right-hand leaf to
Fig. 164.
overlap the left three-quarters of an
inch. When the last leaf is fastened
in place, paste it down tight on the
right-hand side of the inside of the
cover, where it will form a lining concealing
the raw edges of the linen and
the blank pasteboard as the first leaf
covered the left-hand side of the inside
of the cover. This system of fastening
the leaves together will cause
them to fold in the back where there will be no raw edges.
Fig. 164 gives four leaves, showing the back where they are
folded over after each is joined to the preceding leaf. When
the book is finished the back hinge part of the cover is free
from the leaves, leaving an opening from top to bottom
large enough to run a slender pencil through when the
book is opened. If desired the cover can be decorated
with the title “Snap-Shots.”
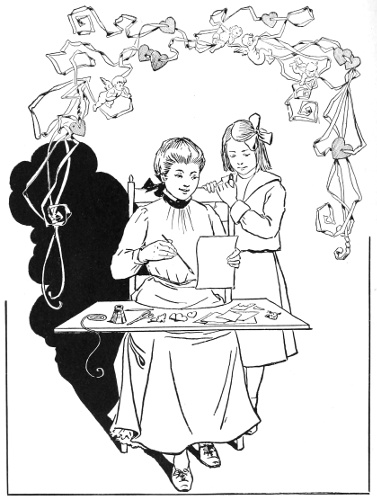
89
CHAPTER VI
ORIGINAL VALENTINES
Always alert, chubby little Cupid works
hard on St. Valentine’s Day; his duties
are many, and his pretty bow sends the
arrows flying in all directions. He is a
merry little fellow, full of queer pranks
and a great favorite. The venerable
St. Valentine seems to have merely
loaned his name to the fourteenth of
February, leaving all the duties to Cupid, who appears to
be well pleased with the arrangement. For hundreds of
years past the young people have been as anxious to send
and receive valentines as at the present time
before valentines were dropped in the mail-box, girls and
boys had a great deal of fun sending them to each other.
Generally the young folks waited until twilight; then each
would sally forth in his neighborhood, lightly step up to
the front door of the house where the valentine was to be
left, and without the least noise slip the paper under the
door, ring the bell and scamper away as fast as possible, to
avoid being seen. Valentines to-day bring the same thrill
of pleasure, and when the whistle of the postman announces
the arrival of the mail on the eventful day, eager fingers
are impatient to open the envelope and discover the treasure
90within. Then the question follows, “Who could have
sent such a lovely valentine to me?”
Before making original valentines try to think of some
particular study or pursuit in which each friend is interested
to whom you desire to send a token on February 14. One
may have a talent for painting, another for music; a third
may delight in flowers, and so on throughout a long list of
subjects which will furnish you with many suggestions for
The Most Appropriate Valentine
to be sent to each. As a little practice before using
ideas entirely your own, try making the valentines here
described. The mystic four-leaved clover (Fig. 165) would
be just the thing for a companion who delights in hunting
that symbol of good luck. This valentine is very simple
and can be made in
a short time.
Cut a sheet of
unruled heavy writing-paper
in halves
and on one piece
trace
(Fig. 166). Paint it green;
an even flat tint will look
well if you cannot manage
shadows, but be careful
to do the work to the
best of your ability. In
plain lettering mark the words,
“Good Luck to You, my Valentine;”
91then slide the missive into an envelope large enough to
contain an unfolded half-sheet of paper. In case you happen
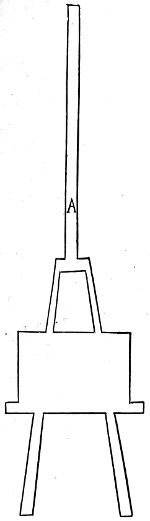
Fig. 167.
to have a natural four-leaved
clover which has been pressed, use
it instead of the painted one, and
take a whole sheet of paper so that
the brittle leaf may not be exposed,
but can be secured inside the sheet
on the third page by means of a
little paste. With the pressed clover
the lettering should be made on the
outside of the sheet of paper before
the leaf is placed within.
Another easy valentine to make is
The Easel Holding a Picture
Cut this from stiff paper or light-weight card-board
(Fig. 167). First trace the design on the card-board; then
92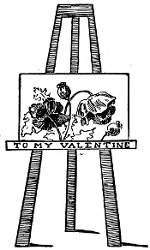
Fig. 168.
cut it out and paint the easel golden-brown on both sides,
except the part which forms the canvas for the picture and
the cross-piece for the lettering. Leave these white; draw
a line at the bottom of the canvas and letter the strip,
Paste any pretty colored floral design you may possess on
the blank space or canvas left for the purpose. Bend down
the supporting strip (A) projecting from the top (Fig. 167),
and the miniature picture and easel will stand alone and be
ready to send to some friend who is studying drawing or is
interested in art (Fig. 168).
To an attractive friend who has no special fancy for any
93particular avocation, send the valentine shown at Fig. 169.
Make it of
of stiff white paper and a small piece of broken mirror.
Cut the heart according to the size of the glass (Fig. 170);
then with strong paste fasten the mirror on the heart (Fig.
170). Cut another heart exactly like the first, and and in its
centre make a heart-shaped opening as large as possible,
while leaving it small enough to cover well the edges of the
glass. If you do not know how to make a heart-shaped
design trace Fig. 169. Decorate the top part with a painted
pink ribbon, and on one side write,
94“Look into this Mirror Clear,”
and on the other,
“And My True Love will Appear.”
At the bottom point of the valentine paste a Cupid; then
using strong paste fasten the heart-shaped frame over
the glass and lay the valentine under several books until the
paste is dry, taking the precaution to put a clean piece of
paper underneath, and another over the top of the valentine
to keep it perfectly fresh and clean. Any other style of
decoration may take the place of the ribbon and Cupid.
Small colored embossed paper forget-me-nots could be
used.
Should one of your friends delight in fireworks displays
give her
shown at Fig. 171. Roll together a piece of stiff paper two
inches wide and three inches long (Fig. 172); let the two
sides overlap each other slightly and join them securely
with strong paste, forming a hollow tube. Have the paper
the peculiar red of genuine firecrackers, if you can obtain
such. For the inside take a piece of white paper four
inches long and a trifle less than three inches wide and
Fig. 172.
write on it these words:
“Your eyes are so bright
That if they were mine,
I would soon have a light
For this queer valentine.”
95In the turned-over edge at the bottom of the paper paste
a waxed string, as in Fig. 173. Then roll the paper and
insert it in the red tube (Fig. 171).
One of the prettiest customs
of St. Valentine’s Day was instituted
by the daughter of Henry
IV. of France, Madam Royal,
who built a palace and named it
the Valentine. She then gave a
grand party in honor of St. Valentine
where each lady received
a beautiful bouquet
of flowers
from one who
was chosen as
her valentine. The same gallantry was repeated ever after
on like occasions. The idea of the valentine flowers is very
pleasing, and we will use it in a modified form, but instead
of cut blossoms in a bouquet we will have
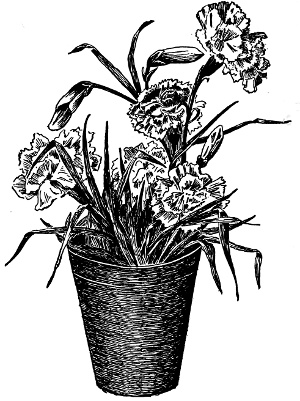
(Fig. 174). Trace on reddish-brown card-board (Fig. 175), and
cut it out, also cut the point B and the slits C and E. Bring
the two sides together, sliding the end D over, not under,
through the slit C, at the same time pushing the point B
into the small slit E; and bend back the extension D on
the wrong side to hold the sides together and keep the
flower-pot upright. Cut out the bottom (Fig. 176) and let
it drop down through the top of the flower-pot until it
lodges. Straighten and fit it in evenly; then cut out the top
(Fig. 177) of dark card-board, as it represents the earth. Of
course, one cannot dig holes in paper earth to plant paper
flowers, so slits must be made according to Fig. 177. On
96white card-board trace Figs. 178, 179, and 180; paint them to
resemble as nearly as possible natural pinks, and plant them
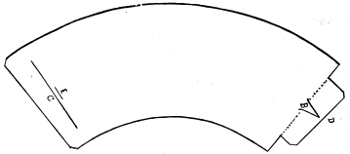
Fig. 175.
97
Fig. 176.
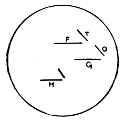
Fig. 177.
in the paper earth in this way: slip the rounded extension
of Fig. 178 through the slit F (Fig. 177). Bend back the
angular part K and slide its
extension L through the small
slit T. Turn the paper earth
over on the wrong side, holding
the flowers in position the
while, and bend up the roots
of the two projecting pieces against the
under side of the disk or earth; paste
them in place. Next plant Fig. 179 in the same manner,
sliding its rounded extension through slit G, and its smaller
one through slit O. Plant the last flower (Fig. 180) through
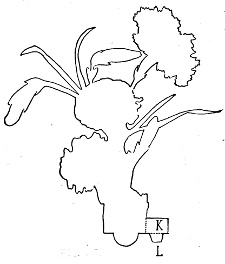
Fig. 178.
slit H; adjust the earth or
top disk, and the finished
work will be a little round
flower-pot filled with growing
pinks standing up separately
from each other and
looking very bright and
natural (Fig. 174). On a
dainty piece of
paper write this
message:
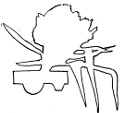
“Go, Little Flowers,
Salute My Valentine,
Who Can, Who May,
Who Must Be Mine.”
Place the note inside the flower-pot. Pretty colored
printed flowers or embossed ones for scrap-books, which
may be bought in almost any toy-store, can be substituted
for the pinks. Fasten them in position by making three
98tracings of Fig. 181 and pasting a
group of flowers and foliage on
each one; these extra pieces will
furnish the flowers
with proper paper
roots, which can be
planted and fitted in
the paper earth in
the same manner as
the pinks.
should receive the valentine which is shown at Fig. 182.
Cut from white card-board the circular disk (Fig. 183);
around its edge write:
“Lift the Loop and You Shall See
That Which Makes Me Think of Thee.”
From fancy gold
paper cut a circular
band (Fig. 184)
smaller in circumference
than the
card-board; fold it
through the centre
(Fig. 185), bring the
Fig. 183.
Fig. 185.
Fig. 184.
Fig. 186.
folded ends together
and again fold (Fig.
186). Once more
fold (Fig. 187) and
from this cut the
outline seen in Fig. 188, being careful not to cut the folded
ends P and Q. Unfold the paper and you will have Fig.
99189. Place this ornamental
golden band
on the white cardboard.
It should fit
just inside the writing.
Stick it down slightly
here and there with a
very little paste; then
make Fig. 190 of fancy
white paper. Insert
the scissors at the beginning
(S) and cut the spiral around
and around in one unbroken
strip until the centre is
reached. In the centre make
a short slit and push the two
ends of a narrow white ribbon
through the slit; then turn the spiral over and paste
each end of the ribbon flat
against the paper, as in Fig.
191. Have ready a white paper dove and fasten it in the
centre of Fig. 183, which has previously been decorated
100with the gold-paper design. Slide the end S of the spiral
under the edge of the gold band, placing the spiral so that it
will lie flat and even inside the golden paper and
will cover the centre of the valentine. Lift the cover by
the loop and you will have a glimpse of the white dove,
which means peace and gentleness.
101
CHAPTER VII
VEGETABLE ANIMALS AND FRUIT LANTERNS
Do you know that with the aid
of a little enchantment equal to
magic employed by the fairy
folks of old, you can make a tiny
fowl, one small enough to stand
on the palm of your hand? A
certain process which you shall
learn will cause a common raw
potato to change into a wee
turkey of which anyone might
well be proud.
The wands you will use for the work differ in nature
and appearance and are far superior to the fairy wands; the
latter are merely stiff sticks said to be endowed with magical
powers, while yours are of most wonderful workmanship
and adapted to any use to which you care to put them.
More than that, you have complete control over the wands;
at your command they do your bidding, making all kinds of
useful and beautiful things, from the most delicate and
fragile articles to the largest and heaviest creations. One
of your wands is known as the right, the other as the left
hand. Look at these pliable and exquisitely fashioned
wands, think of all they have accomplished and may do for
you, then set them both to work on your
102
Select a small potato (Fig. 192), break off the ends of
three burnt matches and force the longer portions into the
potato, two to serve
as legs, and one as a
support (Fig. 193 ).
Trace Fig. 194 on
stiff brown pasteboard,
an old box-lid
will be the best thing to use, its surface
being dull and almost the same in color
as the potato. Cut out the tracing and mark eyes, mouth,
and tuft on it with ink (Fig. 195 ). If you wish to have your
turkey look extra fine, make wattles
of red paper or cloth (Fig. 196 ); fold
as in Fig. 197 , and paste the band-like
upper portion over each side of the
turkey’s neck, allowing the lower
flaps to hang free (Fig. 198 ). Cut a
slit in the potato (Fig. 192, A-A) and
insert the head, pushing in the extension
as far as the dotted line, or until
it fits (Fig. 199). Make a small opening
on each side of the turkey (Fig. 199, C) and
stick in two curved feathers for wings. If
you have only stiff feathers,
choose two small ones, and
with your forefinger and thumb
bend the ribs (Fig. 200) until
they are rounded enough to
cling to the sides of the turkey. Use stiff
feathers for the tail, first making holes in
103the turkey in which to insert them (Fig. 199). Push the
feathers in securely, and should they stand up unevenly at
varying heights, trim them carefully with scissors and the
turkey will be finished (Fig. 201).
In the South a young pig, called
is considered as desirable as a turkey and is eaten with much
relish. Of course, each person is served with only a portion
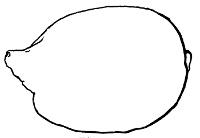
Fig. 202.
and cannot have a whole one, as
is your privilege; for your shoat,
like the turkey, will be very
small, no larger than a lemon,
and of the same color-in fact,
it is a lemon to begin with (Fig.
202). Four sticks furnish the
legs (Fig. 203). The ears are
104
Fig. 203.
formed by cutting the skin in
the shape of a V on each side of
the pointed end of the lemon
(Fig. 204, B) and bending up the
points (Fig. 205). A slender
stick bent at short intervals
(Fig. 206) until it simulates a
twist or curl is used for a tail
(Fig. 207).
In cutting the ears be cautious
not to pierce entirely through the skin; allow the
point of the knife to enter only deep enough into the rind
to cut a piece of sufficient thickness to turn up without

Fig. 206.
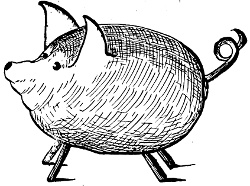
Fig. 207.
breaking, and have the slender sticks used for legs and
tail sharpened at one end
so they may readily be
pushed into the
lemon. Ordinary
wooden
toothpicks will
answer the purpose,
but they must first be
broken into shorter lengths
for the legs. The eyes are
two black-headed pins.
105

is thought a great delicacy
by some families, who deem
a holiday dinner incomplete
without the dish. While we
do not care for the soup, we
would like a small turtle, one that will not
snap at us but be content to remain quiet and look natural.
Ask for a large raisin (Fig. 208) and six cloves, five without
and one with the
round seed; work in
the four cloves with
claw-like ends to
serve as feet (Fig.
209). Use the reverse end of a clove for the tail (Fig. 210)
and the round seed clove for a
head (Fig. 211). Bend the head
and tail up and the feet down
(Fig. 212). Beautiful golden
pumpkins hold a prominent place
in the minds of Americans. Beside the delicious pies made
of the yellow fruit, there are the
fashioned by cutting a semblance of a face in the pumpkin,
shaking out the inside fibre and seeds, and, in the
evening, placing a lighted candle in the queer head,
causing the light to shine through eyes, nose, and mouth
in a manner startling to those unaccustomed to the
sight.
106
The real pumpkin is large and heavy to handle, but you
can have
in the form of an apple. Choose one that is deep red in
color, in order to have the greatest possible contrast between
the features and the head proper. It will not be
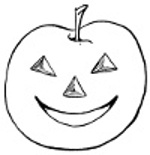
Fig. 216.
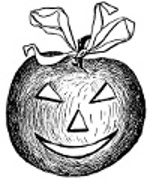
Fig. 217.
necessary nor desirable to light up the face, the apple head
is comical enough with the face merely cut in its surface
and the work is very easy. Cut out
from the apple
(Fig. 213) two triangles
near the
top for eyes (Fig.
214); directly below
the eyes but
in the central part
cut the triangular
nose (Fig. 215);
under the nose
make the mouth in the shape of a slender crescent (Fig. 216),
and tie a ribbon on the stem as an ornamental headdress
(Fig. 217). There! you have fairly made the apple laugh.
Only see how it is stretching its mouth in a broad grin!
107
CHAPTER VIII
PASTEBOARD MODELS FOR A HOME DRAWING
CLASS
Study drawing at home and make your
own models; form a class of several
girls and work together; criticise one
another’s drawings, and get a criticism
from an artist whenever you can. Much
may be accomplished in this way if you
have the enthusiasm, perseverance, and
will to carry it through. Starting with
one object, complete in itself, a variety of forms may be
evolved, and combinations can be made until an entirely
new model is produced. Such, for instance, is the church
shown in the illustration. First there is the house, then the
house with a chimney, the house with chimney and one
wing, the house with chimney and two wings; then the
church, which is made by adding turret and steeple, the
church without wings, and the church with wings. A
number of times this model may be used, changing the
position and adding to or taking from it, and a different
picture will be the result of each drawing.
Simpler models like
can also be made, and it is well to try your hand on this
before attempting the more complicated forms.
108
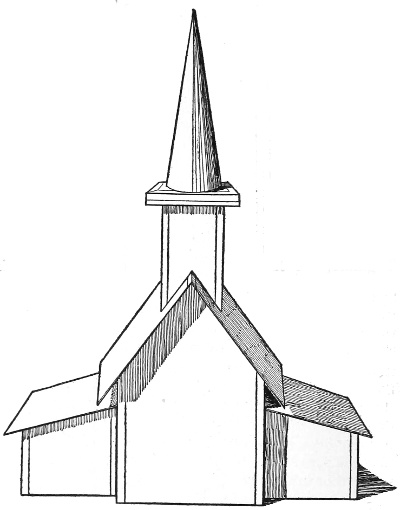
Pasteboard Model of Church.
Lay a sheet of heavy card-board flat on your work-table
and draw carefully four triangles like Fig. 218. These are for
the four sides of the pyramid. Use a rule
to keep your lines straight, and make
each side according to the dimensions
given on the diagram. You will see that the
measurement from apex to base is ten
inches, and the width at the bottom is six
and one-half inches. With a sharp knife,
or large shears, cut out each part, taking
pains to keep your edges true to the
lines. Besides the card-board you will
need a roll of passe-partout paper. This
comes in one-inch widths, ready gummed,
for making passe-partout frames.
It is strong, easily handled, and altogether
more convenient for joining the
parts of the models than ordinary strips of paper. Should
the passe-partout paper be out of reach use new cotton cloth
109
Fig. 218.
Fig. 219.
cut in even one-inch strips. Of course the cloth or paper
must be white. Cut off a strip of your gummed paper a
little longer than
the long edge of
the triangle. With
a pin at each end,
pin it to the table,
the gummed side
up, and draw a
line lengthwise
through the middle,
dividing it
exactly in half.
Have ready a
glass of clear
water and a paint
brush, dip the brush in the water, and with it moisten
one half of the paper. Over the wet half lay one of the
Fig. 220.
triangles so that its
long edge almost
touches the central
line, then gently press
it until the paper holds
fast to the card-board
(Fig. 219). Remove
the pins and turn the
triangle over to make
sure the paper is quite
smooth on the right
side; then lay it down
again, moisten the
other half of the
gummed surface and
110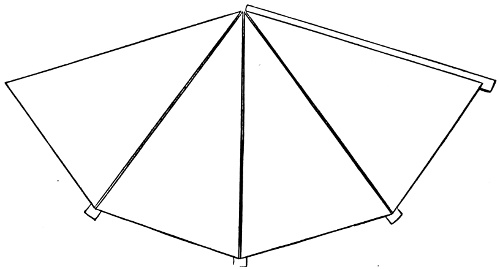
Fig. 221.
press another triangle over that part, keeping the edges of
the two triangles perfectly parallel, but not touching. The
space between the edges must be left to give room for the
bending of the corners (Fig. 220). Pin a second strip of
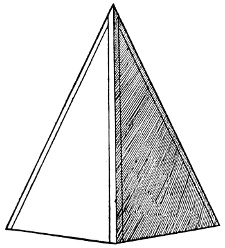
Fig. 222.
paper to the table, moisten one
half, and press still another triangle
in place; continue doing
this until all four sides of the
pyramid are joined as in Fig. 221;
then bring the last two edges
together, while holding it in your
hand, and press the moistened
paper down, smoothing out any
wrinkles that may appear. Lastly,
trim off the ends of the paper
at the bottom, and stand your
pyramid up, holding it so that its
base will form a perfect square (Fig. 222). Do not allow
it to flatten and form a diamond. The top edges of the
111paper should be trimmed off as the sides are put together.
There are six parts to
two sides, two ends, and two halves of the roof. Draw
these on your heavy card-board, like Fig. 223, the roof; Fig.
224, the side, and
Fig. 225, the end,
making them according
to the dimensions
given on
each diagram. Put
the house together,
as you did the
pyramid, with the
passe-partout paper.
When you have joined the sides and ends of the house
and have fastened the two halves of
the roof together, paste strips of the
passe-partout paper along the upper
edges of the sides of the house, as in
Fig. 226. These strips must be on the
112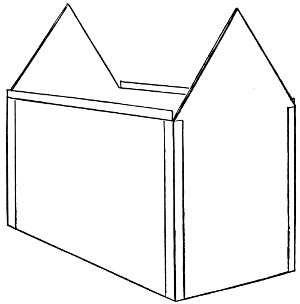
Fig. 226.

Fig. 227.
inside, and half of the
paper must extend
above the edges of
the sides. Moisten
this part and, fitting
the roof to the house,
put your hand inside
and press the paper
up against the roof;
this will hold it securely
in place. In
fitting the roof on, be
sure it extends exactly
the same distance
over each end of the
house (Fig. 227).
is adjustable and
is not fastened to
the house. Make
four sides; two
like Fig. 228, two
like Fig. 229. The
dimensions of
each side are
given on the diagrams.
In putting
the chimney
together, paste
your strips of
paper only as far
113up as the dotted line at the top,
the part beyond this line is to
be turned over as in Fig. 230,
which shows the completed
chimney. Make
with slanting roofs like the ones
shown in the illustration of the
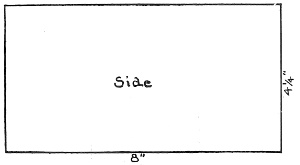
Fig. 231.
church. Fig. 231 is
the highest side, which
goes next the house
when the wing is added;
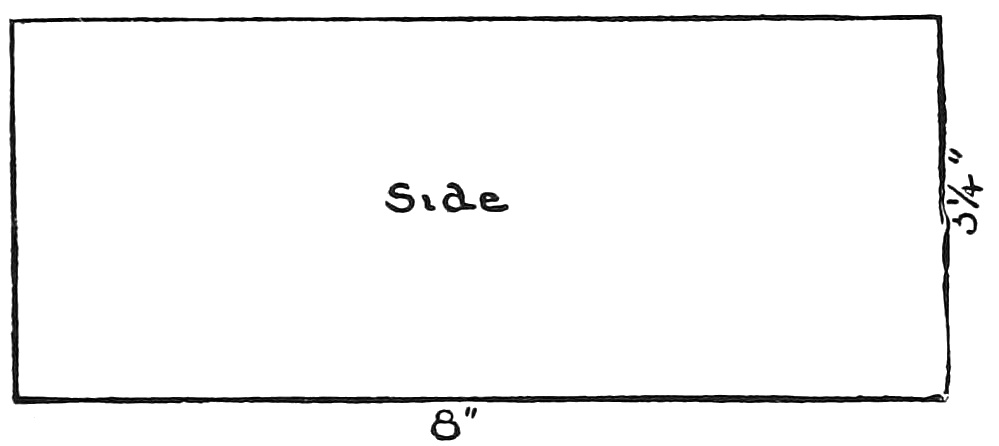
Fig. 232.
Fig. 232 is the
lower side; Fig. 233
is for the two ends,
which are exactly
alike, and Fig. 234 is
the roof. The dimensions are given on the diagrams.
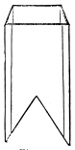
which transform the house into a church are shown in the
illustration. Cut two sides for the tower like Fig. 235, and
two like Fig. 236,
and put them together
like Fig. 237.
The notches in the
lower part of the
tower and of the
chimney allow them
to sit astride the
roof, which position holds them in place without making
114them permanent. Fig. 238 and Fig. 239 are for the cornice
of the tower, which is something like a box with a square
opening at the bottom and a round hole at the top. Cut
Fig. 238 according to the dimensions given and bend at the
dotted lines, first the
lengthwise lines,
then the cross ones.
Allow the laps with
the trimmed corners
to come on top of
the others. Put the
two end edges together
with the
gummed paper to
form a square, then with a drop of glue or paste at each
corner fasten the laps in position, as shown in Fig. 240.
In the centre of a perfect square, made according to the
dimensions on the diagram, Fig. 239, cut a circular hole;

Fig. 238.
116paste strips of paper along the four edges of the square,
Fig. 241, bend down the free edges of the paper and paste
the square on top of the cornice. Fig. 240 is the cornice
with top down to show its construction. Cut the steeple
from rather heavy drawing-paper, like Fig. 242, keeping to
the dimensions on the diagram. Turn in the lower laps and
paste the side lap over the corresponding edge to form a
cone (Fig. 243). Drop a little glue on each of the lower
laps, place the cone directly over the circular hole in the
117top of the cornice, and, slipping your fingers through the
hole, press the laps down until they are firmly fixed. Fit
the cornice on the tower, but do not attempt to glue it, for
it will hold its place quite well without.
Your own ingenuity will suggest other models to be
made in this way; any angular object is easily constructed,
and curved ones are not impossible.
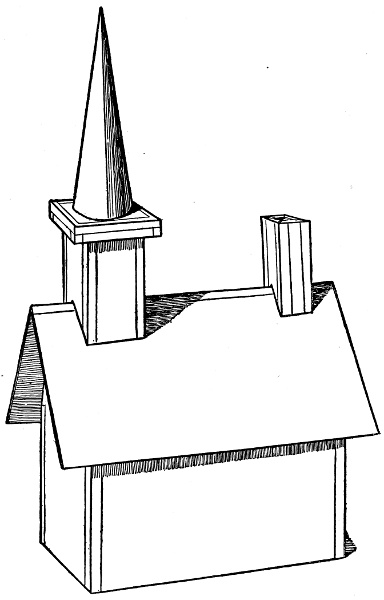
The Tower and Steeple which Transform the House into a Church.
118
CHAPTER IX
QUICK INK PICTURES
When you happen to drop ink on paper you
may be using, do not look disconsolate and
feel uncomfortable. Make a joke of the accident
by turning the blot into something funny.
Fold the paper over the ink-spot, press the
two sides together; then open the fold, and
you will find the dull, round blot transformed
into a queer, comical-looking object the like
of which was never seen on land or sea. The
strange thing about these oddities is that try as you
may you cannot coax any two ink-drops to change
themselves into the same shape; they utterly refuse
to do so. Experiment with them and you will soon
realize that each has its own independent idea regarding
the figure it will assume, insisting, when you press it, upon
taking the matter into its own hidden hands and turning
into whatever it pleases. The various results are generally
decorative and might often be used with good effect for
book-plates.
of three or four ink-drops, they may be controlled to a certain
extent. Hold the paper so that the wet ink will trickle
downward, and you can join the blots together, elongating
the design; then, when the paper is folded lightly, if you
119press the ink with short, gentle strokes out sidewise the
tiny splashes tend in that direction, and an upward movement
will cause the ink to spread upward—sometimes in
little streaks, again in a bulging way, giving an uneven, undulating
boundary. Should the paper be folded across the
ink the result would be a single figure, while an allowance
of an eighth or quarter of an inch space before creasing the
paper gives two designs, one a duplicate because a print of
the other. A similar method of making ink-impressions is
to splash the fluid on the paper with a paint-brush and then
to fold and press it; or, group drops of ink with the splash
of a brush and press the two sides of the paper together.
The ink-impressions may be made to take the form of
Often very pretty effects can be produced in this simple
manner. Fig. 244 is a suggestion showing a stretch of sky
with mountains as a background and points of land jutting
120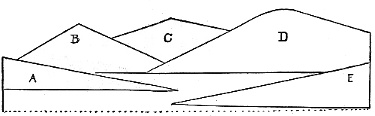
Ink Marine. Fig. 245.
out into the sea for the middle distance, while the foreground
is entirely of water, which reflects the distant
purple hills. The picture is readily made, but the work
must be rapid to insure success, as delays cause the ink to
dry in spots, which ruin the design. Fold through the
centre a piece of blank, unruled paper from a large-sized
writing pad; open it and on the upper portion mark the
sections according to diagram Fig. 245. The dotted line
indicates the crease through the centre of the paper and
gives the distance at which the first sections should be
placed above the fold. With a lead-pencil lightly trace the
divisions: have ready a bottle of ink, a common water-color
brush, a glass of water and a clean dinner-plate. Dip the
brush in the ink and dab it on the plate several times; then
do the same with the water, mixing ink and water together.
Try the strength of this mixture on a scrap of paper; if it
corresponds to the tone of the second point of land in Fig.
244 (or A in the diagram) it is ready for use. B and D
(Fig. 245) require a degree lighter than A, so mix more
water than ink on a clean place in the plate. C (Fig. 245)
is the faintest mountain and needs the most water mixed
with ink. Use ink as it comes from the bottle for E (Fig. 245),
the nearest point of land, as that is the darkest portion. Test
the three tones and keep changing them, adding more water
121as needed, until you are satisfied that each one is of the required
strength; then wash the brush clean and be sure
everything is ready for the work. Having once commenced,
you cannot stop an instant until the sketch is finished; understand
exactly what you intend to do and how you are to
do it before beginning, as there will be
No Time for Deliberation,
and you must work as fast as possible. Dip the brush in
the lightest tone of diluted ink, have it well charged with
the fluid, and in swift strokes paint C. Without
stopping, take up the next lightest tone
on the brush and sweep in B and D, then
the darker, A, and finish with E in pure
ink. Fold the paper immediately, and,
holding it down flat on the table
with the left hand, press with
the right; rub the paper all
over again and again, being
sure to cover the entire surface in order
to print the mountains on the lower portion of the paper.
The study will then be finished with the exception of the
sailing-vessel, which may be indicated with a few strokes.
Bring the brush to a fine point and trace in ink the lines
of Fig. 246. First make the central vertical line, then the
slanting line on the right-hand side which joins the mast
a short distance from the top, from the same point extend
two lines down on the left. Fig. 247 is the hull of the
vessel, and the straight line crossing it a short distance from
the top denotes the narrow space to be left white. Fig. 248
shows the complete outline of the craft, intentionally made
as simple as possible, to enable any girl to introduce the
boat into the sketch without difficulty. As is seen in Fig.
122
Fig. 249.
244, the boat is filled in with black and duplicates itself in
the shadow reflected on the water, but the shadow must be
made with the brush; it cannot be printed from the boat.
The chrysalis of the
(Fig. 249) was made of two or three
ink-blots and a splash of ink from
a paint-brush. This chrysalis did
Fig. 250.
not in the least resemble a real
one, but when the paper
was folded along the edge
of the ink a butterfly appeared.
On soft-finish paper write any word you choose;
then, while the ink is wet, fold the paper, and upon
opening it you will find
Figs. 250 and 251 were made in this way; both
from written words which represent most desirable
states of mind. When you can gain Fig.
250 you will surely have Fig. 251.
(Fig. 252) gave no hint of what might be
expected when they were first seen in the
form of a group of shiny black spots, and it
was only after opening the folded paper that
they revealed their true character as extravaganza
animals with legs different in length
and extraordinary eyes.
123
You can make creatures
wilder in appearance than
these, and in this way form
a collection of pictures of
the animals you have never
known.
Fig. 253 represents
of a peculiar kind, found
nowhere but inside ink-bottles.
Others may come
from the same source, but
none will be precisely like these. Try the experiment of
ink-drops on pieces of muslin; work rapidly and you will
be delighted with the results.
If you are fond of
and happen to have vines
or any other kind of house
plants, you can make valuable
ink sketches from them. Break off a few pieces of the
main growth. Take one at a time, and with the left hand
hold the spray either in the bright sunlight or lamplight in
such a way as to cast a distinct clean shadow upon the
paper pad that is placed beneath it. With a brush dipped
into the ink, paint over the shadow; be careful to follow
every turn and twist of leaf and stem, that the sketch may
be true in every detail. You will find the work to be
quick and easy and the results satisfactory. In no other
124
Fig. 254.
way can better characteristic growth of the
various specimens be obtained. Notice carefully
Fig. 254,
Fig. 255.
and it will give
a true idea of
the plant; and
Fig. 255, how
naturally and
gracefully the
vine turns in curving
lines. Fig. 256 gives
sprigs from four different
plants. Can you name them? All the studies are
decorative and furnish original designs for embroidery,
Fig. 256.
or wood-carving, but,
best of all, you can
make and use this
kind of ink-pictures
as illustrations for the
book in which you
write down your
notes on Nature
study, and so be able,
after describing a plant, to
give an original, realistic picture
of it.
Small specimens can be
painted with ink, root and
all forming one picture, but
larger plants must be separated
at the centres and a
study made of each part, the two halves being placed side
by side on the same piece of paper.
125
CHAPTER X
MOVING TOYS
How would you like a merry-go-round
with all the animals prancing one after
another, each with a girl or a boy on
its back, riding along regardless of the
speed of the steed, like the real ones
you have tried in the parks and at the seashore?
Fig. 257, is easily made, the work consisting
mostly of stringing different things on a hat-pin
and sticking the pin through a box. Procure
a long hat-pin (Fig. 258), a large, empty
spool (Fig. 259), three small corks (Fig. 260)
and, for a foundation, a round flat box if you can obtain or
make it, if not, a common note-paper box must answer the
purpose. A piece of string about a yard long and two
shank buttons will help out the simple machinery (Fig. 259).
The canopy is of paper or card-board (Fig. 261) and the
support for the animals of card-board (Fig. 262).
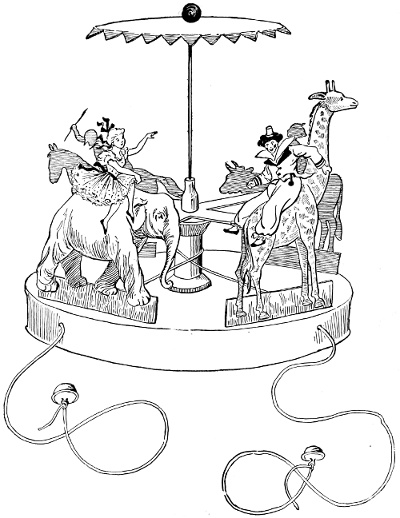
Lay a piece of card-board flat and place over it an ordinary
tea-plate; hold the plate steady and draw a circle on
the card-board by running the lead-pencil around the edge of
the plate. This will give a circle of about the desired size.
Then draw bands across the circle, as in Fig. 262; to do
this draw lines dividing the circle into quarters and at the
126left of each of the four lines draw a line a little more than
half an inch away from it, making four bands (Fig. 262).
127Cut out the circle, then the four wedge-shaped pieces between
the bands, and bend up the end of each band five-eighths
of an inch (Fig.
262).
On these ends paste
any stiff paper animals
you may happen to have,
(Fig. 263), selecting those
which will balance each
other, as the merry-go-round
must revolve evenly. Colored scrap-book animals
look well and are stiff enough to hold themselves
firmly in place. Should you not happen to possess
these, animals from old pamphlets, advertisements or
newspapers may be used. They should be stiffened by
being pasted flat on thin card-board or stiff paper. When
fastening the animals on the merry-go-round paste the body
of the animal to the turned-up end of the card-board band
(Fig. 263).
use a small saucer or bowl as a guide to draw the circle on
paper or card-board. Cut out the circle, point it around the
edge (Fig. 261), turn the points down and the canopy is
Fig. 262.
ready to go on the hat-pin. If you do not
have the correct-sized plate, saucer, or bowl,
the circles may be drawn with the aid of a
home-made compass. To make the compass,
take a pair of scissors and a piece of
card-board (Fig. 264), punch two holes about two inches
apart in the card-board and through them pass the points
of the scissors until they extend through on the other side
an inch or a trifle more; secured in this way the scissors
128make a very good compass. Adjust the scissors so that the
distance between the two points is four inches, then firmly

Fig. 263.
stick the sharper point
in a piece of cardboard
and, keeping
that steady, slowly
move the other point
around in a circle,
pressing it down only hard enough to scratch the surface
(Fig. 264). Make the circle for the canopy in the same way,
but have the distance between
the scissor points
Fig. 264.
much less—not more than
two and one-fourth inches—in
order to preserve the
correct proportions.
Now watch the almost
Magical Forming of the Merry-go-round
Pass the long hat-pin (Fig. 258) through
the exact centre of the canopy (Fig. 261)
then put on one of the corks (Fig. 260); work this up tight
129to the canopy that it may hold the latter in place. Twist
the cork around and around on the pin, as it will be apt to
go on crooked if the pin be forced carelessly through the
cork. String on another cork, working it up the pin midway,
then slide on the bands, with the animals attached,
pushing the pin through the exact centre of the pasteboard;
next put on the large spool.
The Box Must Have Some Holes
made in it before using; puncture two one inch from the
front edge and four inches apart in the lid; then make two
more holes through both lid and box on the front side half
an inch from the top and five inches apart, as seen in the
illustration. Fig. 257.
Stick the loaded pin through the centre of the box-lid,
bringing it well down, and cover the extreme point of the
pin with the last cork in order to prevent the pin from coming
through and pricking. This cork must lie firmly on the
bottom of the inside of the box.
The merry-go-round is now ready for the machinery to
set it in motion. Pass the string around the spool and cross
the two ends in front (Fig. 259) keeping the ends crossed;
thread one of the ends through the two holes on its own side
of the box, bringing the end out from the front of the box, do
the same with the other end of the string as shown in the illustration.
To prevent the string from accidentally slipping
back through the holes, tie a shank button on each of the ends.
Now, holding the box with one hand, gently
Pull One End of the String
with the other hand and see the animals go dancing around,
just like the big wooden griffins, zebras, and giraffes on
real carousels.carousels.
130Of course, the merry-go-round needs boys and girls to
ride the animals and enjoy the sport. Look them up in the
advertisements of old magazines, newspapers, or wherever
you can find paper young people. Cut them out neatly and
let them take turns riding on the different animals. When
cutting out the legs of the paper children, merely cut up a
deep slit to divide the legs in order to make the riders cling
firmly to the various animals.
The brighter the colors used in the merry-go-round the
gayer and more attractive its appearance. There is
Something Very Fascinating
in the toy; even grown people are interested and amused
as they watch it whiz around with its burden of happy little
paper children. Another lively game for paper children is
the
(Fig. 265), where each doll actually waves its own little
paper flag as she dances to and fro.
Make four small flags of different colored tissue-paper,
each 1½ inch wide and 3 inches long, which allows for
fastening to the staff.
Four little paper girls can be cut from Fig. 266. Take
four half-sheets of stiff, unruled white writing-paper, fold
each lengthwise through the centre; then trace Fig. 266
and cut it out of an extra piece of paper. Lay this half
figure with its straight edge on the fold of one of the papers
and with a lead-pencil draw a line around it. Cut out and
open (Fig. 267). Make four dolls. Cut the flag-staff off the
right hand of two and off the left hand of the other two,
that the hands on the outside of the group, when the dolls
131
Fig. 265.
are in place, may hold the flags (Fig. 268). Draw or paint
a face and dress on each of the little girls, being sure to use
the inside of the bend or fold for the front of the doll, as
this slight inclination to fold forward after the doll is cut
out and straightened
out flat is of great
assistance in bracing
the figure when it is
in position. Cut a slit
up between the feet,
but no further. Let
the legs be of one
piece, to insure greater
strength to the standing
doll (Fig. 267).
Fold the flag-staff
lengthwise, also the
hand holding it, and
give to each of the
paper children one of
the home-made tissue-paper
flags by pasting a
flag on every flag-staff (Fig.
268). When the dolls are
ready, obtain a very flexible,
slender, cloth-covered, long steel from a dress-waist or
stays, and tie a strong black thread from end to end, making
a stretch of nine or ten inches. On the centre of this
thread tie another about a yard long (Fig. 265), and on the
steel foundation fasten the four dolls. They should stand
erect, one on each end, and two midway between centre and
ends.
Fig. 268 shows the method of pasting the feet of the figures
132on the steel; slide the steel up between the feet; then
bend them forward and glue one foot on each side of the
steel, flat against it. Fasten a flag, about four and a half
inches long, on the end of a long, strong hat-pin; then stick
the pin firmly in a small pastry-board and slip the steel with
its pretty children over it, resting the centre of the steel
flat against the pin, which is now a flag-pole (Fig. 265).
Take hold of the loose end
of the thread and step-back
from the table on which the
dolls are placed. When a sufficient
distance away to cause
the thread to stretch out
straight give it a number of
gentle jerks in quick succession.
This will cause all the paper
children to rush back and
forth, waving their bright flags
in triumph.
They can enter more heartily
into the play if there is
music, and it gives life to the
“flag dance.” Ask your companion
to strike up the “Star-Spangled
Banner” on a comb while you
make the little paper children dance in time to the music,
which you can do by jerking the thread to the musical
rhythm.
Find three large-sized button-moulds and some burnt
matches for your
Select round matches, as they will fit the holes in the button-moulds.
Place one mould flat down on a piece of orange-colored
133paper and draw a line on the paper around its edge.
Cut out the circular paper and paste it on the flat side of the
button-mould; then pierce a hole through its surface, exactly
over the hole in the mould, slide a match, unburnt end
first, through the mould, until it extends about one-third
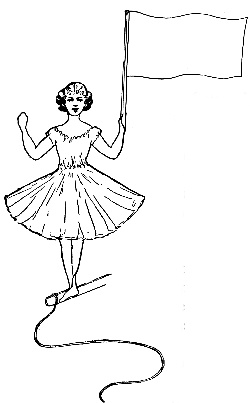
Fig. 268.
beyond the bottom of
the mould. If the match
does not seem firm, fasten
it in place with a little
mucilage. When this top
is finished, make two more of the
same size, one covered with red and
the other with green paper. No
string is necessary for spinning these
tops; merely give each one a twist
with the thumb and second finger of
the right hand and around it goes.
consists in spinning the three tops,
one immediately after the other, the
red top first, then the orange one, and
last the green, allowing them all to
whirl around together and not disturbing
them in any way until the
last one to cease spinning falls. The
top which keeps up for the longest
time scores the first point. When
the first round is finished set the tops twirling again, commencing
with the orange one and taking the red one last.
Mark down the score of the winning top and give them all
a third and last trial, leading with the green top and bringing
in the orange last. The top which gains the greatest
134number of point wins the game. Should each top gain a
point, the game would be a “tie,” and necessitate the playing
of it all over again.
In case two friends would like to join in the sport,
the game may be changed. Let each, with closed eyes,
select a top, leaving one for the hostess. At a given
signal have all the tops spin at once. The top which stands
up longest wins the first point, and the greatest number of
points the game. Allow two rounds, making six points to
each three-handed game.
135
CHAPTER XI
HOME-MADE PYROTECHNICS
If you would like some bright, lively fireworks,
the kind you can manufacture at
home, make them the day before the celebration,
and there will be no necessity of
waiting all the long hours until dark before
seeing the sparks fly. Begin the fun
early the next morning, and fire off these
queer fireworks the entire day. The
Three-story Red, White, and Blue Pin-wheel
is very satisfactory, affording three times the enjoyment of
a simple one-story affair. Fold a three-inch square of stiff
red paper diagonally across from corner
to corner, making two folds, which cross
at the centre of the paper. Unfold and
cut the square along the folds almost to
the centre (Fig. 269); then pierce the
alternating corner flaps with a long,
stiff hat-pin, allowing each point threaded
on the pin to remain there; run the
pin through the centre of the paper
(Fig. 270) and shove the red pin-wheel up close to the large
round head of the hat-pin. Push a small cork on also, to
prevent the pin-wheel from slipping. Work up another
136cork on the pin, about an inch or so below the first one;
then make a larger pin-wheel of white paper and slide it on
the same hat-pin, holding it in place with
a third cork. Cut the last pin-wheel still
larger and make it of blue paper. Shove
up a fourth cork on the pin, and below,
against it, thread on the blue pin-wheel.
No cork will be required under the last
pin-wheel; the hat-pin being now pushed
firmly into the
end of a stick,
the blue pin-wheel cannot
slide out of place (Fig. 271).
When ready, run with the toy,
or whirl rapidly around, holding
it in your hand, and see
how beautifully the three parts
spin, the whole appearing like
a whirling red, white, and blue
pyramid.
Another
has a button as a foundation.
Take a large cup and trace two
circles on yellow paper measuring
three and a half inches in
diameter; make two smaller
circles of red paper, two still
smaller of green paper, two
others—decreasing in size—of
yellow paper, and the two smallest circles of blue paper
(Fig. 272). Separate the disks into two groups exactly
137
Fig. 272.
Fig. 273.
alike; then fasten each of the two sets of disks together by
placing one over another; they will form two vari-colored
disks, each a duplication of the other. Select a large button
and place it between two vari-colored disks. Be sure to have
it in the centre; then with
a large pin or needle punch
two holes through the disks,
covering the corresponding
opposite holes in the button. Thread
a string through the two holes and tie
the ends together (Fig. 273); join the
edges of the two disks and the pin-wheel
will be ready for action. Place
the first two fingers of the right hand
in one loop, and of the left hand in the
other; give the string a twirl and pull the hands
apart. The motion causes the string to twist,
allowing the hands to come nearer together;
another outward motion of the hands and the
pin-wheel will revolve rapidly in another direction.
By alternately bringing the hands together and pulling
them apart, the pin-wheel can be kept spinning as long
as you like. In making the pin-wheel, the paper may be
either pasted or sewed; it is firmer when pasted.
are fiery, sparkling, and larger than the hand pin-wheels
Find a large-sized empty spool (Fig. 274) for a foundation;
then cut a circular pasteboard disk four inches in diameter
for the back of the pin-wheel (Fig. 275). Make blue fire of
strips of fringed-out bright-blue paper (Fig. 276) and paste
them across each other on the disk (Fig. 277). Cut a square
138
Fig. 274.

Fig. 275.
of yellow paper fringed around the edges for the yellow fire
and fasten it over the blue fire. Make red fire of a circle of
fringed red paper (Fig. 278) a trifle
smaller than the yellow, that the
yellow fire may be seen surrounding
the red and the blue stand out
beyond the yellow. Each succeeding
layer of fire must be smaller,
though not necessarily of the same
shape as the last. The uneven, straggling ends add to the
effect when the pin-wheel is in motion. Let the last two
Fig. 276.
Fig. 277.
papers be white and green
and on the top fasten irregular
lengths of the thread-like
tinsel left from your
Christmas-tree decorations.
Do not bunch it too much;
have the tinsel string out

Fig. 278.
long in various directions, so it will look like dropping
flying sparks when you fire off the pin-wheel. If you have
no tinsel, finely cut stands
of gold-paper may take its
place. Paste the back of
the pin-wheel securely on
one end of the empty
spool. When finished it
should resemble Fig. 279.
Select a strong wire nail
and push it through a
small disk of inked pasteboard
(Fig. 280); bring the
pasteboard up close to the
head of the nail, then
139pierce the pin-wheel in the centre and run the nail through
both wheel and spool. The little black card-board prevents
Fig. 279.
the pin-wheel from
slipping off the nail.
After the paste or glue
has dried, hammer the
nail which is in the pin-wheel
upon the fence
and set the firework
off by means of a
strong string placed
over the spool with
the ends crossed (Fig.
281). By holding the
two ends of the
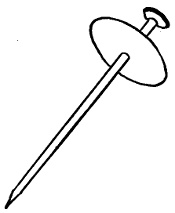
Fig. 280.
Fig. 281.
string, one in each
hand, and rapidly
pulling first one, then
the other, the pin-wheel
will revolve so
fast that it might be
mistaken for one of actual fire, but unlike
the real one there is no likelihood of the
paper wheel turning black and falling to the ground.
140Yours will spin as long and as often as you like, losing
none of its brilliancy (Fig. 282).
is fascinating. Its bright sparks fly up and out in every direction
all over your head, hair, and clothing, but they do
Fig. 283.
no harm. Take a
strip of stiff paper
three and a half
inches wide and
eleven inches
long; cut a hole
in one end (Fig.
141
Fig. 284.
283) and paste
the two lengthwise
edges together,
forming a hollow tube; then pin up the open end
nearest the hole (Fig. 284). Cut Fig. 285, making it about
four inches across at the widest
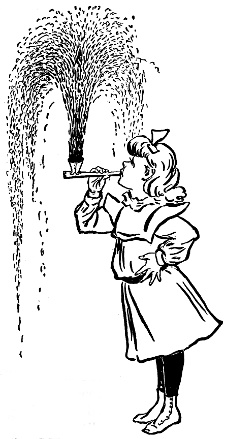
Fig. 288.
point; slash the lower
edge and pin this pipe-bowl
in funnel shape by bringing
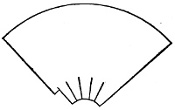
Fig. 285.
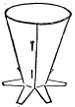
Fig. 286.
the two sides together
(Fig. 286);
fasten it on the tube
over the hole in
the top by gluing
the flaps down on
the pipe-stem (Fig.
287). Half-fill the
pipe-bowl with brilliantly colored
bits of paper, including
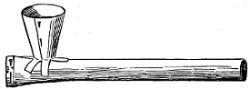
Fig. 287.
scraps of gold and silver tinsel cut
very small. In this way pieces
too little for anything else can be
utilized.
Make a good supply
so that you
142may fire off the calumet many times. Place the open end
of the tube to your lips and blow (Fig. 288).
It will not take more than five minutes to make the
Cut a piece of paper about ten inches long and seven
inches wide, roll it up and slip a small elastic over the roll

Fig. 289.
to hold the Roman
candle in shape;
carefully fold in one
end of the roll (Fig.
289); then collect all of the scraps of bright-colored paper
Fig. 290.
and bits of tinsel for sparks (Fig. 290).
When the sparks are ready load the
candle by filling it with them. Hold
the candle in one hand and gayly swing
it around like a real Roman candle. In
what a dazzling circle the bright paper
sparks fly! No matter if they do scatter
all around, they may be gathered up and used again.
If you can find a side-steel taken from a dress-stay, use
it for a
Bend the
ends together

Fig. 291.
Fig. 292.
until it breaks at the centre (Fig. 291). On
the broken end of one piece paste two gay
tissue-paper streamers (Fig. 292). To fire it,
hold the firework in an upright position,
streamers downward, the papered end between
the thumb and forefinger of the left hand and
143
Fig. 293.
the upper end held with the thumb and
forefinger of the right hand. Bend the
snap-fire as in Fig. 293. Let go suddenly
with the right hand, then an instant
later with the left, and
see the firework spring
up high in the air, carrying
its gay trimmings
with it.
Just wait until you
make the
and send it flying through the air, with its long tail sweeping

Fig. 294.
out behind. How heartily you will laugh when it
strikes its round head against some object
which drives it flying backward.
A rubber ball about three inches in diameter
will make a good comet’s head (Fig. 294).


Cut two strips of bright red tissue-paper,
each four inches wide, the entire length
of the sheet, and paste the two pieces together, forming a
long paper ribbon (Fig. 295); fold this once near the centre
(Fig. 296); fold again, bringing the lower folded end up to
the first end (Fig. 297), then cut the paper in a fringe, making
the strands half an inch wide; begin at the folded end
and cut through all the layers up to the single layer of
paper (Fig. 298). Unfold and you will have Fig. 299.
144
Fig. 299.
Fasten this tail on the ball with strong paste (Fig. 300).
In the same manner cut another long fringe of bright-blue
tissue-paper; fasten it on the
ball partly beyond and partly
Fig. 300.
overlapping the red paper.
Make a third fringe of orange-colored
tissue-paper, and glue that also on the comet’s head.
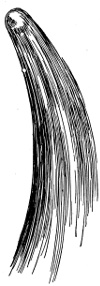
Fig. 301.
Gather up the tail carefully so it will not tangle and set
the ball aside until it
is perfectly dry; then
run out in the sunshine
with the comet
in your arms and throw it up as far
as you can toward the blue sky. The
comet will look gorgeous
sailing through
the air. When it comes down, take the
ball up again and throw it as far in front
of you as possible. Away it will speed
with a flutter and a dash, a long, brilliant
streak of color (Fig. 301). The tail of the
comet can be made longer by using three
instead of two lengths of the paper.
Now we will make
of any firm, strong, hollow cylinder. A
slender pasteboard mailing tube, or a stick
of bamboo, or a section of some shrub
from which you can push the pith, leaving
a hollow case, will answer the purpose.
Have the hollow stick about eight inches
145long, and for a ramrod cut a smooth, round stick an inch
or two longer. Be sure that the ramrod slides easily
through the
tube while
fitting snugly.

Fig. 302.
Fig. 302 shows the ramrod in the pistol. Get a large
raw potato and cut off several thick slices to use for bullets.
Punch a slice with one end of the pistol,
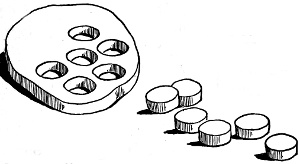
Fig. 303.
then with the other, leaving the potato
bullets in it exactly as they came from
the slice. When you are ready to fire,
place the ramrod against the
bullet in one end of the pistol
and suddenly push
the ramrod with
force through the tube, sending the
first bullet flying, and as it leaves the
pistol a loud report will follow. Fig. 303 shows the potato
slice and the bullets which have been used. Should you
be able to find corks which exactly fit the pistol you could
use them instead of potato. Fasten each cork to the end
of a string and tie the string firmly around the centre of

Fig. 304.
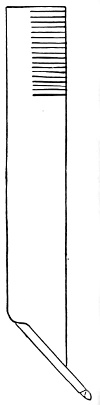
Fig. 305.
the pistol. Remember that the success of the pistol depends
upon keeping the air bottled up tight in the tube by
having the bullets fit tight. If the air is allowed to escape,
no report will be heard; the bullets will not pop. But
never fear; you will be able to make the pistol; have confidence,
patience, and care, and your work will turn out well.
are one of the best kind of fireworks and furnish lots of
fun. We will make some and send them flying through
the air.
146Cut strips of paper eighteen inches long
and two inches wide, fringing them seven
inches on one side (Fig. 304). Commence
at the unfringed end, B, and roll them like
lamplighters (Fig. 305), folding each over at
top end to keep it in place (Fig. 306, C).
These are the sky-rockets, and are best
made of stiff, bright-colored paper, but may
be of any kind except very limber paper.
Make a number of sky-rockets and “fire them
off” by the aid of a large, empty
spool with a piece of elastic adjusted
loosely over one end, but tied securely
(Fig. 307). Place one sky-rocket
at a time through the hole
in the spool, fringed end out,
and, grasping the tip end in the elastic
(Fig. 308), pull the sky-rocket toward
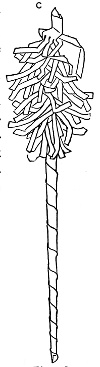
Fig. 306.
you and let it fly back as you
would send an arrow from a bow.
There is another paper sky-rocket
which rivals a real one in brilliancy,
and is much easier to fire. Make the
rocket of a hollow stick—a bamboo handle
from a Japanese fan or
parasol, or an old dried sunflower
stalk will do—and
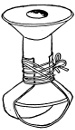
Fig. 307.
cut the stick about seven
inches long. Near one end
tie on firmly a stout rubber
band (Fig. 309). The stick of the sky-rocket
should be strong and slender and about
twelve inches in length. Have it small enough
147in diameter to slide
easily through the
sunflower stalk.
Fasten many gay-colored
streamers of
tissue-paper on one
end, making them
fully a yard in length. When
all is ready, place the stick with
streamers uppermost in the tube,
draw back the rubber band with
the stick (Fig. 310), and fire (Fig.
311). The sky-rocket goes swiftly
through the air, carrying a
stream of paper fire in its wake. As with the real fireworks
you must be careful not to aim any of these in a
direction where they will strike anyone.
148
CHAPTER XII
MONOTYPES
They are charming, these monotypes;
charming in effect
when finished, delightful
in their accidental results,
and wholly fascinating
in the method, or
lack of method, used in
their production. Painted
with a bristle brush,
a camel’s-hair brush, a
sponge, a rag or your
thumb, as the case may
require; painted on glass and then printed on paper, with
a clothes-wringer for a printing-press; can anything be
more enchantingly unconventional? Yet the finished monotypes
are truly artistic and beautiful. If you can paint at
all, be it ever so little, you can make some kind of a monotype,
and you will always have the feeling that you can do
better next time. The
for your work are a piece of glass about six inches square,
a tube of lamp-black oil-paint, some sewing-machine oil, and
a pad of unruled writing-paper.
See that your glass is perfectly clean and free from dust,
squeeze out some of the black paint in a saucer and mix it
149with a few drops of the machine oil. You will soon learn
the consistency required, for if you make the paint too thin
it will run and blot, and if there is not enough oil it will go
on too thickly and smudge in printing.
Choose a photograph or print for your copy which is
simple in effect—that is, one which shows a good deal of sky
and broad stretches of light and shade. It may be either
landscape or marine, but, until you have had some experience
with the work, avoid figure pieces, and architecture. When
you have learned the process be as original as you like, but
keep to your copy at first; you will never make an exact
reproduction. Use whatever kind of a paint-brush seems
best fitted, and work rapidly that the paint may not dry.
A fine soft sponge will give excellent foliage effects; this
should be dipped in the paint and simply dabbed on the
glass. A clean cotton rag will take off extra paint and is
especially useful where water is represented in the picture.
By dragging the rag or sponge over a surface too thickly
painted you can loosen it and give the appearance of grass
and shrubbery, or of a roadway. Soft clouds can be made
by putting the cloth over the end of your finger and rubbing
on the glass with a circular movement, using but little
paint; for an ordinary sky make horizontal strokes with
the rag, keeping the tint as flat as possible. If you place a
piece of white paper under the glass the work will be easier,
for you will appear to be painting on a white surface and
the transparency of the glass will not trouble you.
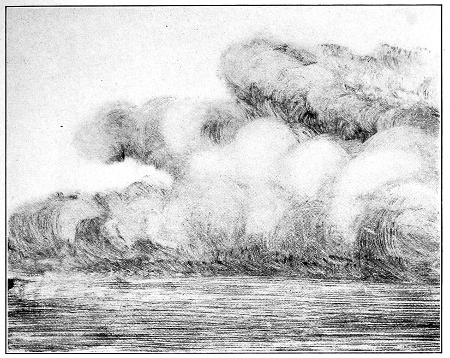
Soft Clouds.
Can be made with a cloth on the end of your finger.
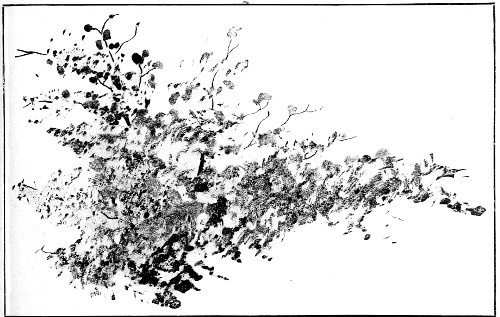
Foliage Effect.
Made with a sponge.
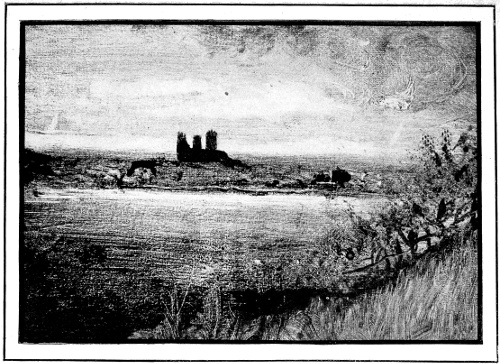
The Distant City.
Printed on Unruled Writing-paper.
If you have ever painted
sooner or later you will long to try one with this process.
A woman’s head with flowing, wind-blown hair seems
150especially adapted to the work. A bristle brush and the
ever-useful rag will spin the hair out, and toss it about in
decorative masses. For the face you will need a small pad
made of soft silk, or muslin, and raw cotton—indeed, several
pads will be found useful. Cut the silk into a four-inch
square, place in the centre a wad of raw cotton about the
size of a hickory nut, and, drawing the silk smoothly over
the cotton at the bottom, bring it together at the top; wrap
with thread close to the cotton and tie securely.
Draw the outlines of the face lightly with a fine camel’s-hair
brush, and lay in the shadows broadly with a large
brush; then take your pad and go over the shadows, stippling
them with little dabs until they are smooth and free
from brush strokes. When it is necessary to deepen a
shadow add more paint with the pad.
Do not put in the features with hard lines, let the face
be modelled with light and shade, making deeper accents
where more sharpness is required. The definite strokes
about the eyes, the nostrils, and the line between the lips
can be made with a brush without hardness. Hard lines
never look well in a monotype; they stand out harshly from
the general softness of the effect, and appear unpleasantly
out of place.
When your painting is finished, slightly dampen a piece
of paper by passing a wet sponge across one side, lay the
dampened side carefully on the glass next to the paint, and
then pass both through the clothes-wringer. Remember to
hold the glass as it comes through that it may not fall and
break. Lift your paper off lightly and quickly, without
dragging, and you have the completed monotype, like, and
yet unlike, the picture you painted. In the first place, the
151design is reversed, and then there are often beautiful effects
which your brush could never have produced. If the
painting on the glass still holds, try another print, and even
a third; the first are not always the best.
The Turbulent Sea.
Printed on Imported Blotting-paper.
Study of a Head.
Printed on Imported Blotting-paper.
Study of a Head.
Printed on Imported Blotting-paper.
When no more impressions can be taken, wipe the paint
from the glass with a cloth and begin another picture.
A very pretty experiment is to use color instead of black
and make a monotone of your monotype. Sepia will give
the picture in soft brown, Indian red in bright red, while
Antwerp blue produces the tone of blue found in a blueprint
photograph. Of course oil colors alone must be used,
water colors will not print.
Another Field for Experiment
lies in using several colors in one picture. For instance,
you might make your mountains blue, your trees green, and
your foreground red and yellow.
Then again mixing the colors and using them as if painting
on canvas will prove interesting. The deepest pleasure
in all work of this kind is to experiment and discover
methods for ourselves, then to work out and perfect these
methods and make them all our own.
There are various
suitable for monotype painting. Rice-paper is especially
pleasing; it is soft of texture, light of weight, and has a
warm, creamy tone. The monotypes printed upon it are
delicate, clear, and distinct. Imported blotting-paper also
produces satisfactory results, though the print is not quite
152as soft in effect; it has a smooth, rather hard surface, but
takes the paint well. Both of these papers are used dry.
Some professionals use a Japan paper and a Holland
paper. The Japan paper is very thin, and the Holland
paper has a surface like water-color paper, but is heavier
than the ordinary kind.
For first efforts the unruled, ten-cent writing pad is the
best. Very good prints can be made on this, and one feels
free to experiment as much as heart desires with such inexpensive
material. The monotypes given here were painted
on writing-paper and imported blotting-paper.
Early Spring.
Printed on Unruled Writing-paper.
Florida Coast.
Printed on Imported Blotting-paper.
153
CHAPTER XIII
PRISCILLA RUGS
As there is no limit to the
beautiful effects which may be
produced by the well-chosen
color combination in the Priscilla
rag rugs, and anyone who
has an eye for color (which,
by the way, may be cultivated)
is sure of success.
There are many new inventions
in hand-looms, yet
the old cumbersome loom of
our grandmother’s day is still
to be found in the outlying
districts of most towns and
cities, and the weaving done on this is fully
as satisfactory as that on the new looms. Almost
every village has its rag-carpet weaver, and on his
old-fashioned machine can be woven all that we want in
this line.
First, there are the all-wool rugs for general use in the
house, then mixed wool and cotton rugs for the piazza, all
cotton for bedroom and bathroom, mixed cotton and silk
and entire silk for portières and couch-covers, and for covers
for sofa-pillows.
154There are also rugs of heavy cotton, such as denim in
its dull reds, blues, yellows, greens, and browns.
The size of a rug for general use is usually one yard
wide by two yards long, the yard width being the limit of
the ordinary loom. Smaller rugs are woven in different
proportions: a runner for the hall is three-quarters of a yard
wide and of any required length, and door-mats half a yard
wide by one yard long. Squares for the centre of the room
can be made by having two breadths woven exactly alike
and then sewing them together.
You who possess a loom of even the clumsiest design
have a field open before you full of interest, for freedom to
experiment in pattern and manner of weaving will lead to
continually new results and there will be increasing originalityoriginality
and beauty in your productions.
Collect all your available material, plan your combination
of colors, and then decide whether it will be necessary
to put some of the rags into the dye-pot. If you have a
handsome vase in your room it is a pretty idea to take that
for your keynote and reproduce its color in your rugs.
Solid colors are the best unless you wish to have part of
your rug what is called “hit or miss.miss.” For “hit or miss”
any short pieces may be used and sewed together indiscriminately;
then again, if you have a good deal of checked,
plaid, or mingled material, it may be used by itself for
centre or border. It is upon the solid colors, however, that
you must principally rely, as there is less of the element of
chance in their use, and your calculation as to the result of
your color combination will be surer.

A favorite design is a “hit or miss,” or a solid-colored
155centre with striped ends. A more unconventional effect is
produced by making the rug in stripes of unequal width
and in daring color combinations; some of these latter are
startlingly barbaric and artistic in appearance and are well
adapted to studio use. Again, more harmonious effects are
produced by using various tints and shades of one color.
Very narrow stripes of black and of white often separate
wide stripes of different colors, sometimes singly, sometimes
together, and when used with discretion they give a
certain decision and finish to the whole. You will naturally
want to exercise your own taste and originality in designing
your rugs, so a description of one all-wool rug will be amply
sufficient as a guide.
This rug is one yard wide by two yards long. The
centre is exactly one yard square and is of solid dark cardinal
red. The two ends are precisely the same and the stripes
of the border follow each other in this order: Next the
centre comes a very narrow stripe of old gold, then one of
the same width of white. These are made by putting the
strips of color only once through the loom, or once across.
After these comes a five-inch stripe of old blue, again the
narrow yellow and white stripes followed by a two-inch
stripe of moss green, a three-inch stripe of dull light blue,
a five-inch stripe of light brown, a two-inch stripe of old
blue, and next the fringe a one-inch stripe of dark cardinal
red. The fringe is simply the warp allowed to extend
beyond the rug about a quarter of a yard at each end.
Gray is a useful color in all-wool rugs and makes an
effective centre for a bright-colored border.
is a beautiful blending of reds and yellows giving a flame
color. The ends are dark red, and, by degrees, the red runs
156into orange, which, in turn, melts into dark yellow, growing
gradually lighter until the centre of the rug is a pale, soft
yellow.
Tack on a Piece of Paper Samples of the Rags Used.
Pale tones of yellows
and greens are
sometimes combined,
also yellows
and browns.
Before taking
your rug to the
loom tack on a piece
of paper samples of
the rags used in the
order in which you
wish them woven,
and write opposite
each sample the
width the stripe is
to be made, as
shown in diagram.
Give this to the
weaver that no mistakes
may be made by him in the placing of the colors.
To calculate how much you will need of each color, remember
that it requires about two pounds of woollen rags
to the yard; therefore, if you want half a yard of one color,
one pound will be required; for a quarter of a yard, one-half
pound. Do not make your calculations too closely, with a
little over-weight in each case no harm is done and it is
better than falling short of the required amount. The narrow,
157or once-across, stripes require an inch or two over the
yard for each stripe.
How to Cut and Sew the Rags
Sew the pieces together
in this way.
Cut your rags in strips one-half an inch wide unless the
material is very thin or loosely woven, in which case make
them wider; very heavy cloth should be even narrower than
the half-inch. Cotton rags should be one
inch wide. As the rags are pinched
together when woven it is the
thickness that counts, and the
object is to keep them of
an even bulk so that
the rug may not have
an uneven, lumpy surface.
Perhaps you
will be told by the
weaver not to sew
your rags too securely,
for they
cannot be jerked
apart readily when it is necessary to break off one color
to begin weaving the next; but do not act on such advice.
You must sew the strips together with care so that the ends
may not stand out and give a ragged look to the finished
rug. The accompanying diagram shows the best manner of
joining the pieces. You see that one piece is laid over the
end of the other, then both are folded lengthwise and sewed
securely in the fold. This gives smooth joints and an even
surface.
Wind your different colors into balls, having, as a rule,
one pound in each, and put them in a bag to send to the
loom.
For piazza rugs, or for summer cottage use, cotton may
be mixed with the wool; indeed, some hold that it is unnecessary
to have all-wool for any purpose, though the writer
thinks differently. The temptation is great, however, to
use the pretty bits of gingham and lawn left from summer
gowns, and they do give a certain, if not lasting, brilliancy
to the rug. That much of the cotton is apt to fade and
grow shiny with use is of little consequence when the rugs
are not subjected to hard and constant use. Rugs of this
class should be as bright and gay as possible; the combination
of even the crudest colors looks well on a vine-shaded
piazza and in the gayly decked summer cottage.
For bedroom and bathroom all-cotton rugs are exceedingly
pretty and appropriate, and when they are made of
fast-colored material they may be washed with ease and
kept always fresh and clean.
The Centre may have Dashes of Color through it.
White should predominate in these washable rugs, and
the best as well as the simplest effect is produced by combining
159it with but one other color. Indigo blue and turkey
red are safe and useful colors; brown and green gingham
also look well with the white. Of cotton rags allow one
and one-half pounds to the yard. When you are in doubt
as to the permanency of your colors soak the rug, before
washing, in a strong solution of salt and water; this will
“set” almost any color. These cotton rugs may be woven
in alternate strips of color and white, or the white be used
for the centre and the colors for the border, or the centre
may have dashes of color through it as shown in diagram.
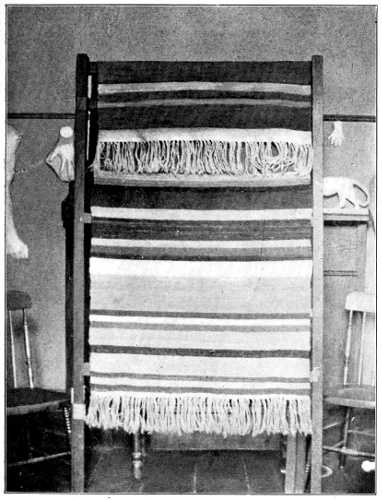
In Stripes of Unequal Width.
Bathroom rugs can be entirely of white or, towel-fashion,
have a narrow colored strip at each end. Any
white cotton may be used in these bathroom rugs, old being
better for this purpose than new, as it is much softer.
Gray linen is undoubtedly the best-wearing warp and
harmonizes with all colors, therefore for all-wool rugs it is
the best. It gives, of course, a gray fringe, but that is not
undesirable. When a colored fringe is wanted the cotton
warp will have to be used. This comes in red, blue, purple,
yellow, and white. Use cotton warp for cotton rugs, and
where the filling is largely white the warp should be white
also. When red warp is used with white filling a pink tone
is the result, while blue and purple with white filling produce
a gray effect.
At each end of the rug the warp should be woven with
self-filling to the depth of one inch. This makes a heading
for the fringe and prevents the rag filling from ravelling.
It is, in fact, a selvage. You may knot the fringe, using six
strands to a knot, or plat it and then knot as in diagram, or
it may be stitched at the top and left to flow freely.
Those who make a business of manufacturing rag
rugs scorn to use the dyes that come ready prepared
and think it well worth the extra
trouble to make their dyes themselves.
So it is,
perhaps, when one
has plenty of time
to devote to the
work, but a girl’s
life is so full of interests
and occupation
she generally
chooses quick
methods, though
the results may
not always be as
lasting.
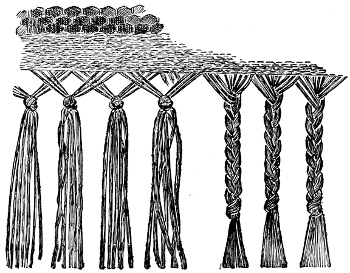
You may Knot the Fringe or Plat it and Knot it.
In case your heart yearns toward the old-fashioned
process and you want to go into the work thoroughly, read
the recipes given here and follow them carefully. They are
taken from an old manuscript recipe-book, yellow with age
and worn by use, which has descended to the writer from an
ancestress famous for her good housekeeping and housewifely
arts. The dye appears to have been prepared in
large quantities, usually enough for sixteen pounds of wool,
but you can easily regulate the proportion of the ingredients
and make as much or as little as you want.
Navy Blue.—"Boil in a sufficient quantity of water twelve
ounces of copperas, three ounces of alum, one and one-half
161ounces of verdigris, one and one-half ounces of cream-tartar.
Run[A] your cloth in it for four hours, then air. Empty out
that liquor and fill up with clear water; add four and one-half
pounds of logwood, boil it for one hour and a half,
then add six ounces of madder and boil for half an hour,
then run your cloth for half an hour. Air it (the cloth),
then add six ounces of blue vitriol and three ounces of
pearl-ash. Mix it well and run your cloth in it for twenty
minutes, then air and rinse it.
Silver Gray.—"On one pound of woollen: Take two ounces
of sumac and three ounces of logwood and boil for one hour
in four gallons of water, then add one-half ounce of cream-tartar.
Put in your woollen for one hour, then take out and
air. Refresh your dye with water and add one-half ounce
of copperas, bring it to a boil and run your woollen for half
an hour, then air, rinse, and dry it.
Yellow.—"On woollen for one pound: Dissolve in four
gallons of boiling water three ounces of alum and one
ounce of cream-tartar, then run your cloth for one hour
and a half at boiling heat. Take out, cool, and rinse,
then boil one pound of fustic chips for five hours, run
your cloth, while boiling, for one hour, then cool, rinse,
and dry it.
Madder Red.—"On one pound of woollen: Boil five gallons
of water in a kettle, add three ounces of powdered alum and
one ounce of cream-tartar, then run your woollen in it for
two hours, rinse and air it. Put five gallons of fresh water
in a kettle, add eight ounces of madder, mix it well and
bring it to the boil, then run your woollen for one hour, but
it must boil only five minutes. Take it out, air and rinse it.
Add to the dye one-half pint of clear lime-water, then run
162your woollen for ten minutes, then take it out and rinse it
immediately.
Brown.—"On cotton for five pounds: Bring eight gallons of
water to the boil and add four ounces of pearl-ash, dip your
yarn (or cloth) for half an hour and then wring out. Take
twenty gallons of water and one bushel of maple or white-oak
bark, boil it two hours, then take out the bark and strain
the liquor and add one pound of copperas; stir it until it is
dissolved and let your liquor cool to lukewarm. Dip your
yarn for five minutes, wring and air it; dip again for fifteen
minutes, wring and dip again until you have it dark
enough.
Purple.—“On cotton for two pounds: Boil four ounces of
sumac in four gallons of water, then dip your yarn for half
an hour; wring, air, and put it in again over night, then take
out and wring. Boil in seven gallons of water one pound
four ounces of logwood for one hour; take three gallons of
the logwood liquor and dip your yarn in it for twenty
minutes, then add three quarts of the logwood liquor and
dip for twenty minutes, then put in the remainder and dip
for twenty minutes, then wring out and dry your yarn.”
The wringing process given in the last two recipes is
for cotton yarn; cotton cloth or woollen cloth should never
be wrung out; simply lift it from the dye with two sticks,
immerse it in clear cold water, if you are to rinse it, then
hang it up and let it drip. All material must be perfectly
clean and thoroughly soaked before being put in the dye.
Note.—“In boiling, all drugs and barks that will not dissolve
ought to be put in a thin, coarse bag and taken out before
you dip, and the liquor should be settled. Dip only in
clear liquor.”
163
CHAPTER XIV
A PEANUT NOAH'S ARK
Changing one thing into another is
always interesting, and the most charming
part of a Peanut Noah’s Ark is that
you can transform these ground-nuts
into any and every kind of
wild creature. At your command
they will come trooping from all
parts of the tangled jungle, the elephants
leading and tigers, lions,
bears, wolves, kangaroos, giraffes,
and others following. Ever so
many insects, too-the curious peanut
spider, actually as large as one of those mammoth
Southern tarantulas which often travel North on bunches
of bananas, and the enormous hard-shelled hornet, whose
sting will not hurt half as badly as its smaller cousins who
are alive and whose nests are large and round, dark gray in
color and appear as if made of paper. In addition to these
you can have beetles of different kinds, grasshoppers, and
various sorts of moths.
With the help of bits of paper and some wooden toothpicks
the ground-nuts may be transformed into
164Denizens of Earth, Air, and Water.
First we will catch the terrible hornet, but to get him you
must select a peanut as near like Fig. 312 as you can find.
This is for the thorax or chest; choose a longer nut, resembling
Fig. 313, for the abdomen or body. Take six common
wooden toothpicks for the legs (Fig. 314), and bend
each stick until it fractures near the centre without breaking
(Fig. 315). For the waist use a short piece of toothpick
(Fig. 316). For the sting take a pin (Fig. 317). To insert
the sting in the body make a small hole on the lower
side and thrust in the pin so that the point will project from
165the tail; push the head of the pin into the nut until it is
out of sight, as shown by dotted lines in Fig. 317, 2A. This
diagram gives the point of the pin as it stands out from the
nut. Join the chest and body by thrusting one end of Fig.
316 into Fig. 312 and the other end into Fig. 313, leaving
a small length of Fig. 316 exposed to represent the slender
waist of the hornet, as shown in Fig. 318. This done, put
three legs on each side of the insect by forcing the toothpicks
into the thorax or chest peanut (Fig. 318).
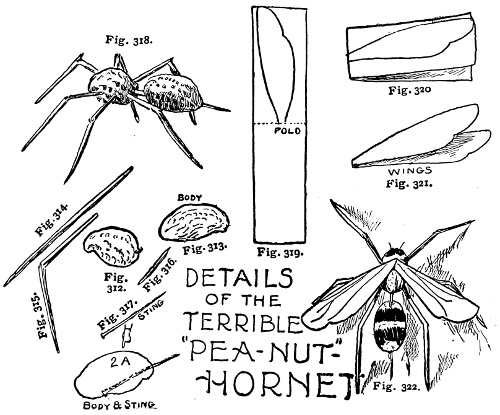
DETAILS
OF THE
TERRIBLE
“PEA-NUT”-HORNET
Fig. 312-322.
Now we have a huge ant, and as ants are practically
wingless hornets, some of them even having stings like the
bee tribe, it is only necessary to add a pair of wings to complete
the terrible peanut hornet. If you have any tracing-paper
or the waxed paper from a candy-box, the semi-transparent
material will form wonderfully natural wings; but
any kind of paper will make
With a pencil draw the pattern (Fig. 319) upon a bit of
paper, fold at the dotted line and you will have Fig. 320.
With the scissors cut around the outline through both
leaves of the folded paper; the result will be Fig. 321, the
two wings joined together. Paste them on the back of the
thorax, and you will have Fig. 322. To make it look still
more lifelike, ink stripes across its back and head, and stick
in the front of the head two fine, small black pins for the
antennæ. To prove that this is a live hornet, let anyone
who doubts the fact press the end of his finger on the point
of the sting and he will be satisfied. Should he still claim
that the thing is not alive, dip your finger in a glass of water
and allow a drop of the fluid to fall on each joint of the legs
where the wood is fractured; the swelling of the wet wood
166will cause the legs to move in a manner sufficiently lifelike
to satisfy the most critical.
It is not commonly known that
but the newly discovered specimen known as the Peanuticus
spiderencus is one which the most dainty little girl may eat
without feeling at all nervous as to consequences. Spiders
differ in many respects
from true
insects, but we
need only observe
the most
obvious points of
divergence.
First, they have
no waist; that is,
their body is jammed
upon their
thorax (Fig. 323).
Next, their heads
are driven into
their shoulders,
so to speak, so that they not only have no neck, but there is
not even a line to indicate where the head ends and the
thorax or chest begins.
From the quart of peanuts select one which looks most
like Fig. 323. Spiders have more legs than beetles or wasps.
Garden spiders have eight well-defined legs, and our Peanuticus
belongs to the garden spider family. Therefore, take
eight toothpicks and, bending them as before described, make
eight legs. Push two legs into each side of the large part
167of the nut—the abdomen—inclining them backward, and two
more into each side of the small part of the nut—the thorax—slanting
them forward, as in Fig. 324. Make the antennæ
of two black pins, bent according to Fig. 325; push the
pins well into the head of the spider (Fig. 324). If you
thread a fine piece of black elastic through the spider’s
back, allowing a length of about a half yard, and weight the
body by fastening a little flattened piece of lead or a small
stone on the under part with melted sealing-wax, the Peanuticus
can be made to dance up and down in the air like a
natural spider running on its web. The black elastic will
not be noticeable. Tie the end of the elastic on a stick;
then you can hold it out from you and have a better view
of the curious creature.
Pick up another peanut and see what it suggests.
Imagine it with long ears. What would it look like?
Cut two ears from white paper and a tail from the same
paper; paste one ear on each side of Bunny’s head and
fasten the little stumpy tail in place. Then stick two short
pieces of toothpicks in the nut for the front legs; bend the
back legs at the centre and push the upright part into position
so that the lower horizontal portion will be bent
forward and rest on the ground. Ink round spots for eyes
and a line partially across the front for the mouth.
are curious creatures, always carrying a little mountain
on their backs, and chewing as if they had an inexhaustible
supply of chewing-gum tucked away in some invisible
pocket. Think of the mountain’s back when selecting a
168
Fig. 326.
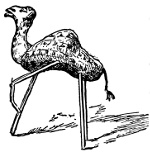
Fig. 327.
peanut for this animal and find one with a high hump.
Cut the head and neck (Fig. 326) of stiff paper or card-board;
ink the
eyes and mouth,
and slide the head
into a slit cut in
the nut. Make
the tail of heavy
black thread or
darning-cotton
and fasten it on
by simply sewing the thread in the
nut. Tassel out the end. For the
two hind and one of the front legs
use three stiff, straight toothpicks; bend the other toothpick
for the front left leg so that the camel will appear to
be walking. The little animal will stand on three legs,
holding the fourth up, as in Fig. 327.
Find a nut shaped something like
with part of it inclining upward for the head. Stick two
short, bent toothpicks in for feet; if properly adjusted the
chick rests on them. Cut paper wings and paste one on
each side of the chicken. Make the beak also of paper and
insert it in the front of the head. The eyes can be marked
with ink.
When among the jungle folks, off in the tangled wild
woods,
grows to an immense size, but things are very different in
Peanut Land. There the big-eared creature is a wee thing
not much larger than the chicken you have just made.
169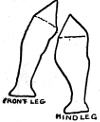
Fig. 328. Fig. 329.
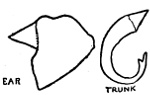
Fig. 330. Fig. 331.
It is a veritable midget of an elephant and not at all dangerous.
Look over all your nuts and choose the one most
closely resembling
the body and head
of an elephant; then
make two pasteboard
front legs
like Fig. 328, and
two more like Fig.
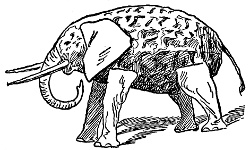
Fig. 332.
329 for the hind legs. Cut two ears (Fig.
330) and a trunk (Fig. 331). The tail should
be comparatively slender
and a trifle bushy at the
end. Paste ears, tail, and
trunk in their proper
places and cut four slits
in the lower part of the
nut for the four legs,
which you may then slide
into place (Fig. 332). The
tusks are two toothpicks
stuck into the lower part of the head. By the diagrams it
may be plainly seen just how the work is done.
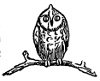
is fashioned from a nut without the joint-like
extension. Ink the eyes, beak, and
wings, and with heavy thread or darning-cotton
sew the wise bird to a twig or
toothpick. Divide the stitches forming
each foot into two portions or
two toes, as a real owl shows only two when in the same
position (Fig. 333).
170In the queer Peanut Land
hold an important position. They are very proud and
carry their heads high as they stand perched upon their
long stilt-like legs. Their Holland relatives delight in
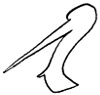
Fig. 334.
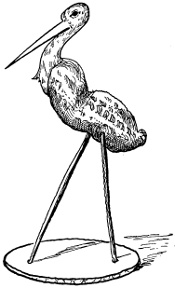
Fig. 335.
building nests on
the tops of chimneys,
and it is always
considered a
sign of good luck
for the occupants of
the house when Mr.
and Mrs. Stork favor them with
their presence. Your stork will
not have to remain on the outside
of the house, because, not being as
large as the others of his family,
you can find room for him in almost
any place. Make the bird’s
body of the most common-shaped
peanut, his legs of two stiff wooden
toothpicks, and his head (Fig. 334)
of stiff paper. Mark eyes on the
head and put the different parts of
the bird together. He will stand
up straight if you punch his feet into a piece of patented
paper used in packing bottles (Fig. 335). If you have no
such paper, use anything you can find that will answer the
purpose.
which will not pinch also live in Peanut Land. They have
eight bent toothpick legs, a tail of paper (Fig. 336), and
171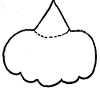
Fig. 336.
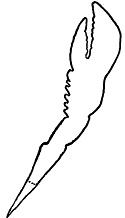
Fig. 337.
paper claws (Fig. 337). The antennæ are toothpicks. Real
lobsters have one front claw larger than the other, but on
peanut lobsters these are of
the same size. When you
have made the lobster (Fig.
338) you might boil him
by dipping the funny little
thing in red ink, for lobsters
are always red after
being boiled.
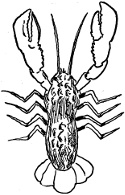
Fig. 338.
All these animals need a
to keep them in order in the Ark.
Make Noah entirely of peanuts; a small
one for the head, a large one for the
body, two for
the arms, two for each leg, and two
small nuts for the feet. String the
nuts together with strong, coarse
thread. Make the hair of a number
of strands of black thread tied together
in the centre. Pin this wig
on the peanut head, part the hair
and spread it out to meet in the
back and gum it in place. Mark
the face with ink and dress the doll
with loose trousers and loose sack
coat. Cut the hat of common wrapping-paper.
First make the brim
of a circular piece of paper, with a
round hole in the middle; then the crown of a strip of paper
slashed on each side. Fasten the ends of this together, turn
172out the slashes on one side and slide the brim over the
crown down on the turned-out slashed portion. Paste it on
tight. Next turn in the slashes on the top edge of the
crown, fit a disk of paper over them as you would put a lid
on a pan, and gum the top of the crown in place. You will
find Mr. Noah rather loose-jointed, but that does not matter;
he is better so, for he is not too stiff to run about and
attend to his collection of animals. Make Mrs. Noah of
peanuts as you did Noah, and dress her in bright colors
with a gay little hat fastened firmly on her head.
may be an ordinary pasteboard box, with a gabled roof
pasted on the lid. Take a box like that shown in Fig. 339,
bend a piece of stiff paper
(Fig. 340), paste the sides of
Fig. 340 on the lid (Fig. 341),
and over the two open ends
gum triangular paper cut as in Fig. 342. Paint windows
and a door on the sides of the Ark; then paste the Ark on a
piece of another larger box-lid cut like Fig. 343. Put Noah
and his wife in the box with all the animals, and tie a string
through a hole pierced in the front of the stand of the Ark,
so that the Ark with its entire cargo of peanut animals may
be dragged from one place to another (Fig. 344).
173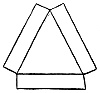
Fig. 342.
Noah’s Ark and all its animals has ever had a great
attraction for young folks, and it is not an uncommon
sight to see baby grab Noah, Mrs. Noah, or some of the
gorgeously painted animals, and put the
Fig. 343.
toy in its mouth. Many of the colors used
in painting the shop toys contain poison,
but the present Mr.
and Mrs. Noah and
all the zoölogical
collection described in this article are healthy, wholesome
food. So when you tire of playing with them you may
eat them, with no
danger of ill consequences.
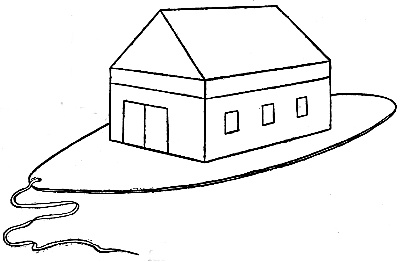
Fig. 344.
Just
think! Elephant
and camel for first
course, stork and
lobster second, and
dessert of spiders, wasps, and
small birds. What a novel bill of
fare! One little girl may eat a
couple of elephants, several giraffes, a rhinoceros or two,
and still have a good appetite for her regular dinner.
174Should you think of some favorite animal not here
described, which would be an addition to your collection,
put your wits to work and hunt up a peanut suitable for the
purpose; then find a photograph or printed picture of the
animal, that you may be sure to have it as perfect as the
materials will allow. In this way almost
Any Animal, Fish, or Insect Can be Made,
for after working out the given examples you will have
gained sufficient knowledge of the governing principles of
the work and enough skill to enable you to continue the
manufacturing of peanut toys alone or with the help of
other girls and boys.
Different Lines of Objects
can also be formed from the nut. Break open one with
only a slight indenture at the centre and make the two
halves into fairylike little sailing vessels by the addition
of a sail and mast cut all in one from white writing-paper,
and gummed to the bottom of the boat near the large
end. It requires but a moment to make these tiny crafts,
and they will sail across a basin of water as if they were
in reality large affairs on the salt sea, their white wings
gleaming out in the most charming manner. Stir the water
slightly with a stick and see how the boats dance; blow
gently on the sails and off the two will race for the opposite
side of the basin. If you are near any small stream or pond
you may launch your tiny boat and watch it bravely breast
the little ripples.
175
CHAPTER XV
A FLOWER FEAST
This dinner party will be great fun,
especially as there need be no
worry about cooking, for the sun,
with the assistance of the rain and
air, has attended to that part of the
preparation.
We shall have to
provide some sort
of a dining-table. An ordinary
letter-paper box about
eight inches long and five
inches wide will answer the purpose. Spread
over the table a fresh, white table-cloth of
paper, and for a centre-piece choose
Fig. 345. Fig. 346.
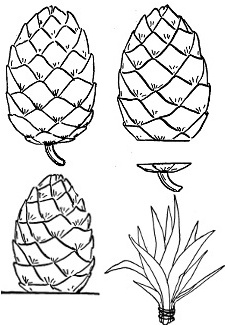 Fig. 347. Fig. 348.
made of a cone one and one-half
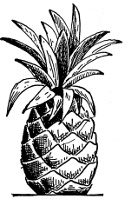
Fig. 349.
or two inches high (Fig.
345), cutting it off flat at
the stem (Fig. 346) so that
it will stand firmly on the
table (Fig. 347). On the top
of the fruit pin a small
bunch of coarse grass tips
tied together with thread
176(Figs. 348 and
349) and use the
petals of a bright-colored
flower,
Fig. 350.
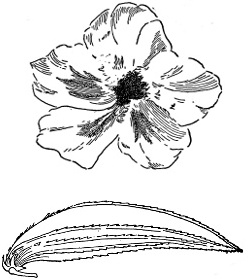
Fig. 351.
which will lie flat
when the lower
portion is cut off,
as an ornamental
mat to place under
the pineapple;
a nasturtium
blossom (Fig. 350)
will look well.
Almost everyone
is fond of
for dinner, so we will select
one which is sound and
perfect. Carefully open a
large-size milk-weed pod in
the seam which you will
find on the rounded side
(Fig. 351) and take out the
beautiful white fish composed of the seeds clinging to their
downy wings, the seeds forming the fish’s scales (Fig. 352)
and the down its body.
Cut out a piece of white
paper (Fig. 353) and with
a drop of paste fasten it on
177the fish to
form the tail
(Fig. 354);
also gum a
small, round
piece of inked paper in position for the eye;
place the fish on a dish made from a long, green leaf (Fig.
Fig. 352.
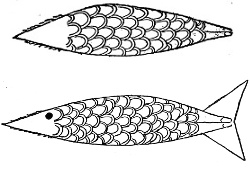
Fig. 354.
355). Hollyhock
seeds, which are

Fig. 353.
packed together
in rounded forms,
must furnish
cheeses, the resemblance
Fig. 355.
being very marked (Fig. 356). Two will be required and should
be placed on the opposite sides of the table.
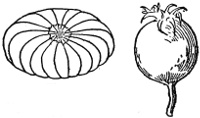
(Fig. 357) which come from
the rose-bush are the seed-vessel
of the flowers, and
so closely do they imitate
little apples, when detached from the bush
they might easily be mistaken for such. Select
a leaf plate, fill it with the apples and place them on the
table between the pineapple and the salad. They give a
bright note of color, which helps the decoration.
The
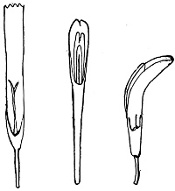
Fig. 358. Fig. 359. Fig. 360.
shall be dainty enough for a fairy queen. We will mix
shredded orange from the petals of a full, fresh young dandelion
blossom (Fig. 358 shows one of the petals magnified)
178with shredded strawberries
produced from the common
red-clover blossom (Fig. 359
represents an enlarged petal),
and shredded cocoanut made
from the ordinary white-clover
petals (Fig. 360 also magnified).
When these are well mixed
serve them on a pretty, green
leaf plate, and the dish will give
another bit of mingled color
with its pink, white, green, and
yellow.
are furnished by the oak-tree and made of acorns. The
lower part (Fig. 361) forms the saucer; the upper (Fig. 362)
Fig. 361
Fig. 362
the cup. Cut off the top, then remove the
kernel and the cup is ready for use (Fig. 363).
It is better to
select a large-sized
acorn for
the saucer and
a smaller one
for the cup, in
order that the
Fig. 363 Fig. 364
Fig. 365 Fig. 366
cup may have
more space in
the saucer and
not fit too closely
(Fig. 364).
Miniature dippers can be
fashioned of acorn cups by piercing a hole
179in one side near the top and pushing a slender stick through
until it rests against the opposite side (Fig. 365).
Odd little baskets are also made of acorns (Fig. 366) by
cutting away all of the top of the acorn except a band
through its centre; this forms the handle. The acorn is

Fig. 368.
left in its rough saucer, which gives the outer surface of
the basket, the inner surface being the interior of the acorn
proper. Make several cups and saucers, and the feast will
be ready for others to see (Fig.
367). Of course, it is only intended
to give pleasure in this way and
not really to serve as food.
Rose petals make an excellent
substitute for the common
such as are usually served at parties
with the refreshments. Choose
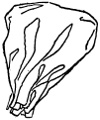
Fig. 369.
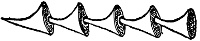
Fig. 370.
the largest and best petals (Fig. 368)
and gather up the edge of one all the way around, holding
the folds securely; a little, bag-like object is thus formed
180(Fig. 369), which, when held firmly with the thumb and
forefinger of one hand and struck against the out-stretched
palm of the
other, snaps
with a loud
noise. If any
opening is allowed when gathering up the
edges of the petal, the air will not be confined
and consequently the bag will not snap,
and you must try another.
Of the thorns covering the stems of the roses you can
make chains by sticking the point of one thorn into the base
of another and continuing in this manner until the chain is
as long as you desire (Fig. 370).
The party being over we will make some
They are pretty and rustic and can be shaped into almost
any style; each bur is provided with little hooked fingers
(Fig. 371) that lock when the two burs are pressed against
each other, enabling them to stick fast together—not so
tight, however, that they cannot be separated when desired.
Be sure the burs are young and fresh; they will then be
free from all dryness and perfectly safe to work with; if too
old they will be difficult to handle and apt to drop the
small, thorny particles. Before commencing the work
spread a newspaper out in front of you, then, placing
your burs on that, take one bur and with several others
form a circular row around it; another row around completes
the bottom of the basket (Fig. 372). Build up the
sides on the top of this last row and form the handle with a
row of burs long enough to reach easily from side to side
Fig. 371.
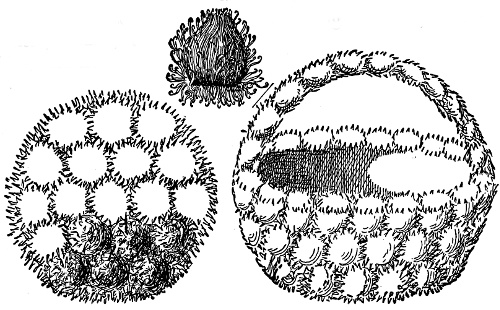
Fig 372. Fig. 373.
181of the basket (Fig. 373). You can experiment
and make all sorts of things—vases, bowls,
plates, chairs, tables,
and houses—of
burs, and the work is very interesting and easy.
Beside contributing to the salad, the dandelion furnishes
You have only to hold its golden head up under your chin
to learn if you are fond of butter. With one hand hold the
flower (Fig. 374), with the other hand a mirror. If you see
a yellow reflection cast upon your chin by the blossom
underneath, you enjoy using plenty of butter on your
bread. Take the grandfather dandelion with his round,
white head (Fig. 375) and blow once, then again and again,
three times in all; the number of downy seeds left on the
head denotes the time of day. For instance, should all be
blown away except three (Fig. 376), it would mean that it
was three o’clock; if two are left it would say two o’clock,
and so on.
182
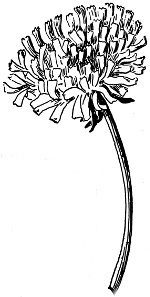
Select another nice
Old Grandfather Dandelion
and he will tell you when you are
fortunate enough to obtain a certain
wish. First make a wish, then say
aloud “yes” and give a single blow;
next say “no” and blow again. Proceed
in this way, repeating the two words alternately,
giving one blow at each, until all the seeds are
detached from the head. If the word “yes” comes
at the last blow your wish will be granted; if “no”
comes last it
Fig. 375. Fig. 377.
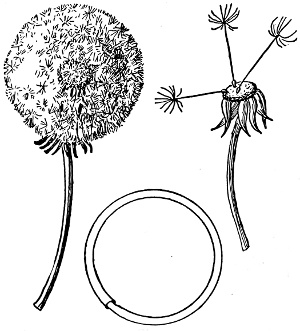
Fig. 376.
will be denied.
With
stems of this
same flower,
which, you
know, are hollow and
much smaller at the
top than at the bottom,
you can make pretty
green rings by pushing
the smaller into the
larger end of the stem
(Fig. 377). To make a
chain, join a number of
rings together by first
passing one end of the second
stem through the first
ring before the two ends of the second stem are fastened
together, doing likewise with the third, fourth, and fifth
stems (Fig. 378).
183
To make an odd little ornament, split the
dandelion stem about two inches down lengthwise
through the centre (Fig. 379) and draw
one side strip through your lips several times—it
is perfectly harmless—until it curls

Fig. 379.
up (Fig. 380). Treat the other side in the
same way and it will also curl (Fig. 381).
gives us some of the most fragile flowers
of which we have knowledge; they
are so delicate and fine of texture not
many artists are able to render perfectly
the peculiar charm of the blossom.
Fig. 381.
Beautiful in their varied colors,
they blossom until killed by frost, and
growing as they do almost anywhere,
even along the dusty roadside, their cheerful
faces sing out a bright “Good-morning”
if one is there in time to find them
open. Usually they begin to close early in
the day, and when they close they change
into twisted elongated affairs which are
184eagerly sought by children bent on having a little sport.
If you will gather a few of these floral cornucopiæ you can
make them pop so loud they will rival the torpedo. Hold
tight the opening end of the closed blossom with the
thumb and forefinger of the right hand and fill it with air
by gently blowing in the wee stem end; grasp this securely
with the left hand; then suddenly push the two ends together,
and snap! will go the flower.
185
CHAPTER XVI
BASKET-WEAVING
In and out, in and out; under and
over, under and over; around and
around, again and yet again; widening
and narrowing, and, lo! a basket
is woven. A child of eight can learn
it, a woman will find the work a
charming pastime; so this is written
for girls of all ages.
Dye your reeds, put all the bright
colors you like into your baskets, and
see if they are not much prettier and
more substantial than the so-called
“Indian work.” Red, blue, green,
yellow, black, purple—a butterfly’s
wing need not be gayer nor an old-time work-basket more
useful. Large, small, medium-sized, deep or shallow—only
one’s desire need determine the question.
A variety of materials are adapted to basket-weaving, but
the most substantial baskets are made of reeds. When the
principle is mastered you may use anything you choose
which will lend itself to the work.
The basket-reeds can be purchased from any reed and
rattan manufacturer, and come in various sizes. Nos. 2, 3,
186and 4 are the ones to use, and as No. 4 is quite heavy you
will need that only for large baskets, such as waste-paper
baskets, flower-pot cases, etc., and even for such purposes
No. 3 will answer. No. 2 is the finest, and of that you will
use the most. The prices range from twenty-three cents to
thirty-five cents a pound, No. 2 being the most expensive.
Beside the reeds you will need a twist of raffia; this is a
soft material used by the florist for tying up plants, and
may be obtained from him at little cost, probably eighteen
or twenty cents a hank.
The reeds come in bunches of five pounds each; separate
these, and taking each reed wrap it loosely around your
hand to form a coil, twisting the ends in and out to hold them
in place. This puts your material into a convenient form,
and you need unwrap the reeds only as you have use for
them, one at a time. Have ready a pan or pail full of water,
for the reeds must be soaked awhile before they are used
to make them more pliable and to keep them from breaking.
Try a small basket at first—let us say a rather flat, shallow
one—and for this one coil of No. 3 and several of No.
2 reeds will be enough. When they have soaked for about
five minutes take out the No. 3 reed, unwrap it, and cut six
pieces twelve inches long and one piece eight inches long;
then untwist your raffia and cut off one strip.
The reeds you have just cut are for the ribs of your
basket. Lay the short rib to one side within easy reach,
then take three of the ribs in your left hand and cross them
with the other three, as in Fig. 382. Be sure the reeds lie
187flat and side by side; do not bunch them. Hold the ribs
where they are crossed between the thumb and first finger
Fig. 382.
of your left hand, the vertical ones
on top, as shown in Fig. 382, and
with your right hand place one end
of the raffia on top of the reeds,
under your left thumb, leaving the
free end to fall to the left, as in Fig.
382. Hold the ribs securely now,
and bring the raffia up under those
on the left-hand side close to the
crossing, then over the upper ribs
(Fig. 383), under the right-hand ribs
and over the lower ones, going
Fig. 383.
around twice and catching down the
end of the raffia in the process; then
trim off the remaining short end of
the raffia. Do not loosen your hold
with your left hand, but with your
right separate the ribs as well as
you can and begin to weave the
raffia, starting at the left-hand rib of
the upper group, as shown by letter
A, Fig. 384. Bring the raffia over
Fig. 384.
this rib and draw it down close to
the centre, then under the next, over
the third, under the fourth, and so
on until you have been once around,
when you will find another rib necessary
to make the weave come out
properly. Here is the place for the
short rib; place one end of this rib
across the centre of the others, as
188shown by letter B, Fig. 385, and hold in place with your
left thumb. Bring the raffia over the new rib, and continue
Fig. 385.
weaving as in the first round; when
you reach the short end of the rib
bind it down with the raffia as you
carry it over one of the other ribs, as
shown by letter C, Fig. 386. Weave
steadily with the raffia now, and keep
your mind on separating the ribs until
they are of an equal distance apart;
also remember to draw the raffia down
firmly each time you pass it in and
out between the ribs, first on one
side, then on the other. Of all parts
it is most essential that the centre
Fig. 386.
of the basket should be firmly and
strongly woven. Be careful not to
weave under or over two ribs at one
time. Under one, over the next, is
the rule; and when you find, as you
will occasionally, that something is
wrong, and alternate weaving has
become impossible, look back over
your work and you will discover
that you have somewhere crossed
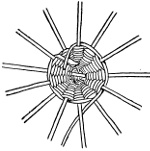
Fig. 387.
two ribs at once. In such a case
pull out the work and correct the
mistake.
Weave the raffia until the centre
is about two inches in diameter, or
until you have used up the raffia,
then take from the water a coil of the No. 2 reeds, unwind
it, and placing one end across the end of the raffia, hold it
189with the thumb of your left hand, and proceed to weave
with the reed just as you did with the raffia (Fig. 387). In
all cases the joining must
be done on the inside of
the basket.
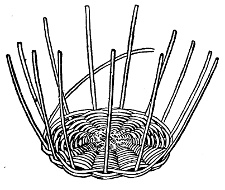
Begin to shape the sides
By bending the ribs upward
Fig. 388.
as closely as possible, and
when you have a disk about
four inches in diameter begin
to shape the sides by
bending the ribs upward
toward you (Fig. 388) and
drawing your reed tighter.
If this slips up in the process,
push it back in place
and hold it down by passing the fingers of your left hand
between the ribs from the inside. Indeed, this is a good
way to hold your basket as soon as the ribs are sufficiently
separated. Your left hand follows your right always in
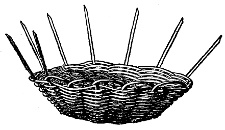
Fig. 389.
basket-weaving, holding
in place what the right
hand commits to its care.
When the First Reed is Used Up
take another, cross the
ends, and continue as you
did when beginning with
the first reed. As your weaving progresses do not forget
to keep the distances between all of the ribs equal, and
try to avoid the tendency they have to curve spirally.
When your basket has slanting sides you will find it will
190almost shape itself after you have given the ribs a sharp
bend at the first and started them in the right direction.
By bending the ribs too much you will make straight sides
to the basket or have them slant in instead of out. Two
inches is a good depth for a small basket, and when you
have woven that much, cut off the ribs, allowing them to
extend about two inches beyond the edge, as in Fig. 389,
and trim the ends slantingly, as shown in the same diagram.
Bend the end of one rib down, and push it into the basket
on the farthest side of the next rib (Fig. 389). Do this with
the second rib, and so continue around until the edge is
“bound off.” When the ends of the ribs do not slide in
easily, pry open the space with a pair of closed scissors,
turning them slightly.
All the baskets shown in
are woven in exactly this manner from start to finish; the
shaping is done by bending the ribs this way or that, and by

Fig. 390
tightening the weave when
narrowing and loosening
it when widening. There
is a difference, of course,
in the length of the ribs,
the larger baskets requiring
longer ribs and more of
them, but there must always
be an even number to start with, the odd rib being
added after the first round of raffia-weaving.
It is difficult to handle more than ten ribs at the start, but
where the basket is large or a close weave is desirable you
may double the number when the disk for the bottom is
almost complete. To do this, cut a number of the ribs one-half
191the length of the ones you have started with, and after
trimming the ends as in Fig. 389, insert one at the right of
each of the original ribs, as shown in Fig. 390, pushing each
well down toward the centre. This will give you an even
number once more, so a third rib must be added to one of
the groups, and should be inserted at the left, the original
rib being between the two new ones (Fig. 390). Separate
these ribs as you weave until all are of an equal distance
apart, and continue the shaping of the basket.
are pretty and useful additions to some baskets; they are
woven in the same manner and are shaped according to
fancy. The saucer shape is the most common style and
requires no sudden bend in the ribs, but rather tight weaving
and an indulgence of the natural inclination to curve
from the centre.
It is only in adding the rings for the
that you need make any change in the weave, and that is
but a slight one. When your cover is almost large enough,
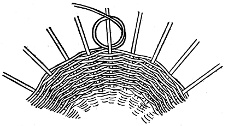
Fig. 391
bring your reed up to form
a small ring on the outside,
crossing one of the ribs, as
shown in Fig. 391; push the
end of the reed through the
ring several times, making
a twist as in Fig. 391, and
continue weaving as before.
This ring should be about one-fourth of an inch from the
edge of the cover. The corresponding ring in the basket is
made in the same manner, and should be placed one-half
192inch from the edge; it must be a trifle smaller than the one
on the cover, that it may be slipped through, and so form a
fastening.
by threading a strip of raffia through the basket near the
edge, and tying it on the inside, then through the lid,
making a stitch across the reeds, back to the under side of
the cover, bringing it around the loop of raffia to form a
twist, and finally into the
Fig. 392
basket, and once more tie
on the inside (Fig. 392).
You may revel in
if you like, in the pretty
work of basket-making.
The soft broken colors,
brightened at times by
touches of more brilliant tones, are really beautiful, while
even those which, alone, seem crude and glaring, by some
happy accident of combination often produce charming
effects. A fine line of black is sometimes effective and
looks well next to the whitest of the natural-colored reeds.
It is
that bands of color should be so placed as to give the idea
of additional strength to the object decorated—that is, on
the most exposed parts, such as the fullest swell of a curve
and the base and edge. You will find that this rule is observed
in most decorated pottery, and it is a good one to
follow in basket-weaving; the nearer one comes to embodying
it in the work, the more satisfactory are the results.
193Another style of decoration is to start with a dark color
at the base of the basket and gradually work in the different
shades up to the lightest color at the edge. One color
need not be used in this, such as red running up to pink, but
gradual blending of one color into another.
194
CHAPTER XVII
AN “ABE” LINCOLN LOG-CABIN
A bright, gray-eyed little Kentucky
boy, of whom all have heard and
whose memory is honored by the
entire nation, lived years ago in a
quaint log-cabin so small that it
would now seem to be about the
right size for a large play-house.
There was but one room, and that
contained only a few pieces of
rough home-made furniture. The
boy, with his musical laugh, was busy and healthy, making
the best of everything and sleeping soundly on the dried
leaves piled in one corner of the loft over the room. There
were no stairs for the little fellow to ascend, so he climbed
to his primitive couch by means of wooden pegs driven in
the side of the wall. He never complained of any hardship,
but always tried to better things; and after he grew up to
manhood he tried to better his country, and succeeded.
Imagine this brave boy dressed in the every-day costume
of the place and times, wearing a 'coon-skin cap which
partially covered his thick dark hair, a homespun shirt,
trousers of roughly tanned deerskin, and on his feet, not
shoes, but home-made moccasins. Thus attired, he daily
trudged by the side of his sister Nancy, walking several
195miles to a school-house, which was also built of logs, so
arranged that they stuck out and formed little recesses in
which the children played hide-and-seek. There were no
windows in the building; the day crept through the open
space where a log had been removed to admit light to
enable the girls and boys to see to study. The school floor
was the bare brown earth, not even boards; yet from such
modest surroundings came one of the greatest of Americans.
Could you have been at the World’s Fair in 1893 you might
have seen a log-cabin which was the home of this boy after
the family had moved to Illinois. The house was on exhibition
at the Fair, having been purchased for the purpose
by a special association.
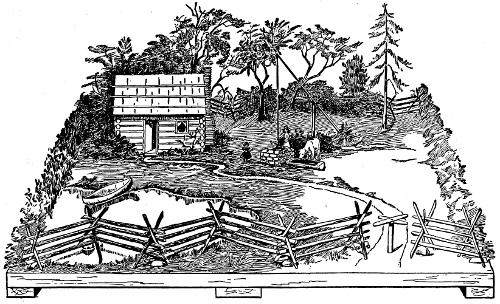
An “Abe” Lincoln Log-cabin.
Probably not many Northern girls have ever seen a
genuine log-cabin, though some may have spent part of
their Summer vacation in recently built log-houses in the
196mountains, but these buildings are usually too luxurious
and spacious to bear any resemblance to the pioneer structure
of logs. The rare human life which has passed through
some of these old log-cabins and left its influence upon
the world, will cause the cabins to be remembered long
after the more pretentious mansions have been forgotten.
It is noble lives which are of real worth, not inanimate
things.
Naturally you would be glad to see the funny little
Kentucky log-cabin where Nancy’s brother first lived, but
long ago the cabin was torn down; however, the logs were
saved, and in 1895 the old house was rebuilt on the original
site. The surest way of seeing a log-cabin like the one in
which our little friend and his sister lived is for you to
erect such a house. Then you will know exactly what little
“Abe’s” home was like—for you must have guessed before
this that Nancy’s brother was the martyred President,
Abraham Lincoln.
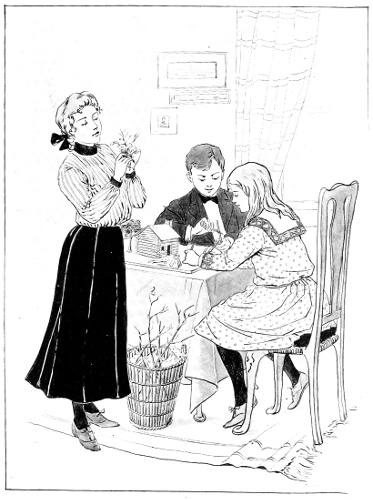
Making an “Abe” Lincoln Log-cabin.
Of course, you cannot build a log-cabin large enough for
grown people to live in. Yours will be
A Miniature “Abe” Lincoln Cabin,
and the longest and heaviest logs should be about as large
around as a lead-pencil and measure not more than eight

Fig. 393.
inches in length,
the short side logs
being five and a
quarter inches in length. Notch each log at both ends and on
both sides (Fig. 393), except the four foundation logs, which

Fig. 394.
require notches
at each end, but
only on the upper
197side (Fig. 394). When erecting the house fit the cross logs
together at the notches (Fig. 395), in order to make the walls
Fig. 395.
firm and to avoid wide spaces
between the logs. Let the
elevation or height of the
house be four inches (Fig.
396). In building the roof use
end logs graduated in length (Fig. 397). These gabled ends
should raise the house two inches through the centre. Before
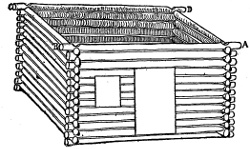
Fig. 396.
adding the roof,
slide in two extra
side logs, each half
an inch or so longer
than the side logs
proper; place one at
each end of the top
of the house along
the inside of the last
logs on top of the
side walls (Fig. 398,
F E). The longer logs are used to extend the roof back
and front beyond the building, causing it to project as do
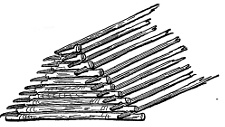
Fig. 397.
the roofs on real houses.
To produce a like result
on the sides, have the
front and back logs of
the roof longer than
those built in the front
and back of the house,
the difference being the
same increase in measurement
as in the sides of the roof (Fig. 396, A B and C D).
Cut a piece of paper two and one-quarter inches long
198and one and one-quarter inches wide to indicate the door;
fasten it by the four corners to the centre of the front of the
house immediately above the foundation log. Cut another
piece of paper the size of the window—one inch long and
three-quarters of an inch wide—and
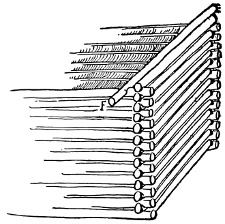
Fig. 398.
paste it also on the front of
the house midway between the
door and the end of the house,
allowing it to come a little lower
than the top of the door (Fig.
396). With paint-brush and white
paint mark the logs along the
edge of the paper door and window;
then carefully take down
the house, placing the logs in
eight different piles: the front of the roof in one place, back
of roof in another, first end of roof in the third pile, and
second end in the fourth. Tie each group of logs separately
and label. Proceed in like manner with the four sides of
the house proper, first removing the pieces of paper. Cut
the logs marked with the white paint on the inside of the
lines to make openings for the door and window, then rub
off the remaining paint from the logs.
Now your material is
and you must find some land upon which to erect the house.
Fortunately log-cabins need no cellars, so digging will be
unnecessary, and the ground need not be deep. A piece of
bookbinder’s stiff pasteboard or a light-weight wooden
board seventeen by twenty-three inches or thereabouts will
prove the best kind of a ground plot and, after space is reserved
for the house, will allow for a large yard. Mark the
199location for the house a little to one side of the centre and
near the back of the lot, as shown in illustration of An
“Abe” Lincoln Log-cabin.
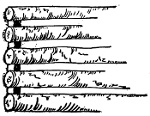
Have ready some strong glue and begin the building of
the cabin. Glue down the four foundation logs to the
board, being cautious to lay them straight and even;
then proceed as when first erecting the
building, only this time glue each log
to the lower ones at the notched ends,
using putty in place of mortar between
the lengths of the logs. Now, do not
say you have no putty. If you cannot
get it, use plaster-of-paris; if you have
no plaster-of-paris, use clay; and if there is no clay use mud.
The ends of the logs bordering the window and doorway
must be held level and kept from falling together by
chips glued in between them (Fig. 399).
Be sure to have the four sides of the building plumb.
Do not let the walls lean one way or another. This item
must be borne in mind constantly while building.
with the exception of the roof, measure the two sides of the
door and window and cut a thin, flat piece of wood—an old
Fig. 400.
cigar-box will do—in the
desired width and length
for jambs. Glue the pieces
in place. Fig. 400 shows
the first jamb on one side
of the doorway. When all
the jambs are fastened on
measure the space of the
doorway and cut a door of the thin wood according to the
200measurements. Be sure it fits, and see that it moves easily
back and forth. The door cannot have a knob, because
during those early times there were no door-knobs in this
country—people used door-latches, mostly of wood, with
a string hanging down on the outside for friends to pull
and thereby lift the inside latch, causing the door to open.
Fig. 401.
Fig. 402.
If the household did not wish
visitors the string was pulled
inside the room; then no one
outside could open the door, as
there would not be anything to
catch hold of. This explains the
old saying, “The latch-string
hangs on the outside of the
door.” Bore a hole through the
little cabin door with the red-hot
end of a hair-pin, for the latch-string; move the hair-pin
around and around in order to burn the hole large enough
to admit the threading through of a string. Dampen one
end of a short string, twist it to a point and pass it through
the hole to the other side, turn the door over and make a
knot in the end of the string large enough to prevent it
Fig. 403.
coming through when the string is pulled
from the outside. Fig. 401 shows the inside
knot and Fig. 402 the outside string.
by means of a cloth hinge; glue a half
inch wide strip of muslin lengthwise
along one edge of the inside of the door
(Fig. 403), leaving the other half of the
muslin to be glued on the inside of the
doorjamb that the door sill may be on the
201outside (Fig. 404). After the door has been satisfactorily
secured in its proper place build on the roof. As a substitute
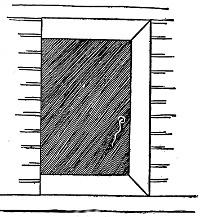
Fig. 404.
for clapboards or shingles glue
birch-bark over the rafters to serve
as a covering, first bending the bark
through the centre to fit the roof, as
a sheet of writing-paper is folded.
When the roof is on, fasten over it
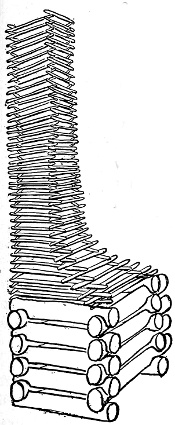
Fig. 405.
lengthwise slender
poles at wide intervals,
that the roof may resemble
the original clapboard
style. In real
houses these poles
were laid across to hold the rough clapboards
in position and have them “break joints,”
which means that the clapboards, which resemble
very long, large shingles, are placed
in rows in such a way that the centres of the
solid bottom edges of those in the upper rows
overlap and cross the spaces between
the clapboards in the lower rows,
just as ordinary shingles are put on
houses to-day.
must be at one end and on the outside
of the house. Begin at the ground,
and in log-cabin fashion build the
lower part up about an inch and a
half of logs. This portion in a real
log-cabin opens on the inside of the room and constitutes
partpart of the framework of the fireplace, but in this tiny house
202it will not be necessary to carry out the interior in detail.
Having securely glued the lower part of the chimney and
plastered it between the logs, get some burnt matches or
split a number of sticks into very slender lengths for the remainder
of the chimney. These are not to be notched. Use
them to graduate the chimney up
a short distance until the opening
is small enough for the chimney
proper. Make the
rest uniform in
size and
extend it up an inch and a quarter higher than the top of
the house (Fig. 405). If the chimney was a real one it
would have to be plastered thick inside with mud, and
between the logs and sticks, but as it will not be used for
fire or smoke, glue will answer at the corners and putty or
some other substitute for the cracks, as in the illustration of
A Fac-simile Miniature “Abe” Lincoln Log-cabin.
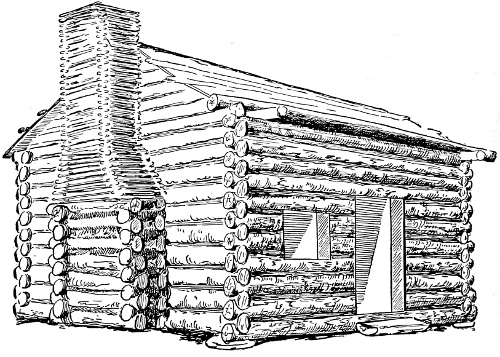
A Fac-simile Miniature “Abe” Lincoln Log-cabin.
The different materials needed for the cabin and
grounds can be readily obtained. Almost any kind of fairly
203smooth twigs will make line logs, but try to have them uniform
in size.
You Can Find Plenty of Moss
for foliage in the woods or swamps, on old stumps of trees
and weather-beaten fences, and a few varieties are to be had
in the open fields; that growing in pine woods or rocky
places is generally satisfactory. Gather the moss wherever
you can find it and obtain as many varieties as possible.
Look also for the beautiful lichens, varying in color and
form; detach them carefully and bring the curious little
plants home in a box separate from the moss. The dainty
lichens do not need preparation for use, but the moss does.
Place it top down on paper near the fire and dry quickly
without scorching. After it is dry shake off all impurities,
such as dead leaves, grass, sand, and rotten wood. Moss
that grows in swamps should be carefully washed soon
after being obtained, as the roots are difficult to clean when
they become dry. As soon as the moss has been thoroughly
dried, put it away in a dark place until you are
ready to use it.
To obtain
The Bark for Roof and Canoe,
hunt up a birch-tree—one that has been dead a short time
is best—and with a sharp knife peel off the pieces needed.
The bark should be of a rich dark reddish-brown on the inside.
Cut it with an old pair of scissors into the desired
shape and size; then place the pieces between two smooth
boards to dry. Put weights or stones of convenient size
upon the upper board, and very soon the bark will be flattened
out and ready for use.
204The trees are small, branching twigs. Search for those
which resemble most closely little trees. Examine carefully
the structure of real trees, stand under the branches and
gaze up into the foliage; in most varieties, you can see
exactly how the tree grows. Try to remember its appearance;
where and how the limbs stand out and the manner
in which they branch off; then select your twigs accordingly.
Little “Abe” was obliged to take a long walk to the
spring for drinking water, but since the size of our lot does
not permit placing a spring at sufficient distance from the
cabin to copy exactly the environment of the Lincoln homestead,
we will introduce
A Pretty Little Lake or Pond
and an old-fashioned country well-sweep as water supplies.
Hunt up a piece of broken looking-glass. This will make

Fig. 406.
an excellent substitute for a miniature
lake of real water, reflecting the beautiful
green shore, the overhanging
trees,
and the graceful
little craft which
we will moor to
its shore. If the
mirror is the
requisite size, its
shape does not
matter. Place the glass
near the front of the
board at the left-hand
side. Move it further back, then forward, a little
to this side and that, until you find the precise spot best
205suited for the lake. Experimenting in this way, you will
gain unconsciously a slight insight into the art of landscape
gardening, and when you have an opportunity you will find
yourself studying the arrangement and beauty of grounds
laid out by professional landscape gardeners. You will
notice in what direction the water lies from the house, the
arrangement of the trees, if they are many or few, in groups
or scattered, the surface of the land, and various other
details that appeal to the close observer.
Having located the place for the lake, lay the broken
mirror on it and glue a strip of paper, half of it to the edge
of the glass and half to the board. Fig. 406 shows the
method, the dotted line giving the extreme edge of the glass
under the paper. Cover the paper with a light coat of glue
and sprinkle clean, fine, dry sand over it while the glue is
wet that the sand may stick fast and conceal the paper.
With a lead-pencil draw two parallel lines as a boundary for
from the house to the front edge of the board and, recollecting
the old saying, “A curved line for beauty, a straight
line for duty,” make the path curve in some such way as
seen in Fig. 407. Extend the walk almost diagonally across
to the right hand of the board. If the first lines do not
give a satisfactory path, try again and again until you have
the walk to suit; then, if possible, obtain sand of a yellowish
color and with the aid of glue make a sandy walk.
206
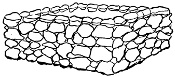
The best place for
is toward the right hand of the land beyond the house, between
it and the front edge of the board. Decide upon the
exact location and over this draw
a square measuring one and three-quarters
inches each way as a
guide in building the wall. You
will need some small stones for
the well, but real stones are not
necessary and you may use instead irregular broken
pieces of cork. These can be made to resemble

Fig. 410.
hard stones by being first coated all over with
glue, then covered with sand of a dark reddish
hue.
Build the square according to and immediately
outside the lines in order to keep the
inside space of the well large enough to allow
the free lowering of the bucket. Make the
walls even and straight, gluing the foundation
stones securely to the ground. When the first
layer of stones is in place fit in others for a
second row on top of the first, breaking joints;
cement the two rows together with putty. Keep on building
until the walls are an inch and a
half high, reserving the flattest
stones for the top (Fig. 408).
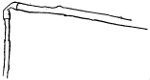
Cut a forked stick five inches
long and push the end in a button-mould
(Fig. 409); glue the button-mould down tight to
the board at the right-hand side six inches from the well;
then make a straight, slender pole five inches long from a
207twig, and a well-sweep from a heavier twig. The well-sweep
should be fourteen inches long and much heavier at
one end than at the other. On the light end of the sweep
attach the slender pole, which has previously had a hole
burned through the lower end with the red-hot end of a hairpin.
Glue a small strip of brown muslin from one stick to
the other, not allowing the ends of the stick to meet (Fig.
410). Wrap and glue the sides of the cloth around the two
poles, forming in this way a hinge, which will allow the slender
pole to hang straight down from the sweep (Fig. 411).
Tie an

Fig. 412.
(Fig. 412) on the end of the pole, pass a string under the
handle of the bucket and through the hole in the poles
then fasten securely. Pierce one of the forked
ends of the stick (Fig. 409), with a pin, measure
seven and a half inches from the smaller, light
end of the sweep, and insert the pole sweep at
this point between the forked ends shown in
Fig. 413. Push the pin entirely through the
sweep and the second fork of the support, where it will act
as a hinge. Try moving the sweep up and down to see if
it works all right.
Should the bucket drop into the well and remain there
when your hand is removed from the pole, it shows that the
heavy end of the sweep is too light. Remedy this by
increasing the weight. Tack and glue a small box on the
end (Fig. 414), resting the pole exactly on the centre of the
inside bottom of the box. Fill the box with small stones
until the weight is sufficient to keep that end on the ground,
glue the stones in tight (Fig. 413). Now try the sweep
again; pull the pendant pole down, bringing the bucket into
208the well just as the real ones are worked. You can pretend
that the well is very deep, containing the clearest and
coldest of drinking water, and that the acorn
bucket is in reality the original “Old Oaken
Bucket.” That famous bucket actually hung
from just such a sweep as you have made,
only, of course, a very much larger and
stronger one.
Let some of
be nearly as tall again
as the cabin; others
may be smaller.
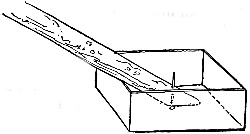
Fig. 414.
Select your
twigs and
push the
end of each into a
large-sized button-mould. If the hole in the mould is too
small, enlarge it. Have a few very small twigs for shrubs;
stand the trees and shrubs around the
grounds as you think they will look best.
Try placing them in
different parts of the
grounds—perhaps a
large tree partially back of the house
would look well. When all are satisfactorily
arranged mark the different
spots, then take each tree and bush
209separately and cause the bare branches to burst forth into
beautiful green foliage. To do this, bring out your box of
moss and carefully select the variety which most
nearly resembles foliage. Use different kinds of
moss for different trees, if you have a variety.
Pick the dainty moss apart fibre by fibre and
glue the pieces one at a time on the branches,
making the foliage thicker in some places than
in others; place the lightest-colored moss on the
outside limbs of the trees, leaving the darker for the
inner branches. Fig. 415 shows a bare tree and
Fig. 416 the same in full leaf. When the trees and
shrubs are ready glue them by their button-mould stands
to the board.
Next the
or the sod planted that the ground may be clothed in
emerald green. Select a quantity of fine short moss and
glue it down all over the entire bare land; then step back
210a short distance and view the work. You will be
surprisedsurprised at the realistic effect produced. Bring
the grass well down, but unevenly, around the
shores of the lake and scatter stones of various
size here and there near its edge. Take a few
pieces of the vine-like moss and trail it up the
side of the cabin, running the vine high under the
eaves.
must be one of the picturesque zigzag rail enclosures sometimes
called “Old Virginia” fences and again “snake” fences.

Fig. 417.
They are peculiar
to America and are
made of split logs.
When Lincoln was a boy he excelled in splitting rails and
made more and cut them faster than any of the other boys.
211The rails you require, however, are so small that a girl as
well as a boy can easily make them. Cut the logs four and
one-half inches long and split each one lengthwise (Fig.
417). Make enough rails to lay a fence around three sides
of the grounds. The back edge of the land can be hedged
in with bushes and trees. Build the fence by first placing
stones—one or more, according to the size—in two rows,
those in each being about four inches apart. The circles in
Fig. 418 give the position of the stones, and the dotted line
that of the rails. Begin the fence by laying the first rail on
two of the stones, the next rail across to the third stone,
and so on. Make the fence several rails high; then cross
two upright rails at each corner and build on the top rails
(Fig. 419). Glue the stones to the ground and the rails one
on top of the other as you build.

Leave an open space at the path for a gateway, but instead
of an ordinary gate you can make
which will twist around just like a real one. Choose a
thick short log and shave it off level on the top; then take
two thin flat sticks about two and one-half inches long;
round off the corners and, crossing them at the centres, glue
the two together (Fig. 420). When dry work a pin through
Fig. 420.
Fig. 421.
both at the centre and push
the pin down, not too tight, in
the top of the log (Fig. 421).
Enlarge the hole in a good-sized
button-mould and fasten
in the turnstile. Scrape away
enough sand at the centre of
the gateway to allow the button-mould to be glued to the
bare board; then brush a little glue over the mould and
around its edges and sprinkle with sand.
The bright-colored lichens come in well as flowers to
give the
Little tufts can be glued at the base of the cabin and chimney.
The variety with the coral-red tops might be planted
here and there along the edge of the walk, and other kinds
could be fastened sparingly on a few rocks at the base of
the well-sweep and wherever they would add to the beauty
and effect of the whole. But be careful about using too
many simply because you happen to have them. Study the
effect of the entire scene and do not overcrowd it.
Cut the boat from the pattern (Fig. 422); sew up the
two ends and, if necessary, bend out the sides until the
213canoe is of the desired shape (Fig. 423). Moor the craft
to the edge of the shore with the aid of a little glue.
Fig. 422.
Or you might put
the canoe out on
the water; glue it in
place and seat two
little jointed dolls in
the boat, one dressed
as a girl and the
other as a boy. The
boy should have
glued to his hands a
little wooden paddle
whittled from a piece of thin, flat wood.
When people lived in log-cabins they burned wood in the
great fireplaces and always kept a generous
near at hand. A
tiny one at the side
toward the back of
the grounds will,
therefore, be in
keeping with the cabin. Burn two holes through each end
of a short flat piece of wood and stick a slender pole in each
hole, fasten them in tight with glue, then burn two holes in
another piece of wood for two similar poles. Place the two
pairs of stakes about three inches apart, and cut your wood
and pile it up evenly between them. The stakes are to hold
the wood in place (Fig. 424).
can be made of four flat pieces of wood and one round
piece. Shut your eyes, think hard, and you will remember
214how a real sawbuck looks; how the cross-piece is nearer the
top than the bottom and how each side-piece forms an awkward-looking
X, the cross of the letter being above the
centre. You can make it without diagrams. Look at the
sawbuck near the wood-pile in Fig. 424 and try.
Find a tiny doll, dress it like a child and glue it in an upright
position on the walk. Have another doll (neither of
these should be jointed) dressed in a way to represent the
little one’s mother, standing by the well drawing water, and
your charming old-fashioned log-cabin home will be finished.
See illustration of An “Abe” Lincoln Log-cabin.
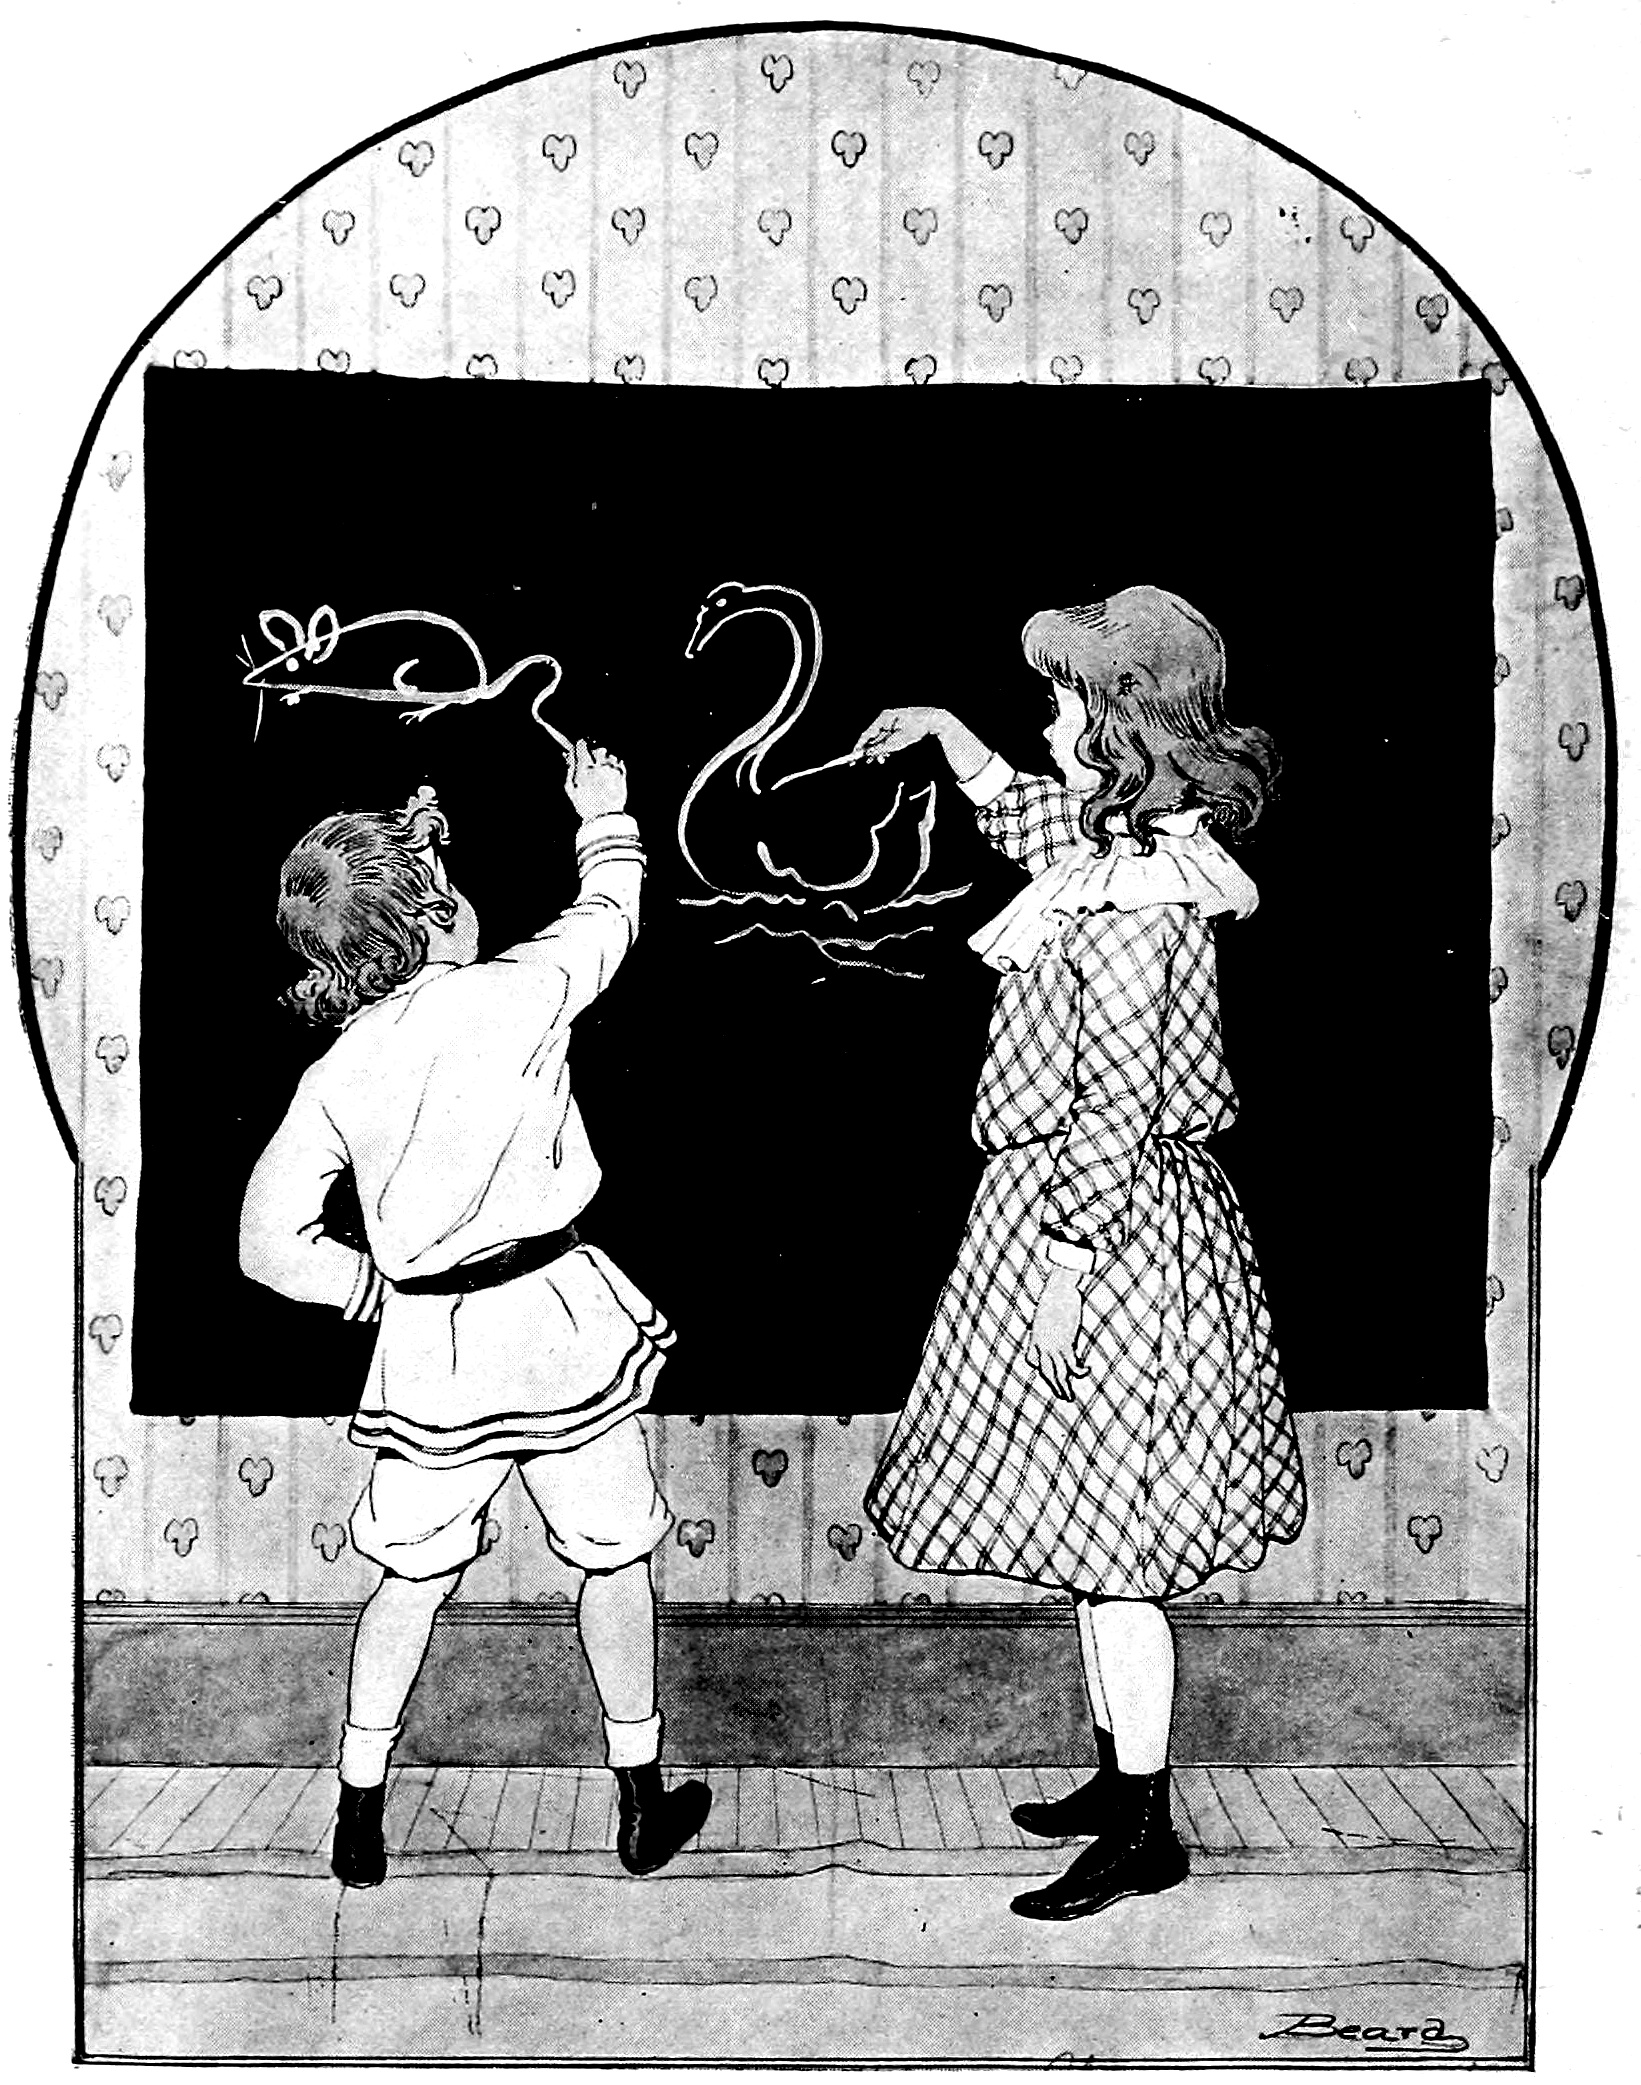
You might be drawing the simple designs.
215
CHAPTER XVIII
QUEER THINGS ON PAPER AND BLACKBOARD
AND HOW TO PUT THEM THERE
Look at a piece of blank paper or, better still,
stand before an unmarked blackboard
and try to imagine pictured on its surface
whatever you would like to see
there. It might be a comical little
turtle, a rose, or perhaps a graceful
swan. If you knew exactly the true
shape and proportion of the objects you
could draw them, but as soon as you
attempt the sketch you realize that you
cannot remember just how these creatures are formed,
and consequently you are unable to depict them. Do not
be discouraged, for there is a way in which you may do the
work easily and that is by reducing the realistic drawing
to a few leading lines, and the girls who are able to sketch
even a small number of simple objects in this way have
resources within themselves both for diversion and development,
worth much more than they are apt to understand.
If you would like to put on paper or board
as it stands with its ears bent forward and nose in air, draw
a horizontal line (Fig. 425). On the right-hand end of this
extend down a short vertical line (Fig. 426); on the left
216draw another vertical line parallel to but longer than the
first (Fig. 427). Draw a bottom horizontal line not quite
as long as the top one (Fig. 428); then connect the two loose
ends by a slanting line (Fig. 429). Make the letter V inverted
and slightly tipped for the ear (Fig. 430); put a dash in
front of the ear parallel with the top line for the eye, and a
little loop at the back for a tail (Fig. 431). Add two short
straight lines to serve as legs on the far side of the pig,
making them touch but not pass the bottom line (Fig. 432).
Next put in the other two legs on the near side of the
animal, extending them up a trifle beyond the bottom line
and down a little lower than
those on the far side (Fig. 433).
There! the pig is all attention,
listening to the welcome
sound of the children’s
call and ready to start for his
dinner! Now make the little animal as he appears when
satisfied and trotting off contentedly. Draw the body as
217for the first pig, but turn it upside down (Fig. 434), then add
the eye, ear, tail, and legs. Slant the eye with the head line
and point the ear downward toward the left (Fig. 435). In
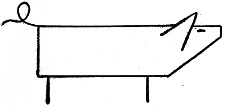
Fig. 432.
these lines forming the two
animals you have produced
expressions; in the first,
expectation; in the second,
contentment, and you have
also suggested character,
by giving the principal distinctive
lines of the pig.
When you see a picture of a pig, or the live creature, try
to find the lines which you have drawn. To do this, first
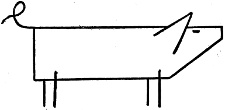
Fig. 433.
get an idea of the general line
forming the back, omitting all
the little ups and downs and
curves—in other words, all
detail. Then proceed in the
same way with lines forming
the rest of the animal. Do
not allow yourself to be confused by the amount of detail;
keep to the principal parts and you will gain some idea of
the form of the object.
In the same way look at the governing lines of
and you will discover that if a triangle be drawn with the
straight line, or base, uppermost and the point down at the
218bottom, it will give the characteristic outline of the hen by
adding simple outlines of head, tail, and feet. But the
leading lines are not necessarily straight and angular;
they are often entirely of curves—the kind of curves boys
and girls delight to cut in the ice while skating, and which
Old Ocean marks upon the sand in summer, using brushes
Fig. 436.
Fig. 437.
made of waves.
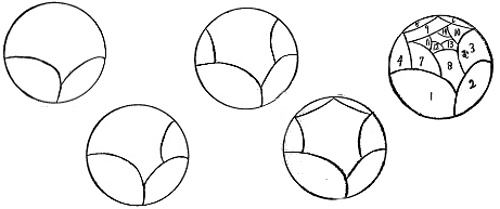
Fig. 438. Fig. 439. Fig. 440. Fig. 441. Fig. 442.
Did you ever notice how many beautiful curves exist in
The Queen of Flowers, the Rose,
the national flower of England? Examine the blossom and
endeavor to take in its beauty. A question often asked in
one of the games of children
is this: “Which would you
rather have, a gold rose or
a gold lily?” and the bewildered
young prisoner
scarce can choose, so impressed
is she with the desirability
of possessing, if only in imagination,
both rose and lily, little dreaming
that once a year a rose of the purest
gold is actually made and given by the
Pope to an Empress, Queen or royal princess
belonging to the Roman Catholic
Church. The rose you can make will
not be of the precious metal,
but of chalk or lead from
a pencil, and you need not
wait to present it to a royal
personage, but may give it
to whom you please. Begin
with a circle (Fig. 436).
219Draw it as perfect as possible, and within its border place
one curved petal (Fig. 437), another (Fig. 438), a third (Fig.
439), a fourth (Fig. 440), and
two more (Fig. 441). Fill
the circle up with petals as
in Fig. 442, then on the outside
of the circle make six
more (Fig. 443); to these
add four on the outer edge
(Fig. 444). Now you may go over all the lines, making
them somewhat irregular, as in Fig. 444. Draw a stem to
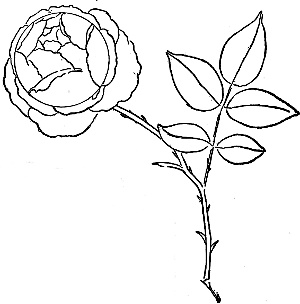
Fig. 444
the rose, add a few
thorns and on the
right-hand side of
the stem attach a
branch of green
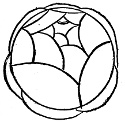
Fig. 443.
leaves according to
the copy. The easiest
way to sketch in
the leaves is to first
draw the mid rib or central line which
reaches from the point
of the topmost leaf to its juncture
with the stem of the rose.
When that line is made draw
two more, branching out on
each side of it. These lines
form the skeleton of the
leaves, and all one has to do
to finish them is to commence at the tip of each line and
draw a curve to its base, first on one side, then on the other,
to form the leaf.
Is not that easy? Should the work be incorrect the first
220time, do it over again and again. Only little animals are
born with a knowledge of all they are required to know;
people must learn everything, even how to walk. Remember
that the women and men who seem so skilled and wise
had to learn by repeated trials, just as you are doing now.
Rub the marks off the blackboard or get a fresh piece of
paper and we will put a face on it—one that, after you have
once drawn it, you can almost
sketch with your eyes shut, so
simple is the work. Possibly
you do not know that the
general outline of
is egg-shaped. Make an egg-shaped
outline, using the large
part for the top like a balloon (Fig. 445).
Draw two curves on the egg for the eyebrows
just above the centre of the face
(Fig. 446); make two smaller curves under
the eyebrows and exactly in the centre
of the face for eyes (Fig. 447); another
curve midway down between the eyes and
the bottom of the chin for the nose (Fig.
448), and a last one below the
nose to form the mouth. See
how supplicating the face
looks! You know how he
feels—the boy wants to go to
the circus (Fig. 449).
Reverse the order of the
lines and the expression will
be entirely different. Turn
221the curves which
form the features
the other way by
bending them
downward instead
of upward
(Fig. 450). The
boy is now thinking
of the lesson
he did not learn.
who ran so fast when the butcher’s
wife went after them can also
be drawn in a simple manner.
Make a curve (Fig. 451) and
draw a straight line from end
to end (Fig. 452); add ears (Fig.
453), eye and whiskers (Fig.
454), a tail (Fig. 455),
and the legs and feet
(Fig. 456). Draw three
mice all alike in a row.
Again, make Fig. 452
to form the body of
Sketch in the gills
(Fig. 457), the eye and
pectoral fin (Fig. 458),
the dorsal fin (Fig.
459), and tail (Fig. 460);
then make the scales
222by first drawing parallel curved slanting lines over the
body of the fish (Fig. 461) and crossing them with others
(Fig. 462). Indicate the
water with a few short
lines (Fig. 462).
are slow creatures, but
they are interesting travelling
about with their
houses on their backs.
Did you ever have one
for a pet? They are
very quiet, not at all
troublesome, and make fine pets for girls. It may be that
you have never seen a geographic turtle. We will draw
one, and that will impress it on your mind. Take the same
Fig. 452 to form its back, mark as in Fig. 463, then give
223the turtle a head, in form something like that of a snake.
Draw the eyes and mouth distinctly and add the feet and
tail (Fig. 464).
Here is something easier to draw than any of the other
objects.
without raising the pencil from the paper. Commence at
the left-hand starting-point and draw a line sidewise, running

Fig. 465.

Fig. 466.
it slightly downward
(Fig. 465). Turn the line up
and cross it over, making a
loop at the right-hand end (Fig. 466). Continue the line to
the other side and turn it up into another loop under the
starting-point (Fig. 467). Keep on crossing
from side to side, looping the line each time
Fig. 467.
Fig. 468.
until you have made Fig. 468;
then draw the line up and
around the loops as in Fig.
469 to form the wing. Next make similar loops, according
to Fig. 470, for the tail. At the last loop draw the line
across under the duck’s
wing, stretching it up
in front (Fig. 471). This

Fig. 469.

Fig. 470.
gives the lower portion
of the head and beak.
Continue the line to make the upper part of the head (Fig.
472). One more trial and you will probably be able to draw
the bird rapidly without once raising the pencil or chalk
from the surface of the paper or blackboard. Let the duck
swim in the water by drawing a few swirling lines around
it as in Fig. 473.
Young people often have an intense enthusiasm at different
224seasons for different sports. At one time it may be
hoop rolling, when every girl must have a hoop, even if it
Fig. 471.
Fig. 472.
be one from a
barrel. Again,
pin-wheels claim
attention, and the
stores are besieged
for bright-hued paper and all
the girls and boys work hard over the pretty whirling
toys, talking of the many colors, sizes, and number of their
Fig. 473.
special designs. Somewhat after
this fashion the grown people in
Holland had at one time a craze, not
for a toy but a flower—the brilliantly
colored tulip—and these older girls
and boys often spent many dollars
for one plant, vying with each other
in their endeavors to obtain rare varieties.
Though often gorgeous in color
is very simple in outline. In one stroke draw Fig. 474,
make a corresponding curve on the other side (Fig. 475),
Fig. 474.
Fig. 475.
forming an oval standing on end; this is one
petal. At the right-hand side, from near the
top of the petal, run a short, slanting curved
line upward and outward (Fig. 476) and connect
the end of this line with the bottom of
the oval by a reverse curve, making the
petal point outward at the top (Fig. 477). Duplicate the
petal on the left-hand side, making three visible petals
(Fig. 478), most of the other three being hidden on the far
225side of the flower. Form the tops
of the back petals by drawing three
Fig. 476.
Fig. 477.
little tent-like points, one on each side
and one back of the central petal (Fig.
479, A, B, C). Add the stem by drawing
two straight lines down from the
bottom of the oval (Fig. 480). A
short distance from the flower add
two long, pointed leaves on the
stem, curving them somewhat after
the manner of the side petals (Fig. 481).
There are other flowers whose outlines may
be drawn in this simple manner. Try the
with its golden centre. First draw a small circle to represent
the centre, and as the texture of its surface is slightly
rough or velvety, differing in this respect from the surface
of the white petals, indicate the difference by covering the
centre with tiny dots. From the edge of the centre sketch
in the petals of the flower by drawing, for the sides of each
one, two long, curved lines which start from the round
dotted centre and end by meeting at the outermost tips.
Make a number of petals extending entirely around the circumference
of the centre. Let them radiate out in all
226directions as the spokes stand out from the hub of a wheel,
being careful to have the petals about the same length, that
the daisy may be circular in form and not uneven.
Always make the designs large in size, drawing the lines
in with free, easy sweeps of the wrist and arm. Never allow
your work to become cramped; move the pencil or chalk
deliberately and think what you are going to do before
starting. Satisfy yourself as to where you are to begin and
where you are going to stop; then do your best.
The duck of fancy loops (Fig. 473) does not portray the
characteristic lines of the bird. Such was not the intention;
it is merely given for the fun of twisting the lines into the
form of a duck, so that you may be able to say, “I can draw
a duck without taking the pencil from the paper. Watch
me!” Then you draw it for the benefit of your friends.
If you can get a blackboard or a piece of blackboard
cloth and tack it over layers of paper on the wall, you might
give
A Little Parlor Entertainment
by drawing the simple designs you have learned, and perhaps
others you can work out for yourself as you stand before
your friends. There is a certain fascination in watching
anyone sketch and seeing lines which appear to be without
meaning develop into familiar objects. Try the idea with
a few friends or the members of your family. As you
sketch the objects tell in an easy, natural manner anything
and everything you know about them. And before you
are aware of the fact you will be giving others a delightful
half-hour, besides enjoying it yourself.
227
CHAPTER XIX
HOME-MADE MUSICAL INSTRUMENTS
Girls, do you know that music lies hidden all
around you, needing only the right touch to
bring it forth? That everything is said to
have its keynote, from a big bridge to a little
wooden bench, and that when the keynote
is struck the object will vibrate perceptibly?
A
does not suggest music in any form, and yet

Fig. 482.
you can draw many and various notes from
it. Cut a strip of writing-paper
like Fig. 482 and whittle two
pieces of wood according to
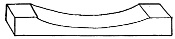
Fig. 483.
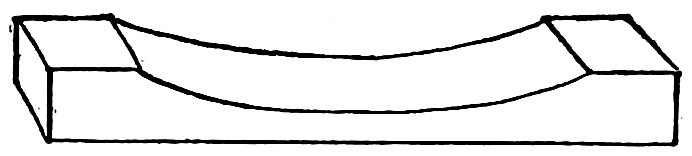
Fig. 484.
Figs. 483 and 484; make the wood a trifle wider than the
paper. Place the paper between the bits of wood (Fig. 485)
and, holding the instrument
tight between your teeth,
blow through it; keep on
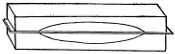
Fig. 485.
blowing until it whistles like
the wind.
228Of course you should have a number of different instruments
in the orchestra you intend to organize, so that each
girl may play on her own special instrument. For the next
one, try
Harps were valued highly in ancient Egypt, and later in
other countries, some of which still retain them. Modern

Fig. 486.
musicians, like Meyerbeer, Gounod,
Berlioz, Liszt, and Wagner, understanding
the worth of the harp, introduced
it in their music. Our instrument may not be as graceful
in form, but you can have more real fun with it than you
could with any of the big, costly affairs. Get some elastic
bands and a deep, empty cigar-box; drive slender nails at
intervals along the front and back edges of the box; then
take ordinary elastic bands (Fig. 486), and stretch them
across the box by slipping each one over two back and two
front nails. The elastics must be of various widths; place
the heaviest at one end of the box and graduate up to the
229lightest at the other (Fig. 487). With a quill (Fig. 488) test
the instrument. You can tighten the elastics by looping them
around and around one or more of the four pins; in this way
the strings may to a great extent be keyed as you wish.
Practise on the musical box with the quill toothpick until
you can make the elastics sing a tune, then put the harp
carefully aside where it will not be broken, and hunt up a
piece of wood for a modern
Have the wood about an inch thick: on the top of it,
lengthwise through the centre, draw a straight line as a
guide. Along the line drive common white pins graduated
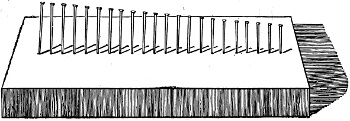
Fig. 489.
in size, placing
the largest at
one end and
the smallest at
the other (Fig.
489). If you can
only get pins of
one size, graduate
their height by sinking some deeper in the wood
than others. To do so without danger of bending the pins,
first make shallow holes with a large strong pin by screwing
it into the wood; a hat-pin will answer the purpose.
Should you happen to have heavy nippers, the pins may be
all of the same height, and you can pinch off their tops,
causing the row to slant down from one end to the other.
All being ready, touch the pins lightly with the quill toothpick,
running the scale first up, then down, the entire length
of the pin row. After a few trials you will be able to play
some simple airs on the pin keys.
Doubtless most of you have seen bells of glass which
230may be rung like those of metal, but probably you have
have never tried bringing
Music From Every-day Glass Finger-bowls
and drinking-glasses. Try it. Collect as many different
kinds of glasses as you can find, the thinner the better.
Place them on a wooden table (Fig. 490) and with a
wooden hammer made by pushing an empty spool on one
end of a lead-pencil (Fig. 491) gently strike first one glass
then another to find the different tones. Having ascertained
these, make the glasses give forth the simplest chimes of
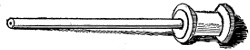
Fig. 491.
the church bells.
But do not stop
here; experiment
until you are able,
with various taps, to bring out more music than you at first
imagined possible. Let the glasses, like Tennyson’s happy
231bells, “ring out the false, ring in the true.” The same poet
in “Locksley Hall” has the speaker ask his comrades to
“sound upon the bugle-horn” when they want him. Few
girls will ever try their powers on a real
but all can readily make a twig sound an alarm. Get a
piece of ordinary willow-tree (Fig. 492). Be sure it is flawless
and perfect; with a sharp knife slice off a slanting piece
at one end (Fig. 493), then cut a notch in top (Fig. 494).

Fig. 494.
Gently tap the bark all over
with one end of a penknife in
order to loosen it from the

Fig. 496.
wood. After carefully removing
the bark without breaking it,
cut the wood according to the
dotted lines in Fig. 495, which will give Fig. 496. The
wood is now ready to slip back into the bark, but before
doing so place a pea in the hollow part (Fig. 495); then
slide the bark back in place (Fig. 497). Now blow the twig
and sound the alarm.
A roast of beef hardly seems promising in a musical way,
and yet the roast, though it looks so sober and quiet,
232can help you with the orchestra. Save the smallest two of
the long, flat
(Fig. 498) and, after cleaning and drying them, hold both in
your right hand, one bone between the first and second
Fig. 498.
finger, the other between the
second and third, so that the
convex or outward curved
sides lie next each other and
the top ends of the bones
extend slightly beyond the
knuckles. Then double up
your hand, holding the first
bone securely, the other
loosely, and in this position
give your hand a quick twist
and jerking motion, causing
the loose ends of the bones to
come together with a click,
click, clickity, click. The
bones should not be cooked,
as too much heat will crack them.
Another home-made instrument of music is the
fashioned of small bottles. Any kind of bottle which sounds
well when you blow into it will answer the purpose. Use
coarse darning-cotton to sew the bottles in a row on a strip
of pasteboard, commencing with the deepest toned and
leading up to the highest toned (Fig. 499). Place the flute
against your lower lip and blow into the open mouth of the
bottle. Continue blowing as you move the instrument along,
233sounding each bottle in turn. After a few trials you can
manage the crystal flute well enough to have all the bottles
join in the grand chorus of the musical jubilee you intend to
give with the home-made
instruments.
A little ingenuity
will enable you to
made a fine fiddle,
strings and all, of a
common field cornstalk,
and a good
flute may be manufactured
from a section of an ordinary pumpkin vine. Naturally
you must think a little over the matter before you
will be able to solve the problem.
Take some hollow door-keys of different sizes and use
them to play on; they are well worth trying, because a hollow
door-key, when blown into, will give much the same
sound as a bottle. You might add the keys to your collection
of instruments.
Even an
can do duty as a musical instrument. Over one side of the
comb lay a piece of common white tissue-paper; then hold
this queer instrument to your lips, allowing the paper to
come between the comb and your mouth; blow against the
paper with lips gently parted somewhat as one blows on a
horn or rather on a harmonica. Should the comb not respond
at once, try again; when the secret is once learned,
there is no limit to the tunes which may be played.
For giving a queer whistling noise there is scarcely anything
better than an ordinary broad
laid lengthwise between the entire length of the two thumbs,
one end of the grass extending beyond the tops of the
thumbs and the other below at the wrist line.
Certain tribes of people are experts in forming
into musical instruments, but for you the shell need not be
altered. Take it as it is, and holding the pretty thing to
your ear, listen while the shell tells of the far-away blue
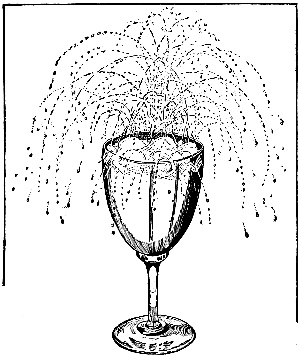
Fig. 500.
sea, which, singing
gently, imparts
to her children,
the shells,
power to transmit
the sound of murmuring
waves to
those who will listen
to the voice.
is one of the prettiest
and most interesting
experiments
and is a
very simple one.
Remember, you
must use a goblet
for the purpose,
not a tumbler, as
235the latter will not work well. Choose a goblet of very thin
glass, fill it almost full of water, dip the end of your finger in
water and rub the edge of the glass quickly around and
around until it rings with a humming sound. You will soon
find the surface of the water shivering and wrinkling up its
face in tiny waves, then it will become greatly agitated,
sending up wee streams and drops of water. Wet your
finger again and keep on with the circular motion until a
little fountain of fine spray shoots up into the air, accompanied
by the musical sound from the glass (Fig. 500).
236
CHAPTER XX
WHAT TO MAKE OF EMPTY
SPOOLS
Gather up all the spools you can find,
big, little, thick and thin; no matter
how many, you can use them all.
There is no end of fun to be had
with these always-on-hand, easily
found toys; they may be made into
almost everything. Tell your mother
that you can build
if she will give you enough spools, and see her smile at the
very idea. But say you are in earnest and ask her not to
look until you call “Ready.” Then go to work and surprise
her with a miniature representation of one of the most
beautiful temples ever built. Begin by standing four spools
in a row for the first side of the building, allowing about the
width of a spool between each two. Place eight in a row
for the second, four for the third, and eight for the fourth
side. Have the spools all of the same size, that the walls
may be alike and perfectly even, because, as you know, the
walls are to be formed of columns, not as many as in the
original, but enough to give an idea of the Greek temple.
Build up the spools three deep into pillars; then lay a piece
237of pasteboard on the top of the columns for a ceiling.
Bend another piece of pasteboard lengthwise through the
centre for the roof, and stand it tent-like on top of the ceiling.
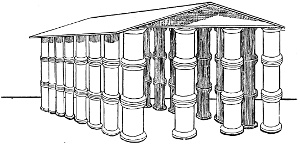
Fig. 501.
You can measure
the correct size
of the ceiling by laying
a piece of pasteboard
down flat on
the floor along the
eight-columned side
of the Parthenon to
obtain the length,
and placing it flat
on the floor across the four-columned side to mark the
width. Make the roof the same length and a little wider
than the ceiling to allow for the height of the bend through
the centre.
Now let your mother see
(Fig. 501) and tell her that she must imagine a space immediately
beneath the roof filled in with the most beautiful
statuary she can think of, that the spools are white marble
columns and she should see, in fancy, another row of stately
columns inside the ones you have built. Your mother will
be greatly interested and can tell you all about the real
Parthenon, and probably will hunt up a picture of the temple
that you may see just how near you came to making
the little model look like the wonderful Parthenon, on the
Acropolis, in Athens.
After admiring the building for a while, pretend that a
left-over spool
shot from a cannon, and toss it gently against the roof at
one end of the temple; then see the columns totter and fall,
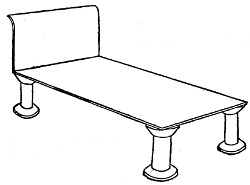
Fig. 502.
leaving only a portion of the Parthenon
standing, in the same way that the real
marble columns fell when the original structure
was shattered and practically
destroyed by the
soldiers.
Take all the spools from
the ruins, put away the ceiling and roof
for future use, and make the spools into
Use four for the legs of a bedstead, place them in position
and lay a piece of stiff white paper, bent up at one end, on
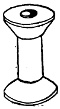
Fig. 503.
top of the spools. The bed will then be ready for the doll
(Fig. 502).
A table can be made in a moment’s time.
Choose a large spool (Fig. 503) and place a round
Fig. 504.
piece of paper (Fig. 504) on the
top (Fig. 505). For chairs use
Fig. 505.
spools with bent pieces of paper
for seat and back. Make the
bureau of six spools
close together in two
rows of three spools
each and cut the top of
a piece of paper with a
high extension in the centre which you
must bend upright for a mirror. The
239wash-stand can be four spools quite close together covered
with a piece of paper. A piano is easily made, but you
must think it out for yourself. Use a small spool for the
piano stool.
(Fig. 506) is a spool with a little roil of white paper
shoved into the hole and a circular piece of paper crimped
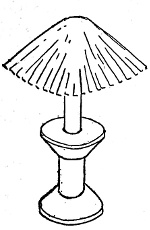
Fig. 506.
around the edge for a shade. Unless you
need the spools to use again in other ways
you might paste the paper on tight and
make a lamp which will not come apart,
and you could also glue the top on the
table and the seats on the chairs. This is
not necessary, however, for if you are
careful and do not knock against the furniture,
it will remain secure.
When enough furniture has been manufactured
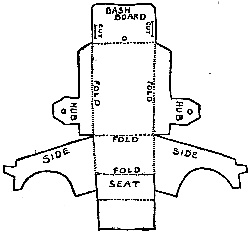
Fig. 507.
for the patient little dolls who
have been waiting all this
time, give them a present
of
in which they can enjoy
the fresh air. Cut Fig.
507 from heavy paper or
card-board that will fold
without breaking. Bend
all the dotted lines and cut
all the heavy lines in the
pattern. Push a burnt
match, or a wooden toothpick,
through one hub, then through an empty spool and
240the second hub. The spool forms the wheels. Screw a
small pin cautiously through each of the two projecting ends
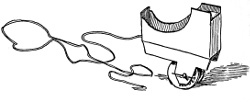
Fig. 508.
of the match, piercing
the wood and leaving
the head and point of
the pin standing out
(Fig. 508). Tie a knot
in the end of a string to
prevent its sliding out
and thread it through the hole in the dash-board (Fig. 508).
Help the dolls into the vehicle and take them for a ride.
Next build
(Fig. 509) something like the one which was erected in New
York City. Commence with two groups of spools a short
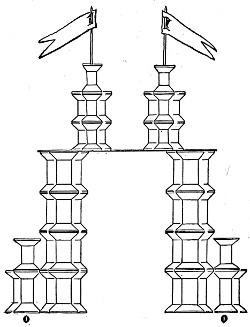
Fig. 509.
distance apart; have
three in each group,
two in the back and one
in the front. Build up
columns four spools
high; then lay a strip
of pasteboard across
from one to the other.
On top of the pasteboard
place two more
groups of smaller spools
a little nearer together
than the first groups.
Make these columns
two spools high and
crown each with a
single spool decorated
with a bright-colored
241paper flag fastened on a slender stick pushed down in the
spool. At the base of the arch add three more spools on
each side (O and O, Fig. 509), and the famous structure will
be completed. This is not exactly like the original, but for
a spool arch it is fine, and a spool procession will feel
honored to march through it.
You might make bridge piers of spools and use a strip
of pasteboard to form the several spans; then the procession
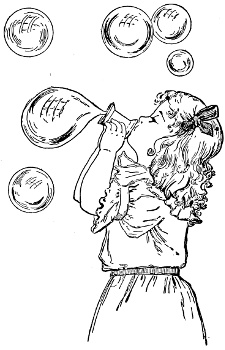
Fig. 510.
could cross the river safely
and march on the other side.
Did you ever
Blow Bubbles with a Spool
—beautiful bubbles, which
float and glide in the air with
all the charm of clay-pipe
bubbles? Mix strong soapsuds,
dip one end of a large
spool in the water; wet the
spool, then blow. If the bubble
refuses to appear, dip the
spool in the water again, put
your head down to the spool
and blow a few bubbles while
the spool is in the water, then
quickly raise it and try again.
Nine times out of ten you will succeed, and a bubble will
swell out from the spool as in Fig. 510. These wooden
bubble-blowers last a long time, with no danger of breaking
when accidentally dropped on the floor, and you may
always find enough to provide each of your playmates with
one when you meet for a trial of skill in bubble-blowing.
242After you tire of this sport try the
Cut a butterfly (Fig. 511) from bright-colored tissue-paper
or thin writing-paper, bend at dotted line and paste
Fig. 511.
on the large end of a very small cork. Fit
the small end of the cork in top of the hole
Fig. 512.
of an empty spool
(Fig. 512). Then
blow through the
spool and see the
butterfly ascend
rapidly to the ceiling
and float down
again. If you could
make several different colored butterflies, you might invite
some young friends to help you fill the room with the pretty
winged creatures.
Take another empty spool and stick a common wire hairpin
partially into the hole, bend the hairpin
slightly down against the edge of the
hole, do the same with three more hair-pins,
and you will have a spool with a funnel-like
opening of hair-pins at the top (Fig. 513).
In the funnel place a small, light-weight
ball made of a crushed bit of bright paper
wound around with thread. Raise the spool
to your lips and blow gently (Fig. 514).
The ball will rise and fall in mid-air, in the
same way that you have seen one of rubber
dance at the top of a small fountain or jet
of water.
243
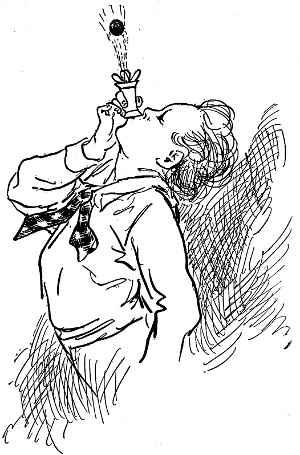
Spools may do duty as
and from them sticks be made
to fly quite a distance. Select a
large-sized spool, cut
the rim off one end,
cut two dents, one
on each side of the
shaved end of the
spool, and then tie
over this end a piece
of black cotton elastic.
On each side tack
a large button-mould;
these serve for wheels
and also cover the
fastening of the elastic.
Paint the cannon
black, and it is ready
for use. Insert a
stick, pull it back with the elastic, and
fire; the stick will shoot swiftly through
the air.
There are many other toys, besides useful articles, which
can be made of empty spools. Find out by experimenting
what they are, so you may have the triumph of originality,
of making things which differ from articles made by others.
The empty spools do not cost money, nor does the
pasteboard from old pasteboard boxes, yet they may furnish
more genuine enjoyment than could be derived from
the most expensive toys.
244
CHAPTER XXI
CHRISTMAS DECORATIONS
When the air is cold and frosty,
and people move quickly
through the streets, stopping
to loiter only in front of the
shop windows; when groups
of merry girls hurry along
on their way to school, their
cheeks, glowing rosy under
the brisk greetings of a
northwest wind; when the
evergreens displayed for sale
upon the sidewalks send
forth a spicy odor which ascends like incense and the very
atmosphere seems pulsating with pleasurable excitement,
there is no need of a calendar to tell us that the holidays
are close at hand. As surely as a cloudless sky betokens a
fine day, so surely do these signs indicate that Christmas
will soon be with us.
Purse-strings, even if kept tightly drawn the rest of the
year, are loosened now, and money is spent freely and
ungrudgingly, not only for gifts, but also for Christmas
greens with which to decorate and beautify the home.
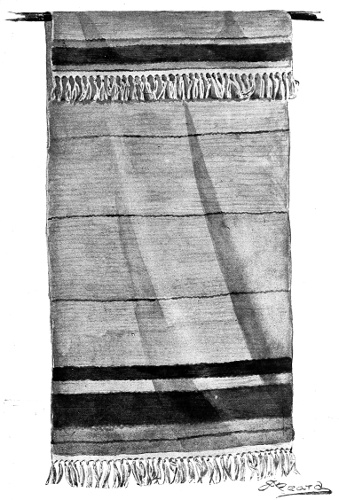
Some of the Portières are Woven in this Style.
Stars, wreaths, and ropes of evergreen and holly will
soon adorn the interior of almost every house. There are
245always plenty of willing
hands ready and eager
to help, but there should
be a head to devise a plan of decoration
and to direct and superintend the carrying
out of the idea; for there is no necessity for festooning a
room and hanging up stars and wreaths in the same way
246year after year. A great variety of new designs may be
made.
For instance, Fig. 515 shows a beautiful and
composed simply of ropes of evergreen fastened to the curtain
pole by looping one end of a rope over the pole, bringing
it down and tying it securely to the same
rope just under the pole. Each piece is fastened
on separately and hangs loosely down.
Fig. 520 is a
Star and Shepherd´s Crook
grouped to form a pretty wall decoration,
the design symbolizing
the star of Bethlehem
and the shepherds who,
watching their flocks by
night, heard the angel chorus
“Peace on earth, good-will toward
men.”
Make the star of five flat sticks
(laths will do), two and a half feet long, and put
them together as shown in
Fig. 521; then cover the
frame with holly so that
Fig. 521.
none of the wood is visible.
Make the crook of a broomstick,
to which fasten with
strong twine, or flexible
wire, a piece of rather stiff
wire bent in the shape of
247Fig. 522. Wrap evergreen closely around the wire and
stick until every bit is covered and it looks like one piece.
Then place the crook behind
the star and wire or tie it in
place.
Fig. 516 is
on a background
of evergreen, the
rays being made
of strips of tinsel
which is sold for decorating
Christmas-trees.
The frame for the background
is made like Fig.
517, and should be about two
feet square. Over this frame
stretch ropes of evergreen,
close together, and fasten with
tacks at each end. Cut the
248
Fig. 517.
star from card-board, cover it with
crumpled tin-foil and fasten to the
centre of the frame with a small nail.
Sew tinsel threads on the points of
the star before it is secured to the
background; then when the star is in
place spread out the tinsel in straight
rays and fasten it to the frame as shown
in illustration (Fig. 516).
Fig. 518 is a design for
upon which one or more candles may be placed. The tin
which forms the back of the sconce reflects the light and
produces quite a brilliant effect.
Nail a block of wood one and one-half
inches square to a piece of tin seven inches
wide and fourteen inches long (Fig. 519).
Silver or gild a number of pine cones and
hang them from the lower edge of the block;
then tack evergreen around the three sides as
shown in illustration (Fig. 518). Fasten the
sconce to the wall with small nails driven
through each corner of the tin and place on
the bracket a candlestick containing a lighted
candle.
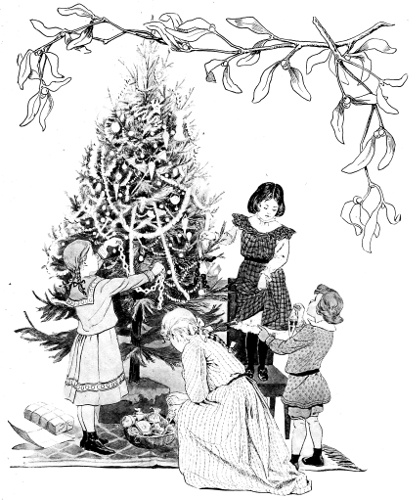
Home-made Christmas Tree Decorations.
One of the most quickly made
Festoons for a Christmas Tree,
and one which has never been thought of until now, is of
tin-foil, the common kind of foil to be found at the florist’s.
It also comes around cakes of chocolate, rolls of cream-cheese,
and large packages of tea. You can make the trimming
249any length desired by pasting strips o f the tin-foil
together, but, before joining the pieces, fold one
at a time and cut slashes on each side nearly across
to the opposite edge as in Fig. 523. Unfolded, the
strip resembles Fig. 524; pulled at each
end it opens and lengthens out into Fig.
525.
This decoration catches the light and
glistens beautifully, but it must be handled
Fig. 525.
carefully and not laid down after it is
stretched open. As soon as ready hang the strips
upon the tree, where they will be
Fig. 524.
safe. The best plan is to make these
loopings after the other decorations
are finished and on the tree. When
the pieces are cut they are more easily
handled if but a few are put together
at a time before they are pulled
open; then the decoration will appear
in perfect shape and look like polished
shining silver hanging in delicate, graceful
festoons.
Another effective trimming made of tin-foil
is in the form of
Fig. 526 shows fringe partially cut; use three
layers of the foil and cut them into fringe;
then take a strong, coarse string and twist the
tin-foil fringe around and around it, forming a rope of silvery
fringe (Fig. 527).
250An ornament that
delights children,
the idea of which
comes from Germany,
is a jolly little
black
with his funny broom held high in air. He wears a peaked
white hat and carries a bag filled with goodies. He is made
entirely of prunes (Fig. 528)—one for the head, two
for the body, one for each arm, one for each hand, two
for each leg and one for each foot. The prunes are
Fig. 528.
strung together with a coarse needle
and thread. If he is too limber,
give him a backbone by running
a slender stick through the
back of the head and body. Make
him a paper hat shaped like a
wide-mouthed horn, and cut out
a paper face and paste it on the little
man’s head; then tie the sheer
white bag across his shoulders,
fasten it at the side with a pin
and fill the bag with sweets; the
broom can be fashioned of a
wooden toothpick with a bunch
of broom-straws bound upon one
end. The happy child who receives
the chimney sweep from
the tree may devour the prunes when tired of the toy.
251Home-made
cut in odd shapes make fine decorations and will be eaten
with delight by the young people. Select a simple recipe,
roll the dough out flat and cut into the shapes of men,
women, animals, and birds. When baked, ornament the
cakes with icing put on in thin, slender lines; in most
instances outline the figures in white sugar.
Yellow is a color which stands out well in the midst of
the dark green foliage of the fir, and
may be used to supply it. A few can be hung to the tree
by means of ribbons; others may be made into pretty little
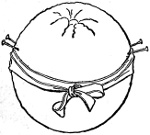
Fig. 529.
baskets and filled with the candied
sections of orange. Tie a piece of
tape or any kind of band around
an orange as a guide for cutting
the rind evenly; stick two pins on
each side to designate the location
and width of the handles; then,
with the small
blade of a knife
carefully cut
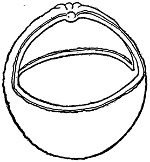
Fig. 530.
the handle, keeping it the same width
all the way from side to side. Next cut
the rind along the edge of the tape (Fig.
529). Remove the skin, in bits if necessary,
to avoid tearing the handle or
edge of the basket. Work the inside
juicy fruit free from the remaining rind
and take it out of the basket (Fig. 530). If there is difficulty
in doing this, cut the fruit out in pieces. Pass a
252narrow ribbon under the basket and up over the handle,
tie the ends; then bind them around under and over
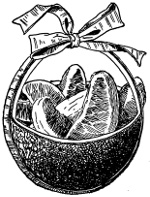
Fig. 531.
the middle of the handle, finishing
with a bow-knot on top. The
ribbon strengthens the handle,
without it the weight of the basket
when hung on the tree would cause
it to break from the handle and
fall.
Fill the orange basket, with sections
of the fruit, which have received
a brittle coating by being
dipped in clear, hot, home-made
sugar candy (Fig. 531).
Make a number of pretty,
of pasteboard cut in different shapes and covered with
various colored paper. One in imitation of a large stick of
peppermint candy may be made of a strip of stiff white
paper ten or twelve inches long and three and one-half
inches wide; unruled writing-paper will do. Paste the two
lengthwise edges together, forming a cylinder. Around
this paste a long, narrow strip of bright-red paper, wrapping
it spirally around the white tube. Slash two circular
pieces of paper around the edges so that the disks may fit
into the ends of the roll when the slashed portions are bent
forward. Fix one of the round pieces in the bottom of the
box with mucilage. When dry fill the box with small bits
of candy or kernels of nuts; then glue a loop of narrow
ribbon or one of red worsted at the top, fasten in the
round cover, and hang the box on the tree.
253Be sure to save some of the prettiest paper for
Cut them according to the dark portion of Fig. 532, and
make the white-paper lining extend higher than the outside.
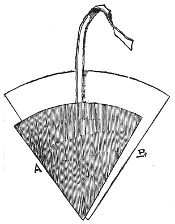
Fig. 532.
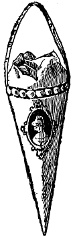
Fig. 533.
Glue the two papers together, inserting
a narrow ribbon
for a handle between outside
and inside papers.
Let the colored paper
project a quarter of an
inch beyond one side of
the lining in order that
the edge A may fit neatly
over the lining B (Fig.
532), avoiding unnecessary
bulkiness where the
two sides join. Ornament
the cornucopias in different ways, according to fancy
and the material you happen to have for the purpose. Fig.
533 shows a gold-paper cornucopia decorated with white
beading on a scarlet ground and a fancy picture in a red
and white embossed frame. You can also make little
bright-colored cheese-cloth
by cutting them out and sewing the edges together with far
apart button-hole stitches of gay worsted. When finished
fill them with sugar-plums or small cakes.
made small and button-holed in the same way, with drawstrings
of worsted, look well on the tree when filled with
254nuts or pop-corn, and little bird’s-nests of egg-shells covered
with moss and filled with eggs of sugar are charming.
of gold paper with scarlet-paper berries will make the tree
very gay. Cut the gilt paper into a number of squares
Fig. 534.
(Fig. 534), fold each piece through the
centre (Fig. 535), and fold again, forming
a small square (Fig. 536). Crease
this diagonally through the centre and
Fig. 535.
cut according
to the dotted
lines of Fig.
537, clipping off
the point C to
make a hole in
the centre of the design. Open out the paper, and it will
be a conventionalized group of Christmas holly leaves (Fig.
538). Fold smaller squares of red paper in the
same manner and cut the design shown by
Fig. 536.
Fig. 537.
Fig. 538.
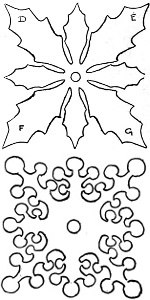
Fig. 540.
the dotted lines of Fig. 539, unfold and the
paper will be a formal pattern of red berries
(Fig. 540). Now lay the berries (Fig. 540) out
flat on the leaves (Fig.
538), adjust the two together; then
lift the berries, put a little glue on the
edge of the hole and fasten the berries
on the leaves, pasting
them together at the
centres only. Fasten another
layer of leaves on
the other side of the berries,
also at the centre,
255putting the berries between the leaves. To the tips of the
large leaves on the last group (D, E, F, and G—Fig. 538)
fasten the tips of corresponding

Fig. 539.
leaves on
another bunch; at the
centre of these glue
more berries, then
leaves, with their four
tips pasted to four
Fig. 541.
other leaf tips, and so on, following,
in order, leaves, berries, leaves
with points pasted
to points of other
leaves, then berries again (Fig. 541), making
the rope of golden holly as long as
needed. Tie a strong string to a small
circle of gilded card-board and run it
through the holes in the festoon. You
can close the holly and berry garland up
flat against the card-board ring by shoving
the leaves and berries together down the
string, as an accordion shuts flat when one
side is pushed toward the other. In this
way the trimming may be kept in good
order and packed safely to serve again
next year.
look tempting on a Christmas tree. They
are easy to make, and taste very good indeed. Have the fire
clear and hot, with no flames, and put in the popper at one
time only enough corn to cover the bottom a single kernel
256deep; shake the popper constantly while the corn is over
the fire until it has all popped. Then boil one-quarter of
Fig. 542.
a cupful of molasses with a
little sugar until it hardens
in water, remove from the
fire before it turns brittle
and pour it over two quarts
of corn. Mix well with your
hands, make into balls about
the size of lemons, suspend
the sweet, white ornaments
from the twigs, and use the
remaining corn for a different
decoration. String a
lot of the flower-like kernels
with a large needle
and strong thread, loop the
strands from branch to
branch, and the snowy
ropes will lighten up the foliage
beautifully (Fig. 542).
Strings of Red Cranberries
with knots of narrow red satin ribbon tied here and there
on the strands, make a fine
Fig. 543.
decoration.
wrapped in yellow, red,
white, light blue, and pale-green
fringed tissue-paper
(Fig. 543) and tied on pendent
257lengths of string, three or four to each (Fig. 544), and
attached at varying lengths to the limbs of the tree are a
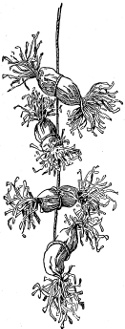
Fig. 544.
splendid decoration, for these peanut
kisses give quite a gala appearance to
the tree.
Do not forget to have some form of
bracelets or necklaces—not of gleaming
precious stones nor yet of gold
or silver, but of toothsome nut kernels
and delicious, dark rich raisins.
With needle and strong thread string
first a peanut, then a raisin, a peanut,
a raisin, an almond, a raisin, a filbert,
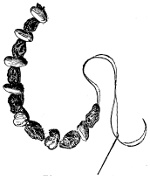
Fig. 545.
a raisin, and so
on, using as many
kinds of nuts as
you deem best
(Fig. 545). The
girl or boy receiving
this necklace
will be
charmed and
later may devour the queer beads
one by one as they are pulled from
the string.
A simple decoration is made of
the first link being formed of a narrow strip of paper pasted
together into a ring; the next link is a piece of paper passed
through the first ring before the two ends are joined. Each
258succeeding link of the chain is made in a similar manner.
Rosy apples are acceptable as ornaments and are always to
be found on the tree in Germany, the land that first introduced
the Christmas tree to other countries.
There is one style of ornamental gift which in Germany
must hang on the tree until New Year’s Day—the
(Fig. 546). The preparation of these can be made a delightful
frolic if there are several young persons in the secret.
Fig. 546.
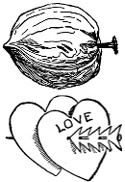
Fig. 548.
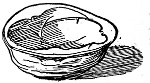
Fig. 547.
Crack open the nuts so
there will be two perfect
half shells to each
(Fig. 547). Inside the
empty nut place a
motto or device which
will tell the fortune, or
part of it, of the recipient of the gift. Ideas will come to
you as the work goes on. For a hint to help a little at the
Fig. 549.
start, cut two hearts of red
paper and fasten them together
with a dart made of a
pin and piece of white paper
(Fig. 548). This denotes that
the girl or boy who gets it
will be the first to marry.
Fig. 549, the water-color brush, means that the happy lad or
lassie to whose lot it falls will be
an artist. Fig. 550 signifies ability to
appreciate music. Fig. 551 ensures
Fig. 550.
plenty of worldlyworldly goods. One suggestion
gives rise to another, and
you will think of more than enough for all the empty
259nutshells. After the “fortune” is placed within the nut,
glue the halves firmly together. When dry, work a tack in
the end where the stem grew, twisting it slowly
that the shell may not split or break. When
the tack seems firmly in place, gild the entire
nut, including the tack; tie a strong string on
this and hang the “fortune” on the tree. As

Fig. 551.
all the nuts look exactly alike, no one can tell
which is which—not even those who made them
will know who receives the different “fortunes” until the
nuts are opened and the secrets revealed.
Most of the ideas given are for a daytime Christmas tree
where lights are not used. If candles are employed, no
paper festoons can be placed on the tree. Lights are always
dangerous, and the tree may be quite brilliant without
them.
Toys and useful little articles, such as you can make as
presents for all the members of the family, big and little,
and for friends, will surely add to the interest and appearance
of the tree.
260
CHAPTER XXII
CHRISTMAS DEVICES
“Christmas gift! Christmas gift!
Ah, I've caught you! Hand over my
present!” With a gay laugh the children
exchange this salutation, without
a thought of the request ever being
granted, but simply for the fun of being
the first to call out the Christmas greeting.
Sometimes the forfeit is paid, usually
with a handful of nuts or candy, a
pretty trifle or anything the captive happens to have convenient
at the moment. The giver enjoys the fun fully as
much as the recipient, and with a hop, skip, and jump departs
in hopes of likewise finding a fellow-playmate or some
member of the family off guard, that she may, in turn, be the
first to wish a “Merry Christmas” and claim a gift.
is a charming device for delivering gifts intended for one
person, and the fun and expectancy last the entire day.
Cover the outside of a new tin pan with plaited white
tissue-paper, and paste the paper along the top and over the
bottom edges. Decide on the number of gifts you intend
the pie to contain, and cut a corresponding number of slits
in the circular piece of white tissue-paper which is to form
261the top crust (Fig. 552). Wrap each present in a bright-colored
piece of tissue-paper, and tie with a narrow ribbon
Fig. 552.
of like hue (Fig. 553); be
sure to fasten the knot on
top of the package securely,
so there will be no possibility
of its slipping from the
parcel when it is jerked out
of its bed of bran. Fill the
pan with bran or sawdust,
arrange the gifts on top in
the order you wish, then
put more bran over the
parcels, heaping it in the
centre; thread each ribbon
through its respective slit in the cover and bring the cover
Fig. 553.
cautiously down
over the pudding
without tearing.
Gather the edge
a little at a time
with your fingers, and paste it down over the sides (Fig. 554).
Paste a double-edged fringe of white tissue-paper around
the top edge of the pie.
To do this, fold several
Fig. 554.
slips of paper, as in
Fig. 555; fold again
through the centre and
cut in a fringe (Fig.
556). Open the fringe,
gather it in the centre
with thread and needle,
and at short distances
262sew on tiny bells; then fasten the fringe in place
(Fig. 557). Puncture a hole with a large needle in the
centre of the top of the pie, and insert
a twig of holly.
Cut as many small squares of writing-paper
as you have ribbons, label
each with the hour when the present
Fig. 555.

Fig. 556.
is to be drawn, slip them on the ribbons near
the ends, and below each tie a little silver bell,
as shown in illustration (Fig. 557).
If there are to be only three packages, let one be drawn in
the morning, another at noon, and the last in the evening.
If more, distribute the gifts as evenly as possible through
the day.
is another means of delivering the Christmas gifts, and
the delight of the children when they see their presents
come tumbling down the chimney in a way they have only
dreamed of, will repay
the thought expended
in preparing
the surprise.
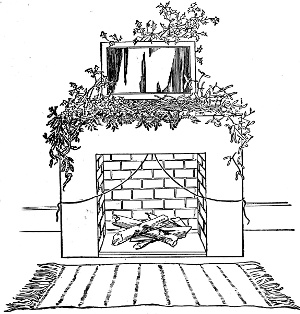 The Magic Christmas Fireplace.
Two wooden
packing boxes, one
about four feet
square and a foot
and a half deep, the
other somewhat
smaller but of nearly
the same depth,
form the framework
of the fireplace.
Stand the large box
on its side—the
longest side if the
box is not exactly
square—and the
smaller box within it as shown by Fig. 558. Remove the
top pieces of both boxes (A B, Fig. 558), and over the top
of the small box tack a piece of doubled light-weight wrapping
paper. At each end of this false cover fasten securely
a piece of strong twine, then puncture two small holes near
the centre of the paper and pass the ends of the twine
through them, drawing it down as shown by letters C D,
Fig. 559. Saw the board, which was taken from the top of
the small box, into two pieces, and place them in a slanting
264position reaching from the top edge of the small box to the
upper corners of the large one (letters E F, Fig. 560). The
Fig. 558.
boards are kept from slipping
by small nails driven half way
into the edge of the small
box. Cover the spaces at the
sides and top, between the
two boxes, with heavy brown
wrapping paper, tacking it
smoothly down along the
edges. This paper should be
marked to represent bricks.
Pile a few sticks of charred wood on the inside hearth
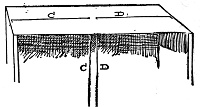
Fig. 559.
and, to make it appear that
they are still smouldering, tack
red tinsel paper upon them
here and there.
Into the receptacle at the
top of the mantel (letter G,
Fig. 560) place all the presents,
resting them upon the paper top of the small box. Things
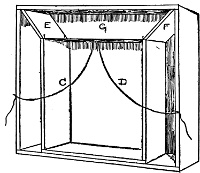
Fig. 560.
that are easily broken should
be covered with soft wrappings,
for in the grand climax,
when the toys roll pell-mell
down into the fireplace, the
fragile articles might come to
grief.
When the last package has
been stowed away, replace the
top of the large box. Decorate
the completed fireplace
with evergreen, and bring the two strings, C and D, which
265hang down upon the hearth, outside, looping them back
over tacks at either side of the fireplace, as shown in Fig.
560.
At the appointed time the group of eager children will
stand and gaze with awe at the wonderful and mysterious
fireplace, which, like a fairy house, has shot up in a
night.
Two persons, one on either side, must grasp the strings
tightly, and simultaneously give a pull. With a ripping,
tearing sound the paper gives way and whiz! bump! bang!
the toys come tumbling down, rolling and bounding out on
the floor.
Because it is Christmas we find ourselves longing to
render little services, to make others happy and cause their
eyes to brighten and sparkle with pleasure, for this is the
season of giving as well as receiving, and the privilege belongs
to all.
If there is a little convalescent in your family or among
your acquaintances, one who will not be allowed to share
the Christmas dinner, prepare for her a
You can make it very attractive.
Have a Christmas tree for a centre-piece (Fig. 561), a
very modest yet charming little affair—only a wee tree
fashioned from a branch of boxwood, beautified with homemade
toys and decorations cut from gilt and bright-colored
papers. Use a large-sized button-mould for the tree
stand; push the end of the stem into the hole in the centre
of the mould, and the tree will stand alone. Should
you have no boxwood, take any green twig and turn
it into a miniature Christmas tree by trimming off the
266ends of the branches until the little tree somewhat resembles
a cone in shape. It will require only a few moments to
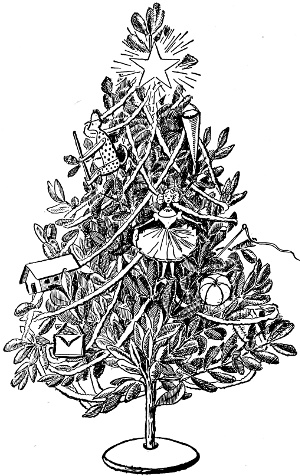
Fig. 561.
make the tree, and
the sick child will exclaim
with pleasure
at the sight of it.
A house with
climbing down the
chimney (Fig. 562) is,
in reality, a piece of
prosaic bread and
butter transformed.
After spreading the
bread with butter, cut
out the door with a
sharp, small-bladed
knife; then the two
windows, and the
chimney. Procure a
jolly little paper
Santa Claus and fasten
him in place by
making an incision in
the top of the chimney
and inserting one
leg of the figure; serve this on as pretty a plate as you can
find, preferably a decorated one.
A Christmas pie is another form of bread and butter.
Cut the shape out with a large-sized tin biscuit-cutter, and
after buttering the bread mark it into wedge-shaped pieces.
Cut a slice or two (Fig. 563), leaving the rest to be cut by
267the child. If permissible, a little white sugar sprinkled
over the top of the pie will enhance its appearance. Layer
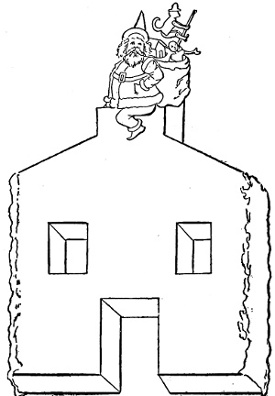
Fig. 562.
jelly cake is made of two
round pieces of bread and
butter, spread lightly, with a
Fig. 563.
layer of chicken jelly placed
between and over the top of
the cake. Odd designs are
always attractive to children
and may be introduced in
Make the toast very carefully, allowing the bread to turn
only a light brown on both sides, and keep it hot between
two hot plates. Toast should be eaten immediately after it
comes from the fire; it loses its delicacy
Fig. 564.
Fig. 565.
Fig. 566.
by being scorched
or served warm or
stale instead of fresh
and hot. After the
rest of the meal is
ready on the tray
and the two plates
are heated, set several
268tin cake-cutters in the oven to heat; then make the
toast with a fork, not a toaster, one piece at a time, and as
each is done, cut it while hot into
queer forms with the warm cake-cutters.
Arrange the pieces on
one of the hot plates and cover
them with the other. The child
will be entertained by the fanciful
shapes (Figs. 564, 565, 566), and eat them with a relish.
In place of the family roast, a lamb chop will probably
have to do duty as the
Select the best cut and broil the chop skilfully over a clear
fire. Let it be well done but not burned; sprinkle with a
Fig. 567.
little salt and pepper.
Have ready some fringed
tissue-paper and wind it
around the end of the
chop; decorate with a
pretty sprig of Christmas
green tied with a narrow
ribbon (Fig. 567). Eggs
of blanc-mange (Fig. 568)
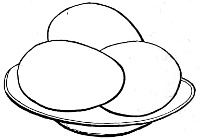
Fig. 568.
are made by using empty eggshells
as moulds. The shells
must be wet on the inside
when the blanc-mange is
poured into them to harden.
If it is best for the patient to
have only a little blanc-mange,
mould in small shells and
serve one or two.
269
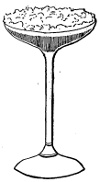
is acceptable and can be given in most
cases of illness. Instead of using a regular
mould pour the liquid jelly into a
wineglass, and if the white of an egg has
previously been beaten up with the jelly,
it will rise in a white foam at the top of
the glass; after the jelly has hardened the
resemblance will be so close it will be
difficult to believe the glass does not contain
wine (Fig. 569). The child will enjoy
this little make-believe. If fresh
are allowed, cut them as Southern people cut their watermelons
(Fig. 570). Slide the knife-blade in the side of the
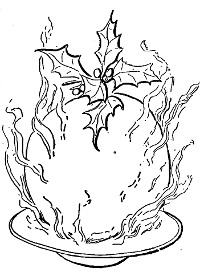
Fig. 571.
apple, and cut
downward, making
a slanting
outward incision
about an
inch and a
half long;
draw out the
knife, insert it
again at the top of the first cut
and make another slit in the opposite
direction, the two slits forming
the letter A without its cross
piece. Again take out the knife
and, commencing at the bottom of
270the second cut, bring the knife upward and outward, as in
the right side of the letter V; continue cutting these points
until the last one meets the first, being careful to push the
knife to the centre of the fruit at each cut. When finished
pull the two halves of the apple apart.
Plum pudding the child cannot have, but a fine baked
apple will answer the purpose and may be made almost as
attractive. Select a baking apple free from all flaws, wash
it well and “bake to a turn”; serve steaming hot, with a
sprig of holly in the top (Fig. 571).
271
CHAPTER XXIII
PICTURE WRITING AND
SIGN LANGUAGE
The next best thing to seeing
one’s friends is hearing from
them, and the more interesting
the letter the greater the enjoyment,
particularly when
the communication is intended
to be passed around the
entire home circle. There is
a delightful way in which to
express yourself differently from ordinary writing, a method
used by the early Egyptians, called picture writing. The
Egyptian pictures were not at all like those made by
modern artists; their representations were crude and unfinished,
yet they answered very well for the people and the
times. You have advantages over those ancient people
inasmuch as you need not even attempt to draw the designs.
All that is necessary for you to do is merely to look over the
newspaper and magazine advertisements, select the prints
needed, and after cutting out and pasting them on a sheet
of paper, with a few connecting words between, you will
have produced an odd, interesting letter, and the work will
be pure fun.
Fig. 572 gives an idea of such a letter, supposed to
have been written on Thanksgiving. Try to read it. For
272fear you might not quite catch the meaning, here it is interpreted
for you:
273
"Dear Grandmother, Aunts, Uncles, and Cousins: I send
you greetings. I know there will be a cooking of tarts,
turkey, puddings, and lots of good things. I like sweetmeats
and fruit best. Please use the camera and send me a
picture of the family while at dinner, and of my cousins
standing in a row. Wishing you a jolly time,
“As ever, your
”Hopeful One."
This is intended only as a suggestion; if you can write
your letter entirely with pictures, without the aid of words,
it will be much better.
There is another method you might employ; take the
well-known
and compose your missive of these. Such as the dove, meaning
peace, gentleness; anchor, hope; ark, refuge; key,
explanation; chain, bondage; star, promise; lamb, innocence;
scales, justice; horn of plenty, prosperity; heart,
love; shepherd’s crook, protection, and hour-glass, time.
The list is much longer, but enough has been given to
explain the scheme; other designs may be added as needed,
but use only those whose significance is well established
and commonly understood.
makes a charming letter, the blossoms being placed in rows
according to their meaning as given in the language of
flowers. Compose a sentence of white clover, oats, and
balm, and it will read:
“I promise (white clover) music (oats) and social intercourse
(balm).”(balm).”
274This might form part of an invitation to your house-party.
For a regular
letter you must do as the red man does and write in Indian
signs, which are usually rudely drawn figures meaning
much to our copper-colored brother,
but often requiring ingenuity on the
part of the white man to translate.
Some of the best examples are to be
seen on sandstone in Dakota County,
275
Man. |

Three Sleeps. |
War. |
Buffalo. |
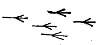
Turkey Tracks. |

Peace. |

Elk. |

Direction. |
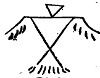
Bird. |

Coffee. |
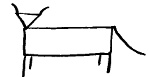
Cow. |
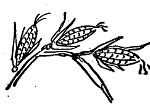
Plenty. |

Papoose. |
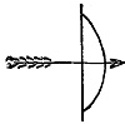
Hunt. |
Bear. |
| Fig. 574. |
Neb., where there are hundreds of sketches. One of the
most distinguished of Indian artists or historians is said
to have been Lone Dog, of Yankton, Dak., who made
most of his pictures on skins. Neither stones nor skins
276will answer your purpose; ordinary paper is more convenient
and will be as fully appreciated if you use thought
and care in drawing and composing your message. Make
simple, rude pictures of different objects, borrowing the
Indian’s idea but adapting it to your needs. Fig. 573 gives
an example of a girl’s powwow letter. You may invent as
many designs as you choose, that will be part of the fun of
Indian writing. Fig. 574 shows some of the signs needed.
is something entirely new; it should be composed of thoughts
embodied in colors, without alphabet, words, or pictures—nothing
but brush strokes of delicate pinks, tender greens,
soft grays, deep orange, rich purples, and all the many and
varied tones, tints, shades, and hues known to man. The
following example, being fully interpreted, will initiate
you in color meanings and composition:
Light Scarlet.
My Dear Friend: |
|
|
|
Light tone of yellow.
I am glad |
Drab.
you have thought out |
Blue.
the truth |
Red brown.
My interest in |
Scarlet red.
and friendship for |
Myrtle green.
Nature |
Orange.
is gaining strength. |
Different tones of yellow.
I travel miles |
Variety of color flecks in rows.
for the flowers. |
|
|
| |
|
Yellow pink.
Your enthusiastic |
|
| |
|
Scarlet.
Friend. |
|
The name signed at the close of the letter need be the
only writing. A list is given of the meaning of some of the
colors, but you will probably need more; work out the extra
combinations for yourself. The system being once understood
it will not be a difficult task.
277Rich red—Love or loved one.
Red brown—Interest in or for.
Orange—Strength, force.
Indigo—Wisdom.
Blue—Truth.
Green—Life, freshness, youth.
Yellow pink—Enthusiasm.
Blue pink—Politeness.
Gray—Doubts, fears.
White—Intelligence, light, innocence.
Black—Ignorance, darkness, night.
Bright yellow—Joy, gladness, sunlight, day.
Drab—Thought.
Scarlet—Friendship.
Myrtle green—Nature.
Different tones of yellow grouped together—Travel, motion.
Brown in solid squares—Rocks.
Blue and green in horizontal lines—Water.
Brown and green in horizontal lines—Summer.
Brown and black in horizontal lines—Winter.
Color dashes in wedge shape, variety denoted by colors used—Birds.
Pink—Acquaintance.
Mingled flecks in a row of any color or colors with green denotes one or more variety of flowers.
Green in long perpendicular dashes—Trees.
Tints may include the personal pronouns I, my, me, or mine.
Shades may include the pronoun you or your.
279
PART II
WHAT A GIRL CAN DO
280
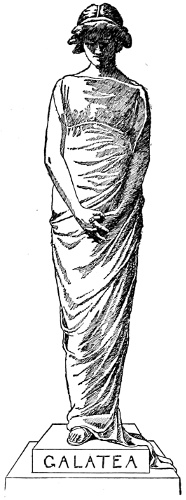
281
CHAPTER XXIV
STATUARY TABLEAUX
In the first place the statues must be white—not
nearly white, but very white—flesh,
hair, and costume; then the background
must be black, a dead, lustreless black.
Given these two requisites any figure, or
group of figures, will look like statuary;
and when care and pains are taken in the
posing and draping and the proper light is
thrown on them, the living, breathing,
warm flesh and blood so closely resembles
the cold, lifeless marble, it is difficult to
realize one is not looking at statues carved by the hand of
man.
Arrange the background on the stage in the form of a
three-fold screen, with sides slanting outward to the front.
When possible, the top of this space should also be covered
with the black material, slanting up to the front; in this
way the statues are entirely boxed in, the only opening
being the front of the stage. That is, the only apparent
opening, for between the back and side panels a space about
one foot wide must be left for side-lights, and on this account
the back should extend at least one foot beyond each
side-panel.
A strong calcium light directly in front of the stage,
though some distance from it, is best for amateur tableaux,
and the side-lights at the back need be used only when it
is imperative that no shadows shall be cast on the background,
as in the case of the armless statues. With the
cross-lights thrown behind the statue, the black-covered
arms melt into the black background with no shadows to
betray their presence. Tall piano lamps are best for this
purpose.
Again, the front light may be placed nearer one side of
the audience-room, and a pleasing effect of light and shade
on the statuary itself be produced.
Place a platform about one foot high, and of a size to
hold the largest group, in the centre of the stage, and leave
it there as a base for all other pedestals.
Packing boxes of various sizes, chosen to
suit the statues, make excellent pedestals,
and these, as well as the platform, must be
smoothly covered with white cotton cloth.
The costume for almost any statue
Pure white Canton flannel is the best
material to use, as it drapes most beautifully
and takes the true sculptor’s folds.
It should not, however, be too heavy in
weight, else it will be stiff and unmanageable.
The Greek or classical costume is
almost the only kind you will need, and it
is made simply of two breadths of the
283canton flannel sewed together and fastened at the shoulders;
the slits for the arms being left open nearly to the
waist. Under this is worn a sleeveless waist of the same
material. A cord tied around and just under the bust,
and the dress pulled up to bag over gives one style of costume;
tied around the waist and bagging down far below
it, gives another, and both under the bust and around the
waist, still another. The dress should be long enough to
allow of all this pulling up, and if too long when the statue
is mounted on her pedestal, it can be turned up underneath;
no hem is necessary on these garments. An extra piece of
drapery is almost always a part of the costume, and is used
for wrapping around the figure to give the narrow effect at
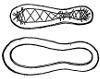
Fig. 575.
the feet; this should be about two yards
long and of two breadths of the material
sewed together.
Make the sandals of white insoles or
two pieces of heavy card-board, cut to fit
the bottom of the foot, extending half an
inch beyond all around.
Cover the card-board with white material
(Fig. 575), and sew together as in
Fig. 576. Fig. 577 shows a simple and
modified form of sandal. Cut the side and
back pieces from the white material like Fig.
578, and sew them to the soles as in the Fig.
Fig. 577.
577. Also sew white tape to the points of toe
and heel pieces, as shown in the diagram,
leaving free the two ends at the ankle for
tying.
Mop-rope, the loosely twisted rope used for
floor-mops, is the material from which to fashion
imitation
Make a tightly fitting white cap to entirely cover the hair,
as a foundation for the wig.
In order to have the parting of the hair directly in the
middle of the head, put the cap on and, with a lead-pencil,
mark the desired line. The rope must be then untwined and
the middle of each strand laid across the top and stitched
down along the pencil line, half the length falling on one
side, half on the other. After this the wig can be donned,
the hair arranged and pinned in place according to taste or
the fashion selected, and then stitched securely to the cap.
When the hair is done up high and a side or back view
is shown, it is necessary to sew the ends of the rope along
the bottom edge of the cap at the sides and back, as the
locks are drawn up from there. A narrow border of raw
cotton sewed entirely around the edge of the cap so that it
will extend a trifle over the forehead and neck, does away
with the dark edge of hair which it is, otherwise, almost impossible
to hide. When only a front view is desired, the
back of the cap need not be covered with the rope. Men’s
and children’s wigs are made on the same principle, be
their hair long or short.
The face, arms, neck, and hands must be as white as it is
possible to make them. Face powder applied in the ordinary
way will not give the required whiteness, and it is
easily rubbed off.
Here is a professional actor’s recipe which is perfectly
harmless and will make the
Take one ounce of white-zinc powder and three ounces of
glycerine and rose-water—two-thirds glycerine, one-third
rose-water. Shake the glycerine and rose-water together,
285mixing them well, then add the ounce of white-zinc powder
and shake again until thoroughly mixed. Apply with a
sponge and let it dry, then smooth it with your hand and
powder with any pure face powder.
First wash with warm water, then rub with cold-cream.
Wipe the cream off with a soft linen cloth, after which
powder the skin to prevent chapping. Always allow plenty
of time for making the flesh absolutely white, as this can
not be done in a hurry.
It is a wise plan to choose a subject already presented
by some sculptor and copy his work as closely as possible,
for the artist has given much thought and study to the
posing of his figures and the lines of his drapery, and one
can be sure the artistic effect will be good; or a subject may
be found in some painting which will be suitable for statuary,
and this also will have the advantage of having been
designed by an artist. Most of the tableaux should be selected
in this way, but a few variations, where a surprise for the
audience is prepared, or seemingly impossible effects are
produced, gives piquancy and charm to the entertainment.
The effect of armless or mutilated statues which, to the
audience, appear almost miraculous, may be produced by
simply covering the parts of the body, supposed to be
missing, with dull black cloth. Everyone knows that by
covering one of the front teeth with a piece of black sticking-plaster
the perfect effect of a lost tooth is given, and it
is on the same principle that limbs are cut off or figures
decapitated in statuary tableaux.
286The illustration of the armless bust shows how the arms
are made to disappear by drawing over them a pair of black
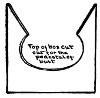
Fig. 579.
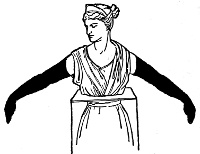
IN THIS MANNER MAKE THE ARMLESS BUST.
stockings, or long,
narrow bags. In
this tableau the
side-lights must be
used to prevent
any shadow from
being cast upon the background;
the lights must shine behind the
statue, not on it.
The pedestal is made of a
packing box, with the top cut
out to admit the figure, as shown in the diagram (Fig. 579).
A fine color effect is produced when this pedestal is covered
with dark red material, upon which rests, to all appearances,
the pure white marble bust. In covering the top of
the pedestal cut the cloth to extend around over the opening
at the back, and it can be fastened down after the bust is
Fig. 580.
in place. For this statue the front light
must not be too strong and its full force
should be concentrated on the head and
bust, leaving the arms in shadow.
Another quite wonderful effect is
that of the
To produce this set a frame up near the
front of the stage, over which is tightly
stretched the black material of the background.
In the centre sew a piece of white cloth cut in
an elliptical shape, about two and a half feet long by two
feet wide (Fig. 580). Make a laurel wreath of white paper
287leaves fastened on wire stems and tie at the bottom a bow
of white ribbon. Sew or pin the wreath upon the black
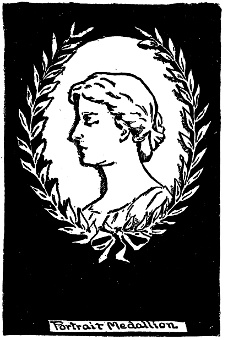
Portrait Medallion.
background, near enough to
allow its inner leaves to lap
over the white. Cut in the
medallion, and through the
background, a hole the shape
of, but smaller than, the head
and bust. This should be
experimented with on other
material before the medallion
is cut, so that no mistake be
made.
The medallion must be
placed at a height easily
reached by the standing figure
of the person posing for
the portrait. The head is
thrust through the hole, then
turned to present a profile
view, while the shoulder is
held back that it may not protrude too far through the
opening. The illustration shows the effect of this tableau.
is an innovation in statuary tableaux which will receive a
warm welcome, but, like the others, it must be well carried
out to be a success. The figure and everything pertaining
to it must be of one color, not white this time, but gray, all
gray, to represent stone.
Study the pictures of old Egyptian statues; notice the
costumes, and copy one carefully in gray canton flannel.
Gray stockings must be worn and gray sandals, or the sandals
288may be omitted. Paint the face, arms, and neck with gray
pastel, rubbing it on lavishly; this has been used without any
harmful effect and is easily washed off with warm water and
pure soap. Cover the hair with the typical Egyptian headdress
(Fig. 581), made of a square of the gray material. Make
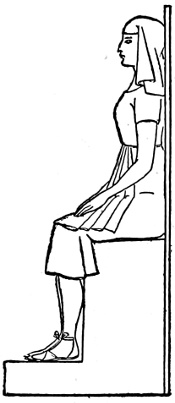
Fig. 281.
Side View.
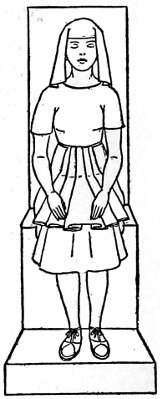
Fig. 281.
Front View.
a seat for the statue of a box
which should be only wide
enough to be comfortable
and of a height to allow of
a footstool under the feet.
Nail a board the width of
the box to the back to form
a back for the seat and let it
be high enough to extend a
few inches above the statue’s
head when she is seated.
Cover the chair and footstool
with the gray canton
flannel.
The Egyptian statue must
be stiff and formal, seated on
her chair as in Fig. 581, with hands on knees and feet together.
The entire absence of graceful curves of body or
drapery makes a charming contrast to the other statues.
In statuary tableaux the eyes must be kept closed, except
in the tableau of Galatea, and the eyelids should be as
white as the rest of the face. The eyelids of the Egyptian
statue must, of course, be gray.
This tableau includes the sculptor as well as the statue,
and requires a little acting on the part of the statue—herein
lies the surprise.
289The tableau illustrates the old story of the Greek
sculptor Pygmalion, who fell in love with the statue he had
made, and prayed to the gods to endow it with life. His
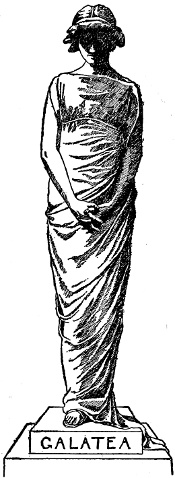
First Position.
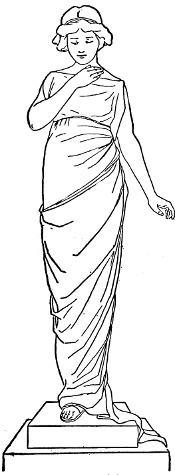
Second Position.
prayer is granted
and the statue, Galatea,
gradually awakens.
When the curtain
is drawn aside, Pygmalion,
dressed in
Greek costume of
brilliant colors (to
contrast with the
white statue), is seen
kneeling with arms
extended at the feet
of Galatea, who
stands in the pose
shown in “first position”
of the illustration.
Pygmalion maintains
his position
without moving
while Galatea awakens.
Standing, as in “first position,” with bent head, closed
eyes and clasped hands, the right foot a little in advance of
the other, the weight of the body resting principally upon
the left, Galatea slowly, very slowly, unclasps her hands
and gradually separates them. The left hand moves out
from her side while the right hand, at the same time, is lifted
outward and upward to her throat, “second position.”
290Keeping the left arm extended a little from her side, the
hand slightly raised and fingers bent, she continues to raise
her right hand until it covers her eyes, at the same time
swinging her body around, bearing the weight heavily on
the left foot, until the “third position” is assumed. Holding
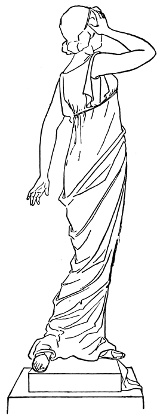
Third Position.
Fourth Position.
this pose for an
instant, she turns
slowly back again,
lifting her hand
until it shades her
eyes; she then raises
her chin and bends
slightly forward as
she opens her eyes
and beholds Pygmalion.
This is the
“fourth position.”
Again she pauses
for an instant, then
by slow degrees the
left arm is raised
while the right one
is lowered and the
hands are held out
in welcome, as in the
“fifth and last position.”
At no time must the arms form parallel lines; even at
the last the extended arms should be bent very slightly outward
at the elbows. The two sharp angles, formed by
bending the elbows in the same direction at the same
moment, should be especially avoided. At all times during
the awakening Galatea must be so posed that her movements
291might, at any moment, be stopped and she would
Fifth Position.
be found standing in a graceful and
charming position. Success in this
can only be obtained, and little
awkwardnesses avoided, by practice
before a large mirror, where
every movement and every curve of
the body may be seen.
No quick or sudden motion must
mar the beautifully slow awakening;
all should be as gradual as the unfolding
of the petals of a rose
until the climax is reached, where
Galatea extends her arms to the
waiting and expectant Pygmalion
and the curtain is dropped.
There is no doubt of the success
of the tableau when this little bit
of silent acting is well done, and
it makes an excellent winding-up
piece to an evening’s entertainment.
292
CHAPTER XXV
WITCHERY
Assured of their welcome, laughter, jollity,
and mystery all attend the Halloween
frolics which are given up to sports with
kale, apples, nuts, mirror, etc. These ordinarily
commonplace articles are claimed, on
this eventful eve, to be touched with magic,
endowed with the power of prophecy and
enabled to tell of wonderful adventure or
fortune which will befall any one who puts
their virtues to the test. And it is Halloween,
of all the nights in the year, that is
best loved by the sprightly little fairies,
gnomes, and elves, who delight in sallying
forth from their homes under stones and in
old hollow trees to play pranks on us poor mortals. The
witches also are out, flying through the air to their annual
dance, on their queer steeds, either cats or broomsticks.
James Hogg’s poem, “The Witch of Fife,” gives a comical
description of the witch who flew out of the lum (chimney)
and left her husband, who soon followed with his coat
“waflling in the wynde.” The witches’ rides would not be
apt to injure old broomsticks, but should you happen to see
any cats the morning after Halloween, notice how tired the
poor creatures look after carrying the witches all night!
That is why the Scotch lads and lassies pity the pussies.
293Of course, there are really no fairies, genii, or witches;
they are all only “make-believe.” Nor are we to put any
faith in
for these are merely tried to furnish sport for the time and
to make us merry; a hearty laugh of itself is good fortune.
Often it is the best kind of medicine.
Whether you will be
can be ascertained with three saucers. Fill one with salt,
which, being white, stands for silver; another with cornmeal,
signifying gold, its color being yellow; while the
third remains empty (Fig. 582). If you dip your left hand
into the cornmeal, you will be very wealthy; if into the
salt, you will be comfortable, but lack the luxuries of life;
if into the empty saucer, you will be obliged to work hard
for a living.
To foretell the complexion of your future mate, select
three of the softest and fluffiest feathers you can obtain. If
none is handy, take a pillow and rip open the end seam
about an inch or so, making the hole scarcely large enough
to admit of your pulling out a few feathers with the thumb
and forefinger. The little opening can be sewed up again
in a moment’s time. On the bottom end of each downy
messenger fasten a small piece of paper; a drop of paste or
mucilage will be sufficient to gum all three in place. Write
294the word “Blond” on one paper; on another, “Brunette,”
and on the last, “Medium.” Label the papers before gluing
them on the feathers (Fig. 583). With your right hand
daintily hold up one feather, by its top, in front of you, and
gently send it flying with a puff of breath. Do the same
with the next, and also with the last one; the feather landing
nearest to you denotes the complexion of your true love.
To make the test sure, try the charm three times, but be
careful not to use too much force when blowing the feathers.
For the
seven small, clean stones are required—six of the common
grayish color, the seventh white.
All should be as
nearly as possible the
same in shape and size
(Fig. 584). After being
blindfolded and having
the position of the stones changed on the platter, describe a
circle in the air three times with your left hand, at the last
bringing the forefinger down on one of the stones. Try the
295charm three times. Should you touch the white one twice
your life will be full of light and happiness; if the gray
twice falls to your share there will be shadows with the light.
Old friends are treasures and cannot be too highly valued,
but new ones also frequently prove to be added joys in
our lives. To determine how many new friends you will
find in the ensuing year, count the number of buttons on
the dress or coat of the first person the fairies send to you
after twelve o’clock at noon on October 31st. Should someone
enter whose clothing shows no buttons, you will be
obliged to rest contented with the friends you now possess,
as no more will be added to the list until the expiration of a
year.
Before going to sleep on the last night of October name
each of the four bedposts, the first being “Art”; the second,
“Science”; the third, “Literature”; and the fourth,
“Business.” The post you see first upon awakening will
denote the pursuit in which you will delight. Should your
eyes first rest upon the post called “Art,” many beautiful
things are in store for you. If the “Science” post is first
seen, you will rejoice in deep learning, etc. Be sure not to
get the posts confused; remember the order in which they
have been named.
Should you wish to know how any one of your friends
may feel toward you, here is the test. Write your name
out in full (Fig. 585—we will suppose the name to be yours).
Under your name write that of a friend (Fig. 586), then
carefully cancel all letters in the coupled names which are
296
Fig. 585.
the same (Fig. 587). Let us go over the first two names
that we may thoroughly understand how it is done. Take
the first letter in the first name—K;

Fig. 586. Fig. 587.
you will not find the same letter in
either Mary or Hallon. Take the
next letter—a; there it is in Mary and in Hallon. We will
cross out all the a’s. There are no t’s in the lower name, so
we go on to the next letter—h—which is an initial in Hallon
and again occurs in Smith. Cancel them all. There
are no e’s, but we find r and n in the other name. Mark
them both. I is not repeated in the lower name, and in
Fig. 588.
297Smith we find only m (h being previously cancelled), which
is the first letter in Mary. Cross them out, then repeat
aloud these potent words:
“Friendship—Love—Indifference—Hate,”
giving each cancelled letter one word in the magic order
(Fig. 588). In this way you find that the girls love each
other. Try your name with a number of others. The results
constantly vary. Couple two friends’ names together
and put them to the test.
Apple-seeds, too, will act as charms. Stick one on each
eyelid and name one “Home” and the other “Travel.” If
the seed named “Travel” stays on longer than the other,
you will go on a journey before the year expires. If
“Home” clings better, you will remain at home. Again,
take all the apple-seeds, place them on the back of your
outspread left hand and with your loosely clenched right
hand strike the palm of the left. This will cause some, if
not all, of the seeds to fall. Those left on your hand show
the number of
you will receive in the coming fortnight. Should all the
seeds drop, you must wait patiently for your mail.
Gather up all the seeds and make them do duty again.
There must be twelve of the little brown charms. Put them
carefully to one side while you cut twelve slips of blank
paper exactly alike and on one side of each write the name of
a friend. Turn them all over with the blanks uppermost
298and mix them so you will not know which is which; then
holding the seeds in your left hand repeat this verse:
“One I love,
Two I love,
Three I love, I say;
Four I love with all my heart and
Five I cast away.
Six he loves,
Seven she loves,
Eight they both love;
Nine he comes,
Ten he tarries,
Eleven he courts and
Twelve he marries.”
Stop at each line to place a seed on one of the papers,
and then turn the slip over to discover the name of the one
you love or cast away, as it happens. Continue matching
each apple-seed with a piece of named paper, as you count,
until all twelve seeds and papers are used. It is both surprising
and interesting to have one’s fate forecast in this
way.
“Bobby” Burns’s well-known poem “Halloween” tells
of many charms and spells to be tried on “Witch Night.”
mean much on Halloween, but certain ceremonies must be
carefully followed in order to insure the spell. Before
going to sleep for the night have someone bring you a small
piece of dry bread. No word should be spoken after this;
silence must invariably prevail. Eat the bread slowly, at
the same time making a wish and thinking of the pleasantest
things imaginable. Then smilingly drop off to sleep, and
your dreams in the land of Morpheus will be sweet and
299peaceful, and your wish will come true if the charm works
in the way it should.
Here is an old verse on
which has been handed down for generations:
“If I a shooting star can see
And before it falls count one, two, three,
I'll find my love in the nearest tree,
For I hunt him and he hunts me.”
Watch for the star and when it comes, if your courage
does not fail, look up a tree. Though you may possibly not
find the desired sweetheart, you can make a wish on the
shooting star, at the same time repeating these lines:
“Star, star, bright star light,
First star I have seen to-night,
I wish I may, I wish I might,
Have the wish I wish to-night.”
An entertainment suitable for any season of the year is
called the
It is intended only for the older girls, not being adapted
to little ones. The ghosts are jolly, bright, realistic beings,
full of fun, who, being invited to your house, enter heartily
into the frolic, each doing her best to make the entertainment
a success. All the prominent past century
ghosts must be included in the party. Artistic, dramatic,
historic, literary, and political ghosts should be present, also
the spirit of customs, ideas, events, and things belonging to
the past century. Summon your fellow-ghosts to haunt
300your house three hours before midnight, appearing in costumes
appropriate to their earthly existence.
Tell them that not a word must be spoken until the company
is relieved from the spell of silence and state in your
invitation that all ghosts are expected to promptly signify
their acceptance in writing, otherwise they will not be admitted
to the haunt.
When the ghosts have assembled each character should
be announced as she enters the reception-room, where the
hostess and one or two other spirits of the occasion await
the arrivals. The announcement must be made in clear,
well-enunciated tones, and always be prefaced by the words
“The Ghost.” Guests after their introduction are allowed
to speak and they should talk and act as nearly as possible
like the spirits they represent. The event will then be a
success if carefully planned, and you will have given to
your friends a novel and delightful treat.
is a midsummer game for little folks. Such a beautiful,
long day for a holiday, and no one remembers to keep
it now, although many, many years ago Midsummer
Day, the longest day in the year, was looked forward
to with as much pleasure as we find in the anticipation of
Christmas.
The people had strange beliefs in those days, and they
thought a being called Fortune would send them gifts on
this holiday if they went through certain performances to
gain her good-will.
Now suppose we make believe, for a time, there is such
a person as Fortune, and one of you shall play her part, and
we will have a game of “Fortune’s Wheel,” which will be
301very appropriate and interesting for June 21st. At one
end of the lawn we will mark off as many spaces, six
feet square, as there are players, not counting
Fortune.
Rope or twine tied to the fence
at the back, and to stakes driven
into the ground in
front, as seen in the
illustration, will
mark the boundaries nicely, and we
will tie some small flags or bright-colored
streamers to the tops of the
stakes to make them look pretty. These spaces we will call
stalls. About ten yards from the stalls, and directly in front
302of them, we must stretch a rope, tying it to stakes or trees,
so that Fortune shall be kept within bounds.
Now bring your rolling-hoop, and we will turn it into
Fortune’s wheel by tacking two tapes across it, as shown in
the diagram. In the centre, where the tapes cross, we will
tie a little bag, which is to hold a gift.
Simple little toys, bonbons, and cake, only one at a time,
however, are the gifts Fortune’s wheel will carry.
Come, little girl, whoever is to be Fortune, whip out your
handkerchief and tie up your eyes, for Fortune must be
always blindfolded; then stand by the rope, which will keep
you from going too far away.
The rest of you scamper off and take your places, each
one in a stall.
Now, Fortune, walk up and down a little that you may
not know exactly where you are; then, standing so that you
can reach the rope with your hand, take your wheel and
strike it hard, sending it down toward the other players.
Whoever catches Fortune’s wheel may have the gift it
carries, but no one must go beyond his stall to reach it. The
wheel must enter a stall before it can be caught by the player
in that stall, and when it enters a stall and falls to the ground
before being caught, the player whose stall it is in must
change places with Fortune, become Fortune, and roll the
wheel. When the wheel stops before reaching the stalls
and does not enter any of them it must be carried back to
Fortune, who will roll it again.
Each time before the wheel is started the players in the
stalls must change places.
When one gift has been won and taken from the bag put
another in its place and Fortune will roll the wheel until all
the gifts are gone and the game ended.
303
CHAPTER XXVI
LIVING ALPHABET
Characters: All the letters of the
alphabet, half girls, half boys; teacher.
Costumes: Girls dressed entirely in
red, boys in white. Teacher wears a pretty
Dolly Varden costume, and carries a white
switch tied with red ribbon.
The back of the stage is decorated with
palms and other greens. The overture is
played, which glides into a march as the
curtain rises.
Enter the teacher and letters from the right. The letters
march in single file in the order of the alphabet (alternately a
girl and boy) headed by the teacher, who keeps time with her
switch. After crossing the stage the teacher leaves the procession
and stands at the left. The letters turn, march back to the
right behind the advancing line, turn again, forming a reversed
S, march to the left, then around the front of the stage to the
right, marching in a circle until a half circle is formed at the
back of the stage, where they halt and remain standing. Fig.
589 shows the order of march. As the letters enter they carry
their shields on their left arms; as they turn to the right they
shift them onto their right arms, always keeping the face of the
shield toward the audience. When standing the shield is held
with both hands directly in front so that the letters may be
plainly visible.
304Teacher. Attention! Present a greeting to our
friends!
The letters A E L S T U step to the front of the stage
and stand in line.
Teacher. Well, what do you say?
The letters change places and form the word SALUTE.
Teacher. Very good. Retire to your places.
The letters step back in line of the alphabet.
Teacher. We all know the alphabet is made up of two
families. The name of one family is Vowel, and the name
of the other is Consonant. The vowels will please step forward.
The letters A E I O U advance to the front.
Teacher. There are two step-sisters which we sometimes
call Vowels. Where are they?
The letters W and Y join the others.
Teacher. That will do.
The vowels return to their places.
Teacher. Consonants come forward!
All of the letters except A E I O U W and Y advance
then W and Y join the consonants.
305Teacher. Very well.
The letters return to their places.
Teacher. We will now have our spelling-class, and be
careful that you spell correctly. The letters for “Cat”
step forward.
The letters ACT run
to the front and stand
spelling ACT.
Teacher. You are
not spelling “Cat.” Try
again.
The letters shift their
position to form TAC.
Teacher. Dear me!
You haven’t got it right
yet. I'm surprised!
The letters change,
forming the word CAT.
Teacher. Right at
last. Now spell something
that cats love.
The letters NIP join
CAT, spelling CATNIP.
Teacher. Can you
spell another word?
C turns her back, while the others change places to
spell PAINT.
Teacher. Another.
P turns his back, and the rest spell ANTIC.
Teacher. Spell one more word.
P remains with his back to the audience, I turns away,
and the others spell CANT, and then return to their places
in the alphabet line.
306
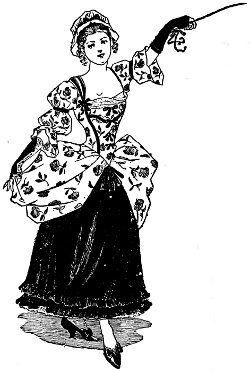
Teacher. Are you ready for your grammar?
The letters YES run to the front, spell YES, and then
retire.
Teacher. Well,
then, we will try verbs. Verbs
signify action. Give me a
word that denotes action.
The letters remain quiet.
Teacher. I will illustrate.
Your sister runs. What does that
signify?
The letters A M O U S E run
out, spell A MOUSE, and return.
Teacher. We will try conjugating
the verb “to be.” It begins:
I am, you are—well?
The letters TIRED walk
slowly forward, spell TIRED, and
return to their places.
Teacher. So am I; we might
sit. What do we stand for?
Here, for the first time, the letters
speak. A steps forward two steps,
answers immediately, and steps backward to her place. Then B
does the same, followed by each letter of the alphabet in turn.
- A. A stands for Action, and that means to run.
- B. B stands for Baker and also for Bun.
- C. C stands for Catnip, the best of all tea.
- D. D stands for Darling, and that stands for me.
- E. E stands for Emerald, a most precious stone.
- F. F stands for Fun and my own Funny-bone.
- G. G stands for Gold, which is yellow and bright.
- 307H. H stands for Hope, Heaven, Holy and Height.
- I. I stands for Ink, which is not a good toy.
- J. J stands for Jelly and Jumping and Joy.
- K. K stands for Kitchen with a dear little stove.
- L. L stands for Laddie and Labor and Love.
- M. M stands for Maiden and Merry and May.
- N. N stands for Nonsense and Noddle and Neigh.
- O. O stands for Omelet and Only and Off.
- P. P stands for Painter and Palace and Puff.
- Q. Q stands for Quaker and Quiet and Queer.
- R. R stands for Rabbit and Racing and Rear.
- S. S stands for Sampler and Sewing and Shears.
- T. T stands for Taffy and Tar-drops and Tears.
- U. U stands for Upper and Under and Urn.
- V. V stands for Vane, which the winds always turn.
- W. W stands for Winter, snowy and white.
- X. X stands for Xylite, I think I am right.
- Y. Y stands for Yes, but never for no.
- Z. Z stands for Zero, and now we must go.
Music. Here the march music strikes up, the pianist playing
“Marching Through Georgia.”
The teacher leads the procession, and the letters follow, singing
to the air “Marching Through Georgia” these words:
We are going now, Alphabet at play,
Holding in our hands all that’s grave or gay;
See how we are marching all the letters in array,
Marching onward to Dreamland
Speak low, speak low, we sing a lullaby;
Speak low, speak low, pray children do not cry,
Though we now must leave you and say a sweet—
308Here the letters G O Q D B Y leave the ranks and stand at
the front of the stage. D places his hand over the quirk of the
letter Q, making it an O, and they form the word GOOD-BY.
The march has carried the rest of the letters to the back,
where they stand in a semicircle. The music accommodates
itself to the movement, so that the GOOD-BY comes in at the
right time, then all take up the song again with the words:
While we are marching to Dreamland.
The endeavor throughout this little play has been to
keep it as simple as possible and quite within the capacity
of the children taking part. The girls and boys should be
well drilled in the marches, that they may keep step and
perfect time, also in the song; and they should know to a
certainty what places they are to take in spelling the words.
Then if, when speaking, they enunciate clearly and speak
slowly the success of the play is assured. Very slowly and
clearly each word must be spoken, otherwise the meaning
and point will be lost.
The character of the teacher should be taken by a
young girl old enough to lead and direct children. The
marches may be as elaborate as the manager chooses, but
they should not be too long or intricate.
The shields are made of heavy white card-board after
the pattern shown in Fig. 590, and the handles are strips of
tin fastened in the middle of the shield. To secure the handle
in place, with a sharp knife cut two horizontal slits
about one inch long in the shield near the centre. These
must be about five inches apart, and one directly over
the other. Then make two more slits of the same size,
309one two inches above the top slit, the other two inches
below the bottom slit. Pass one end of the tin through the
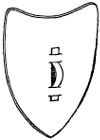
Fig. 590.
lower top slit, working from the inside of
the shield, and bend the end up, slipping
it back through the upper top slit as if
taking a stitch; then fasten the end by
bending it up close to the inner surface of
the shield. Care must be taken not to
tear the card-board during this process.
Now reverse the order of work, and passing
the other end of this tin through the
two lower slits in the shield, fasten it
by bending the end down. The loop of the handle must
be sufficiently large to allow a child’s hand to slide in and
grasp it easily. When the tin is well wrapped in strips of
cotton cloth there is no danger of a cut from the sharp
edges.
Large black letters are either painted on the shields or
cut from black paper or cloth and pasted on. These letters
must be simple and plain in design, that they may be
instantly recognized. All the shields should be of one size,
and as a rule should reach from the shoulder almost to the
knee of the bearer. The children, also, should be as nearly
of one height as possible.
310
CHAPTER XXVII
ODD GARDENS
Summer is coming! Don’t you see
it? Don’t you feel it? Even while
the trees are still leafless and the
grass-plots still brown we know
spring is here, almost as the plants
themselves know it, by the surging
up of new life in our veins.
We open wide our windows to let
the sweet sunshine in and make ready
to welcome the blessed summer so
near at hand.
What if you cannot leave the city,
as some do, to enjoy the delights of a summer in the country;
what if you have not even a foot of ground, you may
still have some of the sweets with which summer is so lavish;
you may, nevertheless, have your flower-garden. Summer
will help you grow your plants. The sun is knocking now
on your window, bidding you prepare the ground for summer
to make fruitful.
A Country Garden in the City
A real hanging garden, with creeping vines and fragrant
flowers, will prove a delight, and it may be yours though
your window is your only garden plot.
311

A Country Garden in the City.
Take your tape-measure and find the width of your
window. It is about three feet wide, isn’t it? Well, it
doesn’t matter. Whatever the width, add two feet more
and you have the
length for your garden.
Thus, for a
three-foot window
you will have a five-foot
garden. Go to
the planing-mill and
select a wide board
of that length. See
that it is without
flaws, and do not be
afraid of having it
thick, for it must
bear a heavy weight.
Buy a pair of strong
iron brackets, or
very likely at the
mill they will give
you two three-cornered
pieces of
board like Fig. 591,
which will answer
the purpose as well.
With screws fasten these brackets to the
board, about half a foot from each end, as in
Fig. 592. Near the back edge of the board, directly above
the two brackets, screw in good-sized screw-eyes, as shown
by A, B, Fig. 592. Measure the distance from the bottom
edge of your board to the top of the screw-eye, as designated
by the dotted line C in Fig. 593, and fasten strong
312hooks in the outer wall on either side of your window at the
same distance above the window-sill. Be careful about
your measurements and have your hooks just as far apart
as the screw-eyes. Go to a hardware store and get a
piece of wire netting, such as is used for fences, long
enough to go around the front and
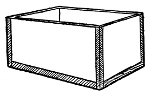
Fig. 594.
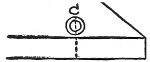
Fig. 593.
side edges of your board. Have three
strips cut from it,
one eighteen inches
wide for your garden
fence, the other
two each twelve inches wide and about three feet long
for trellises for your vines. Fit the fence around the board,
bending it sharply at the corners, and tack in place along
the edge of the board, using double tacks, called staple
tacks, for the purpose. Paint the board and wire netting
dark green, and, when dry, lift it out of the window,
and, resting the board on the outside window-sill, slip the
screw-eyes on the hooks in the wall, as in Fig. 592.
With two staple tacks fasten the ends of the fence to the
wall.
313Now you are
Get two strong wooden ones from your grocer, about eight
inches deep and of a size to fit the board at either side of
your window, and another to fit between the two end ones.
Bore several holes in the bottom of each box, bind the edges
where they meet with strips of tin, as shown by the dark
strips in Fig. 594. Have the tinsmith cut the tin the required
lengths and also bend it to fit your boxes. It will
then be easy work to tack it on yourself.
Binding the boxes in this way makes them strong and
prevents their bursting apart, as they are very apt to do
with nothing to stay them. Paint the boxes dark green,
like the board, and on the bottom of each place a layer of
charcoal, next a layer of sand and then fill with earth,
enriched with fertilizer obtained at the drug-store. Weave
two straight sticks, about four feet long, in and out through
each piece of wire netting for your trellises. Stand a trellis
upright in either end box by pushing the end of the sticks
deep into the soil.
It is a country, not a city, garden you want, is it not?
Then don’t be persuaded into buying geraniums, fuchsias,
verbenas, etc. They are very lovely, but you can have
them all winter long, if you wish. What you are trying
for now is
—one where you plant the seeds and have the excitement
of seeing them come up, then watching them grow, and
finally of discovering the first buds which so soon are to
blossom and reward you with their beauty and fragrance
for all the care bestowed upon them.
314Have you ever seen the hop-vine? It is very pretty, with
its soft festoons of feathery tassels. The hop-vine, running
up the trellis on one side of the window; the red bean, with
its scarlet blossoms, on the other, will bring a bit of the
country to you as little else can.
Around the front and side edges of the end boxes plant
nasturtium seeds, and midsummer will find a wealth of
tangled vines and fragrant flowers which will clamber over,
under, and through your fence in wild abandon.
In the middle box plant bachelor’s-buttons (corn-flowers),
which blossom from July to late autumn with white, blue,
and pink flowers. Plant also mignonette for its sweetness,
and, to complete the country effect, add lady-slippers.
All these flowers are raised from the seed, except the
hop-vine. For this you will have to get the “sets,” which
are the underground stems of the old vines cut into pieces.
Three or four “sets” planted together will give you a nice
vine.
One of the oddest of odd gardens is
This, too, may be just outside your window if you are so
fortunate as to have a balcony large enough to hold a good-sized
tub; or one corner of your backyard may perhaps be
spared for a place in which to rear your water-babies.
Half of a good, strong hogshead barrel makes a fine bed
for a miniature pond; a molasses barrel will answer or any
kind of tank that will hold water and is at least two feet
deep can be used for the purpose.
Do not choose too shady a spot for your water garden.
There are very few plants that are not the better for a little
sunshine. An unsheltered corner which must endure the
burning heat of the afternoon sun is also undesirable, but
315a place which only the morning sun can reach will be
suited to almost any water plant. You will need
as well as water for this aquatic garden, and if you are
living in the city it will be a good idea to take a trip to the
suburbs, where you can fill a tin pail with the muddy, freshwater
swamp soil. Failing that, you may procure from a
florist some turfy loam and enrich it with a good fertilizer.
Fill the bottom of your tank with the soil to the depth of
one foot and plant your roots before adding the water. It
is a good thing to anchor the plants with stones to prevent
them from floating out of place when the water is poured in.
316For most of your
you will probably have to visit the country, as there appears
to be no way of getting the simpler kinds but by
going directly to Mother Nature and transplanting them
from her garden to yours.
Before starting on your search make inquiries and learn
what you may expect to find in the various localities.
Water lilies are not found on all ponds, but they are
well worth any amount of travelling, and secure some you
must, even if several trips have to be taken before they
are discovered.
There is a water garden in our neighborhood which is a
source of great pleasure to its owner. Floating on the surface
of the water in two great stone tanks are pond lilies of
several varieties. As the great buds grow and unfold they
are watched closely and with intense interest until they are
suddenly found full-blown, fair and pure, a floating mass of
loveliness.
Any and every plant which grows in the ponds and
swamps may be made to grow in an artificial pond or swamp
in your own house or yard. The water arum or arrow-leaf;
the pickerel-weed, with its spikes of pale-blue flowers;
the sagittaria, whose flowers are white, and the water
hyacinth are all pretty in the water garden.
There are vines that grow readily in water which you
can put around the edges of the tank, allowing them to hang
over and partially hide the outside. The Wandering Jew is
one which is very hardy and will droop in graceful festoons
of green. It is not a water plant, but will thrive in water
and should not be planted in the soil at the bottom, but
allowed to send out its roots into the water near the surface.
317Aquatic plants are the simplest of all kinds to transplant,
because the sun does not wilt them when their roots are
kept wet. Transfer the plants in baskets filled with wet
moss, or make them in packages covered on all sides with
several wrappings of wet paper. They can be preserved an
indefinite length of time if kept wet.
Cat-tail seeds will grow in mud; so will other swamp
plants, and a swamp garden, kept always wet, may be an
accessory to your water garden.
From time to time you must add fresh water to supply
the loss by evaporation in the tanks, but as the growing
things keep the water pure it does not need changing.
You may arrange smaller and
for the window in glass dishes or bowls, or even glass jars,
and grow there the small and delicate water plants. Only
a layer of clean sand is needed for soil, and some plants do
not even require that. The water-milfoil is an ornamental
little plant; the eel-grass which, growing at the bottom,
sends up its long spiral stems to lift its blossoms above the
water, is interesting, and the horn-wort and water-purslane
do well in narrow quarters. The duck-weed is a surface
plant which drops its slender roots into the water without
touching soil. Besides these there are
Plants Grown Artificially in Water
A friend of mine tells the story of a morning-glory vine
which, growing in water, draped her window luxuriantly
and even blossomed in a timid way. This plant was taken
from the garden when its stem was several inches long and
placed in a bottle of water, where it sent out more roots
and grew rapidly.
318It is possible, too, and is a very pretty experiment, to
start the seeds without soil. Among the plants in my
studio window, a short time ago, was a green glass finger-bowl
filled nearly to the brim with water. On the surface
of the water rested two layers of raw cotton cut to fit the
bowl, and on top of the cotton were scattered a number of
morning-glory seeds. They lay quietly on their soft, floating
bed for a few days, then the seeds began to send out
white worm-like shoots, and shortly there appeared on each
a pair of small heart-shaped leaves tightly clasped together
at the top by the now empty seed-shell. Soon down into
the water, piercing the cotton, little thread-like roots made
their way, growing thicker in mass and stronger as the
young plants shot up in a wonderful growth. We watched
them from their birth until they were three or four inches
high, when an accident brought their existence to a close
and our experiment to an untimely end.
Almost any seeds will sprout when treated in this manner,
and in order to keep the water pure during the waiting
period it is well to drop into it several small pieces of
charcoal. Charcoal is a great purifier and its use is advisable
in all water gardens.
appears quite marvellous to one who sees it for the first
time. Take a large, rather coarse sponge, put it in a glass
bowl, sprinkle it with sand and give it as much water as it
will hold, then scatter all over it flaxseed or mustard seed,
clover seed or buckwheat and place in your window. It
will not be long before you have a sponge of living green,
the secret of whose beauty lies in its being kept always
wet.
of the tuber variety will grow, not in the water, but with
water in them. The sweet potato, which puts forth a
pretty vine, the white potato and the turnip have all
proved successful experiments in my window, and it is said
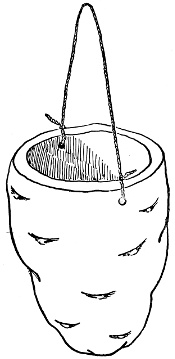
Fig. 595.
that the carrot and parsnip can be
made to grow in the same way;
their tendency, however, is to split
at the sides, which allows the water
to escape and causes them to dry
up. I am told that another way to
grow them is to immerse each half
way in a bottle of water, keeping
the vegetable suspended by means
of a darning-needle thrust through
it and resting on the edge of the
bottle. In selecting potatoes
choose those which have a number
of well-developed “eyes,” and
avoid the sweet potatoes which
look temptingly clean and smooth.
In nearly every case these are kiln-dried,
or dried by artificial means,
and no amount of coaxing will
induce them to sprout.
Take a large potato which will hold considerable water
when hollowed out, cut off one end and clean out the inside
to the depth of several inches. Puncture holes on opposite
sides about half an inch from the edge, pass one end of
a string through each hole and tie, leaving a loop at the top
(Fig. 595), then fill with water and hang at the side of your
320window, where it will not touch the glass nor get the direct
rays of the sun.
In preparing the turnip remember to turn it upside
down, as it is the root end you are to cut off; this is pointed
and generally ends in a string-like root; the leaves sprout
from the other end and form a pretty foliage. The turnip
will not only send out its own leaves, but vines may be
planted inside which will grow down to meet the upward
growing leaves of the vegetable.
English ivy grows well in water, and you all know that
the Japanese lily requires only a layer of pebbles in a dish of
water to grow and blossom most beautifully. Hyacinths in
their own peculiar glasses are also raised entirely in water.
Of other odd gardens which are full of interest there
is one called a
This is composed entirely of plants given by various friends
of the owner, and each plant is called by the name of the
giver. Devote one flower-bed, large or small as the case
requires, to your friendship collection, and set out all your
plants there. They will probably form a strange medley;
but so much the better, it will only make the queer garden
the more interesting. Roses, geraniums, lilies, fuchsias,
heliotrope, sweet violets—sheltered from too great heat by
the larger plants—verbenas and mignonette may all grow
in this odd companionship. Endeavor not to crowd them
too closely and study the habits of each plant, that it may
be kept from encroaching upon the rights of its neighbor, if
aggressive, or be crowded out of existence if of a retiring
and yielding nature. Give all equal care, and your love for
each plant and its giver will also grow and blossom in a
way most sweet and marvellous.
is in reality a collection of souvenir plants brought from
various places one has visited.
You may have your memory garden in your window if
you like, for your plants will probably not be large and
very likely will do best each in its separate flower-pot
with soil adapted to its needs.
From various parts of the United States, from foreign
countries, from places of historical and geographical interest
you can bring mementoes for your garden that will
be beautiful reminders of the pleasant scenes and incidents
of your travels.
322
CHAPTER XXVIII
ACTIVE GAMES
In this game there are two sides, so
that only an equal number can take
part. Each player is provided with a
new, shallow tin pan, the parties then
separate, and stand in two lines, facing
each other, about eight or ten feet
apart.
The starter at the head of one of the
lines fastens one end of a ball of yarn to
a door-knob or chair just behind her
and, putting the ball on her pan, tosses
it to the player directly opposite, who
endeavors to catch it on his pan, and
toss it to the person on the other side, who stands next to
the starter.
The third player in turn sends it back to the one standing
second on the opposite side (Fig. 596).
In this order, going back and forth, the ball travels
down the ranks.
When it reaches the end of the line, it is started back
again, and kept going until the yarn is all unwound.
In no case may the ball be touched with the hands.
When it falls to the floor, it must be lifted up with the pan
by the player who drops or fails to catch it, and when the
323yarn fastens itself to the clothing, or becomes entwined
around the body of a player, it must not be touched, no
matter how much it may inconvenience the movements.
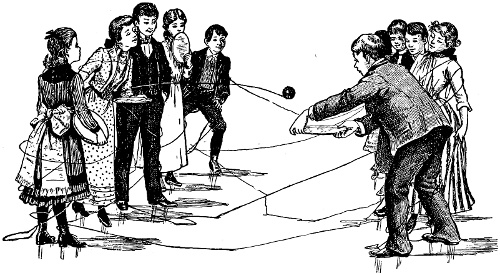
Fig. 596.—Weavers and Weft.
Great care should be taken not to break the thread, anyone
doing so is counted out of the game, she cannot leave
her place, however, for moving may disturb the yarn attached
to others. The ends of the broken yarn must be
tied together before the game is resumed.
When the yarn is all unwound it is the object of each
player to loosen himself from the tangle without breaking
the thread.
The time must be noted and five minutes only be allowed
for the disentanglement.
At the end of this time the side which has the greatest
number of members free from the meshes of yarn wins the
game.
The flashing of the bright tin pans, the struggles of the
players to catch the ball and elude the loose thread, the
324comically careful movements of those who have become
entangled in the yarn, all tend to make the game a very
merry one, to the lookers-on as well as the participants.
Some of the games played with wooden hoops are full
of fun, and the constant changing of position of the players
forms a very pretty moving picture for the spectator.
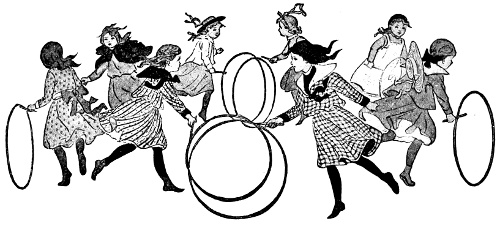
Four boys and four girls make up the set for the “Hoop
Dance,” and chance allots the partners, in this way: A stick
is placed on the ground and the group, standing about
twelve feet away, take turns in tossing small stones as
near to it as possible. The girl and boy throwing nearest
the goal take first position; the girl and boy throwing
second nearest take the second position, and so on. The
four couples stand quite a distance apart, at least six yards
being allowed between those facing each other, as in Fig.
597. (Crosses represent boys and circles girls.) One of
the players is chosen leader, and it is his duty to call out the
different figures of the “Hoop Dance.” At “Attention!”
all take position and stand ready, hoop in hand, to respond
325to the first call. The leader then prompts, “First and second
couples cross over right and left.” Immediately the
two boys, B and F, move to the left, as in Fig. 598, in order
to give space for E to roll her hoop between A and B, and
A to pass between E and F. As the leader prompts the two
couples roll their hoops to the opposite sides. Then the
leader calls, “Third and fourth couples right and left.”
They follow the example of the first couple, the boys H and
D moving to the left to give space for C to pass between G
326and H, and G to cross between C and D. The leader next
calls, “First couples right and left back to places,” and this
movement is repeated by the last couples.
Fig. 597. Fig. 598.
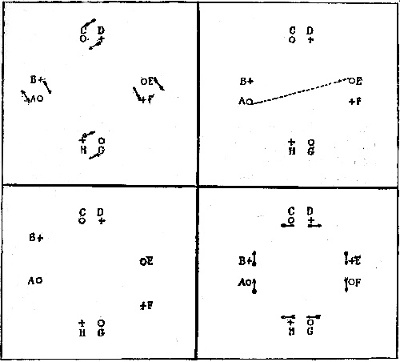 Fig. 599. Fig. 600.
of the dance the girls of the first couples change places, as
in Fig. 599, where A and E roll their hoops diagonally
across the intervening space according to the dotted lines.
This brings A in E's place and E in A's. Next the girls
change places on the sides; C and G cross over to opposite
sides. Then the leader cries out, “Girls of first
couples return to places,” and E and A roll their hoops back
to first position. “The sides do the same.” In like manner
the boys change, first B and F, then D and H, and return
to places, taking great care not to allow their hoops
to fall or get beyond their control.
is “Hoops all around.” At “Attention!” from the leader
each player turns, facing the back of the next player. Arrows
point the direction players are to take (Fig. 600). A
turns toward B; B faces C; C looks at D, and so on. Then,
with hoops in position, at the word “Hoops all around”
each player follows the companion directly ahead, rolling
his hoop as he goes around the circle, stopping only when
his original place is reached.
Again the leader calls, “Attention.” This time each
player faces his partner, stepping a little to one side to
allow the partner to pass (Fig. 597), which brings all the
girls A, C, E, and G, facing the left and outside the ring,
327while B, D, F, and H, the boys, face the right and are
inside the ring. At the call from the leader, “Grand
right and left,” each player carefully rolls his hoop first
to one side, then to the other of those whom he meets
on his way around the circle, beginning with his partner
(Fig. 597). The girl A passes to the right of her partner B,
left of D, right of F and left of H. All the other players
weave in and out in the same way, as in the ordinary quadrille,
the only difference being that instead of the hands
being grasped in passing the hoops are rolled to right and
left. This figure concludes the “Hoop Dance.” Should
the players be all girls, let four of them tie handkerchiefs
on their left arms to show that, for the time being, they
represent the sterner sex.
The Game of Tag never loses its charm. Who can resist
rushing after a companion at the words “last tag.” No
girl with any daring or enterprise can rest content until the
compliment be returned. Somewhat differing from the
original tag, but none the less attractive, is the game of
the same name played with wooden hoops.
keeps one constantly on the alert. Any number may join
in this game, and all, except one, must be provided with
hoops and sticks. Decide who shall be “It” by some
counting-out rhyme—such as
High peg, low peg,
Mary and Ann,
Tom, Dick and Harry,
Jim and Dan,
Roly Poly, cod and trout,
Stingelium, Stangelium,
You are out!—
328This important person has a stick, but no hoop. From
some particular starting-point determine the distance the
players may roll their hoops before “It” is permitted to follow.
The distance is optional—eight yards or so would
do, the place being designated by a house, tree or fence,
as the case may be, and made plain to all by “It” saying,
“I'll stand here and give you all a chance to reach that
tree”—or whatever the object may be—“before I follow.”
At the signal, “Are you ready? Go!” from “It,” all except
“It” start rolling their hoops in the same direction. As
soon as the first player reaches the tree “It” calls out,
“Coming!” and immediately follows. The other players
hearing the word “coming” scatter in all directions while
“It” endeavors to strike someone’s hoop with her stick.
When she succeeds the captive surrenders the hoop to
“It,” who scampers away with her prize to join the others.
The loser, instantly becoming “It,” starts in pursuit of the
nearest hoop. She cannot, however, strike the hoop she
has just lost until the player has had time to run several
yards beyond her reach. The game continues until each
player has been “It.”
When at the circus, has not everyone seen the clown
and other members of the sawdust ring jump boldly
through a hoop held in the air? They perform the feat
with such skill that it looks very simple, but it is less easy
than it appears.
though, is not difficult, for a wooden hoop takes the part
of the clown. The game calls for one extra hoop large
enough to allow the remaining hoops to pass through it
(Fig. 601.) Count out to determine who shall be “It” and
when that is decided let the other players take their places
329at a given distance—about fifty feet—from the large hoop,
which is held perfectly still in position by “It.”
The object of the game is that each player, in turn, shall
roll her hoop through the large one without allowing the
Fig. 601.
rolling hoop to fall on its way to the
other side of the large hoop. The first
player to miss changes places with “It”
and holds the big hoop, giving her
smaller hoop to the first “It”; and the
latter joins the ranks of the players, taking
the last place in the row. The second
to fail surrenders her hoop and in turn
becomes “It.” The game proceeds in
this way until only one player remains
who has not been obliged, through failure,
to take the part of “It.” Such a one is victorious and
the winner of the game. No player is allowed to be “It”
a second time in the same game. The second miss debarring
her from any more trials, she drops from the line to
await a new game, when she will be entitled to the same
chance of winning as the others.
Racing always has its charm, and wherever there is a
group of young girls, sooner or later there will be a race of
some kind. There is no fixed number of players for the
Still it is better not to have more than eight. In determining
the couples who shall race together, eight slender
sticks or broom-straws are used, making four pairs of
straws, each pair of a different length. A player holds the
straws in her hand, showing one end of each. They are
placed evenly, all projecting out the same distance from
the closed hand (Fig. 602). When each player has drawn
330a straw and found her partner, who has its mate, the two
holding the longest straws roll their hoops from the given
starting-point to the goal previously determined. The distance
Fig. 602.
should not be more than
three or four hundred feet.
The two players having the
next two longest straws take
second turn. Third place belongs
to the two holding the
next longest straws, leaving
those with the shortest straws
last. All who fail to win the
first or trial race fall out of
the game, and the four victors
again draw straws for places as in the first trial. The
two couples race, and then comes the final test between
the last two victors, the other two having dropped out.
The last trial is watched eagerly by the six who are out of
the game and stand as spectators on each side of the
course, cheering the players as they race after their hoops.
The first to reach the goal in this run is hailed as the
champion.
When you learn to jump rope you acquire unconsciously
at the same time a delightful sense of rhythm in
addition to the exercise the sport affords. In the lively
Jumping Rope Conquer Game
the players choose a leader and use a long rope which is
turned at each end by two of the players. The others, in
turn, follow the leader, doing everything she does, even to
the turn of the head and the movement of the hands.
When all is ready, the rope turning evenly and steadily
331toward the leader, she runs in and through to the opposite
side without jumping, calling out “Follow me”; the other
players do likewise. Then with the rope turning away
from her she runs back in, jumps once and runs out on the
opposite side. The others follow. Next the leader runs
in, jumps once, then stoops and picks
up a small stone or pebble, which has
previously been placed near the rope,
regaining her position in time to jump
over the rope when it next comes to her feet. Again she
stoops, lays the pebble back in place, jumps once and runs
out. The others repeat this. The leader runs in, jumps
first on one foot, on the other, then on both, and runs out.
The others do likewise. The leader runs in, calling to one
of the followers to join her. They face, grasp each other’s
hands and jump. Still holding hands they raise them over
332their heads and jump. The others, in couples, follow in like
fashion.
Jumping Rope Conquer Game.
Should the leader at any time fail, she must take an end
of the rope, and the one next in line becomes leader, while
the player relieved from turning goes to the bottom of the
line, her turn coming last. At the first miss of the second
leader the player directly following takes the leadership;
each follower becomes leader in turn. When one of the
followers misses she takes an end of the rope, and the
player released goes to the bottom of the line to await her
turn. The game continues until each player has enjoyed
the distinction of being leader.
is a jumping-rope game played by three or more. Two
turn the rope, each taking an end; they walk along, turning
as they go. The other players run in at the start and
jump forward at each turn of the rope, keeping pace with
the rope-turners. As soon as one trips she changes places
with the player at the end of the rope. The point of the
game is that the entire group shall keep constantly moving
forward, each player being obliged to take an end of the
rope when she fails.
In the game of
a long rope is necessary and at least four players, two to
turn and two to jump. If more join the game, they must
divide into couples and take turns jumping, as the sport
requires two to enter and jump the rope together. The
places are taken as in Fig. 603. One player is stationed as
near as possible to one end of the rope, and the other player
close to the other end on the opposite side. As the rope
333turns the players A and B (Fig. 603) advance, jumping toward
each other. They meet, pass and continue on their
way toward the opposite end of the rope until they have
changed positions, A being in B's place and B in A's. They
return to their first positions and run out, leaving the rope
free for the next two to have their turn.
One of the liveliest rope games is
A long rope is turned by two of the players; another runs
in and jumps once; they all sing in chorus “Red, white and
blue,” slowly keeping time with the rope, which is turned
three times high in air above the head of the jumper. The
first turn is for red, the second for white, and the third for
blue. As the turners lower the rope to the ground, without
once stopping in the turning, the player jumps once,
and again the rope goes up and is turned three times in the
air while the chorus is repeated. Then, after another
jump, all chant the words, “Salt, pepper, MUSTARD, VINEGAR,”
the rope turns very slowly for salt, faster for pepper,
still faster for mustard and at lightning speed as vinegar
is pronounced; the jumper increasing her speed at each
turn of the rope.
334
CHAPTER XXIX
EXPENSIVE GAMES WITH LITTLE OR
NO EXPENSE
Everybody plays
Young and old alike enjoy the game whose
object is merely to strike a small ball backward
and forward over a net stretched
across a table. If you have never played
the game it will seem very simple, but
upon first trial you will probably realize
that keeping the ball in motion is not as easy as it appears,
for, instead of returning over the net in an orderly manner,
the ball shows an uncontrollable inclination to jump down
on the floor and hide in some obscure corner, thereby causing
the player to enter reluctantly into a game of hide-and-seek
with the tantalizing little object. However, it requires
only slight practice to gain control of the ball, and the game
is then very fascinating.
Any girl may have a set of Ping Pong, for she can make
it at the cost of
The only thing in the game necessary to purchase is a celluloid
Fig. 604.
Fig. 605.
ball, the price of which is three cents. Other implements
needed are two rackets, a net, and the frame or
stakes supporting the net. The racket can be manufactured
from a piece of wooden box, or possibly a shingle
335
Fig. 606.
which is sound and free from knots. Wood about a quarter
of an inch thick, or more, is best for the purpose. Cut a
paper pattern first as a guide for
the shape of the racket. Take a
piece of paper twelve and a quarter
inches long and six wide; fold
lengthwise through the centre and cut according to dotted
lines in Fig. 604. Open the paper pattern and place it
over the wood; with a lead-pencil
draw a line completely
around it, then carefully saw
or cut out the racket, and
smooth down the rough
edges with sand-paper; make

Fig 607.
Fig 608.
the second racket in the same manner. The head
of the racket should be seven inches long and six wide,
the handle five and a quarter inches long and a trifle over
one inch wide (Fig. 605). Saw the stakes from the handle
of an ordinary hearth-broom, or from any strong, slender
round stick. Make each stake eight inches long and notch it
at the top (Fig. 606). As a support for
the stakes use a strip of board three
inches wide, not more than one inch thick, and about four
feet long. If you have no auger to make two holes in the
336board for the stakes, burn them through the centre of the
ends with the red-hot point of a round poker (Fig. 607). Be
careful not to make the holes too large, have them rather
small, that the stakes when fitted in may be tight and firm.
A strip of almost any kind of cloth six inches wide, hemmed
top and bottom and cut long enough to stretch taut entirely
across and above the board,
when tied from stake to stake,
may serve as a net. Mosquito
netting or turkey-red cotton
cloth make satisfactory strips;
use whatever material is most convenient. Fig. 608 shows
the net with two narrow tapes sewed at the four corners for
tying it to top and bottom
of the stakes. Stretch
the net across the centre
of a table, preferably a dining-room table, bring
forth your rackets and ball, and practise playing
Ping Pong with some friend, each standing at one end of
the table (Fig. 609).
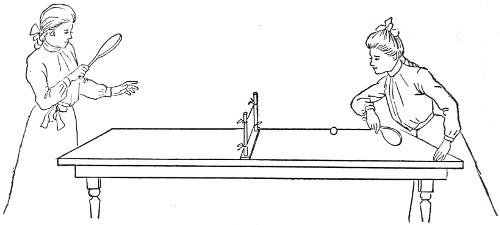
A retriever is sometimes used for picking up the ball
337when it falls to the floor, and, though not necessary, will be
found very useful, especially for beginners. Get a strong,
slender stick about a yard long and fasten a small hoop of
metal or wood on one end by binding the turned-up ends
Fig. 611.
of the hoop securely to the stick (Fig. 610). Test the fastening
and be sure that it is firm and strong, and that the hoop
does not wobble. Then sew a little cloth bag on the hoop
(Fig. 611) and the next time the ball falls to the floor scoop
it up with the retriever.
are similar to lawn tennis, but there is no second service,
as in lawn tennis.
The game of Ping Pong is generally for two, though
four players may take part. The double game will afford
great amusement if but two rackets are used, as the player
must lay her racket down each time for her partner to use.
The player who first strikes the ball across the net is
called the server and the other player is called the opponent.
The idea of the game is to serve the ball so as to
strike the table on the opposite side of the net. The ball is
then in play. If it drops into the net, or does not strike the
table, it counts in favor of the opponent.
The opponent to whom the ball is served must endeavor
to return the ball over the net so that it will strike upon the
table. The ball is thus sent back and forth until one player
or the other fails to get it over the net so that it will bounce
upon the opposite side of the table.
The ball is in play so long as it strikes the table-top and
can be taken on the first bounce. Striking before the ball
bounces is not allowed.
When the game is finished the server becomes opponent
and the opponent server, and so on, alternately.
338If the ball in play strikes any object above or round the
table before it bounces on the table-top itself (net or post
excepted) it counts against the player.
The server wins a stroke if the opponent fails to return
the ball or returns the ball in play off the table.
The opponent wins a stroke if the server serve a fault,
or fails to return the ball in play, or returns the ball in play
so that it falls off the table.
No volleying is allowed; but as long as the ball touches
the table-top it is in play and can be taken at half-volley.
The opponent loses a point if he takes the ball on the volley.
The player who first wins six games wins a set.
The service must be strictly underhand and delivered
from behind the end of the table.
Your opponent scores—If you do not return the ball; if
you strike the ball before it touches the table; if the ball
bounces twice.
You score—If your opponent strike the ball out of play
or bounces the ball his side of the net.
On either player winning his first stroke, the score is
called 15 for that player; on either player winning his second
stroke, the score is called 30 for that player; on either
player winning his third stroke, the score is called 40 for
that player, and the fourth stroke won by either player is
scored game for that player, except when both players have
won three strokes (40 all); the score is then called deuce,
and the next stroke won by either player is scored advantage
to that player. If the same player wins the next stroke, he
wins the game; if he loses the next stroke, the score is
again called deuce, and so on, until either player wins the
339two strokes immediately following the score of deuce, when
the game is scored for that player. In naming the score the
server is always mentioned first, for convenience, as 30-15,
signifying 30 for server and 15 for opponent.
Let means that the ball, while being served, touches the
net in passing over, and the server has the privilege of
serving again. If the opponent makes a let stroke it counts,
the same as if the ball had cleared the net.
Volleying means striking the ball before it bounces.
Half-volleying means striking the ball just as it bounces.
Underhand stroke means striking the ball with the head
of the racket pointed downward.
Overhand stroke means striking the ball with the head of
the racket pointed upward.
All means same score for both players—as 30 all, meaning
30 for server and 30 for opponent.
Deuce means a tie.
Begin by taking plenty of time and serving slowly. Remember
to strike the ball lightly; too much force will send
it flying to the other end of the room, which is to be avoided.
Keep cool and think what you are doing.
Your mind must be centred entirely upon the game.
Grasp your racket close to the head, and when serving keep
your racket down; the ball must not be held above the waistline
and must be served beyond the end of the table.
The writer once knew,knew,
A Little Girl who was Very Fond of Playing
out of doors, and when confined to the house by inclement
weather, a bad cold, or some other disagreeable thing, was
340very apt to grow restless and fretful, complaining always
that she did not know what to do. She had any quantity of
beautiful toys, but, as she said, she was tired of them all.
Then it was that the family would induce her to try to
make something for herself, and when once she became
interested in her work, and found that by her own ingenuity
she could manufacture, from odds and ends, many interesting
little toys, her restlessness vanished, and she was
once more cheerful, happy, and contented.
At one time she had a book presented to her which gave
the patterns and directions for making a few little articles—a
very few it seemed to her, for she speedily did all the
work laid out there, and was again thrown on her own
resources for new ideas.
A Make-believe Sewing-machine
When she was quite a small child, too young to be
allowed to sew on a real sewing-machine, she constructed
a machine which, with the aid of her imagination, did very
good work. Of course she could not really sew on it, but
neither could she have done so had it been a “sure-enough”
sewing-machine, and there was sufficient reality about it to
make her play very absorbing.
The small wheels on top went round with a whiz and a
whirr that filled her soul with delight. There were two
wheels, because they were the remnants of a mechanical
toy, a horse and sulky, which was once driven by a handsome
tin jockey. The horse and jockey were gone, but the
wheels and machinery remained. The key to the clock-like
works was likewise missing, but it was very easy to
wind up the spring by turning one of the wheels round and
round a number of times. Once wound up, the wheels were
bound to go until the machinery ran down again, and it
341was while going at full speed that the pretended sewing
was done.
No, these two wheels were not all of the sewing-machine
by any means. There was the arm made of pasteboard,
with needle attached, which, shaken by the vibration of the
turning wheels, moved up and down quite naturally. All
this was on top of a small table, underneath was the treadle
made of the back of an old geography laid across a piece of
kindling wood. The treadle would sometimes slip out of
place with the rapid movement of the little girl’s feet, but
that was of no consequence, since it was only the work of a
moment to replace it. The fact that there was no large
wheel mattered nothing either, for the little seamstress felt
her feet moving up and down, saw the wheels whirling on
top, and was satisfied without a wheel that could not be seen
anyway.
The sewing-machine was such an ambitious idea that it
required some imagination to carry it out successfully, but
there were other things this little girl made which were
quite complete in themselves, such as toy houses, furniture,
and dolls.
Knowing how thankfully this same little maid received
any suggestions which would assist her in the manufacture
of her home-made toys, I take it for granted there are other
children who will be just as grateful for new ideas and who
are just as happy in carrying them out. If you happen to be
such a little girl, you will be glad to learn about this impromptu
game of croquet which you can make for yourself
in half an hour and enjoy the use of for many a long day.
To Make a Parlor Croquet Set
Diagram No. 612 shows the arches, of which there
must be nine, all made of wire bent in the shape you see,
342with each of the ends thrust into a button-mould. To prevent
the wire from slipping out, fill the holes with beeswax,
and then push the wire in;
this will make the arches quite
strong and steady.
The mallets, as shown, are
made of empty spools, with long
wire nails driven in for handles.
The stakes are made of wire
nails stuck in button-moulds,
like the one seen at the bottom
of diagram No. 612. You will
need two stakes and four
mallets. Marbles, all of the
same kind, but with different
markings, take the
places of croquet balls.
Not an expensive set of
croquet, surely. The spools,
wire, button-moulds, and
nails you will probably find
in the house, and the marbles
also, if you happen to have a small brother; if not, you
can buy them seven for one cent.
The parlor croquet should be played on a good-sized
table covered with a woollen cloth. Place the stakes and
arches in the position shown in diagram No. 613. Let the
stakes stand forty inches apart. Place arch No. 1 four
inches from the starting stake, arch No. 2 four inches from
No. 1, arch No. 3 eight inches to the right and one inch in
advance of No. 2, arch No. 4 twelve inches in advance of
343and on a line with No. 2. Begin at the other stake and
place the arches at the same relative distances.
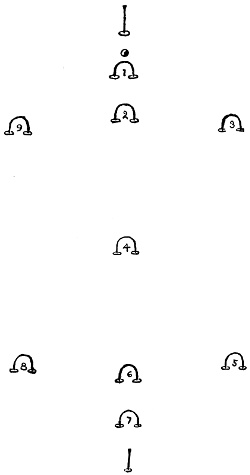
First—The object of the
game is for each player to
send her ball through each
arch in turn, beginning at
No. 1 and using her mallet
for striking her ball. When
a ball has passed through
arches Nos. 1, 2, 3, 4, 5, 6,
and 7, according to their
numbers, it must strike the
stake just beyond No. 7,
then returning through
arches 7 and 6, it must move
on through No. 8, through
No. 4 again in the direction
opposite to the one taken
in its first passage; then
through arches Nos. 9, 2
and 1, striking the stake to
“go out,” and the first
player to do this wins the
game.
Second—To decide who shall open the game, or be the
first to play, each player in turn shall place her ball (marble)
directly under the first arch and play for the stake. The
one whose ball, after playing, stands nearest the stake has
the privilege of the first turn, the next nearest the second
turn, and so on.
344Third—The first play with each ball shall be made after
placing it half way between the starting stake and arch No.
1, and the player may aim for the arch or any ball which
has entered the game, or may send her ball in any direction
she may choose.
Fourth—A ball failing to make its first arch must remain
where it rests until next turn; passing through its arch
gives the player another play.
Fifth—When a ball strikes another the player may croquet
or roquet the ball in any direction she wishes, and
then have another play. No ball may croquet or roquet
another more than once in one turn unless it passes through
an arch or strikes the stake between the croquets.
To croquet a ball the player places her ball touching the
one it has just struck; then, resting her finger on her own
ball to hold it steady, she strikes her ball with her mallet,
sending the other in any desired direction. To roquet a
ball the player places her ball touching the one just struck
and strikes her ball, moving them both at the same time.
Sixth—A ball rolling off the table must be replaced at
the point where it went off two inches from the edge.
Seventh—When a ball has passed through all of the
arches it becomes a “rover,” and need not strike the starting
stake and go out until the player wishes. A rover has
the privilege of croqueting or roqueting any or all of the
other balls in each turn, but may play on each ball only
once during one turn.
Eighth—The game may be played with partners, or
each may play for herself. When there are partners each
side takes a turn alternately.
345
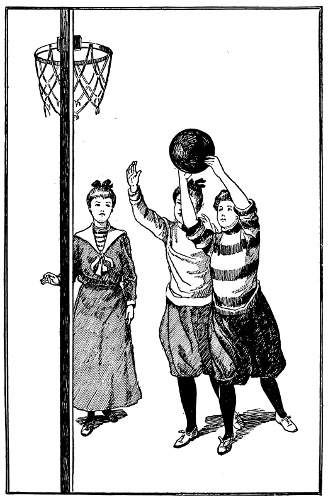
346
CHAPTER XXX
BASKET BALL
With the opening of the basket-ball
season the girls are all wide-awake,
interested, and eager to
enter the teams; there is an exciting
dash and life about the
game which renders it very fascinating.
If you can organize a set of
ten players and divide the
among the girls, each contributing
an equal portion, the individual expense need not be
exorbitant.
The price of a good basket ball is four dollars, and a pair
of goal baskets the same amount, making in all eight dollars,
just eighty cents each, a small amount when compared
with the fun, health, and general benefit to be derived from
the sport. The expense will be even less if shared by the
officials.
It is optional whether you play indoors or out of doors;
the game is suited to either place. The size of a
varies in different localities, being regulated according to
available space, but it must not exceed 3,500 square feet.
347
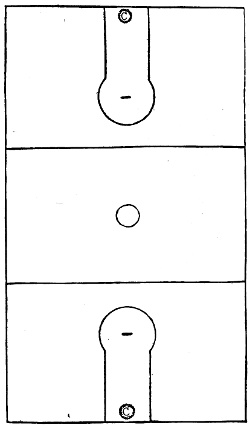
Mark out your field, making the width less than the
length, according to Fig. 614. If indoors, use black paint
for marking the inch and a half wide boundary lines; if out
in the open air have the lines white, of the same width as
the black, and made with
either whitewash, chalk,
paint, or plaster-of-paris.
You must have the side
boundaries of the field at
least three feet from the
wall or fence, and the end
boundaries directly below
the pole or wall surface
against which the basket
goals are placed. The inclosed
field is divided into
three portions (Fig. 614).
Two more inclosures are
necessary, called foul limits;
make them inside the
two end divisions, Figs. 614.
The boundary line of the
curved end must be equally
six feet distant all around
from station line indicated
by a short straight line in
the centre of the inner end of foul limits in both divisions;
the station line must be fifteen feet from the goal or outer
edge of basket; the space across from the straight lines of
the foul limits must measure six feet.
Mark centre of field with a circle of a foot and half
radius (Fig. 614), or two lines one and a half feet apart.
If marked by circle the girls playing centres must stand
348within it; if two lines are used they must toe the lines.
Hang your
ten feet above the ground on the centre of each extreme
end boundary line (Fig. 614, C and C). Be perfectly sure
that the basket goals are firmly fastened in place and rigidly
supported either on a strong upright pole, or on a wall
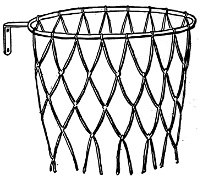
Fig. 615.
surface. If on poles it is better
to have a screen six feet wide
and four high as a background,
though this is not absolutely
necessary. During practice and
ordinary games leave the netting
open at the bottom of the basket,
that the ball may fall through the
basket to the floor or ground
beneath, it being difficult for
girls to get the ball out of the
basket when it is closed at the bottom. Using a pole to
push the ball out is not always attended with satisfactory
results, and the effort consumes valuable time and strength.
The baskets are called the goals; usually they are hammock
nets of cord, sometimes metal chain links; they are
always suspended from metal rings
eighteen inches in diameter (inside).
The back part of the metal ring is fastened
to an iron bar which extends six
inches from the pole or wall to which it
is attached (Fig. 615). The
is round and hollow, composed of two
layers, an inside rubber bladder and an
349outside cover of leather. The rubber is tightly inflated and
the cover so laced that it cannot be caught or held by the
lacing. The ball measures from thirty to thirty-two inches
in circumference and weighs from eighteen to twenty
ounces (Fig. 616).
The usual
is ten, making five on each side, though the game is occasionally
played with more. The set sometimes numbers as
many as twenty members, ten on each side; but such teams
are rare, and generally undesirable. Large teams crowd
the field to such a degree that very little skill is required
to reach the goal, and action to a great extent is rendered
almost impossible.
Each side chooses its own
who must be one of the five girls constituting the side.
There are always two captains in a game, and they should
be selected with care, as much depends upon their proper
qualifications for holding the office. In addition to other
duties, the captains toss for the choice of goals, are active
players in the game, represent their respective sides, and are
entitled to call the attention of the officials to any violation
of the rules which they may think has occurred; it is their
further duty to furnish the scorer with lists of their sides,
giving the positions of the players. The captain appoints
the forwards, guards, and centre.
The game calls for nine more girls; these do not take
active part in the play, but hold positions as officials. The
officials with a set of ten players necessitate nineteen girls
for the usual game. The nine
are one referee, two umpires, a scorer, a time-keeper, and
four linesmen. Always choose your
at least four days before the game. She must be absolutely
neutral and perfectly impartial; to her belongs the honor of
holding the most important office in the game. It is the
referee’s duty to see that the regulations respecting the ball,
goal, and grounds are adhered to.
By mutual agreement of the captains, the referee may
allow alterations in the rules regarding time and grounds,
but not as regards goal, ball, or team. Before the commencement
of the game she must ascertain the time for
beginning, or any other arrangements that have been made
by the captains.
The referee must watch the ball constantly, following it
wherever it goes. She must know at all times the whereabouts
of the ball, as her office constitutes her judge of it,
and she must decide when the ball is in play, to whom it
belongs, and when a goal has been made. Every time the
ball is put in play the referee tosses it up, she alone having
the right to do so. The referee calls time, when necessary,
by blowing a whistle, and she must always call a foul when
any player addresses an officer. No player is allowed to
talk to the officials, though anyone may speak to the captain
and the captain can address the officers; in that way
only are the players able to communicate with the officers.
The referee decides all questions not definitely falling to
the umpires and linesmen, scorer and time-keeper, but is
powerless to alter a decision of the umpire or linesmen regarding
matters under their jurisdiction.
351The referee instructs the team when to play, and either
side refusing to begin the game within three minutes after
the whistle sounds forfeits the game.
The referee’s term of office expires at the conclusion of
the game, and her decision awarding the game must be
given then, as she no longer has power to act as referee.
The referee must disqualify members when they are guilty
of shouldering, tripping, striking, kicking, hacking, or of intentional
or unnecessary roughness of any kind. These constitute
fouls, and the referee overlooks the first offence, but
not the second. When a player is disqualified she must
drop from the game and a substitute take her place. A foul
is a violation of the rules, whether committed unintentionally,
ignorantly, or otherwise; the only guide an officer has
is the cold fact that a foul has been made.
Each team chooses its own
who must be a thoroughly competent and impartial girl.
The umpires call all fouls except cases coming under the
authority of the referee; when the fouls are made by players
crossing the field lines, linesmen judge them.
Each umpire makes her own decision independently of
the other, but a foul called by one umpire cannot be questioned
by the other. The umpire calls time by blowing a
whistle when stating a foul and indicating the offender; she
reports to the scorer the player at fault and the nature of
the foul. The referee appoints the
who must keep the score. She must be perfectly neutral.
It is the scorer’s duty to notify the referee when a player
352should be disqualified for any kind of roughness. The referee
appoints the
who must be exact about the time, noting when the game
starts, and blowing her whistle at the expiration of the
actual playing time in each half previously agreed upon by
captains and referee. The time-keeper must take out time
when called upon to do so by the referee. The captain is
privileged to ask the referee to call time for an injured
player or when a difference has occurred between the captain
and an official. The half game is generally fifteen minutes,
making the entire game thirty minutes, not counting
the intermission. The playing time may be shortened to ten
minutes for each half or lengthened to twenty for each half.
The referee only may order time deducted for necessary
stoppages, should any occur during the game. The four
are appointed by the referee; two for each side. These
four girls usually stand at the four corners of the centre
division, and it is their duty to report if any of the players
step on or cross over the dividing lines. Such offences are
counted fouls. When the ball happens to be thrown outside
the field boundary lines the players are allowed to rush
after it, but are not allowed to go beyond the dividing lines
when in the field.
All the girls should be in their
ready to begin the game at the appointed signal. Fig. 617
will assist you in gaining a clear understanding of the different
353positions occupied by the various members of the team
when in position to commence play. The object of the
game is to throw the ball into the opponent’s basket, and this is
best accomplished by the girls being coupled with opponents
and stationed at various places all over the field. In

Fig. 617.
Fig. 617 the girls on one
side are represented by
circles, those on the other
side by crosses. We will
suppose that the two
captains have tossed for
goals, and that to the
circles has fallen the goal
G and to the crosses the
goal H. In the centre of
the field are grouped
three girls, one player
from each side, and the
referee, who is here indicated
by a triangle.
The referee stands with
the ball in her hands, facing
the other two girls,
having her back turned
toward the side of the
field (Fig. 617).
It is optional on which
side of the centres the
referee is stationed.
The two players stand facing each other with their sides
turned toward the referee, and each has her back toward
her own goal (Fig. 618). These two players, circle and
cross, are known as
There are always two centres in a game, and it is their duty
to jump quickly for the ball as it leaves the hands of the
referee, who opens the game by tossing the ball vertically
in the air immediately between and not more than two feet
Circle Centre. Triangle Referee. Cross Centre.
Fig. 618.
from the centres. Fig. 618
shows the referee ready to
toss the ball. Each centre
endeavors to catch the ball
and pass it to one of the
forwards on her own side,
with the hope that it may,
sooner or later, land in her
opponent’s basket; at the
same time she tries to prevent
the ball from being
passed by the opponent’s
guards across the centre of
the field toward her basket.
The centres must confine
their play within the central
space; they cannot step across the dividing lines running
from side to side of the central division of the field. In
each of the end divisions are stationed two girls called forwards
and two others known as guards; their duties are
implied by their titles. The forwards endeavor to forward
the ball to their opponents’ basket, and the guards guard
their own goals, striving to prevent the opponent forwards
throwing the ball into their basket. In Fig. 617 the circle
are in the end near their opponents’ basket H, that they may
have a better opportunity of sending the ball into it, and
355the cross forwards are on the other end of the field near the
circle’s basket trying to engineer the ball into that goal.
You will notice that the guards on each end protect their
own basket. Standing by each cross forward is a circle
who endeavors to prevent an opponent from succeeding in
her efforts for the goal, and on the cross end of the field
the two cross guards are trying to protect their basket from
the circle forwards.
The stars in Fig. 617 stand for the four linesmen, who
must be continually on the qui vive and report if a girl steps
over the dividing lines.
Each umpire watches both sides; generally one umpire
walks about just outside the field boundary line on one side
of the field, and the other walks just outside the boundary
on the other side of the field. It is optional which side they
take, but they should not both be stationed on the same
side. Fig. 617 shows the circle umpire on the right hand,
and the cross umpire on the left hand of the field. The
umpires are designated by circle and cross, with rays extending
all around them.
The time-keeper stands outside of the field, that she may
not interfere with the action of the players; other than that
restriction, she may move as she pleases. In Fig. 617 the
time-keeper is denoted by a round black spot.
The scorer must also keep out of the field proper and
have her mind on her portion of the work. In Fig. 617 the
scorer is designated by a square.
When all stand ready the
begins. The referee tosses up the ball, and every one of
the players on the field eagerly watches the two centres as
356they strive to catch the ball. The centre, gaining the advantage,
endeavors to toss it to a girl on her own side,
while the other centre does all in her power to prevent the
ball from reaching its destination, often running in front of
the victorious centre, blocking the way and still further
interfering by throwing up her arms. If the first centre
succeeds in tossing the ball to one of the forwards on her
side, that forward immediately strives to get the ball in the
opponent’s basket, but is constantly followed and opposed
by the opponent guard, who endeavors to frustrate the
play. Should the forward decide that the chances for gaining
the goal are better if she throws the ball to another girl
on her side, she does so with the hope that the other forward
will succeed in caging the ball. If, however, the last
forward be baffled, she tosses the ball either to her own
centre, back to the first forward, or over across the field to
one of her own guards, anywhere the rule permits in order
to keep the ball from the hands of the opponents.
If one of the opponent forwards succeeds in capturing
the ball she tries either indirectly, with the aid of others
on her side, or directly, by her own exertions, to cage the
ball in the basket of the opposite side.
The centre catching the ball from the referee is privileged
to throw it to any player on her own side, either
forwards or guards, at one end or the other of the field,
her action depending upon circumstances. Sometimes it is
more advantageous to toss the ball in one direction, again it
is better to throw it in another. Therein lies the secret of
good playing, the ability to see opportunities in time to
profit by them and quickness and accuracy in measuring distances,
so that the ball may land where the player intends to
send it, not falling short or getting too far. The opponent
centre constantly follows the centre having the ball, and is
357ever at her side trying to obtain the ball or prevent it from
reaching its destination.
The forward catching the ball after it has been advanced
to her by her own centre or by guards from the
other end of the field, or obtaining it from an opponent,
generally throws for the basket, and she must be able to
make the goal under many difficulties and from various
positions. Should the ball miss the basket the forward will
have no time for regrets, it being necessary for her to turn
her immediate attention to regaining possession of the ball
or to preventing it from falling into the hands of the opposing
guard.
The forward must have a cool head, must be calm, and
able to decide and judge quickly; she must take the situation
in at a glance and make the most of any, even the slightest,
opportunity of forwarding the interest of her side.
The guard’s principal duty is to prevent opponents from
getting the ball into the basket belonging to the guard’s
team, and when possible to obtain the ball and throw it to
the centre on her side, or across to her own forwards.
The guard’s position requires that she be very skilful
and constantly on the watch to defend her goal.
The players are on the field in couples, but the two
standing together are always opponents; a player is never
stationed by one of her own side. The game is thus in part
played in couples, that is, the two placed together pay
especial attention to each other and are, for the time being,
each the particular opponent of the other, trying to foil all
efforts of the other to gain any advantages in the game, at
the same time endeavoring to assist the players on her own
side.
The inner divisions for fouls, Fig. 614, are ignored except
when a foul has been made; then the side opposed
358to the one committing the foul has a free throw for the
basket and the foul court is in use. The player having
the free throw stands on the line in the centre of the circle
of the foul division (Fig. 614), and must be allowed to take
time to aim well and throw for the basket. No other player
is permitted to stand in or pass through the limits of this
court while the player with the ball is trying for the goal.
The object in marking the inclosure is to prevent any other
girl approaching nearer than six feet to the player throwing
for the basket. The foul court must be absolutely free
from all obstruction during a free throw, nor shall the
player having a free throw step from the station line until
the ball has entered or missed the goal.
When a player is given the privilege of a free throw,
the ball cannot be tossed to any other player; it must be
thrown for the basket. Should this rule be violated, the
goal will not count if made, and the referee takes the ball
and tosses it up in the centre as at the beginning of the
game. If by chance the free player is interfered with in
any way, and she fails to make the goal, she can try again,
and then, in case the ball does not land in the basket, the
ball is in play and the game continues.
The ball may be thrown or batted with the flat part
of the hand in any direction, either with one or both
hands.
While in the field a girl cannot carry the ball nor hold
it longer than three seconds; she must play it from the
spot where she catches it, unless she happens to be running.
If while running she catches the ball, she must stop as soon
as possible; should she fail to do so, in the opinion of the
umpire, the umpire may call a foul. When the player captures
the ball she either throws it at once or stops running
as soon as possible. Allowance is made in such cases, but
359the player cannot consume time by turning around without
making progress in the game.
A player cannot bound the ball on the floor more than
three times, and never lower than the height of the knee;
however, this does not interfere with her throwing for a
goal twice or more in succession.
The player who has the ball is the only one in the field
who may be intentionally blocked in her way; all other players
must be free from intentional interference.
The foul which disqualifies a player counts against her
side.
The ball is
when it completely crosses the boundary line of the field.
Should it bounce or roll back again the game continues,
except if the whistle of the referee is blown; then the ball
is put in play as if it had not returned to the field.
The time allowed for a game is always divided; when
the first part has been played, time is called for a rest by
the whistle of the time-keeper. Generally the intermission
lasts ten minutes, sometimes longer, the game being resumed
after the recess. While resting the players wrap
themselves up to keep from taking cold, and are not permitted
to drink cold water.
After each goal the referee puts the ball in play in the
centre of the field; this she must also do at the commencement
of the game and at the beginning of the second half of
the game. At the end of the first half the sides change
goals, except in case of a tie, when the game continues
without changing goals until either side has made two additional
points. These points may be made either from field
or from fouls. The game is won by the side scoring the
greater number of points during the entire game.
360If the goal (in case of uprights) is moved by an opponent
when the ball is on its edge, one point is scored by the
side throwing the ball.
The game is decided by the winning of the most points
in the actual playing time. When there are two fouls at
once on opposite sides, each side has a free throw for the
basket; afterward the ball is put in play from the centre
by the referee. Whenever it becomes necessary for the
referee to call “time,” because of illness or accident to a
player, play must be resumed in five minutes. If the injured
player is unable to resume play
may take her place, or the game may start at once without
her. If a substitute takes her place she cannot play again
during that game.
A goal made from the field counts two points; made from
a foul, one point. If a player by mistake should throw
the ball in her own basket, it counts for the opponents.
After time has been called the referee puts the ball in
play by tossing it up in such a manner that it will drop near
the spot where it was when time was called, unless it was
held out of bounds. In this case play is resumed at the
whistle of the referee as if time has not been called.
The two opponents nearest this spot when time was
called vie with each other to obtain the ball after play is
resumed. They are indicated by the umpire.
When the ball is held by two or more players for any
length of time the referee blows her whistle, stops the play
and throws the ball up from where it was held.
Whenever the ball is put in play the players who are to
361first touch the ball must not stand further than two feet
from the spot where the ball is to fall.
When the ball goes out of bounds and remains there, it
must be returned by the player first touching it. There can
be no interference with her returning it; that is, no portion
of the person of an opponent may be outside of the field of
play. The ball cannot be touched by an opponent until it
has crossed the line. If either of these rules is violated,
the ball is to be returned to the player who had it and the
ball again put in play at the original place.
The player holding the ball may throw it in any direction
into the field of play from any spot (outside of bounds)
on a line drawn at right angles to the boundary line at the
point where the ball crossed it. The ball must be thrown
into the field of play. When either of these rules is violated
the ball goes to the opponents at the same spot. The
ball must be thrown to some player and disposed of before
the player who passed it can again play it.
When a player obtains possession of the ball outside the
limits of the field she is allowed five seconds to hold it; if
the ball is held longer it goes to the opponents. In case of
doubt in the mind of the referee as to which player first
touched the ball, she tosses it up into the field of play at
the spot where it went out.
When the ball is batted, rolled or passed from the field of
play, in order to claim exemption from interference it must
be given to the opponents at the point where it left the
field of play. When it is passed to a player out of bounds
the ball is given to the other side. Carrying the ball from
the field of play is a foul. When the centres are jumping
for the ball and one of them bats it to out of bounds, it is
in play and goes to the other side.
A goal scored by a player while any part of her person
362touches the ground out of bounds shall not count. In such
a case the ball is put in play in the centre of the field.
If a player throws for the goal and the whistle of the
referee, umpire, or time-keeper sounds while the ball is in
the air, and the throw results in a goal, it is a count.
When the umpire’s whistle sounds simultaneously with
either the referee’s or time-keeper’s, the umpire’s takes precedence.
A goal scored before the whistle can be blown for a
foul made by the side scoring, does not count; but if a
player while throwing for the goal is fouled by an opponent
and succeeds in scoring, both count.
Two hands on a ball are necessary to secure it. In case
of doubt in the mind of the referee as to which player first
put her two hands on the ball, she shall toss it up at the spot
where it was held by the players. In no case may a player
remove the ball from the hands of an opposing player,
either by snatching or batting.
The ball may not be held longer than three seconds.
The ball may not be “juggled”; i.e., tossed into the air
and caught again to evade holding.
Crossing field lines with any part of the body constitutes
a foul.
No player may lean over or reach over another player.
No player may hand the ball to another player. The
ball must be thrown to another player.
Players addressing officers.
Kicking or striking ball.
Carrying ball.
Bounding ball more than three times, lower than the
knee.
363Holding longer than three seconds.
Delaying game.
Tackling, holding, pushing opponents.
Snatching or batting ball from hands of opponent.
Juggling.
Crossing or stepping on the field lines.
Leaning or reaching over another player.
Fouls for Which Players May be Disqualified.
Roughness.
Striking.
Kicking.
Shouldering.
Tripping.
Hacking.
Unnecessarily rough play.
Should any question come up not covered by these rules
the officers may decide the matter in accordance with the
spirit of the game.
These official rules are intended especially for girls'
basket ball as played in most of the well-known colleges,
Vassar, Bryn Mawr, Smith, Wellesley, etc., and by the
majority of schools except in and around New York, in
which section both girls and boys play the boys’ game.
This differs from the girls’ in having greater freedom and
consequently more action, players being allowed to run
to any part where they think they can be of most use within
the extreme limits of the field. The dividing lines from side
to side of the field are omitted, and the girls must be equal
to greater exertion and more violent action for the boys'
game.
The girls’ game is considered the safest and best for
them, being adapted for girls; yet some champion players
364prophesy that ere long the boys’ game will be the one
generally played by both girls and boys. If girls enter into
the boys’ game they must keep in training that their strength
may equal the demands. They must not shed one tear when
occasionally hurt, though such accidents need not occur if
all rudeness is avoided. Should one girl unintentionally
run against another during the game, precious moments
cannot be wasted in apologies, there being no time for either
excuses or tears. While the sport is going on the player’s
mind should be all earnestness and determination, too intent
upon the game to allow thoughts for other things. Girls
will soon acquire greater moral and physical courage by
playing basket ball, and sufficient nerve to keep back the
tears. Their self-control will be vastly improved and their
endurance, strength, quickness of action, and judgment
rapidly strengthened. All these qualities are essential, not
only in basket ball, but in helping one to understand the
art of living.
Players should wear tennis
in order to avoid slipping, sliding, and injuring one another
with heavy heels, should one player accidentally step on the
toes of another. The
of short, full, divided skirt, gathered zouave fashion at the
knee, and a loose woollen blouse or sweater, forms a comfortable,
sensible uniform for basket ball. If desired a knee-length
skirt of stout material may take the place of the
divided skirt, but never attempt to play in a long dress or
tight clothing.
365
CHAPTER XXXI
SOME OF OUR OUT-DOOR NEIGHBORS AND
WHERE TO LOOK FOR THEM
The word grows broader and is more and
more filled with meaning as we begin to
understand that “neighbor” may embrace
in its kindliness not alone the whole human
race, but all the animal creation with which
we come in contact.
These denizens of the woods and fields
are indeed our neighbors, and so also are
the queer folk whose lives are partly or
wholly spent in the water. When we learn
to look for them we will find life full of the
beauty, the music, and the good-will of
our little friends and neighbors.
Few of these out-door acquaintances force themselves
upon us; they are not at all sure of their welcome, so we
must keep our eyes and ears open that we may learn their
haunts and meet them at least half way. While strolling in
the country it is pleasant to walk along laughing and singing
as we go, but we must refrain if we really wish to come
near any of the bright-eyed, suspicious little creatures.
They can only be approached very quietly, for wild things
understand an unusual noise only as a danger signal, and
will start in alarm at the least sound or sudden motion, and
be up and off before we are conscious of their presence.
366A little book for
divided off into spaces, each space having a heading, as in
Fig. 619, will be of great value in identifying the animals,
Fig. 619.
birds, and insects
you may meet, and
in keeping such records,
your interest
will deepen and
your love for Nature
and all her
children greatly increase.
Carry the book
with you, and make
the notes on the
spot. Do not wait
until you reach
home, depending
upon your memory;
it may sometimes
play you false.
Write nothing under
the heading of
“Identification” until
you are quite sure you recognize the creature you are
studying; for this one entry it will be best to wait until you
can consult a reliable book on the subject, and then carefully
compare your notes with what the naturalist gives as
facts.
If your stroll leads you through the woods listen for the
chatter of
This saucy rodent belongs to a large family, with many
branches and ramifications, and squirrels of some kind are
to be found in almost any wooded spot.
The scolding remonstrance to your invasion of his domain
will probably reach you before you catch a glimpse
of him; but sit down and wait quietly, Mr. Squirrel will
soon appear, and very likely his little wife will follow
him. Cautious, alert, yet really unafraid, they will approach
nearer and nearer, until they are quite close enough
for you to mark their peculiarities and decide to which
branch of their family they belong. You may even pass
the compliments of the day with your little host if you
speak gently and softly. They are not timid animals, and
will quickly make friends with anyone who treats them
kindly. In Daytona, Fla., where they are absolutely undisturbed,
the squirrels are very numerous, filling the great
moss-laden trees, scampering over the lawns and fences and
even eating from the hands of those who will regularly feed
them, all the while living in entire freedom, without restraint
of any kind.
Wherever you may find the squirrels, their nest is probably
close by, hidden in a hole in one of the trees. Be careful
how you thrust your hand into such an opening, however,
for squirrels have sharp teeth and may resent such undue
familiarity. About the first of April the nest will be filled
with a promising family of little ones from four to six in number,
and if you can take such a family under your supervision
and “grow up with them,” as it were, you will be amply repaid
by the amusement the merry little creatures will afford
and by the opportunity to observe, with the privilege of an
intimate friend, their house-keeping and manner of life.
368You will know
by his color, during the summer it is a red-brown with a
white vest bordered on the sides with a dark line. He
changes his coat twice a year, and his winter garment is
duller and not nearly so red, while the vest is gray without
the dark border.
When you find a squirrel’s nest in the crotch of a tree
instead of in a hole you may be pretty sure it belongs to
the gray squirrel, which is said to be the most easily tamed
of all its family.
Do not mistake
for a squirrel, although he does resemble one and his lively
chatter seems to be in the same language. He is, in fact,
sometimes called a ground squirrel, but in reality he is
only a distant cousin.
You will not be so apt to find him in the interior of the
woods as in more open places; his favorite promenade is
the top of a stone wall or rail fence. He is a little fellow
with a flat, bushy tail and well-developed cheek pouches,
which he fills with seeds and nuts until his cheeks are
puffed out equal to a boy’s when he eats an apple.
The tawny little chipmunk of the Eastern States has
two white stripes and five narrow black ones down its
back. In the West there are other varieties, the little
black and white striped fellow of the Rocky Mountains
being the prettiest and tamest.
The chipmunk is an engaging little creature, tamer even
than the squirrel, and he will often come close to the house
and sometimes enter it in search of food; it is the dogs that
generally drive him away, for no dog, however well behaved,
369can resist chasing a chipmunk. He is easy game, for he
seldom climbs a tree, and unless he can find refuge in his
hole or under the wood-pile his life is soon the forfeit.
Do not look in a tree for the chipmunk’s nest, you will
not find it there, but perhaps at the foot of the very pine
under which you are standing, or beneath the large rock
which lies in your path there is a small hole opening into
a little hollow, and in this underground chamber is the
soft, warm nest and the store of food which the chipmunk
has providently laid by. Here it sleeps through the cold
winter months, waking only to eat a few nuts, seeds, or
grains of corn, soon to drowse again, and remain asleep until
spring has come once more.
When you see a small, brown, long-bodied animal, not
much larger than a rat, running swiftly along the ground,
you may be pretty sure it is our neighbor
His home is probably near the river or the borders of the
meadow, but he hunts his game with such intelligence and
persistence it is possible to meet him almost anywhere.
We frequently hear this little animal spoken of, not always
with praise, and it is strange he so seldom crosses our
path, for he does not stand in much fear of his human
neighbors. The weasel is very quick and active, and also
quite inquisitive; it lives on frogs, birds, eggs, and mice,
and the farmers complain that it seeks larger game in their
poultry yards.
Mr. Dan Beard tells an interesting story of a walk in the
woods where he found a weasel asleep in a deserted crow’s
nest at the top of a tall tree. It is possible the little brown
intruder might have been able to explain just why the nest
was empty of all save himself.
370The sharpness and cunning of the weasel’s character is
shown in its face. A low forehead, pointed nose, eyes small
and penetrating plainly denote these qualities, yet it is a
most interesting little animal and well worth all the study
and observation you can give it.
A very small neighbor to be found on the borders of the
woods or a shady road is the pretty, harmless
Seldom more than two and one-half inches long, this little
creature is slender and daintily made, with a tail quite the
length of its head and body. Its skin is smooth, not scaled
like the lizard’s, and is generally brilliant in color. One
variety is bright red, darker on the back, where it has spots
of a brighter red encircled with dark rings. I have found
many of them in Pike County, Pa., and always in damp
places, though never in the water. There is another kind
that lives in the water, but my little red friends, while loving
dampness, remain always on land. You will generally
find them under stones or logs, and after a shower they are
also to be met in the open, though they do not travel far
from their haunts. Take one up in your hand and examine
the delicate forefeet, so much like fairy hands. They will
cling to your finger in the most winning fashion and you
may examine the little animal at leisure, for it is clean and
harmless. If you wish to keep the salamander for further
study, place it in a perforated box with damp moss or even
damp blotting-paper, and remember to keep it moist, otherwise
it will simply dry up. I know whereof I speak, for a
friend who was with me in the mountains, wishing to carry
two of the salamanders home with her, placed them in a box
without moisture of any kind and when we lifted the lid the
371next morning the poor little creatures were dead and as dry
as two sticks.
The salamander feeds on small insects, but I have never
seen them eat in captivity. That they may be safely transported
and established in new homes has been proved, for a
gentleman from Seattle, Wash., who was visiting at our
Pike County, Pa., camp, became so deeply interested in
these creatures he took a pail of them across the continent,
and at last accounts they were living in his garden, to all
appearances quite as comfortably as in their native woods.
On the trunks of some of the great trees you are passing
you may possibly see a number of queer, semi-transparent
shells. These are the cast-off armor of
Locusts you will probably call them, but that name
rightly belongs to quite another insect. Perfect in every detail,
even to the great bulging eyes, the cicada’s little coat of
mail clings to the tree with its six pairs of claws like a live
creature, and only a split down its back shows its emptiness
and tells how the cicada crept from the old into a newer
and fuller life.
The shells one usually finds belong to quite a large
black and green insect, one of the more common species of
cicada. This is called the dog-day harvest fly, and requires
but two years to develop, while the smaller red and black
variety is known as the “seventeen year locust,” because it
spends seventeen years of its life underground before it
reaches maturity. All this while it bears the name of
nymph. A pretty name for the young insect, isn’t it?
The nymph began life as an egg which its mother deposited,
with a number of others, in a slit she made in a twig
of a tree. For six weeks it lay snugly in its narrow bed,
372then came forth a tiny white creature, with little legs which
carried it about in a lively manner. Its mouth was simply
a hollow tube which would change into jaws later on. For
a while the nymph was happy in its new-found life, then
Cicada and Shell.
suddenly a longing for quiet
seemed to come over it and
it dropped to the ground,
there to bury itself in the
earth, which was to be its
home for many years.
Down in the mysterious
darkness, in that busy world
where so much we do not
understand is going on, the
little nymph grew very
slowly for a year, nourished
by the juices of the roots he
found near him and which
he sucked up through his
tube-like mouth. Then he
shed his first skin for another,
which gave him
greater freedom for further
growth. After a time this
skin was also discarded, another
and another, until, we are told, six times his garment
was changed while yet he was deep in the earth, with no
one to see and admire his new attire. Then when seventeen
long years were passed and his days of preparation
were accomplished, he dug his way up into a new world at
the dictate of a new impulse, and one evening he emerged
to find himself in a goodly company of his kind, all intent
upon reaching a still greater height. The tree under which
373he had lived so long was his goal, and up this he made his
way for some distance, then, forcing his little claws into the
bark, he clung to his place awaiting his final transformation.
Presently his nymph-skin opened down the back and the
cicada, a nymph no longer, crawled slowly out. White
again as when he first saw the light, except for two black
spots on his back, soft and helpless he clung anew to the
bark. At first his wings were so much a part of his body
you would have thought he had none, but almost immediately
they began to unfold and grow, becoming transparent
and firm as he waved them slowly back and forth. During
the night his color was marvellously changed from white
to black and red, and the next morning came his season of
rejoicing. With all faculties fully alive, he joined the
chorus of the other cicadas and the woods were made to
resound with their high, rasping notes.
By the way, do you know
Or, rather, they do not sing, the noise they make is instrumental,
not vocal, and their instruments are usually carried
under their wings, a part of themselves to be played upon
at will, when and where they choose.
The cicada’s instrument is a kind of drum, and, as if one
would not be sufficiently noisy, he carries two, one behind
each of his hind wings. He has no drum-sticks, but
vibrates his drums until the natural buzzing sound rises
almost to a shriek. Other insects play on other instruments,
but, however the sound is made, each species has a
note of its own, not to be mistaken for that of any other.
Deep in the forests where the dead leaves and pine-needles
cover the ground you will be likely to find the
well-known
the delight of all children and an object of interest to
everyone. This wonderful little ghost flower, so purely
white and so quickly blighted by exposure to sunlight
appears to live for its beauty alone. As far as we know it
is of absolutely no use, and does not even provide for itself,
as do other plants. It is a root parasite and draws its
nourishment from the roots of the pine upon which it has
fastened itself. The stem as well as the blossom is silvery
white, it has no foliage, and the flower at the end of the
stalk bends its head as though ashamed of its idle life, but
it continues to live on the vital juices of the roots and we
call it the Indian Pipe because it somewhat resembles the
long-stemmed Indian calumet, or pipe of peace. The botanists,
however, know it as the Monotropa Uniflora.
Another beautiful inhabitant of the deep woods is the
which arrays itself every summer in its spotted pink or
yellow dress, and stands as proudly erect on its slender
stalk as though troops of admirers were to pass its way,
when, in fact, it is rarely seen save by those who seek it.
As its name suggests, it resembles an Indian moccasin in
shape, the hanging pouch forming the toe, while the heel is
clasped by five pointed and twisted petals. Over the opening
of the pouch there is a little flap, which has much to do
with the fertilization of the flowers. The botanical name
of this little orchid is the Cypripedium, and some call it
lady-slipper, though it looks not at all like your slipper or
mine.
As you walk on under the interlacing branches of the
close-growing trees, look about for evidences of the
Pull the bark from a dead trunk or limb and you will probably
find its trade-mark. Fig. 620 is one pattern, but there
are various others, among them a spiral
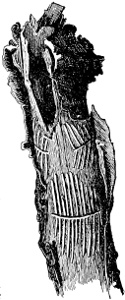
Fig. 620
design cut as smoothly as though done
with an engraver’s chisel.
These little workers in wood are but
babies, being the larvæ of the engraver
beetle, which, deposited as eggs under the
bark of a dead tree, turn into worm-like
creatures and eat their way along the surface
of the sap-wood, tracing the cabalistic
designs in their progress. When fully
developed the beetle is still a wee thing,
the largest being not over a quarter of an
inch in length. Some are brown in color
and some black.
Drop your eyes now and look for
in the soft earth. You will frequently find
them around ponds and the margin of
brooks. They make a most interesting
study, and will soon enable you to learn which of your
forest neighbors has visited the spot before you.
A small, delicate impression, much like that of a dainty
little hand, will show that
has been along, and this is all you are likely to see of him
unless you take a moonlight stroll, for Master 'Coon shuns
daylight, and is about only at night. Being a pretty and an
376intelligent little animal, he is sometimes tamed and even
allowed the freedom of the house, like a dog or cat, but
'coons are as mischievous as monkeys, and very frequently
the little hands are used to work disaster among the household
gods. When that occurs a chain is used to keep
Master 'Coon out of further trouble and consequent punishment.
The 'coon’s fur is long, thick, and of a pepper-and-salt
gray. Its tail is decorated with rings, and its broad white
face is marked with three radiating black lines across the
forehead and black settings to its eyes.
Though all you find is the footprint of this nocturnal
little fellow you may rest assured that somewhere, just
above your head perhaps, he is snugly curled up in the
hollow of a dead limb awaiting the darkness, when he will
sally forth to seek his supper.
In the softly creeping twilight, when the woods become
more mysterious, and one’s nerves are almost like the wild
things in their quick response to sudden noises, the night
prowlers begin to awake and stir about. Before darkness
quite settles down is the time to make the acquaintance of
the night birds, nocturnal insects, and some of the small animals
which avoid the garish light of day.
Though they love darkness better than light these little
creatures are just as harmless as the ones you have seen in
the genial sunshine. Do not be startled, then, if a small
dark body suddenly sails through the air near you, but
watch it in its flight, see how it courses downward, always
downward, on a gradual incline until, with a short upward
curve, it alights on a low branch or trunk of a tree. From
the summit of a tall pine its flight has been, perhaps, fifty
yards, yet it has no wings and in the dim light you will
see before you only a big-eyed, satin-coated little squirrel,
377and you will have met, it may forit may for the first time, your
neighbor
Look closely and notice that he wears a suit of brownish
gray, white underneath, bordered with black, which fits him
so loosely about the legs and sides that when he stretches out
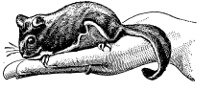
Flying Squirrel.
and flattens himself he may
almost be said to be web-legged,
and can sail through
the air like a parachute.
The natural home of the
flying squirrel is a hole in
a tree, where he makes a
soft nest, deep enough to burrow into until completely hidden.
But a hole anywhere, except in the ground, attracts
him. Whole families will take up their quarters in an unoccupied
house if they can squeeze themselves through some
crack or crevice, and will frequently refuse to vacate when
the rightful owner appears and claims the premises.
I have several times made pets of the young flying
squirrels, and they are the prettiest, most friendly and entertaining
little things imaginable, as tame as kittens and as
harmless. They are nocturnal in their habits, sleeping all
day in their woolly nests and scampering about all night,
full of mischief and merry play.
If you wake one of the baby squirrels from its nap and
take the drowsy little thing in your hands you will love it
immediately; it is so soft, so babyish, so unresisting.
A rare but most beautiful dweller in the woods is the
named for the moon and sometimes called the “queen of
night.” One evening just at dusk it was my good fortune
378to find a luna moth clinging to a forest tree by the roadside.
It had but recently emerged from its chrysalis and
was slowly moving its delicate wings back and forth, drying
them in the warm night air and strengthening them for
flight.
The Tropœa luna, as the scientists call it, is one of the
giant silk-worm moths. It has the large, fuzzy body of the
moth, with the feather-like antennæ; but its wings are
unusual in shape. Nearest the tail they are extended to
form long appendages, which curve gracefully outward.
The color is a delicate light green, the edges
of the fore-wings are bordered with a band of purplish
brown, and they are further ornamented with four large
eyes.
Look on the ground under the walnut, hickory, or other
hard-wood trees for the cocoon, as it is on these trees the
larva feeds.
When daylight comes again seek the path which leads
through
and once more you are among the little folk who love the
warm, bright sunshine.
The birds leave the shade to sit on the old rail fence and
sing joyously. You will see the busy little wren here, tripping
about importantly, and the song-sparrow, too, which
loves to perch on the top rail and sing its heart away.
Hidden deep in the tangled grass or nestled amid the clover
you may find the nest of the bobolink. Do you know the
lines which occur in one of Saxe Holm’s stories:
“I wonder what the clover thinks?
Intimate friend of the bobolinks.”
When you remember these you will remember to look
for the bobolink where you see the red clover.
There is a concert going on at this very minute; do you
hear it? The high soprano is taking the lead, the soft,
gurgling notes of the contralto are coming in, and now the
whole chorus has burst into song and one of the sweetest
of Nature’s anthems is being given. You must hear it,
some of you, for no matter what the season, in this great
land of ours, somewhere the warm summer sun is shining,
somewhere, without money and without price, these beautiful
songsters are pouring out their souls in exquisite
melody.
Stop and think what the birds are doing for you; think
of what life would be without them and how near akin
they are to all that is joyous and bright within you; read
“The Birds of Killingworth” in Longfellow’s “Tales of a
Wayside Inn” and then wear the dead bodies of your little
friends on your hats if you can.
As you cross the pasture be on the lookout for the
It is generally on the side of a hill or knoll, and in front of
it is a small pile of earth which the woodchuck has taken
out in his excavations. The hole is large enough for a small
dog to enter, and leads to several tunnels, some of them
twenty or twenty-five feet long. If you remain quietly near
for awhile perhaps you will be rewarded by seeing the
woodchuck, or ground-hog, as he is sometimes called, peep
cautiously out of his front door and then come boldly forth
to look about and see what is going on in the outer world.
Make a sudden noise and he will sit up on his haunches with
hanging forefeet, like a begging dog, and then dart into
his hole to remain in hiding until it seems safe for him to
venture out again.
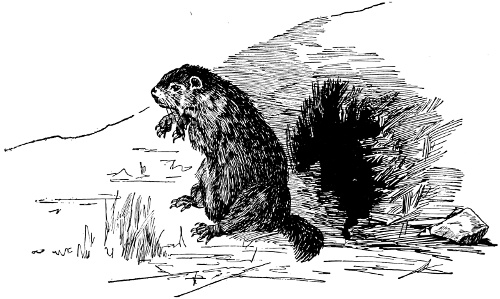
The woodchuck is a snub-nosed little animal, a trifle
larger than a good-sized rabbit. Its tail is short and bushy
and its hair long, coarse, and of a brownish color, ears low
and inconspicuous, and eyes round and bright. At the approach
381of winter he retires to his nest, which is in a chamber
at the farthest end of his longest tunnel, there to sleep
or hibernate until spring. A popular legend has it that on
the second day of February the ground-hog—he is always a
ground-hog in this connection—is sure to be up and out to
see how high the sun is and investigate the general progress
of things.
You know the rest of the story; how he prophesies an early
or late spring by his actions on this important day. If he stays
out we will have an early spring; if he goes back we will have
winter weather for six weeks longer; and his going and
staying are determined by the sun. This is because the
ground-hog is supposed to be absurdly afraid of his shadow,
which he has not seen for so long, and if the bright sunshine
reveals it to him he is said to return ignominiously to his
hole, where he will remain for another six weeks. If, on
the other hand, the day proves cloudy, and there are no
shadows to alarm him, he concludes that he has slept quite
long enough, that there will be no more winter, and that it
is high time to be up and about his business.
The farmers hunt the woodchuck because of its voracious
appetite for green things. They say it takes more than its
share of the farm products, and they make forcible objections.
June is the time to find the baby woodchucks, which in
this month play like puppies around the entrance to their
home.
And now these few remaining pages must be devoted to
our small neighbors of
To some of them at least; a volume would not give space
for all.
382It is on rocky coasts or the shores of bays and inlets that
you will find most of the creatures which make their home
on the borders of the vast and mighty ocean. Along a
rugged shore like that of Maine, where the storms and
great breakers carry the water high upon the rocks, little
pools are formed, and in one of these natural aquariums there
is enough life for a summer’s study.
Undisturbed by the rising and falling tide, the water is
transparently clear, and you can see distinctly all the inhabitants
of this little water-world. Clinging to the rocky sides
are what appear to be silvery pink moss and brilliant
aquatic flowers. Lying at the bottom or amid the jagged
stones are round, prickly looking balls which resemble chestnut
burs, some of them no larger than a tiny pearl button.
So much like vegetables do all these things appear,
it seems hardly possible they are animals; yet the moss is
sometimes called the
and some of the small bubble-like bags clinging to its stems,
which give it the silvery appearance, are full of eggs that
will hatch into minute jelly bodies. After various transformations
and subdivisions these bodies develop into the
wonderfully beautiful and fairy-like jelly-fish which you
find swimming in the deep waters of the bay, some of them
trailing long, filmy, lace-like skirts or veils as they move.
The delicate red, green, yellow, pink, and lavender blossoms,
which add so much to the beauty of the pool, are
Animals, too, every one, living only on animal food, which
they find and absorb in a peculiar manner. The fringed
petals are in reality tentacles that reach out and draw food
383into the mouth at the centre, from which it is taken into the
stomach just below.
How the baby sea-anemones are born, how they are
cared for by their mother, how they are at first “foot loose”
and afterward become fixtures on the rocks, you must
study out for yourselves; the description here is but an
introduction at best and must be necessarily brief.
The queer-looking green burs, which you will see moving
about if you watch them closely, are the
You have, perhaps, found some of their beautiful shells on
the beach, empty of all life and bleached quite white by
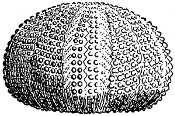
Shell of Sea Urchin.
the sun. Where the green spines
grew are regular rows of bead-like
projections, looking like strings of
pearls; but, lovely and pure as the
shells are, they cannot possibly be
as interesting as the real creatures,
full of life, crawling about at the
bottom of the crystal pool on
Sea Urchin.
the tips of their prickly looking
spines.
I have never found a live
sea-urchin except in these
quiet pools, probably because
they do not like to subject
themselves to the buffeting
waves, and when in deep water hide in the crevices of the
rocks or bury themselves in the seaweed.
Unlike the sea-anemone, they are vegetarians and seldom
indulge in animal food. The mouth is underneath
the little animal, where you find the round hole in the shell.
too you will probably see crawling over the rocks at the
bottom of the pool. Although called by that name, these
strange, five-fingered creatures are no more fish than the
sea-urchins, and their life is not so much of the water as of
the ground below. The starfish may swim, but it greatly
prefers gliding about over the slippery stones and sandy
bottom, searching for the small shellfish which form its
food. If you will place a starfish in a small fish globe filled
with salt water, or in any clear glass vessel that is large
enough, you can see its numberless feet, which are little
tubes projecting from the under side of the five rays. This
wonderful waving mass of tube feet is quite concealed when
we look at the animal from above, and until we have discovered
them its rapid movements seem very marvellous.
There are barnacles looking like a part of the rock to
which they are firmly attached, tiny crabs darting hither
and thither, various species of small mollusks and numerous
other forms of salt-water life to be found in Nature’s beautiful
rock aquariums, but we must leave you to make their
acquaintance alone, while wishing you much joy and happiness
in your intercourse with these and all of your little
neighbors.
385
INDEX
- “Abe” Lincoln log-cabin, how to build, 194
- Acorn bucket, “Abe” Lincoln cabin, 207
- Acorn made from egg, 38
- Active games, 322
- All-cotton rugs, 158
- Alphabet, living, 303
- Animals, to make a Noah’s ark, 164
- Animals, vegetable, 101
- Apples, Christmas, 269
- Apples, to make flower feast, 177
- Apple-seed charms, 297
- Arch, to make spool memorial, 240
- Ark, peanut Noah’s, 163
- Ark, to make the, 172
- Armless bust, 285
- Auger-bit, 8
- Ball, basket, 348
- Bamboo pistol, 144
- Bark, for “Abe” Lincoln cabin roof, 203
- Basket ball playing-ground, 346
- Basket-ball rules, 360
- Basket, corn-husk, 60
- Basket-weaving, 185
- Baskets of green burs, 180, 181
- Bedposts, naming the, 295
- Birch-bark canoe, 212
- 386Blackboard drawing, 215
- Blotting-paper, for painting monotypes, 151
- Bobbinet bags, 253
- Bonbons, snapping, 179
- Bones, 232
- Books, to illustrate, 82
- Boxes, to make fancy Christmas, 252
- Brace, 48
- Braiding palm grasses and corn-husks, 64
- Brownie, to make from egg, 34
- Bubbles, spool, 241
- Bucket, acorn, 207
- Bugle-horn, 231
- Burs, baskets made of, 180, 181
- Bust, armless, 285
- Butterfly ink, 122
- Butterfly paper, 51
- Button-mould tops, 132
- Calendar, to make a, 80
- Calumet, sparkling, 140
- Camels, to make Noah’s ark, 167
- Cannon, spool, 243
- Canoe, birch-bark, 212
- Canoe, birch-bark for, 203
- Canopy, merry-go-round, to make, 127
- Captain, basket ball, 349
- Centres, basket ball, 354
- 387Chair, hooded, made from packing-box, 21
- Charms, apple-seed, 297
- Chicken, to make Noah’s ark, 168
- Chimney, “Abe” Lincoln log-cabin, 201
- Chimney, pasteboard, 112
- Chipmunk, 368
- Chisel, 4, 8
- Christmas decoration, to make, 244
- Christmas devices, 260
- Christmas pie, an all-day, 260
- Christmas stockings, 253
- Christmas tray, 265
- Church, pasteboard, 107, 108
- Cicadas, 371
- Circus, the hoop game, 328
- Clothes-press, portable corner, 15
- Collections, 69
- Color basket, 192
- Color letter, 276
- Color schemes for rugs, 154
- Colored pictures, 83
- Comb, musical, 233
- Comet, rushing, 143
- Cone hanging basket, 58
- 'Coon, 375
- Country garden in city, 310
- Corn-husk basket, 60
- Corn-husks, braiding, 64
- Cornucopias, 253
- Costume, statuary tableaux, 282
- Cotton dyes, 162
- Cotton rugs, 158
- Covers, basket, 191
- Cranberries, strings of red, 256
- Crook, sheep and shepherd’s, to make, 246
- Croquet, parlor, 341; rules, 343
- Crystal flute, 232
- Cups, to make flower feast, 178
- Daisy, to draw a, 225
- Dance, flag, 130
- Dandelion games, 181
- Dishes made from eggs, 36
- Doors, from “Abe” Lincoln log-cabin, 199;
- Dove, to make from an egg, 28
- Drawing-class, home, 107
- Dreams, Halloween, 298
- Dressing-table, to make a, 11
- Duck, to draw a, 223
- Dulcimer, to make a, 229
- Dyes, rug, 160, 162
- Easel, valentine, 91
- Easter hare, 32
- Easter lily, 52
- Easter, paper, 45
- Egg changed into rooster, 46
- Egg, possibilities of an Easter, 26
- Egg, slippers made from egg, 41
- Egg, spinning, 30
- Egg, to make brownies from, 34
- Eggs, hares made from, 33;
- fruits, vegetables, opera-glasses, and dishes made from, 36;
- radish, 37;
- watermelon, plum, acorn, 38;
- a dainty vase, a teapot, 39;
- sugar-bowl, egg dippers, 41
- Eggs, paper, 45
- Egyptian statue, 287
- Elephant, to make Noah’s ark, 168
- Engraver beetle, 375
- Fastenings, basket, 191
- Feather tests, 293
- 389Fence, “Abe” Lincoln cabin, 210
- Fence, pin-wheel, 137
- Festoons, Christmas-tree, 248
- Festoons, holly-leaved, 254
- File, 4, 9
- Finger-bowls, musical, 230
- Fire-cracker, valentine, 95
- Fireplace, magic, 263
- Fire rug, 155
- Fish, to draw, 221
- Fish, to make flower feast, 176
- Flag dance, 130
- Flower feast, 175
- Flower pad valentine, 95
- Flower-stand, to make a piazza, 17
- Flower writing, 273
- Flying squirrel, 377
- Fortune wheel, 300
- Forwards, basket ball, 354
- Fouls, basket ball, 363
- Four-leaved clover valentine, 90
- Friendship garden, 320
- Fringe, ruching, 249
- Fringe, rug, 159
- Frog, swimming, made from an egg, 26
- Fruit lanterns, 101
- Fruit salad, to make flower feast, 177
- Fruits made from eggs, 36
- Furniture, set of spool, to make, 238
- Galatea, 288
- Games, active, 322
- Games, expensive, with little or no expense, 334
- Garden, friendship, 320;
- Garden, real summer, 313;
- water garden, 314;
- soil for, 315
- Gardens, odd, 310
- Ghost ideas, 299
- 390Gimlet, 7
- Going to market, 332
- Gouge, 4, 8
- Grass-blade, musical, 234
- Greek temple, to make spool, 237
- Guard, basket ball, 355
- Guest book, to make a, 78
- Halloween fortunes, 293
- Hammer, 3, 5
- Hand pin-wheel, 136
- Hare, Easter, 32
- Hares made from eggs, 33
- Harp, to make a, 228
- Hatchet, 6
- Head, to draw a, 220
- Heads, to paint, 149
- Heart-shaped valentine, 94
- Hen, to draw, 217
- Hinges, basket, 192
- Home drawing-class, pasteboard models for, 107
- Home-made pyrotechnics, 135
- Hoop dance, 324
- Hoop-race game, 329
- Hoop tag, 327
- Horses, fantastic ink, 122
- House, pasteboard, 111
- Houses, 10
- Illustrating, books, 82
- Indian pipe, 374
- Indian powwow, 274
- Ink, landscapes, marines, 119;
- butterfly, fantastic horses, 122;
- pair of birds, 123
- Ink pictures, 118
- Jelly, 269
- Jelly-fish, 382
- Jewelry, Christmas-tree, 257
- Jumping-rope conquer game, 330
- Kaleidoscope in an egg, 31
- Lake, to make a, 204
- Lamp, to make spool, 239
- Landscapes, ink, 119
- Lantern, pumpkin, 105, 106
- Lanterns, fruit, 101
- Lavender sticks, 62
- Letter of color, 276
- Lights for statuary tableaux, 282
- Lily, paper Easter, 52
- Linesmen, basket ball, 352
- Living alphabet, 303
- Lobsters, to make Noah’s ark, 170
- Log-cabin, “Abe” Lincoln, how to build, 194
- Luna moth, 377
- Magic fireplace, 263
- Marble flesh, to make, 284
- Marble locks, to make, 284
- Marines, ink, 119
- Mats, sweet-grass, 59
- Memorial arch, to make spool, 240
- Memory garden, 321
- Merry-go-round, 125
- Mitre-box, 10
- Moccasin flower, 374
- Models, pasteboard, 107
- 392Monotone monotypes, 151
- Monotypes, 148;
- monotone, 151;
- papers for painting, 152
- Morning-glory, 183
- Mounting pictures, 70
- Moving toys, 125
- Musical instruments, home-made, 227
- Naming the bedposts, 295
- Net, ping pong, 336
- Noah, to make, 171
- Noah’s ark, a peanut, 163
- Observation notes, 366
- Odd gardens, 310
- Officials, basket ball, 350
- Opera-glasses made from eggs, 36
- Original valentines, 89
- Ostrich, paper, 45
- Owl, to make Noah’s ark, 169
- Palm-grasses, braiding, 64
- Paper chains, colored Christmas, 257
- Paper Easter, 45
- Paper, musical, 227
- Paper, to prepare for picture mounting, 72
- Parthenon, to make spool, 236
- Passing by, 332
- Pasteboard church, 107;
- Pasteboard models for home drawing-class, 107
- Pasteboard pistol, 144
- 393Peanut, Noah’s ark, 163
- Peanuts, Christmas, 256
- Pedestals, statuary tableaux, 282
- Penguin, paper, 45
- Photograph book, 84
- Photographs, 83
- Picture hanging, 73
- Picture writing, 271
- Pictures, mounting, 69
- Pictures, quick ink, 118
- Pie, an all-day Christmas, 260
- Pièce de résistance, 268
- Pig, blackboard, 215
- Pineapple, to make flower feast, 175
- Ping pong, 334
- Pin-wheel, three-story, red, white, and blue, 135;
- in your hands, 136;
- on the fence, 137
- Pistol, pasteboard or bonbon, 144
- Plane, 4, 7
- Plants, ink sketches from, 123
- Plants, water, 316
- Players, set, in basket ball, 349
- Plum, made from egg, 38
- Pop-corn balls, 255
- Portfolio, to make a, 74
- Portière, to make effective, 246
- Portrait medallion, 286
- Potato turkey, 102
- Printing, monotypes, 150
- Prints, to make a collection of, 69
- Priscilla rugs, 153
- Pumpkin lantern, 105, 106
- Pygmalion, 288
- Pyramid, pasteboard, 107
- Pyrotechnics, home-made, 135
- Rabbit, paper, 45
- Rabbit, to make a Noah’s ark, 167
- Raccoon, 375
- Racquets, ping pong, 335
- Radish made from eggs, 37
- Rags, how to cut and sew, 157
- Raisin turtle, 105
- Red, white, and blue, 333
- Reeds for basket-weaving, 186
- Referee, basket ball, 350
- Rice-paper, for printing monotypes, 151
- Roman candle, 142
- Roof, “Abe” Lincoln log-cabin, 201
- Rooster, made from egg, 46
- Rooster, paper, 45
- Rose, to draw a, 218
- Rugs, Priscilla, 153;
- color schemes for, 154;
- fire, 155;
- weight of rags for, 156;
- cotton and wool, all-cotton, 158
- Rule, 7
- Rules, basket ball, 360
- Rules, ping pong, 337
- Rushing comet, 143
- Salamander, 370
- Santa Claus, to make, 266
- Saucers, to make flower feast, 178
- Saw, 3, 4, 6
- Sawbuck, “Abe” Lincoln cabin, 213
- Sconce, 248
- Scorer, basket ball, 351
- Scoring, ping pong, 338
- Screw-driver, 6
- Sea-anemones, 382
- Sea-shells, musical, 234
- 395Sea-urchins, 383
- Sewing-machine, a make-believe, 340
- Shepherd’s crook, to make, 246
- Shields, living alphabet, 309
- Shoat, lemon, 103
- Sign language, 271
- Sky-rockets, 146
- Snap-fire, 142
- Soil for water garden, 315
- Sparkling calumet, 140
- Spiders, to make Noah’s ark, 166
- Sponge, green, 318
- Spool bubbles, 241
- Spool cannon, 243
- Spools, what to make of empty, 236
- Spring, “Abe” Lincoln cabin, 204
- Squirrel, 367; red, 368
- Squirrel, flying, 377
- Starfish, 384
- Statuary tableaux, 281
- Steeple, pasteboard, 113
- Storks, to make Noah’s ark, 170
- Sugar-bowl, made from egg, 41
- Suit, basket ball, 364
- Sunshine diary, to make, 75
- Sweet-grass mats, 59
- Symbols, 273
- Tableaux subjects, 285
- Teapot, made from egg, 39
- Tea-table, to make a five o’clock, 16
- Temple, to make spool, 237
- Terms, ping pong, 339
- Time-keeper, basket ball, 352
- Toast, to serve, 267
- Tool-chest, 4
- Tool-rack, 5
- Tools, 4
- Tools, how to use, 5
- 396Touchstone charm, 294
- Towel-rack, to make, 14
- Tower, pasteboard, 113
- Toys, 125
- Toys, button-mould, 132
- Tray, Christmas, 265
- Trees, “Abe” Lincoln cabin, 208
- Try-square, 4, 9
- Tulip, to draw a, 224
- Turkey, potato, 102
- Turtle, made from raisin, 105
- Turtles, to draw, 222
- Vacation work with Nature’s materials, 57
- Valentines, original, 89;
- four-leaved clover, 90;
- easel, 91;
- heart-shaped, 93;
- fire-cracker, 94;
- pot of flowers, 95;
- little friend, 98
- Vase, a dainty, made from egg, 39
- Vegetable animals, 101
- Vegetables, growing in water, 319
- Vegetables, made from eggs, 36
- Vines, ink sketches from, 123
- Wagon, to make spool, 239
- Walk, “Abe” Lincoln cabin, 205
- Walnuts, gilded English, 258
- Warps, rag, 159
- Wash-stand, to make a, 14
- Water garden, 314
- 397Watermelon, made from egg, 38
- Water plants, to procure, 316
- Weasel, 369
- Weavers and weft, 322
- Weaving materials, 185
- Well, “Abe” Lincoln cabin, 206
- Wings, pasteboard, 113
- Wings, to make hornet, 165
- 398Witch writing, 295
- Witchery, 292
- Wood, choosing the, 10
- Woodchuck, 380
- Wood-pile, “Abe” Lincoln, 213
- Wool dyes, 160
- Wool rugs, 158
- Workshop, 4
399THE BEARD BOOKS FOR YOUNG PEOPLE
THE AMERICAN GIRL'S HANDY BOOK
HOW TO AMUSE YOURSELF AND OTHERS
By LINA and ADELIA B. BEARD
With nearly 500 Illustrations by the Authors
One volume, square 8vo, $2.00
Eight new chapters have been added to the forty-two which have carried
this famous book to the hearts of all the young people since its first appearance,
and everything that the girls of to-day want to know about their sports,
games, and winter afternoon and evening work, is told clearly and simply
in this helpful and entertaining volume. The volume is fully and handsomely
illustrated from drawings by the authors, whose designs are in the
best sense illustrative of the text.
First of April—Wild Flowers and
Their Preservation—The Walking
Club—Easter-Egg Games—How to
Make a Lawn Tennis Net—May-Day
Sports—Midsummer-Eve
Games and Sports—Sea-side Cottage
Decoration—A Girl’s Fourth
of July—An Impression Album—Picnics,
Burgoos, and Corn-Roasts—Botany
as Applied to Art—Quiet
Games for Hot Weather—How to
Make a Hammock—Corn-Husk
and Flower Dolls—How to Make
Fans—All Hallow Eve—Nature’s
Fall Decorations and How to Use
Them—Nutting Parties—How to
Draw, Paint in Oil-colors, and
Model in Clay and Wax—China
Painting—Christmas Festivities,
and Home-made Christmas Gifts—Amusements
and Games for the
Holidays—Golf—Bicycling—Swimming—Physical
Culture—Girls'
Clubs—A New Seashore Game—Apple
Target Shooting—Water
Fairies.
Louisa M. Alcott wrote: “I have put it in my list of good and useful books for young
people, as I have many requests for advice from my little friends and their anxious mothers.
I am most happy to commend your very ingenious and entertaining book.”
Grace Greenwood wrote: “It is a treasure which, once possessed, no practical girl
would willingly part with. It is an invaluable aid in making a home attractive, comfortable,
artistic, and refined. The book preaches the gospel of cheerfulness, industry, economy, and
comfort.”
400The Outdoor Handy Book
FOR PLAYGROUND, FIELD AND FOREST
By DANIEL C. BEARD
With more than 300 Illustrations by the Author. Square 8vo, $2.00
“It tells how to play all sorts of games with marbles, how to make and spin more kinds
of tops than most boys ever heard of, how to make the latest things in plain and fancy kites,
where to dig bait and how to fish, all about boats and sailing, and a host of other things which
can be done outdoors. The volume is profusely
illustrated and will be an unmixed
delight to any boy.”—New York Tribune.
Marbles—Tops—Latest Things
in Kites—Aerial Fish and Dragons—Hoops
and Wheels—How to
Make the Sucker—Up in the Air
on Stilts—Bait, Live and Dead—Fishing—Aquatic
Sports—Rigs of
All Kinds for Small Boats—Shells
and Canoes—Hints for Collectors—Honey-Bee
Messengers—A “Zoo”—Choosing
Up and “It”—Counting
Out Rhymes—Swimming—Games
of Tag—I Spy—Leap Frog—Various
Sports for Hot Days—Tip
Cat—Games of Ball—Mumbly
Peg, Hop-Scotch, and Jack Stones—Hints
for Bicyclists—Camping
Out—Boy’s Ballista—“Tally-ho!”
and Other Cries—Indian Games for
Boys—Football—Golf, Hockey,
and Shinny—Turtle Hunting—Skating—Stunning
Muskrats and
Fish—Snowball Battle and Snow
Tag—Sleds.
From Charles Dana Gibson: “It makes a man of a boy and a boy of a man.”
“This book is praiseworthy from end to end, and will find favor even with those who
have long since passed to man’s estate.”—The Nation.
“It is one of the completest things of the kind ever written, and with it one can hardly
conceive how a boy could be without pleasant and profitable amusement at any time. It
treats of directions for every season of the year, in and out of doors, and on land and water.
One of the best things about it is that it furnishes employment for a boy’s ingenuity and
mechanical skill. It seems as if this book must be destined to an immense popularity.”—The Advance.
401THE AMERICAN BOY'S HANDY BOOK
Or, What To Do and How To Do It
By DANIEL C. BEARD
One volume, 8vo, fully Illustrated by the Author, $2.00
Mr. Beard’s book tells the active, inventive, and practical American boy
the things he really wants to know; the thousand things he wants to do, and
the ten thousand ways in which he can do them, with the helps and ingenious
contrivances which every boy can either procure or make. The author
divides the book among the sports of the four seasons; and he has made an
almost exhaustive collection of the
cleverest modern devices, besides
himself inventing an immense number
of capital and practical ideas.
Kite Time—War Kites—Novel
Modes of Fishing—Home-made
Fishing Tackle—How to Stock,
Make, and Keep a Fresh-water
Aquarium—How to Stock and Keep
a Marine Aquarium—Knots, Bends,
and Hitches—Dredge, Tangle, and
Trawl Fishing—Home-made Boats—How
to Rig and Sail Small Boats—How
to Camp Out Without a
Tent—How to Rear Wild Birds—Home-made
Hunting Apparatus—Traps
and Trapping—Dogs—Practical
Taxidermy for Boys—Snow
Houses and Statuary—Winged
Skaters—Winter Fishing—Indoor
Amusements—How to Make a
Magic Lantern—Puppet Shows—Home-made
Masquerade and Theatrical
Costumes—With many other
subjects of a kindred nature.
“It is an excellent publication, and is heartily recommended to parents.”—The Brooklyn Eagle.
“The book has this great advantage over its predecessors, that most of the games, tricks,
and other amusements described in it are new. It treats of sports adapted to all seasons of
the year; it is practical, and it is well illustrated.”—The New York Tribune.
“It tells boys how to make all kinds of things—boats, traps, toys, puzzles, aquariums,
fishing tackle; how to tie knots, splice ropes, to make bird calls, sleds, blow guns, balloons;
how to rear wild birds, to train dogs, and do the thousand and one things that boys take delight
in. The book is illustrated in such a way that no mistake can be made; and the boy
who gets a copy of this book will consider himself set up in business.”—The Indianapolis Journal.
402The Jack of All Trades
OR, NEW IDEAS FOR AMERICAN BOYS
By DANIEL C. BEARD
Profusely Illustrated. Square 8vo, $2.00
“Every boy who is handy with tools
of any sort will enjoy this book.”
—Youth’s Companion.
“This book is a capital one to give any
boy for a present at Christmas, on a birthday,
or indeed at any time.”
—The Outlook.
“Full of new ideas for active boys who
like to use tools and see interesting things
growing under their hands.”
—N. Y. Tribune.
“A perfect treasure-house of things that
delight the soul of a boy and keep him happy
and busy.”
—The Interior.
Part I. Fair Weather Ideas
Tree-Top Club-Houses—How to Capture and Trap Small Live Animals—The
Back-Yard Zoo—A Back-Yard Fish-Pond—Pigeon and Bantam
Coops—How to Make a Back-Yard Aviary—A Boy’s Back-Yard Workshop—How
to Build an Underground Club-House—A Boys’ Club-House
on the Water—How to Have Fun on a Picnic—How to Build and How to
Furnish a Daniel Boone Cabin—Flat Boatman’s House—The American Boy’s
House Boat—Back-Yard Switchback—How to Build a Toboggan Slide in
the Back-Yard.
Part II. Rainy Weather Ideas
A Home-Made Circus—Good Games with Toothpicks and Matches—Fun
with Scissors and Pasteboard and Paper—How to Prepare and Give a Boys'
Chalk Talk—A Christmas Novelty for Boys—How to Make Two Boys into
One Santa Claus—A Circus in the Attic—A Boys’ Stag Party—A Wild
West Show in the House—How to Have a Panorama Show.
CHARLES SCRIBNER'S SONS, Publishers
153-157 Fifth Avenue, New York
Errors deemed most likely to be the printer’s have been corrected, and
are noted here. The references are to the page and line in the original.
| 38.5 |
Wate[r]melon |
Inserted. |
| 129.30 |
on real carous[a/e]ls. |
Replaced. |
| 154.14 |
there will be increasing orig[i]nality |
Inserted. |
| 154.23 |
what is called “hit or miss[.]>” |
Added. |
| 201.31 |
and constitutes [p]art of the framework |
Restored. |
| 210.2 |
You will be su[r]prised |
Inserted. |
| 258.30 |
plenty of wor[l]dly goods. |
Inserted. |
| 273.30 |
and social intercourse (balm).[”] |
Added. |
| 336.28 |
The writer once knew[./,] |
Replaced. |
| 377.1 |
and you will have met, [it may for] the first time |
sic. |
End of the Project Gutenberg EBook of What a Girl Can Make and Do, by
Lina Beard and Adelia B. Beard

*** END OF THIS PROJECT GUTENBERG EBOOK WHAT A GIRL CAN MAKE AND DO ***

***** This file should be named 56588-h.htm or 56588-h.zip *****
This and all associated files of various formats will be found in:
        http://www.gutenberg.org/5/6/5/8/56588/

Produced by KD Weeks, Chris Curnow and the Online
Distributed Proofreading Team at http://www.pgdp.net (This
file was produced from images generously made available
by The Internet Archive)

Updated editions will replace the previous one--the old editions will
be renamed.

Creating the works from print editions not protected by U.S. copyright
law means that no one owns a United States copyright in these works,
so the Foundation (and you!) can copy and distribute it in the United
States without permission and without paying copyright
royalties. Special rules, set forth in the General Terms of Use part
of this license, apply to copying and distributing Project
Gutenberg-tm electronic works to protect the PROJECT GUTENBERG-tm
concept and trademark. Project Gutenberg is a registered trademark,
and may not be used if you charge for the eBooks, unless you receive
specific permission. If you do not charge anything for copies of this
eBook, complying with the rules is very easy. You may use this eBook
for nearly any purpose such as creation of derivative works, reports,
performances and research. They may be modified and printed and given
away--you may do practically ANYTHING in the United States with eBooks
not protected by U.S. copyright law. Redistribution is subject to the
trademark license, especially commercial redistribution.

START: FULL LICENSE

THE FULL PROJECT GUTENBERG LICENSE
PLEASE READ THIS BEFORE YOU DISTRIBUTE OR USE THIS WORK

To protect the Project Gutenberg-tm mission of promoting the free
distribution of electronic works, by using or distributing this work
(or any other work associated in any way with the phrase "Project
Gutenberg"), you agree to comply with all the terms of the Full
Project Gutenberg-tm License available with this file or online at
www.gutenberg.org/license.

Section 1. General Terms of Use and Redistributing Project
Gutenberg-tm electronic works

1.A. By reading or using any part of this Project Gutenberg-tm
electronic work, you indicate that you have read, understand, agree to
and accept all the terms of this license and intellectual property
(trademark/copyright) agreement. If you do not agree to abide by all
the terms of this agreement, you must cease using and return or
destroy all copies of Project Gutenberg-tm electronic works in your
possession. If you paid a fee for obtaining a copy of or access to a
Project Gutenberg-tm electronic work and you do not agree to be bound
by the terms of this agreement, you may obtain a refund from the
person or entity to whom you paid the fee as set forth in paragraph
1.E.8.

1.B. "Project Gutenberg" is a registered trademark. It may only be
used on or associated in any way with an electronic work by people who
agree to be bound by the terms of this agreement. There are a few
things that you can do with most Project Gutenberg-tm electronic works
even without complying with the full terms of this agreement. See
paragraph 1.C below. There are a lot of things you can do with Project
Gutenberg-tm electronic works if you follow the terms of this
agreement and help preserve free future access to Project Gutenberg-tm
electronic works. See paragraph 1.E below.

1.C. The Project Gutenberg Literary Archive Foundation ("the
Foundation" or PGLAF), owns a compilation copyright in the collection
of Project Gutenberg-tm electronic works. Nearly all the individual
works in the collection are in the public domain in the United
States. If an individual work is unprotected by copyright law in the
United States and you are located in the United States, we do not
claim a right to prevent you from copying, distributing, performing,
displaying or creating derivative works based on the work as long as
all references to Project Gutenberg are removed. Of course, we hope
that you will support the Project Gutenberg-tm mission of promoting
free access to electronic works by freely sharing Project Gutenberg-tm
works in compliance with the terms of this agreement for keeping the
Project Gutenberg-tm name associated with the work. You can easily
comply with the terms of this agreement by keeping this work in the
same format with its attached full Project Gutenberg-tm License when
you share it without charge with others.

1.D. The copyright laws of the place where you are located also govern
what you can do with this work. Copyright laws in most countries are
in a constant state of change. If you are outside the United States,
check the laws of your country in addition to the terms of this
agreement before downloading, copying, displaying, performing,
distributing or creating derivative works based on this work or any
other Project Gutenberg-tm work. The Foundation makes no
representations concerning the copyright status of any work in any
country outside the United States.

1.E. Unless you have removed all references to Project Gutenberg:

1.E.1. The following sentence, with active links to, or other
immediate access to, the full Project Gutenberg-tm License must appear
prominently whenever any copy of a Project Gutenberg-tm work (any work
on which the phrase "Project Gutenberg" appears, or with which the
phrase "Project Gutenberg" is associated) is accessed, displayed,
performed, viewed, copied or distributed:

  This eBook is for the use of anyone anywhere in the United States and
  most other parts of the world at no cost and with almost no
  restrictions whatsoever. You may copy it, give it away or re-use it
  under the terms of the Project Gutenberg License included with this
  eBook or online at www.gutenberg.org. If you are not located in the
  United States, you'll have to check the laws of the country where you
  are located before using this ebook.

1.E.2. If an individual Project Gutenberg-tm electronic work is
derived from texts not protected by U.S. copyright law (does not
contain a notice indicating that it is posted with permission of the
copyright holder), the work can be copied and distributed to anyone in
the United States without paying any fees or charges. If you are
redistributing or providing access to a work with the phrase "Project
Gutenberg" associated with or appearing on the work, you must comply
either with the requirements of paragraphs 1.E.1 through 1.E.7 or
obtain permission for the use of the work and the Project Gutenberg-tm
trademark as set forth in paragraphs 1.E.8 or 1.E.9.

1.E.3. If an individual Project Gutenberg-tm electronic work is posted
with the permission of the copyright holder, your use and distribution
must comply with both paragraphs 1.E.1 through 1.E.7 and any
additional terms imposed by the copyright holder. Additional terms
will be linked to the Project Gutenberg-tm License for all works
posted with the permission of the copyright holder found at the
beginning of this work.

1.E.4. Do not unlink or detach or remove the full Project Gutenberg-tm
License terms from this work, or any files containing a part of this
work or any other work associated with Project Gutenberg-tm.

1.E.5. Do not copy, display, perform, distribute or redistribute this
electronic work, or any part of this electronic work, without
prominently displaying the sentence set forth in paragraph 1.E.1 with
active links or immediate access to the full terms of the Project
Gutenberg-tm License.

1.E.6. You may convert to and distribute this work in any binary,
compressed, marked up, nonproprietary or proprietary form, including
any word processing or hypertext form. However, if you provide access
to or distribute copies of a Project Gutenberg-tm work in a format
other than "Plain Vanilla ASCII" or other format used in the official
version posted on the official Project Gutenberg-tm web site
(www.gutenberg.org), you must, at no additional cost, fee or expense
to the user, provide a copy, a means of exporting a copy, or a means
of obtaining a copy upon request, of the work in its original "Plain
Vanilla ASCII" or other form. Any alternate format must include the
full Project Gutenberg-tm License as specified in paragraph 1.E.1.

1.E.7. Do not charge a fee for access to, viewing, displaying,
performing, copying or distributing any Project Gutenberg-tm works
unless you comply with paragraph 1.E.8 or 1.E.9.

1.E.8. You may charge a reasonable fee for copies of or providing
access to or distributing Project Gutenberg-tm electronic works
provided that

* You pay a royalty fee of 20% of the gross profits you derive from
  the use of Project Gutenberg-tm works calculated using the method
  you already use to calculate your applicable taxes. The fee is owed
  to the owner of the Project Gutenberg-tm trademark, but he has
  agreed to donate royalties under this paragraph to the Project
  Gutenberg Literary Archive Foundation. Royalty payments must be paid
  within 60 days following each date on which you prepare (or are
  legally required to prepare) your periodic tax returns. Royalty
  payments should be clearly marked as such and sent to the Project
  Gutenberg Literary Archive Foundation at the address specified in
  Section 4, "Information about donations to the Project Gutenberg
  Literary Archive Foundation."

* You provide a full refund of any money paid by a user who notifies
  you in writing (or by e-mail) within 30 days of receipt that s/he
  does not agree to the terms of the full Project Gutenberg-tm
  License. You must require such a user to return or destroy all
  copies of the works possessed in a physical medium and discontinue
  all use of and all access to other copies of Project Gutenberg-tm
  works.

* You provide, in accordance with paragraph 1.F.3, a full refund of
  any money paid for a work or a replacement copy, if a defect in the
  electronic work is discovered and reported to you within 90 days of
  receipt of the work.

* You comply with all other terms of this agreement for free
  distribution of Project Gutenberg-tm works.

1.E.9. If you wish to charge a fee or distribute a Project
Gutenberg-tm electronic work or group of works on different terms than
are set forth in this agreement, you must obtain permission in writing
from both the Project Gutenberg Literary Archive Foundation and The
Project Gutenberg Trademark LLC, the owner of the Project Gutenberg-tm
trademark. Contact the Foundation as set forth in Section 3 below.

1.F.

1.F.1. Project Gutenberg volunteers and employees expend considerable
effort to identify, do copyright research on, transcribe and proofread
works not protected by U.S. copyright law in creating the Project
Gutenberg-tm collection. Despite these efforts, Project Gutenberg-tm
electronic works, and the medium on which they may be stored, may
contain "Defects," such as, but not limited to, incomplete, inaccurate
or corrupt data, transcription errors, a copyright or other
intellectual property infringement, a defective or damaged disk or
other medium, a computer virus, or computer codes that damage or
cannot be read by your equipment.

1.F.2. LIMITED WARRANTY, DISCLAIMER OF DAMAGES - Except for the "Right
of Replacement or Refund" described in paragraph 1.F.3, the Project
Gutenberg Literary Archive Foundation, the owner of the Project
Gutenberg-tm trademark, and any other party distributing a Project
Gutenberg-tm electronic work under this agreement, disclaim all
liability to you for damages, costs and expenses, including legal
fees. YOU AGREE THAT YOU HAVE NO REMEDIES FOR NEGLIGENCE, STRICT
LIABILITY, BREACH OF WARRANTY OR BREACH OF CONTRACT EXCEPT THOSE
PROVIDED IN PARAGRAPH 1.F.3. YOU AGREE THAT THE FOUNDATION, THE
TRADEMARK OWNER, AND ANY DISTRIBUTOR UNDER THIS AGREEMENT WILL NOT BE
LIABLE TO YOU FOR ACTUAL, DIRECT, INDIRECT, CONSEQUENTIAL, PUNITIVE OR
INCIDENTAL DAMAGES EVEN IF YOU GIVE NOTICE OF THE POSSIBILITY OF SUCH
DAMAGE.

1.F.3. LIMITED RIGHT OF REPLACEMENT OR REFUND - If you discover a
defect in this electronic work within 90 days of receiving it, you can
receive a refund of the money (if any) you paid for it by sending a
written explanation to the person you received the work from. If you
received the work on a physical medium, you must return the medium
with your written explanation. The person or entity that provided you
with the defective work may elect to provide a replacement copy in
lieu of a refund. If you received the work electronically, the person
or entity providing it to you may choose to give you a second
opportunity to receive the work electronically in lieu of a refund. If
the second copy is also defective, you may demand a refund in writing
without further opportunities to fix the problem.

1.F.4. Except for the limited right of replacement or refund set forth
in paragraph 1.F.3, this work is provided to you 'AS-IS', WITH NO
OTHER WARRANTIES OF ANY KIND, EXPRESS OR IMPLIED, INCLUDING BUT NOT
LIMITED TO WARRANTIES OF MERCHANTABILITY OR FITNESS FOR ANY PURPOSE.

1.F.5. Some states do not allow disclaimers of certain implied
warranties or the exclusion or limitation of certain types of
damages. If any disclaimer or limitation set forth in this agreement
violates the law of the state applicable to this agreement, the
agreement shall be interpreted to make the maximum disclaimer or
limitation permitted by the applicable state law. The invalidity or
unenforceability of any provision of this agreement shall not void the
remaining provisions.

1.F.6. INDEMNITY - You agree to indemnify and hold the Foundation, the
trademark owner, any agent or employee of the Foundation, anyone
providing copies of Project Gutenberg-tm electronic works in
accordance with this agreement, and any volunteers associated with the
production, promotion and distribution of Project Gutenberg-tm
electronic works, harmless from all liability, costs and expenses,
including legal fees, that arise directly or indirectly from any of
the following which you do or cause to occur: (a) distribution of this
or any Project Gutenberg-tm work, (b) alteration, modification, or
additions or deletions to any Project Gutenberg-tm work, and (c) any
Defect you cause.

Section 2. Information about the Mission of Project Gutenberg-tm

Project Gutenberg-tm is synonymous with the free distribution of
electronic works in formats readable by the widest variety of
computers including obsolete, old, middle-aged and new computers. It
exists because of the efforts of hundreds of volunteers and donations
from people in all walks of life.

Volunteers and financial support to provide volunteers with the
assistance they need are critical to reaching Project Gutenberg-tm's
goals and ensuring that the Project Gutenberg-tm collection will
remain freely available for generations to come. In 2001, the Project
Gutenberg Literary Archive Foundation was created to provide a secure
and permanent future for Project Gutenberg-tm and future
generations. To learn more about the Project Gutenberg Literary
Archive Foundation and how your efforts and donations can help, see
Sections 3 and 4 and the Foundation information page at
www.gutenberg.org


Section 3. Information about the Project Gutenberg Literary Archive Foundation

The Project Gutenberg Literary Archive Foundation is a non profit
501(c)(3) educational corporation organized under the laws of the
state of Mississippi and granted tax exempt status by the Internal
Revenue Service. The Foundation's EIN or federal tax identification
number is 64-6221541. Contributions to the Project Gutenberg Literary
Archive Foundation are tax deductible to the full extent permitted by
U.S. federal laws and your state's laws.

The Foundation's principal office is in Fairbanks, Alaska, with the
mailing address: PO Box 750175, Fairbanks, AK 99775, but its
volunteers and employees are scattered throughout numerous
locations. Its business office is located at 809 North 1500 West, Salt
Lake City, UT 84116, (801) 596-1887. Email contact links and up to
date contact information can be found at the Foundation's web site and
official page at www.gutenberg.org/contact

For additional contact information:

    Dr. Gregory B. Newby
    Chief Executive and Director
    gbnewby@pglaf.org

Section 4. Information about Donations to the Project Gutenberg
Literary Archive Foundation

Project Gutenberg-tm depends upon and cannot survive without wide
spread public support and donations to carry out its mission of
increasing the number of public domain and licensed works that can be
freely distributed in machine readable form accessible by the widest
array of equipment including outdated equipment. Many small donations
($1 to $5,000) are particularly important to maintaining tax exempt
status with the IRS.

The Foundation is committed to complying with the laws regulating
charities and charitable donations in all 50 states of the United
States. Compliance requirements are not uniform and it takes a
considerable effort, much paperwork and many fees to meet and keep up
with these requirements. We do not solicit donations in locations
where we have not received written confirmation of compliance. To SEND
DONATIONS or determine the status of compliance for any particular
state visit www.gutenberg.org/donate

While we cannot and do not solicit contributions from states where we
have not met the solicitation requirements, we know of no prohibition
against accepting unsolicited donations from donors in such states who
approach us with offers to donate.

International donations are gratefully accepted, but we cannot make
any statements concerning tax treatment of donations received from
outside the United States. U.S. laws alone swamp our small staff.

Please check the Project Gutenberg Web pages for current donation
methods and addresses. Donations are accepted in a number of other
ways including checks, online payments and credit card donations. To
donate, please visit: www.gutenberg.org/donate

Section 5. General Information About Project Gutenberg-tm electronic works.

Professor Michael S. Hart was the originator of the Project
Gutenberg-tm concept of a library of electronic works that could be
freely shared with anyone. For forty years, he produced and
distributed Project Gutenberg-tm eBooks with only a loose network of
volunteer support.

Project Gutenberg-tm eBooks are often created from several printed
editions, all of which are confirmed as not protected by copyright in
the U.S. unless a copyright notice is included. Thus, we do not
necessarily keep eBooks in compliance with any particular paper
edition.

Most people start at our Web site which has the main PG search
facility: www.gutenberg.org

This Web site includes information about Project Gutenberg-tm,
including how to make donations to the Project Gutenberg Literary
Archive Foundation, how to help produce our new eBooks, and how to
subscribe to our email newsletter to hear about new eBooks.