The publishers hereby give warning that the unauthorized printing of any portion of the text of this book, and the reproduction of any of the illustrations or diagrams, are expressly forbidden.
Since the publication of this volume two years ago as "Handicraft and Recreation for Girls," it has occurred to us that "Recreations" alone much more accurately defines the contents, for the handicrafts represented are only those that in effect are recreations. Therefore we have thought it best to drop the word Handicraft and issue the new edition under the more appropriate title, "Recreations for Girls."
September, 1906.
This book, like a girl's life, is divided into two parts: occupation and amusement, or handicraft and recreation.
It is not equally divided, for handicraft is so much more like play than work, and is so entertaining in itself, we find difficulty in drawing a distinct line between that and recreation. The one insists upon blending with the other and the book, after all, is a book of entertainment.
With the old handicrafts coming back into favor and new ones constantly being brought forward, a girl's life may be full of delightful employment. To work with joyous enthusiasm and self-reliant energy, as well as to play with light-hearted enjoyment, cannot fail to make her sensible, wholesome, and happy, and it is with this end in view that we have written and illustrated the book. Our wish is to help our girl friends to make the most of their girlhood and to enjoy it to its fullest extent.
We have had practical experience in the actual working out of all the various handicrafts and recreations, and therefore give only that which we know can be well and easily done by the average girl.
Thanks are due to the Delineator, Harper's Bazar, Woman's[vi] Home Companion, and Good Housekeeping, for their courtesy in promptly returning for this work the original drawings and material used in their respective magazines.
Flushing, August 2, 1904.
| PART I | |
| HANDICRAFT | |
CHAPTER I. | |
| PAGE | |
| Spinning | 3 |
CHAPTER II. | |
| Weaving on a Home-made Loom | 15 |
CHAPTER III. | |
| A Ball of Twine and What May Be Made of It | 27 |
CHAPTER IV. | |
| An Armful of Shavings, and What to Do with Them | 36 |
| [viii] | |
CHAPTER V. | |
| Primitive Reed Curtains | 43 |
CHAPTER VI. | |
| Things to Make of Common Grasses | 53 |
CHAPTER VII. | |
| Possibilities of a Clothes Line | 62 |
CHAPTER VIII. | |
| How to Weave a Splint Basket | 68 |
CHAPTER IX. | |
| Modelling in Tissue-Paper | 75 |
CHAPTER X. | |
| Nature Study with Tissue-Paper | 86 |
CHAPTER XI. | |
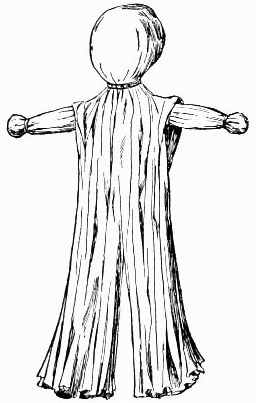
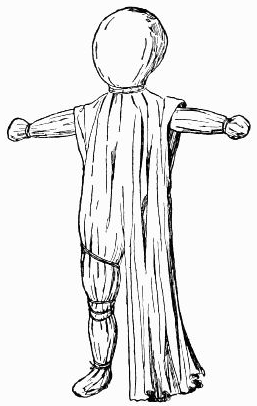
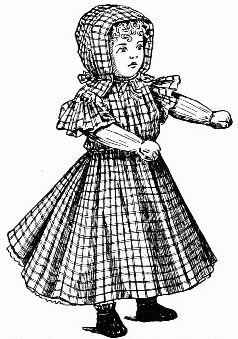
| A New Race of Dolls | 103 |
| [ix] | |
CHAPTER XII. | |
| An Indian Encampment on a Pastry-Board | 111 |
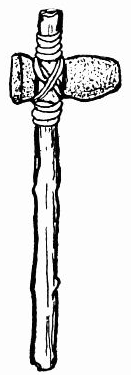
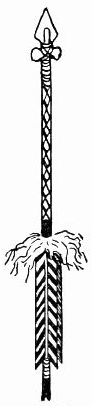
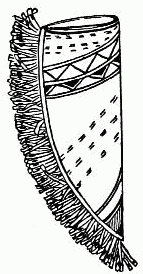
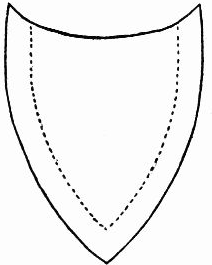
The Ground, 111; The Wigwam, 112; Decorating the Wigwam, 114; The Fire, 114; The Doll Indian, 115; The War Head-Dress, 116; A Travois, 118; Pipe of Peace, 119; A Perfect Little Tomahawk, 120; The Chieftain's Shield, 120; Arrow-Heads and Arrows, 122; A Bow That Will Shoot, 124; The Doll Squaw, 125; Squaw's Chamois Gown, 125; Primitive Loom and Navajo Blanket, 125; Papoose, 130; Cradle for Papoose, 130; Indian Money, 131; Wampum Necklace, 131. | |
CHAPTER XIII. | |
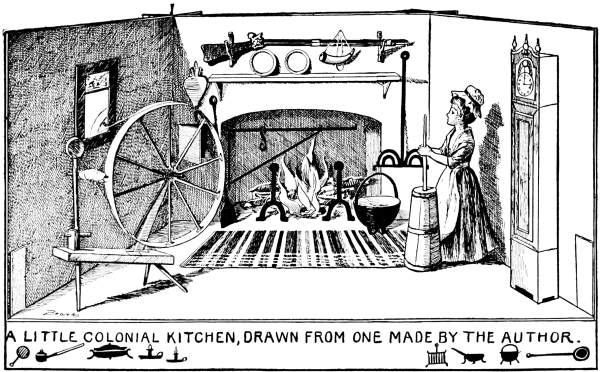
| A Toy Colonial Kitchen with Fac-simile Colonial Furnishings | 133 |
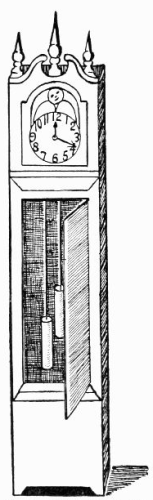
The Floor, 135; The Fireplace, 138; A Hair-pin Crane, 138; Little Dutch Oven, 139; Two Andirons, 141; The Fire, 142; Iron Pot, 143; The Peel, 144; The Toaster, 144; Pot-Hooks, 145; The Spinning-Wheel, 147; The Little Spinner, 150; The Costume, 150; Flint-Lock Rifle, 151; The Bellows, 153; Colonial Pewter Dish, 154; Grandfather's Clock, 155; Colonial Churn, 160. | |
CHAPTER XIV. | |
| Little Paper Houses of Japan | 162 |
CHAPTER XV. | |
| Some Odd Things in Russia | 175 |
CHAPTER XVI. | |
| Pottery Without a Potter's Wheel | 185 |
| [x] | |
CHAPTER XVII. | |
| Baby Alligators and Other Things of Clay | 193 |
CHAPTER XVIII. | |
| Funny Little Apple Toys | 206 |
CHAPTER XIX. | |
| Marvel Pictures | 215 |
PART II | |
RECREATION | |
CHAPTER XX. | |
| Egg Games for the Easter Holidays | |
| Lifting for Pasch Eggs | 227 |
How to Prepare the Egg-Shells, 227; Hanging the Eggs, 228; The Players, 228; The Lifting, 229; The Egg Dance, 230; Placing the Eggs, 230; Dividing the Players, 230; The Dance, 230; The Reward, 231; Easter Angling, 231; Materials for the Game, 231; Fish-poles, 231; Eggs, 232; Rules of the Game, 234; Table Egg-Rolling, 235. | |
| [xi] | |
CHAPTER XXI. | |
| May Day Amusements | 237 |
CHAPTER XXII. | |
| Hallowe'en Revels | 254 |
CHAPTER XXIII. | |
| The Magic Cloth and What It Will Do | 264 |
CHAPTER XXIV. | |
| Finger Plays for Little Folk | 273 |
The Teeter, 273; Church, 275; Steeple, 275; Open Door, 276; The People, 276; The Preacher, 277; Man Chopping Wood, 277; My Mother's Knives and Forks, 279; My Father's Table, 280; My Sister's Looking-Glass, 280; The Little Black Birds, 280; The Baby's Cradle, 281; Chin Chopper Chin, 282; Build the Tower, 282; The Five Little Pigs, 285; Little Heads for Little Fingers, 285. | |
CHAPTER XXV. | |
| How to Arrange Fresh Flowers | 289 |
| [xii] | |
CHAPTER XXVI. | |
| Open Air Playhouses | 298 |
CHAPTER XXVII. | |
| Keeping Store | 308 |
CHAPTER XXVIII. | |
| A Frolic with the Roses | 320 |
CHAPTER XXIX. | |
| A Straw Ride Picnic | 333 |
The Season, 333; Games for the Wagon, 333; Simon Says, 335; Bird Wish, 337; Lines to Be Recited Rapidly, 337; At the Grounds, 338; Chasing the Deer, 338; The Swing, 338; Teeter-Tarter, 338; The Dinner, 339; Dishes, 339; Camp-Fire, 342; After Luncheon, 342; Telling Stories, 343; Game of Menagerie, 343. | |
CHAPTER XXX. | |
| A Paper Chase | 345 |
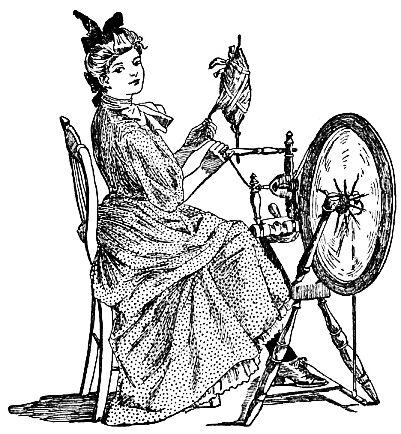 The spinning-wheel shall buzz and whirr.
All the old handicrafts are coming back again, and ere long we shall be as proud as the maids in Revolutionary[4] times of our hand-spun and hand-woven fabrics. To be able to spin and weave is to be accomplished in the newest as well as the oldest of household arts.
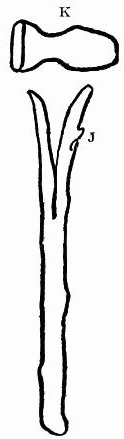
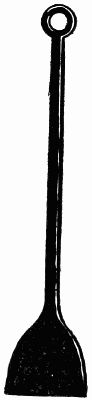
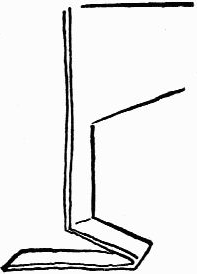
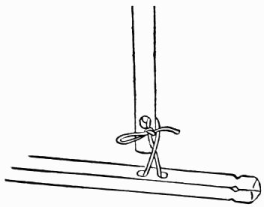 Fig. 1.—The slender rod tied at the lower end.
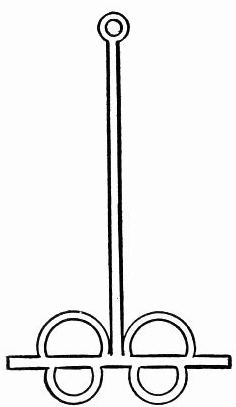
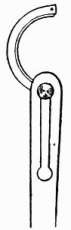 Fig. 2.—The looped upper
end of the rod.
Fig. 2.—The looped upper
end of the rod.
Is the old spinning-wheel in the attic, neglected and covered with dust, or in the parlor, decked in all its bravery of blue ribbons and snowy flax? Bring it out, wherever it may be, and for the first time in many years it shall buzz and whirr, while a girl's slender fingers part the flax and a girl's light foot rests upon the treadle. Look well to
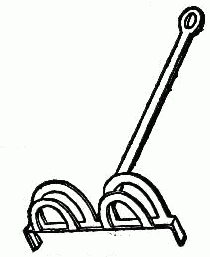
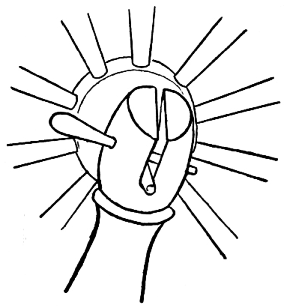 Fig. 3.—A little peg slipped through two holes.
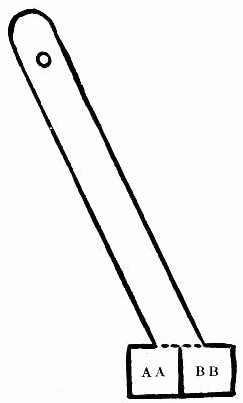
 Fig. 4.—The leather rings.
The two slanting uprights which hold the wheel in place are slotted at the upper ends, and in these slots rests the axle. A little peg, slipped through two holes in one of the uprights, keeps the axle from slipping out of place (Fig. 3).
The frame that holds
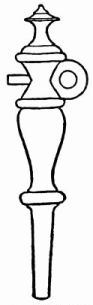 Fig. 5.—One ring in each
upright.
Fig. 5.—One ring in each
upright.
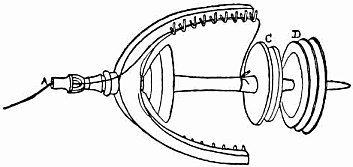 Fig. 6.—The spindle.
In the two uprights of the spindle-frame there must be[6] leather rings like Fig. 4, one ring in each upright. The narrow strip extending outward from the ring is pushed through the hole in the upright, and the edge of the ring fitted into the little grooves just above and below one of the holes (Fig. 5). These two leather rings hold the ends of the spindle, which can be easily taken out and put in by bending one of the rings backward or slightly turning one of the uprights. Fig. 6 shows the spindle with the spool, or bobbin, and the small, double-grooved wheel. The spindle proper is simply the metal rod and horseshoe-shaped piece of wood with its two rows of[7] little hooks or teeth. Besides the wheel and spindle there must be
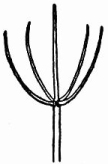 Fig. 7.—The tip of your Christmas
tree for a distaff.
Fig. 7.—The tip of your Christmas
tree for a distaff.
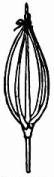 Fig. 8.—Bring the four branches
up and tie at the top.
Fig. 8.—Bring the four branches
up and tie at the top.
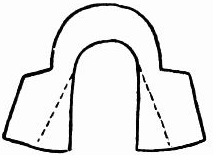
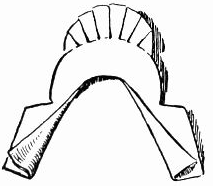
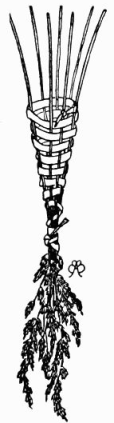
The distaff, which the mountaineers of Kentucky call the "rock," is a thing you can make for yourself if your wheel happens to have lost its own. Many are cut from the top points of pine-trees which grow like Fig. 7, and dogwood also is sometimes used. The tip of your Christmas tree will be just the thing. Strip off the bark, bring the four branches up, and tie at the top to the middle stem (Fig. 8). Let the lower end of the stem extend about four inches below the branches and whittle it down to fit in the hole in the distaff-arm.
These are all the parts of the spinning-wheel, but before[8] you can "see the wheels go round" every piece of metal must be
When the cleaning is finished, grease with lard the parts where there is any friction. The slots that hold the axle, the spindle-stem, and the metal arm, where the treadle-rod rests upon it, all need lubricating.
The best
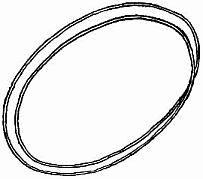 Fig. 10.—Make a double loop.
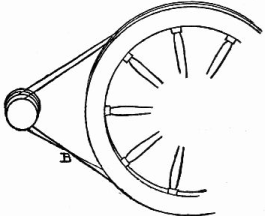 Fig. 11.—The band will cross at the bottom.
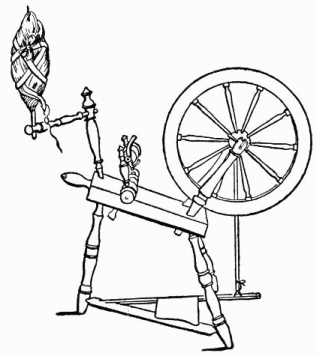 The spinning-wheel.
Open your hank of flax, take part of it, and spread thinly over the distaff, wrapping it around and around. Put on several layers, each almost as thin as a spider-web, extending it out widely and smoothly each time.
You may think the ribbon tied on the distaff of your parlor wheel is merely for ornament, but it is not. The bands hold the flax in place while it is being spun, and a crisp, dainty, pretty-colored ribbon is just as useful for the purpose as one that is old and faded, and it is far prettier to look upon. Wrap the ribbon around the flax on the distaff, beginning at the bottom, cross it, and tie as shown in illustration of the spinning-wheel.
Though everything is ready, before attempting to spin,
It seems a simple thing to work the treadle, but you will find that without previous practice you will forget to make your foot go in the absorbing interest of getting the flax ready to run on the spindle. Curb your impatience a little while therefore, and resolutely turn the distaff, with its pretty load, away from you. Place one foot on the treadle, give the large wheel a turn to the right, or away from the spindle, and try to keep a steady, even motion with your foot. The jerks caused by uneven pedalling will always break the thread, so you must learn to make the wheel turn smoothly and easily, without hurry and without stopping. Some spinners place only the toe of the foot on the treadle, others rest on it the heel also; it matters little which[12] method you adopt so long as the wheel turns evenly. When you are quite satisfied that you can keep the wheel going without giving it a thought you may begin
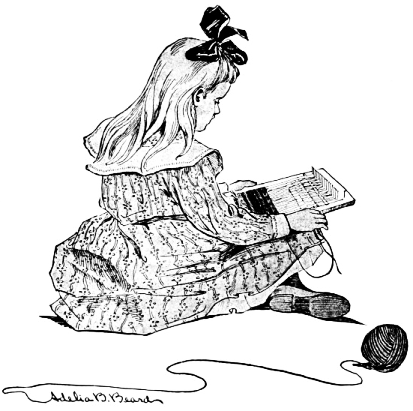
From the lowest ends of the flax draw down several strands and twist them with your fingers into a thread long enough to reach easily the bobbin on the spindle. Pass the end of the thread through the hole in the end of the spindle nearest to you (Letter A, Fig. 6), carry it across and over the upper row of teeth and tie to the bobbin (Fig. 6). Start your wheel going, and, forgetting the action of your foot, give your undivided attention to drawing out the flax. Hold the strands lightly with your left hand and with your right keep constantly pulling them down and at the same time twisting them slightly. See illustration on first page. All this time you must keep the flax from matting and tangling and the twist from running up into the mass of flax on the distaff. Only practice will make perfect in this work, though the knack may come suddenly and you will wonder at your first clumsy attempts. The little fluster and excitement one feels in beginning and the hurry to get the flax into shape for the spindle is a drawback that practice will also overcome.
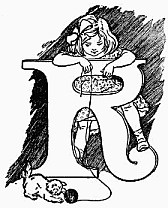
 The little girl and the little loom.
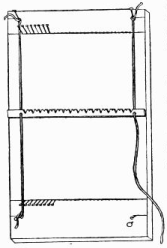 Fig. 12.—The frame for the loom.
If it is natural to weave, it should also be natural to make one's own loom, and
Make the frame for the loom of a smooth piece of soft pine-board, fifteen inches long by nine inches wide (Fig. 12). Make the heddles of two flat sticks, nine inches long, half an inch wide, and one-eighth of an inch thick (Figs. 13 and 14). From another flat stick of the same thickness, nine inches long by one inch wide, make the shuttle (Fig. 15).
With a pencil and ruler draw two straight lines across the board, the first one inch and a half from the top edge, the other two inches and a half from the bottom edge. This will make the lines just eleven inches apart. On these lines, beginning one inch from the side edge of the board, make a row of dots exactly one-quarter of an inch apart, twenty-nine dots on each line, as in Fig. 12. At each corner of the board, one inch above the upper line and one inch below the lower line, draw a short line, and on[17] each short line, three-quarters of an inch from the side edge, make one dot.
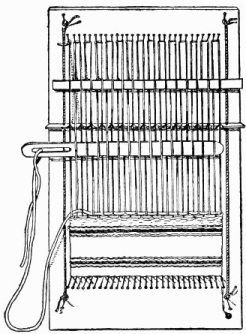
With a small tack-hammer drive a pin in each of the twenty-nine dots on each long line, and in each single dot on the four short lines (Fig. 12). When driving in the pins let them all slant evenly outward, the ones on the top lines slanting toward the upper edge of the board, those on the lower lines slanting toward the bottom edge, as in Fig. 16. Now lay your board aside where nothing will be placed on top of it, and make your heddles.
Along the entire length of one of the sticks rule a line dividing it exactly in the middle (Fig. 17). On this line, beginning three-quarters of an inch from the end of the stick, mark off spaces one-quarter of an inch apart, making thirty-one dots. At the upper edge of the stick mark off the same number of spaces exactly opposite those on the line. Then draw straight lines connecting the upper and lower dots, extending the first and last lines entirely across the stick (Fig. 17.) At a point on the upper edge, exactly[18] in the middle between the first two lines, start a slanting line and bring it down to meet the second line where it touches the long line. Between the second and third lines draw another slanting line to meet the first at the bottom, forming a V. Leave the third line, and make another V at the fourth, and so go the length of the heddle, drawing a V at every other short line. At the top between the V's make smaller V's, as in Fig. 17. With a sharp knife cut out these notches, bringing the large ones quite down to the middle line (Fig. 17). On the end lines just below the middle line bore a hole with a small gimlet or a hat-pin heated red-hot at Letter A in Fig. 17. Indeed the notches, too, may be made with a hat-pin by laying the red-hot end across the edge of the stick at the top of the line, and pressing it down while rubbing it back and forth. If you are unused to handling a knife, burning the notches will be the easier way. You can shape and trim them off afterward with the knife.
 The complete pin loom.
Of the third flat stick make
Curve the corners at each end as in Fig. 15. Sharpen one end down to a thin edge and in the other end cut an eye two inches long and one-quarter of an inch wide (Fig. 15). Cut your yard of colored cord in half, pass the end of one piece through one of the holes in the notched heddle, the end of the other piece through the hole in the opposite end of the heddle, and tie each end of the cords to one of the pins at the four corners of the board, drawing the cords taut. This will fasten the heddle in its place across the loom (Fig. 12).
Near the bottom of the board, directly below the last pin at the right on the long line, drive the carpet-tack to serve as a cleat for fastening the end of the warp. All that now remains to be done is
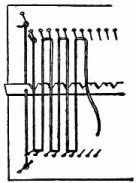 Fig. 18.—Adjusting the warp.
Tie the end of the warp securely to the first pin on the long line at the upper left-hand corner of the loom (Fig. 18). Bring the string down and around the first two pins on the lower line, up again and around the second and third pins on the upper line, and then down and around the third and fourth pins on the lower line. Up[20] again, down again, crossing two pins each time, back and forth until the last pin on the lower line has been reached. Wrap the warp around this pin several times, and then around the tack, tying it here so that it cannot slip. The warp must lie flat on the board where it passes around the pins, and in stringing up it must be drawn rather tight, though not with sufficient force to pull the pins out of place.
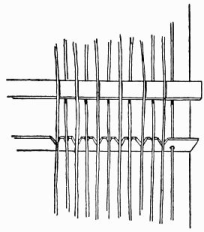 Fig. 19.—Putting in the second heddle.
Turn the heddle on edge, the notches up, and slip the threads of the warp into the notches, one thread in each notch. This, you will see, divides the warp into upper and lower threads, and forms what is called the shed. While the threads are separated take the other heddle and darn it in and out above the first heddle, taking up the lower threads and bringing the heddle over the upper ones as in Fig. 19.
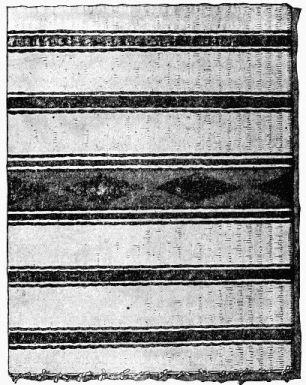 A Miniature Navajo Blanket.
This is
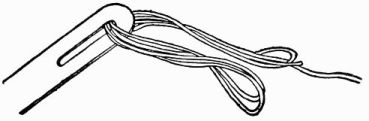 Fig. 20.—The threaded shuttle.
Tie the long end of the wool to the first pin at the lower left-hand corner of the loom, on the long line, making a tight knot and pushing it down close to the board (Fig. 21).
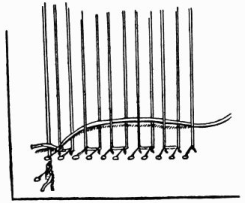 Fig. 21.—Starting the woof.
With the notched heddle on edge push the shuttle through the shed—that is, between the upper and lower threads of the warp. Draw it out on the other side, then turn the heddle down, notched edge toward you, and stand the plain heddle on edge. This will lift the lower threads of the warp above the others and make them the upper ones. Push the shuttle back through the shed, lay the plain heddle[23] flat, and stand up the notched heddle. Weaving from the left, the notched heddle always stands, while the plain one lies flat. Weaving from the right, the plain heddle stands, and the notched one is turned down.
Do not draw the woof tight across the warp. When you have passed the shuttle through, leave the thread like Fig. 21, and then push it down firmly with your finger-tips until it lies close to the pins.
Weave back and forth until all the wool in the shuttle is used. If the end of the woof extends beyond the last thread of the warp on either side, turn it back and weave it under and over several threads, and start a new piece with the end just lapping the old. The ends of the woof must never be allowed to extend beyond the warp at the sides. It is not necessary to tie the new piece of woof; the tight packing will hold it in place.
In this case the new woof must be of the red wool. Weave it across twice, or once over and back, making a very narrow red stripe, then cut it off and thread the shuttle with white. Weave the white twice across, then change to black and weave a stripe one-quarter of an inch wide. Above the black weave another narrow white stripe and another narrow red one. Put a long thread of white wool[24] in the shuttle, and weave a white stripe one inch wide. You will have to thread the shuttle twice for this, as too long a thread will make so large a bunch that it will be difficult to pass it through the shed. After the white stripe weave another black, white, and red stripe like the first, then another inch-wide white stripe. Once more weave a black, a white, and a red stripe. Begin with the narrow black, follow with the narrow white, and then weave a wider red stripe, taking the thread four times across. After the red the narrow white, and then the narrow black stripe.
This last stripe is the lower border of
Thread the shuttle with a long piece of red wool and weave it once across from the left, turn back and weave through five threads of the warp, draw the shuttle out and weave back again to the edge; again weave through the five threads, then back as shown at B in Fig. 22. Turn here and do not take up the last thread of the warp; pass the shuttle under three threads, turn on the next thread, and bring it back under four threads (C, Fig. 22), once more under the three threads, turning on the next as before, but passing back under two threads only. Turn on the next thread (D), and pass under three.[25] Back under two threads (E), turn as before on the next thread under two, turn, back under two (F), turn, under one, turn on the next, under two (G), turn, under one, turn on the next, back under two, and unthread the shuttle, leaving the woof hanging.
Begin with a new piece of red wool, follow the same direction, and weave another red point on the next five threads, then a third one which will take in the last warp-thread on the left. You will notice in the diagram that the woof always turns twice on the same thread of warp.
When the three red points are finished fill in the spaces between with black (Fig. 23), then continue to weave the black up into points as you did the red, making two whole and two half black diamonds. Leave the woof quite loose when you make a turn in weaving, and the space left between the red and black will fill up in packing.
Take up the end of the red wool left at the top of the first red point, and weave in the space between the half and first black diamond, then break off. Take the next red end and fill in between the two whole diamonds, then the next, and fill in between the whole and the last half diamond. This will give you a pattern of black diamonds on a red ground. Weave the last of the red woof once across, then break off and weave a black, white, and red stripe like the one forming the lower border of the pattern. Finish the blanket with the wide white stripes and narrow colored ones like those first woven.
To take the work from the loom, cut the threads between the pins at the top of the loom, and with quick but gentle jerks pull it off the lower row of pins. Tie together the first and third loose ends of the warp close to the edge of the blanket, then the second and fourth threads, and so on across, then cut the ends off rather close to the knots.
The little Navajo blanket woven in this way will closely resemble the real Indian blanket in texture, pattern, and colors.
Drive twelve large tacks in a straight line across the top edge of the board; place the tacks one inch and a half apart (Fig. 25), and with a pencil draw lightly a line across the board from side to side, one inch and a half below the tacks.[28] This will guide you in keeping the knots even. Be sure that the line is perfectly straight; then draw another line one inch and a half below the first and continue making lines until the board is covered with them, at equal distances apart and running across from side to side. Over each tack on the top of the board hang a piece of string about two yards long (Fig. 26). Being doubled, each string makes two lengths of one yard each.
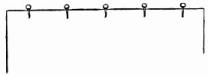 Fig. 25.—Tacks in top of board.
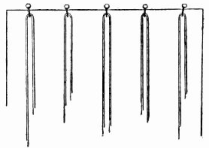 Fig. 26.—Over each tack hang a piece of
string.
Fig. 26.—Over each tack hang a piece of
string.
Bring the two ends of each strand down evenly together that all the strings may hang exactly the same in length. Fig. 26 is intended only to show how to hang the strings and gives but a section of the work.
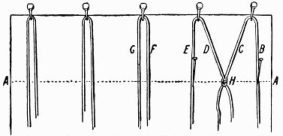 Fig. 27.—With strong pins fasten the first and fourth strings
to the board.
Fig. 27.—With strong pins fasten the first and fourth strings
to the board.
With strong pins fasten the first and fourth strings down tight to the board (see B and E, Fig. 27); then tie the second and third strings together (C, D, Fig. 27), making the knot H (Fig. 27).
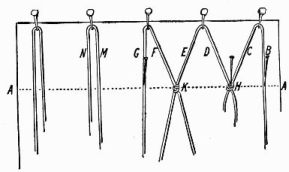 Fig. 28.—When knot H is secure stick pin in string G.
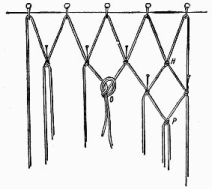 Fig. 29.—Tying the knot.
When the first knot (H, Fig. 27) is tied, take the pin out of the string E and stick it in the string G, according to[30] Fig. 28. Fasten down the knot H with another pin, and you will have the knot H and the string G firm and tight to the board while you tie the two loose strings F and E together, forming the knot K. Pin this down to the board and remove the pin from the string G and place it in the string N, leaving M and G free to be knotted together.
Continue tying the strings in this way until you have made the first row of knots across the board, always using pins to hold the boundary-strings securely to the board on each side of the two you are tying. As each knot is formed, pin it to the board and allow the pins to remain in the first row until the second row of knots has been made.
Fig. 29 shows the beginning of the third row of knots in the knot P, the pin being taken from the first knot, H, ready to be placed in the knot P. Form row after row of meshes by knotting the strings until the netting comes too near the bottom of the board to work comfortably, then slip the top loops off from the tacks and hang a portion of the net over the top of the board, allowing a lower row of meshes to hang on the tacks.
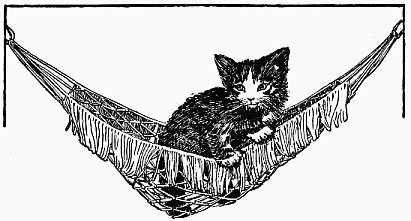
Fasten the last row of the knots carefully, binding with strong strings the short loose ends of the strands securely to the string forming the mesh each side of the knot. Remove the net from the board and make
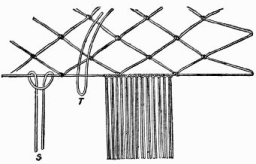 Fig. 30.—Making the fringe.
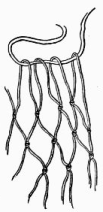 Fig. 31.—Heavy
cord through loops
on end of hammock.
Fig. 31.—Heavy
cord through loops
on end of hammock.
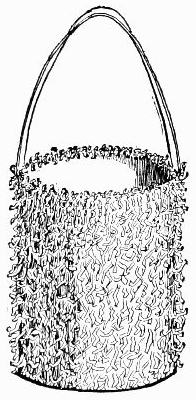
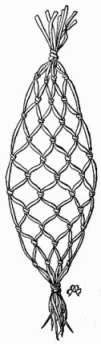
When you have made the fringe, thread a separate heavy cord through the loops on each side of the hammock (Fig. 31). Tie the loops together (Fig. 32) and fasten together the two ends of each cord, making these two extra last loops long enough to allow of a free swing for the little hammock, or you can thread a cord of the same as that used in the hammock through every loop, tying the ends of each piece together through a brass ring, and instead of one long loop a number will support the hammock.
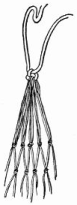 Fig. 32.—Tie
loops together.
Fig. 32.—Tie
loops together.
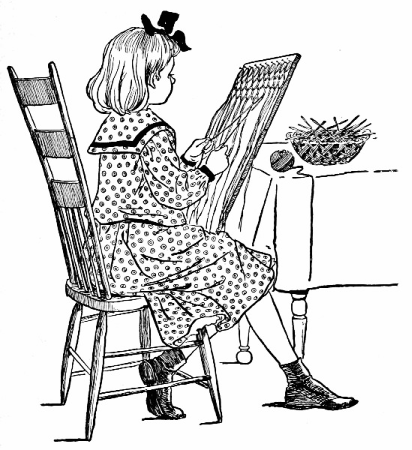 Making a sash-curtain for her room.
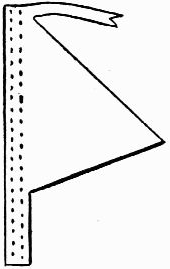
Fig. 33 shows a strong, serviceable little
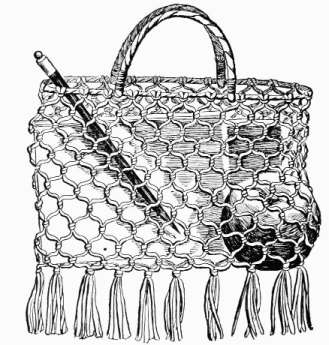 Fig. 33—Your school-bag made of string.
Having finished the bag, untie the strings attached to the two ends and make two handles of heavy cord or slender rope. Fasten the handles on their respective sides of the bag. Loop the ends of the handles under the cord forming the top of the bag, and bring each end up against its own side of the handle. Sew each of the two ends of the two handles securely to the handle proper; then bind the sewed portions neatly together with fine cord as in Fig. 33.
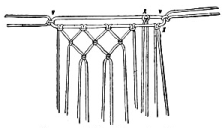 Fig. 34—Making the school-bag.
With some firm straws and more string we will make
Fig. 35 shows how to manage the work. It is almost exactly like that of the hammock, the only difference being the threading on of the straws which hold the strings in place without a knot at the top (see W in Fig. 35). Let the bottom of the net end in a fringe. Take the loops off from the tacks when the curtain is finished, and slide them on a straight, slender stick, which you can fasten to the window by resting the ends of the stick through loops of tape tacked on the sides of the window-frame at the right distance up from the ledge of the window.
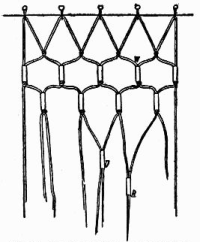 Fig. 35.—Sliding straws on strings for
curtain.
Fig. 35.—Sliding straws on strings for
curtain.
If possible, let all the net-work be made of pliable, soft material; it is easier to handle, and the results are much prettier.
Make the curtains of any color you may fancy.
It is great fun, yet there is still more entertainment to be found in these pretty shavings.
Gather an armful, then, choosing the most perfect ones, not too thin, with firm, smooth edges, and you shall weave them into
 The soft little basket made of shavings.
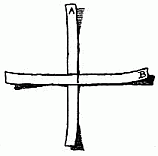 Fig. 37—So that the upper edge of B
will touch the dividing line of A.
Fig. 37—So that the upper edge of B
will touch the dividing line of A.
Pine-shavings are the best to use, as they are less brittle than those of harder woods. Select a number and put them to soak in cold water to make them soft and pliable. Then, lifting out those of an even width, place them before you[37] on a lap-board or table, and after passing them between your fingers several times to take the curl out, cut eight pieces eleven inches long. Directly across the centre of two of the strips draw a straight line, as in Fig. 36. Place one of these strips, A, flat on the table and lay the other, B, across it so that the upper edge of B will touch the dividing line of A and the mark on B will be on a line with right-hand edge of A, Fig. 37. Under A slide another strip, C, Fig. 38. Over B and under C slide[38] the strip D, Fig. 39. Over D and under A pass the strip E, Fig. 40. Under E, over B and under C weave the strip F, Fig. 41. Under E, over B, and under C weave the strip G, Fig. 42. Over F, under D, over A, and under G weave the strip H, Fig. 43. This forms a square for the bottom of the basket.
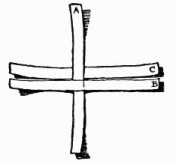 Fig. 38.—Under A slide the strip C.
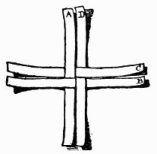 Fig. 39.—Over B and under C slip
the strip D.
Fig. 39.—Over B and under C slip
the strip D.
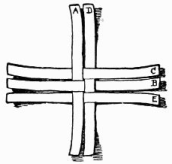 Fig. 40.—Over D and under A pass E.
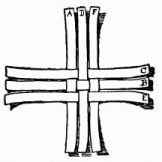 Fig. 41.—Under E, over B and under
C weave F.
Fig. 41.—Under E, over B and under
C weave F.
Bend up the ends and
 Fig. 42.—Under E, over B and
under C weave G.
Fig. 42.—Under E, over B and
under C weave G.
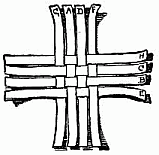 Fig. 43.—This forms the bottom of
the basket.
Fig. 43.—This forms the bottom of
the basket.
If you find any difficulty in keeping in place the part you have woven, pin it to the board or table with several pins, as in Fig. 44. Bring the sides up close to the edges of the bottom, then start your weaver at D, on the inside of the basket (Fig. 44).
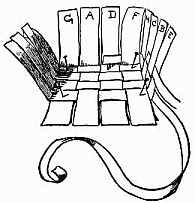 Fig. 44.—Bend up the ends now and weave
the sides.
Fig. 44.—Bend up the ends now and weave
the sides.
Weave all the way around, turning the corners sharply, until the weaver meets the first end; lap it over this, cut it off and tuck the last end under H. Start the next weaver at C, weave it around and tuck under E. Weave five weavers around the sides of the basket, beginning each time[40] in a new place that the joints may not all come together, then bend the upright shavings over the edge of the top weaver, tucking the ends of each under the third weaver, one inside, the next outside, as they may come inside or outside the basket (Fig. 45).
 Fig. 45—Bend the upright shavings over
the top edge.
Fig. 45—Bend the upright shavings over
the top edge.
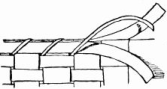 Fig. 46.—Bind the edge with two
binders.
Fig. 46.—Bind the edge with two
binders.
Cut two strips the width of your side weavers for
Loop the handle diagonally over the basket and fasten the other end on the second weaver on the side. Secure the ends of the long strip on the third weaver, allowing it to cross the other side of the handle at the[41] top, then bind the two pieces together at the middle by wrapping with a shaving of the same width over and over. Split this wrapper at the last end and tuck the two ends in at the sides. Fig. 48 shows the under part of the handle with one end of the wrapper tucked in.
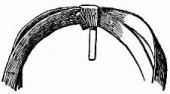 Fig. 48.—Tuck the two ends in at the
sides.
Fig. 48.—Tuck the two ends in at the
sides.
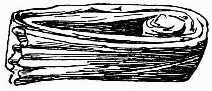
You can make table-mats, charming little handkerchief-cases, and a number of other things of the dainty shavings, all on the same principle as that of the basket.
To make
 The handkerchief case.
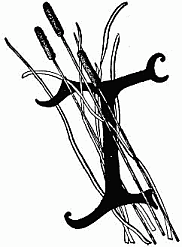
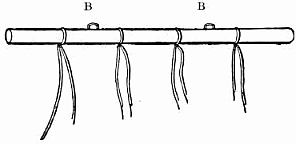 Fig. 49.—Beginning a primitive curtain.
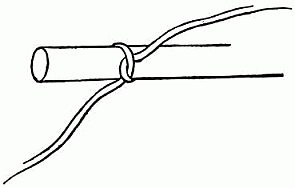 Fig. 50.—Centre of twine tied
on long stick.
Fig. 50.—Centre of twine tied
on long stick.
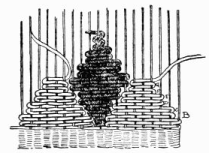
An old bamboo fishing-rod, a length of handle from a long-handled dusting or window brush, or any kind of a long, slender, smooth, round stick will do for the top curtain-pole from which to hang the reeds. Lay the pole across a table in front of and parallel to you; then tie the centres of four pieces of cord of even lengths on it at equal distances from each other (Fig. 49). Detail of the work is given in Fig. 50. Place a cat-tail reed up against the four ties, allowing one string from each tie to come over and the other under the cat-tail (Fig. 51). Cross the two lengths of each cord over the last cat-tail, bringing the lower string up and the upper string down (Fig. 52); then lay another reed up against the crossed strings, carrying the strings in turn over this reed (Fig. 53). Again bring the lower strings up and the upper down before[45] placing in another cat-tail, and always alternate the large and small ends of the reeds as in Fig. 54, in order to have them equally balanced and to avoid bringing all the small ends on one side and the large ones on the other side of the curtain.
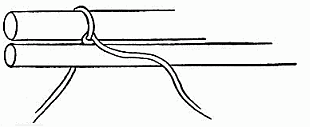 Fig. 51.—Allow one string to come over and the other under
the cat-tail.
Fig. 51.—Allow one string to come over and the other under
the cat-tail.
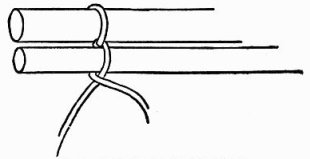 Fig. 52.—Cross the two lengths of twine.
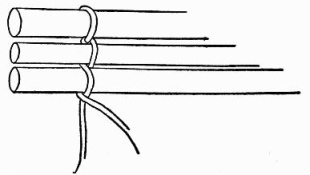 Fig. 53.—Lay another cat-tail up against the crossed strings.
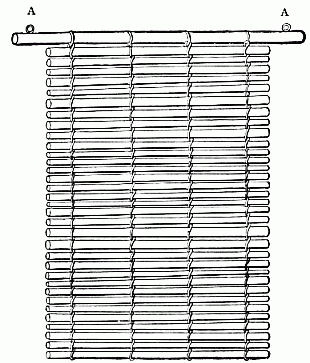 Fig. 55—Primitive curtain of reeds and twine stitch.
 Fig. 56.—Staple nail in top pole of curtain.
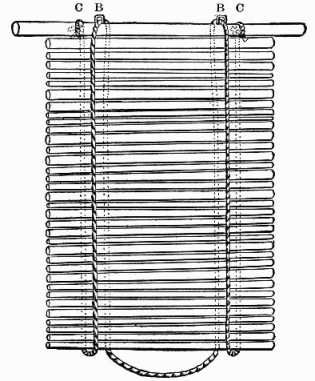 Fig. 57.—Cord fastened on top pole for rolling up curtain.
The girls and boys could readily make a number of hangings[49] in one afternoon, and while weaving the reeds together they would weave into the work all sorts of bright speeches and gay laughter, so that ever after the curtains would be filled with delightful associations of the charming summer afternoon. Reed curtains can be fashioned in any width. If very narrow hangings are in demand, cut your reeds to measure the length needed for the curtain-width and weave them together with the same twine cross-weave used in Fig. 55.
 Fig. 58.—Cat-tail curtain
raised by loop
from bottom.
Fig. 58.—Cat-tail curtain
raised by loop
from bottom.
 Fig. 60.—Large end of another.
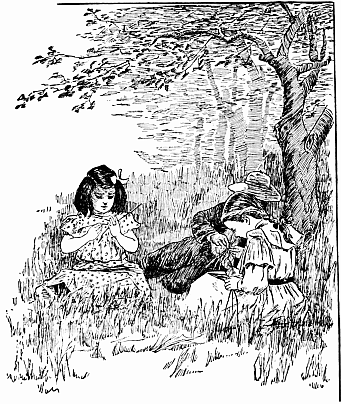 Sitting in the orchard
"Go 'long, chile, I done got 'nough to do 'thout makin' no hoppergrass-houses."
"Please, mammy, only one, and then I can make them for myself. I'll watch you just as close. Won't you, mammy?"
"Pick me some grasses, then; I 'low I has to, but don't yo' come pesterin' me no more after this time.
"Seed-top grasses, honey, seed-top grasses; don't git me none of them blade kind. Ketch hol' near the top and pull 'em up slow like, then they'll come out nice and smooth, an' leave they ole rough skins behind, just like a eel does when you skins him. That's it, you got 'nough now; bring 'em 'long here an' we'll make the hoppergrass-house.
"Hol' your own hand, honey, you'll learn best that-a-way. Can't forgit the feelin' of it once you build it on yo' fingers.
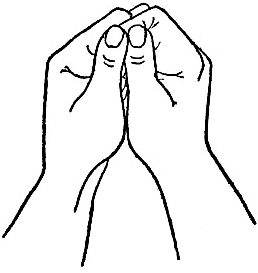
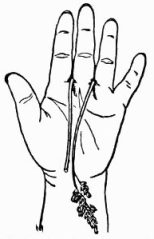 Fig. 62.—Put the grass around your middle finger with the end inside.
|
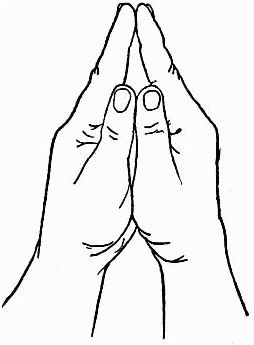
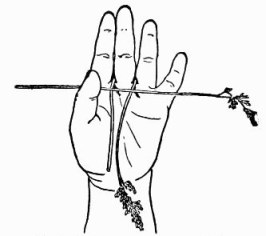 Fig. 63.—Lay the next grass across the first.
|
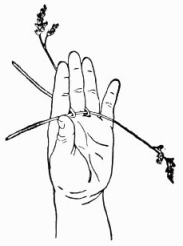 Fig. 64.—Bend back the ends of the first grass.
|
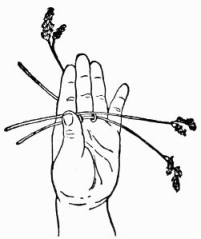 Fig. 65.—Put the next grass across your hand.
|
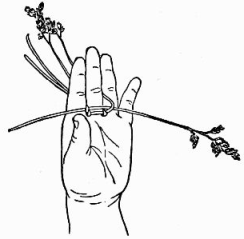 Fig. 66.—Bend back the second grass
ends like the first.
Fig. 66.—Bend back the second grass
ends like the first.
"Take one piece o' grass an' put it round yo' middle
finger with the ends inside like this (Fig. 62). Now lay the
next piece right across the first (Fig. 63), an' bend back the[54]
[55]
ends of the first grass
over the tother an' tuck
'em 'tween yo' fingers just
like that (Fig. 64). Put
the next grass across yo'
hand (Fig. 65), an' take up
the second grass-ends,
bendin' 'em back to keep
company with first grass-ends.
That makes another
bar (Fig. 66). Now
yo' do it an' let mammy
see how yo' git along.
That's right, lay the grass
across an' put
the under ends
back ev'ry time. How
many bars has yo' got
now? Six? That's 'nough
fo' any hoppergrass, an'
is as many as yo' little
hand can hol' anyway.
"Now slip it offen yo' fingers, bring the ends together an' tie with a blade o' grass just above these here blossom ends (see illustration). There now, yo' done made a hoppergrass-house, an' don' yo' come askin' yo' ole mammy to stop her work no more."
That is the way the little girls and boys in the South are taught to make the grasshopper-houses, by the old colored "mammies." They are funny little cages, and, of course, will not hold a grasshopper or any other insect, but we like to imagine they will.
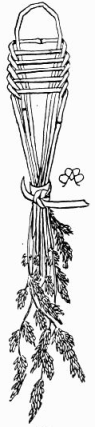 The
grasshopper-house
The
grasshopper-house
There are other things to make of grasses, any one of them requiring only a few moments' work, and it is a pretty, quiet occupation for restless little fingers. Sitting in the orchard, nestling like little partridges amid the tall grasses, all your materials are close at hand. Reach out and gather some of the long-bladed grass, and we will make
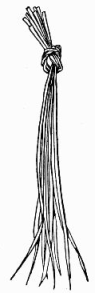 Fig. 67.—Tie them together
at the root ends.
Fig. 67.—Tie them together
at the root ends.
|
 Fig. 68.—Lift two of
the grasses and tie
them together.
Fig. 68.—Lift two of
the grasses and tie
them together.
|
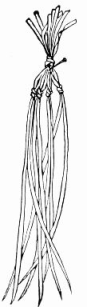 Fig. 69.—Tie them all
in pairs.
Fig. 69.—Tie them all
in pairs.
|
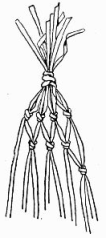 Fig. 70.—Make the knots
of the second row one
inch below the first row.
Fig. 70.—Make the knots
of the second row one
inch below the first row.
|
 The grass hammock.
Some of this grass measures twenty-five inches in length. It does not grow on stalks, but the blade appears to spring directly from the root, and it is smooth and pliable. You may find orchard-grass almost any where, generally in neglected corners and close to fences where the scythe does not reach.
Take eight or ten of the blades of this grass and tie them together at the root-ends as in Fig. 67, drawing the knot tight as in Fig. 68. Stick a pin through just below the knot and fasten to your knee; then lift two of the grasses at the right-hand side, and tie[57] them together about one inch below the pin (Fig. 68). Tie the next two grasses together in the same manner, the next, and the next, until you have tied them all in pairs (Fig. 69). Make the second row by separating the pairs of the first and tying one grass of one pair to the neighboring grass of the next pair, making the knots one inch below the first row. This leaves the first and last grasses hanging loose (Fig. 70). On the third row the first and last grasses are tied in once more (Fig. 70). On the fourth they are left again, and so they alternate until the hammock is finished. Keep the rows of knots at even distances apart, and make the hammock as long as the length of the grass will allow. Leave about three inches of the grass below the last row of knots, and then tie the ends together as in the illustration. Swing the little hammock between the low-hanging branches of a tree; put your dolly in it and let the summer breezes rock her to sleep while you sing:
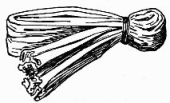
A very pretty
 Bouquet-holder made
of seed-grass.
Bouquet-holder made
of seed-grass.
| 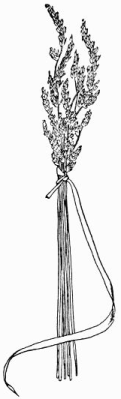 Fig. 71.—Bunch together
the seed-grass stalks.
Fig. 71.—Bunch together
the seed-grass stalks.
|
Bunch together seven fine, strong seed-grass stalks and tie just below the blossoms, with the root-end of your long-blade grass (Fig. 71). The stems of the seed-grasses are the spokes, the long grass the weaver. Turn the blossom-ends down, the stem-ends up, and close to where it is tied, begin to weave the long grass in and out, under one spoke, over the next, under the third, over the fourth, going around and around spirally until the end of the weaver is reached, then tie it to one of the spokes. Keep forcing the spokes farther and farther apart as you weave until the holder is shaped like a cone. As you see in the illustration, the weaver never passes over one of the spokes twice in succession. In one row it goes over a spoke, in the next[59] row under it, in the third over again, and so on. In order that it may always come this way you must have an uneven number of spokes. Four will not do, nor six, nor eight, but five, seven, or nine spokes will bring the weave out all right.
 Grass napkin-ring.
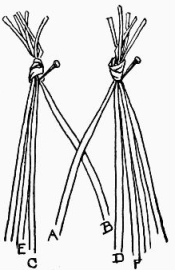 Fig. 72.—Take one blade from each bunch and cross them.
| 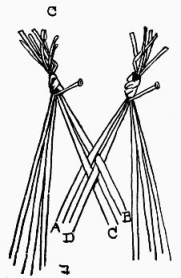 Fig. 73.—Bring C over A and D under B and over C.
|
Select ten fine long blades of grass, divide them into two bunches of five each, put the root-ends together, and tie them as when making the hammock. Pin these two bunches to your knee about two inches apart, and taking one blade from each bunch, cross them as in[60] Fig. 72, the right-hand grass A on top of the left-hand grass B. Now bring the left-hand grass C over A, and the right-hand grass D under B and over C (Fig. 73). Next weave the left-hand grass E under A and over D, then the right-hand grass F over B, under C, and over E. Weave the remaining four grasses in the same way, taking first from one side, then from the other. When your work has reached the stage shown in Fig. 74, take the grass A, turn it under and weave it in and out as in Fig. 76, then the grass B, turn it over and weave until it crosses A (Fig. 76). D comes next, to be woven until it crosses B, then C, which will cross D. On the left hand always turn the grasses under before beginning to weave, on the right hand turn them over before beginning to weave.
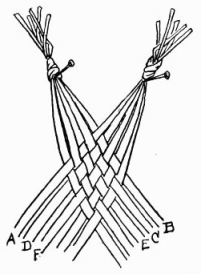 Fig. 74—Weave the remaining grasses in
the same way.
Fig. 74—Weave the remaining grasses in
the same way.
| 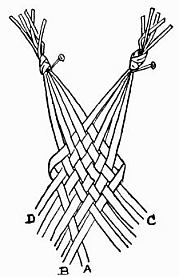 Fig. 76.—Turn the grass A under,
and weave it in and out.
Fig. 76.—Turn the grass A under,
and weave it in and out.
|
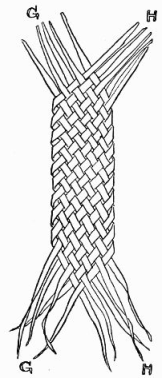 Fig. 77.—Tie the opposite ends
together.
Fig. 77.—Tie the opposite ends
together.
Do not use rough or saw-edged grasses for any of this work, for they sometimes cut the hands, and the seed-top grasses must not be old enough to shed their seeds into your eyes. When dry most grass is quite brittle and will break if you attempt to bend it. The fresh, green, soft and pliable grasses are the kind you need and these you may always find in season.
Hemp rope and cotton, large rope and small, down to the ordinary heavy twine, all lend themselves to this work.
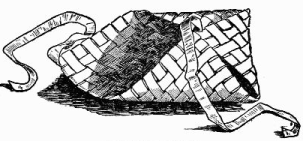
It requires a rather heavy clothes-line, one considerably lighter, called by some rope-cord, and a piece of strong twine for the
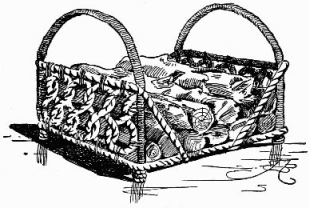 The wood-basket.
Make the bottom of a board two feet long and sixteen inches wide, and on each end of the board nail securely one-half of a barrel-hoop (Fig. 78). From an old broom-stick cut four rounds one inch thick for the feet (Fig. 79), and fasten one round to each corner underneath the board with strong screws or wire nails (Fig. 78, Z Z).[63] This is all the wood you will need for the basket, the rest is to be made entirely of rope.
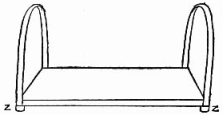 Fig. 78—On each end nail one-half of a barrel-hoop.
 Fig. 79—For
the feet.
Fig. 79—For
the feet.
Take your small rope and nail one end of it to the edge of the bottom, close to one end of one of the barrel-hoops (Fig. 80), then wrap the hoop with the rope, one row close to another until it is completely covered. Cut off the rope when it reaches the end of the hoop and nail it down as you did the first end of the rope in beginning. Fasten a piece of the heavy rope entirely around the edge of the board, nailing it at intervals along each side, but leaving loose that at the end edges until later. Make the
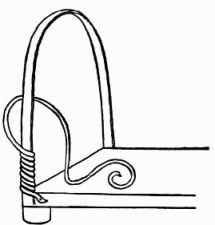 Fig. 80.—Nail one end of the small rope to
the edge of the bottom.
Fig. 80.—Nail one end of the small rope to
the edge of the bottom.
Eight inches from the end of the bottom, underneath but near the side edge, nail one end of your heavy rope; bring it up slantingly and wrap and tie it to the hoop just above and touching the top edge of the loops, stretch the rope tightly across the hoop and tie at the other side, then carry the end down and fasten underneath the bottom eight inches from the end of the board (see illustration). Wrap and tie the top loops of the end piece to the top rope as shown in illustration. Finish the other end of the basket in the same manner, not forgetting to nail in place the rope left loose at the end edges. Give the completed wood-basket several coats of dark varnish. The varnish not only produces a nice finish, smoothing down both wood and rope, but also stiffens and helps to hold the rope in place.
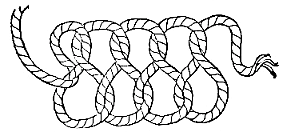 Fig. 81.—Make the end pieces like this.
This netting may be made of heavy rope for a grille in an open doorway, or of lighter rope for fringe. In either case the method is the same.
In a board, at regular distances apart, along a straight line, drive a row of wire nails. It depends upon the size of the rope how far apart the nails should be placed. For a heavy rope there must be at least four inches between, and this distance should lessen as the rope decreases in size.
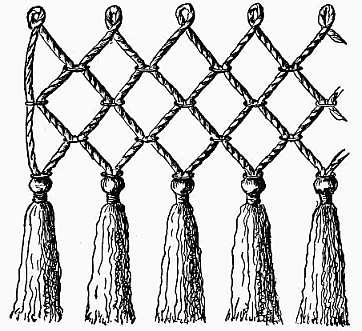 Fig. 82.—A Rope netting.
Cut your rope into pieces four feet in length if it is heavy, not so long if it is light rope. Loop one piece of rope over each nail and let it hang down evenly, then[66] bring the first and fourth strands together and slip on them a small brass curtain or embroidery ring (Letter A, Fig. 83). Push the ring up to within four inches of the line of nails if the nails are four inches apart. If the distance between the nails is three inches the ring must be three inches below the line. Catch the ring to each strand of rope with needle and thread to hold it in place. Bring the third and sixth strands together and slip on a ring (Letter B, Fig. 83). Then the fifth and seventh, and so across the board.
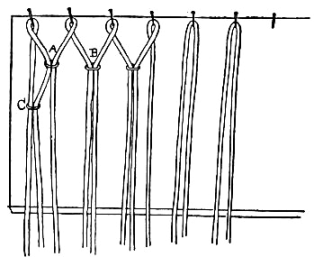 Fig. 83.—Slip on a small brass curtain ring.
Begin the next row by slipping a ring on the first and second strands, placing it the same distance below the first row of rings that the first row of rings is below the line of nails (Letter C, Fig. 83). Bring the third and fourth strands together with a ring, the fifth and sixth, continuing the original pairing of the strands until the row is complete. The third row of rings brings together again the second and fourth strands, the third and sixth, as in the first row, and the fourth row of rings goes back to pairing the first and second, third and fourth strands.
Below the last row of rings wrap and tie the strands together, then untwist the ends of the rope up to where it[67] is tied and fray it out until it becomes fluffy. Make the head of the tassel by wrapping closely with twine a short distance below the ring, or you may slip on several of the brass rings as a finish.
The board on which you make your netting need not be any longer than is convenient to handle, for when one part of the netting is finished it can be taken off the nails and new strands added to carry on the work.
Fig. 84 is an ornamental design suitable for decorating a wooden chest or, if sewed on cloth, for a hanging. By studying the design you can easily reproduce it without the aid of description or other diagram.
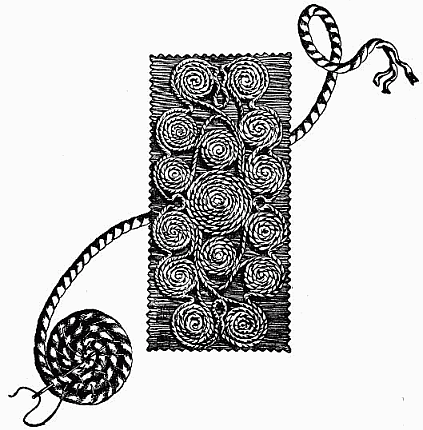 Fig. 84.—Ornamental design.
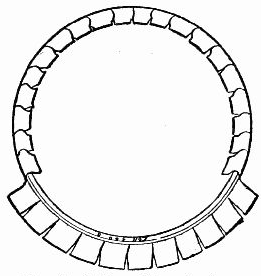
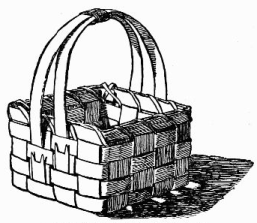
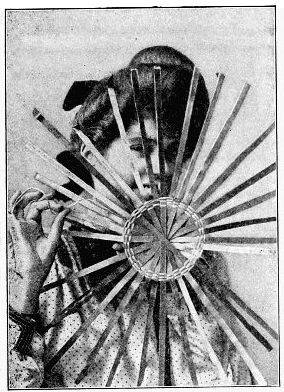
A basket measuring about six inches in diameter and three inches in height is a convenient size on which to learn.
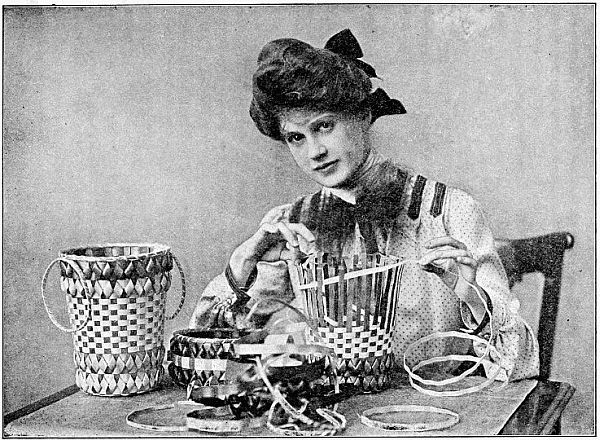 Weaving the sides of basket with long weaver.
Wipe the dripping water from the splint, and cut off six pieces nineteen inches long; then cut these into sixteen strips one-half inch wide, for the spokes of the basket. Do not attempt to tear the splint, for it will not tear evenly. From the other piece of splint cut four strips for weavers, making the first one-half of an inch wide, the next one-fourth of an inch wide, another one-eighth of an inch wide, and the last one-sixteenth of an inch wide. Place all the weavers in the water and leave them until you are ready to begin weaving.
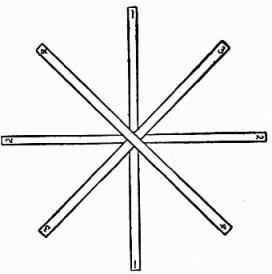 Fig. 85.—The first four spokes.
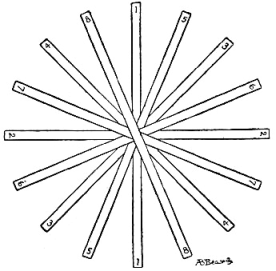 Fig. 86.—Eight spokes in place.
For instance, the
ninth spoke should
come between No. 1 and No. 5, the tenth spoke between
No. 5 and No. 3, the eleventh spoke between No. 3 and
No. 6, and so on around the circle (Fig. 87). Be sure the
lower end of a spoke fits between the same numbers as the
upper end. When all the spokes are placed hammer a[69]
[70]
strong pin directly through the centre where they are
crossed, to hold them together while you begin.
 Bottom of basket completed.
|
 Material for weaving basket.
|
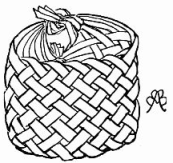
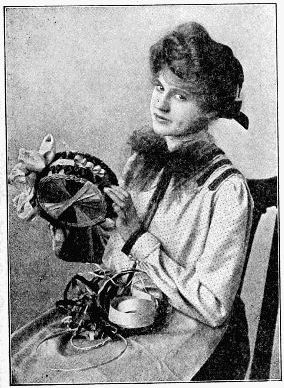 Small basket with two rows of trimming on
different colored weaver between.
Small basket with two rows of trimming on
different colored weaver between.
|
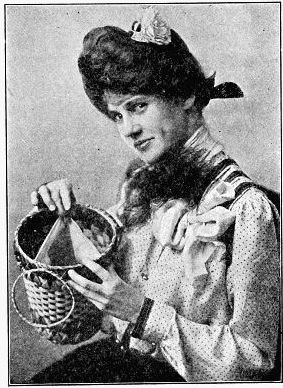 Lining the basket.
|
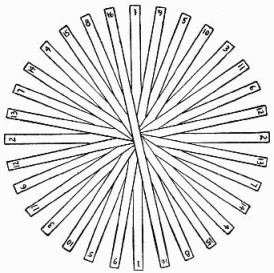 Fig. 87.—All of the spokes in place.
With the spokes lying in the position shown in diagram (Fig. 87), take the eighth-inch weaver, and begin to weave it in and out of the spokes. Start it under spoke No. 1 about two and one-half inches from the centre, bring it over No. 9, under No. 5, over No. 10, under No. 3, over, under, over, under, until it has crossed spoke No. 16; then skip No. 1, bring the weaver under No. 9, and weave another row. You will find it necessary to skip one spoke at the beginning of each row, in order to make a continuous under-and-over weave. Weave five rows with the eighth-inch weaver, then slide the end under the last row, lapping it an inch or so and running it under several spokes, to hide the joint. Slip the first end under a spoke also. During this part of the work your main endeavor must be to weave in a perfect circle. The illustration shows the bottom of the basket completed.
Before bending the spokes for the sides of the basket, let them soak in the water a few minutes, then place the work on the lap-board, the same side up as when started, and carefully bend the spokes up at right-angles with the bottom (Fig. 88). Start a half-inch weaver inside the basket, close to the bottom, and weave under and over until the row is complete; then, allowing for a lap of about three inches, cut the weaver off and slide the end under the first end of the weaver, making the invisible joint by tucking each end under a spoke. Start the next row a little beyond the joint of the first row, that the joining may not all come in one place. Weave five rows of the half-inch weaver, then two rows of the fourth-inch weaver and then bind off (Fig. 89).
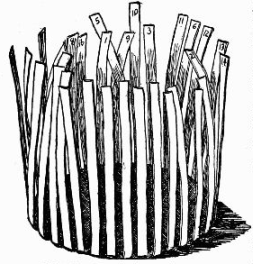 Fig. 88.—Bend the spokes up.
Cut the spokes off evenly,
leaving about two inches extending
above the top of the[71]
[72]
basket, then put the basket in the water, spokes down,
and soak until pliable. Bend each spoke down snugly over
the top weaver, and
slip the end through
the next weaver,
pushing it down
until its end is hidden
under one of
the weavers. Bend
one spoke inside,
the next outside the
basket, according as
they come inside or
outside of the top
weaver (Fig. 89).
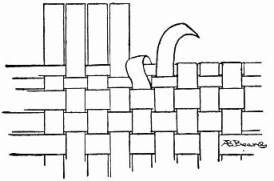 Fig. 89.—Binding off.
This binding off holds the top weaver in place and makes the basket very firm; but the spokes must be protected from wear where they are bent, and it is necessary to put a double band around the edge. For this band cut two pieces of the fourth-inch weaver which will go around the basket and lap about an inch. Place one piece along the inside edge, the other along the outside edge of the basket, and with the sixteenth-inch weaver bind them to the top weaver, as shown in Diagram 90. Fasten the end by taking several cross-stitches with the narrow weaver, passing it under the inside band only, and tucking the end under the same band.
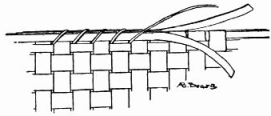 Fig. 90.—Putting on the band.
Many splint baskets are trimmed with twisted loops of the same material. For this trimming take one of the half-inch weavers and cut a thread's width off its edge, making it just a trifle narrower than the other weaver. Insert the end of this weaver under a spoke at the top of the basket (letter A, Diagram 91), give a twist to the left, and pass it beneath the next spoke, as shown in Diagram 91, letter B. Pull the loop down and flatten it a little with your thumb, then twist the weaver again, this time to the right, and slip the end under the next spoke, letter C. Continue this around the basket, and make the joint of the trimming as you did the other joints, by lapping the ends and slipping them under the spokes, which makes the last loop of double thickness.
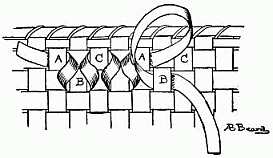 Fig. 91.—Making the trimming.
The small basket shown in the illustration has two rows of trimming, and between them is run a weaver of another color pulled out into loops at the sides.
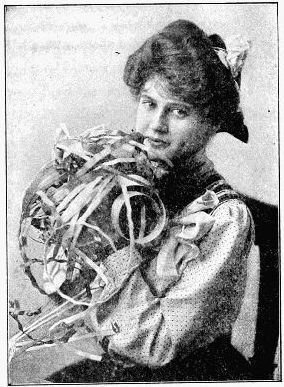
The illustration on the first page of this chapter shows a large basket with four rows of trimming and handles. The handles are made of the fourth-inch weaver, which is brought around twice, making a ring of double thickness. The ring is then wrapped with the eighth-inch weaver, and fastened to the basket with loops of the same. The weaving of this large basket differs from the smaller one, in that the weaver is not cut at the end of each row, but is continued[74] around row after row. For a large basket the half-inch weaver can be used in this way, but in a small basket the slant of the weaver as it runs around is too apparent. If a long weaver is used in a small basket it must not be more than one-eighth of an inch in width.
While baskets of the natural white splint are extremely dainty, color certainly gives variety and adds interest to the work, and the splints will take dye readily. You might also line your basket with silk of a color to harmonize with the splint.
The white-ash splint one and one-half inches wide comes in rolls of twenty-five yards, and a roll will make several medium-sized baskets. The material may be obtained of almost any kindergarten supply firm.

You must select paper of the necessary color, and fold, roll, fold, squeeze, fold, tie, with here a little pull and there a little pat, a spreading out, a pinching in; that is all. There is no sewing, no pasting, no pinning, merely modelling and tying, using only tissue-paper and string.
These animals are very substantial and unique. They are not at all thin or flat, but well rounded out and lifelike, with character and independence enough to stand alone—just the kind your little brother and sister will be delighted with, for they may play with the toys free from all danger of hurts or bruises. To
 Fig. 92.—The beginning of the paper chicken.
 Fig. 93—Second step in modelling chicken.
 Fig. 94.—Third step in modelling chicken.
 Fig. 95.—Fourth step in modelling chicken.
 Fig. 98.—Modelling the chicken's legs.
Roll a separate piece of paper into a little wad and lay it on the creased strip (Fig. 93) about one-fourth of the distance from one end. Bend the short end of the strip over the wad of paper, as in Fig. 94; then fold up the strip[77] where the end of the short fold lies, bend this over the first fold (Fig. 95) and bring the loose end on the bottom of the three layers. Fig. 96 shows a wad of paper inserted at one end of a strip of creased paper folded over and over three times, making four layers, two on top and two on the bottom of the paper wad. Wind a string around the paper tight up to the wad and tie it securely to form the head (Fig. 97). You now have the body and head of the chicken. Make the legs and feet of a strip of paper about sixteen inches long and seven and one-half wide. Gather up the two long sides with your fingers as you did the paper in Fig. 93; crease the paper, then wind each leg with string, leaving one inch free at each end to form the feet (Fig. 98). Lift up the free end of the folded paper (Fig. 97) and place the centre of the legs (Fig. 98) midway under the last fold as in Fig. 99. Tie the end of the loose layer of the body securely[78] on the body, and you will have the foundation ready for the beak, wings, and tail (Fig. 100).
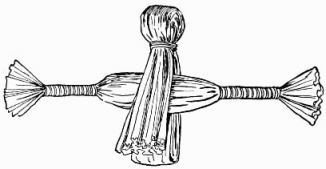 Fig. 99.—Modelling body and legs of chicken.
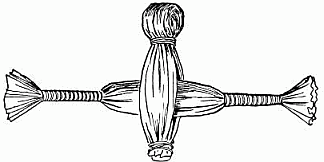 Fig. 100.—Partially modelled ready for beak, wings and tail.
 Fig. 101.—The beak of chicken.
 Fig. 102.—Modelling beak on chicken.
 Fig. 103.—Paper chicken
nearly finished.
Fig. 103.—Paper chicken
nearly finished.
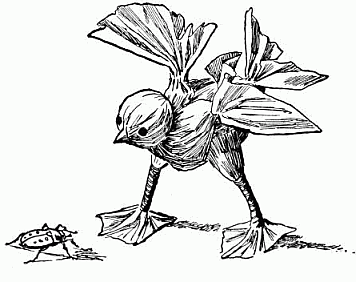 Fig. 104.—Hungry little paper
chicken.
Fig. 104.—Hungry little paper
chicken.
Cut a square of the same kind of tissue paper, measuring
nine and one-half inches on all four sides; fold diagonally
twice across the square as when making a paper pin-wheel.
The centre of the square is exactly where the
diagonal lines meet and cross; pinch the centre portion up
into a beak and tie it with a string (Fig. 101); then fit the
beak over the centre of the chicken's head, bringing the
paper entirely over the head on all sides; tie the square
around the chicken's neck close up to the head (Fig. 102).[79]
[80]
The two points A
and B of the square
must form the wings,
while C is carried
backward over the
under portion of the
body and D back
over the upper part,
the two ends C and
D being brought
together and tied tight
up to the body to form
the tail. In Fig. 103 you
will see exactly how to
pinch up the wing if you
notice particularly the
upper part of the wing
B, next to the body. The
wing A on Fig. 103 shows
how the two wings must
be tied close to, but not
on, the body. When each
wing is tied, make the
tail of C and D by tying
the extensions together
as explained above; that
done, bend down the legs,
spread out the wings and[81]
tail, open out and flatten the feet, then stand the little
chicken on a level surface (Fig. 104). Remember always
to crease the tissue-paper
with the grain of
the paper; if you attempt
to cross the grain
the paper will be very
apt to tear.
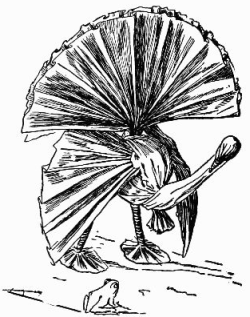 Fig. 105.—The astonished paper turkey.
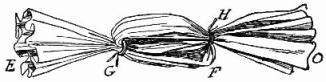 Fig. 106.—Modelling turkey's body.
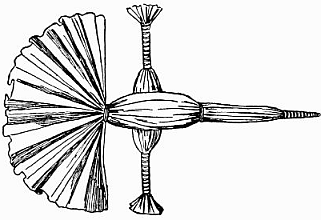 Fig. 107.—Legs and feet of turkey.
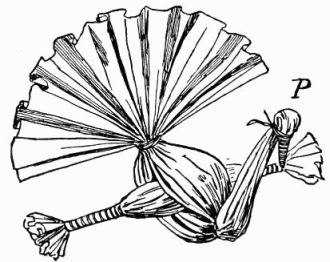 Fig. 108.—Head modelled on turkey.
 Fig. 109.—Paper for turkey wings.
(Fig. 105) is also modelled from half a sheet of tissue-paper as near the general color of a turkey as can be found. Make Fig. 92 and Fig. 93 of the paper; then fold Fig. 93 five and three-quarter inches from one end (Fig. 106, F). Three inches from this end tie the two layers together (Fig. 106, G). Fold the strips back and tie a string through the lower loop up over the loose top layer (Fig. 106, H). Wind the extreme end of the paper (Fig. 106, O), with string to form[82] the beak (Fig. 107), bend the beak down and tie it to the neck to form the top of the head (Fig. 108, P). Make the legs and feet as you did those for the chicken (Fig. 98) and slide them through the body so that one fold of the body will be above and two beneath the legs (Fig. 107). Cut the wings from a separate piece of tissue-paper (Fig. 109). Let the paper measure seven inches on the widest side, five on the opposite side, and four and one-half on each of the other sides. Pinch the paper together through[83] the centre and tie (Fig. 110). Gather up one wing, so that it will not tear, and slip it through the body, immediately over the legs, with the widest side toward the front (Fig. 105), leaving the other wing out free on the other side of the turkey. Bend down the legs, spread the tail out fan shape and bend it up; open out the wings and drop them downward and forward (Fig. 105). Flatten out the feet and stand up the turkey (Fig. 105).
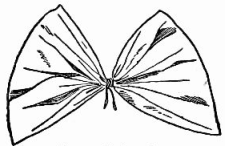 Fig. 110.—Turkey wings.
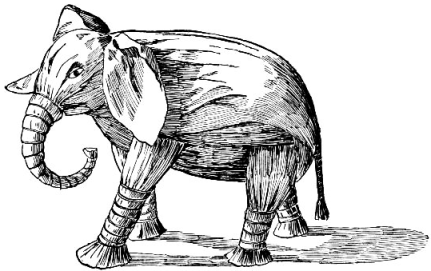 Fig. 111.—Elephant modelled of tissue-paper.
(Fig. 111) will require two sheets of brown tissue-paper for its body, head, and trunk, which are all made of a single strip of paper. Unfold, spread out and fit the two sheets of[84] tissue-paper together; then gather up one side, as in Fig. 92, crease and gather up the other side (Fig. 93). Bind one end with black thread to the distance of four and one-half inches to form the trunk; then fold the remainder of the strip into four layers, beginning with the free end of the paper; fold over and over three times. This gives the body and head. Bind black thread around the folds next to the trunk to form the head. Make four legs of two pieces of paper in the same way you formed those of the chicken (Fig. 98), only the elephant's legs must be very much thicker. Slide the legs through the body between the two layers of paper, shove the front legs forward and the hind legs backward. For the tail use a small strip of the brown tissue-paper. Wrap it around and around with black thread to within an inch of the bottom and cut this end up into fringe. Fasten the tail on the elephant with black thread,[85] pass the thread between the first and second layers of paper forming the back of the body of the animal and tie the tail on the outside threads which cross from side to side of the elephant; bend the top of the tail over the thread, as you would hang a garment on a clothes-line, and tie the bent-over end down on to the tail proper. Shape the ears like Fig. 112, pinch together the end S and tuck it under the thread which separates the head from the body. Allow the long side, M, to form the front of the ears. You can add white ivory tusks if desired. Roll up two white writing-paper lighters and push an end of each up in the head under the trunk, forming one tusk on each side.
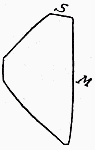 Fig. 112.—Elephant's
ear.
Fig. 112.—Elephant's
ear.
In making these little creatures do not forget that you must do some modelling, bending and shaping them with your fingers, squeezing up the paper where it stands out too far, and gently pulling it out in places where it flattens too much. The heads can be turned to suit the fancy, the bodies inclined this or that way, or they may stand stiff and erect. You might model a number of chickens, of different-colored paper, some yellow, some white, and others black, like real chickens; or make several turkeys and two or three elephants, some of the latter with tusks and others without. The toys when finished will cause exclamations of delight and approval. They are simple and easy to put together, something which will not cost much and yet be worth many times the amount expended for the necessary material to manufacture. The little animals are attractive, substantial toys, entirely different from the common ones which any girl or boy with sufficient pocket money may purchase.
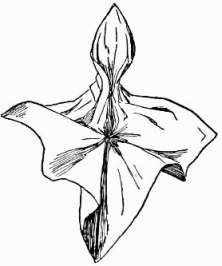
There are no patterns, only circles and squares and strips of paper which you gather here, spread out there, wrap and tie some place else and, with deft fingers, model into almost exact reproductions of the natural flower before you.
With its unfamiliar terms to be committed to memory and the many parts of the flower to be distinguished, botany is apt to prove dry and tiresome to the little child, but to study nature by copying the flowers in this marvellously adaptable material is only a beautiful game which every child, and indeed many grown people, will delight in. The form of the flower, its name and color, may, by this means, be indelibly stamped upon the memory, and a good foundation laid for further study.
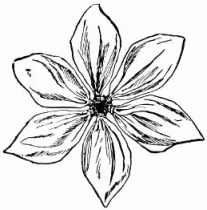
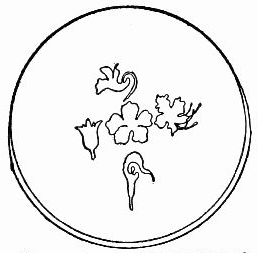
Ordinary garden flowers and those most easily procured make the best models. The carnation-pink, the morning-glory, and the rarer blossoms of the hibiscus, are well[87] adapted to the work, also the daffodil and some of the wonderful orchids.
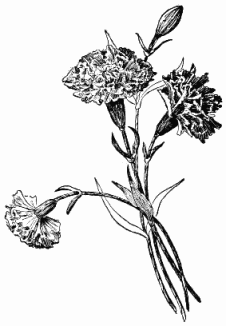 Carnations modelled from tissue-paper.
Even holly with its sharp-spiked leaves and scarlet berries and the white-berried, pale-green mistletoe may be closely copied. All these and many more are made on the same principle and in so simple a manner even quite a little child may succeed in producing very good copies from Nature.
Buy a sheet of light pink tissue-paper, another of darker pink, and one of the darkest red you can find. Then a sheet of light yellow-green and one of dark green. Have a table "cleared for action" and place your paper on the right-hand side, adding a pair of scissors and a spool of coarse thread, or, better still, of soft darning-cotton.
With all this you are to copy the
Lay your natural flower down on the left-hand side of the table, away from your material but quite within easy reach, for it must be consulted frequently. Seat yourself comfortably and don't work hurriedly.
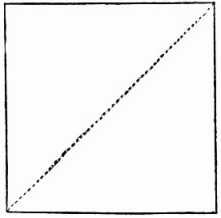 Fig. 113.—Fold the square diagonally through
the centre.
Fig. 113.—Fold the square diagonally through
the centre.
The first thing necessary in this system of squares and circles is to know
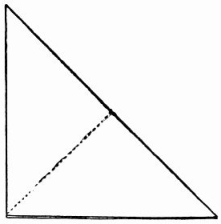 Fig. 114.—The first triangle.
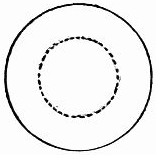
Cut a square the size you wish to make your circle. That is, if you want a circle with a diameter of four inches cut a four-inch square (Fig. 113). Fold the square diagonally through the centre according to the dotted line on Fig. 113, and you have the triangle (Fig. 114). Fold this at the dotted line and it will make another triangle (Fig. 115). Again fold through the middle and you have the third triangle (Fig. 116). Fold once more and Fig. 117 is the result. Measure[89] the distance from the edge, B, to the centre A in Fig. 117 and mark the same distance on the other side of the angle shown by the dot, C (Fig. 117). With your scissors cut across from C to B, curving the edge slightly, as shown by the dotted line from C to B (Fig. 118). Fig. 119 is the circle still in its folds. Fig. 120 is the circle opened, the dotted lines indicating where it has been folded.
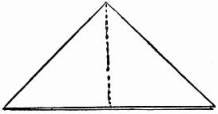 Fig. 115.—Second triangle.
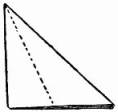 Fig. 116.—Third triangle.
Your eye will soon become sufficiently accurate to enable you to gauge the distance from A to B, and you can then cut from C to B without measuring.
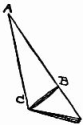 Fig. 117.—Fold
once more.
Fig. 117.—Fold
once more.
| 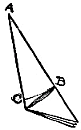 Fig. 118.—Cut
from C to B, curving
the edge.
Fig. 118.—Cut
from C to B, curving
the edge.
|  Fig. 119.—The
circle still in its
folds.
Fig. 119.—The
circle still in its
folds.
|
Now hold the pink off at arm's length. The separateness of the petals disappears and you see them only as a mass; the points on the edges are not noticeable except as they give the flower a crimped appearance, and the edge of the calyx looks almost straight. It is this last appearance or the impression of the flower that you are to produce rather than its many and separate little parts. So now to work.
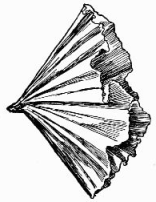 Fig. 122.—Crimp the edge with
your fingers.
Fig. 122.—Crimp the edge with
your fingers.
|
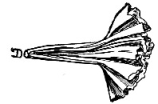 Fig. 123.—Draw these through
your hand to bring them
closely together.
Fig. 123.—Draw these through
your hand to bring them
closely together.
|
 Fig. 126.—The calyx.
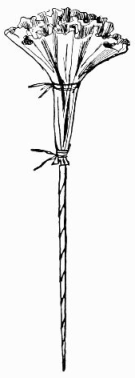 Fig. 125.—Wrap and tie at the bottom
and where the petals spread.
Fig. 125.—Wrap and tie at the bottom
and where the petals spread.
| 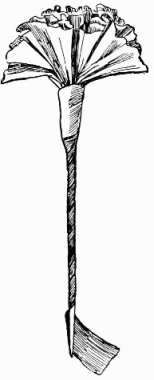 Fig. 127.—Wrap the paper spirally around
the stem.
Fig. 127.—Wrap the paper spirally around
the stem.
|
 Fig. 128.—The leaves.
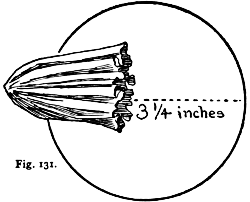
From your light-green paper cut a circle measuring three and one-quarter inches through its diameter and cut it in two to make the half circle for the calyx (Fig. 126). Remove the thread that holds the flower just below its petals and wrap the calyx closely around the lower part, tying it at the bottom;[93] then cut a narrow strip of dark-green paper and wrap it spirally around the stem, beginning at the top (Fig. 127). Let the wrapper extend a little below the lighter and twist the end to hold it in place. Spread the petals of your flower as much like the natural blossom as possible.
For the leaves cut a strip of dark-green paper six inches long and three-quarters of an inch wide (Fig. 128). Find the centre by folding the paper end to end and making the crease shown by dotted line in Fig. 128. Gather it along this line, not with needle and thread—we use no needle in this work—but with your fingers, and pinch it together; then twist each end into a point (Fig. 129). With the sharp point of your scissors punch a hole directly through the centre (E, Fig. 129), and push the point of the stem through the hole, bringing the leaves as far up on the stem as you find them on the natural flower; then wrap and tie them in place.
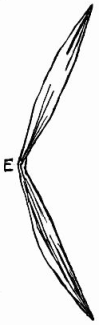 Fig. 129.—Twist each
end into a point.
Fig. 129.—Twist each
end into a point.
It is wonderful how very natural these blossoms appear. At a short distance no one would think they are not the real, old and familiar pinks. Only the fragrance is missing, and that may also be supplied and a spicy odor given by enclosing a whole clove in the heart of each flower.
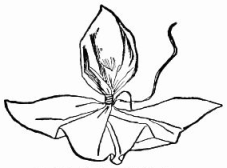
From your pale-pink paper you can make the delicately beautiful morning-glory. Have the natural flower with its stem and leaves to copy from, even if the blossom is not the color you want. As with the pink, it is the general form and appearance we strive for in the morning-glory, not the detail.
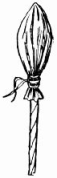 Fig. 132.—Slip
the bag over
the head of a
lighter.
Fig. 132.—Slip
the bag over
the head of a
lighter.
Make your pink circles with a diameter of about seven inches. It is always better to have your flowers a trifle larger than the natural ones, rather than smaller.
But one circle is required for each morning-glory. Crimp this in your fingers and draw through your hand as you did the circles for the pinks; then, pinching it together to within one and one-half inches of the edge, hold it in your left hand and flatten out the top as in Fig. 133. See that the fulness is evenly distributed, and pull and straighten out the edges until you are satisfied with its appearance.
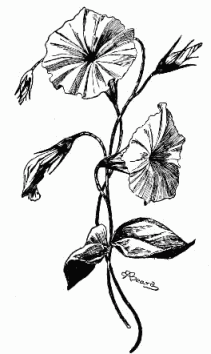 Morning-glory modelled from tissue-paper.
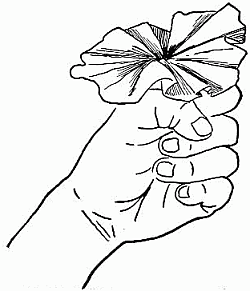 Fig. 133.—Flatten out the top of the flower.
A piece of bonnet-wire makes the best stem if you wish to give the true viney effect of the growth. If it is only the blossom you are making, a paper lighter will answer. When you use the wire bend one end over to form a small loop; this is to keep the stem from slipping through the flower. Pass the[96] straight end of the wire through the centre of the flower and draw it down until the loop is hidden.
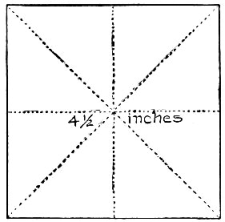 Fig. 134.—Green square for calyx.
Make
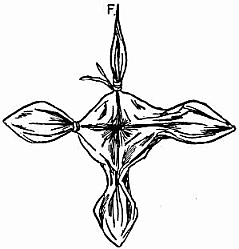 Fig. 137.—Twist each corner into a point.
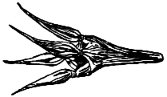 Fig. 138.—Bring the points together.
Make several buds of the pink paper, following the directions given for the green bud of the pink; then twist each bud at the point and add a calyx.
The wilted flower shown in the illustration is made by taking one of the morning-glories you have just finished and actually wilting it by drawing the flower together and creasing and pressing it to resemble the partially closed and drooping natural blossom.
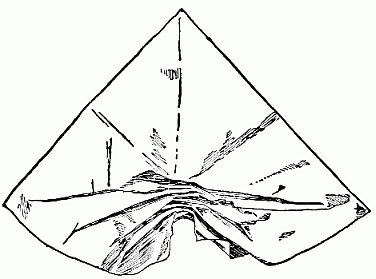 Fig. 139.—Gather along one of the creases.
Only a piece of dark-green paper six inches square is required to model two almost perfectly shaped morning-glory leaves.
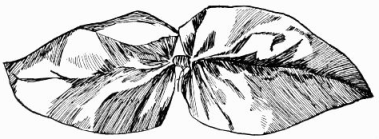 Fig. 140.—The morning-glory leaves.
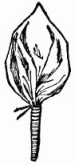
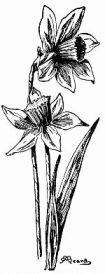 Daffodils modelled from
tissue-paper.
Daffodils modelled from
tissue-paper.
Fold the square twice diagonally across from corner to corner to find its centre; then begin at one corner and[98] gather along one of the creases until you reach the centre (Fig. 139). Start again at the opposite corner, gather along the crease to the centre, then wrap and tie (Fig. 140). Pinch each leaf from underneath along the crease in the middle, to give the depression at the midrib. Straighten the leaf out a little at its widest part and you will find you[99] have made a pair of leaves which are surprisingly natural. Wrap and tie these to the stem and make as many more as you think are needed.
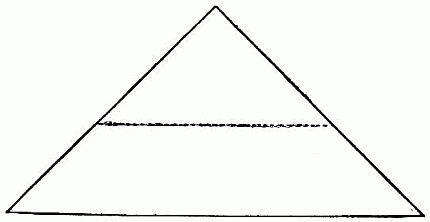 Fig. 141.—For the two extra petals.
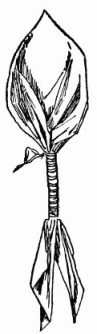 Fig. 143.—Bring together
the fan of
paper below the
petal.
Fig. 143.—Bring together
the fan of
paper below the
petal.
Match the tint of your natural daffodil in yellow tissue-paper as nearly as possible, and then cut two squares for each flower measuring about five and one-half inches. Fold the squares crosswise and diagonally through the centre as you did for the calyx of the morning-glory (Fig. 134), and cut one square in half along one of its diagonal folds[100] (Fig. 141). Gather the square two and a quarter inches below each corner and tie as in Fig. 137, but do not twist the points. This gives you four petals, but as the daffodil has six, you must make two more from the triangular halves of the square you have just cut. Gather each triangle across from side to side, according to the dotted line in Fig. 141, and pinch and tie in place as in Fig. 142, making sure the petal is of exactly the same size as those on the square. Bring together the fan of paper left below the petal and wrap and tie as in Fig. 143, then cut off the ragged end (Fig. 144).[101] Draw the petals of the square together as you did the calyx, and insert the stem made of a paper lighter. Put in place the two extra petals, pushing the wrapped ends down into the heart of the flower; fit each loose petal between two of the others and tie (Fig. 145).
 Fig. 146.—Pinch the cup together.
|
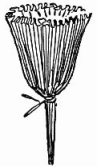 Fig. 147.—Slip the cup on your
finger like a thimble.
Fig. 147.—Slip the cup on your
finger like a thimble.
|
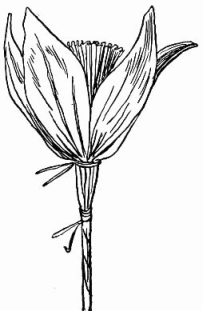 Fig. 148.—Insert the stem of the cup into
the centre of the flower.
Fig. 148.—Insert the stem of the cup into
the centre of the flower.
|
Turn back to the bud of the pink (Fig. 130), and from a circle of the yellow paper, with a diameter of four inches, make the cup (Fig. 131), using the scissors to give a fine crimp to the edges. Pinch the cup together at the bottom almost half-way up and tie (Fig. 146); slip it on your finger like a thimble and press it into shape like Fig. 147. Insert the point or stem of the cup into the centre of the[102] flower and tie in place just below the petals (Fig. 148).
Cut a two and three-quarter-inch square from light-brown paper and divide it diagonally in half for the calyx. Examine your natural daffodil and notice how loosely the calyx seems to be wrapped around the flower. Imitate this by leaving the point loose at the top, while you wrap the bottom of the calyx closely around the stem. Allow the wrapping for the stem to cover the lower part of the brown calyx. Make several long, narrow leaves from strips of dark-green paper, two inches wide and of varying lengths. Twist one end of each leaf into a point and, gathering the other end, draw it through your hands until it stands up stiffly. Wrap each leaf partly around the stem and tie in place, following as closely as possible the natural growth of the leaf on the stem. Bend the stem just below each flower, being careful not to break the paper lighter which forms it.
If you use thread the color of the flowers for tying and green for the stems the effect will be almost perfect.
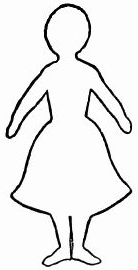
 Here she comes. Little Miss Muffett.
To make
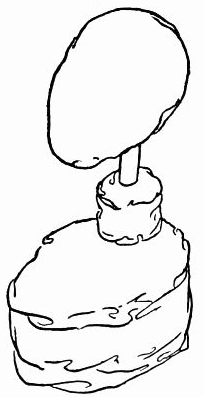
 Fig. 149.—Creased tissue-paper for making doll.
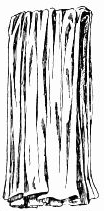 Fig. 150.—Six
sheets of tissue-paper
folded together
for making
doll.
Fig. 150.—Six
sheets of tissue-paper
folded together
for making
doll.
|  Fig. 151.—Head
of doll.
Fig. 151.—Head
of doll.
| 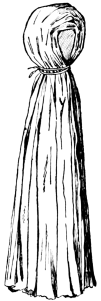 Fig. 152.—Head tied
on body.
Fig. 152.—Head tied
on body.
|
Take one sheet of the white paper at a time and draw it lengthwise through your hands, creasing or crimping it as in Fig. 149. Do this to all the eight sheets. Then, pulling six of them partly open, place them evenly one on top of another and fold through the middle (Fig. 150). Take another sheet of the crimped paper and roll it into a ball like Fig. 151. Open the folded paper, place the ball in the middle, bring the paper down over the ball and wrap and tie just below with coarse linen thread or white darning-cotton (Fig. 152). This is the head, which you must model into shape with your fingers, squeezing it out to make it fuller and rounder at the back and pinching it to give a chin to the face. Fold another crimped sheet like Fig. 153 for the arms. You will notice the ends do not quite reach the folds. The space left should measure a little over[105] one inch. Crimp half a sheet of the pink paper and with it cover the arms; allow the pink to extend equally at each end beyond the white and fold over the ends, tying them as in Fig. 154. Then tie the loose ends down as in Fig. 155. Open the paper just below the head, slip the arms in place and tie below (Fig. 156).
Spread out your smooth sheet of pink paper, place the doll's head directly in the centre and draw the paper down over head and body; keep it as smooth as possible over the face and wrap and tie at the neck (Fig. 157). Push the pink paper up on the shoulders and cut a slit about six inches long lengthwise through the middle of the entire mass of paper, as shown in Fig. 157. Wrap and tie each of the legs (Fig. 158) and tie once more under the arms (Fig. 161). Fold the bottom edges under and model the feet in shape (Fig. 158). The wrappings at the thighs and knees take slanting lines, which give a more natural shape to the legs than if the thread were simply wrapped round and round as at the ankles.
 Fig. 156.—Arms in place.
Miss Muffett's curls are furnished by
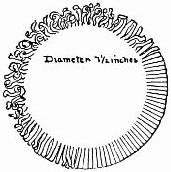 Fig. 159.—The wig.
Cut a circle seven and one-half inches in diameter, and on the edge cut a fringe one inch in depth (Fig. 159). This is the hair, which you must curl by drawing it lightly over the blade of a penknife or scissors (Fig. 159).
Fit the wig on Miss Muffett's head, holding it in place with pins until you can tie it on just back of the curls (Fig. 161).
Now for the little lady's clothes. To make
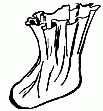 The shoe.
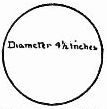 Fig. 160.—Pattern
of shoe.
Fig. 160.—Pattern
of shoe.
Cut the white skirt in a circle seventeen inches in diameter with a circular opening in the centre (Fig. 163). Crimp the skirt and put it on over the feet, not the head, of the doll, wrapping and tying it in place around the waist.
Not only may tissue-paper be purchased in all colors, with their various shades and tints, but in pretty little checks, plaids, and figures as well, so Miss Muffett may have a dress equal in appearance to the cotton or silk gown of her china sisters.
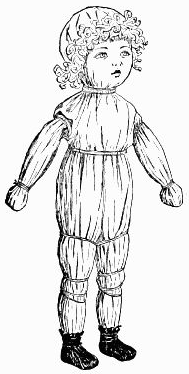 Fig. 161.—Ready to be dressed.
Cut the skirt of
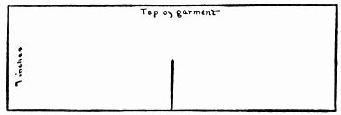 Fig. 162.—Union garment.
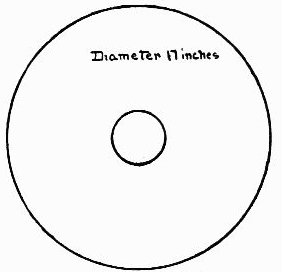 Fig. 163.—White skirt.
| 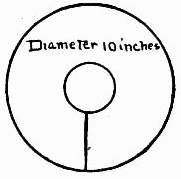 Fig. 164.—Waist pattern.
|
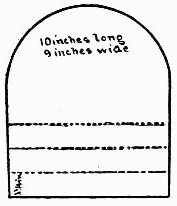 Fig. 165.—Pattern for sun-bonnet.
| 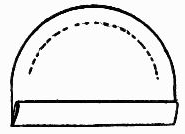 Fig. 166.—Bonnet folded.
|
This waist circle should measure ten inches in diameter. Do not crimp the dress skirt, but put it on in all its crisp freshness, and tie in place at the waist-line. Adjust the waist on Miss Muffett, bringing the slit opening at the back.[109] It looks very much like a cape now, doesn't it? But draw the fulness in at the bottom and around the arms at the shoulders, and you have a little waist with full short sleeves. Tie the waist rather high, and bring it down to bag slightly over the skirt as shown in the illustration of Miss Muffett. Cut
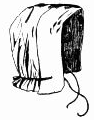 The sun-bonnet.
Fit Fig. 166 on Miss Muffett's head, allowing the folded edge to extend slightly beyond her face, then draw the bonnet down at the back and gather it in with your fingers until it sits snugly to the neck. Through the middle of the fold, one inch from each end, puncture a hole, and through these two holes pass the thread that goes around the back of the bonnet and ties under Miss Muffett's chin. See illustration of sun-bonnet.
Take for
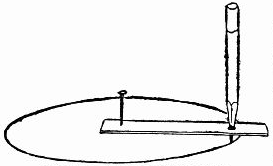 Fig. 167.—Home-made compass.
Now that we have our camping-ground, the first thing we must do is to
Cut twelve slender sticks eleven inches long and sharpen the heavy end of each into a flat point (Fig. 168). The sticks must be straight, for they are wigwam-poles. Tie three poles together two inches from their tops and spread out the sharpened ends at nearly equal distances apart on the circle line; mark the spots where they rest and bore gimlet-holes in each place through the cloth into the wood. Enlarge each hole with a penknife and insert the poles, pushing the sharpened points down firmly into the holes (Fig. 169). Add seven more poles around the circle, keeping the spaces between all about even. Sink these last poles in the ground as you did the first three; then tie the tops together[113] around the first three poles, and you will have the wigwam framework of ten poles standing strong and firm.
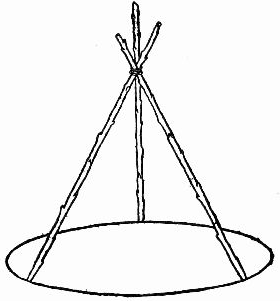 Fig. 169.—First three poles planted firmly in
edge of circle for wigwam.
Fig. 169.—First three poles planted firmly in
edge of circle for wigwam.
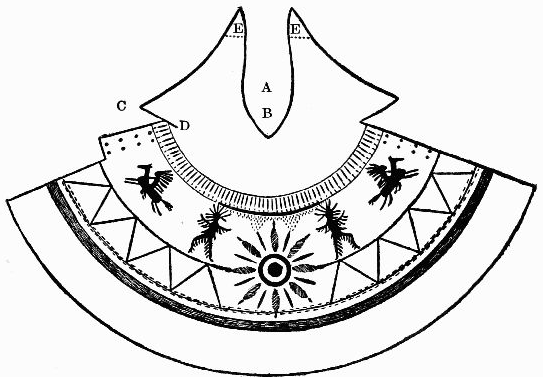 Fig. 170.—Cover for wigwam.
Make the cover of unbleached or brown-tinted cotton cloth cut like Fig. 170. Mark the curved lower edge with the home-made compass used for the grass circle. Fasten the pin and pencil in the paper strip nine and one-half inches apart; draw almost a[114] half circle, then an inch and a half from the spot A (Fig. 170), where the pin is stationed, begin to cut the opening for the top of the wigwam poles, B (Fig. 170). Slash the point C in as far as D, sew pieces of cloth over the points E and E, leaving the opening at dotted lines to form pockets for the smoke-poles. Cut two rows of little holes on each side of the upper part of the wigwam to run the pinsticks through when fastening the wigwam together (Fig. 171).
Now comes the fun of decorating the cover. Pin the cloth out flat and smooth, and paint in brilliant red, yellow, black, green, white, and blue the designs given in Fig. 170. When finished, fit the cover over the wigwam-poles and with short, slender sticks pin the fronts together. Peg the lower edge down to the ground with short black pins and slide a pole in each pocket of the smoke-flaps E and E (Fig. 170). Bring the poles around and cross them at the back of the wigwam. As you do this you will exclaim with delight at the result, for the little wigwam will be very realistic.
In front of your wigwam or tepee
If you can find a Zulu doll of the required size, with long, straight black hair, and give him a wash of dull red paint, you can turn him into a fine Indian. Failing these dolls, make an Indian doll of dull red raffia or cloth. This you[116] can do if you try, and remember to have your red man a little more slender than store dolls; most of these are rather too stout to make good Indians.
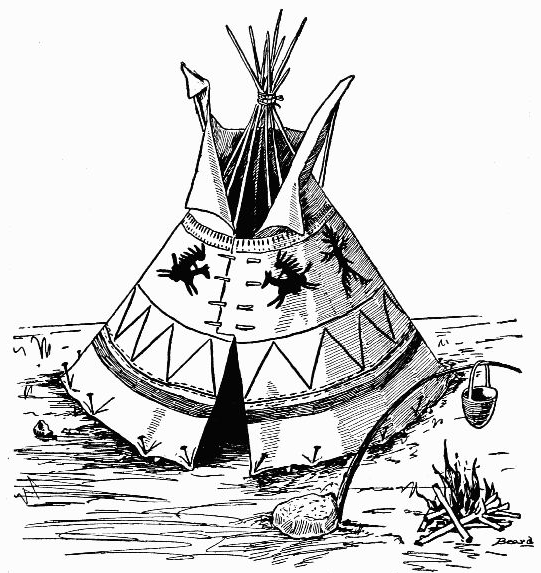 Fig. 171.—Wigwam with make-believe camp-fire.
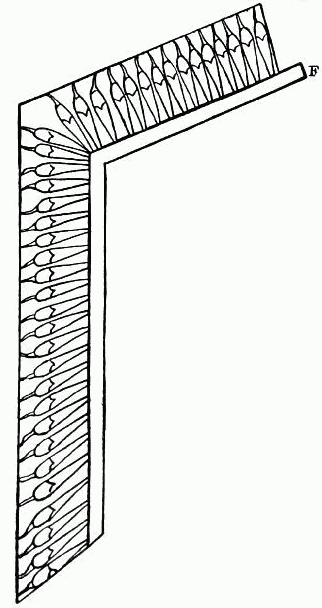 Fig. 172.—Pattern
for war
bonnet.
Fig. 172.—Pattern
for war
bonnet.
Real chiefs like Turning Eagle, Swift Dog, Crazy Bull, and others, wore gorgeous feather headdresses, and gloried in the strange war bonnets, not because they were gay and startling, but for the reason that each separate feather in the head-band meant that the owner had performed a brave deed of which the tribe was proud, and the greater the number of brave deeds the greater the number of feathers; consequently the longer the bonnet-trail. This explains the real meaning of the common expression, "A feather in your cap."
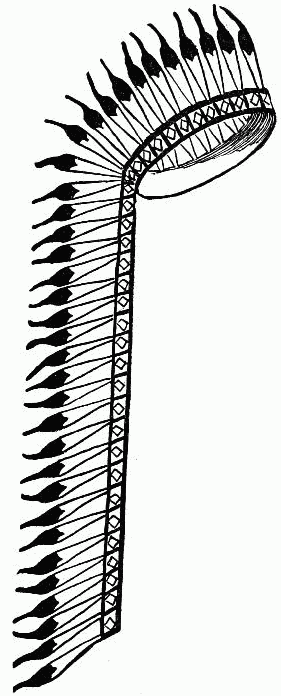 Fig. 173.—Indian
war bonnet.
Fig. 173.—Indian
war bonnet.
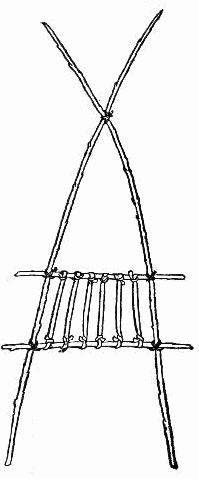 Fig. 174.—Tie the
four poles together
and tie thongs across
centre for your
travois.
Fig. 174.—Tie the
four poles together
and tie thongs across
centre for your
travois.
Your Indian must be a mighty chief and will need a very long-trailing
Cut the head-dress like Fig. 172 of white paper. Paint all the paper horse-hair tips on the paper eagle feathers red, the tops of the feathers black, and the band in which they are fastened yellow, red, and green, leaving white spaces between the colors (Fig. 173). Cut out, then turn the end of the band F (Fig. 172) until the loop fits the Indian's head, and glue the end of the loop on the strip[117] (Fig. 173). Paste fringed yellow paper around each of the chieftain's feet, fringed edge uppermost, to serve as moccasins. Part the Indian's hair at the back, bring the two divisions in front, one on each side of the head, and wind each with scarlet worsted as the real Indian wears his hair, then wrap around your red man a soft, dull-colored cloth extending from the waist to the knees. Pin the drapery in place and the chief will be ready to take charge of his bronco pony, which may be any toy horse you happen to possess. The horse in the illustration is an ordinary cloth toy.
Red men are not fond of remaining long in one place, and naturally your Indian will soon want to break camp and carry his belongings elsewhere. Help him prepare by making
You will need four slender poles, two fifteen and one-half inches long, one five and one-half and another six and one-half inches long. Bind the six-and-a-half-inch pole across the two long poles four inches from their heavy ends; fasten the five-and-a-half-inch pole across the long poles two and one-half inches above the first cross-piece. Instead of thongs of buffalo hide, such as the real red man would use, take narrow strips of light-brown cloth to form the rude net-work over the space bounded by the four poles. Tie the top ends of the long poles together (Fig. 174), then tie the travois to the horse, as in Fig. 175. In most of these conveyances the thongs are tied across one way only, from short pole to short pole, forming a ladder-like arrangement.
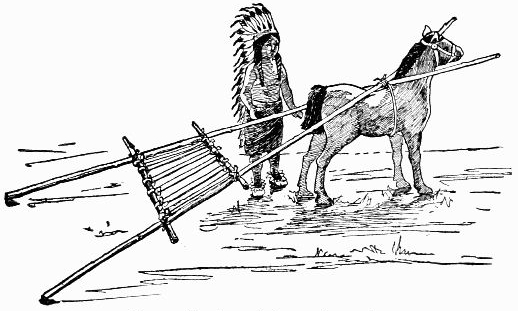 Fig. 175.—Travois ready for camping outfit.
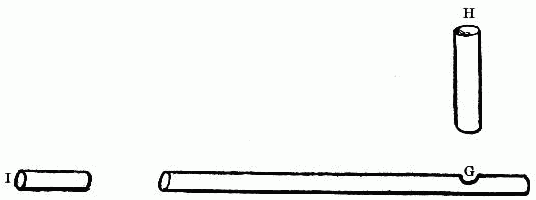 Fig. 176.—Different parts of straw calumet.
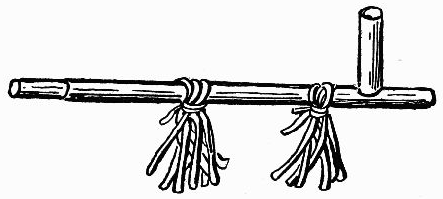 Fig. 177.—Calumet finished.
A chief must always have his
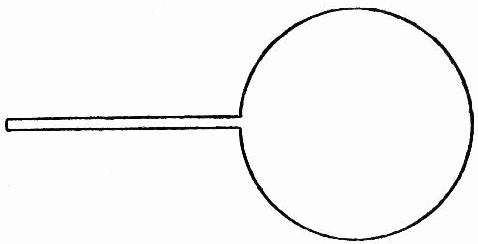 Fig. 180.—Diagram
for shield.
Fig. 180.—Diagram
for shield.
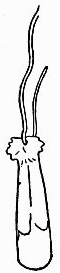 Fig. 181.
Eagle feather
of paper.
Fig. 181.
Eagle feather
of paper.
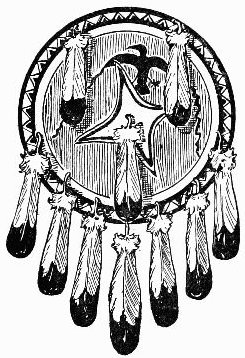 Fig. 182.—Decorated Indian shield.
Bison hide is something you cannot obtain, so take writing paper for the shield. Cut it into a circle an inch and a half in diameter, with an extension for the handle (Fig. 180). Glue the free end of the handle on the opposite side of the back of the shield. Make ten paper eagle feathers (Fig. 181), hang seven on the bottom of the shield with red thread, after first[122] decorating the centre of the shield with given designs and the edge with colored bands, using any or all of the following colors, but no others: positive red, blue for the sky, green for the grass, yellow for the sun, white for the clouds and snow, and black. To the Indian color is a part of religion. Purple, pinks, and some other colors, the red man, loyal to his beliefs, can never bring himself to use. Attach two of the remaining feathers at the top and another on the centre of the shield, as shown in Fig. 182.
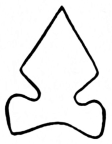 Fig. 183.—Paper
flint arrow-head.
Fig. 183.—Paper
flint arrow-head.
The Indian makes his
Though you cannot make a real flint arrow-head, you can manufacture a toy one. Take a piece of stiff pasteboard and cut it like Fig. 183. Let the length be a trifle over half an inch. Cover the arrow-head all over with a light coat of glue, then dip it in sand, and the arrow-head will come out as if made of stone. Were it actually hard stone and large size you would be obliged, as the Indians do, to trim and shape more perfectly the point and edges of the arrow-head. You would hold a pad of buckskin in your left hand to protect it from the sharp flint, and on your right hand would be a piece of dressed[123] hide to guard it from the straight piece of bone, pointed on the end, which you would use to strike off little bits of stone along both edges, working cautiously as you neared the point in order not to break it. But such work will not be needed on your arrow-head.
For
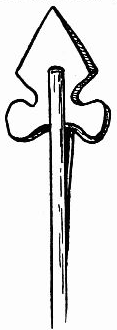 Fig. 184.—Insert arrow-head
in shaft.
Fig. 184.—Insert arrow-head
in shaft.
| 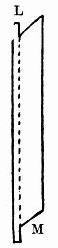 Fig. 185.—Arrow-head
and shaft
bound together.
Fig. 185.—Arrow-head
and shaft
bound together.
| 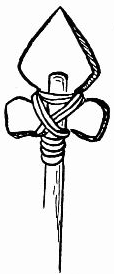 Fig. 186.—Paper
feather for arrow.
Fig. 186.—Paper
feather for arrow.
|  Fig. 187.
|
Cut three paper feather strips (Fig. 186), each an inch in length, paint black bands on them, bend at dotted line and glue the feathers on the shaft one-quarter of an inch from the notch, allowing them to stand out at angles equally distant from each other (Fig. 187). Bind the[124] extensions L and M (Fig. 186) to the shaft, and tie tufts of white and red worsted on immediately above the feathers to help in finding the arrow (Fig. 188). Paint the shaft in brilliant colors.
Almost any kind of wood that has a spring will make
Make the bow case (Fig. 192) of ordinary wrapping paper cut like Fig. 191, three and a half inches long and two and a half inches wide.[125] Fold the paper lengthwise through the centre and glue the sides together along the dotted lines; then fringe the edge up to the dotted line and decorate with gay paint.
Dress the jointed doll squaw in a fringed
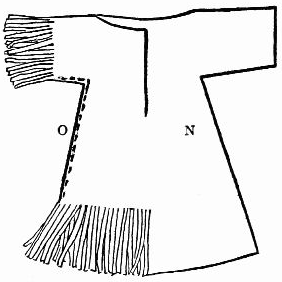 Fig. 193.—Squaw's chamois dress.
Paint a two by four inch piece of white cotton cloth with a blanket design in red and black, with white[126] between the markings, and pin it securely on a board (Fig. 195). Tie stones to a pole six inches in length (Fig. 196); with long stitches fasten the stone-weighted pole to the bottom edge of the painted cloth blanket (Fig. 197).
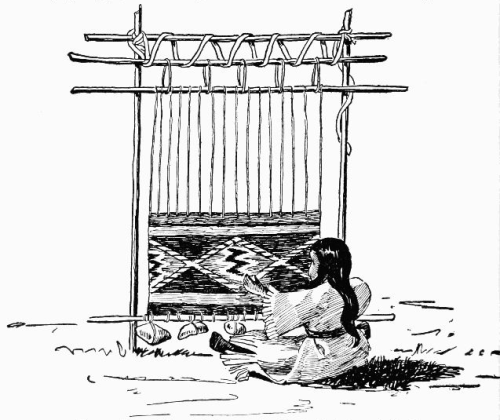 Fig. 194.—Squaw doll make-believe weaving Navajo blanket on primitive loom.
Two inches above the blanket attach a six-inch pole to the board with pins and use a coarse needle and heavy thread to make the warp. Run the thread through the[127] wrong side of the blanket and up around the pole. Cross it on the under side of the long thread (P, Fig. 197) which extends from blanket to pole.
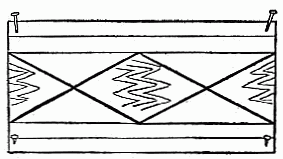 Fig. 195.—Indian blanket pinned on board.
 Fig. 196.—Stones tied to pole for bottom of loom.
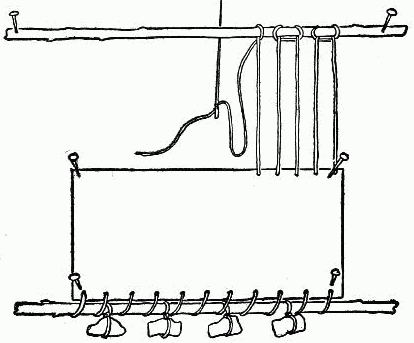 Fig. 197.—Building primitive loom.
Carry the thread along the pole a short distance, loop it over (Q, Fig. 197) and bring the thread down through the right side of the blanket. Take a long stitch and again carry the thread up over the pole. Continue until the warp is entirely across the blanket. Pin another pole six and a[128] half inches long, three-quarters of an inch above the top pole, and fasten the two poles together by tying loops of string across from one to the other (Fig. 198).
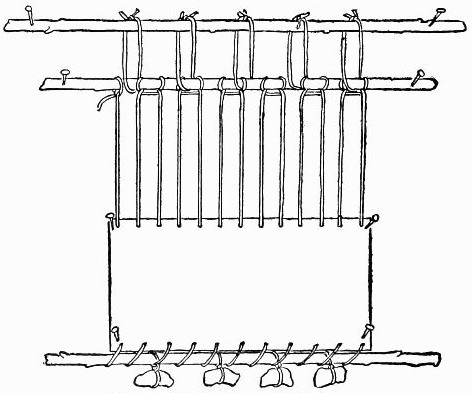 Fig. 198.—Primitive loom ready for frame.
Make the loom frame of two seven-inch poles four and a half inches apart and crossed at the top by another seven-inch pole, the three firmly tied together and made to stand erect on the grass by planting the two upright poles in holes bored through the cloth grass into the board ground. Hang the loom on this frame by winding a narrow strip of cloth loosely around the top of the frame and top of loom (Fig. 194).
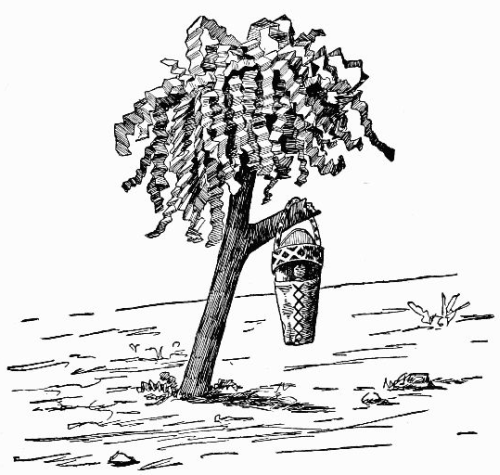 Fig. 199.—Natural twig and tissue-paper tree.
Find a stout, short-branched twig for
(Fig. 199). Sharpen the bottom and drive it into a hole in[129] the ground. For the foliage cut a fringe of soft green and olive-brown tissue-paper folded lengthwise in strips. Crimp the strips with a blade of the scissors, then open out the fringe; gather each one through the centre, give the paper a twist, and the two ends will form bunches of foliage. Work the twisted centre of one piece down into a crack at the top of the tree. Over across this at right angles in another opening, fit in the second twist of paper foliage and[130] crown all with a bunch standing upright as shown at Fig. 199.
A solemn
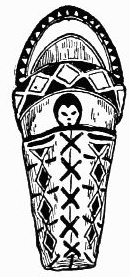 Fig. 200.—The little papoose
you can make.
Fig. 200.—The little papoose
you can make.
| 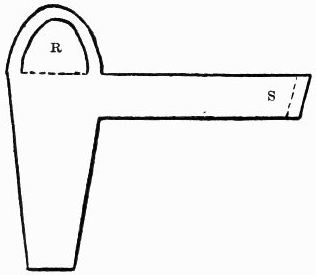 Cradle for papoose.
|
 Fig. 201.
Wampum,
Indian money.
Fig. 201.
Wampum,
Indian money.
The red men use queer money which they call
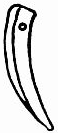 Fig. 202.
Buffalo claw
cut from
wood.
Fig. 202.
Buffalo claw
cut from
wood.
It is made of shells found usually along the borders of rivers and lakes. The Indians cut the thick part of the shell into cylinders about an inch long, bore holes lengthwise through the centres and string them like beads on fine, strong sinews (Fig. 201), but this money is not as pretty as glass beads, for it resembles pieces of common clay pipe stems. A certain number of hand-breadths of wampum will buy a gun, a skin, a robe, or a horse, and when presented by one chief to another the wampum means good-will and peace. Of course, you will want to supply your Indians with their own kind of money. You can string the wampum into a necklace and decorate the strand with eagle claws, bright beads, and tufts of gay worsted.
Find some beads much smaller, but as near as possible in color and form to real wampum, and string them with tiny eagle claws made of wood cut like Fig. 202, only smaller. Paint the claws very dark gray, almost black, and bore a hole through the heavy end with a hat-pin heated red hot. The claws will then string easily and give quite a savage appearance to the necklace (Fig. 203).
Let the colored worsted tufts, which must take the place of hair, be bright-red, and the strands of round[132] beads on each side of the necklace of various colors (Fig. 203).
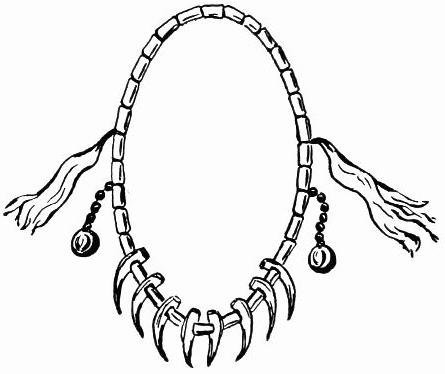 Fig. 203.—Indian necklace of wampum, eagle claws, tufts of hair, and bone beads.
Indians when they cannot obtain beads use gayly colored porcupine quills for their embroidery. You need not try the embroidery, but be sure to make the entire Indian encampment with everything pertaining to it.
The kitchen in those days was the chief apartment and
the most interesting room in the house. Who would want
to go into the stiff, prim "best room" when they could be
so much more comfortable in the spacious kitchen where
everyone was busy and happy, and where apples could be
hung by a string in front of the fire to roast and made to
spin cheerily when the string was twisted, that all sides
might be equally heated? Any girl or boy to-day would be[134]
[135]
only too glad of a chance to sit on a log in front of such a
fire and watch red apples turn and sputter as the heat broke
the apple skin, setting free the luscious juice to trickle down
the sides.
As the Indian's first thought was for shelter, and he put up his wigwam, so the early settler's first thought was for shelter, and he built, not a wigwam, but a log-house with a kitchen large enough to serve as a general utility room. It was filled with various things, and all articles in it were used constantly. Everything not brought from the mother country the settlers made by hand. The colonial kitchen you can build may be of gray or white cardboard. Old boxes, if large enough, will answer the purpose.
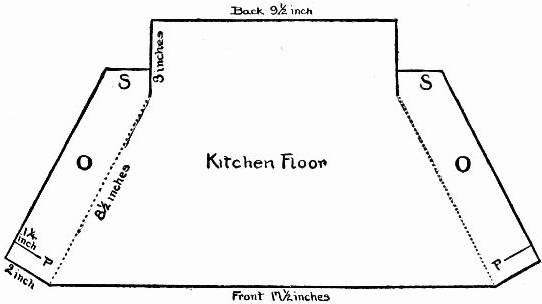 Fig. 205.—Kitchen floor.
I will tell you exactly how I built the colonial kitchen seen in Fig. 204. I made the floor (Fig. 205), the two side walls both alike (Fig. 206), the back wall (Fig. 207), and the interior of the fireplace (Fig. 208) of light-gray cardboard.[136] I cut all the heavy lines, scored and then bent all the dotted lines.
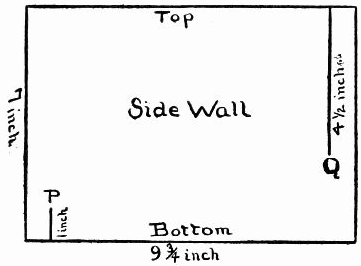 Fig. 206.—Side wall.
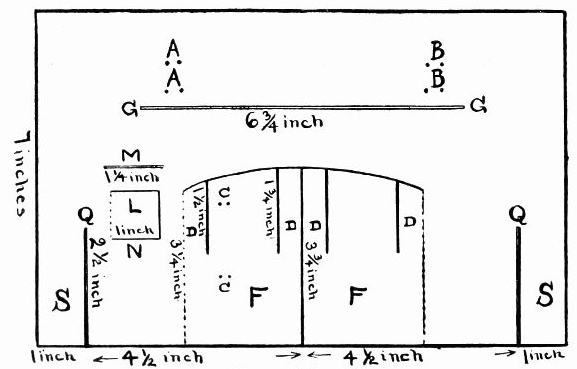 Fig. 207.—Back wall.
Now you do the same thing. Get your measurements correct and be careful to make the lines perfectly straight. Before putting the kitchen together, fasten the rustic brackets, cut from a branching twig (Fig. 209), on the wall above the mantel-piece to support[137] the flintlock gun. Take two stitches through the wall around each twig, as shown in Fig. 210, at the dots A and A and B and B (Fig. 207).
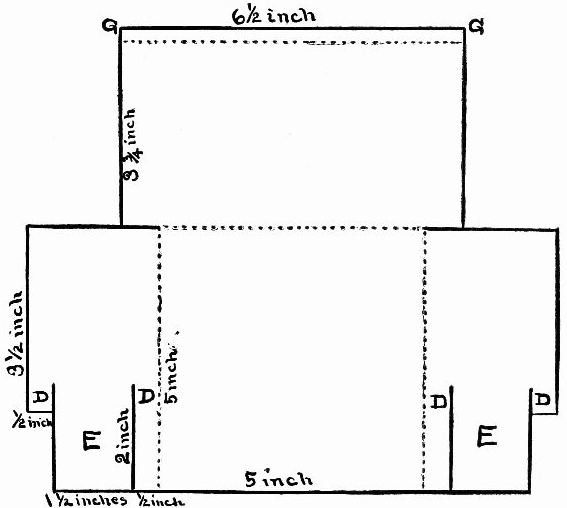 Fig. 208.—Interior of fireplace.
Every colonial fireplace boasted of
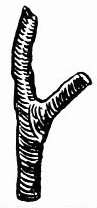 Fig. 209.—A forked
twig for the
bracket.
Fig. 209.—A forked
twig for the
bracket.
|
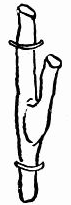 Fig. 210.—Put
the brackets
up in this way.
Fig. 210.—Put
the brackets
up in this way.
| 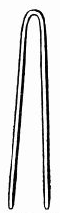 Fig. 211.—The
crane is made
of a hair-pin.
Fig. 211.—The
crane is made
of a hair-pin.
|
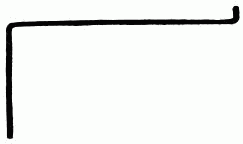 Fig. 212.—The crane.
Bend the two sides of
F and F (Fig. 207) as in Fig. 213. Bend forward the interior of the fireplace (Fig. 208) at dotted lines, and fit Fig. 208 on the back of Fig. 207 to form the inside of the fireplace and the mantel-piece. Slide the slashed top strips of the sides of the fireplace D,D,D,D (Fig. 207), back of the slashed strips D,D,D,D (Fig. 208), which will bring the two centres E and E of the sides in[139] Fig. 208 behind F and F in Fig. 207, and will thus form two layers on the sides of the chimney. Push the edge G and G of Fig. 208 through the slit G and G in Fig. 207 to form the mantel-piece, then bend down the edge of mantel-piece along dotted line.
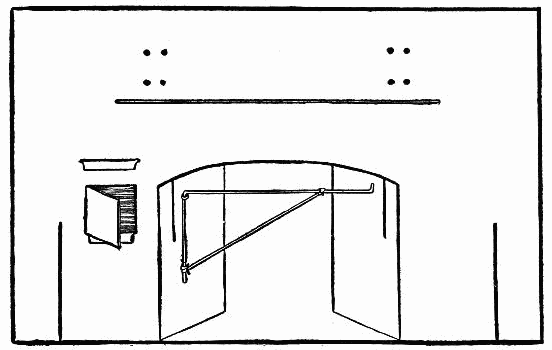 Fig. 213.—Back wall, showing crane hung and oven door open.
You must have
Make your box-like oven according to Fig. 214, cut the heavy lines, score and bend the dotted lines. Bring the side H to the side I; lap I over H so that the two slits, J and J, will exactly fit one over the other; then bend the back down and run the flap J on the back through the two slits J on the side, and the flap K through the slit K.
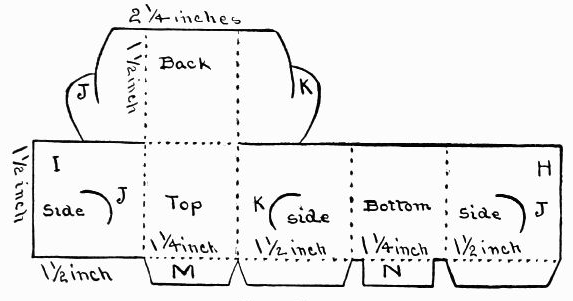 Fig. 214.—The oven.
 Fig. 215.—Pattern for
andiron.
Fig. 215.—Pattern for
andiron.
Adjust the oven back of the oven door L (Fig. 207), and fasten it tight on the wall by sliding the flap M of the oven (Fig. 214) through the slit M (Fig. 207) above the oven door; bend it down flat against the wall. Bring the bottom oven-flap N in through and over the lower edge of the oven door-way N (Fig. 207) and bend that also flat against the wall (Fig. 213). The two side oven flaps will rest against the back of the wall on each side of the oven door-way.
Now that is finished firm and strong, and you can
As soon as the Indian's wigwam was up, he had a brisk fire to cook by, for after shelter came food. The white man did likewise after his house was built. Though he had andirons to help with his fire, even then to
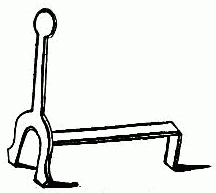 Fig. 216.—The andiron.
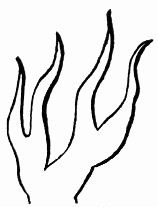 Fig. 217.—The flames.
Cut from red, orange, yellow, and black tissue-paper flames like Fig. 217; bend at dotted line and paste the mingled flames one at a time and turned in varying directions on a piece of cardboard made to fit the bottom of the fireplace. Adjust the little black andirons to the fire and glue them in place; select a large log for the "back-log," and a more slender one to lay across the front of the andirons. Place smaller wood in between with the flames, and scatter a few bits of black paper on the hearth underneath to appear like fallen charred wood. When finished the fire should look as if it were actually sparkling, roaring, and blazing (Fig. 218).
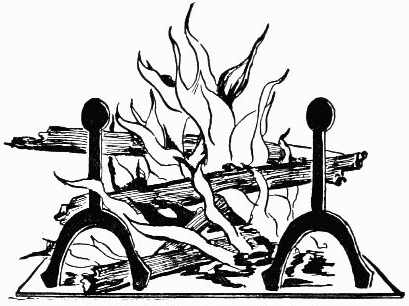 Fig. 218.—The flames leap up the chimney.
 Fig. 219.—Cut the shell
in half.
Fig. 219.—Cut the shell
in half.
Your fire is ready, so you must hurry and get the
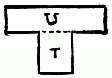 Fig. 221.—Cut the pot
leg like this.
Fig. 221.—Cut the pot
leg like this.
|
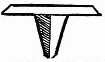 Fig. 222.—Bend the pot
leg like this.
Fig. 222.—Bend the pot
leg like this.
| 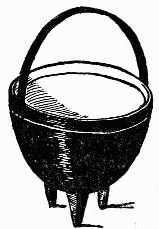 Fig. 223.—Paint the pot
black.
Fig. 223.—Paint the pot
black.
|
Remember all the time you are playing, that this is the way your colonial ancestors cooked.
In days of long ago, they had many other
One of the easiest for you to make is the long-handled iron shovel called a "peel" (Fig. 224), used to place bread and pie in the great oven. Cut the peel from stiff cardboard, paint it black and stand it up by the side of the chimney (Fig. 204). Trace the toaster (Fig. 225) on cardboard, paint it black, bend up the four semicircular rings and bend down the two feet, one on each side (Fig. 226).
Chicken and other eatables were placed between the front and back rings on the toaster and broiled before the[145] fire, which was so hot that it was necessary to have long handles on all cooking utensils.
Several pieces of iron of varying lengths, generally made into the shape of the letter S, were called "pot-hooks"; they hung on the crane. Make two or three pot-hooks of cardboard and paint them black (Fig. 227). When you are not using the little toaster, bend up the handle and hang it on a pin stuck in the wall (Fig. 204).
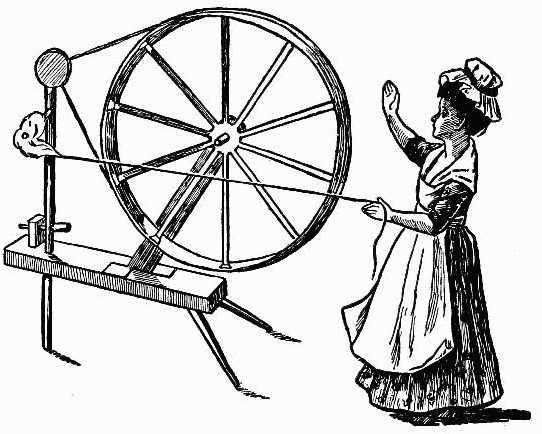 Fig. 228.—The spinning-wheel and jointed doll spinning.
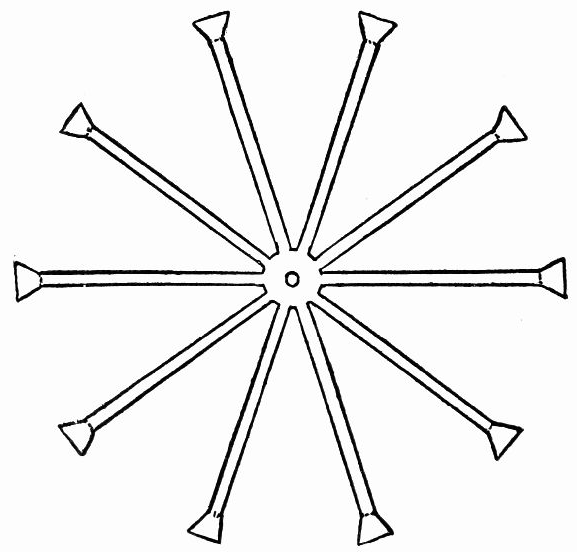 Fig. 229.—Spokes.
Just look at your little colonial friend, Thankful Parker! (Fig. 228). The tiny maid seems almost to be stepping lightly forward and backward as she spins out long threads of the soft, warm yarn, singing softly all the while a little old-fashioned song. How busily she works, and listen! you can all but hear the wheel's cheery hum, hum, hum![147] That's the way the real colonial dames used to spin. Such a
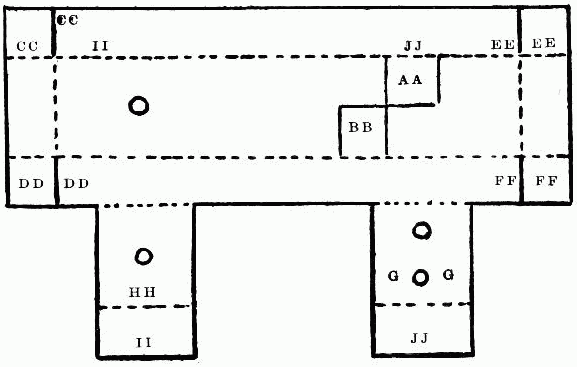 Fig. 232.—Stand.
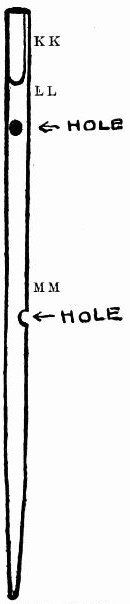 Fig. 234.—Upright.
Cut from cardboard the spokes (Fig. 229) for your miniature colonial spinning-wheel, the tire (Fig. 230), and the two small wheels (Fig. 231). Bend forward the fan-shaped ends of each spoke (Fig. 229) and glue the tire (Fig.[148] 230) around on them; let one edge of tire lie flush on the edges of the bent ends of the spokes.
With the exception of the square spaces AA and BB on the stand (Fig. 232) cut the heavy lines and the little holes; score, then bend the dotted lines. Bend down the long sides and the ends fitting the corners against and on the inside of the same letters on the sides, glue these in place and you have a long, narrow box with two extensions on one side (HH and GG). Bend these extensions, also their ends II and JJ, and glue the ends on the inside of the opposite side of the box against the places marked II and JJ.
Turn the box over, bringing the level smooth side uppermost. Cut out the wheel brace (Fig. 233), turn it over on the other side, then bend AA backward and BB forward, and glue the brace on the box-like stand (Fig. 232) on the squares AA and BB. See Fig. 228.
Make the upright (Fig. 234) of wood; shave both sides of the end, KK, until it is flat and thin, then glue a small wheel (Fig. 231) on each side, raising the wheels above the wood that the flat end of the upright[149] may reach only to their centres. Glue the wheels together to within a short distance of their edges.
With the red-hot end of a hat-pin bore the hole LL through the front of the upright, and below bore another hole, MM, through the side. Make the screw (Fig. 238) and the block (Fig. 239) of wood. Run the screw through the side hole MM in the upright (Fig. 234), and push the screw on through the hole in the top of the block (Fig. 239). Break off more than half of a wooden toothpick for the spindle (Fig. 236) and pass it through the hole LL (Fig. 234).
Make the hub (Fig. 235) of wood and thread it in through the wheel and brace (Fig. 233), to hold the wheel in place. Use two wooden toothpicks, with the ends broken off (Fig. 237), for legs; insert these slantingly into the holes, GG (Fig. 232), on the under part of the stand, allowing the top ends to reach up and rest against the under side of the top of the stand. Spread out the bottom ends of the legs.
Run the upright (Fig. 234) through the single hole near one end of the stand (Fig. 232) and pass it down through the under hole on HH. The lower part of the upright forms the third leg. See that all three legs set evenly when the wheel stands, and that the box part is raised slightly higher at the upright end, slanting downward toward the other end (Fig. 228). Glue the three legs firmly in place.
Connect the two small wheels (Fig. 231) and the large wheel together by passing a string between the small wheels and over around the outside of the tire of the large wheel, fastening it on here and there with a little glue (Fig. 228). Twist a piece of raw cotton on the spindle and tie a length of white darning-cotton to the end of the cotton (Fig. 228).
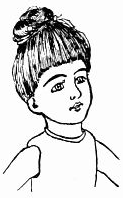 Fig. 240.—Do her hair up in this fashion.
Stretch the thread across to the hand of your colonial-dressed doll, glue it in place, and the next time your mother attends a meeting of the Society of Colonial Dames tell her to show your little maid Thankful Parker and her spinning-wheel. When you
 Fig. 245.—Pattern of kerchief.
 Fig. 246.—Fold the
kerchief like this.
Fig. 246.—Fold the
kerchief like this.
| 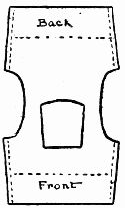 Fig. 247.—Pattern of
waist.
Fig. 247.—Pattern of
waist.
|
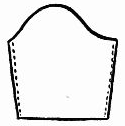 Fig. 248.—Pattern of
sleeve.
Fig. 248.—Pattern of
sleeve.
| 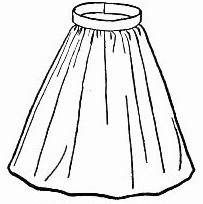 Fig. 249.—The apron.
|
Make the cap (Fig. 243) of thin white material cut like Fig. 242, and the band (Fig. 244) of the same color as the dress. Cut the thin white kerchief like Fig.[151] 245, and fold it as in Fig. 246. Fig. 247 gives the design for the dress waist, and Fig. 248 the sleeve. The skirt is a straight piece gathered into a waistband. The apron (Fig. 249) is white. When the doll is dressed it should resemble little Thankful Parker (Fig. 228). An
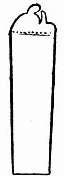 Fig. 250.—Lock and
band of tinfoil.
Fig. 250.—Lock and
band of tinfoil.
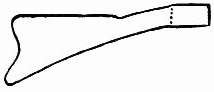 Fig. 251.—Make this part of pasteboard.
The gun was kept hanging in plain sight over the kitchen mantel-piece, ready for defence at a moment's notice, for in those early days wolves and other wild animals were numerous and dangerous, and enemies were also likely to appear at any time.
You should have one of those queer old guns to adorn your kitchen wall. Get some heavy tinfoil off the top of a bottle, or take a collapsible[152] tube and from it cut a wide strip like Fig. 250, one narrow, straight strip and two medium-wide straight strips, four in all. Cut the butt end of the gun (Fig. 251) of stiff cardboard. Break a piece measuring four and one-half inches from a common coarse steel knitting-needle for your gun-barrel and use a slender, round stick, or the small holder of a draughtsman's pen, cutting it a trifle more than three and one-half inches in length for the ramrod groove.
 Fig. 253.—Slide the paper end in the wood like this.
In the centre of one end of the stick bore a deep hole with the red-hot point of a hat-pin and insert the pointed end of an ordinary pin for a ramrod (Fig. 252). Split the other end of the stick up through the centre not quite half an inch and work the butt end of the gun in the opening (Fig. 253).
 Fig. 254.—Ready for the tinfoil bands.
Lay the gun-barrel above the wooden part (Fig. 254) and fasten the two together with the four bands of tinfoil (Fig. 255), allowing the top part of Fig. 250 to stand up free to represent the flintlock. We must be content without a trigger unless you can manage to make one by bending down and cutting a part of Fig. 250. Paint the butt and wooden portion of the gun brown before binding on the[153] barrel, and you will find that you have made a very real-looking little rifle to hang upon the rustic brackets over the mantel-piece.
 Fig. 255.—Colonial flintlock made of knitting-needle and small pen-holder.
When the fire in your big kitchen fireplace needs brightening, use the
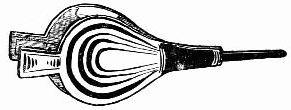 Fig. 257.—The finished bellows.
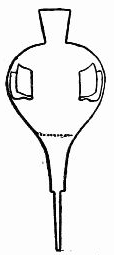 Fig. 256.—Cut the
bellows by this
pattern.
Fig. 256.—Cut the
bellows by this
pattern.
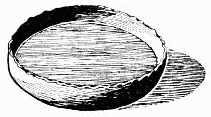 Fig. 258.—Colonial pewter dish made
of tinfoil.
Fig. 258.—Colonial pewter dish made
of tinfoil.
Heavy tinfoil must furnish material for your
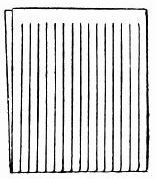 Fig. 259.—The warp.
The colonial kitchen would be incomplete without a bright,
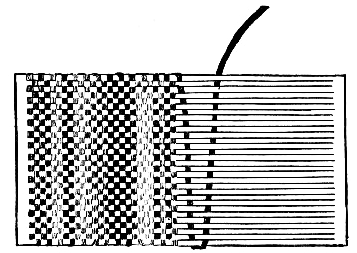 Fig. 260.—Weave the rug in this way.
Now we must manufacture a fine
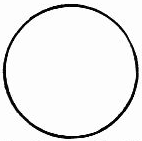 Fig. 263.—Draw the circle.
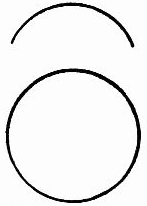 Fig. 264.—Then a curve
above the circle.
Fig. 264.—Then a curve
above the circle.
|
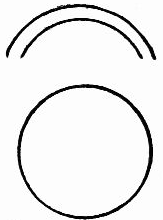 Fig. 265.—Another curve
above the first one.
Fig. 265.—Another curve
above the first one.
|
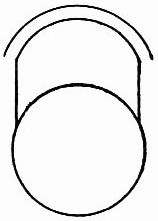 Fig. 266.—Connect the
lower curve with the
circle by two lines.
Fig. 266.—Connect the
lower curve with the
circle by two lines.
|
Leave Fig. 269 white, but paint the other portions of the clock a light reddish brown with black lines above and below the door, and a black band almost entirely across the bottom edge of the front of the clock that the clock may appear to be standing on feet. Gild the three points on the top to make them look as if made of brass.
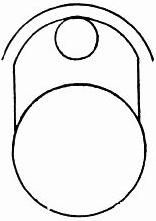 Fig. 267.—Draw a small
circle above the large one.
Fig. 267.—Draw a small
circle above the large one.
|
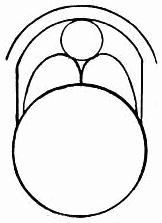 Fig. 268.—Connect the two
circles by two scallops.
Fig. 268.—Connect the two
circles by two scallops.
|
 Fig. 269.—Extend line of upper
circle down to form a square.
Fig. 269.—Extend line of upper
circle down to form a square.
|
Be sure that the four holes in the top (Fig. 262) are fully large enough to allow a coarse darning-needle to be passed readily through them; then bend the clock into shape, fitting the extension PP over the extension QQ; the two holes in PP must lie exactly over those in QQ. Glue the[158] clock together, using the blunt end of a lead-pencil, or any kind of a stick, to assist in holding the sides and tops together until the glue is perfectly dry.
 Fig. 270.—Make this face
in the small circle.
Fig. 270.—Make this face
in the small circle.
|
 Fig. 271.—Put the numbers
on the clock face
in this way.
Fig. 271.—Put the numbers
on the clock face
in this way.
|
 Fig. 272.—Make the
hands of the clock
like these.
Fig. 272.—Make the
hands of the clock
like these.
|
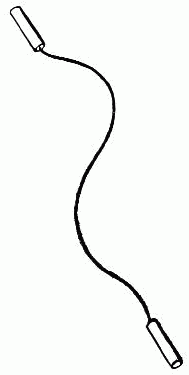 Fig. 273.—Weights for winding
the clock.
Fig. 273.—Weights for winding
the clock.
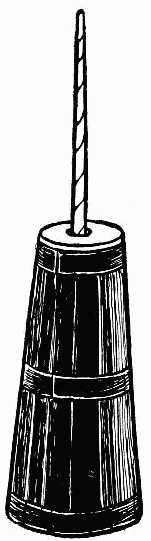 Fig. 275.—The churn.
Thread a piece of heavy black darning-cotton in the largest-sized long darning-needle you can find; on one end of the thread mould a cylinder-shaped piece of beeswax, cover it with thin tinfoil, then open the clock-door and hold the clock with its head bent outward and downward from you. Look through the open door and see the holes on the inside of the top; run your needle through one of these holes and[159] across the top on the outside, bringing it down through the other hole into the clock. Slip the needle off the thread and mould another piece of beeswax on the free end of the thread, make it the same size and shape as the first weight, cover this also with tinfoil and you will have clock-weights (Fig. 273) for winding up the old-fashioned timepiece. Gently pull down one weight and the other will go up, just as your colonial forefathers wound their clocks. When the weight is pulled down in the real clock it winds up the machinery, and the clock continues its tick, tack, tick, like the ancient timepiece Longfellow tells us of, stationed in the hall of the old-fashioned country-seat.
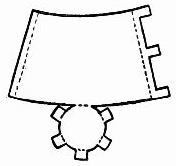 Fig. 274.—Pattern of the churn.
Do you like real country buttermilk, and have you ever helped churn? If you live in the city or for some other reason are not able to make the butter, you can still enjoy manufacturing a little
 Fig. 278.—Dasher.
|
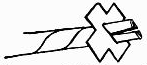 Fig. 279.—Push the end
of the handle through
the dasher.
Fig. 279.—Push the end
of the handle through
the dasher.
|
 Fig. 280.—Cut
end of handle
pasted on the
dasher.
Fig. 280.—Cut
end of handle
pasted on the
dasher.
|
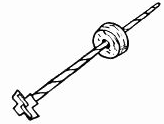 Fig. 281.—Put the handle of the
dasher through the lid.
Fig. 281.—Put the handle of the
dasher through the lid.
Cut Fig. 274 of heavy paper or light-weight cardboard; mark three bands on it (Fig. 275). Make your churn much larger than pattern, have it deep enough to stand as high as Fig. 275. Glue the sides together along the dotted lines, turn up the circular bottom and glue the extensions up around the bottom of the churn. Fit a cork in the top for the churn-lid and make a hole through the centre of the cork for the handle of the dasher (Fig. 276). Make the handle by rolling up a strip of paper as you would roll a paper lighter. Glue the loose top end of the handle on its roll; then cut the large end of the handle up a short distance through its centre (Fig. 277). Cut the dasher (Fig. 278) from cardboard, slide it over the divided end of handle (Fig. 279), bend the two halves of the handle-end in opposite directions, and glue them on the dasher as shown in Fig. 280. Slip the handle of dasher through the cork lid (Fig. 281), and fit the lid in the churn (Fig. 275).[161] Paint the churn and handle of dasher a light-yellow-brown wood color, the bands black, and when dry you can work the dasher up and down the same as if the churn were a real one. Stand the churn in your kitchen not far from the fire so that little Thankful may attend to the cooking while she is churning.
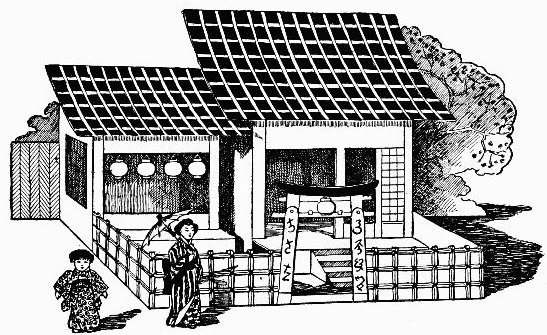 Fig. 282.—The little paper house.
We will make our
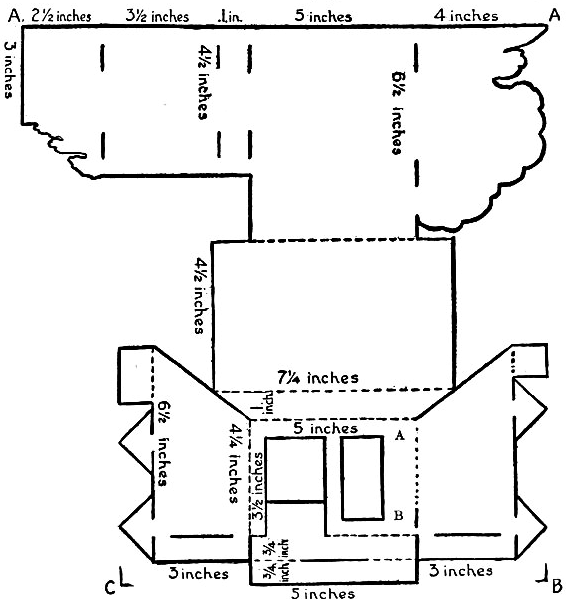 Fig. 283.—Plan of large room.
No paste is used in making the building; the design is merely cut out, bent into shape, and fastened together with projecting tongues run through slits. Cut all the heavy lines, lightly score, then bend all the dotted lines, except the two immediately across the front of the room at top and bottom. This front is five inches wide and four and a half inches high, with two openings in it and a portion extending down in front to form the little porch. Make a pinhole at each[164] end of the two lines forming top and bottom of the front of the room A and B, then turn the paper over and draw a top line and a bottom line across on the wrong side of the paper from pin-point to pin-point. Score these on the wrong side of the paper, for they must bend from that side in order to[165] extend inward from the right side to form the projection of the roof and the top landing of the veranda. Fasten the room together, then cut out the floor (Fig. 284), slide it in place and also the steps (Fig. 285), marking straight lines across the diagram to indicate steps.
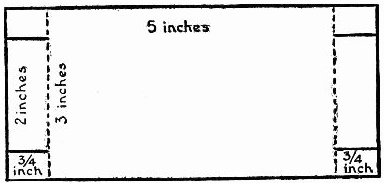 Fig. 284.—Floor of large room.
Build the small room (Fig. 286) in the same way that you made the large one. Cut it from a piece of paper nine and one-half inches wide and thirteen and one-half inches long. This room has no floor. When finished run the tongues extending out on the back of the room through the remaining four slits at the side of the foliage on the back of the large room (Fig. 283). Work carefully and you will be fully repaid.
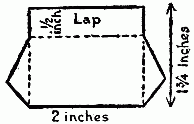 Fig. 285.—The steps.
Paint the roof of each room in little black squares with white markings between to represent black tiling. Paint the outside of the house yellow, the back wall of the large room pale blue, the floor light brown. Paint the back of the small room mottled green and pink. Make a band of light blue edged with black across the outside top of the front opening and a red band across the bottom. Let the projecting veranda be yellow, with vines across the lower part. Edge the openings of the large room with two narrow bands, one purple the other black, and mark black lines[166] from side to side crossed with lines running from top to bottom to form a lattice-like work on the side of the smaller opening (Fig. 282).
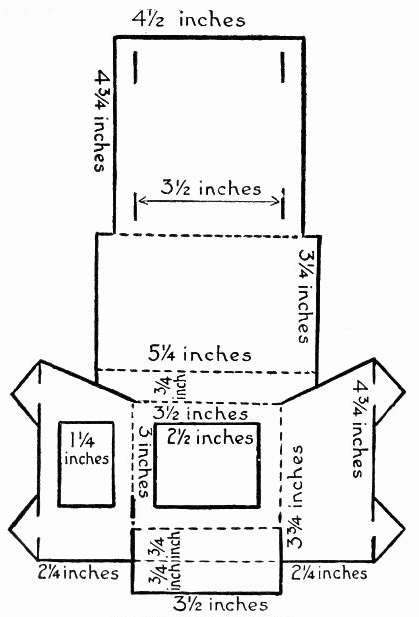 Fig. 286.—Plan of small room.
The sides of the house are supposed to be formed of paper-covered screens which slide in grooves and may be[167] removed entirely when desired. The interior of a real Japanese house is divided into rooms merely by the use of sliding paper screens, and the entire floor may readily be thrown into one large apartment, there being no solid partitions as in our houses. Cut out flat round paper lanterns, paint them with the gayest of colors and make the small top and bottom bands black; then with needle and thread fasten the lanterns along the top front of the large opening of the small room (Fig. 282).
You need not be concerned in the least about furnishing the little house: it does not need any furniture, for the Japanese have no stoves, chairs, tables, knives or forks, carpets, bedsteads, washstands, bookcases, desks, framed pictures, nor any comforts like ours.
Of course, men, women, and children all sit on the floor; and when
When night comes the natives
Every Japanese house should have its
Make your fence of paper cut according to Fig. 287, and mark the pattern (Fig. 288) on it with two tones of yellow paint. Paint the convex top of the gate-way a bright red with narrow black border, and mark the white gate-posts[169] with black Japanese lettering like Fig. 289. Paint the remaining portions of the gate-way yellow, the edges black. Fig. 282 will help you to grasp the idea of the fence and gate-way. The names of the streets are not on the corners as in our cities, so a panel of white wood is nailed to the gate-posts with both the name of the street and householder on it, and often a charm sign is added.
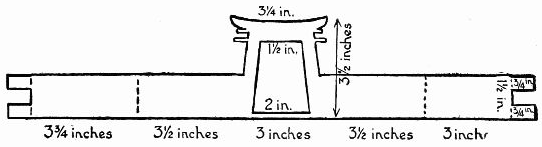 Fig. 287.—Fence and gate-way.
 Fig. 288.—Draw this pattern
on the fence.
Fig. 288.—Draw this pattern
on the fence.
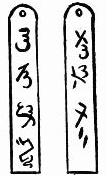 Fig. 289.—Signs for gate-posts.
Put up the fence by slipping the upper tongues on each end through the slit on the outside front edge of each room, then sliding the lower tongues of the fence through the lower outside edges of rooms and porches (Fig. 282).
Both boys and girls have fine times in Japan, and they are as happy as the day is long. On the fifth day of the fifth month the boys reign supreme, and their relatives and friends vie with each other in their endeavors to render the day a happy one for the little fellows. All Japan is alive and anxious to celebrate the occasion. Quaint flags in the shape of enormous[170] fish swim in the air and float over the towns, forming bright masses of color. Every home that is blessed with one or more boys displays a fish banner for each son, the younger the child the larger the fish, and the proudest house is the one that can boast of the greatest number of fish flying from its bamboo pole. Every Japanese boy's birthday is celebrated on this day with great rejoicing, no matter at what time of the year he was born.
 Fig. 290.—Upper half
of koi.
Fig. 290.—Upper half
of koi.
|
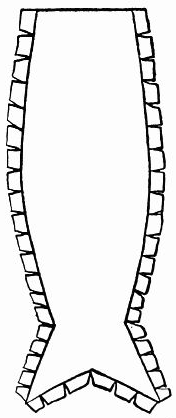 Fig. 291.—Under half of koi.
|
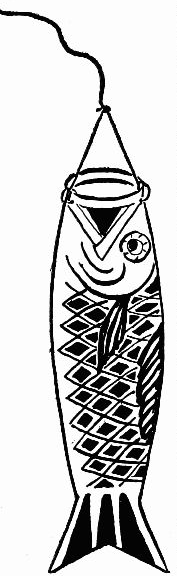 Fig. 292.—The koi—emblem
of undaunted
determination.
Fig. 292.—The koi—emblem
of undaunted
determination.
|
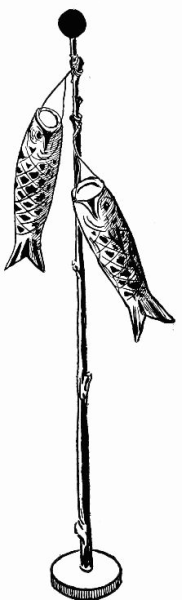 Fig. 293.—Boy's birthday pole.
Make
for the pole to be placed in front of the little paper house; they look very comical, bobbing and swinging high in air with their wide-open mouths. Cut Fig. 290 of white tissue-paper, also Fig. 291, which is a trifle larger than the first and is slashed along three edges. Lay Fig. 290 on top of Fig. 291; bend the flaps over and paste them on Fig. 290. Form a little hoop of a strip of stiff paper with the ends pasted together; blow the fish open, then paste the hoop on the inside of the open edge of the head to form its immense mouth. When dry mark the fish with red paint like Fig. 292. Tie a thread on the two opposite sides of the mouth and with another thread attach[171] the loop to a slender stick on the end of which you have fastened a gold disk made of two pieces of gilt paper. This is intended to represent the rice ball with which the real fish are fed. The fish banners are hollow so that the wind may fill them, causing the fish to rise and fall as the breeze comes and goes. Push the end of your fish-pole through the centre of a small box-lid or button mould (Fig. 293) and stand the decoration outside the gate-way of the little house. The fish used on this eventful day are the famous carp, which the natives call koi, the unconquerable. The Japanese carp stands for good cheer, indomitable will, perseverance and fortitude, and it is used to impress these virtues upon the boys, but all the good qualities named[172] are fully as necessary for girls even though the Japanese do not mention the fact, but girls are not forgotten. The nation gives them the third day of the third month for their festival. It is called the
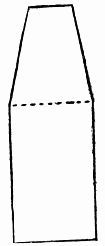 Fig. 294.
Pattern of kago.
Fig. 294.
Pattern of kago.
There are no sidewalks in Japan, the pavements being laid lengthwise through the centre of the streets, and on this path people stroll or hurry along. Mingled with the others are the Japanese laboring men, called coolies, carrying between them
 Fig. 295.—Bind the edges of the kago with grass or straw like this to make the frame.
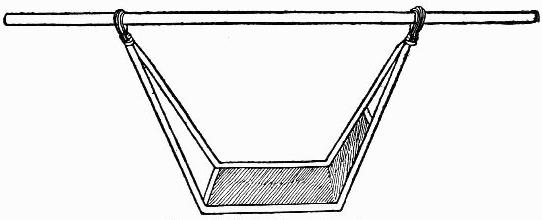 Fig. 296.—Tie the kago to the pole.
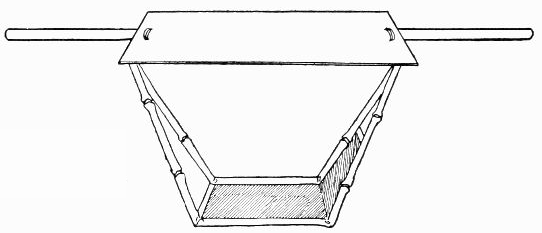 Fig. 297.—Sew the
top on over the pole.
Fig. 297.—Sew the
top on over the pole.
Either buy a little
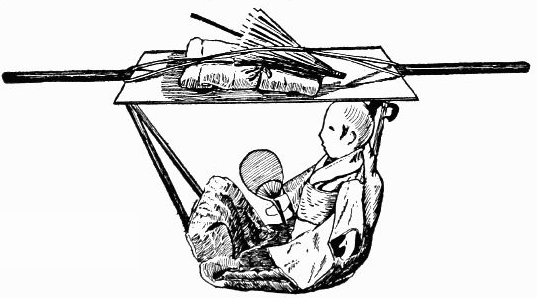 Fig. 298.—The little
lady rides in her kago.
Fig. 298.—The little
lady rides in her kago.
For centuries the great white Czars have been crowned in the
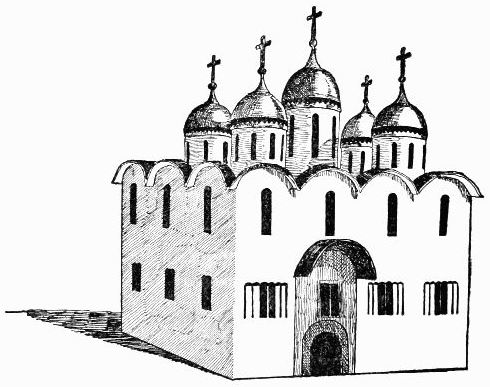 Fig. 299.—Miniature Cathedral of the Assumption.
To give a true conception of the wonderful interior of the sacred cathedral to one who has never seen it, is impossible, but we can gain an idea of the general appearance of the exterior by making a miniature Cathedral of the Assumption[176] (Fig. 299). Find, or make, a firm white pasteboard box seven inches long, five and one-quarter inches wide, and four and one-half inches high; this is for the body of the building. Fold a strip of paper seven inches in length, crosswise, through the centre, and bring the ends together, making another fold crosswise through the centre of the doubled strip, which will give four layers of paper of equal length. Cut this into a scallop three-quarters of an inch deep, open out the strip and you will have four scallops, each one and three-quarters inch wide, at its base. Lay the strip in turn along each of the top edges of the sides of the box, and mark the box around the edges of the scallops, drawing four scallops on the two long sides of the box, and[177] three on each of the short sides. Cut out the scallops on top of the box; then take the cover of the box, which must form the roof of the structure, and remove the bent-down sides; trim off with scissors the extreme edge of one long side and one short side, until the cover forms a tight fit in the top of the box, but may, with gentle pressure, be made to slide down one inch. Fasten the roof in place at each corner by running a strong pin from the outside wall through into the roof, until the pin is embedded its full length in the roof.
 Fig. 300.—The Door-way.
|
 Fig. 301.
The door.
Fig. 301.
The door.
|
 Fig. 302.—Door
window.
Fig. 302.—Door
window.
|
 Fig. 304.—Lower front
windows.
Fig. 304.—Lower front
windows.
|
 Fig. 305.—Lower
side windows
Fig. 305.—Lower
side windows
|
Now cut the
 Fig. 306.—The door-arch.
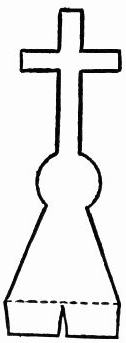 Fig. 307.—The paper
cross.
Fig. 307.—The paper
cross.
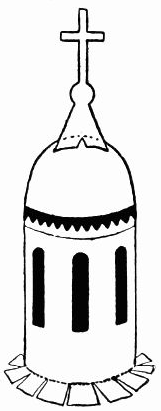 Fig. 308.—A cross on the
top of each cupola.
Fig. 308.—A cross on the
top of each cupola.
Make five
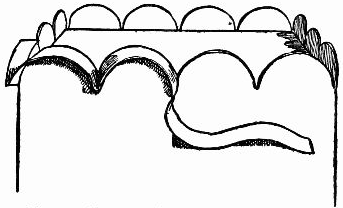 Fig. 310.—Fasten a strip of paper along the edge.
When finished, place your little cathedral up high on a level with your eyes, turn it until you have the view which is given in Fig. 299, and you can very easily imagine just how the real Cathedral of the Assumption appears.
Thousands of girls, boys, and grown-up men and women in freezing, snowy Russia,
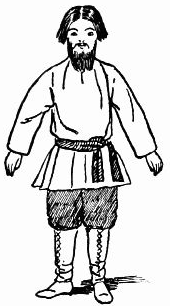 Fig. 311.—Dress a doll like a
Russian.
Fig. 311.—Dress a doll like a
Russian.
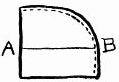 Fig. 312.—Half of
cap.
Fig. 312.—Half of
cap.
If you would know how the average Russian looks,
 Fig. 313.—The cap.
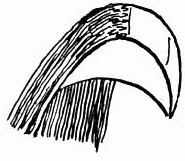 Fig. 314.—The fringe of hair
partially sewed on.
Fig. 314.—The fringe of hair
partially sewed on.
Cut another piece of cloth (Fig. 315), and sew in a fringe of the tan-colored cotton (Fig. 316); glue this on the doll to form the beard, and trim off the edges. Paint the moustache on the face, making it the color of the hair. Russians, as a rule, are blonds, having either red or lighter-colored hair.
 Fig. 315.—Another piece of cloth.
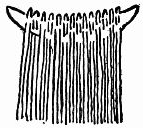 Fig. 316.—The beard.
Make the trousers loose and bind them to the doll below the knees. The Russian leather boots which the natives wear always reach up over the trousers, and you can make such boots by painting the doll's feet black and sewing straight pieces of black material on the doll for boot-legs, allowing the cloth to be long enough to wrinkle around the ankle.
Try to make the boots appear as if laced up the front, for many wear them so in Russia. The blouse should be loose and belted in at the waist, hanging straight and square around the bottom. In case your doll has real hair, omit the wig and cut the real hair in Russian style.
These people never use their immense stove for heating a teakettle, though they drink tea upon all occasions. To make tea they resort to a samovar, which is a curious brass or copper vessel, shaped something like an urn. When the tea is ready, it is poured into tall glasses, a slice of lemon is put in each glass, and the tea drunk scalding hot. The beverage is called chai, and the Russians enjoy it so much that they often take twenty glasses in succession. When one desires sugar, it is not put in the tea, but held in one hand, and a portion bitten off from time to time between the swallows of tea.
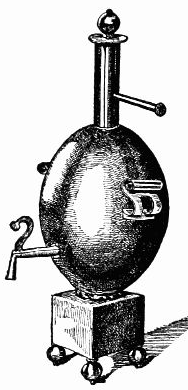 Fig. 317.—A little Russian samovar.
If you will empty an egg-shell of its contents and get a sheet of white writing-paper, a small square box, a piece of yellow sealing-wax, some liquid gilt, and five gilt beads, four about the size of large peas, and the fifth a trifle larger, we can manufacture
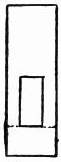 Fig. 318. The handle.
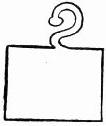 Fig. 319.—The faucet.
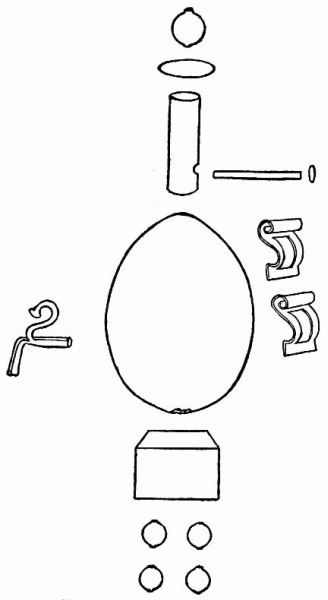 Fig. 320.—The different parts of the samovar.
Cut the faucet (Fig. 319) of paper
one inch wide; roll the paper up from
the bottom, bringing the handle on top;[183]
[184]
bend the handle straight up, and bend the spout down in
front of the handle. Glue the other end of the faucet to the
front of the samovar with sealing-wax, placing it near the
bottom, half-way between the two handles.
Make the top chimney of a roll of paper a generous inch in width. Paste the loose edge of the paper down on the roll, and pierce a hole in the roll one-quarter inch from the bottom, making it large enough to admit the end of a match. Glue a burned match in this hole, allowing the main part to extend out one-quarter of an inch from the chimney. Fasten a small, round, flat button on the end, and attach a round paper disk three-quarters of an inch in diameter to the top of the chimney, crowning the disk with the large bead.
Fig. 320 gives all the different parts of the samovar and shows as nearly as possible how they should be put together. When the samovar is finished, gild it all over, and you will have a unique little creation that would delight the heart of a Russian.
First they wove rude baskets for holding and carrying food; then they learned that cooked food was better than uncooked and could be preserved much longer, so they made baskets of a closer weave and cooked in them by means of water heated by hot stones; finally, they tried cooking over the fire in shallow baskets lined with clay. The clay came out of the basket baked and hard, and behold, they had a new kind of vessel—fire-proof and water-proof.
We may imagine with what joy they welcomed this addition to their meagre store of home-making utensils and with what patient industry they strove to improve upon this discovery.
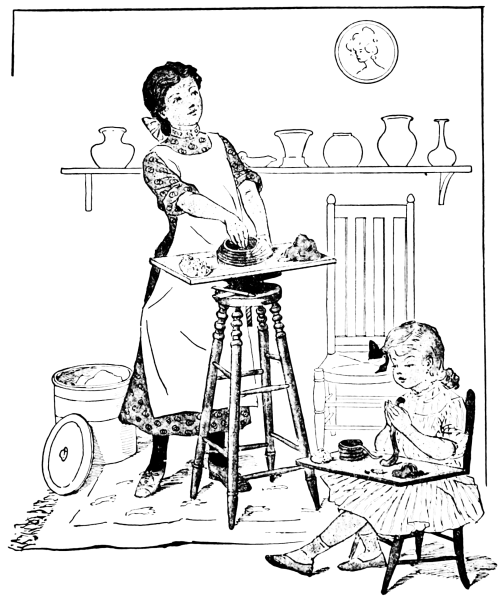 Making coiled pottery
They used their baskets as moulds to hold the soft clay, and they fashioned the clay without moulds into shapes suggested by natural objects. The sea-shells furnished inspiration and many vessels were made in their beautiful forms.
The first potter was a woman, even as the first basket-maker was a woman, and, coming down to our own times, the important discovery of the production of exquisite colors and blending of colors in the Rookwood pottery was made by a woman.
Discovered, developed, and still, in many cases, carried on by women, surely pottery is a woman's art, and as a girl inheriting the old instincts, you may find it the simplest and most natural means of expressing your individuality and love of the beautiful. Beginning as these gentle savages began, using their primitive method, you may be inspired to study deeper into the art, and perhaps become the discoverer of some new process that will give to the world a still more beautiful pottery.
Even the smallest girls may do something in
Keep the clay always in the jar and closely covered that it may not again become too dry.
Besides the clay you will need a table to work on, a pastry-board, a thin block of wood about twelve inches square, a wet sponge for cleaning and moistening your fingers, and several simple tools.
If you stand at your work, a tall office stool with rotating seat will be just the thing you want, for by turning the seat this way and that you may look at your work from all sides without disturbing its position. Any kind of ordinary table will answer the purpose, however. On top of the table or stool place your pastry-board, and at the right-hand side the sponge, which must be kept quite damp.
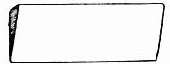 Fig. 321.—A short, flat stick.
You will want but
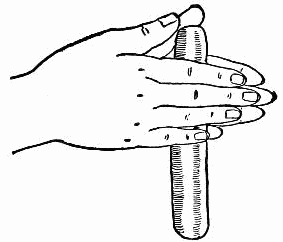 Fig. 323.—Turn it lightly between your hands.
On the pastry-board place a large lump of clay, then take a handful of the clay and begin to make
 Fig. 324.—Begin to coil the clay.
Unless you have made a very long roll, which is not easy to handle at first, you will soon have to stop coiling for lack of material. Do not use all of the first roll, but allow the end to rest on the table, where it can be joined to the new roll you are to make. Pinch the[190] end of the new roll to that of the old and round the joint between your hands.
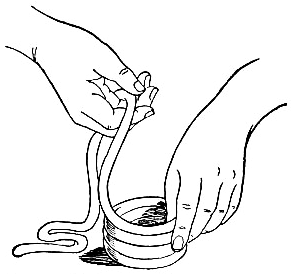 Fig. 325.—Lift the roll and build up the sides.
Continue coiling until you have made a cup-shaped vessel three inches high, then break off the roll and flatten the end to meet the surface of the brim. Moisten your fingers on the sponge, and smooth the inside of the cup, holding the walls in place with your left hand curved around the outside (Fig. 326). Do not press too hard with either hand, but slide your fingers gently round and round over the inner surface. When the coils on the inside have become well flattened mix a little clay and water into a paste, and spread it on, filling any cracks that may still be left between the coils, constantly smoothing all the time.
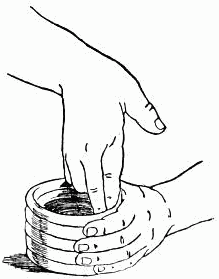 Fig. 326.—Smooth the inside of
the cup.
Fig. 326.—Smooth the inside of
the cup.
You will find that this process has, at first, the effect of broadening the base and lowering the sides of the cup, and until you have quite mastered the method you must allow for the broadening and flattening of your work. Your cup, with a base of two and one-half inches and sides three inches in height, will now probably[191] be a saucer measuring about four inches across the bottom, and not more than one inch and a half in height. It matters little, though, at this stage what shapes you turn out. Do your best with each piece, and if the work flattens turn it into a pretty dish by pinching the edge to form a little lip, and adding a handle like Fig. 327.
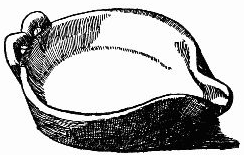 Fig. 327.—Turn it into a pretty dish.
As you are working without a wheel the symmetry of your pottery must depend entirely upon your eye and hand, therefore keep turning the block upon which it stands that no irregularity may be overlooked.
When you add ornaments or handles see that the roll of clay from which you make them adheres closely to the vessel. Add soft clay to the joints and smooth until the whole seems to be of one piece.
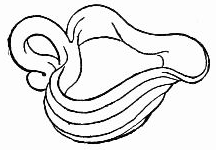 Fig. 328.—The outside corrugated
by the coil.
Fig. 328.—The outside corrugated
by the coil.
In your first attempts leave the outside of the pottery corrugated by the coils (Fig. 328); later work you may smooth, making a surface equal to that turned on a wheel. Do not try to finish a piece in one day; it is much better to allow it to harden a little and become set, then make it as smooth as you can with your tools, levelling the edges and taking away extra thicknesses. If this cannot be done at one time, set the work away once more covered with a damp cloth and it will keep in good working condition for any length of time, but remember, the cloth must be kept damp, otherwise the clay will harden.
When you have perfected your piece of pottery to your satisfaction put it away to dry, not in the sun. Several days later, after it has become quite hard, go over the surface again with knife and emery-paper, scraping and rubbing down until it is entirely smooth and free from flaws. The work will then be ready to take to the potter for firing.
The color of clay changes in firing, and your little piece of pottery will probably come back to you almost the color of old ivory. One cannot be very positive about the color, however, for clays vary, and perhaps yours may be of a kind that will fire another color. The potter will glaze your work for you if you wish, or leave it in the bisque. Nothing has been said about what
 Fig. 329.—Alligator modelled from life.
It is not difficult to model a
 Fig. 330.—Clay for modelling alligator.
 Fig. 331.—Clay rolled between the hands.
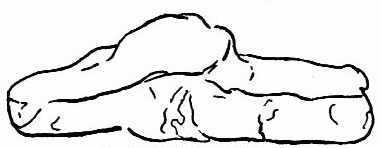 Fig. 332.—Beginning the head.
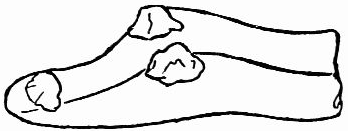 Fig. 333.—Extra pieces on for eyes and nose.
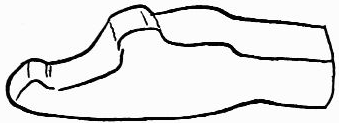 Fig. 334.—Head almost in shape.
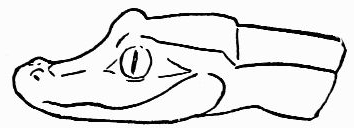 Fig. 335.—Head finished.
All you need for the work is a lump of soft clay, a hat-pin, your fingers, and determination to succeed. Take a piece of clay (Fig. 330) and roll it between your hands until it resembles Fig. 331. Push the two ends together, causing the roll to hump up slightly near the centre, lay it down on a board or any hard, flat surface, and[195] with the fingers carefully pat, squeeze, and push it into the form of Fig. 332. Gently smooth out all roughness; then nip off little pieces of clay from the big lump for the nose and two eyes; stick them on as in Fig. 333. Again smooth the rough edges until the clay looks like Fig. 334. With a little careful modelling you can make the head exactly like Fig. 335. Mark the eyes, mouth, and nose with the flat point of the pin. If portions of the head become too thick, take off some of the clay, and if at any time the head is worked down too thin fill in the hollow spots with clay. In modelling one can always pinch off pieces here and there when necessary; or add little bits, smooth it all down,[196] and the places altered will never show the marks of the change.
When the head is finished cover it with a wet cloth to keep the clay moist, and begin to make
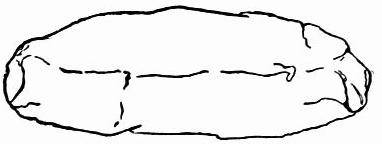 Fig. 336.—Clay for body of alligator.
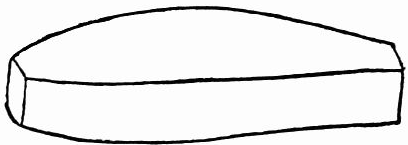 Fig. 337.—Body of alligator.
Mould another piece of clay like Fig. 336. Run the ball of your thumb along the sides, making the body the form of Fig. 337, broader and thicker through the centre than at the two ends. For the tail pull from the large lump a smaller amount of clay, roll it and model it like Fig. 338, larger at one end than at the other. The last portion (Fig. 339), like the others, is flat on the bottom, and with the exception of a small triangle at the heavy end of the tail the two sides meet at the top, forming a sharp ridge which decreases in height as it tapers down to a point at the extreme end. As each part is finished keep it moist with a wet cloth, and[197] when the four sections are made place them in a row (Fig. 340), then join them together, rounding all the edges slightly. Fig. 341 shows how to mark the back of the alligator.
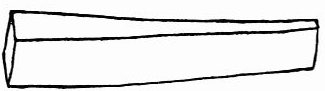 Fig. 338.—Section of tail.
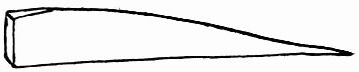 Fig. 339.—Tail of alligator.
 Fig. 341.—Marking the back.
Live alligators, you know, are encased in a natural
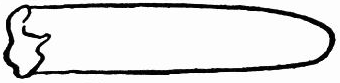 Fig. 343.—Break off a part.
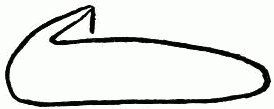 Fig. 344.—Turn back the end.
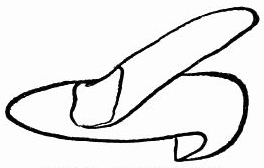 Fig. 345.—Add another piece.
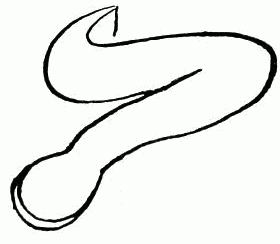 Fig. 346.—Press end of
leg out flat.
Fig. 346.—Press end of
leg out flat.
Roll a small piece of clay (Fig. 342), break off a part (Fig. 343) and turn back the broken end (Fig. 344). Add another piece to it (Fig. 345), smooth the edges together, forming a bend like an elbow (Fig. 346), and press the end of the leg out flat (Fig. 346). Roll five small pieces (Fig. 347) and fasten them on the flattened portion of the leg in the positions shown by Fig. 348. The foot suggests a human hand, the toes taking the[199] places of thumb and fingers. Rub the toes into the foot and spread out the extended, flattened part of the leg, making it appear web-like between the toes (Fig. 349). The foot of the real animal has nails or claws on three of the toes (Fig. 350), but you need not attempt this detail. If the foot is correct in form and proportion you have made it well. Fig. 350 is given merely to show how the natural foot looks.
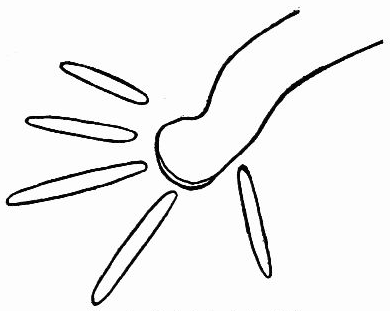 Fig. 347.—Ready to begin the foot.
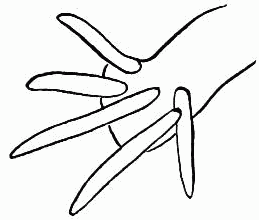 Fig. 348.—Modelling the foot.
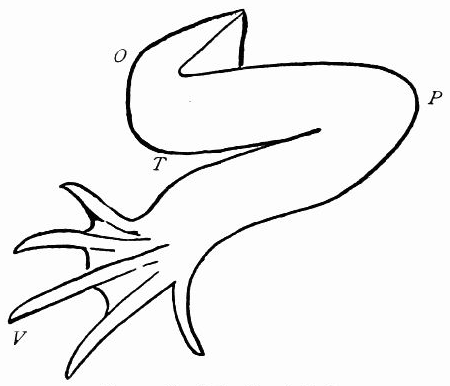 Fig. 349.—Fore-foot and leg of alligator.
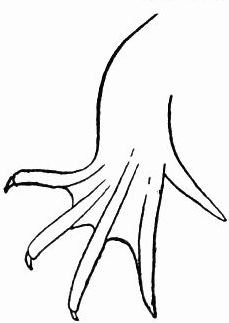 Fig. 350.—Fore-foot of alligator.
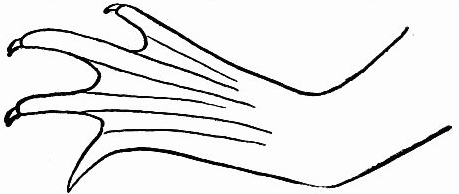 Fig. 351.—Alligator's hind-foot.
Model two front and two hind legs and feet; see that the hind feet and legs are larger and differently formed from the front ones. The hind feet have only four toes (Fig. 351). The line A (Fig. 340) designates the place where the front legs should be joined to the body, and the line B (Fig. 340) shows where to fasten on the hind legs. That you may have a thorough understanding of the manner and direction in which the joints of the legs bend, we will suppose that[200] you rest on the floor on your knees and elbows. You will then find that your knees bend forward and your elbows backward, with your arms corresponding to the front legs and your legs to the hind legs. Now, when you draw or model hereafter, you will not make any mistake in regard to it. Look again at Fig. 349. The foot, V, corresponds to or rudely resembles your hand; T, your wrist; P, your elbow; O, your shoulder. Examine Fig. 329. On the hind[201] leg are the foot, ankle, knee and hip joint. While the alligator is in a plastic state make him open his mouth, by cutting a slit in the head from the front along the waved line up back beyond the eye; carefully pull apart the jaws (Fig. 352). Have your alligator measure at least fourteen inches from tip to tip, for it will be more difficult to model a smaller one. Once having made the little creature, you will find it easy to model similar animals; select something else in the same line and try to make it.
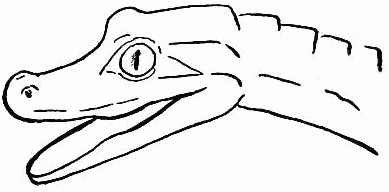 Fig. 352.—Cut open the mouth.
Most fruits are readily reproduced in clay.
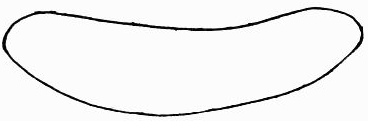 Fig. 353.—Clay ready for modelling banana.
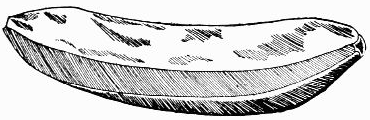 Fig. 354.—Banana modelled in clay.
The "Father of His Country" always commands admiration, and everything pertaining to him is interesting.
Be sure to have the head of correct proportions[204] before beginning the features; then take away a little of the clay where the nose joins the forehead and cut away more clay under the nose straight down to the chin, according to the dotted lines which appear in Fig. 357. Hollow out places for the eyes and indicate the mouth with a straight line. Add more clay for the hair, forming it into a queue at the back.
 Fig. 358.—George Washington.
|
 Fig. 359.—Washington's profile.
Finished head.
Fig. 359.—Washington's profile.
Finished head.
|
 Fig. 360.—Back of Washington's
head.
Fig. 360.—Back of Washington's
head.
|
Be careful to study well the character of Washington's face before going on with the work. Notice that it is strong, the chin firm and square, the lips tightly closed and the mouth almost a straight line, the nose not perfectly straight but inclined to be aquiline, the eyes rather heavy-lidded; and the hair, following the line of the head on the[205] top, is puffed out on the sides, covering both ears. Fig. 358 gives the front view, Fig. 359 the profile, and Fig. 360 the back view of the head. Make the neck full and large. You can keep the clay moist with a wet cloth and work on the head a little each day. Persevere until you make so good a likeness of George Washington that it will be recognized at a glance, and ever afterward you will enjoy and appreciate much more all portraits of him.
 Fig. 361.—Bent
toothpick.
Fig. 361.—Bent
toothpick.
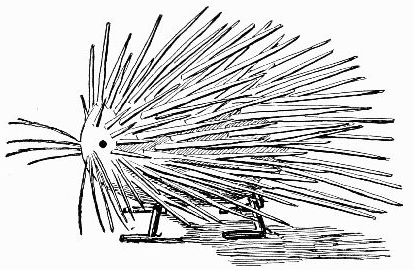 Fig. 362.—The apple porcupine.
If you can find an apple with a bump on one side, you may make a porcupine in less than five minutes, for all that is necessary is to stick the apple full of wooden toothpicks, and that work will be as easy as putting pins into a cushion. Let the bump on the apple form the head of the animal. Bend four toothpicks like Fig. 361 and push them up into the apple to serve as legs and feet. Make the bent toothpicks balance the apple perfectly, so that the porcupine will stand firmly on its feet without other support. Use black pins for eyes and broom straws for the whiskers. Stick[207] them into the head of the animal as shown in Fig. 362. Begin at the extreme back of the porcupine to insert the wooden toothpicks that are to serve as quills; although they are not hollow it makes very little difference, as this wee creature cannot shake them, causing the quills to knock against each other, as does the real animal when he wants to produce a rustling sound to warn off an enemy. Continue pushing in the toothpicks until the apple resembles Fig. 362. Keep the quills inclined backward and be careful not to have them stand out too far; slant the quills as much as possible, as the length of the porcupine must appear greater than the breadth. Now, if you could endow the animal with life, you would find that he was a vegetarian; that is, he could not eat meat, and you would be obliged to feed him on fruit, roots, and certain kinds of bark. You may be glad, though, that this porcupine is only a "make-believe one," for, if he lived, he would sleep all day and want to run about and take his exercise during the night; and, more than that, you would feel very sorry[208] for the poor little fellow, because he would be extremely lonesome so far away from his native land of India, Africa, or some part of Southern Europe. So of the two, all things considered, the apple porcupine makes a better pet for the small members of the household.
 Fig. 367.—Sally's
open mouth.
Fig. 367.—Sally's
open mouth.
|
 Fig. 368.—Strip of
paper rolled up
tight.
Fig. 368.—Strip of
paper rolled up
tight.
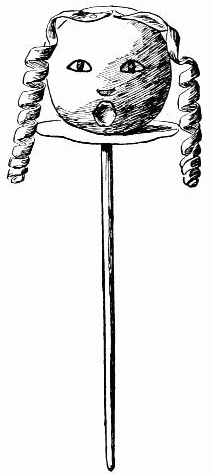 Fig. 363.—Sally Walker's
head.
Fig. 363.—Sally Walker's
head.
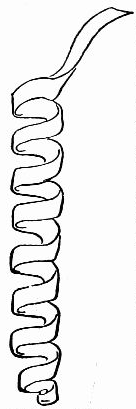 Fig. 369.—Sally's
curl.
Fig. 369.—Sally's
curl.
A round, delicately pink-tinted apple is best for
(Fig. 363). With the small blade of a pocket-knife cut the eyes near the centre of the apple, placing them far apart to give an innocent expression to the face (Fig. 363). Cut the lower line of the eyes straight and the upper curved, as in Fig. 364; then push the small, pointed end of an apple-seed in the centre of each eye; run the seed in so far that only a small portion of the blunt end stands out (Fig. 365). Cut away a small, half-moon-shaped piece of the skin (Fig. 366) to indicate the nose. The mouth must be open and made the shape of Fig. 367. Cut it into the apple a trifle more than an eighth of an inch in depth. Make the curls of two narrow strips[209] of paper rolled up tight like Fig. 368; then pulled out as in Fig. 369. Pin one curl on each side of the head (Fig. 363). Cut a round piece of white paper for Sally's collar. Make a small hole in its centre and slip the collar on the end of a stick; then push the stick well up into the lower part of the head (Fig. 363). Keep the collar in place by two pins stuck through it into the apple.
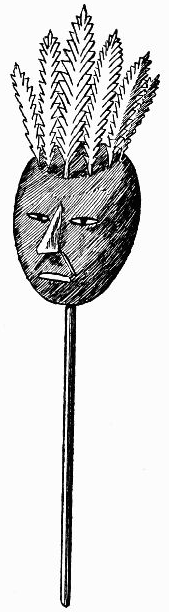 Fig. 370.—The apple
Indian.
Fig. 370.—The apple
Indian.
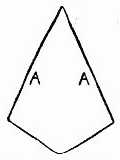 Fig. 371.—Indian's
nose.
Fig. 371.—Indian's
nose.
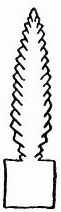 Fig. 372.—Paper
feather for apple
Indian.
Fig. 372.—Paper
feather for apple
Indian.
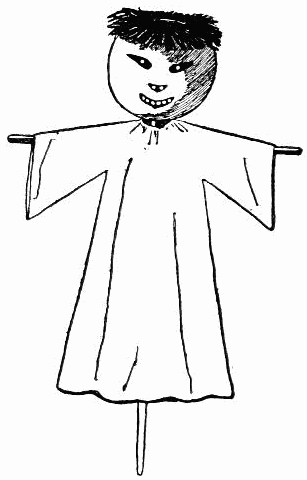 Fig. 373.—The apple Jap.
 Fig. 374.—Apple
Jap's eye.
Fig. 374.—Apple
Jap's eye.
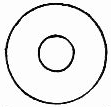 Fig. 375.—For apple
Jap's hair.
Fig. 375.—For apple
Jap's hair.
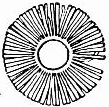 Fig. 376.—Apple
Jap's hair.
Fig. 376.—Apple
Jap's hair.
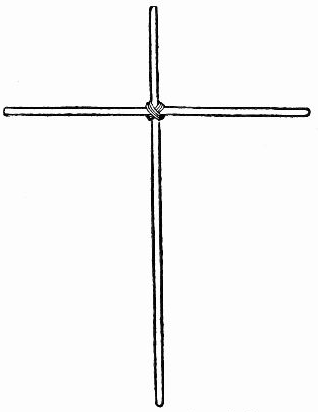 Fig. 377.—Stick frame for apple Jap.
Make the nose crescent-shaped, and pin it on with two
white pins. The mouth must be much larger than the
nose, though cut in similar shape. Hold the mouth in position
by running a row of white pins
through it into the head. The pins
will also form the Jap's teeth. Cut
the hair of black paper (Fig. 375); if
you have no black paper, make some
with ink. Fringe the hair as in Fig. 376; then fasten the circle of stiff black
hair on top of the head with black
pins. Use a russet apple or a yellow
one for the Jap, because, you know,
these people do not have red cheeks
or fair skins. When the head is
finished, push it down on the top of
a stick across which has been fastened
another shorter stick near the top
(Fig. 377). Make a simple kimono-like
[213]
[214]gown of paper and hang it on over the Jap's arms.
If you wish, you can paste the edges or seams of the garment
together (Fig. 373).
Find a firm, sound, round apple, and we can
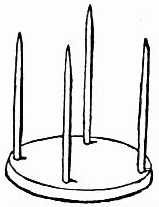 Fig. 379.—Foundation of
apple tower.
Fig. 379.—Foundation of
apple tower.
|
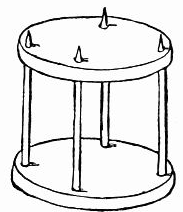 Fig. 380.—Second floor of
apple tower.
Fig. 380.—Second floor of
apple tower.
|
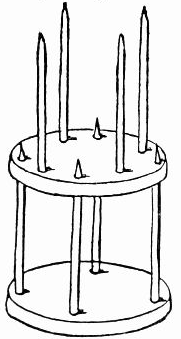 Fig. 381.—Ready for third
floor.
Fig. 381.—Ready for third
floor.
|
A fine Dutch windmill can be made of one apple and a paper pin-wheel, and there are lots of other interesting things you may manufacture from the same fruit.
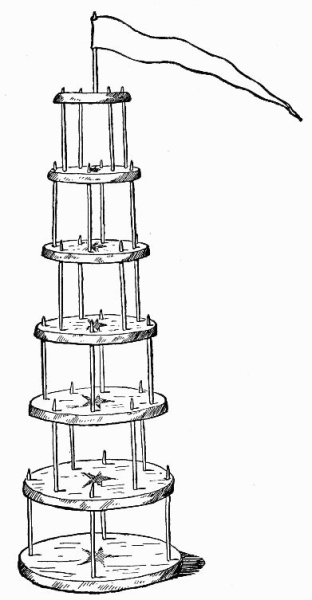 Fig. 378.—Apple tower.
 Mary.
Mary.
Take a smooth piece of white tissue-paper, lay it over
the drawing of Mary given here, and with a moderately
soft pencil make a careful tracing of the little figure. Turn
the paper the other side up and go over the lines again with
a very soft pencil; then lay the paper right side up on a
piece of white cardboard, a little larger than the page of[216]
[217]
this book. See that the figure is exactly in the middle and
again go over the lines with your pencil. Remove the tissue-paper
and strengthen the lines of your drawing with
your hardest pencil. If you have a box of water-color
paints, tint Mary's face, her
neck and arms flesh-pink.
Redden her cheeks a little,
and paint her lips a darker
red. Make her eyes blue and her hair a light brown and
she will be quite ready for
Fig. 382 is the pattern, which you must make by tracing it on tissue-paper and then cutting it out. Choose any material[218] you like—wool, cotton, or silk, for her dress and any color, only let it be quite smooth. Lay the tissue-paper pattern down on the goods, pin it in place and cut around close to the edges. Try the dress on Mary to see that it fits perfectly; then cover the wrong side thinly with paste, adjust it to the little figure and press down firmly, smoothing out any wrinkles that may appear. Cut a white lawn apron like the pattern (Fig. 383), and paste it over the dress bringing the upper edge up to the waist line.
Make a cunning little
 Fig. 389.—Pattern of lamb's coat.
Fig. 389 is the pattern for Master Lamb's coat, which you are to cut from a sheet of white cotton wadding, opened through the centre to give the wooliness of the raw cotton. A sheep's wool does not grow long on its legs, so you need not wonder that the lamb is not provided with leggings.
Paste the coat on the lamb's back and the little cap (Fig. 390) on top of his head and he will have all the clothing to[220] which he is entitled. The dotted line below the lamb's ear shows how far the wool is to reach on his face, and that on the top of his head gives the limit for the edge of the cap.
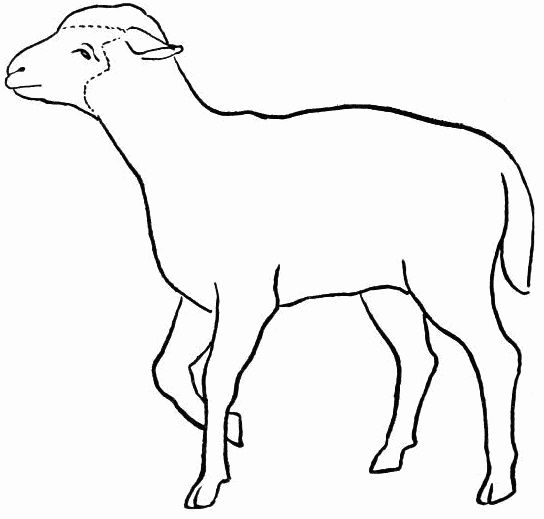 Mary's Lamb.
When you have traced
 Fig. 391.—Tail feather.
|
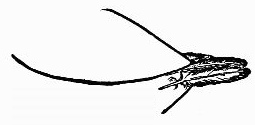 Fig. 392.—How to paste
on the tail feathers.
Fig. 392.—How to paste
on the tail feathers.
|
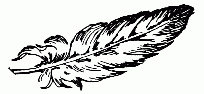 Fig. 393.—Body feather.
|
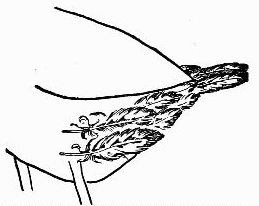 Fig. 394.—How to paste on the body feathers.
|
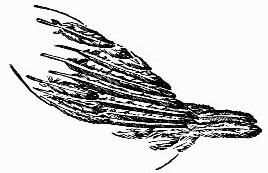 Fig. 397.—How to paste on the wing feathers.
| |
 Fig. 398.—Neck and
breast feather.
Fig. 398.—Neck and
breast feather.
|
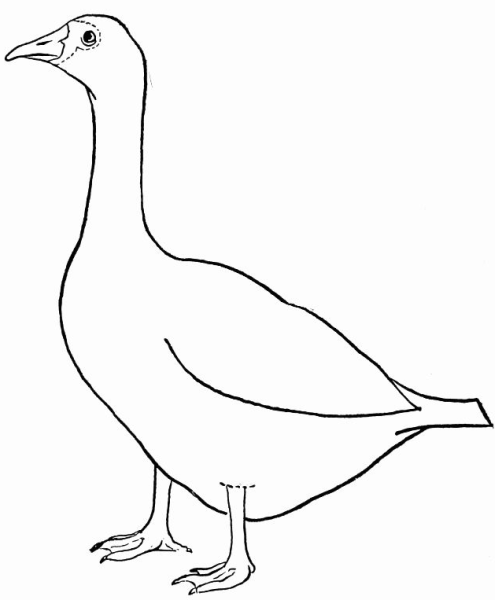 Mother Goose's goose.
Select three feathers for the tail like the tail feather Fig. 391, and fit them in place on the goose to see just where they are to go; then take them off, cover the tail with glue and carefully put the feathers back in place, pressing them down until they stick fast (Fig. 392). Find body feathers like Fig. 393 and, beginning near the tail, cover part of the body with glue, then stick the feathers on, overlapping them as in Fig. 394. The under part of the body must be entirely covered with these feathers, but before going on to the breast and neck the wing must be attended to.
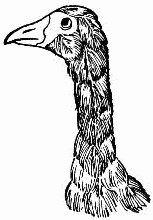 Fig. 399.
There are two kinds of wing feathers—some long and narrow (Fig. 395), and others much shorter (Fig. 396). Begin at the lower edge of the wing and glue a row of the long feathers in place, allowing the lower edge of one feather to overlap the upper edge of another, as in Fig. 397. Along the top edge of the wing glue a row of the small feathers (Fig. 397), and then, beginning again at the lower edge of the wing, cover the remainder with the small feathers.
The short, broad feather (Fig. 398), is the kind to use on breast and neck. Begin at the wing and fasten them on, going upward until the head is reached, then trim off the stems of the feathers to fit the space shown by the dotted line on the goose's head (Fig. 399). Do not put too much glue on the goose at one time, only enough for one row of feathers, and spread it very thinly, for it takes but little to catch and hold the light feathers in place.
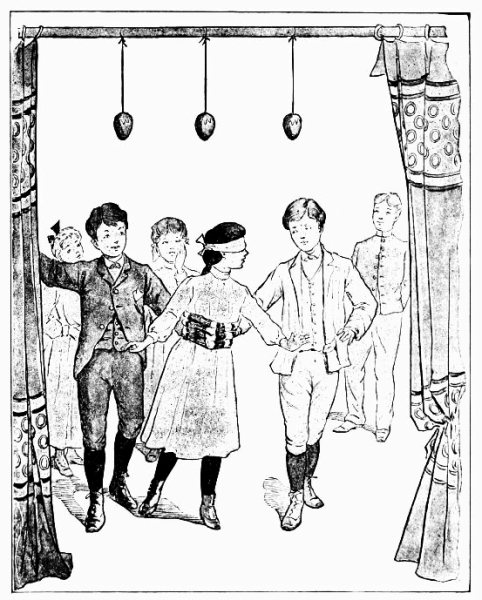 Lifting for Pasch eggs.
First you must
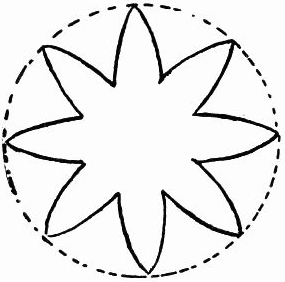 Fig. 400.—Cut three scalloped disks like this.
Cut from gilt or colored paper three scalloped disks[228] four inches in diameter (Fig. 400). Through the centre of each disk pass a needle threaded with doubled black linen thread, cover the under side of the disk with paste, separate the two ends of the thread and hold them down on each side of the large end of a shell, as shown in Fig. 401; then draw the disk down and paste it upon the shell over the threads. If the ends of the thread extend below the disk, clip them off with sharp scissors. Wait until the paste is quite dry and the paper firmly attached to the shells, then hang the eggs by their threads in a door-way so that they will be just one foot higher than you can reach.
There must be at least two girls and two boys to play the game. Fold a shawl or wide scarf until it forms a narrow band. Wrap it around the waist of one of the girls, fasten it securely, and blindfold her with a handkerchief. Let a boy stand on either side of her, grasp the band firmly, and then march her up to the door-way where the eggs are suspended, chanting these words:
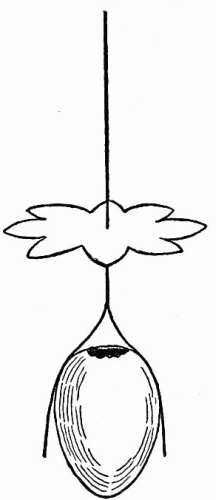 Fig. 401.—Paste the disk on the shell.
Reaching the door-way they must halt just before it, and when the girl says "Ready" she must jump, the boys at the same time lifting her by the band around her waist. As she jumps she must try to catch one of the eggs. She can have but one trial, and if she succeeds in bringing down an egg it is hers; failing, she must wait until her turn comes again for the chance of securing a prize.
One of the boys must have the next trial, while the two girls become the "lifters." The same ceremony must be gone through with for each player, a girl and a boy alternately, and the same verse repeated.
It is not necessary to expend any strength in the "lifting," for the players should jump, and not depend upon the helpers to be lifted up within reach of the eggs. When the eggs have been pulled down, the fun consists in eating the candy, with always the certainty of finding some bitter drops among the[230] sweet, and the uncertainty of how soon and how often the bitter will be found.
The egg dance is very old, so old that it is a novelty to young people of this generation. It is said that this dance formerly created much mirth, and no doubt it will afford our modern girls and boys an equal amount of merriment.
To prepare for it, take thirteen eggs, blow the contents from the shells, color eight red, gild four, and leave one white. The object in removing the egg from the shell is to save the carpet from being soiled should the eggs be trampled on. If the carpet is protected by a linen cover hard-boiled eggs may be used.
Place the eggs on the floor in two circles, one within the other. The outer circle, formed of the red eggs placed at equal distances apart, should measure about eight feet in diameter; the inner circle, formed of the gilded eggs, should be four feet in diameter, and the white egg must be placed directly in the centre of the inner circle.
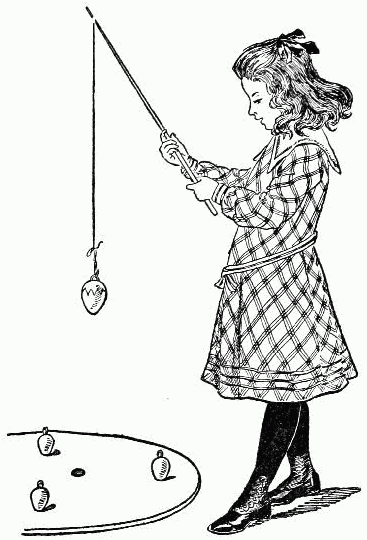 Angling for Easter eggs.
The eggs being arranged the company is divided into couples, each in turn to try the dance. The first couple takes position within the outer circle—that is, between the red eggs and the gilded ones—and, to waltz music, they dance around the circle three times, keeping within the space between the two circles. Entering the inner circle they waltz three times around the central egg, and all this must be done without breaking or greatly disturbing any of the eggs. When an egg is broken or knocked more than[231] twelve inches from its position, the dancers retire and give place to the next couple. The broken eggs are not replaced, but those out of position are set in order before the succeeding couple commence the dance. When each couple has had a turn and none have accomplished the feat, all change partners and the trial begins again.
The first couple to go through the mazes of the dance without breaking or disturbing any of the eggs win each a first prize; the next successful couple receive second prizes, and the third are rewarded with one colored hard-boiled egg which they may divide between them.
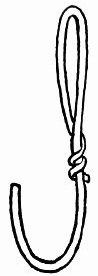 Fig. 402.—Eight hooks
made of wire.
Fig. 402.—Eight hooks
made of wire.
The appliances for this game are manufactured at home, and consist of three toy hoops, such as children use for rolling, eight bamboo walking-canes, and eight hooks made of wire like Fig. 402. A piece of twine three-quarters of a yard long is tied to the small end of each stick, and to the other end of the twine is fastened a hook.
Smooth, stiff, light-brown paper is pasted or tacked over each hoop like a drum-head, and in this paper covering of each hoop six round holes are cut, just large enough to admit the small end of an egg, or about the size of a silver quarter of a dollar. Four of the holes are made at equal distances apart, twelve inches from the edge of the paper, and the other two are near the centre (Fig. 403).
Eighteen eggs to be angled for are provided. They are not boiled, but the shells are emptied and prepared for decoration in the manner previously described.
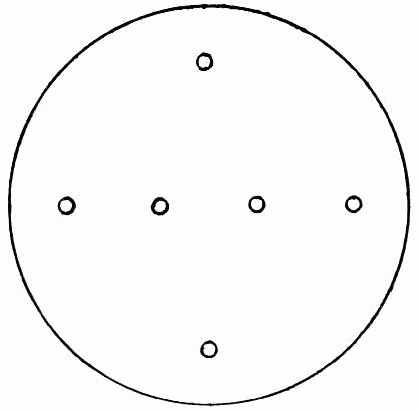 Fig. 403.—Cut six holes in the paper like these.
 Fig. 404.—Cut the star by following
dotted lines.
Fig. 404.—Cut the star by following
dotted lines.
They may be painted with water-colors, with designs of spring flowers and butterflies, gilded or silvered, or colored with dyes.
A circle of gilt paper is folded twice, which forms Fig. 404, and an eight-pointed star is cut by following the dotted lines in Fig. 404. In the centre of this is cut a round hole, and when opened, the star (Fig. 405) is the result.
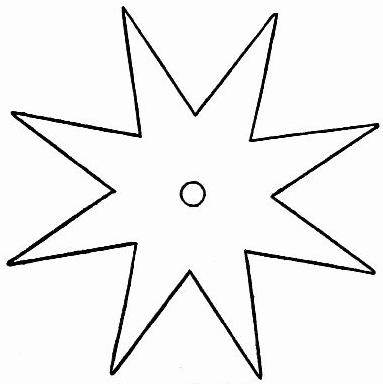 Fig. 405.—The gilt star.
A piece of narrow white satin ribbon, three inches long, is folded and pushed through the hole in the centre of[234] the star, forming a loop; the ends are then pasted to the point on either side of the star.
When the egg-shell has received its decoration, this star and loop are glued to the large end of each shell, as shown in Fig. 406.
In twelve of the egg-shells are hidden trifling gifts of candy, a tiny penknife, silver thimble, or a trinket of any kind; in four are slips of paper on which are written "Prize Ring," and in the other two are also slips of paper; on one is written "First Prize," and on the other "Second Prize."
Every shell being supplied with its gift the holes at the small end of the egg are covered by pasting over each a small round of white paper, the edge of which is cut in points to make it fit more easily to the shell.
1st. Eight players only can take part in the game.
2d. The three hoops are placed on the floor, paper side up, at some distance apart. In each of the two ordinary rings are placed six eggs standing upright in the holes, small end down; four eggs contain presents and two the papers bearing the words "Prize Ring." In the third, or prize ring, are four eggs containing presents, and the two which hold the papers with the words "First Prize" and "Second Prize."
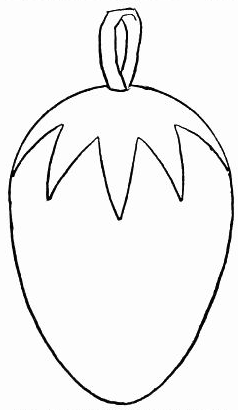 Fig. 406.—Glue the star and loop to
the shell.
Fig. 406.—Glue the star and loop to
the shell.
3d. There must be no distinguishing mark upon any of the prize eggs.
4th. Four players stand around each of the ordinary rings. Having once chosen their places they must keep them until all the eggs have been taken from the ring.
5th. Every player is provided with a fishing-rod which is held by one end, not in the middle.
6th. The endeavor of each player is to insert his hook through the ribbon loop on one of the eggs and lift it out of the ring, doing this as quickly as possible and catching as many as he can.
As each egg is taken from the ring its contents are examined and the player who first gets a prize-ring egg ceases angling until the other prize-ring egg has been caught.
7th. When the eggs have all been taken out of both ordinary rings, the two players in each ring who have the prize-ring eggs move to the prize ring and angle for the eggs which it contains.
8th. Two prizes, the first and second, fall to the lot of the two players who are fortunate enough to secure the prize eggs in the prize ring.
The prizes given for the prize eggs at the prize ring should be of a little more importance than those contained in the eggs. Instead of trinkets these eggs may contain only candy, which will give more prominence to the two real prizes given at the end of the game.
Everyone knows about the egg-rolling where the eggs are started at the top of a hill and rolled to the bottom, for it has become almost a national game, being played annually on the White House grounds in Washington on Easter[236] Monday; but there is a new game of egg-rolling to be played in the house, in which any person in any place may take part. This is played, not with cooked eggs, as in the Washington game, but with empty egg-shells, which have been blown and left as nearly perfect as possible; and the field for the game is a table with a chalked line across either end about eight inches from the edge and another line directly across the centre.
The players are divided into
On no account must the egg be touched except in placing and replacing it on the centre line, which is done whenever a score is made, and when the egg rolls off the table; in all other cases it may be moved only by fanning. Each time the egg enters a goal it counts one for the side at the opposite end of the table, and when the score is marked the egg must be replaced in the centre; then, at the given signal, the fanning is renewed.
The winning score may be ten, fifteen, or twenty-five, but it is best not to make it too large, for several short games are more enjoyable than one long one.
From certain customs of these bygone days we can evolve a delightful entertainment and call it the Twentieth Century May day. The most important personage on this occasion is the May Queen, who must win her crown by skill in archery. The next in importance is the King who wins his title in the same way. Of course,
 Fig. 408.—Fastening
on the bow-string.
Fig. 408.—Fastening
on the bow-string.
|
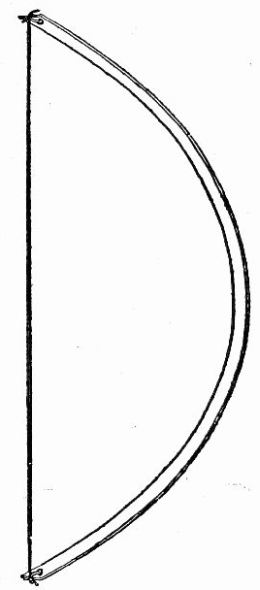 Fig. 410.—Bow strung ready for arrow.
|
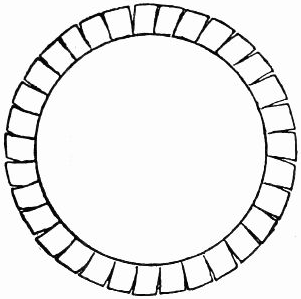 Fig. 411.—Paper cover for target.
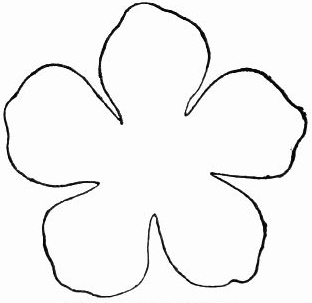 Fig. 412.—Cowslip for target.
 Fig. 413.—Violet for target.
|
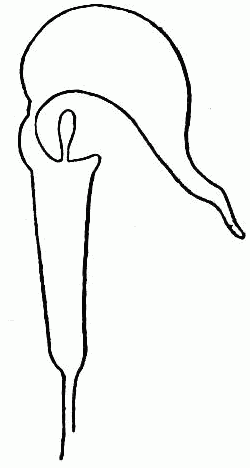 Fig. 414.—Jack-in-the-pulpit
for target.
Fig. 414.—Jack-in-the-pulpit
for target.
|
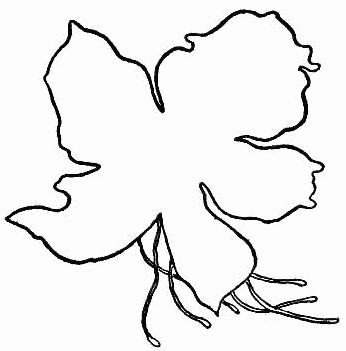 Fig. 415.—Azalia for target.
|
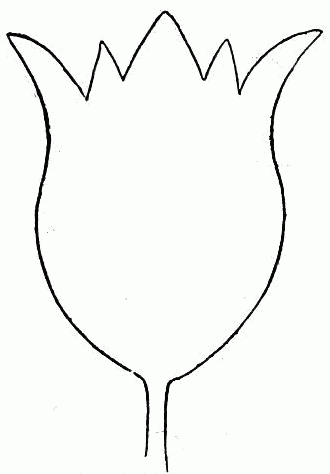 Fig. 416.—Tulip for target.
|
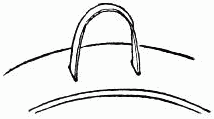 Fig. 417.—Staple in hoop.
Select a good position on a tree or fence. Drive in a nail at the proper height and hang the target by the staple in its rim; then with a stick or stone mark a line on the ground about three yards from and directly in front of the target. Let each player in turn stand with toes touching the mark and shoot one arrow at the target. Someone must keep tally, and as each arrow strikes or misses make a record of the shot. When all have had one trial the second round may be played; then the third, which finishes the game of archery and decides the relative places of all the company.
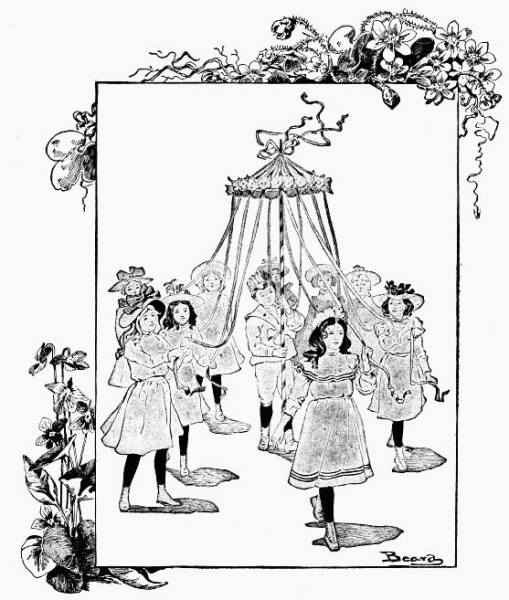 May Queen and King and loyal subjects.
The girl and boy with highest records are
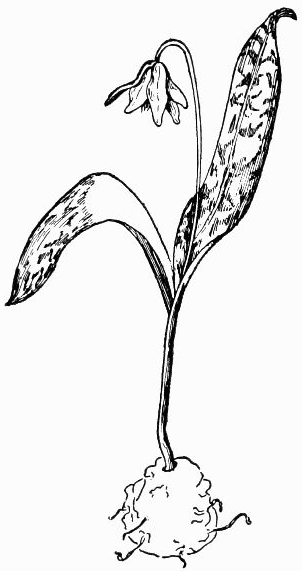 Fig. 420.—Take the flowers up roots and all.
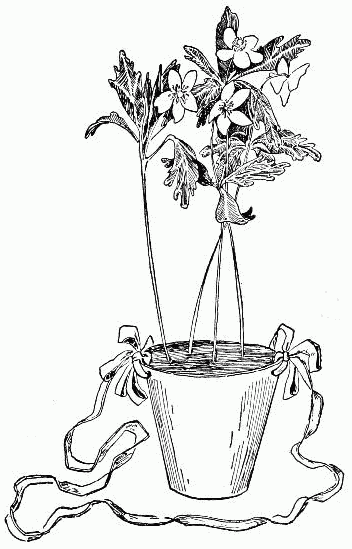 Fig. 421.—Water-proof paper flower-pot May-basket.
The delicate little blossoms of early spring need very careful handling, and it would be well for the King and his gentlemen to be provided with old kitchen knives or trowels,[245] that they may be able to dig around and under the little plants in order to take the flowers up root and all, with the earth clinging to them (Fig. 420); each one can then be carefully placed upright in a flat-bottomed basket or box and carried home in safety. Better still would be a number of tiny water-proof paper flower-pots, which may be purchased per dozen for a trifling sum. In each pot place one plant with plenty of damp earth surrounding it, and upon reaching home tie a gay narrow ribbon through holes pierced on each side; the little receptacle will then make a charming May-basket, and the wild flowers will keep fresh and blooming for a long time (Fig. 421).
While the King and his men are at work digging up the plants the Queen and her ladies can gather the buds and blossoms, picking them with as long stems as possible and remembering to have a few green leaves of each plant with its blossoms. To keep the flowers from wilting, as they would if held in the hand, let each girl be[246] provided with a clean, perfectly dry baking-powder can which has a lid that fits tightly; the blossoms must be without moisture and very carefully placed within the can as soon as they are plucked. When the tin box is filled the cover can be fitted on securely to exclude all the air. The green leaves may be carried in the hand, and when they droop they can be revived by being placed in fresh water. The bit of wildwood brought home in the form of dainty cut flowers could be put in water until dark, when the little
 Fig. 422.—Beginning wire May-basket.
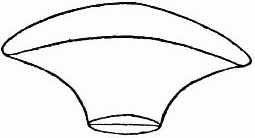 Fig. 423.—Basket ready for handle.
Manufacture the May-baskets of paper boxes, colored straws, wire, and cardboard. Those of wire can be made to resemble coral and are pretty when shaped like that shown at Fig. 425. Make a ring of wire about the size of the top of a very large teacup by twisting the two ends of the wire together, then pull it into an oblong shape curved downward at the two ends. Form another smaller ring, connect the two by a length of wire fastened on one end (Fig. 422); twist the wire on the bottom loop and bring it across the bottom[247] and up on the other side end (Fig. 423). Proceed the same way with the broad sides, extending the wire up and across the top to form the handle (Fig. 424); if more braces are needed, add them, and tie bits of string in knots of various sizes at intervals all over the basket frame to form projections for the branches of coral.
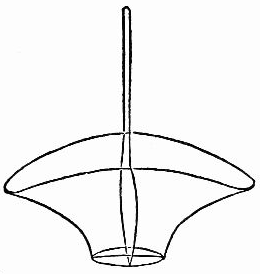 Fig. 424.—Wire basket to be turned into
coral.
Fig. 424.—Wire basket to be turned into
coral.
Transform the wire into coral by melting some white wax and mixing with it powdered vermilion. While the wax is in a liquid state hang the basket on the end of a poker or stick and, holding it over the hot wax, carefully cover the frame with the red mixture by pouring the wax over the basket with a long-handled spoon. The wax cools rapidly and forms a coating closely resembling coral; the little lumps and projections that form give the basket the appearance of real coral, which is branching and uneven.
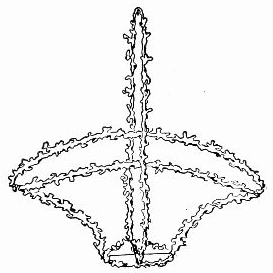 Fig. 425.—Coral May-basket.
As soon as the wax has hardened (Fig. 425) insert in the basket a pasteboard bottom cut to fit; and when filling this basket with flowers place the foliage around the sides first.[248] The fresh green contrasting with the red coral gives a pretty effect, and the leaves filling the spaces between the wires prevent the flowers from falling through.
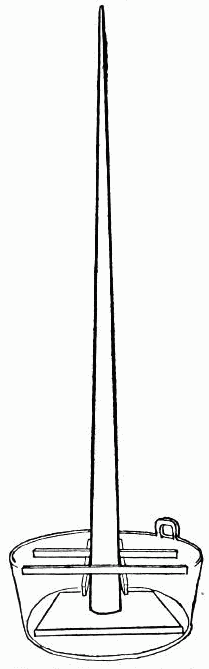 Fig. 428.—The pole is planted
in a tub.
Fig. 428.—The pole is planted
in a tub.
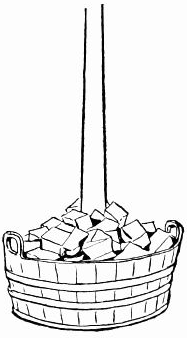 Fig. 429.—Fill in with stones.
Just at dusk the flowers may be arranged in the baskets with as little handling as possible. Then, when twilight[249] comes, the May day party can steal cautiously to the door of the house fortunate enough to be favored by a May-token, hang one of the little baskets of flowers on the door-knob, ring the bell and scamper away before they are seen, for no one of the party must be present when the door opens.
If you live in the country erect your May pole on the lawn or in an open field; if in the city put it up in the back-yard, or if it rains or is cold hold your May day games in the house. In any case the pole should be planted in a tub as in Fig. 428, and decorated as shown in the illustration. The pole must be round and smooth and stout enough to support the weight of the hoops at the top. For an out-of-doors pole from ten to twelve feet is a good height, but an indoor pole must be adapted to the height of the ceiling of the room it will occupy.
Before placing the pole in the tub nail securely to its base a piece of board eighteen inches square, as shown in[250] Fig. 428. Erect the pole in the middle of the tub, put in cross-pieces (Fig. 428), nailing them at the ends and fill in all around with stones or bricks, as in Fig. 429.
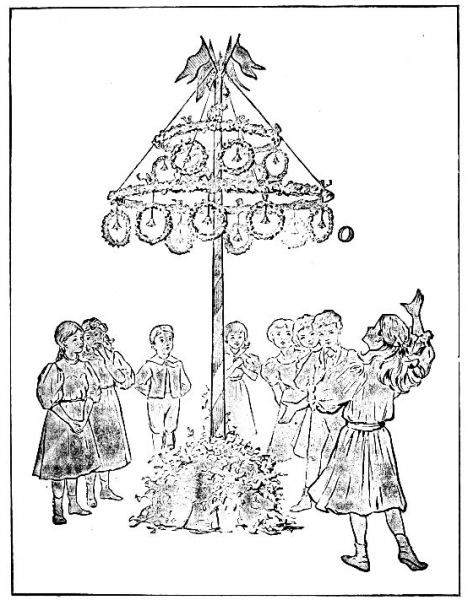 The first player throws the ball.
Cover the tub with green crimped tissue-paper and bank up with flowers—paper flowers if no others can be obtained. Beginning at the top, wrap the pole with ribbon or strips of pink and white cambric in alternate stripes. This can best be done before the pole is erected. Buy two toy hoops, the smallest measuring about three feet, the largest four feet in diameter. Wrap these hoops with greens of some kind—evergreens if you can find no others—adding sprays of tree blossoms and all the flowers you can manage to get.
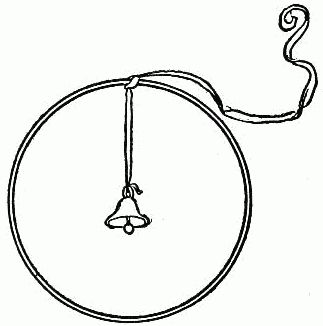 Fig. 430.—On the end of each ribbon fasten a small
bell.
Fig. 430.—On the end of each ribbon fasten a small
bell.
Besides the two large hoops you will need fourteen small ones about nine inches in diameter. These you can make of wire for yourself. Wrap eight of the small hoops with pink, and six with white cambric, then decorate with flowers and green leaves. Keep the decoration quite narrow, in order to leave as large an opening as possible in the centre. Get two and two-thirds yards of narrow pink ribbon and two yards of narrow white ribbon; divide the pink into eight and the white into six pieces. On the end of each ribbon fasten a small toy bell; tie the ribbon on the small hoops, the white ones on the white hoops, the pink on the pink hoops, as shown in Fig. 430. Space the largest hoop off into eight equal parts and tie the small pink hoops to it at these points by their ribbons. Divide the other hoops into six equal parts and attach the small white hoops in the same manner. With wire or ribbon suspend the hoops from the top of the pole as in the illustration. Decorate the top of the pole with small flags and flowers.
Make four paper balls in this way: Take a piece of newspaper and, placing a small weight of some kind in the middle, crush it and roll it into a ball four inches in diameter; place the ball in the centre of a square of tissue-paper and bring the four corners of the paper together over the top; overlap the corners and fold and smooth down the fulness at the sides. Wrap the ball with fine cord, making six melon-like divisions, as in Fig. 431. Make two of the balls of pink tissue-paper and two of white. Have ready on a tray a number of small favors consisting of two or three flowers tied together, some with pink, some with white ribbon.
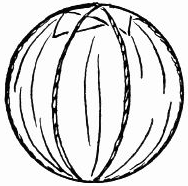 Fig. 431.—Wrap the ball with
fine cord.
Fig. 431.—Wrap the ball with
fine cord.
The decorations of the pole may be added to or curtailed as circumstances permit, and if flowers are scarce paper flowers may be mingled with the natural ones, and the difference will hardly be noticed. When
To the first four children at the right end of the line the four paper balls are given, one to each. The first child, or Number One, takes three steps forward and, aiming at the bell in one of the hoops, throws the ball with the purpose of sending it through the hoop and at the same time striking the bell hard enough to make it ring. If successful, Number One is given a favor, to be pinned to the front of the coat or dress, as the case may be, the color of the ribbon attached to the favor being in accordance with the color of the hoop through which the ball passed. As it is more difficult to send the ball through the hoops in the second row, the white-ribboned favors confer the most honor.
As soon as Number One has played he or she gives the ball to Number Five and returns to his or her place; then Number Two takes a turn, giving his ball afterward to Number Six, and so on down the line, thus always keeping the children about to play supplied with balls.
The game goes on until the players are tired or the favors give out, and the object of the players is to win as many favors as possible.
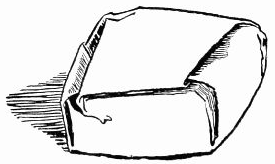 Fig. 432.—The gold nugget.
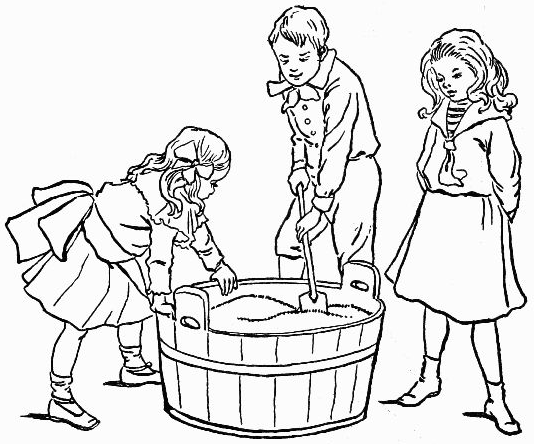 Fig. 433.—Hallowe'en miners at work.
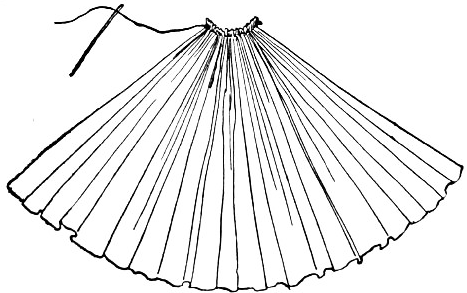 Fig. 435.—Tissue-paper for making witch.
Each player in turn must take the shovel and dig in the mine until one gold nugget is found. He must then open the package carefully and read aloud the fortune Fate has given him, while the other players look on and listen. The fairies can readily whittle or saw out a wooden mining shovel from a shingle or thin box-lid. Tell them to make it about four inches long and three wide, with a handle eleven[256] inches in length. Try to think of original ideas to write on the slips of fortune paper, or, failing these, look up apt quotations for the prophecies. If you can have the lines bright and witty, writing something that will cause a laugh when read aloud, without hurting anyone's feelings, your Hallowe'en mining will be a great success.
 Fig. 437.—Tissue-paper for witch arms.
|
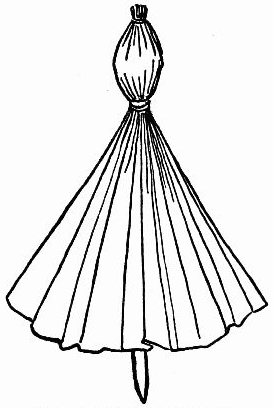 Fig. 436.—Head formed for witch.
|
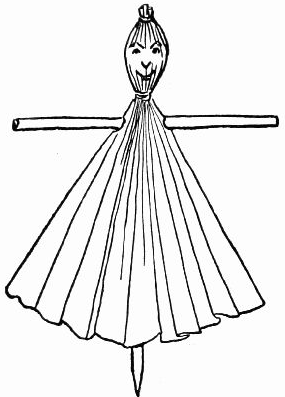 Fig. 439.—Arms run through hole in body of witch.
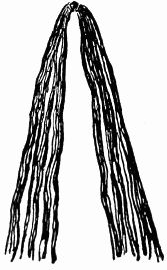 Fig. 441.—Black hair for witch.
|
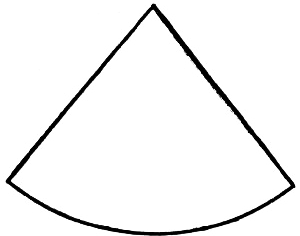 Fig. 442.—Crown of witch hat.
|
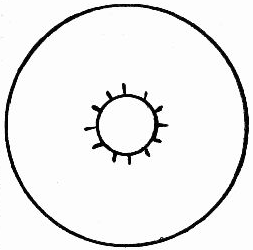 Fig. 443.—Brim of witch hat.
|
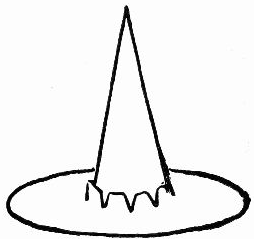 Fig. 444.—Witch hat.
|
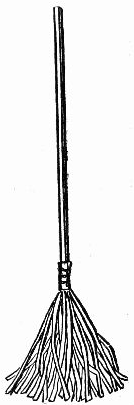 Fig. 446.—Witch broom.
|
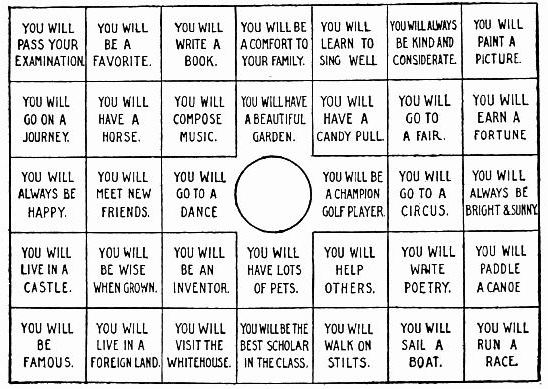 Fig. 447.—Fortune chart.
If you have
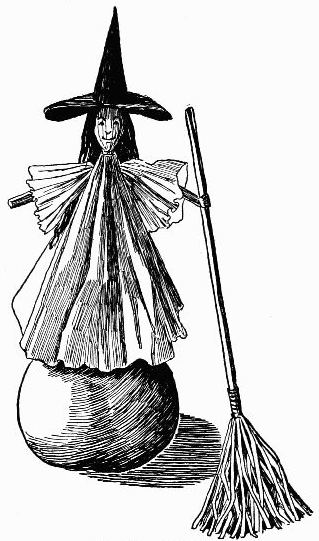 Fig. 448.—Apple witch.
A glimpse into the future showing the disposition of your sweetheart may be had by
A very jolly time may be had with
Purchase or make a number of brown paper bags of medium size. In each place a simple little gift such as a tiny home-made doll, a paper toy you have manufactured or a picture of a young woman or man cut from a newspaper and pasted neatly on a half sheet of fresh writing-paper, drop a nut in the fifth bag and add other home-made gifts for other bags, and label each appropriately. Pin a piece of paper on the doll with these words written on it, "Dorothy's new doll" (if none of the girls happens to have that name use another in its place). Under the young woman's picture write, "Marie when she is grown," and under the young man's write, "This is Malcolm when he is a man." Change the names if they do not represent any of the party. After a gift has been dropped in, take the bags one at a time and blow them full of air, do not allow the air to escape while you wind a string around the openings and tie them securely. The bags, being puffed out with air, will appear much the same, rendering it impossible to tell, by merely looking at them, which contain the largest gifts. All the bags should be tied on a strong string, forming a fringe of bags stretched across the room. The young people should draw lots for first choice of the fortune bags, then each player in turn must point to the bag selected, no one being allowed to touch a bag until the leader has clipped it from the string. Only one bag can be given out and opened at a time, in order that all may see and enjoy the contents of each separate fortune. All young people enjoy the fun of trying their fortunes. Even when convalescent and not yet quite strong enough to join in the general frolic, they may, in a quiet way test many old-time and some new prophecies. The three saucers is one as in the illustration. The apple seeds charm commencing with "One I love" is another and for new ideas there is The Feather test, Witch Writing, etc.
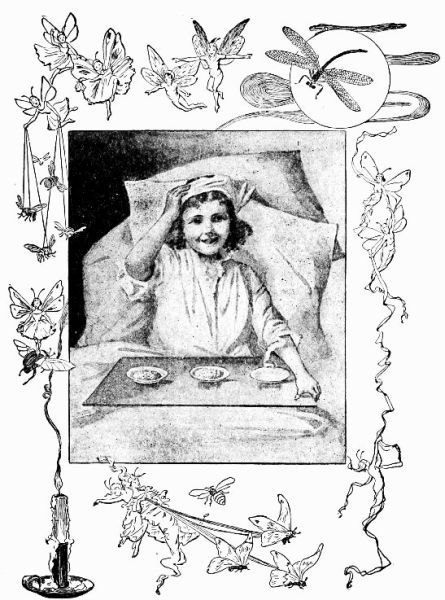 A Convalescent Witch.
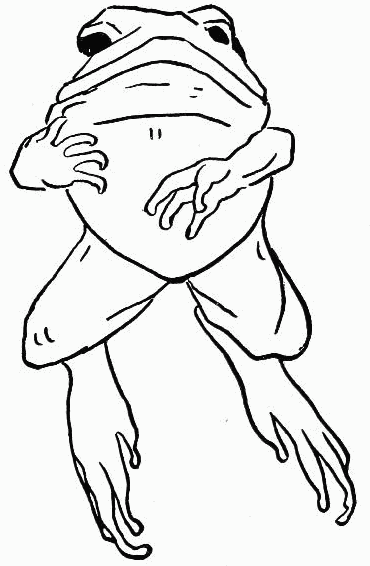 Fig. 449.—One for the
money, two for the
show,
Fig. 449.—One for the
money, two for the
show,
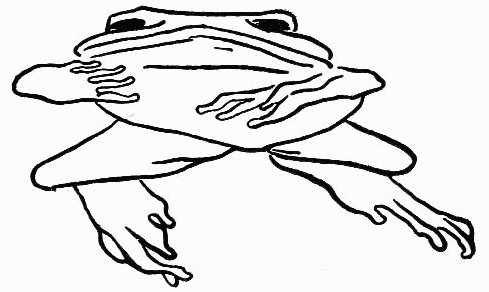 Fig. 450.—Three to make ready
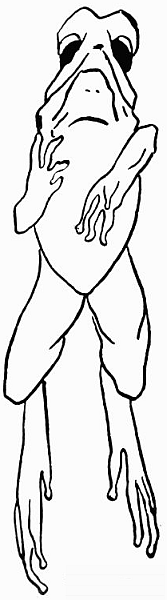 Fig. 451.—And four
to go.
Fig. 451.—And four
to go.
With a soft lead-pencil trace the frog (Fig. 449) on tracing-paper;
then transfer it to a very soft, pliable piece of
white cotton mull or any white cloth that will stretch readily
when pulled, for stretch it must, or the frog will not jump.
Turn the square of cloth so that it will resemble the ace of
diamonds in a pack of playing-cards, having one point up,
one down, one at the right and one at the left hand.
Fasten the cloth over a piece of white paper on a smooth[265]
[266]
board or table with thumb-tacks
or strong pins. Very carefully
place the tracing-paper, on which
you have drawn the frog (Fig. 449),
over the cloth, allowing the head
to come under the top point of
the square and the feet to extend
toward the lower point. Mr. Frog
may then be drawn exactly on the
bias weave of the cloth. When
you have finished the tracing, go
over the lines again with a soft
lead-pencil to make the markings
clear and distinct.
Look at the frog to be sure he is correctly drawn; then remove the pins and, allowing the cloth to remain on the table over the piece of smooth white paper, spread both of your hands out on the cloth, one at each side of the frog, and, keeping your eyes on the drawing, move your hands gradually outward, at the same time moving the mull with them. The stretching of the bias material will cause the frog to flatten out until he crouches for a spring (Fig. 450). Cautiously raise your hands up and off the cloth and place them down again in a different way; put one above and the other below his Frogship, and, still keeping your eyes on the figure,[267] suddenly move your hands, stretching the square up and down, when the frog will give a quick leap and spring straight upward in the most unexpected manner (Fig. 451).
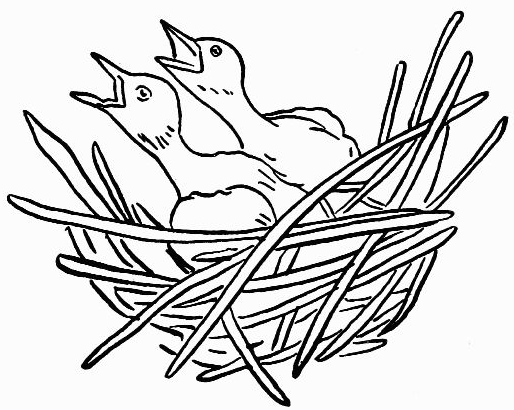 Fig. 452.—"We are hungry."
Cut the squares of material large enough to be easily handled; if made too small your hands will slip off the edges.
Have you ever seen little young birds in their nest? How they huddle together with their large yellow mouths open wide watching for their mother to return with their dinner! Trace the drawing (Fig. 452) on bias cloth and[268] you can make these little birds move and really stretch up their heads for their dinner as you slowly pull the cloth upward and downward (Fig. 453). Watch them. Then stretch the cloth out sidewise and see the birdlings quietly settle down in their nests with a "Thank you" and "Good-by." (Fig. 454).
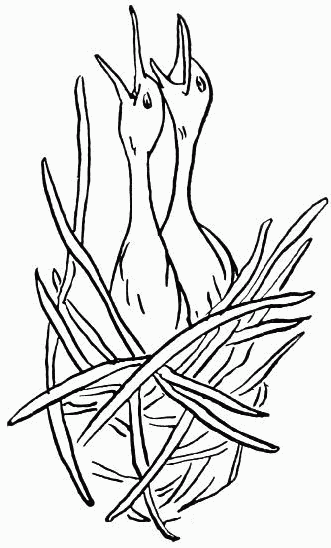 Fig. 453—"Here comes
our dinner."
Fig. 453—"Here comes
our dinner."
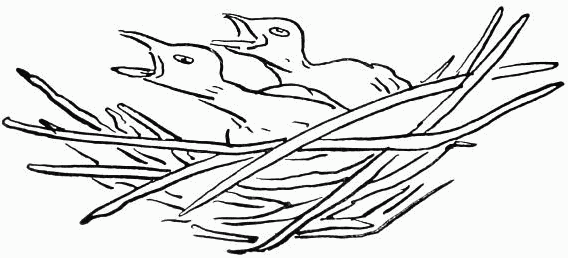 Fig. 454.—"Thank you"
and "Good-by."
Fig. 454.—"Thank you"
and "Good-by."
Trace the girl and boy (Fig. 455) on bias cloth as you did the[269] frog. Fig. 455 shows how the children appear when they meet. Pull the cloth sidewise and their faces change expression (Fig. 456); they do not seem to enjoy their chat. Now pull the cloth in the opposite direction, and in an instant their faces show surprise and dismay (Fig. 457).
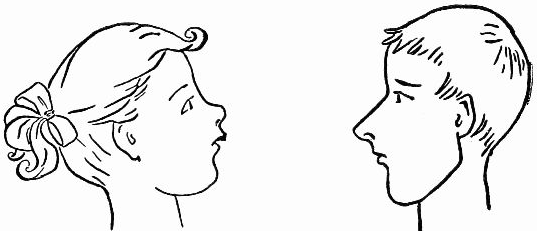 Fig. 455.—"I can beat you spelling."
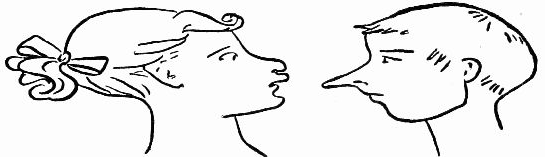 Fig. 456.—"You can't, either." "I can, too."
 Fig. 457.—"Oh! Oh! We are
both at the foot of the class."
Fig. 457.—"Oh! Oh! We are
both at the foot of the class."
 Fig. 458.—D O.
I wonder if you ever attended a concert where the tenor had difficulty in reaching his high notes, where he fairly seemed to rise up on his toes in his efforts to attain the notes as his voice ran up the scale, and everyone in the audience sympathized to such an extent that they, too, felt like rising and stretching up their heads in search of the difficult note. Such a tenor is shown at Fig. 459. Trace him on bias cloth and pull the cloth out sidewise (Fig. 458); then, beginning with the lower note, do, slowly sing the scale as you leisurely pull the cloth upward and downward at the same time. When you come to sol the face should be like Fig. 459, and as you continue[271] singing and stretching the cloth, the tenor should resemble Fig. 460 when you reach your highest do. Though not a very high note it is the best he can do, and he looks very comical while his face is changing, his eyes and mouth opening wider and wider and his hair rising up straight on the top of his head.
 Fig. 459.—S O L.
The objects which are here illustrated may be replaced by others with equally amusing results; any animals, such[272] as goats, rabbits, camels, hounds, may be drawn on the cloth and then manipulated so as to afford the greatest amusement.
 Fig. 460.—D O.
You can have any amount of fun with the moving figures on your magic cloth if you will remember the important points, which we will repeat to be sure you understand. Have the squares of cloth for all the drawings sufficiently large to be easily manipulated. Draw the design clearly and distinctly. Draw it on the exact bias of the cloth; move the two sides of the cloth at precisely the same time. Move the cloth always with both hands spread out flat on top of the cloth. Place the cloth over a large piece of white paper that the picture may be plainly seen. Care should be taken to obtain soft cloth that will stretch readily. These diversions will afford fine sport for a quiet evening and will be enjoyed by the entire family. If painted the designs will be still more comical.
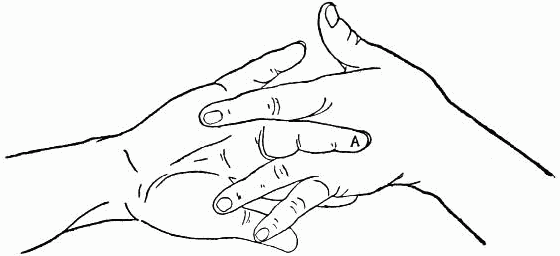 Fig. 461.—The queer little teeter.
You might cut out of writing-paper two small dolls and bend them so that they will sit on the teeter. The least bit of paste on the ball of the teeter finger of your left hand and some more on the nail of the teeter finger of your right hand will fix the paper children securely on the teeter, and you can make it go as fast as you please without danger of the dolls' falling off. Fig. 462 gives the pattern for the dolls; Fig. 463 shows how to bend them, and Fig. 464 gives a little paper girl seated on one end of the teeter.
Take the dollies off the[275] teeter and let them rest for a while and watch you build a church. Place your two hands back to back, with the ends of the fingers of the right loosely crossing those of the left hand; then, bring the palms of the hands together, fingers inside and thumbs outside and lo!
 Fig. 464.—Doll on teeter.
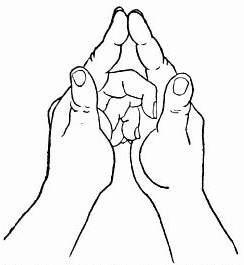 Fig. 467.—"Open the door and see all
the people."
Fig. 467.—"Open the door and see all
the people."
|
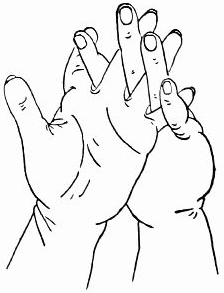 Fig. 468.—"Here are the people
climbing up-stairs,"
Fig. 468.—"Here are the people
climbing up-stairs,"
|
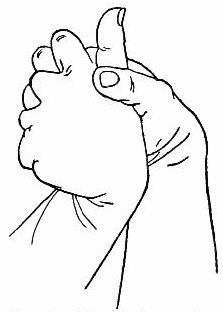 Fig. 469.—"Here is the preacher
who for them cares."
Fig. 469.—"Here is the preacher
who for them cares."
Leaving the hands in this position, turn your two elbows outward and down, which will bring your hands up; slide your right thumb outside and around your[277] left thumb, the left thumb will then be the minister and, though you cannot see them, the fingers clasped inside the hands are the people, but you can see the thumb, preacher, standing up ready to talk to the people, and you may say, "Here is the preacher who for them cares" (Fig. 469).
If you want to form
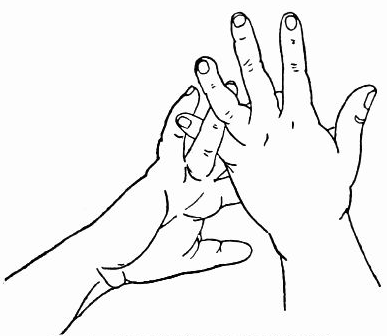 Fig. 470.—Preparing for man chopping wood.
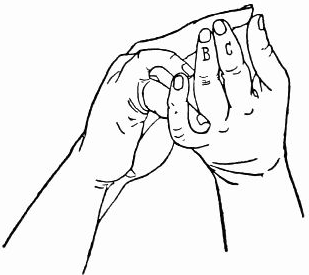 Fig. 471.—Man chopping wood.
To make a
The four fingers working at the same time make it quite lively, but you will find that if the man chops fast, the children will pick the chips very quickly, and if the man works slowly the children will not hurry about gathering the chips. It will be very difficult for you to have the man chop slowly when the children are eager and quick at their task. The feat will be almost as hard as patting your chest with the left hand while you rub the right hand back and forth over the top of your little head. You will laugh to see the left hand rub, when you told it to pat; the poor little left hand tries to mind, but just as soon as its twin brother, the right hand, begins rubbing, the left hand has to stop patting and rub too.
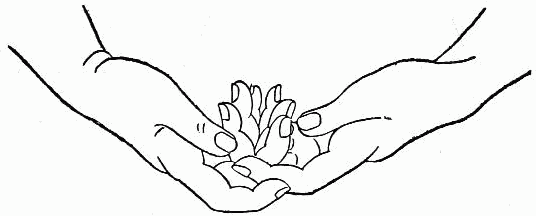 Fig. 472.—"Here are my mother's knives and forks,"
Lay your two hands down showing the palms; lace the fingers together and say,
(Fig. 472). Of course, the fingers are the knives and forks. Turn your hands over while the fingers remain in place, bring the wrists down and say, "Here is my father's table" (Fig. 473). Raise the two first fingers, bringing their[280] tips together, and say, "Here is my sister's looking-glass" (Fig. 474). Then raise your two little fingers and, rocking the hands from side to side, say, "And here is the baby's cradle" (Fig. 475).
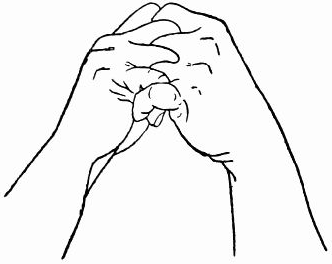 Fig. 473.—"Here is my father's table,"
There is another little finger game, which we will call
 Fig. 474.—"Here is my sister's looking-glass,"
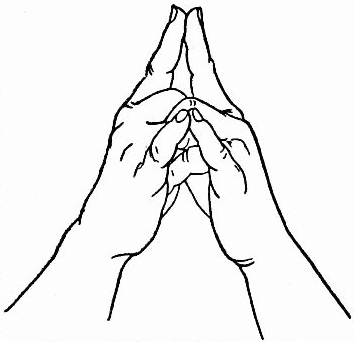 Fig. 475.—"And here is the baby's cradle."
Dampen two bits of paper and press one down tight on the nail of the first finger of your right hand and the other on the nail of the first finger of your left hand. The two pieces of paper are the two blackbirds. Now hold your first fingers, on which the birds are resting, out stiff and double up the remaining fingers; then let your father see how well you have taught these little pet birds to mind, for they will do exactly as you say, going and coming at your command. Place the tips of[281] your two first fingers on a chair, which you must pretend is a hill, and raising first one finger to make the bird fly, then the other, keep the pets flying up and down while you repeat these lines:
As you say the last line raise the right finger up and back over your right shoulder; while there, quickly bend down the right finger with Jack on it and stiffen out the second finger in its place. Bring your right hand down with Jack hidden and put the empty second finger on the chair instead of the first. The bird will be gone and lonesome little Jill will perch on the hill with no playmate, so you must let her go too. Repeat these words, "Fly away, Jill," and make her disappear as you did Jack, bringing down the empty second finger of your left hand and your father will find that both birds have gone; but you may make them return by saying, "Come back, Jack," as you raise your right hand and close down the second finger while you straighten out the[282] first and bring it again to the chair with Jack upon it. Call Jill also that Jack may have some one to sing to, and as you say, "Come back, Jill," bend down the second finger and straighten out the first one with Jill on it, and let her fly down to Jack. You may repeat the lines again and again, making the pets come and go.
You can play
Were I with you now we would play
I would place my right hand down flat on my lap with the back of the hand uppermost, and say to you, "Lay your right hand out flat on top of mine;" then I would place my left hand over yours, and you would cover mine with your left hand. That would make four hands all piled up in a tower; but the moment your left hand came down on top of mine I would pull my right hand out from under the tower and lay it on top, covering your left hand; then you would hurry to take your right hand from under the pile and place it on top. So we would continue to play, always drawing the hand out from the bottom of the pile and placing[283] it on top until we were able to build the tower very rapidly, and, when either of us took too long a time to draw her hand out from under the pile, a forfeit would have to be given to the other.
 Fig. 476.—The famous five little pigs.
Ask your older sister or brother to trace the
(Figs. 477, 478, 479, 480, 481) on unruled white writing-paper and cut them out. The strip of paper extending from one side of each little pig must be made into a ring (Fig. 482) to fit the end of one of the five fingers on your right hand (Fig. 476). Begin with "This little pig went to market" (Fig. 477) for the thumb, next, "This little pig stayed at home" (Fig. 478) for the first finger, then "This little pig had roast beef" (Fig. 479) for the second finger, and "This little pig had none" (Fig. 480) for the third finger; to the little finger belongs (Fig. 481) "This little pig said wee, wee, all the way home." Adjust the bands until they fit perfectly, then paste the end of each band under the free side of the attached pig. If the bands are too long they can be cut to proper length. Fig. 482 gives the wrong side of a pig with band curled around and pasted on back of pig, and Fig. 476 shows how the Five Little Pigs will look when on your fingers. If you can give each little pig a flat wash of pink water-color paint, and when dry ink the outlines, they will appear more real. After you have played with the wee pigs, try
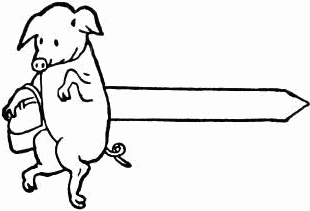 Fig. 477.—"This little pig
went to market,"
Fig. 477.—"This little pig
went to market,"
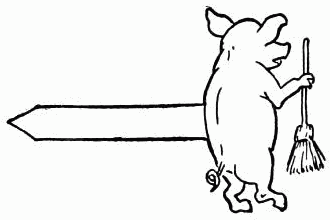 Fig. 479.—"This little pig
had roast beef,"
Fig. 479.—"This little pig
had roast beef,"
 Fig. 478.—"This little pig
stayed at home,"
Fig. 478.—"This little pig
stayed at home,"
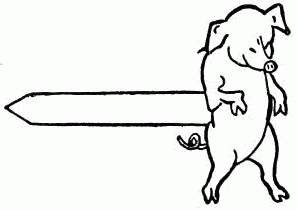 Fig. 480.—"This little pig
had none,"
Fig. 480.—"This little pig
had none,"
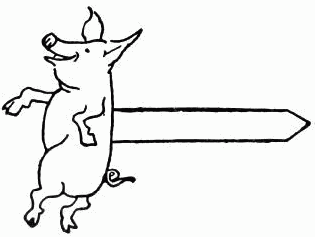 Fig. 481.—"This little pig said
wee, wee, all the way home."
Fig. 481.—"This little pig said
wee, wee, all the way home."
 Fig. 482.—Ring of
paper on pig.
Fig. 482.—Ring of
paper on pig.
(Figs. 483, 484, 485, 486, 487), and ask some one to fold
paper into hats for your finger-heads, as shown in Figs. 488,
489, 490, 491, 492. You might ask to have the various children's
heads painted, giving each girl and boy different[286]
[287]
colored hair—black, brown, red, deep yellow, and pale
yellow. If the hats are of colored tissue-paper the effect
will be fine, especially if a bit of gay cloth be wound around
each finger for clothing. Then the five alive little dolls can
bow to each other and dance.
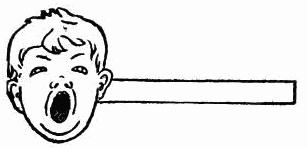 Fig. 483.—"I am sleepy."
|
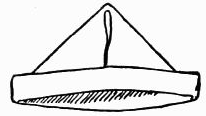 Fig. 488.—Sleepy boy's hat.
|
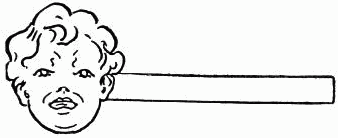 Fig. 484.—"Where is my hat?"
|
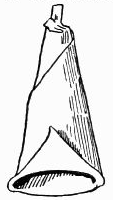 Fig. 489.—Crying boy's hat.
|
 Fig. 485.—"I think you are funny."
|
 Fig. 491.—Laughing boy's hat.
|
 Fig. 486.—"Will you play with me?"
|
 Fig. 490.—Hat for little girl who
wants to play.
Fig. 490.—Hat for little girl who
wants to play.
|
 Fig. 487.—"I'll give you a good time."
|
 Fig. 492.—Little girl's hat.
|
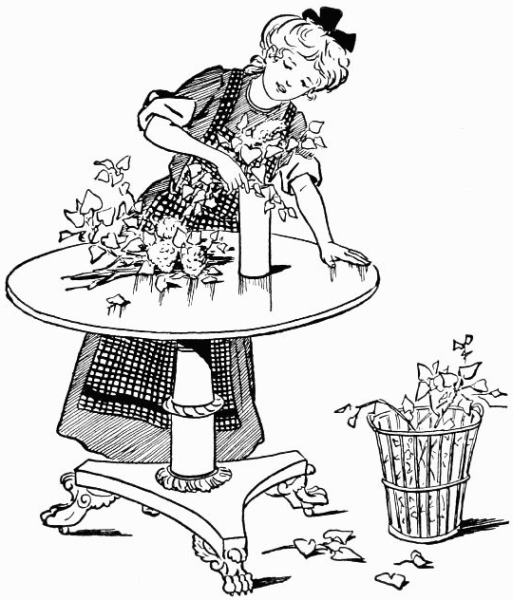 Arranging the flowers.

You may crowd a room with the rarest and most expensive flowers, but so arrange them that more than half of the effect of their beauty is lost; and you may have only one flower, but if it be the right kind of flower in the right kind of vase, and placed in just the right spot, your room will appear abundantly decorated and be filled with the beauty and sweetness of the one blossom.
In a house where good taste always prevailed there stood, one day, on the uncovered top of a grand piano a tall, colorless, transparent vase which held just one long-stemmed American Beauty rose. The queenly flower with[290] its stem showing through the glass and the few green leaves attached were all reflected in the highly polished piano, and the effect of the colors reproduced in deepened, darkened tones by the rich rosewood was indescribably lovely. There were no other flowers and, though the room was a large one, none were needed. One's eyes fell immediately upon the rose when entering, and lingered there with no wish to be drawn away by lesser attractions.
It was not merely a happy accident that placed the one flower in its prominent and effective position, but the experience and unerring taste of the daughter of the house.
Few flowers look well packed tightly together and all are better for loosening up a trifle. Purple violets are almost the only flowers that will bear crowding, though many think wild daisies adapted to this arrangement, and spoil their beauty by making them into hard, tight bunches. A good rule is to follow Nature as far as possible in this[291] direction. Flowers that grow singly and far apart, should not be crowded, but those which grow thickly clustered may be more closely massed.
It is almost always well to
While flowers of different varieties seldom look well together, you may sometimes add much to its beauty by giving a flower the foliage of another plant, and a trailing green vine will often be just the touch needed to soften a stiff arrangement.
Asparagus fern is an airy and feathery green, but you must use it with discretion, as it is suitable only for fragile, delicate flowers in very loose arrangements. Other ferns, though often used, do not really combine well with any flowers, they are too distinctly another species of plant and hold themselves aloof in their separateness. The wild oxalis, wood-sorrel, or, as the children call it, sour grass, has pretty delicate leaves that look well with sweet-peas and other small flowers. As a rule, a flower's own foliage suits it best, however, and you may be certain not to offend good taste by keeping to it.
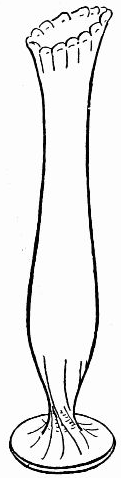 Fig. 493.—An inexpensive
clear
glass vase.
Fig. 493.—An inexpensive
clear
glass vase.
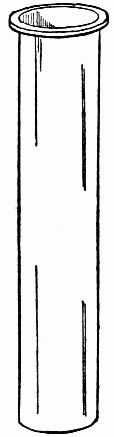 Fig. 494.—The olive
bottle.
Fig. 494.—The olive
bottle.
In the careful arrangement of flowers your object should always be to bring out their whole beauty, and let all else be secondary to that. One vase, though beautiful in itself, may not be at all suitable for holding flowers, while another, of no value as an ornament, will display them to their best advantage.
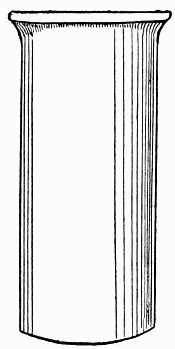 Fig. 495.—A cylindrical jar.
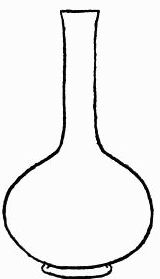 Fig. 496.—Another good
shape.
Fig. 496.—Another good
shape.
Do not use ornate or highly decorated vases. No design should conflict with the natural flowers, and the shape of the vase should also be simple.
Cylindrical jars, like Fig. 495, are suited to heavy clustering flowers like the lilac and also to the large chrysanthemums. Fig. 496 is another good shape; but avoid vases like Fig. 497 with a neck so small it will admit only one or two stems, while the bowl is much too large for the few flowers standing stiffly erect.
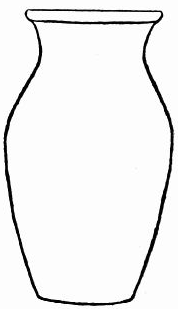 Fig. 497.—Avoid vases
like this.
Fig. 497.—Avoid vases
like this.
Place short-stemmed flowers, like the pansy and violet, in low jars or bowls, and it is not necessary to have them lie flat on the water. A friend of mine has invented for her own use this little
 Fig. 498.—At
each end of the
wire make a
loop.
Fig. 498.—At
each end of the
wire make a
loop.
 Fig. 499.—Bend
the loops over.
Fig. 499.—Bend
the loops over.
With an old pair of shears, or a wire-cutter, snip off a dozen or more pieces of copper wire of varying lengths between ten inches for the longest and five for the shortest piece. At each end of every wire make a loop like[295] Fig. 498; bend the loops over (Fig. 499), then fasten all the pieces to a brass curtain-ring by twisting each piece once around the ring at the centre of the wire (Fig. 500). Bunch the wires together and stand the lifter in a bowl of water; put your flower-stems through the wire loops, as in Fig. 501, and the wires under water will look like the flower-stems, the loops being hidden by the blossoms.
If you can take
Bloodroot will keep a long while if the roots are not disturbed, and one of the loveliest flower-pieces we ever had in the house was a gray-green Japanese bowl filled with the growing bloodroot. The blossoms stand closely together and a small bowl will hold quite a number.
Wood anemones, hepaticas, and wild violets are all adapted to this temporary transplanting. I have kept ferns[297] in this way for several weeks and the centre-piece for the table in our mountain camp was at one time a clump of maiden-hair fern in a small china bowl, which lasted fresh and perfect many days. As there can be comparatively little soil with the roots of these wild flowers, they must be kept very damp all the while, and ferns, especially, will do best when set in a pan or bowl of water.
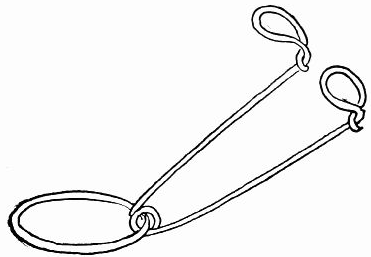 Fig. 500.—Fasten the pieces to a brass curtain-ring.
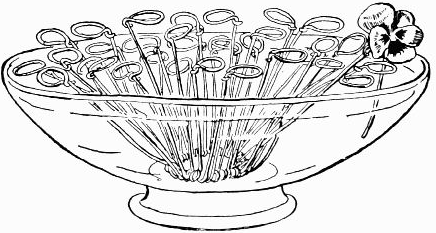 Fig. 501.—Put the flower stems through the wire loops.

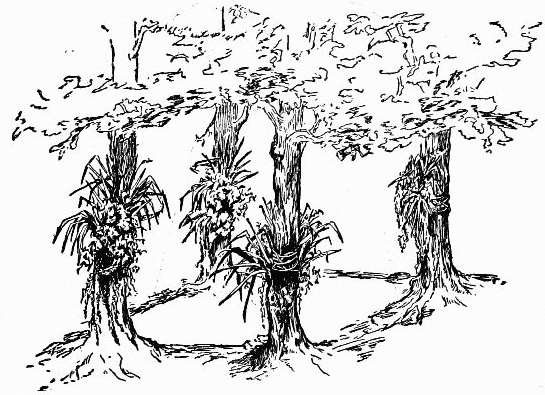 Fig. 502.—Florida playhouse.
Similar playhouses may be built by children in any spot where trees grow within a short distance of each other. In place of tropical decorations the young builders can use the[299] most ornamental bouquets within reach, selecting foliage and flowers which will keep fresh at least for a few hours.
If trees are not available, make the open-air
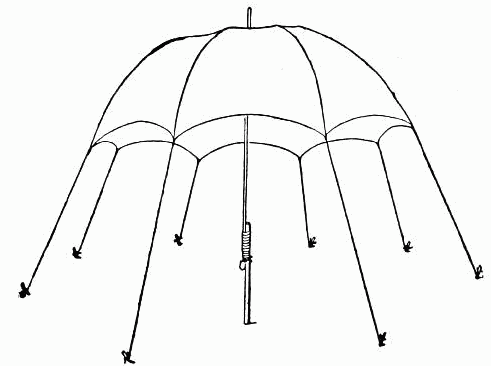 Fig. 503.—Framework for umbrella playhouse.
Tie a strong piece of twine securely to the end of each of the ribs and tie the loose end of each piece of twine around the notch cut in a pointed wooden peg a short distance from its top. This will give an umbrella with a fringe of dangling pegs. Open the umbrella and fasten the handle securely to a long, sharp-pointed stick, binding the two together with strong twine. First run one end of the twine down the length you intend binding, allowing enough to tie[300] at the bottom; then commence binding at the top over all three—the umbrella handle, the twine, and the stick. Wind the string around very tight, and when you reach the bottom, tie the twine you hold to the loose end of the length under the wrappings. Examine carefully and be sure the handle does not slide or twist on the stick; then push the point of the stick down into the ground at the place decided upon for the playhouse. If you are not strong enough to erect the house by yourself, ask some companions to lend a hand and help sink the stick firmly in the earth. When this is accomplished stretch out each length of twine in turn and drive the peg in the ground (Fig. 503). You will need a wide ruffle on the edge of the umbrella of some kind of material full enough to reach around the[301] outer circle of pegs on the ground beneath its lower edge. The stretched twine will hold the ruffle out, forming an odd little playhouse with a smooth, round roof and drapery walls. Plait the ruffle and pin it on the umbrella with safety-pins; also fasten it at the bottom to each peg (Fig. 504). Newspapers pasted together and made of double thickness may be used for the ruffle, if more convenient, but be careful in handling the paper, as it tears readily. The[302] longer the pole the higher and larger will be your house, for the strings also must be longer.
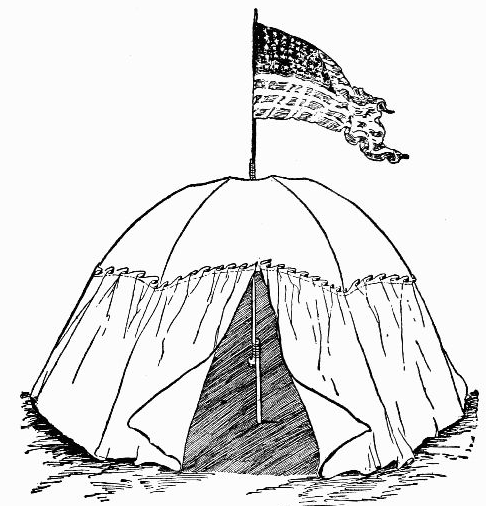 Fig. 504.—Umbrella playhouse.
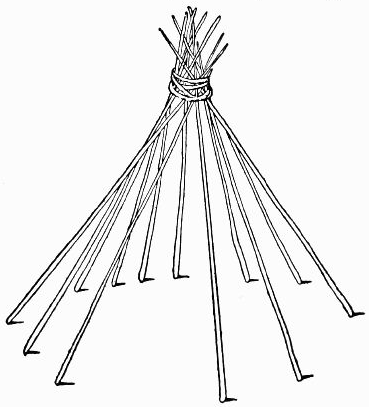 Fig. 505.—Frame for wigwam.
When you want to play Indian and pretend you live in the Wild West, your home must be
Get a dozen slender poles about as large around as a broom-stick, and twice and one-half as tall as yourself. Tie three poles securely together near the tops and stack the others around the first three as a foundation or framework for the house. Settle each pole firmly in the ground, forming a circle, and bring the tops together at the centre, where each pole should form a support for the others, and all should lean against and across each other; then bind[303] all the poles together at the top of the framework (Fig. 505). Covers of real wigwams are usually cut to fit the framework and often decorated in savage fashion. Sometimes they are composed of skins of wild beasts. If you can make yours in Indian style, it will be very realistic and lots of fun. Find some inexpensive dull-brown or gray outing cloth or Canton flannel and sew several lengths together. Fig. 506 gives the pattern of a wigwam covering, and the dotted lines enclosing B-B-B-B show how the breadths are sewed together. C is the chimney-opening where the poles come through at the top. O is one of the flaps held back with an extra pole; D, one of the lower front sides folded over for the door-way. The dotted line A indicates the slit to be cut for the chimney-flap. The two chimney-flaps can be brought together for protection when necessary. Along the curved edge of the blank side of the diagram (Fig. 506) holes are shown for the wooden stakes to be used in pinning the wigwam to the ground. The holes must be continued along the entire edge of the covering.
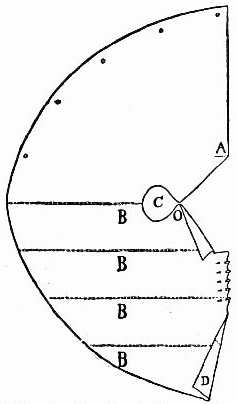 Fig. 506.—Cover for playhouse wigwam.
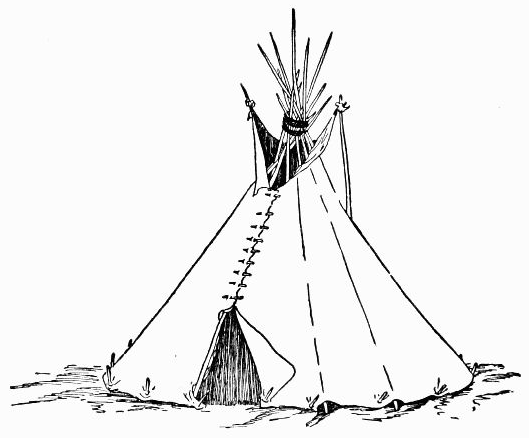 Fig. 507.—Your wigwam playhouse.
With a large-sized Japanese umbrella, a breadth of cloth, a stick, and some straw you can make an
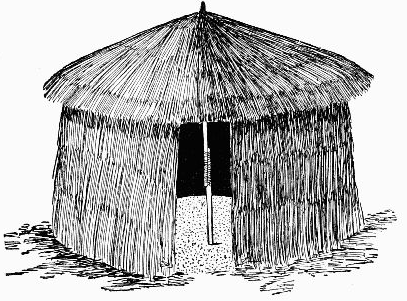 Fig. 508.—African hut playhouse.
Take the straw or hay and divide some of it into bunches twelve inches in length. Tie these all together in a long row, forming a straw fringe. Sew the fringe around the edge of the umbrella with a coarse needle and thread, allowing it to hang over and down. Overlap the first row with another straw fringe and continue to sew on row after row until the top is reached and the umbrella entirely covered; then fasten the handle securely to a sharp-pointed stick and plant it firmly in the ground. Measure the distance around the outer edge of the umbrella, not including the straw thatch, and cut the cloth long enough to reach around, leaving an open space for the door-way. Use more straw to[307] cover the cloth completely and sew the straw on in overlapping layers lengthwise of the material. With safety-pins fasten the wall around the inner edge of the umbrella, pinning the cloth to little loops of tape you have tied at intervals over the ribs of the umbrella (Fig. 508).
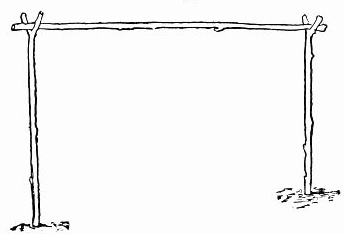 Fig. 510.—Framework ready for floral tent.
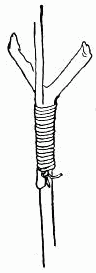 Fig. 509.—Binding
branch on
forked stick.
Fig. 509.—Binding
branch on
forked stick.
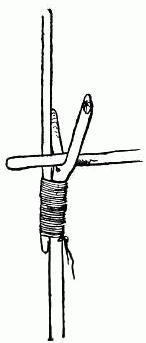 Fig. 511.—Building
the
floral tent
playhouse.
Fig. 511.—Building
the
floral tent
playhouse.
The
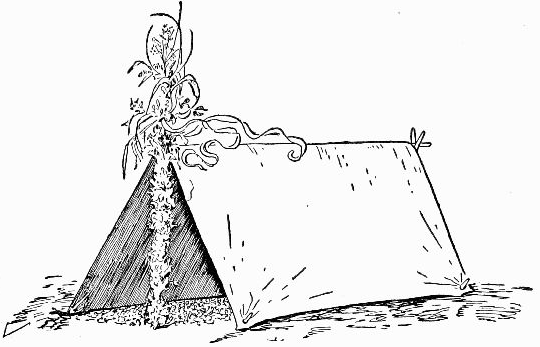 Fig. 512.—Floral tent playhouse.
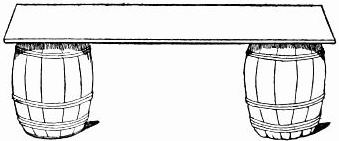 Fig. 513.—The counter for your store.
On each end of the counter nail an empty wooden box. Stand the box on one end and let the open part face backward; put your hand inside and drive a few nails through box and counter to fasten the box securely[309] in place. Do the same with the second box and your counter will be ready for
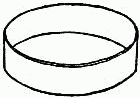 Fig. 514.—Tin cover for
scale.
Fig. 514.—Tin cover for
scale.
|
 Fig. 515.—Tin cover
pierced with three
holes.
Fig. 515.—Tin cover
pierced with three
holes.
|
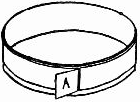 Fig. 516.—Band for
measuring holes.
Fig. 516.—Band for
measuring holes.
|
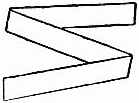 Fig. 517.—Folded paper
for measuring.
Fig. 517.—Folded paper
for measuring.
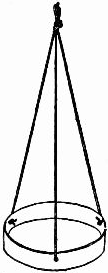 Fig. 518.—Strings
tied on tin lid.
Fig. 518.—Strings
tied on tin lid.
These are very necessary in weighing different articles.
They can be made of the round covers of two large-sized
baking-powder or cracker cans (Fig. 514). Have the covers
exactly the same size, and punch three holes in the rim of
each at equal distances apart (Fig. 515). To obtain the exact
measurements for placing the holes, take a strip of paper
and wrap it smoothly and tightly around the outside of the
rim of the cover. Let the paper be a trifle
narrower than the rim of the lid, and be sure
to fold over the long end exactly where it
meets the first end (Fig. 516,
A). Remove the paper, cut
off the fold, and again try the
strip on the cover. See that
the measurement is perfectly
correct, then take the paper
off and fold it into three equal
sections, making two folds and two ends (Fig. 517), and for the third time wrap the strip of
paper around the cover rim. Mark the tin at
the point where the ends meet, and where the[310]
two creases in the paper strike the tin; this will give three
marks on the rim equally distant from each other. Drive a
wire nail through
the tin rim at the
three marked places
to make the necessary
holes (Fig. 515);
then tie knots in the
ends of six pieces
of string of equal
length, and thread a
string through each
of the three holes in
each of the lids. Fasten the three strings on each lid together
at the top (Fig. 518). Cut a notch at each end of a
stick and tie the scales in place (Fig. 519).
Make two notches in the centre of the stick,
one on the top, the other on the bottom, and
tie a string around the stick at the centre
notches by which to suspend the scales.
This centre string may be fastened to an
overhanging tree-branch, or you can make a
support for it. Nail an upright stick to the
end of the counter and box, allowing it to
come a little below the board; then nail
another upright stick in the same way to the
other end of the counter. Notch the tops of
the uprights, lay a long, slender stick across
from one to the other and tie the centre string
of the scales on the cross-stick (Fig. 520).
Fig. 521 gives an end view and shows exactly
how to nail the upright on the box and end of
board. Use different-sized stones as weights;[311]
[312]
a small one for a quarter of a pound, one twice as large
for a half pound, and another twice the size of the last for
a whole pound.
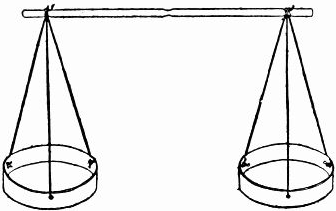 Fig. 519.—Scales of tin can lids.
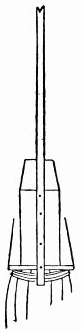 Fig. 521.—Nail upright
on box and
end of board this
way.
Fig. 521.—Nail upright
on box and
end of board this
way.
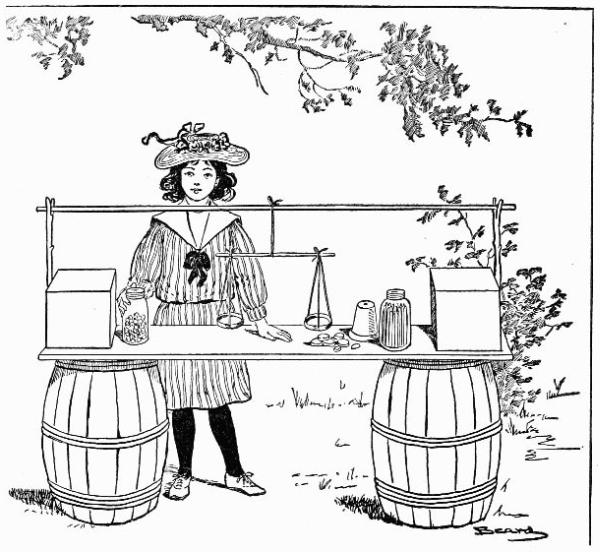 Fig. 520.—Take your place behind the counter and keep store.
Find a number of empty boxes in which to keep
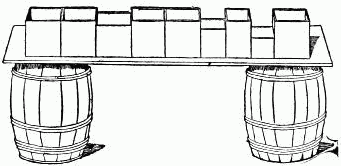 Fig. 522.—Supplies for your store.
Acorns make fine nuts. Gather a quantity of them, and for cabbage tie a number of corn-husks together, or grape-vine or hollyhock leaves; any kind of large leaves will answer the purpose. Take a small, short stick and with a string wind the ends of the leaves, one leaf at a time, on the stick, folding the first leaf opposite to and inside the second, the second in the third, and so on, always allowing each succeeding leaf to overlap the last until the cabbage-head is large enough; the resemblance to the real cabbage will be remarkable. Spinach may be made of small leaves. For asparagus pick a number of long, slender seed stems of the plantain. Short, slender sticks placed in a glass jar may[313] serve as sticks of candy, licorice, or licorice root. You can utilize various grasses, leaves, roots, and seeds in many ways.
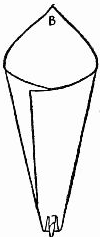 Fig. 523.—Newspaper
cornucopia.
Fig. 523.—Newspaper
cornucopia.
When selling groceries you will need
Flower-pots or tin cans, large and small, may serve for pint and quart measures. Always give generous measure and full weight when selling your supplies. This item is very important; remember it every time you make a sale, for the act will help to build up true ideas of justice and honesty.
Now make
 Fig. 524.—Paper for your
pocket-book.
Fig. 524.—Paper for your
pocket-book.
After printing all money necessary, cut it out ready for use and put the change into
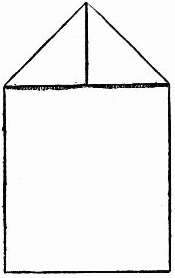 Fig. 525.—Fold down the two top
corners until they meet.
Fig. 525.—Fold down the two top
corners until they meet.
|
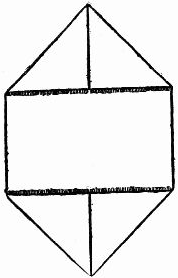 Fig. 526.—Fold the other two corners
in the same way.
Fig. 526.—Fold the other two corners
in the same way.
|
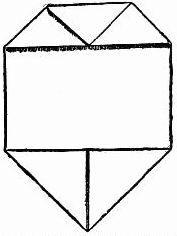 Fig. 527.—Fold top point to meet
centre of folded edge.
Fig. 527.—Fold top point to meet
centre of folded edge.
|
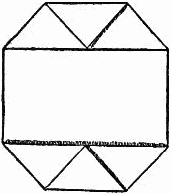 Fig. 528.—Fold bottom point to meet
centre of folded edge.
Fig. 528.—Fold bottom point to meet
centre of folded edge.
|
It requires only a few moments to make them. Cut a piece of smooth paper eleven and one-half inches long and seven wide (Fig. 524). Fold down diagonally the two top corners until they meet (Fig. 525); fold the other two corners in the same way (Fig. 526). Fold the top point down to meet centre of folded edge (Fig. 527); do likewise with the bottom point (Fig. 528). Turn the top over and fold to centre (Fig. 529); bring the bottom up to meet the edge of the folded top (Fig. 530). Now fold back and under one of the sides (Fig. 531), fold under the other side (Fig. 532), and bend back lengthwise through[315] the centre until top and bottom meet (Fig. 533). Lay the pocket-book down on one side and the lower part will resemble Fig. 534. The lower portion of the sides O and P, Fig. 534, must be fastened together that the bottom may be tight and secure. Cut a strip of paper a trifle shorter than[316] the length of (Fig. 534), and insert it at the bottom by first folding the strip through the centre lengthwise, then sliding one edge in at O and the other in at P. Push the two sides of the strip well up in the pocket-book, and the bottom will be tightly bound (Fig. 535). Turn the pocket-book right side up, and you will find two nice, firm little pockets. Slip your finger in one pocket and pull out the point to serve as a cover (Fig. 536). Cut a short slit through one layer of the front of the pocket-book for securing the point of the cover when the pocket-book is closed (Fig. 537).
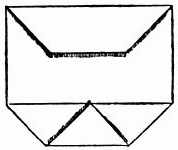 Fig. 529.—Turn the top over
and fold to centre
Fig. 529.—Turn the top over
and fold to centre
|
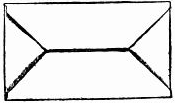 Fig. 530.—Bring the bottom
up to meet edge of folded top.
Fig. 530.—Bring the bottom
up to meet edge of folded top.
|
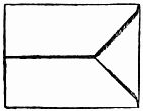 Fig. 531.—Fold back and
under one of the sides.
Fig. 531.—Fold back and
under one of the sides.
|
Divide the money among those taking part in the sport; then
Be careful in making change that there are no mistakes, and insist that each customer count the money received in change before leaving the store. If you wish to be very business-like, take account of all goods sold. Write down the articles with the measure or weight and the price received, as nearly as possible as accounts are kept in real stores. Should customers keep you too busy to put down the items yourself, let another person act as bookkeeper and cashier, and when you make a sale call out to[317] your assistant the item with amount sold and money received; for instance, should a boy purchase a pound of sugar, call to the bookkeeper: "One pound of sugar, ten cents;" then turn your attention to the next customer while your comrade writes down the amount. If the weather continues fine, you can leave your store undisturbed for several days in succession and conduct it after school hours.
 Fig. 532.—Fold under the other
side.
Fig. 532.—Fold under the other
side.
|
 Fig. 533.—Bend backward until
top and bottom meet.
Fig. 533.—Bend backward until
top and bottom meet.
|
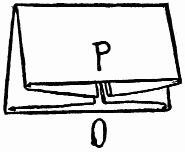 Fig. 534.—Showing under part
of pocket-book.
Fig. 534.—Showing under part
of pocket-book.
|
 Fig. 535.—Bottom of pocket-book
tightly bound.
Fig. 535.—Bottom of pocket-book
tightly bound.
|
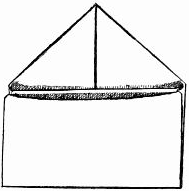 Fig. 536.—Pointed cover of
pocket-book.
Fig. 536.—Pointed cover of
pocket-book.
|
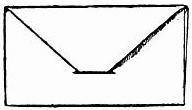 Fig. 537.—Pocket-book closed.
|
If you find that you need more and a greater
Do not forget to make bars of soap of moist clay or earth. Have the clay only soft enough to mould and cut with an old knife; when of the right consistency form the cakes, making them all the same size. Cut the edges smooth and even and lay the soap on a board in the sun to harden sufficiently to handle with ease.
You might also use moist clay for butter, and cut off portions as customers call for it, weighing the butter in your scales to obtain the exact quantity desired by each purchaser. Now try and think of other supplies you can make of the moist clay.
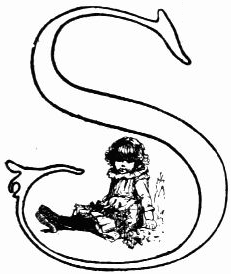
Carefully detach the rose petals one by one, beginning with the outermost and largest. Be cautious not to bruise or injure the fragile little things. Cut the sail and mast all in one piece from tissue-paper (Fig. 538). Fold the mast over twice, according to the dotted lines, that it may be stiff and able to stand erect. Bend the lower portion of the mast as in Fig. 539. Paste the inner sides of the fold together, and it will form a flat piece extending out on each[321] side of the mast (Fig. 540). Over the bottom of this spread the least bit of strong paste or glue and place the mast well forward on one of the largest rose petals. The portion of the petal which grew inside the calyx forms the front part or bow of the boat. Have the mast stand perfectly erect; if it is inclined to bend toward either side, straighten it and keep it upright. Before launching the vessel allow a few moments for the glue to dry, then lift the boat very carefully by the top of the mast with your thumb and first finger and set it down on the water, which must be without even a ripple. When once the boat is well launched the waves may come with slight risk of damage to the craft.
Let the first boat be of a large pink rose petal and have its sail of the same color.
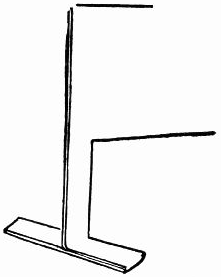 Fig. 540.—Form a flat stand.
 Fig. 541.—Green tissue-paper
sail and mast.
Fig. 541.—Green tissue-paper
sail and mast.
Take one of the green leaves and fasten on it a green sail different in shape from the white (Fig. 541). Place this boat with the other pretty craft on the miniature lake in the large glass dish or basin. Though not so fragile and delicate, the green bark is charming. Agitate and move the water as the boats lie at anchor, and watch the effect. Drifting, floating, and dancing, the fleet of tiny boats will begin to move: the mingling of the different tints and colors, the various beautiful reflections cast in the clear water by the little vessels with their spreading sails, form a delightful fairy-like spectacle. Fig. 542 gives only a faint idea of the actual scene, which is all color, life, fragrance, and beauty.
When you keep the dainty fleet on the water in-doors, it ought to remain in good condition for several days. If you wish to have the
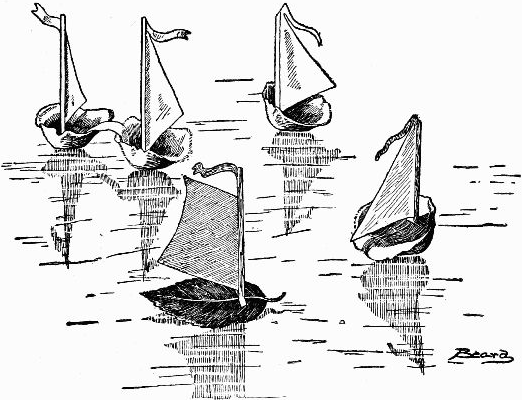 Fig. 542.—Fairy fleet of rose-petal boats.
You will need a little
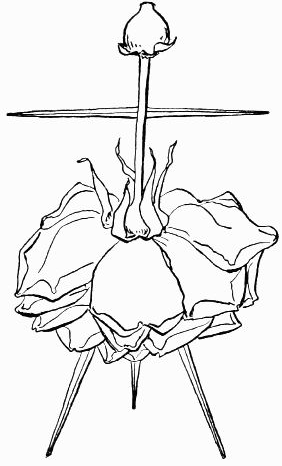 Fig. 543.—How to make the rose girl.
 Fig. 544.—The wide-awake rose girl.
Fashion the head from an old seed-vessel, which you will probably find still clinging to one of the rose-bushes. First make a small hole quite deep in the top of the seed-vessel; then push the end of the stem of the rose up into the head (Fig. 543). Run each toothpick arm through a green leaf and use a white or pale-pink rose petal for the girl's face (Fig. 544). Pin the petal to the head with four rose thorns, using two for the eyes, one for the nose, and one for the mouth. Pin a rose petal on the top of the head for a hat. Turn backward two petals, without breaking them from the rose, to form the dress waist; pin or gum one petal to the arms and neck in front and the other to the arms and neck at the back. Then stick three wooden toothpicks in the top of the rose (Fig. 544); place the toothpicks so they will form a tripod,[325] two on a line across the front and the third a trifle back of and midway between the front ones. These three toothpicks will enable the rose girl to stand alone; the two foremost serve as legs and the other as a support. You can make feet of two green leaves stuck on the ends of the two front toothpicks (Fig. 544).
Perhaps the little rose girl would like
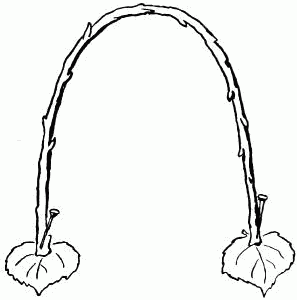 Fig. 545.—Bent
rose-stem for arch.
Fig. 545.—Bent
rose-stem for arch.
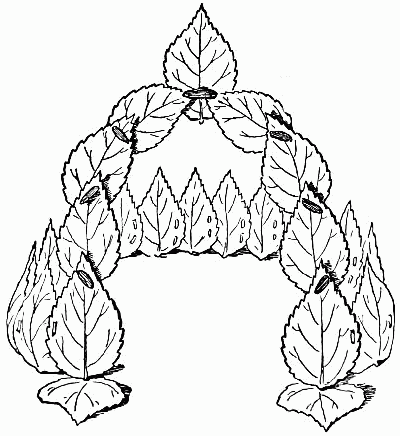 Fig. 546.—The rose-girl's garden fence.
 Fig. 547.—Peachblow
vase of rosebud.
Fig. 547.—Peachblow
vase of rosebud.
Of course you must
In addition to these things the rose girl must have a little
Draw a face with ink on your finger, and make a
 Fig. 550.—Rose-petal cap for
finger-head.
Fig. 550.—Rose-petal cap for
finger-head.
|
 Fig. 551.—Two cream-colored rose-petals
for part of pansy.
Fig. 551.—Two cream-colored rose-petals
for part of pansy.
|
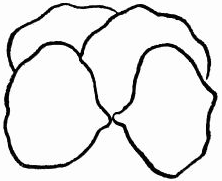 Fig. 552.—Pink rose petals partially
over light ones.
Fig. 552.—Pink rose petals partially
over light ones.
|
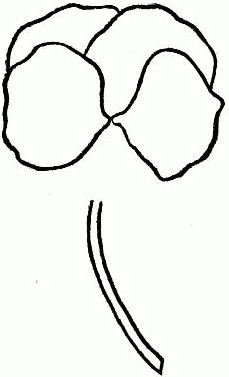 Fig. 553.—Pansy ready for last rose
petal.
Fig. 553.—Pansy ready for last rose
petal.
|
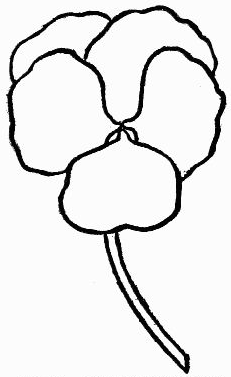 Fig. 554.—Pansy ready for green
leaves.
Fig. 554.—Pansy ready for green
leaves.
|
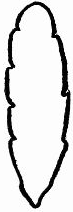 Fig. 555.—Pansy
green leaf cut
from rose leaf.
Fig. 555.—Pansy
green leaf cut
from rose leaf.
|
We have not enough rose petals to serve for a shower, as had a Roman emperor long ago when he made bushels of them rain down upon his guests from the ceiling of his banquet-hall, but we can collect sufficient
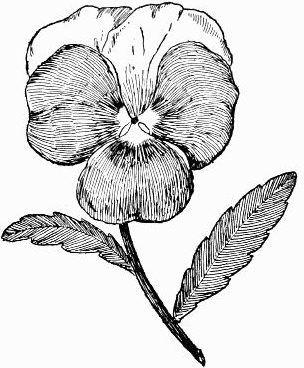 Fig. 556.—Painting of pansy made with rose
petals.
Fig. 556.—Painting of pansy made with rose
petals.
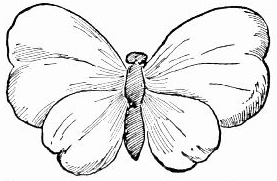 Fig. 557.—Red rose-petal wings and green
rose-leaf body.
Fig. 557.—Red rose-petal wings and green
rose-leaf body.
Rose butterflies do not look exactly like real ones, but they are very pretty, and you can readily paint one. Arrange two large red rose petals for the front wings (Fig. 557); slightly over-lapping the lower edges of these lay two smaller white petals, and make the body of a green leaf cut like Fig. 558. Gum it down over the lengthwise centre of the group of petals.
Under the tip of each point slide the inner end of a rose petal, any color you choose. Between each two rose petals gum a green leaf (Fig. 559). Now take away the star centre and use rose petals in its place, and you will have a "rose window" design. Try alternating red and dark-red velvet petals, or use all yellow petals. In this way you may form a variety of patterns painted with roses.
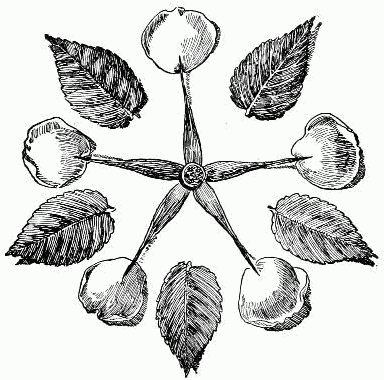 Fig. 559.—Conventional design painted with roses.
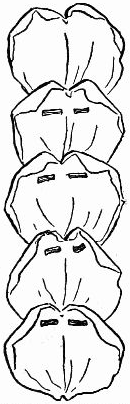 Fig. 560.—Rose petals
pinned together for
wreath.
Fig. 560.—Rose petals
pinned together for
wreath.
To make
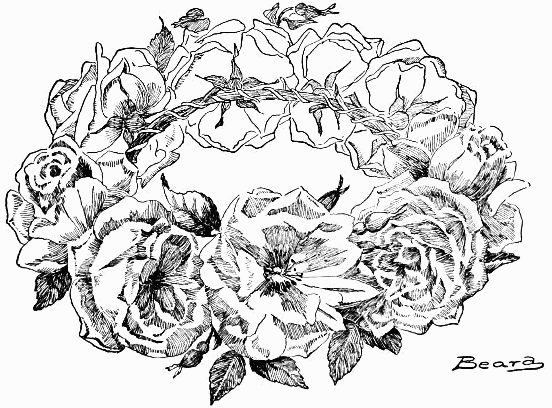 Fig. 561.—Wreath of roses.
Try to find some new beauty in every rose you see this summer. Write it all down, and the following June you will discover still other beauties to jot in your rose book.
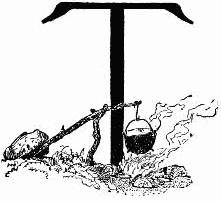
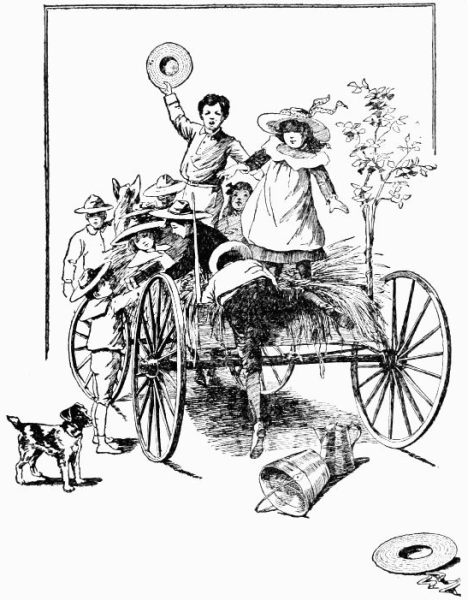 Going on a straw-ride picnic.
June is the ideal time for picnics; in this month there are so many perfect days, when none should work, but all should play, that one is prompted to plan for a little fun and frolic, including an informal
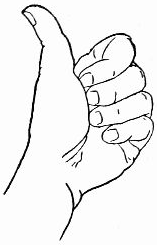 Fig. 562.—Simon says
"Thumbs up."
Fig. 562.—Simon says
"Thumbs up."
Should the ride be more than a mile or two, the way may be beguiled with gay songs and choruses, or games in which all may join while sitting quietly in their places. Such a game is the old one
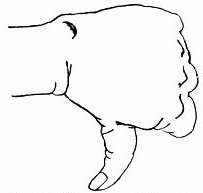 Fig. 563.—Simon says "Thumbs
down."
Fig. 563.—Simon says "Thumbs
down."
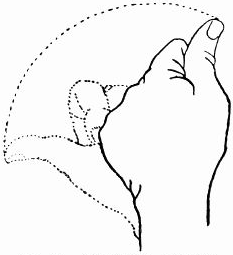 Fig. 564.—Simon says "Wiggle
waggle."
Fig. 564.—Simon says "Wiggle
waggle."
The leader proceeds with "Simon says, 'Thumbs up,'" then up must go all thumbs, and when "Simon says 'Wiggle waggle,'" all move their thumbs from side to side while the hand rests in position (Fig. 564)—dotted lines show the swing of the thumb. If any neglect to do so it counts one against him; next comes the order "Stop"; the thumbs continuing to wag, the leader calls "Simon says 'Thumbs stop.'" The leader may command a change in the position and movement of the hand and thumb according to his fancy, but the hand cannot be unclasped nor the thumb folded down during the game. Three failures count the player out, and he must then content himself with watching the others until the play ends. The leader, being privileged, follows all directions in order to confuse the others. The game is short, consisting of ten commands from the leader. It may be played with sides, the group dividing into two parties; the young people at one end of the wagon form one side, while those at the other end constitute the other side. The party losing fewest players wins the game.
Another interesting amusement, easily played as the wagon rolls along, is the
If more diversions are needed during the drive, try the following
When the picnic grounds are reached and all have had time to look about, everyone will be ready for exercise. So prepare for a grand rush after one of the group chosen as
After resting from this game bring the rope from its hiding-place in the wagon, also the long board stowed away flat against the side of the vehicle, and in less time than you imagine the rope can be securely fastened on a strong branch of a tree to serve as
If the players are of unequal weight, the heavier one shortens his half of the plank by shoving it along farther across the fence or log, preserving in this way the equilibrium. To start the "Teeter-tarter" one of the players should give a slight spring upward with the feet while retaining his sitting posture on the board.
Prepare
 Fig. 565.—Picnic salt-box.
The lunch should have been packed in paper boxes, to avoid the care of baskets. In the first box might be the loaves of fresh uncut bread and a tin baking-powder can of sweet butter, the bread to be cut into thin slices, buttered and prepared for sandwiches of various kinds. These can be easily made by adding either the chopped nuts that have been packed in a separate small box, or crisp lettuce leaves which have been detached from the stalk, well cleaned and sprinkled with fresh water, then carefully placed by themselves in a box lined with waxed or oiled paper such as is[340] used by confectioners for sweetmeats. Or the sandwiches may be of sliced ham, tongue, roast-beef or lamb, each kind of meat being folded in waxed paper and packed in its own box. When the different articles of food are managed in this way they are much more attractive and palatable, each retaining its own flavor, and there is no danger of their being mashed and jumbled together, as happens too often when the dinner is indifferently arranged and put together in a thoughtless manner.
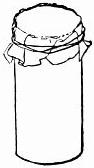 Fig. 566.—Paper over the
top.
Fig. 566.—Paper over the
top.
The best way to carry salt, pepper, etc., is to put each into a small paper box, the salt in one of cylindrical form, the lid of which has previously been punched full of holes with the aid of a tack or a slender wire nail (Fig. 565). The pepper can be in a smaller and differently shaped box, and sugar in a box of still another size and shape, that there may be no chance of mistaking one for the other and covering the meat with sugar or trying to sweeten the lemonade with salt. The perforations in the lid of the pepper-box must be quite small; punch them with a large-sized needle. After the boxes are filled the lids can be fastened securely with strong paste and, before they are packed, may have paper tied down over the tops (Fig. 566), to preclude all chance of the contents sprinkling out during the journey.
If mustard is needed, it should be prepared at home and carried in a small, wide-mouthed bottle. Mayonnaise dressing is best conveyed corked up in a small stone china jar, such as is often used for jam.
Boiled, fried, or broiled chicken is always acceptable at[341] a picnic dinner; the chicken must be well cooked, cut into pieces and each portion wrapped in a separate piece of waxed paper, then packed together in a box. Cold-boiled asparagus or string beans, with fresh lettuce and mayonnaise dressing, may take the place of a meat salad if desired.
Fruit is very refreshing and always welcome if consisting of fresh berries, cherries, etc.; pack it in the same manner as lettuce, omitting the sprinkling and washing.
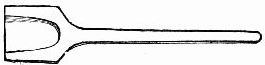 Fig. 567.—Picnic wooden-spoon.
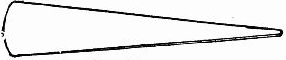 Fig. 568.—Flat sticks to use as spoons.
Of course, young people do not care for coffee, but the grown ones would like it, and they must be remembered. Grind the coffee and mix with raw egg; it may then be carried in the tin coffee-pot, the coffee to be made after the grounds are reached. If cake is taken, do not let it be rich; sponge or plain cup-cake, made in layers with apple-sauce between, is best.
As far as possible have the table equipment of paper, that it may not be necessary to carry it back home. A tablecloth composed of large sheets of smooth white wrapping-paper will answer the purpose very well. Paper plates such as are used by bakers, make excellent substitutes for china ones and are the very thing for outing parties. Spoons may be home-made, whittled of wood; should the bowls of the spoons prove too difficult to manage, make them like small shovels (Fig. 567). If time will not allow of this, flat, smooth sticks larger at one end than the other (Fig. 568) may take their place. Knives are not absolutely necessary. Only one need be taken, but that must be of good size and sharp, to be used for cutting[342] bread. It is a mistake to carry fine table linen or silver, they always prove a great care and are apt to be injured or lost, but not being skilled in the art of eating with chopsticks, like the Chinese, you will have to be supplied with forks. Take barely enough for the purpose and have them of the most inexpensive quality; then it will not matter if one or two happen to be lost. Only a few cups will be required and no saucers; the company can take turns using the cups. One item more—a pail for the water.
A small
After luncheon gather all the boxes and paper and burn them in the camp-fire, being careful not to put too much on the fire at a time and waiting until one portion is burned before adding more. The paper should be rolled in small, tight balls to prevent a possible breeze from wafting it in the air.
All can join in feeding the fire and enjoy
"The Prince, arrayed in gorgeous and rich apparel, was about to enter his crystal palace when——"
A short, quiet time with jack-stones, played with small stones found on the ground, will allow of sufficient rest before participating in the exhilarating sport of
Only a short while will remain before it will be time for returning home, a few moments more for tumbling about close to Nature; then comes the ride back home in the big wagon filled with gay and happy girls and boys.
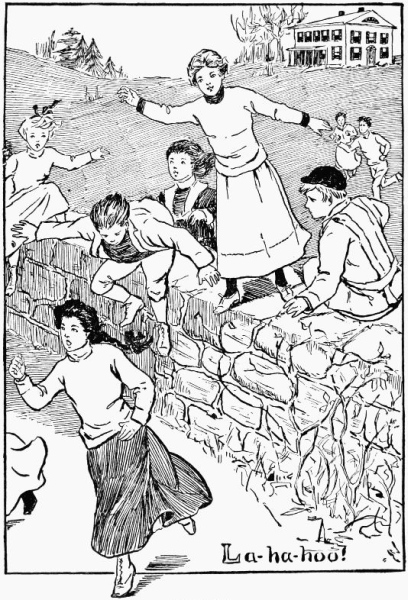 Over Fences.
Select a convenient club-house or residence for the meet and let there be two hares and at least six hounds.
The first thing to be decided upon is the distance of the run, which should not be too great, especially for beginners. The next is the agreement between the hares upon a general plan to be pursued in their tactics, which must be kept secret from the hounds.
The morning hours are best for the game, and a hearty appetite for lunch, or the hunt-breakfast, it might be called, is the result.
The object of the hares is so to scatter the paper in their cross-country run as to lead the hounds on
To be sure all this uses up much precious time, but the compensation lies in mystifying and delaying the hounds, each of whom must decide for herself which trail is the most likely to prove the one the hares have really taken.
When
From time to time the hares must give their cry Kee-ooi! Kee-ooi! that the hounds may not go too far astray, and the hounds reply with their La-ha-hoo! to let the hares know they are on their tracks.
This is the fun of it, the wild scramble over all obstacles and the exultant moment when, if a hound, you have run down the hares or, if a hare, you outwit the hounds and make the home-run in safety. The game requires good generalship on both sides, quick thought and ready decision.
Light bags for the hares to carry may be made of cotton cloth with straps of the same to throw over the shoulder.
Good health, good-fellowship, good-nature, and fair play are the requisites for the complete enjoyment of this most exhilarating of all games.
An elaborate book for girls, by Lina and Adelia Beard whose former books on girls' sports have become classic, which contains a mass of practical instruction on handicrafts and recreations. So many and so various are the things it tells how to do and make that it will give occupation to any sort of girl in all seasons and all weathers.
This book is the result of the authors' earnest desire to encourage in their young friends the wish to do things for themselves. Its aim is to give suggestions that will help them to satisfy this wish. Within its covers are described a great variety of things useful, instructive, and entertaining, suited for both indoors and out.
In this book Lina and Adelia Beard, the authors, tell everything the girls of to-day want to know about sports, games, and winter afternoon and evening amusements and work, in a clear, simple, entertaining way. Eight new chapters have been added to the original forty-two that made the book famous.
This book by Lina and Adelia Beard comprises an infinite variety of amusing things that are worth doing. Some of these things are:—"A Wonderful Circus at Home," "The Wild West on a Table," "How to Weave Without a Loom," "How to Make Friends with the Stars," "A Living Christmas Tree," etc.
He gives easily workable directions, accompanied by very full illustration, for over fifty shelters, shacks, and shanties, ranging from the most primitive shelter to a fully equipped log cabin. Boys will find it an invaluable guide in constructing temporary or permanent shelters in their hikes or encampments.
The directions for making boats are practical and illustrated by simple diagrams, and the work is full of new and suggestive ideas for all kinds of craft.
Obvious punctuation errors repaired. There is no figure 75.
Page xi, "Witche's" changed to "Witch's" (Witch's Hair)
Page xii, CHAPTER XXVI, "Play-House" and "Play-Houses" changed to "Playhouse" and "Playhouses" to match usage in text.
Page 193, "tanger" changed to "tanager" (cardinal, the scarlet tanager)
Page 206, "fellows" changed to "fellow" (little fellow differs)
Page 273, CHAPTER XXIV came after the chapter title, FINGER-PLAYS FOR LITTLE FOLKS, in the original text. These were switched to follow the form of the rest of the book.
Page 308, "Flay" changed to "Fly" ("Fly away, Jill,")
Page 337, "payed" changed to "played" (easily played as the)
Page 353, "Face, Miss Muffet's" was moved from the last place in the "E" section to the first place of the "F" section.
Page 354, the section titles for "I" and "J" were added to the text.
Page 355, since the text capitalizes all uses of Pasch, the index was changed to reflect this (Lifting for Pasch eggs) and also on page 355 (Rules, Pasch game)
Page 355, "Pocketbooks" changed to "Pocket-books" to match usage in text (Pocket-books, store)
Page 357, "play-house" changed to "playhouse" to match usage in text (Wigwam, playhouse)