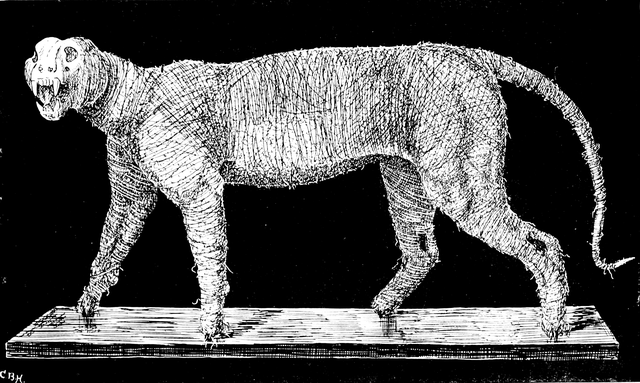
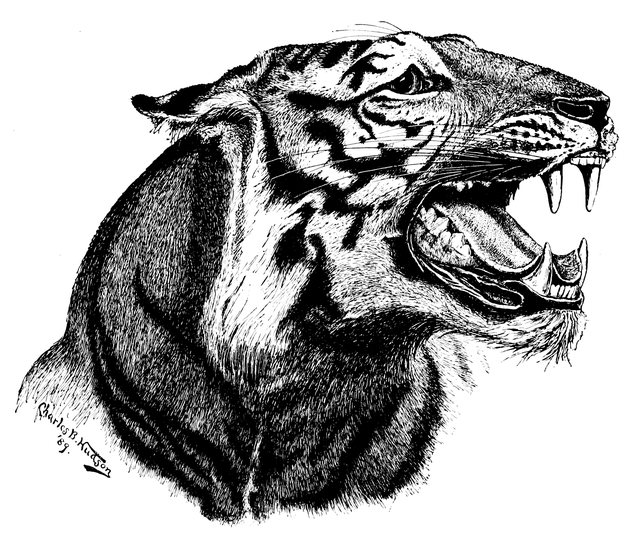
 HEAD OF ROYAL BENGAL TIGER.
Mounted by the Author.
The Project Gutenberg EBook of Taxidermy and Zoological Collecting, by
William T. Hornaday and W. J. Holland

This eBook is for the use of anyone anywhere at no cost and with
almost no restrictions whatsoever.  You may copy it, give it away or
re-use it under the terms of the Project Gutenberg License included
with this eBook or online at www.gutenberg.org/license


Title: Taxidermy and Zoological Collecting
       A Complete Handbook for the Amateur Taxidermist, Collector,
              Osteologist, Museum-Builder, Sportsman, and Traveller

Author: William T. Hornaday
        W. J. Holland

Illustrator: Charles Bradford Hudson

Release Date: June 30, 2012 [EBook #40109]

Language: English

Character set encoding: ISO-8859-1

*** START OF THIS PROJECT GUTENBERG EBOOK TAXIDERMY AND ZOOLOGICAL ***


Produced by Chris Curnow, Mark Young and the Online
Distributed Proofreading Team at http://www.pgdp.net (This
file was produced from images generously made available
by The Internet Archive)
And
By
With Chapters On
By W.J. HOLLAND, Ph.D., D.D.
Illustrated by CHARLES BRADFORD HUDSON
And Other Artists
24 plates and 85 Text Illustrations
FOURTH EDITION
In these heydays of popular zoology, when eager young naturalists are coming to the front in crowds, and fine new scientific museums are starting up on every hand, there is small need to apologize for the appearance of a work designed expressly for the naturalist and museum-builder. Had justice been done, some one would have written this book ten years ago.
The rapid and alarming destruction of all forms of wild animal life which is now going on furiously throughout the entire world, renders it imperatively necessary for those who would build up great zoological collections to be up and doing before any more of the leading species are exterminated. It is already too late to collect wild specimens of the American bison, Californian elephant seal, West Indian seal, great auk, and Labrador duck. Very soon it will also be too late to collect walrus, manatee, fur seal, prong-horn antelope, elk, moose, mountain sheep, and mountain goat. All along the Atlantic coast and in Florida the ducks are being exterminated for the metropolitan markets, and the gulls, terns, herons, egrets, ibises, and spoonbills are being slaughtered wholesale for the equally bloodthirsty goddess of Fashion. If the naturalist would gather representatives of all these forms for perpetual preservation, and future study, he must set about it at once.
This work is offered as my contribution to the science of zoology and the work of the museum-builder. It is entirely "an affair of the heart," and my only desire in regard to it is that it may be the means of materially increasing the world's store of well-selected and well-preserved examples of the beautiful and interesting animal forms that now inhabit the earth and its waters. The sight of a particularly fine animal, either[viii] alive or dead, excites within me feelings of admiration that often amount to genuine affection; and the study and preservation of such forms has for sixteen years been my chief delight.
In these pages I have sought to give, in clear language, the detailed information which I have found deplorably lacking in all "manuals" on this subject that I have ever seen, save one, in French, published many years ago, and which, while very tiresome to write out, are precisely what the practical worker wants. I hold a permanent grudge against those who have written before me on the subjects here treated of, because of what they did not write. The average book on taxidermy contains four times too much "padding," and not one quarter enough practical information. "If this be treason, make the most of it."
The students of entomology are indebted to Dr. Holland for his admirable chapters on Insects, and I leave them to make their own acknowledgments. My own very sincere thanks are hereby tendered him for his valuable contribution to this work, thereby making it complete. I am also under obligations to Mr. Charles Bradford Hudson, the accomplished artist, whose skill has done so much to explain and embellish the text. The spirit and interest with which he entered into his share of the work very materially lightened and encouraged my own tardy labors.
My thanks are also due to my valued friend, Mr. Frederic A. Lucas, of the Department of Comparative Anatomy, National Museum, and one of the founders of the Society of American Taxidermists, for advice and assistance in the preparation of the illustrations relating to work on skeletons. Mr. W. Harvey Brown, Naturalist of the U.S. Eclipse Expedition to Africa, kindly wrote for me nearly all of the chapter on "Mounting Disarticulated Skeletons;" Messrs. William Palmer and John W. Hendley, of the National Museum, also rendered me valuable services; for all of which I gladly record here an expression of my thanks and appreciation.
Having already retired from taxidermy forever, this is positively my "last appearance" in this field.
W.T.H.
Buffalo, N.Y.
| PAGE | |
| CHAPTER I. | |
| The Worker, and the Work to be Done, | 1-7 |
| CHAPTER II. | |
| Outfits, and Hints on Hunting, | 8-19 |
| CHAPTER III. | |
| How to Select and Study Fresh Specimens, | 20-23 |
| CHAPTER IV. | |
| Treatment of the Skins of Small Mammals, | 24-36 |
| CHAPTER V. | |
| Collecting and Preserving the Skins of Large Mammals, | 37-45 |
| CHAPTER VI. | |
| Collecting Skins of Small Birds, | 46-57 |
| CHAPTER VII. | |
| Collecting Skins of Large Birds, | 58-63 |
| CHAPTER VIII. | |
| Collecting Reptiles, | 66-70 |
| [x] | |
| CHAPTER IX. | |
| Collecting Fishes, | 71-79 |
| CHAPTER X. | |
| Collecting Marine Invertebrates, | 80-89 |
| CHAPTER XI. | |
| Collecting Birds' Eggs and Nests, | 90-97 |
| CHAPTER XII. | |
| The Laboratory and Its Appointments, | 99-101 |
| CHAPTER XIII. | |
| Preliminary Work in Mounting Mammals, | 102-107 |
| CHAPTER XIV. | |
| Principles of Universal Application in Mounting the Higher | |
| Vertebrates, | 108-114 |
| CHAPTER XV. | |
| Mounting Small Mammals, | 115-128 |
| CHAPTER XVI. | |
| Mounting Large Mammals: Ordinary Methods, | 129-139 |
| CHAPTER XVII. | |
| Mounting Large Mammals: The Construction of Manikins, | 140-149 |
| CHAPTER XVIII. | |
| Finishing Mounted Mammals, | 150-157 |
| [xi] | |
| CHAPTER XIX. | |
| Mounting Mammal Heads as Trophies and Ornaments, | 158-170 |
| CHAPTER XX. | |
| Facial Expression and Mouth Modeling, | 171-178 |
| CHAPTER XXI. | |
| Relaxing Dry Skins of Birds, | 179-182 |
| CHAPTER XXII. | |
| Mounting Small Birds, | 183-190 |
| CHAPTER XXIII. | |
| Mounting Large Birds, | 191-197 |
| CHAPTER XXIV. | |
| Cleaning the Plumage of Birds, | 198-201 |
| CHAPTER XXV. | |
| Mounting Reptiles, | 202-207 |
| CHAPTER XXVI. | |
| Mounting Fishes, | 208-216 |
| CHAPTER XXVII. | |
| Mounting Lobsters and Crabs, | 217-219 |
| CHAPTER XXVIII. | |
| Ornamental Taxidermy, | 219-228 |
| CHAPTER XXIX. | |
| Groups and Grouping, | 229-235 |
| CHAPTER XXX. | |
| General Principles of Group-making, | 236-239 |
| [xii] | |
| CHAPTER XXXI. | |
| Groups of Mammals, | 240-247 |
| CHAPTER XXXII. | |
| Groups of Birds and Reptiles, | 248-250 |
| CHAPTER XXXIII. | |
| Hints on Painting Museum Specimens, | 251-257 |
| CHAPTER XXXIV. | |
| Principles of Universal Application in Making Moulds and | |
| Casts, | 259-267 |
| CHAPTER XXXV. | |
| Casts of Mammals, Fishes, and Reptiles, | 268-270 |
| CHAPTER XXXVI. | |
| Collecting Skeletons, | 271-281 |
| CHAPTER XXXVII. | |
| Cleaning Large Skeletons by Macerating, | 282-284 |
| CHAPTER XXXVIII. | |
| Cleaning and Mounting Small Skeletons, | 285-295 |
| CHAPTER XXXIX. | |
| Mounting a Large Disarticulated Skeleton, | 296-304 |
| [xiii] | |
| CHAPTER XL. | |
| The Classification of Insects, | 305-308 |
| CHAPTER XLI. | |
| Eggs and Larvæ: Breeding and Rearing, | 309-319 |
| CHAPTER XLII. | |
| Collecting Imagoes, | 320-327 |
| CHAPTER XLIII. | |
| Preparation, Care, and Display of Insects, | 328-338 |
| CHAPTER XLIV. | |
| Insect Pests, and Poisoning, | 339-345 |
| CHAPTER XLV. | |
| Useful Information, | 346-350 |
| CHAPTER XLVI. | |
| The Best Books of Reference, | 351-355 |
| INDEX | |
| FACING | ||
| I. | Head of Royal Bengal Tiger. (Frontispiece.) | PAGE |
| II. | Two Pages from an Old Field Note-book (Double Plate), | 22 |
| III. | Measurements of a Large Mammal, | 38 |
| IV. | How to Cut Open and Mount a Fish, | 76 |
| V. | Paring Down a Large Mammal Skin, | 104 |
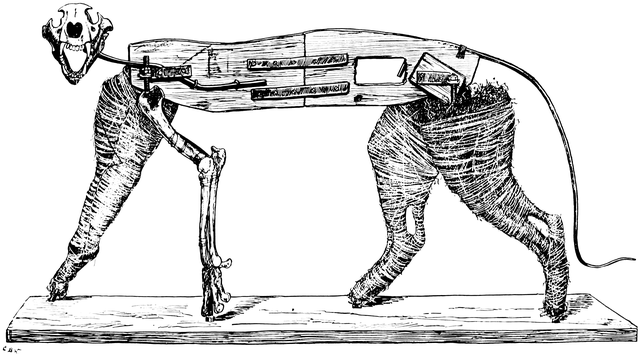
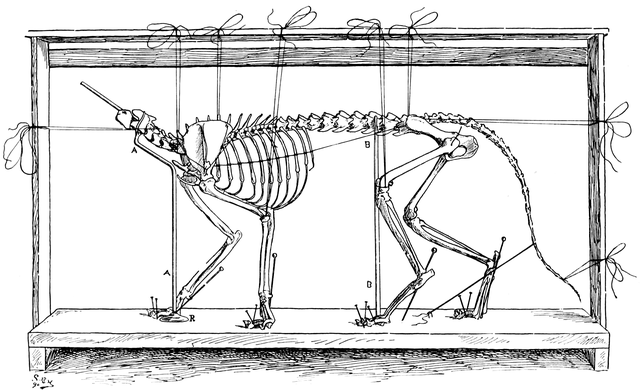
| VI. | Interior Mechanism of a Half-mounted Wolf, | 132 |
| VII. | Manikin for Bengal Tiger: First Stage, | 142 |
| VIII. | Manikin for Bengal Tiger: Completed, | 148 |
| IX. | Manikin for Male American Bison: Half Finished, | 152 |
| X. | Manikin for American Bison: Completed, | 156 |
| XI. | Head of Prong-horn Antelope, | 168 |
| XII. | Workshop of a Bird Taxidermist, | 182 |
| XIII. | Mounted Bird, with Interior Structure Exposed, | 192 |
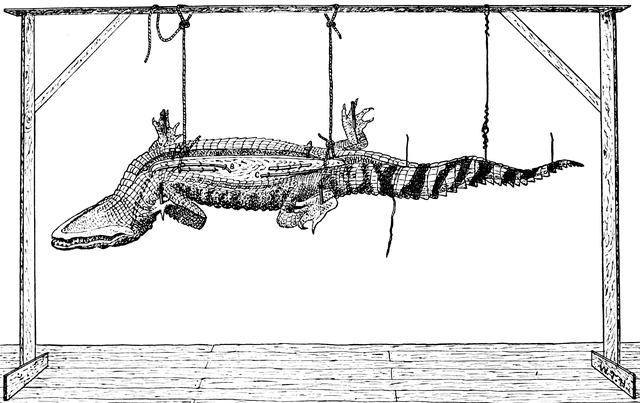
| XIV. | Mounting an Alligator: Last Stage, | 206 |
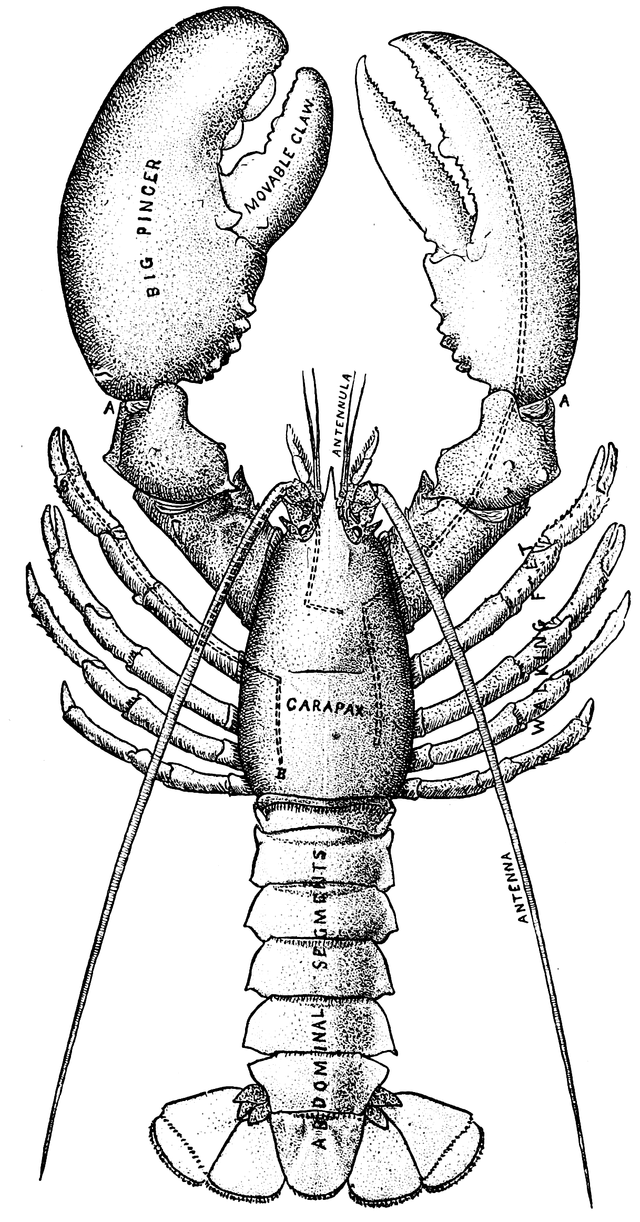
| XV. | American Lobster, | 217 |
| XVI. | Specimens of Ornamental Taxidermy (Double Plate), | 222 |
| XVII. | A Fight in the Tree-tops, | 231 |
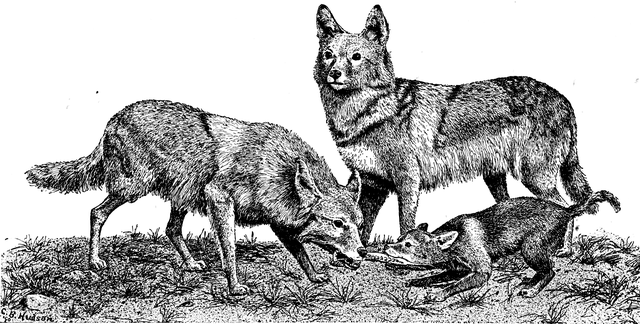
| XVIII. | Group of Coyotes, | 235 |
| XIX. | Group of American Bison (Double Plate), | 246 |
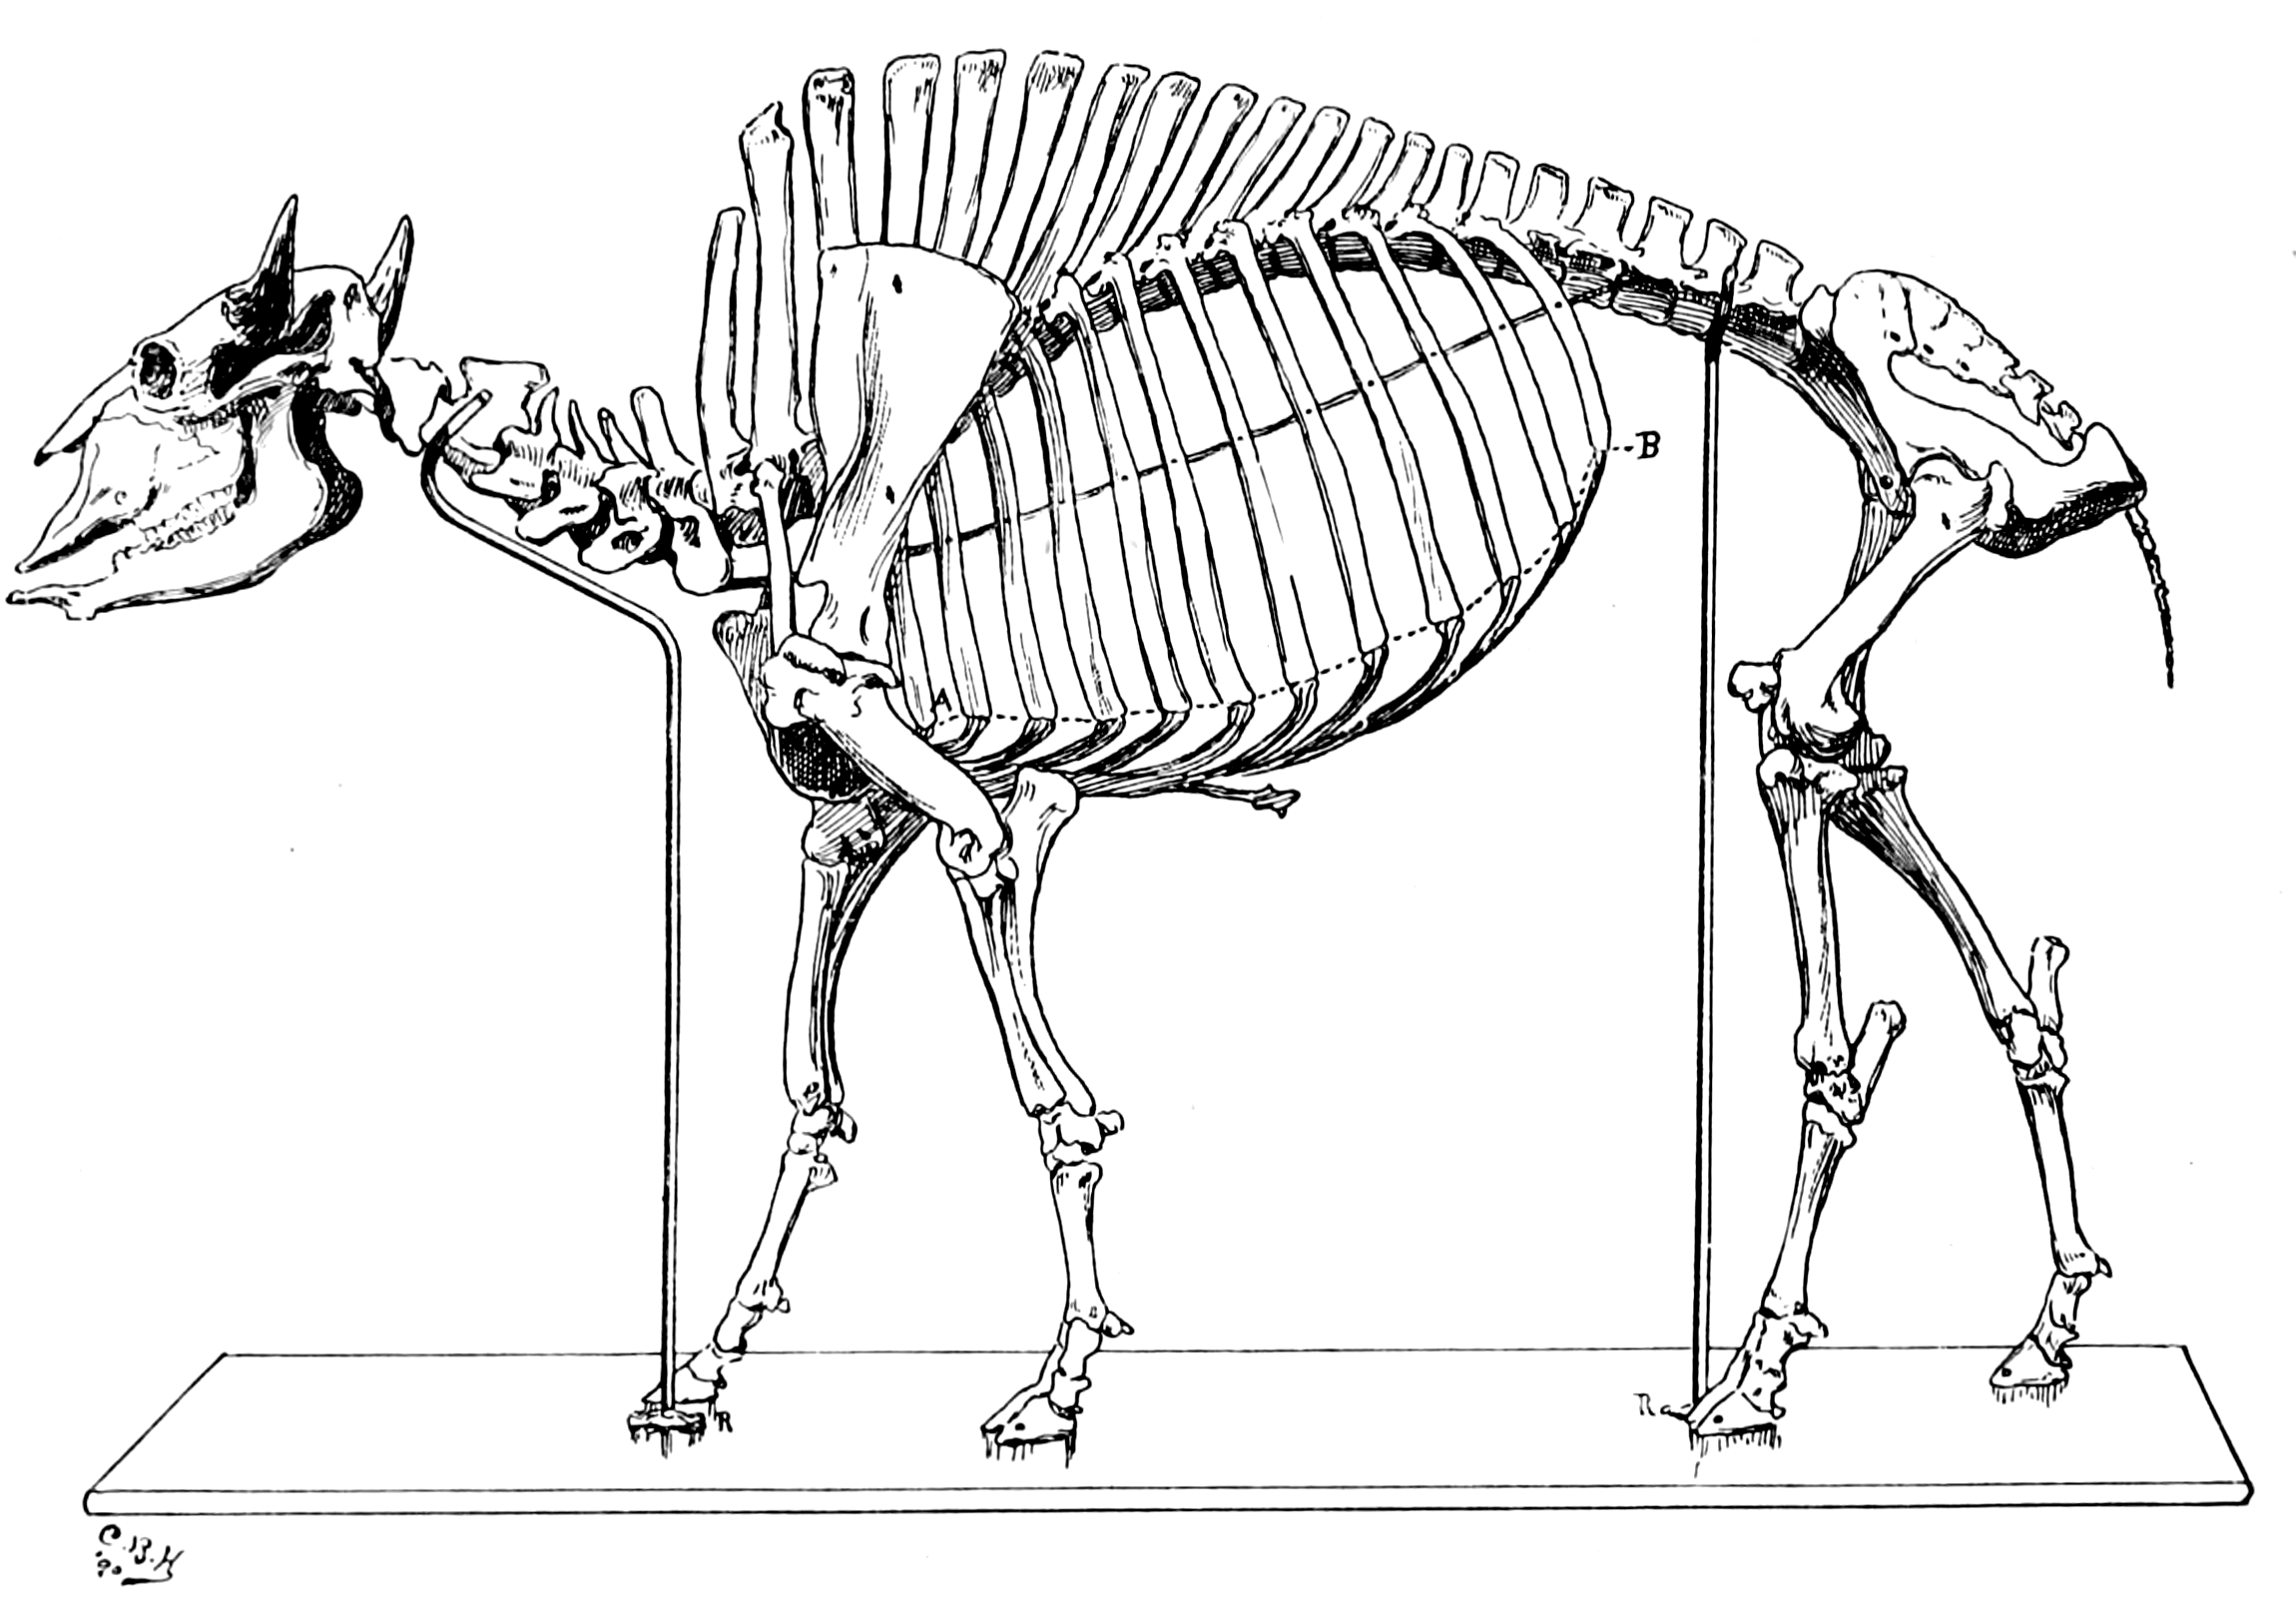
| XX. | A Ligamentary Skeleton, Mounted and Drying, | 288 |
| XXI. | Skeleton of an American Bison, | 298 |
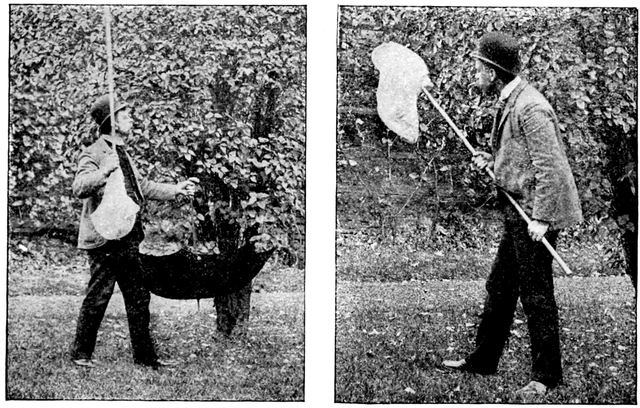
| { Fig. 1.—Beating the Bush, | 320 | |
| XXII. | { Fig. 2.—A Successful Stroke, | 320 |
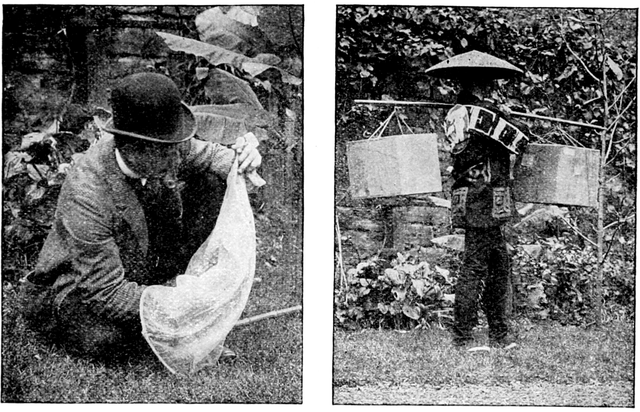
| { Fig. 1.—Bottling a Skipper, | 326 | |
| XXIII. | { Fig. 2.—Japanese Porter with Collecting Boxes, | 326 |
| FIG. | PAGE |
| 1. The Best Knives for a Collector or Taxidermist, | 15 |
| 2. Squirrel partly Skinned | 27 |
| 3. Skinning a Squirrel's Head, | 28 |
| 4. A Model Mammal Skin, | 34 |
| 5. Another Form of Mammal Skin, | 35 |
| 6. Opening Cuts on a Large Mammal, | 40 |
| 7. Opening Cuts at Back of Prong-horn Antelope's Head, | 41 |
| 8. A Well-made Dry Deer-Skin, | 43 |
| 9. Foot of an Orang-Utan, | 44 |
| 10. Names of the External Parts of a Bird, | 47 |
| 11. First Steps in Skinning a Bird, | 50 |
| 12. Bird Skin, Wrong Side Out, | 51 |
| 13. The Bird Skin in Position, | 53 |
| 14. The Skin Half Wrapped, | 54 |
| 15. Spreading the Tail, | 55 |
| 16. The Skin fully Wrapped, | 55 |
| 17. A Perfect Bird Skin, | 56 |
| 18. How to Shape a Heron Skin, | 60 |
| 19. How to Open a Turtle, | 69 |
| 20. Agassiz Tank, for Alcoholics, | 73 |
| 21. Bird Nest, in situ, | 92 |
| 22. Wire Standard for Nests, | 93 |
| 23. Nest on Wire Standard, with Labels, | 94 |
| FIG. | PAGE |
| 24. Skin Scrapers, about One-fourth Actual Size, | 103 |
| 25. Leg Making and Wiring, | 117 |
| 26 Wiring Together, | 119 |
| 26a. The Legs Wired Together, | 121[xvii] |
| 27. The Finished Specimen, | 124 |
| 28. Author's Method of Mounting Bats on Glass, | 128 |
| 29. Artificial Skeleton for Hand of an Orang-Utan, | 131 |
| 30. Fillers of Various Kinds, | 133 |
| 31. An Iron Square, | 136 |
| 32. Leg Irons of an American Bison, | 144 |
| 33. Skinning a Deer's Ear, | 161 |
| 34. The Ear Half-Skinned, | 161 |
| 35. Skinning Down the Inside, | 162 |
| 36. The Cartilage Out, | 162 |
| 37. Internal Mechanism of a Deer's Head, | 164 |
| 38. Complete Manikin for a Deer's Head, | 165 |
| 39. Modeling Tools of Wood, | 173 |
| 40. Modeling Tools of Wood, | 173 |
| 41. Modeling Tools of Wood, | 173 |
| 42. Steel Modeling Tool, | 174 |
| 43. Steel Modeling Tool, | 174 |
| 44. Steel Modeling Tool, | 174 |
| 45. Side View of Tiger's Tongue, | 175 |
| 46. End View of Tiger's Tongue, | 175 |
| 47. Top View of Tiger's Tongue, | 175 |
| 48. Wiring a Bird's Leg, | 184 |
| 49. Cross-Section of Artificial Body, | 185 |
| 50. The Finished Body and Neck, | 185 |
| 51. How the Leg Wires are Inserted and Clinched, | 186 |
| 52. The Winding of the Bird, | 189 |
| 53. Cast of the Neck and Windpipe of a Heron, | 195 |
| 54. Method of Mounting Alcoholic Reptiles, | 203 |
| 55. Medallion of Yellow Pike, | 213 |
| 56. Cross Section, | 213 |
| 57. Wall Case of Birds, | 223 |
| 58. Wood Duck, | 232 |
| FIG. | PAGE |
| 59. Beginning to Make a Piece Mould, | 260 |
| 60. Second Step in Making a Piece Mould, | 261 |
| 61. Last Step in Making a Piece Mould, | 262[xviii] |
| 62. The Finished Mould, | 262 |
| 63. The Beginning of a Waste Mould, | 263 |
| 64. Second Step in Making a Waste Mould, | 264 |
| 65. Chiseling Off the Waste Mould, | 265 |
| FIG. | PAGE |
| 66. Rough Skeleton of a Small Animal, | 274 |
| 67. Rough Skeleton of a Bird, | 277 |
| 68. Steel Bone-Scrapers, | 286 |
| 69. Skeleton of a Bat, as Exhibited, | 291 |
| 70. Skeleton of a Bird, Mounted and Drying, | 292 |
| 71. Wiring a Skeleton Wing, | 293 |
| 72. Skeleton of a Turtle, | 294 |
| 73. The Sacrum and Spinal Rod, | 298 |
| 74. Attachment of Ribs to a Vertebra, | 298 |
| 75. Middle Joint of the Hind Leg: Side View, | 300 |
| 76. Middle Joint of Hind Leg: Rear View, | 301 |
| 77. Bones of the Foot: Side View, | 301 |
| 78. Bones of the Foot: Rear View, | 301 |
| 79. The Knee-Joint, | 302 |
| 80. Front View of Knee-Joint, | 302 |
| 81. Front View of Elbow-Joint, | 302 |
| FIG. | PAGE |
| 82. Apparatus for Inflating Larvæ, | 314 |
| 83. Drying Oven, | 315 |
| 84. Drying Oven for Larva Skin (After Riley), | 315 |
| 85. Wire Bent into Shape for Mounting Larva (After Riley), | 316 |
| 86. Breeding Cage (After Riley), | 317 |
| 87. Breeding Cage, | 318 |
| 88. Net-frame (After Riley), | 320 |
| 89. Net-head, for Removable Frame (After Riley), | 321[xix] |
| 90. Folding Net (After Riley), | 321 |
| 91. Collecting Jar, | 322 |
| 92. Perforated Paper Disc for Jar, | 322 |
| 93. Method of Pinching a Butterfly, | 325 |
| 94. Manner of Folding Paper Envelope, | 328 |
| 95. Butterfly in Envelope, | 328 |
| 96. Double Mount, | 330 |
| 97. Frame for Mounting Beetles, | 330 |
| 98. Setting-board, | 331 |
| 99. Setting-board (After Riley), | 331 |
| 100. Setting-block, | 331 |
| 101. Setting-block, with Butterfly, | 331 |
| 102. Setting-Needle, | 332 |
| 103. Box for Receiving Setting-boards, | 333 |
| 104. Shingling Specimens, | 334 |
Eternal vigilance is the price of a collection.
The need of thoroughly skilled collectors is increasing every hour; and right here let me say to the young naturalist athirst for travel and adventure, There is no other way in which you can so easily find a way to gratify your heart's desire as by becoming a skilful collector.
The most important vertebrate forms are being rapidly swept off the face of the earth by firearms, traps, and other engines of destruction. In five years' time—perhaps in three—there will not be a wild buffalo left in this country outside of protected limits. There are less than one hundred even now—and yet how very few of our museums have good specimens of this most interesting and conspicuous native species.
The rhytina, the Californian elephant seal, the great auk, and the Labrador duck have already been exterminated. For many years the West Indian seal was regarded as wholly extinct, but a small colony has lately been discovered by Mr. Henry L. Ward on a remote islet in the Gulf of Mexico. The walrus, the manatee, the moose, mountain goat, antelope, mountain sheep, the sea otter, the beaver, elk, and mule deer are all going fast, and by the time the museum-builders of the world awake to the necessity of securing good specimens of all these it may be too late to find them.[2]
Even in South Africa, where big game once existed in countless thousands, nothing remains of the larger species save a few insignificant springboks, and no game worth mentioning can be found nearer than the Limpopo Valley, eight hundred miles north of the Cape!
Now is the time to collect. A little later it will cost a great deal more, and the collector will get a great deal less. Sportsmen, pot-hunters, and breech-loading firearms are increasing in all parts of the world much faster than the game to be shot, and it is my firm belief that the time will come when the majority of the vertebrate species now inhabiting the earth in a wild state will be either totally exterminated, or exist only under protection.
But do not launch out as a collector until you know how to collect. The observance of this principle would have saved the useless slaughter of tens of thousands of living creatures, and prevented the accumulation of tons upon tons of useless rubbish in the zoological museums of the world. It costs just as much to collect and care for scientific rubbish as it would to do the same by an equal number of scientific treasures. Between fool collectors on one hand, and inartistic taxidermists on the other, the great majority of the world's zoological museums have been filled with objects that are anything but attractive; and for this state of affairs the collectors are more to blame than the taxidermists.
Bad work in collecting is, in nine cases out of ten, due to one of two causes—ignorance or laziness. By some curious process of reasoning, many really intelligent men conclude that they can go into the field and collect successfully without having learned a single thing about methods, or asked a word of advice from a competent instructor. Many seem to think that the only thing required is main strength, and that even that may be exerted by proxy. Even now, men who have travelled and written books go to South America and dry all their skins in the sun—after having carefully removed all the leg bones—and their small skeletons they boil!
Some of the worst mammal skins I ever saw were made by a professor of natural history, who actually managed to do nearly everything as it should not have been done. And yet, collect[3]ing all kinds of animal specimens, in all climates, is perfectly simple to any one who has enough enterprise to inform himself of the most reliable methods, and put them in practice.
I will confess I feel very deeply on this point, for I have toiled, needlessly, unnumbered hours, and days too, in overcoming, as far as possible, the inexcusable blunders of collectors. I have seen thousands of dollars wasted in this way that could have been saved by good work in the field. It is easier to mount two good skins within five per cent of perfection than to mount one poor one not nearly so well. Let me advise the directors of all scientific museums, institutions of learning, and patrons of natural history generally, when appealed to by an enthusiastic collector for funds with which to go abroad and collect an untold amount of priceless specimens, in every case withhold your aid until the would-be collector demonstrates conclusively that he has learned how to collect. If he has not wit enough and grit enough to acquire ability, and then prove property, he is not fit to send anywhere, save back to the bosom of his family.
These are the qualities which are required to make a first-class collector: He must have a fair general knowledge of zoology, especially the vertebrates. He must be a good shot, a successful hunter, and capable of great physical endurance. Then he must be a neat and skilful operator with the knife, and conscientious in the details of his work, down to the smallest particulars, for without this quality his specimens will always be faulty and disappointing. In addition to all these requirements he must be a man of tireless energy, incapable of going to bed so long as there are birds to be skinned, and who, whenever a doubt arises in his mind in regard to the necessity of more work on a specimen will always give the specimen the benefit of the doubt.
I strongly advise every one who becomes a collector to learn to sketch from nature. No matter whether you have any artistic ability or not, if you are determined about it, you can learn to make pencil sketches of rare specimens in the field, and of native houses, costumes, weapons, etc., and remarkable natural objects of all kinds, which, even though crude and inartistic in finish, may be of permanent value to the scientific world. The[4] camera and dry plate are of great value, but commend me to the pencil and sketch-book that "sticketh closer than a brother," and that never fail you on account of weather, weight, or accidents. Therefore I say, sketch; sketch poorly if you cannot sketch well, but above all, sketch.
The moment you make up your mind to go on a collecting trip, even if be only into the next county, read everything you can get hold of which will tell you aught about the natural history of the country you are to visit. Ask what has been written, search library catalogues for titles of books, then get all you can, and read all you get. Only the churl will refuse to lend you a book you cannot afford to buy. Read all about the physical geography, geology, climate, inhabitants, fauna and flora, for all these will have a direct bearing on your work. If you are going to unexplored territory, about which nothing has been written, then "read up" on the adjacent countries, for even that will be very useful information.
Guides and Companions.—No matter where you go, you will be obliged to have one or more companions, who know the country, to act as guides and general assistants. It may be that you can find a single person combining the necessary qualities of a guide and interpreter with those of a boatman, a teamster, or porter. The expense of such assistants must be counted upon from the very first. It may be stated as a general rule that in the tropics the services of natives can be had cheaply; while those of Europeans are generally dear in comparison with what they do.
Clothing and Food.—These subjects I propose to leave entirely alone. They make excellent "padding" for a work of this kind when there is a lack of really useful information with which to fill up; but every man feeds and clothes himself according to the dictates of his temperament, his purse, or his own sweet will. Whether his way is the best or the worst, he will still have food and clothes more or less suitable to his needs, and time spent in advising him what to wear and to eat is time wasted. These questions are generally controlled by the locality and circumstances.
Preservation of Health.—There are certain hygienic principles which apply all the world over, and since their observance[5] becomes in the tropics a question of life and death, I will record them. Their observance has preserved my health intact in unwholesome jungles in a way that I consider nothing short of wonderful.
Never sleep on the ground in the wet portions of the tropics when possible to avoid it, but keep above the poisonous miasmatic vapors that lie close to the earth.
Boil water before drinking it, if it is thought to be bad, and avoid stagnant water at all times.
Drink no spirits whatever except when really sick or debilitated, nor wine, nor other alcoholic beverages. Avoid brandy, whiskey, and rum as you would the plague.
Eat no unripe fruit, and with moderation of even ripe fruits, excepting bananas, which are harmless and most excellent food.
Avoid eating large quantities of meat, but give the preference to rice, and farinaceous foods generally.
Wear light flannel shirts, and at all hazards keep the head and nape of the neck well shielded from the sun. Pith helmets are best.
After getting wet, do not sit down in the hot sun with your wet clothes on, but if you must remain in the sun, keep moving.
By means of rubber clothing, or "ponchos," keep from getting wet whenever you can.
On coming into camp with wet garments, do not sit down in them to rest, but change immediately to dry clothing and footgear. The strict observance of this rule will save many an attack of fever.
Medicines.—Every traveller or collector who goes beyond the ready reach of doctors (and for that matter also every family living in the country) should have a small box filled with certain medicines and simple appliances as a resort in all cases of emergency. Very often a deal of mischief can be prevented by having the proper remedy at hand and ready for immediate application. Who has not seen great suffering endured for the lack of a simple remedy costing only a few cents? No matter where I go in the field, or how much luggage I am impeded with, I always carry with me a small, square, japanned tin box[6] (10 inches long, 7 inches wide, and 4 inches deep) which contains the following:
| 1 roll silk court-plaster (about 1 yard). | 1 bottle Collis Browne's chlorodyne. |
| 6 curved surgeon's needles and silk thread. | 1/2 ounce quinine. |
| 4 ounces spirits of turpentine. | 1 package Epsom salts. |
| 4 ounces tincture of arnica. | 1 package senna leaves. |
| 2 ounces syrup of ipecac. | 1 package carbonate of soda. |
| 1 ounce paregoric. | 2-ounce bottle of Squibb's diarrhoea mixture. |
| 1 ounce ammonia. | 1 box Beecham's pills. |
| 2 ounces castor oil. | 1 small measuring-glass. |
| 1 pint lime-water and linseed oil. | 1 piece of small rubber tube, a foot long. |
| 1 pint best brandy. | 12 doses of tartar emetic. |
The above makes a formidable showing, but the whole stock costs only about three dollars and fifty cents, and the box, with lock and key, about one dollar more. I have lately added to this outfit a most valuable and helpful little book, entitled "Till the Doctor Comes," by George H. Hope (G.P. Putnam's Sons, New York), which to any traveller or country dweller is worth twice its weight in gold. Fortunately, however, it costs only fifty cents, and no one need be without it.
While a traveller or hunter should never drink brandy or whiskey as a beverage, it is a most excellent thing to have in many cases of sickness or accident, when a powerful stimulant is necessary. Above all things, however, which go farthest toward preserving the life of the traveller against diseases and death by accident, and which every naturalist especially should take with him wherever he goes, are habits of strict temperance. In the tropics nothing is so deadly as the drinking habit, for it speedily paves the way to various kinds of disease which are always charged to the account of "the accursed climate." If a temperate man falls ill or meets with an accident, his system responds so readily to remedies and moderate stimulants that his chances for recovery are a hundred per cent better than those of the man whose constitution has been undermined by strong drink.
There are plenty of men who will say that in the tropics a little liquor is necessary, "a good thing," etc.; but let me tell you it is no such thing, and if necessary I could pile up a[7] mountain of evidence to prove it. The records show most conclusively that it is the men who totally abstain from the use of spirits as a beverage who last longest, have the least sickness, and do the most and best work. As a general rule, an energetic brandy-drinker in the jungle is not worth his salt, and as a companion in a serious undertaking, is not even to be regarded as a possible candidate.
In making up an outfit with which to work on specimens in the field, away from civilization perhaps, you must first decide definitely upon the line of work you intend to do, for upon this the extent and character of your outfit must depend. The requirements to be met are economy of space, weight, and labor, with no necessary article lacking. The mere item of keeping one's tools in order, and always accessible, is much more important than it would at first seem to be. There must be no confusion, and not a single article must get lost. Good tools, and plenty of them, in good working order, go a great way toward the production of faultless specimens, having the highest possible value.
I think I may say without boasting that on my third collecting trip abroad (to the East Indies) my outfit came as near perfection in size and arrangement as can ever be reached without far greater expense than that entailed. I was obliged to pack and unpack the whole of it at least fifty times, but its arrangement was so systematic and compact that the complete packing up never required more than fifteen minutes, and I could go to it in the dark and find any article desired, even to a needle and thread.
The whole arrangement was very simple. To start with, the entire outfit of firearms, ammunition, tools, hunting-gear, and a good stock of preservatives was contained in an iron-bound black walnut chest about the size of a carpenter's tool-chest.
To keep my loading implements and ammunition in order, I had an ammunition-box of walnut, 14-1/2 inches long, 12-1/2 wide, and 4-1/2 deep, outside measurements, divided inside into five compartments, which held and kept in order all the append[9]ages belonging to my three guns, and enough ammunition to last a month for ordinary shooting.
Another small box, made of ash, one-quarter of an inch thick, and divided into four compartments, contained an assortment of knives, labels, and small tools (see list below), and was in every way multum in parvo. Both these boxes had their places in the chest, and my guns, each in its own box-case, were provided for in the same receptacle. I have had made for collectors going out from the National Museum nearly a dozen tool-boxes in exact duplication of the original mentioned above, and I can confidently recommend both it and the ammunition-box as serving their purposes most satisfactorily.
Since my outfit for the East Indies proved very satisfactory, and with one or two additions is precisely what I should take were I to go again on a similar expedition, I give below a full list of its contents. The additions I should make would be a Winchester 7-shot repeating rifle, calibre 45-75, with the necessary ammunition, a double-barrelled breech-loading gun, No. 12, and possibly a wooden tank 2 feet × 2 feet × 2 feet, with a screw top, for the preservation of mammal skins in a salt and alum bath. This last addition is rendered necessary by the fact that I have adopted a different method of preserving skins from that I had followed up to that time. Instead of drying all skins as I did then, I now preserve the majority of them in a wet state, and keep them so, except such as are desired as skins for study, and not for mounting. The apparatus necessary for collecting insects will be described in the section devoted to work of that class.
Outfit for General Collecting,
Vertebrates and Invertebrates, both Large and Small, Dry and in Spirits, and on a Large Scale.
| 1 Agassiz tank (copper), in wooden box, for alcoholics. | |
| 1 chest of black walnut, iron-bound, to contain all the articles enumerated below: | |
| 1 Maynard rifle, two barrels, calibre 40, | 40 pounds shot, assorted sizes. |
| and 45-85. | 10 pounds Maynard bullets. |
| 1 double-barrelled breech-loading smooth-bore 1,000 Berdan primers. | |
| gun, No. 10, in case ($30). | 12 pounds Orange ducking powder. |
| 1 Maynard shot-gun, No. 16. | 30 pounds arsenical soap. |
| 1 Smith & Wesson revolver, cal. 32. | 15 pounds dry arsenic. |
| 1 cartridge-belt and cartridge-bag. | 1 dozen large skinning-knives. |
| 1 dozen small skinning-knives. | 2 pairs scissors. |
| 6 scalpels. | 1 brain hook. |
| 2 claw hatchets. | 1 pair long forceps. |
| 1 saw. | 1 pair short forceps. |
| 1 large skin scraper. | 1 pair cutting-pliers. |
| 1 geological hammer. | 1 pair flat pliers. |
| 1 bull's-eye lantern. | 2 sets skeleton-scrapers. |
| 1 A No. 1 field-glass. | 1 small skin scraper. |
| 1 compass. | 1 flat file. |
| 2 brushes for arsenical soap. | 2 three-cornered files. |
| 1 blow-pipe and set of egg-drills. | 1 cold chisel. |
| 1 hydrometer and test-glass. | 2 awls. |
| 1 thermometer. | 1 4-inch saw (for turtles). |
| 2 pairs hunting-shoes. | 1 tape measure. |
| 2 rubber blankets. | 1 2-foot rule. |
| 1 double woollen blanket. | 1 ivory thimble. |
| 1 Ashanti hammock. | 1 oil-stone. |
| 3,000 labels, three sizes. | 1 spool thread. |
| 1 tool-box, size 7 × 13 × 3 inches, to contain the following: 2 dozen labels. | |
| 4 skinning-knives. | 3 papers glover's needles. |
With this outfit I collected, in two years, more than $15,000 worth of salable skins, rough skeletons and skulls of mammals, many of which were very large; birds, reptiles, and fishes, especially the large and important species; also fishes and fish skins in alcohol and brine; crustaceans, shells, star-fishes, corals, and a few insects. In not a single case did I ever fail to collect a desired specimen through lack of implements and preservatives with which to care for it, and only three or four specimens spoiled on my hands in course of preservation. One of these was an orang skin, the last one I took, which spoiled because I had to pack it up and travel with it without giving it even one day's drying; and the others were skins which spoiled while I was on my back with jungle fever.
The outfit listed above is of such a nature that for a trip across Africa, South America, or even a much shorter distance on foot or horseback, away from rivers and wagon-roads, it would be difficult to take the whole of it. But then, on some expeditions, for example, such as are made through Darkest Africa, the travellers are generally glad to get through with their lives, to say nothing of more cumbersome luggage, and very little collecting is done. In nine cases out of ten, however, it is advisable to take along a good outfit, even though[11] there be three or four boxes of it, for, except in such journeys as those mentioned above, there will always be a way to get it along. It will cost a few dollars for freight, and some trouble in management; but if you are a good collector, and mean business, you will not mind that in the least. Where there's a will there's locomotion; and to collect well, or even at all, one must have something to collect with. It is an expensive and exceedingly laborious business at best, so don't go expecting to have your "baggage checked through to destination, free of charge."
But there are a great many of my readers who, while they may never want to go off into a howling wilderness, might greatly enjoy collecting on such trips as they do take. Then, again, there are sportsmen and travellers who will willingly carry into good game districts a book of instructions, and enough tools to enable them successfully to remove and preserve the skins of valuable trophies of the chase, and other specimens which should be kept on account of their scientific value or their beauty. To meet the requirements of both the amateur and the sportsman I recommend:
The Traveller's Handy Outfit,
For a Collector of Mammals, Heads, Trophies, etc., and also Birds.
Firearms, as you please.
A tool-box of 1/4 inch ash, size 7 × 13 × 3 inches, containing the following:
| 2 large skinning-knives (see Fig. 1). | 1 tape measure. |
| 2 cartilage knives (see Fig. 1). | 1 brain hook. |
| 1 pair scissors. | 1 pair 9-inch forceps. |
| 1 small oil-stone. | 1 pair short forceps. |
| 1 spool thread. | And if eggs are to be collected, then must |
| 1 package needles. | be added: |
| 1 package labels. | 1 blow-pipe. |
| 1 2-foot rule. | 1 set of egg-drills. |
With the addition of 10 large skinning knives, this was the identical outfit I took with me on two collecting trips to Montana, during which we skinned and skeletonized 24 buffaloes, about 20 antelope, 10 deer, 9 coyotes, and a goodly number of birds and small mammals.
The points in favor of this outfit are its cheapness, compactness, portability, and great general utility. It can be carried in a knapsack behind a saddle on an overland journey, and to[12] an explorer it is useful in a hundred ways besides those for which it is specially intended.
Firearms.—The gun question is a good deal like the wife question—every man prefers to choose for himself, and advice is chiefly superfluous. Nevertheless, to those who have as yet no preferences, I will briefly state mine, and the reasons for them.
If I could have but one weapon, I should choose the Maynard rifle, calibre 40, with extra long cartridge, and a No. 12 shot-barrel fitting to the same stock, and interchangeable in less than fifteen seconds of time. The rifle is light and handy; it hits hard, and is as true as steel ever gets to be. It will hit every time precisely where you hold it. Its construction is so simple it seldom breaks or gets out of order, the brass shells never wear out, and when loaded are about as impervious to water as marine torpedoes. Should you go under water—rifle, cartridges, and all—you have only to "bob up serenely," and go on firing as if nothing had happened.
By the addition of a shot-barrel, at a very slight expense, you have, in reality, two good breech-loading weapons that will serve you well for general purposes.
For ordinary large game I also prefer the Maynard rifle, but of a heavier calibre than the above. Calibre 45 is the best size, taking the U.M.C. Co.'s Bullard cartridges loaded with 85 grains of powder and 295 grains of lead. These with the Maynard make a beautiful combination. It carries point-blank up to 170 yards, if not even 200; the ball has great accuracy and penetration, with a very low trajectory, and very little recoil. A heavier bullet means a hearty kick and loss of accuracy, and one of 500 grains of lead means occasional blood at your end of the gun, and a black and blue shoulder.
For such great beasts as the elephant, rhinoceros, and hippopotamus, the choice must lie between a double 8-bore rifle, and the No. 8 smooth-bore. For my part, I would rather hunt my elephants with such a gun as I used on them in India, a No. 8 smooth-bore, double-barrelled, which, though weighing less than 10 pounds, never kicked seriously, even with enough powder (6 drachms) to send a zinc bullet through an elephant's skull and brain, and out on the other side. With such a weapon[13] there will be no need to run after an animal, nor run away from it either, after you get one fair shot at it.[1]
For hunting large birds and small mammals a No. 10 shot-gun is the best; but if you are specially interested in birds and care little for mammals, a No. 12 breech-loader with top-snap action will be preferable. For my purposes, however, my No. 10 double Werner and No. 16 Maynard always worked beautifully together, and I think these two sizes afford the best combination a collector can find. Being very strongly built, I often loaded my No. 10 with a single ball, and bagged many a fine Indian bison in that way.
I always used heavy brass shells with all my shot-guns, for the following reason: I could not spare room to carry paper shells, the rains I encountered would have spoiled too many of them, and away from home they were too expensive a luxury for me to afford. The brass shells are expensive to start with, but they last forever, or until they are lost.
Hints on Hunting.—The duty of a naturalist to his specimen begins when he levels his gun at it in the field.
Do not shoot a specimen to pieces, or mutilate it beyond recognition by its own mother.
Study the moral principles of your guns, find out exactly what they will do with what you put into them, and then don't shoot your specimens too much. What is a tiger worth with the top of his head blown off, or a deer with a great hole torn in his side by an explosive bullet?
Three vital principles to be observed in hunting specimens are the following: See everything ahead, and allow nothing to see you. Shoot to kill, but shoot so as to get your specimen with the least possible mutilation. A squirrel shot with a rifle is usually unfit for a specimen, and a bird with its legs shot to pieces, mandibles shot off, and half its tail feathers torn to pieces is about the same as no bird at all, unless it happens to be a rare one. In using a rifle, get as close to your game as you can (unless it be a tiger or bear!), so as to be sure of getting it. With the shot-gun, get as far away as you dare, so as to get no more shot into your bird than is necessary to kill it.
It is a disgrace for a collector to shoot a bird to pieces and be obliged to throw it away.
I append a showing of what I use in collecting, according to circumstances. It is hardly likely that any two collectors in the world agree on these points, therefore I do not expect that these tables will suit the old hands. I put them forth as mere suggestions to beginners.
Recommendations in Regard to Hunting with the Rifle.
| Animals to kill. | Weapon to use. | Charge of | Weight of | Best |
| powder. | bullet. | distance. | ||
| Elephant | Smooth-bore, | 6 drs. | Spherical, | 30 yds. |
| No. 8. | pure zinc. | |||
| Tiger, bear, elk, deer, sheep, seals, | ||||
| large crocodiles | Maynard, 45. | 85 grs. | 295 grs. | 75 " |
| Apes, monkeys, small ruminants, | ||||
| and small carnivora | Maynard, 40. | 60 " | 200 " | 50 " |
Recommendations in Regard to Hunting with the Shot-gun.
| Animals to kill. | Weapon to use. | Charge of | Charge of shot. |
| powder. | |||
| Deer | No. 10. | 6 drs. | 20, No. 8 buckshot. |
| Fox | " 10. | 5 " | 1-1/2 oz., No. 00. |
| Woodchuck | " 10. | 3 " | 1-1/4 " " 2. |
| Squirrel | " 12. | 3 " | 1-1/2 " " 6. |
| Chipmunk | " 16. | 2 " | 1 " " 10. |
| Eagle Duck | |||
| Powder. | |||
| Eagle, crane, vulture | " 10 or 12. | 5 drs. | 1-1/2 " Double 00. |
| Turkey buzzard | " 10 or 12. | 4 " | 1-1/4 " No. 4. |
| Crow | " 12. | 3 " | 1-1/4 " " 6. |
| Quail | " 12. | 3 " | 1-1/2 " " 8. |
| Robin | " 12. | 2-1/2 drs. | 1 " " 10. |
| Warbler | " 16. | 2-1/2 " | 1 " " 12. |
| Humming-bird | " 16, or | 2 " | 1 oz. dust shot. |
| Auxiliary, 22.[2] |
Of course it would be easy to recommend a large assortment of different weapons for different purposes, but when it comes to providing an outfit of firearms, I must say I never cared to take care of more than three or four weapons, and I doubt if [15] the average amateur will feel disposed to maintain a small arsenal. In preparing the above tables I have limited the weapons to those I have actually used. For my use, the following constitutes a model collector's outfit of firearms for all purposes in all countries. It is cheap, but first class, not cumbersome, easily cared for in all climates, and equal to every occasion that can arise:
1 No. 8 double breech-loading smooth-bore, and
1 Auxiliary barrel, No. 22, for very small birds (price, $12).
1 Calibre 45-85 Maynard rifle, 1 calibre 40-60 rifle-barrel, and 1 No. 16 shot-barrel, all to fit interchangeably on the same stock. A smaller rifle-barrel might also be added, but it is not really necessary.
1 Calibre 45-75 7-shot Winchester.
1 No. 12 breech-loading shot-gun.
The Winchester is useful for rapid firing at short range, but the Maynard is the weapon to depend upon for perfect accuracy at all ranges.
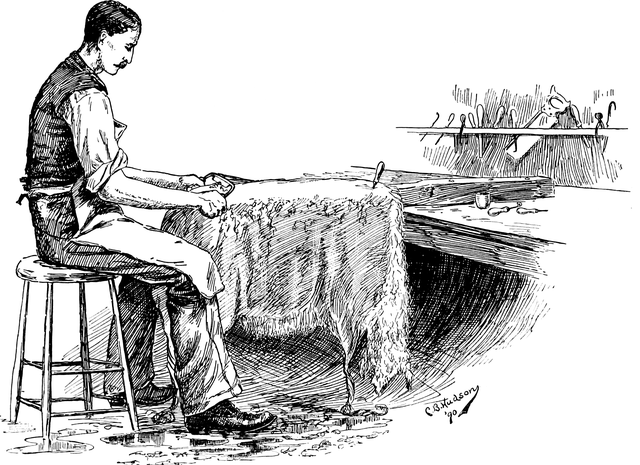
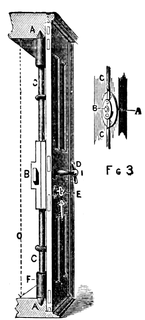
Knives.—For general use the best knife for the collector or taxidermist is a steel-handled cartilage-knife, as shown in Fig. 1, B. It costs seventy-five cents. There are two kinds of cartilage-knives, but the one shown has the best-shaped blade.
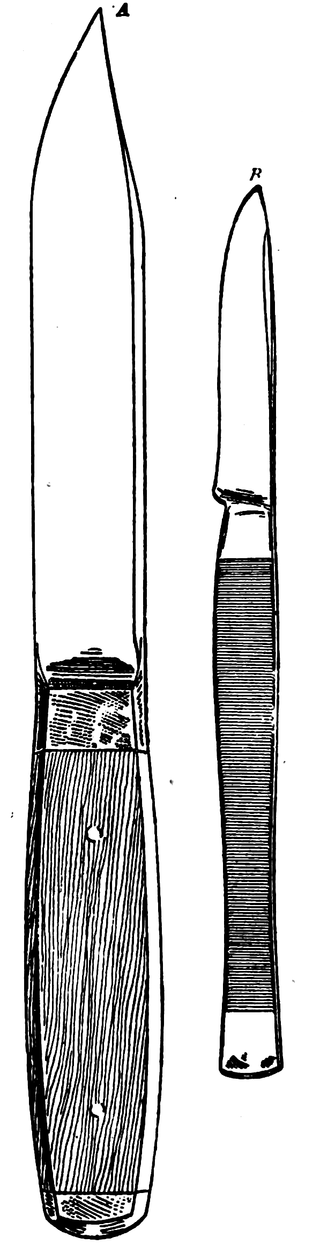 Fig. 1.—The Best Knives for
a Collector or Taxidermist
(about two-thirds actual size).
A, Russell's "killing-knife;"
B, Cartilage-knife.
Fig. 1.—The Best Knives for
a Collector or Taxidermist
(about two-thirds actual size).
A, Russell's "killing-knife;"
B, Cartilage-knife.
For heavier work the best knife I have ever used or seen is the so-called "killing-knife," No. 01512, as shown in Fig. 1, A, made by John Russell, Green River Works, Turner's Falls, Mass., the retail price of which is only seventy-five cents. Had I designed it myself, especially for collectors' use, I could not have done better. The shape of the blade, the thickness of it, and the shape of the handle are[16] all perfect. If you cannot procure one of these knives, then buy a good butcher-knife, and grind the blade down to this shape. A knife with a straight edge is not fit to use, for many reasons.
Always keep a good coarse (water) whetstone for large knives, and a Wichita oil-stone and oil for your finer knives, and the final touches to your large ones.
Seasons for Collecting.—Mammals.—In the temperate zone never take fur-bearing or game animals before September 1st, or later than February 1st, if possible to avoid it. On most of these mammals the pelage is the finest during November and December. It is then at its maximum length, very clean and well dressed, and also at its brightest color. The ruminants begin to shed in May (the American bison as early as March), and by July the new hair upon them is only about half an inch long, but very fine and sleek. At that time it does not have its natural color. In our country, September, October, and November are the months par excellence for the taking of mammals, especially the large species, for after December 1st the storms and snows of winter render their haunts untenable for the hunter, unless he builds a cabin in the woods and makes a winter of it. The haunts of the mountain sheep and goat must be abandoned by December 1st, at the latest, on account of the snow. The best time to take families of young mammals is from May to August. If taken earlier they are too young, and later they have passed their most interesting age. The smaller the species are, the quicker the young mature, and in collecting all such, the naturalist must be on the keen lookout to take them at the precise time they reach the most interesting size and age.
Birds.—In the temperate zone the best months for bird collecting are March, April, May, June, September, October, and November; but since the study of migration depends upon collections and observations made all the year round, there is really no time to begin collecting, and no time to cease. At the same time the amateur will soon discover that, aside from the birds that are found only in their particular season, the greatest number of species to be obtained in the Northern United States come in the months mentioned; and, of course, in the cold half of the year they are most plentiful in the South, whither they[17] go to escape the cold weather. In the northern regions bird-collecting naturally begins with the spring migration from the South, and is most active from that time up to the end of June. During July and August the old birds are moulting, and the young ones have immature plumage and stub tails.
A rule which can be safely applied, to all tropical climates is that the dry season is best for either collecting, sport, or travel. Never collect in the rainy season if you can help it. Animal life is doubly hard to find, specimens are desperately difficult to preserve, and field work is very trying on the patience and the constitution.
In the Arctic regions, hunting and collecting must be done in midsummer, or not at all. While it is true that in the torrid and temperate zones there is a certain amount of work to be done all the year round, there is always a particular season which may be regarded as the harvest-time.
Collecting by Amateurs.—There is one kind of collecting which should be discouraged in every possible way, and that is the postage-stamp style of collecting by boys who have no real love for natural history. Boys in their teens often make collections of bird-skins, eggs, and nests in precisely the same spirit that prompts them to gather coins, postage stamps, and autographs—"to see who can get the most kinds." This vicious propensity is apt to involve a very good boy in a useless and inexcusable warfare against the feathered tribes. Many a time I have been saddened by the sight of drawer upon drawer, full to overflowing, of poorly made skins of our most beautiful songbirds,—hundreds of them in a single collection, perhaps not worth ten cents apiece in any market,—each skin merely recording the important fact that it was shot on a certain day in a certain place. There is a way to prove whether a juvenile collector has really a love for the study of birds. Let the one who furnishes the sinews of war—parent, guardian, or elder brother—demand that he shall mount every good specimen he kills, and be able to tell all about its habits, food, economic value, etc. This will in any event result in great good. If the collector is not really absorbed in the study of bird-life, the labor such a course involves will soon deter him from indiscriminate slaughter; and even if he is destined to become a distinguished member of[18] the A.O.U., it will be all the better for him to be taught to place a high value on every bird, living or dead.
Shooting Birds as a Pastime.—I cannot, without being profane, find language strong enough to adequately express my abhorrence of the damnable practice some parents have of providing thoughtless boys with shot-guns and ammunition for the slaughter of birds and small mammals, just for the fun (!) of the thing, or to become proficient in the use of the gun. For the killing of birds for food, or to mount for the cabinet, or to study intelligently, there is some excuse; but for the slaughter of birds as a boyish pastime there is no excuse whatever, and either boys or parents who have such a disregard for life as to make it possible should be fined as heavily as can be done under the law. Firearms and their users are multiplying at such a frightful rate that it seems highly probable the time will come when there will be no more wild birds or quadrupeds left upon the face of the earth.
It is a good thing for a boy to be taught to shoot, and skill in the use of a rifle may fairly be regarded as an accomplishment; but the taking of life is not in the least necessary to its acquirement. If a boy wants to shoot for the sake of becoming an expert with the gun, give him a rifle and a target, or a shot-gun and clay pigeons, that he may start in the right direction. Do this, and the chances are ten to one that he gets ten times the sport and twenty times the benefit out of rivalry at the target that he would out of roaming over the country and killing every bird he can discover. Even in the immediate vicinity of Washington a song-bird can hardly raise a note without attracting a boy with a gun.
Poisoning and Trapping Mammals.—Inasmuch as there are in print a number of good books that treat this subject exclusively, I may be spared the labor of taking it up here. The reader must be assured, however, that traps and strychnine are very valuable allies in collecting, and he who ignores them will lose much. Above all things, carry with you plenty of strychnine, use it industriously, and it will bring you many a fine carnivore you would not get otherwise. Poison a skinned carcass by cutting gashes an inch deep in the rump and other fleshy portions, and putting strychnine in them. Also cut up chunks[19] of meat in little cubes, put poison in the centre of each, and scatter them around for the benefit of the wily wolf and fox, the fat and festive badger, the wary golden eagle and raven, and other meat-eaters in general. On our hunt for buffaloes in Montana, Mr. W. Harvey Brown was our Borgia, and his industry and strychnine laid low some of the finest small specimens we obtained, including specimens of all the species mentioned above. After putting out poison, search the vicinity thoroughly for two or three days, and the chances are your efforts will not be in vain.
Dr. C. Hart Merriam and his collectors have reduced the trapping of the very small mammalia to an exact science, the like of which I venture to say has never been seen before. They use three kinds of traps—the Lamb steel-trap, No. 0; the Cyclone, and the Climax. These are all small, all may be used with bait, or quickly modified to serve as runway traps, for arvicolas and the like. Boiled oatmeal mixed with corn meal is the standard bait used for small rodents. For shrews, small carnivora, and omnivorous rodents, meat baits are used, such as birds' heads, intestines, pieces of skin, and meat—in fact anything fleshy.
Selection of Specimens.—This is the golden rule in collecting: Preserve the first specimen you collect of every species you encounter, lest you never get another. When you have obtained too many of a kind, it is an easy matter to throw some away. At all hazards, try to obtain one really fine adult male and female of each species, to serve as standards of comparison in your subsequent studies. Remember that immature, undersized specimens are not typical representatives of a species, nor do they add glory to a collection. At the same time, quite young specimens, say one-fifth to one-tenth adult size, are always very interesting, and should be collected and preserved whenever possible. Collect your mammals and birds during the season when their pelage and plumage are at their finest. Especially should every specimen that you propose to mount be strictly first-class. Life is short and species many, and when you do go through with the task of mounting a specimen, it should be so fine in every way that you will never need to replace it for the reason that it is too poor to keep. Of rare species, the rule is to preserve every specimen taken, and, I may add, make as many different kinds of preparations of a rare species as you know how to prepare. For example, of the guacharo bird, or cave-bird of Trinidad (Steatornis caripensis), my friend Jackson and I prepared skins, skeletons, and alcoholic specimens, and took a full assortment of nests and eggs.
Measurements.—It is of great importance to acquire a fixed habit of carefully measuring every specimen you prepare, unless you are already in possession of an abundance of measured specimens of the same kind. After getting into the habit of measuring, it takes only a very few minutes to do the work, and[21] the value of the information thus obtained is sure to be equal to ten times its cost.
Record the measurements on the label bearing the name of the object, and by all means adopt for each class of objects a certain system of measurements, which should always be followed. Under their respective headings, in the following chapters on collecting, I will give directions for measuring small mammals, large mammals, and birds, according to the system I think most useful.
Casts.—The great value of casts as working models and records cannot be overestimated nor ignored without loss of accuracy. They are especially valuable in preserving records of the forms of mammals; and the methods of making them—all very simple and easy—will be found fully described and illustrated in the chapters devoted to "Making Casts" (Part III.).
Photographs.—To the taxidermist and collector, photographs of dead animals are of very little value unless it be a large picture of the head of a large specimen, such as a moose. Photographs of live animals taken "broadside on," as the sailors say, are extremely valuable aids in mounting; but these you get only in the zoological gardens. I never took a camera into the field with me, and have always been glad of it, for it would not have repaid the trouble it would have involved. No man who has his hands full of shooting, preserving, and packing specimens can afford to waste time on a camera with which to take dead animals, because it is apt to fail to emphasize the very points you most wish to have recorded. I have had enough dead animals photographed to feel sure on this point.
On the other hand, the taxidermist who permits himself to be wholly unable to make simple sketches, with a fair degree of accuracy, from animals in the flesh, is seriously handicapped. It is only the heaven-born genius—as yet unborn, I believe—who can study animals and remember everything he sees. Written descriptions help out a great deal, especially when particular emphasis is called for, and in the absence of sketches, photographs are the next best thing. It is an excellent thing to be able to photograph animals, both living and dead; but the trouble is,[22] one cannot always get the game and the camera together. A note-book and a pencil one can always carry, and even when you have the camera, the former often proves the better ally of the two.
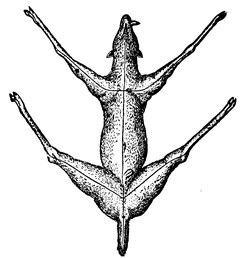
Outlines.—For years it has been my constant practice to make outlines of dead animals, on large sheets of paper, before skinning them. My plan is to lay the specimen on its side on a sheet of heavy manila paper, place the legs and feet in an easy walking attitude, pin or nail them fast in place, then mark entirely around the animal with a long lead pencil. To get an exact diagram of a rather large mammal, I invented a wooden square, carrying a pencil point at its outer angle, with which it was easy to get the exact outline of a large animal, or large skull. In mounting a specimen, such an outline is of great value as a check on errors in proportion that might easily be made in putting it together.
Field Notes.—There are hundreds of specimens on which you will not need to take notes, unless you have the time to study their habits, find out what they eat, how they live, etc. But of rare and interesting objects you will want to record all the information you can gather regarding their life history. To determine what they feed upon, examine the contents of their stomachs. If there is no time to do that in the field, then preserve the stomachs in alcohol, carefully labelled, and examine the contents at your leisure. Learn how to observe, and then put down in black and white, between substantial leather covers, all that you do observe, and all that is told to you by the natives about species with which they are familiar. Do not forget to ascertain and record the native names of your specimens, for after you get home you will be certain to wish to know them. One thing is certain; when you come to write about your collection, you will wish you had taken more notes in the field.
While a specimen is fresh, take careful notes as to the color of all the soft parts that will lose their color when the skin is dry. Learn to describe colors accurately, and, if possible (though this seems like asking a great deal!), try to describe colors so that afterward, when your notes get cold, you yourself will know what they mean!

In describing the colors of soft parts, I would advise you to[23] purchase the following Windsor & Newton tube colors (oil) and use them as standards for reference: Ivory black, Vandyke brown, burnt umber, burnt sienna, raw sienna, Naples yellow, Indian yellow, chrome yellow, Indian red, vermilion, purple lake, cobalt blue, and indigo.
Labelling.—For scientific purposes, a specimen without a label is not quite so good as no specimen. It takes up room, and is useless. The most important record to make on a label is the name of the locality in which it was taken. Next in importance is the date of its capture. You may leave off everything else if you really must, for as to its name the specimen can speak for itself. But it is by all means desirable that the label should give the name, locality, date, sex, and some measurements. I need not mention "name of the collector," for the collector can always be trusted to look out for that without advice from anybody, even under the most discouraging circumstances.
Many hundred beautiful and curious quadrupeds are shot every year and allowed to perish utterly for lack of the little knowledge and skill which would enable the hunter to remove and preserve their skins. The operation is simple and easy, the requirement in tools and materials quite insignificant, and the operator has only to exercise a little patient industry to achieve good results. There are few circumstances under which a determined individual finds himself thwarted in his desire to remove and preserve the skin of a dead animal. In nineteen cases out of twenty the result hinges on his own disposition. If he is lazy, a thousand things can hinder his purpose; if he is determined, nothing can. A sharp pocket-knife, a little powdered alum and arsenic in equal parts, or failing that, common salt alone, will do the business in lieu of a better outfit, for any small mammal that ever lived.
I begin with small mammals, because it is squirrels, rabbits, cats, woodchucks, weasels, opossums, raccoons, and foxes that the beginner will fall in with long before he is called upon to wrestle with such subjects as deer, bear, elk, or buffalo. These general directions apply to the skinning of all terrestrial quadrupeds up to the size of a setter dog, and the preservation of their skins in a mountable condition.
Measurements.—The following are the most valuable measurements to take of a small mammal.
1. Length, from end of nose to root of tail. This is to be taken with the head stretched out straight as far as it will go. Measure from the tip end of the nose to the point where the tail joins the body. In my judgment it is always best in determining this latter point to take the angle made by the tail (underneath)[25] and the rump when the tail hangs or is bent down at an angle of forty-five degrees to the spinal column. This point is always fixed and constant, and can be quickly and accurately determined by bending the tail down and sticking a pin or awl at the angle. To measure an animal like a monkey on the top of the tail is to attempt the location of a point which can rarely be determined twice alike. For this reason I have always taken this measurement in both large and small mammals underneath the tail.
2. Length of tail, from root to end of vertebræ.
3. Length of hind foot. Bend the heel at a right angle, and measure from the outer extremity of the angle to the tip end of the longest toe, including the nail.
4. Height at shoulders, if the animal be not too small. To take this, lay the animal on its right side, then, as nearly as you can, place the right leg and foot in the position they would assume if the animal were standing erect (the sole of the foot must be parallel to the axis of the body), and measure in a straight line from the bottom of the heel to the top of the shoulders. Record, also,
5. The color of the eyes, and the other soft parts.
6. Weight, in certain cases.
Do not forget what has been said in Chapter III. about outlines and sketches. On one corner of the outline-sheet we record the name of the specimen, locality, date, sex, measurements, color of eyes, lips, feet, etc. It takes but a few moments' time, and the result is a complete and accurate record of what the animal was in the flesh. These sheets are numbered and filed away, the skin is numbered and put in the bath, and even though it be not until five years later that we are ready to mount it, we can tell as accurately what the animal was like as if it had been received only the previous day. If the specimen is a baboon, for example, with several colors on its face, it was for years my practice to make a rough sketch of the face and put upon it the various colors that belong there, in oil-colors, usually, though sometimes with water-colors. It was also my custom to spend half an hour or so in taking a mould, and making a quick cast in plaster Paris of the face of every monkey or baboon which came to me, unless I already had one which would answer as a model to copy in finishing the face.[26]
Skinning Small Quadrupeds.—Lay the animal flat upon its back, head to your right. Hold your knife with the edge up, and push the point through the skin of the throat, precisely in the middle of the neck. Now push the point of the knife forward under the skin, between it and the flesh, and divide the skin in a straight, clean cut along the middle of the neck, breast, and body, quite to the base of the tail. If the animal has a large, fleshy tail, like a dog or raccoon, it must be slit open along the under side (without cutting the hair) for its entire length, except an inch or two at the base. If the tail is small, slender, or bony, like that of a squirrel or a rat, it can usually be slipped out of the skin by pulling the bony part between two sticks held close together against the skin of the tail.
The sole of each foot must be slit open, lengthwise, from the base of the middle toe straight back to the heel, and in case the foot is large and fleshy, like that of a dog, the cut must be continued on up the leg, perhaps one-third of the way to the knee, to enable the skin of the leg to be turned wrong side out over the foot.
Having made all the opening cuts, begin at the abdomen, catch one edge of the skin between thumb and finger, and with the knife cut it neatly and cleanly from the body, leaving as little flesh as possible adhering to the skin. In using the knife do not go at it in a daintily finical way, as if you were picking birdshot out of the leg of a dear friend; for, if you do, it will take you forever to skin your first specimen, and there will be no time left for another. Learn to work briskly but carefully, and by and by you will be able to take off a skin with a degree of neatness and rapidity that will astonish the natives. It is not a dissecting touch that is called for in taking off a skin, but a firm, sweeping, shaving stroke instead, applied to the inside of the skin, and not to the carcass. This applies to all skinning operations on all vertebrates except birds.
After starting at the abdomen, we come very soon to where the foreleg joins the body at the shoulder, and the hind leg at the hip. Disjoint each there, and cut through the muscles until each leg is severed from the body. Skin each leg by turning the skin wrong side out over the foot quite down to the[27] toes. That done, cut the flesh away from the bones of the leg and foot, neatly and thoroughly.
Never leave the foot of an animal unskinned, unless it happens to be a very small one, like a chipmunk, or smaller, and the proper way is to skin the flesh out, even then.
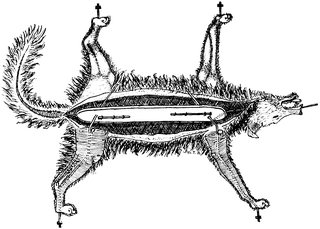
 Fig. 2.—A Squirrel partly Skinned, showing Process.
Be careful to leave all the bones of each leg attached to each other by their ligaments at the joints (see left hind leg in Fig. 2), and to the skin itself at the toes. Never throw away the leg bones, unless the skin you are preserving is to be kept as a pelt or a rug.
Detach the skin from the back, shoulders, and neck, and[28] when you come to the ears, cut them off close down to the head. Turn the skin wrong side out over the head, until you come to the eyes. Now be careful or you will do mischief. Work slowly with the knife, keeping close to the edge of the bony orbit, until you see, through a thin membrane under your knife edge, the dark portion of the eyeball—iris and pupil. You may now cut fearlessly through this membrane and expose the eye. If your work has been properly done, you have not cut the eyelids anywhere. If you are ever in doubt when operating on the eye, thrust the tip of one finger fairly into the eye and against the ball, from without, and cut against it. This is always an excellent plan in skinning large mammals.
Skin down to the end of the nose, cut through the cartilage close to the bone, and cut on down to where the upper lip joins the gum. Cut both lips away from the skull, close to the bone, all the way around the mouth. The lips are thick and fleshy, and must be split open from the inside and flattened out so that the flesh in them can be pared off. Do not mutilate the lips by cutting them away at the edge of the hair, but leave the inside skin, so that in mounting you can fold it in (with a little clay replacing the flesh) and thus make a mouth anatomically correct. Do not shave off the roots of the whiskers, or they will fall out. Gash the flesh between them (they are set in rows), but leave the follicles themselves untouched. Pare away the membrane which adheres to the inside of the eyelids, and turn the ear wrong side out at the base, in order to cut away the flesh around it. If the ears have hair upon them, they must be skinned up from the inside and turned wrong side out quite to the tip, in order to separate the outside skin, which holds the hair, from the cartilage which supports the ear.
 Fig. 3.—Skinning a squirrel's
head.
Fig. 3.—Skinning a squirrel's
head.
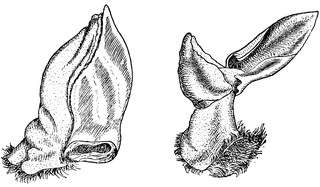
For a full description of ear skinning, see another chapter.
The great principle which is the foundation of all valuable field work on mammal skins is this: A skin must be so taken off, cleaned of flesh, and preserved that the preservative powder or fluid can act directly upon the roots of the hair from the inner side of the skin, and over every portion of its surface. Neither alum, nor salt,[29] nor alcohol (unless it be of great strength) can strike through a thick layer of flesh and penetrate through the skin to the epidermis quickly enough to save it from decomposition. The epidermis of most animals is of such a close and oily nature that preservatives cannot strike through it from without, and therefore when a skin is removed it must be cleaned of flesh and fat, so that the preservative liquid or dry powder can come immediately in contact with the cutis.
The skin is now off. If the lips have been opened out, the ears skinned to the tip (if they be haired), and the feet well skinned down, we are ready to go on. But first we must clean the skull. Cut the flesh all off, or the most of it at least, for it is not possible to get it all away at the base; cut out the eyes and tongue, and with your brain-hook, or a piece of wire hammered flat at the end and bent up at a right angle, patiently draw out the brain through the occipital opening at the base of the skull. By this time, perhaps, the skin will be bloody in places, or possibly it was dirty to start with. Now is the time to wash it thoroughly in clear water. Remember that a skin which has been dried with blood upon it is damaged forever. It stains the hair, and very often forms a hard, gummy mass which nothing will dissolve.
Preservation of the Skin.—The next step depends upon what you propose to do with the skin, or it may depend upon the conditions under which you are collecting. 1. If you are in your laboratory preparing skins to mount, preserve them all (except quite young specimens and certain others) in a soft, or wet state, in a salt-and-alum bath. 2. If you are in the field (especially the tropics), making a large collection of mammal skins for mounting, by all means do the same if possible. 3. If the skins are for purposes of study as skins, during which frequent handling and examination is absolutely necessary, make them up as dry skins. 4. If you lack facilities for preserving them wet, then make dry skins of them. 5. If the necessities of travel and transportation make it necessary to reduce the weight to the lowest possible limit, and to divide it up for carriage overland, make up all skins dry, both little and big. 6. If you have only one or two skins to preserve, it will be less trouble to you to make them up dry at once.[30]
Here are the two methods:
A. The Salt-and-Alum Bath.—This is the finest solution ever discovered for the preservation of the skins of quadrupeds that are destined to be mounted. It is inexpensive, simple, and easy to make; its action is perfect; its strength can be regulated to suit any kind of a skin; it never gets stale; and if properly handled will preserve a skin for a hundred years in the same pliable and elastic condition as when it leaves the animal's back. In only two or three instances have I ever known it to change the color of the hair in the least. Every taxidermist knows that it is far easier to mount a fresh specimen in fine style than an old, dry skin which has lost all its elasticity. The work on a soft skin (i.e., one which has never been dried) can be done more easily, more quickly, and vastly better. With a dry skin you can make only what it will let you; but with a wet skin you can make just as fine a mount as your skill is capable of producing. And with the latter it makes no difference whether the skin came off the animal last week or ten years ago, except in the case of very young animals. Of these the bath softens the leg bones. For years it has been my custom to preserve all skins that I expect to mount (except the young of the smaller species) in this salt-and-alum bath, and it is almost superfluous to add that I strongly advise all others to do the same. In many ways it is a great economy to do so.
Directions for Making It.—For every gallon of water put in three-quarters of a pound of alum (one pint) and a pound and three-quarters of salt (about one quart), and heat the liquid to the boiling-point, stirring occasionally, so that the salt and alum will dissolve. Then pour it into a wooden, earthen, or glass vessel, or a tank lined with lead (for zinc or galvanized iron will not answer), and when it is cool, or even milk warm, it is ready for use. Test it with your salometer (which you can procure for fifty cents of Bahmann & Hoehn, 21 Park Place, New York), and see that it stands at 15°. This is the normal strength. If stronger than that, e.g., 16° or 17°, the skin will be hardened too much. It can go as low as 13° with safety, but that is the limit. At 12° skins are liable to lose their hair.
Directions for Use.—If the hair is tight on the skin everywhere, simply immerse it in the bath, leg bones and all, giving[31] it plenty of room at first. Move it up and down, and leave it as much spread out and free from folds as possible. Remember that the fluid must act upon the inside of the skin, for the epidermis is often almost impervious to it. If you allow the skin to lie upon itself in thick folds, stuck together on the inside, those spots are liable to lose their hair in a most unaccountable and aggravating way. If the skin is small and thin, the bath soon does its work; but if it is a large skin, move it up and down, and all about, every day for the first two or three days. By the end of that time its preservation will be complete.
Half-spoiled Specimens.—Very often a subject will be brought to you in the flesh, several days old, green on the abdomen, and the hair starting to slip off between the hind legs. If the hair pulls out readily on various parts of the body and limbs, it is a gone case; but if it starts only a little on the lower part of the abdomen, and is firm everywhere else, put some bath, with a little extra alum in it, on the fire to get warm, snatch that skin off in a hurry, and without stopping for any fancy touches whisk it into the warm bath. The bath should not be so hot that you cannot bear your hand in it. It will act like magic. Then you can gradually finish your work on the skin, so as to keep it safe from harm. Very often quick work, and a warm bath with plenty of alum in it, will save a skin in fine, mountable shape, when nothing else will. The alum acts as a powerful astringent, drawing together the fibres of the epidermis around the root of each individual hair, and likewise binding together the cutis and epidermis.
Cleanliness.—You will observe that as fresh skins are put into a bath it gradually loses its strength, and it is also liable to become, in time, so dirty with blood and grease that it must be thrown away. Keep skins that are greasy (bear, seal, etc.) carefully by themselves, and never put the skin of a deer, cat, or any animal with a fine coat in a greasy or dirty bath. If a bath is clean, but of too low strength, make some extra strong bath, say 20°, and add to it and bring it up to 15°. Keep all your bath receptacles tightly closed, or the liquid will evaporate very rapidly.
Testing the Bath.—If you have no salometer, and are not overparticular, you can test your bath by tasting it; but unless the[32] bath is new and untouched, I prefer the little salometer. By tasting the bath when first made in the proportions given above, and remembering the degree of its astringency upon the tongue, you can make that a standard for comparison—if it suits your taste!
Skulls and Leg Bones.—The leg bones of all small and medium sized mammals, even up to the deer, can just as well go into the bath, after they have been thoroughly cleaned of all flesh and tendons. The skulls, however, had better not go into the solution. Clean them carefully, anoint them all over with thin arsenical soap, put a tag on each to show to what skin it belongs, and let it dry. Don't lay it aside without poisoning, or it will be swarming with dermestes before you know it.
As before stated, a skin must have room while it is curing, but when that has been thoroughly accomplished, which with the largest skins never takes more than four or five days, they can be packed together like sardines so long as the bath is strong enough.
B. Making Dry Skins.—Poisoning and Preserving.—When the skin has been removed and cleaned, the next step is to sew up from the inside any holes that may have been made in the skin by bullets or knives. Then make up a mixture of two-thirds powdered alum and one-third arsenic, and rub as much of it upon the inside of the skin as will stick there. The alum is to preserve the skin, the arsenic to poison it against the attacks of insects. Apply this mixture thoroughly, especially in the feet, ears, head, and tail, for these are the points the dermestes attack first.
Another Method, and one which I almost invariably follow when I am compelled to make dry skins, is to anoint the skin with strong arsenical soap,[3]—the finest poison for skins yet discovered,—then rub on the skin, as soon as the soap has been fully absorbed, a mixture of fine salt and powdered alum, in equal proportions. Though the arsenical soap may be thought "mussy" at first, it should not be used thin and watery, but as a thin paste, like thick cream. The advantages of this method are—(1), that the skin is more thoroughly poisoned, especially externally, on the hairless portions; (2), the skin dries without
becoming so hard and brittle and inelastic; and (3), it can be softened and mounted much more easily and successfully than skins prepared by the first method. For skins which are to be mounted, the advantages of this method are very obvious.
The Simplest Method.—If you have neither arsenic nor arsenical soap, and yet wish to save a skin so it can be sent to a taxidermist in good condition, prepare it with fine salt alone. Use the salt liberally, and if the weather is warm, leave the skin turned wrong side out and roll it up in a quantity of it. If you use it sparingly, the skin will absorb it all in a day or two, literally "cry for more," and failing to get it will sweat and spoil. It is simply a question of enough salt.
Even when collecting in the field, I nearly always cure small skins with salt only, so that they will stay quite soft and fresh until they get to the laboratory, and then go into the bath without ever having been dried.
Rats.—Skins preserved with salt only must be carefully guarded from the attacks of mice, rats, cats, dogs, and other vermin that go about seeking what they may devour.
Making up a Dry Skin.—The Legs.—Having applied the preservatives, if you propose to make up your specimen as a dry skin, wrap a little tow, oakum, cotton, or cotton cloth around the bones of each leg, to partly replace the flesh, and keep the skin away from the bone, so that both can dry quickly. If you have no other material, paper will do. In the East Indies, where transportation was difficult, I used to carry with me bundles of coarse brown paper such as the grocers use, and used it for wrapping the leg bones of monkeys, foxes, and the like. But for the small rodents, one must have either tow, oakum, cotton, or cloth, the preference being in the order named. On no account should the skin be left to dry down upon the bone. The proper filling out of the legs is desirable in order that they may have a neat, shapely, and natural appearance, so that the hair will lie naturally, and can be studied to advantage. If this part of the process is neglected, the skin of the leg shrivels up, dries down upon the bone, and looks like a mummy. In the tropics the moisture in a leg bone is sufficient to cause the decay of the skin which surrounds it unless they are separated by some kind of wrapping. To avoid this, some tropical, collectors allow their[34] skins to dry wrong side out, a most lazy and vicious habit, the results of which are in most cases totally worthless.
 Fig. 4.—A Model Mammal
Skin.
Fig. 4.—A Model Mammal
Skin.
Having wrapped the leg bones enough fairly to replace the flesh, turn back the skin of the leg until it comes right side out again, adjust the skin neatly, and make the member as shapely and natural as you please.
The Skull.—There are two ways of disposing of the skull. The universal custom has been to replace it in the head, with a little filling in the cheeks and orbits, the lips neatly adjusted on the teeth, and the eyelids also in their place, half open. This makes the best looking skin, and unless you wish to study the skull, is the best method to follow. For skins that are specially designed for study, the plan lately adopted by the curator of mammals of the National Museum is an excellent one. It is to remove the skull entirely from the head, and in case of all mammals smaller than a coyote, put it in the centre of the body, with the filling, in the line of the seam along the belly, so that by cutting a few stitches in the dry specimen it may be readily taken out at any time. The advantages of this arrangement are obvious.
The Tail.—The tail must be disposed of according to its character. If it is long and slender, take a small wire, wrap it with tow or cotton cloth, so that the skin cannot touch the iron at any point, insert it in the tail and sew it up with a few long stitches. If you have not the means wherewith to do this, whittle a slender stick to a point, and insert it in the tail from within two inches of the body out to the tip. If the tail is large, and has been split open for its entire length, it can be left flat.
Filling.—Begin at the head and fill out the head, neck, and body to about the natural size of the animal when alive, but no[35] larger. Better leave it too small than fill it too full, and stretch the skin out of proportion. With needle and thread sew up the skin to give it a neat appearance, beginning at the throat. Comb and brush the hair so that it will lie naturally, and show its texture and colors to the best advantage. Take a stitch also in the centre of the lips to hold them together.
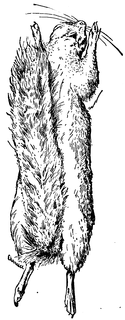 Fig. 5.—Another Form of Mammal Skin.
Shaping.—The ends to be sought in laying out a skin to dry are, to have it take up a limited amount of space in a drawer, to have all breakable points protected, and at the same time to have all parts of the specimen accessible for examination. The shape of a dry skin, therefore, must depend upon its character. The handsomest collection of small mammal skins that I have ever seen is that of Dr. C. Hart Merriam, Chief of the Bureau of Economic Ornithology and Mammalogy, Department of Agriculture. Although it is purely a private collection, it contains at this date 5,750 skins. Dr. Merriam's method of shaping a skin is certainly, so far as looks are concerned, the best yet devised. Fig. 4, on the opposite page, shows it perfectly. The tail is wired, and extends straight out behind, lying between the hind legs, which also extend directly backward. The forelegs are drawn forward just far enough apart to allow the head to lie between them. The skin is well shaped, and lies flat[36] upon the belly, with all the members resting down upon the bottom of the drawer.
With specimens having long tails this arrangement is open to one objection. In the rough-and-tumble experiences that collections made in the field almost inevitably go through before they reach safe anchorage in the museum, a long tail sticking straight out for its full length is very liable to suffer damage in various ways, especially at the tip. For this reason I always bend the tail down and lay it along on the belly, with a stitch or two to hold it there, safe from harm (Fig. 5). And with such animals as monkeys, sloths, cats, etc., having long and slender forelegs, I always place those members close alongside the body, instead of extending them their full length toward the front.
Steel Combs.—For dressing the hair of an animal it pays to have a furrier's fine steel comb, and a coarser comb of German silver, such as can be obtained at seventy-five and fifty cents each, respectively, of J. Ruszits, No. 73 Mercer Street, New York. The same furrier also furnishes a very large steel robe-comb (like an infant garden rake), which is very useful on large mammals having long, matted hair, such as buffaloes, camels, llamas, and the like.
The fundamental principles to be observed in skinning a large mammal are, in general, precisely the same as those which govern the same process in small mammals, and which have been recorded in detail in the preceding chapter. Having done my best to afford the student a clear and full understanding of those principles, it is almost unnecessary to say anything about large mammals. A keen-witted worker could skin any mammal and preserve the skin by the light of the directions already given, with such variations as common-sense would dictate.
But, in order to aid the student to the fullest extent, we will endeavor to state the exceptions and variations of method which are necessary in disposing of large subjects.
Measurements.—Up to this hour there has been a total lack of system and uniformity among naturalists and hunters in taking measurements of large quadrupeds. I have in several important cases found it utterly impossible to interpret the meaning of measurements taken by other collectors—and it is very likely they have experienced the same difficulty in understanding mine. In the hope of securing uniformity hereafter in observations of this kind, I venture to propose the following system, which will apply to all terrestrial mammals larger than the fox, except the large quadrumana. If the method here proposed is rigidly adhered to, it will produce a uniformity in results that will certainly increase the value of specimens collected hereafter. The measurements are listed in the order of their importance, and are fully indicated in the accompanying illustration (Plate III.). Straight lines indicate straight measure[38]ments between two points, not following curves; and curved lines indicate circumference measurements.
Record all measurements in feet and inches, and fractions of an inch. If you would have your records understood by the few rather than by the many, then bow to the dictates of the French and German naturalists, who, as a rule, care not a brass farthing for American science or zoological nomenclature, and employ the metric system. The chances are as twenty to one that no one outside of the English language will ever care a continental about your measurements, and for this reason United States measurements ought to be good enough for us. There is no more reason why 120,000,000 English-speaking people should adopt the metric system for a few Europeans who might care for their measurements, than that we should write all our zoological books and papers in French or German. If you wish to make your records available to the people who will care for them, make them in the United States language.
1. Length of head and body to root of tail (Plate III., A-A).—In taking this measurement, lay the animal upon its side, stretch the head straight forward as far as it will go, and hold a stick perpendicular against the tip of the nose. Erect another perpendicular rod under the tail, close to where it joins the body, at the angle formed by the lines A and H, then measure between these two perpendiculars.
2. Height at the shoulders (B-B).—This is a difficult measurement to take, because it is subject to the management of the operator. Plant a perpendicular rod close against the shoulders at the highest point. Then hold the foreleg perfectly straight, at a right angle to the axis of the body, and bend up the foot into the position it would assume if the animal were standing upon it. In short, place the foreleg and foot exactly as they would be were the animal alive and standing, with its weight resting upon it, and measure from the bottom of the heel in a straight line to the perpendicular at the shoulders.
3. Girth behind foreleg.—In taking this, always measure at the point where the girth of a saddle touches the horse, and draw the tape-line taut upon the skin. If the hair is thick and long, part it.
4. Circumference of the neck.
5. Depth of flank (E-E).—To a taxidermist, this is often a very important guide in the construction of a manikin. There is always a thin fold of skin at the point where the skin of the hind leg passes to the side of a large animal, as indicated by the dotted line in the figure, at the lower end of the line E-E. Erect a perpendicular at the upper end of the line E, and measure between the two points.
6. Circumference of forearm (F-F).—To be taken at the point where the forearm has the greatest circumference.
7. From head of humerus to head of femur.—This is always of extreme value in building a manikin. As the animal lies upon its side, hold the foreleg the same as when you measured the height at the shoulders. Then feel for the two high points G-G, where the skin rests on the outer extremity of the arm and thigh bones (not the pelvis), at shoulder and hip, and measure between the two points.
8. Length of tail (H-H).—Hold the tail down at an angle of forty-five degrees with the axis of the body, or the line A-A, and measure from the angle A-H to the end of the vertebræ of the tail. If you measure to the end of the hair, let this be a supplementary measurement.
These are the measurements which should always be taken on a large animal. Of course, of certain subjects, there are many other measurements that you will want, but your own needs will tell you what they are.
Weight.—It is very desirable to ascertain the weight of an animal whenever possible. A thousand times, at least, have I been asked the weight of my big tiger (495 pounds), and that number of times have I been glad that in spite of jungle fever, I persevered with my 50-pound scales, and weighed the animal piecemeal, after he had been skinned and cut up. With a particularly fine animal it is well worth the trouble it costs.
Skinning a Large Mammal.—Rip the skin open by a clean, straight cut from the throat along the neck, breast, middle of the belly, and on to the root of the tail. We are now obliged to slit the legs open along their entire length, so that the cuts will be as much out of sight as possible when the animal is mounted. In making these opening cuts, always insert the point of the knife under the skin, edge uppermost, to avoid cutting the hair.[40] To rip open a leg, seize the foot in your left hand, bring the leg against your own knee to hold it tense and firm, then insert the point of your knife into the middle of the foot at the back, and cut straight up the back of the leg until you come to the "knee" on the foreleg, and hock-joint on the other. At these points gradually change the direction of the cut and run it on up the inside so that it will finally come to the body-cut at a point exactly between the legs, and as much as possible out of sight. The lines in the accompanying figure (6) show how the cuts in the legs should be made. In skinning the head of an animal having antlers or horns, it is necessary to make an opening at the back of the neck shaped like a Y. Make the cuts as shown in Fig. 7, on opposite page; cut completely around each horn at its base, and skin the head by working downward over the forehead and cheeks. The skull is then taken out through this Y[4].
Thoroughness.—The principles to be observed in skinning the body are precisely the same as those given for small mammals. Remember that it is easier to take the skin off clean and free from flesh as you cut it from the animal, and can stretch it tight with your left hand in order to shave the flesh off clean, than it will be to clean the skin after it is off. An excess of flesh left on the skin means unnecessary weight, a waste of preservatives, and longer time in curing the skin. A clean, thin skin is more easily and quickly cured and carried than one badly taken off. My habit is to clean a skin so thoroughly in taking it off that no paring down is necessary before curing it—unless, indeed, it[41] be the skin of an elephant or other pachyderm. When I once preserved the skin of a large, old elephant in an Indian jungle, I kept ten native chucklers at work upon it for three days, thinning it down to a portable degree.
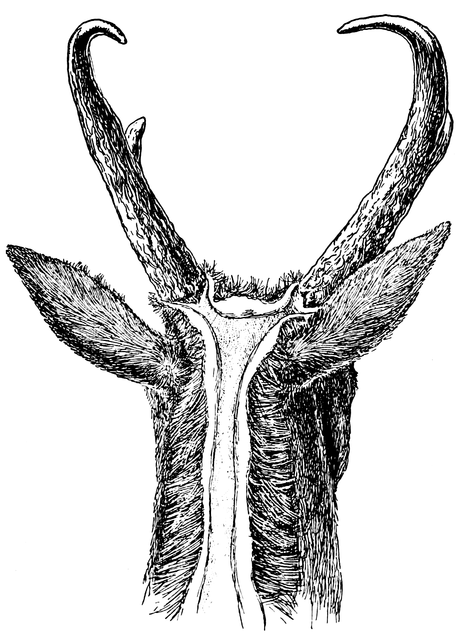 Fig. 7.—Opening Cuts at Back of Prong-horn Antelope's Head.
The Legs.—If the specimen is of medium size, e.g., not larger than a deer, disjoint the legs at shoulder and hip, and leave all the leg bones attached to the skin, just as with small mammals; but, of course, cutting off the flesh and tendons carefully. If the animal is larger than a deer, the skin would be too heavy and cumbersome to handle if all the leg bones were left attached to it. Therefore, with your elk, moose, buffalo, etc., cut off the[42] foreleg at the "knee" (so called), and the hind leg at the hock-joint, leaving the calcaneum, or heel-bone, attached to the canon bone, and thus remaining with the skin. The bones from the two upper joints of the legs are to be cleaned of flesh, tied in a bundle, and sent with the skin—unless the collector happens to be travelling by pack train in mountainous country, far afield. In such a case we can forgive him for throwing away the large bones of the legs if he will only bring in the skin, skull, and lower leg bones all right. The point is, in mounting a skin we must have leg bones—if not the real ones, then they must be counterfeits carved out of wood, to give shape to the legs, particularly at the joints. And he who tries it once will find it is a two or three days' job to carve a large set of leg bones, even with patterns by which to work, to say nothing of having to evolve models from one's inner consciousness. Therefore, I say, save the leg bones.
Beware of Blood.—By all means keep the hair from getting bloody, but if you cannot possibly keep it clean, keep it as clean as you can. Remember that blood must be washed out on the spot, no matter how scarce water is, nor whether the mercury stand at 110° above zero, or 10° below. If a wound bleeds profusely, throw plenty of dry dirt or sand on the hair that has become bloody, to absorb the blood. The dirt can be knocked out with a stick, and it will take the blood with it. If the white hair of the prong-horn antelope once gets soaked with blood, it is impossible to remove all traces of it. The soft, tubular hairs get filled with blood wherever there is a break, and enough of it will always remain to mark the catastrophe. In the Bad Lands of Montana I once washed three long and bitterly cold hours on a fine antelope skin that had lain twenty-four hours with blood upon it, but had to give up beaten, at last, and throw the skin away.
Shaping.—Since these directions will be used chiefly in preparing the skins of deer, antelope, and kindred ruminants, the accompanying illustration (Fig. 8) is given to show how such skins should be made up when they are to be preserved dry, either for study or for mounting. It is best to defer folding up a skin until it is partially dry and has begun to stiffen a little.[43]
 Fig. 8.—A Well-made Dry Deer Skin.
Special and Exceptional Directions.—Apes and Monkeys.—If you are in the jungle, the chances are that you will have no plaster Paris with which to make casts, in which case you must make the sketching-pencil and tape-measure do double duty. With such a wonderful and characteristic form as a gorilla, chimpanzee, or orang-utan, you cannot study it too much, unless you study it until the skin spoils. Above all things, study every feature of the face, and also its expression, so that you can make a copy of it two years afterward which shall be both mathematically and artistically correct. If you have plaster Paris, fail not to take a mould of the face, and also of one hand and foot, so that later you can make casts. The same advice applies to the great baboons with their fearful and wonderful faces and ischial callosities, some of them gotten up with all the colors of the rainbow, and far more brilliancy. Remember that when the skin dries all those colors totally disappear, and the skin turns to the color of parchment. Therefore, out with your box of colors at once, and make a color-sketch of the face. If you have skill[44] but no colors, or colors with no skill, then out with your "Ridgway's Nomenclature of Colors," make a large diagram or sketch of the head, and mark the names of the respective colors upon it. Whenever the skin of any animal has any noticeable color, record the fact in as definite terms as possible.
All the great anthropoid apes should have the opening-cut for the body made along the middle of the back, up to the back of the head, instead of along the abdomen and breast, which are generally but thinly haired, and on the throat are quite naked. By doing this, the sewed-up seam comes at the back of the mounted specimen, in the hair, and out of sight. With adult specimens of the gorilla, chimpanzee, and orang the skeleton is quite as valuable as the skin, therefore every bone must come forth and be carefully preserved. Skinning the fingers is a tedious task, and one which requires some skill, especially when it comes to working the end off so that the nail is left in its place in the skin, and without mutilation. But when the value of a skin and skeleton runs up into hundreds of dollars, you can well afford to spend a whole hour in skinning a hand, if you cannot do it in less time. The opening cuts for the hand and foot of any ape or monkey are to be made as shown by the dotted lines in the accompanying sketch of the foot of an orang-utan (Fig. 9). This is necessary even in skinning small quadrumanes which are to retain their leg bones, because the skin of each finger must be separated from the bone so that the preservative powder or liquid can get at the inside of it.
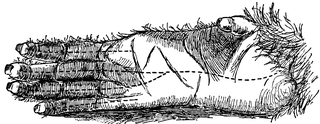 Fig. 9.—Foot of Orang-Utan, showing Opening Cuts.
The Eyes and Nose.—Be exceedingly careful in skinning the face. The eyes are deeply sunken in their sockets, and if you[45] are not very careful your knife will make an ugly gash at the corner of the eye before you know it. A finger held in between the lids against the eyeball will be a safe guide. Of course, you will cut the lips away at the gum, and split them open afterward from the inside to remove the flesh. And, of course, the proboscis of the baboon and the long-nosed monkey of Borneo must be skinned out quite to the tip while the specimen is fresh, or it will dry up horribly.
The Ear.—The ear of a quadrumane, especially that of a chimpanzee, because of its great size, is a very miserable part to preserve, unless you have a salt-and-alum bath at hand. If the cartilage is entirely skinned out—itself a difficult thing to do—it will afterward be almost a practical impossibility to give the ear its proper shape. Therefore the cartilage must remain. The skin can be loosened from the cartilage at the back of the ear, however, which is a great gain. Do this, and insert a good quantity of powdered alum. Then paint the whole ear over on both sides with arsenical soap, and put on all the powdered alum that will stick—unless the skin is to go in the bath. In that case treat each ear to a little strong alum water for an hour or so.
The lives of hundreds of thousands of wild birds have been sacrificed to no purpose by persons claiming to be ornithological collectors, and yet who had not the knowledge, skill, or industry to make up good bird skins. There are now in this country numerous large collections of bird skins that are a sight to behold. The ability to make up fine, clean, shapely, well-preserved skins, and make them rapidly also, is a prime requisite in anyone who aspires to be sent off to interesting "foreign parts" to shoot, collect, and see the world—at the expense of someone else. An aspiring young friend of the writer, whose soul yearned to travel and "collect," missed a fine opportunity to make a very interesting voyage on the Albatross, for the sole reason that with all his yearning he could not make good bird skins,—and it served him right for his lack of enterprise.
Let me tell you that, while twenty years ago any sort of a bird skin was acceptable to a museum, now such specimens must be first class in order to be well received. Fine skins are the rule now with curators and professional ornithologists, and poor ones the exception. Although the work itself is simple enough, it is no child's play to perform it successfully.
It is best for the beginner to learn first how to skin small birds, and make up their skins, and when he has mastered these details he is prepared to undertake the preparation of large specimens, and learn how to overcome the exceptional difficulties they present. To this end the present chapter will be devoted to setting forth the leading principles involved, which are most easily learned from small specimens.
We will first undertake the work of skinning a small bird—a robin, thrush, or blackbird, whichever you happen to have. If[47] in skinning, skin-making, and mounting you master the robin, for example, which is the highest type of a bird, you will be well prepared for the great majority of the other members of the feathered tribe.
Shoot your specimen with as fine shot as possible, and not too much even of that, in order to avoid shooting its mandibles, feet, legs, and feathers to pieces. As soon as it is dead, plug the throat, nostrils, and all wounds that bleed, with bits of cotton, to keep the blood and other liquids from oozing out upon the feathers, and putting you to more serious trouble. Carry the specimen home in any careful way you choose, so as to avoid rumpling or soiling the plumage. By all means let your first practice be upon clean birds.
 Fig. 10.—Names of the External Parts of a Bird.[5] 1, Crown;
2, forehead; 3, nostrils (or cere); 4, upper mandible; 5, lower
mandible; 6, throat; 7, neck; 8, spurious quills; 9, occiput;
10, ear; 11, nape; 12, breast; 13, middle coverts; 14, large coverts;
15, belly; 16, tibia; 17, tarsus; 18, inner toe; 19, middle
toe; 20, outer toe; 21, thumb; 22, under-tail coverts; 23, tail; 24,
primaries; 25, secondaries; 26, tertiaries.
Fig. 10.—Names of the External Parts of a Bird.[5] 1, Crown;
2, forehead; 3, nostrils (or cere); 4, upper mandible; 5, lower
mandible; 6, throat; 7, neck; 8, spurious quills; 9, occiput;
10, ear; 11, nape; 12, breast; 13, middle coverts; 14, large coverts;
15, belly; 16, tibia; 17, tarsus; 18, inner toe; 19, middle
toe; 20, outer toe; 21, thumb; 22, under-tail coverts; 23, tail; 24,
primaries; 25, secondaries; 26, tertiaries.
A bird should lie an hour or two after being shot, in order that the blood may coagulate. Warm specimens bleed very badly in skinning.
We are now in our workroom, with the gun standing quietly in its corner, and a robin lying on the table before us. Look at it. Study its form and structure, and remember what you see. Notice how smoothly the feathers lie—how nicely they fall over the angle of the wing at the shoulder—how completely the thigh is buried in the feathers of the breast and side, and also where the legs emerge from the body feathers. Notice how
short the neck is, how the eye does not bulge out of the head, and note the fact that the breast and belly look full, round, and comfortable, instead of presenting that ghastly, drawn-up, eviscerated appearance so often seen in the amateur's mounted specimens. Note the color of the eye, the bill, the cere, tarsi, claws, and all other parts that will require painting when the specimen is mounted, if it ever should be. Now take the following Measurements.—It would be high treason for me to recommend any other system of bird measurement than that directed by Dr. Coues in his incomparable "Key to North American Birds," and it is hereby set forth:
1. Length.—Distance between the tip of the bill and the end of the longest feather of the tail.
2. Extent of wings.—This means the distance between the tips of the outstretched wings as the bird lies flat upon its back.
3. Length of wing.—Distance from the angle formed at the (carpus) bend of the wing to the end of the largest primary. In birds with a convex wing, do not lay the tape-line over the curve, but under the wing, in a straight line.
4. Length of the tail.—Distance from the roots of the tail feathers to the end of the longest one. Feel for the "pope's nose;" in either a fresh or dried specimen there is more or less of a palpable lump into which the tail feathers stick. Guess as near as you can to the middle of this lump; place the end of the ruler opposite the point, and see where the tip of the longest tail feather comes.
5. Length of bill.—Dr. Coues takes "the chord of the culmen," which is determined thus: "Place one foot of the dividers on the culmen just where the feathers end; no matter whether the culmen runs up on the forehead, or the frontal feathers run out on the culmen, and no matter whether the culmen is straight or curved. With me the length of the bill is the shortest distance from the point indicated to the tip of the upper mandible."
6. Length of tarsus.—Distance between the joint of the tarsus with the leg above, and that with the first phalanx of the middle toe below. Measure it always with the dividers, and in front of the leg.[49]
7. Length of toes.—Distance in a straight line along the upper surface of a toe is from the point last indicated to the root of the claw on top. Length of toe is to be taken without the claw, unless otherwise specified.
8. Length of the claws.—Distance in a straight line from the point last indicated to the tip of the claw.
9. Length of head.—Set one foot of the dividers over the base of the culmen, and allow the other to slip just snugly down over the arch of the occiput.
For skinning a small bird, the only instrument imperatively necessary is a good-sized scalpel or a sharp penknife. You can use a pair of small scissors now and then, if you have them, to very good advantage, in severing legs and wings and clipping off tendons. Have ready a dish of corn meal to absorb any blood that is likely to soil the feathers. Now push a wad of cotton up the vent, and we are ready to remove the skin.
No, there is one thing more. The wings lie close to the body, and will be continually in our way unless we break them so that they will fall back and leave us a clear field. It is the humerus that must be snapped in two, as close to the body as possible. Those of small birds are easily broken with the thumb and finger, but in a large bird they must be treated to a sharp blow with a heavy stick, or a hammer.
Lay the bird upon its back, with its head toward your left hand; part the feathers in a straight line, and divide the skin from the centre of the breast straight down to the end of the breastbone, and on until the vent is reached. Cut through the skin only, for if you go too deep and cut through the wall of the abdomen you will have the intestines and various other troubles upon your hands.
Skin down each side of the bird until you come to the knee-joint, which lies close to the body, and well within the skin. Sever each leg completely at the knee, leaving the thigh attached to the body, turn the skin of the leg wrong side out over the fleshy part, quite down to the joint, and then cut away every particle of flesh from the bone of the leg.
Sever the tail from the body close to the ends of the tail feathers, without cutting through the skin. Now take the body between the thumb and forefinger of the left hand, holding it[50] at the hips, and with the other hand separate the skin from the back. From this point we proceed to turn the skin wrong side out over the shoulders and head. When the wings are reached, cut them off where they are broken, and turn the skin down over the neck. Avoid cutting through the crop. If blood flows at any time, absorb it all with the corn meal or plaster Paris.
 Fig. 11.—First Steps in Skinning
a Bird.
Fig. 11.—First Steps in Skinning
a Bird.
Almost before you know it you have skinned your bird down to the head, for it hangs head downward during the latter part of the operation, suspended on a small wire hook thrust through the pelvis, so that you can work with both hands.
It is a trifle more difficult to turn the skin over the head. Push it up from the back of the head with the thumb-nail, working it patiently, at all points, and stretching the skin gradually until it will pass over the widest part of the skull. Presently the crisis is past, the skin slips down without trouble, and we see by the way it is held at a certain point on each side of the head that we have come to the ears. Cut through the skin close up to the head, and a little farther on we reach the eyes.
Now be careful. Cut very slowly at the eye, and close to the head, until you can see through the thin membrane and define the exact position of the eyeball. Now cut through the membrane, but do not cut the eyelid on any account. A little farther and we come to the base of the bill, where the skin and our skinning stops.
Cut through the back of the skull so as to sever the head completely from the neck, and lay bare the base of the brain. Remove the brain from the skull; cut the eyes out of their sockets; cut out the tongue and remove all flesh from the skull.
Skin each wing down to the first joint, or the elbow, and stop the "wrong-side-out" process there. The ends of the second[51]aries must not be separated from the bone of the forearm, or the ulna. It is possible to clean out the flesh from the forearm and also from the arm bone (humerus) without detaching the ends of the secondaries, as you will readily see. Cut away any flesh which has been left at the root of the tail, but do not cut the ends of the tail feathers.
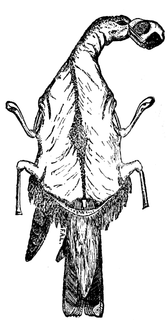 Fig. 12.—The Skin Wrong Side Out,
and Ready to be Poisoned.
Fig. 12.—The Skin Wrong Side Out,
and Ready to be Poisoned.
The next thing is to poison the skin. Do this with a mixture of powdered arsenic and alum, in equal parts. Some of our most extensive collectors use no alum, simply pure arsenic in liberal quantity; but I consider that the use of alum also is always desirable, and under certain conditions it is extremely so. Some collectors use arsenical soap exclusively, even on small birds, and on large birds I, too, have used it quite extensively, supplemented by an immediate sprinkling of powdered alum, to do the curing of the skin. For genuine thoroughness in poisoning and preserving, I will back arsenical soap and alum against all other substances the world can produce; but in treating small birds that are to be made up as dry skins, I prefer and recommend powdered arsenic and alum, as stated above.
Whatever poison you decide to use, apply it thoroughly to every part of the skin, the skull, wings, legs, and tail. Now put a ball of cotton in each eye-socket to fill up the cavity, and you are ready to reverse the skin and bring it right side out once more. It is usually some trouble to get the skin back over the skull, and that I accomplish in this wise:
Let the skin rest on the edge of the table, place both of your thumbs on the back of the skull, and with all your fingers and finger-nails, reach forward and begin to crowd the skin of the[52] head back where it belongs. At the same time, you must push on the skull with your thumbs, as if trying to push it into the neck, and in a very short time, by a combination of coaxing and crowding, the skin made passes the critical point on the skull, and, presto! the whole skin is right side out once more. Now take it by the bill and give it a gentle shaking to stir up the feathers so that they will fall back naturally. Pluck outward the cotton in the orbit into the opening of the eye, to imitate the round fullness of the eyeball.
The wing bones of very small birds need not be wrapped with cotton, but the leg bones should be, always. Now take a bunch of cotton batting of the right size, and roll it between the palms until it attains the proper size to fill the neck, and is a trifle longer than the entire body and neck. Fold over one end of this, take it between the points of your forceps, insert it through the neck, and into the cavity of the skull. Tuck up the other end at the tail, and give the cotton body its right length. Then in the middle of the skin, pull the cotton roll apart sidewise, spread it out and lay on it a ball of cotton to form the body.
Next, take hold of the broken humerus with the forceps, and pull it inward until the joint of the wing appears, and the two humeri lie parallel and close to each other. This draws the wings into place.
Be sure to put enough cotton in the body of a skin; for a little plumpness and rotundity is desirable in a small skin. Avoid making cylindrical bird skins; avoid the East Indian native habit of crowding the breast of a bird clear up into its neck, and also avoid stretching a skin.
We have now to finish the head by inserting a little bunch of cotton in the throat, until that part is properly filled, and plucking out or cutting off the surplus. The mandibles must be held together by a thread or a pin until they have dried in position. Next adjust the wings, legs, and tail. The tail should be slightly spread, and there are two ways of doing this. One is to reverse the natural overlapping of the tail feathers, which is the quickest way, and quite satisfactory. The other is to lay the skin on a board, put a pin through each corner of the "pope's nose," spread the tail, and thrust the pins into the board until the skin is dry. Finally, tie on your label, which[53] should be as small as possible to contain the necessary data—locality, date, sex, number, collector's name, measurements, and remarks. Some collectors label only with numbers, corresponding with recorded data in a note-book; but it is a bad plan. Note-books often get lost, and then such specimens lose half their value.
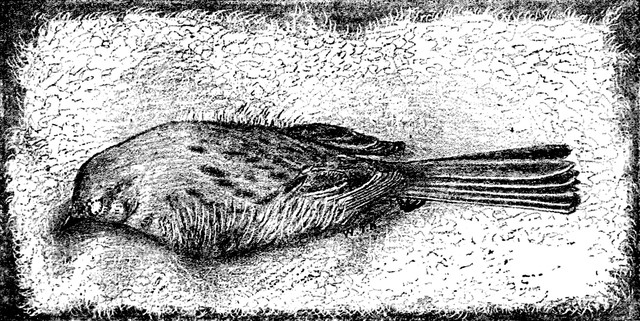 Fig. 13.—The Bird Skin in Position.
Wrapping up a Skin.—There are various ways of "laying out" bird skins. The best is to wrap each skin in a very thin sheet of cotton batting or wadding, which draws with the softness of down, and yet, when pinched or twisted at the ends, it holds every feather in place. The bird skins prepared by Mr. William Palmer, one of the National Museum taxidermists, are fine examples of how skins should be made. Mr. Palmer's method of shaping and wrapping up a small skin is as follows, and the accompanying figures are from specimens prepared by him: Take the skin up between the left thumb and forefinger, at the shoulders, and pinch it together, while with the small forceps you adjust the scapulars over the point of the wings. Cross the feet, lay the skin breast downward on a thin sheet of cotton batting of the proper dimensions, and arrange the feathers of the back, the wings, etc. (Fig. 13). Then lift the outer edge of the sheet of cotton, bring it forward over the skin toward the operator, so that it will cover the back (Fig. 14).[54] Next, lift the inner edge of the cotton sheet, draw it with gentle pressure to make the skin of the right size, and lap it well over the other. The two edges of the cotton sheet will stick together very well by simply overlapping them.
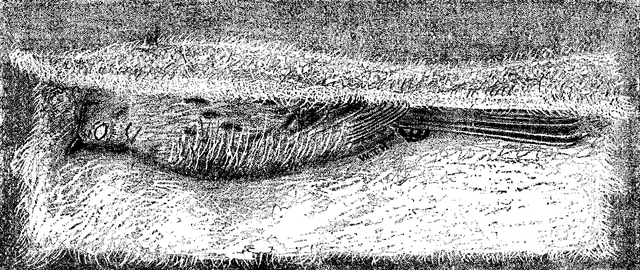 Fig. 14.—The Skin Half Wrapped.
The head can be adjusted by pulling on the cotton at that end, and pinching the end together beyond the head. The bill must be set at the proper angle, and held by catching the point in the cotton. Do not let the bill point straight out, for it will stretch the skin of the throat too much; neither should it point up at a right angle to the body, for the tip will be catching in everything that comes near it. The best way with most short-billed birds is to let the bill point at an angle of about forty-five degrees to the axis of the body. Beaks that are very long require special arrangement, as shown in Figs. 17 and 18.
Now lift the wrapped-up skin, lay it with the tail toward you, breast uppermost, and with both hands tear the cotton open in a straight line up to the base of the tail (Fig. 15). You can now spread the tail by overlapping the feathers, or leave it closed if you prefer. See that your label is on, adjust the toes and legs carefully, then fold over the edges of the cotton and overlap them, and the skin is done (Fig. 16). Always spread the toes of all swimming-birds.
Another plan is to dispose of each skin in a little cylinder of paper, made to fit, of course. This is the best plan when you are far from the conveniences of home, and in a hurry. The[55] effect of this, however, is to produce a cylindrical skin, which is not a prize shape. Still another way is to make a small cornucopia of stiff paper, and slip the skin into it, head first, after which the large end is closed by bending in the edges. The old-fashioned, corrugated drying-board is an excellent resource when you are in a great hurry with a number of specimens.
 Fig. 16.—The Skin fully Wrapped.
The illustration on p. 56 (Fig. 17), from one of Mr. Palmer's specimens, shows the shape a small skin should have to be considered perfect.
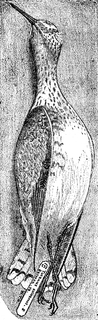 Fig. 17.—A Perfect Bird Skin.
Freshly made bird skins should never be subjected to crowd[56]ing or pressure, nor should old skins either, for that matter. If you go far afield, and expect to collect hundreds of skins, you should go provided with a light and strong chest, either made to open at one side and contain a series of shallow drawers to receive skins, or else, which is the next best thing, and very easily made, a box containing a series of shallow tills of varying depth, standing one upon another from bottom to top. Each drawer or till should be made just deep enough to hold skins of a certain size, but no more, or else in travelling the skins will tumble about. Remember it is useless to try to make large collections of good skins in the field unless you can take care of your finished specimens. This is for specimens freshly prepared and not yet dry. After skins become thoroughly dry, they can be packed "in bulk," in a chest or trunk, by putting the largest at the bottom, and filling the cavities with the small skins which cannot stand so much pressure. Bird skins should always be packed in cotton when they are to be shipped, giving to each a soft, comfortable resting-place, and the box must be filled full, so that there will be no tossing about.
Determination of Sex in Birds.—To a collector who is working under difficulties this often seems like the very "last straw upon a camel's back;" but it must be attended to in every case wherein the sex of the bird is not clearly and unmistakably indicated by the plumage. If you can, get an experienced ornithologist to show you how to determine the sex in difficult subjects (e.g., young birds, or birds midway between[57] two breeding seasons). But there are ways in which we can help ourselves. If you begin with birds during or near the breeding season, you will have plain sailing long enough to become familiar with the subject.
In birds the organs of generation lie close up to the lumbar vertebræ, near the kidneys, in the region called "the small of the back." The best way to reach this region for examination is to make a cut clear across the wall of the abdomen, break the back over at the last pair of ribs, and the intestines will at once fall down, exposing the lumbar region. You will then see the kidneys—two large, dark-brown masses situated in the concavity of the sacrum—and on their surface, at the upper end, lie the reproductive organs. The testicles of the male are two dull, whitish, ellipsoidal, or nearly round bodies, of the same size, lying close together. The sign for this sex is the astronomical sign for the planet Mars ♂.
The ovary of the female is, except during the breeding season, the most difficult to distinguish. Look first for a little bunch of minute round globules, of varying sizes and grayish white color. In the breeding season the eggs are easily found. Failing in that, you must look for the ovary itself, which, when found, will be recognized as a little, irregular, flattish bunch of a light gray color. If you search with a magnifying-glass, you may be able to detect it by its peculiar granulated appearance. The sign for the female is the sign for the planet Venus ♀.
General Principles Involved in Skinning Large Birds.—In skinning a large bird you must have room according to your strength and the size of your subject. You will need the usual materials in quantity, plenty of table space, and a stout hook depending from the ceiling at the end of a stout cord, to hang your half-skinned victim upon at a certain stage of the proceedings.
With but few exceptions, the process in skinning a large bird is, from start to finish, precisely similar in principle to that for a small one, which has already been described. When you get the body about half skinned, and are well started up the back, thrust your hanging hook into the top of the pelvis, and suspend the bird in mid-air, so that you can work with both hands. Be careful, however, throughout the whole operation that you do not allow the weight of the body of the skin to stretch the skin of the neck.
If the head is small enough that the skin of the neck will pass over it, skin right over it to the base of the beak itself, and proceed in every respect as with small birds. If, however, the skin of the neck will not go over the head, then skin the neck as far toward the head as you possibly can (usually in such cases you can go no farther than the lower end of the axis or second cervical vertebra), and then cut it off.
The next step is to skin the head. Turn the skin right side out, make a clean, straight cut from the top of the head straight down the back of the neck for a sufficient distance to allow the remaining cervical vertebræ to be drawn up through the opening. It is now a very simple matter to skin the head and clean the skull.[59]
The wing of a large bird contains, between the elbow and the so-called "shoulder-joint" (carpus), quite a quantity of flesh lying underneath and between the radius and ulna. Whatever you do with the wing, never cut the ends of the secondaries loose from the ulna. In spacing and adjusting those secondaries nature has done something which, to save your life, you cannot do as well, and if you meddle with her work some one will be sorry. Slit open the skin all along the under side of this long joint of the wing, cut out all the flesh from around the radius and ulna, and poison the interior thoroughly. Put in a little filling of tow or cotton, and sew up the opening. Even in small birds, except the smallest ones, it is an excellent plan to slit open the wing on the under side and put some dry poison on the flesh, without stopping to sew up the cut. Clean out the flesh and the oil sac from the root of the tail, and poison that part so thoroughly that any insect who ever dares to think once of harboring there will instantly drop dead.
A bird like a large heron, with long legs, or an eagle with very thick legs, should always have the tendons removed from the legs in order to facilitate curing, and for the mutual benefit of both specimen and taxidermist when, a little later, the two meet in the laboratory and engage in a hand-to-hand struggle for supremacy. To accomplish this, cut a slit lengthwise in the ball of the foot where its rests upon the ground. Cut off the tendons where they branch and attach to the toes, seize the end of each large tendon with your pliers and pull it forcibly out of the leg. You can do this with a fresh bird in about five minutes, whereas in a dry skin that has been relaxed it will take you much longer. This removes a fine subject for decomposition, and also leaves the space necessary for the leg wire when the specimen is mounted. After having removed the tendon I always give the legs a coat of rather thin arsenical soap, both to cure them and protect them from insects. Another excellent plan is to lay all such long legs in a pan of salt-and-alum bath solution for a few hours to thoroughly cure them.
If there is a layer of fat adhering to the skin, it must be scraped off and absorbed with corn meal, and scraped again until it is all off. A layer of fat spoils a skin more quickly and more effectually than any novice can be expected to believe[60] until he sees for himself, in some of his finest ducks and brants, just how it is done. If a skin is worth saving at all, it is worth preserving properly. Grease left on a skin "burns" it.
In making up a skin having a long, slender neck like that of swan, goose, heron, or crane, it is an excellent plan (when possible) to take a stout wire, as long as the entire neck and body, wrap a little tow or cotton rags around it to partly form a false neck, and insert it in the skin. This will often save a neck from being completely broken in two. Fill the body of the skin with excelsior, tow, cotton, or crumpled paper, which, in distant jungles, far from civilization, is an excellent thing. In case of need, you may fill with dry leaves, dead grass, in fact almost anything except wool, hair, or other animal products. Do not fill the body out to more than two-thirds its natural size, unless you have abundant storage-room, and transportation facilities. If filled out full size, large bird skins fill up boxes and drawers wonderfully fast, and generally it is best to flatten such skins a little.
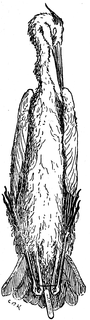 Fig. 18.—How to Shape
a Heron Skin.
Fig. 18.—How to Shape
a Heron Skin.
Large bird skins should always be sewn up. The head must be properly filled out, and if cut open at the back, that also should have a few stitches, but not too many, for obvious reasons. In laying out a large skin, if the neck be long, bend it around to one side as the specimen lies before you on its back, and lay it on the side of the body along the edge of the wing. If the legs are long, they, too, must be bent up so that the feet lie upon the body. The accompanying figure, from a specimen prepared by Mr. William Palmer, shows just how a great blue heron should be done. The wings must be carefully placed, the plumage dressed and nicely adjusted, and the finished skin pinned up in a wide strip of thin cotton-cloth, or anything else you please, to keep it in perfect shape until it dries.
Of course, a large skin requires plenty of air while it is dry[61]ing, and several days' time besides. If such specimens are packed and shipped before they are dry, mould and destruction will be their portion, and the collector will do well to flee from the wrath to come. In shipping bird skins in the East Indies and similar climates, it is customary to solder them up, air tight, in tin-lined boxes. Dr. W.J. Holland advises me, however, that dry wooden boxes are good enough if they are tight, and are first painted over on the inside with melted crystals of carbolic acid.
Special and Exceptional Cases.—Having fully considered the various principles involved in making ordinary bird skins, it is now necessary to note the exceptional cases, and state how each is to be disposed of. It is my desire to equip the beginner, as far as possible, against every emergency that is likely to arise in ornithological collecting. For convenience we will take a few of the avian orders, in their natural sequence, beginning with the lowest.
The Struthiones: Ostriches, Emus, and Cassowaries.—These great birds are prime favorites with the showmen, and many a fine specimen often falls most unexpectedly into the hands of an astonished "local taxidermist," to the ultimate enrichment of some museum. Happy is he to whom falls a beautiful, glossy, brown-black cassowary, with head and neck of rich purple, and red and yellow, and what-not—truly a wonderful bird, and not too large. A full grown African ostrich is an avian colossus, and his enormous size makes him quite a serious matter.
With these great birds it is best to open the skin of each leg from the lower end of the tibia all the way down to the foot, in order to entirely remove the tendons. Detach the skin from the bone all the way round, and cure it with arsenical soap and a little alum. The leg should be cut open on the inside, well back, where the seam will be most out of sight. After having removed a skin, you will need to keep it soft, sometimes for several days, perhaps until you can make a suitable manikin, if it is a large ostrich. Cure the skin with arsenical soap and salt (protecting the feathers carefully meanwhile), and keep it wrapped up and away from the air until you are ready to put it on the manikin for the last time; then treat it with dry alum to make it dry and harden properly.[62]
Order Sphenisci: The Penguins.—The penguin of the Antarctic seas is the king of fat birds, but such magnificent monsters as those brought home by the Challenger, and now in the British Museum, are worth a long trip to secure. Mr. Frederick Pearcy, who collected and preserved the specimens, assured me that it required two men to carry one, and that the removal of the grease from the skins was a dreadful task. Of the largest specimens, the huge legs and feet were cut off at the lower end of the tibiæ, and preserved in alcohol until they could be skinned and cleaned. Since it is probable that only a very few of my readers will ever visit the rainy, foggy, storm-beaten and God-forsaken land of the penguin, I will leave the question of grease removal to the paragraph relating to the Lamellirostres.
Longipennes: The Gulls, Albatrosses, etc.—The gulls, terns, and petrels are so beautiful in flight that they are often mounted with the wings fully spread, in flying attitudes. When a bird is to be mounted thus, the large wing-bones must not be broken, but simply disjointed and cut loose from the body at the shoulders. When it is possible to do so, an albatross should be mounted with wings, outspread, to reveal to the student their enormous length, and the disproportionate shortness of the primaries and secondaries. If all the albatrosses in a museum collection are mounted with closed wings, as they nearly always are, the average observer gains not the faintest conception of the form and size of the bird in motion—its normal condition.
Steganopodes: The Pelicans.—The great white pelican is one of the most satisfactory and even agreeable birds to mount that could possibly fall into the hands of an able-bodied taxidermist. If I ever adopt a shield and an assortment of devices with which to cover it, one of the latter shall be a figure of a huge white pelican rampant; for it was a bird of that species that gave me a start in taxidermy. It happened in this wise:
The year before I penetrated the walls of my Alma Mater, its venerable president sought to find among the students an (alleged) taxidermist, or at least the promise of one. He publicly offered the princely sum of $10 to any one who could come forward and mount a bird decently. The gauntlet thus recklessly thrown down no one could pick up that year, and by the year following, when I appeared upon the scene, it had grown cold.[63] Like another Lochinvar, I "came late" for that offer. I had seen one bird skinned and mounted, and I knew I could do one like it. That was an old, rusty, second-hand crow. I petitioned to have a chance to "stuff birds," but it fell on deaf ears. I even went so far as to mount a squirrel, to show what I could do, and although it was a very fair specimen for that benighted period, it failed to win.
But one day some good genius sent a dead bird to the president, for the museum, and with it heaven sent my opportunity. Professor Bessey sent for me and said, "Now, young man, we are going to see how much you know about stuffing birds. We've got a specimen for you to try your hand on, and if you succeed in mounting it decently, you may possibly get an opportunity to work in the museum." I replied, "Show me the victim."
He took me to his room, and there, spread out upon the carpet, lay an enormous white pelican. His body was like a great downy pillow, his bill was as long as a fence-rail, with a great horny knot atop of it, and his huge yellow pouch would have held a whole school of mackerel, teachers and all. And what wings! They were full-grown angel's size, and as white and spotless as Gabriel's own. It seemed like sacrilege to touch them. And such feet! Enough of them would have covered the college campus. I had never before seen such a bird, even in my dreams. He really was larger than the maximum measurements given by Audubon for that species. Professor Bessey informed me that his name was Pelicanus erythrorhynchos. It was not quite so long as his bill, nor so rough, but it was pretty nearly.
With a pocket-knife, an old misfit pair of pliers, and a smooth, flat piece of steel that had once been a file, I skinned and mounted that bird, "in the highest style of the art," as the taxidermic business card always hath it. I have also faint recollections of a great wad of oakum made into a body, a thimbleful of arsenic, and a pair of eyes—merely this and nothing more. As I hope to live, I believe I could feed a live pelican as much arsenic as I put upon that great skin without even giving him the stomach-ache; but the bugs seemed to know that was my first effort, and they have never touched him. I mounted him as[64] the Irishman played the fiddle at Donnybrook fair, neither by note nor by ear, but, "be jabers, by main strength," and posed and shaped him by Audubon's superb plate. He was pronounced an unqualified success. I shaped his future, and he shaped mine at the same time. When I saw him again, seven years later, he was every bit as good as new, and I was astonished to find how really good he was. He was the first bird I ever skinned or mounted, and a lucky bird he was for me. Had he been a dirty, greasy, old swan, think what a scrape I should have been in!
Lamellirostres: The Ducks, Geese, Swans (and Flamingoes).—There are but two points to be spoken of under this head. The first is that all the birds of this order must have their heads skinned through a slit at the back of the head. The other is in regard to cleaning.
All ducks, geese, and swans are very fat, even when they are poorest. Were they otherwise, they could not live on the water as they do. Nearly the whole body is enveloped in a firm, tenacious layer of fat, into which the ends of the body feathers run and take root, and bind the skin itself down so firmly that it really becomes a part of the fatty layer. To remove the skin, you must have a keen knife, and by hard labor slice through the fat as you go. As a general thing, it is slow and tedious work. When you begin, and all the way as you proceed, use plenty of plaster Paris or cornmeal to absorb the free oil, and keep it off the feathers.
After the skin is off the body, and before you turn it right side out, scrape the inside to get the oil off, absorb it with your absorbent material, and scrape it again and again until the grease is practically all off, and you have only the skin remaining. This takes work. There is no royal road to making good duck skins. If you think you can get along all right by overwhelming the grease on the skin with arsenic and alum, and venture to leave it half cleaned, you will pay the penalty later, and it will serve you right. You cannot cure grease with preservatives. You may fill a fat duck skin half full of arsenic, and yet the oil will ooze out through the skin on the other side, turning the feathers a dirty yellow color. The dermestes can eat every feather, and also the skin itself, from the outside, with[65]out getting a morsel of the arsenic. The fat simply acts as an impervious wall between the poison and the skin. Clean a duck skin thoroughly or else throw it away. It used to be a common thing to see duck skins with the breast feathers a solid mass of nasty yellow grease from the oil that had run out from the opening cut, but such specimens are becoming rare now.
If the feathers get soiled with grease, blood and dirt, wash the plumage with clean turpentine and a soft tooth-brush, apply an abundance of plaster Paris, rub it into the feathers, and immediately beat it out with a supple switch, or piece of stiff wire of proper size. If you have not these materials, wash the feathers with warm water and a little soap, and dry as best you can, according to what you have. Manipulate the feathers while they are drying and they will come out soft and fluffy as in life; but if left to dry without this, they will remain in a bedraggled, soaked, and stringy condition. This subject will be fully considered in a separate chapter (XXV.).
In making up the skin of a duck or goose, a piece of wire must be put into the neck, with the tow or other filling wrapped around it, or failing that, the neck filling must be wrapped around a small stick, the upper end of which is to be thrust forcibly into the skull. The head is large and heavy, and the neck is very small, so small that the skin will break in two if there is not a wire or stick run through the body and neck into the head to support the latter when the skin is being handled. The feet of all web-footed birds should be spread while drying.
Alectorides: The Cranes and Herodiones.—There is but little to add in regard to birds of either of these orders. The cranes require a slit in the skin at the back of the head, but the herons do not. The necks of the latter are very often filled too full in making up a skin, and the neck filling is often made round, whereas it should always be flat, like the actual neck of the heron or bittern. It is not necessary to remove the tendons from the legs of the small herons, ibises, etc., but the legs should always be bent up and the feet disposed of on the body. The feet and legs of all the above must be treated to a coat of thin arsenical soap, for the benefit of insect pests.
Ophidiæ: Serpents.—All the small and medium-sized serpents should be preserved entire in good, clean, ninety-five per cent alcohol, diluted with one-half its own bulk of water. If the spirits is not as strong as ninety-five per cent., then dilute with one-third water instead of one-half. There should be from two to four incisions made along the median line of the belly, each one a few inches in length, to make openings through which the spirits can reach the abdominal region. Give the specimen plenty of room until it is thoroughly penetrated with the alcohol.
Large serpents must be measured carefully, slit open underneath in a straight line from the vent up to within six or eight inches of the head, and completely skinned. A dry snake skin is about as good as none at all for mounting. I have seen many, but never yet knew of one being mounted well. By all means preserve all snake skins in spirits, as described above, or in the salt-and-alum bath. By making a head of cork it is quite easy to take both the complete skin and skeleton of a large serpent. If the head is to be mounted with the mouth open, an extra skull must be procured.
Lacertilia: The Lizards.—As with serpents, the small ones should be opened underneath and preserved entire in spirits, while the large ones, if alcohol is scarce, may be skinned in the field, and the skins only put into the spirit-tank for preservation. In putting up specimens entire, the abdominal opening must be large enough fully to insure the entrance of the liquid into the abdominal cavity, or otherwise the decay of the intestines may cause the epidermis to slip from the outside.
Crocodilia: The Crocodiles and Alligators.—A word in regard to shooting saurians. Go prepared to hunt and kill[67] whatever specimens you require, for the chances are you will not get any save what are brought to bag with your own trusty (or rusty) rifle. To kill a crocodile, proceed as follows: Find where he is in the habit of coming out on the bank for his daily sun-bath; then, at precisely the right time,
Sneak up as close to him as you can, get a position so that you can attack him broadside on, and post a couple of natives close by, primed beforehand with instructions to rush forward and grab the scaly monster by the tail as soon as you fire. Estimate the distance carefully, wipe the perspiration out of your eyes, aim at the neck-bone, or the vertebral column anywhere in front of the shoulders, and let drive. If the reptile's body lies still and his jaws fly wide open, run for him like a quarter horse, for you have hit his spine, and he is your meat if you only get to him in time to lay hold of his tail. Take your rifle along, for you might need it again, particularly if the crocodile is more than ten feet long. If he requires a coup de grâce, give him another bullet in one of his cervical vertebrae, and the subsequent proceedings will interest him no more.
It is quite a task to skin a ten-foot saurian properly, and to preserve the skin so successfully that none of the scales will slip off when the time comes for the skin to be softened and stuffed. My method, which I have practised successfully with the skins of eleven species of crocodiles and alligators, is as follows: For the sake of science in general, and the taxidermist in particular, measure the crocodile carefully and record the dimensions. Divide the skin along the under side, following the median line from the throat to the tip of the tail, in one long, straight cut. Beginning at the end of each middle toe, divide the skin along the bottom of the foot and the under side of the leg, up to the point where the leg joins the body, but no farther. Then begin at the edges of the first cut, and skin as far down the sides of the body as possible. When the legs are reached, detach them from the body at hip and shoulder without cutting the skin, and continue on round the body until the backbone is reached and the skin entirely detached. Sever the[68] head from the neck at the first cervical vertebra without cutting the skin. Skin out the tongue and remove the flesh from the palatal apertures and various cavities of the head. Skin each leg by turning the skin wrong side out until the toes are reached. Leave all the bones of each leg attached to each other and to the skin itself at the toes, but cut away the flesh carefully, the same as in skeletonizing. Remove from the skin as much as possible of the flesh which will be found adhering to it. When the skin is thoroughly clean, immerse it in a strong bath of salt and water, and allow it to remain twenty-four to thirty hours. Then take it out, rub the inside and the leg bones thoroughly with strong arsenical soap, after which apply powdered alum liberally over the inner surface, so that not a single spot is missed. Then hang the skin up by the head (no danger of stretching in this case), and allow it to dry in the wind and shade. When almost hard and stiff, take it down and fold it up as carefully as if it were a Sunday coat, so that it can be packed in a box of ordinary dimensions.
Of course small crocodiles, and the skins of larger ones not exceeding six feet in length, can best be preserved in alcohol, as already described for lizards. Full instructions for "roughing out" skeletons will be found in Chapter XXXVII. I will only add to this paragraph the suggestion that of all the objects that a collector can gather, nothing so well repays in every way the time and labor spent upon them as a few large, well-made, and sufficiently hideous skins of crocodilians. They are at once big, ugly, awe-inspiring, and marketable. The general public is very fond of horrible animals from far-distant countries, and I always gave it crocodiles galore.
Chelonia: Turtles.—Go where you will in the warm regions of the earth, you are almost certain to find representatives of this order. In the tropics the species are very numerous, highly interesting, and often of commercial value. Many a time your own hunger will be appeased by a tender steak of green turtle or loggerhead, or a terrapin stew, or a "soft-shell" fried in batter, or a peck of terrapin eggs dug out of the sand, fresh and otherwise. The rare and hideous mata-mata of South America will make you a good meal, and afterward bring you in $25 in hard cash. The hawksbill, with the valuable "tortoise[69] shell" upon his back, is "a thing of beauty" and "a joy forever," price, $15. Wherever you go collecting in the tropics or sub-tropics, turtles are your lawful prey.
How to Kill a Turtle.—Mr. Lucas says the best way is to do it with chloroform, by tying a saturated cloth over the victim's head, and keeping it there until death ensues. This is undoubtedly the most merciful way, but somehow I never had the chloroform to spare. My plan was to do the killing in a short, sharp, and decisive onslaught with the knife. With a small, sharp saw (a dissecting saw with an adjustable back, for the small specimens), saw through the bridge which unites the shell of the back (carapax) with that of the under surface (plastron) at B, B (Fig. 19); then, with the quickest of work, divide the skin around the plastron, as shown by the dotted line A, A, A, A; with half a dozen quick strokes of the knife detach the plastron from the flesh of the body, and lift it up until the interior of the body is exposed. Except for the sawing through the shell, the rest is but the work of a moment. Now pierce the heart instantly, and cut the neck in two, which ends all pain at once. The only merit of this method of killing is that the victim is disposed of and put beyond the power of pain in about three or four minutes. Very often it is better to make an incision on the dotted line shown immediately behind the foreleg, and through this pierce the heart and lungs.
The dotted lines in the figure show all the opening cuts that are necessary. The skin is left attached to the front of the plastron for apparent reasons, but the plastron is turned up and over the head to completely expose the interior. In the case of a sea-turtle, which has the front limbs developed as broad, flat flippers instead of feet, the opening cut must extend on up the leg, quite out to the extremity of the flipper.
The animal's legs, tail, and neck are now skinned precisely as those of a mammal would be, with the exception that each of these members is detached from the body and pulled inward in order to turn the skin wrong side out. Of course all flesh is to be removed from the animal, precisely as with a mammal, and unless the skeleton is to be preserved, the shoulder girdles and pelvis may be cut out with the flesh and thrown away.
Having removed all flesh from the entire subject, wash it clean, and if it is not to be preserved in alcohol apply arsenical soap and alum to the skin, putting some of the latter on the outside as well as inside, and make up the skin otherwise as directed for dry skins of ordinary mammals. The neck, legs, and tail should have the right quantity of filling to prevent their shrinking and shrivelling up to the point of unsightliness. Remember that the specimen may remain as you preserve it, and be studied for years as a dry skin.
The box turtles are so constructed that when they desire to retire from the world nothing whatever save the hard shell remains exposed. They cannot be opened up as described above. It is necessary to meet their wants by simply sawing a big rectangular section out of the plastron, leaving only a rim remaining, and through the hole thus made the animal can be skinned, and also stuffed when the time comes.
As to the methods of procuring your fish, I have very little to say. In all my collecting I have never yet seen the time when it did not pay far better to buy fish specimens of professional fishermen than to turn fisherman myself. With an enterprising set of fishermen, much may be done by offering to purchase the strange and curious species that are often unfit for food, and are usually thrown away. Be first in the fish-market when the day's catch is being landed; be on hand persistently, in season and out of season, and by so doing you will have the first chance to buy the handsome sharks, rays, rhinobati, etc., before they are ruthlessly cut up and sold piecemeal. Mask your enthusiasm; learn to dissemble, and then you will not need to pay more than the ruling market prices, even for the specimens which are of the highest scientific value. In Ceylon I once bought a remarkable shark-ray for three shillings, which I sold again, almost immediately, for $75; but it almost cost me a fit of apoplexy to control my feelings while the bargain was being made. I wanted to give three cheers for Rhamphobatis ancylostomus!
Field Notes on Fishes.—Colors.—In collecting and preserving fishes, happy is he who can sketch with a pencil, and thrice happy is he to whom the gods have given the ability to paint in water-colors. If you are blessed with this ability, the correct and imperative thing to do in collecting is to make a good outline sketch of each species, and color it carefully from a perfectly fresh specimen. Then, when the glorious colors of the living fish vanish like magic in the alcohol, or in the air, as the case may be, there is your permanent and indisputable record, a thing of great value to science until a better one is produced. At the National Museum it has for years been the policy of[72] Dr. Goode to have an accurate water-color drawing made by Mr. Schindler of every species of fish, cetacean, and reptile received. The result is a series of exhibition casts in which every detail of color is reproduced with admirable accuracy and life likeness. In preserving your fresh specimens remember that, no matter what you may do, the colors will fade, and the more delicate tints will disappear entirely.
Labels.—For alcoholics the best thing to use is a small bit of pure sheet tin, or else sheet lead, with a number stamped upon it. The next best thing is a parchment tag having the necessary data written upon it with a lead pencil, which is much more permanent in alcohol than any ink.
Scientific Facts.—Of the many facts the novice should try to ascertain regarding each species, the following are the most important: All the local names; degree of abundance; time when most abundant; whether it is a permanent resident or is migratory; if migratory, the facts relating thereto; its habits; the depth and character of bottom preferred; food; what fishes prey upon them; value as food or for other purposes.
Methods of Preservation.—In the field, fishes may be collected and preserved in four different ways, according to circumstances, as follows: 1. Preserved entire in spirits. 2. As skins, preserved in spirits. 3. As skins preserved in brine. 4. As rough skeletons, either preserved dry or in spirits.
For the purposes of scientific study and close investigation, the most valuable fish specimens are those which have been preserved entire in alcohol, or some equally efficient preservative solution. Good alcoholic specimens rank next in scientific value to fishes fresh from their native element. Ordinarily, however, the collector's resources are limited, and it is necessary for him to preserve only the skins of the large and bulky specimens.
Tanks for Alcoholics.—For years past the National Museum and United States Fish Commission have used square, box-like tanks, made of copper and lined with tin, each tank having a large round hole in its top, as large as the width of the top will allow, and which is closed tightly by means of a screw cover. These are known as "Agassiz tanks," for the reason that the design originated with Professor Louis Agassiz. They are light, not very costly, easily managed, and are about as nearly[73] perfect for their purpose as anything can be in this world. They are made of three sizes, to hold four, eight, or sixteen gallons. To protect them during shipment a strong pine chest is used, which is provided with wrought-iron handles, hinged cover, hasp, and padlock. The chests are made to contain one sixteen-gallon tank, two of eight gallons, and either three or four four-gallon tanks. The tanks used by the National Museum are made by W.S. Barker, Seventh and D Streets, S.W., Washington, at the following prices, exclusive of the chests; sixteen-gallon tank, $16.50; eight-gallon, $10; four-gallon, $4.25; pine chests, complete, $3 each.
 Fig. 20.—Agassiz Tank, for Alcoholics.
If Agassiz tanks are not obtainable, the next best and the cheapest course is to have some large round cans made of galvanized iron, with tops that can be soldered on when the time comes to ship specimens. Wooden kegs are not of much use in collecting, but both kegs and barrels are good enough to use in transporting collections. Many a time I have helped myself out of a difficulty afield by falling back upon the immortal American kerosene can, holding five square gallons, and which goes to the uttermost parts of the earth.
Glass Jars.—In the field I have never found any other sort of a glass jar half as useful and safe as a common Mason fruit jar, varying in size from pint to half-gallon. They are infinitely superior to glass-stoppered jars, and far less liable to be broken.
Preserving Fishes Entire in Spirits.—Having taken all the notes on a fresh specimen that you desire, the next thing is to wash it thoroughly. But "before washing the fish," says Dr. T. H. Bean, "look it over for external parasites; examine the gills and the inside of the mouth carefully, as these are favorite situ[74]ations. These parasites often furnish a clue to the migration of the fish; remove them if they can be taken off entire; if not, let them remain, and call attention to their presence in your shipping notes. Preserve the parasites in vials or bottles, and provide them with labels, stating from what fish they came, and in what situation they were found."
Many fishes when taken from the water have the entire body and gills covered with a coat of persistent mucus that can be removed only by determined effort. If you have any alum at hand, you can in a moment make up a pint or quart of alum water, which will cut the mucus instantly, and clear it off. Use a stiff brush—a large tooth-brush is the best thing—in cleaning off this mucus, and do not forget to cleanse the gills thoroughly.
Open the abdominal region of every fish by making a generous cut from the vent straight forward toward the ventral fins. Usually the length of the opening should be equal to about one-fifth of the entire length of the fish. If the fish be a large one, it has always been my practice to open the fleshy interior still farther by working through this cut, and detaching the skin from the flesh as far up each side as possible. This gives the spirits immediate access to the entire mass of flesh, and the result is very speedy and perfect preservation without any change whatever in the form or weight of the specimen.
Dr. Bean always directs that the viscera be preserved, to assist in identification, even though it becomes necessary to remove them from large fishes and preserve them in separate jars. When there is no particular reason for their preservation, it is a great advantage to remove them and throw them away. They are—unless of scientific value—an abominable nuisance, and do more to spoil good alcohol than all the rest of the fish.
Fishes that have begun to decompose, and have become offensive, yet are too valuable to throw away, may be disinfected by washing them inside and out with a moderately weak solution of pure carbolic acid and water, or with a solution made by dissolving a tablespoonful of chloride of soda in a pint of water.
For years a very common formula for preservative alcohol has been ninety-five per cent alcohol diluted with one-third of its bulk of water, or, in other words, three parts of alcohol and one of water. If there is any fault to be found with this solution, it[75] is that it is stronger than is really necessary. I have preserved barrels of alcoholic specimens in a solution composed of two parts of proof spirits and one part water, and have never lost a specimen except through leakage. This solution is strong enough to stand considerable deterioration without the loss of its contents.
I have never attempted to collect quantities of alcoholics without an alcoholometer in constant use. This little instrument costs but a trifle, and affords the only reliable means for testing the strength of alcohol. Its use enables the collector to exercise economy in the use of his spirits, and get the maximum benefit from it. Therefore I say, buy an alcoholometer at all hazards, and carry it and a suitable test-glass with your outfit. Test the spirits on your specimens frequently, and you will then run no risks of loss.
Keep a receptacle to use as a receiving and curing tank, into which all fresh specimens are placed, with abundant room for each to undergo the curing process. Every animal contains in its body a heavy percentage of water, which must be, in great measure, replaced by the spirits before the flesh can be preserved from decay. Into the first bath a great quantity of blood and abdominal fluids will be soaked out from the specimen, and it is bound to lose strength rapidly, and also become foul. As long as it remains clean enough to use, keep up its strength by the addition of pure spirits, and in it immerse all specimens until they are thoroughly cured. Give them plenty of room at first, and keep them from settling down to the bottom by putting there a bunch of excelsior, tow, or cloth. While the spirits in a can may be strong enough on top to preserve a specimen, at the bottom, where the animal impurities settle, it may be so weak that anything lying in it would soon spoil. Often the tail of a fish which hangs upright in a jar will spoil while the remainder will be preserved.
After specimens have remained in the receiving-tank for from two to four days, according to size, put them in another receptacle in clean, fresh spirits, still allowing them plenty of room. Finally, when ready to pack up and make a shipment home, wrap each fish separately in a piece of thin, white cotton cloth, just large enough to cover it well, dip it in clean spirits, and without any tying or pinning of the cloths, lay the fishes in[76] your barrel like sardines in a box, as closely as they will lie without being squeezed. Fill the receptacle full of fishes, head it up, and then pour into it all the clean spirits it will hold.
In order to proceed with the second and third methods of preserving fish specimens, it now becomes necessary to describe a process.
How to Skin a Fish.—Of course, no one aspiring to become a collector of fishes will remain in ignorance of the names of the different fins. And, more than that, before he can prepare even the rough skeleton of a fish he must know what its bony structure is like. On the whole, there is a good deal to be learned about methods in collecting fishes, and as a beginning we must learn how to skin a scale fish. The methods with cartilaginous fishes will be considered later.
The principles with all scale fishes are precisely the same, the only difference being in the greater amount of cold steel and energy required for such great, hulking brutes as the jewfish, and the magnificent tarpon. For convenience we will take a specimen about a foot in length; for example, a striped bass, a pike, or a red snapper.
As is the case with quadrupeds, the left side of a mounted fish is always expected to be "the show side." Lay the specimen upon its left side, start at the vent with a stout pair of sharp-pointed scissors, and divide the skin in a perfectly straight line along the median line of the belly toward the head, stopping the cut when you approach close to the narrow, tongue-like point which terminates between the lower angles of the gill openings. Now reverse the fish, begin again at the vent, and divide the skin with a clean cut through the scales, in a line parallel with the base of the anal fin, and about half an inch from where the scales meet the fin rays. This is really a cut along the side of the fish, as low down as possible, made necessary by reason of the anal fin. Continue this cut straight back to the tail, as shown in the dotted line g-h in Plate IV.
You will find that the ventral fins are joined together in the flesh by a strong bony arch, called the pubis, and this must be divided through the middle so as to entirely separate the fins. The anal fin-rays must now be cut loose from the interior rays (called interhæmal spines), which are really their bony founda[77]tion. The ventral fins must also be cut loose from the pubic bones at the point where they are articulated. Now take the cut edge of the fish skin between the left thumb and forefinger, and with the cartilage-knife carefully cut the skin free from the flesh. Be careful not to disturb the white layer of color pigment which is spread like a silver lining of feeble tin-foil over the inside of the skin. This is what gives the fish its silvery color, and if skinned off or scraped away the skin will look like colorless parchment. Whatever you do, do not disturb that color lining. Proceed with the skinning until the skin has been detached from the entire upper side of the fish. This brings you to where the dorsal and caudal fins are inserted.[6]
Now turn the fish over, and proceed as before, as far as you can go. You presently reach the caudal fin, which must be cut loose from the end of the vertebral column as far back in the skin as possible. When this has been done, the skin and the fleshy body still hang together by the attachment of the rays of the dorsal fin to the interhæmal spines. Cut these apart with the scissors, from back to front, close up to the skin, which brings you to where the vertebral column joins the skull. You will make very short work of that, which frees the fleshy body from the skull. Now scrape away the surplus flesh from the inside of the skin, wash it thoroughly, remove the gills (if they are not to be studied), and lay the skin flat upon its side in your tank of alcohol.
By thus preserving the skins of fishes, instead of whole specimens, a great number of really large specimens can be preserved in a small quantity of alcohol, for at the last they can be packed together, heads and tails, precisely like sardines.
Skinning Cartilaginous Fishes.—Sharks, Rays, etc.—The skinning of a shark or saw-fish calls for no special instructions in addition to the foregoing, except that the long, narrow, pointed tail requires to be slit open along the right side of its upper lobe for a considerable distance. Remember the principle that wherever there is flesh, a way must be made so that it can be removed, or at least reached from the inside by the preservative. Of the skull, nothing is to be left attached to the skin
except the jaws. The skeleton is wholly of cartilage instead of bone, and is easily cut through.
The extremely flat, circular-bodied ray, also with a cartilaginous skeleton, must be opened on the underside by two cross cuts at right angles to each other, one extending from mouth to tail, and the other from side to side. The fin rays are very long stems of cartilage, set so closely together as to form a solid sheet of cartilage extending from the thoracic skeleton out to the extremities of the fins, which taper out to nothing. The thoracic skeleton gives shape to the body of the ray, particularly the back, and it must be left in place, with the skin of the back attached to it. Cut through the fin rays where they join the body, and this will enable you to skin down each side of the fish until you get so near the outer edge there is no longer any flesh. Stop at that point, cut the flesh away from the fin rays, and cut away as much of the fin rays themselves as you please.
Clear out all the flesh and preserve the skin in a very strong solution of salt and water (what is known to chemists as a "saturated solution"), or in alcohol if you have it to spare.
Preparing Rough Skeletons.—In about seven cases out of ten, it is a far easier and more simple matter to rough out, clean, and mount the complete skeleton of a fish than the uninitiated would naturally suppose. A few fishes, such as the shad, have more bones than the law allows, and the preparation of a complete skeleton thus becomes a practical impossibility. Fortunately, however, most fishes are more reasonable in the matter of bones, and to these we direct our efforts.
First and foremost, study the bony structure of a typical scale fish, learn what its principal parts are, and how they are articulated. Learn how the ribs lie, and how a row of slender, riblike bones called appendices, or epipleural spines, are attached to the true ribs, and at their outer extremities touch the inside of the skin along the lateral line of the fish. If you will take a good-sized perch as your first subject, you will not be troubled with any osteological extras, and the process will be as follows:
Lay the perch upon its side, and with a sharp scalpel cut away the skin from the whole of the exposed side. Remove all the viscera. By careful examination, ascertain the exact location of the ribs, and particularly the row of epipleural spines[79] attached at the upper ends of the former. With a broad, flat bone-scraper, or your knife-blade if you have nothing better, begin at the lateral line of the fish, and work toward the top of the back, taking the flesh away in chunks as you go. In a very short time the vertebræ and the interhæmal spines are exposed, and with a narrower bone-scraper the flesh is easily removed from them.
Now turn the fish around, and with great care cut and scrape the flesh away from the ribs and the epipleural spines. Do not on any account detach the latter from the former, but at this stage leave them attached to each other by a thin strip of flesh for their better protection.
Do not separate the ventral fins by cutting through the pubic arch, but with your small, curve-ended bone-scraper remove the flesh from the angular recesses of these bones, and leave the anterior end of the pubic arch attached to the coracoid. Next, pick out the flesh from around the base of the pectoral fin, remove the eye from its socket, and whatever flesh the skull contains. Thus does the bony structure of one entire side stand revealed. The gills are of course to remain in place, as the skeleton would not be complete without them.
There is but one thing more to add. In treating the other side of the fish in a precisely similar manner, care must be taken to not disturb the attachment of the interneural and interhæmal spines which join the dorsal and anal fin rays to the processes of the vertebral column.
Having thus denuded the fish of its flesh, lay the skeleton in a pan of water, and with a moderately soft tooth-brush, or nailbrush, brush it carefully to wash away all blood and mucus. If the bones are full of blood (which is very rarely the case), the skeleton must be soaked in clear water for an hour or two, or longer if necessary, to soak out the blood, so that it will not dry in the bones and permanently disfigure them.
Rough skeletons of fishes may be preserved in alcohol, but for many reasons it is much the best to dry them. Poison them with dry arsenic; do not put upon them either salt, arsenical soap, or alum, hang each one up by the head, and see that it dries in good shape. The pectoral fins should lie well down upon the ribs for mutual protection.
Sponges.—A live sponge is simply a vast colony of protozoan animals, each member of which lives an independent existence, but all are at the same time mutually dependent upon each other. The sponge of commerce, and the "cleaned" sponge of the museum collection is, like a branch of coral, merely the skeleton of the living aggregation. A live sponge is a dark colored, heavy, tough gelatinous mass, cold and clammy to handle, quickly offensive if left in the open air, and utterly useless until "cleaned," or rid of its mass of animal matter. The skeleton of a sponge may be horny, like that of the useful sponges of commerce; silicious, like the marvellously beautiful framework of the famous glass sponge of the Philippine Islands (Euplectella); or calcareous, like the curious little Grantia, which looks like a miniature bouquet-holder, with a frill of spines around its open end.
Owing to the extreme scarcity of sponge collections, very few persons know how great a variety of forms, and what really remarkable forms, exist no farther from home than the waters that wash the coast of our own beloved Florida. I once had the pleasure of collecting no fewer than sixteen distinct species on the beach between Biscayne Bay and New River Inlet, some of them of remarkable form, and all of them nicely cleaned for me by old Ocean.
Of course, I searched for sponges, and found many a fine specimen buried almost out of sight in the sand,—but what glorious fun it was, to be sure! There I obtained the large, coarse "basket sponge" (Hirvina campana), a hollow, inverted cone, often capable of holding a pailful of water; the remarkable finger sponge (Tuba vaginalis), which forms clusters of upright,[81] hollow cylinders; a large cylindrical sponge of a rich brown color, and beautiful wiry texture, called Verongia fistularis; and sponges that were like trees, like interlocked deer antlers, and what not.
Professor H.A. Ward's last catalogue of invertebrates enumerated forty-three species of sponges that were on hand when the list went to press. Of these, the largest specimen was a huge Neptune's cup (Paterion neptuni), four feet in height, and shaped like a gigantic goblet, which came from the neighborhood of Singapore.
Therefore, I say, when on the seashore, be on the lookout for sponges. If you can find them on the beach ready cleaned and dried for you, so much the better; but if you get them alive, the soft animal matter must be macerated and washed away, just as you would macerate the flesh from a large skeleton. Soak them in fresh water for a short time to macerate the soft matter, then wash it out in salt water, and keep this up until the sponge is at last clean.
Corals.—The bleached white coral cluster of the cabinet is, like the sponge, only the skeleton of its former self. When it was forcibly torn from its foothold at the bottom of the sea it was covered with living coral polyps, which gave it the color which is peculiarly its own. Some species, notably Madrepores, when first taken from the water look like colored glass. The main branches are of a yellowish-brown tint, shading toward the tips to the most delicate and beautiful bluish purple. There is no way to preserve these colors, because they are due entirely to the presence of the living polyps. When those delicate organisms die, as die they must, the color vanishes, and if not cleaned and bleached, the coral assumes a dead, smoky brown appearance, suggestive of dust and dirt.
Therefore it is best to clean and bleach your corals at once. This requires a little time, but the process is "so simple a child can use it." Small specimens can be cleaned quickly by washing them in dilute muriatic acid, and afterward in clear water to keep the acid from going too far, and then placing them out in the sun to bleach. Large specimens cannot always be treated in this way, and the best plan for wholesale operations is to place the coral on the ground, in a sunny situation, and dash[82] water upon it daily until the soft animal matter has been washed away, and the wind and sun combined have bleached the specimens to snowy whiteness.
As a general thing, the natives who live within reach of coral groves are in the habit of gathering it in quantity, cleaning it very successfully, and offering it for sale at prices that defy competition on the part of any scientific collector whose time is worth more than fifty cents a day. The best thing the collector can do is to get acquainted with the native fishermen and boatmen, treat them well and pay fairly, and then, if there is anything in the sea that his collectorship wants, it will soon be forthcoming. Thus, instead of the growth of the collection depending upon one or two men, there will be from ten to twenty local experts directly interested in it. I once came to a complete deadlock with my interpreter and three boatmen on the translation of the word "coral." They were Singhalese and Tamils, and coral was worse than Sanskrit to them. Finally, as a last despairing effort, I took a pencil and began to make a sketch of a madrepore. The crowd watched its progress in breathless silence until very soon one appreciative auditor shouted triumphantly, "Koki kalli!" The crowd joyfully echoed it, the mystery was solved, and in five minutes more we were afloat and on our way to seek
The packing and shipping of branching corals is a serious matter. I have tried every way I could think of, and have seen others do the same, and am firmly convinced that no matter how the large branching clusters are packed, they are bound to get somewhat broken anyway! Of course, if you care to travel with them and see to their handling at every transfer, that is another thing, but who can do that? The trouble is that the individual branches are so very heavy for the diameter of the stems next the base, a sudden jar causes them to snap in two by their own weight. But then corals are very beautiful, very interesting, and no matter though they are troublesome, we must have them.
In packing brain coral, and other compact forms without[83] branches, the principal thing is to wrap them in sufficient soft materials that their surfaces cannot get rubbed, for that would ruin them. Do not pack a large chunk of brain coral without putting a partition across the box to hold it firmly in its own place, no matter how the box is turned. In Ceylon I once took the trouble to divide a large box into twelve separate compartments for the reception of that number of coral specimens.
In packing branching coral, a good quantity of soft, elastic, fibrous material like coir, cotton, tow, oakum, or something similar, is necessary. From first to last, take whatever precautions are necessary to keep your corals from getting filled with dirt and litter. Each cluster must lie on a thick pad of your fibrous material. In order to get downward pressure upon it, to hold it in place without breaking the branches, take some soft paper or cotton cloth, roll up a long, cylindrical pad of cotton or something else, and thrust it far down into the largest opening between the branches, with one end projecting above the top of the cluster to receive and transmit pressure from above. This principle, if properly carried out, will enable the collector to so firmly fix even the most fragile cluster that it is fitted to withstand pretty rough treatment in transit without serious damage.
Star-fishes.—When star-fishes are first taken from the water their arms are pliant, but after a bath in alcohol they become perfectly rigid. If left to themselves when first put into spirits, the smaller and more spider-like species will almost tie their arms into double bow-knots, and insist on keeping them so forever after. Since the way to cure a star-fish is to soak it in alcohol for from six to twenty-four hours, according to size, and then dry it flat and in good shape, it becomes necessary to pin the small ones firmly in shape upon thin boards before immersing them, and then they will "stay put." See to it that while in the spirits all your star-fishes, large and small, cure in proper shape, flat, and with each arm flat and extended in the right direction. After removal from the spirits, pin out all those not already fastened upon boards, and then let them dry. I have never found it necessary to poison the spirits, for the reason that dermestes and other insects seem to respect a dried star-fish for his own sake.[84]
Echini.—In all tropic seas the collector is liable to find echinoderms, "sea-urchins," "sea-eggs," or " sea-porcupines." These creatures are usually spherical in shape, with the mouth underneath, and the internal structure of the animal is covered with a stout, calcareous shell of uniform thickness, which is set all over on the outside with a mass of protecting spines, usually fine and very sharp-pointed, but sometimes thick and blunt. In life the spines are movable, and by means of them the creature walks, or clings to its native rocks most tenaciously.
The best time to seek echini is at low tide, and the best places are those where the shore line is composed of rough rocks, scooped out here and there into shallow pools. Take with you a large basket, a large screw-driver, if you have one, or failing that, a knife with a long, stout blade. Wear old clothes, unless you can afford to spoil new ones. When the tide is low you can wade around in the now peaceful pools, and find the echini in the sheltered crevices, clinging to the bottom, or the perpendicular sides of the rocks, but always under water.
To dislodge them, the knife-point or the edge of the screw-driver must be neatly and skilfully worked under the victim far enough to enable you, with the exertion of some force and a steady pull, to pry him loose from the rock, whereupon he becomes your lawful prey. Next comes the cleaning process. With a small knife, detach the skin of the mouth parts from the edge of the round hole underneath, in the middle of which the mouth is situated, and remove all fluid and fleshy matter from the interior of the shell. That done, wash it out thoroughly. The bony jaws, or "Aristotle's lantern," may also be drawn out through the hole and thrown away—unless you happen to be collecting for some one who is studying the anatomy of echini, in which case he must speak for himself.
Having cleaned your sea-urchin, put it in clean alcohol (same strength as for fishes) and let it soak for about twenty-four hours. This will prevent the spines from gently dropping off, like leaves in autumn, when you proceed to dry the specimen. After soaking in spirits, put the specimens out in a shady place to dry. It is a curious fact that all the echini of Ceylon and Malayana lose their spines unless soaked in spirits before drying, whereas those of the Red Sea, the Mediterranean,[85] and the West Indies can be dried without soaking, and the spines will not fall off.
Shells. "Living" and "Dead" Specimens.—The first thing that the amateur needs to learn about a shell is that it may be living or dead. As a general thing, what is technically called a "dead" shell is worthless in a cabinet. A live shell is one which has been collected with a living mollusc in it, and then duly cleaned, preserving all its beautiful colors. A dead shell is one in which the occupant died a natural death, has lain and bleached in the sunshine until its colors are entirely gone, and its form also ruined by the weather. Therefore I say, leave dead shells alone, unless it be that you are making an exhaustive collection of the species in a given locality, when a dead shell which is identifiable is as good a record as a living one. Where a shell is actually devoid of color, a dead shell is as good as a living one, provided it is collected before its edges or its angles have been rounded by exposure to the sun and rain. Many a living shell has an epidermis, the same as an animal, while a dead shell has none.
When shells are obtainable, who can resist the impulse to gather them? The man, woman, or child who is proof against the seductive powers of the beautiful and many-colored shells of the seashore "is fit for treason, stratagems, and spoils." Next to the pleasure of collecting shells one's self is that of witnessing the keen delight of children and ladies in gathering these beautiful treasures of the sea. If you have never yet had an opportunity to stroll along the smooth sands of an ocean beach at low tide, and gather your basketful of beautiful shells, curious sponges, bits of coral and coralline, while your soul is soothed by the rhythmic music of the surf, then I pity you. You have indeed yet something left to live for.
Hooker has divided the shell-bearing mollusca into three great groups—land, fresh-water, and marine—and the shell collector will do well to study each one separately.
Land Shells.—These are most abundant in the tropics, less so in the subtropical regions, and are rare elsewhere. They are seldom found where moisture is not abundant. In the tropics they are to be collected all the year round, but in the temperate zone it is best to collect them in the autumn, when they are[86] fully grown. It is impossible, without devoting too much space to this subject, to give more than a general idea of the situations in which land shells are found. Some species are to be looked for on trees and bushes; others on rocks and stone walls; others again on the ground, and others again on the blades or in the roots of grass. In the tropics it is particularly desirable to watch for the beautiful land snails, which are almost strictly arboreal in their habits. They are to be found on the trunks and leaves of palms, the banana, myrtle, orange, and scores of other trees and shrubs.
Fresh-Water Shells which inhabit clear and shallow water are easily gathered with a stout hand-net. Where the water is murky, or so deep that the bottom cannot be seen, it is necessary to have an instrument like an iron-toothed rake, with the teeth set closely together, to be used as a sort of clam-dredge, raking the bottom and gathering up the mussels. In our own country the amateur collector will doubtless be surprised at the number of species of Unio which will repay the labors of a diligent collector.
Marine Shells.—If you would have one of the jolliest picnics in the world, don a suit of old clothes, equip yourself with a stout basket, a screw-driver with a long handle, and a case-knife with a thin blade,
Go before the tide is at its lowest ebb, and search in the vicinity of the largest boulders,[** bowlders] under ledges of rock, under loose stones, in shallow pools, in bunches of sea-weed, in fact everywhere along the shore. In these various places you will find cowries, ormers (Haliotis), chitons, limpets, and more others than I could name in an hour.
When wading in shallow water it is well to look out for the pestiferous sting-ray, and not step on one unawares, lest you find its caudal spine driven through your foot like a poisoned arrow. But, fortunately, they seldom trouble the collector. With the limpets, chitons, and other small shell-fish, you must work the point of your case-knife under them, and with it gradually detach them from the rock. Where such prey is plentiful, the collecting of it is grand fun, I assure you.[87]
There are many bivalves which burrow or bury in the mud or sand, which must be dug out with a stick or trowel, while other species, still more enterprising, bore into wooden piles, and even into rocks! These, of course, can be collected only with the aid of a hatchet, or chisel, or stone-hammer, as the case may be. If you are on the Florida coast you will do well to search over the coral reefs and the mud flats at low tide. On the latter you will find conch-shells, pinnas, and numerous other species. I once made a very successful search for pinnas by wading around barefooted on a sandy flat on which the receding tide had left the water but little over a foot in depth. These shells were always found standing up in the sand, at bay, with their sharp edge up. By going barefooted as I did, you find the shells by stepping on them and cutting your feet, which is to be accomplished, however, without hurting the thin edge of the shell. A cut foot will heal up, but a broken shell never will.
Cleaning Shells.[7]—In gathering shells, particularly the marine species, many of them will be found covered with a thick, leathery, and persistent epidermis, and many others will be so buried under rough, limy accretions that their own fathers would scarcely recognize them. However beautiful such shells may be when cleaned, it is no child's play to clean them and get them ready for the cabinet. To any one willing to learn, the processes are really very simple; and what manual labor under the sun could be more interesting to a lover of natural history?
Removing the Animal.—With a large shell, such as a conch, the first step is to remove the living animal. In some cases I have accomplished this by hooking a fish-hook into the head of the animal and hanging it up so that the weight of the shell constantly pulling down on the animal would cause it to gradually relax and draw out. An excellent plan is to place the shell for a few days in fresh water and macerate the animal sufficiently that it may be drawn out. Fortunately the great majority of molluscs are very small, and it is possible to prepare them for
the cabinet without the necessity of removing the animal. Mr. Greegor's plan is to soak the shell in alcohol for a few days, to completely preserve the animal, and then dry it thoroughly to expel all the water from it. When that is done, the final step is to pour into the shell, through a rubber tube, a little thick varnish, or hot beeswax mixed with a little vaseline to make it flow readily, and thus cover the dried-up remains of the animal with an impervious coating which does away with all odors which might otherwise arise from it. This part of the process, be it understood, is to be attended to after the cleaning and polishing has been done.
Removing the Epidermis.—The epidermis is so tough and horny, and sticks so tightly to the shell that tools cannot remove it successfully and it must be done chemically. Make a strong solution of chloride of lime and water, by putting into a jar one-fourth its bulk of chloride of lime, two-fourths water, and leaving the remaining fourth part of the space for the froth that will rise. Soak shells in this pasty solution for a short time, and it will eat the epidermis off.
Removing Limy Accretions.—The bulk of all these thick, irregular coatings must be removed with steel tools—file, scraper, knife, sand-paper, or hammer—to suit each individual case. The tool that Mr. Greegor most relies upon is a small and very light hammer, made especially for him, which is shaped somewhat like a square-headed tack-hammer, with the pointed end drawn out to a blunt cutting edge, like the edge of a cold chisel. With this cutting edge a skilful hand can peck the lime or coral incrustations off a shell very neatly, and without injury to the surface of the specimen. Acid will not remove the thick, limy deposits, and they must be cleaned off by mechanical means.
After the bulk of the limy deposits have been removed by means of tools, the shell usually has a dull, lustreless appearance, and appears to require something that will remove the remaining particles of lime, impart to it a permanent gloss, and bring out its beautiful colors. Fortunately there is a way to do this to perfection, which consists in dipping the shell in a weak solution of muriatic acid and water, boiling hot. The strength of this solution must vary according to the nature of the specimen. For thick and strong shells, which by their solid character you[89] are assured cannot be damaged by a maximum of acid, put 3 parts of muriatic acid in 10 parts water. For thin and delicate specimens, use 1 part acid to 10 of water, varying the amount of acid from 1 part to 3, as your experience will soon teach you is most desirable. Put this solution in a porcelain kettle, bring it to a boil, and then with a pair of wooden tongs or forceps dip each shell into it and hold it there for a second or more, as may be necessary. On removing it, wash it in clear water and dry it, and if its appearance is not satisfactory dip it again.
For very delicate shells, having a thin surface color, such as the Cypreas and Olivias, or such shells as have very delicate sculpture, the weaker solution is best. When it is desired to cut more on one part of a shell than another, the acid may be applied with a brush, finishing with a quick dip. Never allow any of the acid solution to remain on the shell, or it will eat into it and dull the lustre. For fine work, dry each specimen with a towel.
Shells which have on their exterior a great deal of horny or organic matter, such as Haliotis, Ostrea, Lingula, and a few others, work badly in acid, and require to be brushed constantly while cutting, to remove the organic matter, for the reason that the acid acts only on the lime of the shell.
Chloride of lime and muriatic acid are both very volatile, and when not in use should be kept in tightly closed vessels.
Identification.—Positive and unmistakable identification of the builder and occupant of a nest is quite as imperative on the collector as the gathering of the nest and eggs themselves. There must be no guess-work on this point, for eggs without a pedigree are often valueless. If an oological expert is within reach—one who can tell to a certainty the species of doubtful eggs, or if the eggs themselves are so characteristic and unique in their shape, size, and markings as to render their certain identification an easy matter, then is it safe to take home a "find" without finding the owner.
It is only the fledgling oologist who needs to be told that in all cases of doubt regarding the identity (i.e., the exact species) of a nest-builder, the only proper course is to collect the bird as well as the nest and eggs. This may often involve long watching, but it relieves the result from all uncertainty. No collector should think of going afield in quest of nests and eggs without taking his gun along. In South America, the only way in which I could get possession of the wonderful pensile nest of the crested cacique was by cutting off the limb to which it hung, with a rifle bullet.
In all timbered regions the collector must have a pair of good climbing-irons, such as telegraph linemen use, to enable him to climb with ease the nest-bearing trees that would otherwise defy him. It was before the days of climbing-irons that aspiring Sir Walter Raleigh wrote for the fair eyes of Queen Elizabeth,
to which his august mistress promptly responded with a piece of wisdom which every young oologist will do well to paste in his hat:
Very good and serviceable climbing-irons can be obtained of Mr. Frank B. Webster, 409 Washington Street, Boston, for $3.50 per pair. Mr. Webster also keeps, at his very complete naturalist's supply depot, nearly every requisite that an oologist or taxidermist requires, except one thing that is indispensable in hunting and lofty tree-climbing,—nerve. Every collector or taxidermist should send Mr. Webster ten cents for a copy of his illustrated catalogue, which of itself is probably the finest of its kind ever issued, and in which all naturalist's and oologist's supplies are pictured, described, and priced. The following are the principal articles needed to make up a proper outfit for an egg collector, and Mr. Webster's prices thereon:
| Collecting-box, 75 cents. | Pasteboard trays, for eggs, per dozen, 12 |
| Egg drills, six sizes, 15 cents to $1.50. | cents. |
| Calipers, for use in measuring, 60 cents. | Pocket-case (leather), complete, with drills, |
| Embryo hooks, 25 cents. | blower, hooks, scissors, and forceps, |
| Embryo scissors, 25 cents to $1.50. | $5.00. |
| Egg measures, 75 cents to $1.00. | Climbing-irons, per pair, $3.50. |
Collecting Nests.—Our boys pay too much attention to collecting eggs, and not half enough to nests. To the average observer who takes an interest in perusing the pages of Nature's story-book, a fine collection of bird's nests is a joy forever. It is ever ready to unfold chapter after chapter of bird lore, tales of wonderful intelligence and divine ingenuity in adapting means to ends, and stories galore of difficulties surmounted by the cunningest little architects in the world. Notice, if you please, the bewildering variety of materials employed in the construction of these bird-dwellings, great and small. Why, even the human architects of our own time are completely surpassed by the Baltimore oriole, the marsh wren, and the humming-bird.
There is food for thought and cause for admiration in a really good collection of bird's nests. To me there is much more of interest in any nest than in the eggs it contains. The latter is a plain and simple product of nature, to which the bird is merely an interested party to circumstances beyond its own control. The former is an exhibit of the instinct, intelligence, reasoning powers, industry, and mechanical and artistic skill of a[92] living creature of a high order. The nest is what the bird makes it, and it often tells quite a story. Boys, let us give eggs and skins a rest, and make a fine collection of nests, in situ, as the rockologists say. We can do this after the nestlings have flown, if you like, without stealing any eggs or shedding any innocent blood. After the young have tumbled out, the nest is a back number, and becomes your lawful prey. Take it, and enjoy it, without remorse over blood that you haven't shed.
 Fig. 21.—Bird Nest, in situ.
The most interesting and valuable nests are those that are collected in situ, or, in other words, in the particular crotch, or bunch of grass, or bush in which the bird placed it. Anything that will show just where a nest was placed by its builder adds immensely to its interest, and increases its scientific value. The accompanying illustration of such a nest in Captain Bendire's collection (Fig. 21), may be taken as an example of how nests of a certain class can be collected and displayed. The section of the sapling was sawn squarely off a few inches below the nest, and screwed (from below) upon a highly polished ebonized pedestal. In drawing this specimen the label was removed in order that no portion of the principal object should be concealed, but Captain Bendire's system of labelling is fully shown in another figure.[93]
The possibilities in collecting and displaying nests in situ are almost endless. Indeed, so far as I have observed, this is a new and very attractive field for the collector, for although I have visited a great many large museums, and in both the New and the Old World have seen many ornithological collections, I have never yet seen a collection of birds' nests which represented a tithe of the possibilities in that direction. Every oologist should have in his library a copy of Rev. J.G. Wood's charming book, "Homes without Hands," which portrays many of the wonders of bird architecture.
 Fig. 22.—Wire Standard for Nests.
In collecting nests one must go prepared to saw off branches, to cut sections of grassy earth, to gather up big tufts of grass, and transport all these to some safe destination. Very often it will be necessary to protect a nest by filling its cavity with some soft material, and then with fine thread or wire to wrap it securely to the limb on which it is placed. Or again, it may be necessary to remove a nest temporarily from its resting place, wrap it thoroughly, and transport it separately to the museum, to be put in its place later on.
Most naked nests, i.e., those that have been plucked from their resting-place, require to be wrapped to keep them from gradually falling to pieces. This may be done with fine thread of the same color as the outside materials of the nest, or, what Captain Bendire uses and recommends as being better, the finest kind of wire which, in large cities, can be bought, neatly made up on spools, at five to ten cents a spool. The wire or thread is wound on quite as one would wind thread on a ball, except that the wire must never be allowed to cross the cavity of the nest, which would at once make it conspicuous. Put on only enough winding to hold the nest well together, and distribute it so that the wire will not be noticed when the nest is placed on exhibition.[94]
For the display of naked nests, Captain Bendire uses a very simple but ingenious little standard made of four wires twisted together so as to form an upright stem, a horizontal platform of the right size, with four perpendicular standards to receive and hold the nest. These standards are easily bent to conform to the shape of the nest, and if the upper ends project above the nest they are snipped off with a pair of cutting pliers. The illustration on page 93 (Fig. 22) shows the exact character of the wire standard, and Fig. 23 shows it in use, supporting a naked nest. Captain Bendire's method of labelling his nests is also shown in full. It is to be noted that the locality of the specimen exhibited, and the name of the collector, appears in full upon the label—two features which should never be omitted on a specimen that is of sufficient value to occupy a place in a museum. Nevertheless, by less careful curators both these statements are frequently omitted from labels.
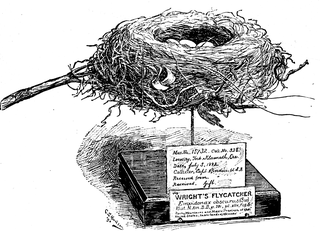 Fig. 23.—Nest on Wire Standard, with Labels.
Collecting Eggs.—In connection with a collection of nests, each nest holding its own lawful and original contents, a good collection of birds' eggs possesses much interest and beauty.[95]
In collecting and preserving eggs, the most difficult feature of all is to remove the embryos successfully. In the days when I diligently collected eggs in many lands, it seemed to me that out of every dozen eggs I gathered, about thirteen contained from one to two embryos each! But there are ways in which this difficulty can be successfully overcome.
The full set of eggs laid by a bird for one brood is called a "clutch," and in collecting it is of scientific importance that whole sets should be collected and always kept separate, and the number of eggs in each set taken should be recorded.
Eggs are always blown through a small, round hole in the middle of one side, preferably in each instance on the poorest side of the egg, if it has one. Of course, the smaller the egg, the smaller the drill must be, and the greater the care in handling. It is often a good plan to pierce the shell with a needle in order to furnish the drill a point of attack. If an egg is cracked, or happens to be of such value that it must be saved at all hazards, reinforce it by pasting narrow strips of goldbeater's skin or court-plaster across the line of fracture.
Having drilled the hole, insert the end of a small wire, having a small portion of the end bent at a right angle, and if the embryo has not begun to develop, or happens to be quite small and soft, twirl the wire rapidly between your thumb and finger, to thoroughly break up the contents of the egg. Having accomplished this, insert the tip of your blow-pipe (the best in the world consists of a tube of glass bent at a right angle and terminating in a fine point, with the large end set in the end of a rubber bulb, which saves the mouth and lungs all trouble) and with gentle and gradual pressure blow in air. Hold the egg with the hole downward, of course, so that the contents will run out freely. Go slowly and carefully, even coaxingly, for too great pressure will burst any ordinary egg in two parts very neatly. If the embryo is small and disposed to be accommodating, help it out by inserting the point of your smallest scissors, snipping it to pieces, and then drawing out the parts, one by one, with your smallest forceps.
Having emptied the egg of its contents, introduce some clear water by way of the blow-pipe, wash out the inside thoroughly,[96] and in case the egg is in a clean, healthy condition, it can now be laid away on cotton or cornmeal, with the hole downward, to drain and get dry. Observe this point, however. The thin, membranous lining of an egg, which the point of the drill pierces but cannot cut away, often closes together inside the hole so closely as to retain, for some time, whatever water might chance to remain. For this reason it was my custom to cut away this membrane around the edges of the hole. Captain Bendire remarks that "eggs that have been thoroughly cleaned will retain their original color much better, and insects or mice are not so apt to trouble them."
Removing Large Embryos.—It often happens that eggs are taken quite near the hatching point, containing embryos so lusty in size, and so "very fillin'" that their successful ejectment seems impossible. Nil desperandum. The way out of the difficulty is through a very small hole. On this point I appealed to the highest authority, Captain Bendire, and he kindly gave me, in general substance, the following directions:
In the first place, make up your mind to go slow, and take plenty of time. If the egg is valuable and the embryo is large, reinforce the egg all over with strips of goldbeater's skin or court-plaster. Having drilled a fairly large hole, then insert the head of a needle in a small stick for a handle, and with the point pierce the embryo in twenty or thirty places. The egg sac, which is always present, should be taken out, if possible with the forceps, to give room for water.
Having cleared out the egg as far as possible, fill it up with water to assist in the decomposition of the embryo. Cover the bottom of a box with a layer of cornmeal or sawdust; lay the egg on this, with the hole upward (still full of water), cover the box, and place it under a stove or in any other place warm enough to hasten the process of decomposition. Work at the egg a little about every alternate day, but without hurrying matters, and keep this process in operation until the embryo softens, falls to pieces, and is ready to be drawn out piecemeal. In removing a large embryo, try to get hold of the tip of the mandible with the small forceps, so that it can be drawn out, point foremost, without splitting the shell.
Eggs that emit an offensive odor after they have been blown[97] need to be rinsed out with carbolic acid and water, or some equally good disinfectant.
It is, of course, to be understood that eggs must be clean on the outside before they are fit for the cabinet. Usually soap and warm water is sufficient to remove dirt and stains, but occasionally a particularly hard case calls for the addition of a little washing soda in the water. The last washing, however, should always be in clear water.
Inasmuch as a label cannot be attached to an egg, the data necessary to give the egg a respectable position in the oological world must be written on the under side of the egg itself, either in lead pencil or India ink, which is capable of being erased, at will.
The following are the data that should be recorded on every egg collected and kept:
1. Name of species, or number in A.O.U. check list, if North American.
2. Collector's number, which belongs to every egg of a given set, and refers to his catalogue and field notes.
3. Number of eggs in the set, or "clutch."
4. Date in full.
In packing eggs for shipment, a great many small boxes of wood or tin are absolutely essential, and in these the eggs must be carefully packed in cotton, each one separated from the rest of the world by a layer of cotton. It is an excellent plan to wrap every large egg separately in cotton, as oranges are wrapped in papers. Captain Bendire recommends the making of divisions, one for each egg, with strips of pasteboard, like the crates in which egg producers pack eggs for shipment to market. This gives each egg a compartment by itself, with a bit of soft cotton cloth at top and bottom. If produce dealers can afford to take such care of eggs worth only thirty cents per dozen, surely oologists can do the same when they are within the pale of civilization, and can get the materials.
At the National Museum the duplicate eggs are stored in small, rectangular, shallow pasteboard trays, or half boxes, each of which has its bottom covered very neatly and exactly with a section of cotton wadding, which gives a soft, springy cushion for the eggs to lie on without the undesirable fluffy looseness of ordinary cotton batting.
Keeping everlastingly at it brings success.
It would be impossible for me to dwell too strongly upon the importance, nay, even the vital necessity to the taxidermist, of a commodious and suitable workroom, and a good supply of proper tools and materials. Anyone setting up a store of any kind meets the expenditures for fixtures and furniture as a matter of course; but the average taxidermist would consider it a killing thing to invest from $100 to $200 in good tools and materials. First-class tools, and a good assortment of them, are indispensable allies in the production of the finest kind of work in the shortest possible time.
In taxidermy let us have no making of bricks without straw. As well might an artist attempt to paint a grand picture with a sash tool as a taxidermist attempt to mount fine specimens with a dull knife, an old file, and a pair of rusty pliers.
Let us suppose we are fitting up a taxidermic laboratory in which to mount all kinds of vertebrate animals, great and small. To begin with, we must have a good room, if possible 15 X 25 feet, or even larger, with good light, a high ceiling, and an abundant supply of water. There must be somewhere a storeroom for bulky materials, and a drying-room for freshly mounted specimens. There must be provided somewhere, for the wet mammal skins, a big, box-like tank lined with sheet lead, for very large objects, and some alcohol barrels for smaller ones.[100] These must be provided with tight covers, or the salt-and-alum bath will evaporate with great rapidity.
After the above, our laboratory will require the following
Furniture and Fixtures.—A heavy work-table, 8 feet long, 4 feet wide, and 2 feet 6 inches high; top 1-1/2 inch thick.
A tool case and chest of drawers.
A stove, a chopping-block, a heavy bench vise.
A grindstone, a blacksmith's anvil, and portable forge.
A water-tight platform on castors, on which to stand large mammals that are wet and dripping.
Tools.
| 2 killing-knives. | 1 machinist's hammer. |
| 2 cartilage-knives. | 1 hatchet, to lend. |
| 1 pair shears, and 1 pair fine scissors. | 1 sharp hatchet, to use. |
| 1 draw-shave, adjustable handles. | 1 cold chisel. |
| 2 skin-scrapers, of sizes. | 1 set stone-cutter's chisels. |
| 3 gouges, of sizes. | 1 punch. |
| 3 chisels, of sizes. | 1 tap wrench. |
| 1 screw-driver. | 1 pair calipers. |
| 1 2-foot rule. | 1 set of hack saws, for iron and brass. |
| 1 tape-measure, 12 feet. | 1 set iron fillers, of sizes. |
| 1 thread-cutter, for iron. | 1 set wooden fillers, of sizes. |
| 1 thread-cutter, for brass. | 1 set modelling tools. |
| 3 pair pliers, of sizes. | 1 set of files. |
| 3 pair cutting nippers. | 1 set of paint brushes. |
| 4 pair forceps, of sizes. | 1 set of brushes for hair and teeth. |
| 1 hand vise. | 1 gluepot. |
| 1 hand drill. | 1 set of awls. |
| 2 monkey wrenches, of sizes. | 1 set of glover's needles, 3 sizes. |
| 1 ratchet brace, with bits and drills. | Best linen sewing twine, or "gilling |
| 4 gimlet bits, of sizes. | thread," of two or three sizes. |
| 1 hand-saw. | 1 iron thimble. |
| 1 key-hole saw. | 1 spirit-lamp, or gas-stove. |
| 1 claw hammer. | Pails, kettles, cups, bowls, etc. |
| 1 tack hammer. | 12 spools of Barbour's linen thread. |
Materials.—Excelsior; hemp tow of two qualities, coarse and fine, both of long fibre; flax tow, such as upholsterers use; cotton batting; oat straw; potter's clay; good glue; plaster Paris; arsenical soap; spirits of turpentine; benzine; salt by the barrel; ground alum by the hundredweight; pine and hemlock lumber, one to two inches thick; 2×4 pine scantling; an assortment of annealed wire; rods of Norway iron, from 3/16 inch to 1 inch; nails, tacks, wrought-iron staples, screws, nuts, bolts,[101] wrapping twine; rosettes for iron standards; washers, all sizes; alcohol, shellac, white hard oil finish (varnish); muriatic acid, sheet wax, sperm oil; glass eyes, all sizes, kinds and colors; unlimited pluck, patience, and perseverance.
If the worker intends to mount only birds and small mammals, he will need but a very small portion of the tools and materials enumerated above. But fie! Where is the taxidermist worthy of the name who will admit that his resources are limited, or that he is not able and ready to "set up" any animal that may be brought to him, no matter how big or how bad it is. Perish the thought that he is not able to cope with dog, deer, or even elephant.
We now start on the supposition that you have acquired all the tools and materials you are likely to need, and that our subsequent work is not going to halt or hang fire on account of the lack of this or that article.
Relaxing Dry Skins.—Nearly all mammal skins that go from one country to another are sent in a dry state, and it is a rare exception to obtain a foreign skin in any other condition. It therefore behooves the mammal taxidermist to become a thorough expert in softening dry skins of all kinds and sizes, and bringing them into mountable condition.
To relax a dry skin, rip it open, remove the filling material, and immerse it in a weak but clean salt-and-alum bath (see Chapter IV.) until it becomes soft, be the time required three days or three weeks. If you are in a great hurry, soak the skin at first for a brief period in clear water, and if it is milk-warm, so much the better. Sometimes a skin is so old and hard and refractory that the bath of salt and alum seems to make no impression upon it, in which case try clear water. In a few hours it will yield and collapse, and then it must be put into the bath, or the water will soon macerate it, and cause the hair to slip off. You can leave the skin in the salt-and-alum bath as long as you choose without endangering it in any way.
The inside of every dry skin usually has over it a hard, inelastic coating which, when once gotten rid of by shaving or scraping, leaves the skin underneath measurably soft and elastic, according to its kind. If the skin is a small one, or no larger than that of a wolf, the best way to get it in working order is to lay it flat upon the table, and go at it vigorously with the skin-scraper (see Fig. 24). In this there must be no half-way measures, no modesty, no shirking. Bear on hard, dig away at the same spot with all your energy, first in one direction, then crosswise, then diagonally. Scrape as if you were scraping on a wager, and presently the skin will become so[103] thinned down it will become quite soft, and even elastic. This is hard work, it starts the perspiration and keeps it going, but it will conquer the hardest skin that ever was made.
To make a skin sufficiently elastic to mount, it must be turned wrong-side out and scraped all over thoroughly with a skin-scraper, from nose to tip of tail, and phalanges. Small skins yield far more readily and kindly than the larger ones. The skins that are hardest, horniest, and most refractory are those of the capybara, all of the Suidæ (hogs), and tropical deer. I have mounted skins of these that when first softened were precisely like horn,—and at best with such subjects the resulting specimens are only "passable."
Sometimes when the scraper can make no impression, it becomes necessary to laboriously pare down the inside of an entire skin with the knife before scraping it. This is tedious, but effective, for a sharp knife leaves no room for argument.
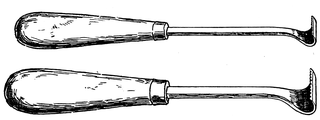 Fig. 24.—Skin-Scrapers, about one-fourth actual size.
All skins larger than a gray wolf, whether they be fresh or dry, need to be stretched on a beam, and pared down with a sharp draw-shave that has adjustable handles. This useful instrument can be bought at any large hardware store for $1.25. Keep it thoroughly sharp. The beam should be about seven feet in length, and six by three inches in size, and laid flat. One end of it is to be bolted firmly down to your bench by two movable iron bolts, and the half which projects beyond the edge of the table must have both of its upper edges rounded off so that it will represent half a cylinder with the convexity uppermost. The table itself must be fastened securely in place. Throw the skin over the rounded end of this beam, drive a stout "scratch-awl" through it, just beyond the reach of your[104] arms, stretch and flatten the skin upon the beam, and with the draw-shave carefully shave down the entire skin until it is thin enough.
Be very careful at first, until your hands acquire skill, or you will cut through the skin, which, in the case of an animal like a hair seal means an unsightly, permanent defect. Do not be afraid of paring a skin too thin so long as you stop at the roots of the hair.
Of course you can not pare down the skin of the head and feet with the draw-shave, and these must be treated with the knife and scraper. The skin of the head of every mammal must be pared down and scraped particularly thin all over, especially the eyelids, lips, and nostrils, so that when these parts are backed up with clay you can model them into exquisitely fine form and expression. If you slight the skin of the head, good-by to all expression; you will merely be able to "stuff" it, and that is all. If its features look coarse, uncouth, and wooden, it will probably be because the thickness and inelasticity of the skin defies your art.
Of course the joints of the feet must be got into working order. The leg bones and skull require to be thoroughly scraped and cleaned, and the skin itself worked up as nearly as possible to the condition of a fresh subject.
Carving Wooden Skulls and Leg Bones.—It is absolutely essential that every mammal to be mounted should have a skull, and all save the smallest should have leg bones also. If the skull and leg bones that belong in a skin are missing, I invariably carve others of the same size out of soft pine to replace the lost members. These bones are imperatively necessary to give shape and length to the various joints and angles of the limbs, to shape the head, to give a foundation for the attachment of wires, and to build upon generally. Very often the skull of an animal is of such value to science that it must be kept out of the skin at all hazards, and exhibited separately. Then it must be duplicated in wood.
Every mammal taxidermist must learn how to carve wooden bones, and the quicker he becomes expert at it, the better. Very few tools are required, and these are as follows: A small hatchet, a pair of 8-inch calipers, a pair of 8-inch dividers, gouges of three sizes, 1/4, 1/2, and 3/4 inch; chisels of about four sizes[105] between 3/8 and 1 inch, a draw-shave, a spoke-shave, a good sharp pocket-knife, and the usual supply of boring tools.
To carve a wooden skull, proceed as follows: If you have not the genuine skull to use as a pattern, you must procure one from an animal of the same species, and ascertain its size in comparison with what the wooden skull must be, e.g., whether it be larger or smaller. Then procure a piece of soft pine timber, free from knots, and thick enough to turn out a skull of the proper size. If this can not be found in one piece, glue together several pieces of pine until they form a block of the proper size. On the top of this block place your genuine skull, and trace its outline on the wood, making your outline larger or smaller, as it may need to be, and bilaterally symmetrical. Now take your hatchet and hew the two sides of the block down exactly to this outline. This represents the "ground plan" of the skull.
To get the side elevation, sketch out on the side of this block a side-view outline of the skull, and then hew down to that. With your dividers, locate exactly the inner edge of the orbits, and then mark out with a pencil the entire circle of each orbit. With a gouge carve out the hollows neatly, and then with your flat chisels attack the cranium, round off its angles, and so work over the entire skull.
Measure frequently with the calipers to see that the dimensions are correct. There is no need to go into any of the details of the back part, or basi-occipital portion of the skull, nor with any other details except those that lie on the surface. It is important to shape the orbits, zygomatic arch, the frontal bones, the muzzle and lower jaw, quite accurately, for these bones bear scarcely any flesh. In making skulls for apes and monkeys the greatest care is necessary to produce the facial angle, orbits, and muzzle, so sharply characteristic of the various families.
When a wooden skull is used, the mouth should always be closed, unless it is very necessary to have it open. While it is possible to take moulds from a real skull, and cast a full set of teeth in plaster or lead, or to set real teeth, or painted wooden imitations, into a wooden skull, the result is generally unsatisfactory to a critical eye. When teeth are cast and painted, the paint always changes color with age, causing the teeth to look[106] "made up." If you can not have a real skull with genuine teeth in it, for whatever mammal you are mounting, no one has any right to require that it be mounted with open mouth, unless the head is to go on a rug instead of a scientific specimen.
Observe the following precautions in making a skull:
1. Be sure that it has the proper facial angle.
2. Be sure that it is in no way too large. Better have it too small than too large.
3. Be sure that there are no sharp corners upon it anywhere, lest they come out next to the skin in mounting, and cause trouble.
When a skull is finished, bore a hole (or two in some cases) through it from the occiput to the centre of the nose or mouth, for the passage of the neck irons or wires that are to support the head.
The principles involved in carving skulls apply equally to carving leg bones, except in this work there is much to be done with the draw-shave and spoke-shave. Of course they require to be wired together at the joints, with two wires at each joint, so that the space between them may be channelled out with a gouge to receive the leg iron.
Sewing up Holes in Skins.—After thoroughly cleaning a skin, take a glover's three-cornered needle of the proper size, and a waxed thread from a ball of strong linen thread, or "gilling twine," and sew up all the holes that are to be found in the skin. It requires some little ingenuity sometimes to know just how to trim the edges of a hole so that it can be sewed up without puckering the skin, but a little experimenting will soon reveal the way.
If you have to sew up a cut which has no hair to cover it, sew tightly with a curve-pointed needle, starting the stitches on the inside well back from the edge, and sewing only three-quarters of the way through the skin. Draw the edges tightly together. When the sewing is finished, place a flat bar of iron or wood underneath the seam, and hammer it with a hammer all the way along. This will flatten the ridge formed by the sewing, and will render the seam almost invisible.
In order to do fine work, a taxidermist must be quite expert in the use of the needle and thread. In sewing up skins there are two points to be aimed at, viz.:
1. To sew strongly.[107]
2. To sew so neatly that the seam will be as nearly invisible as possible.
For general work one must also have common round needles, and No. 30 thread for very fine sewing, as, for instance, torn eye corners or lips, and holes in the face where the skin is very thin and there is little hair, or none at all; three-cornered glover's needles, Nos. 00, 1, 2, 3; and three sizes of strong linen sewing twine. In the beginning of your work acquire the habit of being particular about the size of the needle and thread you use upon a skin, and never let them be larger than necessary. When special strength is needed, double the thread and wax it with beeswax to prevent its rotting. Always sew with the ball stitch, e.g., from the inside of the skin to the outside, every stitch. It is often convenient to use a curved needle, and this can be made by heating a glover's needle to a red heat in the flame of a spirit lamp and curving it while hot.
How to Make Long Needles.—In making manikins, and also for other purposes, it is necessary to have a set of needles varying in length from six to eighteen inches, or even longer. You can buy needles up to ten inches in length from anyone who keeps upholsterers' supplies, but the longer ones you must make for yourself. To do this, take a piece of No. 12 or 13 steel wire and grind one end to a point. For the eye, heat the other end red hot, flatten it with the hammer, then heat it again, lay it on a bar of lead, and with a brad-awl and hammer punch an eye in it while hot.
Neck Irons in Mounting Mammals.—Never allow a neck iron to come through the top of the skull, through the forehead, or through the face anywhere. The neck iron, which must support the entire weight of the head and neck, should pass through the back of the skull and into the nasal cavity. Let the iron extend some inches beyond the end of the nose until the neck is made, and the head placed in position, for not until then can you tell what length the neck iron should be. When the head is well-nigh finished, take a small hack-saw and saw off the neck iron close up to the nasal cavity, so far from the end of the nose that by no possible chance can the animal shrink so much in drying that the end of the iron will protrude through one of the nostrils and into view.
General Remarks.—We may assume that any one who is ambitious to excel in taxidermic work desires to do so by the high character of his productions, and the recommendation they silently give him. I am well convinced that any one who takes the trouble to read this book will welcome the following principles that apply very generally in mounting the higher vertebrates, and are, at all events, intended to increase the average of general excellence and permanency in mounted specimens.
A place in the front rank of taxidermists is not to be easily won. It can only be accomplished by the studious methods of the sculptor, the experience and observation of the field naturalist, and a combination of these with technical and mechanical skill in the laboratory. The painter paints but one side of his animal, and he is not hampered by bulk or measurements. The sculptor blithely builds up his clay model, with neither skin, bones, nor hair to vex his soul. The taxidermist must not only equal the form of the sculptor's clay model, but he must also make it to fit a certain skin with exactitude.
The ideal taxidermist must be a combination of modeller and anatomist, naturalist, carpenter, blacksmith, and painter. He must have the eye of an artist, the back of a hod-carrier, the touch of a wood-chopper one day, and of an engraver the next.
With increased skill on the part of the workers has come increased appreciation on the part of museum officials, and higher salaries. Let me say to aspiring beginners, there is plenty of room at the top, and money and glory to spare for those who get there. But there is no royal road to fortune in this business. Success means years of earnest work and study.[109]
With the understanding, therefore, that we are aiming at perfection, and that "a little knowledge is a dangerous thing," we will endeavor to call attention to a few principles which underlie all good work in taxidermy. At the same time I will try to point out a few of the most common faults generally observable in mounted specimens.
Permanency.—This is the foundation on which every specimen must be built in order to be first class. A preserved and mounted animal that has not enough solidity and stability to stand the test of time is unworthy of a place in any museum or private residence, for its existence is sure to terminate speedily in disappointment, disgust, and loss. During the last eight years the National Museum and American Museum of Natural History have thrown away and otherwise gotten rid of enough stuffed specimens to stock a small museum, and all because of poor and unstable taxidermic work only twenty years ago.
A taxidermist who knows his business can mount a specimen to last ten years or ten hundred, just as he chooses. If you, like a certain taxidermist I once knew, believe in "quantity not quality," then you, like him, can use small and weak supporting irons ("they work so much easier than heavy ones!"), half clean your skins and skulls, ram a skin full of excelsior, straw, paper, and rubbish from your dirt-box, sew it up with long stitches and cheap twine, cram its eyes and nostrils with nasty putty, and insert the cheapest eyes obtainable. Then, while the specimen may look passably well during its first six months, by the end of two years its sides will be a succession of hills and hollows, its seams will be ripped and gaping wide open, its nose will be shrivelled up and shapeless, its ears will look like dry autumn leaves; it will lean over helplessly to one side, and will also have settled down upon its feet until they are shapeless deformities.
This is no fancy picture, for it fairly represents the condition of many a buffalo, deer, and moose that I have been called upon to either dismount, remount, or destroy. A dishonest taxidermist may slight the interior work of a specimen and have it escape detection for six months, or even a year, but time soon tells the story. Dishonest or careless work, like[110] murder, will out. In a bird, it expresses itself in a look of roughness, and a general falling away from grace at all points.
To secure perfect stability and permanence in a mounted specimen, observe conscientiously the following principles in its construction:
1. Pare every skin down thin, so that its shrinking power will be reduced to a minimum. This will prevent its seams from opening.
2. Poison with the utmost thoroughness, so that even though the specimen should chance to stand unprotected for years where insect pests are thickest, they can find nothing to feed upon in its hair or feathers.
3. Use heavy supporting irons or wires, as heavy as the specimen will accommodate without sacrificing the form and position of legs and feet. The fault of using the lightest possible supports is entirely too common, and is so thoroughly reprehensible in a taxidermist that it becomes a vice.
4. Make the mechanical structure of every specimen (e.g., the fastening together of the body, limbs, head, neck, and tail), so firm that the rigidity of all is complete. It is then, and only then, in your power to place any member of the body in a desirable attitude and have it remain fixed.
5. Every portion of the skin should rest upon a firm, smooth surface of clay, excelsior, straw, or tow, according to circumstances. If there are lumps under the skin, they will appear soon after it is dry, and destroy its smoothness. If there are hollows, the result will be the same.
6. The larger the specimen the thicker is the skin, and consequently the harder and more unyielding should be the material it rests upon. Do not make a manikin with hoop iron and burlap, and a little loose filling between that and the skin, for specimens so mounted nearly always come to grief. If you stuff a skin with straw, excelsior, or tow, pack the filling in a solid mass, for with the lapse of time all such materials are bound to shrink, no matter how hard you make them at first. The shrinkage of straw is often remarkable and highly disastrous.
Attitude.—On this subject no fixed rules can be offered. To one fact, however, which should always be borne in mind by the[111] preparator, I must call special attention, and that is as follows: Animals of all kinds, even in a state of nature, and entirely of their own volition, often assume attitudes that are highly ungraceful, unpleasing to the eye, and anything but fairly representative of the creature's form and habits. This being the case, do not make the mistake of concluding that because you have seen a particular animal assume a particular attitude, it is "natural," and therefore you can do no better than to reproduce that attitude in the specimen you are mounting. No, a thousand times no. This mistake will lead to the reproduction of many an ugly attitude, even though like life itself.
Every animal is capable of assuming scores of different attitudes, and from all these you should choose the one which is most strikingly characteristic of the subject, most truly representative, and which does the animal the same sort of justice that you seek at the hands of the artist when you go to have your own picture taken. On such occasions you do not lounge ungracefully, nor "stand stoop-shouldered," nor look listless; you stand erect, at your full height, and look your very best. Make your animal do the same.
For your own picture you do not assume a violent and tragic attitude, nor anything strained. You stand or sit at ease, quietly but intently regarding something in particular; or your attitude may with equal propriety represent a moment of rest in the course of some quiet action. Pose your mounted specimens according to the same principles, and the results will be most satisfactory to all. The choice of an attitude depends wholly upon your artistic instincts, "upon your eye," so to speak. Choose that one which is most graceful or grand, and is at the same time truly characteristic of the subject. To my mind, the attitude taken by an animal when startled by visible or suspected danger, is the one par excellence in which it appears at its best when mounted. Under such conditions the animal always stands fully erect, head aloft, and with every sense keenly on the alert. The next best attitude is that which represents an animal quietly walking or climbing, according to its habits and modes of progression.
The subject of groups and grouping will be considered in full later on in this work.[112]
Proportions.—On this point a single observation will be sufficient. The taxidermist often receives, from the zoological gardens and menageries, specimens that are very thin in flesh. In mounting an animal, do not let your knowledge of anatomy run away with your judgment, art, and even nature itself, by producing a tiger, panther, zebra, or buffalo with all its ribs showing, and its scapula, pelvis, and vertebral column all standing out in bold relief. Unless the individuals of a given species are always scrawny, I pray you, for the sake of truth and justice, do not make your solitary representative of that species look like a candidate for special honors at a bone-yard.
Let me assure you, on the honor of a hunter, that animals in a state of nature are nearly always well fed and plump-looking, and show very few bones. It is easy to make ribs on a clay-covered manikin, but do not do it on a wild animal, unless you deliberately intend to produce a starveling. According to its nature, make every animal look well-fed and in good condition, but not fat. It seldom happens that a wild animal in a state of nature grows really fat, but it is still more seldom that one looks under-fed and poor. If fatness is a special characteristic of a species, then fat let it be, but scrawny never.
Above all things, avoid in your birds and quadrupeds the half-filled body which makes the subject look as if it had been eviscerated. The abdomen is always convex, not concave.
The Uses of Clay as a Filling Material.—The value of clay in the mounting of mammals, reptiles, and fishes can hardly be overestimated. Previous to 1880 its use among the taxidermists of my acquaintance was unknown, and when its value was discovered and put to general use by the writer, in the year mentioned, many of my rivals predicted all manner of evil from it. They declared it would destroy skins, go to dust within them, become soft mud in damp weather, crack, etc. I persisted in its use, disproving all evil prognostications, and now its general use really marks a new era in American taxidermy. By means of this common and cheap material it is not only possible but easy to mount a horse, a seal, a hairless dog, a turtle, snake, fish, or any other animal, with absolute accuracy in every detail of form and size. Not only is this true, but, so far as I can discover, there is no other material than clay with[113] which these results can be accomplished. For covering manikins, coating the skulls of large animals, and for filling in the nose, mouth, eyes, and ears, it is everything that could be desired. With it a stretched skin,
can be worked together on the clay-covered manikin, and reduced in size until it fits without the slightest visible wrinkle, or any cutting out such as used to be necessary by the old methods.
To prepare clay for use, take the clean, worked chunks of soft potter's clay (which costs about two cents per pound, and should be quite free from sand and grit), put the right quantity in a pail, and pour a little water upon it. With the hands knead it until the water is taken up, and it becomes as soft as dough. It will, of course, be quite sticky, and in this state is altogether too soft to use except to cover a large manikin, in which case it must be soft enough to spread easily with the hand. For ordinary use, however, chop up finely, with the hatchet, some clean hemp tow of long fibre, and mix it thoroughly with the clay, which can be done only with the hand. This makes the clay more stiff, about like soft putty, and of the proper consistency for filling into feet, cheeks, eyes, mouth, nose, etc. If the clay is too soft, you will have difficulty in making it retain the proper form under the skin. If it is too stiff, it balls up, and you can not work it along under the skin from one part to another. When you learn to make it of just the right consistency it works to perfection, no matter where you put it, and will forever retain the form your fingers give it by pressure from without. Elsewhere will be given more detailed advice in regard to the various uses of clay.
Coloring.—The time was when American curators held it sacrilege to paint the soft parts of birds, and the hairless portions of certain mammals. For my part, I have always fought that idea unconditionally, in season and out of season, and I am glad to say that within the last eight years it has been utterly abandoned. Clearly, it is better to reproduce the colors of soft parts as accurately as one can, rather than let them remain in a[114] colorless, dry, and mummified condition, hideous to the eye and meaningless to the understanding. By all means let us color everything that has color in life, though the heavens fall. Ascertain in some way what the color should be (this can often be done by reference to books with colored plates), then paint accordingly. Paint with turpentine and oil, rather than with oil alone, which leaves an unnatural gloss. You can tone down any oil color, however, by stippling it with a stipple brush dipped in a pan of dry color, or plaster Paris. The taxidermist who can paint the exposed parts of his specimens accurately and artistically has a very powerful advantage over all those who can not. This subject will also receive special attention elsewhere.
General Finish.—In all work on specimens, cultivate a delicate and artistic touch, and then leave its impress upon everything you do. Do not leave a specimen looking as if a coal heaver had finished it. Work at it, and keep on working at it until it is perfect; and then go back to it the next day, and work at it some more! There is no inferno too deep or too hot for a slovenly, slatternly taxidermist. The fault with such workers usually lies not so much in their lack of skill as in their lack of patience and the dogged stick-to-itiveness that conquers all difficulties, no matter whether they come singly, in platoons, or by divisions. Delicacy is just as essential in the production of good work as originality and strength.
In attempting to give the beginner a fair start in the general work of mounting small mammals of all sorts, from mice up to small foxes, I will describe in detail the entire process of mounting a typical specimen, which in this instance will be a squirrel. This will embody all the general principles involved, and after having laid this foundation we will proceed to consider exceptional cases, and describe the manner in which they must be met. The exceptional cases are bats, rabbits, young animals of the smaller species, and a few others.
We will assume that the subject before us is either a "dry skin" which has been fully relaxed, scraped, and rendered perfectly pliable and elastic, or else "a fresh skin," i.e., one which has been preserved in our antiseptic solution (the salt-and-alum bath) or possibly in alcohol, and has therefore never been dried. For the sake of the beginner's courage, which should never be taken out of him at the very first onset by putting him on a dry skin of doubtful quality, we will take the skin of a fine, old, gray squirrel (Sciurus carolinensis) which lies in the bath waiting to be immortalized—or something else.
It may easily happen that for good and sufficient reasons the beginner has no salt-and-alum bath, and can not prepare one. In that event the skin can be mounted immediately after it is taken off the animal, only it is necessary to apply to it after the arsenical soap, as directed hereafter, a copious quantity of powdered alum. If you have no arsenical soap, then as you proceed with the mounting moisten the inside of the skin with water, and rub on powdered alum and arsenic, mixed in equal parts, and be sure that the skin is everywhere coated with it eventually. This leaves the fur dry and clean, and will save you the trouble of drying and dressing it.[116]
On taking our squirrel skin from the bath to mount it we find its texture is firm, and it is somewhat shrunken in size, so that when it is filled out it will not stretch all out of proportion. If either in haste or carelessness you have left a layer of flesh upon the skin, pare it off until the inside of the skin is quite clean. If any holes have been cut by bullets or knives, sew then up from the inside with a strong linen thread and a No. 3 glover's needle—three-cornered.
Now for the wires. Measure the leg bones from the sole of the foot to the end of the thigh-bone, add three inches for what the wire must project beyond the sole of the foot, five inches more at the other end, and cut a No. 15 annealed iron wire[8] of the length thus obtained, for each hind leg. The length of the wires for the forelegs is obtained in the same way. Thus for our squirrel, the wires for the hind legs must be fourteen inches long, and for the forelegs twelve.
Cut another No. 15 wire twice the length from the back of the head to the root of the tail, and this will be the body wire eighteen inches long. The tail wire must be smaller, No. 17, long enough to reach from the tip of the tail to the centre of the body—seventeen inches. Straighten all these wires carefully, lay them together on the table, and remember the purpose of each. If they are rusty, rub them with sand paper. File one end of the tail wire to a tapering point, for the tip of our squirrel's tail is very slender.
We are now ready to make one of the legs, and will begin with one of the hind legs. Take one of the two longest wires, pass one end of it through the slit in the skin at the bottom of the foot, let it project three inches beyond the sole of the foot, and up into the skin of the leg. Now bend the wire until it fits closely along the under side of the leg bones as seen in the accompanying illustration. Tie it firmly with linen thread to the bones of the foot, to the tibia and the femur, as seen in the accompanying illustration.
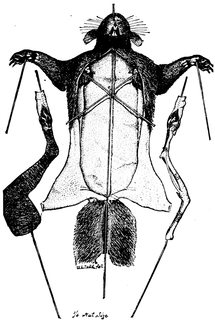 Fig. 25.—Leg-making and Wiring.
Now take fine, clean tow, of good long fibre, and, beginning at the foot, proceed to wrap it around the leg bones, smoothly and evenly, to replace the muscles which have been cut away. The lower part of the leg is flat on the inside and round on the outside,[117] almost bare of flesh at the ankle. Remember always that the flesh on the "calf" of the leg, and the forearm, lies behind the bones, swelling out toward the back and the inside of the limb, and in front the skin lies upon the bone itself. Observe this, and build up the muscles accordingly. The thigh is broad and much flattened, rounded on the outside only, as you must have noticed when you skinned it and cut off the flesh, and the knee-pan is prominent. To make the leg this shape, first wind some tow around the thigh bone, then make up a little roll of tow a little larger than your forefinger, place it along the under side of the thigh and wind it fast there with tow. By a judicious continuation of this process, you can make the thigh of the proper width and flatness both above and below the bone. At no point is a squirrel's thigh more than three-fourths of an inch thick, and the calf, the arm, and the forearm are even less. By reference to the tracing made of the animal in the flesh, you will be able to tell the width of the legs at all points and correct your work all the way along.[118]
In all thin-haired animals the tendon of the heel must be made by drilling a hole through the end of the heel-bone, passing a small wire through for half its length, then twisting the wire together half-way up to the knee. Wind a little fine tow around this wire, gradually increasing the quantity from the heel upward until the false tendon is complete, and the upper end is wound in with the tow which forms the lower part of the thigh. In small mammals which have long, thick hair, as our squirrel for example, it is not necessary to make the tendon, as it does not show. Remember there is no flesh on the upper part of the foot-bones, but considerable underneath.
It is not best to make the legs extremely hard, or they will be difficult to bend, but at the same time the tow must not be put on in a loose, slovenly manner. Avoid making the legs too large; the opposite extreme is the lesser evil of the two.
When the leg is finished, anoint the skin of that leg with arsenical soap, rub either a little wet clay or thick soap over the tow leg so that it will slip into the skin easily, then turn the skin up over it and adjust it from the foot up. If the leg does not fit, turn the skin back and alter its shape until it does fit perfectly. This done satisfactorily, insert a little clay or finely chopped tow in the bottom of the foot, bend the wire so that it leaves the foot at a right angle, sew up the cut, and you are ready to proceed in like manner with the three remaining legs. Be sure to make both legs of each pair precisely alike if you wish to have a healthy-looking animal when finished.
Having made all the legs, the next thing is the tail. Take some of your finest tow in your right hand, the tail wire in your left, begin at the pointed end, and by turning the wire constantly from left to right, let it wind up the tow which runs between your right thumb and finger. Make the tail of a regular taper, perfectly smooth, and not too large. Try it in the skin occasionally to insure accuracy. If the first one is a failure, discard it and make another. When at last you have what is required, anoint the inside of the tail skin with arsenical soap, slip the false tail into its place, and if the tail has been slit open, sew it up neatly all the way along, commencing at the tip.
Now punch a small hole in the back of the skull a little above the occipital opening, pass the end of the body wire through it,[119] force the end through into the nasal cavity and on out at the end of the nose. Let the end of the wire also pass through one of the nostrils of the skin for about two inches. Now put some soft clay on the sides of the skull and jaw to replace the muscles which have been cut away, and fill the orbits with the same material. Anoint the skin of the head and neck with the arsenical soap, turn it back over the skull, and when the skull is once more in its proper position in the skin, which can best be determined by noticing whether the eye opening comes over the centre of the orbit, drive a tack over each eye through the skin and into the bone.
Another tack at the top of the head will also do good service in holding the skull in its place while the grand struggle with the body is going on, for the head is the last thing finished. Life is too short and space too valuable to allow me to explain fully why all these things must be done, but if you neglect any of these simple directions you will very soon find out why they were given.
The legs and tail are wired and made, the skull is in its place, with one end of the body wire passing through it, and we are now ready to wire all the parts of the animal together. The skin lies on the clean table before us, right side out, with the legs in the same position as when we drew the outline. Bend the inner ends of the foreleg wires back from the head of the humerus at an obtuse angle, and let them cross each other like the limbs of an X, as seen in the accompanying figure. At the point where they cross each other, turn a little ring in the body wire, six inches from the end, just large enough for the two wires to pass through easily. For this purpose you will find a pair of round-nosed pliers convenient. Pass the end of each foreleg wire through the ring, and let them cross again, with the wire of the left leg underneath the other.
 Fig. 26.—Wiring Together.
Now refer to your outline, measure the distance between the[120] extremities of the toes, and it will tell you exactly how to adjust the leg wires so as to get the right distance between the two ends of the humeri, or, in other words, the shoulders. The wire between the head of the humerus and the ring represents the scapula, and, if rightly measured, will enable us later on to pose the forelegs with ease and success.
Now, with the round-nosed pliers in the left hand, grasp the three wires firmly at the ring, lay hold of the two leg wires with the flat-nosed pliers and give two complete turns to the right, twisting the wires together as tightly as possible. Bend up the body wire to one of the leg wires, and, leaving out the other, give these two a couple of turns. Take the other leg wire and body wire and give them a twist. If the legs are now solidly together, it is enough, but if they are not, this twisting process must be continued until they are perfectly firm. No looseness, if you please.
This done, straighten out the body wire once more, arrange the skin as before, according to your outlines, and you will soon see that the ring for the hind legs must be turned about five inches below the first one. The ends of the hind-leg wires are bent slightly forward (toward the head) from the ends of the femora, and also cross each other in the ring. After getting the hind legs the right distance apart, give the wires two turns as before, then bend the free end of the body wire straight up and over until it points toward the head. Proceed with it precisely as with the other leg wires until the hind legs are immovably fixed on it. Now give the free ends of the wires each a turn around the middle of the body wire and thus fasten all together, forming a backbone of twisted iron wire.
The end of the tail wire must pass under the hind-leg wires (as the skin lies on its back), and after giving a turn or two around the wire backbone, tie it fast with strong twine. The tail must be as firmly fixed upon the body wire as though it was soldered there. This done, wrap a goodly quantity of tow tightly and smoothly around the wire backbone, so that the numerous ends of wire, and the irregularities in the mass of twisted wire, will not cause trouble when we come to fill the body. Now that you no longer need to put your hands inside[121] the skin, anoint it most thoroughly with the soap, from the back of the head to the base of the tail. While the skin is absorbing the soap, take a hatchet and chop up finely a quantity of coarse tow. With your longest forceps, cover the inside of the skin with a layer of cut tow, placing it between the wires and the skin. It is highly important to have a good thick cushion of it next to the skin at the shoulders, hips, and along the back.
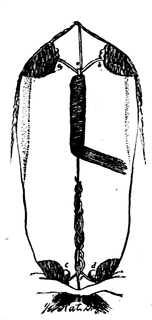 Fig. 26a.—The Legs
Wired Together.
Fig. 26a.—The Legs
Wired Together.
This is the time to give the animal the attitude it is to have when finished. All the members are now completely under control, and we can give the animal any pose we wish. Bend up each leg at a right angle to its present position, making the bend abruptly at the head of each femur, and thus leave between them the same distance that separated them when they joined the pelvis in life. Likewise bend up the foreleg, by making nearly a right angle in the leg wire at the head of each humerus, and leave the proper space between the shoulders. With the play that is given to the forelegs, by means of the distance left between the shoulder point and the ring, we are able to adjust the forelegs with the greatest freedom, to move each shoulder either up or down, and increase or lessen the distance between them at will.
The most pert and characteristic attitude of a squirrel is sitting up on its haunches, either on the alert, eating something held in its paws, or, perhaps, washing its face with its paws. This attitude is rather difficult to get, but it is well worth trying for. Bend each hind leg at the knee until the thigh touches the calf and rests upon it. Bend the ankle-joint until the foot makes an acute angle with the calf. Make a very decided curve in the backbone, so as to throw the body well forward between the knees, which must come nearly opposite the centre of the body. Push the hind legs up into the body so that the squirrel can sit upon his tail.
The elbows drop down until they almost touch the knees, which is partly accomplished by curving the back. Just below[122] the shoulders the backbone must be curved, to throw the head and shoulders up, and hold them well erect. Give the head the pose you wish it to have, slightly turned to one side, let us say.
The next step, a very important one, is filling the body. If you do not do it intelligently, your squirrel will need to find a grave in the ash barrel. The mechanical part of this filling process is exceedingly simple, and everything, or nearly everything, depends upon how much you know of the anatomy of the animal before you. This is a private matter between yourself and nature. Your hand will nearly always be able to keep up with your eye if you give it a fair chance.
With your long forceps, which work like a dextrous thumb and finger eight inches long, pick up the chopped tow, and little by little insert it in the skin where it is needed. First fill out above the backbone until you get the desired outline, in profile, of the back and shoulders from tail to head. Then fill out the shoulders and form them properly. Fill in the neck, first around the base of the skull, and sew up the neck skin from the end of the cut downward for about two inches, and without cutting off your thread insert more chopped tow in the neck and shoulders, packing it firmly, if you have the proportions right. Do not allow the tow to roll up into wads and make the skin full of hills and hollows on the outside. The pressure of the tow on all points of the skin should be the same, and the filling must be packed firmly and evenly, so that the finished animal will keep its shape tenaciously in the struggle for existence, and not collapse at a firm touch.
One secret of success in filling the body lies in gradually and equally filling out the entire body to fair proportions before finishing any one part. Give the animal its exact attitude, then proceed. If there is an apparent lack of skin at any particular point, attack that first, and fill it out. You will soon find how easy it is to draw skin from one part of the body to another by judicious filling.
Having finished the neck and shoulders, leave that part and go to the haunches. Fill around the base of the tail, the hips, the upper part of the thighs, and the abdomen. Be careful to make both sides alike. Commence at the root of[123] the tail and sew up the opening for about two inches, without catching the hair in your stitches, after which you may bore two small holes in a pine board, the proper distance apart, pass the two hind leg wires through, and set the little animal up. This is only a trial trip, and if you find the feet are not the proper distance apart (or the squirrel does not walk properly, if you have put him in a walking attitude), or does not sit properly, take him off the board and remedy the defects. When you have corrected his attitude, proceed with the filling, sewing up from both below and above, until the body is properly shaped, filled full of tow, and the opening entirely sewn up.
Now comb the tow out of the damp fur, and, if it is dirty, wash it with washing soda, soap and water until it is thoroughly clean. Place the animal upon its board pedestal, and correct the attitude with the utmost care before you bend the wires up underneath the board and clinch them fast. If the specimen is even a moderate success thus far, we will go on with it.
If the animal you are mounting is a tree-climber, and you wish to mount it upon a tree limb, select one for the purpose, and, according to your desire to have it nearly perpendicular, slanting, or horizontal, saw it off at the lower end, plant it firmly upon a rough board pedestal, and fasten it by putting two long, stout screws through the board and up into the base of the branch. Put your specimen upon the branch as nearly in position as possible, mark the places where the holes should be bored, and bore them with a bit of the proper size. You can then run the ends of the leg wires through, draw the feet down closely, and clinch the wires on the opposite side.
As soon as the little animal is firmly fixed on his temporary pedestal, or his branch, which must be permanent, we are ready to give the final touches to the body. We will, with thumb and finger, press in the shoulders if they are too high or wide, flatten the body by pressure if it is too round on the sides, and emphasize the undulating outline of the sides also by pressure. If there is a hollow spot where the surface should be smooth, thrust a sharp awl through the skin, catch some tow on the point of the awl, and, with a sharp lifting motion, pull the fibre[124] up until it fills out the hollow. If there is a lump of tow under the skin, making an unsightly hump, thrust the point of the awl through into it, and spread it out underneath until the skin lies flat. It is often necessary to work all over the body of an animal with the awl in this way.
We have now to finish the head. With the cutting pliers, cut off the end of the body wire close up to the skull, so that the end will be hidden. Adjust the skin so that it fits naturally and easily on the skull and around the mouth, and see that the eyes come over the centre of the orbits. If the clay which was put upon the skull does not fill out the jaws and sides of the head quite naturally, push in a little chopped tow until the proper form is obtained.
 Fig. 27.—The Finished Specimen.
Avoid getting one jaw fuller than the other; it is only boys and men who chew tobacco who have cheeks that are not bilaterally symmetrical. Avoid getting one eye too far back, forward, up or down, but match the one that is correctly placed.
Fill in the end of the nose, the lips, and the chin with clay, fold the lips naturally and press them into place. If the skin[125] around the mouth is not unnaturally drawn back, the lips will stay in place, and dry there without any fastening. If the skin is drawn too far back, the lips must be pinned in place until they dry. The advantage in using clay for filling out the head is that it enables you to press the skin down upon it and mould all the parts into their natural shape and size, without giving to the head that unnatural, puffed out, stuffed appearance, which is almost unavoidable when tow only is used.
Introduce clay at the eye opening until the addition of the glass eye inside will make the organ sufficiently prominent. Insert the glass eye edgewise through the opening, turn it in position and embed it in the clay. With a large needle, or your awl, adjust the eyelids upon the glass, and if the eye is not right, work it into its proper position. Adjust both eyes alike, and, above all, see to it that they both look at the same point, be that point real or imaginary.
The same amount of iris must show in each eye, and the position of the pupils must correspond exactly. Do not make them unusually staring, as though about to burst from their sockets. It is the eye more than any other one feature that gives any animal, living or stuffed, its expression, and this is due entirely to the arrangement of the lid and brow. The eyeball has, in itself, no more power of varied expression than a glass marble; therefore the facial expression of a mounted animal is wholly under the control of the taxidermist, provided he takes the trouble to procure good glass eyes of the right size and quality.
Unless the ears of your specimen are very small and insignificant, it will be necessary to cut two pieces of thin card-board the shape of each ear, but larger, and after getting the ear in position, pin it between them, so that it will be held in a natural position and good shape until it dries. Do not thrust the pins through the ear, but through the card-board around the edge. The last thing is to arrange the toes and feet naturally, and pin each toe in place until it dries. Since our squirrel is to be holding a nut, we will cut off the foreleg wires, all but half an inch, and bring the paws close together at the proper elevation. We must now drill two small holes in opposite sides of a hickory nut, force the wires into them until the nut rests[126] nicely in the paws, and there let it remain. If necessary, we will tie the toes in position around the nut until they are dry. It is a common fault with beginners in taxidermy to slight the toes of their specimens, both birds and mammals, and, as a result, all such specimens have a slovenly, tramp-like appearance.
Nature alone can tell you how to pose the tail to represent the state of the animal's feelings. Try to look at your work with the eye of an artist, analyze it, and catalogue its faults, so that you will be sure to avoid them in the next specimen.
If the hair needs no more washing, comb it out carefully at the last moment, and set your specimen on a shelf to dry, out of the dust if possible, and out of the sunshine, and watch it while it is drying to see that the head and feet dry in good shape. At the end of two weeks, or perhaps three, the little mammal will be dry and hard, and ready for the last touches. Pull out all the pins which have been holding the toes, ears, lips, or eye corners in place, and if they leave any holes, fill them up with putty. I have not told you how to stuff a head with the mouth open, and model the soft parts in papier-maché and wax, because you will hardly want to try anything so difficult at present, and it involves processes which cannot be described within the limits of this chapter.
When your mammal is quite dry, dress the fur with a fine comb and brush, and beat it with a small piece of whalebone or a little switch, to make it stand out from the skin, full and fluffy, as in life. This end must be accomplished, no matter how long it takes.
Procure some tube colors, oil and turpentine, equal parts, and a small sable brush, with which to tint the eyelids and the end of the nose their natural color. Put a little varnish and turpentine, equal parts of each, on the toe-nails, and, in short, do everything you can that will give the specimen the look of a living animal. If it looks stuffed, put it in the darkest corner of your cabinet, and try another. The glass eyes must be cleaned with great care, and polished with a soft cotton rag until they glisten.
At the last moment change the rough board pedestal for a permanent one, either of black walnut, polished, or ash, planed[127] and sand-papered very smooth, and covered with two coats of shellac. If you have perched your squirrel on the top of a small stump, sawed off square at the bottom, or upon a large branch, with a section of the trunk serving as a base, of course no artificial base is necessary. Artificial branches for mounted birds are bad enough, but for mammals they are altogether too bad, and should never be used.
In conclusion, do not expect that your first mammal is going to be an overpowering success. Do not take a cat for your first subject, for a cat is the most difficult of all small quadrupeds to mount successfully. A tough old squirrel is the best thing for you to wrestle with until you have learned the method thoroughly.
Exceptional Cases.—There are certain classes of small mammals whose skins should not be put through the salt and alum bath, if possible to avoid it, for several reasons. These are the young of the smaller mammalia, especially such as rabbits, squirrels, and other familiar forms. It is by far the best plan to mount all such skins as soon as they are taken off, without wetting the hair, and using dry arsenic and alum, equal parts, to preserve and poison them. The bones of young animals become quite soft in the bath, and the hair is difficult to dress to look like life. The fur of a rabbit is the meanest fur in the world to comb out and dress to look fluffy and immaculate after it has once been wet with salt-and-alum water. Mount them without wetting when you can, only poison them well against moths. Alcohol is far preferable to the bath for the skins of such species as the above, and, as our English cousins would say, is "not half bad."
Mounting Bats.—Having tried all known methods of mounting and displaying these pestiferous little subjects, I finally evolved an arrangement which I now conceitedly believe is the only satisfactory solution of the difficulties they present. My plan is to mount the bat without any wires, save in the legs of the larger species, and when finished lay it on its back on a smooth board, spread the wings, put pieces of pasteboard over the membrane until all is covered, and pin them down. Of course the wings must be in perfect position. When the specimen is dry, apply some royal glue of the best quality to the[128] back of each wing, and stick his batship permanently on a strip of thick plate glass, which has been prepared previously by being cut to the proper size, and ground on the edges.
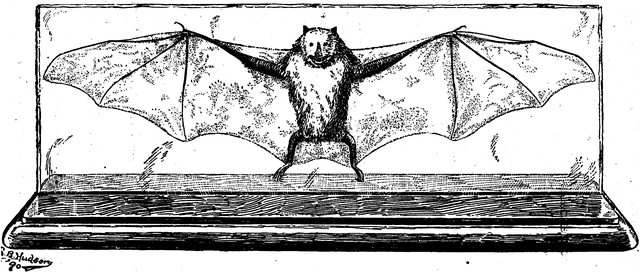 Fig. 28.—Author's Method of Mounting Bats on Glass.
The accompanying cut (Fig. 28) was drawn from a specimen as exhibited, omitting the label. The advantages of this arrangement are as follows: It shows the specimen perfectly on both sides; the wings do not warp and shrivel up; it is possible to repair breaks in the wing membrane, and the most delicate specimen is well protected. The strip of glass stands on edge in a deep groove which has been cut to fit it tightly in the top of a flat, narrow pedestal having the usual moulded edge.
Section 1. Long-haired Mammals of Medium Size.—Examples: Wolves, certain dogs, large apes, baboons and monkeys; the smaller bears, hair seals, all long-haired quadrupeds from the size of the fox to the Newfoundland dog; also, all old dry skins of mammals between the two sizes mentioned.
While it will be advised in Section III. of this subject to mount short-haired skins of the above sizes upon clay-covered manikins, it is very often an impossibility to pursue this course with a dry skin, no matter what its pelage may be like. Dry skins more than one year old are usually so shrunken, hard, and inelastic, that in circumference they are one or two sizes smaller than life, and it is very often impossible to stretch them sufficiently to make them fit over a manikin of the right size. The only way in which enough power can be brought to bear upon them to force them to stretch to their proper size in neck and body, is to fill them with straw, and ram it so hard that the skin is forced to stretch. Even if you fill a shrunken body so full that it will stretch no more, if you keep it thoroughly moist, or even wet, in wet cloths, and return to the charge next day with more straw and muscle, you will find that the skin yields a good deal more, and perhaps reaches the right size without further protest. Very often this is the only treatment that will save an old, dry skin from becoming a total loss. In all such cases fill out the worst shrunken parts first, to make sure of conquering them, and leave the less difficult portions to the last.
The chief differences between the method described in the previous chapter for mounting small mammals, and that for the subjects included in this section are simply these: (1.) The[130] larger animals require leg wires or irons that are too large to be bent at will and twisted together. (2.) Where rods are used, a thread must be cut on the lower end of each to receive a nut under the pedestal, because leg rods can not be fastened in any other way. (3.) A stout wooden bar must be used in the body for the leg, head, and tail wires, or irons, to run through, and upon which all these can be stapled down firmly. (4.) For various reasons, it is best that all these animals should be filled with straw by the old process of stuffing.
To mount a specimen belonging in this section, proceed precisely as directed in the previous chapter, with wiring and making each leg, except where the specimen is so large that it requires rods for the legs instead of wires. It is only the larger and heavier animals of this section, viz., the wolves, large dogs, large kangaroos, anthropoid apes, and the like, that require rods instead of wires. For your foxes, baboons, and small kangaroos, you can use wires of the large sizes, of about the same proportionate length as for your squirrel. In getting out the rods for the legs of your large specimens, use Norway iron, because it is toughest, and proceed as follows:
Decide upon the attitude of your specimen, then lay the bones of each leg in its intended position on the table, take a straight wire of large size (No. 9) and bend it to fit the back of the leg bones, precisely where you wish your rod to go. Leave an end about two and one-half inches long, projecting straight downward from the centre of the foot, to go through the pedestal and receive a nut underneath. Cut a thread on this lower end, and fit a hexagonal nut. For the hind legs, let the upper end of each rod project beyond the upper end of the femur for a distance equal to about two-thirds the length of that bone. The irons to support the head should be two in number, and should be long enough to reach from the end of the nose to the centre of the body. The tail iron will be regulated by circumstances.
The Hand of an Anthropoid Ape.—It nearly always happens that every skin of a large gorilla, chimpanzee, or orang utan is totally destitute of bones. Now the hand of such an animal is a very important feature. Do not attempt to make it with wires and tow alone, for if you do, the fingers will be semicircles, resembling the half of an over-brown doughnut. Each joint must[131] show an angle, and each finger be flat on the inside. The accompanying cut (Fig. 29) shows how to make the hand of an anthropoid ape so that it shall be as natural as life. The wooden bones give the proper angles at the joints, and the tow-wrapped wire underneath gives the finger its proper breadth. When all is ready, cover each finger manikin with clay, make the palm hollow and flat, and let the end of the iron rod come out in the centre of the palm. This method gives a hand that is beyond criticism. For hand and foot studies of apes and monkeys, see "The Standard Natural History," vol. v., page 512.
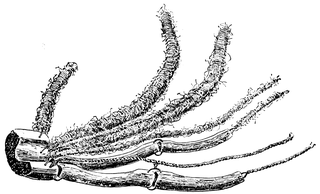 Fig. 29.—Artificial Skeleton for Hand of an Orang Utan.
The following animals, when of adult size, require leg supports of the following sizes: Large foxes, No. 8 wire; olive baboon, No. 5 or 6; small kangaroo, No. 4 to 6; wolverine, No. 6; coyote, 1/4 inch rod; setter dog, 1/4 inch; peccary, 1/4 inch; great ant-eater, 1/4 inch; gray wolf, 5/16 inch; giant kangaroo, 3/8 inch for hind legs; harp seal, 3/8 inch.
Having made the legs complete, lay the skin upon its back, with the legs spread out, make the irons or wires cross each other as shown in the accompanying figure (Plate VI.), and then hew out a piece of tough wood of the general shape and proportion as that shown in the cut. Let this be as small as practicable to avoid splitting when the irons are stapled down upon it. Round off the corners and the ends, so that you can easily[132] work all around this wooden backbone, when filling the animal. Now lay this piece of wood in the skin, upon the crossed leg irons, mark the points at which the irons need to pass through it, and bore holes accordingly, slanting each hole through the stick, for good reasons. The next step is to pass the irons through these holes (by bending them a little, and straightening them afterward) and when all are through, adjust the legs so that there is plenty of loose skin in the body, both in length and breadth. Remember that the stick is to be in the centre of the body, not the top. When the adjustment is complete, bend the end of each iron sharply down upon the stick, and staple it down with the utmost firmness.
Next pass one of your neck irons through the skull from back to front, boring a hole at the back for the purpose, so as to make the end of the iron pass out at the nasal cavity. Replace the missing flesh of the skull with tow or excelsior, bound down with thread, cover all with clay, poison the inside of the head and neck skin with arsenical soap, insert the skull in the head, and fasten the lower end of each neck iron firmly upon the centre stick.
The tail must now be made, but it is wise to fasten the tail iron so that it can be made to slip out or in, until it is known precisely how long it shall be, and then the end may be fastened securely with staples. Now bend up the legs into position, and give the animal its attitude. Procure your pedestal, or limb of a tree, and place the animal in attitude upon it; mark where the iron supports are to pass through, bore the necessary holes, and see if the animal will stand just as you wish it to. If not, work at its legs, and bore new holes until it does; then take it off, poison the inside of the skin liberally with strong arsenical soap, and proceed to stuff it with straw, or chopped tow, or excelsior if you prefer that, but I never do. For my own use I prefer soft straw, chopped fine.
Fill the neck first, using your wooden filler, then the body. If the body threatens to be too small, fill that first. Before going far, fill out the hind-quarters properly. Work on the body all over at the same time, and do not finish one-half of the animal before you have touched the other half, for this course would get you into endless trouble.
Having filled the body full, and shaped[133] it the best you can, and sewn it up at all points save two,—a hole between the forelegs and one under the tail,—now put it in final position on its pedestal, and fasten it there. Having done this and surveyed the scene, you will observe that the form of the animal is very faulty, and the skin not nearly full enough. Something more must be done.
Unless the specimen is a seal, or something else with short, close hair, part the hair carefully and make a long, perpendicular slit in the skin behind each foreleg and in each flank, as shown in Plate III., I-I, and K-K. Through these openings you can introduce your metal filling tools, and also filling materials ad libitum, and give the interior a complete overhauling. You can easily push your iron filler through the straw, and raise the line of the back, shoulders, or hind-quarters, and lower the line of the breast and abdomen until both are right. Then, fill with more straw, or tow, if you like now. Through these holes you command the entire body of the animal at every point, and now you must work out your own salvation. When all is finished and the body is quite full and solid, sew up the openings carefully, and unite the hair over them so that they will be hidden. If you are careless in filling, and pull out a lot of hair around each of the openings, so much the worse for you.
For full instructions in regard to work on heads, see a special chapter.
 Fig. 30.—Fillers of Various Kinds, One-sixth Actual Size. a, Filler of hard wood, 3 ft. long (another should be 2 ft. long); b, filler of steel, 5/16
inch x 3 ft. for long reaches in large mammals; c, filler of iron, 3/8 inch x 2-1/2 ft., for heavy work (another should be 18 in. long); d, filler of brass,
or galvanized iron wire, No. 5, for light work (another should be still smaller, for very fine work).
Fig. 30.—Fillers of Various Kinds, One-sixth Actual Size. a, Filler of hard wood, 3 ft. long (another should be 2 ft. long); b, filler of steel, 5/16
inch x 3 ft. for long reaches in large mammals; c, filler of iron, 3/8 inch x 2-1/2 ft., for heavy work (another should be 18 in. long); d, filler of brass,
or galvanized iron wire, No. 5, for light work (another should be still smaller, for very fine work).
Cutting out Pieces of Skin.—It not infrequently happens that[134] in mounting an old skin it will be found to have been unduly stretched in drying, and in spite of one's best efforts there will be too much skin in a flank, or behind a shoulder, or that the body itself will be entirely too large. In such cases, when the animal is clothed with hair which can be made to hide the seams, it is necessary and permissible to cut a long slit in the skin where the looseness occurs, and cut out a strip so that when the edges are brought together the wrinkle no longer exists. Usually such cuts are made in the shape of a triangle running out to a very fine point, so that when the incision is sewn up the entire adjacent surface will be quite smooth.
When a taxidermist has a fresh skin, or one which has been but recently prepared dry, it is very seldom that any skin-cutting is necessary. With a good elastic skin there are ways of working away from any part a superabundance of skin, or forcing the skin on parts adjacent to the wrinkles to contract sufficiently to cause their disappearance.
On close-haired animals, wrinkles must be worked away, which can in a majority of cases be accomplished by hard, persevering work with the filler. With long-haired animals which have no stripes or spots, and on which the hair can be made to hide all seams, it is best to cut out triangular strips of skin. In the latter case it saves much time and hard labor. It certainly gives a better specimen, and if such tricks leave no visible trace upon the animal, where is the harm? I care not if a skin be slit in twenty places so long as the cuts are tightly sewn up, and are invisible to the eye of the observer.
Bird skins must never be cut in this way, for to the ornithologist who diligently studies every specimen, the presence of every feather and every bare spot naturally belonging to the bird is of importance. Do not forget this caution, unless you wish to call down upon your head the just wrath of the ornithologist. Neither is it possible to do any skin-cutting upon reptiles, for there is no natural covering to hide seams, and to cut out any scales is to mutilate a specimen.[135]
Section II. Mounting Long-haired Mammals of Large Size, for which the Manikin is unnecessary.—Examples: Musk ox, bears (except large polars and grizzlies), yak, Bactrian camel in winter coat, llamas and their allies; also old, dry shins generally, which require forcible stretching.
While the manikin process is the one par excellence for the great majority of large quadrupeds, it is also, until you get perfectly familiar with it, the longest. There are various large animals whose long, thick, and matted hair so completely hides the surface of the wearer that a shorter method of mounting can be followed with very satisfactory results. This is simply stuffing with straw in the same manner as described in detail in the previous section, with but one exception—the manner of attaching the leg irons to the central beam of the body.
The leg irons are cut and fitted to the leg bones precisely as shown in Plate VII. But the legs are made with the skin attached at the foot, the skin is drawn over, fitted and sewn up, and each leg is completely finished while the skin lies in a heap upon the table. For a large animal this takes some time, and as fast as the legs are finished each must be carefully wrapped up in ice blankets that have been wet in salt-and-alum water, and kept soft until all are done. Oil the threads on the rods, to keep them from rusting.
The next step is to procure the centre board, which should be about one-third as wide, from top to bottom as the depth of the animal's body. In the illustration showing the manikin of a tiger (Plate VII.) the body board is wider than is desirable for the same animal were the body to be filled with straw. If the board is too wide, it is impossible to get around it with the fillers, and work through the specimen from one side to the other.
To put the members of the body together, lay the skin upon the floor on its back, in the same general shape as shown in Plate VI. Put the body board in place and mark the points where the ends of the leg irons strike it. Now for the iron squares.
The old and antiquated way to fasten leg irons to a centre[136] board consisted in leaving a long end projecting, bending it like the letter U, and stapling it to the board. That was always a poor way, and in the light of a perfect arrangement it now seems poorer than ever.
When Mr. John Martens came over from Hamburg to work as a mammal taxidermist in Professor H.A. Ward's great Natural Science Establishment, at Rochester, N.Y., the most valuable luggage he brought with him was the idea of the iron square for attaching leg irons to a centre board. For that particular purpose it would be hard to devise a more perfect arrangement, and I shall be at some pains to describe it.
It requires four irons to fasten the legs to the centre board, one for each leg, and to make a set for an animal the size of a large mountain sheep ram, proceed as follows:
Procure four pieces of flat bar iron, 1/4 of an inch thick, 1-1/4 or 1-1/2 inch wide, and 9 inches long. At a point 3-1/2 inches from one end, bend each iron at a perfect right angle, which, of course, can only be done by heating it. Now heat the short arm red hot, clamp the end of it in a vise, and make a twist of exactly a quarter of a turn in the short arm, as close up to the angle as you can. This will make the end of the short arm stand out in a horizontal plane against the side of the body board.
At the end of the short arm, with its centre exactly 3 inches from the inner face of the long arm, drill or punch a hole of the right size to receive the threaded end of the leg iron, but no larger. (For our Ovis montana ram it should be half an inch in diameter.) File off the sharp corners of this end.
 Fig. 31.—An Iron Square.
At a point about 1-1/4 inch from the inner angle of the square, and in the long arm, drill a hole about 7/16 or 1/2 an inch in diameter, for a stout bolt to pass through. Between that and the end of the long arm, drill (or punch) two screw-holes, and countersink them. That is all there is to the making of the square, and the accompanying cut (Fig. 31) accurately represents it. Each pair of squares is put on with a single square-headed bolt, the length of which varies according to the thick[137]ness of the body board. For our mountain ram, the bolts should be 3/8 of an inch in diameter, and about 2-1/2 inches long.
It is useless and unnecessary for me to attempt to describe the different sizes of squares necessary for animals of various sizes, for circumstances must be the instructor in that. I will remark, however, that for a large bison or moose, where the finished specimen will weigh perhaps 600 or 700 pounds, and the strain on the irons is very considerable, I have found it necessary to make squares of flat iron 3/8 or 7/16 of an inch thick by 1-3/4 inch wide.
Caution.—Do not make, the short, or outer arm, too long. If too long, and the hole once drilled, you will hardly be able to make it shorter; but if too short, it can easily be made longer by putting a piece of board between the long arm of the square and the body board. The length of the outer arm of the squares for the hind legs is gauged by the width of the pelvis. The measurement to be taken is the distance between the centres of the two femora when both are in their natural positions in the skeleton, and with this distance once ascertained it is easy to deduct the thickness of the centre board, and calculate how long each outer arm shall be. The distance between the heads of the two humeri is practically the same as the distance between the femora.
In making the hind leg, the iron should be no longer at the upper end than the end of the femur, and once this is determined the upper end of the femur must be cut off with a saw, to give room for the squares and two nuts. The end of the iron for the front leg may project three inches or so above the head of the humerus, and be bent slightly backward; to point upward in the same direction as the scapula.
Remember that at first the squares of the two pairs are set on exactly opposite each other, by means of the single bolt for each pair. Insert the upper end of each leg iron, screw the upper nut down firmly, then lift the half-made animal and stand it on its legs. Being free to move, the legs are very shaky, and you proceed at once to put them in position. You now adjust the legs according to your original design, bore holes in the rough pedestal for the lower ends of the rods to pass through, and shift and change the different members, now[138] here, now there, until you are satisfied that the leg's are in precisely the right attitudes. If the leg that is stepping out in front is too short, run up the two nuts at the square, and thus make the leg an inch or two longer. Those that are too long are easily shortened by shifting their nuts lower down. You have such absolute control over the legs that you can shift and change them just as much as you please, and that very easily. If the whole animal is coupled too short or too long, it is but five minutes' work to take out a bolt, bore another hole, and shift the forelegs farther forward or back. When everything is perfectly to your liking, tighten up every nut to its very tightest, and insert screws through the screw-holes that have been provided in the long arm of each square. Each leg is now a fixture.
The great beauty of this method, which appears to its greatest perfection in the construction of a manikin, lies in the fact that you have, from first to last, the most perfect control over the different parts of the entire animal. When you discover as you proceed that something is wrong, it is an easy matter to change it, provided the skin has not been put on the manikin.
In putting together an animal with the legs in the skin, you are necessarily troubled somewhat by the skin of the body, which hinders the turning of your wrench, etc.; but all such difficulties exist only to be overcome.
Put the neck irons through the skull, and fasten the inner end of each to the body board, as shown in the tiger manikin, or in any other solid way you prefer. As to the tail, ditto, and when the attitude is perfect, and all parts fastened together, then, and not until then, anoint the inside of the skin with arsenical soap, all that it will hold, and give it time to be absorbed. Put the head in position by bending the neck irons, place the feet in position, and tighten the nuts under the pedestal. Now turn the animal upside down, put a rope under each end of the pedestal, and hang the whole affair up to the ceiling, or to a beam, by means of the ropes, so that it will swing clear of the floor.
Next sew up the skin of the abdomen and breast, and proceed to fill the neck, shoulders, and hind-quarters with soft straw. Oat straw is the best, if you can get it. If you can procure no[139] soft straw, then have a boy take your wheat straw, bunch by bunch, and with a mallet pound it upon a block to crush it and make it soft. In filling the animal, the first thing to do is to fill it out at all points, loosely at first, to get the general proportions. The skin should not touch your iron squares or the body board at any point, for if it does, something is wrong. At first you will work with your large wooden fillers, but as the straw gets packed, and the wooden tool will not go through it, take your iron fillers. No matter how hard straw may be packed, with a burrowing, twisting motion you can force that wedge-pointed instrument through the straw so as to reach any point that needs more filling out.
Be careful about the line of the back, and keep it exactly in place, along the centre of the body, and always at the highest point. Do not let the back line of a feline animal, especially a tiger or a leopard, get down upon one side, as will be sure to happen if you are not watchful. When the outline of the back is fixed, then fill out the breast and abdomen, and get the lower line of the body just as it should be. As you proceed with all this, keep sewing up the skin from time to time until only two holes remain, one at the breast and one between the hind legs well back. Now take the animal down, stand it upon the floor, cut slits in the sides, as directed in the previous section, and through them finish the filling and shaping of the body.
All this takes work, hard work, intelligent work, and a great deal of it. Make the body hard and firm, and as smooth on the outside as Nature does. To secure smoothness, and to lower the unnatural knobs that are sure to appear, beat the animal from time to time with a flat club. When all is done, fill in the last bit of straw at the various holes, sew them up strongly but neatly with stout linen twine, or "gilling thread," well waxed, and dress the fur. This will be treated elsewhere in a separate section, as also will the treatment of the head.
Section III. Short-haired or Hairless Mammals, and Others of Great Size.—Examples: Lion, tiger, zebra, horse, giraffe, bison and buffalo, camel, all deer and antelopes; elephant, rhinoceros, hippopotamus, tapir, etc.
Of the numerous processes described in this work there are two which I must mention as being distinctively and particularly my own. One is the general use of clay as a filling material, and the other is the evolution and development of the clay-covered manikin, on the principles now to be described and illustrated. Already this method of mounting quadrupeds has been quite generally adopted by the new school of American taxidermists, and I think it is destined to fill our museums with more perfect mounted mammals than the rest of the world can show. I have always willingly taught the advantages of the clay-covered manikin, and the various processes involved in its construction, to every enterprising taxidermist who desired to learn it, and it was my intention to have published a full description of it years ago. Now it comes as a sort of "farewell performance," and "positively the last appearance."
Among taxidermists, the term manikin is applied to the made up figure of an animal over which a skin is to be adjusted, and made to counterfeit the actual form and size of a living animal. While it is well adapted to the successful treatment of mammals, reptiles, and fishes in general, it is impossible to employ it in mounting bird skins unless they are very badly torn, and require to be put together a piece at a time, or else are of the very largest size. The worst torn and mutilated bird skin can be[141] put together on a manikin with perfect success, provided the skin is all present.
Speaking from my own experience, I must say that my clay-covered manikin process seems to possess important and undisputed advantages over all other methods I have ever seen employed or described for the mounting of not only the most difficult mammalian subjects, but also reptiles of many kinds, and fishes. By it the most perfect results attainable by the taxidermic art are not only possible, but may be achieved without even a risk of failure save through lack of anatomical knowledge. Nearly all the mechanical difficulties which beset the other methods are eliminated, and the result becomes chiefly a question of knowledge and artistic sense. By this method, I have successfully mounted such mammals as the following: Elephant,[9] American bison, polar bear, zebra, tiger, puma, elephant seal, hairless Mexican dog, etc. The last-named specimen was in competition against the elephant in a competitive exhibition, and I learned afterward from the judges that it came near wresting the grand prize from its lordly competitor. This fact is mentioned to show that the process was equally successful in the treatment of a thick-hided elephant and a small dog with a skin as thin as writing-paper, and utterly destitute of hair. A plaster cast of the unskinned body of the dog was exhibited with the mounted specimen, to enable the observer to judge of the success of the process.
The unchallenged superiority of the clay-covered manikin process is due to the following reasons:
1. The absolute control the operator is able to exercise over the form of his subject from first to last, without prejudice to the safety of the skin to be mounted.
2. The possibility of working out anatomical details which it is useless to attempt by other methods.
3. The absolute permanency of the form produced.
4. The ability of the operator to place his subjects in attitudes so difficult that by ordinary methods they would be unattainable.
5. The most perfect preservation of the skin and its covering from damage by excessive handling, beating, and wetting.
6. The absolute perfection of form and attitude which is attainable by this method only.
Until you have fully learned the principles of manikin-making, do not attempt to mount by this process a skin that has come to you with no measurements nor leg bones. Choose for your first attempt a good-sized dog or sheep, or some quadruped of similar size which you have in the flesh, and from which you can take a full series of outlines, measurements, casts, etc. I can probably teach you as well as any living man how to proceed when you have no measurements whatever, and will give you a few hints presently; but now I say, you must have your first subject in the flesh. It is then within your power to secure to yourself all possible advantages in what you are about to do.
It is desirable to take the usual measurements before the skin is removed, but by all means make another series of the skinned body and limbs. In skinning, disjoint the leg bones at the carpal joint,[10] which leaves only the bones of the foot attached to the skin. When the skin is put on for the last time, this joint must be re-articulated with two wires. When the skin is out of the way, you can take the length of the body from the back part of the thigh to the point of the shoulder; the distance between elbow and knee, from the elbow to the top of the shoulder; the circumference and diameter of the body, neck, and limbs, at various points; the depth of the body, etc. You can also measure from the highest point of the head of the femur to a similar point on the humerus, and when the hind legs have been cut off, you can easily determine the proper length for your iron squares by measuring between the two hip sockets (os inominata). Observe, now, if you never did before, that the front edges of the tibia and the ulna have no flesh whatever upon them, nor has the angle of the elbow, the knee-cap, nor the front of the metacarpal bones.
Save the bones of each leg complete, and without any farther disjointing; but, of course, the flesh must be carefully trimmed and scraped away. Save the skull, of course, and it will be a great help if you will hastily "rough out" the bones of the en[143]tire body and save them for reference until the manikin is complete. The pelvis and the thorax will help you greatly by and by. We will now assume that we are ready to proceed with the manikin, which we will follow out by successive steps.
1. The first thing to do is to cut a deep groove in the bones of the heel, close alongside the base of the calcaneum, also in the bones of the foot at the joints, and in the head of the humerus from the back, so that the iron can fit in snugly, and not create a great, awkward, rounded hump at each of those joints. In a hoofed animal, the centre of the hoof must be cut out so that the iron can pass through it quite out of sight where it enters the pedestal. The lower joints of the foreleg must be channelled out in the same way. Study the shape of each joint and you will then see precisely what is needed. In cutting out these grooves, I use a saw for certain bones, and gouges and stone-mason's chisels for others, according to circumstances. Remember that between the tendon of Achilles and the lower end of the tibia there is always a deep hollow, where the skin of the two sides actually comes together. Keep your leg iron out of that hollow at all hazards,—and this can be done only by sinking the iron into the tibia.
2. If you have an outline of the animal's body, lay it upon the floor, and draw a straight line to represent the top of your pedestal. If you have no sketches, then you must draw an outline in chalk upon the floor, choosing a certain crack as the line of the pedestal. Now lay down the skeleton of each leg in its own place, in the position the leg is to have in the finished animal. Measure the height of the missing bones of the foot, and leave a space accordingly above the top of your assumed pedestal. It is highly important these leg bones should each have the right attitude.
3. Take four straight No. 6 wires, and with the first leg laid out carefully in position, bend the wire to fit the back of the leg bones very exactly, cut it off the right length, and so make an exact pattern for the leg rod. Remember to allow for its going through a good thick pedestal, and having about two inches to spare underneath for a nut and washer. The rod for the foreleg may project above the upper end of the humerus one-third to one-half the length of that bone, but the rod for[144] the hind leg must not be the least bit longer than the upper end of the femur. Remember also to bury the iron well in the centre of the lowest joint of the leg and the foot, so that it will not be seen when the animal is finished. In order to show the bends that are necessary in the leg irons of a ruminant, I have taken the trouble to photograph and reproduce herewith (Fig. 32) the identical leg irons which now support the huge bull buffalo in the National Museum group, the manikin of which is also shown in this chapter. Before bending, the irons for the forelegs were each 4 feet 1/2 inch in length, and those for the hind legs were 4 feet 6-1/2 inches; diameter, 5/8 inch.
 Fig. 32.—Leg Irons of an American Bison.
4. Having made your four patterns exact in length and bend, cut four leg irons to match, from round rods of Norway iron, or best American, if Norway cannot be procured. I can give you no fixed rule by which to determine the size that leg irons should be, but I can at least mention the sizes I use in certain animals:[145]
Adult moose, male or female, and giraffe, 3/4 inch.
Bull bison, cow bison, horse, 5/8 inch.
Male caribou, black-tail deer, and large mountain sheep, 1/2 inch.
Male Virginia deer, antelope, tiger, 7/16 inch.
All these sizes, except the two largest, can be bent cold in a strong vise.
5. Having bent the irons to match the patterns, and to fit the bones also, cut a long thread on each end of each rod, and fit two large hexagonal nuts on each end so that they turn readily, but not loosely.
6. With soft but strong twine, or annealed wire, bind each leg iron firmly to the leg bones from top to bottom. You may now take a saw and cut off the upper third of the femur.
7. During the course of the foregoing work, you have had a blacksmith at work making your four iron squares (see previous chapter) according to a hoop-iron pattern furnished by you, and now they are ready to use in attaching the leg irons.
8. Now comes the question of a centre board for the body. If the animal is a dog, a small deer or antelope, a tiger, or anything so small that you can reach around its body with your arms, make the body board as narrow as you please, or as wide as the entire depth of the animal's body, if you choose. I think it better to make it similar in proportions to that shown in the accompanying illustration (Plate VII.) of the first stage of a tiger manikin, in order that with a long needle one can sew through the body from side to side. It is well, for the same reason, to cut a hole in the board, as shown, at a point opposite the iliac region. I mounted this tiger with a decided curve in the middle of his body, which obliged me to cut the centre board in two, and unite the two parts again at an angle by means of two bent pieces of iron screwed on either side. In most animals, however, this is unnecessary. The centre board need not be over 7/8 of an inch in thickness in any save very large animals, when it is best to have it 1-1/2 inch, or nearly that. It is best to use dry white pine, because it is light and works easily.
9. Lay the body board on your chalk outline, lay the iron legs in position, put the squares down and mark the place where the bolt for each pair should pass through. Bore the holes, bolt on[146] the squares quite firmly (but leave the screws out as yet), then insert the leg rods, and tighten the nuts. Set the legs on as nearly right as possible while the skeleton form lies on the floor, then stand it up, put it on a rough pedestal, and see how it looks. Now comes the crucial test of your knowledge and artistic sense. A number of things are wrong, and the shaky skeleton of the manikin "don't look right."
What is the matter? Is one of the front legs bent forward at the carpal joint? Then straighten it. Is the animal coupled too short? Then move one pair of legs a trifle on the centre board, to increase the length of the body. Do not the legs walk naturally? Then make them. Are the forelegs, and hind legs also, too close together? Then your squares are too short, and they must be lengthened by placing a bit of board under each one, as seen under the hind-leg square of the tiger manikin.
You will probably need to shift the feet on the pedestal also, by boring new holes. You can make any leg longer or shorter, make the stride shorter or longer, and, in fact, make any change that your eye, or your picture or cast tells you is necessary. The vital necessity is that your eye must be so trained and educated that it detects a fault instantly, no matter how slight, and sees what is required to remedy it. The eye of a successful taxidermist must be educated just as thoroughly as the hand of a pianist.
For a large animal, it is, for me, several hours' work to attach the legs to the body board, and make the changes necessary to bring everything into perfect position. The last thing is to take the cleaned skin out of the bath, throw it over the skeleton manikin, and see how it fits. If, when it is adjusted, the feet do not touch the pedestal, you know that the manikin is too high, and you must either cut down the top of the centre board with a draw-shave, or else lower it by attaching the squares nearer the top. In this trial the feet should stand loosely upon the floor.
Having got everything finally adjusted, put the screws in the squares, tighten up all nuts, and put a washer under each nut that strikes the pedestal, both above and below, and make all secure. There must be no looseness, or the manikin will lean over immediately. The centre board should stand exactly perpendicular. Test it with a plumb-line, and see if it does so. Is[147] the manikin now so secure that you can sit upon it without racking it? If not, it should be. To test the manikin for my big buffalo, shown in this chapter, I climbed upon it, and stood with my full weight, first on the outer end of one iron square, then on another, and to test the strength of the neck irons I put a large anvil on the top of the skull without making the slightest permanent impression on the irons.
10. It is unnecessary to speak further of the irons for the head and tail, and their attachment. See figures.
11. Next comes the making of the legs. The lower joints, where there is scarcely any flesh, had best be made of clean, long-fibre tow. Where the thick muscles lie, bunch up some tow, put it where the muscle was, and bind on with thread or twine. Continue this process until this muscle has been built up to its proper size, and wrapped at all points until it is smooth, firm, and properly shaped. Higher up, where the muscles are thicker and lie in larger masses, use excelsior in precisely the same way. Little by little, but with much excelsior and twine, the muscles are gradually built up. Leave the bones bare at the points where nature does. The hind leg must have its tendon of Achilles before it can be finished. To make this, drill a hole through the end of the calcaneum, or heel bone; pass a long wire through for half its length, twist the two halves tightly together until they will reach half-way up the thigh, then wrap tow around the twisted wire from the heel bone up, making the tendon larger as you proceed. Presently you are ready to merge it into the flesh of the leg so that its upper end disappears.
To give form to a leg, and bring out the prominent muscles, take a very long needle and a very long piece of twine, and sew through and through the leg on certain lines, putting on pressure to produce certain depressions that exist between the larger muscles. To give detailed directions on this point would oblige me to go into the subject of musculation at great and tiresome length, and since this is not a work on anatomy, I will not attempt a dissertation on the form of each genera of the mammalia. The illustrations of the tiger and bison manikins show the form of the external muscles of Felis tigris and Bison americanus, and what is possible in a manikin.
Making the Body of a Manikin.—The centre board of a large[148] mammal, like the bison, moose, and all such animals, should accurately represent a section through the centre of the body from top to bottom. In the absence of measurements and living models, the closest approximation to the desired form is obtained by laying the skin upon the floor, hair inside, and folding it loosely upon itself so as to get what looks like the general shape of the animal, and then taking the outline thus obtained.
A very large manikin may be made hollow in the manner represented in the accompanying plate (Plate IX.), which is self-explanatory. This is often desirable to avoid making the figure too heavy, as would be the case were the entire bulk to be made a solid mass of excelsior. For the smaller buffaloes, I made the bodies of excelsior alone. Each side was built up separately by driving a row of nails along the top of the centre board, and another along the bottom to carry the twine over in binding on the layers of excelsior. At the last, these nails were driven home.
During all this process the skin has been tried on the manikin from time to time, to make sure that the structure is of the right size in every respect. Beginners nearly always make a manikin too large, especially in circumference.
It is the commonest trick in the world for legs and necks to be made so large they have to be reduced. If a skin does not fit when it is tried on, the manikin is generally to blame, though sometimes the skin is badly shrunken, and requires to be further thinned down to make it more elastic. It is easy enough to make a manikin larger or higher, especially on the hind quarters, even while the skin is being put on for the last time; but woe to him whose manikin is too large at the last moment. That means serious delay.
When the manikin is finished at every point, shear it all over with a large pair of shears to clip off the ends of the wisps of excelsior, and then poison the skin thoroughly on the inside with arsenical soap, and on the outside with arsenic water, if the hair be long. While the poison is being absorbed, mix up enough clay to cover the entire animal with a coat an eighth or a quarter of an inch thick, and smear it on with the hand. Have it soft and pasty, so that it will rub into the excelsior, and catch hold of it. If the clay is too stiff, it will neither spread nor stick.
When the manikin has been fully covered with clay from end[149] of nose to tip of tail, not a single inch of surface having been missed, you then have a complete clay statue of the animal, except the feet. Now put the skin over and adjust it carefully. Leave no air-bubbles under it. Catch it together between the fore legs, hind legs, under the belly, the throat and neck, and around the legs, and make it fit everywhere. Then begin at the feet and sew it up with short, strong stitches in the manner already described, shaping and filling out wherever necessary, as you go. On a large mammal it is very desirable for two persons to work at the same time, to keep the skin from drying up prematurely. Of course, the skin must be kept wrapped up in wet cloths until finished. Finish all the legs first, and then the body. You can actually model the skin down upon the body, and it will not only take the exact form of the manikin—every depression and every elevation—but it will also keep it. If there is too much skin on one side of the animal, work it together with your hand, and coax it to shrink until the superfluous skin is distributed over the animal, and finally disappears. Once, when mounting the skin of a Burchell's zebra in a peculiar attitude (at bay), I found that, owing to its elasticity, there was a superabundance of about ten inches of skin in front of the left hind leg, which was placed very far forward, under the body. But for the saving grace of a clay-covered manikin I should have been in a fix. As it was, I started in half-way up the neck, to work together and stow away the surplus skin from that point backward, and by the time I reached the seat of the difficulty (at the flank) the surplus skin was all taken up, and the side of the animal was as smooth and immaculate as if nothing had happened.
There is supreme pleasure in crowning a well-made manikin with a handsome skin, and seeing a specimen take on perfect form and permanent beauty as if by magic. It is then that you begin to be proud of your work; and finally you revel in it. You say to yourself, "This is art!"—and so it is,—but let your work speak for itself.
The head is the last thing to be finished, and this feature of the work will be treated in detail in another chapter.
Drying and Shrinking.—After the actual mounting of a mammal is finished, the specimen should be put aside in a separate room, away from the dust, and allowed to stand for from three or four weeks to three or four months, according to its size. It must have time to dry thoroughly, and shrink as much as it will. Every specimen is bound to shrink in drying, and it is better for this to occur before it leaves the workroom, and before the finishing touches are put on, rather than after it goes on exhibition, and is practically beyond your reach.
In shrinking, all the seams open, more or less; the eyelids draw away a trifle from the glass eye; usually the lips open somewhat; and in ruminants the inner skin of the ear often draws straight across the inside.
Cleaning Up a Specimen.—In finishing a specimen, the first thing is to dig the clay and tow out of all open seams, cracks, and small holes, preparatory to filling them with papier-maché. With the sharp point of a pointed bone-scraper, dig out the clay, or whatever filling material is in sight, very thoroughly, so as to give the papier-maché a chance to enter deeply and catch firmly underneath the edges of the skin. With a stiff brush, brush out the seams and openings, so that no clay-dust remains, for there is nothing so good as clay-dust to prevent papier-maché from sticking to a skin. It is often well to use a bellows in getting dirt out of holes and seams.
Beat the dust out of the hair, or blow it out with the hand bellows, or brush it out, or wash it out if necessary, any way to get it out. If the hair has been poisoned with arsenic water, do as little to it as possible in getting out the accumulated dust, for too vigorous treatment will bring out the arsenic with the dust, and send it into your lungs.[151]
If, however, the hair has not yet been poisoned, as soon as the cleaning is finished lay the animal upon its back, or on its side, and pour into the hair, so that it will run immediately down to the roots, a solution of alcohol, water, and corrosive sublimate made as follows: If you wish to make four gallons of the solution, take two gallons of ninety-five per cent alcohol, dissolve in it all the corrosive sublimate it will take up, making what chemists call a "saturated solution." In this there will always be a little of the sublimate left on the bottom of the jar. This is, of course, too strong to use thus, under any circumstances. Carefully pour off the clear liquid so as to leave the sediment remaining in the jar, and then dilute the former with an equal quantity of water, which thus yields the desired four gallons. It is most effectually applied by pouring it from a small watering-pot, with the sprinkler off the spout, into the hair, so that it will fill it and cover the skin without being wasted. The corrosive sublimate is deposited at the roots of the hair, and also on the hair, in quantity sufficient to prevent the ravages of insects, but not to be injurious to the health of the taxidermist. Strong arsenic water may be used for this purpose,[** pupose] instead of the other solution, if preferred. In case the solution used should leave a gray deposit on the hair, it should be sponged off with a little warm water.
Papier-Maché.—How to Make and Use It.—Every taxidermist must know how to make good papier-maché before his education can be considered complete. This material is absolutely indispensable in taxidermic work, and its composition should be thoroughly understood. It is used in filling up holes, seams, and cracks, in modeling the mouth parts of specimens that have been mounted with the mouth open, in restoring missing parts of various specimens, in modeling bones to go in "restored" skeletons, etc. It is also of great value in modeling groundwork to be made in imitation of rock or wood. There is really no good substitute for this material. When properly made it sticks tightly to its place, is easily modeled, can be crowded into the smallest crack, dries quickly when exposed to the air, is hard and smooth when dry, takes paint readily, and yet when kept wrapped in a wet cloth under an inverted bowl can be kept soft for several days.[152]
There are several ways of making papier-maché, according to the use to which it is to be put. I have taken pains to prepare an exact formula for making the finest and best quality, and from that the worker will undoubtedly be able to work out variations in quality, according to his needs.
The most important ingredient is the paper pulp. The finest pulp for papier-maché is that made by the ton in the Bureau of Engraving and Printing in Washington, from mutilated paper currency, but not from tobacco stamps, which is coarse and not fit for fine work. A hundred pounds of this pulp would cost, in Washington, about $1.50, and could be made into sheets of small bulk, and dried for use as needed. It is a great advantage to have it in this form. When needed for use, take a dry sheet or ball of the right size, dissolve and beat it up into a thin mush in a bowl of water, until the particles are all well separated, then pour it on a sieve to run the water out without losing the pulp. The water is then squeezed out of it by gentle pressure with the hand, but it should not, by any means, be squeezed as dry as possible, for the water is an important factor. Pulp prepared thus can be stirred up with glue into a perfectly homogeneous paste, free from all lumps, and so fine it can be pressed into the smallest crack.
If you have no manufactured pulp, then you must make it yourself. Procure a lot of old newspapers, of as soft paper as possible, tear them to bits, put the pieces in a kettle of boiling water and beat the mass in any way you please, boiling it meanwhile, until it becomes paper pulp. It should be free from lumps and small pieces of paper, or it will not work well.
The following are the ingredients necessary to make a lump of papier-maché a little larger than an ordinary base-ball, and weighing 17 ounces.
Fine Papier-Maché.
| Wet paper pulp, | { dry paper, 1 ounce | } | 4 ounces (avoirdupois). | |
| { water, 3 ounces | } | |||
| Dry plaster Paris, | 8 ounces | " | ||
| Hot glue, | ½ gill, or 4-1/2 tablespoonfuls. |
While the paper pulp is being prepared, melt some best Irish glue in the gluepot, and make it of the same thickness and general consistency as that used by cabinet-makers. Meas[153]ure the different ingredients to be used, until the result teaches you what good papier-maché is like, and after that you can be guided by your judgment as you proceed. On taking the paper pulp from the water, give it a gentle squeeze, but by no means squeeze it as dry as you can. Now put it in a bowl, put over it about three tablespoonfuls of your hot glue, and stir the mass up into a soft and very sticky paste. Next add your plaster Paris, and mix it thoroughly. By the time you have used about three ounces of the plaster, the mass is so dry and thick you can hardly work it. Now add the remainder of your glue, work it up again until it becomes sticky once more, then add the remainder of your plaster. Squeeze it vigorously through your fingers to thoroughly mix the mass, and work it until it is free from lumps, is finely kneaded, and is sticky enough to stick fast to the surface of a planed board when you rub a bit on it by firm pressure of the finger. If it is too dry to stick fast, add a few drops of either glue or water, it makes little difference which, and work it up again. When the paper pulp is poor, and the maché is inclined to be lumpy, lay the mass upon a smooth board, take a hammer and pound it hard to grind it up fine.
If the papier-maché is not sticky enough to stick fast to whatever a bit of it is rubbed upon, it is a failure, and requires more glue. In using it the mass should be kept in a lump, and used as soon as possible after it is made. Keep the surface of the lump moist by means of a wet cloth laid over it, for if you do not, the surface will dry rapidly. If you wish to keep it over night, or longer, wrap it up in several thicknesses of wet cotton cloth, and put it under an inverted bowl. If it should by accident or delay become a trifle too stiff to work well, add a few drops of water to the mass, pound it with the hammer, and work it over again. If you wish to keep a lump for a week, to use daily, add a few drops of glycerine when you make it, so that it will dry more slowly.
The papier-maché made when the above formula was prepared had the following qualities: When tested by rubbing between the thumb and finger, it was sticky and covered the thumb with a thin coating. (Had it left the thumb clean, it would have been because it contained too much water.) When rubbed upon[154] a pane of glass, it stuck tightly and dried hard in three hours, without cracking, and could only be removed with a knife. When spread in a layer, as thin as writing-paper, it dried in half an hour. A mass actually used dried hard enough to coat with wax in eighteen hours, and, without cracking, became as hard as wood; yet a similar quantity wrapped in a wet cloth and placed under an inverted bowl kept soft and fit for use for an entire week.
Such are the qualities of first-class papier-maché, and the manner of producing them all. I have dwelt at great length on this material because it is such an important and indispensable factor in general taxidermic work. It will pay any taxidermist to become an expert in making it and using it, and a little later, when we get to modeling intricate mouth parts, and making all sorts of restorations and repairs, we shall see what a valuable servant is papier-maché.
"Machéing" Mounted Mammals.—Surely it is unnecessary for me to devote much space to directing how to fill up with papier-maché the holes, seams, and cracks in a mounted mammal. Of course all cavities opened by shrinkage or accident must be filled up. Use a sharp-pointed knife, press the fine and soft maché deeply into every opening, make it catch underneath the skin, so that when dry it cannot flake off, or be knocked off; and smooth it on the outside to the level of the skin. Use the maché liberally, and it will be more certain always to remain as you leave it. Fill up rough seams until they are smooth, so that the hair can be glued on if necessary. Wherever dry clay shows, dig it out and replace with the other more durable material, which can be painted, whereas dry clay can not.
Putty.—In the days of my youth I was taught by my European teachers to use putty for all such work as that described above; but I very soon became disgusted with it, and years ago ceased to use it for any purpose whatever. It is greasy, inert, and yet purely temporary stuff. It never gets really hard unless used in a great mass, and when used in small quantities for fine work it is utterly worthless. Do not use it unless you are so situated that you are positively unable to make papier-maché—and I cannot imagine any such situation as being possible within the pale of civilization.[155]
Painting on Papier-Maché.—Of course this material dries white, and must be painted. If paint is put directly upon it, the oil and color is absorbed at once, and it takes many coats to properly fill it up. To save time and give the best results, first give your papier-maché work two coats of shellac, which dries in a few minutes and fills up all the pores, so that your paint will stay as you put it on. Use oil colors, but put them on with turpentine to avoid the unnatural gloss that oil will give. In another chapter (XXVI.) will be found detailed hints in regard to painting mounted specimens.
Gluing Hair upon Mammals.—It is very seldom that a dry skin is mounted without there being upon it some spot or spots destitute of hair, which must be repaired. Sometimes it is only a small spot, sometimes it is nearly the entire head, or an entire leg from which the epidermis has come loose, carrying the hair with it, and leaving an unsightly bare spot. It requires a good deal of ingenuity, much skill, and tireless patience to glue hair upon an animal so that it will so closely resemble the natural growth that no one will notice the difference. But in every case, except some of the seals and sea-lions, this can be accomplished, if it be necessary, although very often it requires good judgment and the hand of an artist to do it.
Each mammal has its own peculiarities in regard to the quality, thickness, length, and general set of its hair, all of which must be carefully studied. When the hair grows long and thickly, the task is much easier than if it be thin or short.
1st. Procure a pair of very small curve-pointed forceps, so fine they will hold a single hair if necessary. (Price, 75 cents.)
2d. Procure a pair of small and sharp scissors, with sharp points.
3d. Procure a bottle of common fish-glue, or royal glue.
4th. If possible, procure a piece of useless skin, from which to cut the hair necessary to use in making the repairs.
Very often it is impossible to procure any pieces of skin with hair suitable for the purpose, and then the only way is to cut hair from the specimen which is to be repaired, picking out with the forceps a tiny bunch here and there in such a way that the bunches cut out will not show. This can nearly always be done in making slight repairs upon thick-haired animals, such[156] as bears, wolves, monkeys, etc. But with such short-haired animals as the tiger, zebra, and giraffe, the hair must be procured elsewhere. Use the hair of any animal to repair the coat of another, so long as it will answer perfectly, no matter what the genus or species may be. Use tow, or jute, painted or dyed the proper color, if it is sufficiently like the hair which will surround it.
In order to treat this subject intelligibly, we will undertake to separate all terrestrial mammals into three classes, as follows:
1st. Animals with very close, short hair; as the tiger, zebra, horse, and giraffe.
Upon such animals as the above, the hair lies almost flat upon the skin, completely covering it with a very smooth, glossy coat. To repair hair upon such animals, procure pieces of skin having hair of the requisite quality, and soak them in clear water until decomposition sets in, and the hair easily comes out by the roots. The hair must not be cut off, or it will not answer. Be sure that your fish-glue is good and strong, and about as thick as castor-oil. Clean the bare surface of the skin by scraping it with a knife to remove all dirt, and give the glue a chance to take hold. With your small forceps, pull from the pieces of half-macerated skin a small bunch of hair of the proper tint, and with a small camel's-hair brush apply a drop of glue to the roots of the hair. Begin at the side of the bare spot where the hair grows directly away from it, and lay down your little bunch of hairs so that their tips shall fairly cover the roots of those nearest the edge. Then press down the bunch of hair thus placed in position, work the hairs slightly apart, and make them lie quite flat upon the skin. Follow up this process with untiring patience, and the result will be entirely satisfactory. I have seen large patches of hair glued upon a tiger so successfully that when finished the sharpest eye could not detect the repaired spots. But it was very slow work, requiring an hour's steady work to cover a spot of not quite two square inches.
2d. Animals with thick, long hair; as most monkeys, bears, wolves, all the ruminants of cold climates, etc.
In repairing the coats of such as the above, the necessary[157] hair may be cut off in bunches, either from the animal itself, or from old pieces of skin, so long as the hair is of the proper length. Notice carefully the set of the hair, and imitate it very exactly. The glue may be applied quite plentifully to the roots of each bunch of hairs while you hold it in your forceps, and usually quite a large bunch may be set on at a time, and afterward spread out a little. In repairing the mountain sheep (Ovis montana) and prong-horn antelope (Antilocapra americana), the point of vital importance is to get every hair to set in precisely the right direction, so that the surface will be smooth. If the hair is put on carelessly, and without due observance of the above caution, upon the repaired spot it will stick stiffly out like the bristles of a shoe-brush, and the imperfection of the coat will be painfully apparent.
3d. Animals with long hair growing very thinly; as upon certain portions of orang utans, chimpanzees, and all members of the hog family.
Upon the animals indicated above, it will be found that the hair grows in little bunches of three or four hairs in a bunch, but so thinly distributed that the skin shows through quite distinctly.
Furthermore, in such cases the hairs stand out from the skin, and their roots are plainly visible. Successfully to repair such a skin is very slow, tedious work, and cannot be done by a man whose time is very valuable. A boy working for small wages is the best means to employ, but he must be watched closely.
Procure the hair necessary for making the repairs. Then with a sharp awl, or coarse needle, prick the skin full of holes to correspond in number and distribution with the arrangement of the tiny hair bunches upon the skin surrounding the spot. Prick the little holes rather deeply and slanting in the right direction. Then take a bunch of three or four hairs in your smallest forceps, dip the end in the fish-glue, and keeping the hairs well together, set the bunch into one of the little holes. See that the hairs stand out in the right direction, and proceed in this way until the bare spot is covered.
Sportsmen, if you really must kill all the large mammalia from off the face of the earth, do at least preserve the heads that are brought low by your skill and prowess. Now that our elk, moose, deer, caribou, antelope, mountain sheep, and mountain goat are all disappearing so rapidly, and nearly all these species are doomed to speedy extermination, head collecting has become quite the fashion. There are in this country probably two score of taxidermists who live by heads alone; and many hunters who once lived by buffalo robes and beaver pelts now make a business of hunting for heads to sell. I know many such, and their scale of prices for heads, according to size and "points," shows that they have got the business "down fine."
And why should not heads be collected and made much of, as well as pelts and meat? A naturally handsome mammal head which has been skilfully mounted is a thing of beauty and a joy forever. Wearied with the survey of inane and meaningless pictures, stiff portraits, cheap statuettes, and tawdry fancy decorations, the eye rests gladly and gratefully upon a fine head on a handsome shield, hanging in a good light, and blesses the hand that placed it there. Such an ornament calls forth endless admiration and query, even from those who know no other chase than that of the mighty dollar, and who, alas! have never found out by experience that
And therefore I say, if you must go and kill things, save their heads and mount them as an atonement for your deeds of blood. They will give pleasure to you and your friends long after you have hung up your rifle forever. I have gathered numerous[159] curiosities and works of art in foreign lands, but they do not excite one-half the admiration that is called forth by the series of really fine heads of buffalo, deer, mountain sheep, elk, antelope, and mountain goat of which I am the fortunate possessor.
Inasmuch as this chapter is intended chiefly for the benefit of sportsmen and amateur taxidermists, we must begin at the beginning, and treat the subject in somewhat full detail. We will consider that we have a deer as our subject.
Many a fine deer head is spoiled forever by being cut off too close behind the ears. With such animals as the lion, tiger, leopard, puma, and bear, a long neck is not desirable unless the head is to be mounted in a glass case, looking out of a thicket; and neither is it best for a buffalo head to have a long neck. It may be set down as a safe rule, however, that the heads of all deer, antelopes, sheep, goats, and the like, should have moderately long necks. Having experimented fully with necks of all lengths, I find that the most satisfactory to competent critics, and therefore the handsomest, are those which strike a happy medium, such as the antelope head shown in Plate XI. To secure this length, the head should be cut off well back toward the shoulders, so as to leave a little surplus to be trimmed off when the head is mounted.
To Skin and Preserve a Deer Head, proceed as follows:
1. Start at the back of the neck (on top) just in front of the shoulders, or "withers," keep the point of the knife under the skin, with the edge up, and divide the skin in a circle all the way around the neck, keeping down to the point where the neck sets on the shoulders. You need not cut through the flesh and bone of the neck at that point.
2. Never slit the skin open along the under side of the throat. Cut it open in a straight line along the back of the neck, all the way along, up to a point midway between the ears. From that point run two cuts like the arms of a Y, one to the base of each antler or horn, as seen in Fig. 7. Run the point of the knife close around the base of each antler, and cut through the skin all the way.
3. Begin at the back of the neck, and skin downward on each side until the entire neck is free. As you proceed you will presently come to the ear, which stands up like a tree-trunk covered[160] with bark. Cut the ear off close to the skull, leave it for the present just as it is, and go right on down toward the cheeks and throat, as far as you can go.
4. Begin next at the angle of the Y, on the top of the head, and skin down between the antlers and over the forehead until you reach the eye. Now proceed carefully. In many ruminants there is a deep cavity in the bone directly in front of the anterior corner of the eye, called an "eye-pit." The skin lines this eye-pit quite down to the bottom. Do not cut through the skin, but get down to the very bottom of the eye-pit, and detach the skin from the bone.
5. Be careful not to cut the corners of the eye, or the edge of the eyelid. Keep close to the bony orbit, and insert the end of one finger in the eye from the outside, to cut against when you sever the thin membrane that surrounds the eyeball.
6. The nostrils must be cut through so far back from the end of the nose that the cut will not be visible in the open nostril when viewed from in front. The cartilaginous septum that divides the nostrils like a partition wall must be split in two, edgewise, from inside, clear down to the very tip of the nose, so that all the flesh can be cut away. Many a fine head is spoiled by having the flesh left in the end of the nose. It seems all right for a short time, but when it dries, it shrinks and shrivels up, and the nose not only loses all character and beauty, but becomes an eyesore.
7. The lips must be cut from the jaw close to the bone, and afterward slit open along the inside, laid out flat, and the flesh pared off carefully with a sharp knife. Leave one-half to three-quarters of an inch of the inner skin of the lip all the way around, so that the form of the lip can be presently reproduced by replacing the flesh with clay.
8. A deer's ear consists of a big, leaf-shaped piece of cartilage, thick at the base and centre, very thin at the edges and the upper end, and rolled together on itself at the base to form a half cone, like a funnel with one side partly cut away. Over this sheet of cartilage is stretched the skin, with no flesh whatever between the two. This cartilage can be completely skinned out and replaced with a leaden imitation. It must be skinned out; for if it is not done, the hair will probably all slip off the[161] ear; but, even supposing that it does not, an equally bad thing happens. When the head is mounted and dry, the ears will begin to shrink and shrivel up like a pair of dry autumn leaves, and the beauty of the head is gone forever! In skinning out the ear cartilage, a sharp scalpel of large size, or a cartilage-knife, is the best instrument, and it should be held in the fingers precisely as one holds a pen in writing. A good, keen pocket-knife is plenty good enough for all emergencies.
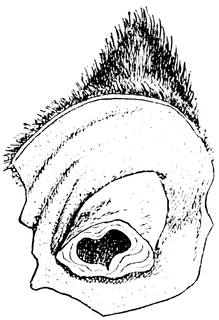 Fig. 33.—Skinning a Deer's Ear.
Begin at the fleshy base of the ear, detach the skin from the cartilage by cutting, and by pulling and pushing the two apart with the thumb and fingers (Fig. 33). Of course you must stop at the edge of the cartilage, and be very careful not to cut through the skin there. Keep right on up the back of the ear, gradually turning the ear wrong side out, until you reach the tip (Fig. 34). The ear is now wrong side out, and the skin is detached from the back of the cartilage, but still adheres on the inside. Now begin at the tip, where the cartilage is thinnest (Fig. 35), peel it up, and by the same process as before gradually work the inside skin loose without cutting through the skin at any point, until it is free quite down to the base of the ear, so far within that when the skin is cut straight across and turned right side out again, the point of detachment cannot be seen (Fig. 36).
 Fig. 34.—The Ear Half-skinned.
It is likely that the beginner will find this a difficult operation, for it really is so until one has done at least one pair of ears. After that, with a fresh specimen, the process is simple and easy. Save the ear cartilage in your salt-and-alum bath,[162] for you will need it presently as a model in making a leaden imitation to take its place.
9. The skin is now off. To preserve it in the field, first pare away the flesh that may have been left adhering to it, especially at the lips and end of the nose, and wash it clean. If you have arsenical soap, anoint it thoroughly over the inside, then literally smother it in salt. You need not dry the skin if you have plenty of salt for it. If you have but a limited quantity, attend to the poisoning to keep off insects, then rub on as much salt as you have to spare, hang the skin up in a shady place over a pole, open it out widely so that the air will circulate freely upon all parts of it, and let it dry. In a dry climate a skin can be dried in this way and successfully preserved (temporarily) even when you have neither poison nor preservative of any kind to put on it; but it must be watched and guarded with jealous care until you get it safely home, or in the hands of a taxidermist, to prevent its being eaten up by insects, rats, or dogs.
In moist climates, ground alum is to be used in lieu of salt, and all skins must be dried unless you have a salt-and-alum bath for them. In preserving heads, the sportsman will find that ten pounds of salt, or in the tropics ten pounds of alum, will go a long ways, if care is taken to keep a skin open until it is[163] nearly dry. Never, save as a last resort, dry a skin in the sun, and never hang one up by the nose.
The Skull.—Of course the skull must always be cleaned and saved, as directed elsewhere.
Paring down the skin, preparatory to mounting. See Chapter XIII.
The Work of Mounting.—We will suppose that the head skin has been fully cured or relaxed in the salt-and-alum bath, pared down quite thin with draw-shave and knife, the holes have been neatly sewn up, and the ear cartilages skinned out. We will also suppose that the skull has been cleaned with the knife in the first place, and afterward boiled and scraped to remove the last vestiges of animal matter. If the skin and skull have been thus attended to, the mounted head will be clean enough and free enough from all animal odors, when dry, to go into my lady's boudoir, or into the dining-room of the White House.
There are almost as many different methods of mounting mammal heads as there are taxidermists, but I shall describe only my own. I have tried various other methods than that to be described, but without satisfactory results, and I offer this as being at once the simplest and easiest for the amateur, as well as the professional worker, and above all, the one by which the finest results are obtainable. The operator retains full control of the shape of the specimen almost up to the last moment, which I consider a sine qua non in any method. The method should be your servant, not your master. Judging from the extent to which this method has been adopted among the taxidermists of this country since I first described it in a paper read before the Society of American Taxidermists, in New York, in 1883, it may be considered to possess some merit.
1. We have before us the clean skull. Procure about two pounds of plaster Paris, and a piece of board an inch or an inch and a half thick, three or four inches wide, and about two feet long. This is to be the neck standard. With the hatchet round off the corners of one end. Then, with a saw and cold chisel, cut a long, narrow hole in the base of the skull, so that the end of the neck standard can pass through it into the brain cavity, and strike against the top of the skull (Fig. 37). The[164] opening should be cut lengthwise with the skull, and only just large enough to receive the end of the board comfortably. In case it is desired to have the head turned to one side, looking to the right or left, the neck standard must be fitted into the skull accordingly. An iron rod may be used instead of a wooden standard, if the operator finds it more convenient.
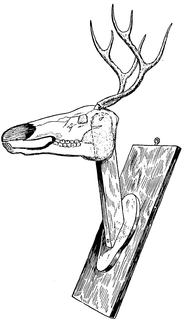 Fig. 37.—Internal Mechanism of a Deer Head.
2. Now place the skull upside down on the table, with the forehead on a level with the table-top, and proceed to set one end of the neck standard in the skull. This is done as follows: Into about a quart of water, placed in a basin or large bowl, sprinkle the plaster Paris, a handful at a time, until the water is filled with it and will take up no more. Then stir it thoroughly with a spoon, and after placing the end of the neck standard in the skull cavity in a perpendicular position, pour the plaster around the end of it, filling the brain cavity, and piling it up on the base of the skull in a copious mass, so that when it hardens the board will be immovably fixed. The plaster should also fill around the articulations of the lower jaw, to make that also a[165] fixture in its place. The neck standard should be set at a right angle with the axis of the skull. This may seem strange to you at first, but you will presently see that the angle is correct.
While the plaster is hardening, which it will do in about twenty minutes, you must leave the head undisturbed and busy yourself with giving the final touches to the skin, or to the preparation of some clay and tow for future use.
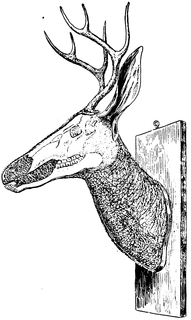 Fig. 38.—Complete Manikin for Deer Head, without Clay
Covering.
Fig. 38.—Complete Manikin for Deer Head, without Clay
Covering.
3. When the plaster has fully set, you are ready to decide upon the length of neck to be shown, and the general pose of the head. Having decided upon the former, which is a matter of taste, you can have an assistant hold the side of the neck standard up against the side of a door-post in about the pose you wish it to have, while you stand off and survey it at a distance, and change the elevation until it suits you. Then, mark where the neck standard is to be sawn off, and also the precise angle, and saw it off. Having done this, have the head held up against the wall as it will be when mounted, and see that the elevation of the nose is right. If it is too high or too low, saw off the end of the neck standard at a different angle, and be sure that the attitude is right before proceeding farther.[166]
4. The next step is to cut a board to fit into the lower end of the neck. Its approximate circumference can be determined by measuring the width and depth of the neck the proper distance down. The shape of the board must be about like that shown in Fig. 37—a broad oval, broadest at the top, or else an ellipse. Bevel off the upper and lower ends on opposite sides to match the outline of the neck, and then screw it firmly to the lower end of the neck standard. It may be necessary to alter the shape of the neck-board a little later on, which is easily done.
5. Now take some excelsior, or straw, or fine, soft hay, and build up a false neck of the proper shape and size to fit the skin by placing the material around the neck standard and winding it down with cotton twine (Fig. 38). It is a very pleasing task to form a neck by this easy process, and impart to it the graceful curves, the taper, and flatness near the head so characteristic of the deer. You can show the windpipe and gullet by sewing through the neck from side to side, and forming a hollow from the corner of the jaw down the side of the neck, as shown in the figure. You now have the form of the neck wholly under your control, and your eye and hand will be held accountable for the result. Be careful to make the neck much smaller than it is to be when the skin is on. The thick coat of hair makes a vast difference in the size, and adds perhaps half an inch, or more, all around.
If you are mounting an old skin that has for years been in a dry state and requires much powerful stretching to bring it out to its proper size, you will be compelled to stuff the neck with straw in the old way, so as to put great pressure upon it from within, and stretch the skin by sheer force. Of course you will lose many of the fine points, but very often a skin is so hard and refractory that it can be mounted in no other way. In working by this method the neck is stuffed from the lower end, and the neck-board fitted and screwed into place afterward.
6. Make the neck smooth by winding; make it symmetrical and true to nature, and try the skin on it occasionally to test the proportions of your manikin. There is to be no "stuffing" of the neck after the skin is once on, therefore the manikin must be made correctly.
7. When the neck is at last finished, work up about half a pail[167]ful of potters' clay until it forms a soft, sticky paste, and cover the neck with a coat of it about an eighth of an inch thick, to insure absolute smoothness.
8. Put a proper quantity of clay on each side of the skull to form the animal's cheeks, and enough upon the back of the skull, forehead, and muzzle to replace the flesh and skin that has been cut away. On no account attempt to stuff a fresh head with tow, or any fibrous material, for it is a practical impossibility to keep it from becoming too large. Instead of clay you might possibly use papier-maché, putty, or plaster Paris, if you prefer either; but clay has many and great advantages over all other materials. Plaster Paris acts too quickly to be of much real use, putty is greasy and inert, and papier-maché dries too slowly when underneath a skin.
9. Before putting the skin in place, sew up whatever rents there may be in it, and replace the cartilage of the ear with thin sheet lead, or sheet tin, cut the proper shape and trimmed down thin at the edges. Rub a little clay on the metal to enable the skin to stick to it. Sheet lead can be purchased at about 10 cents per pound at almost any large plumbing establishment. The finest material, however, and which I have used for years, is pure sheet tin, which the National Museum procures of The John J. Cooke Co., Mulberry Street, New York, at 26 cents per pound. It is thin, easily cut and shaped, and just stiff enough to work perfectly in imitating the shape of an ear cartilage. Good, firm, card-board can be used for the ears instead of lead, when you can not get either of the sheet metals.
10. Anoint the skin copiously with arsenical soap, give it time to absorb the poison, then put it in place on the skull and neck, and adjust it carefully. Fasten the lips together at the end of the muzzle by taking a stitch in each and tying the thread. See that the eyes come exactly over the orbits, and then put two or three tacks through the skin of the forehead, into the skull, to hold it in place. Sew the skin tightly together around the base of the antlers, and sew up both arms of the Y.
11. Sometimes the skin of the neck is so much stretched that to fill it out would make the neck, when finished, entirely too large. In such cases, with a clay-covered manikin, it is possible to make a fresh skin contract mechanically by crowding it to[168]gether in minute wrinkles in order to make an undue fulness disappear.
12. Before sewing up the skin along the back of the neck, (which must be done with very strong linen "gilling thread," well waxed to keep it from rotting) put enough clay at the base of each ear and on the back of the skull to properly form those parts. Observe that in a live deer the base of the ear is quite close up to the burr of the antler, and it also has a peculiar shape, which should be studied and faithfully reproduced, but can hardly be described.
13. If the manikin is of the right size and shape, you are now ready to sew up the skin; nail it fast with small brads around the lower edge of the neck-board, and trim the surplus off neatly and evenly. Screw the head upon a rough shield or piece of board, so that it will stand alone on your table while you are working at the face.
14. Unless you have carefully studied a deer's head in the flesh, or have a cast to work by, you can not reasonably expect to be able to make the head precisely as it should be. Fifteen minutes of close and studious examination and note-taking of a head in the flesh will do for you what my poor pen could not hope to accomplish with ten pages of written matter.
15. There yet remains that part of the work which requires the most artistic treatment. In finishing the face, the first thing is to shape the cheeks, which is quickly done provided they are filled with precisely the proper quantity of clay. By trial you will find whether more clay must be put in, or some taken out. After the cheeks, form the eyebrow, fill the orbit with clay, and with a small wire nail fasten the skin down in that deep pit which is found in front of the anterior corner of the eye. Press the skin down upon the muzzle, fill in the lips with clay, and fold them as they were before skinning. Before bringing the lips together, fill out the nose, the chin, and corners of the mouth—but not too full, however. That done satisfactorily, bring the lips together as they were in life. No wiring or sewing is necessary, nor even pinning. It is to be supposed that you have kept the skin of the lower jaw pulled well forward into place, and if so, the lips will go together easily and stay there for all time to come. In modeling the end of the nose and the[169] nostrils, give the latter good depth. Make the opening so deep that no one can ever see the bottom of it. No little fault disgusts me more than to see the nostrils of a deer, buffalo, or elk all plastered up with putty, as if the animal had never drawn a breath. Make your animal look as if it were breathing, rather than standing up with rods in its legs, and its hide full of rubbish.
16. The eyes come next. Arrange the lids carefully over the clay, which nearly fills the orbit, then insert the glass eye, (which in every ruminant should have an elongated pupil and white corners), and work it into its exact position. Do not have too much clay behind it, or it will have a bulging, overfed, or choked-to-death expression. Do not let it protrude until it could be knocked off the head with a bean-pole, or lassoed with a grape-vine. Keep the eye well down in the orbit, and the front corner well sunken. An animal's expression depends upon the eye more than any other one thing, and the expression of the eye is dependent upon the disposition of the eyelid and the line of sight. A good glass eye has just as much power of varied expression as has a living, naked eyeball—which is no power whatever—unless it be the eyeball of an angry cat.
17. See that both eyes look at the same point, in front, about eight feet distant; that precisely the same amount of iris shows in each, in short, that both are exactly alike in every respect. A deer should have a mild, but wide-awake—not staring—expression, and the attitude should not be unpleasantly strained, either in the curve of the neck or the carriage of the head. Avoid the common error of making a deer's head too "proud." No goose-necks or goitre on your deer, if you please.
Having finished the eyes and fashioned the nostrils, cut some pieces of pasteboard, bend them to the right shape, and either sew or pin them upon the ears to hold them in precisely the right attitude until they dry. If the ears have lead in them they will support themselves. Lastly, wash the head thoroughly to get all the dirt and clay out of the hair, and comb it until it lays naturally. Now hang the head up in a dry room and leave it for a month, if possible, two weeks at all hazards.
When quite dry and shrunken, brush it well, and rub around the mouth, nose, eyes, and ears with a tooth-brush to remove the[170] last remaining suggestions of clay. (See chapter on "Finishing Mounted Mammals."). Paint the end of the nose and edges of the eyelids with vandyke brown and black, using oil colors. The hairless parts of the lips are entirely concealed, consequently there is no painting to be done around the mouth unless the shrinkage has slightly parted the lips. If this has occurred put some black paint in the crack.
By all means mount a handsome head upon a rich and handsome shield. Tastes differ widely, but for my part I dislike a thin, light shield, and one not nicely finished is also an eyesore. The wood should be of a color that will harmonize best with the color of the head upon it. The finest shields are made of cherry ebonized, or red-wood, black walnut, oak, mahogany, or maple, and highly polished. The best shape for a shield is such as that seen behind the caribou head in Plate XVI.
We have now reached one of the most interesting features of all taxidermic work. There is no royal road to success in this direction, nor aught else that leads thither save hard study, hard work, and an artistic sense of the eternal fitness of things.
The large Felidæ (tiger, lion, leopard, etc.) are the finest subjects for the taxidermist that the whole animal kingdom can produce. They offer the finest opportunities for the development of muscular anatomy, and the expression of the various higher passions. The best that I can do with the space at my disposal for this subject is to offer the reader a few hints on how to produce certain expressions, illustrated by an accurate drawing from one of my mounted specimens.
In the first place, strive to catch the spirit of your subject.
It frequently happens that the attitude desired for a feline or other carnivorous animal is one expressive of anger, rage, or defiance. For a single specimen, the most striking attitude possible is that of a beast at bay. Unless a carnivorous animal is to be represented in the act of seizing something, the mouth should not be opened very wide. It is a common fault with taxidermists to open the jaws of such an animal too widely, so that the effect striven for is lost, and the animal seems to be yawning prodigiously, instead of snarling. Open the jaws a moderate distance, indicating a readiness to open wider without an instant's warning. The thick, fleshy part of the upper lip is lifted up to clear the teeth for action, and the mustached portion is bunched up until it shows two or three curving wrinkles, with the middle of the curve upward. This crowds the nostril opening together, and changes its shape very materially. In most carnivora, but most strikingly so in bears,[172] the end of the lower lip falls away slightly from the lower incisors.
In old lions and tigers the face wrinkles pretty much all over, especially across the nose and under the eyes. In all the Felidæ the opening of the eye changes most strikingly. When angry, the eye of a ruminant animal opens its widest, and shows portions of the eyeball that are never seen otherwise. In the carnivora, the reverse is the case. As if to protect the eye from being clawed or bitten, the upper eyelid is drawn well down over the ball, as seen in Plate I. (Frontispiece), and the eyebrows are bunched up and drawn near together until the scowl becomes frightful. The decks are further cleared for action in the disposition of the ears. Instead of leaving them up ready to be bitten off, they are "unshipped," and laid back as far as possible, close down upon the neck, and out of harm's way. The tongue also pulls itself together, contracts in the middle, curves up at the edges, and makes ready to retire farther back between the jaws at the instant of seizure.
All this time the body is not by any means standing idly and peacefully at ease. The attitude must match the expression of the face, or the tragedy becomes a farce. The body must stand firmly on its legs, alert, ready either to attack or defend, head turned, body slightly bent, or slightly crouching, and, unless the animal is walking, with the tail switching nervously from side to side. If the animal is walking forward, the tail should be held still and in the same vertical plane as the body. The finest attitude for a large carnivor is one which represents it at bay, and awaiting attack. A cat is an animal of a thousand attitudes. Very many of them, if reproduced exactly in a mounted specimen, would look very uncouth and devoid of beauty; therefore, choose those which are at once characteristic and pleasing to the eye.
Modeling an Open Mouth.—In mounting a feline animal with mouth open and teeth showing, beware what you do, or you will make the animal laughing instead of snarling. This is often done! In fact, in my younger days I did it once myself—but without any extra charge.
In modeling an open mouth, first fill the inside of the lips with clay, and also back them up underneath with clay until the[173] lips, when fixed in position, have the expression desired. The inner edge of the hairless portion of the lower lip should fit up close against the jaw bone, and perhaps be tacked down upon it temporarily. Very often it is necessary to hold the lips in position, while drying, by sewing through the edges and passing the thread across the jaws from side to side. The skin of the nose must be fully backed up with clay, so that no hollows are left into which the skin can shrink away in drying. It is often desirable to hold the end of the lower lip up to its place, while drying, by driving a small wire nail through it into the bone.
Do not fill the mouth full of clay, for it must be borne in mind that the final modeling of the soft parts of the mouth must be done in papier-maché. It is no small task to dig out of a mouth a quantity of clay and tow after it has become hard; therefore, leave a place for the tongue.
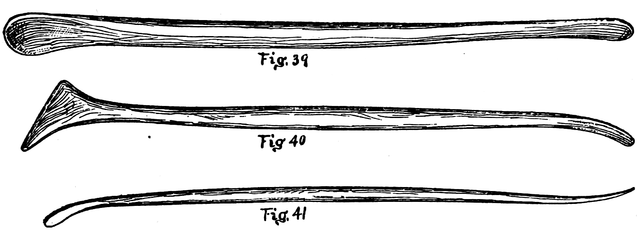 Modeling Tools of Wood.
A head must be thoroughly dry and shrunken before the mouth can be finished and made permanent. In drying, the lips draw away from the gums somewhat, which is just as it should be. The first step is to clear away the dry clay from around the teeth and lips, and get everything clean and ready for the maché. Then make some fine papier-maché, as described elsewhere, that is sticky enough to adhere firmly to smooth bone, and of such consistency that it works well in modeling. With this, and your modeling spatulas and other tools of steel, zinc, or hard wood (see Figs. 39-44), cover the jaw bones to replace the fleshy gums, and fill up to the edges of the lips so that they seem to be attached to the gums as in life. Coat the roof of the mouth, and model its surface into the same peculiar[174] corrugations that you saw in the mouth immediately after death.
This is slow work. It requires a good eye, a skilful, artistic touch, and unlimited patience. If you are an artist, prove it now by the fidelity with which you copy nature in this really difficult work.
In modeling the surface of papier-maché, you must have a clean, well-polished modeling-tool, like Fig. 42, and by wetting it now and then so that it will slip over the surface, your work can be made very smooth.
Next comes the tongue. The only perfect tongue for a feline animal is a natural tongue, skinned, and stuffed with clay. The papillæ on the tongue of a lion, tiger, leopard, or puma simply defy imitation, and after many experiments with many different animals I found that with the real tongue, and with that only, one can reproduce nature itself and defy criticism. Of course, this is possible only when you have the animal in the flesh, and can cut out the tongue and preserve it in alcohol until you are ready to mount it.
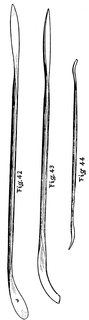 Modeling Tools of Steel.
To prepare a tiger's tongue, for example, first preserve the whole tongue in alcohol, for safe keeping. When ready to proceed, slit it open lengthwise underneath, and skin it carefully. Take a piece of sheet lead, cut it and hammer it into the right size and shape, and fit it in the mouth as nearly as possible in the shape the finished tongue is to have. By judicious hammering with the round end of a machinist's hammer you can give it any shape you desire. When it is just right, cover it with clay to replace the flesh of the tongue, treat the skin with arsenical soap, put it over, and sew it up. Now fit the tongue[175] into the mouth, and by pressure with the fingers change its shape wherever necessary in order to make it fit exactly as you wish to have it. When finished, lay it aside to dry. The accompanying figures were drawn from the finished tongue of the tiger represented in Plate I., where it is seen in place.
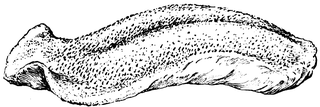 Fig. 45.—Side View of Tiger's Tongue.
When the tongue is dry it must be painted with oil colors, using a little turpentine so that the surface shall not be too glossy, nor have a varnished look. Vermilion and white are the best colors to use, and above all do not make the tongue or lips look like pink candy, or red flannel, or red sealing-wax. Call up the household cat at an early stage of the proceedings, and use her mouth as a model, whether she will or no. A patient old tabby is an invaluable ally in the mounting of feline animals of all sorts, and Towser will also help you out with your Canidæ. When modeling the mouth or muscles of a gorilla or orang utan, catch the first amateur taxidermist you can lay your hands on—the wilder and greener the better—and use him as your model. Study him, for he is fearfully and wonderfully made. The way some of my good-natured colleagues used to pose for me as (partly) nude models at Ward's, when I once had a ten-months' siege with orangs, gorillas, and chimpanzees, was a constant source of wonder and delight to the ribald crew of osteologists who knew nothing of high art.
 Fig. 46.—End View.
Fortunately the tongues of most large mammals are smooth,[176] and are easily reproduced by using the same leaden core as described above, and covering it first with papier-maché, drying it, and coating with tinted wax, laid on hot with a small flat paint-brush called a "fitch." With small specimens it is not necessary to make the tongue as a separate piece, or put a leaden core in it. Fill into the mouth a sufficient quantity of papier-maché, pack it down, and then proceed to model the surface of it into a tongue, shaped to suit the subject. Such a tongue is, of course, a fixture in the mouth.
Cleaning Teeth.—Before finishing a mouth with wax, the teeth must be washed clean with a stiff brush. If they will not come out white enough to suit you, wash them with a solution of two parts muriatic acid and one part water, applied with a tooth-brush if possible. Let it stay on the teeth about a quarter of a minute, when it must be washed off with an abundance of clear water. If the acid stays on too long, it will destroy the entire outer surface (enamel) of the teeth.
Waxing a Mouth.—Of course it will answer, and sometimes quite well enough, perhaps, when a mouth has been handsomely and smoothly modeled in fine papier-maché, to sand-paper it and paint it over when dry with two or three coats of oil color. You can hardly do otherwise, in fact, when you are not prepared to work with wax. But the really fine way, however, is to coat your dry papier-maché with tinted wax as follows:
Procure from the nearest dealer in artists' materials some cakes of white wax. You must also have a small oil or gas stove, or a spirit-lamp, and rig above it a wire frame on which you can set your wax cup. The wax cups should be small, and made of pressed tin, so that they contain no soldered joints. The wax is to be applied hot, or at least quite warm, for bear in mind that if you heat your wax too hot it changes its color quite perceptibly, and makes it dark and yellow. Wax should always be clear and transparent, and when the excess of heat turns it yellow, throw it away.
 Fig. 47.—Tiger's Tongue, Top View.
Regulate the heat carefully, so as to make it gentle. Melt a small portion of a cake of wax in one of your clean tin cups, and if it is the tongue, roof of the mouth or gums, that you have to cover, color the wax a delicate flesh tint by putting into[177] it a very little vermilion, or other suitable color, from your Windsor & Newton oil-color tube. Oil colors mix very well with hot wax; but in using it, it is necessary to keep the wax well stirred with the brush, or the color will settle to the bottom.
Take a clean, dry bristle brush, of the right size (the flat brushes are always best for wax), with a good, compact point, dip it into the hot wax, stir from the bottom, and then, before the wax on your brush has even two seconds in which to get cool, apply it to the surface to be covered, with a quick, dextrous touch, sweeping it on broadly to keep it from piling up and making the surface rough. This wax business requires genuine skill, and, after beginning, one must not be discouraged because it does not "go right" at first, but try, try again. After your hand has acquired the trick, the beauty of the results will amply repay your labor.
It is very difficult to change the surface of a coat of wax after it is once on; therefore try to get it right with the brush. Of course, if the color or surface does not suit you, scrape it all off, and "to 't again." To treat the roof of the mouth, the specimen must be turned upside down. At the point where the black lip joins the pink gums, the two colors can be nicely blended by letting the last layers of pink wax lap over a trifle, upon the black, so that the latter will show through the former here and there, and give the line of demarcation a mottled appearance, with the two colors thus blended together. Much can be done by taking advantage of the transparency of thin layers of wax when its color is light.
After the wax has cooled, something can be done to smooth the surface, and give it a very shiny appearance, by carefully scraping the surface over smoothly with the edge of a knife, or a sharp bone-scraper. The latter tool will be found of great value in modeling a mouth in papier-maché, and also in trimming up the wax after it has been applied.
Cleaning Glass Eyes.—Always have the glass eyes of a finished specimen faultlessly clean and well polished, to give the brilliancy of life. If paint gets on the glass, remove it with a drop of turpentine, and polish afterward with a bit of cotton cloth. Some of the old-fashioned taxidermists have the habit[178] of smearing a lot of nasty lamp-black in the eyes of every mounted mammal, for what purpose no one knows—but possibly in imitation of actresses, some of whom have the same unaccountable trick, and a hideous one it is in its results, in both cases. There is only one point in its favor—it is the easiest way in the world to give an animal a black eye.
As usual with most processes in taxidermy, there are several ways in which a dry bird skin may be softened, and made ready to mount or make over. I will first describe the one I consider the best in all respects.
Treatment of Small Skins.—Open the skin and remove the filling from the body, neck, and head. Tear some old cotton cloth into strips from one to two inches wide, wet them in warm water and wrap one around each leg and foot until it is completely covered with several thicknesses of the wet cloth. Lift up the wing and put two or three thicknesses of wet cloth, or else thoroughly wet cotton batting, around the carpal joints, and also between the wing and the body. Put some more wet cotton, or rags, inside the skin, in the body and neck, wrap the whole specimen completely in several thicknesses of wet cloth, so as to exclude the air, and lay it aside. If the skin is no larger than a robin, in about twelve to fourteen hours it will be soft enough to mount. The scraping and cleaning will be considered later.
Treatment of Large Skins.—Under this heading it is necessary to place nearly all birds above the size of a robin, for the reason that the legs and feet, being large and thick in comparison with the skin of the body, require special treatment in advance. The legs and wings of some birds require several days' soaking, and were the thin skin of the body to be relaxed for the same length of time, it would macerate, and the feathers would fall off. The legs and wings of large birds must, therefore, be started first in the relaxing process.
Let us take, for example, the skin of a ruffed grouse (Bonasa umbellus). If the skin is an old one, cover the toe-nails and[180] beak with hot wax, or else by much soaking the horny sheaths will flake off. Wrap the feet and legs with wet cloths, as described above, and let the skin lie without any other wrapping for one day. By the end of that time the joints can be bent somewhat, and they should be manipulated until they bend easily. When they will do this, put wet cloths around the joints of the wings, under the wings, inside of the body and the neck, and wrap the whole skin in a wet cloth of the proper size. By the end of the second day the entire skin will be soft and pliable, and smelling like an African shanty—damp and musty.
Of course the larger the skin the longer it will take to completely relax. Sometimes the wings of very large birds require soaking half as long as the legs, but care must be exercised not to soak any feathered parts too long, or the feathers are liable to fall out and cause trouble. By this process skins may be softened and made ready to mount, according to their size, as follows: Wren to robin, in twelve to fourteen hours; ruffed grouse, two days; great blue heron, three days; bald eagle, four days; condor, five days; ostrich, six to seven days. Skins which are less than one year old soften in about half the time they would require if five years old, and if properly made in the first place, will make as handsome mounted specimens as would fresh skins.
Wet Sand.—Some taxidermists soften dry bird skins by burying them in wet sand after the legs and wings have been relaxed in the way already described. I have tried it occasionally with small skins, and found that the results were quite satisfactory.
A Good "Sweat-Box."—Professor L.L. Dyche, of the University of Kansas, described to me a sweat-box which he has used, and which is certainly a good one for the creation of a damp atmosphere for the softening of skins, and also to keep half-finished birds in over night, to prevent them from drying up. What a deal of trouble the bird taxidermists of my acquaintance might have saved themselves during the last ten years had they known of, or devised, this simple but perfect contrivance. It is made by selecting a wooden box, of the right size to suit, providing a hinged cover, and coating the entire inside with plaster Paris an inch or so in thickness. To make use of it, it is filled with water and allowed to stand until the[181] plaster lining has soaked full, when the rest of the water is emptied out. If a layer of wet sand is spread over the bottom, the saturation of the air inside the box, when closed, will be still more complete.
A Heroic Method of Relaxation.—Mr. William Brewster thus describes "A New Wrinkle in Taxidermy," in Messrs. Southwick & Jencks' "Random Notes," vol. ii., No. 1:
"Wishing to turn a mounted bird into a skin, and having but a limited time to devote to the task, I tried an experiment. Taking a funnel, and inserting the pointed end in the stuffing between the edges of the skin on the abdomen, I poured in a quantity of hot water (nearly boiling hot) taking care to regulate the injection so that it should be rather slowly absorbed by the stuffing, and holding the bird at various angles, that every portion of the anterior might become soaked. The effect was magical; the skin quickly relaxed, and within fifteen minutes I could bend the neck and make other required changes without any risk of a break.
"My first experiment was with a gull; afterward I tried other birds, both large and small, with equal success. I found also that the plan worked equally well with skins which had been overstuffed, or otherwise badly made. In a very few minutes they would become nearly as tractable as when freshly taken from the birds, and much more so than I have ever succeeded in making them by the use of a damping-box. The only difficulty experienced was that the water, especially if turned in too fast, would escape through shot-holes and other rents in the skin, thus wetting the plumage in places. Of course, after the required improvements or changes have been made, the stuffing is so thoroughly saturated that the skin must be placed in a very warm place to dry. I dried mine most successfully by placing them on a furnace register, and leaving them exposed to the full blast of heat for several days."
Scraping and Cleaning Relaxed Skins.—After a dry bird skin has been softened, it then remains to scrape it clean and manipulate it all over to get it into thoroughly elastic working order, as soft and pliable (if possible) as when first taken off. Small skins should be scraped with the round end of a small bone-scraper, which has a sharp chisel edge, but the large ones[182] must be scraped with a small-toothed skin-scraper such as is used on small mammals.
Of the many thousand species of recent birds, only the ostriches, penguins, and a few others have the feathers distributed evenly over the whole body. In all the Euornithes they are arranged in regular patches or groups, called pterylæ, between which lie the naked or downy spaces, called apteria. In thin-skinned birds it is the pterylæ that need to be attacked with the scraper, and so scraped and stretched and pulled apart that the skin widens, and each feather is free, as in life, to move on its own root independently, and take whatever position it should have on the mounted bird. Turn the skin completely wrong side out, scrape it all over, and get every part fully relaxed, and into thorough working order. Large birds, or birds with thick, fat skins, require plenty of work to get out all the grease, and get the wings, legs, and head into a thorough state of collapse. In large, long-legged birds, the tendons must be removed from the leg, the same as if the specimen were a fresh one, for otherwise the wire may split the skin of the tarsus wide open, and make a very bad and unsightly turn at the heel besides. It is a difficult task to remove the tendon from the leg of an old, dry heron or crane, but it must be done.
Damaged Skins.—It not infrequently happens that in cleaning and scraping a rare and valuable old skin it proves to be "burnt" with grease, and goes to pieces like so much brown paper.
If the skin is not torn too badly it may be lined with thin cotton or linen cloth, which must be cut and fitted within, and sewed fast to the skin all over. This plan, though rather tedious to work out, develops admirably when determinedly and carefully pursued.
If the skin goes all to pieces, a manikin must be made, and the pieces glued upon it, one by one, beginning at the tail,—a process which is so simple it is unnecessary to describe it in detail. In Fig. 50 is seen a manikin all ready to receive its feathers, wings, and head.
We will suppose that the skin of a small bird—a robin, blackbird, or thrush—now lies on the table before us all ready for mounting. Perhaps it is a dry skin which has been thoroughly relaxed, scraped, and worked into pliant shape; but, for the sake of the beginner, we will assume that it is a fresh skin which has just been taken off, poisoned, and turned right side out again, in accordance with the directions for skinning small birds which have been given in Chapter VI. The body of the bird lies before you, and instead of making up the subject as a dry skin, we will mount it.
In mounting small birds the following tools are absolutely necessary to the production of good results: A pair of flat-nosed pliers six inches long, for bending and clinching wires, price sixty cents; a pair of six-inch cutting pliers, for cutting wire, eighty-five cents; a pair of bird-stuffer's forceps, four to six inch, price twenty to seventy-five cents; a nine-inch flat file, twenty-two cents. Make for yourself a stuffing-rod, by taking a piece of stiff brass or iron wire, a little larger and longer than a knitting-needle, hammering one end flat, with a slight upward curve, and inserting the other in an awl-handle.
Of materials you will need some excelsior; some clean, fine tow; a little putty or potter's clay; a spool of cotton thread, No. 40, and some suitable glass eyes. With our tools and materials ready at hand, and the skin of our bird lying before us right side out, we are ready to begin a new operation,—mounting.
For a bird the size of a robin or cat-bird, cut two pieces of No. 18 soft or "annealed" iron wire (hard wire heated red hot and allowed to cool slowly), each three times the length of the bird's legs, from foot to end of long leg-bone, or tarsus. File[184] one end of each wire to a slender and very sharp point, and rub a little oil or grease on each so that it will easily slip when inside the leg.
 Fig. 48.—Wiring a Bird's Leg.
Now take one of the bird's legs between the thumb and finger of the left hand, holding it at the foot with the back part uppermost, and with the other hand enter the point of one of the sharpened wires at the centre of foot, push the wire up the back of the leg and over the heel until the point reaches to where the leg has been skinned. Be sure that you do not run the wire up the side of the leg, either at foot or knee, for if you do it will show badly when the bird is dry. Also be careful not to run the sharpened wire out through the skin just above the heel. To avoid this, grasp the leg at the heel between the thumb and middle finger of left hand, and by strong upward pressure of the first finger under the end of the leg-bone, and of the fourth finger under the foot, both joints of the leg can be held exactly in line until the wire passes the heel safely and enters the open skin above (Fig. 48). Then we turn back the skin of the leg till we see the point of the wire, after which we push the wire on up until the point passes the end of the leg bone. We now cut off the thick upper end of this bone, (the tibia), and wrap a little fine tow smoothly around the bone and the wire, to replace the flesh cut away. The other leg must, of course, be similarly treated. We are now ready to make the body.
We have kept the body of our specimen for reference, and now we measure the length of both body and neck, cut another wire not quite twice their length and file it sharp at both ends. This will be the neck-wire. Now take a handful of excelsior (tow or oakum will also serve), compress it into an egg-shaped ball—smaller and more pointed at one end than the other, and wrap a very little fine tow loosely around it, to make it smooth on the outside when finished. Now wind stout linen thread around it, shaping it all the time by pressing it between your left thumb[185] and forefinger, until at last you have a firm body, smoothly wound, of the same general shape and size as the natural one. When the body is half made you may run the neck-wire through it lengthwise, letting it come out above the centre of the larger end, because the neck is but a continuation of the backbone, which lies at the top of the body. When the wire is inserted, the upper side of the body—the back—must be pinched together and made more narrow than the breast, which is round and full. Be sure that the body is not too large. Better have it too small and too short than too large or long, for the former can be remedied later on by filling out. When the body is finished, bend up the end of the neck wire for an inch and a half at the lower end of the body, enter the point in the lower part of the body and force it down and backward until the end is firmly clinched and will forever remain so, no matter what is done with the other end. Make the neck by wrapping fine, soft tow smoothly and evenly around the neck wire from the body upward for the proper distance. Make the false neck a trifle larger than the real one, but no longer. The body is now ready for insertion.
 Fig. 49.—Cross Section of Body.
The next step is to take a thread and tie the elbows together, fastening to each humerus just above the elbow-joint. Now take the false body in the right hand, open the skin, introduce the sharp end of the neck-wire into the neck skin, force the wire through the top of the skull in the centre, and push it through until the neck and body come nicely into place. Now see whether the body is of the right size. It should not be so large as to fill the skin precisely, for if so it is too large.
 Fig. 50.—The Finished Body and Neck, with Legs in Position.
We must now fasten the legs to the body, and will take the left one first. The leg is still perfectly straight. Hold the lower part firmly between the thumb and finger, grasp the leg-wire, push it on through the leg and enter the sharp point at about the centre of the left side of the false body, and slanting[186] a little forward. (See Fig. 51.) Now push the wire through the body until it projects more than twice the thickness of the body on the right side. Bend the end of the wire until it forms a hook, with the point just touching the body. Now pull the wire back until the point is again forced through and out on the left side for half an inch, which is then bent down and forced firmly into the excelsior, and securely clinched. Wire both legs in this way, and the bird will be so firmly put together it would be almost impossible to pull it asunder.
The legs move freely up and down the leg-wires. Push them up toward the body until the heels are in precisely the same places they were before you skinned the bird—almost hidden in the feathers at a point about opposite the middle of the bird's wing. Now bend the legs forward at a proper angle (see a living bird or a good picture) and push some finely cut tow down on each side of the body to fill out the place of the thighs. Insert a little more cut tow, evenly distributed, in the breast, where the crop would properly be, and some more at the base of the tail.
 Fig. 51.—How the Leg Wires are
Inserted and Clinched in the False
Body.
Fig. 51.—How the Leg Wires are
Inserted and Clinched in the False
Body.
Be sure there are no lumps or wrongly placed masses of chopped tow anywhere in the skin, for if there are any you can not expect to get a smooth and well-shaped bird.
Now take a needle and thread, begin at the upper end of the opening in the bird—on the breast,—and with careful fingers sew the skin together without tearing it or catching the feathers fast. Fill in a little tow, if necessary, as you proceed, but not enough to fill the skin hard and full, and when you reach the lower end of the cut draw the skin of the tail sharply forward for half an inch to take up what it has lengthened by stretching, and sew it fast by several long cross-stitches. At the last moment fill in a little more tow at the base of the tail, sew up the opening, and cut off the thread. The most difficult[187] part of the whole operation is now before us. It now remains to put the specimen on a perch, pin the wings fast to the body, adjust the feathers and wind them down, stuff the head, pin the tail, and put in the eyes.
With a piece of pine board four inches square, and two round pine sticks, each about three inches long, make a rough T perch, similar to the one standing vacant on the table in Plate XII. The cross-piece should not be too large for the bird's feet to grasp comfortably. With a small gimlet, or awl, bore two holes in the cross-bar, on a slant, about an inch apart, run the leg-wires through them, perch the bird naturally, and twist the wires together once underneath, to hold it firmly. Study a living bird or a good picture, and give your specimen a correct and natural attitude.
Cut a piece of wire five inches long, sharpen one end, bend it into a T shape, as in Fig. 50, and run the sharp end through the base of the tail underneath, and on up into the body. The tail feathers are to rest on and be evenly supported by the cross part at the lower end, which may be either straight or curved, as occasion requires.
With the small forceps, plume and dress the feathers all over the bird, catching them near the root, a bunch at a time, and pulling them into place where necessary. Work them against the grain by lifting them up and letting them fall back into place. It will be a great help if you can at this stage procure a dead bird of the same kind to examine, and see precisely how the feathers lie. One such specimen will aid you more than pages of description.
It often happens that the back, breast, or side of the bird is not quite full enough at some point, or, in other words, is too hollow. Now is the time to remedy such defects. Lift the wing and cut a slit lengthwise in the skin of the body underneath it, and through this opening insert fine clipped tow wherever needed. The forceps is the best instrument to use in doing this. The opening under the wing is of great importance, for it gives you command of one entire side of the bird's body. You can by means of this hole fill out the back, breast, or shoulders, if not full enough, and make other important changes in the bird's form. There is no need to sew up the opening when[188] you have finished, for when the wing is pinned in place it will be entirely hidden.
The wings must be fastened to the body before the feathers can be fully adjusted. Cut six small wires, each two inches long, and sharpen at one end. Let us wire the left wing first. Hold it between the left thumb and forefinger, and with the right hand push the point of one of the small wires through the angle of the wing, commonly called the shoulder. When the point is well through, hold the wing in place against the body, adjust it with great care, and when you see that the feathers of the shoulder fall properly over the angle of the wing, push the wire through into the excelsior body until it holds firmly. Push another wire through at the base of the large quills (primaries), and another through the upper part of the wing, just below where it leaves the body. These wires are well shown in Fig. 52. The wing now fits closely against the body, and the feathers fall over it smoothly, so as to completely cover the upper part of it.
Wire the other wing in the same way, taking great care that one is not placed farther ahead than the other, nor farther up or down on the body. The tips of the wings should touch each other exactly at the point. Look at your bird from all sides before finally securing the second wing.
With the wings firmly wired and the feathers nicely adjusted, we next proceed to stuff the head. With the scissors cut up some fine tow or cotton, and by inserting it through the mouth with the forceps, a pinch at a time, fill out around the back and sides of the head, the upper part of the neck and the throat. Do not fill the skin too full, and take care that both sides of the head are precisely the same shape and size. Take plenty of time and do your work nicely.
When the head has been properly filled out, fill in each eye-socket with a little soft clay or putty, insert the glass eyes, and embed them in it. Study the eyes of your dead bird, and imitate their appearance and position with those of your mounted specimen. It is a good plan to put a drop of mucilage around the inside of each eyelid and thus gum it down upon the glass eye. Be sure that the eyes are exactly opposite one another, and that one is not higher nor farther back than the other.[189]
Fasten the mandibles together by thrusting a pin up through the lower mandible into the skull, or else by passing a pin through the upper mandible at the nostrils and tying around the bill behind it with a thread.
It now remains to wind down the feathers with thread to give the bird the exact outline we desire, and to make the feathers lie smoothly. Attend to this with the closest attention and care, for on the success of this process depends the smoothness of your specimen when finished.
 Fig. 52.—The Winding of the Bird.
The best method of winding ever known is that developed and practised by Mr. F.S. Webster, whose wonderful skill in the treatment of birds is already widely known. His birds are marvels of smoothness and symmetry, and I take great pleasure in describing his method of winding as the best known. First make six hook-wires by filing six pieces of wire, each two inches long, to a sharp point at one end, and bending the other with the pliers in the form of a double hook. (See Fig. 52.) Insert three of these in a line along the middle of the back, and two along the middle of the breast, as seen in the cut. The wing-wires are not to be cut off, but left sticking out for half an inch. The bird is now divided into equal halves, and there are three wing-wires on each side, so that it will not be very difficult to wind both sides alike.[190]
Now take a spool of white thread, No. 40, fasten the end to the hook-wire on the top of the back; take the base of the pedestal in the left hand and proceed to wind down the feathers. By means of the hook-wires you can wind from point to point at will, so as to bind down the feathers where they lie too high, and skip them entirely where they lie low enough. Get the general outline of the bird first, and apply the thread with a light and skilful touch, so that it will not make creases in the bird. A little practice will enable one to wind a bird with gratifying success.
The next thing is to spread the feathers of the tail evenly, and pin them between two strips of thin card-board placed crosswise to hold the feathers in position until they dry.
Lastly, adjust the toes so that they grasp the perch properly, and set the specimen away to dry where it will not be touched. In about two or three weeks, when it is thoroughly dry, cut the threads off with a pair of scissors, pull out the hook-wires, cut off the projecting ends of the wing-wires close down to the wing, and cut off the wire at the top of the head close down into the feathers.
Mix a little varnish and turpentine together in equal parts, and with a paint-brush paint the feet and bill in case they happen to require it. Clean the eyes and rub them until they shine. You can perch the specimen now permanently on the artificial twig, turned T perch, or natural twig, or whatever else you have had in mind. In doing this, clinch the leg-wires together underneath the perch, and cut off the ends so that no portion of the wire will show. Be neat in everything, and study to make the bird look alive.
Do not be discouraged if your first bird is a dead failure, nor even if your first dozen birds are fit only for immediate destruction. If you get discouraged because your first attempt at anything is not a complete success, you are not fit to succeed. Better never begin than stop short of success. If you have a love for taxidermy, and the patience and perseverance to back it up, you are bound to succeed.
After all that has been said in regard to mounting small birds, and relaxing and cleaning dry bird skins, there remains but little to add on the subject of bird-mounting, and that little relates to large birds. For all birds, up to the emu and ostrich, the principles remain about the same as those illustrated in the mounting of a robin. Moreover, the mounting of birds is now so generally understood it is unnecessary to dwell at great length on this subject.
Professor L.L. Dyche has called my attention to the great desirability of taking a series of measurements of every large bird before it is skinned, and another series of the skinned body, as a check on possible errors in making the false body and in mounting. The idea is a good one, and the following are the measurements that should be taken:
Before Skinning.—Total length; distance from angle of wing at the carpal joint to the eye; distance from the end of the closed wing to the tip of the tail; distance from the base of the middle toe to the carpal joint of the wing.
Measurements of the Skinned Carcass.—Length of the body; length of the neck; circumference of the body around the breast; circumference around the abdomen.
The notes should also state whether the body and the neck are respectively round or flat.
The False Body.—In starting out to make a body for a large bird, particularly one with a long neck, take a piece of wood about the size of a large ear of corn, and much the same shape, through one end of which pass one end of the neck-wire and firmly staple it down. The purpose of this is to give the firmest attachment possible for the neck. The false body is then[192] made by firmly winding successive layers or bunches of excelsior or straw upon this wooden core, and binding each successive layer down with fine twine from start to finish, so that the finished body shall be firm enough. If the false body is not made hard enough, the leg-wires can not be firmly fastened, and the bird will "wabble."
If you have the fleshy body before you, or even the measurements of it, it will be easy enough to reproduce its form and size. It is desirable to copy the form of the natural body as closely as possible, which in many cases necessitates the use of a long needle to sew through and through it, in reproducing certain hollows and corresponding elevations. Professor Dyche lays great stress upon this point, and always makes the false body of a bird with such care and attention to every detail of form that when the skin is put over it it fits perfectly, the feathers fall into position and lie properly, no extra filling being necessary anywhere save at the tail; and, what is more, he considers that it is unnecessary to wind down the plumage with thread. The most life-like snowy owl I have ever seen is one which Professor Dyche mounted for me as a practical demonstration of his method, the virtue of which was thus handsomely proven. The skin was the same as a fresh one, having been made less than a year, and the excelsior body was made to fit it without the aid of measurements. As the result of repeated ocular demonstration, I am convinced that Professor Dyche's method of making every body with extreme care, as to form and details, is well worthy of universal adoption.
The necessity of removing the tendons from the legs of all large birds has already been mentioned. When this has been done, the wiring of the leg is an easy matter, for the wire will take the place of the tendon so perfectly that there will be no outward sign of its presence. Use as large leg-wires as you can without disfiguring the leg of the bird.
When any animal is mounted in a walking attitude, the foot which is represented in the act of leaving the ground must always have its centre well elevated, and only the toes touching. This being the case, surely no intelligent taxidermist will ever be guilty of so unpardonable an offence against the eye as to run the supporting-iron straight down from the ball of the foot to the pedestal, with a ghastly section of it exposed to view. No[193] matter how you manage it, the iron must follow the bones of the foot until it reaches the toes, and then it can be bent down to a perpendicular line and passed through the pedestal, always out of sight.
In all but the largest birds, the leg-wires are fastened in the body in precisely the same way as described and illustrated in the previous chapter, except that it requires stouter pliers and more strength to bend them and clinch them firmly in the body. In inserting the leg-wires in the artificial body, be sure to enter them about the middle of the body, on each side, and not near the tail, as nearly all beginners are prone to do. This is by all odds the commonest and worst fault in mounted birds that fall short of perfection. It arises from the fact that the beginner makes the mistake of entering the leg-wires at the same point where the bird's humerus joins the pelvis, which is too far back by just one-third of the length of the entire body! The humerus is not represented on your wire at all, and the wire should enter the body precisely where the knee-joint comes in the living bird. The flesh and bone of the thigh is made up (or should be, at least) on the artificial body, not on your leg-wire. Lay out a dead bird in a walking attitude, or study a skeleton (see Fig. 70), and see where the knee-joint comes; then you will never again be in danger of spoiling a bird by making its legs come out from under its tail.
In mounting large birds, the sizes of the wires I have used were as follows: Great horned owl, No. 8 or 9; bald eagle, No. 7 or 8; peacock, No. 7; great blue heron, No. 6; sandhill crane, No. 5.
An ostrich or emu requires a manikin constructed on the same principles as that built for the tiger, except that each leg-rod should have two iron squares instead of one. The upper extremity of the leg-rod is clamped tightly to one square, with two nuts, as usual; but in addition to this there should be a second square with a hole in its short arm large enough for the smooth rod to slip through, and this should be screwed to the body-board as low down as the anatomy of the bird will allow. The object of this second iron is to prevent the bipedal specimen from swaying and leaning over, as it would otherwise be very apt to do.[194]
Inasmuch as the legs of an ostrich or emu always require to be cut open and completely skinned, the manikin method is perfectly adapted to their wants. If the skin is so shrunken that it requires vigorous stretching, its body must be stuffed with straw after the neck and legs have been made and joined to a centre-board, precisely as directed for long-haired mammals above medium size. I may also remark in this connection that I have seen both the complete skin and skeleton of a large ostrich preserved and mounted to stand side by side, but I pitied the operator when he had to make a full set of bones for the legs and feet, and a wooden skull with the horny shell of the beak fastened upon it. At one stage of the proceedings the outlook for the skin seemed anything but promising, and on the whole I would not advise anyone save an expert to attempt a similar task.
Mounting Birds with Wings Spread.—In the first place, each wing must have a wire large enough to adequately support it. This should be straight, bright, well-oiled, and filed sharp at both ends. One end is to be inserted inside the skin, passed along next to the wing-bones as far as the carpal joint, from thence it is forced on as far as possible between the skin and the under surface of the metacarpal bones until it emerges from the feathers not far from the end of the fleshy portion of the wing. The wing must be so straight that the wire can be slipped through it freely backward and forward. It must next be passed through the artificial body at the point where the upper end of the humerus is attached to the coracoid in the complete skeleton, and very firmly clinched in the same way as described for the leg-wires. Then lay the bird upon its back, place the wing exactly in position, bend the wing-wires so they will fit snugly against the wing-bones, and tie them firmly down. After that, the middle joint of each wing is to be poisoned, stuffed with fine tow, and sewn up neatly. Of course the wings can not be given their correct elevation and pose until the bird is placed firmly upon its temporary perch, unless it is to be represented as flying.
Now is the time to properly dispose of the feet. If the talons are to be grasping any kind of prey, the object must be placed at once, before the feet begin to dry. If the bird is to[195] be in full flight, they must be drawn up, clinched, and almost concealed in the feathers. To keep the feathers of a spread wing in place while the specimen is drying, thrust a long, sharpened wire into the body under the wing, and another on top, bend both until they conform to the curve of the wing, twist their outer ends together, and then slip under each wire a long, narrow strip of pasteboard. Such a specimen requires constant watching lest something get awry by accident, and dry so. The winding of a bird with its wings spread, to say nothing of laying the plumage, is a difficult and delicate matter, and the chances are that he who takes the greatest pains will produce the best bird.
 Fig. 53.—Cast of the Neck and Windpipe of a
Heron.
Fig. 53.—Cast of the Neck and Windpipe of a
Heron.
Making the Neck of a Heron.—Ordinarily the anatomy of a bird is well concealed by its feathers, but to this rule the neck of a heron is a marked exception. In this remarkable member there is room for the most ambitious operator to show his skill. The neck is very long, very thin and flat, the joints of the vertebræ often show very plainly, and the windpipe has a way of shifting over the sides of the neck in a most free-and-easy way. (See Fig. 53.) If you wish to mount a bird that will show your skill to the best advantage, by all means choose a heron, and mount him in a stooping posture, with his head thrown back, in the act of spearing a fish with his sharp beak.
One of the artistic triumphs of the New York exhibition of the Society of American Taxidermists was Mr. F.S. Webster's[196] "Wounded Heron," which was awarded a specialty medal as being one of the best pieces in the entire exhibition. It was presented by Mr. Webster to the National Museum, for the Society's exhibit, and is represented in Plate XVI.
Ordinarily you can make a good neck for a heron by taking two wires of suitable length, winding fine tow very smoothly and evenly around each one until it has attained very nearly the required thickness of the neck, then putting the two together and winding a thin, even layer of fine, soft tow around both. This doubles the width of the neck, without materially increasing its thickness. The necks of some herons are so excessively wide and thin that it requires three tow-wrapped wires wound together thus to give the necessary width. All this winding should be done quite firmly, and when finished, if the neck is of the right size, it should be wrapped with spool cotton from end to end to make it keep its shape. One of the neck-wires should be thrust through the skull, but the end of the other should be bent down, and (if the beak is to be closed) passed out of the throat, into the mouth, one-third of the way to the tip of the beak.
If, however, you wish to produce a prize bird and challenge criticism, then make a neck which will show the joints of the vertebræ, and show them plainly and strikingly. Now there may be a dozen different ways in which that could be done, but the best is to make the neck over a hard skeleton that will show its joints willy-nilly. Your best plan is to clean the neck vertebræ without disjointing them, tie your neck-wire firmly underneath them, wrap with fine tow to replace the flesh, bind down with thread, and cover all at the last moment with clay. The windpipe is easily reproduced by wrapping fine tow around a small annealed wire, and then sewing it in its place on the neck. If you have not the cervical vertebræ, the next best thing is to make them roughly and quickly out of wood, wire them together, and use as you would the real bones. The reason why this is necessary to success is that it is very difficult to make a wire bend in angles instead of curves after it has been wrapped with tow and inserted in the neck of the bird.
Setting the Eyes.—On this point I have always been at war with most of my taxidermic friends. They insist that it is not[197] best to insert the eyes in a bird as soon as it is finished otherwise, but leave the bird to dry without them. Afterward, they insert wet cotton, soften the eyelids, and then insert the clay backing and the eyes. They claim that this is necessary to prevent the skin from being drawn away from the eye by shrinkage in the general drying.
I hold that it is best to set the eyes at once, before the bird dries, in order to secure the greatest degree of elasticity in shaping the eyelids, and thereby have a more perfect mastery of the situation. But having seen my friends secure as good results by their method as I do by mine, I naturally conclude that it is only a matter of personal preference, and either way is good enough.
I shall never forget how vainly I sought, when a lonesome and isolated amateur, to find somewhere in print some useful information about how to remove grease, dirt, and blood-stains from the plumage of birds. I remember well my disgust and anger at the makers of the so-called "complete" manuals of taxidermy that left me groping in Egyptian darkness on that subject, and most others also; and I registered a solemn vow that should I ever write on taxidermy I would do my best to afford some practical information on cleaning the plumage of birds.
As has been previously stated, the time to clean the plumage of a bird is while you are making up the fresh skin (Chapter VI.), before the skin has been laid away to dry, before the blood dries and imparts a permanent stain (to white feathers, at least), and before the oil has had a chance to ooze out into the feathers to gather dirt, and presently form a nasty, yellow oil-cake upon the skin. In cleaning the skin of a fat or oily bird, scrape all the grease from the inside of the skin, and absorb it with corn meal or plaster Paris. Scrape the skin until it looks as if the feathers are about to fall out, until no more oil is raised, and then you may call it clean. When you have done this, you need not fear that any oil will ever exude upon the feathers.
Fresh Specimens.—If a freshly killed bird has blood upon its plumage, separate the bloody feathers from the others, lift them on your fingers, and with warm water and a sponge gently sponge them off. Give the blood a little time to soften, and when the feathers are as clean as you can get them with water, wipe them as dry as you can, then sponge them over with clear spirits of turpentine or benzine, and absorb this with plaster[199] Paris. The manner of managing plaster Paris will be described in detail in another paragraph.
Very often the plumage of a freshly killed swan, gull, or duck, becomes so covered with dirt, blood, and grease by the time it reaches the taxidermist that it is a sight to behold. Never mind if it is, you can make it as good as new, in every respect, so far as cleanliness is concerned. The thing to do is to skin the bird, and clean the skin before either mounting it or making it up as a skin. The cleaning is often made easier, however, by hastily filling the loose skin with excelsior or tow, to give a firm foundation to work upon when cleaning the plumage.
If you have no turpentine, as will probably happen to you many a time when you least expect it, take some warm water, as warm as you can bear your hand in, rub some castile soap in it, and with a sponge, or a soft cotton cloth, wash the soiled feathers. Do not scrub them as you would a greasy floor, and utterly destroy the perfect set of the feathers, but sponge them with the grain, as far as possible, treating them as a compact layer. Now, if you have turpentine, wipe the feathers as dry as you can, and give them a sponging with that, for they will come out better from the plaster Paris than otherwise. When the plaster is put upon feathers that are wet with water, it acts too quickly in its drying, and the feathers are often dried before they have had time to become fluffy as in life. But if you have no turpentine, you must finish without it. Whichever liquid you use, at the finish fill the feathers full of plaster Paris, and almost immediately lift the bird and beat it gently to knock out the saturated plaster. That done, put on more plaster, filling the feathers full of it down to their very roots, and presently whip that out also. By the time you have made the third application, the feathers are almost dry, and the plaster falls out almost dry also. Now is your time to whip the feathers with a supple switch, or a light filler of stiff wire, to make each bedraggled feather fluff up at the base of its shaft, and spread its web for all it is worth. This treatment is also vitally necessary to knock the plaster out of the plumage. Work the feathers with your long forceps, lifting them up a bunch at a time and letting them fall back into place. By this time the plaster flies out in a cloud of white dust, and the whipping of the feathers[200] must be kept up without intermission until the plaster is all out. If any plaster remains in the feathers, you may count with certainty that it will always be sifting out upon the pedestal, and, what is even worse, if the plumage is black, or dark-colored, it will impart to it a gray and dusty appearance.
Caution.—Remember that if you leave the first application of plaster, or even the second, too long in the feathers it will "set" or harden there, and make you wish you were dead before you get it out.
Dry Skins.—The hardest subjects to deal with are old, dry skins. While fresh, fat is merely so much clean oil smeared on the feathers. An old, dry duck, goose, swan, penguin, auk, or albatross skin is liable to have the feathers of the breast and abdomen all caked together in a solid mass of rancid, yellow grease, to which time has added a quantity of museum dirt. In mounting one of the charming specimens of this too numerous class, it is not always safe to clean the feathers before inserting the body. There is danger that the skin will go to pieces. For this, and other reasons, the skin should be scraped clean inside, poisoned, furnished with a body, and sewn up before you attempt to clean the feathers.
When feathers are badly caked with old, dry grease, it is an excellent plan to apply a jet of steam to the afflicted region, which quickly warms and moistens the grease, and allows the turpentine to cut it in less than half the time it would otherwise require. There is nothing that starts dry grease as quickly as a little well-directed steam; but steam is a powerful shrinking agency, and it must be used with judgment.
Usually an old skin is so dirty that it requires to be "plastered" all over. If you have no steam, attack the greasy portions first with warm water (but no soap), to warm up the grease and soften it. Time and patience are both necessary. Next, wipe off the water, and with a wad of cotton cloth, tow, or cotton batting, dip from your dish of turpentine, and apply it as a wash upon the feathers, always rubbing with the grain, of course. When, after repeated applications, you see that the turpentine has dissolved the grease to quite an extent, go rapidly over the remainder of the bird, then lay it down upon a sheet of heavy paper, upon its back, and cover it completely with[201] plaster Paris. It takes two or three quarts to do this usually, and for a swan it requires a pailful.
As soon as the plaster has had time to absorb the greasy turpentine, which it does in about a minute, lift the bird from its burial-place, and holding it head upward hit it several sharp blows with a light stick to knock the plaster out of the feathers. Devote from three to five minutes to this, then examine the feathers and see whether they are perfectly clean. Most likely they are not, if it is a case of old grease, and a repetition of the dose is necessary. Start again with your wash of turpentine and do precisely as before (without the use of any water). If this does not bring the feathers out clean and white from roots to tips, then give it a third going over, with unabated vigor and thoroughness. The third time is usually "the charm," even with the worst cases. This time the plaster must be thoroughly beaten out of the feathers, even if takes you an hour to accomplish it.
All this is rather disagreeable work. Of course you will put on old clothes and get out doors to windward of your bird while beating it, so that the plaster will fly off upon some other fellow. Soft feathers may be handled more carelessly than the stiffer sorts. Of course great care must be taken to not separate the web of the tail and wing feathers, nor to break the shafts of even the small ones. Beware getting any of the body feathers twisted during this operation, or they will not lie down where they belong.
Benzine can be used instead of turpentine in cleaning plumage, but it is too volatile, and evaporates too quickly to render the best service.
It is practically useless to attempt to remove clotted blood from the feathers of old dry skins. Even if by persistent effort the blood itself is removed, it leaves a lasting stain upon the feathers, and they are also permanently awry. The universal custom with taxidermists in such case is to obey the (paraphrased) scriptural injunction—if a feather offend thee, pluck it out. If this course leaves a vacancy in the plumage, steal a perfect feather from some suitable portion of the bird's body, and glue it fast in the place of the missing one. Fortunately, however, collectors have about ceased to make up skins to dry with blood upon them, and there is not much trouble to apprehend hereafter from that source.
Ophidia: The Serpents.—There are several methods of mounting snakes, but only one that I can recommend. Such processes as ramming a rubber-like snake skin full of sawdust, or cotton, or tow, are to be mentioned only to be condemned. In my opinion, the only proper way to mount a serpent is to make a manikin of tow, carefully wound on a wire and afterward shaped with thread, and cover it with clay at the finish. It is necessary to attach small wires to the body-wire at given intervals, so that they can be passed down through the pedestal, and afford a means by which a finished specimen may be drawn down and made to lie naturally.
A manikin for a large snake, like an anaconda or python, is best made of excelsior, and its exact form secured by sewing through it with a needle. In the field notes printed in Chapter III. something may be learned of the form of the python.
If a snake is "stuffed," it stretches the scales apart most unnaturally, and never looks like life. For this reason, the clay-covered manikin is necessary, in order that any excess of skin may be modeled down upon it, and the scales be made to form an unbroken covering.
Lacertilia: The Lizards.—With the exception of the iguana, the gila monster, mastigure, and a few others, the lizards are so small and slender, and have tails so tapering out into thin air that they are altogether too small to be mounted by the ordinary methods of taxidermy. The finest method ever devised for the preservation and display of small reptiles and batrachians is that adopted by the Museum of Comparative Zoology, Cambridge, Mass. Each specimen is preserved in clear spirits in a jar by itself, and instead of being dropped in head first to[203] sink or swim, and tie itself into a bow-knot if it can, the reptile is placed (in the flesh) on a thin, rectangular slab of plaster Paris or cement, of the tint best suited to the display of the specimen. The object is placed in a life-like attitude and held in place by threads which pass through holes in the slab and tie the feet down securely. The accompanying illustration (Fig. 54), drawn from a specimen, and the following description, both of which have been kindly furnished me by Mr. Samuel Garman, Curator of Reptiles, Museum of Comparative Zoology, will enable any intelligent preparator to adopt this admirable method:
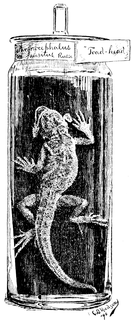 Fig. 54.—Method of Mounting Alcoholic Reptiles
at the Museum of Comparative Zoology.
Fig. 54.—Method of Mounting Alcoholic Reptiles
at the Museum of Comparative Zoology.
"It was in 1875 we began to mount the reptiles and batrachians of the Museum of Comparative Zoology on tablets, in alcohol. Before that date they had been stuffed and dried, a method which proved rather unsatisfactory, especially so in regard to color, and the shrivelling of digits and tails. However varied at first, the appearance soon became uniform and dusty. Mounting in the alcohol does away with the most serious objections; we can give the specimens life-like attitudes, or arrange them in groups as if playing, courting, or fighting; and the liquid heightens their beauty, as the water does that of the pebble at the seashore, while ravages of insects are entirely out of the question.
"The tablets are made of plaster Paris, or if a harder one with[204] finer finish is desired, of cement mixed with water and spread on a glass plate to set. Holes are bored through them wherever necessary to fasten the specimen, which is simply tied on. With the tints used in fresco painting they are colored to suit. Experiments now under way convince me there is less fading on plates of certain colors than on the white ones. For black tablets, common slate is good. A mixture of plaster and cement makes a fine quality."
The larger lizards are generally so round and plump-bodied they may very properly be mounted with tow and clay legs, and a body-filling of clean and soft chopped tow, the same as small mammals. If one is encountered which has a high, sharp, spinal crest, which cannot be reproduced with loose filling, then it is necessary to make the legs and tail, wire all together, and make an excelsior manikin in two halves, so that each side may be inserted in the body independently, and then the two may be sewed together and covered with clay as necessary.
At Professor Ward's celebrated establishment I once saw Mr. Webster remove the entire skeleton from a Hatteria punctata, a rare New Zealand lizard about sixteen inches in length, replace the leg bones and skull with wooden counterfeits, and successfully mount the skin. This was quite a feat, and was the only instance of the kind that ever came to my knowledge. The chief difficulty lay in removing the skull from the skin, which grew tightly upon it, and in successfully replacing it with a wooden imitation.
Crocodilia: The Crocodiles and Alligators.—These great saurians—thick-hided, case-hardened, and always fat—require no carefully made manikins, no clay save in the small ones, nor very gentle treatment of any kind, unless the specimens happen to be young and tender. Small crocodilians should be mounted in the same way as the larger lizards, using clay next to the skin of the body and tail. I once achieved success with a tiny alligator, and delighted its bereaved owner, by filling it with clay on a core of excelsior, and modeling the form into perfect shape.
Large saurians should be mounted on the same general plan as wolves and small bears, viz., by cutting the leg-irons long, passing the inner ends through a rather small centre board, bending them down to the wood, and fastening with staples. Of[205] course the leg-irons must fasten underneath the pedestal by means of nuts. The legs are made of tow, and so is the tail, which must have in its centre a stout iron rod, cut about four inches shorter than the end of the tail to allow for shrinkage. At two or three points equidistant from the end of the tail, and from each other, fasten a stout wire to the tail rod, so that when the specimen is finished these wires can be passed down through holes bored in the pedestal, and used to draw the tail down tightly and hold it there. If this is forgotten the tail will spring up in spite of you, and show daylight underneath, which never happens with the tail of a living saurian.
As to attitude, one or two hints will suffice. A live saurian, either crawling or at rest, nearly always carries his legs well up to his body. Do not spread his legs far out, but bend them up rather close to the animal's body, as if he expected to use them to walk with. The body should always rest down upon the ground. Give the tail two or three curves sidewise to relieve its stiffness. The head should be held well up, but the elevation should be given by the neck alone, with the head itself in a horizontal position, turned a trifle to the right or left to avoid extreme stiffness in the attitude.
When your large alligator has been put together, suspend it from the ceiling, bottom upward, and stuff the thick part of the tail, the body, and the neck with straw. Begin at the end of the tail, and fill and sew up until the head is reached. It is necessary to use stout and very sharp glover's needles of large size in sewing through the horny-hide of an old saurian, and the thread should be the best of linen twine, doubled and waxed until it is in the best possible condition for holding. Sometimes a skin is so horny it is necessary to pierce holes for the needle with an awl. The shrinking power of a big saurian is something fearful to behold, therefore prepare your seams accordingly.
The centre-board of the body should be placed low enough that two screw-bolts, six inches long, may be put through the pedestal from underneath, and screwed into the board to bring the body of the animal down upon the pedestal as closely as possible, and also to hold it more securely. Of course, each leg-iron must pass downward through the foot, and fasten with a nut underneath the pedestal.[206]
The tongue of a saurian is not free, but the skin may be removed from its upper surface, the flesh replaced with clay, and the skin sewed down again. The color of the tongue and roof of the mouth of a saurian is pale yellow, a little lighter than Naples yellow, but never pink. In young specimens the inside of the mouth is white.
Bear in mind this fact, that the eye of an alligator or crocodile is of a dark greenish color, and the pupil is vertical.
The thin serrated scales, which form the crest of the tail, must be clamped firmly between thick pieces of card-board while they are drying, so that they will retain their proper shape and erectness, for otherwise they will curl up and become very unsightly.
After a saurian has dried properly, and has been "machéd," it should be varnished all over with a coat of white varnish and turpentine, to bring out the colors.
If the teeth of an alligator need to be cleaned and whitened, brush them with muriatic acid, washing it off again almost immediately with plenty of clear water.
Chelonia: The Turtles.—This group embraces the sea-turtles, having the fore limbs developed as long, flat, triangular flippers, with large head, small under shell, and with head and flippers non-retractile,—the terrapins, soft-shelled turtles, and tortoises. Of the large, sea-going species, our ocean waters produce the huge leather-back or harp-turtle, the loggerhead, next in size, the green turtle and the hawksbill, which last yields the valuable tortoise-shell of commerce. To the taxidermist, a fresh hawksbill to be mounted is a thing of beauty and a joy forever; the smooth and succulent green turtle is also a welcome guest; the big loggerhead is a serious affair, and the huge, lumbering, greasy 800-pound leather-back is a first class calamity. Shun him, unless there is plenty of money behind him. I once had the misfortune to be chief mourner over a leather-back which pulled down 940 pounds dead weight—mostly oil.
vowing that neither gold nor glory (neither of which is yielded by Sphargis coriacea) should ever again tempt us to "strike oil" in that manner. The soft and gelatinous shell of that monster dripped clear oil for three months, and actually yielded several[207] gallons.
Fig. 19 shows the underside of a turtle, and the dotted line indicates where the cut has been made in the skin near the posterior edge of the plastron, where the shell bridge that unites the upper with the under shell has been sawn through with a small saw. The process of skinning such a subject has been already described, and the process of mounting is to be carried out on precisely the same general principles as described and illustrated in the mounting of mammals with long hair, with but slight variations.
After the legs and neck have been made with tow, the tow wrapping should be covered with a quarter of an inch of soft clay, so the skin can afterward be modeled down upon it, either smoothly or wrinkled, as in life. The body should be stuffed with straw to keep the shell from collapsing while drying. The divided portions of the shell must then be joined and wired together firmly with soft brass wires passed through small holes, as shown in the figure. Of course, the cuts in the skin must be sewn up neatly but firmly.
When the specimen has been placed on its pedestal, it then remains to shape the legs, neck, and feet, which the soft clay underneath renders quite easy. Folds and wrinkles in the skin must be exaggerated, to provide for what is sure to disappear by shrinkage in drying.
General Observations.—Judging from specimens generally, it would seem that taxidermists, the world over, either do not know how to mount fish specimens with the same degree of excellence as mammals and birds, or else they are universally slighted by intention. Certain it is, that in nearly every large zoological museum the stuffed fishes are the least attractive, and the least like life of all the vertebrates. In many instances the reptiles are not far behind in unsightliness, although as a rule they are a little more life-like than the fishes. In only one natural history museum out of twenty-seven have I found a collection of stuffed fishes which surpassed in number and quality of specimens the collection of birds and mammals, and formed the most attractive feature of the entire museum. That fish collection is to be seen in the Government Museum at Madras, India.
The specimens were all mounted while fresh from the ocean, which, of course, has been a great advantage to the taxidermist. I was somewhat surprised to learn that the taxidermist in question was an Indian native, named P. Anthony Pillay, because East Indian natives are, almost without exception, very indifferent taxidermists.
None of the specimens are mounted on standards, but either lie flat in table cases, or, if too large for that, hang against the wall. The common scaly fishes always lie upon one side, usually the right, with tail curved upward.
Mr. Pillay assured me that the exquisite smoothness of his specimens was due to the use of silk cotton as a filling material, plucked from the pod and cleaned by hand. His scale fishes and sharks were very life-like, but his rays and ray-like Rhino[209]bati were somewhat faulty. Being filled with fibrous material, they lacked that extreme flatness so characteristic of fishes of this type.
Numerous methods for the preparation of fishes have been devised. In the collection in the National Museum made by the Society of American Taxidermists there is a series of six specimens, representing five different methods, mostly bad. One is a fish carved in wood and painted; another is a flimsy paper cast of Dutch extraction; a third is a painted plaster cast; the fourth is a half fish, or fish medallion, and the fifth is an entire stuffed fish. It is necessary to add, however, that the last-mentioned specimen falls far short of properly representing its class—the most common of all in museums. In disposing of this subject it is not my purpose to waste time in the discussion of obsolete and valueless methods, but to describe only those of practical utility.
Mounting Small and Medium-sized Fishes with Scales.—The process of skinning a fish has been described in a previous chapter, and on this subject but few other points remain to be noticed. These are the following:
From some fishes the scales fall off so very easily while they are being skinned and mounted, it is necessary to wipe the specimen dry, and before starting to remove the skin, paste a piece of thin but tough writing-paper over the whole fish excepting the fins, and let it dry before proceeding further. With a pen, line out the course of the opening cut, and make a mark across it here and there to guide you in joining the edges again after mounting. This paper covering will fully protect the scales from displacement, and it is to remain on until the mounting is completed, when its removal is easily accomplished with water and a sponge.
On the great majority of scaled fishes, however, the scales are sufficiently persistent that the above is unnecessary. But keep the fish wet while you are at work upon it, and handle it with care and delicacy. If you let the scales get dry, their edges begin at once to curl up, which must not be permitted.
It is generally of great advantage to allow the skin of a fish to lie over night in spirits (two parts of ninety-five per cent alcohol to one of water) for the sake of curing and toughening[210] the integument, and curing whatever particles of flesh may chance to remain in the skull.
After having removed the skin, it must be cleaned most carefully. With a keen-bladed knife, pare and scrape off all the adherent flesh from the skin, cut out the gills, and remove the flesh from the interior of the skull, and the base of the fins. Of course the eyes must come out also. With a stout pair of scissors trim off the projecting bases of the rays of the dorsal and anal fins, so that the fin itself may set squarely upon the top of the centre-board.
I will now describe, step by step, the entire process of mounting a fish by what I consider the simplest, easiest, and most practical method known. Be advised in the beginning, however, that you can not mount fishes on nice brass standards with nothing at all in the way of special materials and tools. You must have an assortment of hard brass wire, Nos. 3 to 10, a hack-saw, some brass rosettes, a small die for cutting threads on brass wire, and taps of corresponding sizes for cutting threads in the brass nuts and rosettes. The outfit is by no means expensive, but it is indispensable if you wish to mount your specimens on standards, and thus have them show off to the finest advantage.
1. Procure a piece of soft wood, pine preferred, and with the skinned body of the fish before you, whittle the wood down to the general shape of the body, but one-fourth smaller in actual size. In Plate IV. the outline a, b, c represents the wooden centre-board, which is really the foundation upon which the mounted specimen is to be constructed.
2. Prepare two small brass standards (e, e), and screw the upper end of each firmly into a gimlet-hole bored into the centre-board at d, d. At the lower end of each standard the thread should be cut for a little more than an inch of its length, and a turned brass rosette screwed on, to rest on top of the pedestal, and hold the rod from slipping down through the hole. Underneath the pedestal a square nut is screwed on tightly. These rods should be exactly perpendicular, and the axis of the fish (an imaginary line running lengthwise through the centre of the bulk), should be as nearly as possible horizontal. A fish mounted with its tail too high in the air seems[211] to be taking a header, and when the reverse is the case, it suggests a ship sinking stern foremost.
3. Having thoroughly cleaned the inside of the skin, anoint it liberally with arsenical soap, or if you have not that, with a plentiful sprinkling of powdered arsenic.
4. For the fourth step—filling—I shall describe two very different processes, advising the beginner to make a fair trial of both, and then adopt the one he succeeds best with.
The filling which I infinitely prefer for a fish is clay and chopped tow, mixed together, and used as stiff as may be to work well. Clay which is too soft when used shrinks as the excess of water dries out of it, and is liable to leave an uneven surface. With a flat modeling-tool, coat the centre-board evenly with the clay until you have reproduced the form and size of the fleshy body of the fish. Then put the skin over this, press it down firmly to exclude all air-bubbles, working it from the back downward. When you find that the skin fits perfectly and without any drawing or straining, begin at the tail and sew the skin together, making, as you proceed, a perfect finish of the specimen. Draw the edges closely together, and the more perfectly the scales can be made to hide the opening the better.
The other filling process is to use fine, soft tow, chopped up finely. With a goodly quantity of tow before you, open the fish skin, and with your forceps insert a layer of tow all along the back, and also on the side which lies next to the table. Then put the centre-board in its place, while the skin still lies before you, and with the forceps distribute an equal quantity of tow between the upper side of the board and the skin. Thus a perfect and even cushion of tow is provided to lie between the skin and the board at all points save below. Begin at the tail, and with your needle and thread sew up the skin for an inch or two; then with your small forceps or filler, stuff to the right size and shape the portion that has been sewn up. That done, sew up another section, and stuff as before, proceeding thus until the head is reached and the entire fish has been filled and shaped. Notches must be cut in the skin at the points where the brass rods enter it.
All this time the fish has been kept wet so that the fins are soft and elastic, and the scales are perfectly smooth. The fins[212] must now be spread, and each one enclosed between two bits of pasteboard cut to the right shape, and held firmly together by sticking pins through them around the edge of the fin. Do not on any account stick pins through the fins, or you will afterward have the trouble of filling up the pin-holes. Force the pins through the two thicknesses of pasteboard with your small pliers, and whatever may be the shape, or size, or position of a fin, you must so shape your pasteboard that the fin will be spread, and have the same position it would on a live fish.
6. The last thing at this stage is to mix together equal quantities of white varnish and turpentine, sponge off the fish carefully, removing every particle of clay, tow, or dirt, and varnish it all over. This prevents the scales from curling up when they dry, and it also goes far toward fixing the colors of the fish. The fins are to be varnished afterward when they get dry.
7. While the fish is drying, the eyes should be prepared. Every one knows that the eyes of different genera of fishes vary in shape, size, and color, to as great a degree as do the eyes of quadrupeds. For mounted specimens, one of two things may be done; insert a conventional silver or golden glass eye, or else keep on hand a lot of uncolored fish eyes, and paint each pair from nature, in oil colors of course, to suit the particular specimen it is to adorn. When the paint has had time to dry and harden, cover it with two or three coats of shellac to protect the colors from any changes which might be effected by the material in which the eye is to be set. If the coating of paint is left unprotected, it is very apt to undergo chemical changes, and the eye may thereby be ruined.
8. The eye may be set in clay or putty provided none of the setting material is to be exposed. If the glass eye is smaller than the opening, which is very often the case, set it in fine papier-maché, which must be nicely modeled around the glass, and afterward coated with shellac, and painted.
10. The subject of painting fishes will be considered in a separate chapter.
Simple as it may appear, and really is, the above processes may be applied with slight modifications to even the largest scale fishes, and to the sharks and saw-fishes. Such large subjects as the jewfish require strong iron rods for standards, and[213] the skin may either be mounted over a manikin, made of excelsior tied down upon a central beam, or it may be stuffed with soft straw, which, considering the great thickness of the skin and scales, is quite satisfactory.
Mounting Fish Medallions.—A fish with but one side mounted and exhibited may be called a fish medallion. It may lie flat in a table-case, or be screwed to the back of an upright case, or it may even be set up on standards fastened to it at the back. As a specimen, either to prepare or exhibit, it has its advantages, and I will briefly describe my process.
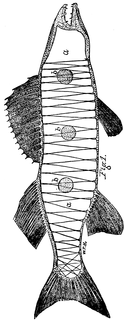 Fig. 55.—Medallion of Yellow Pike.
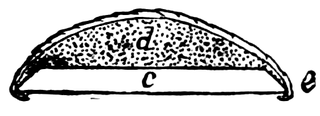 Fig. 56.—Cross-Section.
We will suppose that our fish is a fresh subject, or an entire specimen from alcohol. The first thing is to procure a pine board of proper thickness, lay the fish flat upon it, and with a pencil mark out its outline. Although only one side of the fish is to show, it is desirable to mount a little more than precisely one-half of it. Therefore, select the side to be displayed, and remove the skin from the other to within a short distance of the median line of the back and abdomen. This extra margin[214] of skin is to give the skin an appearance of entirety and rotundity, rather than flatness such as would be the case if an exact half were represented. The head of the fish must be sawn through with a fine saw, and, of course, the observance of the directions already given will leave the dorsal and anal fins on the portion to be exhibited.
Having carefully skinned, cleaned, and preserved the portion to be exhibited, the centre-board is cut out with a short bevel on the inside, and on the other the full shape of one side of the fish. When this fits the skin properly, the right quantity of clay is put upon it, the skin is then put on, and fastened at the back according to circumstances. With a small fish, the edges of the skin may be sewn together from top to bottom, across the exposed surface of the centre board, but with large specimens it is best to nail the edges to the board.
Mounting Cartilaginous Fishes: Sharks, rays, saw-fish, etc.—The only failures I have ever made during my thirteen years of taxidermic work have been with subjects of this class. I call them failures because, after taking infinite pains and mounting my specimens to the complete satisfaction of all concerned, the best ones, the very ones I had considered most perfect when finished, for two or three years afterward continued to shrink and shrink, until the skin burst open, and the tail and fins warped out of shape by the same process until it was maddening to look upon them.
I once spent a week of diligent labor in mounting over a clay-covered excelsior manikin the skin of a ten-and-a-half foot gray shark (Hexanchus griseus), which came to me in the flesh. It was a beautiful specimen, and I mounted it according to elaborate measurements, and a cast of the head. The result was all that could be desired. Three years later that shark was a sight to behold. Around the body, just back of the gill openings, the skin had burst open in a crack an inch wide. The tail had been ripped open by the terrible strain of shrinkage, so had the seam underneath the belly, and at first the damage seemed beyond repair. We did repair it, however, very fairly, but to me the specimen has ever since been an eyesore.
By the bitterest of experiences I have learned that a shark, ray, or saw-fish is bound to keep shrinking and shrinking, in[215] both length and circumference, from the day it is finished to the crack of doom. The fins and tail will warp and twist out of shape, and I defy any man to prevent it. Since finding it impossible to mount a fish of this class substantially, and have it retain its original size, I have adopted a plan which allows shrinkage. The rod which supports the tail is fastened to the centre-board by two staples so loosely that when the strain of shrinkage comes upon it, it will gradually slip through the staples and allow the specimen to shorten instead of bursting.
It is best not to mount a shark too well. Stuff it with soft straw instead of making a firm manikin, and do not fill the body any harder than is necessary to secure smoothness. As the specimen gets old, and its circumference grows smaller by degrees, and beautifully (?) less, the mass of straw will also shrink to accommodate the lawless tendencies of the skin.
I have successively tried the effect of curing skins of sharks in brine, in alcohol, and in the salt-and-alum bath, but the result is always the same. It is easy enough to mount them to perfection, but to make them remain as mounted for five years is beyond my powers.
The rays are the meanest of all subjects that vex the soul of the taxidermist. Shun them as you would the small-pox or the devil. Such abominable animated pancakes, with razor edges that taper out to infinite nothingness, were never made to be mounted by any process known to mortal man. To mount the skin of a vile ray, and make it really perfect and life-like is to invite infinite shrinkage, rips, tears, warps, defeat, and humiliation at the hands of your envious rivals. If you must mount a ray, by all means get square with it at the start. Stuff his miserable old skin with tow or straw, the more the better. Ram him, cram him "full to the very jaws," like the famous rattlesnake skin that taxidermist Miles Standish stuffed "with powder and bullets." If you can burst him wide open from head to tail, by all means do so, and you may call me your slave for the rest of my life. Make him nice and round, like a balloon, and then no matter what he does afterward to mortify and disgrace you, and to drag your fair standard in the dust, you will always have the satisfaction of knowing you are square with him.
Once when I was young and innocent, I encountered an enor[216]mous ray. He was not thrust upon me, for I achieved him—and my own ruin also, at one fell stroke. I mounted him willingly, nay, eagerly, as Phæton mounted his chariot, to show the rest of the world how all rays should be done. I mounted his vast, expansive skin over a clay-covered manikin that had edges like a Damascus razor, and I made him flat. He was flat enough to navigate the Platte River at low water, which even a thick shingle can not do. He was life-like, and likewise was a great triumph. But almost the moment my back was turned upon him forever, he went back on me. I had put him up to stay put, so far as my part was concerned, so he just got mad and literally tore himself to tatters. He became almost a total wreck, and to make my defeat a more genuine and unmitigated crusher, Professor Ward sent word to me, all the way to Washington, that he would sell me that large ray for $5. I never forgave him for that.
The best way to mount a ray is to make a nice plaster cast of it, paint it, and then bury the accursed ray in a compost heap. As a class these fishes are remarkable, and highly interesting, and there is a far greater variety of them than anyone who is not an ichthyologist might suppose. To me there is no other group of fishes more interesting, and, I may add, there is no other group that is, as a general thing, so poorly represented in museum collections. They exhibit all possible intermediate forms between the ordinary shark and the perfectly round, flat ray. The intermediate forms, Rhynobatii and Rhamphobatis, are naturally the most interesting.
The following directions were written from the mounting of a large lobster, but apply equally to all crustaceans large enough to be stuffed.
1. Remove the shell of the back (carapax) in one piece, by cutting under its lower edges, and with steel bone-scrapers clean out all the flesh from the body and tail.
2. Take a long, stiff wire (about No. 10 for a lobster), flatten it out at one end, and bend up a quarter of an inch of it, to form a scraper with a sharp chisel edge. Insert this in the legs (or "walking feet"), one by one, and clean out all the flesh they contain, quite to their tips. With a strong syringe inject water into each leg to thoroughly wash out the inside.
3. Take off the "movable claw" from the "big pincer," also make a hole in the joint at A (Plate XV.), and through these two openings remove all the flesh from the large claws, and syringe them out.
4. Having thoroughly cleaned the specimen, either soak it in some liquid poison, such as arsenic water (the easiest to prepare—by dissolving arsenic in boiling water), or a corrosive sublimate solution, or else poison it by injecting diluted arsenical soap into the legs, claws, and body with a syringe.
5. Insert in each leg and claw a soft wire of zinc, galvanized iron, or brass, and bend the end in the body at very nearly a right angle (B-B). In large specimens the wire should be wrapped smoothly with a little tow, so that the claws will not be loose upon it.
6. Insert a wire in each feeler as far up as possible, and let the lower end extend well down into the body. To hold the specimen on its pedestal, take another wire, as long as the en[218]tire specimen from head to tail, pass one end of it down through the centre of the body, bend the wire down at a right angle, and in the same manner pass the other end down through the middle abdominal segment. The ends are to pass through the pedestal and be clinched below.
7. The claws need not be stuffed.
8. When all the various members have been wired, bend all the inner ends of the wires down in the body, and pour in a lot of plaster Paris, which, as soon as it hardens will hold all the wires in place.
9. Stuff the cavity of the abdominal segments with tow, put what filling is necessary into the thorax, then put the shell back in its place and glue it fast all around the edges.
10. Replace the movable claws, and with glue and cotton fasten them firmly where they belong.
11. Put a wire around the end of each claw to hold it down, or, what is better still, wire it down from the under side in such a way that the wire will not be visible.
12. When the specimen is dry and its colors have partly faded out, procure a fresh specimen of the same species, and with your oil colors paint the shell carefully and artistically from your model. Learn to blend the colors together as nature does in such objects, softening all the lines. When the paint is dry, if the specimen has a dead, opaque appearance, give its surface both lustre and transparency by applying a thin coat of white varnish and turpentine.
Until within a very few years, the taxidermist produced but little purely ornamental work, and the most of that little was rather crude and unattractive. Now, however, decorative pieces are produced in bewildering variety, and many of them are justly regarded as works of art. The productions of the Society of American Taxidermists are now to be seen in thousands of the finest homes in the United States, and in art galleries, both public and private. In all the exhibitions of the Society, the display of "Articles for Ornament or Use" has always been the most attractive feature, and the one which has elicted from visitors the most surprise, admiration, and hard cash. The beautiful exhibits made by Messrs. F.S. Webster and F.A. Lucas, of Washington; Thomas W. Fraine and W.J. Critchley, of Rochester, N.Y.; Mr. and Mrs. George H. Hedley, of Medina, N.Y.; Mr. John Wallace, of New York; David Bruce, of Brockport, N.Y.; and Messrs. F.T. Jencks, and Aldrich & Capen, of Boston, will certainly never be forgotten by those who saw them.
It is impossible to describe here the precise methods by which the various kinds of decorative objects may be produced, and surely in the light of all the methods and details that have already been given, it is unnecessary. It will be sufficient to describe by word and picture the character of the various classes of objects, and leave their production to be worked out according to the principles already laid down. The accompanying plate represents a carefully selected group of decorative objects which were displayed in the New York exhibition of the Society of American Taxidermists, and were afterward presented by their respective owners to the National Museum at Washington, where they are now displayed in the Society's exhibit.[220]
Wall Cases.—The shallow box case with glass front, sheltering one specimen or a group, and garnished with certain accessories, is one of the most popular and pleasing of all pieces of decorative taxidermy. Its evolution is due directly to the desire to protect from destruction the more cherished of the single specimens that first began to grace the homes of the lovers of animated nature. In American homes there are to-day thousands of pretty wall-cases of choice birds mounted with suitable accessories, either natural or artificial, many with painted backgrounds, and an equal number without. There are also hundreds of cases of small mammals mounted in the same way.
Artificial Leaves.—The accessories most available are grasses and ferns carefully pressed, dried, and painted green, and set in the foundation work. Natural moss is used in the same way, and for bushes with foliage, artificial leaves are easily procured and wired on to the twigs of the branch that has been selected for use. These can be procured of any first-class dealer in taxidermists' supplies, or at large artificial flower establishments. If leaves of some special kind are desired, or leaves in great quantity, it will be best to procure them direct of C. Pelletier, 135 Wooster Street, New York City, who has supplied me for eight years. The cost of leaves varies from 25 cents to $2.00 per gross; and for some kinds even more.
Water and Ice.—To represent water, use a sheet of clear glass, and build up underneath it a bottom of sand, or gravel, or weeds, as may be necessary. Ice is easily counterfeited by coating a sheet of glass or wood with paraffin, which is quite white, and sufficiently transparent to give the proper effect. Icicles are manufactured by Demuth Brothers, 89 Walker Street, New York, especially for taxidermists, at very moderate prices, and are infinitely better than anything the taxidermist can produce. They are fastened to the sides of snow-covered rocks, or wherever they belong, by setting them at the base in stiff papier-maché with sinew glue.
Snow is made by flowing plaster Paris over the surface to be covered, and dressing its surface at once; and then, before it becomes quite hard, sprinkling its surface with painter's frosting, which is exceedingly thin flakes of clear glass, and must be[221] ground up in a mortar to get it fine enough to use. If ground too finely, it becomes a dull white powder, like marble dust, and is useless. In order to give a glistening appearance to the surface the particles must be large enough to reflect light. Mica is of no use for this purpose. In making the snow that covers the ground underneath the group of musk ox in the National Museum, Mr. Joseph Palmer invented a compound composed of the pulp of white blotting-paper, starch, and plaster Paris, which made a white, fluffy-looking mass that could be sprinkled over the ground by hand, and closely resembles a light fall of snow.
For the preparation of boughs of evergreens for use in groups, so that the needles will not fall off the twigs, Mr. Jenness Richardson, taxidermist to the American Museum of Natural History, in New York, has, by long and patient experimenting, evolved a solution in which he actually effects the complete preservation of coniferous foliage. When the branches to be used have been put through this liquid and dried, they are afterward painted, and are really as perfect as when living on the parent stem. Mr. Richardson has kindly put me in possession of the knowledge of his entire process, but I am not at liberty to publish it at present.
Painted Backgrounds.—The beauty of a wall-case, or indeed of any group in a flat case, is greatly enhanced by the addition of a painted background of the proper character to represent the home surroundings of the living creatures in front of it. Of course the back must seem to be a harmonious continuation of the bottom, where the real objects are. The tints of the picture should be very quiet, and by no means gaudy or striking, and should not attract attention away from the zoological specimens. The objects to be gained in a painted background are distance, airiness, and, above all, a knowledge of the country inhabited by the bird or mammal. As an example of the value of a painted background in the production of a pleasing effect, the reader is respectfully referred to a group the writer produced nine years ago, entitled "Coming to the Point," and now in the National Museum (see Fig. 1, Plate XVI.). It is not boasting to say that that simple group, composed of a white setter dog, six partridges, a bush full of autumn-tinted leaves,[222] and a really handsome painted background (by Mary E.W. Jeffrey) has given more pleasure than anything else the writer ever produced. The case is only ten inches deep, but the apparent distance is about a mile, and the autumn scene is very acceptable to the public, sportsmen especially.
As yet the museums will have no painted backgrounds. Ten years ago they would have no groups, and no birds with painted legs and beaks. They have all come to the two latter, and they will all come to painted backgrounds also, in due time, and it will be a good thing for them when they do. If I am ever at the head of a museum, it shall have groups with painted backgrounds galore, and there will be imitators thereof in plenty. There is in this direction a vast field which has hardly been touched, and when it is once developed the world will be the gainer. Museum managers the world over are too conservative by half. Some of them will get out of the ruts they are in by following others; some will not get out until they are dragged out, and a few others will never get out at all.
Twenty-five years hence the zoological museums of this country will be as attractive and pleasing as the picture galleries, and they will teach ten times as many object-lessons as they do now. To-day the average museum is as lifeless as a dictionary; but the museum of the future will be life itself.
In Plate XVI. are shown three other examples of wall-cases, of different kinds. Fig. 10 is a group of humming-birds, with choice accessories, under a hemispherical glass shade, surrounded by a black velvet mat, and set in a rich gold frame. This exceedingly artistic arrangement is designed either to stand on an easel or hang on the wall, and is the work of Mr. and Mrs. George H. Hedley. No. 11 represents a group of gray squirrels in a rustic case made of papier-maché, with glass front, top, and sides, and natural accessories, the work of Mr. Joseph Palmer, of the National Museum. No. 12 represents a group of south southerly ducks at the edge of a marsh, in a square case with closed back, and painted background. This was prepared by Mr. William Palmer. In Fig. 57 appears a representation of a very pretty wall-case, by Mr. F.A. Lucas. This was one of a series of four companion cases representing the four seasons, and it is only the very unscientific who need to be informed that the blue-birds building their nest are meant to represent "Spring."
Contributions of Ornamental Taxidermy from the New York Exhibition of the Society of American Taxidermists to the U.S. National Museum.
| Fig. | ||
| 1. | "Coming to the Point" | By W.T. Hornaday. |
| Special Medal at Third Exhibition of S.A. | ||
| T.; also medal at Cincinnati Exposition, | ||
| 1884. | ||
| 2. | "An Interrupted Dinner" | By Frederic A. Lucas. |
| Diploma of Honor at First Exhibition. | ||
| 3. | Head of Caribou | By W.J. Critchley. |
| (Presented by Professor Henry A. Ward.) | ||
| 4. | Peacock Screen | By Thos. W. Fraine. |
| 5. | "Wounded Heron" | By F.S. Webster. |
| Second Specialty Medal, Third Exhibition, | ||
| S.A.T. | ||
| 6. | Dead Gull | By Edwin A. Capen. |
| 7. | Frightened Owl | By John Wallace. |
| Special Medal, Third Exhibition. | ||
| 8. | Bald Eagle | By John Wallace. |
| 9. | Fox Squirrel | By P.W. Aldrich. |
| 10. | Humming-Bird Group | By Mr. and Mrs. |
| Geo. H. Hedley. | ||
| 11. | Group of Gray Squirrels | By Joseph Palmer. |
| 12. | Group of Ducks | By William Palmer. |
| 13. | Grotesque Group of Frogs | By J.F.D. Bailly. |
| 14. | Frogs Skating | By J.F.D. Bailly. |
| 15. | Snowy Heron | By Thomas Rowland. |
| 16. | Portrait of Jules Verreaux | By J.F.D. Bailly. |
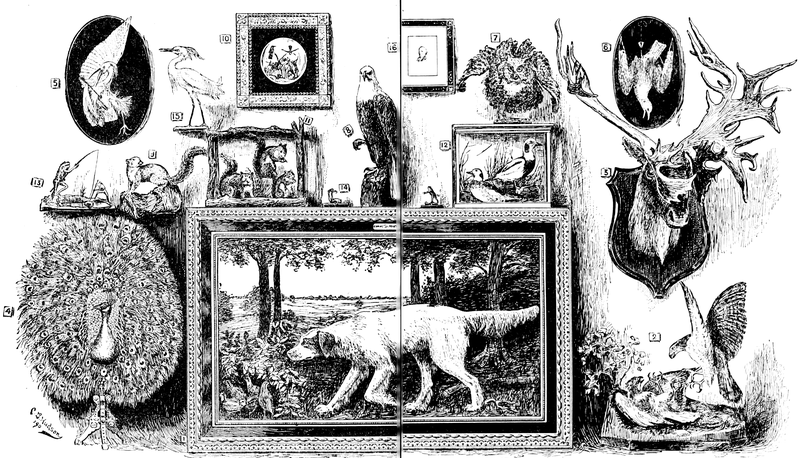 PLATE XVI.
Table Groups.—Very fine specimens are often furnished with[223] cases having glass on all sides, including the top, permitting inspection from all points. Of course every group of this kind requires a small table for its base. The most striking table group I have ever seen is one that was prepared by Mr. F.A. Lucas, entitled "An Interrupted Dinner," and represented by Fig. 2, Plate XVI. A red-tailed hawk has just killed a ruffed grouse, and has scarcely begun his meal when a goshawk swoops down upon him with outstretched talons to seize the quarry. The hawk has turned upon his back, shielding his prey with one wing, and with beak and talons "at full cock" is ready to receive his assailant, who hovers in mid-air immediately above him. The goshawk is supported on an invisible brass standard, which enters his body by way of the tail, and the illusion is perfect.
 Fig. 57.—Wall-case of Birds, by Frederic A. Lucas.
Mr. Frederic S. Webster has in his Washington studio a table-case single specimen which is in every sense a masterpiece. It is very nearly a replica, but with a heron of a larger species, of his prize piece, "The Wounded Heron," represented in Plate XVI., Fig. 5. A snowy heron lies on its back (on a black velvet panel), its breast pierced by a gilt arrow, which[224] the wounded bird has seized with its right foot, and is endeavoring to withdraw. The subject is a difficult one, and its treatment in every detail is masterly.
Dead-Game Panels.—Game birds of all kinds—particularly the handsomest ducks, geese, grouse, woodcock, and snipe—made to represent bunches of dead game, are very popular as dining-room ornaments, and during the last ten years the taxidermists of this country have produced thousands of them, many of great beauty. In regard to their proper make-up I will offer a few suggestions.
While the bird is yet warm, or at least relaxed, hang it up by one leg, pose it carefully, and mark out its outline on paper. See that the bird hangs like a dead bird, and not like a stuffed bird. In mounting the skin, make the body flat rather than round, and have the eyes three-quarters closed. The majority of "dead-game" birds are mounted with their eyes wide open. Birds close their eyes when dying.
The "Dead Gull," shown in Plate XVI., Fig. 5, which is the work of Mr. E.A. Capen, of Boston, author of "Oology of New England," may be taken as a perfect model of its kind. In every line it is a dead bird, one that has been killed with small shot in a sportsman-like manner, and has fallen dead without a feather awry.
Fire-Screens.—Probably no handsomer fire-screens were ever produced by a taxidermist than those of Mr. Thomas W. Fraine. The specimen presented by him to the National Museum is represented in Plate XVI., Fig. 4. It is made of the mounted head and neck of a peacock, set against a background of the ocellated tail feathers, of which the magnificent metallic feather shield from the bird's back forms the centre. The framework is a very thin board of tough but light wood, the back of which is covered with satin or raw silk, and the whole is supported on an elegant gilt tripod standard. The effect of this arrangement as a whole is truly superb, and it is no wonder that Mr. Fraine's peacock screens have been very popular.
The wings of the roseate spoonbill, the scarlet ibis, pelican, egret, great blue heron, and many other birds, are often made into fire-screens, either with or without the mounted head and[225] neck. Of these the two first mentioned are the most beautiful, especially the roseate spoonbill.
There is one form of screen produced in the west against which I protest. An entire bird is mounted standing on a perch-standard, its wings are spread full stretch, and drawn upward, regardless of the laws of anatomy, until the front edges meet and touch on a perpendicular line above the bird's back. Such an arrangement of wings for a bird that is otherwise naturally mounted is painful to look upon, to say the least. The bird seems to be undergoing torture, and the general effect is not pretty.
Bird Medallions.—In 1880 Mr. F.S. Webster's genius evolved one of the most beautiful designs in ornamental taxidermy ever produced, viz., the bird medallion. The idea of mounting one-half of a bird was not of itself a new one, but Mr. Webster's development of that suggestion was entirely new and novel. Instead of mounting one side of a bird with the rotundity that an actual half of a fully mounted bird should possess, he studiously flattened the subject, carefully preserving all the while a perfect uniformity in proportions, and in each case produced the proportions of an ordinary medallion. Of course both legs appeared on the specimen, and every specimen so mounted was the finest of its kind, and faultless in form and finish. The first specimen of this sort may be described as a type of all the rest.
The subject chosen was a snowy heron (Ardea caudidissima) of extra fine quality. In the centre of a massive and very deep gold and velvet frame, with a glass across its top, against a background of black velvet of the heaviest and finest quality stood the snow-white bird, in relief,—a genuine medallion. The exquisite plumes of the head, breast, and back lay against the rich black cloth like threads of spun glass. The head was raised, and the beak slightly elevated in a very life-like attitude; the body rested on one leg, which stood on a little gilt log, modeled in papier-maché, and the other foot was held up near the breast in an attitude characteristic of the herons. The effect as a whole was charming. There was nothing gaudy, nor cheap, nor hard in the arrangement, and the idea was a great success. The receiving-frame used by Mr. Webster was also his[226] own design, called forth by the necessity of fully protecting the work.
Other birds that became popular subjects for treatment in this way were the wood duck, scarlet ibis, white ibis, roseate spoonbill, English pheasant, and resplendent trogon. Of course the color and quality of the material used as a background was varied to suit the colors of each subject, but of all the materials tried, plush proved to be most acceptable.
Heads.—This subject has been fully discussed in another chapter. An additional example, showing a particularly fine head of a barren ground caribou, on a shield of a very artistic pattern, is to be seen in Plate XVI., Fig. 3, the original of which was mounted by Mr. William J. Critchley, and presented to the Society, for its exhibit in the National Museum, by Professor Henry A. Ward.
Single Specimens.—Eagles, owls, hawks, ravens, crows, herons, ducks, grouse, and other game birds in general, mounted singly, on either plain or fancy pedestals, make very interesting and proper ornaments for the tops of book-cases, wall-brackets, easels, and the like. Good examples of objects of this class are represented in Plate XVI. as follows: Fig. 8, Bald Eagle; Fig. 7, "Frightened Owl," by Mr. John Wallace, of New York City; Fig. 15, Snowy Egret, by Mr. Thomas Rowland; and No. 9, Gray Squirrel, by Mr. P.W. Aldrich, of Boston.
Grotesque Groups.—No one who has ever visited one of the exhibitions of the S.A.T. is likely to forget the exceedingly droll and mirth-provoking groups of stuffed frogs, caricaturing poor humanity, produced by Mr. J.F.D. Bailly, now of Montreal, Canada. As a humorist and satirist our old friend Bailly has few equals, and, in conjunction with his fine mechanical skill, his love of the ridiculous took permanent form in groups of frogs. The frog seems to have been created for the especial purpose of enabling Monsieur Bailly to caricature mankind. The results must be seen to be appreciated. We have had groups of frogs duelling, playing billiards, making love, getting drunk, smoking, dancing, fishing, gaming, electioneering, and what not. For frogs, however, there is only one taxidermist, for I have never seen anyone else, either French or American, who could even rival our old friend. He skinned every[227] frog through its mouth, without breaking the skin, turned it wrong side out, wired it, made its legs of cotton, turned it back, filled its body with cotton, set it up in position, varnished it all over, and fitted it out with miniature furniture to suit the subject.
Mr. Bailly used to cut similar taxidermic capers with squirrels, and Messrs. Critchley, Lucas, and others have produced some very amusing grotesque pieces with cats and kittens. In Plate XVI., Fig. 15, is shown (indistinctly) one of Mr. Bailly's frog groups, entitled "Sold Again." A fisherman is in the act of pulling out a big fish, which the attending small boy reaches out to take in with a dip-net, when the fish turns out to be only an old shoe.
Fur Rugs with Mounted Heads.—Before a raw pelt or skin can be made up as a rug, it must be sent to a first-class tanner, and thoroughly tanned and dressed. This process should make the skin clean, soft, and pliable. If the head is to be mounted, that part should not be tanned, nor put through any process. After the skin has been properly tanned, relax the head, and mount it in such a manner that the head will lie as flat as possible upon the floor. When the skull is present, it is customary to mount tiger, leopard, and bear rugs with the mouth open, snarling. Some prefer to have a head mounted with the lower jaw entirely off, and only the upper half of the head filled out. This makes of the head what is known as a "mask." Every rug requires to have an inner lining of buckram to give it body and stiffness sufficient to keep it spread out flat. Underneath that must come the lining proper, of quilted felt of suitable color, which is generally left projecting an inch or two beyond the skin all around. This projecting edge is pinked with a pinking iron, to make it more ornamental.
The finest work on rugs, particularly the finer kinds, such as lion, tiger, leopard, and bear, is done by Mr. F.S. Webster, of Washington, who has developed this line of work most handsomely and systematically, and who does an immense amount of it. Elsewhere in this book appears full directions for the preservation of skins for sale as pelts for furriers' use.
How to Make Imitation Rocks.—In making a rockwork pedestal, the first thing is to build your foundation, of wood if[228] it be very large, of wood covered with very stiff and strong paper, if it be small. In the latter case there must be a wooden skeleton to which the paper may be tacked. Having tacked the paper on in large sheets, and duly crumpled it to get the proper form of the rocky mass, give the paper a coat of thick glue. When dry it will be quite stiff and strong. Now apply papier-maché of a coarse quality, and model its surface to show the proper angles or lines of stratification. Procure some granite or sandstone, or whatever rock you choose to imitate, pound it up as finely as necessary, and after giving the surface of the papier-maché a coat of thick glue, apply your rock material by throwing it against the surface to be covered, so that the particles indent the surface and stick fast. In this way the whole surface can be completely covered, and when it is done with the actual material, no painting is necessary. The possibilities and variations in this line are infinite, and so much depends upon circumstances it is unprofitable to go further into details.
Very pretty single pieces, or small masses of rock, may be made by using peat, or coke, or cork, either in large pieces or smaller pieces glued together, and covering the surface with fine sand mixed with various dry colors, and adding colored lichens in spots here and there.
Cloth is poor stuff to use in making rockwork. It draws in straight lines, and in smooth, plain surfaces. It generally shows up the wooden framework to perfection. Use manila paper instead, by all means, and take great pains in shaping your wooden foundation. Always avoid straight lines and plain surfaces.
The rapidity with which the art of taxidermy has won its way to public favor in the United States during the last two decades is certainly very gratifying. Less than twenty years ago a great naturalist declared that a skin stuffed is a skin spoiled. Even ten years ago the only specimens permitted in museums were those that were mounted singly, in stereotyped attitudes, on polished pedestals of hard wood.
Between the years 1860 and 1876 a few of the more ambitious taxidermists of Europe produced various groups of mammals, large and small. Of these, one of the most noteworthy was the "Lion and Tiger Struggle," by Edwin Ward, of London, and another was Jules Verreaux's "Arab Courier attacked by Lions." The most of these groups represented animals in theatrical attitudes, usually fighting. While they were of much interest for certain purposes, they were of but little value to persons desiring to study typical forms of the species which were represented. It would have been quite as appropriate to place the "Dying Gladiator" or "The Laocoon" in an ethnological museum, as it would have been to place such groups as the "Lion and Tiger Struggle" of Edwin Ward, or Rowland Ward's "Combat of Red Deer," in a collection of mounted mammals in a scientific museum. Up to the year 1879 no large groups of mammals had been prepared in this country which were considered appropriate for scientific display collections. Furthermore, the production of groups of mammals or birds suitable for scientific museums was generally considered an impossibility.
In 1879 the writer returned from a collecting trip to the East Indies, having in mind numerous designs for groups of mam[230]mals, both large and small. It was believed then that many of these would not only be suitable for scientific museums, but would also be far more attractive and instructive than ordinary specimens. A design for a group of orang utans was prepared and submitted to Professor Henry A. Ward, with whom the writer was then associated, at his Natural History Establishment, with a proposition to prepare such a group as was there represented. After considerable hesitation Professor Ward finally decided to let the experiment be tried, and the group was prepared according to the design.
I do not deny the soft impeachment that in one respect this design was highly suggestive of the methods adopted by my European rivals to secure attention to their work, or, in other words, it was a trifle sensational. The group in question represented a pair of immense and hideously ugly male orang utans fighting furiously while they hung suspended in the tree-tops. The father of an interesting family was evidently being assailed by a rival for the affection of the female orang utan, who, with a small infant clinging to her breast, had hastily quitted her nest of green branches, and was seeking taller timber. The nest which she had just quitted was an accurate representation of the nest constructed by this great ape.
In the middle of the group, and at the highest point, was another nest in the top of a sapling, on the edge of which another interesting young orang utan—a production evidently of the previous year, was gazing down with wide-eyed wonder at the fracas going on below. The accessories to this were so designed and arranged as to represent an actual section of the top of a Bornean forest, at a height of about thirty feet from the ground, representing the natural trees, with leaves, orchids, pepper-vines, moss, and vegetation galore. For such a subject an unusual amount of care was bestowed on the accessories. Although the design of this group included the theatrical feature of a combat between animals, there was method in this madness. This feature was introduced for the specific purpose of attracting attention to the group and inviting discussion.
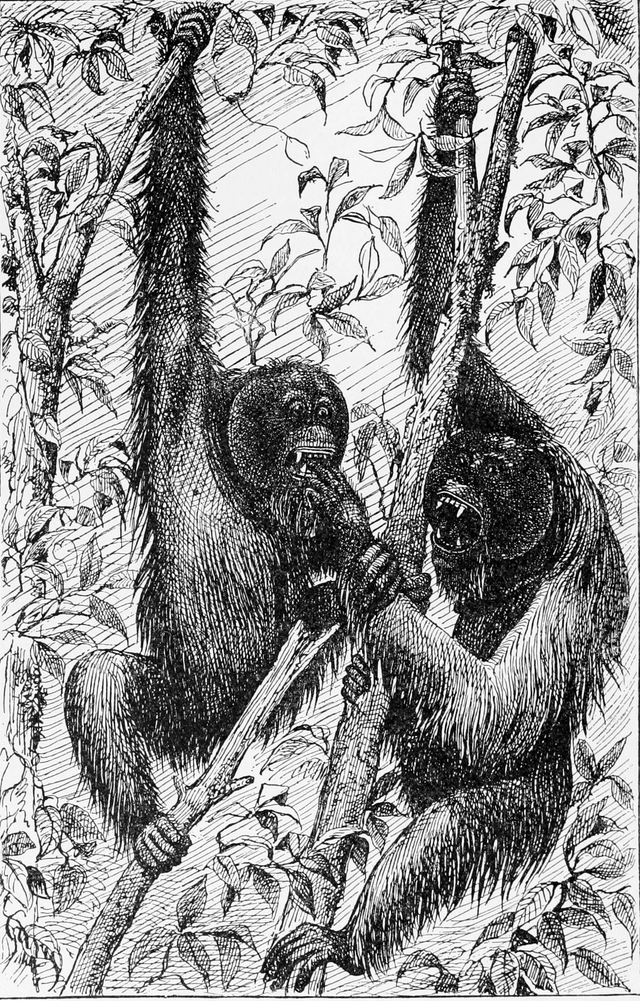 PLATE XVII.
The remainder of the group was of such a character that it seemed no scientific observer could find fault with its naturalness. All the various members of the group were represented in natural attitudes (the result of elaborate life-studies in the[231] Bornean jungles), and each one told its own story of the orang utan's life and habits (Plate XVII.)
It is not too much to say that the group caught the popular fancy. It was completed in September, 1879, just in time to be sent to Saratoga, for exhibition before the meeting of the American Association for the Advancement of Science, ostensibly for the purpose of illustrating a paper by the author on "The Species of Bornean Orangs." Naturally it attracted considerable attention, and it seemed to meet the approval of the members of the Association, particularly the museum directors and superintendents, who were especially interested in such work.
Although it may be the reverse of modest in me to say so, I cannot help believing that the production of that group marked the beginning of an era in the progress of museum taxidermy in the United States. The price placed upon this group ($2,000) prevented its immediate sale; but in a short time another group of orang utans, similar in composition but of a very different design, was ordered by Mr. Robert Colgate, of New York, for the American Museum of Natural History, and prepared by the writer at Professor Ward's establishment. This group represented the orang at home—a perfectly peaceful scene in the top of a Bornean forest. It included five orang utans, of various sizes and ages, feeding on durions, sleeping in a nest, climbing, sitting, and swinging. This group was also very well received by the public. As in the case of the first production, the accessories were all carefully worked out. The price paid for this group was $1,500.
In the year 1880, when the Society of American Taxidermists was organized in Rochester, N.Y., for the development of the art of taxidermy, the museum-group idea was much discussed by its founders at Ward's Natural Science Establishment. Mr. Frederic S. Webster determined to make a further test of public sentiment by the production of a large group of birds, designed especially for a place in some scientific museum. With most praiseworthy enterprise he accordingly prepared, at his own expense, and with great care and skill, a group of three flamingoes of the largest size. Two of the birds were repre[232]sented as standing at the edge of a shallow lagoon, and the third was sitting on its nest of mud. The water of the lagoon was successfully represented, as also were certain aquatic plants by artificial productions of the finest kinds. At the first exhibition of the Society, which was held in Rochester, in 1880, this group, and also the first group of orang utans, "A Battle in the Tree-tops," was exhibited. To the group of orang utans was awarded the specialty medal, offered "for the best piece in the entire exhibition;" but to the surprise of everyone, save the judges themselves, and to the consternation and chagrin of the founders of the Society, the group of flamingoes was entirely ignored, and the medal offered for the second best piece in the entire exhibition was awarded to a solitary wood-duck, mounted by Mr. Webster, and figured herewith (Fig. 58).
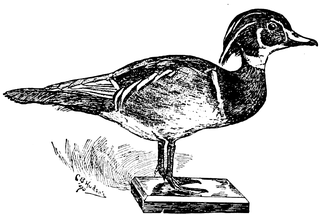 Fig. 58.—Mr. Webster's Prize Wood-Duck.
The failure of the flamingo group to receive any recognition caused deep disappointment to all those who had watched its production with so much interest and hopeful anticipation. It had been fondly hoped that it might prove to be the predecessor of a long series of bird groups of the most varied and interesting character.
The judges of this exhibition were men of high scientific attainments, and their honesty of purpose in making their awards could not be questioned for a moment. On being mildly taken to task for their failure to appreciate the group of flamingoes, the judges maintained that such groups were not suitable for scientific museums, as was the evident intention in its preparation. Arguments to the contrary were of no avail, and the believers in such groups were obliged for the time being to hang their harps on the willows. It is a pleasure to record the fact that, although the time had not then arrived, subsequent events have proved that the idea of the group-makers was a[233] good one; and, although the production of groups did not come to pass precisely as was then anticipated, time has wrought its perfect work, and groups are now the order of the day.
In 1882 the writer was appointed chief taxidermist of the National Museum. In the year following, the first group of orang utans, "The Fight in the Tree-tops," was purchased of Professor Ward by that institution, and after being partly reconstructed was placed on exhibition in the Hall of Mammals, where it now is. Since it left his establishment, Professor Ward has been pleased to call it "the king of groups."
The group idea was frequently advanced by the writer to the directors of the National Museum, but the time for its practical adoption on a liberal scale did not arrive until 1886. It is true that in 1884 Professor Goode had six groups of ducks prepared by Mr. Webster, and six bird groups of the same size prepared by Mr. Marshall at the Museum; but with the completion of these the mounting of bird groups there came to an end. The condition of the regular exhibition series of mounted mammals demanded several years' uninterrupted work before any attention could be devoted to such exceptional work as the preparation of groups either large or small. Finally, in the year 1886, the auspicious moment arrived. The collecting by the writer of a very large series of specimens of the American bison resulted in his receiving permission to prepare a large mounted group after his own design. To his intense gratification he was given carte blanche as to time and expense, and no limit was placed on the size of the group, the character or extent of the accessories, or the cost of the case to contain all. The experiment was to be regarded as a crucial test of the group idea as adapted to the purposes of scientific museums.
While the group of buffaloes was still in course of preparation, the writer prepared, as a "feeler," a very simple group, consisting of three coyotes, a large male and female and one young specimen. The attitudes and grouping was simplicity itself, and the ground was nothing but gravelly sod, bearing a few stunted bunches of bad-lands grass. In order that familiarity might not breed contempt, this group was kept carefully secluded from the observation of the Assistant Director until it was finished and in its case in the mammal hall of the museum.[234] Its character was about as follows: A young specimen—a puppy about four weeks old—was playfully endeavoring to pull the jawbone of an antelope out of its mother's mouth. Standing a trifle behind these two stood the father of the family, a really noble specimen of the species, if by any stretch of the imagination a coyote—the king of sneaks—can be considered noble. His head was held high in the air, and he was undoubtedly looking afar off, as if watching for the coming of the man with a gun. (See Plate XVIII.)
This little group was heartily approved, and the question of groups in the National Museum was settled forever before the production of the buffalo group was fully accomplished. The idea as a whole was pronounced not only satisfactory, but exceedingly desirable, and orders were given that groups of all the more important American mammals should be designed and produced as rapidly as practicable. Work was immediately commenced on several other groups, and by the time the group of buffaloes was completed and ready for exhibition, which occurred in March, 1888, three other groups were ready to be displayed at the same time, viz., of antelopes, prairie-dogs, and opossums.
The reception accorded the group of buffaloes settled all doubt that might have previously existed regarding the estimation in which such productions would be held by the public. At present the only trouble which the taxidermic department of the National Museum labors under is that it is unable to produce groups of mammals half fast enough. In March, 1890, a large group of moose, of the same dimensions as the group of buffaloes, was completed, and a group of musk oxen was completed a month later. Many other groups are in course of preparation.
By a curious coincidence, within three years from the time the Society of American Taxidermists found its first group of birds so frowned upon by museum officers, the British Museum undertook the preparation of a large series of mounted groups of birds, with accessories both natural and manufactured. Precisely in line with our idea, these groups were intended to show the birds in their haunts, and, as far as possible, to show their nesting habits. Naturally enough they were produced with the care which such subjects merit, and the results are[235] truly admirable. When some of these groups were seen by the enterprising and far-sighted President of the Board of Trustees of the American Museum of Natural History, Mr. Morris K. Jesup, he immediately determined to have a series of bird groups prepared for the great institution he has for many years so ably directed. He engaged Mr. Jenness Richardson, then in the taxidermic department of the National Museum, and the work was begun in 1886. Mr. Richardson never saw any of the bird groups of the British Museum, and the work he has produced is as much his own as though the British Museum collection had never existed. Going as he did from the National Museum, the group idea was by no means new to him, and the seventy beautiful groups he has since produced stand as a lasting monument to his skill as a taxidermist, his artistic conception in designing, and his energy as a collector. No other feature in the entire Museum of Natural History at New York is so attractive and pleasing to the general public as are the groups of mounted birds.
There are several vital principles which apply to all kinds of groups, both large and small, and we must consider these before proceeding to discuss the different kinds of groups.
Specimens.—The specimens selected to compose a group should by all means be the finest procurable. It is a mistake to go to the trouble and expense of mounting a number of specimens in a group unless each object is entirely satisfactory in quality. If the group is to represent a family, let the old male and female specimens be of the largest size, and with the finest possible pelage or plumage, as the case may be. Do not begin the mounting of a group until you have in hand a series of specimens that is entirely satisfactory. Let them be so fine that their quality will be remarked by all observers. It will then be a pleasure to lavish work upon them. Even if you should mount a specimen and afterward discover that it is inferior, discard it by all means in favor of a better one. A large group of either mammals or birds represents a very considerable outlay in money and time, and unless the quality of the specimens is above criticism, the group is by no means a success. I have found that it is a work of from one to two years' time to procure the specimens necessary for a complete group of large mammals of any kind.
The best of all ways to procure specimens for groups is to go into the field, find them in their haunts, study them alive, study their habitat and their habits; shoot, measure, and preserve them with your own hands. If you are unable to do this yourself, then it must be done for you by some competent person, under your direction. In procuring young animals, which are very necessary in nearly all groups for scientific pur[237]poses, the greatest vigilance is required to enable the collector to secure the specimens just when they reach the right age and size.
Design.—When you have determined to prepare a group of a certain species, study the character and size of the subjects to compose it, and then begin by sketching, to the best of your ability, a design in which each specimen shall have its place and attitude. In the preparation of large groups, I have always found the satisfactory arrangement of the specimens the most puzzling and perplexing feature of the work. But however difficult it may be to satisfy myself with a design, I never proceed with a group until the composition of my sketch group is satisfactory. The two largest and finest specimens in a group should constitute its central and commanding figures. Put as little life as possible in the corners of a group, and by all means make the specimens show an interest in, and a relation to, each other. The design must be dominated by one central idea or purpose, which should never be lost sight of in the arrangement of the group. It is unnecessary to say that each group should form a perfect picture, compact, well rounded, and the relationship of the different specimens to each other should be so clearly defined as to leave no room for the suggestion that the specimens have been mounted independently, and simply placed together.
Space.—No matter how small or large a group may be, to be perfect in effect it must have abundant case-room. Let there be some room to spare in the corners and above the group. The top of the case should by all means be of glass. An airy, light, out-door effect can not be secured in a small, cramped cage, in which the specimens appear like caged circus animals. If you wish to have your specimens look alive, and as if they are really on their native heath, they must not be "cabin'd, cribb'd, confin'd."
Accessories.—Although poor accessories are better than none, you will, of course, have them all as nearly perfect as possible. Spare neither time, trouble, nor expense in procuring the finest collection of accessories that you can possibly gather. Do not think you must be satisfied with the first that comes to hand, but search far and wide until you have obtained precisely[238] what you want. Do not be too lavish in the use of accessory material. Remember that enough is as good as a feast, and too much is good for nothing. There are two principles, either one of which can govern you in your selection of accessory material. One is to select a given spot of ground of precisely the same area as the section you propose to use as the groundwork of your group, and reproduce only such materials as are found on that particular square of mother earth. This is the idea which has been strictly followed in the preparation of the groups of birds in the American Museum of Natural History by Mr. Richardson. I hold to a different principle. I believe that it is best to select from a given locality such material as will best represent an ideal section of the country to be represented as the habitat of the group. Of course, it is necessary to exercise care not to bring together too great an assortment of materials. By acting on this principle we secure a limited selection of the most common and familiar species of plants in a given locality, and at the same time have the advantage of arranging them for the best artistic effect on the ground which has been prepared to accommodate the group according to the design. With small groups, in which a nest or burrow is to be represented, it is an easy and simple matter to reproduce the exact situation in which the home of the animal was situated. In the preparation of large groups this is a practicable impossibility.
Special Exhibition Groups.—To this class properly belongs such subjects as Verreaux's "Arab Courier attacked by Lions;" Edwin Ward's "Lion and Tiger Struggle;" and the two groups, "Lions Fighting" and "Horseman attacked by Tigers," prepared by John Wallace, of New York. Such groups are bold in design, theatrical in effect, and each one is supposed to represent a tour de force on the part of the originator. They are valuable for great expositions, for show-windows, fairs, crystal palaces, and the like. For such purposes the more startling they are, the better. Animals are usually chosen which will admit of a representation of vigorous action. The most favorite theme is large animals in combat. He who has the boldness to introduce the human form divine in such a composition will oftener than otherwise have occasion to wish[239] he hadn't. The human figure is, at best, a difficult subject to handle, and in its introduction with mounted quadrupeds the designer often finds, to his sorrow, how very short is the step from the sublime to the ridiculous. In general I should say that the human figure is an excellent thing to leave out of a group of mounted quadrupeds, unless it happens to be an Esquimau completely enveloped in thick furs. In the preparation of groups of this class, the ambitious taxidermist has before him almost as great a variety of subjects as has the sculptor, since his work is subject to precisely the same general rules.
Grouping Small Mammals.—Since our small mammals can not migrate south in winter, as do the birds, each species must provide itself with a winter home, or perish. The nesting and burrowing habits of these builders of "homes without hands" afford a most interesting field for investigation and study, and one which is of great interest to everyone. Almost without exception, every mammalian species found in the United States below the size of the coyote, establishes for itself during a part, if not the whole, of the year, a fixed habitation. Some of the more enterprising species, notably the squirrels and rabbits, enjoy the luxury of a summer residence as well as a winter home. The groups of small mammals which the National Museum is now producing and placing upon exhibition have for one of their principal features the illustration of the homemaking habits of the species represented. A mention of one or two examples will serve to convey an idea of the type of each class.
A group of American opossums may be taken as a good example. The case which encloses the entire group is 4 feet long, 3 feet wide, and 3 feet high. The frame of the case is as light as possible, and all four sides and the top are of glass. On the side of a sloping bank stands the base of a small gum-tree, with the roots on the lower side exposed by the crumbling away of the bank. Of course the trunk rises to the top of the case, where it is cut squarely off. At the bottom of the sloping bank, between two of the roots, is an opening, which is recognized at once as the doorway to the opossum's home. The burrow winds upward between the roots of the tree, and finally turns off to the left into the bank, where, after[241] running through a passage-way of two or three feet in length, the nest itself is found. It is in a pocket-like excavation, and a circular section is cut out of the front of the bank so as to make an opening through which the nest can be seen. The nest is lined with dead leaves, in which lies an opossum curled up and sound asleep. At the back of the case a sectional view of the bank is represented, and by means of an opening cut here and there, the course of the burrow is plainly seen. In the foreground is an old mother opossum with several young ones riding on her back, clinging to her gray coat, while the head of another protrudes from her pouch. This represents the manner in which the opossum carries her young after they have reached a certain age. From a small branch hangs another opossum, suspended by its prehensile tail, sprawling in mid-air. This specimen is a female, and shows the size and location of the wonderful marsupial pouch. Another individual is climbing up the trunk of the tree. A fourth specimen, which has been disturbed by another, is pausing to protest with widely opened mouth, while in the act of creeping into the mouth of the burrow.
Please notice the number of facts that are taught by this simple little group. It shows that the opossum is a marsupial, and the female carries her young in a pouch in her own body; that when the young reach a certain age, they ride upon the mother's back, clinging to her fur; that the animal is arboreal in habit, and has a prehensile tail, by which it is capable of suspending itself; that it burrows in banks in dry situations, and sleeps curled up like a ball in a bed of dry leaves. It also shows the full size of the adult, the young of the previous year, and the recent brood. But for an unfortunate accident, which has yet to be repaired, it would also show the number born at one birth. Of course in this group the grass and moss is properly represented, and there are artificial leaves on the tree branches which enter the group.
Groups of this class can easily be made to show the ordinary nesting and breeding habits of the animals represented. Now it happens that animals of some species make a variety of nests, according to circumstances or caprice. In 1889 we prepared a group in three sections, each of which shows one of the habits of[242] the gray squirrel in nesting. Each is composed of an actual nest, and in the identical tree in which it was built by Bunny himself. One represents a nest in a hollow beech tree, in which a pair of gray squirrels bred for years. Another is what might be called a summer nest, made of cedar bark, in the top of a cedar tree. It is a round ball, and in size and shape much resembles a hornet's nest. The third section represents an outside nest of green oak-leaves, placed on a branch of an oak tree. These three groups are exhibited in one case, but while each is separated from the others by a plate of heavy tinted glass, it is made apparent that they all illustrate the habits of the same animal. The specimens composing the three groups were all collected within a radius of ten miles of the city of Washington. Besides teaching what the nesting habits of the gray squirrel are, it also impresses upon the observer the very important fact that the habits of different individuals of a given species are capable of wide variation. They show how dangerous it is for a student or scientific investigator to generalize too freely from one or two facts, and that it is dangerous for anyone to say what an animal will not do!
In beginning the preparation of small mammal groups (for a museum) the following hints may be of service: It is not necessary that a small group should be designed and sketched out in advance. The first step, therefore, is the finding of a typical family of specimens, and a suitable burrow or nest. The character of the creature's home will largely determine the design of your group. By all means endeavor to secure a nest or burrow which can be fitly shown as a typical home of the creature represented.
When the nest of an animal is situated in a tree, it is nearly always possible to cut out a section of the tree, and introduce it bodily into your case, with appropriate leaf settings. When an animal burrows in the ground, as do the fox and the woodchuck, the best that can be done is to dig out the spot carefully, taking measurements and diagrams as you proceed, to show the direction and size of the entrance and the exact shape and size of the nest. You can then manufacture a bank and reproduce a perfect fac-simile. Of course all the nest materials—refuse bones, hair, and feathers—must be taken along bodily, and used in the manufactured nest.[243]
In displaying a portion of a tree-trunk which contains a nest, it has been our custom to saw out a rectangular section at one side of the hollow, and hang the piece on hinges at one side of the opening, like an open door, so that the entire interior and the situation of the nest can be seen. Of course it is in order to place a number of the young specimens in the nest in characteristic attitudes.
When you have collected a number of young specimens, mount them at once while the forms and attitudes are fresh in your mind and the skins are in good condition. If you are lucky enough to get the young alive, you can mount some of the skins while the others serve as living models.
Now comes an important point. It usually happens that at the time when the young are of the best age to display in a group, the fur of the adult specimen is at its poorest. Worse than that, shedding is often in progress. No matter what hypercritics may say, do not hesitate to perpetrate an anachronism by taking adult specimens later in the season, when their fur is at its best. It would be an injustice to the group, to the species, and to yourself, to include adult specimens in their poorest pelage. Along with your groups of young animals, which necessarily represent conditions during spring or summer, do not forget to represent some of your species in their winter homes, with their stores of nuts, acorns, etc., for winter use.
The field open to the conscientious and really artistic taxidermist in the preparation of groups is a wide and deeply interesting one. I know of no branch of taxidermy which ought to be more interesting than this. Its possibilities are open to all. While it is impossible for everyone to prepare groups of large mammals, in the matter of small groups you can say, "The world's mine oyster."
Groups of Large Mammals.—In creating a high-class group of large mammals, it is, as has been stated before, extremely desirable to prepare the design first, and collect the specimens to suit it. There is no burrow or nest to reproduce, and this course is not only possible, but usually very necessary.
There is one important fact which should never be lost sight of in the preparation of a design for a group of large quadrupeds. If the animals are purely terrestrial, as will be the case[244] in nearly all large groups, the largest and finest adult male and female should each stand on a flat and horizontal surface, in easy and conventional attitudes. This is necessary in order that the form, height, and back outline of each of the typical adult specimens can be studied by the technical zoologist with as much certainty and accuracy as any ordinary case specimen standing on a flat pedestal of hard wood. To illustrate the point: If the huge bull bison in our large group had been put walking up hill, or walking down hill, it would now be practically impossible for anyone wishing to draw a picture of him to accurately determine the precise angle of his hump. Furthermore, his height at the shoulders would be either exaggerated or diminished, almost unavoidably. As it is, he was with deliberate intention mounted on a flat and horizontal surface, as was the cow also, so that even though they are in a group they lose nothing whatever of their value to the technical zoologist, who demands that all specimens shall be mounted on flat surfaces, and in conventional attitudes for the sake of comparison. Having done this much for pure science, we are at liberty to vary the attitudes of the remaining specimens of the group.
In a museum group suppress all tendency to the development of violent action on the part of your specimens. In a well-regulated museum no fighting is allowed. Represent every-day, peaceful, home scenes in the lives of your animals. Seek not to startle and appal the beholder, but rather to interest and instruct him. Surely there are enough quiet and peaceful attitudes to supply all your specimens without exhausting the stock. Let them be feeding, walking, climbing up, lying down, standing on the alert, playing with each other, or sleepily ruminating—in fact, anything but fighting, leaping, and running. If you do not happen to know the habits of the animals which form the subject of your group, and it is impossible for you to learn them by observation, then must you throw aside all reserve, and appeal to some one who has seen and studied them in their haunts.
It is no child's play to prepare a group of large mammals. It invariably costs several hundreds of dollars, perhaps even thousands, and the work is supposed to last a century or longer. Judge, therefore, how important it is that every detail of the[245] work should be absolutely above criticism. If you mount such a group in haste, you are certain to repent at leisure.
Having prepared your design, collected your specimens, and made all your studies for the entire group, the next step, of course, is mounting each individual specimen. It is an excellent plan, and one which we have found particularly satisfactory in grouping ruminants, to prepare all the manikins before putting any skin on permanently. We begin with the most important specimen. By mounting the manikins one by one, and grouping them, we are able to secure the precise artistic effect that was intended in our design. The grouping of the naked manikins from time to time enables you to eliminate errors, and make such changes in the attitudes as the eye may suggest.
A few facts in relation to the work done in setting up the buffalo group will serve as a fair index to work of this kind. Of course it is to be understood that every case is to have a wooden floor, and that one end can be opened bodily. Each of our buffaloes stood on a strong, thick base by itself, a rough pedestal, in fact, of a very substantial character. With pine boards we built a miniature hill, on which stands the spike bull, placed him upon it, and fastened him there permanently. The final work of arrangement was not undertaken until a trial grouping in the case had been satisfactorily made, and the exact position of each specimen definitely settled. A hole was cut in the bottom of the case, to give depth to the pool of water. The bottom of this pool was carefully modeled in papier-maché, and painted. The specimens standing farthest from the end containing the doors were first put in place, and the groundwork built up around them. The face of the cut bank was made by nailing wire cloth to a skeleton framework of boards, and covering this with a coarse sort of papier-maché, made of sawdust, plaster Paris, glue, and hair, and used in large quantities. As fast as a specimen was put in place and fastened, the rough groundwork of boards was covered with the papier-maché composition to make a perfectly smooth foundation to receive the prairie sod. From first to last, between three and four barrels of this coarse papier-maché was used. It was made to set quickly, and the modeling[246] which was done on the surface of the cut bank, and in the bed of the stream, was done as soon as the soft material was put on. The surface of the pool was represented by a sheet of plate glass, a quarter of an inch thick. The entire groundwork of the case was covered with genuine prairie sod, each piece about one inch thick and a foot square, cut on the buffalo range in Montana, and shipped in barrels to Washington.
When this sod became perfectly dry, it lost all color and had the appearance of cured hay. In order to give it the right tone, it was necessary to spray it with a thin mixture of green paint in turpentine, to impart to it a pale green tint. As soon as the papier-maché was dry, the sod was cut neatly, matched carefully, and laid upon it—the joints being skilfully closed. A number of clumps of sage brush and bunches of broom sedge, grubbed up in Montana and carefully dried, were set here and there through the group. A bed of cactus was also introduced in the foreground. The sage brush required no preparation except to pack it carefully, and dry it after it reached Washington, with the branches in position. The leaves were of the right color when dry, and remained attached to the stems. Montana dirt was used in the bottom of the buffalo trail, and on the side of the cut bank. A few buffalo bones were stuck in the side of the bank to represent fossil bones as they are often seen protruding from the faces of cut banks in Montana. While the papier-maché around the edge of the pool was yet soft, tracks were made in it with genuine buffalo hoofs of various sizes, and many more tracks were made in the dust in the bottom of the buffalo trail. Of all the accessories in the buffalo case, everything in sight came from the Montana buffalo range, except the sheet of glass forming the surface of the pool.
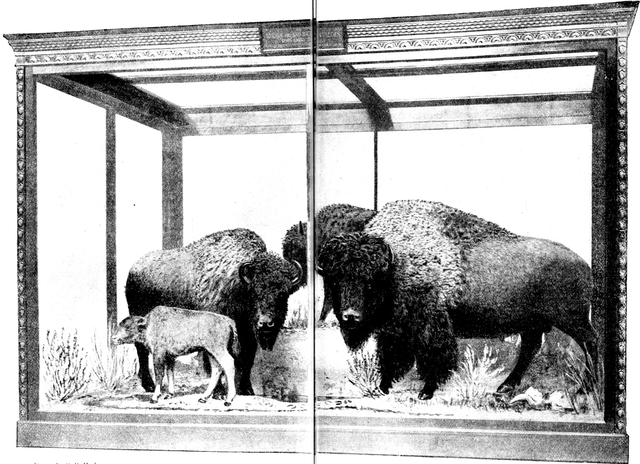 PLATE XIX.
The last six months of my connection with the National Museum witnessed the completion of the great group of moose, which we began in 1889. In size and general make-up it is a companion piece to the group of buffaloes, and is a memorial worthy of the colossal species it represents. The setting represents a section of the moose woods of Upper Canada, in which the larger animals are browsing on the tender twigs of the white birch. The animals have come together at the edge of a bog, which is growing full of a gigantic species of grayish[247] moss, peculiar to that locality. The time represented is the middle of autumn. The few leaves that remain on the maple saplings have been painted with October's most gorgeous tints of crimson and yellow, mixed with green, and the leaves of the white birch have turned pale yellow. The ground is plentifully strewn with leaves of bright tints, through which the green moss of moist banks shows in patches here and there.
Of the animals, the three largest—and huge beasts they are, truly—are feeding upon the birch twigs. A yearling calf is licking the head of a tiny brown-coated younger brother, while a two-year-old bull is in the act of "riding down" a stout birch sapling in order to get at the branches of its top, which would otherwise be beyond his reach.
Three of these fine specimens were collected by Colonel Cecil Clay, of Washington, and by him presented to the Museum for this group, together with the trees, moss, and other accessories, which he collected with infinite labor and care in the moose woods. He also furnished us with field notes and critical advice throughout, which had much to do in making the group what it is—a monument to Colonel Clay's skill and prowess as a sportsman, and to his deep interest in Alces malchis. It is to be sincerely hoped that other sportsmen will follow the Colonel's admirable example, and aid the museums in which they are most interested to secure some attractive groups.
The moose group was followed immediately by the group of musk-oxen, and there are others of Rocky Mountain goat, mountain sheep, and sea-lions in course of preparation.
The principles which underlie the production of successful groups of birds are precisely the same as those which have already been set forth under the head of "Groups of Small Mammals." In addition, however, there is another which should be kept constantly in mind, viz., to guard against the temptation to permit the accessories of a group to completely overshadow, and, I might say, overwhelm, the specimens themselves. Be careful to make the birds conspicuous, and to avoid the appearance of an exhibit of artificial plants and flowers, instead of mounted birds.
Of course each species must be represented by itself in a case which shall contain its nest, displayed in the identical bough, or bunch of grass, or hole in the bank which it occupied when found by the collector. Except when a nest is situated in a bank of earth, the collector should cut a square section out of nature, of the proper dimensions for casing, and convey bodily the nest and its situation to the museum. Occasionally circumstances will prevent this, when it becomes necessary to collect the nest and the material surrounding it, so that with their aid the situation of the nest can be built up in the laboratory.
The finest groups of birds to be found in this country are those in the American Museum of Natural History in New York, which are the work of Mr. Jenness Richardson. At present (1891) the series consists of groups composed almost wholly of species found in the State of New York. Each group, except in a few instances, occupies a light, iron-framed case by itself, and stands on an ebonized table-base, raised on legs about eighteen inches from the floor. The framework of the case, and the wood-work of the base is painted black. When the home of[249] a ground-nesting bird is shown, a section has been cut from mother earth, placed on the base as the foundation, and all the perishable plants growing thereon have been carefully reproduced in wax by casting, and put back in place.
Where a nest was situated in a low bush, the bush and its foliage, and the ground beneath have all been included in its transfer. When a nest was placed on the end of a bough, the difficulty has been surmounted very satisfactorily by cutting off as much of the bough as could be put in the case, then reproducing, on the bottom of the case, the ground exactly as it was under the tree, and simply laying carelessly upon it the cut branch containing the nest and the birds. Of course watery situations call for the introduction of the plate-glass imitation.
The feature of these groups that is so pleasing is that each one appears to have been cut out of its place in field or forest, and brought to the museum within an hour. The life-like birds, the earth and water, the natural wood, and the beautiful foliage of spring combine to impart to each group the breezy freshness of the forest, the very soul of Nature all unchanged.
To see these charming productions, fresh from the hand of a true artist-naturalist, and lay aside the spirit of carping criticism which would find fault with even a heavenly harp, is the next thing to finding one's self in the actual haunts of our native birds, with their songs trilling in our ears. Mr. Richardson's groups lack but one thing—the song of the birds. They are so many pretty pages from Nature's choicest book, and actually bring the life of the forest into the otherwise dead and silent museum hall.
The time will yet come when our wealthy lovers of art and animated nature will find places in their houses for such groups as these, and the money to pay for them will be forthcoming. At present they are tired of the old-fashioned glass "shade," covering a stiff and utterly unnatural pyramid of small stuffed birds on an impossible "tree." The old-fashioned wall-case of birds also fails to satisfy the æsthete, for the simple reason that something better is wanted. We are all ready to step up to a higher plane.
Groups of Reptiles.—I know of but one good group of reptiles, and that is a group of turtles which was prepared by Mr.[250] F.A. Lucas, and displayed at the exhibition of the S.A.T., in New York, in 1883, where it received a medal, and afterward was presented by him to the National Museum. This altogether unique and pretty group teaches one very important lesson, viz., that even the most commonplace animals are interesting when they are well mounted, and grouped with a setting which represents their natural haunts. Some of the specimens in this group are represented above water, and some beneath it, while one enterprising individual is caught in the act of diving, with part of his body under water and the other half out. The situation represents the successful accomplishment of a very neat mechanical feat, and is of itself an illustration of the possibilities in such matters.
After the quadrupeds of North America have been gathered and grouped until there remain in that direction no more worlds to conquer, it will be quite in order for our enterprising taxidermists then to proceed to the mounting of groups of reptiles.
There are possibilities with such subjects as the crocodiles, iguanas, lizards of various kinds, serpents, and turtles that few dream of. Already Professor Goode has under consideration the production of a series of reptilian groups for the National Museum, and within a short time the work will be undertaken.
In the preparation of museum specimens in general there is, from first to last, a great deal of painting to be done, and a knowledge of how to paint specimens properly is quite as necessary as a knowledge of how to mount them.
Materials Necessary for General Work.
| Brushes for Fine Work. | |||
| Artists' round Sable, | No. 2, | each | 8 cts. |
| "" | " 4, | " | 12 cts. |
| "" | " 6, | " | 15 cts. |
| "" | " 7, | " | 18 cts. |
| "" | " 9, | " | 20 cts. |
| "" | " 11, | " | 27 cts. |
| Brushes for Ordinary Work. | |||
| Flat Fitch (bristles), | No. 1, | each | 7 cts. |
| " " | " 2, | " | 7 cts. |
| " " | " 3, | " | 8 cts. |
| " " | " 4, | " | 10 cts. |
| " " | " 5, | " | 10 cts. |
| " " | " 6, | " | 12 cts. |
| Brushes for Coarse Work. | |||
| Sash tool, | No. 5, | each | 20 cts. |
| " | " 6, | " | 25 cts. |
| Sash tool, No. 7, each | 30 cts. | ||
| " | " 8, | " | 35 cts. |
| Palette | 25 cts. | ||
| Palette knife | 25 cts. | ||
| Palette cups, each | 10 cts. | ||
| Spirits of turpentine, per qt. | 15 cts. | ||
| Boiled linseed oil, per qt. | 20 cts. | ||
| Hard oil finish (white, for varnishing) per pt. | 25 cts. |
Windsor & Newton's Tube Colors, as follows:
Ivory black, 8 cts.;
Vandyke brown, 8 cts.;
Burnt sienna, 8 cts.;
Raw sienna, 8 cts.;
Burnt umber, 8 cts.;
Raw umber, 8 cts.;
Naples yellow, 8 cts.;
Chrome yellow, 8 cts.;
Yellow ochre, 8 cts.;
Indigo, 8 cts.;
Indian red, 8 cts.;
Vermilion, 15 cts.;
Flake white, 8 cts.;
Sugar of lead, 8 cts.
For coarse work, all these colors, except the finer ones, should be bought in one-pound cans, ground in oil. In addition to colors ground in oil, it is extremely desirable to have from one to two pounds of each of the following:
Dry Colors, and Cost per Pound.
Zinc white 10 cts.
Vandyke brown 15 cts.
Chrome yellow 25 cts.
Lamp-black 35 cts.
Plumbago 10 cts.
Raw sienna 15 cts.
Burnt umber 15 cts.
Raw umber 15 cts.
Burnt sienna 15 cts.
To the enterprising taxidermist a few dollars judiciously expended in such materials as the above are bread cast upon the waters, that will be sure to return to him before many days, buttered on both sides.
No matter what it costs, have the right kind of brushes, and a good assortment of coloring materials. Do not try to "get along" with whatever you happen to have, if it happens to be not the right thing. Don't try to paint fish scales with a sash tool, or delicate fin-rays with a fitch. Use for such purposes delicate, little sable pencils (flat), Nos. 1 to 4. Take good care of them after use, wash them out with soap and water, or benzine, and keep them in good working order by keeping them clean and soft. Do not let the colors on your palette get in a nasty mess, fit to turn an artist's stomach inside out, but keep your palette clean and in good order. Take from the tubes only as much color as you are likely to use. Keep the centre of your palette free from masses of color, so that you can have that space for mixing.
Only those who have first been taught the slipshod ways of the slouch, and afterward learned the methods of the artist, can realize the advantages in favor of the latter as revealed in results.
General Principles.—The skins and fleshy parts of all mammals and birds become shrunken, mummified and colorless when dry, and if not covered with hair or feathers require to be painted with the colors which have disappeared. As to what the colors should be, the taxidermist must learn by observation from living specimens, or those freshly killed, or from good colored illustrations.
Surface.—Whatever the subject to be painted, the first care is to see that the surface is properly prepared to receive the color. If it be skin, it must be perfectly clean, and free from dirt, dust, or loose scales. If a skin has any sort of powdery deposit upon it, it must be scraped clean with a knife. Holes and seams must be filled up with papier-maché, long enough in advance that it will have time to dry. Papier-maché which is to be painted should always be given two coats of white shellac, mixed rather thin, before putting on any paint. If this is not done, the maché will absorb two or three coats of paint, like a sponge, and the surface will dry perfectly dead.[253]
Gloss.—The colors on terrestrial mammals and birds (except the mouth parts and noses of the former) are very seldom, if ever, what may be called glossy. The mouth parts of mammals, or at least such as are wet by the animal's saliva, are always glossy, as also are the edges of the eyelids, and the bare end of the nose in ruminants.
To give paint a perpetual gloss, like varnish, use colors ground in oil, and mixed with boiled linseed oil only when applied.
To give paint a faint gloss, use colors ground in oil, and mix with a mixture of boiled linseed oil and turpentine, equal parts.
To have paint dry without gloss, mix with turpentine only when it is applied.
To have paint dry flat and dead, use dry colors, and mix with turpentine.
To make paint dry quickly and be very hard, mix with it a little sugar of lead (ground in oil) fresh from the tube.
To paint the skin of an animal, and yet make it look as if the skin contained the color instead of bearing it upon its surface, use oil colors, mix with boiled linseed oil and turpentine, equal parts, and apply. When the paint is beginning to dry, so that it is sticky, take some dry color of a corresponding tint, dip into it a clean, dry, square-ended bristle brush of good size, and twirl it about until it becomes filled with the dry powder, then, with light and delicate strokes, apply it directly upon the painted surface so that the dry color will fall upon the wet paint like a shower of colored dust. This is to be done with the motion that painters use in "stippling," and may very well be done with a stippling brush, if you have one. Do not get on too much of the dry color, or the effect will be spoiled. Your eye must teach you when to stop. In this process of stippling dry color into wet paint, plaster Paris may very frequently be used to good advantage to deaden gloss, and soften effects. In coloring the hairless portions of the faces, hands, etc., of apes, baboons, and monkeys, and on many other subjects, this process is of very great value.
Blending Colors.—If two colors are laid down, one against the other, each in a solid mass, up to the imaginary line that lies between them, the effect is hard and unpleasing, because unnat[254]ural. Nature never joins two contrasting-colors without a blending together and softening of the two tones where they touch each other. If it be red and brown, the red merges a little way into the brown, imperceptibly, perhaps, and the line of demarcation between the two is thus softened, and naturalized, if you please. Therefore, in your painting have no hard lines where your colors meet, but always blend adjoining colors together by passing a small brush over the line where they meet.
Strength of Tones.—The colors that Nature puts on an animal are not hard, crude, and staring, like bright red in the mouth of a mounted quadruped, but they are always in harmony with the other parts of the object. A bird may have yellow legs, but if it does, you may be sure they will not be a bright, glossy, chrome yellow, so gaudy as to instantly catch the eye. The chances are, they will be Naples yellow, with only a tinge of chrome. Learn to soften tints so they will not be staring, gaudy, and offensive to the eye. Examine the tongue of a live tiger or lion, and you will notice its color is a pale pink.
In all painting, study the harmony of colors, the strength of tones, and the blending of tints. Do not get your colors too gaudy, too sharply contrasted, nor laid on roughly; but paint evenly, and keep all your colors in perfect harmony.
Painting the Skin of Thinly Haired Mammals.—It very often happens that the skin of a thin-haired mammal has a decided color of its own, which must be imparted to it by painting. This is particularly the case with our next of kin—the apes and monkeys. The orang utan has a chocolate-colored skin, except the old males, in which it is black; the mona monkey has a bluish skin, and the faces of nearly all primates require painting. To paint a skin through thin hair, use oil colors mixed with turpentine, and made so thin that the mixture runs over the skin as soon as it touches it, like water. By separating the hair, it is often possible to get the paint on the skin without saturating the hair save at its roots; but if the turpentine color does get on the hair it must be sponged off with benzine. Do not mix your colors with oil, or you will get into serious trouble; but the oil in which the tube color has been ground will be just sufficient to give a natural tone to the skin. If the color when[255] put on appears too strong and conspicuous, stipple the surface with a little plaster Paris, to tone it down.
Painting Legs and Beaks of Birds.—Paint the legs and beaks of such birds as require it, with a mixture of boiled linseed oil and turpentine, equal parts of each, and have your paint thin enough on the legs that it will not obscure the scales. On the beak, a thicker coat is necessary, and, in fact, it is nearly always necessary to put on two coats. In coloring the beaks of toucans and hornbills, blend adjoining colors very deeply but evenly, and let there be no hard boundary lines anywhere. A little white wax softened and cut with turpentine and mixed with the paint on a bird's beak gives the color a depth and transparency quite similar to the appearance of the beak of a living bird.
Painting Mounted Fishes.—A fish must be perfectly dry before it is touched with a brush. Time spent in painting a half-dry specimen is so much thrown away. The repairs with papier-maché must be complete and dry, and the specimen perfectly clean. Nearly every fish possesses in its coloring pigment a quality which imparts to it a silvery, metallic lustre; therefore, to secure the finest result attainable in painting a fish, either an actual specimen or a plaster cast, all those that are silvery must first be coated over the entire scaly surface with nickel leaf, laid on sizing, similar to the treatment of gold leaf in gilding.
With dark-colored fishes satisfactory work may be done without the use of nickel leaf, except on the under parts, which are nearly always silvery white. It is absolutely impossible to reproduce the brilliant lustre so characteristic of white scales by the use of white paint alone, or even silver bronze, or silver paint. Without the nickel underneath the paint looks dead and artificial. If you are called upon to make a large collection with as little outlay as possible, it will be sufficient to omit the nickel leaf, for your paint will still faithfully record the colors. But if you wish to have your fish look as brilliantly beautiful as when taken struggling from the water, put on the leaf first, and paint on it, thinly, so that the silver will show through your colors and impart to them the desired lustre. If you paint too thickly, the leaf will be covered up, and its lustre obscured.
Do not attempt to use silver bronze, silver paint, or even[256] silver leaf, for nickel leaf is the only substance which has sufficient lustre and will not oxidize, and turn yellow.
If the whole body of a fish is dark, and without silvery tints, it is, of course, unnecessary to use leaf, for the lustre can be obtained by varnishing over the paint.
In many fishes, such as the scaled carp, for example, Marsching's gold paint or Japanese gold can be used directly on the scales (after the entire fish has had a thin coat of Hendley's enamel varnish), and the silver paint can be used to good effect in edging the scales. On the belly, however, which is silvery white, nickel leaf must be used. The heads of most fishes are so dark as to render the use of leaf unnecessary upon them, and of course it need not be used on the fins.
Painting Plaster Casts of Fishes, Reptiles, Etc.—When a cast is first taken from the mould, it will nearly always be found that its surface is pitted here and there with little round holes caused by air-bubbles. The process of wetting the inside of these holes, and carefully filling each one with mixed plaster Paris is called "pointing up" a cast. After this has been carefully done, and the form and surface of the white cast is perfect, if the cast is thoroughly dry we are ready to begin to paint it, and proceed as described in the preceding section.
In case you find it impossible to use nickel leaf on your fishes, you can do very good work without it, except that the silvery parts will not be really silvery, and the white paint put on will gradually turn yellow with age. After you have given the specimen a good coat of colors (using zinc white for the silvery parts, because it is more permanent than other whites), varnish the specimen all over with a kind of heavy white varnish called Siccatif de Harlem, or, lacking that, enamel varnish. This will dry in about twenty minutes, after which paint the object over again, this time with extreme care in the final touches. In painting fishes and reptiles, there is a vast amount of detail to be wrought out, and constant blending of colors. On many fishes each scale must be marked off and painted separately. In blending the edges of two adjoining colors, it must be done with a clean brush—a small one, of course—with either a quick, nervous motion along the line of contact, or else a steady sweep, according to circumstances. When the brush gets full[257] of paint, wash it out in benzine (not turpentine), because it quickly becomes clean, and dries perfectly in a moment.
The eyes of fishes and reptiles are so peculiar, and vary so exceedingly, that it is a practical impossibility to provide glass eyes that will be exactly right for each species. For fishes, as good a way as any is to let the eye be cast in situ, and when you paint the fish, paint the eye also as it should be, and when dry, varnish it over with a thick coat of soluble glass or enamel varnish.
The processes employed in making plaster Paris moulds and casts are very simple, and easily learned, even by one who has had no previous knowledge of the subject. To be sure, a certain degree of intelligence and skill is necessary in the operator; but we are not writing for the edification of duffers who do not know how to use their hands, or follow plain directions.
The first thing to understand is the difference between a mould that will "draw," and one that will not. A mould may be made on one side of a base-ball, and it will draw off the object at once, because there is no point on the ball behind which, or under which, the plaster can catch, and hang fast until something breaks. A mould of one full side of an apple will not draw, because the apple has a hollow at each end, and when these are set full of plaster the mould and the apple are held firmly together.
A hollow or a protuberance on an object which would prevent a mould from drawing away makes what is called an "undercut," and necessitates the making of a separate piece in the mould. To cast several copies of a human head and neck necessitates the making of a mould in several pieces, all fitting very nicely together, with countersink joints, to accommodate the undercuts behind the ears, under the chin, the hollows of the eyes, etc.
A mould made in more than two pieces is called a "piece[260] mould." It may have any number of pieces, of course, according to the nature of the object. Perhaps the most remarkable piece mould in existence is that used by Professor H.A. Ward in making casts of the tail of the great fossil armadillo called the glyptodon. The tail is a mass of big conical tubercles, and the mould contains, as nearly as I can remember, about one hundred and twenty-five pieces, all fitting into a big "jacket" of plaster which holds them all in place while a cast is being made. In the case of a piece mould the cast is not taken out of the mould, but the latter is dissected and taken off the cast, piece by piece.
The principles involved in making moulds and casts are best explained by brief descriptions of the processes, and if they are learned by carefully following the directions here given, the operator will be able to apply them, indefinitely, to all classes of objects, large or small.
How to Make a Piece Mould.—Let us take a good-sized apple as our subject, and follow out the process, step by step.
1. In making a mould of any kind of fruit, first soak the fruit in water an hour or two, to "plump it up," so that it will not swell in the mould and cause trouble.
2. Wipe it dry, and with a small paint-brush give it a thin coat of lard oil, so that the plaster will not stick to it. Some objects should be coated with clay water, or very thin clay, instead of oil.
 Fig. 59.—Beginning to Make a Piece Mould.
3. Bed one end of the apple in damp sand, precisely as shown in the illustration (Fig. 59). If you have no sand, use fine sawdust, or wet corn meal. Some objects require clay. Do not have the sand wet and water soaked, for it will not yield so readily to the palette knife.[261]
4. Dot a line on the sand all round, to show how far out to run the plaster, and avoid making the mould too thick.
5. Take two-thirds of a teacup of water, and put in plaster Paris until it becomes about as thick as New Orleans molasses. Stir thoroughly with a spoon, and let it stand two or three minutes.
6. Dip the plaster out with a teaspoon, and cover the exposed part of the apple. It will run down all over the horizontal surface of the sand, but never mind that. Make it cover the apple everywhere to a depth of a quarter of an inch. In some places it will be thicker. After about three or four minutes the plaster will be as stiff as modeling clay. While it is in this state take your palette knife and neatly smooth and shape the outer surface. Finish smoothing with the finger, and let the plaster harden. This will take about seven minutes longer, or until the plaster has warmed and cooled again. The time varies according to the humidity of the atmosphere.
7. Take the apple from the sand, with the half mould on it, wash off the sand, and neatly trim the edge of the mould with a knife.
8. With a blunt-pointed knife make three countersunk holes in the edge of the mould.
9. With a brush, anoint the edge of the mould with thin clay, clay-water, or soft soap, or lard oil, or even lard.
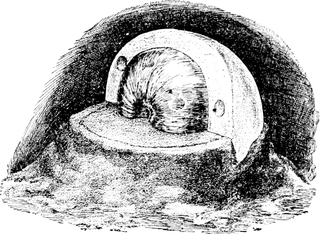 Fig. 60.—Second Step in Making a Piece Mould.
10. Turn the mould up on edge, and bed half of the exposed portion of the apple in the sand, as seen in Fig. 60. Fill in this space with plaster, precisely the same as when the first piece was made, which produces the second piece of the mould.[262]
11. Make the countersunk holes in the edge of the second piece as before; fill in with plaster all the remaining space between pieces 1 and 2, and we have the third piece, which completes the mould. As soon as this hardens, tap the mould lightly all over with a small mallet, to loosen it from the object, then take out piece No. 3, and the mould is easily separated and the apple taken out. Take one part of gum sandarac (dissolved in ninety-five per cent alcohol) and three parts of white shellac, also dissolved, and mix them. They will form a solution a little thicker than water. Have the mould perfectly dry, and apply this solution to the entire inner surface of it with a small paint-brush. The solution will be absorbed at first, and you must continue to apply it until the inner surface has an egg-shell gloss, which is sufficient. Then oil the inside with lard oil.
 Fig. 61.—Last Step in Making a Piece Mould.
12. Put together pieces 1 and 2 of the mould, cut a groove around them to hold a stout string, and tie it tightly to hold them together. Then mix some plaster, and fill each piece (1 and 2) about half full, walling it up the sides with the finger, a[263] quarter of an inch thick, or as the plaster will make it. Then wipe off the exposed edges of the mould so they will fit snugly together with No. 3. Now mix up a little more plaster, about one-fourth the quantity first used, pour into the hollow, then put on the third piece; tie all tightly together, and turn the mould round and round slowly. This fills the third piece, and holds it in its place. Keep turning the mould slowly, and tapping it with the left hand. Leave a little of the plaster on the outside, on a piece of glass or paper, so that you can tell when it gets hard and flinty in the mould. Do not take off the mould until the cast is perfectly hard.
 Fig. 62.—The Finished Mould.
How to Make a Waste Mould.—When a soft or fleshy object is to be cast, one which will yield, and draw out of the mould regardless of undercuts, a very quick and satisfactory process (provided a second copy of the cast will never be wanted) is to make what is called a waste mould. This, with a fleshy subject, is a short cut to a perfect cast, and often saves hours of valuable time. In obtaining casts of mammal heads, legs, or other parts, or casts of fishes and reptiles, it is the method par excellence. Let us learn the principles of it by making a waste mould and cast of a human hand.
1. Bed the hand in damp sand (i.e., one-half of it), as shown in the accompanying figure, No. 63.
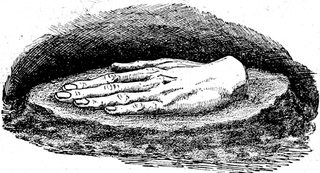 Fig. 63.—The Beginning of a Waste Mould.
2. Give the exposed portion of the hand a good coat of lard oil.
3. Take two-thirds of a gill of water in a teacup, put into it half a teaspoonful of dry Indian red (to be bought for five cents at any paint store), and mix it up. This is to color some plaster with which to make a thin, colored lining for our mould, the purpose of which will be appreciated later on.[264]
4. Mix with this red water one and one-half gills of plaster Paris, stir it up thoroughly to get it well mixed and free from air-bubbles, then with a teaspoon distribute it all over the hand until it is completely covered with a coat of the pink plaster about one-eighth of an inch thick.
5. After this thin coat has hardened, anoint the surface of it with lard oil or clay water, so that the plaster which is to be put upon it will not stick to it, but separate readily when the outer case of the mould is chiseled off.
6. Take one and one-half gills of water, and three-quarters of a pint of plaster, mix for outer case of mould, and apply on top of the pink lining to a thickness of about half an inch. Let this get perfectly hard. (Fig. 64.)
 Fig.64—Second Step in Making a Waste Mold.
7. Take the subject out of the sand. Turn it over, anoint the edge of the mould with clay water or lard oil, and treat the other side in precisely the same manner. This is the course when the whole object is to be cast. If half the object is sufficient, as is the case in taking a record cast of one side of an animal's head and body, then take the subject from the mould, and
8. Wash the inside of the mould thoroughly to get out the clay and sand.
9. Anoint the inside of the mould with clay water, thin clay, or lard oil, and lay it in position to receive the plaster.
10. Mix a proper quantity of plaster, pour it into the mould and let it harden.
Lay the mould (with the cast inside) on a cushion, or on your lap; take a half-inch chisel and a light mallet, and, beginning at the end nearest your left hand, chisel away the case of the mould, bit by bit, until you come down to the pink lining coat, which shows that you are close to the cast.[265] Great care is necessary to avoid breaking the cast, which of course is very easily cut or broken. In cutting off the pink lining be exceedingly careful not to go too deep (Fig. 65). The purpose of this lining is to show you when you are close to the cast. If the case of the mould is quite thick, hold the chisel on a slant of about fifty degrees from a perpendicular, and pare off the upper surface gradually.
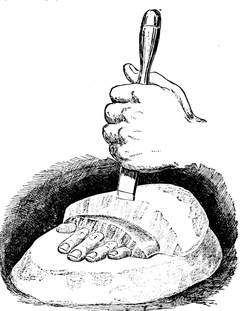 Fig. 65.—Chiseling off the Waste Mould.
Making Gelatine Moulds.—There are many objects which can not be copied in plaster by either of the above methods without great difficulty. These are hard substances, the surfaces of which are extremely irregular and full of little hollows, such as meteorites, statuettes, sculptured rocks, or models such as those of the Aztec calendar stone and sacrificial stone. When a number of copies are required, the making of a waste mould for each copy is out of the question, and the manufacture of a piece mould that will draw off is also a long task, to say nothing of making the casts themselves and cleaning them up. The solution of all such difficulties is the gelatine or "glue" mould, which is elastic, pliant, and yet keeps its shape perfectly. This is how to make it:
Let us suppose we are to make a gelatine mould of a flattened meteorite, eight inches in diameter and about three inches thick. Take some potter's clay, or modeling clay, which has been nicely worked up in a square lump, and is not wet enough[266] to be too sticky. With a small wire, cut it into slabs about three-quarters of an inch thick, and with these cover the entire object to the depth mentioned. Put the clay on everywhere the same thickness, making it conform to the irregularities of the surface. This clay will presently be exactly replaced with gelatine.
Having coated the object as described, make a plaster Paris mould of the whole of it, in two parts, which separate horizontally around the outermost edge. When you make a plaster mould of the upper half, erect a high cone of clay over the centre of the meteorite as it lies flat upon the table, so that it will make a funnel-shaped hole in the upper half of the mould, through which you can pour in the gelatine. Of course the two pieces of this plaster mould must fit nicely together, with countersunk holes. This plaster mould of the clay-covered object is called the "jacket," and its use will soon be apparent. Now for the gelatine.
Recipe for Gelatine Moulds.—The gelatine compound is made by taking glue and glycerine in the following proportions, varying the quantity to suit the size of the object: Of best Irish glue, 3 pounds; glycerine, 1-1/4 pounds; and about 1-1/2 ounces of white-wax. Dip the glue in water, and then roll it up over night in several thicknesses of wet cloth, so as to soften it without soaking it in water, which is an element to be kept out. In the morning the glue will be soft. Procure a large-sized gluepot, or improvise one by putting a small tin pail in a larger one, with water between, and in this put the glue and glycerine and cook it up. Melt the wax separately, and pour it in after the other is well mixed and hot. A gelatine mould can be made of any degree of hardness by adding dry white zinc which has been carefully ground in a mortar, but ordinarily none is necessary.
To make the gelatine mould the clay must all be taken off the object, and the latter washed clean. Lay the lower half of the "jacket" upon the table, inside uppermost, and drive four small wire nails into it at different points, allowing each one to project just three-fourths of an inch, for the meteorite to rest upon, and give space for the gelatine to flow underneath and form that part of the mould. Now put the meteorite carefully in[267] place, resting on these nail-heads, and then put on the upper half of the "jacket." Cord the jacket tightly together without disturbing the position of the object inside. If there are any cracks at the edges, fill them up with clay. Now pour in the hot gelatine at the funnel-shaped hole in the upper half of the jacket, until the mould is quite full. Let the mould stand two hours to cool and harden; then remove the upper half of the "jacket." To get the object out, take a sharp knife and slit the coating of gelatine fully half-way round, so that the two halves can be opened like an oyster, and the object lifted out. The inside of the gelatine mould must now have a coating to make it impervious to the water in the plaster Paris.
Mix up the following:
Mix this well, paint the inside of the mould with it, two coats, which makes the gelatine waterproof.
To make a cast, oil the inside of the mould with lard oil, put the plaster jacket around it, so that it fits perfectly, and tie the two pieces of the jacket firmly together to prevent a disaster when the plaster begins to heat in the mould.
Mix your plaster with ice-water for the same reason, and you will have no trouble. For irregular objects, the working of a gelatine mould is perfection itself. It yields gracefully in coming out of the undercuts and around corners, takes every detail perfectly, and in the jacket its shape is always the same. A careful operator can make from twenty to fifty copies of a cast in a single mould before its loss of sharpness necessitates its abandonment.
Casting Parts of Mammals in the Flesh.—Although it is usually impossible to carry more than ten or fifteen pounds of plaster into the field when you go off on a collecting trip, a quantity sufficient for a special purpose is often worth its weight in silver dollars. But many a fine subject comes entire to the laboratory, where the taxidermist can work his will upon it. If I have never done any other good thing in my life, I believe I have at least taught some of our best American taxidermists the usefulness and value of plaster casts taken from the flesh. It is only a few hours' work to make a mould and cast of the entire side of an animal as large as a large dog, or even a lion, and still less to take half the head, or the nose, a fore leg, or hind leg. Once we had an opportunity to cast the entire head of an immense bull moose, and right greedily did we seize it. The resultant cast has been of priceless value to us as an exact record of the form of a wonderful head. If you wish to do a fine piece of work, and have the animal in the flesh, by all means make a cast of one whole side of it. It will repay its cost ten times over. No record of form is equal to a cast, even though it be a poor one. I once made a mould of one entire side of the head of a large leopard in twenty minutes. It is about an hour's work to make a good mould of the entire head of a monkey, or two legs of a tiger.
The principles of this work have already been stated, and there is little more to be said. If the specimen is a large one, lay it upon the floor, build up around it with sand, or even wet sawdust, and arrange to take one side of the animal's head, or entire form, as the case may be. To take the two legs it will be necessary to first fill plaster under each one to make a separate[269] piece. In order to keep the plaster from sticking to the hair, fill the hair full of thick clay-water, or thin clay, and plaster it down with the pasty mass so that the plaster Paris will not run into it. Coat the whiskers and eyelids with warm wax, or fill them full of clay. Do this thoroughly, to save the hair and save trouble. A little hair will stick in the mould anyway, but when you take the mould off, work the animal slowly and carefully from the mould, perhaps pouring in a little water to facilitate matters.
Always make a waste mould in these cases, to save time. If your cast breaks in two while you are chiseling the mould off, go ahead more carefully, and when you are done, chip the broken edges at the back, wet them with water, and stick them together with plaster. Small casts can be stuck together with shellac. If your mould breaks in pieces while you are taking it off, don't be discouraged, but simply put the pieces together, back them up with more plaster, and come up smiling for the next round.
It is often necessary to cast skulls or teeth, to put in skins that are being mounted, though it is better to carve a skull out of soft wood.
Casting Fishes.—Fishes are easy and interesting subjects to cast.
Usually only one side is taken, and the cast is then mounted on a flat slab, or perhaps on two brass standards. The full method of procedure is as follows:
Wash off the mucus with alum-water. Put some dry alum on the side to be cast, to harden the soft edges of the fins, and make every scale stand out distinctly. Clean the fish carefully, close the mouth, adjust the eye and the gills. Lay the fish on its side, with the side to be cast uppermost. Take some modeling clay, beat it out, and roll it into a smooth, square cake with parallel sides. With a small wire cut a section of this cake, and place it under each fin, so that the fin will be held in position as in life.
To make a piece mould, make it in three pieces, thus: Put up a wall of clay around the head from the base of the dorsal fin to the base of the anal fin, keeping the clay wall a little distance away from the head and body. With plaster Paris fill[270] in the space thus left, up to the median line of the fish, but no higher.
With a knife work the plaster under the edge of the fish, and let it harden; then put two countersinks in each side. For the main piece, mix some dry color in enough plaster to coat the fish one-eighth of an inch thick, make it thin, and pour over with a spoon. When covered thinly, blow hard upon it, all over, to make it take the scales sharply; then put on enough more to make the colored coat an eighth of an inch thick. Let this harden, then put on the thick coat of white plaster, which is to be chiseled off, as this is supposed to be a waste mould. In making the cast, if it be possible make it before the mould gets dry, so that the latter will chisel off easily. Pour the mould nearly full of plaster, then set a piece of wood in at the back to afford a means of screwing the cast to a panel, or inserting standards. After the cast is made it must, of course, be carefully painted, which is another matter, and is treated elsewhere.
Casting Reptiles.—After all the detailed directions that have been already given on this subject it is not necessary to speak further of methods. Mr. Joseph Palmer, of the National Museum, has produced such pleasing and artistic representations of reptiles of all sorts, especially serpents and tortoises, it would seem that perfection in this line has been reached. His serpents are all on imitation rocks, trees, or earth, and in about all the attitudes they would assume in life. They are represented as crawling, sleeping, fighting, striking, and threatening. By the introduction of wires in the moulds while making the casts, they are made to act quite naturally. Of course they have been carefully and artistically painted, and half the credit for their beauty is therefore due to the colorist. Lizards of many species, large and small, and also tortoises and turtles of every American species, are thus represented with great success. This interesting collection is well worthy of study; but to the taxidermist who is not also a first-rate artist in oil colors, this method is beyond his powers.
It is really strange that so few American collectors are taught the scientific value of skeletons, and the need to collect them, especially when in the haunts of rare animals. While hundreds of collectors gather bird skins by the cord, perhaps not one out of the whole lot saves a rough skeleton. Any one who is wholly unaccustomed to the preparation of skeletons is apt to stand appalled at the thought of preparing one from the beginning; and, indeed, the final work of cleaning and mounting is no child's play. But let me assure you that, so far as the field work is concerned, you can easily become a successful collector of skeletons of all kinds, even though you may never learn to clean and mount one. All you have to do in the field is to "rough out" skeletons from the flesh, and dry them in compact bundles for shipment.
A Rough Skeleton of a mammal, bird, reptile, or fish, is simply the complete bony framework of the body, from which the most of the flesh has been cut away with a common knife, after which the skeleton and remaining flesh has been dried preparatory to its being, at some indefinite time in the future, taken in hand by a professional osteologist. The work of preparation on such specimens is very simple, and when once learned is easily performed.
Selection of Specimens.—When a choice is possible, select large and perfect adult male specimens as subjects to be skeletonized. The skeletons of young animals are always imperfect[272] in development, do not properly represent a species, and are seldom valuable except for comparison with other specimens of the same species. Very often a fine adult specimen has its skin so badly torn by shot or bullets, or the skin covering is in such a bad state of shedding, moulting, and the like, that the skin is totally unfit for preservation. In such a case the preservation of a fine perfect skeleton becomes a clear gain of one specimen to the collector and to science.
A perfect skeleton is one in which not a bone is missing, and in which no substitutions have been made. But it is by no means always possible to secure a wild animal without breaking some portion of its osteological anatomy. When a bone is broken, the best thing to do is to supply it with a corresponding bone from an animal of similar size and age. Sometimes the closet naturalist, who generally thinks that rare wild animals are gathered like berries, will grumble because a broken bone has thus been replaced, and find fault with the size of the substitute, but that need not trouble the collector's conscience in the least. I once shot a fine prong-horn antelope buck, skeletonized it carefully, cut up the skeleton, and carried the whole of it for three days attached to my saddle, while I rode a very restive and dangerous horse, and also carried two blankets and a Maynard rifle. That skeleton, thus earned, had some broken bones supplied from another specimen. It finally went to Europe, and fell into the hands of a closet naturalist, who blithely found fault with the collector because of the supplied bones. Again, when I once risked drowning in order to enter a cave on a dangerous sea-coast to collect guacharo birds, and got a goodly number, a German closet naturalist complained bitterly because a skin that was sent to him had two missing tail-feathers supplied by two other feathers that were a trifle smaller than the missing ones.
But I did once perform a feat in South America which filled the souls of my friends at Ward's with wonder, and even admiration. In collecting about half a dozen skeletons of capybara, each of which I took care should be absolutely perfect, by some brilliant man[oe]uvre I contrived to send home to the establishment one skeleton which was the happy possessor of two left forelegs and two left hind legs, but never a right one; and in[273] the language of the Old Testament, "his bones are there to this day!"
Skeletons of Mammals: Small Objects.—The smallest quadrupeds—such as bats, small rodents, shrews, and the like—should be eviscerated, and preserved in alcohol, without being skinned; but each specimen should be fully labeled. As a general thing it is best, for various reasons, not to dry such small carcasses.
For all mammals below the size of the Virginia deer, proceed as follows:
1. Remove the skin as expeditiously as possible, in order to have a fair show at the skeleton.
2. If the skeleton is smaller than a fox, leave the legs attached to the body, for convenience, until you have cut the flesh away from them with your scalpel or pocket-knife, without any disjointing. When all the legs have been thus roughly denuded of flesh, cut them loose from the body and lay aside for the moment.
3. If the specimen is larger than a fox, cut off the legs from the body, lay each one flat upon the ground, inside uppermost, divide the flesh all the way along it directly over the bones, and literally dissect the bones out of the mass of flesh, instead of cutting the flesh away piece by piece. This is the quickest and neatest way. The scapula must come off with the fore leg, and be left attached to the humerus. Be sure you cut off all the masses of flesh, but don't cut off the knee-pan, as you may easily do if you are not watchful.
4. Now for the carcass. Hold it on its back, begin at the breastbone, flake off the flesh from the sides of the body close down to the ribs, until the backbone is reached. Cut off as much flesh as you can (hurriedly) from along the backbone.
5. Next attack the abdomen. Beginning at the lower point of the breastbone, detach the walls of the abdomen from the ends of the short ribs, down to the lumbar vertebræ, and so on around the iliac margin of the pelvis. Cut through the diaphragm close up to where it is attached to the ribs, and remove at one effort the entrails and vital organs.
6. Cut away the flesh from the pelvis, both inside and out, and the flesh of the tenderloin from underneath the lumbar vertebræ.[274]
7. Cut the flesh from the thick portion of the tail.
8. Cut off the head at the first cervical vertebra, and clean the skull as previously described elsewhere, but leave the hyoid bone in its place.
9. Cut the flesh away from the neck vertebræ as well as you can. Be careful not to cut the sternum (or breastbone), which is soft cartilage, and easily cut; nor the ends of any vertebral processes, nor any soft bones.
10. If the skeleton is a small one, it is apt to get quite bloody during the operation. Wash it clean, and if necessary soak it in clear water for an hour or two. It will come all the whiter for it in the end. Skeletons of ruminant animals are generally clean enough without that.
11. Do not poison a rough skeleton with arsenical soap, nor put salt upon it; so says Mr. Lucas, the osteologist of the National Museum. The former has a tendency to prevent skeletons from properly macerating and coming white. Sprinkle dry arsenic upon a skeleton, if anything is necessary to protect it from Dermestes and other insects. Never put alum on a skeleton.
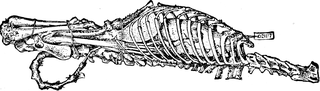 Fig. 66.—Rough Skeleton of a Small Animal. (After F.A. Lucas.)
12. The last thing is to make up the skeleton into a small, compact bundle, that will pack nicely and economically when dry, and withstand some pressure without breakage. Put the skull in the chest cavity. Fold up the upper joints of the legs, put the foot of each in the pelvis, and the other end in the cavity of the chest. Now tie all the legs tightly to the spinal column. (See Fig. 66.) Bend the tail under the pelvis and tie it fast also. Finally, hang the specimen up in the shade and wind, so that it will dry quickly.
It will be observed that the above process leaves the body of[275] the skeleton entire, and all the bones of each leg and foot united by their natural ligaments. A skeleton prepared thus may ultimately be mounted as a "ligamentary skeleton," or it may be disjointed throughout, macerated, and mounted as a "disarticulate skeleton." Except for skeletons of bison, elk, and other animals which are entirely too large to admit of transporting their bodies whole, it is much the best to prepare all others in the field as described above, and disarticulate some of them afterward; for this reduces to a minimum the chance of losing some of the parts.
Skeletons of Large Mammals.—The process of roughing out the skeletons of large mammals, no matter how large they may be, is precisely the same as described above for small ones; but to make it possible to transport and box them, they must be cut to pieces, or, I had better say, disjointed, for fear some zealous partisan might interpret my words too literally, and go at a valuable skeleton with an axe. And right here let me publish a law which is as fixed and unalterable as the laws of the Medes and Persians, and admits of no exception:
In disarticulating a large skeleton, no matter how large, an axe or hatchet must never be used for any purpose whatever. Use nothing but the knife, and in a few cases a small saw to separate the sternum from the ends of the ribs.
To come down to the details of cutting up a large skeleton in, the field, and making it up into a number of separate bundles, let us suppose that the skeleton lies before us, completely roughed out, in accordance with previous advice. The bones of each leg must be dislocated (at the "knees" in ruminant animals) either once or twice, so that the parts can be easily handled. In a full-grown elephant the leg bones are so large it is necessary to cut the ligaments at each joint, so that the scapula, humerus, radius and ulna, and foot may each be handled separately.
Of course, the head is to be cut off at the first cervical vertebra. Then, by careful work, and much coaxing with the sharp point of the knife, dislocate the spinal column just where the neck joins the body. At first this will bother you, but have patience and you will soon learn how to do it easily and quickly. In dislocating the spinal column, take hold of the neck, move it[276] backward and forward, and strain it a bit to see just where the articulating surfaces of the vertebral process are, so that you can cut them. When your intelligence has made some headway on the joint, then you may put forth a little main strength and tear the vertebræ apart, but do not attempt this too soon.
The next thing is to cut off the ribs, and the first step toward this is to cut out the sternum, or breastbone. (See Plate XX.) This so-called bone is really cartilage, soft enough in a fresh skeleton to cut on the outside, and in thin places, like cheese rind. It must be cut out in one piece, the same as may be seen in the figure of the mounted skeleton, and the dotted line A B shows where the cartilaginous ribs of the sternum join the bony ribs that form the main arch of the thorax. At the points marked by the dotted line, cut the two apart. I have never found it necessary to use a saw for this work in a perfectly fresh skeleton, but in dry ones a saw is necessary. When you come to the short, or "floating ribs," as they are called, it will be found that their cartilages are only attached weakly to the cartilages of the previous ribs, or else are altogether free. These must be cut from the ribs and preserved with great care.
After the ribs have been cut free from the sternum, separate them from the backbone, one by one, make them up into bundles, and tie them up. The pelvis is to be separated from the spinal column at the last lumbar vertebra; and if necessary the spinal column may be again dislocated about the middle.
Formerly it was my practice to poison all rough skeletons with a thin wash of arsenical soap, to make them dry without smelling badly, and to keep off the myriads of insects that the shreds of flesh would naturally attract. Now, however, in obedience to the mandates of Mr. Lucas, I have eschewed the use of arsenical soap for this purpose, and recommend the use of dry arsenic instead, which does not retard the cleaning of the bones.
Rough Skeletons of Birds.—As in the case of a small mammal, first remove the skin from the body; but if the identity of the bird is in doubt, leave the large tail feathers and the primaries in place, for future reference. In fact, it is a good plan to always leave the primaries and spurious quills on the wing, for then there will be no danger that some of the small bones[277] of the last joint will get lost or cut away by mistake. Moreover, when you come to tie up the skeleton, the primaries will afford valuable protection to the ribs.
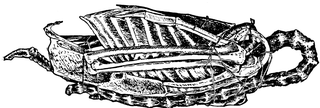 Fig. 67.—Rough Skeleton of a Bird. (After F.A. Lucas.)
With a bird, the entire skeleton should be roughed out before any disjointing is done, and even then none is necessary, save to cut off the legs of large birds, especially those with long legs. Study carefully the accompanying figure of a bird skeleton (Fig. 67), and then it will be hardly necessary to say more than to roughly, but carefully, cut off the flesh with a cartilage knife or scalpel, and remove all the viscera. Look out for those delicate little points on the neck vertebræ, and also be very careful not to cut off those curious little appendages (called uncinate processes) that project backward from the middle of each rib. Leave the hyoid bone in its place, and also the bony ring surrounding the eyeball of the great blue heron, the owl, and other birds of prey. If any portion of the windpipe reveals any bony structure, the entire windpipe should be saved. Whenever any tendons are found to be partly ossified, as they will certainly prove to be in the "drumstick" of your Thanksgiving turkey, leave them in place for the osteologist to do with as he pleases.
When in doubt about any special part, give the osteologist the benefit of the doubt by saving the special part for him.
If the bird is a large one, cut off the head, and after cleaning it pack it away in the chest cavity. If the bird is small, you can leave it attached to the neck, and remove the brain by bending the head down and cutting it half off from above, thus ex[278]posing the occipital opening at the back of the skull, through which the brain may be drawn out.
After the skeleton has been roughed out, it should always be cleaned by washing it in a basin of water and brushing it meanwhile with a soft tooth-brush. If blood is left on the skeleton, the bones will absorb it, and become permanently discolored thereby. The cleansing done, make the skeleton up into a compact bundle by folding the wings naturally against the body, bending the neck down in some way so that it can be tied upon the body, and either cutting off the legs and putting them into the thorax and pelvis, or leaving them on and folding them up as compactly as possible. Then tie the bundle up thoroughly by passing a light string many times around it, so that it can never lose its compactness. Sprinkle it with dry arsenic, or wash over with thin arsenical soap, and hang it up in the shade to dry.
Skeletons of Reptiles.—After all the foregoing directions, it surely is unnecessary to describe, in detail, the skeletonizing of reptiles. The principles are precisely the same as already set forth for birds and mammals. Wherever special bones or cartilages are found, as in the abdominal-cartilaginous ribs of crocodilians and certain lizards, they must be carefully saved whole and in situ. With large skeletons, take whatever means are necessary to get them, while fresh, into compact shape for drying and packing. With large crocodiles and alligators, the neck, legs, head, and tail all go nicely inside the body, as I have proved scores of times. The skeleton of a large serpent is easily done up in a close coil, by which it not only takes compact shape, but the ribs are well protected. With serpents, do not attempt to cut the flesh from between the ribs, for it is desirable that it should remain.
On each rib of a crocodilian there is a strange, flat piece of cartilage attached to the posterior edge at the middle of the rib, and projecting backward, quite overlapping the next rib, as sure as the world the reptilian development of what in the full-fledged bird becomes a bony uncinate process. You will soon discover this in skeletonizing your first crocodilian, and be sure to respect its anatomy.
It surely is superfluous to say that every skeleton must be carefully and fully labeled, and in a substantial way.[279]
Fishes.—This subject has been treated in Chapter IX. (Collecting Fishes).
Skeletonizing Cetaceans.—The rough skeleton of a cetacean—porpoise, blackfish, whale, and the like—is the bloodiest, greasiest, nastiest specimen the collector ever has to prepare. Nevertheless, they are necessary evils, and fortunately their structure is so simple that their roughing out is not a difficult matter. The vertebral column terminates in a point, there being no bones in the flukes of the tail, or the dorsal fin. The best way to operate is to split the body open along the middle of the back all the way from head to tail, and carve the flesh away until you reach the vertebral column, and after that the ribs.
The vertebral column must be cut in two in two or more places, according to its size. Midway between the last pair of ribs and the tail, and underneath the vertebral column, lie two very useless and absurd little ossifications known as the pelvic bones. They are called pelvic bones because that happens to be a handy name. They bear about as much resemblance to a genuine pelvis as a cigarette does to a locomotive. They are so small that it takes an expert with a search-warrant to find them, and, for my part, I always consider their loss a real gain to the cause of science. Of course the scapula and flipper, the ribs and the sternum, must each in turn be cut away, cleaned as well as possible, and bundled up to go with the head and the three sections of the vertebral column.
Packing Skeletons.—All rough skeletons, skulls, etc. (as well as all skins) must be thoroughly dry when packed, or they will sweat, soften up, smell offensively, and spoil any dry skins, or other perishable objects that may be packed with them. Skeletons should always be packed in tight boxes, so that rats and mice cannot get into them and gnaw the small bones. Tie some soft material over the teeth of separate skulls to save them from getting broken. Put the largest skeletons and skulls at the bottom, and use hay, straw, or excelsior for filling. Of course the small and fragile specimens will be put in the protected corners and crevices between the larger objects, and, as before remarked, dry skeletons that have been made up into compact bundles will stand a very considerable amount of pressure without breaking.[280]
Collecting Fossil Skeletons.—The vertebrate zoologist glories in the skeleton of almost any living species of vertebrate, but a fossil skeleton he fairly worships. The more of previous theories it upsets, the dearer it is. If it is a reptile with feathers on its tail, a bird with teeth, or a scientific what-is-it, as was the gigantic megatherium, it is simply canonized. Beware, then, red-handed hunter of living species, how you recklessly pass by a bit of bone protruding from a "cut bank" beside some stream, for you know not the day and the hour when you may touch elbows with His Mysterious Highness, the Missing Link.
The tertiary deposits of the United States contain the fossil remains of many magnificent vertebrates, impossible even to mention here. Very often huge bones and tusks of the mastodon are unearthed in well or ditch digging, and before they receive proper attention are exposed to the air and allowed to crumble into dust in a few hours. If a fossil bone is very soft when dug up, it will crumble in a short time unless properly cared for. If this is likely to be its fate, cover it up again without delay, to keep the air from it until you are ready to preserve it. To accomplish this, prepare a kettle of glue water (simply hot water with a little glue dissolved in it) and wrap the bone tightly from end to end with an abundance of twine. Then with a ladle or large spoon pour the glue water over the bone or tusk, gradually, but continuously, so that it will soak in, and when dry, it will bind together the weak material and form a hard shell of some thickness and protect the form of the bone intact. This will often save a fossil which would otherwise fall into countless tiny fragments in a few hours.
If a skeleton or portion thereof is embedded in a matrix of hard rock, do not attempt to work it out fully in the field. That is work for the laboratory—and a very good one at that, sometimes requiring costly tools, much skill, and plenty of time to chip away the surrounding rock.
Oftentimes the fossil remains of a fish, small reptile, or mammal are uncovered bodily by the removal of the slab of rock which has covered it for ages, like a blanket. In such cases do not attempt to pick the bones, one by one, out of their resting-place, but procure the necessary tools, cut out the entire[281] slab of rock which contains the skeleton, and keep it in one piece forever. Such specimens have a good market value in cash, which will well repay the care and labor bestowed upon them; but at the same time a novice should not make the very common mistake of supposing that a fossil which is new to him must necessarily be worth its weight in gold. If you wish to sell any good fossils, you will get a fair valuation by offering them to Professor Henry A. Ward, Rochester, N.Y.
There are two ways to clean the skeletons of large mammals: (1) by boiling the bones, and (2) by maceration. The first is short, cleanly, and agreeable; but the skeleton produced by it is sure to be full of grease, and is anything but white and pleasing to look upon when mounted. The boiling process is also detrimental to the texture of the bone. The professional osteologist, to whom a greasy bone in a mounted skeleton is an unpardonable offence, never thinks of boiling a skeleton to get the flesh off, for the reason that the grease is boiled into the bone instead of out of it. Cleaning by boiling is permissible only under exceptional circumstances. If you wish a particular skeleton for a special purpose within a very short time, or if you are so situated that macerating a skeleton is impossible then boiling is excusable, but steaming is far preferable.
Preparing a Skeleton for Maceration.—It is, of course, to be understood that it is only the skeletons that are too large to be scraped and mounted as "ligamentous skeletons" that are to be macerated, bleached, and afterward articulated with wire. The first thing to do is to cut out the sternum in one piece, as already shown in Plate XXI., poison it in arsenic water, and hang it away to dry and be scraped afterward. A sternum must never be macerated, for it is so soft the cartilaginous framework would be entirely destroyed. The skeleton must now be cut completely to pieces, excepting that it is not necessary to separate all the vertebræ of the spinal column. The ribs must be cut off, and the joints of the legs cut asunder. The large bones of the legs contain marrow, and of these bones each one must have a large hole drilled in each end on the face of the articulating surface, so that when mounted the holes will not show. These holes are to afford the water access to the interior of the bone.[283]
Macerating and Cleaning.—The maceration of a skeleton is a question of time as compared with eternity. Procure a wooden barrel or keg large enough to contain the entire skeleton, knock the head out and see that there are no nails, nor any other metal anywhere on the inside to stain and discolor the bones. Pack the skeleton closely in the empty barrel, fill it up with water and let it stand. In a few days its offence, like Othello's, "is rank, and smells to heaven." But that is no matter, provided your barrel has no neighbors. Let it stand for four months, six months, a year, or two years if need be, until every particle of fleshy matter on the bones has disintegrated and become a pulp. Keep the barrel covered, and when the water evaporates and the bones on top are about to be exposed, fill up with water and keep the bones always covered. If a skeleton is very bloody, it is well to soak it for a week in salt water to dissolve the blood-corpuscles. Then it may be macerated as directed above. The odor will be horrible, but if you are going to study bones you must not mind that.
When you find upon examining the bones that the flesh has totally disappeared from them, leaving them dark-colored or even black, but without any fleshy matter upon them, they are then to be taken out. Pour off the water, place the entire contents of the barrel in a large sieve-bottomed tray, and wash the bones thoroughly. When that has been done, put them in a large tub of boiling water, and keep them in warm water while you scrape all the bones, one by one, with your bone-scraper, and scrub them with a stiff brush, going over the entire surface, and washing them meanwhile in the warm water. The interior of each of the large leg bones must be washed out with a strong syringe, and every cavity in the vertebræ must be carefully scraped out.
Bleaching.—Having carefully scraped and washed the bones, the entire skeleton is now to be soaked for a short time, the length of time varying according to the size and age of the skeleton, in a solution of chloride of lime and water. To make this of the proper strength, dissolve about two or three ounces of chloride of lime in a barrel of water. Bones of young or immature animals must not be left in this solution as long as those of old specimens. Young bones are soft and porous, and[284] the chloride of lime will soon destroy them if they remain in it too long.
The following skeletons, adult in every case, require to be left in this solution a length of time as stated herewith: Dog, 6 hours; sheep, 6 hours; deer, 8; buffalo, 12; elephant, 12.
After removing the bones from this bath, wash them with clear water, lay them in slat-bottomed trays, with cheese-cloth above the slats, without piling one bone upon another, and expose them a number of days in the hot sun. After they have bleached on the upper side, turn them over. If it does not rain upon them occasionally, they should be sprinkled with water, late in the evening or early in the morning, to hasten the process.
Great care is necessary to keep the tiny carpal, tarsal, and phalangeal bones from getting lost. When the bones are white as chalk, or nearly so, tie the parts of each skeleton in a stout paper bag by itself, label it, and put it away until you are ready to mount it.
The sternum is to be soaked in clear water, with a little washing soda to cut the grease, until it is soft, and then scraped the same as the bones of a ligamentary skeleton, which process will be described in the next chapter.
The skeletons of small vertebrates should never be macerated previous to mounting, for the reason that their complete rearticulation would be a practical impossibility. The bones must be left united at the joints by their natural ligaments, which when dry become quite hard, and with the aid of either one or two small brass standards will hold the entire skeleton erect and in proper shape. Skeletons mounted thus, with the parts attached to each other by their own dried ligaments instead of wires, are called ligamentous, or ligamentary, skeletons. All mammals smaller than a large fox, all birds smaller than a small ostrich, all turtles, lizards, iguanas, serpents, crocodilians, and all fishes are mounted in this way. Fortunately it is possible to clean to perfect whiteness the skeletons of almost all these subjects without putting them through the maceration process, which resolves everything into its component parts.
Drying before Mounting.—In order to have a skeleton so that it will scrape to the best advantage and become as white as possible, every ligamentary skeleton must be dried before it is finally cleaned and mounted. In a perfectly fresh skeleton the epiphyses and ligaments are so soft the operator would find it hard to keep from destroying them with his keen-edged steel scrapers, and the smaller bones and cartilaginous members would also be in great danger of mutilation in the same way. When a skeleton dries, all these soft portions harden, and when afterward the skeleton is soaked in clear water for two or three days, or longer as may be necessary, the flesh quickly softens so that you can scrape it all away without encroaching on the framework, and the ligaments at the joints are just soft enough that a portion of it may be scraped or trimmed away, and yet leave sufficient to hold each joint together.[286]
Relaxing a Dry Skeleton.—As intimated above, this is accomplished simply by soaking the specimen in clear water until its joints are pliable, and the flesh upon the bones is soft enough to scrape off. In order that the specimen should not become offensive and disagreeable to work upon, it must not soak long enough for decomposition to set in, for that is the first stage of maceration. Therefore, scraping should begin just as soon as the flesh is soft enough to be readily removed.
 Fig. 68.—Steel Bone-scrapers.
Scraping a Ligamentary Skeleton.—The removal of the flesh and other animal matter from a small skeleton is accomplished by scraping the bones with various chisel-edged scrapers specially designed for this work, and by clipping and trimming on the joints with either curve-pointed or straight scissors. The principles to be learned in skeleton-scraping are comparatively few and simple. In the first place, a sufficient quantity of the connecting ligament at each joint must be left to hold the two bones together in proper shape when the specimen dries. This must not be left in a thick, unsightly mass, but requires to be scraped and trimmed down so that it is reduced to as small a quantity as will serve the purpose. In scraping the flesh off the main stem of a bone, such as the humerus, for example, always begin at the end and scrape toward the middle. The skeletons of turtles, lizards, and the like are an exception to this rule by reason of their structure, and should be scraped from the middle toward each end. If[287] you scrape from the middle of a mammalian or avian bone toward either end, before you are aware of it, you have loosened the attachment of the ligament, and have nothing left to hold the joint together. By beginning on the ligament itself, and working away from it, you can scrape it down so thin at the point of attachment that its identity is quite lost, and the point where it ends is hardly visible. This principle applies to the scraping of all ligamentary skeletons, except a few reptiles.
In cleaning bird skeletons beware of injuring the little tack like points which project downward from each of the cervical vertebræ. Have a care also for the soft bones of the coccyx, and the uncinate process which projects backward from the posterior edge of each rib. In fishes the greatest difficulty lies in leaving the ribs attached to the remainder of the skeleton, for if the operator is at all as the writer used to be in the days of his youth, he will be prone to scrape some of the ribs loose, and be obliged to glue them in place in the dry skeleton, with glue and cotton batting that has been clipped up finely with a sharp pair of scissors.
While a small skeleton is undergoing the scraping process it must not be allowed to get dry until it is finally set up in position. When the skeleton is not being worked upon, it must be kept soaking in clean water; but remember that this cannot go on very long, or maceration will set in, the ligaments will give way, and the bones will all come apart. A little borax in the water serves to arrest decomposition, and will allow a skeleton to remain soaking for several days longer than could otherwise be allowed. After a skeleton has been well scraped, in order to get it as white as possible and free from grease, it must be treated with
Keep this on hand in a glass-stoppered jar, in the dark. In using it, draw off a small quantity in a broad, shallow, earthen dish. Lay every small skeleton in it, and with a soft tooth-brush of the right size, brush all the bones thoroughly for about five minutes. At the end of that process wash the skele[288]ton thoroughly with clear water, and perhaps it is then ready to mount.
Often the bones of a small skeleton contain an inordinate amount of grease. The easiest and simplest way to remove it is to soak the greasy bones for several days or weeks, as may be necessary, in a jar of pure naphtha.
Mounting a Small Skeleton.—The skeleton of every bird, mammal, and reptile requires to have the spinal cord replaced by a stout zinc wire, to give both strength and rigidity to the structure. Zinc wire is necessary because iron wire will rust, and brass wire is too expensive to use when something cheaper and better is obtainable. If you cannot procure zinc wire, use good galvanized iron wire. For very large specimens you may use iron wire, but it must be covered with two coats of asphaltum, applied with a brush, like black paint. After inserting the wire the full length of the cavity of the spinal cord, leave enough of the end protruding beyond the first vertebra of the neck to afford a means for the attachment of the skull. The extra length to be allowed should always be nearly equal to the lateral depth of the brain cavity.
Attitude.—It is often somewhat difficult to decide upon the attitude the skeleton is to have when finished. The possibilities in this line are extensive, and the result depends entirely upon the character of the subject, and the knowledge and good taste of the operator. In the first place, the position of the skeleton must be a correct representation of some characteristic attitude of the species. For example, a sloth skeleton should hang underneath a branch; a monkey should be climbing, or walking on a stout bough; a hyena should sneak and crouch; a passerine bird should always perch, while the penguins and the auks must stand erect on flat pedestals. If the young osteologist can do so, it will pay him well to travel several hundred miles, if need be, to see the beautiful, and even elegant, collection of skeletons and other preparations in Mr. F.A. Lucas's Department of Comparative Anatomy in the National Museum, all of the specimens in which have been prepared, mounted and displayed by Mr. Lucas and his assistant, Mr. Joseph W. Schollick. I know of no other osteological collection which in the beauty and scientific accuracy of mounting, and exhibition arrangement of its specimens, can be considered equal to this.[289] The museum-builder may well consider it a model of its kind. Every skeleton, from that of a tiny humming-bird to a whale forty-eight feet long, is as nearly perfect as human skill can make it, and the variety of the characteristic attitudes represented in the smaller species makes this collection a particularly attractive one.
Process with Mammals.—We will assume that the skeleton has been carefully scraped, and is now ready for mounting. The successive steps in this work from start to finish are about as follows:
1. In case the skeleton has been dried after scraping, as is often done, it must be soaked in clear water until the ligaments are relaxed.
2. Cut a zinc or galvanized iron wire of the right length and size to replace the spinal marrow, and long enough that the upper end of it will project beyond the axis into the brain cavity of the skull. Sharpen one end of this wire so that you can force it well down into the sacrum, and insert it in its place in the spinal column.
3. Bend the vertebral column to its permanent shape. In doing this, draw the sternum well forward so that the ribs will spread out, and show a chest cavity of the right size for inflated lungs. If you are not careful in this regard, the chest cavity will be too narrow.
4. Hang the body in a frame made of light strips of wood, as shown in the accompanying plate. Let the body hang at just the right height from the pedestal to receive the legs (Plate XX.).
5. Space the ribs carefully by starting a thread from the neck, and taking a turn around each rib from the first to the last, finally making fast the remaining end of the thread to one of the lumbar vertebræ.
6. Put on each hind leg by drilling a small hole straight through the head of the femur and the socket of the pelvis (innominate bone), through which a small brass wire is to be passed and clinched down closely at each end, to hold the head of the femur firmly in place.
7. Place each leg in the attitude chosen for it, plant the foot[290] according to its osteological character, and pin each toe in its proper place, as shown in the accompanying plate. The leg must be held in place by attaching threads to it, and making them fast to the various parts of the gallows.
8. In putting on the foreleg, the position of the scapula must be defined with accuracy, in order to avoid placing it too low or too high, and thus making an incorrect representation of the height of the animal. Bear in mind that the scapula never lies prone upon the ribs, but is separated from them by a cushion of muscle. It is therefore necessary to leave a certain space between ribs and scapula.
9. Next cut two stiff brass wires of the proper length for the two standards that must support the skeleton (see A A and B B in Plate XX.). To make the U-shaped fork at the upper end of each standard, to clasp the vertebral column, heat one end of the rod red-hot, and plunge it into cold water, which softens the metal. Now put it in a vise, and with a hack-saw split the rod down the middle as far from the end as necessary. Finish neatly by rounding off the ends with a fine file, and bending them in shape with the pliers. The lower end must have a thread cut on it an inch or so in length, a neat brass "rosette" screwed upon it (R) to do duty on the top of the pedestal, and a small brass nut made to screw on underneath the pedestal, to hold the standard firmly upright. These standards need not be put in place under the skeleton until it is mounted finally on its handsomely polished, permanent exhibition pedestal.
10. Mr. Lucas has two methods for attaching a small skull to the skeleton. One is to cut a piece of cork to fit snugly in the occipital hole of the skull (foramen magnum), then pierce a hole through its centre, and fit it tightly on the projecting end of the vertebral wire, close up to the first cervical vertebra (the axis). The cork thus becomes stationary, and the skull may be put in place and removed at will.
The other method is to place the skull exactly in position on the skeleton, fitting it closely to the axis. Then drill a small hole through each side of the axis in such a manner that in its passage from top to bottom the drill will also pass through the occipital condyle of the skull. By fitting a wire through each of these holes the skull will be held fast in position so long as[291] the skeleton remains in its place, right side up. If the skeleton is to be packed for shipment, the skull (unless it be very small and light) must be taken off, wrapped, and packed separately for safety in transit.
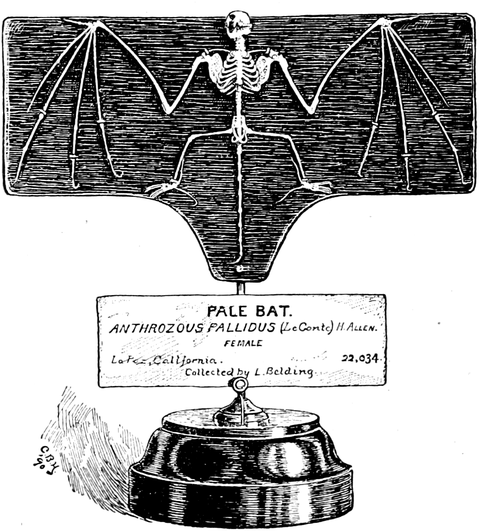 Fig. 69.—Skeleton of a Bat, as exhibited by Mr. Lucas.
11. If any bones have been broken, they must now be repaired, either by gluing them together, or by joining with a short wire fitted into the axis of each piece, and the missing particles of bone may be restored by a filling of best sinew glue mixed with plaster Paris into a paste, and applied hot, so that it will adhere. As it cools it can be shaped properly, and when thoroughly dry and hard, its surface must be dressed down with a fine file and sand-paper until the form of the bone is once more perfect. This is work which very often calls for considerable skill in the operator, but the process itself is a very simple one.
If ligaments are missing and a small bone is completely detached, it should be put on as follows: Procure some fine cotton[292] batting, cut it up very finely with the scissors, then apply some hot glue to the joint, lay a bit of clipped cotton upon it, and work it into the glue so that when dry it will form a false ligament and hold the bone firmly in its place without attracting any attention to the fact that the ligament has been made for the occasion.
12. Finally, transfer each skeleton to its permanent pedestal, which we will assume has been prepared while the specimen has been drying. Mr. Lucas puts all his small skeletons on handsome ebonized pedestals, which are the thing par excellence. The limbs for his climbing animals, and the thin, black boards for his bat skeletons are also ebonized. The illustration on page 291 (Fig. 69) shows one of his bat skeletons complete, as it stands in its case, bearing a label of black letters on an olive-gray card, with no ornamentation. In the final mounting the standards are put in place, and the upper end of each fitted fast to the backbone. Each toe is fixed firmly in its place, and held down by the bent-over end of a headless pin, or by having a pin put through it, and cut off close down to the bone.
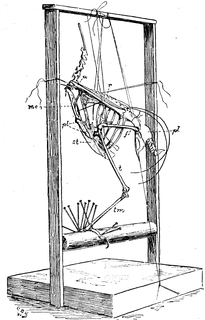 Fig. 70.—Skeleton of a Bird Mounted and Drying.
Cautions and Exceptions.—It is only the tiny skeletons, such[293] as mice, shrews, small squirrels, and the like, that can safely be mounted without standards. To be sure, a large cat skeleton can be mounted on its own legs, without any standards, and so can a man drink a pint of bad whiskey; but in each case the falling from grace will be in about the same degree, if not the same in kind also. In long-continued moist weather, ligaments are apt to soften and let large unsupported skeletons come down, without neatness, but plenty of despatch.
Birds.—The foregoing principles, which have been described in detail for small mammals, apply so fully and with such complete general similarity to birds, that it is only necessary to add the two accompanying illustrations.
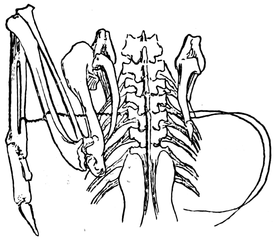 Fig. 71.—Wiring a Skeleton Wing.
Reptiles.—Serpents.—The skeletons of serpents should always be scraped and mounted as ligamentary specimens, and not macerated. The skeleton should be supported on from three to five low brass standards clasping the vertebral column at proper intervals, the body curved naturally, and the ribs spread out and spaced evenly as in life, according to the curves of the body. The skeleton looks best when placed low down on the pedestal. The ribs must be spaced with threads where the ligaments are soft, but when dry require no wires. The skeleton may be mounted in any life-like attitude, either coiled or in motion.
Lizards.—Small species are to be treated the same as small mammals.
Crocodiles and Alligators.—It is best that all saurian skeletons, even the largest, should be scraped and mounted without maceration, on account of the elaborate cartilaginous sternum and false ribs. The head requires a special standard, and the tail requires a pair, while the tip of the latter is to be pinned down with a wire. Of course the feet must rest down on the pedestal as in life. One thing which would greatly enhance the scientific value of every crocodile and alligator skeleton would[294] be the preparation and display, in its proper place, of one side of the skin of the back with its wonderful shield of bony plates nicely articulated together. This remarkable covering of the vital organs seems to have been specially designed to ward off glancing bullets, and it has saved the lives of thousands of crocodilians. (Of course this shield is not proof against a bullet fired squarely against it.) So far, all collectors and osteologists have ignored this remarkable feature of the saurians, but it should have the attention it deserves.
 Fig. 72.—Skeleton of Turtle, as Exhibited.
Turtles and Tortoises.—The skeleton of a tortoise, if mounted on its feet in a life-like attitude, has the best part of its anatomy concealed by its shell. This difficulty Mr. Lucas meets occasionally by sawing out and laying back one-half the carapace, to expose the interior. The commonest method, however, is that shown in the accompanying illustration (Fig. 72), which is self-explanatory. The plastron is hinged at one side, furnished with a latch, and opens like a door. The skeleton is mounted on a single standard, which is split at the upper end like a Y, the arms bent to fit the curvature of the shell, and riveted to the carapace. Each leg is held in place by a small wire attached to the shell at its edge.
Fishes.—There is nothing in the mounting of fish skeletons that has not been fully described in the foregoing pages. Of[295] course fish skeletons are never macerated, but must be scraped and mounted with their natural ligaments in place. Each skeleton requires two brass standards, one clasping the vertebral column close to the tail, the other near the head. A very long fish, or one with a large skull, requires three standards, one for the skull and one for the middle of the body. Where only two are used for a large fish, the head requires to be supported by a wire running from the centre of the backbone.
It will be well for anyone who intends to mount a large skeleton, if he has not already a fair knowledge of osteology, to take some book which contains a description of the skeleton, for example, of the domestic cow, and familiarize himself with the names of the various bones and the different anatomical terms used in describing them. In fact it is next to impossible to describe the process of mounting a skeleton without making use of quite an array of technical terms.
In order to make our description of this intricate process as clear as possible, we will choose as our typical subject the skeleton of an American bison, and go through with it in detail, aided by an abundant supply of illustrations. We of course assume that the macerating, cleaning, and bleaching has been done.
In mounting a disarticulated skeleton, begin with the vertebral column as the key to the situation. It is, in point of fact, the keel upon which the whole structure is to be built. The vertebræ should be arranged, each in its place, and, then they should be numbered with pen and ink on the anterior articulating surface of the body of each one, beginning with the first vertebra in front of the sacrum. This vertebra (the last lumbar) should be marked No. 1, the next in front No. 2, and so on to the axis.
The next step consists in boring two holes through the sacrum from its under surface (Fig. 73, a, a) to its anterior articulating surface (b, b), and these holes should be continued on through the body of each of the succeeding vertebrae to the axis. They should come out underneath that vertebra (the axis), where the wires which pass through all these holes are afterward to be[297] twisted together. The holes should be somewhat larger than the brass wires which are to pass through them.
It is necessary to mark the place for starting the drill into the posterior surface of each vertebra by fitting two articulating surfaces together, and passing the drill through the holes already made. The points at which the drill should come out on the anterior surface of a vertebra should be marked with a lead pencil. The beginner will find some difficulty in making the drill come through at precisely the right spot. The greatest difficulty will be experienced in getting these holes through the cervical vertebrae.
When the axis is reached, bore the holes so that they will come out underneath, about half way between each extremity of the vertebra, and about three-fourths of an inch apart.
It is just as well to now bore the holes through which the wires which fasten the axis and atlas together are to pass, though these need not be actually united until the remainder of the spinal column has been, articulated. The wires uniting the atlas and axis are smaller than those passing through the spinal column. The holes for these wires are made by boring two of them through each of the two surfaces by which the axis articulates with the atlas. These holes should come out underneath the axis. Then, placing the axis and atlas together, mark on the atlas the places through which the holes are to pass by running the drill through each of the holes already made.
The next thing to be done is to cut pieces of artificial cartilage, called "buffle," to fit the posterior articulating surface of the body of each vertebra, and each piece should be fastened to the vertebra to which it belongs by a small wire nail through its centre. The holes in each vertebra should be continued straight on through the false cartilage. Now cut a brass wire three times the length of the spinal column, double it, pull it straight, pass the two ends through the sacrum, and so on forward through all the vertebræ.
When the vertebræ have all been strung on the two wires and tightened up, it will be seen that the spinal column assumes a curve approximating very nearly to the natural one. Mark this curve with chalk on a table or a board.[298]
Unstring the vertebræ from the wire. Then take a square rod of iron, a foot or so longer than the spinal column, and over which each of the vertebra will fit easily. Have the blacksmith flatten out one end into a sort of spear, so that it will fit snugly in the spinal canal of the sacrum (Fig. 73, c).
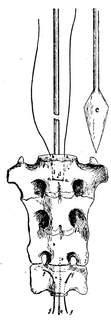 Fig. 73.—The Sacrum and Spinal Rod.
Drill a hole through the under surface of the sacrum, and on through the iron rod: Into this a brass pin is to be fitted at d. Bend the iron rod to correspond exactly with the curve previously marked with chalk on the board. Paint the rod black, and when it has dried place it again in the sacrum, drive in the brass pin, leaving enough of the end exposed to be seized with a pair of pliers and pulled out if desired. Now string the vertebræ over the rod and wires. If all fit properly they can then be unstrung preparatory to attaching the ribs to them.
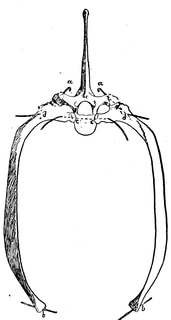 Fig. 74.—The Attachment of the Ribs to a Vertebra.
Each rib should have a hole bored through its lower end at the middle, to come out on the inner surface (Fig. 74, b, b). Through these holes wires are to pass, as seen in the accompanying figure, and to these wires the sternum is presently to be attached.
Having arranged the ribs so that you know the place of each, take the first pair, and the first dorsal vertebra to which this pair attaches. Bore a hole with the drilling machine through the rib, beginning at the centre of the articular surface of the tubercle of the rib, directing the drill so that it will come out on the under side (Fig. 74, c, c); then drill a hole through the head of the rib (d, d). Now fit the rib to the vertebra, and with a small awl,[299] a sharp-pointed wire, or drill, mark, through the holes already made, the points on the articular surface of the vertebra through which the holes should be drilled (a, a). Bore similar holes through the rib of the opposite side, then through the vertebra at the points marked, and the wire will pass through as in the figure.
Continue this same process for the remaining ribs. It will be found, however, that the process of carrying a single wire through the heads of both ribs and the anterior portion of the body of the vertebra cannot be continued with all. In the last of the dorsal vertebrae the wires will have to be put through the head of the rib and the pedicles of the vertebrae into the neural canal.
Make a loop on the end of each wire, as at a, a, Fig. 74, and put the ribs on each vertebra as they belong, having only one end of the wire—the one on which is made a double loop—pulled up snugly. The other end of the wire should be left a few inches in length, but bent slightly close to the rib, to hold the latter in place.
The innominate bones should be attached to the sacrum either by two brass bolts, one passing through each side at about the middle of the articular surfaces between the sacrum and each ilium, or by passing a heavy double wire through each of these places. Before tightening permanently, apply "plaster-glue" (the mixture of glue and plaster Paris already described) to the articular surfaces between the sacrum and ilia, thus when dry making the pelvis firm.
Now that the ribs are attached to the vertebræ, and the innominate bones to the sacrum, proceed to string the vertebræ again on the wires and rod. The atlas can now be attached to the axis by passing wires through the holes previously made, after which the wires are to be twisted firmly together.
When all the vertebræ with their ribs attached have been put in place, hang the backbone to a framework similar to that used for suspending the alligator (Plate XIV.), or, what is much better, to the ceiling, by two small ropes attached at the neck and pelvis.
With the pliers now twist tightly together the wires under[300] the axis, then take a screw-driver and work between each pair of vertebrae from underneath, beginning with the last lumbar, and prying back toward the sacrum. By the time you have reached the axis a considerable space will have been gained. Shorten the wires by twisting them, and continue this process until the vertebrae all fit snugly together, and are tight one against the other.
 Fig. 76.—Middle Joint of the Hind Leg.
The next step is to put on the sternum, which has been soaked in water containing a little washing soda, and thus made flexible. Of course it has been previously cleaned by the scraping process. A hole should be bored through the end of each sternal rib, coming out on the inner surface. The sternum is suspended temporarily by strings attached to the vertebral column, and the single wires that have previously been placed through the end of each rib are now run, one by one, through the end of the sternal rib it is to support.
Now space the ribs temporarily with a string that will hold each one of them exactly in its place. Having done this, two brass wires can now be used to hold the ribs permanently in place, running them on each side from the inferior process of the last cervical vertebræ to the transverse process of some one of the lumbar vertebra, or to the pelvis. What is much better for a large skeleton, because it is both firmer and more elegant, is a long, narrow strip of polished brass on the inside, bent carefully to fit the curve of the ribs, and fastened by a brass pin through each rib, the posterior end of the brass strip being attached to a transverse process of one of the lumbar vertebræ (see Plate XXI.). After this has been done, each rib can then be permanently fastened at top and bottom by making the loop and cutting off the long end of each wire.
 Fig. 76.—Middle Joint of Hind Leg: Rear View.
The next step is to put on the tail. A hole should have been bored into the middle of the articular surface of the posterior end of the sacrum, and on each side a little hole coming out below (see Fig. 73). The large middle wire (e, e) should be of[301] stiff brass, and extend through the entire length of the tail, the tapering end being filed small so that the small vertebræ can fit over it. The small side wires of soft brass (f, f) should only extend through a few of the larger tail vertebræ, and are for making things firm.
 Fig. 77.—Bones of the Foot: Side View.
To articulate the bones of the hind leg, first arrange them so as to know the precise place of each. Take first the tarsal and metatarsal bones. In articulating these it is necessary for one to use his judgment largely, and put wires through so as to make the joint firm. Bore holes through the astragalus and os calcis (Fig. 75, a, a) so as to put a double wire through these and hold them together firmly. Next send two strong double wires through these and through the other tarsal bones, and bring them out on the posterior surface of the metatarsal or canon bone (c and d).
 Fig. 78.—Bones of the Foot: Rear View.
Next articulate the bones of the feet. This is very simply done by passing a single heavy wire through the lower end of each half of the canon bone to each set of phalanges, making a loop at each end of the wire (see Figs. 77 and 78). In large skeletons it will frequently be found necessary to further strengthen the articulations of the phalanges by means of brass pins, as shown in the figure at a. The sesamoids are fastened on by two stiff brass pins through each at b.
The femur and tibia can be fastened together by a double brass wire passing through each condyle of the femur, and through each side of the head of the tibia, or,[302] what is better, a strip of brass set into the middle of the joint, and fastened firmly by two stout brass pins driven transversely through from side to side, as indicated in Fig. 79.
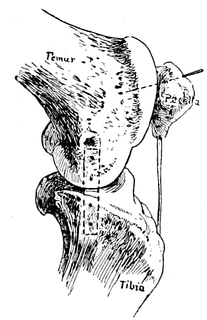 Fig. 79.—The Knee-Joint.
The patella is fastened on by passing a wire through it and twisting it, or erecting it on a small strip of brass set into the tubercle of the tibia. The joint is further strengthened by putting a brass pin through the patella into the end of the femur.
The tibia is articulated to the lower portion of the leg, or, more properly, the pes, by putting stiff wire pins into it. The femur is articulated to the pelvis by a brass bolt. The front foot is articulated on the same principles as the hind foot.
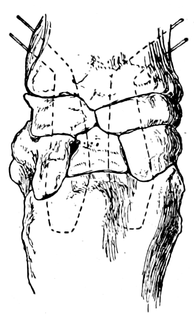 Fig. 80.—Front View of Knee-Joint.
In articulating the knee-joint, as it is called, send two heavy wires through, letting them come out on the posterior surface of the radius and metacarpal bone, and insert two wire pins diagonally through the joint, as shown in Fig. 81. The scapula is fastened to the humerus by brass pins. The humerus, radius, and ulna are also fastened by brass pins, three in number.
 Fig. 81.—Elbow Joint: Front View.
The scapula is attached to the body by two brass bolts attached to the ribs. Sections of spiral spring wire or pieces of brass tube are placed on the bolts between the scapula and the ribs, to hold the former off the latter the same distance as when the flesh surrounding the scapula was all present. As to the position of the legs, the operator must use his own judgment. It is of course to be understood that the attitude of the legs has been decided upon before their articulation began, and that the work of wiring together has been carried out in accordance with this plan. It is hard to do more with a large skeleton[303] than to place the legs in an easy walking attitude, of which the buffalo skeleton already figured may fairly be taken as a model.
The rod extending through the spinal canal is cut off so that the head will hang on it properly. Two brass pins are passed through the atlas, one into each occipital condyle. Two iron rods, with lacquered brass shoulders, are used to support the skeleton, as shown in the figure. These rods should be painted black.
The lower jaw is fastened to the skull by means of brass spiral spring wire, which permits it to be moved freely up and down by any one who is studying the animal's dentition.
The method of mounting any large disarticulated skeleton of a quadruped is essentially the same as that described for the buffalo, the principle variation occurring in the feet. In articulating the feet of a wolf, for example, the method of wiring the tarsal bones, carpal bones, metatarsals, metacarpals, and the phalanges, is very similar to that described for the buffalo, but the workman must here also depend largely on his own ingenuity. A single wire passes through the phalanges of each digit, and two sesamoids are fastened on by a single wire.
Where the digits are more than two in number, a wire is passed transversely through the lower ends of the metacarpals and metatarsals, and on this are placed short pieces of fine coiled brass spring, to hold the digits at proper distances from one another.
The tools used in mounting large skeletons are by no means so numerous or costly that any one need be deterred from trying his hand at practical osteology on the score of facilities or the lack of them. Of course the complete outfit of a professional osteologist includes an extensive array of tools, some of which are rather costly. The most important item is a good drilling machine, chuck and lathe, to work by foot-power. This can be procured of Goodnow & Wightman, of Boston, and in ordering it will be necessary to have a 1/4-inch hole drilled through the centre of the axle, to receive the long, steel drills of various sizes that are to drill the many holes required in the various bones.
The amateur who can not afford an expensive plant and a first-class drilling machine, can get along very well with a Millers' Falls hand-drill and a good assortment of first-class steel drills to fit it. I once saw an old German anatomist mount a cow skeleton for a Western college with hardly more tools than I could hold in one hand—but, of course, that skeleton was not mounted à la Lucas, by a considerable difference.[306]
It is estimated that four-fifths of the species comprised within the animal kingdom belong to the class of the Insecta. Fully one hundred and seventy-five thousand species of insects have already been named and described. Nevertheless vast territories teeming with insect life have been as yet only very imperfectly explored. The life-history and habits of only a few thousands of species have as yet been accurately investigated. There remains, therefore, a broad field for discovery and research in this portion of the animal creation.
Many insects are polygoneutic, that is, the species is represented by two or more annual broods, or generations, and thousands of individuals may, by careful treatment, be reared from the eggs of a single female. In the case of the higher animals the development and multiplication of individuals takes place but slowly, and it is obvious, therefore, that there is in the domain of insect life a far more convenient field for the investigation of the great problems of variation in animal forms, than among the vertebrate animals. Aberrant forms are not uncommon, especially among butterflies and moths, and are worthy of careful study. The various broods often present great and striking differences. The phenomena of seasonal and sexual[307] dimorphism are nowhere more clearly developed than among the lepidoptera. Hybridization also often takes place between allied species of insects, especially in the case of the bombycid moths, and it is possible for the skilful entomologist to conduct investigations in this interesting department of inquiry with almost as much freedom and success as have attended the labors of the botanist in the domain of plant life.
The economic importance of the study of entomology can scarcely be overestimated. Some of the best friends of the agriculturist, as well as multitudes of his worst enemies, are found among the insects. The silkworm, the cochineal insect, and the bee have aided in the accumulation of many fortunes, and their culture has provided employment for millions of human beings. On the other hand, property worth millions of dollars is annually destroyed by insect ravages. It has been asserted by competent authorities that the depredations of the Codling moth (Carpocapsa Pomonella) have resulted, in a single year, within the limits of the State of Pennsylvania alone, in the destruction of fruit worth over a million of dollars, and the terrible Phylloxera at one time threatened the total overthrow of viticulture in Southern Europe.
Various schemes have been proposed for the classification of insects, and there is as yet only partial agreement among students upon this subject.
Insects belong to that great group of animals designated by zoologists as the Arthropoda. As a means of assisting to a better understanding of the practical hints and suggestions which follow, a sketch of the classification of the Arthropoda is here given.
Animals possessing an external skeleton composed of chitinous rings, or somites, and provided with articulated limbs.
Ceratophora.
Acerata.
The Egg.—The Arthropoda are developed from eggs. The eggs of these animals are often exceedingly curious in form and remarkable in color. The eggs of insects are generally deposited upon those substances upon which the animal feeds during its larval or rudimentary stage of existence. They are most frequently found attached to the leaves and twigs of plants and trees. Some insects are carnivorous as larvæ, and deposit their eggs upon dead animal matter, or even, as the ichneumon-flies and other parasitic forms, upon the tissues of living animals. Some lay their eggs upon decaying wood, or upon the ordure of animals. Some deposit their eggs in water. The female of some of the myriapoda deposits her eggs in a mass under the bark of decaying trees, and, coiling up about them, apparently guards them with maternal instinct until they are hatched. The spawn of many of the crustacea is carried about by the female, attached in masses to the lower surface of the body. The eggs of some insects, as the cockroach and the mantis, are deposited in masses concealed within cases, and so united as to appear to form composite or multiple eggs. These are conspicuous objects. A similar arrangement is found in the case of the ova of Hydrophilus and allied aquatic Coleoptera. The eggs of the mosquito are deposited upon the surface of the water in small, boat-shaped masses, composed of from fifty to one hundred ova. The eggs of the Lepidoptera, which are generally deposited upon the leaves and blossoms of trees and plants, are not difficult to find, and have been more carefully observed and described than those of other orders. By confining impregnated females of many species of butterflies and moths in nets of gauze drawn over the branches of the[310] food-plant, it is often possible to obtain their eggs in considerable numbers. The insects thus confined should be supplied with food and drink. This may be done by sprinkling upon the leaves water sweetened with sugar, or preferably honey. The females of many of the bombycid moths and hawk-moths will lay freely, if enclosed in a dark box, without the presence of the food-plant. When eggs are found and their parentage is unknown, a few should be preserved as hereafter described, and the remainder should be retained and kept until they have been hatched and the perfect insect has been reared therefrom. Insect eggs may often be obtained by dissecting the gravid female, but it is always preferable to obtain them, if possible, after oviposition has taken place, since in many cases the color of the egg in the oviduct is somewhat different from what it is after having been laid.
The eggs of insects may be deprived of their vitality by immersion in alcohol or by exposure to heat. The albumen of ova coagulates at 160° F., and the temperature of the egg should not be raised above 175°. They are best killed by being placed in the stove used for drying the skins of larvæ, which is described on page 315. It is better to kill by means of a gentle heat than by immersion in alcohol, as by the latter process a change in color is sometimes produced. After they have been deprived of their vitality they may be preserved in small phials in dilute glycerine, or, if this cannot be had, in a solution of common salt. The phials should be kept tightly corked, and should be numbered by a label, written in lead pencil and placed within the bottle, to correspond with the note made in the collector's note-book giving an account of the place of discovery, the food-plant, the date when found, and the name of the insect which deposited them, if known. In the latter case it is best to put the name of the insect in the phial with the number. Unless insect eggs are preserved in a fluid they are apt in many cases to shrivel with the lapse of time and become distorted, through the drying up of their contents, which, on account of their small size, it is impossible to void. The shell of some eggs is often very neatly voided by the escape of the larva, but there is generally a large orifice left, the color is frequently materially altered, and great vigilance in securing[311] the shell must be exercised, as the young larvæ of many species have the curious habit of whetting their appetites for future meals by turning about, as soon as they have been hatched, and eating the shell which they have just left.
The eggs of insects are best mounted in the form of microscopic slides in glycerine jelly contained in cells of appropriate depth and diameter. It is well to mount several upon the same slide, exhibiting the lateral as well as the terminal aspect of the eggs. At the upper end of all insect eggs there are one or more curious structures, known as micropyles (little doors), through which the spermatozoa of the male find ingress and they are fertilized. The peculiar, and often very beautiful, features of this part of the egg are, in a well-mounted specimen, exposed to view. In some cases it is advisable to slice off the end of the egg with the micropyle and mount it microscopically. The best display of this curious structure is thus often obtained.
The slides should be kept in a cabinet arranged in shallow trays. They should be accurately named, and have references to a book into which, from time to time, should be carefully transcribed from the field-book the observations of the collector, or his assistants and correspondents. Such a collection of insect ova is not only valuable but intensely interesting.
The Larva.—By reference to the table of the classification of the Arthropoda, given in Chapter XL., it will be observed that the Insecta are broadly divisible into two groups, the Heterometabola and the Metabola. The animals classified in the first group do not undergo metamorphosis in the development from the egg to the perfect insect to the same extent and in the same manner as the Metabola. In this respect the Peripatidea, the Myriapoda, and the various classes included under the Acerata agree with them. The young myriapod and the young spider are found immediately after they have emerged from the egg to present most of the features of the mature insect, and so also the immature grasshopper and squash-bug resemble the perfect insect in nearly everything but size and the absence of fully developed wings. In preparing a suite of specimens of these insects, designed to illustrate their life-history, the directions which are given for the preparation of the imago apply[312] equally well to the larva. It is simply necessary, for instance, in preparing a series of specimens of the Rocky Mountain Locust, to make sure that a specimen representing the creature after each successive moult has been secured, and these are mounted upon pins, and treated exactly as specimens of the adult insect are treated. Be careful not to pin, however, too soon after the moult.
In the case of many of the Coleoptera, and of all the Metabola the work of the collector is rendered far more laborious, for these pass from the egg into vermiform larvæ, which undergo in some cases many moults, are then transformed into pupæ, which are either naked or contained in a protecting envelope known as the cocoon, and then finally, after a longer or shorter period in the pupal state, are transformed into the perfect insect.
The student and collector, if intending to benefit science by their efforts, dare not neglect these rudimentary forms.
The larvæ of most insects which undergo a complete metamorphosis are very small when first emerging from the egg, and before they make the first moult are, for the most part, best preserved as microscopic objects in cells filled with glycerine. In the case of the larvæ of the great bombycid moths, which at the time of hatching are dark in color, it is possible to make a fairly good specimen by piercing the anal extremity of the caterpillar, and spitting it upon the extremity of a thick, black bristle, or a fine copper wire wrapped with black silk. Specimens so mounted will not shrivel greatly, and may be attached to pins and placed in the cabinet after the slide containing the egg, as the first in the series of slowly maturing forms. After each successive moult the larvæ increase rapidly in size. The method of preparing the larger forms which is now preferred by good collectors is that of inflation.
In inflating larvæ the first step is to carefully remove the contents of the larval skin. This is best effected by making an incision with a stout pin or needle at the anus, and then, between the folds of a soft towel, gently pressing out the contents of the abdominal cavity. The pressure should be first applied near the point where the pellicle has been punctured, and then be carried forward until the region of the head is reached. Great[313] care must be exercised not to apply such a degree of pressure as will expel those tissues lying nearest to the epidermis, in which the pigments are located, and in the case of hairy larvæ not to rob them of their hair. Practice can alone make perfect in this regard. The contents of the larva having been removed, the next step is to inflate and dry the empty skin. Some persons, as preliminary to this step, recommend that the empty skin be soaked for a period of a few hours in pure alcohol. By this process undoubtedly a certain portion of the watery matter contained in the pellicle is removed, and the process of desiccation is facilitated, but it is objectionable in the case of all larvæ having light colors, because these are more or less effaced by the action of the alcohol.
The simplest method of inflating the skins of larvæ after the contents have been withdrawn is to insert a straw or grass stem of appropriate thickness into the opening through which the contents have been removed, and then by the breath to inflate, while holding over the chimney of an Argand lamp, the flame of which must be regulated so as not to scorch or singe the specimen. Care must be taken in the act of inflating not to unduly extend the larval skin, thus producing a distortion, and also to dry it thoroughly. Unless the latter precaution is observed a subsequent shrinking and disfigurement will take place. The process of inflating in the manner just described is somewhat laborious, and while some of the finest specimens, which the writer has ever seen, were prepared in this primitive manner, various expedients for lessening the labor involved have been devised, some of which are to be highly commended.
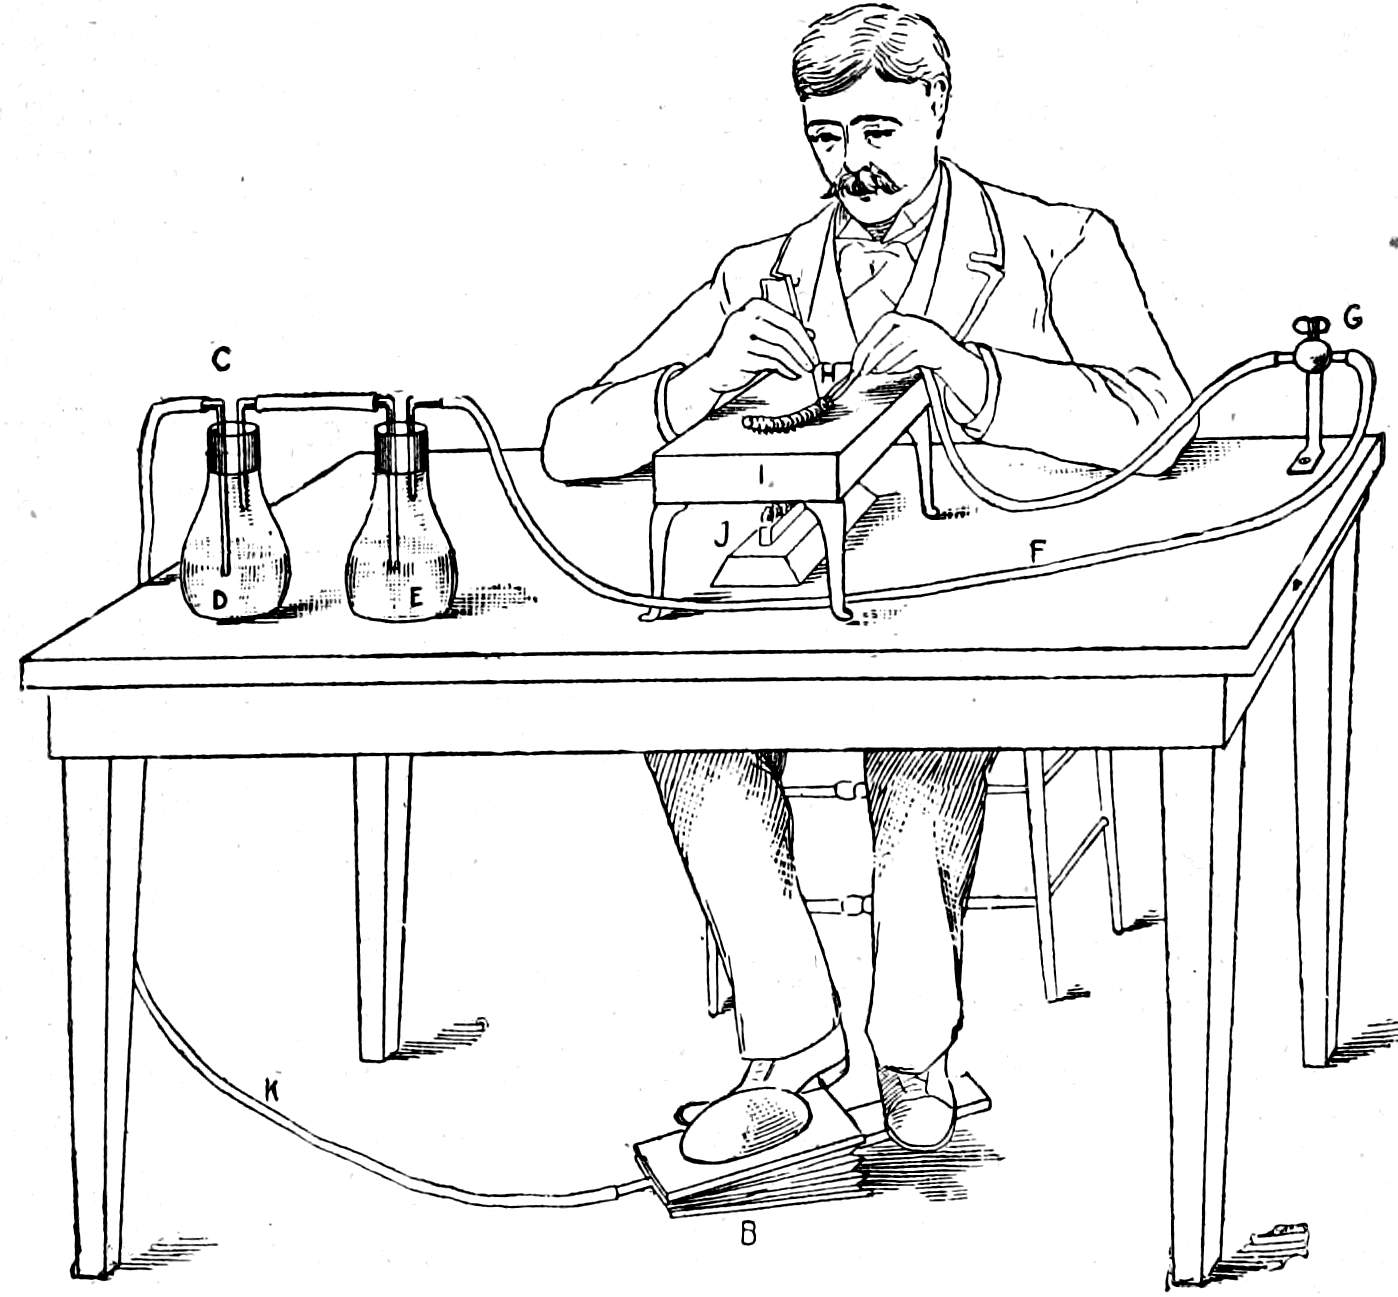 Fig. 82.—Apparatus for Inflating Larvæ. B, Foot-bellows; K, rubber tube; C, flask; D, anhydrous
sulphuric acid; E, overflow flask; F, rubber tube from flask; G, standard with cock to
regulate flow of air; H, glass tube with larva upon it; I, copper drying-plate; J, spirit-lamp.
Fig. 82.—Apparatus for Inflating Larvæ. B, Foot-bellows; K, rubber tube; C, flask; D, anhydrous
sulphuric acid; E, overflow flask; F, rubber tube from flask; G, standard with cock to
regulate flow of air; H, glass tube with larva upon it; I, copper drying-plate; J, spirit-lamp.
A comparatively inexpensive arrangement for inflating larvæ is a modification of that described in the "Entomologische Nachrichten," 1879, vol. v., p. 7, devised by Mr. Fritz A. Wachtel. It consists of a foot-bellows such as is used by chemists in the laboratory, or, better still, of a small cylinder such as is used for holding gas in operating the oxy-hydrogen lamp of a sciopticon. In the latter case the compressed air should not have a pressure exceeding fifty pounds to the square inch, and the cock regulating the flow from the cylinder should be capable of very fine adjustment. By means of a rubber tube the air is conveyed from the cylinder to a couple of flasks, one of which contains[314] concentrated sulphuric acid and the other is intended for the reception of any overflow of the hydrated sulphuric acid which may occur. The object of passing the air through sulphuric acid is to rob it, so far as possible, of its moisture. It is then conveyed into a flask, which is heated upon a sand-bath, and thence by a piece of flexible tubing to a tip mounted on a joint allowing vertical and horizontal motion and secured by a standard to the working-table. The flow of air through the tip is regulated by a cock. Upon the tip is fastened a small rubber tube, into the free extremity of which is inserted a fine-pointed glass tube. This is provided with an armature consisting of two steel springs fastened upon opposite sides, and their ends bent at right angles in such a way as to hold the larval skin firmly to the extremity of the tube. The skin having been adjusted upon the fine point of the tube, the bellows is put into[315] operation and the skin is inflated. A drying apparatus is provided in several ways. A copper plate mounted upon four legs, and heated by an alcohol lamp placed below, has been advocated by some. A better arrangement, used by the writer, consists of a small oven heated by the flame of an alcohol lamp, or by jets of natural gas, and provided with circular openings of various sizes, into which the larval skin is introduced. (See Fig. 83.) A modification of the oven is given in Fig. 84.
 Fig. 83.—Drying Oven. A, Lamp; B, pin to hold door open; C, door open; D, glass cover.
A less commendable method of preserving larvæ is to place them in alcohol. The larvæ should be tied up in sacks of light gauze netting, and a label of tough paper with the date and locality of capture, and the name, if known, written with a lead pencil, should be attached to each such little sack. Do not use ink on labels to be immersed, but a hard lead pencil. Alcoholic specimens are liable to become shrivelled and discolored, and are not nearly as valuable as well-inflated and dried skins.
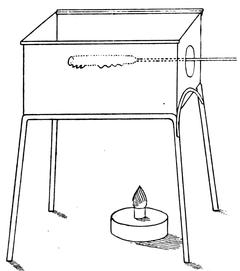 Fig. 84.—Oven for Drying Larva-skin, made of tin
joined without solder and with top made of glass. (After Riley.)
Fig. 84.—Oven for Drying Larva-skin, made of tin
joined without solder and with top made of glass. (After Riley.)
When the skins have been inflated they may be mounted readily by being placed upon wires wrapped with green silk, or upon annealed aluminium wire. The wires are bent and twisted together for a short distance and then made to diverge as in Fig. 85. The diverging ends are pressed together, a little shellac is placed upon their tips, and they are then inserted into the opening at the anal extremity of the larval skin. Upon the release of[316] pressure they spread apart, and after the shellac has dried the skin is firmly held by them. They may then be attached to pins by simply twisting the free end of the wire about the pin, or they may be placed upon artificial imitations of the leaves and twigs of their appropriate food-plants. This method of preparation is applicable to the larvæ of Coleoptera and Diptera as well as to those of the Lepidoptera.
 Fig. 85.—Wire Bent into Shape for Mounting
Larva. (After Riley.)
Fig. 85.—Wire Bent into Shape for Mounting
Larva. (After Riley.)
An account of the manner of preserving larvæ would not be complete without an account of the manner of rearing them. In rearing the larvæ of Coleoptera, Diptera, and Hymenoptera, the student must be left in a large degree to his own devices. A few large glass jars capable of being closed with a gauze top are necessary, though in the case of the Hymenoptera reliance must be mainly placed upon finding the larvæ in their nests. Bees and wasps construct various larval edifices, and these must be explored as found in nature for a knowledge of the immature insect. Breeding them in captivity is attended by difficulties which are rarely overcome by the most expert, except in a few isolated cases. This is also true, but to a less extent of the larvæ of the Coleoptera. The larvæ of many beetles which are carnivorous may be reared in glass jars, or boxes, covered with fine wire gauze, at the bottom of which earth or sand has been placed, and in which a supply of appropriate food can be put, such as the soft larvæ of beetles, maggots, and bits of meat. It is best to previously scald the earth and sand placed at the bottom of the breeding cages in order to destroy the eggs and small larvæ of other species which might be introduced. The cages should have a sufficient supply of moisture, and, so far as possible, the circumstances should be made to approximate those under which the larvæ were found. The larvæ of wood-boring beetles may be bred in portions of the wood which they frequent. A tight barrel with a cover made of wire gauze fitting closely over the top is a good device. In the fall of the year it may be filled with fallen twigs and pieces of branches from the forest, on which beetles have oviposited, and in the spring there will be generally found a large number of beautiful specimens of species,[317] some of which are otherwise very difficult to secure. The barrels should be placed in a covered spot in the open air, and the twigs and wood occasionally lightly moistened with water. The larvæ of leaf-eating beetles may be bred as the larvæ of lepidoptera. The larvæ of neuropterous insects, such as Myrmeleon, may be easily reared in boxes at the bottom of which sand to the depth of six inches has been placed. They may be fed with house-flies which have been deprived of their wings, and soft bodies of coleopterous larvæ, and the larvæ of ants. The larvæ of the Odonata and aquatic beetles must be reared in aquaria in which there is a muddy bottom provided, and in which there are a few pieces of rotting wood, with loose bark upon it, so that they protrude some inches above the surface of the water, and in which aquatic plants are kept growing. Many aquatic insects pupate under the bark of trees growing at the edge of the water.
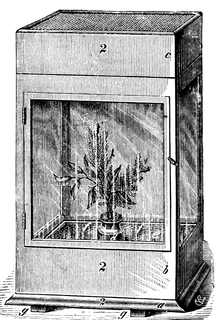 Fig. 86.—Breeding Cage. (After Riley.) a, Bottom
board; g g, battens to prevent warping; f f, zinc pan
four inches deep; d, zinc tube soldered to bottom of
pan and intended to hold jar of water for food-plants;
e, earth in pan; b, box with glass sides and hinged
door; c, removable cap of box covered with wire gauze.
Fig. 86.—Breeding Cage. (After Riley.) a, Bottom
board; g g, battens to prevent warping; f f, zinc pan
four inches deep; d, zinc tube soldered to bottom of
pan and intended to hold jar of water for food-plants;
e, earth in pan; b, box with glass sides and hinged
door; c, removable cap of box covered with wire gauze.
The breeding of the larvæ of lepidopterous insects has received far greater attention than that of other insects, and many modifications of devices for this purpose have been suggested. The simplest devices are often the best, and in the early stages of the smaller forms the best plan is to pot a specimen of the appropriate food-plant, when it is low and herbaceous and capable of being thus treated, and then put it under a cover of[318] tarletan or under a bell glass. When the larva undergoes its transformations in the ground a bed of earth several inches in depth, upon which some dead leaves and litter are placed, should be provided. A convenient form of a breeding-cage is represented in Fig. 86. Mr. W.H. Edwards, who has done more than any other person to elucidate the life-history of North American butterflies, often uses a breeding-cage made of a nail keg, the top of which has been knocked out, and over which gauze netting is tied. The writer has successfully employed, for breeding moths upon a large scale, common store boxes, with about eight inches in depth of good soil at the bottom, covered with a close-fitting frame lid over which mosquito-netting is tacked. Branches of the food-plant are set into the box in jars of water, in which they remain fresh for several days (see Fig. 87). If possible, and if operations are to be prosecuted upon a large scale, it is well to appropriate to breeding purposes a small room from which all the furniture and carpets have been removed. The windows should be closed with gauze netting tacked over them, and the doors should also be made tight so as to prevent the escape of the insects. When the caterpillars descend from the food-plants which are placed in the apartment in jars of water, or in pots, and thus indicate their readiness to undergo transformation, they should be secured and placed in smaller boxes fitted up as before described, and, in case the insect pupates in the soil, provided with a sufficient depth of earth. In case it is desired to go to still greater expense, a small house, arranged after the manner of a greenhouse, and with suitable cages and compartments, may be provided. Such an insect-house exists at Cornell University, and is under the care of that admirable investigator, Professor Comstock, who no doubt would be glad to furnish students with a knowledge of the details of its construction. The larvæ of many lepidopterous insects emerge from the egg in the fall[319] of the year, and after feeding for a time and undergoing one or two moults, hibernate, and upon the return of the springtime begin feeding again, and finally pupate. It is best in the case of such to leave the larvæ in the fall in a cold place, as an icehouse, and to suffer them to remain there until an abundant supply of the proper food-plant can be obtained.
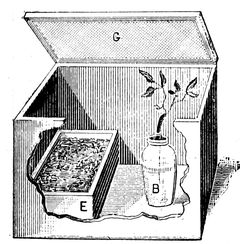 Fig. 87.—Breeding Cage. B, Jar with food-plant;
E, box with soil; G, gauze lid.
Fig. 87.—Breeding Cage. B, Jar with food-plant;
E, box with soil; G, gauze lid.
In the breeding of larvæ experience must be the great instructor, and practice can alone make perfect. No department of entomological study is, however, quite so fascinating as this, even though its prosecution may be somewhat laborious.
 Fig. 88.—Net Frame.
(After Riley.) a, Wire ring with ends bent to insert in ferule b; c, point where plug and net-handle meet.
Fig. 88.—Net Frame.
(After Riley.) a, Wire ring with ends bent to insert in ferule b; c, point where plug and net-handle meet.
The name imago is applied by naturalists to the perfect form of insects, which is revealed at the conclusion of the round of metamorphoses. In the collection and the preservation of these the most necessary implement at the outset is the net. A simple way of making a serviceable and strong net is to take a piece of brass or galvanized iron wire about three feet and six inches in length, and about three-sixteenths of an inch in diameter, and having bent it into the form of a hoop, with the two ends forming shanks, to insert these into the end of a brass ferule such as is used on fishing-rods, and fix them there by pouring in melted lead or solder in such a way that the handle can be inserted into the other end of the ferule. This can be easily accomplished by plugging the handle end of the ferule with a piece of soft wood or with clay. The handle should be light, and not more than four or five feet in length for ordinary use. To the ring of the net a sack made of green tarletan, or less preferably mosquito-netting, about two and a half times as deep as the diameter of the ring, should be sewn. A piece of green muslin should be then stitched on as a binding over the ring. Green is to be always preferred to any other color as less likely to alarm the insects. Nets with folding rings and jointed bamboo handles are to be had of most dealers, and are to be highly recommended for convenience, if well made. In collecting about electric lights which hang high, and along the woodland walks of tropical forests, it is well to be able to add[321] to the length of the handle by inserting more joints of bamboo. Some butterflies are "highfliers." Nets made of stout muslin are useful for sweeping the tops of grass and low herbage, and in this way multitudes of small insects of various orders may be taken. Such nets should be larger than the ordinary net. Nets made of stout lace cloth are used for capturing aquatic insects in pools and ditches. For this purpose a scoop made of wire gauze may also be advantageously employed.
In the capture of insects the umbrella plays, in the hands of a skilful collector, a very important part. It is used as a receptacle for insects which are beaten from the overhanging branches, under which it is held in an inverted position while the operation of beating is going on. As the insects fall they must be caught and placed in the collecting-jars. (See Plate XXII., Fig. 1.)
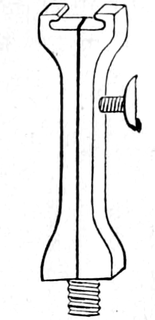 Fig. 89.—Net-head for
Removable Frame. (After Riley.) The frame is made of elastic brass ribbon, and may be put inside of the hat when not
in use, and the handle used as a cane.
Fig. 89.—Net-head for
Removable Frame. (After Riley.) The frame is made of elastic brass ribbon, and may be put inside of the hat when not
in use, and the handle used as a cane.
 Fig. 90.—Folding Net. (After Riley.) a, Net-ring open;
b, enlarged view of joint and check; c, ring folded and detached from ferule; d, nut sunk into end of ferule; e, screw
to hold ring in place; f, illustrating manner of putting ring and rod together.
Fig. 90.—Folding Net. (After Riley.) a, Net-ring open;
b, enlarged view of joint and check; c, ring folded and detached from ferule; d, nut sunk into end of ferule; e, screw
to hold ring in place; f, illustrating manner of putting ring and rod together.
Collecting-jars are of various sizes. For Lepidoptera the one-pound jars used by Schering for hydrate of chloral, which have nicely ground glass stoppers, are admirable. In preparing the jars the following directions should be closely attended to: Place at the bottom of the jar some lumps of cyanide of potash, over these place a few pieces of paper loosely crumpled and rammed down so as[322] to hold the lumps of the cyanide in position. Pour in two or three drops of water. Take a piece of stout and clean writing-paper and describe upon it a circle of the same size as the inside of the bottle, and around this another circle three-quarters of an inch greater in diameter. Cut out a circular disc of paper, following with the scissors the line of the outer circle. At intervals of a quarter of an inch cut slits all around the disc of paper extending them inwardly only as far as the first circle drawn upon the paper. Fold back the outer edge of the disc upon the side of the paper which is to come uppermost in the bottle. With a pin, or a small punch, pierce a number of holes through the middle of the paper. Apply some gum to the edge of the disc which has been folded back, and fix it securely on the top of the mass of cyanide and paper at the bottom of the jar, by pressing the gummed edge against the sides of the bottle. This method is infinitely preferable to the old way of fixing the cyanide in the bottom of the jar by pouring in a cement of plaster of Paris. Instead of lumps of cyanide of potash, lumps of carbonate of ammonia may be used to charge the poisoning-jar, but a jar so charged must never be used to kill insects which are green in color, as the fumes of the ammonia often serve to bleach these and make them white or brown.
 Fig. 91.—Collecting
Jar. Cy., Cyanide of potash wedged into place with soft paper; P, perforated paper disc.
Fig. 91.—Collecting
Jar. Cy., Cyanide of potash wedged into place with soft paper; P, perforated paper disc.
In the case of large insects, or insects which struggle violently, a few drops of chloroform may be poured into the collecting-jar, to prevent them from injuring themselves. Chloroform is not, however, to be commended as a killing agent, inasmuch as it induces thoracic spasms, which make the specimen difficult to set after death. In the case of the larger moths and beetles death may be instantaneously induced by injecting a solution of cyanide of potash with a hypodermic syringe. The use of oxalic acid in solution, administered by making an inci[323]sion into the thorax of the insect with the point of a crow-quill pen dipped into the solution, is not to be highly commended, as the acid changes the color of the specimen, and, after it has been pinned, corrodes the pin. Likewise when specimens have been kept too long in a jar charged with ammonia, and are pinned immediately after they have been taken out, the pins are liable to be corroded and eaten through.
 Fig. 92.—Perforated Disc of Paper for Holding Cyanide in Place at Bottom of Jar.
The collector having provided himself with nets and killing-jars, will not be thoroughly equipped for field work until he has added to his outfit the necessary conveniences for carrying his captures with him uninjured. The writer, after long experience as a collector in many lands, is inclined to think that the best appliance is a tin box lined with cork, and provided with a compartment in which a cyanide cake[11] may be placed before going to the field, and in which, after the return, when the cyanide cake has been withdrawn, a sponge may be put, which should be saturated with a weak solution of carbolic acid for the double purpose of keeping the specimens from drying out too rapidly and from moulding. The box should not be more than 10 × 8 × 3-1/2 inches inside measurement, and should be divided into two equal parts, hinged at the side which is carried uppermost, and hung over the shoulder by a strap. A pincushion filled with pins may be attached to the belt. A belt arranged like a cartridge-belt, with pockets to carry pillboxes about one and one-half inch square and three-quarters of an inch deep should also be provided. These boxes should have glass bottoms. They are to be used in "boxing" the smaller lepidoptera and other delicate insects which, if killed and pinned on the field, would be too dry upon return from the chase to make good cabinet specimens. Boxed specimens may be kept for a day or two, and killed and mounted at leisure. A bag containing several small boxes may also be carried. These boxes should have in them a supply of paper envelopes, for papering specimens in the way hereafter to be described. A loose sack-coat, with an abundance of capacious pockets inside and out, is indispensable. A small poisoning-jar for beetles should be carried in the right-hand pocket of the[324] pantaloons, a similar jar in the left-hand pocket for hymenoptera and diptera. In the right-hand pocket of the sack-coat should be carried the large jar for killing lepidoptera, and in the left-hand pocket a smaller jar for neuroptera and orthoptera. Thus arrayed the collector is completely furnished for the chase. It will, however, be well for him, if he can, to secure the attendance of an assistant to carry some of his "traps" and assist him. We will now go out with him into the field and give him a few practical instructions as to the best mode of procedure.
First of all, it is proper to observe that it is advisable not to be in a hurry and not to rush over the ground. The representations in comic newspapers of the entomologist, wildly tearing about the fields and in mad haste chasing a butterfly over hills and meadows, are not drawn from a study of the methods of experts. "All things come to him who waits." Slyness, coolness, a keen eye, and adroit quickness in the use of the net are the qualities which yield the largest returns to the collector. In the use of the net the habits of insects must be noted. Those which alight upon the ground or low herbage may be caught by clapping the net over them. Most butterflies and moths have the habit, when caught, of flying upward in the net. Therefore so soon as the insect, if a lepidopteron, is enclosed in the net, hold up the closed end of the sack, and, introducing the poison jar, from which the stopper has been removed, take the insect. A little practice will soon enable the collector to do this without allowing the fly to beat and injure its wings, and without touching them in the least with the fingers. (Plate XXIII., Fig. 1.) A convenient way of securing small insects in the net is by a rapid motion hither and thither, with the mouth open to the wind, to drive them back into the bottom of the sack, and then to place this in the bottle and leave it there a few seconds until the insects are stunned, when they may be shaken into the jar. When the insect alights within reach upon the ends of branches or the tops of flowering plants, it may be swept into the net by a dexterous movement and thus secured. A similar stroke will often, when well aimed, secure specimens flying past the station of the collector. (Plate XXIII., Fig. 2.) Beetles and insects of other orders than the lepidoptera may be[325] placed in the jars appropriated to them and left there until the return from the fields. With the Lepidoptera it is necessary to exercise greater care. The smaller specimens, such as the Tortricidæ and Phycitidæ and Tineidæ should be "boxed" in the pillboxes provided for this purpose. The Lycænidæ, Hesperidæ, and most of the moths, should be caught in the large jar in the manner just described, and when stunned, pinned and placed in the cork-lined box, where the process of completely depriving them of life will be completed. The larger, and even some of the smaller, butterflies may be killed while in the net by gently pinching them through its folds, between the first finger and the thumb at the point where the wings are attached to the thorax (see Fig. 93). The pressure should be applied when the wings are folded back to back, as the insect sits when in repose. If applied in any other way the specimen is likely to be seriously damaged, and moths should never be thus killed. In pinning specimens in the tin box used for transportation while upon the hunt, the storage power of the box will be increased by pinning a number of specimens upon one pin, thrusting the pin through the insect horizontally and not perpendicularly through the upper surface of the thorax.

The labors of the collector should not be confined to the day. Multitudes of the rarest and most desirable species are nocturnal in their habits. Some of them are readily attracted to light, though, strangely enough, the individuals among the lepidoptera thus attracted are mainly of the male sex. By placing a lamp at an open window many moths may be secured. Electric lights are good points for the collector, if they are within reach. The burnt and ragged refuse which the cleaner[326] finds in the globes in the morning, half-buried in the dust of the disintegrated carbons, is of little or no value. Various traps lighted with lanterns have been suggested, but so far few of them have equalled the simple device of a friend of mine, who, living in a tropical country, has set apart a small room for this purpose, and having cleared it of all furniture, and whitewashed the walls, keeps a powerful lamp burning in it every night opposite a large window facing the forest. His captures vary from a dozen to a hundred specimens of lepidoptera every night of the year, and multitudes of insects of other orders. In the temperate zones a favorite method of collecting lepidoptera is by "sugaring." For this a mixture of sugar and stale beer, or molasses and water, flavored with rum, and of about the consistency of thin maple syrup, should be used. It is best applied to the trunks of trees upon the edge of clearings, and on moonlight nights on the side of the wood toward the moon. Apply the mixture to from forty to eighty trees, stumps, or stakes, with a whitewash brush, and then go over the "beat" with a dark lantern and capture the moths in the wide-mouthed cyanide jar. In this way the writer has taken as many as three or four hundred moths in a single evening. The same trees should be sugared and visited night after night, and the best results are often only obtained after a beat has been in operation for some time and the insects have learned to know it. The best catch is generally to be had in the two hours immediately following sunset. In tropical countries, aside from the Erebidæ and allied moths, few species appear to be attracted to sugar, and in warm climates plenty of rum should be added to the mixture. To keep ants off from trees which have been sugared, the writer finds it good to tie a band of dark cloth which has been treated with a saturated solution of corrosive sublimate about the trunk near the ground. This only is to be done where a regular route has been selected for nightly visitation, and it has the disadvantage of keeping away from the baits many beetles which are attracted to sugar. Trees which have been sugared and visited at night should be revisited in the daytime, and many day-flying species will be found feasting upon what has been left by the revellers who attended the banquet of the night before.
Some insects have quite revolting tastes, and may be captured[327] by pandering to them. The ordure of wild animals has a charm for many, and by placing the dung of dogs, or civet-cats, or any of the Felidæ, in the woodland paths of tropical forests many great rarities may be secured. Carrion and dead fish in particular are attractive baits.
It has been recently claimed by a writer that painted decoys representing butterflies, placed upon flowers, or kept in motion at the tip of a switch, may be effectively used in securing rare and wild species. The writer has no personal knowledge of the merit of the plan. It might be worth trying, however, in the case of monstrous rarities.
 Fig. 94.—Manner of Folding Paper Envelope. A-B, First fold; B-C, second fold; A-D, third fold; B-F,
fourth fold; A-E, fifth fold.
Fig. 94.—Manner of Folding Paper Envelope. A-B, First fold; B-C, second fold; A-D, third fold; B-F,
fourth fold; A-E, fifth fold.
The next step after the capture of the specimens is to prepare them either for transportation or for the cabinet. If collecting upon a journey, or where facilities for the preparation of specimens for the cabinet are lacking, the insects may be preserved in papers. Common druggists' envelopes are a very convenient resource for the preservation of lepidoptera. They may be purchased by the thousand at about sixty-five cents. If these cannot be had, envelopes may easily be made from pieces of paper, preferably stiff newspaper or common writing-paper upon which ink has not been used. The manner of folding these is illustrated by Figures 94 and 95. Care should be taken to write upon the envelope, before the insect is placed in it, the date and the locality of capture. Beetles, if black and devoid of hairy vestiture, may be preserved in alcohol, and the same course may be taken with many insects of other orders. It is preferable, however, to pack beetles and other hard-bodied insects in layers of cotton batting. A small box may be made to contain an immense number of insects in envelopes or in cotton, and they may thus be safely transported anywhere. In case alcohol is used as a preservative all the specimens of a species should be sorted out and tied together in a small sack[329] made out of thin netting, and to this should be attached a label giving the date and place of capture and a reference to the note-book. In case cotton layers are employed all the specimens of a species, if numerous, should be placed in one layer, and a memorandum to the same purport as the label inserted.
 Fig. 95.—Butterfly in Envelope.
Insects are prepared for the cabinet by being mounted upon pins and "expanded." There are various sorts and sizes of insect-pins, but those made by Klaeger, of Berlin, are generally preferred at the present time by the leading entomologists of the world. The French pins and the so-called "Carlsbader pins" are too long and the points are too fine, and, therefore, too likely to be injured to make them desirable. The English pins are too short, and except in the case of very small insects, are not used by the best collectors. Insects should be mounted high upon the pin, i.e., in such a way that not more than one-fifth or at the most one-fourth of the pin shall be exposed above the body of the specimen. Dr. Staudinger, the celebrated lepidopterist of Germany, makes it his rule to mount all his specimens in such a way that the wings are elevated upon a plane one inch above the tip of the pin. The writer has had the greater part of his collection, of over fifty thousand specimens of lepidoptera, mounted at an average height of seven-eighths of an inch above the points of the pins. The "English method" of mounting low down, and only leaving enough of the pin exposed below to permit of fixing the specimens in the cork at the bottoms of the drawers of the cabinet, is rapidly passing out of vogue, even in England, and is giving place to the "Continental Method." Insect pins are of various sizes; adapted to the size of the insect which they are to carry. The most serviceable sizes and which will be proportioned to the majority of the insects which the collector is likely to take, are Klaeger's No. 3 and No. 5. For very large insects higher numbers may be employed, and for smaller insects lower numbers, though in the case of the latter it is perhaps better to use the short English pins and then to mount the specimens upon the bits of cork or pith which are themselves mounted upon the longer German pins. Such mounts are known as "double mounts" (see Fig. 96). The writer desires to utter a caution against the use of the common black insect-pins so often sold[330] by dealers, and the sole stock in trade of one or two firms of opticians in this country. They are very liable to rust at the point and to bend, and are totally unsuited for use in humid, tropical, and semi-tropical climates, or for collections which are to be transported far over the seas. Beetles should always be pinned through the right elytron. Bugs should be pinned through the scutellum, as the small triangular piece between the elytra is called. All other insects should be pinned in the middle of the thorax, and care should always be taken to set the pins perpendicularly.
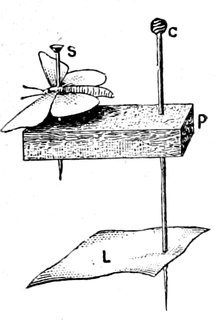 Fig. 96.—Double Mount. C, Long pin; P, pith; S, specimen mounted on short pin; L, label.
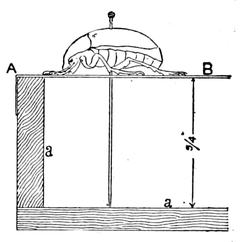 Fig. 97.—Frame for Mounting
Beetles. a, a, Wooden frame; A,
B, paper drumhead.
Fig. 97.—Frame for Mounting
Beetles. a, a, Wooden frame; A,
B, paper drumhead.
Having pinned the specimen the next step is to expand it properly. In the case of beetles this is done by simply arranging the feet and the antennæ in such a way that they can easily be inspected. In doing this it is well to have a frame seven-eighths of an inch deep, or thereabouts, backed by a thin piece of soft pine, and covered on top by a sheet of paper, which has been first moistened and then pasted around the edges, and which when dry expands like a drumhead. (Fig. 97.) Upon this a number of beetles may be pinned, their feet drawn out, and there be left to dry. In the case of lepidopterous insects, and other insects having considerable expanse of wing, setting-boards are required. These are boards provided with a groove in the middle capable of receiving the body of the insect, and permitting of the expansion of their wings laterally. These boards should be of various widths, so as to be adapted to insects having various expanse of wings, and the grooves also should be of various depths, adapted to insects having bodies of various size. The best form of a setting-board, with which the writer is acquainted, is that given in Fig. 98. The narrow slit below the groove, which is intended for the reception of the body of the insect, admits of passing the pin down to a[331] proper depth, and the depth is regulated of course by the piece at the bottom of the setting-board. The two side pieces should always be from seven-eighths of an inch to an inch thick. The best material is soft, clean pine, or, better still, the wood of the Kiri-no-Ki (Paulownia regalis).
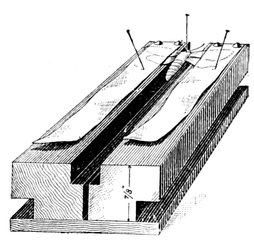 Fig. 98.—Setting-Board.
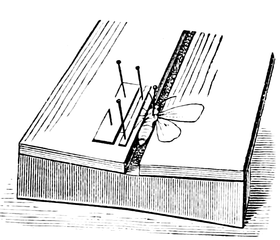 Fig. 99.—Setting-Board. (After Riley.)
Instead of setting-boards, setting-blocks (see Figs. 100 and 101), may be advantageously employed in setting smaller specimens, especially of the Hesperidæ and the Noctuidæ, the wings of which are refractory, and refuse to be treated in the method that has just been described. Instead of using strips of tracing muslin it is necessary, in the case of setting-blocks, to use threads or cords, which may be adjusted, as is shown in the figure. Care should, however, be taken not to draw the thread or cord so tightly about the wings of the specimens as to cut into their vestiture and thus leave marks.
Fig. 100.—Setting-Block. A, Groove for
body of insect; B, nick for holding thread;
C, cork to receive point of pin passing
through holes in bottom of A.
Fig. 101.—Butterfly Expanded upon Setting-Block.
The insects having been adjusted upon the board, care being taken that the pin is set perpendicularly, the next step is to[332]
 Fig. 102.—Setting-Needle.
draw out the wings in the position which they are to maintain when the specimen is thoroughly dry. This is accomplished by means of what are known as "setting-needles" (see Fig. 102). They can easily be made by inserting ordinary needles into handles, which may be made of some soft wood. The writer generally employs as handles for his setting-needles matches, from which the sulphur tip has been removed. In drawing the wings into position care should be taken to plant the setting-needle immediately behind the strong nervure of the costal margin of the wing. Otherwise the wings are likely to be torn and disfigured. The rule in setting lepidoptera is to draw the anterior wings forward in such a way that their posterior margins form a right angle with the axis of the body, which rests in the groove in the middle of the setting-board. The posterior wings are then drawn forward in such a way as fully to expose their outline. The next step is to firmly fix the wings in position, as they have been placed. Some writers recommend for this purpose using short strips of paper over the wings, others recommend placing upon the wings pieces of glass, of a size sufficient to cover the entire wing. A far better plan is to employ strips of tracing muslin, such as is used by draughtsmen and engineers. These strips may be secured at the ends of the setting-board by thumb-tacks, and may be drawn down over the wings of the specimen and securely held by pins in place. Care should be always taken to nicely turn up the edge of the strips nearest to the body, so that a crease or depression may not be left upon the scales covering the wings of the insects when the specimen has been thoroughly dried. The wings having been arranged, the antennæ and the feet may be brought forward and displayed in a natural position. Care should be always taken to lower the antennæ so that they do not stand erect above the head. In the latter position they are very apt to become broken. A number of such boards may be conveniently arranged in a box, as shown in Fig. 103, and if strips of muslin are used, and are firmly held in place by pins, such a box may be transported from place to place, upon the backs of men or beasts, and the process of drying the insects may go on en route, while the naturalist is[333] conducting his investigations. In this manner the writer carried four or five large boxes with him through the interior of Japan (Plate XXIII., Fig. 2), and succeeded in bringing home with him nearly six thousand specimens, dried and ready to place in the cabinet. The length of time which is required for drying, varies of course a little with the temperature, and the amount of humidity in the atmosphere. In some climates it is almost impossible to absolutely dry the specimens, in others they dry very quickly. In the United States a week or ten days will generally suffice to secure that rigidity which is necessary in a cabinet specimen.
 Fig. 103.—Box for Receiving Setting-Boards. a, Board partly
withdrawn; b, T-shaped strip to hold board in place; c, sliding
door of box; d, tongue on edge of door working in groove at
front of sides.
Fig. 103.—Box for Receiving Setting-Boards. a, Board partly
withdrawn; b, T-shaped strip to hold board in place; c, sliding
door of box; d, tongue on edge of door working in groove at
front of sides.
The process of drying may be hastened advantageously by placing the setting-boards in a cool oven. The temperature, however, should not be above 130° F. Some insects lose their color when dried, and it is impossible in certain cases to retain them. In some cases also the bodies of insects shrivel up very greatly and become distorted. It is very often advisable in such cases to make an incision into the abdomen and withdraw the viscera and stuff the body with cotton. Spiders should always be treated in this way, and so also the larger Mantidæ and Locustidæ. When the insects have become thoroughly dry, and their wings are rigid, they may be removed from the setting-board, and are now ready for the cabinet. In case, however, it is desired to transport them, as is the case with specimens that have been collected upon a journey, they may be pinned in boxes lined with cork or pith, with their wings "shingled" as in Fig. 104, and they may, if firmly secured to the bottom of the boxes, be in this shape transported for long distances; but it is[334] always necessary to pack the box in which they are contained in an outer box, separating the inner box from the outer case by at least two inches of straw, excelsior, or some other light and elastic substance, to save the specimens from being jarred in transport.
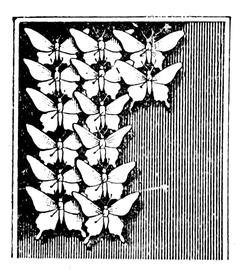 Fig. 104.—Butterflies Pinned
with their Wings Shingled.
Fig. 104.—Butterflies Pinned
with their Wings Shingled.
Specimens that have been preserved in paper, as described on page 328, in order to fit them for the cabinet, should be relaxed and then expanded. In order to relax them, one of the best methods is to place the envelope which contains the specimen between layers of cloth that have been dampened in pure water, to which has been added a small quantity of carbolic acid, enough to prevent mould. Be careful not to add too much carbolic acid. Another method is to lay the specimens at the bottom of a jar, half-filled with sand, which has been moistened and well carbolized. The jar should be tightly closed, so as to retain the moisture. Specimens that have been fastened with pins may be placed on pieces of board, and then set in a jar, prepared in the way that has been described. After exposure to the moist atmosphere of the jar, or to the moisture contained within the towelling, for a period varying from a few hours to a day, the specimens will be sufficiently relaxed to permit of them being treated as if they had been freshly taken, and mounted and expanded upon the setting-board as described on page 331. It is well to have the top of the jar, before the lid is placed upon it, covered with a layer of blotting-paper, or some other substance which will absorb the moisture which otherwise might drip from the lid upon the specimens below. This is a precaution which is especially necessary in the case of butterflies which are of a bright blue or a pale green color, and which are much disfigured by water stains.
Mould is one of the great enemies of the collector, and strenuous efforts should be made to prevent its appearance in the cabinet or among the specimens. In order to do this, it is well to secure a thorough desiccation of the specimens, but where it is[335] impossible to thoroughly dry them, moulding may be prevented to a greater or less extent by placing between the paper envelopes pieces of blotting-paper which have been saturated with carbolic acid and permitted to dry. The sides of the boxes containing the specimens may also be painted with carbolic acid. Naphthaline in crystals may be introduced among the envelopes, and this appears in many cases to serve as a partial preventive of mould. When a specimen has been attacked by mould, the mould may be largely removed by thorough drying in a cool oven and then dusting off the specimen with a soft camel's-hair pencil that has been rubbed in carbolic acid and dried.
Specimens sometimes become greasy, and it is then desirable, if possible, to remove the grease with which their bodies and wings are saturated. The only method which can be employed advantageously is that of washing out the grease by means of benzoline, or some of the allied volatile mineral oils.
By immersing a greasy specimen for a considerable time in gasoline, it is possible to remove the grease. The specimen having been thus exposed should be placed in a cool spot, free from dust, and all the gasoline should be allowed to evaporate. Care should be taken to conduct this process away from fire and lights, in order to prevent an explosion. The writer has found that the best method for removing grease is to allow the gasoline to fall drop by drop upon the thorax of the specimen. The specimen is therefore placed in a very large glass jar, say six inches in diameter, and is fixed at the bottom upon a piece of cork, tightly secured in place. The gasoline is placed above and is allowed to filter down from the bottle in which it is contained upon the specimen drop by drop. In this way the grease is gradually washed out, and will be found after a while at the bottom of the jar in the form of thick globules, the density of which causes them to sink to the bottom. In the case of some large bombycid moths the writer has washed out as much as a teaspoonful of animal fat from the body and wings of the specimen, in the manner that has been described.
The receptacles into which entomologists place their collections vary somewhat according to the taste and the length of[336] the purse of the collector. Some large collections are contained in boxes, and most of the coleopterists of this country, so far as the writer knows, have adopted these as receptacles for their collections. The boxes should be about two inches deep in the clear, the bottom should be lined with the best quality of cork, about one-fourth of an inch in thickness, and the whole papered inside with white paper. The lid should be fastened upon the lower part of the box, either by a tongue and groove or by thin strips nailed around on the inside and projecting above the margin of the bottom portion at least half an inch. These boxes should also be hinged. The material should be well seasoned. Double boxes with cork on the top and on the bottom are sometimes used, and these may be prepared with backs resembling books, and may be placed upon their ends upon shelves. They should not be laid one upon the other, as the insects pinned upon the upper side are liable sometimes, through jarring, to become detached, and falling out to cause a breakage among the specimens. The writer employs in his own collection drawers twenty-two inches long, eighteen inches wide, and two inches deep, covered with glass, the glass cover being attached to the bottom by a tongue and groove.
The specimens should be kept in the dark, as exposure to light bleaches them, sooner or later. Great pains should be taken to keep out dust, mould, and insect pests, such as Anthrenus and Dermestes. Naphthaline crystals destroy mites and they cannot exist where it is abundantly present. Anthrenus and Dermestes may be kept out of collections by naphthaline, but when they have been once introduced they will remain and propagate in spite of the presence of the drug. In order to exterminate them various agents are employed. The best is perhaps chloroform, and next to this carbon bisulphide. In buying the latter drug, care should be taken to purchase the washed and purified article, which is not as malodorous as the common varieties which used formerly to be sold by druggists. It is, however, highly explosive when mixed in quantity with the air, and care should be taken not to use it in proximity to a light. It has the advantage of destroying at once the imago, the larva, and, perhaps, the eggs of museum-pests. The writer[337] makes it a point annually, in the early summer, to place sufficient chloroform or carbon bichloride in his cabinet drawers to exterminate anything that may be living there, and thus secures comparative immunity from insect attacks.
Instructions as to the use of labels may be restricted to the simple advice to make them small enough to permit of their being placed upon the pins bearing the insects, and to have them written legibly. Of course every label should bear, if it is possible for the student to determine them, the generic and the specific names of the insects, and that of the author of the specific name, together with the date and locality of capture. In writing labels a small crow-quill pen is to be preferred.
A great many instruments of different sorts will suggest themselves to the collector in the process of his labors as being more or less useful, but none will prove more so than the forceps. It is impossible to do good work in the cabinet without a forceps, and those made by Blake, of Philadelphia, are the very best.
Books to be Consulted by the Collector for further Information as to Methods of Manipulating Specimens.
Packard: Guide to the Study of Insects. 8vo. Henry Holt & Co., New York.
Scudder: Butterflies. 8vo. Henry Holt & Co., New York. Kirby and Spence: Introduction to Entomology. Various editions.
McCook: American Spiders. Strecker: American Moths and Butterflies.
A great deal of practical and valuable information is to be derived from the pages of the following journals:
The Canadian Entomologist.
The Bulletin of the Brooklyn Entomological Society. Psyche.[338]
Names of Dealers in Entomological Supplies who are to be Recommended.
John Akhurst, 78 Ashland Place, Brooklyn, N.Y.; pins, etc.
John Burr, North Fifth Street, Camden, N.J.; boxes, cabinets, etc.
Armstrong, Brother & Co., Pittsburgh, Pa.; cork. The largest cork manufacturing firm in the United States. Will cut cork of any size which may be ordered, within practical limits.
Blake & Co., 55 North Seventh Street, Philadelphia; forceps.
The Pests.—If an island of bare rock should be born to-day in the middle of the Pacific Ocean, and an unpoisoned skin of bird or mammal laid down upon it to-morrow morning, I would wager that Dermestes lardarius would find that skin before sunset. If you were to prepare a skin without poison, and lock it up immediately in the bowels of a burglar-proof safe, not to be opened for six months, at the end of that time you would find it swarming with Dermestes. If you ever omit to poison anything in the shape of a vertebrate specimen, be sure your sin and the beastly bugs will find you out.
Dermestes.—The greatest enemy of the zoological collector and conservator, and one which is world-wide in its distribution, is a small beetle, one-third of an inch in length, commonly called the "bacon beetle." Its flight is rather feeble, but "it gets there just the same." The most common species, Dermestes lardarius, is of a dark, dirty-brown color, with a broad, transverse band of dull gray encircling the middle of the body. The imago is not of much consequence as a destroyer, but the larva, a nasty, hairy, brown-backed, and white-bellied abomination half an inch long, and with an appetite like a hog, is the incarnation of all that is pestiferous. A skull that has been "roughed out" and put away without poisoning will soon be literally swarming with Dermestes larvæ, and half-buried with the brown, powdery excrementation they leave behind. If the curator ever sees a fine, brown dust falling in little heaps out[340] of any part of a mounted specimen, he may know that Dermestes larvæ are at work.
Not long ago the National Museum was visited by another species of the bacon beetle, Dermestes maculatus, a gray-colored variety, beside which his congener seemed harmless and inoffensive. Maculatus was an unmitigated terror. He disdained to graze modestly on the outside of a specimen, as did lardarius, but simply began to eat wherever he "lit," and went straight in to a depth of an inch or so, as if shot out of a gun. An unhappy stuffed monkey that once crossed the track of this little fiend had half a dozen neat round holes eaten through the dry skin of his side, and straight on into the hard tow filling for quite an inch. A gimlet could not have done the work half so well. The most ridiculous thing was that this insatiable little monster attacked a plaster cast, and bored it full of holes also! Fortunately for the National Museum, the stay of this highly interesting stranger was of brief duration. He came in 1885, and vanished that same year—so far as my observations went.
Moths.—Next in destructiveness are the tiny moths, of which four species are to be fought in the museum and the household. These are the clothes moth (Tinea flavifrontella), the fur moth (T. pelionella), the carpet moth (T. tapetzella), and the grain moth (T. granella). The perfect moth is of course by preference a night-flying insect, and very seldom flies in the daytime except when disturbed. The imago is harmless, but the larva—a tiny, white worm no thicker than a pin, and about one-tenth of an inch in length—will soon shave the hair off an unpoisoned elk or deer head more smoothly than you could do it with the best razor ever made. Of course moth larvæ are most active and destructive during the breeding season—the warm months from May to October—but in warm rooms they sometimes keep at work all through the winter.
In one sense the moth is the zoologist's most dreaded foe, for the reason that its work is so subtle and unseen. Often the first intimation the victim has of the presence of his enemy is when dusting a favorite head he suddenly knocks off a section of hair half a foot square, exposing underneath the smooth, bare skin covered with fine gray dust. The larvæ of the moth attack[341] birds and quadrupeds in one way only, that is by eating the roots of the hair or feathers, and the epidermis. Mounted heads of large ruminant animals are the particular prey of these abominable pests, because they cannot be protected by glass cases, and are seldom touched save with a feather duster.
In ethnological collections all the garments of skin and leather, and all the textile fabrics are subject to the attacks of the Tineids, as they also are to those of the species to be noticed next.
Anthrenus.—Although I have seen this "buffalo bug" try hard to make an impression on mounted mammals, I have not yet seen it do harm except to furs and leather or woolen garments. The adult buffalo bug (Anthrenus lepidus) is a tiny, round, brown beetle, with white spots on its elytra, and, as usual, it is the larvæ that do the mischief.
Symptoms of the Presence of Insect Pests.—Whenever little heaps of brown dust are seen accumulating here and there on a pedestal underneath a mounted specimen, know that dermestes are actively at work somewhere above. Sometimes the larvæ will even show themselves on the hair, which means a bad case.
If a perfect moth is seen flying in a case, or resting on a specimen, search at once for the larvæ. The best way to do this is to go over a specimen with a rough brush, or a comb, to see if the hair pulls out at any point. If a tuft of hair gives way at its roots, and you see a bare spot underneath, it means moth larvæ.
Poisoning.—Let us take first the case of a mounted specimen which is known to be infested with the larvæ of either Dermestes or Tineids. It must be treated thoroughly all over with a powerful poison, not only to kill the insects already there, but to poison any larvæ that may be hatched hereafter and seek to attack it.
If possible, remove the specimen from its pedestal, and beat out of it whatever dust it may contain. Procure a quantity of alcohol sufficient when diluted with fifty per cent of water to completely saturate the hair (or feathers) of the specimen, and dissolve in it some corrosive sublimate—about one ounce to every three pints of the liquid. The point to strive for in making up such a solution is to make it as strong with the corrosive sublimate as it can be without leaving on dark hair a gray (or[342] white) deposit when the liquid has evaporated. In practice I always mix the liquid, and then test it with a tuft of black or brown hair. If the deposit left is quite apparent to the eye, a little more alcohol and water must be added. The principle of the process is simply this: The alcohol, being at once very penetrating and very volatile, and also capable of combining chemically with the corrosive sublimate, is used as a vehicle for the distribution of the poison. The poison is carried to the roots of the hair and left there as a deposit when the liquid evaporates. In Chapter XVIII. the method of applying this solution is described. Arsenic water, also described there, is equally good, and any intelligent person can make up either solution and apply it successfully without the slightest difficulty.
When the specimen has dried, the hair must be dressed by brushing and combing it. If the white poison shows on the hair, take a sponge, and with either hot water or alcohol sponge off the surface of the hair, leaving all the unseen poison undisturbed. If your solution contains the proper amount of poison, and is thoroughly applied, I warrant that insects will never again touch that specimen, even though it should exist a thousand years.
It often happens that moths get into cases of birds, or mammals, or insects, which cannot be treated as above without damaging the specimens. In such an event there are several poisons of a volatile character which give off fumes so deadly that no insect can live in them. The best for this purpose is naphthaline crystals, exposed in the cases in little bags made of musquito-netting, used in abundant quantity, and left in the cases, which must of course be kept closed as tightly as possible. In insect collections each box should have a little cone of crystals,[12] as a standing menace to all would-be marauders. Liquid or crystal bisulphide of carbon, exposed in saucers on the bottom of a tightly closed case will also kill whatever living insects may be found therein; but it does not destroy eggs, and by the time it has evaporated another generation of destroyers may have been born, hungrier than the first.
A half-ounce bag of naphthaline crystals will last about three months. Mr. John B. Smith, who published in the "Proceed[343]ings of the Entomological Society of Washington," vol. i., No. 2, p. 113, a very interesting paper on "Museum Pests," found in treating some boxes of coleoptera that were infested with Trogoderma that both bisulphide of carbon and naphthaline killed all larvæ and imagoes, and held all the eggs in a dormant condition, even through the summer months, until the poison had all evaporated, when the eggs began to hatch.
At present naphthaline in the form of crystals has become the most popular of the various volatile poisons, and among ornithologists, mammalogists, and entomologists is very generally used. It prevents mould, destroys bacteria and schizomycetes; the salt is perfectly neutral, is not poisonous to man, and is cheap, costing only twenty-five cents per pound.
Poisoning Textile Fabrics and Skin Clothing.—Objects of this class can not be put through any liquid poison, for the reason that some would be made hard and stiff, some would lose their colors, and all would come out in bad shape generally. To meet the exigencies of such cases one alternative is to poison the atmosphere of an air-tight case with some of the volatile poisons already mentioned, and the other is to treat each article with some powerful liquid poison, applied as a fine spray with an ordinary atomizer of gutta-percha, which can be purchased for from one to two dollars. The immense collections of the department of ethnology in the National Museum have necessitated a great amount of poisoning in both these ways, especially the latter, which has the merit of being permanent. In the "Smithsonian Report for 1887," vol. ii., pp. 549-558, Mr. Walter Hough has published a very complete, lucid, and valuable paper on "The Preservation of Museum Specimens from Insects, and the Effects of Dampness," which every zoological conservator should read and hold for ready reference.
In spraying large objects Mr. Hough uses either a Shaw & Geary No. 2 air-compressor (cost, $15) or a four-nozzle gutta-percha atomizer ($2.50), and the spray is from the following solution:
| Saturated solution of arsenic acid and alcohol | 1 pint. |
| Strong carbolic acid | 25 drops. |
| Strychnine | 20 grains. |
| Alcohol (strong) | 1 quart. |
| Naphtha, crude or refined | 1 pint. |
For treating specimens of ordinary size with the concentrated[344] fumes of bisulphide of carbon, the National Museum uses a galvanized sheet-iron tank 3 × 2 × 2 feet, which has around its upper edge a deep groove filled with water, into which the rim of the cover fits when the tank is closed. The centre of the cover contains an air-hole, which is also capable of being hermetically closed in the same way. This tank should be used in the open air, if possible, so that the fumes will not injure the health of the operator.
Poisoning Rugs.—It has long been a problem how to poison a fur rug to protect it from insects, and yet to keep out of it the dry mineral poisons which would be injurious to the health of the little ones, the dog, and the cat, who are "tenants in common" of the bear-skin on the floor. Mr. F.S. Webster has solved the difficulty by poisoning all his rugs on the inside with our old and valued friend, arsenical soap. It strikes into and through the skin, of course, and, contrary to previous expectations, it is by no means offensive, or even noticeable by odor in the finished rug.
Furs.—Even in Washington, the City of Moths, Mrs. Hornaday carried the family rugs and furs, and all woolen clothing, through eight summers, unscathed, by the liberal use of camphor gum alone. If the crumbled gum is sprinkled liberally into the folds of anything when it is being folded or rolled up, its protection against moths is assured.
Insect Powders.—For the benefit of the American housewife I will mention the fact that for the complete annihilation of ants, roaches, water-bugs, and the like, there is nothing that I know of that is so far-reaching and so deadly as a powder produced in California called buhac, costing sixty cents per pound. The price is high, but the powder is well worth it—and this is an absolutely free advertisement.
The Effect of Poisons on the Taxidermist.—Arsenical soap is by all odds the safest poison that can possibly be used. It gives off no poisonous fumes whatsoever, its presence in the mouth, nose, or eyes is always detected instantly, and the worst that it ever does is to get into a cut or under the ends of the finger-nails of the careless taxidermist, and make a festering sore which is well in a few days—a purely local ill.[345]
Dry arsenic is more injurious. It sometimes poisons the fingers of a careless operator, and if it is inhaled in the form of dust the effect may be serious. A few persons are very susceptible to the effects of dry arsenic, others are not. If the blood is in a healthy condition there is little to fear from it, except through gross carelessness. I have used, all told, probably more than a hundred and fifty pounds of arsenic in various forms, and never had an hour's illness in consequence, nor anything more serious than a sore finger.
Corrosive sublimate is much more powerful and more dangerous. It should never be used in the preparation of a skin before it is mounted; after mounting it may, with care, be used quite safely.
Strychnine is far too dangerous to be used by a taxidermist save in poisoning animals he wishes to secure as scientific specimens.
Recipe for Making Arsenical Soap.
| White bar soap, soft rather than hard | 2 pounds. |
| Powdered arsenic | 2 " |
| Camphor | 5 ounces. |
| Subcarbonate of potash | 6 " |
| Alcohol | 8 " |
Directions: The soap should be the best quality of laundry soap, and of such composition that it can be reduced with water to any degree of thinness. Soap which becomes like jelly when melted will not answer, and should never be used.
Slice the soap and melt it in a small quantity of water over a slow fire, stirring sufficiently to prevent its burning. When melted add the potash, and stir in the powdered arsenic. Next add the camphor, which should be dissolved in the alcohol at the beginning of the operation. Stir the mass thoroughly, boil it down to the consistency of thick molasses, and pour it into an earthen or wooden jar to cool and harden. Stir it occasionally while cooling to prevent the arsenic from settling at the bottom. When cold it should be like lard or butter. For use, mix a small quantity with water until it resembles buttermilk, and apply with a common paint-brush.
The prices charged for the manufactured article by chemists who make arsenical soap to sell are out of all proportion to the cost and labor involved, and every taxidermist who uses much of it should by all means manufacture his own supply.
Hendley's Enamel Varnish.—Take equal parts of ether and alcohol, mix them, and add one-third as much gun-cotton. To every gill of this mixture add six drops of olive-oil to give elasticity. It is a good plan to keep two bottles, one containing[347] the varnish ready for use, and the other containing the proper mixture of ether, alcohol and olive oil, to use in thinning the varnish when it gets too thick. This is a very superior varnish being absolutely colorless, and of high gloss.
The Wickersheimer Solution for the Preservation of Fleshy Objects Entire.—
| Alum | 500 | grains. |
| Salt | 125 | " |
| Saltpetre | 60 | " |
| Potash | 300 | " |
| Arsenic trioxide (white arsenic) | 100 | " |
Dissolve in one quart of boiling water. Cool and filter, and for every quart of solution add four quarts of glycerine and one quart of alcohol. Immerse the objects to be preserved in this solution, and keep them in it. It is but little else than our old familiar friend, the salt-and-alum bath, with enough glycerine added to prevent the excess of alum from unduly hardening and shriveling the specimens.
Composition for Use in Modeling Tongues, Mouths, and in General Fancy-Work.—"Procure 3 pounds white glue, 1 pint raw linseed oil, and 1 pound of resin. Heat the oil and resin, then add hot glue and stir thoroughly. Thicken with Paris white until the mixture has the proper consistency to mould when warm. This composition soon dries, becomes very hard, and can be colored or gilded. Fancy decorations of any design can readily be made from moulds of plaster or wood, and be glued on to shields and cases, thereby saving the expense of carving. The above is my own composition, which I have successfully employed for many years."—(J.H. Batty.)
Composition for Snow Scenes.—"Crush burnt alum with a roller, and remove small lumps. Add frosting, which has been pulverized in a mortar to the proper degree of fineness."—(Batty.)
Varnish Cutter (to remove old varnish from antlers, teeth, wood, or from the surface of an old oil-painting).—Take a sufficient quantity of eighty or ninety per cent alcohol, and slowly pour into it clear spirits of turpentine until the mixture becomes of a milky color. Then cork the bottle and shake the mixture thoroughly, and it is ready for use. Apply it with a small sponge, rub the surface vigorously for a moment only,[348] then dip a rag in boiled linseed-oil and apply it to the cleaned surface. The varnish cutter acts almost instantly, and if left on too long the surface of a painting might be injured.
To Prevent Mould in Boxes of Specimens.—Take some carbolic acid crystals (forty cents per pound), melt them in the sun, and with the resulting liquid acid paint the entire inside of each box, and, if possible, pack contents with naphthaline crystals. This is efficacious in boxes of small skins of birds and mammals, of insects and the like, even in hot climates, but of course does not apply to boxes of large specimens which contain a great amount of moisture.
To Polish Hard Wood.—1st. Rub the surface thoroughly with raw linseed-oil, turpentine, and powdered pumice-stone. 2d. Give the surface a smooth coat of shellac. 3d. When dry, take fine sand-paper and go over it rather lightly. 4th. Give the surface a good coat of hard oil finish (a white varnish), and let it harden. 5th. When quite dry rub down with raw oil, turpentine, and pumice-stone, to soften the gloss of the varnish, and give a polish instead. For rubbing, use a piece of hair-cloth, or clean burlaps.
Cement for Gumming Labels to Minerals and Shells.—Pulverized gum Arabic, 4 ounces; pulverized white sugar, 2 ounces; starch, 4 drachms.
Dissolve all separately in as little water as convenient. Dissolve starch in cold water, then stir it into sugar water, and then that mixture into the gum water. Boil with great care, as burning will spoil the whole. It is well to use a tin vessel raised from the bottom of another vessel containing water. After the starch ceases to make the mixture look milky it is cooked, but at least an hour's time will be required. Keep in large mouthed, tightly corked bottles, or when done pour into a tray covered with strong paper, spreading it evenly over the paper, and allow it to dry. When dry enough, moisten back of paper and remove it from the gum, dry again thoroughly, break into fragments and preserve for use in wide-mouth stoppered jar.—(Southwick & Jenck's "Random Notes.")
Arsenic Water (for poisoning mammal skins, etc.).—Water, 4 quarts; arsenic, 4 ounces. Mix, stir and boil until the arsenic is all taken up.[349]
The Treatment of Furs and Peltries.—Inasmuch as the readers of this book may sometime desire to preserve a few mammal skins as furs, or to be made up as rugs, I will quote entire, verbatim et literatim, a circular of instructions lately issued by one of the largest fur houses in this country, Messrs. William Macnaughtan's Sons, of New York City. Observe particularly, however, that skins prepared thus are utterly worthless to the taxidermist and the scientific museum. They are good for furs only:
"Directions for Fur Collectors and Trappers, to Insure High Prices, Ready Sales, and Save from Losses through Ignorance.—'Cased:' Ermine, fisher, fox, lynx, martin, mink, opossum, otter, skunk, must be 'cased,' that is, not cut open. In skinning, cut at the rump, and turn the skin inside out (like a glove) over the body of the animal, leaving the pelt side out. Then after scraping, cleaning, and drying, turn the skin back again while it is soft and easily managed, leaving the fur side out. Then put a thin board inside the skin, cut the natural shape of it, stretching the skin to its fullest extent, but not so much as to make the fur thin. Too much stretching spreads the fur over a large surface, and makes it thin and lacking in richness. A liberal supply of good boards should be kept on hand. Never use bent sticks, bows, or anything irregular in shape or that yields. When the above are 'opened' they have a Southern appearance that lessens the value greatly.
"'Open:' badger, bear, beaver, cats, raccoon, wolves, wolverine, must be 'open;' that is, cut open, up the belly from rump to head. After scraping, cleaning, and drying, stretch a uniformly oblong shape, to the fullest extent of the skin, but not so much as to make the fur thin. When thoroughly dry, trim off legs, shanks, flippers, and any little pieces that spoil the appearance of skin.
"Exceptions: Skunk, long stripe, such as come from the Territories and sections of California, Wisconsin, Minnesota, and Iowa, cut open and stretch oblong, as explained. Skunk, with the white stripe (or any portion) shaved out, blackened, or tampered with, must be collected at half price. Opossum from Indian Territory, cut open, and stretch oblong as explained. Chop off the tails where the fur ends, as they make opossum[350] look poorly and lessen their value. Beaver are sometimes stretched almost round, but appear very much better stretched oblong. Value by the skin, never by the pound. They rapidly lose heavily in weight. They bring most sold by the skin. Muskrats must be 'cased,' but with fur side in. Chop off the tails as explained. Skin at the nose and make rumps square. Round tails have less value and do not sell well. Muskrats must not be injured by shooting or spearing. Trap them.
"Skins that have dried without proper care can be treated same as fresh, green skins. Otherwise they have no value. Dissolve a handful of common salt in a pail of fresh water, and apply frequently with brush or rag (to pelt side only, as it spoils appearance to wet the fur) until the pelt becomes perfectly soft. Then handle as explained. The same with 'open' skins.
"Cautions: Do not cure with alum or salt. It injures them for dressing and spoils their sale. Do not dry skins at a fire, or in the sun, or in smoke. It often 'burns' them; when they then spoil, and ruin on being dressed. Dry in the open air where shady. Meaty skins often 'burn.' The meat and fat on them heats and 'burns' them, and they then go to pieces and rot on being dressed. Too much warmth curls and spoils the top fur or hair. Never stuff furs of any kind; dry and stretch as explained. Do not stretch out the noses and make them pointed. It gives a Southern appearance and lessens value. Do not cut off heads, ears, or noses, or mutilate in any way. It lessens value and injures sales. Remove as much of bone from tail as possible, otherwise the tail rots.
"Trapping: Fur-bearing animals must not be killed till they have at least a fair growth of fur. Stop trapping as soon in early spring as the fur begins to shed or becomes thin, or a little faded. These too early or too late caught furs are a disgrace to fur trappers and collectors, and a wasteful, worthless slaughter."
It is manifestly impossible even to name under this head a tenth part of the excellent books which might well be given place. It is also inexpedient to include in a list, that must of necessity be brief, the names of special works relating to the fauna of other countries than North America. Having been from first to last a diligent user of books in the course of my work, and ever on the alert for something new in printed word or picture that would be of practical use, I will give here the titles of the books that have proven of the greatest practical value to me. I must also in this connection strongly urge the young taxidermist and collector to supply himself with as many of these standard works as he can possibly procure. If diligently studied they are bound to save him from many an error, and richly repay their cost.
General Zoology and Classification.
"Steele's Popular Zoology." By Professor J.W.P. Jenks. American Book Company, New York. $1.00.
A model manual; of great value to the student because of its clearness, conciseness, and wealth of information. Copiously and elegantly illustrated.
"Proceedings of the Zoological Society of London;" also "Transactions."
Contains a great number of fine animal plates of much value to professional taxidermists. The series is extensive and very costly, and is therefore usually inaccessible except when it can be reached in some scientific library.[352]
On Mammals.
"Illustrated Natural History: Mammals." Rev. J.G. Wood. Routledge, London, 1861. Price about $4.00. Get the original edition if possible.
This book has been of more help to me than any other I have ever found.
"Quadrupeds of North America." Audubon and Bachman.
Out of print and difficult to obtain, but very valuable.
"The Mammalia, in Word and Picture." By Carl Vogt and F. Specht. Translated from the German by Geo. G. Chisholm. D. Appleton & Co., 1-5 Bond Street, New York, 1890. Super royal 4to. $12.00.
This great work contains the finest illustrations of mammals, both singly and in groups, ever published in any country. The groups represented are wonderfully fine and life-like, and must be seen to be appreciated. No mammal taxidermist can afford to be without this work.
On Birds.
"The American Ornithologist's Union Code of Nomenclature, and Check-List of North American Birds." L.S. Foster, 35 Pine Street, New York City. $3.00.
Indispensable to the American collector, because it is the highest authority on the classification and nomenclature of North American birds. Thanks to this work, it is no longer necessary to take a daily paper in order to keep posted on the latest changes in bird nomenclature. The names adopted by Baird (1858), Coues (1873), Ridgway (1880), and Coues (1882) are all given. No illustrations.
"Key to North American Birds." By Dr. Elliott Coues. Estes & Lauriat, Boston. $7.50.
This great work—indispensable to every ornithologist—consists of a masterly treatise on systematic ornithology and the anatomy of birds, a key by which even the tyro can learn to[353] analyze any American bird and identify it, and also a valuable treatise on "Field Ornithology," or bird-collecting.
"Nomenclature of North American Birds." Robert Ridgway. Sold by F.B. Webster, 409 Washington Street, Boston. $7.50.
Especially designed for use in the determination of species.
"Illustrated Natural History: Birds." Rev. J.G. Wood. Routledge, London, 1861. Price about $4.00. Get the original edition.
To a bird taxidermist this is the most valuable book ever published in a single volume, because of its wealth of excellent illustrations. Of special value in mounting strange foreign birds. Beware of the later editions.
"Studer's Birds of North America." Illustrated by Theodore Jasper. Large royal quarto. Jacob H. Studer, New York. $25.00.
Contains 119 plates, and a colored figure of every species of North American bird known at the date of its publication. A notable work. The illustrations are of great value to young taxidermists as models by which to mount birds.
"Birds of North America." J.J. Audubon.
This superb work is out of print; rare and costly. The octavo edition is to be found in most large libraries, however, and every bird taxidermist should at least know where the copy nearest to him is to be found, and how to gain access to it in time of need.
"Oology of New England." E.A. Capen. Sold by Frank B. Webster, 409 Washington Street, Boston. $8.75.
This is the finest illustrated work on birds' eggs ever published in this country.
On Reptiles.
"Illustrated Natural History: Reptiles." Rev. J.G. Wood. Routledge, London, 1861.
Uniform with volumes on Mammals and Birds.[354]
On Fishes.
"American Fishes." G. Brown Goode. Standard Book Co., New York, 1888. $5.00.
An elegant work, of convenient size. Comprehensive and eminently useful. Fully illustrated. No collector or student of American fishes can afford to be without it.
"The Fishery Industries of the United States." Section I. By G. Brown Goode and Associates. 2 vols. Complete and exhaustive, both in text and plates, and very valuable. Government publication. Sold at cost by the U.S. Fish Commission, Washington.
"Introduction to the Study of Fishes." Albert Gunther. A. & C. Black, Edinburgh.
On Insects.
See the end of Chapter XLIV.
On Invertebrates.
"The Ocean World." Louis Figuier. Cassell & Co., New York. $2.50.
"Recent and Fossil Shells." S.P. Woodward, London. John Weale, 1856. (Apply to Bernard Quaritch, London.)
A very handy and useful manual for the field. Many illustrations. Price about $1.50.
"Structural and Systematic Conchology." Geo. W. Tryon. Philadelphia Academy of Natural Sciences. $12.00.
A great work; complete, exhaustive, and richly illustrated.
For Suggestions of Groups of Animals.
"Homes Without Hands." Rev. J.G. Wood. Longmans, Green & Co., London. Price about $3.00.
"Mammalia in Word and Picture." Specht and Vogt, already described.[355]
Miscellaneous.
"The Sportsman's Library," as advertised by the Forest and Stream Publishing Company, 318 Broadway, New York, contains an attractive and valuable selection of books on subjects of special interest to the sportsman, naturalist, and traveller. It includes books by specialists on such subjects as "Camping and Trapping," "Hunting and Shooting," "Angling," "Boating and Yachting," "Guide-Books and Maps," "Horse," "Kennel," "Natural History," and miscellaneous works. The list, as a whole, is an excellent one to select from.
Of course no one with a spark of interest in hunting and the natural history of the higher vertebrates will be without Forest and Stream—a whole sportsman's and naturalist's library in itself,—or The Field, or Sports Afield. No young ornithologist can get along without his best friend, the Ornithologist and Oologist, and it would indeed be rank heresy for the professional bird-man to ignore the stately and infallible Auk.
(Formerly of Washington.)
Our new firm will now successfully compete with the best establishments of a similar kind in this country.
We are ready to furnish and prepare
Groups of Mammals and Birds,
for museums and the trade; also, heads of large game, artistic articles for household ornament and utility, such as picture groups, panels, screens, and many original novelties in fur and feather, unique in design,
ALL OF WHICH WILL BE ABSOLUTELY MOTH PROOF!
Mr. Webster's long professional experience and reputation as an expert taxidermist is well known and established. Under his personal superintendence of the large trained force employed by us in this important branch of our business, the very best work obtainable is guaranteed.
WE ARE ALSO MANUFACTURING FURRIERS.
With Mr. Sowdon's 30 years experience in the trade, we offer a full line of
Fur Garments, Animal Rugs,
Robes and Fine Furs of every description.
We carry a full line of fur stock, raw and dressed. With competent designers, fitters and cutters, our patrons are assured of good fitting and well-made garments at reasonable prices. Correspondence solicited.
ENTERPRISING TAXIDERMISTS WILL
The best procurable are those made by
from life studies of living animals.
WHITE CORNERED EYES for the larger animals a specialty, and eyes are made to order on short notice when colored sketches are furnished.
The attention of American taxidermists is called to the fact that for eight years past our glass eyes have been used exclusively by Mr. Hornaday in all the animals mounted by him and under his direction in the U.S. National Museum, and reference to him as to the quality and cost of our goods is hereby made, by permission.
Send for our price-list and diagram of sizes.
WE ALSO MANUFACTURE
GLASS SHADES of all shapes and sizes for the protection of
mounted birds, flowers, wax fruit, etc.
SCIENTIFIC GLASSWARE of every description.
GAUGE TUBING AND CYLINDERS, for Distillers,
Brewers, etc.
All kinds of glass work done to order. Established 1862. The oldest and best firm on the continent in the manufacture of Artificial Eyes and Glass Shades. Catalogue free upon application, and careful attention given to mail orders.
Glass Factory on Newtown Creek, near Penny Bridge, Brooklyn, E.D., New York.
The undersigned manufactures the Patent Brackets and Racks for adjustable shelves (Fig. 1), also Patent Monitor Locks (Fig. 2). These are arranged for all styles of Museum and Book Cases, French Windows, etc. Adopted and recommended by the principal Museums in the United States. Special new and improved machinery for cutting and polishing Minerals, Petrified Wood, etc., by steam or foot power, on hand or furnished to order (Fig. 3).
Full information given on application to
ELISHA T. JENKS.
Middleborough,
Plymouth Co.,
Mass.
The Best are the Cheapest.
THE · UNRIVALLED · SUPERIORITY
OF THESE
Museum Case Locks,
Brackets and Racks,
is fully attested by their adoption and general
use in such Institutions as the following:
Smithsonian Institution,
United States National Museum,
Museum of Comparative Zoology,
Peabody Museum, Cambridge.
Boston Society of Natural History,
College of New Jersey, Princeton.
Yale College, Vassar College,
Brown University,
Peabody Academy of Science,
College of Charleston, S.C.,
and many others.
IN MAKING UP YOUR
ORDER ALL YOUR
FROM
Successors to C. PELLETIER,
(ESTABLISHED 1856,)
For the last eight years we have supplied the U.S. National Museum with all the artificial leaves used by Mr. Hornaday in his animal groups, and refer to him by permission. The most of the leaves thus used were made to order, on short notice and at reasonable prices, from samples furnished us. Fine leaves and tropical plants are our specialty. Let us know your wants, and we will supply them promptly, and to your satisfaction.
OF SPECIAL INTEREST TO MUSEUM BUILDERS.
OF EVERY DESCRIPTION A SPECIALTY.
Our Jars are used largely by the Smithsonian Institution and United States National Museum, and give such satisfaction as is found only in first-class productions.
We have always on hand a large assortment of well prepared Skins for Taxidermists, also finely mounted specimens of native and foreign Mammals, Birds, Reptiles, Fishes, etc.
Catalogue 150 pages. Price 30 cents.
Also HEAD SKINS AND ANTLERS. Custom work done in Taxidermy, and in preparing and mounting skeletons.
Minerals, Rocks, Fossils, Casts of Fossils, Geological Relief Maps, Models and Diagrams, Archæological Specimens, and Birds' Eggs.
Skins and Skeletons of Animals, Invertebrates, Crustaceans, Shells, Corals, etc., Anatomical Models, Human Skeletons, Skulls and Skeletons of Races, etc.
Before you can properly understand the practice of Taxidermy, it will be necessary to engage in the work, and attain efficiency by actual practice. To accomplish the best results, it is of vital importance to have the proper tools and materials. Poor tools and materials produce poor results. See to it then, that you are amply provided, and before you purchase, write us for our 24 page Catalogue, devoted entirely to SUPPLIES FOR THE NATURALIST.
We can not only supply any and all of the materials named in the preceding pages, but we can also supply you with
of which we carry thousands of specimens in stock. We specially desire to call your attention to our line of supplies for the
Such as glass eyes of fine grades, leaves and grasses for case decorations, tools of all kinds from a skinning knife to an engine lathe, collecting paraphernalia, and a large line of books treating on Natural History.
The only periodical in this country treating directly on matters of special interest to the Field Collector. Price, $1.00 per year.
Office: 409 WASHINGTON ST., BOSTON, MASS.
You may go shooting and get no game, or fishing and catch no fish; but you cannot buy a copy of the Forest and Stream (this week or next week or any week) without finding it brimful of capital sketches of shooting and fishing, and papers on natural history and sportsman's travel and experiences, and discussions of yachting and canoeing. A paper for men.
Forest and Stream believes in the recreation found in the haunts of deer and grouse, and trout and bass. It believes in the common sense that calls a halt in business drive and professional grind, for a holiday with gun, rod, and paddle—if only afterward to drive the faster and grind the harder. It is a journal for those who love the country and life out of doors. It reflects the spirit and records the experiences of the great army of outers. If you have any sympathy with these things, the Forest and Stream is just the paper you would like to have come into your home every week. Send for a specimen copy (free on mention of this book), or $4.00 for a year's subscription. Sold by all newsdealers.
Chief Taxidermist U.S. National Museum.
One vol., 8vo, pp. xxii. 512, two folding maps and 51 illustrations. Price, $3.00.
The author relates the experiences of a hunter and naturalist in India, Ceylon, the Malay Peninsula, and Borneo; and certainly no richer hunting-ground could be found anywhere else in the world. Mr. Hornaday is chief taxidermist in the United States National Museum. He was formerly connected with Professor Ward's Natural Science Museum of Rochester, N.Y., and his expedition to the East was in the interests of that establishment. While his book is in some respects like such works as those which Du Chaillu and Sir Samuel W. Baker have written to delight and interest a multitude of readers, he has imparted a vast amount of information, a large part of which is new and of the greatest moment to the naturalist.
Mr. Hornaday started from New York in 1876. From England he went finally south to India, arriving at Bombay; he went across country to Benares; from here he made an expedition to the north to Cawnpore and Agra. From Benares he worked his way to Calcutta, journeyed down the Bay of Bengal to Madras; southward again, he made a complete circuit of Ceylon, than to the Malay Peninsula, and finally to Borneo, where his adventures with the oran-gutan were met, ending his two years of fruitful and entirely successful search. The illustrations are many, and most of them are taken from Mr. Hornaday's own sketches. Though it may seem to be stating much, it certainly may be truly said that a more interesting book of travel and adventures was never published.
"Decidedly the most interesting and instructive book of travel and adventure in the East Indies it has ever been our good fortune to read."—Baltimore News.
"An entertaining volume.... The author has proved his ability to write a good book of travel."—Morning Post (London).
"To the naturalist, Mr. Hornaday's book cannot but be as deeply interesting as to the sportsman and traveller.... It deserved to be distinguished from among the mass of books of sporting adventure."—Melbourne Argus.
"One of the most entertaining and instructive books of its kind that has been published."—San Francisco Post.
[1] For further particulars, see Two Years in the Jungle. New York: Charles Scribner's Sons.
[2] For No. 22 use wood powder and a gun-cane. It makes no noise, does not frighten the little birds and mammals, and, if you are wicked enough, you can use it on Sunday.
[3] See recipe in Chapter XLV.
[4] For detailed instructions in skinning large heads, see Chapter XIX.
[5] From Steele's Popular Zoology, by permission of the American Book Company.
[6] Some operators open a fish in a straight line along the middle of one side, but I have never been able to see any reason for this preference.
[7] For the best part of the information given under this heading I am indebted to Mr. I. Greegor, the well-known dealer in sea-shells and Florida "curios," at 61 Laura Street, Jacksonville, Fla., who is an acknowledged expert in the treatment of shells, not only in cleaning, but in cutting sections, polishing, etc. I obtained the facts from him while he occupied a very high position in the Smithsonian Institution—in the north tower, at least fifty feet from the ground.
[8] If you can not procure annealed wire, take hard iron wire, heat it to redness, and as soon as it reaches that state remove it from the fire and allow it to cool slowly.
[9] This specimen received the silver specialty medal awarded "for the best piece in entire Exhibition," at the New York Exhibition of the Society of American Taxidermists, in 1883.
[10] At the hoof in the case of all hoofed animals.
[11] The cyanide cake is made by pouring plaster of Paris into a mould of proper size and imbedding in it before setting a number of lumps of cyanide of potash.
[12] Made and sold by Blake & Co., Philadelphia.
Obvious punctuation and spelling errors repaired.
Page numbers for blank pages, and pages consisting entirely of illustration, are not visible.
The remaining corrections made are indicated by red dotted lines under the corrections. Scroll the mouse over the word and the original text will be displayed.
End of the Project Gutenberg EBook of Taxidermy and Zoological Collecting, by
William T. Hornaday and W. J. Holland

*** END OF THIS PROJECT GUTENBERG EBOOK TAXIDERMY AND ZOOLOGICAL ***

***** This file should be named 40109-h.htm or 40109-h.zip *****
This and all associated files of various formats will be found in:
        http://www.gutenberg.org/4/0/1/0/40109/

Produced by Chris Curnow, Mark Young and the Online
Distributed Proofreading Team at http://www.pgdp.net (This
file was produced from images generously made available
by The Internet Archive)


Updated editions will replace the previous one--the old editions
will be renamed.

Creating the works from public domain print editions means that no
one owns a United States copyright in these works, so the Foundation
(and you!) can copy and distribute it in the United States without
permission and without paying copyright royalties.  Special rules,
set forth in the General Terms of Use part of this license, apply to
copying and distributing Project Gutenberg-tm electronic works to
protect the PROJECT GUTENBERG-tm concept and trademark.  Project
Gutenberg is a registered trademark, and may not be used if you
charge for the eBooks, unless you receive specific permission.  If you
do not charge anything for copies of this eBook, complying with the
rules is very easy.  You may use this eBook for nearly any purpose
such as creation of derivative works, reports, performances and
research.  They may be modified and printed and given away--you may do
practically ANYTHING with public domain eBooks.  Redistribution is
subject to the trademark license, especially commercial
redistribution.


*** START: FULL LICENSE ***

THE FULL PROJECT GUTENBERG LICENSE
PLEASE READ THIS BEFORE YOU DISTRIBUTE OR USE THIS WORK

To protect the Project Gutenberg-tm mission of promoting the free
distribution of electronic works, by using or distributing this work
(or any other work associated in any way with the phrase "Project
Gutenberg"), you agree to comply with all the terms of the Full Project
Gutenberg-tm License (available with this file or online at
http://gutenberg.org/license).


Section 1.  General Terms of Use and Redistributing Project Gutenberg-tm
electronic works

1.A.  By reading or using any part of this Project Gutenberg-tm
electronic work, you indicate that you have read, understand, agree to
and accept all the terms of this license and intellectual property
(trademark/copyright) agreement.  If you do not agree to abide by all
the terms of this agreement, you must cease using and return or destroy
all copies of Project Gutenberg-tm electronic works in your possession.
If you paid a fee for obtaining a copy of or access to a Project
Gutenberg-tm electronic work and you do not agree to be bound by the
terms of this agreement, you may obtain a refund from the person or
entity to whom you paid the fee as set forth in paragraph 1.E.8.

1.B.  "Project Gutenberg" is a registered trademark.  It may only be
used on or associated in any way with an electronic work by people who
agree to be bound by the terms of this agreement.  There are a few
things that you can do with most Project Gutenberg-tm electronic works
even without complying with the full terms of this agreement.  See
paragraph 1.C below.  There are a lot of things you can do with Project
Gutenberg-tm electronic works if you follow the terms of this agreement
and help preserve free future access to Project Gutenberg-tm electronic
works.  See paragraph 1.E below.

1.C.  The Project Gutenberg Literary Archive Foundation ("the Foundation"
or PGLAF), owns a compilation copyright in the collection of Project
Gutenberg-tm electronic works.  Nearly all the individual works in the
collection are in the public domain in the United States.  If an
individual work is in the public domain in the United States and you are
located in the United States, we do not claim a right to prevent you from
copying, distributing, performing, displaying or creating derivative
works based on the work as long as all references to Project Gutenberg
are removed.  Of course, we hope that you will support the Project
Gutenberg-tm mission of promoting free access to electronic works by
freely sharing Project Gutenberg-tm works in compliance with the terms of
this agreement for keeping the Project Gutenberg-tm name associated with
the work.  You can easily comply with the terms of this agreement by
keeping this work in the same format with its attached full Project
Gutenberg-tm License when you share it without charge with others.

1.D.  The copyright laws of the place where you are located also govern
what you can do with this work.  Copyright laws in most countries are in
a constant state of change.  If you are outside the United States, check
the laws of your country in addition to the terms of this agreement
before downloading, copying, displaying, performing, distributing or
creating derivative works based on this work or any other Project
Gutenberg-tm work.  The Foundation makes no representations concerning
the copyright status of any work in any country outside the United
States.

1.E.  Unless you have removed all references to Project Gutenberg:

1.E.1.  The following sentence, with active links to, or other immediate
access to, the full Project Gutenberg-tm License must appear prominently
whenever any copy of a Project Gutenberg-tm work (any work on which the
phrase "Project Gutenberg" appears, or with which the phrase "Project
Gutenberg" is associated) is accessed, displayed, performed, viewed,
copied or distributed:

This eBook is for the use of anyone anywhere at no cost and with
almost no restrictions whatsoever.  You may copy it, give it away or
re-use it under the terms of the Project Gutenberg License included
with this eBook or online at www.gutenberg.org/license

1.E.2.  If an individual Project Gutenberg-tm electronic work is derived
from the public domain (does not contain a notice indicating that it is
posted with permission of the copyright holder), the work can be copied
and distributed to anyone in the United States without paying any fees
or charges.  If you are redistributing or providing access to a work
with the phrase "Project Gutenberg" associated with or appearing on the
work, you must comply either with the requirements of paragraphs 1.E.1
through 1.E.7 or obtain permission for the use of the work and the
Project Gutenberg-tm trademark as set forth in paragraphs 1.E.8 or
1.E.9.

1.E.3.  If an individual Project Gutenberg-tm electronic work is posted
with the permission of the copyright holder, your use and distribution
must comply with both paragraphs 1.E.1 through 1.E.7 and any additional
terms imposed by the copyright holder.  Additional terms will be linked
to the Project Gutenberg-tm License for all works posted with the
permission of the copyright holder found at the beginning of this work.

1.E.4.  Do not unlink or detach or remove the full Project Gutenberg-tm
License terms from this work, or any files containing a part of this
work or any other work associated with Project Gutenberg-tm.

1.E.5.  Do not copy, display, perform, distribute or redistribute this
electronic work, or any part of this electronic work, without
prominently displaying the sentence set forth in paragraph 1.E.1 with
active links or immediate access to the full terms of the Project
Gutenberg-tm License.

1.E.6.  You may convert to and distribute this work in any binary,
compressed, marked up, nonproprietary or proprietary form, including any
word processing or hypertext form.  However, if you provide access to or
distribute copies of a Project Gutenberg-tm work in a format other than
"Plain Vanilla ASCII" or other format used in the official version
posted on the official Project Gutenberg-tm web site (www.gutenberg.org),
you must, at no additional cost, fee or expense to the user, provide a
copy, a means of exporting a copy, or a means of obtaining a copy upon
request, of the work in its original "Plain Vanilla ASCII" or other
form.  Any alternate format must include the full Project Gutenberg-tm
License as specified in paragraph 1.E.1.

1.E.7.  Do not charge a fee for access to, viewing, displaying,
performing, copying or distributing any Project Gutenberg-tm works
unless you comply with paragraph 1.E.8 or 1.E.9.

1.E.8.  You may charge a reasonable fee for copies of or providing
access to or distributing Project Gutenberg-tm electronic works provided
that

- You pay a royalty fee of 20% of the gross profits you derive from
     the use of Project Gutenberg-tm works calculated using the method
     you already use to calculate your applicable taxes.  The fee is
     owed to the owner of the Project Gutenberg-tm trademark, but he
     has agreed to donate royalties under this paragraph to the
     Project Gutenberg Literary Archive Foundation.  Royalty payments
     must be paid within 60 days following each date on which you
     prepare (or are legally required to prepare) your periodic tax
     returns.  Royalty payments should be clearly marked as such and
     sent to the Project Gutenberg Literary Archive Foundation at the
     address specified in Section 4, "Information about donations to
     the Project Gutenberg Literary Archive Foundation."

- You provide a full refund of any money paid by a user who notifies
     you in writing (or by e-mail) within 30 days of receipt that s/he
     does not agree to the terms of the full Project Gutenberg-tm
     License.  You must require such a user to return or
     destroy all copies of the works possessed in a physical medium
     and discontinue all use of and all access to other copies of
     Project Gutenberg-tm works.

- You provide, in accordance with paragraph 1.F.3, a full refund of any
     money paid for a work or a replacement copy, if a defect in the
     electronic work is discovered and reported to you within 90 days
     of receipt of the work.

- You comply with all other terms of this agreement for free
     distribution of Project Gutenberg-tm works.

1.E.9.  If you wish to charge a fee or distribute a Project Gutenberg-tm
electronic work or group of works on different terms than are set
forth in this agreement, you must obtain permission in writing from
both the Project Gutenberg Literary Archive Foundation and Michael
Hart, the owner of the Project Gutenberg-tm trademark.  Contact the
Foundation as set forth in Section 3 below.

1.F.

1.F.1.  Project Gutenberg volunteers and employees expend considerable
effort to identify, do copyright research on, transcribe and proofread
public domain works in creating the Project Gutenberg-tm
collection.  Despite these efforts, Project Gutenberg-tm electronic
works, and the medium on which they may be stored, may contain
"Defects," such as, but not limited to, incomplete, inaccurate or
corrupt data, transcription errors, a copyright or other intellectual
property infringement, a defective or damaged disk or other medium, a
computer virus, or computer codes that damage or cannot be read by
your equipment.

1.F.2.  LIMITED WARRANTY, DISCLAIMER OF DAMAGES - Except for the "Right
of Replacement or Refund" described in paragraph 1.F.3, the Project
Gutenberg Literary Archive Foundation, the owner of the Project
Gutenberg-tm trademark, and any other party distributing a Project
Gutenberg-tm electronic work under this agreement, disclaim all
liability to you for damages, costs and expenses, including legal
fees.  YOU AGREE THAT YOU HAVE NO REMEDIES FOR NEGLIGENCE, STRICT
LIABILITY, BREACH OF WARRANTY OR BREACH OF CONTRACT EXCEPT THOSE
PROVIDED IN PARAGRAPH 1.F.3.  YOU AGREE THAT THE FOUNDATION, THE
TRADEMARK OWNER, AND ANY DISTRIBUTOR UNDER THIS AGREEMENT WILL NOT BE
LIABLE TO YOU FOR ACTUAL, DIRECT, INDIRECT, CONSEQUENTIAL, PUNITIVE OR
INCIDENTAL DAMAGES EVEN IF YOU GIVE NOTICE OF THE POSSIBILITY OF SUCH
DAMAGE.

1.F.3.  LIMITED RIGHT OF REPLACEMENT OR REFUND - If you discover a
defect in this electronic work within 90 days of receiving it, you can
receive a refund of the money (if any) you paid for it by sending a
written explanation to the person you received the work from.  If you
received the work on a physical medium, you must return the medium with
your written explanation.  The person or entity that provided you with
the defective work may elect to provide a replacement copy in lieu of a
refund.  If you received the work electronically, the person or entity
providing it to you may choose to give you a second opportunity to
receive the work electronically in lieu of a refund.  If the second copy
is also defective, you may demand a refund in writing without further
opportunities to fix the problem.

1.F.4.  Except for the limited right of replacement or refund set forth
in paragraph 1.F.3, this work is provided to you 'AS-IS' WITH NO OTHER
WARRANTIES OF ANY KIND, EXPRESS OR IMPLIED, INCLUDING BUT NOT LIMITED TO
WARRANTIES OF MERCHANTABILITY OR FITNESS FOR ANY PURPOSE.

1.F.5.  Some states do not allow disclaimers of certain implied
warranties or the exclusion or limitation of certain types of damages.
If any disclaimer or limitation set forth in this agreement violates the
law of the state applicable to this agreement, the agreement shall be
interpreted to make the maximum disclaimer or limitation permitted by
the applicable state law.  The invalidity or unenforceability of any
provision of this agreement shall not void the remaining provisions.

1.F.6.  INDEMNITY - You agree to indemnify and hold the Foundation, the
trademark owner, any agent or employee of the Foundation, anyone
providing copies of Project Gutenberg-tm electronic works in accordance
with this agreement, and any volunteers associated with the production,
promotion and distribution of Project Gutenberg-tm electronic works,
harmless from all liability, costs and expenses, including legal fees,
that arise directly or indirectly from any of the following which you do
or cause to occur: (a) distribution of this or any Project Gutenberg-tm
work, (b) alteration, modification, or additions or deletions to any
Project Gutenberg-tm work, and (c) any Defect you cause.


Section  2.  Information about the Mission of Project Gutenberg-tm

Project Gutenberg-tm is synonymous with the free distribution of
electronic works in formats readable by the widest variety of computers
including obsolete, old, middle-aged and new computers.  It exists
because of the efforts of hundreds of volunteers and donations from
people in all walks of life.

Volunteers and financial support to provide volunteers with the
assistance they need, are critical to reaching Project Gutenberg-tm's
goals and ensuring that the Project Gutenberg-tm collection will
remain freely available for generations to come.  In 2001, the Project
Gutenberg Literary Archive Foundation was created to provide a secure
and permanent future for Project Gutenberg-tm and future generations.
To learn more about the Project Gutenberg Literary Archive Foundation
and how your efforts and donations can help, see Sections 3 and 4
and the Foundation web page at http://www.pglaf.org.


Section 3.  Information about the Project Gutenberg Literary Archive
Foundation

The Project Gutenberg Literary Archive Foundation is a non profit
501(c)(3) educational corporation organized under the laws of the
state of Mississippi and granted tax exempt status by the Internal
Revenue Service.  The Foundation's EIN or federal tax identification
number is 64-6221541.  Its 501(c)(3) letter is posted at
http://pglaf.org/fundraising.  Contributions to the Project Gutenberg
Literary Archive Foundation are tax deductible to the full extent
permitted by U.S. federal laws and your state's laws.

The Foundation's principal office is located at 4557 Melan Dr. S.
Fairbanks, AK, 99712., but its volunteers and employees are scattered
throughout numerous locations.  Its business office is located at
809 North 1500 West, Salt Lake City, UT 84116, (801) 596-1887, email
business@pglaf.org.  Email contact links and up to date contact
information can be found at the Foundation's web site and official
page at http://pglaf.org

For additional contact information:
     Dr. Gregory B. Newby
     Chief Executive and Director
     gbnewby@pglaf.org


Section 4.  Information about Donations to the Project Gutenberg
Literary Archive Foundation

Project Gutenberg-tm depends upon and cannot survive without wide
spread public support and donations to carry out its mission of
increasing the number of public domain and licensed works that can be
freely distributed in machine readable form accessible by the widest
array of equipment including outdated equipment.  Many small donations
($1 to $5,000) are particularly important to maintaining tax exempt
status with the IRS.

The Foundation is committed to complying with the laws regulating
charities and charitable donations in all 50 states of the United
States.  Compliance requirements are not uniform and it takes a
considerable effort, much paperwork and many fees to meet and keep up
with these requirements.  We do not solicit donations in locations
where we have not received written confirmation of compliance.  To
SEND DONATIONS or determine the status of compliance for any
particular state visit http://pglaf.org

While we cannot and do not solicit contributions from states where we
have not met the solicitation requirements, we know of no prohibition
against accepting unsolicited donations from donors in such states who
approach us with offers to donate.

International donations are gratefully accepted, but we cannot make
any statements concerning tax treatment of donations received from
outside the United States.  U.S. laws alone swamp our small staff.

Please check the Project Gutenberg Web pages for current donation
methods and addresses.  Donations are accepted in a number of other
ways including checks, online payments and credit card donations.
To donate, please visit: http://pglaf.org/donate


Section 5.  General Information About Project Gutenberg-tm electronic
works.

Professor Michael S. Hart is the originator of the Project Gutenberg-tm
concept of a library of electronic works that could be freely shared
with anyone.  For thirty years, he produced and distributed Project
Gutenberg-tm eBooks with only a loose network of volunteer support.


Project Gutenberg-tm eBooks are often created from several printed
editions, all of which are confirmed as Public Domain in the U.S.
unless a copyright notice is included.  Thus, we do not necessarily
keep eBooks in compliance with any particular paper edition.


Most people start at our Web site which has the main PG search facility:

     http://www.gutenberg.org

This Web site includes information about Project Gutenberg-tm,
including how to make donations to the Project Gutenberg Literary
Archive Foundation, how to help produce our new eBooks, and how to
subscribe to our email newsletter to hear about new eBooks.