
Fig I
Title: Cutting and draping
a practical handbook for upholsterers and decorators
Author: John W. Stephenson
Release date: April 18, 2023 [eBook #70586]
Language: English
Original publication: United States: Clifford & Lawton, 1905
Other information and formats: www.gutenberg.org/ebooks/70586
Credits: Charlene Taylor, Karin Spence and the Online Distributed Proofreading Team at https://www.pgdp.net (This file was produced from images generously made available by The Internet Archive)
A PRACTICAL HANDBOOK FOR
UPHOLSTERERS and DECORATORS
OVER TWO HUNDRED AND FIFTY DIAGRAMS AND ILLUSTRATIONS
By JOHN W. STEPHENSON
CLIFFORD & LAWTON
19 UNION SQUARE, NEW YORK
| French Festoon Drapery, | 3 |
| Irregular Festoon Drapery, | 7 |
| Flat Valances or Lambrequins, | 11 |
| Pleated Valances or Lambrequins, | 15 |
| Piano and Mantel Draperies, | 19 |
| Scarf Draperies, | 23 |
| Festival Decorations, | 26, 31 |
| Lace Curtains, | 35 |
| Window Shades and Blinds, | 39, 43 |
| Archways and Alcoves, | 47, 51 |
| Portieres and Appliques, | 53 |
| Bed Draperies, | 57 |
| Traverse, Drop and Theatre Curtains, | 65 |
| Interior Grouping, Cosey Corners, Wall Hangings, | 69 |
| Awnings and Veranda Curtains, | 73 |
| The Application of Grille Work, | 77 |
| Workroom Auxiliaries, | 81 |
Copyright, 1905, by Clifford & Lawton.
Fig I
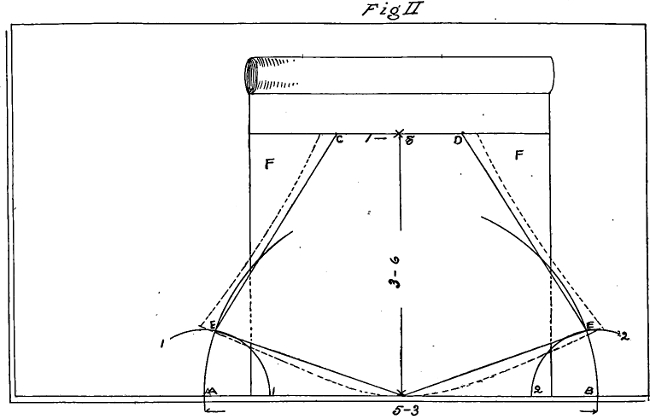
Fig II
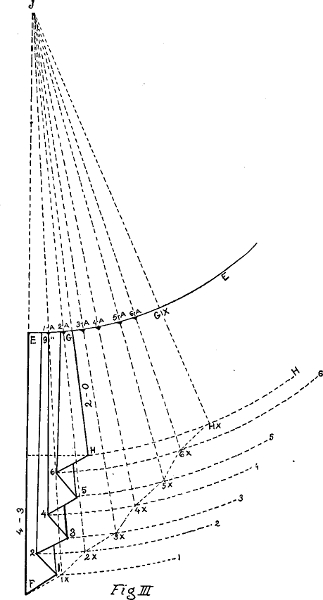
Fig III
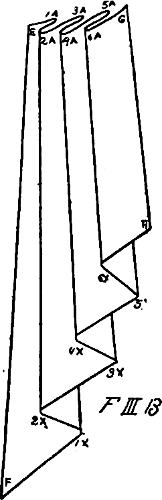
Fig III B
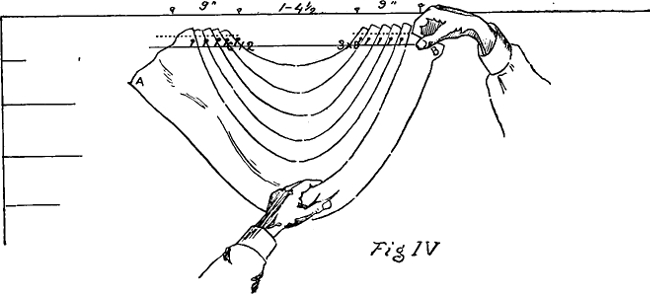
Fig IV
FRENCH FESTOON DRAPERY
(SEE TEXT ON OPPOSITE PAGE)
[3]
The art of draping is nearly as old as is the manufacture of fabrics. And artists and craftsmen of all ages have taxed their ingenuity to produce ideas unique, original, out of the ordinary—with varied success. Of the myriad of designs and treatments thus produced some of the more pleasing have stood the test of time.
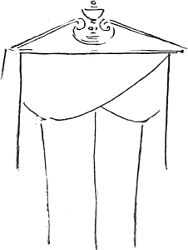
One of the survivors is that generally known as “French festoon drapery,” which, by reason of its voluminous pleats and scallops, presents a showy appearance in almost any class of fabrics. To measure, plan and cut this style of drapery is one of the first problems that confronts the would-be decorator and drapery artist, and to make plain the method successfully used by the writer is the purpose of this article. Of course to the practical decorator such close discussion of details is irksome; but it is for the novice that I write. (See diagrams on opposite page.)
Figure I is an example of straight festoon drapery, the right side in skeleton to more clearly show the figures. To measure a door or window for this style it is necessary to have the extreme width of the space to be draped (5-0), the distance from the top of wood trim to floor (8-0) and the distance from the top of trim to ceiling (2-0). This is to determine the general proportion of the various parts in planning the complete treatment. Always measure with rule, getting the width measurement at the floor line and the height measurements from a ladder, and put them down as soon as taken. Don’t trust anything to memory! A three-foot folding pocket rule is a splendid all-round measure, as it comes in nine-inch sections (quarter yards) and the length gives it a decided advantage over the old-fashioned two-foot rule.
When these measurements have been secured take a piece of paper sufficiently large to lay out the dimensions of the space to a scale of say one inch to the foot, and on it sketch the style of the drapery you wish to produce.
Bear in mind that the purpose of draperies is to relieve the austerity of the straight wood lines, and to dress or furnish an otherwise bare space, not to make an ostentatious display of fabrics. Moreover, the display must be practical as well as decorative. If a window is low and a drapery carried out in proportion would be so low as to exclude the light or interfere with the vision, the usual rule must be departed from and the drapery raised to a greater height. The proper elevation our third measurement will enable us to easily determine.
Again, if we are planning a door, we must allow sufficient distance from the floor to the lowest point of the festoons for an ordinary person to pass or stand beneath without stooping. In practice it is seldom well to leave less than six feet six; but of course different designs call for different execution.
In planning for styles similar to Figure I the general rule is to allow the lowest point of the tails to drop one half the distance to the floor and the lowest festoon one half the length of the tail. Having determined the style and size of the drapery on the plan, correct the general outline till it conforms nicely to your idea and the requirements of the space, and measure it as follows: Take a flexible rule (a six-inch celluloid pocket rule makes a splendid article for this purpose, and can be obtained from celluloid novelty manufacturers) and, making it conform to the shape of the bottom line of the festoon, note the measurement A to B (Figure I), and record it as also the line C to D; measure all the curved outlines on the plan in like manner and record the various distances.
Now measure the space covered by the pleated ends of the festoons and the distances between, as one to two, two to three, three to four, Figure I, and the distance from X, the lowest point of the line C—— D to X, the lowest point of the line A—— B, record the distance in feet and inches (two and one-half inches on the plan representing two feet six inches), for convenience in cutting later on; for the tails measure only the straight lines represented by the points E to F, G to H, E to G and I to H.
You are now ready to cut the festoons, and unless there is a likelihood of a number of festoons being needed exactly the same size, we can dispense with a pattern and cut direct from the measurement; but I would advise the novice to start on inexpensive material,[4] like shaker or canton flannel, until he is sure of his ground.
Lay the goods on the table, face down, with the end to—and even with—the side of the table, in front of you. The pattern, if any, should run from you, and in the case of pile goods the nap should run toward you. Smooth the goods out sufficiently to transfer the complete measurements without readjusting. Take a piece of soft white crayon, and mark off on the end of the goods nearest you the distance between the points A—— B on your scale plan, using the end of the goods as your line (Figure 2). If the width of the goods is not sufficient, as in this case, mark the points on the table, at equal distance from each selvage. (See A—— B, Figure 2.) Now at X the centre of the line or end of goods, strike a perpendicular line X—— X at right angles to the edge of table and end of goods and as long as twice the distance from A—— B to C—— D in Figure 1. This allows as much again for fulness—a safe allowance for nearly all purposes, but governed to some extent by the nature of the goods. Soft materials like art silks, silkolines and other light-weight drapery stuffs require a little more.
At the top of this perpendicular line X—— X, Figure 2, draw a horizontal line parallel to the bottom line and nearly as long (or, if it is the last cut in the goods, right across the goods, leaving a straight end), and on it, with X as a centre, mark the points C—— D equidistant.
With one point of a pair of dividers at A and one-third of the distance from A to X as a radius describe a quarter circle from the line, 1—— 1 Figure 2, and repeat at B, 2—— 2 Figure 2. Then with point of dividers at X and A—— B as radii strike a semi-circle to bisect the two smaller circles at points E—— E, rule from these two points to X on the bottom line and also to points C and D on the top line. This gives us the general shape of the festoon, but the lines must be rounded a little at the bottom and sides and allowance left for straightening the pleated ends. (See dotted lines, Figure 2.) And if, as is the case in Figure 2, the width of the goods is less than the distance between the points E—— E, the corners must be pieced out of the pieces F——F.
In cutting the sides, as dotted lines Figure 2, allow about three inches extra at top and bottom and hollow at centre to one and one-half inches from straight lines E—— D and E—— C, round the bottom as curved dotted line, with greatest swell at about one-third of the distance from X. This gives us our perfect festoon pattern, with three inches allowance at each side for trimming off after pleating.
To lay out the plan for the tail it is more economical to use a paper pattern; take a large piece of paper and lay on the table with the longest edge parallel with the edge of the table nearest you. From the end, as point F, which should be at the corner of the table, mark the point E the same distance as on the scale drawing you have, also the point I about half way between. With this as a basis locate the points G and H according to measurement and draw the full sized plan of tail as defined by these points, Figure 3, solid lines.
Locate the point J where the lines E——F and G——H would intersect if continued (the distance J is from E governs the amount of flare in the bottom of the tail, farther meaning less flare and closer meaning more). With J as a centre, make with cord and chalk circling lines to intersect with each point of the raking edge, 1——1, 2——2, 3——3, 4——4, 5——5, and 6——6, also one at H and at E, making the line longer as you go towards the top of the tail.
With point of dividers at F and I as a radius allow a couple of inches extra for fold and strike to intersect line I at 1X, measure from 1 to 2 and using 1X as centre locate the point 2X on line 2, and locate the other intersecting points 3X, 4X, 5X, 6X and HX in like manner, always allowing the two inches extra for folding, rule from F to 1X, 1X to 2X, to 3X, to 4X, to 5X, to 6X, to HX, as dotted line indicates, and also from HX to J to locate GX on line E, and from points 1X, 2X, 3X, 4X, 5X and 6X to J, to find the points 1A, 2A, 3A, 4A, 5A and 6A on line E——E. These last should be notched out in pattern to mark goods for folding. Cut out along the raking edge F——1X, 2X, and so on, from H to G and the sweep E to GX, and the pattern is complete. As our pattern stands, Figure 3, it is a left-handed pattern; mark this side (Left) and turn face down on the table and mark the other side (Right) and always remember to turn over the pattern in cutting a pair, so as to make right and left tails. To cut out lay the pattern on the face side of goods with the line HX——GX parallel with the selvage and piece out the point if necessary. When all cut and pieced out complete, spread the pattern out over it and mark the points 1X, 2X, 3X, etc., and also the notches on line E——E, 1A, 2A, 3A and so on. With the edge E——F parallel with the edge of the table in front of you catch points 2X and 2A, one in each hand, and draw toward you till fold is made at 1X——1A. Take 4A and 4X in like manner and repeat till all are folded. A glance at Figure 3 B will explain the method. Trim the top square, and the tail is complete. To pleat up the festoon requires a little more care, but facility is easily acquired with a little practice.
Mark off on a horizontal board (see Figure 4) the dimensions of the completed festoon, as indicated on the scale drawing, Figure 1, points one, two, three, four, and put a large tack in each of these points as a guide, also about six inches above each point place another, which can be seen when the others are covered up with the goods. Temporarily attach[5] corner D of the festoon to point three and corner C at point two, allowing in each case about three inches to project above the line. The centre of the goods between these two points lay back toward the board to form the top pleat, Figure 4, and the lowest point of this pleat should correspond with the top line C——D on the scale drawing, Figure 1. If it is lower or higher than the drawing calls for it should be properly adjusted until it is correct. In this case, Figure 1, there is a distance of three inches from bottom of pole to X on line C——D.
In adjusting be careful to keep the goods perfectly centred, or you will not get nice pleats. Now divide the remaining space from three to four and two to one into as many spaces as you intend to make pleats. In this case (the general rule) there are six. So you need six spaces, the last pleat (which is being put up, Figure 4) covering two spaces. Having divided the distance, now with the left hand pinch up the goods about one-fifth of the distance from fold already made and with the right hand grasp the biased edge D——B, Figure 4, and form a pleat toward the point D, adjust till the fold follows naturally around from one hand to the other without drawing, and temporarily tack it in place on the line in its space. Take the left bias edge, A——C, and make this fold follow around to the point where it should attach in the first space to the left on the line one——two. These folds should follow around from one end to the other without pulling or buckling, and will need to be helped at first by the disengaged hand until the fold is complete.
Pleat up all the remaining goods in this manner and tack each fold to the line, being sure that each fold goes around clearly without in any wise interfering with the hang of the previous one and using the same quantity of goods each time.
This will not come easily at first, but follow the method illustrated in Figure 4, and practice will do the rest.
The last fold covers two spaces and completes the festoon. If you have too much fullness for the last fold go over the rest and take up a little more for pleating them. If the distance from the centre of top line to the centre of bottom line does not correspond with the distance on the plan, you will have to raise or lower the pleating until it is the same. Leave the points C——D attached and adjust each pleat separately till the desired result is obtained.
Now, if the ends are to be joined over a pole, as in Figure 1, allow three-quarters of the diameter of the pole above the line and trim square. (See dotted line, Figure 4.) Pin or baste pleats in place and take down and bind with a bias piece of the same goods about one and one-half inches wide, turning in the raw edges. Bind tail in same way and sew together with baseball stitch that is illustrated in Figure 4 B. This stitch allows the greatest flexibility, and the tail can be on top or be turned back and the festoon on top without re-sewing, as it acts as a perfect hinge.
To estimate for this style a safe allowance roughly is one yard of goods to a foot of the width of space, and three yards more fringe than goods; thus, this drapery on that basis would take five yards of goods and eight of fringe; but for a close estimate make your scale drawing first and measure from that, thus, add together the depths of the various festoons with as much again for fullness and add to this the length of the tails on their longest side. This drapery measured in this manner would require two and one-third yards for the festoons and three and five-sixths yards for the tails, or five and one-sixth yards, six inches more than the other way. This last method, of course, is absolutely safe, while the other will vary according to the depth of the festoons. The practical man will, with the rough-estimate system, usually be correct, but the novice had better measure his plan before giving a positive quantity. Another thing, too, will be noticed between the two systems, for spaces under five feet wide the yard to the foot will be scant, while for spaces over five feet, unless you try to make too many festoons, the calculation on this basis will invariably be over the mark.
When using a striped goods that would admit of any number of seams, a seventeen-foot bay window has been effectively dressed with twelve yards of goods, including in the treatment two double tails, and presented such an elaborate appearance that a disgruntled representative of a rival house offered to alter it and save enough from it to drape an eight-foot window at the back of a room.
This is mentioned only to show to what extent economy can be practiced without skimping the appearance. The eight-foot window in question, with all possible economy, required six and three-quarters yards when the order was completed.
It is a good plan for the beginner to take the rules here set forth and sketch out a number of draperies with festoons of various depths and measure. Cut and make up in some inexpensive material, such as cotton or cheap flannel, until you get the method thoroughly memorized.
A little practice will make the veriest novice master of this method, which has been evolved from practical experience, and is thus independent of the various sketches and patterns offered for sale.
If any material advantage would be gained, several other methods that are used could be given, but the foregoing will be found thoroughly practical and economical, a great item in present workroom problems.
To estimate the fringe add together the measures of the bottom line of each festoon and the length of each tail and add ten per cent. for taking up in sewing.
[6]
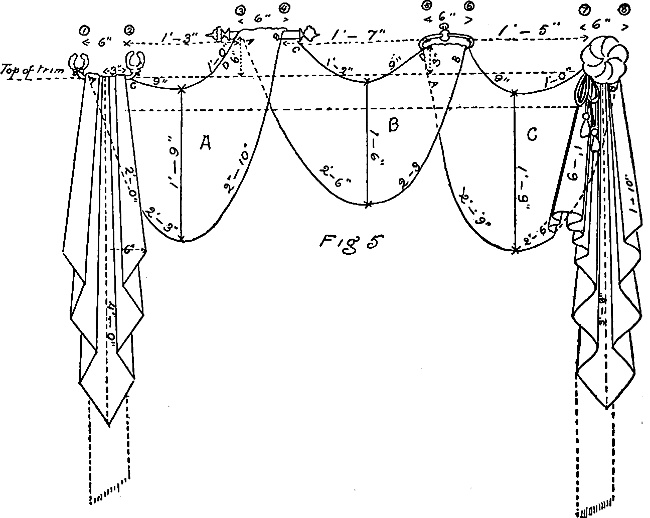
Fig 5
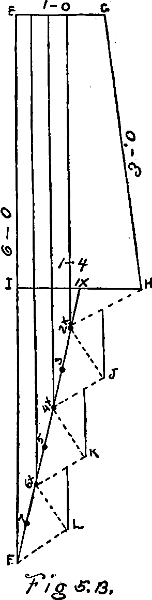
Fig 5B

Fig 6
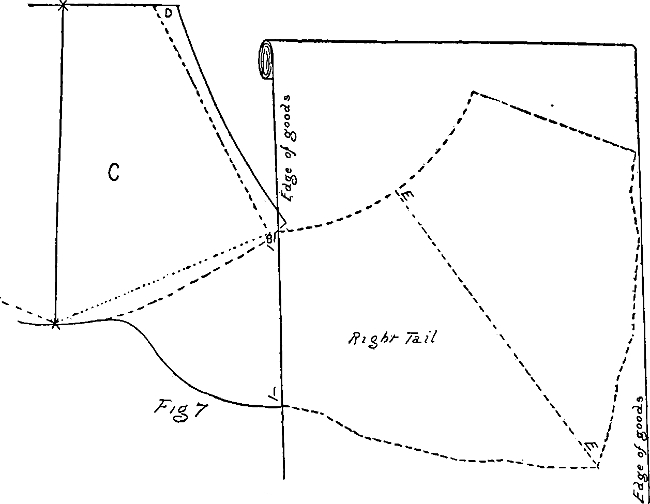
Fig 7
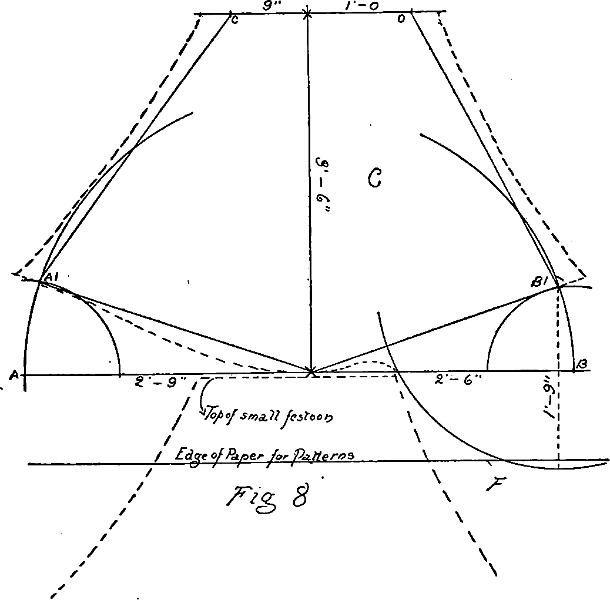
Fig 8
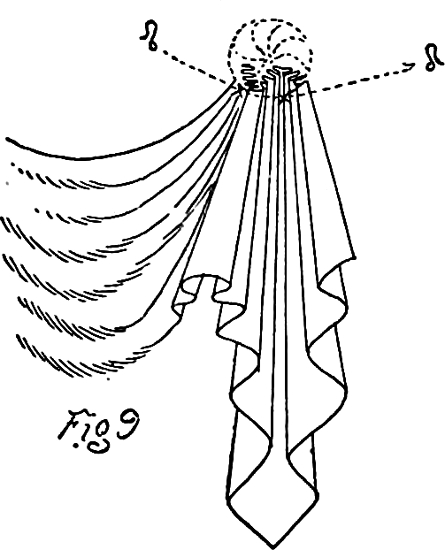
Fig 9
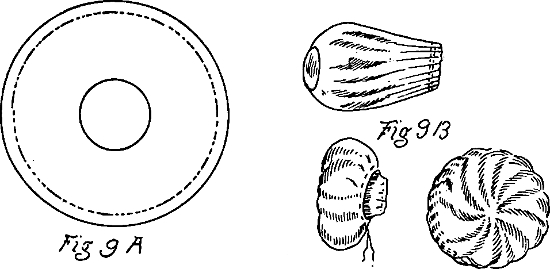
Fig 9A Fig 9B
IRREGULAR FESTOON DRAPERY
(SEE TEXT ON OPPOSITE PAGE.)
[7]
If the top of the opening or space to be draped is not a straight line, but is curved, arching or angular, necessitating that the ends of the festoons be fastened at different heights to follow the shape of the space, irregular festoons must be used. Or, when the space to be draped exceeds five feet in width irregular festoons will present a better appearance, and add character to the decoration.
By irregular festoons we mean those in which the two halves of a festoon differ in size and shape, as when the lowest point of the bottom line falls to one side of the centre; when one pleated end covers a wider space than the other; or when the ends are fastened at different levels.
Figure 5 (see diagrams on opposite page) is an example of irregular festoon drapery, covering a straight space six feet wide, with the middle festoon elevated to give the whole an irregular appearance.
Having secured the measurements from floor to top of trim, from top of trim to ceiling, and the extreme width, make a scale drawing of the space in the proportion of one inch to the foot, and on it sketch the drapery, as explained for straight festoons in last chapter.
Unless the wood is unsightly it is not necessary to cover it altogether, as this style is of a lighter, more airy character than the last one, and the appearance is sometimes improved by showing enough of the trim to define the opening.
If the color of the wood interferes with the harmony of the wall and fabric, then, of course, it must be hidden as far as possible; but dispose the festoons to accomplish this without making the purpose apparent.
Correct the sketch of the drapery to conform with the necessities of light or passage, as explained before, observing the proportion the tail about one-half the height of the space, and the deepest festoon one-half the depth of the tail, and it is ready to measure.
In Figure 5, on the opposite page, we have three different sizes and shapes of festoons, so that all must be measured and cut separately.
From the lowest point X on the line A——B draw a perpendicular line at right angles to the floor line to connect with X on the line C——D, top of festoon. (Festoon A, Figure 5.)
Measure the distance from A to X and X to B on bottom line, following the curve, also from C to X and X to D on top line, and from X to X; record the distances on the plan in feet and inches, also the spaces covered by the pleated ends 1 to 2 and 3 to 4, and the distance between 2 and 3 horizontally (see dotted line), and the elevation from line 1——2 to line 3——4. (See dotted perpendicular line from top of trim.) Record all these distances and measure festoon B in like manner.
Festoon C is joined to tail on right side to form a pipe, but is measured in the same way, treating the bottom line as if it were continued around to the rosette (dotted line through pipe, Figure 5), mark point X and measure the same as festoon A, measure the length of pipe from rosette to bottom and record the distances.
To measure the double tails draw a line through centre (dotted line, left tail, Figure 5) and measure the pleated half in the same manner as the single tail in last chapter.
Lay out and cut pattern as for a single tail, and repeat from the back edge (dotted line) to give the double tail.
If necessary to piece the tail in planning the goods, make the seams where the folds will conceal them when pleated up.
If you find any difficulty in sketching the full size pleated tail from which to lay out the pattern for[8] cutting, as explained in last chapter, Figure 3, the following method, while not needed by many, will give you correctness and certainty:
The pleated top should equal one-sixth the distance from top of tail to bottom point, and the widest part, which occurs half way down, should be one and one-third times the width of the top.
Thus a tail 6—0 long would be 3—0 on the front edge and pleat into 1—0 at the top, spreading to 16 inches at the widest part.
Lay out your paper with the longest edge even with the side of the table in front of you, and from the right hand end point F, Figure 5B, mark point E the length of the tail and I half way between. Draw a perpendicular line at E and on it mark G the proportionate distance, and on another perpendicular line at I locate H, Figure 5B. Halve the line I——H and from its centre 1X rule to F; divide the line 1X——F into seven equal spaces, and mark every alternate point, commencing with the first one, 2X, 4X and 6X, and the points between 3, 5 and 7. At right angles from the line at point 3 mark J, the distance from 3 to 2X, or one space, and repeat at 5 and 7, locating points K and L.
Rule from points J, K and L to 2X, 4X and 6X (dotted lines, Figure 5B), and from 2X, 4X and 6X draw straight lines to the top parallel with the line E——F.
Rule also from J, K and L to the dotted raking lines and from G to H, and you have a complete outline of the pleated tail from which to plan your pattern, as explained in last chapter.
The right tail joined to festoon C is cut in exactly the same manner as if it were not joined, but was complete in itself.
Lay the pattern on the goods with the side to be joined to the festoon even with the selvage. (See Figure 7. Dotted lines which show festoon C cut out and the right hand tail marked out for cutting lying together for matching at the selvages.)
To cut irregular festoons it is well at first to make a paper pattern; spread out a paper sufficiently large to contain the full measurements, with the longest side even with the table in front of you (Figure 6), using the edge of the paper as the line A——B, from which to project the shape of the festoon according to the measurements.
From the right-hand end point B mark X the distance recorded on Festoon A, Figure 5, on your plan, and from X mark point A. Erect a perpendicular line at X as long as twice the distance from X to X, Figure 5, and at right angles to the bottom line.
Draw a horizontal line parallel with the bottom line or edge of paper, passing through X, the top of your perpendicular line, and on it mark the points C and D the same distances as they appear on your plan.
From X on the bottom line, with B as a radius, strike a quarter circle from the line, and repeat on the other side with X as centre and A as a radius.
With A as a centre, and one-third the distance from A to X as radius, strike an arc to intersect with quarter circle A at point A1; and from point B, with one-third the distance from B to X as radius, locate point B1 in the same way.
Rule from B1 to X and from A1 to X on the bottom line, and from C to A1 and D to B1, which gives us the general outline.
The bottom lines must be rounded as dotted lines indicate, with greatest swell one-third of the distance from point X on each side; and the raking lines at the side must have the allowance added for trimming off three inches at top and bottom, hollowed to one and a half inches at centre, dotted lines, Figure 6.
Cut out along curved lines on sides and bottom, and straight line at top, and the pattern is complete.
Spread out the goods on the table face up, the pattern, if any, running from you, and the nap, if pile goods, running toward you, with the end of the goods, which must be square, even with the side of the table, in front of you.
Lay the pattern on it with the perpendicular line X——X positively at right angles to the straight end of the goods and parallel with the selvage.
If the width of the goods is not sufficient to cut the festoon without piecing, lay the pattern so as to leave an equal projection beyond the selvage at each side.
If the amount to be pieced out does not exceed six inches, make the join at one side only, and piece out with the pieces left from the raking sides, F——F, Figure 6.
Pleat festoons A and B in the same manner as straight festoons in last chapter, the lines on the board corresponding with the lines on the plan, the elevation at 3——4 exactly as the plan calls for, and adjust the goods until it conforms to the size and shape on the plan. When one end of a festoon is attached at a higher level than the other, attach the elevated end of the pleat first, and then the lower end, for greater ease in forming the pleats nice and round.
Irregular festoons are not interchangeable any more than clothes, and will only fit the size and shape for which they are made; for this reason be careful in laying out the measurements on the board, as once pleated they will hang that way only, and a change in elevation or distance, unless very slight, will destroy the neatness of the pleats. If, in a drapery design, a festoon with the heavy fall point X to the left of the centre is repeated in another place with the heavy fall to the right of the centre, and the sizes are exact, the pattern cut for one will do for the other by turning the other side of the paper up; but be careful to mark each side and the festoons to correspond, so as not to duplicate.
[9]
It is a good plan to number or letter each festoon and tail on the plan, and the patterns to correspond; then, if the goods is cut with the face side up, the completed drapery must be the same as the plan.
If for any reason it is advisable to cut the goods with the face side down, you must be careful to turn your patterns all face down, or your drapery will be transposed, with the right tail at the left side, and vice versa, and errors of this kind are, to say the least, vexatious.
To lay out festoon C for cutting is a little more difficult, but can be easily mastered with care. Lay out the paper for pattern on the table, as explained for festoons A and B, and draw the bottom line A——B parallel with the edge of table, and about half the length of the pipe above it (Figure 8). Erect the perpendicular line X——X, and find all the points on the pattern in exactly the same manner as for festoon A; round out the line from A1 to X (dotted line, Figure 8) and the raking line A1 to C.
From point B1 as a centre, with the length of the pipe as a radius, strike a quarter circle from the line A——B down to a point below B1 (line 1——B1), round the line right side from X to a little above the line, and gracefully sweep to break the sharp corner where the circle intersects, as dotted line, Figure 8, and rule from B1 to D, adding afterwards the allowance for trimming off after pleating.
If you have a small festoon to cut, and one of this kind, mark out the small one first, letting the pattern lie to the opposite side from the side on which you want the piece for the pipe, and the allowance for the pipe can usually be cut out of the corner, F. (See broken line, Figure 8, which outlines the top of a festoon beneath the line A——B.)
In irregular festoons the line X——X must be at right angles to the end of the goods, or chalk line representing bottom of festoon where no pattern is used.
Cut festoon C out complete and match the pattern of the goods to the piece before cutting out the tail. (See Figure 7.)
Join the straight side 1——B1 on festoon C to the left side of tail and press the seam out so that it lies flat as one piece.
Spread out on the table, and with the paper pattern mark the top and bottom points of the folds in the tail, and commencing at the middle (dotted line E——F, Figure 7) pleat the outside in the way explained in last chapter. Pleat the other side toward the centre also, forming all but the last fold or pipe, and pin or baste the folds in place. Tack the top of tail on the board, which you have already chalked out to the sizes of the pleated festoon and tail on the plan, and pleat up the festoon by the method explained in last chapter, forming the last pleat of the festoon and the last fold of the tail into a pipe (Figure 9), concealing the seam in the fold under the pipe. The rosette is made of a circular piece of goods, usually joined up from the waste, as the pleats will conceal the seams.
If the completed rosette is to be six inches in diameter, take a circular piece of goods seventeen inches in diameter, and in the centre cut out a three-inch circle; shirr the outside edge from the wrong side, using long stitches on the right side and short stitches on the wrong side (Figure 9A), dotted and unbroken lines (dotted lines on face side of goods), use a strong linen thread or twine and draw the shirring up close, wrong side out, and fasten securely. (Figure 9B.)
Turn back the small circle over this to bring the right side out, and shirr it into the other shirring, fastening both together securely. This method gives very little fulness on the back of rosette, and plenty in front; pick out the pleats to distribute the fulness evenly around the rosette, keeping the outer edge square and thicker than the centre.
The fulness is governed by the size of the hole in the centre, and the distance from it to the outer circle must equal the desired diameter of the finished rosette, with one inch allowance for shirring.
Sew the rosette to the finished festoon tail, and if it is to be suspended from a loop, as Figure 5, sew a couple of lambrequin hooks beneath the rosette to take the weight. (XX, Figure 9.)
Figure 5 illustrates a straight top opening, but this style is particularly adapted to spaces where the top is curving or angular, or in the case of a low door or window, where it is desired to give an effect of greater height without elevating the entire drapery scheme.
Sketch out and plan a number of irregular festoon draperies to your scale, complying with different requirements in the way of curves and angles, and cut out of some soft and inexpensive material, as advised in last chapter, until you have thoroughly mastered the rules and acquired the knack of forming nice round pleats from end to end. Be careful in sketching an irregular drapery not to get the festoons too thin from X to X, which you will be apt to do.
Except in some special case where a shallow festoon is required, a pleated festoon that is less than eighteen inches from X to X will not look well on this size space, and should be as much deeper in proportion as the size of the space requires.
Double tails are used in Figure 5 to explain the method of cutting them, and where the quantity of goods will not permit the use of double tails, single tails may be used with very good effect.
Double tails are frequently joined in the centre (dotted line E——F, Figure 7), and except in goods of a striped or pronounced design may be joined even more by calculating for the seams to be in the under folds.
[10]
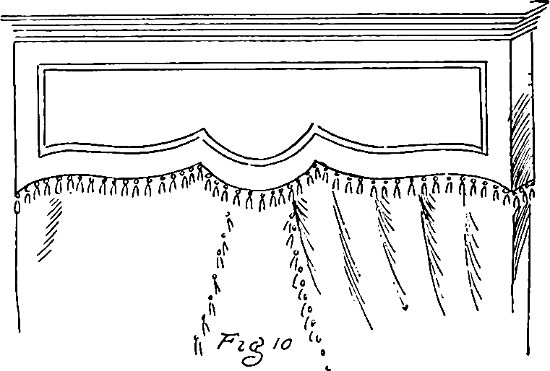
Fig 10
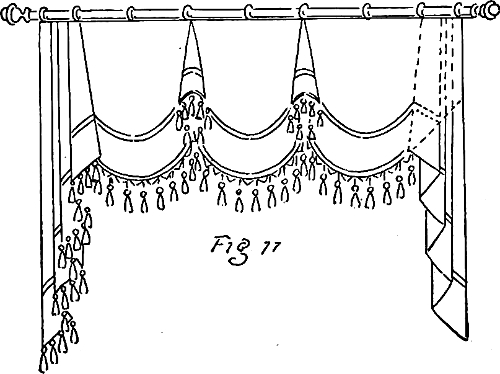
Fig 11
Fig 11A
Fig 11B
Fig 11C
Fig 11D
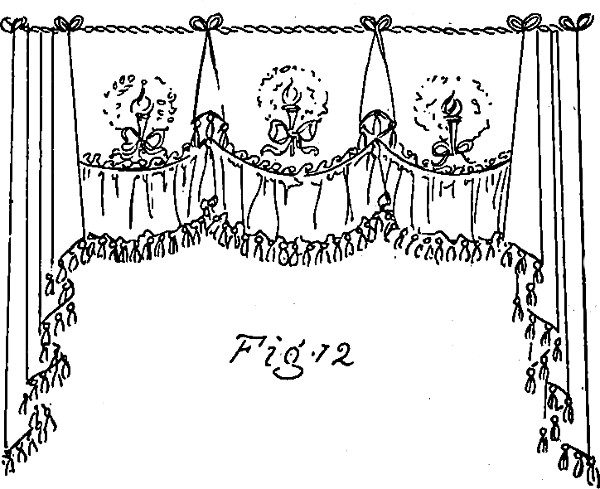
Fig 12
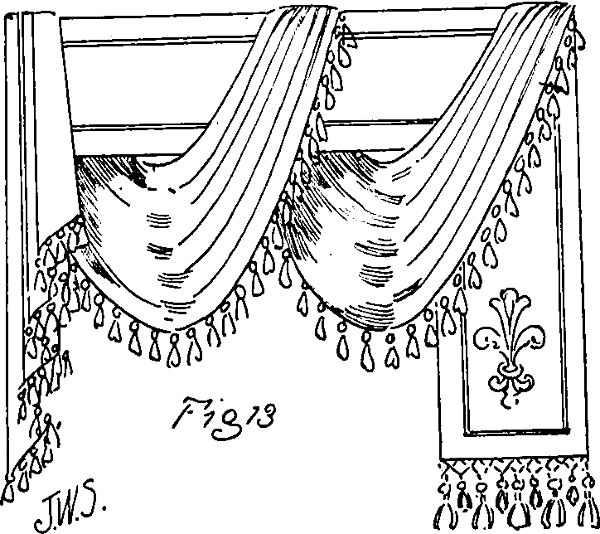
Fig 13
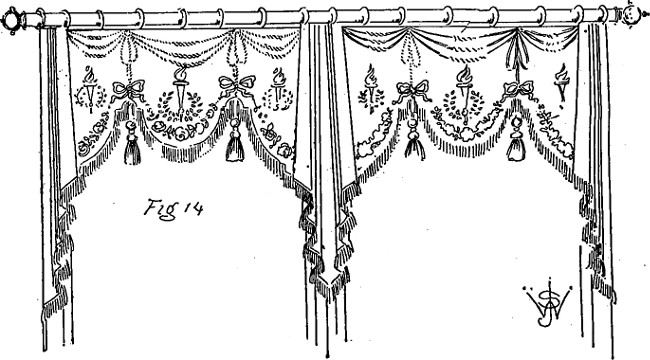
Fig 14
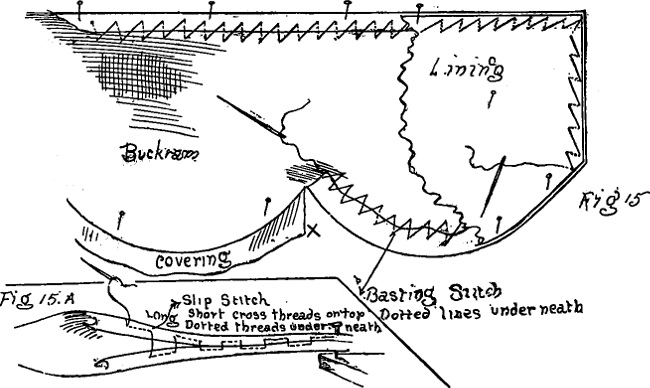
Fig 15
FLAT VALANCES OR LAMBREQUINS.
(SEE TEXT ON OPPOSITE PAGE)
[11]

SIX WAYS TO HEAD AND HANG DRAPERIES.
The flat valance or lambrequin was originally designed as a body or background on which were embroidered the most elaborate patterns. It has passed through various forms and modifications, and at present is used for almost every purpose in the way of drapery treatments. We illustrate a few styles which will explain its versatility.
Figure 10 is one of the simpler forms, surmounted by a moulding cornice, and is frequently used where it is desired to give the windows the appearance of greater height by raising the cornice the desired distance above the top of the frame, the valance concealing the real height of the window.
This style is provided with a piece at each end that returns to the frame (at right angles to the face) and confines the curtains as well as concealing the pole or rod to which the curtains are attached. It can be made very simple and inexpensive, and is suitable for bedrooms, dining-rooms or libraries when the nature of the window and the general architecture of the room requires simple treatment.
Figure 11 is a combination of the flat valance and festoon drapery. Its use is not confined to any particular room, and it can be made simple and inexpensive, or elaborated with appliqués, as Figures 12 and 14, until it is rich enough for any purpose. Its main characteristics are the small quantity of goods required and the ease with which it can be made. Nearly all flat valances are made on buckram to give them the required stiffness to hang flat and smooth.
LOUIS XIII.
Make a scale drawing of the space and sketch the style of the valance upon it. Then lay out the full size on a piece of paper and cut out the pattern of the flat body or background. Spread out the buckram and transfer the outline to it, joining it, if necessary, to get the size by lapping the edges one upon the other and sewing them together flat.
If the buckram is sufficiently large without joining you can draw the design upon it without making a pattern.
Do not try to make too many scallops; allow the outside scallops to be a little wider than the others, so that they will appear about the same size when the tails are put over them. The outline of the end scallops can be made a little more straight where the tail covers it, as dotted line, Figure 11.
The illustrations show these two styles trimmed with a galloon or gimp, which, on a plain material, is an effective trimming.
Figure 11A illustrates the method of finding the radius of three given points—as the two ends and the centre of a scallop. Having determined the width of the scallop, draw perpendicular lines at its extremities, A——A and B——B, Figure 11A, and on these lines mark X the distance you wish to raise the ends of the scallop from the line. With point of dividers at C on the bottom line strike an arc at a little more than half the distance to X on line A; then with point of dividers at X on line A strike an arc with the same radius as before to cross the other arc at the two ends. Repeat this on the other side of the centre point C toward line B,[12] and by ruling straight lines through the intersecting extremities of each arc to where they meet in the centre you find the radius from which all three points would be touched by a sweep of the dividers.
The pipes which are attached at the top of each scallop are cut in the following manner: Measure the length of space the pipe is to cover and draw a line on your pattern paper its equivalent in length; from one end, with half its length as a radius, draw a quarter circle on each side of the line marking point D where it crosses the line. With point at D and the end of the line as a radius sweep to intersect the curved line at each side, which will give you points C——C; rule straight lines from points C——C to B and to A. The bottom line following the circle is too round for a nice pipe, and should be modified to midway between the curved and straight lines, as dotted lines, Figure 11B.
This pattern can be used to good advantage by utilizing half of it only, repeating from the line A——B for the buckram pattern and the lining, as Figure 11B, and repeating from the line A——C for the pattern for the outer covering, Figure 11C. After being covered with the lining, as Figure 11B, it is bent round and the two edges joined together with fine thread and baseball stitch, as Figure 11D. Cut the covering as Figure 11C, allowing a half inch all around for hem; fold together wrong side out and stitch the edges A——A and B——B together; press the seam out flat, turn right side out, and pull over the buckram form, turning in the edge around the bottom and sewing it down.
The tails are cut just as for festoon draperies, and the tops are turned over the top edge of the buckram body and sewn to the wrong side or back of it.
A valance of this kind is provided with lambrequin hooks on the wrong side to hook into the curtain rings, and can be put upon the same rings with the lace curtains or on extra rings, as you desire. The hooks should be placed to support it at the points where will be the greatest weight—one on each side of the tail, one at the top of each pipe, and about every six inches between. The tip of the pipe is sewn over the top like the tails and the bottom is fastened securely at the end of the scallop. A nice effect is given to the pipe by suspending a large pair of tassels from its interior, falling about six to twelve inches from its base, according to size.
GOTHIC.
Figure 12 is a similar treatment, with the lower third composed of a shirred skirt; the buckram form is made first and covered, and the skirt is sewn to the under side before the lining is put on. In addition to the fringe at the bottom of the skirt this style is further embellished with an edging or lace around each scallop and an appliqué ornament centreing each scallop. The top edge is sometimes finished as illustrated with a heavy silk cord with knots or double loops at the prominent points.
Figure 13 is a combination of pelmet and overdrapery, used where the decoration is desired to be very deep without the appearance of excessive weight. The flat back or pelmet is made perfectly straight and flat, trimmed with a gimp or galloon, and appliquéd, the long end being provided with a deep fringe. The overdrapery is cut as per rule for irregular festoons, and while it has the appearance of passing over and down behind the pelmet, it is joined behind just out of sight, using no more goods than is necessary for the appearance on the face side. This can be made very effective by using a plain material for the pelmet covering and a striped or figured fabric for the overdrapery. It can be used for dining-rooms, libraries and offices where the windows are high and not very wide. Repeated from the left side with double tail in centre it is a nice treatment for a double or mullioned window.
Figure 14 illustrates another style and the method of applying it to a double window. The top is further embellished with a garniture of heavy silk cords and tassels, which, on very deep valances, is sometimes replaced with a light-weight silk festoon drapery in harmonizing shades.
A bow or bay window is treated in like manner by suspending a double tail between each window.
To make up flat valances lay the cut out buckram form upon the goods with which it is to be covered and cut the goods an inch larger all around.
If there is a pattern that is conspicuous, plan it so that it will centre in each scallop, joining the goods if necessary where the pipes will conceal the seams. Pin the goods to the buckram to prevent from slipping and draw the edges over and baste them to the back[13] of the buckram. This must be done smoothly and without puckering.

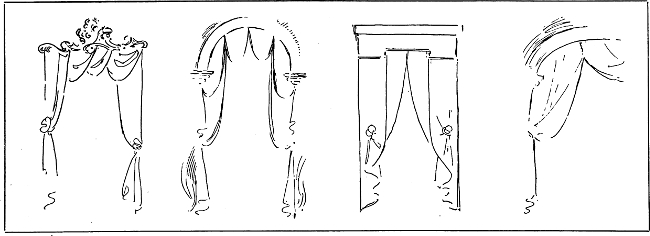
ILLUSTRATING FOUR POSITIONS OF THE DRAPERY RELATIVE TO THE WOODWORK.
It will be necessary to notch the goods to allow it to go up into the points of the scallops, as X, Figure 15.
After the covering is all basted down lay the face side down and spread the lining out over it, allowing an inch to project all round. Turn in the edge and tack it with shoe tacks or pins, then the bottom edge and the two ends, taking care to keep the thread or grain of the goods straight and square to avoid puckering.
When all properly basted it is either slip-stitched together, as shown in Figure 15A, or machine stitched, keeping the edge of the lining about a sixteenth of an inch back from the edge. The tails also are lined; lay the cut tail on the table face down and turn over on top about half an inch on the two sides and bottom, and with shoe tacks tack it to the table nice and even all round the edge; lay the lining over it face side up and tack it over the other, turning in the edge the same distance that the goods is turned over, and with edges lying even, removing the first round of tacks as you put in the others, baste the two together with basting stitch and slip-stitch, or machine stitch it together, according to the nature of the goods. In making the pipe cover the buckram form with the lining before forming it into the cone shape, bringing all the edges over and sewing them to the wrong side, so that they will not be visible in the cone when made.
A MODERN VERSION.
For the skirt in Figure 12 allow about as much again for fullness for light-weight goods, and half as much again for medium weight.
Do not make it on heavy goods unless very deep, and then some other styles would be better.
All appliqués should be put on and sewn before the lining is put on.
In estimating for these styles calculate how many widths of goods are required to cover the form from end to end, and take that many times the depth of the valance, with two inches allowance each time for turning in, and add to that the length of the two tails.
Thus a valance like Figure 11 would take for a four-foot window two and five-eighths yards of fifty-inch goods, the same of lining, and about one yard of thirty-six-inch buckram.
The fringe you can measure from the drawing, but three yards more fringe than goods is near enough for an approximate estimate.
[14]
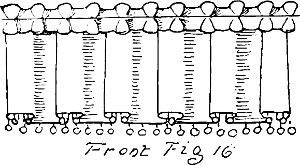
Fig 16
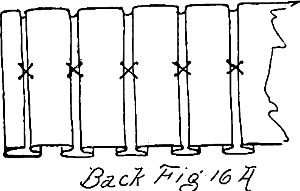
Fig 16A
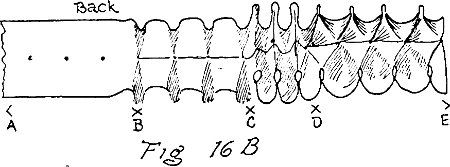
Fig 16B
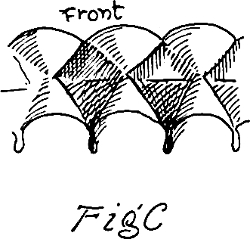
Fig 16C
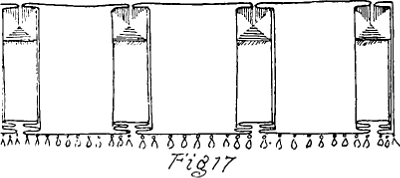
Fig 17
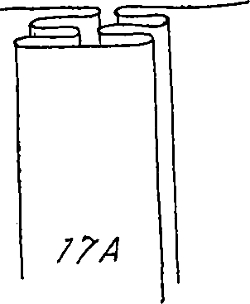
Fig 17A
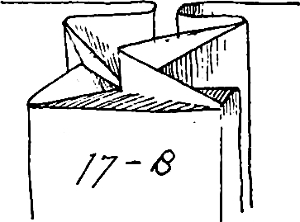
Fig 17B
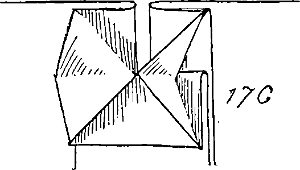
Fig 17C
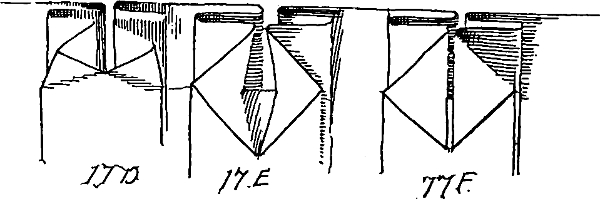
Fig 17D E F
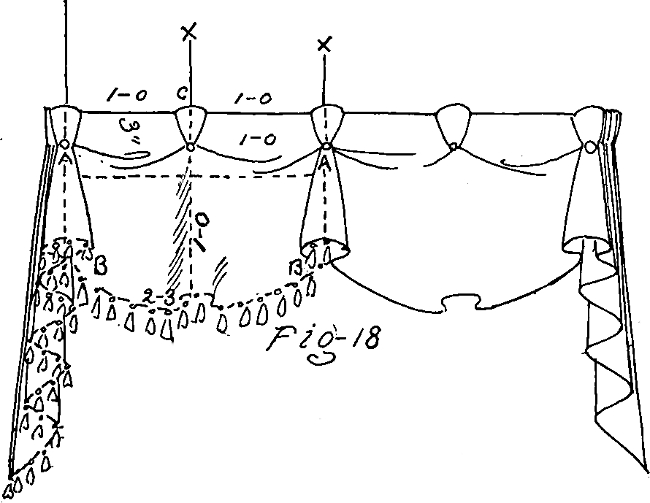
Fig 18
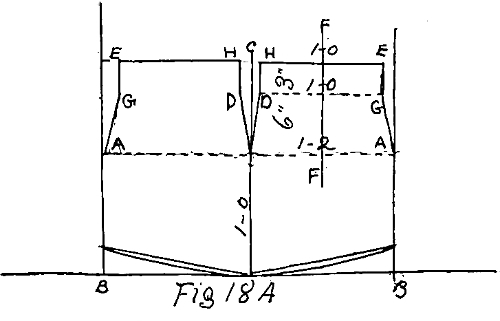
Fig 18A
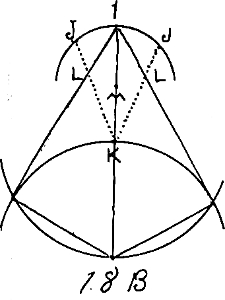
Fig 18B
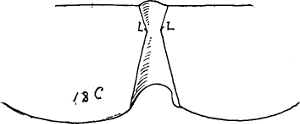
Fig 18C
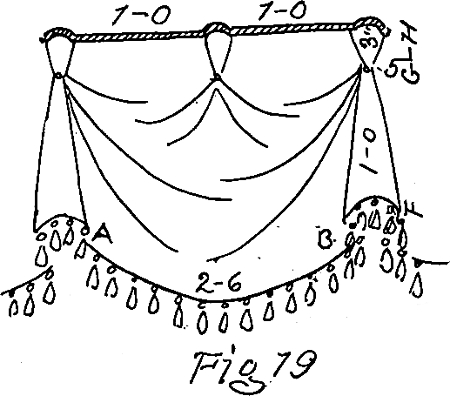
Fig 19
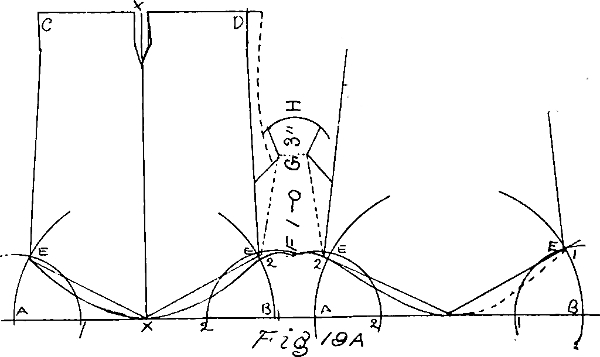
Fig 19A
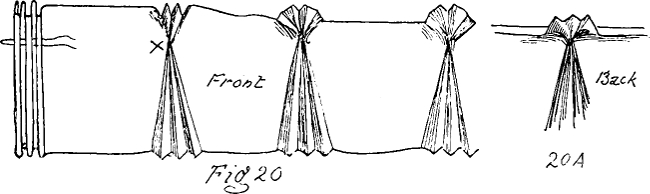
Fig 20 Fig 20A
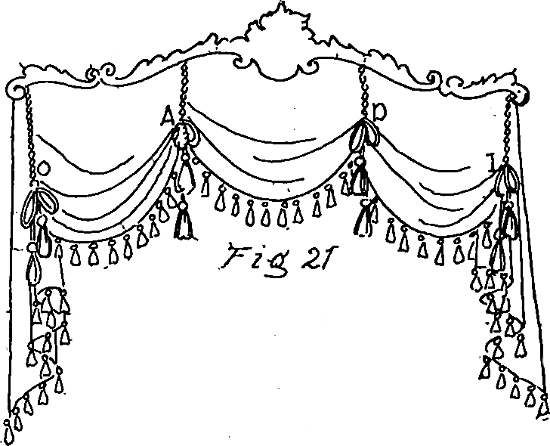
Fig 21
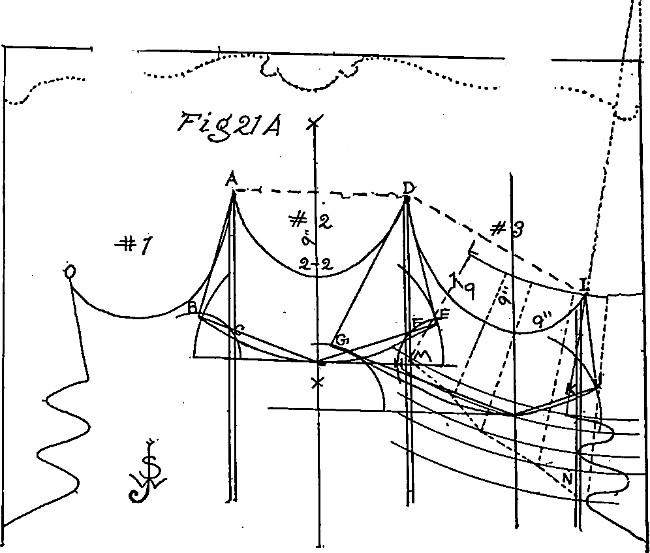
Fig 21A
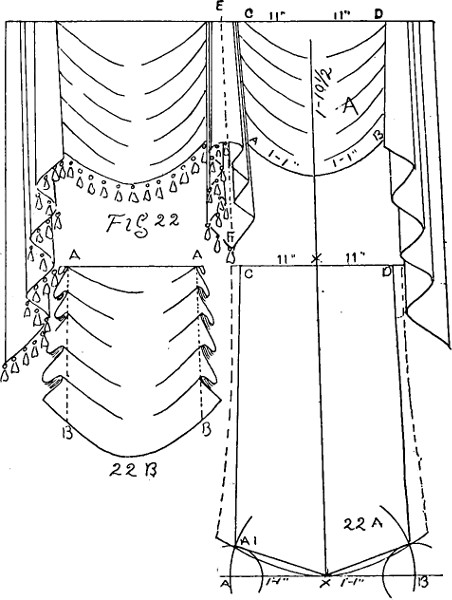
Fig 22 Fig 22A Fig 22B
[15]
For places where a flat valance seems too stiff and severe, a number of simple, but dainty and graceful, treatments have been evolved.
One of these is the plain box pleat surmounted by a French ruffle. (See Figure 16 on opposite page.) The box pleat is made with various degrees of fullness and in many different ways. The usual method is to allow each pleat to be as wide as the spaces between them—as illustrated. For a valance pleated in this way allow about three feet of material to one foot of finished pleating. After the goods are hemmed the proper width for the valance, they are pleated on the table, the pleats are tacked top and bottom to keep them in place temporarily, and the folds are pressed.
The tops are pinned while still in this position and the whole is then turned face down, each pleat being tacked to the next one with stout thread (see Figure 16A) to keep them from becoming disarranged in use. The top is either attached to a pole or is nailed flat to a board cornice and the top edge finished with a moulding or French ruffle. (See Figure 16.)
When the pole is used sew a flat tape to the back of the heading, and sew lambrequin hooks to the tape.
The French ruffle illustrated in Figure 16 is made of a strip of goods about four inches wide, lined with window holland wiggin or fine canvas to give it stiffness.
Hem both edges, allowing about two and one-third times as much strip as the finished ruffle is desired; turn on its face and mark every two inches on the back on or slightly below the centre (A to B in Figure 16B). Then take a needle and stout thread or twine and draw together every alternate mark and knot them securely (B to C). At the top and bottom of these alternate spaces pinch them together and knot them about one-half of an inch from the pinched point, which should be in line with the centre of the space (C to D). Then turn face side up, and a slight pulling or stretching from end to end will start the pleats into shape, when a little manipulation will make them take the desired shape, as sketch Figure 16C, showing the face side; the back should appear as D to E, Figure 16B.
The double box pleat is a little more decorative than the ordinary pleat, and is made as illustrated by Figure 17. The top is turned forward and pressed flat, as shown in successive stages by drawings 17A, 17B and 17C. And another style by drawings 17D, 17E and 17F, which can be quite easily followed.
Figure 18 illustrates another style with French heading, which requires a little more care in calculation and in making. If you have determined the length and depth of the valance, divide the distance into the number of scallops you desire to make, and proceed to mark out the full size of one festoon upon your pattern paper. Use the bottom of your pleats (dotted line A——A in Figure 18) as a temporary top line, and the distance from centre of pipe to centre of pipe, with about four inches extra as a temporary width, the depth the same as plan calls for, with no allowance extra.
Lay out the bottom line according to the measurement of bottom of scallop, and draw perpendicular lines at A and B to about nine or twelve inches above the line A——A in Figure 18A. On these mark off the distance from bottom pleat (line A——A) to the top of heading, with as much again for fullness, and rule line E——E, which is the true top of the festoon.
Half way between E and E make a perpendicular cut, C——C, from the top to the line A——A, and from the bottom C draw a horizontal line the length of the measurement of the bottom pleat (in this case 1 foot 2 inches); divide it in the centre and erect a perpendicular line through E——E as a centre guide.
On the line E——E, with F——F as a centre, mark the points of the top of the heading, H and E in Figure 18A, the distance apart that lies between X and X on your sketch (in this case, Figure 18, one foot) and repeat this measurement at D——G one-third the distance from line E——E to line A——A in Figure 18A.
Rule from D to H, G to E, D to C on dotted line,[16] and G to A, as illustrated, and from A to B, fold pattern over on centre line C——C and cut out the other side. Lay pattern on the goods so as to centre the pattern of fabric nicely in the scallop, and cut out as many as required for the valance.
In order to get the pleating shirr or pleat the raking lines G to A and D to C as tightly as possible, so that H H and D D meet together just above the lower C. The pipes between the festoons are cut in a manner similar to the plain pipes in last chapter.
When the pattern is planned out and ruled off for cutting, as there explained, measure down from top point of pattern on centre line one and one-half times the distance represented between the lines H——E and D——G on Figure 18A, and with point of dividers at this point (K, Figure 18B), and point I, the top of pipe, as a radius, strike an arc equal in length to one and one-half times the radius. Rule from each end of the arc, J——J, toward middle K, till you meet the raking line of each side.
This gives the outline of the pipe, which is joined flat to the festoons on either side, as illustrated, Figure 18C, and formed into a pipe by pinching together the two back edges at L and L.
Should the pleated pipe seem too wide at this point double pleats on each side will obviate any difficulty. The pattern included between the points J J and M on pipe pattern is the size and shape required for the little heading at C——C, Figure 18, and is simply formed into a pipe inverted and sewn in place. This particular style is very effective for bedrooms, made in art ticking, denim, cretonne or taffeta, having a prominent pattern. The sketch shows a slight ripple in the bottom of the scallop, which is not sufficient to interfere with the pattern, and will be greater or less, according to the sag of the pleats, and consequent distance between H and H, Figure 18.
The pipe on the outside is joined to the tail and festoon, as Figure 18C, and is pleated up with the tail to the shape illustrated.

SIMPLE DRAPERY SCHEME.
Figure 19 is similar in style, with a pleated scallop, and is made after much the same plan. Make a scale or full-size drawing of the festoon and pipe, and measure the bottom of the festoon, as a regular or straight festoon. Lay the measurement out on your pattern paper, as per rule for straight festoon, chapter I, except that points E E are raised one-quarter the distance from A to B, instead of one-sixth, as formerly explained.
The depth for cutting is twice the depth of the finished festoon, and the top measurement and centre cut are found and determined as explained for plain scallop in Figure 18A.
Mark out the full pattern as illustrated in Figure 19A, measure the circumference of bottom of pipe, and lay out the distance horizontally from E to E parallel with the bottom line. From the centre of line E——E erect a perpendicular line as a centre guide, and on it mark the length of the pipe from F to G and G to H. (See dotted outline of pipe pattern in Figure 19A.)
The circumference of the small part of the pipe is laid out horizontally at G, and also the upper sweep at H, as explained for pipe in Figure 18B. Then rule from the extremities of dotted line G, dropping slightly to raking edge of festoon, add pleating allowance as dotted line from D to pipe, and the pattern is complete.
This festoon and pipe can be repeated indefinitely, as in Figure 19A, and make a very pretty effect as a valance. If necessary stiffen the top edge with wiggin or fine canvas. The festoon is pleated up as hereafter explained for Figure 22. The design can also be made with separate pipes, if so desired, by following the instructions for Figure 22 and using pipes instead of tails.
Another simple valance is that illustrated in Figure 20. It is very easily constructed. The goods are cut to the required length to allow for top and bottom hems[17] and as many widths as are necessary to give double fullness across the space. Starting at one end make three or four pleats about one and one-half inches wide, and fasten them temporarily together at a distance of six or nine inches or more, according to the design of the goods and width of the space, repeat pleating, and so on to the end of the goods.
If you have correctly spaced and estimated your goods so that they come out even to the desired length, fasten the pleats permanently together about two and one-half inches down from the top and through the centre of the pleat. (See X in Figure 20.) Draw down the top of each outside pleat behind and stitch them in fan shape, as shown in back view, Figure 20A, the top edge turns over to the back between each bunch of pleats and is sewn flat.
Figure 21 is another form of lambrequin in which the corners to form the festoons are obtained by piecing out. Draw out on paper the full-size sketch of complete lambrequin, as in Figure 21A, and from the pleated ends of festoons represented by the letters O, A, D and I, mark out on the sketch each festoon pattern, allowing them to overlap each other as they will, taking double the depth of the pleated parts for the depth of the festoon from dotted line to bottom (Figure 21A).
After each pattern is lined out on the paper in full, take a small nail, and laying the pattern over a piece of soft wood, punch the extreme points of the outline of each part by driving the head of the nail through the paper, as also the points where any part crosses the perpendicular double lines. The paper is then cut up the double lines and around the extreme outline of the parts, as from outside bottom corner of right hand tail to N, N to I, K to H, H to D and F to C; the pattern can then be folded over on X——X, the centre line, and the left side cut out.
By laying the pattern over another paper, and with a soft pencil marking through the punched holes, as well as the corners where the perpendicular lines cut through the outline, you easily get the dimensions of the pieces to be joined on to complete the pattern.
Thus the triangular piece represented by the points A, B and C is that required to piece out the left side of festoon No. 2; D, E and F the right side of festoon No. 2; D, G and H the left side of festoon No. 3; I, J and K the right side of festoon No. 3, and I, L, M and N the balance of the tail.
After the different pieces are all joined on and the whole lined the parts are pleated up in the usual way, with the top of valance tacked flat on the board, and the ends of the pleating sewn nicely and covered with a knot of large cord which appears to support each raised part.
When cutting the goods add the trimming allowance of three inches beyond the raking sides of the patterns and trim the surplus to as small a compass as possible when pleated.
Figure 22 represents a style of narrow festoon drapery which presents a fairly elaborate appearance with a small quantity of goods. The tails are planned as explained in the chapter on French Festoon Drapery.
The festoons are measured from the sketch, allowing the straight lines between the heads of pipes and tails to represent the top measurement, the curved line at bottom of festoon the bottom measurement, and twice the distance between for depth and fullness.
To plan festoon A, which is a regular festoon, lay out the bottom line, Figure 22A, and from its centre erect the perpendicular line X——X, and on the horizontal line at the upper end mark off the top of festoon. Find all the points of the festoon, as explained for straight festoons in the chapter on French Festoon Drapery, and round out the bottom and sides as for regular festoons.
Follow also the instructions already given in cutting the goods, keeping the perpendicular line parallel with the selvage, and in regard to nap and pattern.
To pleat up the festoon fasten the top edge to the board with temporary tacks, pinch up a pleat about one-fifth the distance from top to bottom, and with the disengaged hand form a pleat at the edge of the goods, the point of which is attached on the line of the top edge. (Points A——A, Figure 22B.)
The remaining goods are equally divided and pleated in like manner into four full pleats of equal size and depth.
When all tacked in place a line is drawn from A to B on each side, the pleats pinned or basted and taken down, then the edges trimmed off square to the line and bound.
The centre pipe or tail is treated as a single tail by drawing a line through its centre to divide it for measuring. (E——F, Figure 22, dotted line.)
The half is sketched out full size, as explained in Figure 3, Chapter on Festoon Drapery, allowing one more return fold at back to meet the other side at centre line (Point F, Figure 22), and the pattern repeated at G——H X in Figure 3 to make the full double tail, which is lined and joined together at the edges E——F, Figure 22, and then pleated.
It is well to cut a double pattern all in one piece and pleat it so that you can tell by the folds of the pattern where seams will be permissible in the fabric.
A great many combinations such as these can be made by the exercise of a little ingenuity and patience, which will depend for their appearance on the neatness of the work and the disposition of the stripe or pattern of the fabric.
[18]
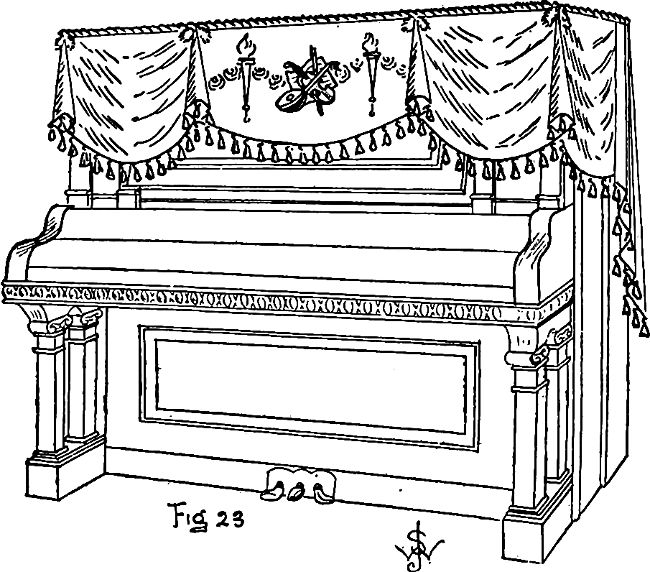
Fig 23
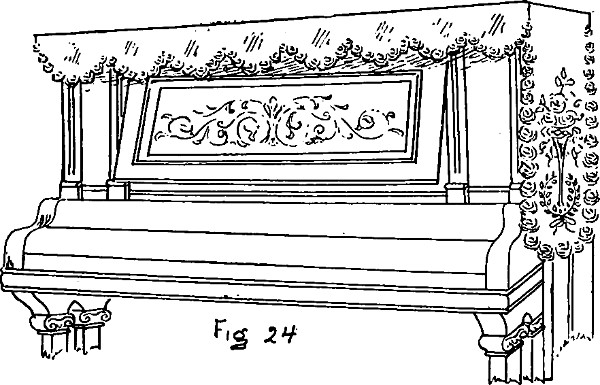
Fig 24
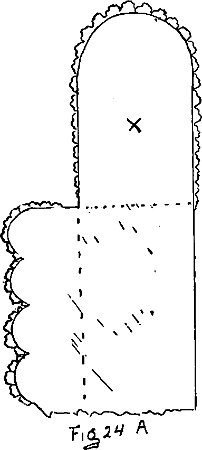
Fig 24A
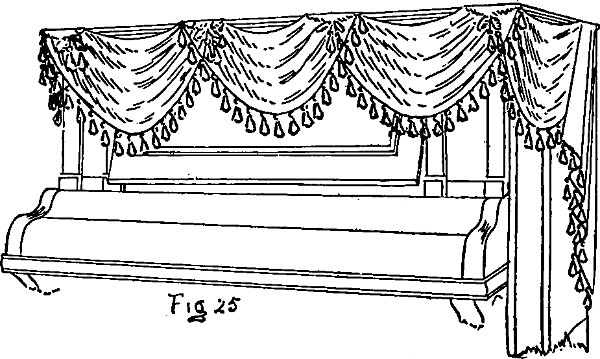
Fig 25
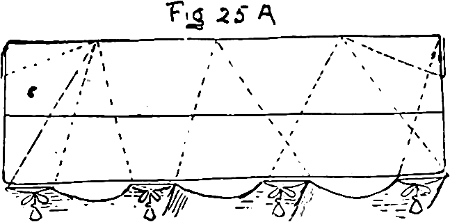
Fig 25A

Fig 26

Fig 27
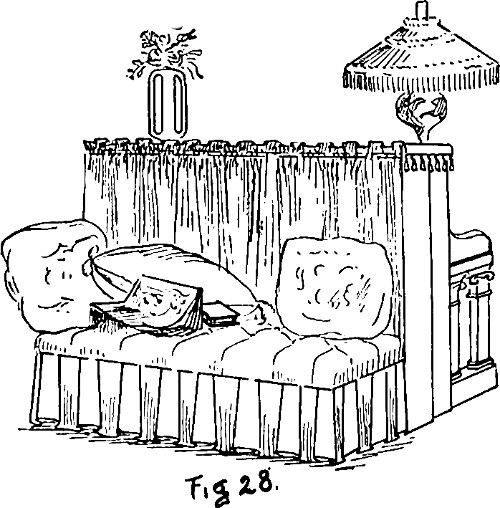
Fig 28
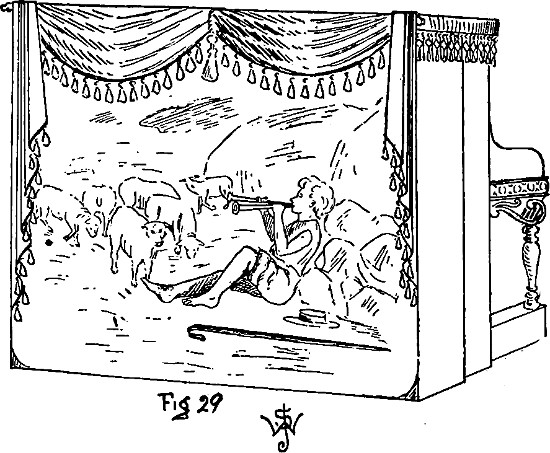
Fig 29

Fig 29A
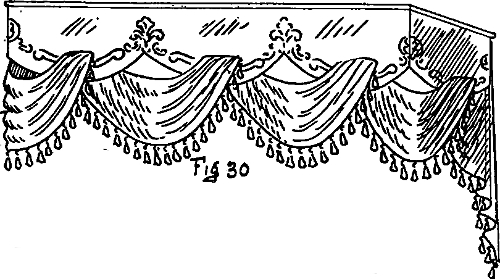
Fig 30
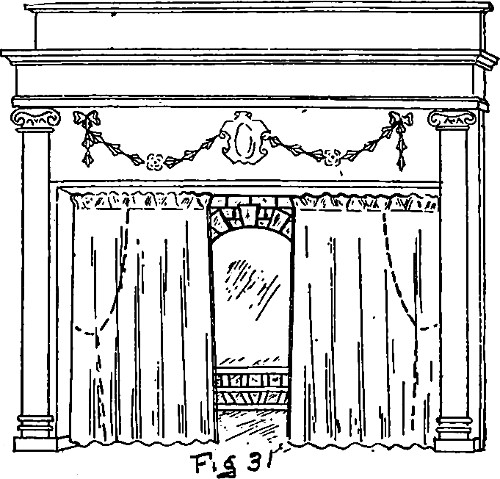
Fig 31
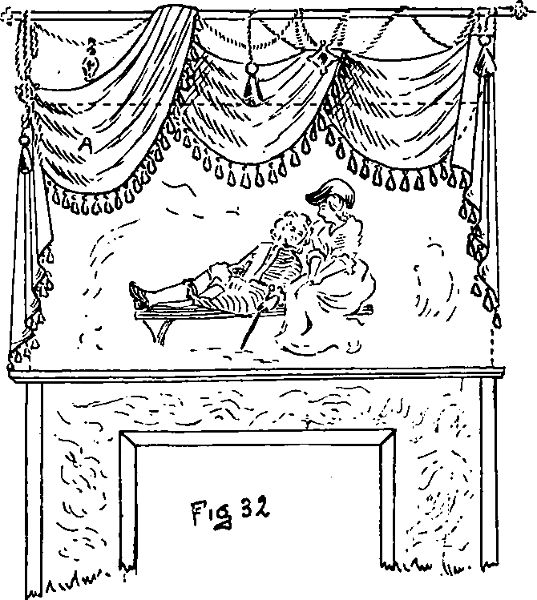
Fig 32
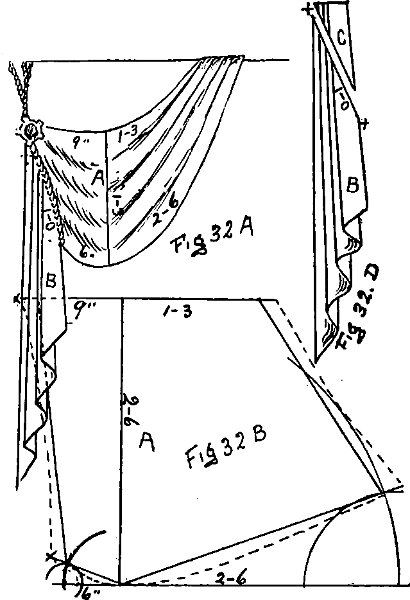
Fig 32A Fig 32B Fig 32D
[19]
The fabric decoration of pianos presents difficulties peculiar to itself, and the effort to combine beauty with common-sense utility has resulted in many pretty treatments, a few of which we illustrate. One of the first problems in the treatment of an upright piano is to securely and neatly attach the drapery to the instrument without in anywise interfering with its use or marring its finish.
For most treatments a board the shape of the top of the instrument, covered with a neutral-tinted fabric and lined beneath with felt or canton flannel, will be found to be an easy and practical method of protecting the top of the instrument, at the same time affording a solid place for the attachment of the drapery.
When covering the under side be careful not to leave any tack heads projecting; either sink them into the fabric below the surface, or at the four corners, and centre tack a small wad of felt about an inch in diameter, and drive the tack in so that the felt is forced upward around the head of the tack.
If the board should be inclined to teeter or rock, thicken the wads at the loose corners until it lies perfectly flat and solid.
The drapery can be attached to the board in a number of different ways. For light festoon draperies in which the top of the festoon falls below the edge of the board a good method is to attach a small metal rod to the edge of the board, turning the corners nicely with elbows, or bending it sharply at right angles, and loop the drapery over this. For flat or straight top festoons attach directly to the board and cover the edge with a ruffle or large cord.
Figure 23 illustrates a valance or lambrequin treatment made with a plain scalloped centre and narrow festoons on the sides and ends, with pipes at the intersections of the scallops. The festoons are fastened along the edge of the board and covered by a large cord. The plain scallop in centre does not interfere with the use of the music rest and is sufficiently decorated with an appliqué pattern.
The pipes may either be made separately, as explained in chapter on flat valances, or cut together with festoons, as in chapter on pleated valances or lambrequins. Where appliqués are used, whether of leather, tinsel or lace, the best effect is obtained by using a self-color fabric without pattern or design. Sew the appliqués down flat either by hand or machine before the lining is put in.
Figure 24 is a flat appliqué valance on which the appliqué is allowed to project beyond the edge of the scallops, making an irregular lace edge effect. This makes a very neat and simple arrangement, and is cut as Figure 24A, to allow an overhang on the face and two ends of the instrument.
The overhang X at the end is made the width of the top, so that the front overhang falls close to its front edge and meets the appliqué to conceal the opening at the corner.
This style usually requires two breadths of fifty-inch goods, and is made with an overhang of six or nine inches in front and eighteen to twenty-four inches at each end. After the edging is sewn on it is lined (sometimes interlined) and laid on the piano, where its weight is usually sufficient to keep it in place.
Figure 25 is a festoon drapery looped over the metal rod on the edge of the board or attached to the edge of piano top, as illustrated by small cords and tassels, which are attached to the back of the piano. (See dotted lines Figure 25A.) They may be either straight loops, as left side of illustration, or crossed, as right side of illustration. This style is cut and made up with due consideration of the size and requirements of the space, as explained in chapter on French festoon drapery.
A pretty scheme is sometimes made in soft fabrics by using a drapery that is a composite of the last two, a flat top cover with a pleated festoon effect on the front and end, as outlined by scalloped broken lines on Figure 26. It is made as explained for Figure 21 in chapter on pleated valances or lambrequins.
After the festoons are drawn out full size and marked for cutting, the pipe for the corner may be added and cut out with the festoon. (See explanation for Figure 19A in chapter on pleated valances.)
The tail in Figure 26 is planned the reverse way to the method mentioned in a former chapter, but a study of this illustration will show that the principle is the same.
The tail and pipe may be cut separate from the rest or cut attached by allowing for the little connecting pieces X and X, which fold beneath and do not show. In cutting the tail for this design there is nothing to be gained by cutting it attached to the festoon, but the method is given here to explain the principle.
The plain tied scarf, Figure 27, is usually a piece of soft unlined fabric twenty-seven inches wide by about two and two-thirds yards long, and is caught up as illustrated by tying a small shirring cord which is run through the fabric and divides the front overhang into three festoons.
In large rooms there is sometimes an advantage in turning the keyboard to the wall and decorating[20] the back of the instrument, which is then the most prominent part.
The nature of this treatment is to disguise the piano and give it the effect and usefulness of another piece of furniture.
Figure 28 illustrates a popular treatment, the back covered with a curtain of soft fabric shirred on a rod, and attached to the back of the instrument so that the heading or shirring projects slightly above the top. In making the curtain allow about as much again for fullness (or twice the length of the space to be covered), letting the bottom edge of the curtain hang free or shirr it on a rod similar to the top. To this is added an upholstered seat or bench and a few pillows.
If desired a festoon drapery can be added at the top of the curtain with good effect.
A decorative panel may be used instead of a curtain, as illustrated in Figure 29, either with or without a seat, and the drapery made to conform to the style of the panel.
The drapery may be made as a part of the panel, as Figure 29A, or attached separately after the panel is in place.
A square or grand piano is prettily treated with a flat cover, the size and shape of the top trimmed with an overhanging fringe or appliquéd edge of a depth to suit the individual taste.
The cover may be made of any medium-weight material of self or composite colorings, but preference should be given to a fabric not easily marked by the ornaments or bric-à-brac.
In many cases the designs suitable for an upright piano can be used with good effect on a mantel, Figures 23, 24, 25 and 27 of our illustrations possessing this feature to a certain degree.
The decoration of a mantel, however, does not present the same difficulties as the decoration of a piano, because there are fewer restrictions to bear in mind, and there is perhaps more danger of overdoing mantel decoration on this account.
From the appearance of some of the old-fashioned fireplaces still in existence we would infer that in those days utility and capacity were the first, last and only considerations.
The open grate, though popular for a long time after its introduction into this country, gradually became less and less frequently used, and as its usefulness decreased its artistic insufficiencies became more and more apparent, draperies being used to relieve and ornament it where it was thought unwise to remove it altogether. Succeeding the period of disguised homeliness we have a period of more elaborate designs, and with the return of the overmantel architectural art has lavished upon this piece of furniture carvings and mouldings until it is usually a thing of beauty, and the decorator has sometimes to advise against what would be a superfluity of decoration in the employment of fabric.
A little judicious advice along the line of superabundant decoration is sometimes profitably and kindly received, but the man who presumes to so advise must do so only upon invitation and with the utmost tact. In a great many cases, however, the mantel drapery is still an artistic necessity, and we give herewith a few styles and methods of modern treatments. Figure 30 is a flat-covered buckram pelmet, having a scalloped bottom, and a series of apertures through which a light-weight drapery is arranged in regular festoons.
This style is frequently employed to obtain depth without the appearance of weight. The top edge of the pelmet may be finished with a cord, fringe, moulding, antique nails or any simple form of trimming. For method of making this class of drapery see chapter on flat valances and lambrequins. It is sometimes necessary to provide an open grate with draught curtains, as Figure 31.
These are hung on a small rod close up to the top of the opening, using rings large enough to allow them to traverse easily, and are provided with a tassel loop at each side to retain curtains, as dotted lines, Figure 31, when the grate contains fire.
It is necessary, unless the goods are very heavy, to weight the bottoms of the curtains to prevent the draught from drawing them inward. This is accomplished by a small roll of shot, about the thickness of a lead pencil, cased in cotton and inserted between the lining and the goods along the bottom of the curtain. Do not fill the roll so tightly that it will not retain its flexibility.
This will be found a good method to employ where a draught of any kind interferes with the proper appearance of a light-weight curtain, and the roll can be kept almost invisible in the lightest materials by covering it with a piece of material the same shade as the curtains.
Frequently the appearance of a room may be enhanced by giving the mantel fitment some elevation, as, for instance, Figure 32, by reason of its plainness, would in a large room present a squatty appearance, were it not for the elevation given it by the panel and drapery. Instead of the panel, a mirror may be used, and the drapery added to relieve the bare top line. The drapery may be attached to a pole, cords or ornaments, as your design may require, taking care only to give it sufficient extension to clear the panel nicely and not lie flat against the face of it.
This style, with Figure 32A, gives another method of combining a festoon and a tail, the join being made after both are pleated up and the seam concealed by a cord which appears to loop it back.
Measure and cut festoon A, Figure 32A, as per rule for irregular festoons in the chapter pertaining to[21] that subject, which will give you the pattern Figure 32B. Pleat this up on your board to the dimensions and shape of your plan and make a paper pattern of an ordinary single tail the size you require. Pleat this up and trim the corner C, Figure 32D, to fit the angle covered by the cord in Figure 32A. Cut, line, and pleat up the tail in the usual way, and join it to the pleated festoon as neatly as possible.
The decorator with an eye for ensemble will sometimes be able to suggest the breaking up of a too flat boudoir or dressing-room side-wall with a mantel shelf or hanging book-shelf, which can be tastefully decorated in keeping with the surroundings. The treatment of high upright steam rediators is analogous to this line of furnishing and demands in some instances much the same mode of procedure. A board or shelf is made to fit the top of the radiator and so constructed as to fit squarely and securely with a boxing or keeper beneath, to prevent sliding or slipping. This is covered with a fabric to harmonize with the other furnishings and trimmed with a deep fringe, a Japanese reed and bead curtain, a moulding, or a very shallow valance.
The depth of any, governed by the style of the radiator and the taste of the decorator, best results are obtained by using a board that has saw cuts about an inch apart, and running within a few inches of from end to end, lengthwise. Very low upright radiators can be effectively treated by making the top into an upholstered seat and trimming the front and ends with a deep close fringe from seat to floor, which will conceal the radiator and permit the escape of all the heat.
A study of the accompanying illustrations will suggest the application of each to the requirements of a piano, mantel or shelf, and from these a great many pretty combinations may be evolved.
In the styles presented we have tried to avoid anything of a cumbrous or fussy nature, on the ground that dignity and simplicity are more preferable in the smaller furnishings.
[22]
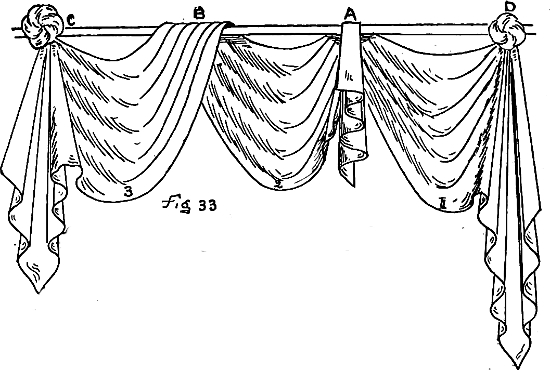
Fig 33
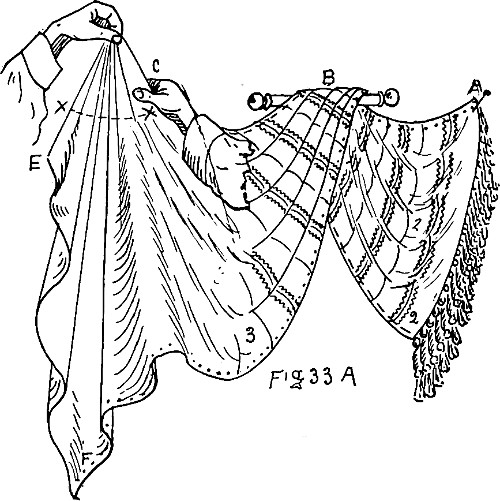
Fig 33A

Fig 33B
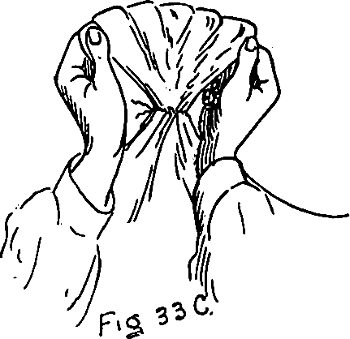
Fig 33C
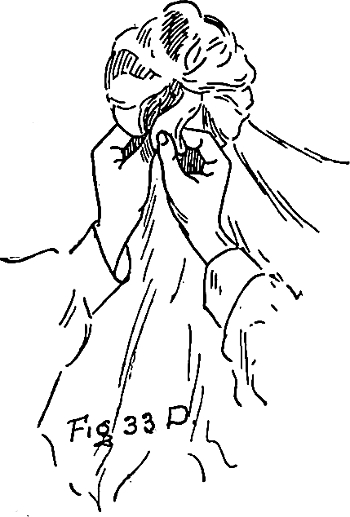
Fig 33D
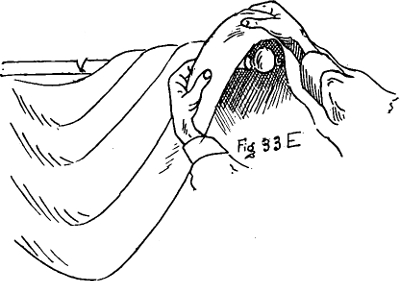
Fig 33E
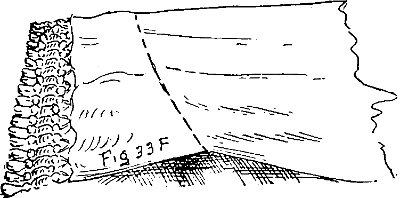
Fig 33F
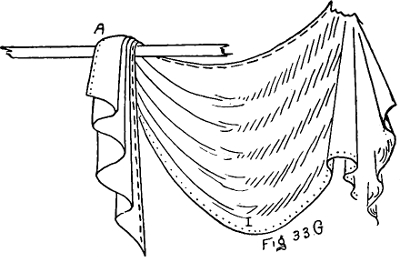
Fig 33G
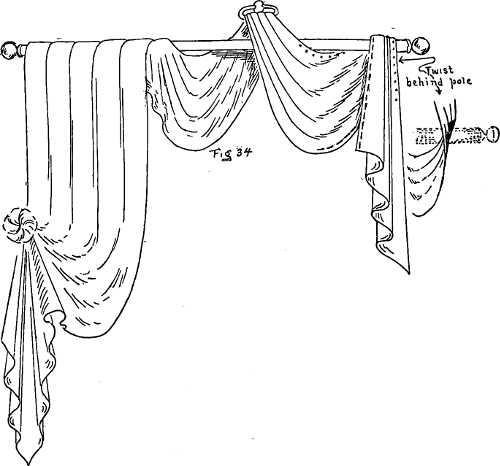
Fig 34
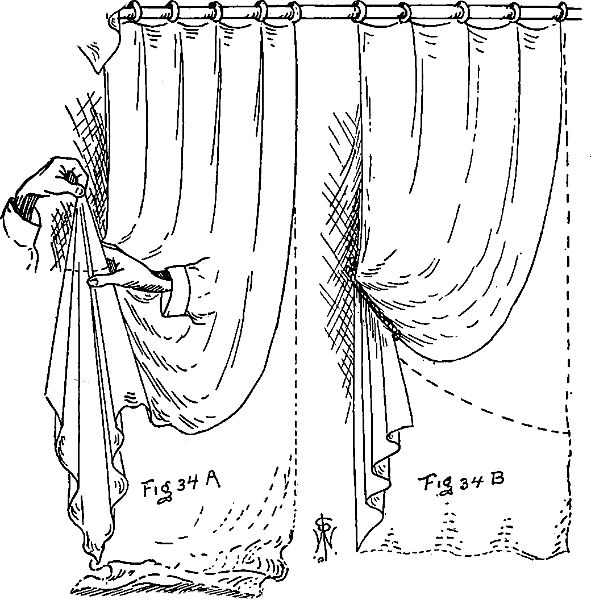
Fig 34A Fig 34B
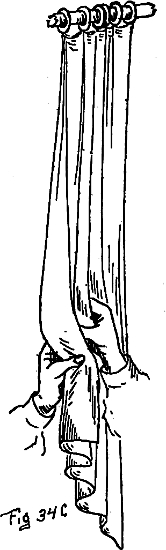
Fig 34C
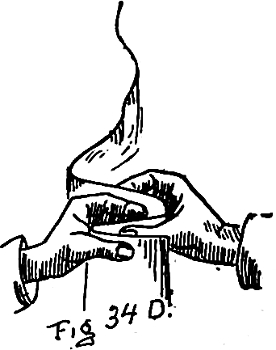
Fig 34D
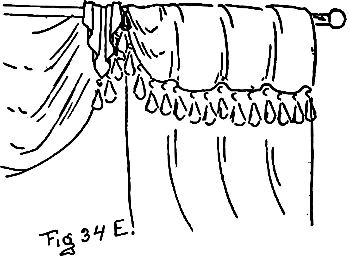
Fig 34E
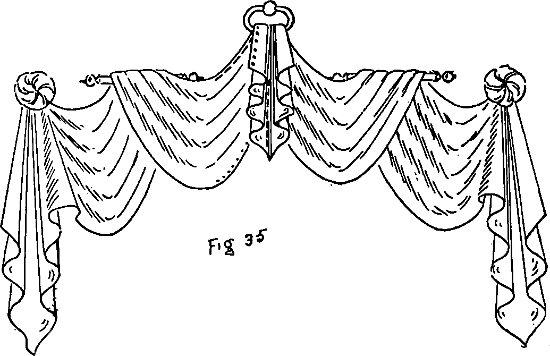
Fig 35
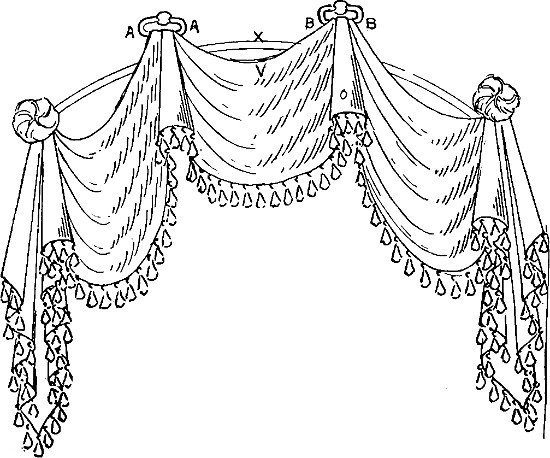
Fig 36
Fig 37
Fig 37A
Face Side of Goods
Back of Goods
Fig 38
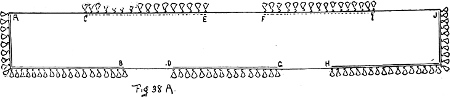
Fig 38A
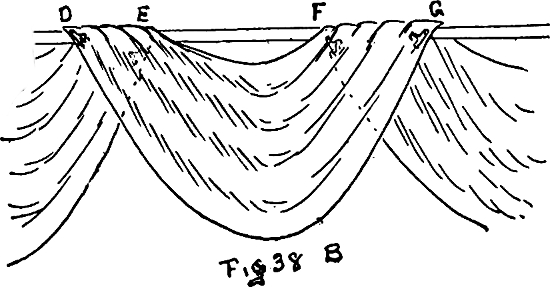
Fig 38B
[23]
ALL draperies that are not regularly cut and made, according to some design, but depend for their appearance entirely on the way in which the fabric is put up, are classed under the heading scarf draperies. They are at best but an imitation of the cut festoon drapery, and for anything permanent much better satisfaction is obtained by the use of fabric properly cut and made up.
When the decoration is of a transient character, however, such as show-window decoration, festival decoration, or the temporary adornment of a door or window, very good effects can be obtained by practice and the exercise of a little ingenuity without cutting the material, and it is not a rare occurrence to meet men of long experience in the drapery business who employ this method altogether. As a knowledge of the methods used to obtain various results in this style will doubtless prove useful, we present herewith a number of illustrations which show the versatility of this principle.
Figure 33 (see diagrams on the opposite page) illustrates one treatment of a pair of tapestry, silk or chenille curtains to form a drapery over a six or seven foot opening.
To accomplish this divide the width of the opening into three spaces, the middle one slightly narrower than the others. At point A, Figure 33A, temporarily attach the corner of one curtain and draw the other end of it up and over the pole B, from behind; without twisting the curtain, draw the top (or dotted line) edge Figure 33A over until the sag between A and B is nearly correct, then adjust the bottom (or broken line) edge, allowing it to sag considerably more than the upper edge to give the necessary depth to festoon 2. Note the stripes of the material in Figure 33A, which illustrates how a straight cross-striped material would look if used in this way.
Fasten the goods temporarily at B with a few tacks and proceed with festoon 3.
Carry the (broken line) top edge, which was the bottom edge in festoon 2, to C, your left outside point, Figures 33 and 33A, allowing it to sag slightly as the top of the festoon.
Hold the material at point C with the right hand, and with the left hand grasp the edge of the goods a short distance farther to the left and raise it above the right hand (at point C) until the edge of the goods between your hands is taut, as illustrated by Figure 33A.
If you have allowed a sufficient distance between your hands, corner E of the curtain should be higher than corner F, as illustrated.
Adjust the position of your left hand until you get the corners to satisfy you, leaving the corner F as low as you desire to have it. With the hands in the positions of Figure 33A move the left hand over above the right hand, keeping the edge of the material still taut between them, and with the fingers and thumb of the right hand gather up all the goods across the dotted line X——X into small pleats and squeeze this tightly with the right hand as Figure 33B. Half way between the two hands bend this bunch back, bringing the point held by the left hand under the fingers of the right hand where it is tied securely by a cord passed around the goods gathered there, and attach it to the wall, pole or door frame at point C, Figure 33.
The rosette is formed by spreading out the loop formed by bending back the point for tying. Spread it fan shape, Figure 33C, bringing each side around to form a complete circle, ending by tucking one within the other as Figure 33D.
Pick out the most prominent folds below the rosette to form pleats and form them as far back toward point B as you can follow them, making as many as are necessary to dispose of the fullness of the festoon; form a pipe dropping from the centre of the tied bunch beneath the rosette and pleat the rest of the fullness to form a double tail as illustrated.
Release the goods where they were temporarily tacked at B and form folds over the pole that will be continuations of the pleats radiating from the rosette.
Commence at the side nearest the rosette and tack each one as you form it, allowing the last one to be a nice full pleat, as illustrated in Figure 33E. The point of the curtain which was attached at A is now drawn up slightly to make a few shallow pleats in festoon 2, and the point thrown back toward the wall, out of sight, where it is fastened to keep the pleats in place.
For festoon 1 spread the curtain out flat, as Figure 33F, and with one hand gather the goods into small pleats across the end on the bias and slightly curved, as dotted line. This is securely tied and thrown over the pole at point A, the short edge uppermost and next to the other curtain (see Figure 33G), fasten it there and make a festoon rosette and tail with the balance of the curtain, as explained for festoon 3, Figure 33A.
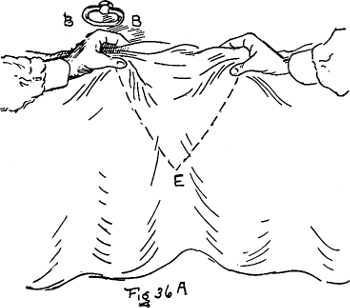
Fig 36A
If you wish the single tail at A, formed by the end of the second[24] curtain, to cascade the reverse way (with long side next to the other curtain), twist it where it is brought up behind the pole, but do not turn the whole curtain over, as you need the longest edge for the bottom of the festoon.
A study of the dotted and broken line edges of each illustration will explain how they are manipulated to secure the requisite length for the bottom of the festoon, how the surplus from the top of one festoon is used to increase the length of the next one, and how, by using alternate edges of the curtain, it is made to cover a larger space.
Figure 34 is another treatment of a pair of curtains for a similar space.
The right-hand curtain is manipulated much the same as the left-hand curtain in Figure 33, which has been already explained. The left-hand curtain is pleated into the space allowed for it at the top, either tacked over the pole as illustrated, or attached to rings. It is allowed to hang straight from the pole and either caught up with a rosette at the side or is gathered back and confined by a loop.
To make the rosette, allow the curtain to hang perfectly straight either just to the floor or even a half yard longer (if you desire the sweep of the bottom edge nice and full), and grasp the edge, without stretching it, at the point where you wish to make the rosette.
Then with the disengaged hand, Figure 34A, catch the edge again lower down and raise it until the longest point of the curtain clears the floor or is as much higher as you want it to be when finished, gather across dotted line, Figure 34A, and form the surplus into a rosette, as explained for Figure 33.
Pick out the fullness of the curtain into pleats, form a pipe depending from the centre of the tied part beneath the rosette and pleat the balance into a double tail.
To gather the curtain back with a loop, as Figure 34B, allow it to just nicely clear the floor, and then with both hands gather it into large folds commencing at the outside edge considerably below the position of the loop, and following the sweep indicated by dotted line across curtain in Figure 34B.
Figure 34C is an illustration of how this can be accomplished neatly without the necessity of pulling the curtain through the loop after it has been caught up; Figure 34D is a cross section of a curtain while being gathered, illustrating the position of the fingers as they form each successive pleat, the thumbs remaining stationary and the fingers drawing the goods toward them to form each pleat.
Figure 34E is a back view of the end of the curtain that is pleated over the pole, Figure 34, and shows also the corner of the curtain which forms the middle festoon. For Figure 35, another treatment of a pair of curtains, gather the curtains, one for each side, as explained for festoon 1, Figures 33F and 33G, and fasten the tied parts together to form the double tail in the centre, twist each curtain where it passes through the ring to bring the short edges to form the outside of the double tail, and form the festoons, rosettes and outside tails, as explained for Figure 33.
Figure 36 is an illustration of a scarf drapery for a six-foot circular top window or archway, made of six yards of fifty-inch material, with a fringe sewn on one side and both ends.
Divide the space for the number of festoons you wish to make, mark the points where the attachments will be fastened, and put them in place, mark X the centre of the space and V the middle of your length of goods on the top or unfringed edge.
Temporarily attach V at point X and carry the edge of the half length to the right or left to A or B, the first point of attachment, allowing a slight sag for the top of the festoon.
With one hand hold the edge of the goods at B, Figure 36A, and move the other hand twelve or eighteen inches farther along the edge, and with a gathering motion of fingers and thumb allow the two hands to follow the shape of the dotted line across the goods, Figure 36A, until they meet at E, which you have judged to be as far from the bottom edge as the length you wish to make the pipe O, formed at B——B, Figure 36.
As the hands meet gather all the goods into one and with the other tie a cord tightly around the gathering, the same as for the rosette, Figures 33A and 33B; the surplus above the tying may be formed into a rosette or thrown back through a ring, as illustrated.
The same process is repeated at ring A——A, and the two outer festoons and tails formed as explained for festoon 3, Figure 33. After all is securely attached pick the fullness into pleats that follow nicely from one point of attachment to the next; form pipes of the surplus bottom edge and fold and pick out the ends until you have a presentable double tail surmounted by a rosette, as illustrated.
As we have already stated, scarf draperies depend for their appearance on the way in which they are put up, and a little time spent in carefully adjusting the pleats and pipes so that they hang gracefully without drawing or twisting will be amply rewarded by the appearance of the finished product.
Some materials require an infinite amount of coaxing, particularly for scarf draperies, but patience and perseverance will usually conquer the most contrary fabric.
Figure 37 is a scarf drapery made with one reverse where it passes through the ring. By reverse we mean that the fringe instead of being all sewn on one side of the goods is for some distance transferred[25] to the other side of the goods and sewn to the opposite edge.
If the material is reversible (finished alike on both sides) the fringe can be reversed, as Figure 37A, without cutting the goods, and the fringe, instead of ending with the two ends opposite one another, is allowed to pass or overlap to about the position indicated by the extremities of the dotted A——A.
If the material is not reversible, as is supposedly the case in Figure 37A, the goods are cut (in this case one-third the distance from one end) and sewn together at A1——A1, with the long end the reverse side up. Gather the goods across the broken line A1——A1 and draw through the ring until the seam is concealed; draw over the hook B, leaving the necessary sag to the bottom edge and allowing the top edge only a slight droop; gather and tie at the outside corner D, and then go over both the festoons and coax the pleats into shape.
You will find that the goods have become considerably biased where they pass over the hook B, and for that reason do not fasten them at C until the centre festoon is finished to your satisfaction. When this is accomplished proceed to finish the left festoon after the manner of festoon 3, Figure 33A.
The top edge between B and C will be found quite full, and the surplus must be disposed of in the rosette at C. This is one of the most popular styles of small scarf draperies, and if nicely carried out in soft fabrics can be made to look quite neat. Before cutting the goods for reversing, we would advise the temporary draping of the goods, as hereafter explained for Figure 38.
Figure 38 is an elaborate festoon scarf drapery, with the fringe reversed in four places.
To accomplish this successfully it is almost imperative that we use a reversible material that will permit of each side being alternately presented to view in the festoons without perceptible difference.
To calculate for reversing scarf draperies the best plan is to mark off on your drapery board the dimensions of your space or opening, and attach to it at requisite points ornaments, rings or poles similar to those you intend to attach it to when finished.
Cut off your material, allowing one yard of material to each foot in width of space, and temporarily attach the centre of one edge of your goods to the middle of your space; then bring it through or over the next attachment, drawing to about the desired proportion of the festoon, and repeat at the next point, and so on to the end rosette; bring the goods over and over each time without twisting it, as you would bind a bandage round a limb. When all temporarily attached go back over each festoon and be sure that it is correctly adjusted, and then tie up the ends to form rosettes. You can now readily see where fringe will be needed; mark it as it hangs, using safety curtain pins, placing a pin at the extremities of the bottom line of each festoon, the points toward the bottom of the festoon. (See Figure 38B, points D and G.)
The bottom line of the next festoon runs up behind this one, consequently you must reach up underneath the first festoon and place the pins in the face side of the under festoon, points downward, as dotted out lines, E and F, Figure 38B. Put a pin also in the outside corner of each tail, pointing toward the lower point of the tail. When all pinned take down and sew the fringe on the side from which each pair of pins was inserted, and from point to point of each pair. This will bring the fringe alternately first on one side and edge and then on the other side and edge, as Figure 38A, which represents the fringe between points A——B, D——G and H——J, as being on the top side of the goods as it lies spread out, and that between points C——E and F——I, on the under side.
Figure 38B shows a variation from the style of Figure 38, in that the festoon does not form a wind round the pole, but is as a loop dropped over it, both ends of the festoon showing in front of the pole. It is seldom employed more than once or twice in a large drapery, and then in the centre or at equal distances on each side of it.
In scarf draperies, as in cut draperies, study to produce a symmetrical and well-balanced effect, and at the same time avoid having each side the exact duplicate of the other. Figure 38, for example, is an illustration of this thought.
If for architectural reasons it is necessary that both sides be alike, as Figure 35, then plan to have them as exact as possible, but, as a general rule, a slight variation adds character to the decoration.
Avoid, also, too many rosettes, two being quite sufficient in almost any drapery that is not of a temporary character.
We do not advocate the use of scarf draperies for permanent treatments, but the knowledge and skill acquired by practice in this style of decoration is a valuable possession.

[26]
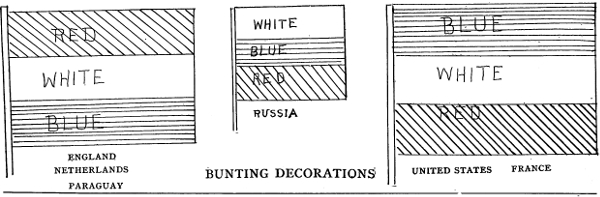
BUNTING DECORATIONS
RED WHITE BLUE
ENGLAND
NETHERLANDS
PARAGUAY
WHITE BLUE RED
RUSSIA
BLUE WHITE RED
UNITED STATES
FRANCE
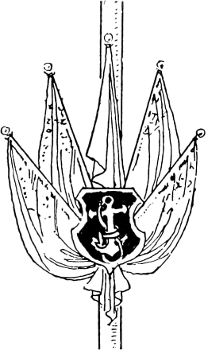
During certain seasons of the year the decorator is called upon to furnish decorations for national demonstrations, society functions and the enrichment of halls, lawns, booths, etc. These decorations demand something more than the usual exhibition of a few flags and bunting, that may signify anything from a national victory to the opening of a saloon, and this branch of work is gradually becoming more important in the decorative business.
To successfully handle it to any extent it is necessary to carry on hand a quantity of the different decorative materials, such as flags, bunting, shields, banners, etc., and for quick and effective display a few of the following suggestions might be profitably adopted.
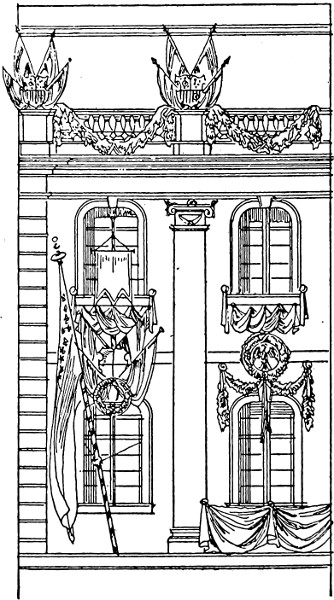
The natural advantages peculiar to each building frequently suggest the basis for a decorative scheme, and in planning an exterior trim it is best to first make a careful study of the building and jot down what particular features strike you as offering advantage or difficulty in their decoration. Note also the accessibility of the prominent places, and plan your trim accordingly.
Too much stress cannot be laid on the importance of this preliminary survey, for plans might be suggested which would have to be considerably modified in execution, to the disappointment of your customer.
After notes are taken, secure, if possible, a cut of the building from the stationery or advertising matter of the tenants or owners, and with these as a basis project your scheme of decoration. If a sketch must be made, adhere rigidly to the architectural proportions of the building, and be careful not to show streamers or festoons where your workmen would require wings to place them and glue to stick them in position.
The methods of disposing decorations for exterior work differ according to taste, and no hard and fast rule can be laid down as to what is and is not proper. We illustrate in Figure 39, on the opposite page, a few of the different designs which are most frequently used.
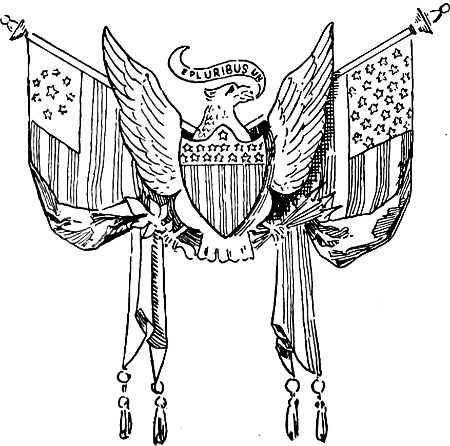
This building possesses most decided natural advantages, and the whole decoration could be carried out completely in any one of the different styles suggested in the illustration.
On the ground floor elevation we illustrate a number of columns resting on a square base and surmounted by an illuminated globe. The plinth (see detail Figure 40) is a square box covered with cotton stretched smoothly and tacked on the back or bottom to conceal the tacks.
The torus is a circular piece of board a little less in diameter than the top surface of the plinth,[28] covered with cotton, also drawn tightly and tacked underneath.
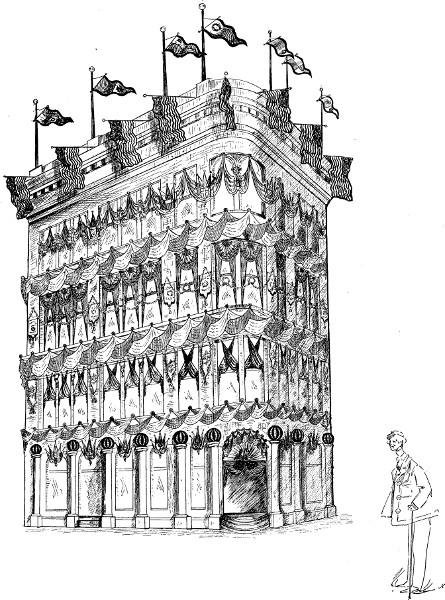
FESTIVAL DECORATIONS
FIGURE 39. SEE TEXT ON OPPOSITE PAGE.
The framework of the shaft is made as Figure 40A. Two pieces of board are nailed together V-shape, and finished at each end with a circular piece of board the diameter you desire your shaft to be; this frame is covered with cotton pleated from end to end, as figure 40B.
This requires considerable practice to do it nicely, but when neatly covered with bleached white cotton, with pleats about one and one-half inches wide, it makes a very pleasing column.
The astragal, neck, ovolo and abacus (see detail) are covered circles of graduated diameters, all securely fastened together; the globe which surmounts the capital is a hollow shell made on a frame similar to Figure 41, and covered with alternate colors of cotton, the joins tacked together on the ribs and concealed by the puffing explained a little later.
When completed, the whole forms a light and neat semblance of a heavy fluted column, and gives a dignified appearance to a trim. If desired they can be made half round or half square and used as pilasters, made and finished in the same way. While not quite as effective, they require less time and material.
Fig. 40
Fig. 40A Fig. 40B
Fig. 41
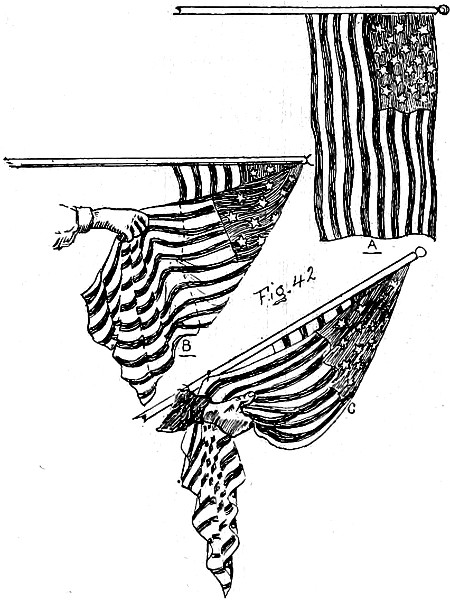
Fig. 42
A, B, C

Fig. 43
Fig. 47
Fig. 47A

Fig. 44
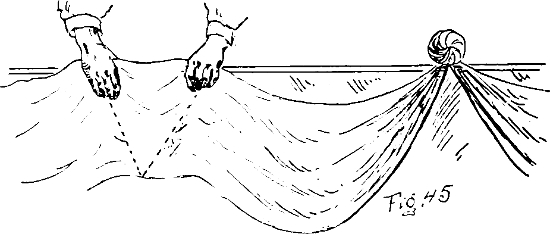
Fig. 45
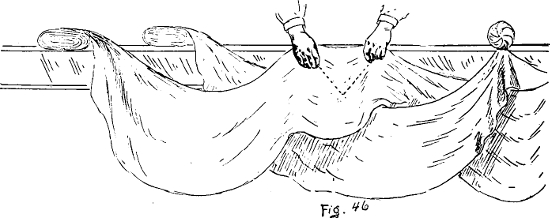
Fig. 46
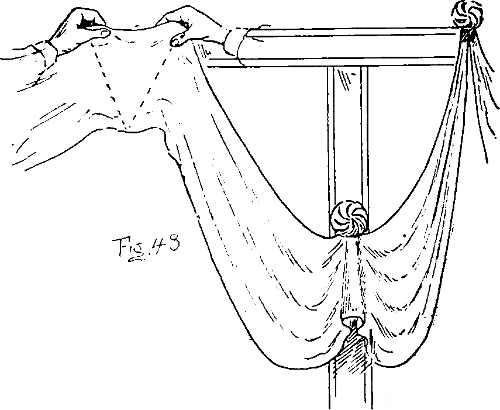
Fig. 48

Fig. 49
The corner doorway of Figure 39 shows a round top shirred in with cotton or bunting trimmed with a couple of flags and a drapery of two alternate colors.
If the sweep of the arch is a semi-circle, take a piece of material a little more than half the diameter in width and as long as twice the diameter (or bottom measurement) and gather one edge into small pleats, tie it tightly and attach it to the centre of the bottom frame.
Commence in the centre of the top edge of the fabric and fasten it to the middle of the top frame, and, working from this each way, stretch the material smoothly into pleats radiating from the tied edge, and tack it all around the sweep of the frame, cover the bottom edge with a couple of flags draped as Figure 42 A, B and C, minus the sticks, and finish the outside of the circle with a puffing.
To make the puffing, fold a width of material (about 30 inch) into pleats about two inches wide, and tack one end of it to the point where the puffing is to finish. Leave a loop of the pleated material about three inches high, and with a single tack attach the goods three inches from your first tack; follow this out to where the puffing ends, and then go back over it and open each loop out nice and round, taking a selvage each way, as illustrated in Figure 43.
The sprays of flags between the columns are made as explained by Figure 44; the flags for these and the[29] windows of the second story, manipulated as Figure 42 A, B and C, to produce the full-draped effect.
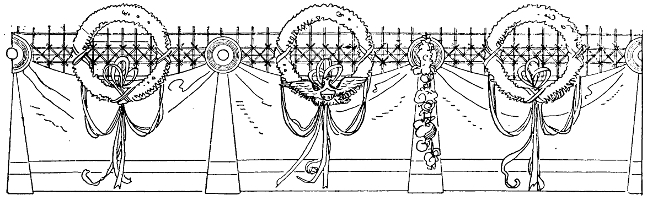
The double drapery of alternate light and dark festoons below the second story windows are gathered as Figure 45, the hands gathering down from the top edge till they meet at the bottom edge, as explained for Figure 36A, in chapter on scarf draperies.
The banners on the second and third stories may be made of bunting, joining the different colors together, or of cotton, with the colors and patterns painted on them. The draperies on the third and fourth stories are gathered as Figure 46, the hands gathering the goods as dotted line, and meeting about one-third of the distance from the top.
With an assistant to handle one piece of the goods, the alternate effect can be easily produced by making first a festoon of one color then a festoon of the other color, crossing the goods each time a festoon is made.
If you desire to use three colors, stretch one, preferably the lighter, straight along the back as a background and drape the others over it.
The wreaths and festooning on the third story are made of tissue paper or of cedar twigs tied together, and are quite effective in contrast with other decorations.
To secure the effect illustrated at the windows of this floor, the end of the material is tied into a bunch and attached at the bottom corner of the window (Figure 47), and then stretched up and spread along the top of the frame and tacked; treat the other side of the window the same, and finish the top with an inverted fan.
To make the fan, allow about three times as much material as the width of the space, and pleat one edge into small pleats; attach this to the centre of the top of the frame, and then carry the two outside bottom corners of the material up to the corners of the window frame, and gather each into a rosette, as Figure 47A.
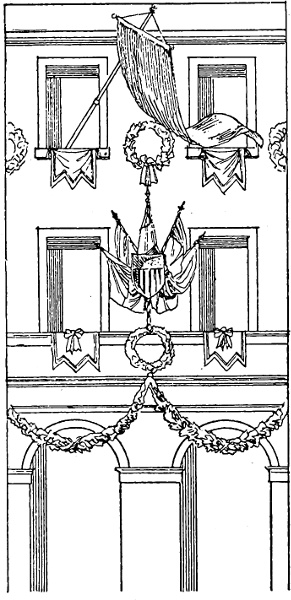
The drapery on the top floor of the illustration is made as a scarf drapery. Gather the high points, allowing the hands to describe two sides of an equilateral triangle (Figure 48), and form the surplus into rosettes, the lower points gather as Figure 46; tie in position, form rosettes and carry the goods on up to the next point, as illustrated. Do not tie rosettes where the shields will be placed, but allow the goods to fall in a deep festoon. The shields or trophies are a quick and effective decoration, usually made of sheets of tin or heavy cardboard, mounted on a frame, as illustrated Figure 49, and painted with emblematic devices or coats of arms; flags are inserted at the top to form a spray.
The Venetian masts shown on the top of the building are very largely employed in out-door decorations, usually in the form of a colonnade, to line the sides of a street or walk, or to flank the entrance and approach of public buildings during a demonstration. A quick way to erect them when they cannot be driven into the ground is to stand them in barrels; fasten them upright and fill the barrels with sand or stones.
They may be any height, and placed as far apart as you wish, but do not put them nearer than a mast length apart to obtain the best effect.
The small triangular banners are suspended from the mast top by ropes attached at each corner of the wide end of the banner, a rod being hemmed in the banner for this purpose.
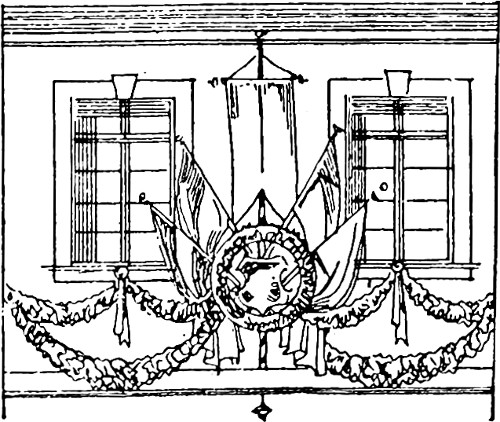
Festoons of wreathing or small flags and code signal flags may be strung from mast to mast with good effect. The decorator can easily arrange a variety of treatments embodying some or all of these ideas,[30] and by following out the architectural suggestions of each building will obtain sufficient variety to avoid repetition.
Two things are to be carefully considered in decorations of this character. The danger of fire from contact with electric wires, and the changes which may be occasioned by the weather.
To avoid disaster and disappointment, use only fast colored materials, drive every nail and tie every knot to stay under the strongest wind.
Various schemes have been used to keep bunting draperies from flapping in the wind and lodging upon ledges or other projections, thereby destroying the effect of the decoration.
We have discarded all methods of weighting or tying the bottom edges, because these methods only serve to hold the wind, as does a close-hauled sail, and increase the danger of tearing away the decoration.
To prevent the drapery from becoming disarranged, make short festoons, and do not allow the top much sag. Use a double alternate drapery, and keep it so far away from projections that it will drop into place again after the gust has passed.
You will find if it hangs free with only its own weight to keep it in position that the wind will to a large extent blow off it, and it will not become unsightly.
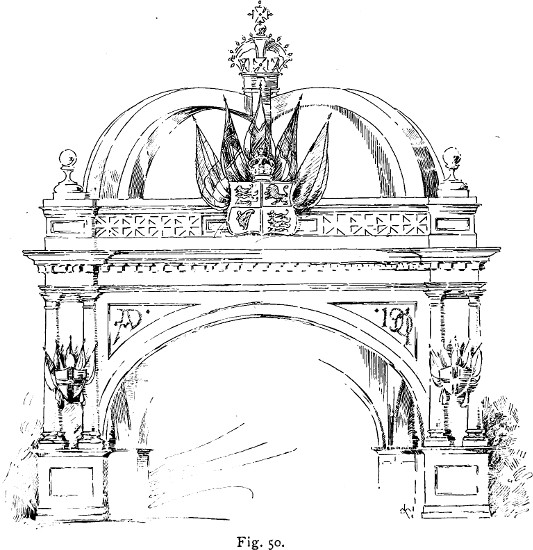
Fig. 50.
Under ordinary conditions the colors red and blue used with white present a most attractive combination. For special occasions, however, any desired colors may be employed, bearing in mind the relation of one color to the other and the harmony of the whole.
In different countries the relative position of the three colors in a joined red-white-and-blue bunting drapery is different (Figure at head of page 26). In Great Britain, Netherlands and Paraguay red has the place of honor at the top; in the United States blue; and both observe the old law of heraldry that color must be separated from color by one of the metals—in this case by white, the emblem of silver. Where two colors only are used in combination better balance is obtained by having the darker band slightly the narrower. As the object sought is brightness, sharp contrasts give best results, always bearing in mind the correct harmony of related colors. Mourning draperies should avoid as far as possible fussy or frivolous tendencies, the festoons taking on the appearance of solemn massiveness, and finished at each extremity with a heavy cascade or tail.
Black, the accepted emblem of mourning, is either used alone or mixed with a small percentage of white in unobtrusive places.
Deep purple, symbolical of extreme grief, is used in conjunction with black as the official emblem of royal mourning.
The weight of the materials used for exterior decorations differs according to the taste of the decorator. We have found our purpose best served by using unbleached factory cotton of a fairly heavy weight, having it specially dyed to the colors in demand, and for white using a soft-finished bleached cotton or a shaker flannel.
[31]
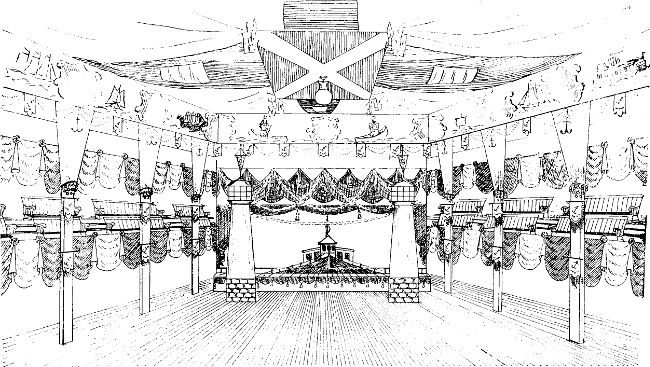
Fig. 53.

When the nation is called on to do honor to one high in the world’s esteem, and State, corporation or society coffers contribute to the erection of a triumphal arch, the experienced decorator, supplementing his knowledge with the advice of the carpenter, plasterer and painter, will submit plans and specifications, and will frequently secure the contract. Figure 50 shows a quadruple arch placed at the intersection of two streets. The frame is built of heavy timbers and lathed into the shape of the arches and moldings. Then two or three heavy coats of plaster, and a smoothing last coat, which is colored dead-white.
The same effect can be produced with bleached cotton stretched tight over wooden frames, the molding being covered separately and attached afterwards.
Electricity is an important decorative feature in nearly all present-day treatments of any size, and serves the two-fold purpose of decoration and illumination. Its unquestioned supremacy after dark is a temptation to place the entire decoration in the hands of the electrician. The result of that is a building pleasing by night, but by daylight exhibiting nothing more attractive than a temporary wiring and stripping.
To produce a satisfactory result the electrical and fabric decorations should be planned together, so that one will aid the other.
Ball and banquet decorations are usually planned in keeping with the nature of the function, and suggest by the symbols and emblems used the nature of the organization under whose auspices it is held. Figure 53 represents a large hall decorated for a yacht club ball. This hall is fortunate in possessing a stage and gallery, which facilitates its decorative arrangement. The stage is planned to represent the upper deck and pilot house of a large yacht, and is arranged for the use of the orchestra. Everything in the yacht’s furnishings is represented, and the effect is of a vessel moored bow on, at the end of the hall.
Flanking this, on each side, are miniature lighthouses, made of wood covered with cotton, and fitted in the upper chamber with electric lights. The roof of the hall is covered in the club colors of blue and white, so interwoven as to form four complete club burgees radiating from the centrepiece, which is a St.[32] Andrew’s cross, made on a frame and drawn up into position.
Fig 54
Fig 55
Fig 55A
Fig 56

Fig 58
shirring thread
shirring thread
The cotton forming the ceiling is first attached to the centrepiece and stretched to the outer edges, one or two men handling each end of the goods so that it can be stretched without showing gaps between. Where there is much overhead work, time is saved by constructing an upright trestle after the manner of Figure 54, which is mounted on large casters, and can be moved about from place to place in the room without the workmen descending. We have used trestles of this kind thirty-five feet high, eight feet square at the base and three feet square at the top, which could be moved about quite easily.
Immediately below the ceiling is a painted frieze, representing primitive and modern methods of navigation, the figures sketched on white cotton and heavily shadowed to give a relief effect. Separating the figures are shields bearing the principal dates and events in the club’s history.
The space between the bottom of the frieze and the edge of the gallery ceiling is covered with white, over which are suspended banners bearing the club emblem and the names of the different yachts, and in addition to these a double festooning of large white cotton rope, with anchor pendants.
The pillars are pleated from floor to frieze with white cotton, which spreads fan-shape above the electric light bracket; a short board is fastened across the post, just above the bracket, and another of equal length at its base; the cotton is tacked first to the upper block and drawn up to the frieze and tacked there. Then commencing at the upper block again it is drawn to the lower block and secured. It can be done in one piece, but is more easily accomplished by using one piece for the fan and another for the straight lower part.
The spaces between the pillars above and below the gallery are draped with large tri-color banners, gathered as dotted lines, Figures 55 and 55 A, and require about two feet of material to each foot of space. The banners on the faces of the pillars are suspended from boat-hooks, the whole thought being to give things nautical particular prominence.
The drapery on the front of the stage platform, with Figure 56, illustrates another method of manipulating a scarf drapery to secure the necessary fullness for the bottom edge, and take up the excess of the top edge, by forming a double pleat at the top and gathering the material from the bottom. This method is equally applicable to any purpose where the fringe is all on one edge of the material, and not reversed, and will be found particularly useful with narrow material. The back and sides of the stage may either be pleated in with white or covered with marine scenery.
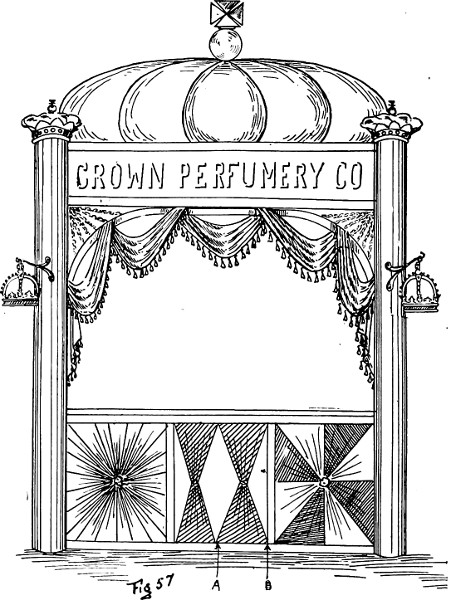
Fig 57
We illustrate, Figure 57, a booth for exhibition purposes which embodies some of the main decorative[33] ideas in use. This is built independent of any pillars or beams of the building in which it may be used, but frequently a booth is so situated that part of the building proper is incorporated in its construction.
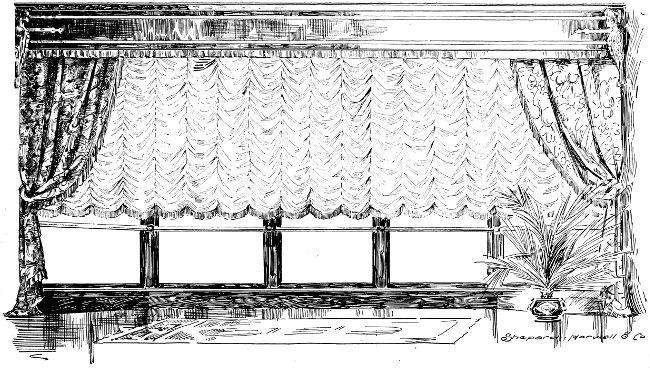
AUSTRIAN SHADES. SEE ARTICLE “WINDOW SHADES AND BLINDS” BEGINNING ON PAGE 39.
In all cases where goods are exhibited for commercial purposes, the size, shape and appearance of the materials exhibited should guide in the construction of the booth. Our illustration shows only one exposure of the booth which is repeated on all four sides. The corners are columns made like Figures 40A and 40B, capped with plaster crowns. The roof is made on a shaped frame covered in the same manner as the globe Figure 41. The arches are curved pieces of wood covered with velvet, and radiating from the corners to the arches are spirals of twisted ribbon or colored crêpe tissue paper. The drapery illustrated is a simple reversed scarf drapery made as explained in the chapter on scarf draperies. The lower portion of the booth shows three methods of paneling. The first one on the left is made of one piece of material with a circular piece taken out of the centre. The piece taken out is equal to about one-quarter of the width of the panel and the material gathered and fastened in the centre as illustrated by Figure 58. After that it is stretched into pleats to the edges.
The centre panel is a quick and effective method of covering space. The background is first covered plain, then commencing at the floor or bottom of paneling stretch the goods out its full width and tack the end of it at A—B, Figure 57. Tie a small piece of the goods loosely around this at what will be about the middle when it is pulled up. Then proceed to stretch up the top and tack it along. Draw it out to the same width as the bottom and pull out all the wrinkles, so that it pleats nicely each way from the tied part. After it is tacked in place adjust the tying to the exact middle and proceed the same with the next one.
To make the right hand panel, alternate colors of material are bunched and tacked in the centre of the space and stretched to the outer edge, keeping the dividing lines square and true.
The designs and instructions that we have given are sufficient when variously combined and assembled for almost any decorative requirement. The main things to bear in mind are balance or symmetry, neatness, and color harmony; a proper consideration of these points will result in a satisfactory trim.
For interior work the decorator is limited only by his price in his selection of material; but sometimes the best effects are obtained without the use of more expensive fabrics than those previously mentioned. Next in the order of values are sateen, cashmere, velours, satin and silk, in plain fabrics, and the endless variety of damasks, brocades, etc.
[34]
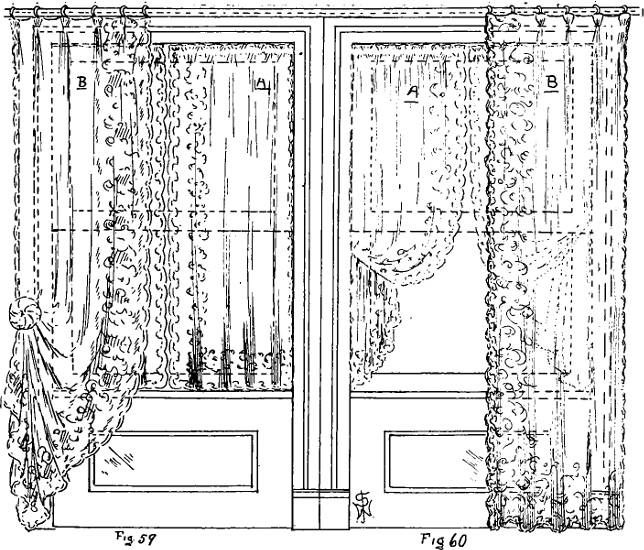
Fig 59 Fig 60
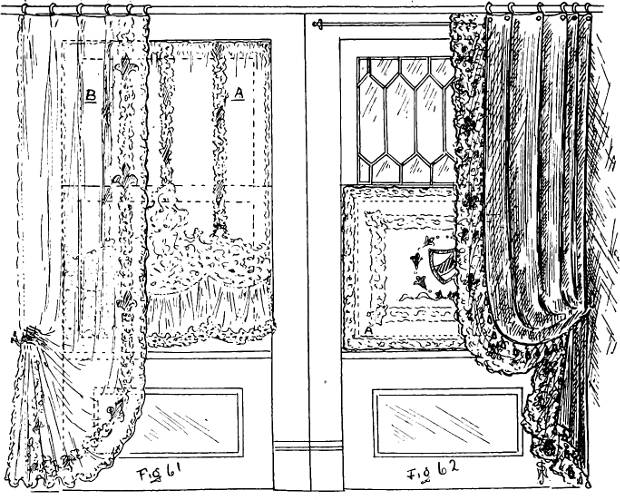
Fig 61 Fig 62
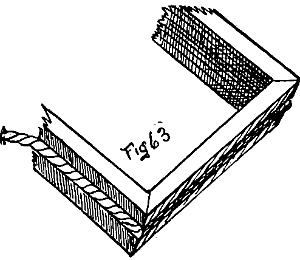
Fig 63
Fig 64 Fig 70
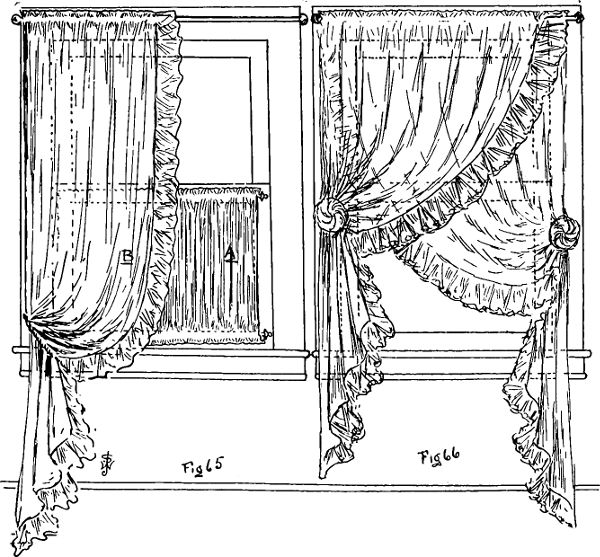
Fig 65 Fig 66
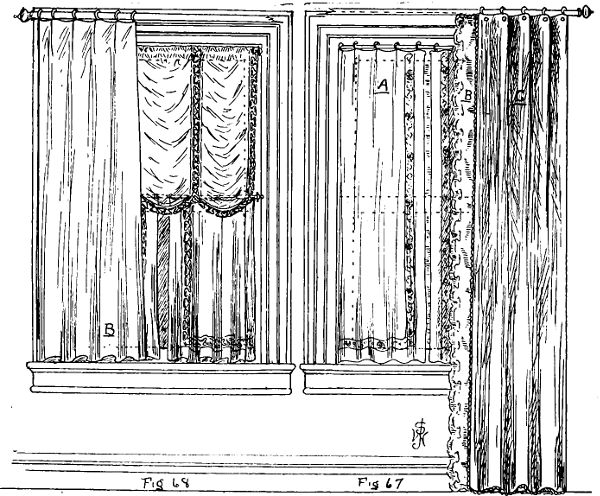
Fig 67 Fig 68
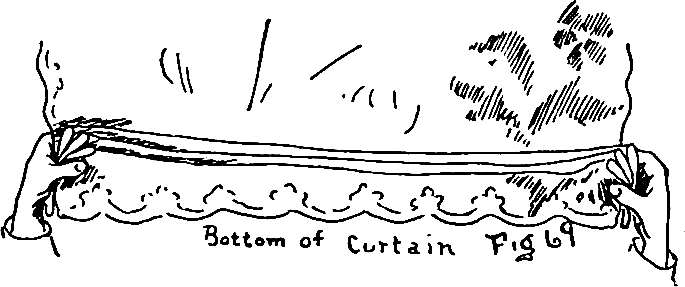
Fig 69

Fig 71
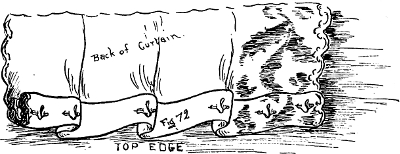
Fig 72
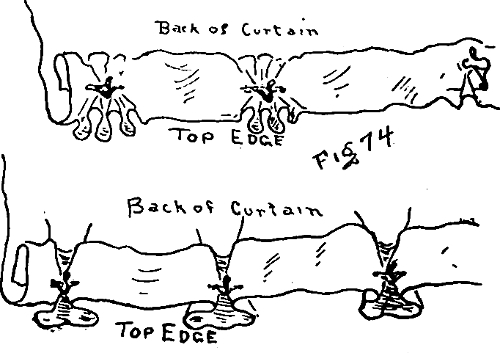
Fig 74
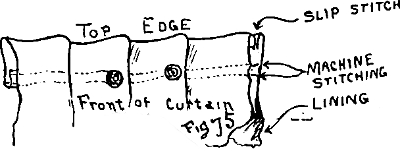
Fig 75

Fig 76
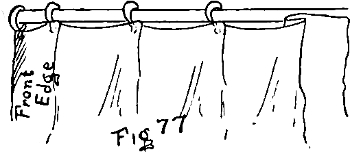
Fig 77
Fig 78
Elevation Detail
TOP EDGE
[35]
In the eyes of the housewife the lace curtains are one of the most important considerations in the furnishing of the home, and until they are properly in place the house does not seem to be settled. Considerable interest is usually exhibited in the matter of hanging them, and the discussion as to the proper method invariably hangs on the following queries:
Should they come to the window sill, a little below it, or down to the floor?
Should they hang straight, be looped back, or caught up with a rosette?
Should sash curtains, stores or panels be used next to the glass?
The answers to these and other questions will depend largely on the architectural position and style of the window, the nature of the room and the purpose for which it is to be used. The question of sash or glass curtains is usually a matter of taste, and in the majority of cases they are used for outside appearance only. The examples of different styles presented herewith cover a fair range of treatments, which can be easily added to or modified, as the occasion demands.
Sash curtains to hang straight are made as Curtain A, Figure 59, and reach from the top of the window sash to nicely clear the sill. They may be shirred on a rod or attached to rings.
If the material is liable to shrink when laundered it is customary to turn in an extra allowance of one or two inches at the top (according to the length of the curtain), to be let down when required. Sash curtains hanging straight, as Figure 59, reduce the apparent width and increase the height of the window, and should not be used on long, narrow windows.
If made of plain or dotted material they may be edged with lace or ruffle on the sides and bottom, or finished with a deep hem, as Figure 67, with or without an insertion.
Sash curtains to loop back, as A, Figure 60, are made about six inches longer than the length of the window from top to sill, with shrinking allowance added, and produce the opposite effect to straight curtains, seeming to increase the width and reduce the height. They may be made of bordered goods or of plain or dotted material edged with lace or ruffle of itself. Looped curtains give a jaunty, cheerful appearance to the exterior of a house, but do not look well on wide, short windows, unless left widely separated at the top. Stores bonne femme, as illustrated, Figure 61, Curtain A, do not materially alter the apparent size of a window, and are very effective on large windows. They are usually made with scalloped bottom edge, trimmed with a frill eight or ten inches deep, and edged with lace.
For a wide window the body of the curtain is sometimes divided into panels by rows of insertion, instead of having a motif or lace pattern set into it, as illustrated.
The material used is usually a fine étamine, madras or fine net. They are hung on a rod fastened to the top or just inside the frame (see Rod E, Figure 78) so that they will hang next to the glass, as sash curtains, and are usually made to just clear the sill in length and very slightly full in width.
The upper part of the window in Figure 68 is a combination of the bonne femme and Austrian shade, and makes a very effective sash or glass curtain for dining-room, library or bedroom. They are made in the same manner as the Austrian shade explained later, except that they hang stationary, and do not raise or lower. The material may be plain or colored silk, net, challie, casement cloth, or madras, with insertion of any desired style, and edged with lace to match. In colored materials good effects can be obtained by using a contrasting color for the insertion.
The curtains on the lower sash are attached to a rod placed at I, Figure 78, and are trimmed to match the curtains on the upper sash, they hang free at the bottom and just clear the sill, the insertion across the bottom placed high enough to show clearly through the glass from without. They may be used in conjunction with the upper curtain, as illustrated, or may be used alone, and are usually sewn to rings, as Figures 70 or 77.
Lace panels with motif centre, as A, Figure 62, are quite largely used for clubs, hotel or institution windows, and in many cases for dwellings also (though some think them too severe for the latter). Wherever used they should be perfectly proportioned and shaped to fit the size and shape of the window, the design so executed that it shall be entirely visible from without, and appear as a picture framed by the window sash.
They are generally made to order by applying lace insertion and motifs to net, and are attached to the sash by rods, tacks, or, what is still better, make a small wooden frame of strips one-half inch by three-quarter inch and wrap it neatly with cotton the same color as the net, baste the panel to the cotton and attach it to the window sash with small brads. This frame is only slightly visible through the panel on the inside and completely hidden by the sash from the outside.
To attach a panel to a door where the glass is[36] framed by fancy moldings, the small frame is made as above to fit into the sash against the glass. It is finished to match the woodwork of the door, and has a groove on the outer edge to receive a small, soft cord, tacked or glued in place, and projecting sufficiently to permit the edge of the panel to be sewn to it (see Figure 63). Care should be taken in measuring for panels, as the effect is completely spoiled by a misfit.
Sash curtains, stores or panels, when properly applied, add greatly to the exterior appearance of a house, but should be uniformly applied to all windows visible from the same quarter. For instance, if sash curtains are used on the front drawing-room windows, all of the front windows, from basement to attic, should be treated with some form of sash curtains adapted to each individual space and in harmony with the whole. Nearly all glass curtains are provided with a double hem at the top, Figure 64, through which is passed a small rod fastened at each end to the stops or frames of the window in such a manner that the sash will work freely if raised or lowered. (See E B, Figure 78.)
In some cases it is desirable to apply a peek-a-boo sash curtain to the lower sash to render it opaque from without and not exclude the light. This is accomplished by using a curtain with a double hem at top and bottom and attached (as illustrated A, Figure 65) so that it raises with the sash and does not touch the stop on either side. (Note Rods I and G, Figure 78.)
The pleats are stretched tightly from top to bottom, and the usual allowance for fullness is twice the width of the space to be covered, which may vary according to the density of the material.
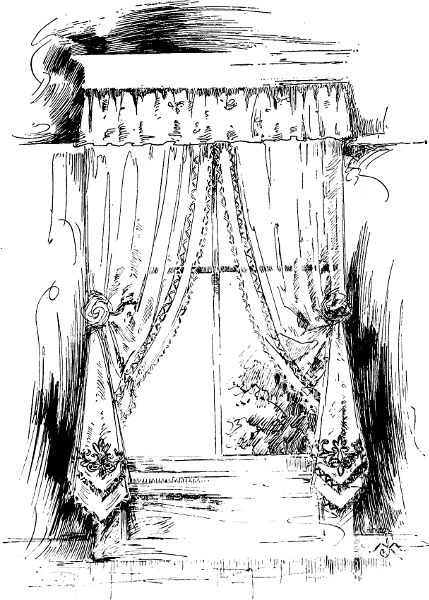
It is natural that the ground floor windows should be more densely dressed than those of the upper floors, not only to impart a sense of privacy, but as following the general construction of ordinary buildings, the ground floor windows usually being larger and more heavily trimmed, and as the treatment ascends from floor to floor permit the curtains to be less weighty in character and expose a larger area of uncovered glass. By lace curtains we mean that class of furnishing familiarly known to the trade by that name and comprising all of the various styles of net and patterns.
The sizes usually carried in stock run 2, 2½, 3, 3½ and 4½ yards long, and vary in width from one to two yards.
Where the decorator has not the necessary equipment for making special sizes and designs he is compelled to employ more or less of these ready-made furnishings. Briefly stated, these for the most part consist of plain or fancy nets, scrim or muslin with a pattern of lace or muslin appliquéd thereon or woven in with the net, and the edges finished with bound or overlock stitched scallops, a lace, or a ruffle of the same material.
The method of hanging these curtains depends to a great extent on their surroundings, and on the nature, style and use of the room in which they are used, and while it is not possible for us to give positive rules that will guide the decorator in every case, we illustrate some of the effects that may be produced by the different methods, and suggest their adaptability to various requirements.
In the absence of special reasons to the contrary, it is a safe rule to hang any style of lace curtains in the way that will best display the beauty of the pattern or fabric; thus a heavily worked border and body pattern would show best hanging straight, while plain bodied goods with a small pattern would look well either way.
Setting aside for the moment all thought of the size and shape of the window, long curtains hanging straight to the floor, as Figures B 60 and B and C 67, appear to curtail the floor space, while curtains looped back or caught up with rosettes, as 61, 62, 65 and 66, apparently increase it, therefore in small rooms it is usually an advantage to tie up the curtains, and in extra large rooms to allow them to hang straight to the floor, subject, of course, to other considerations equally desirable.
[37]
If sash curtains are used it is usually a good plan to hang the long curtains to be the opposite of the sash curtains; that is, if the sash curtains hang straight loop the long curtains, and vice versa. In this way the treatment will balance, and a neutral effect be obtained, as Figures 59 and 60. Bear in mind also in this connection our former statement that long curtains hanging straight reduce the width and increase the height of the window, while curtains looped or caught up with a rosette reduce the height and increase the width.
Curtains reaching only to the sill, or just below it, as Figure 68, have a tendency to shorten the window, and if looped or draped this effect is increased.
Sash curtains, stores, panels, or any other style of glass curtains, are hung with the right side of the goods to the glass, unless the windows are so far removed from ordinary vision that it is impossible to discern the difference. Long lace curtains are hung with the right side to the room where sash curtains are used, or the reverse way when hung alone, subject to the above proviso in reference to the difference being perceptible from without.
We illustrated in Figures 34A and 34B, chapter on scarf draping, the method of gathering back a curtain for looping and for draping with a rosette, and lace goods are manipulated in the same way. To obtain the effect illustrated in Figure 61, Curtain B, attach the curtain at the top, allowing it to be from six to eighteen inches longer than to the floor, hold the edges of the curtain in each hand and pleat it forward and back from the bottom, as illustrated in Figure 69, until it is pleated up to where you desire to fasten the loop; hold the outside side edge there and release the inside edge and it will fall in a fan shape, as illustrated; the loop is then passed around, the pleats still retained, and the surplus of about six inches above the tying pushed back and down behind the edge of the curtain, as shown.
Lace curtains may be shirred on to the pole or rod by making a double hem at the top, as illustrated in Figure 64, the distance between the two stitchings A and B a little less than twice the diameter of the pole, to allow for shrinkage. Thus, for a one-inch pole, which would measure loosely three and one-eighth inches in circumference, you would require to allow about one and seven-eighths inches between A and B, making three and three-quarter inches of a pocket for the pole to pass through.
A pretty effect is produced (Figure 70) by running a tape into a small double hem (leaving one inch for the heading and half an inch between A and B for the tape) and shirring the curtain to the width of the space it is to cover, after which rings or hooks are sewn to the back in the position indicated by letter A above Figure 70.
Curtains made of soft net or muslin, with a very small border or soft ruffled edge, look well shirred, but those having heavy pattern borders look best pleated.
Where it is possible to do so the top of the curtain to be pleated should be turned over about two inches (Figure 71) and a tape about one inch wide sewn along the back where the pins will be inserted. This gives strength to the delicate fabric where repeated pinning is apt to cause its destruction.
If this cannot be done, spread the curtain out upon the floor or other flat surface, face downwards, and turn over about six inches of the top, smooth this down nicely and fold it again in the middle, or three inches from the top of the first fold, press it flat with the hands and pleat and pin it while in this position, the pins being inserted about two inches from the top edge (Figure 72).
Curtain B, Figure 61, with Figure 73, shows a box pleat slightly gathered on a safety curtain-pin, the fullness being taken up equally in the pleats.
In curtain B, Figure 59, with Figure 74, the fullness of the curtain, instead of being pleated, is gathered on to the safety pin, but this can only be done with fine curtains. The fullness is equally divided among the pins, and the tops of the small pleats are spread into a small fan shape, making a dainty finish beneath the pole.
The pleat illustrated in Figure 67C and 77, is a straight pleat, held in place by the curtain pin, and is most commonly used for all purposes.
Turn the pleat to the front edge of the curtain on the wrong side, which lies upwards, as you pin it, and that will make the pleats turn to the back edge on the under or right side, as illustrated in Figure 72.
If a small curtain the pleats may be formed and the rings sewn on as Figure 77.
Lace curtains hanging straight, as in Figure 60, Curtain B, should just nicely clear the floor, and to adjust this to a nicety we have found it a good plan to pin them so as to clear the floor by about two inches (not more), and then gently stretch them down this distance.
To stretch them, place an outspread hand on each side of the curtain, and, pressing the two palms together, stretch gently, a little at a time, working across the curtain from one side to the other until it is the required length. This must be done very carefully, and if the curtain is not found pliable enough to stretch the required distance pin it over again, allowing it to be longer.
Curtains having a distinct pattern, as figure 72, are usually pleated as there indicated, without any pleats in the border, the fullness being all taken up by pleats in the body of the curtain, and where fabric over-curtains are used, as Curtain C, Figure 67, the over-curtain should not be permitted to cover the border of the lace curtain.
Over-curtains are always better on a separate pole,[38] but may be attached to the same pole as the lace curtains by using extra rings for them. In the elevation detail, Figure 78, Rod B is for lace curtains and Pole A for the over-curtains, a plan that permits either curtain to be drawn without interfering with the other. Over-curtains may be used at the discretion of the decorator in almost any room, and are particularly effective in large rooms. They may hang straight or loop back, having the same effect on the apparent size of the window as already explained. They should be long enough to just clear the floor, whether straight or looped back, and should cover the back edge of the lace curtains.
When gathered back, as in Figure 62, the lace curtain and over-curtain should be looped back separately, the over-curtain drawn back far enough to show a good border of lace down the front edge and across the bottom.
Narrow windows in large rooms may be made to appear wider by making the pole or cornice project at each side and pleating the curtain to cover part of the wall at each side. The pole or cornice should be placed high enough in this case to entirely conceal the top of the wood trim, as in Figure 67; but in cases where it is advisable to show the wood trim at the top it should be shown also at the outside, as in Figure 68, which shows the trim all around. Over-curtains are pleated to the size as illustrated by Figure 72 for lace curtains, or shirred on a tape, as in figure 70, and lambrequin hooks or rings sewn on. A lined over-curtain, if to be pleated for pinning, is made as the right corner of Figure 75, the two materials turned in and slip stitched at the top and sides and machine stitched as indicated, about one and one-half inches from the top of the curtain. The curtain is spread out right side up for pinning, the pleats formed and a Gordon hook pin (as Figure 76) is passed through the pleat between the two lines of machine stitching. Use the straight pleat of Figure 72 for this purpose, making as many as may be necessary to dispose of the fullness. If the over-curtain is not to be lined turn the top over as the left corner of Figure 75, and stitch and pin as already explained.
Soft curtains finished with a full ruffle usually look best looped back, as B, Figure 65, or if fastened with a rosette the edge drawn up near the rosette to give a full sweep to the ruffle, as Figure 66.
If the curtain is made of very fine or soft net graceful effects are produced by using two rods at B, Figure 78, one a little in advance of the other, and both the same height; shirr one curtain on each rod, so that when tied back the crossed effect is produced, as illustrated.
A great variety of styles can be produced in either crossed or single curtains by changing the position of the loop or rosette, and a good way to acquire the different styles is to take a pair of curtains and see how many different effects you can obtain by tying them at different heights and by manipulating the fullness in different ways. Crossed curtains are not effective unless the curtain is lacy and soft enough to drape gracefully. Heavy patterned curtains treated in this way do not produce good results.
Frilled curtains, as Figure 65 and 66, are more particularly suitable for bedrooms, sewing and sitting-rooms, but with proper surroundings may be applied to some of the heavier down-stairs rooms during the Summer season.
Frilled curtains made up as sash curtains are also very effective next to the glass, but should be made of very soft material that will drape easily and gracefully.
Sash curtains, lace curtains or over-curtains should be pleated to the exact width of the space they are to cover, sufficient pins being used to dispose of all the fullness and hold the top edge of the curtain from sagging between each pin.
This may seem a small thing, but to those accustomed to neatness the sloppy droop of the top edge of a curtain from pin to pin is extremely distasteful and would spoil an otherwise neat arrangement.
In hanging lace curtains having a prominent pattern it does not always follow that the same distance turned down at the top of each one will bring the patterns in line, and it is well to spread them in pairs side by side and match the pattern, so that when hung the pattern will be perfectly true and not zig-zag all the way up the two middle edges.
We have given the simpler forms of pinning and tying, which may be easily mastered by practice. Numerous other forms will suggest themselves, and a proper consideration of the effect to be produced will result in the selection of the style most suited to each requirement.
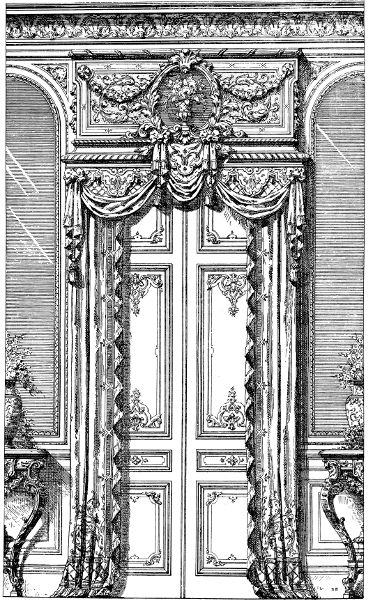
LOUIS XIV
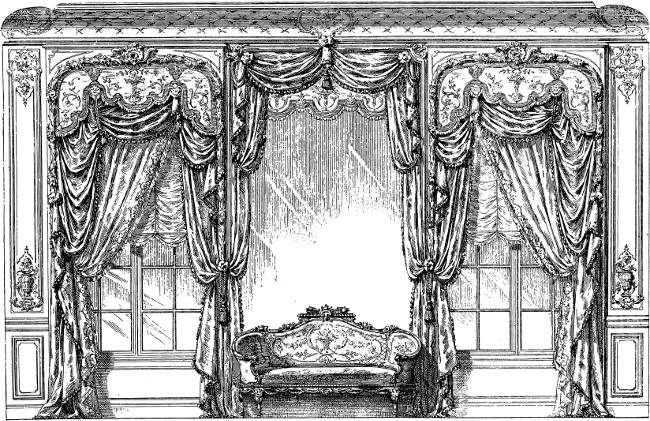
LOUIS XV
[39]
Modern decorative thought has been directed to almost every article in the equipment of a house with more or less artistic result; but with few exceptions the articles on the market for the purpose of excluding the sun or shutting out the vision have been plain and ordinary in the extreme, despite the fact that the treatment of the windows as presented to view from the exterior has much to do with the general appearance of a house.
From the day when the housewife made her own shades out of green paper or white cotton up to the present, the chief requirements seem to have been opacity and the faculty of being easily rolled, folded, or in some way put easily out of sight when not in use. One of the oldest methods, still recommended and manufactured for this purpose, is the rolling shade, made of thin slats of wood, laced together with twine to form a flat flexible curtain or shade, rolled from the bottom by means of a cord passed over a pulley.
For public institutions, offices or verandas, where usefulness and efficiency may be desired more than decorative value, they serve the purpose very well; but it can never be claimed that they tend to beautify the room in which they are used.
The tilting slat blind, which gathers from the bottom, and tilts with a touch of the hand as a child’s Jacob’s ladder, is also used for the same purpose, with the same limitations.
The sliding or folding inside shutter, illustrated in figures 79 and 80, came near to accomplishing the purpose, but had such a knack of getting out of order, and presented such a jail-like, uninhabited appearance, that they, too, have been almost altogether discarded.
In rare cases we find them still in use, and where adverse criticism would not be well received it is best for the decorator to adjust his schemes so as to include them, and, if possible, hide their unsightliness.
Figures 79 and 80 illustrate how this may be accomplished by using a lace-trimmed shade between them and the glass, while sash curtains of almost any kind are equally effective for outside appearance.
Where the shutters are so constructed that they open into the room, as Figure 79, the curtain pole must be projected forward from the frame a sufficient distance to allow the shutter to swing clear of the curtain without interfering, and if the curtain is looped or caught up with a rosette at the side, the point where it is tied must be projected forward in a similar manner.
These blinds, so far as their manufacture and installation are concerned, rest perhaps more with the carpenter than with the decorator, and will, therefore, interest him little except as to their after treatment.
The rolling shade, made of painted cotton or glazed linen, as illustrated in Figure 79, is perhaps most commonly known of all expedients for seclusion and sun protection, and the ease with which these shades can be made to order in any size is so well known that nearly every upholstery shop is equipped with a cutting table and the necessary material for their manufacture.
The table illustrated in Figure 81 will be found to possess a combination of many good points in cutting tables for this purpose, although one less elaborately planned and constructed may serve for a small shade-order business. The top is made of clear white wood, and is six feet wide by twelve feet long. At one end is a half round, trough-like receptacle, the bottom of it composed of two-inch rollers with pin heads (see Figure 81A for detail); these rest in iron brackets, and revolve when necessary with the action of rolling or unrolling shade cloth.
A flat steel plate about one inch wide and a quarter of an inch thick (or slightly thinner if more convenient) is fastened to one edge of the table to form a solid straight-cutting edge. It should be all in one piece and free from any irregularities, and a similar plate is fastened to the end on which the bracket is attached. Saw-cuts about one-eighth of an inch deep run across the table, perfectly true and at right angles to the side of the table, dividing it into feet from end to end. At the bracket end, and included in the first twelve inches, a six-inch strip of hardwood is let into the top, flush with the rest, and has saw-cuts (as illustrated in Figure 81A) one-half inch, two and a half inches, three inches, three and a half, four and four and a half inches from the outside edges of the steel plate.
These are scoring lines for marking the hems, and should be half an inch deep and about one-eighth inch wide. The cuts marked one to eleven are filled in smoothly with dark putty, and are for measuring purposes, while cuts A to F are cut with a fine-tooth saw and left as cut. In addition to the lines every twelve inches it is necessary to have the inches between these spaces.
[40]
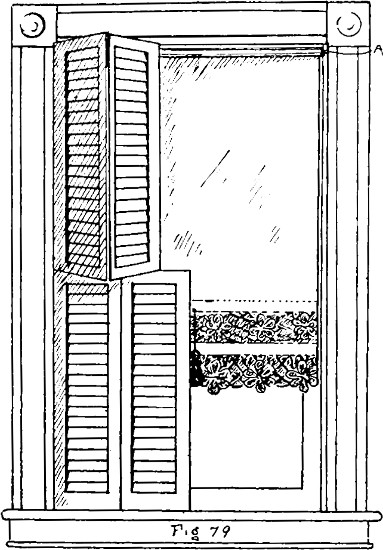
Fig 79
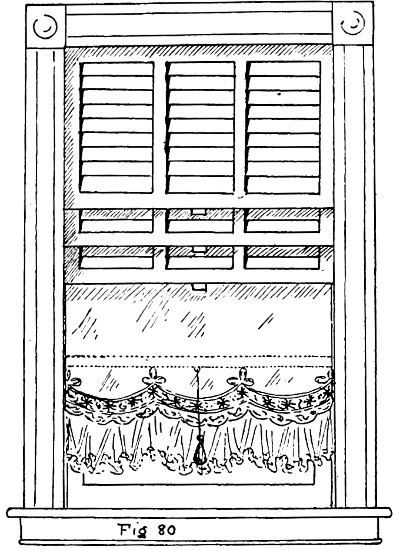
Fig 80
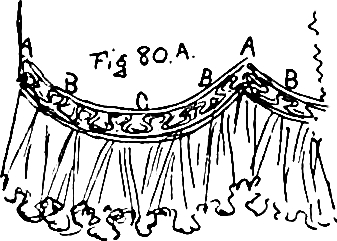
Fig 80A
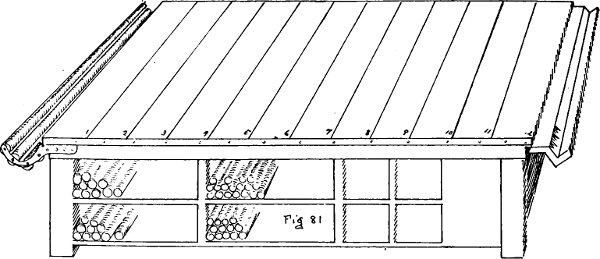
Fig 81
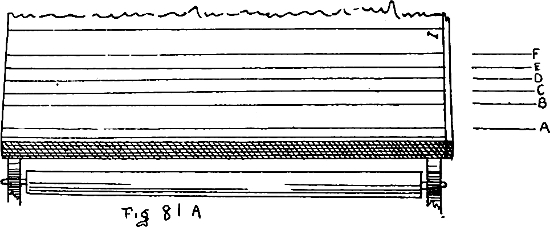
Fig 81A
END of TABLE
right hand of above
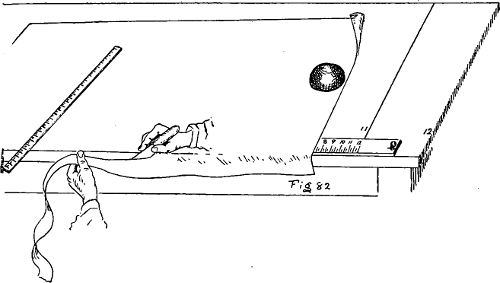
Fig 82
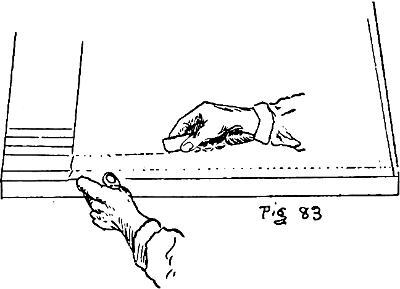
Fig 83
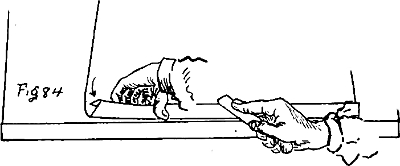
Fig 84
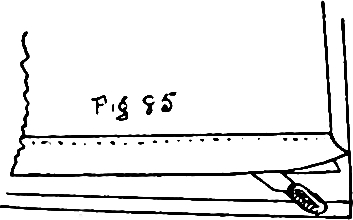
Fig 85
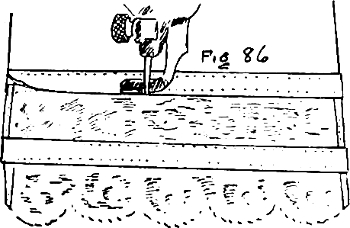
Fig 86
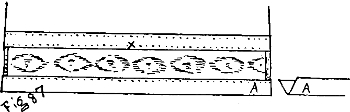
Fig 87
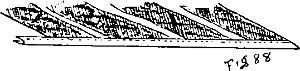
Fig 88
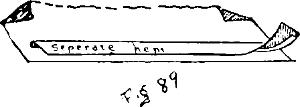
Fig 89
SHADE KNIFE
Fig 90
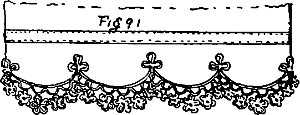
Fig 91
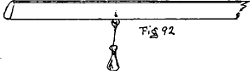
Fig 92
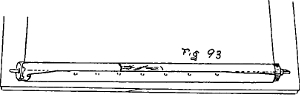
Fig 93
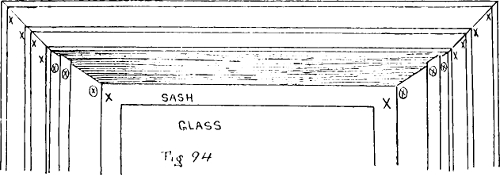
Fig 94
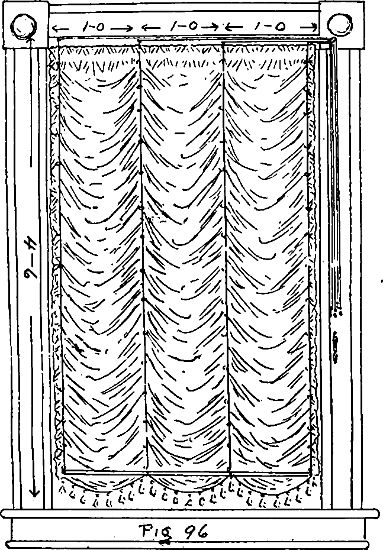
Fig 96
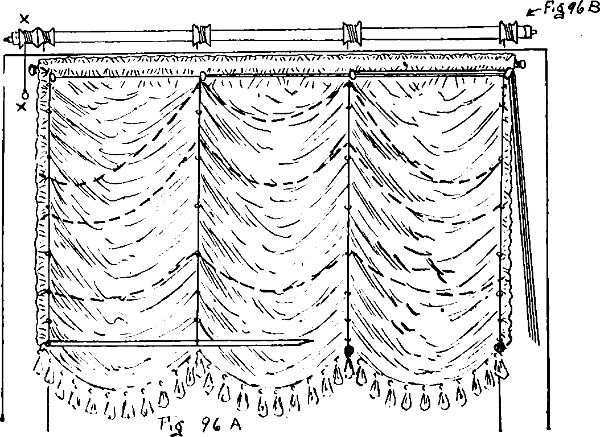
Fig 96A Fig 96B
Fig 98 Fig 99
[41]
A convenient way of providing these is a flat steel rule about one-eighth inch thick, three inches wide and eighteen inches long, marked with inches from one to twelve, and with a small button at the end for convenience in moving it. This will be heavy enough to lie where placed, and by placing it at the side of the table between the lines, as in Figure 82, the measurement of a piece of cloth can be accurately gauged.
The other sections of the table and their purposes can be readily understood from the illustration, the shelves being used for rollers, drawers one, two, three and four for shade hardware and accessories, and drawer five for tools.
The trough at the right end of Figure 82 is made so as to slide in out of the way when not required, and is used when cutting the ends off rollers. It is marked in inches along its entire length, and the cutting end is faced with metal, or has a true saw-cut a short distance back as a guide for the saw. In the latter case it should be made of hardwood, and the saw-teeth should have very little set.
The table should be placed so that the operator faces the light, and his stock of materials should be as convenient as possible to the cutting table.
Having gauged the length of the shade with the small steel rule, as Figure 82, place the roll of cloth with the end of the material resting at the mark. Weight it with a small weight and unroll the cloth until the roll reaches the receptacle at the end; a touch of the hand will tighten the slack by revolving the roll; adjust it evenly and run the knife along the steel edge, severing the piece from the roll. If more than one shade of the same length are to be cut from the same roll, allow this length to lie as cut and unroll over it as many more pieces as you need, cutting each one as you get the cloth adjusted evenly.
When the lengths are all cut, if care has been taken to have the cloth running true with the edges of the table, the cut ends will have been trimmed square by the action of severing them from the roll. Adjust the edges nearest the cutting side of the table so that they lie even and project about a half inch over the edge of the table, as Figure 82, and the cut ends lying true and even with the table end, the cloth is securely weighted at each end and the projecting edges trimmed true by running the knife along the cutting guide, as illustrated.
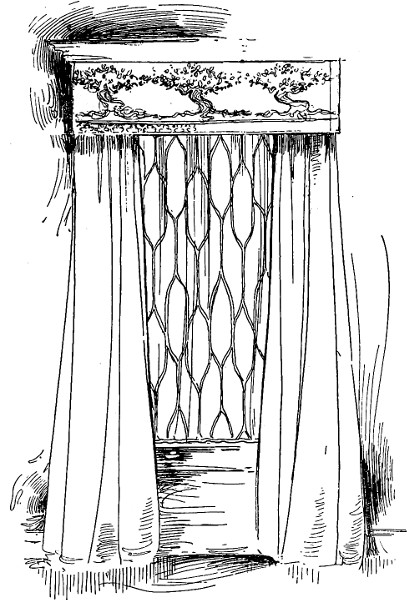
The knife should be held perfectly true with the flat of the steel edge, allowing no play sideways, and with the handle slightly slanting toward the shoulder of the operator (Figure 82).
While the weights are still in position measure with a six-foot rule the width the cloth is to be cut, measuring from the trimmed edge, and mark it at each end as x x (Figure 82). Now remove the weights, and without allowing the trimmed edges to shift, change the cloth end for end on the table, bringing the pencil marks at each end directly above the side cutting edge of the table, and with the ends of the cloth projecting sufficiently beyond the end cutting edge; weight as before, and trim the surplus off end and side.
It is more difficult to trim a number of pieces than to trim one, but with a little practice it can be done quite easily and considerable time saved thereby.
As the cloth now lies it should be even with the steel edges at end and side, the left hand ends lying over the scoring lines, and as they lie one or more may be scored at once, according to the weight of the cloth. Roll back the rest a sufficient distance, and holding the rounded corner of the back of the knife in the position indicated by Figure 83, draw it across the first score line A; do not bear too heavy on the knife, but make sufficient indentation so that it can be folded over without trouble.
If the shade is to have the regulation two-inch hem score also at the second line B, if for a two and a half-inch hem score A and C, for three-inch A and D, and so on according to the width you desire to make the hem. All ordinary shades have a two-inch hem, but special cases require a variation from the rule.
Fold the hem over as illustrated in Figure 84, and press it flat with the side of the knife; it is then ready for stitching.
While almost any sewing machine will stitch a window shade, perfect results are only obtained by using a special shade-stitching machine.
Care must be exercised in stitching the hem so that it does not slide or pucker, but lies flat and even, with the line of the stitching as straight as possible.
If lace is to be applied to the bottom of the shade, as Figure 79, the knife is run over the bottom of the hem after stitching it to press it flat, and then passed through it, as Figure 85, and the lace[42] inserted between the edges and stitched, as Figure 86.
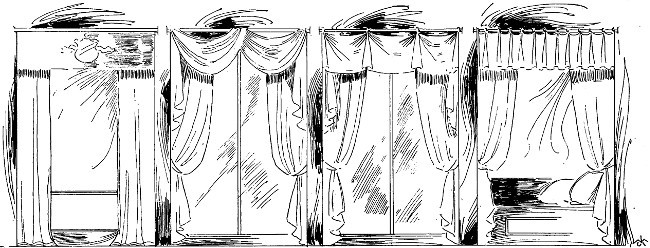
If insertion is used without lace, as Figure 87, the top edge of the insertion is placed between the cut open edges of the hem, as above described for lace, and a separate hem (A—A, Figure 87) scored, folded and sewn on, as illustrated. If both lace and insertion are to be applied the bottom of the separate hem (A, Figure 87) is split and the lace inserted and sewn in, as above.
This separate hem is made the same width as the ordinary hem for shades, but need not have the little turn in indicated by arrow in Figure 84.
When cutting lace or insertion measure it so that the pattern will balance nicely, and if both lace and insertion are used be careful to have the pattern of the insertion in line with the lace. After these trimmings have been cut the size of the shades, the cut ends are bound by sewing them between the edges of a piece of the same cloth as the shades, say half an inch wide, folded in the middle, and for convenience a number of the ends can be stitched into the same piece of binding, as illustrated in Figure 88, and afterwards separated by cutting the binding.
Motif patterns, as Figure 90, are applied to the shade by a double row of stitching, about one-quarter of an inch apart, all around the outside edge of the motif, after which the cloth is carefully cut away from the back, just below the stitches and following the outline. Should the pattern prove too large to work beneath the arm of the sewing machine, pin it carefully in place on the shade and sew it on by hand, passing the needle down and back as neatly as possible. This is a tedious job, and should only be resorted to when no other way seems possible. Applique lace edges, as Figure 91, are sewn on in the same manner, and the cloth cut away from the scallops behind.
The shade illustrated in Figure 80 is a combination of the bonne femme and motif shade, and is constructed like the foregoing Figure 91, having in addition a frill eight or ten inches deep, composed of étamine, madras, mull, muslin or net, and trimmed with a lace. This is applied to the scalloped edge of the motif, and has usually an allowance of as much again for fullness (two feet of unshirred frilling to one foot of space), or if very fine a little more.
When applying the shirred frill to the scallops, have the greatest fullness between the points B and C (Figure 80A), and decrease the fullness from B to A, for as the material follows the curve up into the angle at point A, it will be found that the bottom edge of the frill becomes more full according to the elevation of point A above point C.
Lace motif and scalloped bottom shades may be made with a hem and slat, as illustrated in Figure 80, or the slat may be dispensed with and the shade operated by a cord which passes through a screw eye at A (Figure 90), and winds around the roller, which is left long enough for the purpose. The cord is wound around the roller the same number of times as the shade and attached by a fair-sized tack. The roller need not be provided with a spool unless the shade is extra long, as the screw eye at A will guide the winding and confine it to a small space. Figure 90 shows the cord and ball pull attached to the left end of the roller; but the tack which fastens the cord would be likely to penetrate to the spring on that side, and it would be best to attach it to the right end of the roller.
The shade is operated by pulling the cord, and works the same as with the tassel in the regular way, as Figure 92.
[43]
All other shades except the previously mentioned styles are provided with a slat to which is attached a screw-eye and tassel, as illustrated. Always attach the tassel above the insertion on insertion shades, as Figure 79 and X, Figure 87, as the strain of pulling the shade will stretch the insertion out of shape if fastened below. (See diagram on page 40.)
The cloth is not hemmed at the sides, but left as trimmed, and the top is tacked on to the roller in a straight line, as Figure 93. Most shade rollers have a line drawn the length of the roller as a guide for the shade cloth, and one-ounce tacks are used to tack it to the roller. Several kinds of clips or clasps are also used, but the tacks are most popular.
Standard sizes of shade rollers in both wood and tin are guaranteed by the makers to carry ordinary cloth up to a certain size for each roller, but it is safe to underestimate their assurance by a little rather than work up to the limit.
The roller is cut to be one and a-half inches longer over all than the width of the cloth, and is mounted to allow the same play at each side, though in special cases this rule may be departed from, and a smaller allowance for play will sometimes work quite freely if hung perfectly true. It is customary to allow only one inch difference between cloth and roller for inside brackets, as they are usually made narrower than those for outside brackets, and, the bracket being much smaller, they work freely with the smaller allowance.
Dark-colored shades are most opaque, but light-colored shades give a more cheerful appearance to the exterior of a house. Combination-colored shades are frequently used; light on the outside to the glass and dark on the inside to the room. This gives the necessary density and preserves the cheerful exterior of light-colored shades. In making combination shades the bottom hem is cut off, reversed, and sewn on as illustrated by Figure 89. The chief objection to combination-colored shades is the fact that the dark color is exposed to view in the room whenever the shade is pulled down, and the window cannot be at all obscured without this feature.
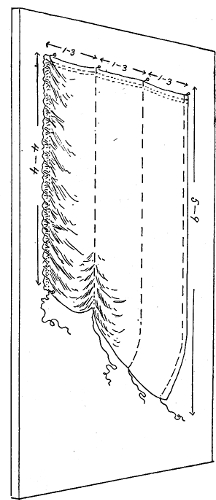
Fig. 97
Perhaps the best plan for correctly shading and obscuring a window is to use double shades, as illustrated by Figure 90; the outer shade next to the glass made of a light-colored material, which may be ornamented and decorated in any desired manner. This may be fastened to the window stop as at A, Figure 79, with inside brackets, or at C, Figure 90, with outside brackets.
If placed on the stop at A, Figure 79, a plain shade of dark green or other opaque color is placed on the frame at C-C, Figure 90, and is made wide enough to effectually shut out all sunlight at the sides.
If the light shade is placed on the frame at C-C, as Figure 90, the dark shade is placed just beneath it at D-D, and is made about two inches wider than the light shade, so that the cloth of the light shade passes freely between the brackets at D-D and does not interfere with the dark shade.
The advantage of this plan is that the light shade may be used all the time and is decorative from both sides, while the dark shade is only used when needed, and when not in use is only a small dark roll at the top of the window, where it is not objectionable.
The dark shade must be provided with a small cord or chain reaching down a convenient distance when the shade is completely rolled up at the top. Roller shades are hung perfectly level and square, noFig. 95 matter how much the window may be out of true, as they will only work satisfactorily when so hung.
The two different kinds of brackets used are illustrated by Figures 93, outside brackets, and 93 A, inside brackets—outside meaning on the face or room side of the window frame and projecting toward the room; inside meaning some portion of the woodwork facing to the centre of the window (see diagram 94).
Wood rollers are made with two slots or notches in the spring-post, in which the pawls drop when slowly revolving, and as they are on opposite sides of the roller, it is immaterial which side is uppermost as it lies in the bracket.
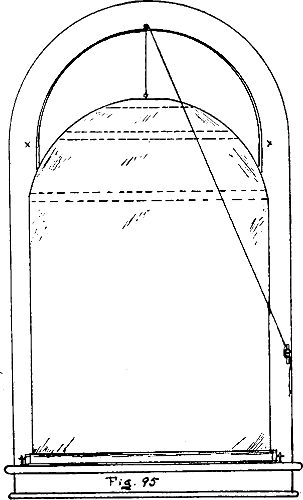
Fig. 95
Most tin rollers, however, have only one slot, and if dropped into the bracket with the slot down, the[44] pawl, which depends on its weight for its action, will not come in contact with the slot, and the shade will not remain down when unrolled. Should you accidentally place a shade in the brackets thus wrong side up, unroll it altogether and push a small wire or stout pin through the hole you will find punched through the roller directly behind one of the pawls and force the pawl up into the slot, when the tension of the spring will hold it in place so that it can be taken out and put in properly.
It is sometimes necessary to run shades from the bottom of the window instead of the top, as in the case of a 10 ind-top window (Figure 95), or when the object is obscurity without excluding necessary light, as in some office windows. This is accomplished by placing the brackets at the bottom of the window, as illustrated by Figure 95, the slot bracket to the right, placed upright on the sill, and a small nail inserted in the little holes found near the edge of the opening, to prevent the roller from leaving the bracket. Stop the action of the pawls after the shade is adjusted by a clip made for the purpose (squeezing soap in behind them answers very well), so that all the tension of the spring is exerted on the cloth and on the cord, which passes over a pulley at the top of the window.
This pulley may be an ordinary pulley and the cord attached to a small cleat at the side of the frame to hold the shade the required distance, or an eccentric stop-pulley may be used, which binds the cord at the will of the operator, the latter being the more convenient method.
Round-top shades are provided with extra slats at various distances, as illustrated by Figure 95, which prevent the edges of the shade from flapping as they might unless so supported. These slats are perfectly flat, made of clear wood about one-eighth of an inch thick and one inch wide, or larger, according to the strength required, and, being flat, they readily roll up with the shade.
The slat used in the bottom of shades is usually made wedge shape, as Figure 92, and possesses more strength than the perfectly flat slat.
As we have already stated, roller shades are usually made of painted cloth or glazed holland, and while for years they have been, with few exceptions, plain and undecorated as to the fabric itself, we are pleased to note recent efforts on the part of manufacturers to produce something more distinctive and artistic, shade holland now being produced in delightful damask effects in a variety of weaves and colors, while the painted goods are also being made to order in beautiful hand-decorated patterns of artistic merit.
The Austrian shade illustrated by Figures 96 and 96A is a very pretty and effective method of diffusing and softening the glare of the sun without excluding the light.
They may be made of a great variety of fabrics, including challie, casement cloth, plain and brocaded silk, silk or wool damask, madras, net, or other soft material of sufficient strength and fast color to withstand the sun, and are a very effective combination of shade and sash curtain. They are simple of construction, but must be accurately and neatly made to insure satisfaction.
Having secured the size of the window and determined the space the shade is to cover, the goods are joined up to the required size, allowing a third of the space (four inches to the foot) each way extra for fullness, with about three inches allowed in addition for double hem at the top and also for a single hem on each side. Calculate so that the seams will come on one of the shirrings each time when joining for the width, as they will not show there and are very unsightly anywhere else.
The material, when ready, is spread flat on the table, as Figure 97, and the width divided into the requisite number of panels and marked in straight lines for shirring. Turn the double hem at the top for the rod, and a single hem on each side of one or one and a-half inches. Baste these hems and sew them. Then spread the material on the table again, as illustrated, and with a stout thread gather each shirring line into the required length, fasten each end of the thread to the table with tacks as you gather them, and when all gathered go over each one and adjust the fullness until it is nicely distributed the length of the curtain. Leave the lower one-third of the curtain slightly less full than the upper two-thirds, for when in place it is generally left fastened about half way up the window, and if this is done, the lower end, which is all pleated on the strings, does not look so much more full than the upper portion, which is hanging as shirred.
Cut strips of paper one inch wide and as long as the shirring-thread and pin them along each shirring, the pins sufficiently close to hold the fullness in place. When all pinned in place, the tacks are drawn and the curtain turned paper side down and run through the machine (the paper is used to prevent the machine feed from disturbing the fullness), using the thread as the line for stitching. The paper is then torn away and the shirrings run through the machine a second time for safety if very stretchy material is used.
Spread it out on the table once more, face side down, and on the back of the shirrings baste a quarter-inch baby ribbon or tape to match the goods, and stitch this also. Sew small brass rings to these tapes, as illustrated in Figure 96, about six inches apart, along the full length of each tape or ribbon. Shirr the double hem at the top to the required length and stitch a tape to it also, to keep the panels equally divided, and trim the bottom with a fringe.
The bottom of the shade need not be scalloped[45] unless the material is heavy, as the act of shirring it lengthwise and across forces the fullness to take that shape.
The bottoms of the shirrings are weighted to keep the lines perpendicular. This is accomplished either by a small rod covered with the material, as left of Figure 96A, or by small bags of shot covered with the material and attached to the bottom of each shirring.
The rod, while not so unobtrusive as the bags, has the advantage of keeping the bottom spread full width, separate weights having a tendency to swing toward the centre.
The shade is drawn up and lowered by means of cords passed through screw-eyes at the top of the window, down through the brass rings and attached to the bottom weights. After passing through the screw-eyes at the top they are led to a pulley at the side, as indicated by Figure 96, and all adjusted to draw evenly, fastened together and attached to a cleat. They may also be manipulated by attaching the cords to a shade roller after they pass through the screw-eyes.
The roller is provided with spools either turned up in wood or made by tacking a ridge of leather around the roller, allowing a spool-like space between, and the cords are wound several times around these, while the shade hangs full length; the free bottom ends are then attached to the weights, as before explained, and the whole manipulated by the free cord at the end (X, Figure 96B), as explained for raising and lowering the shade illustrated in Figure 90.
If the roller is swelled toward the centre by wrapping with leather or by using graduated spools, as Figures 98 and 96B, the shade will draw up in an arching shape, as indicated by dotted lines in Figure 96A, the larger spools in the centre consuming more cord each revolution than the smaller ones at the ends, and hence drawing the curtain up faster in the centre, producing the arched effect.
If the cords are mounted on a plain roller without spring-winding attachment, as Figure 99, the manipulating cord is wound on it the reverse way, and is all wound on when the shade is down, so that pulling on it causes the roller to revolve, winding up the other cords, and, releasing it, allows the weight of the shade to unwind the roller and causes the shade to descend.
In measuring for shades, some decorators measure for the cloth only and have the rollers cut and mounted accordingly, either at the house or in the shop. We have found it best to measure for the rollers by selecting the most convenient place for the bracket and making the cloth to fit the rollers. Figure 94 illustrates a modern window trim, showing by crosses the most convenient places for placing shade brackets, those enclosed in circles representing inside brackets and the plain crosses outside brackets.
The illustration of a window’s elevation, Figure 78 in the chapter on sash curtains, also shows the positions of double shades on the face of the window frame—C, the roller of the light shade, and H the bottom of the shade, and D the roller of the dark shade, with F the bottom of the shade.
Always measure for shades with a rule, as tape-lines are unreliable, and put down the measurement accurately in feet and inches, being careful to make a decided stroke or dot between the feet and inches, as 2 = 2—6 × 9—0 means two shades two feet six inches wide by nine feet long, and the obliteration of the strokes between vastly alters the sizes.
If there is anything peculiar about the windows that should be noted in their manufacture, jot it down also, leaving nothing to memory. In measuring the length, allow about one foot extra for a couple of laps around the roller when the shade is all pulled down. Austrian shades need no extra length, but should just clear the sill when down full length.
Shades running horizontally, as across the bottom of a skylight, are treated exactly the same as explained for Figure 95, and if very large, stretch a number of wires lengthways beneath the shade to help support it.
Put up shade brackets with the slot or open bracket to the left side of the window and the hole or closed bracket to the right, leaving a little play between the brackets and the roller. Place the shade in the brackets and pull it down full length. If the spring is too weak to carry it up smartly, take it out of the brackets and roll it partly up, replace it in the brackets and try it again. If still too weak, take it out and roll up a little higher.
If the spring is too strong or will not allow the shade to come down full length, take it out of the brackets when rolled up and unroll it a little.
Do this until the roller will carry the shade smartly without too much tension, and if you find the roller is not strong enough it is always better to replace it with a heavier one before the customer makes a complaint.

[46]
ARCHWAYS AND ALCOVES
Fig 100
Fig 100A Fig 100B

Fig 100C Fig 100D
Fig 101

Fig 102
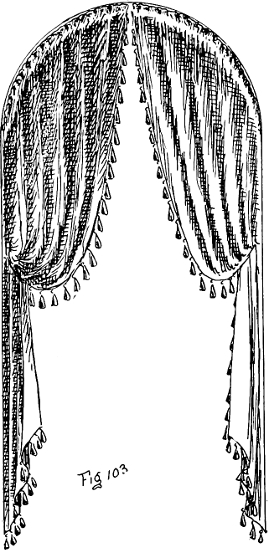
Fig 103
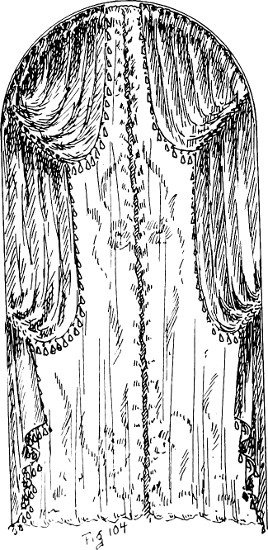
Fig 104
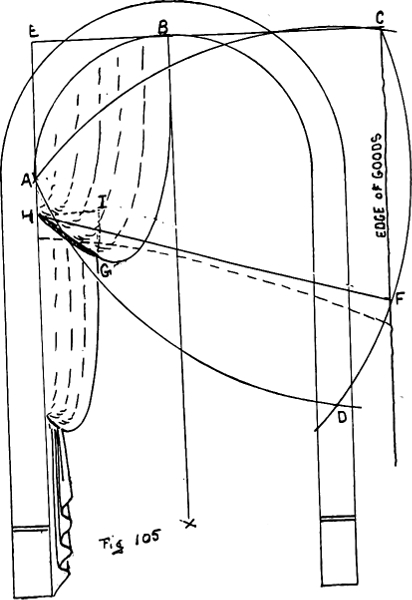
Fig 105
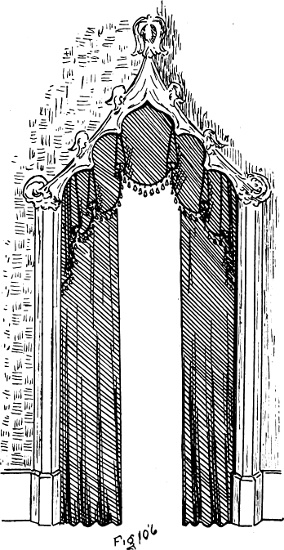
Fig 106
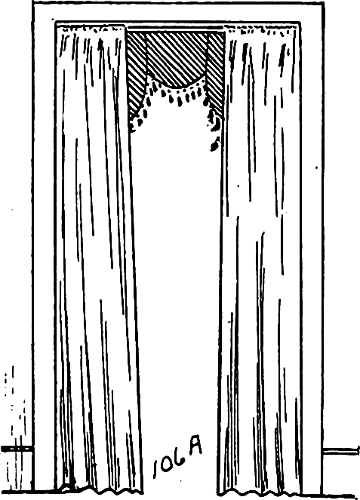
Fig 106A
[47]
Given a straight opening, the average decorator will have no hesitancy in suggesting numerous stock schemes of treatment, from the simple and inexpensive to the most elaborate. But if the top of the opening is curved, his difficulties are increased. In the chapters on scarf and festoon draperies, we illustrated how draperies may be applied to the face of a round top opening when the object is to decorate or relieve the severity of the opening by partially concealing the outline. We desire now to more particularly deal with a few cases which demand that the opening be not concealed, but harmoniously decorated within its prescribed limits.
Figure 100 illustrates an opening between two rooms, presumably a drawing-room and dining-room, where a treatment is desired that will admit of the opening being either completely or partially closed at will. This is accomplished in this case by a pair of portières that traverse freely on a pole placed at X, the spring of the arch; or if this is considered too high the pole may be placed lower and the upper treatment brought down to meet it. It is not wise, however, to leave an opening less than six feet six inches in height beneath the pole. The upper part of this arch is filled with a frame made as illustrated in Figure 100A and covered with the same material of which the curtains are made. This is fastened beneath the arch by mirror plates (see Figure 100B), which are barely visible, and hold the frame securely in place. If the curve of the arch is an unbroken line and the portière curtains are desired to completely divide the rooms, the bottom of the frame will look well straight, as illustrated, and the curtains are suspended directly beneath it, as Figure 100C, showing side detail of frame and curtain.
If the pattern of the fabric, the motif appliqués, or the irregular curves of the opening suggest an irregular curved bottom line, as Figure 101, and perfect division is desired, two frames are used, as Figure 100D, with the curtains traversing between them, and the pole placed high enough to be invisible, or if one room is less particular than the other, the pole may be placed high enough on the back or least particular side so as not to show from the other room, and a single frame be used to fill the opening from the front room. For arches which have large projections, as Figure 101, the frame is not usually made to fit into all the little irregularities of the plaster, but these little irregularities are usually included in graceful sweeping curves, which follow the general outlines of the projections, giving almost as good effect as if it were made to fit closely. Of course we do not mean that it is permissible to leave conspicuous openings between the plaster and the frame, but as it will be found extremely difficult to fit all the little projections in plaster ornamentation, we suggest the advisability of including the lesser ornamentation in this way rather than nicking out the edges so that it is neither square nor curving.
If, as frequently occurs, there is more light on one side of the arch than on the other, and little points of light sift through, showing up any irregularities from the dark side, a little chinking with a strip of the same material will overcome this difficulty; but it must be neatly done, and unless the frame is a very bad misfit it should not require enough to be at all visible from either side.
In measuring curved openings for any purpose there is no method so satisfactory as an accurate full-sized pattern, which may be marked, cut, and tried into the opening before leaving the house. Figure 102 illustrates a splendid way of taking the shape of a plaster detail where an exact fit is required. The pattern paper is held behind the object, and with one point of a pair of dividers following the outline the other point will tick off the corresponding points on the paper by pressing it through the paper or marking with a lead pencil, and when cut and fitted the detail may be attached to the rest of the pattern in the proper position.
Fig.126B
The portière curtains may be attached to a pole as above mentioned to secure complete division, but if the object is rather decoration, with partial division, the method (illustrated in Figure 101) of suspending the curtains from chains will be found pretty and effective, the chains equalizing the irregular curves and keeping the tops of the curtains straight. Portières can be hung in a shallow arched opening by using the chains to equalize the sweep and allowing the curtains to hang straight on a line with the spring of the arch. The chain used should be of a fairly large[48] pattern, and of metal and finish to harmonize with its immediate surroundings. It is attached to the arch or frame by cup hooks, and being in one continuous length (as illustrated) is easily adjusted to the proper length before fastening permanently.
Figure 103 illustrates a round top opening treated with a pair of shaped curtains shirred on a rod so as to leave a small heading all around the curve, and is a very pretty way of treating a window or doorway where the top of the curtains may remain fastened and need not be disturbed for ingress or egress. The space left for the rod should be made small enough to fit quite snugly to the rod and prevent the weight of curtain from dragging the fullness down to the outside corners; or if the material is very heavy a shirring tape is sewn in separate from the rod, and stitched to the goods to keep the fullness in shape, after which it is run on to the rod and placed in position.
Figure 104 is another variation of the same principle, showing a double festooned curtain, which is very effective and largely used in arch draperies. The lace curtains shown in this illustration are hung on a separate rod, and so arranged that one does not interfere with the other.
To plan the top of a shirred round-top curtain, lay out the full size of your arch on a blackboard (as Figure 105), dividing it in the centre by an upright line, as X—B. Locate the point where the curved top leaves the straight side line, and mark it (as A in illustration). The distance from this to the centre line, B—X, is the width of half the space, and, therefore, the proportion of the space covered by one curtain or width of goods, and the circling line from A to B represents the shape to which the curtain is to be shirred.
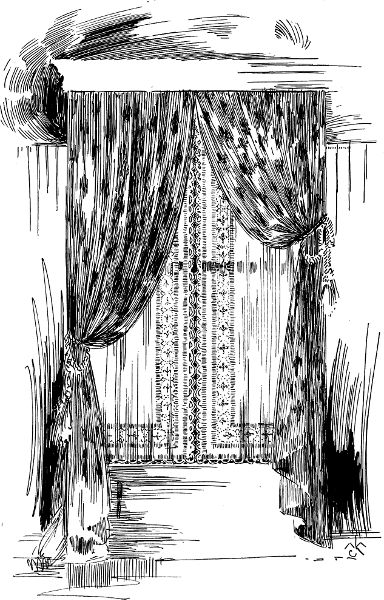
It will be readily seen that the circle of the top must be increased in proportion to the amount of fullness desired in the shirred curtain. For example, say that the distance from A to line B—X is twenty inches and the width of the curtain before shirring is fifty inches. Spread out the goods on your cutting-table, and, taking the line E—C of Figure 105 to be the top of the goods, measure down on the E or left-hand selvage the distance from E, the top of the arch, to A, the spring of the arch, and mark point A; now, with a cord fastened at A, and the goods spread smoothly out, face side up, strike a quarter circle, with C as a radius (line C—D, Figure 105); shift the cord to C, and with A as a radius strike another line to intersect the first one, thus locating point D, the point of intersection; shift the cord again to point D, and with A as a radius strike another sweep toward the upper right-hand corner until you cross point C.
The line thus drawn from A to C will be the top line of the curtain that will shirr properly into the space A—B. Add sufficient for heading and hem, before cutting, and trim to shape. If the curtain is to hang as Figure 103, measure down the C selvage edge of the goods the distance from top of arch to the floor, and trim squarely across for the bottom of the curtain, the gathering and raking edge (Figure 103) being formed by the looping up, as illustrated in Figures 34B, C and D, chapter on Scarf Draperies.
If the curtain is to hang as a double festoon curtain, as Figure 104, sketch the curtain on your blackboard with the arch as Figure 105, and after defining the top of the curtain on your goods as above explained, measure the distance from B to G on your blackboard, and mark the same distance on the edge of your goods from C downward.
This locates point F. Measure the distance from A to H (the top of the seam) on your board and mark it on your goods exactly same size; add trimming allowance as dotted line three inches extra at each end and one and one-half inches in centre, and the piece of material defined by points A, C, F and H will shirr and pleat correctly into the space sketched on board, and[49] defined by A, B, G and H. Pleat this up on the board and trim the line H—G square. Measure the distance from H to floor and cut a length of material, allowing a little for trimming. Pleat this on the board also, allowing the bottom to clear the floor nicely by a half inch, and not spreading beyond the points H and I. Trim this corner dotted line H—I—G to fit the line H—G, and join to the upper part, making as small a seam as possible, which is covered by a cord, in Figure 104.
The back of the seam is bound by a piece of the material or lining, as the case demands.
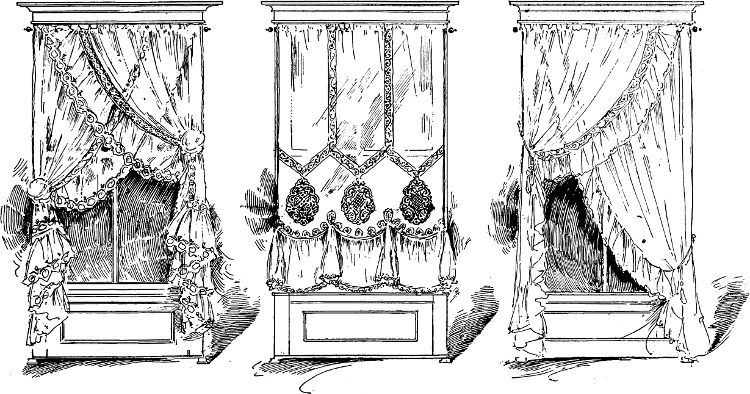
The Gothic arch illustrated in Figure 106 shows a case not often met with, but serves to illustrate a principle of soft valance cutting equally applicable to any shaped opening and any desired scallop.
The opening in question had an arching exposure into one room and a square exposure into the other room. The square opening is simply treated with a pair of portières, as Figure 106A, the same showing behind the valance in Figure 106. To plan the valance itself it is necessary to have a full-size pattern of the arch, and on this as a plan (106 B) sketch out the drapery actual size. Be sure to allow more paper than is defined by the outline of the arch, as the details of the pattern will probably go beyond the outline as in this case. Half of the sketch only need be used, but it should be fairly correct in outline and proportion. When satisfactorily sketched (as Figure 106) detail the individual pipes and tails as follows:
If the pipes have been properly sketched it will be readily seen that the side outlines converge toward the centre at the top, and diverge from the centre at the bottom. Continue these lines upward until they intersect as at U and V, Figure 106B. This point will be nearer or more distant according to the flare of the pipe at the base. With one point of a pair of dividers at point U, and with the top of the pipe as a radius, strike a line across and on each side of the pipe, as line 1—2; repeat at the bottom of the pipe, cutting through the front sides and back of the mouth of the pipe, as dotted lines 13 and 14; place one point of dividers at Y and with Z as a radius add a half inch for fold, and strike to cross line 13 on each side; shift point of dividers to this intersection on line 13, and with I as a radius strike to intersect line 14, thus locating point 8 (Figure 106B). Locate point 7 in the same way, and rule from 7 to Y and from 8 to Y, swinging the line a little to include the intersection on line 13 a half inch from point Z; rule also from all these points, 7—8—Z and Z to U, locating points 1 and 2 where the outside lines cross the sweep at the top of the pipe. Find all the points on the next pipe and mark and rule in the same way. Continue the outlines of the first fold of the tail until they meet at W; attach a cord there, and with chalk or pencil strike circling lines at the top of the tail and at M, N, O, P, Q, R, S and T, the bottom of the tail.
Place point of dividers at M, and with N as a radius add an inch and strike to cross line NI, locating NX on line NI; measure from N to O and lay out this distance, with an inch added, by placing dividers at NX and crossing line OI, locating point OX; locate PX, QX, RX, and so on, in the same way, and rule from NX to TX, striking each intersection on the way, and also from each intersection to W, as dotted lines. When all located the lines between 5—6—11 and 12 will be the outline of the tail, those between 3—4—9 and 10 one of the pipes, and 1—2—7 and 8 the other pipe.
Now, lay the patterns over a soft board, and with a nail perforate the outline of the arch from A to T, the outline of the drapery from G to H, I to J and K to L, and also the outlining points of the pipes and tail, namely, 1—2—7 and 8, 3—4—9 and 10, 5—6—11 and 12, and the points NX, OX, PX, QX, RX and SX.
(Continued on page 51.)
[50]
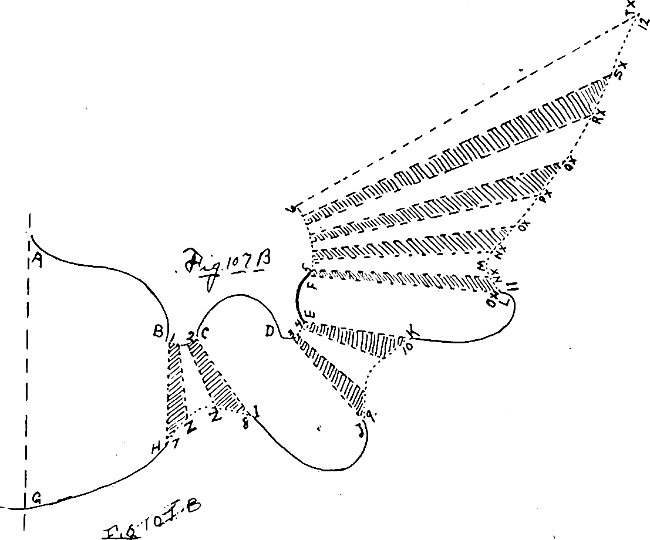
Fig 107B
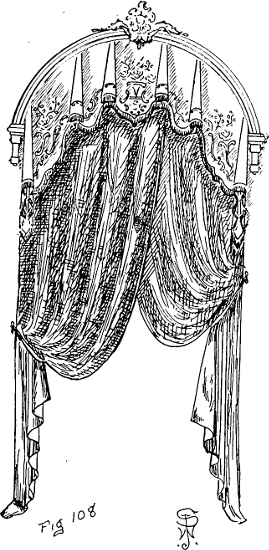
Fig 108
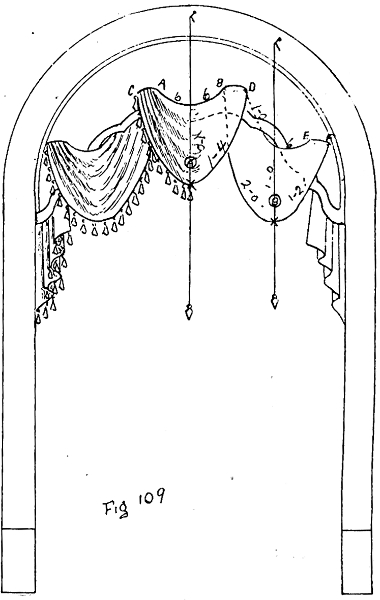
Fig 109
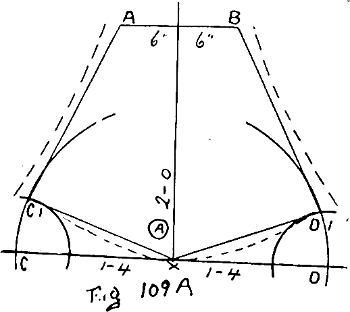
Fig 109A
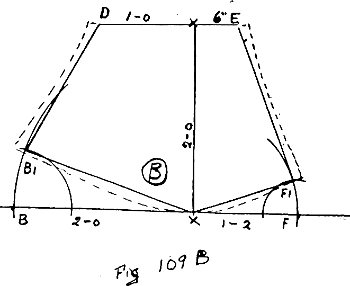
Fig 109B
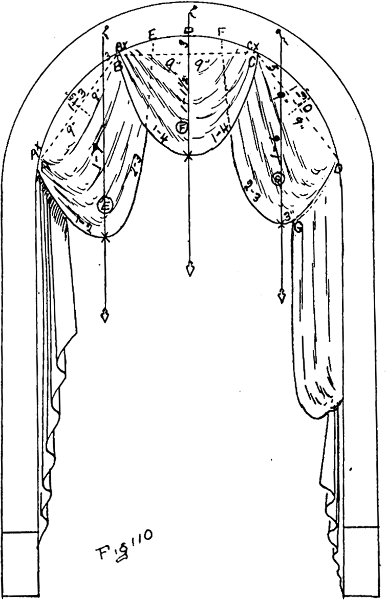
Fig 110
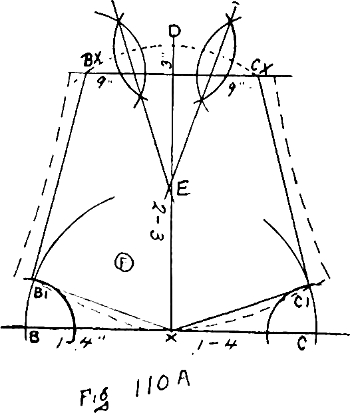
Fig 110A
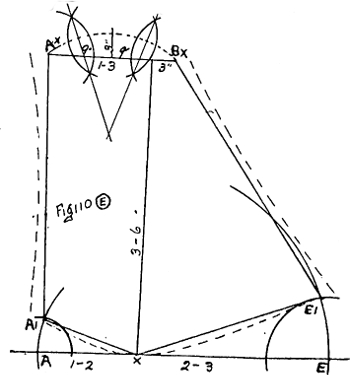
Fig 110E
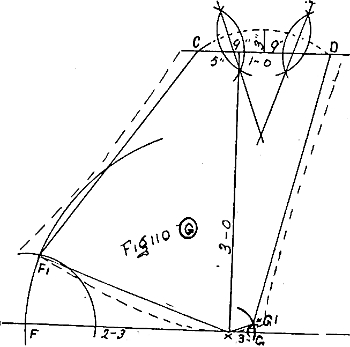
Fig 110G

Fig 111A
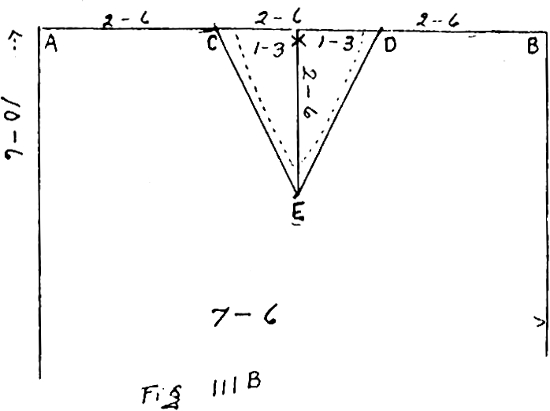
Fig 111B
Fig 111C
[51]
(Continued from page 49.)
Now take a piece of paper about twice the size of your pattern paper and lay your perforated pattern over it. A glance at 107 B, showing the detailed drapery pattern, will show you how best to lay your pattern to use the paper you have to advantage.
Commence by marking A—B—G and H through your perforations as well as any perforations which may be included between these; shift No. 1 on the pattern over point B, as marked through your perforation, and point 7 over point H, and mark out the perforations from 1 to 2 and 7 to 8; shift C over mark 2 and I over mark 8, and mark from C to D and I to J; shift 9 over mark J and 3 over D; mark the perforations included between 3—4—9 and 10; shift E over mark 4 and K over 10, and mark E to F and K to L; shift 5 over F and 11 over L, and mark all the points of the tail pattern. When all complete the under paper should appear as the outline of 107 B. Fold the pattern by following the lines of this illustration, the plain parts all face the front and the shaded parts all face the back of the drapery. As this is rather an intricate piece of work we have given each move in detail, and would suggest that you make a full-size plan of the pattern here illustrated to familiarize the details.
Figure 108 illustrates a round-top window treatment made like the foregoing, or either of these effects may be obtained by making scalloped flat valances as explained in the chapter on that subject.
The round-top flat valances may also be used in conjunction with a festoon drapery by providing apertures in the valance through which the drapery is passed, as left side of Figure 109.
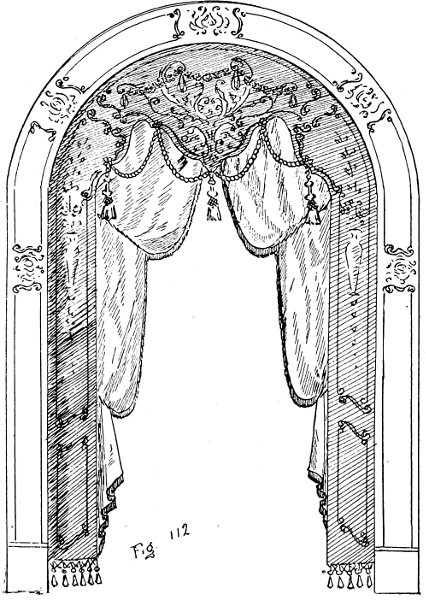
Fig. 112
To plan aperture pelmets for any purpose we prefer to sketch out the full size of the pelmet on a blackboard and plan the points where the apertures will be. Then lightly sketch the outlines of the drapery on your board, as right side of Figure 109, and measure from your chalk lines direct as follows: Take a small plumb line and allow it to fall over the deepest part of the festoon, as illustrated; attach a tape at D, festoon A, and allow it to drop down to X and around up to C; note the measurement at X and record it, and also the distance from X to C, which, in the case of a regular or equal-sided festoon, is the same; measure from B to A in the same way, recording the distance on each side of the line and also the distance from the top of the festoon to the bottom of it, in line with the plumb line. Measure festoon B in the same way, recording the distance on each side of the plumb line, and also the depth.
These festoons are cut as explained in the chapters on French festoon drapery and irregular festoon drapery, but we give the diagrams here as an additional guide. (Note Figure 109A and 109B.)
The drapery illustrated in Figure 110 illustrates an irregular festoon drapery, made to exactly fit the arch or opening. To plan this drapery use the blackboard and full-size sketch as for last figure. After the outline is sketched in and corrected to your satisfaction, flatten the tops of the festoon by ruling lines from each end of the bottom outline, as B to C dotted line, or from the outside extremity of one bottom outline to the outside extremity of the next festoon, as A to B and C to D dotted lines.
Drop a plumb line over the deepest part of each festoon and measure the outlines as explained for Figure 109, recording the measurements on the board; measure the distances of the straight dotted lines, tops of festoons on each side of the cord, and also on each side of the centre of the dotted line, recording the distances each way, and also the distances from the centre of the dotted lines to the outline of the arch.
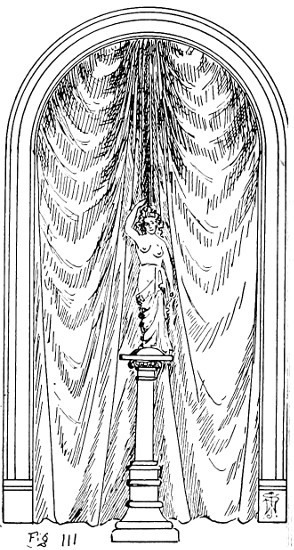
Fig. 111
When all measured, take a large sheet of pattern paper and proceed to mark out your pattern. Spread your paper on the table, the longest edge of the paper even with the side of the table next to you, and on this edge mark the measurement of the bottom line of festoon F, as recorded on your board. (See Figure 110A.) In this[52] festoon the plumb line crossed its centre and both sides measured equal, so, measuring each way from the centre of your line, mark the ends B and C, distant 1—4 from X, the centre of your line; erect a perpendicular line twice the length of the depth of the festoon, from dotted line to bottom line, and in line with the plum line (twice 1—1½ = 2—3). At the top of this line, or 2—3 from its base, draw another horizontal line parallel with the bottom line, and on it, each side of the perpendicular line, mark the distances recorded on your board each side of the plumb line; now, with one end of a pair of dividers or cord at X (110 A), and with B—C as radii, strike a quarter circle upward from these two points; with one end of the dividers at C and one-third of the distance from C to X as a radius strike an arc to intersect the first circle, locating C 1. Repeat this arc at B and rule from B 1 to X, C 1 to X, B 1 to B X and C 1 to C X. Add trimming allowance at the sides, as dotted lines, three inches extra at extremities and one and one-half inches in centre, and round out the bottom from C 1 to B 1, as dotted line. This gives you the shape of the pleated part of festoon F, and to this you must add the plain piece above the dotted line.
From the centre of the top line of the festoon erect a perpendicular line to correspond in length with the upright three-inch dotted line at the top of festoon F (Figure 110); place one end of dividers at this point D (Figure 110A), and with a little more than half the distance to C X as a radius strike an arc equal to a quarter circle. Shift the dividers to C X with the same radius and strike an arc that will intersect the first one at both extremities; repeat these with the same radius from D toward B X and from B X (as illustrated), and rule lines that will pass through both intersections of both arcs until they themselves intersect at E; now, with one point at E and B X as a radius you can sweep the same circle from B X to C X as is outlined on your board of Figure 110. Festoon E and G of Figure 110, and B of Figure 109, are measured and laid out in the same manner; the measurements on each side of the perpendicular line corresponding with those recorded each side of the plumb line, the points locating the end of bottom lines raised one-third the distance from the end in question to the perpendicular line, and the depth of the festoon doubled on the perpendicular line to allow for pleating.
The draperies illustrated in Figures 109 and 110 are attached by rings to bent poles inside the arch, to a light frame similar to Figure 100 A, or may be tacked to the arch itself.
A plan employed largely by French decorators is illustrated by Figure 111, combining the principles of the drapery and long curtain. The arch here illustrated and detailed in Figure 111A represents an arch 5—0 wide by 8—0 high. Add to these dimensions half as much again to the width (2—6) and a like quantity (2—6) to the length; join the fabric up to these increased dimensions (111 B), 7—6 x 10—6, and lay it out flat on the table; from the centre of the top edge draw a line at right angles to the top and as long as the quantity added to the length (2—6), and on each side of this line mark on the top edge points equal to half the quantity added (1—3), thus locating points C—D and E; rule from C to E and E to D; add the trimming allowance, as dotted lines, and cut this piece out.
Shirr these curved lines from C to D tightly (as illustrated 111 C) and tack it in place at C—D (111 A); raise each outside edge until it just clears the floor and tack it at E, the spring of the arch; edges C to A and D to B are tacked around the curve from the centre as far as they will reach, and the surplus between B and E is distributed into pleats and the same repeated on the other side.
It is sometimes necessary to square the bottom edge if the goods are very heavy, but the bottom can usually be kept square with the pleating. To straighten the bottom tack the curtain in place temporarily and allowing it to hang naturally, insert pins all along the goods as it hangs at the floor line; trim off the surplus thus marked, and finish the bottom with a hem, cord or fringe, and trim the top with a gimp or large cord. This method is only suitable where the fabric will not be disturbed, but is very effective as a background.
Figure 112, a combination of an embroidered flat valance and pair of double festooned curtains, is very effective for large spaces. The valance, made on a light frame or on buckram and tacked to the arch, the tacks covered with a gimp in harmony with the embroidery, and the curtains attached as explained for Figure 104.
The method of employing a blackboard and full-sized drawings mentioned in the foregoing, with the explanation of festoon F (Figures 110 and 110A) gives the fundamental principle of the blackboard system of drapery cutting, and the principles therein suggested may be applied to any explanation of drapery cutting which we have given by changing the scale drawings to full-sized drawings and measuring the sketch with a tape. It is not at all necessary that the outline of the festoons be made up of accurate and true lines. If the general size and shape is fairly correct you will find that the tape will hang true enough to correct any deficiency in sketching.
[53]
As early as the year 1012 B.C., straight hanging portières for connecting doorways were employed in the temple built by King Solomon. In a modern house, portières are almost as important as doors. Aside from the ready-made portières, which are manufactured in a variety of patterns and materials, the demand for portière curtains specially adapted to various rooms has resulted in a profusion of made-to-order styles, a few of which we illustrate.
Among the fabrics most used are tapestries, brocatelles, damasks, velvet, plush, plain and figured velours, armures, fancy reps and serges, and for Summer furnishings, the lighter-weight fabrics, such as taffetas, art tickings, cretonnes, denim and sateen, in almost endless variety of shade and pattern.
In many cases the carpets and wall coverings are chosen and in place before the portières are considered. This is unfortunate for the drapery man, as it not infrequently happens that the unadvised or overadvised purchaser has chosen colorings that bear no relation to one another, so that to select a material for portières that will harmonize with the carpet at its base and also with the side-wall which it divides is a difficult proposition. Frequently the best that can be done is to employ an unassuming neutral color that will not offer a very decided contrast to either floor or side-wall, and then introduce the colors of these other furnishings in a modified form in the trimmings.
Where walls and floor are in harmony, or where the furnishings are chosen together, it is a safe plan to build from the ground up, allowing the portières to be slightly lighter in tone than the carpet, and the over-draperies and side-wall in lighter tones still. This applies equally whether the scheme be one of contrast, or analogy.
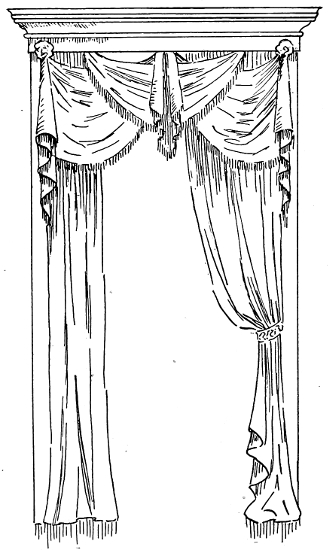
Considerable care must also be exercised as to the general effect of plain or patterned fabrics in relation to floor and side-wall. As a general rule avoid upright stripes for long, narrow doors, since the stripes accentuate the slimness of the portières. Likewise avoid cross stripes on short openings, as they decrease the height and increase the width. Plain self-colored materials look larger than figured materials unless the expanse of color is reduced by appliqué trimmings. Study the effect you wish to produce and plan accordingly.
Some of the fabrics mentioned above are reversible, having a finished surface on each side. These, as a rule, do not require lining unless too light in weight or out of harmony with the colors of the adjoining room. Other goods should be lined and—unless the goods are heavy enough without it—interlined as well.
Figure 113, on the next page, illustrates the most common type of portières made of a figured material and trimmed with a cord on one side and bottom of each curtain.
Assuming that these are made of a reversible or double-faced material, the goods are first spread on the table and the measurement of the portière marked out. If the curtain length as marked spoils the pattern at both top and bottom it is better to shift it up so that the bottom pattern may be perfect (or both bottom and top if possible), add about three inches to the net length of the curtain measurement and cut it; match the next length to this one before making the second cut. If it creates too great a waste and there should be more than one pair required of the same material (the pairs not required to match each other) cut a length for one of the other pairs and try the first pair again. If this is no better and there are no other sizes to cut, try the other end of the goods. Never cut to waste without trying every plan you know for avoiding it, as a little planning will often pay for itself in the amount of material saved.
PORTIERES AND APPLIQUES
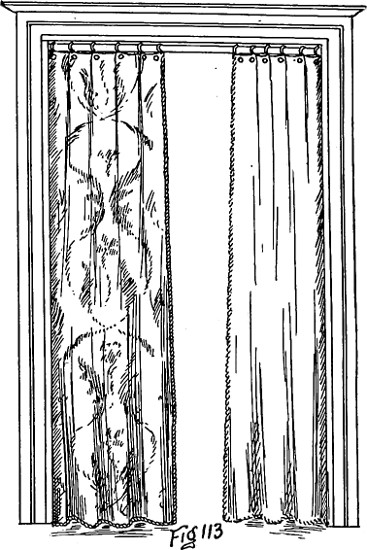
Fig 113
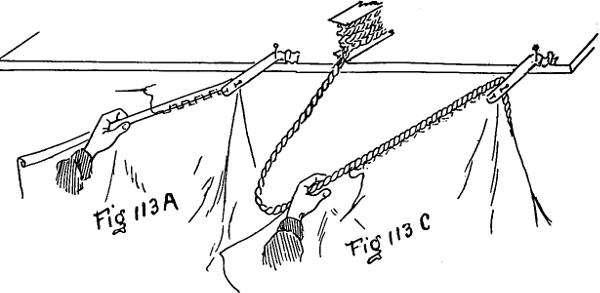
Fig 113A Fig 113C

Fig 113B
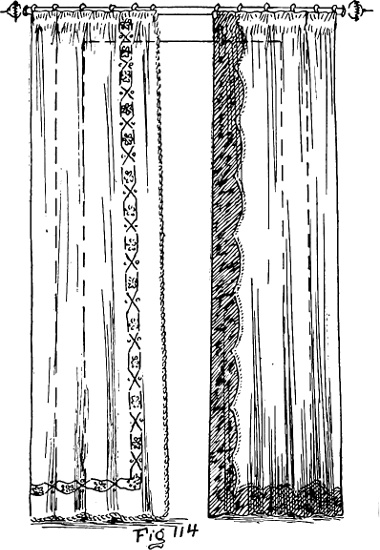
Fig 114
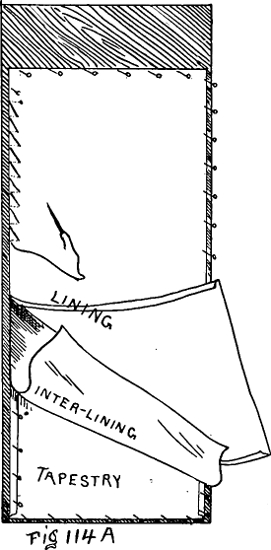
Fig 114A
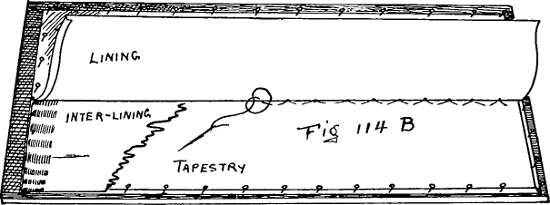
Fig 114B
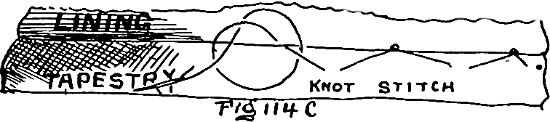
Fig 114C

Fig 114D
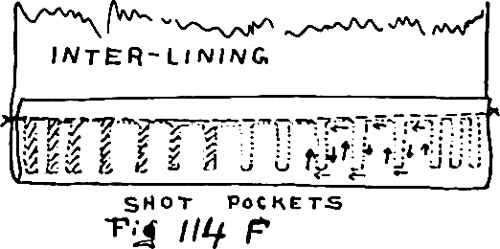
Fig 114F
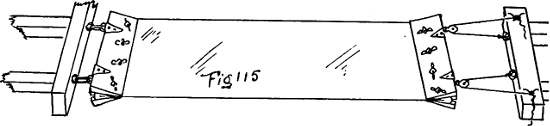
Fig 115
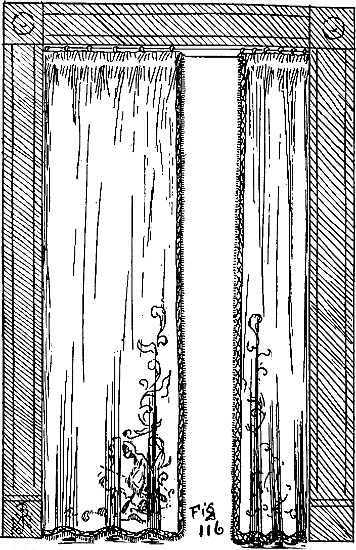
Fig 116
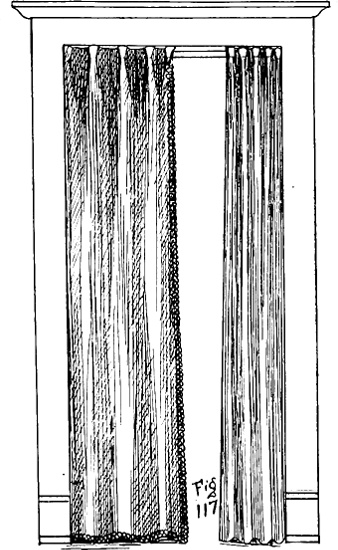
Fig 117
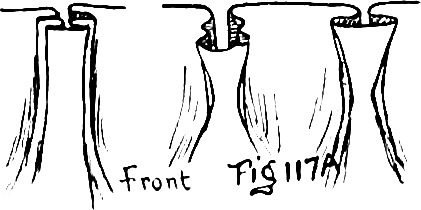
Fig 117A
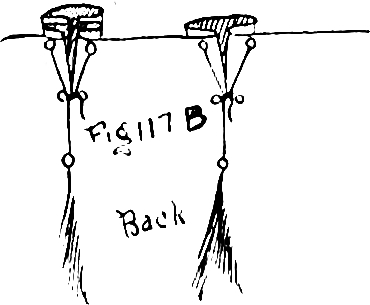
Fig 117B
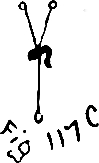
Fig 117C
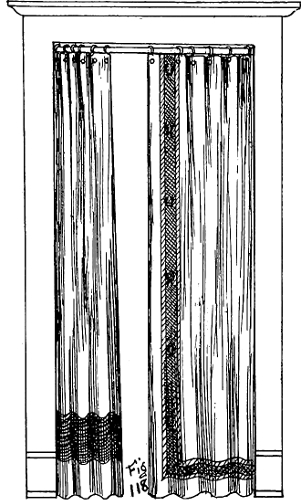
Fig 118
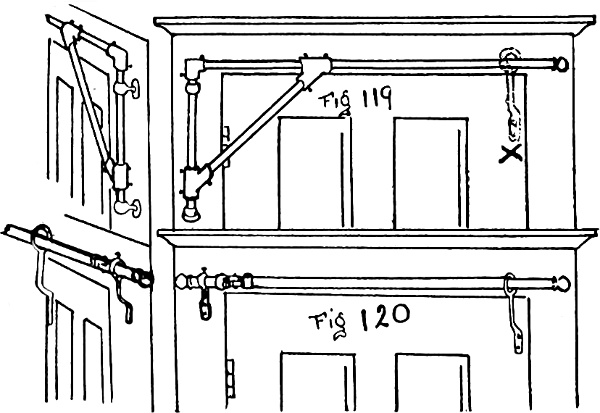
Fig 119 Fig 120
[55]
Assuming still that this is reversible material and the matched lengths are ready for making, spread each length on the table and cut off the selvage or[54] part of it, according to the width of it, and turn or fold the edge over as Figure 113A to make a felled edge about three-eighths of an inch wide, which is slip-stitched as illustrated. Be careful that the stitches are taken between the threads of the goods and do not show on the reverse side.
Fell the curtains on both sides and bottom, taking care not to stretch the edge of the material in doing so, and leave the top as cut. When all felled around, lay the fabric on the table with the bottom of the curtain even with the end of it and the sides parallel with the table top, mark the length of the finished curtain on the table as A Figure 113B and fold the top of the curtain over as illustrated, making a fold about two inches deep, which is stitched at X the bottom edge of the fold and at O one-half inch above it.
The cord is sewn on as illustrated by Figure 113C, holding both cord and curtain loosely, so as not to stretch either, and pulling the stitches barely taut.
A great deal of the difficulty in the hang of portières is caused by the way in which the cord has been put on, and too much care cannot be taken until one is expert enough to produce perfect results.
The right side of the curtain is considered to be that side from which the hems were turned, and the cord is sewn from the right side, the ends being securely fastened and sufficient fullness allowed at the corners to turn them squarely.
In portières, as in draperies, cut the goods to be made with the pattern running up, and the nap of pile goods running down. When not shirred to the width of the space the portières are pleated to the width, the pins being inserted between the two stitchings X and O, Figure 113B, and the pleats turning to the back edge of the curtain, as Figure 113.
Figure 114 is an illustration of how a pair of portières can be applied to a narrow door to give it the effect of greater width. Hung in this way and for this purpose all woodwork must be hidden and the pole projected forward far enough for the curtains to clear the face of the door frame.
An appliqué lace is illustrated as a trimming on the left-hand curtain (Figure 114), and the curtains are lined on the reverse side with a fabric to harmonize with the surroundings in the next room.
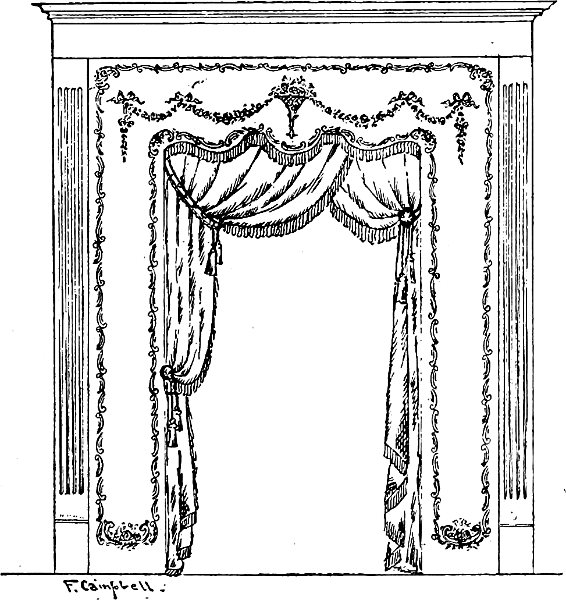
To apply the trimming, the curtain is first tacked out flat on the table face upward, true and even with the square table edge, and a guide line ruled where the lace is desired to be.
Open-work appliqué trimmings are usually started from the corner, and the trimming so planned that where the mitre is made a perfect pattern is made and the surplus cut away. When all laid on in place the trimming may be either basted, pinned or cemented, after which it is taken up and sewn permanently. For pile goods a splendid method of holding the trimming in place is to spread some paste on a piece of paper and then press the wrong side of the trimming on to the paper until it absorbs a quantity of the paste, then lay it on the fabric in position and weight it until dry, after which it can be stitched.
After the trimming is stitched in place, lay the curtain on the table face downward and turn a half inch (or more if desired) over on sides and bottom, as illustrated in Figure 114A and 114B, and tack it temporarily, taking care not to stretch the material, but keeping it smooth and straight with the table; turn the surplus down at the top to make it the length of the finished curtain, less whatever allowance is necessary for cord or fringe, which projects beyond the bottom edge, and so must be included in the length of the curtain.
Lay the lining over it, as Figure 114B, turning under sufficient at sides and bottom to make it equal to the width of the tapestry or chief fabric of the curtain. Tack only half of this, as illustrated, and then fold the free half back over the tacked half and knot—stitch the lining and fabric together, as shown in 114C. Pass the needle between the threads of each material in such a manner that the stitch will not show through on the right side of the curtain, and knot it to one fabric only.
When all knot-stitched, using one, two or more rows, according to the weight, texture and value of the fabric, finish tacking the lining, turning under the edges as before and baste the fabrics together all around, using a stitch similar to that illustrated in Figure 114A, which holds the folded edge well in place.
Stitch the top across twice, as X—O, Figure 114E, and then pin the curtains temporarily to a try-pole to see if either side sags down and looks baggy. If it does so the bottom basting must be taken out and the excessive fullness allowed to hang free until both[56] fabrics hang square and flat together; then pin the two fabrics about four inches from the bottom, so that neither can shift, lay it on the table, and, turning in the bottom evenly as at first, baste it once more and test it on the pole.
If flat and even this time without sagging, it may be removed and slip-stitched all around, holding the edges as basted and using the stitch illustrated in Figure 114D.
The curtain is then corded as explained in connection with illustration Figure 113C, and if the lining is a different color and sufficiently important to require it, the cord should either be a mixture of the two colors or two separate cords should be put on, each sewn from and matching the color of its own side.
If the tops are to be pleated and pinned, as Figure 113, the pins are inserted between the stitches X and O, Figure 114E; but if they are to be shirred, as Figure 114A, a tape is run between the stitches X and O, and hooks placed in between the tops, as A, Figure 114E, and sewn to the tape, after which the spaces between the hooks are stitched at intervals to keep the two fabrics up in position.
Where price limitations do not exist a more satisfactory portière can be made by using an interlining of sateen, canton, or shaker flannel the bottom of which contains small vertical pockets, as Figure 114F, which are filled with shot and sewn up. These are made by turning up the bottom of the lining about three inches and running it through the machine, as indicated by the arrow. It will be noticed that the pockets are heavier or a little closer together at the corners to increase the weight there and correct the tendency to flare common to a pleated or shirred curtain. This weighted interlining is placed in position before putting on the lining in Figure 114B, and is included in the knot stitching and basting; the edge of it, however, is trimmed even and lies between the turned-in edges of the two fabrics without itself being turned in. When weighted interlinings are used with extra-heavy corners the fabrics should be knot-stitched together, say four inches from each outside edge and down the middle for ordinary fifty-inch material (three rows in all). There is a tendency on the part of a great many fabrics to sag or stretch down with their own weight after hanging for some time. The best way we have found to correct this is to stretch the material between clamps, as Figure 115, allowing the tension to remain on the material for about twelve hours, after which it is made up in the usual way.

Figure 116 illustrates a pair of portières with a leather or embroidery appliqué corner which is applied as already explained for lace appliqué, making a very rich and effective portière. When made to order it is possible to have the embroidering done on the fabric itself, making thereby a better finished and more durable article.
The French heading illustrated in Figure 117 is made as explained by drawings 117 A and 117 B, showing the front and back views of the double box pleat which is opened out into the heading after having been sewn to the hook. This heading requires a special hook having upright arms which support the top of the heading and are something after the style of Figure 117C.
Figure 118 is an illustration of a tapestry panel made up as a portière by bordering it with a plain material, such as velours or plush; they are made with very little fulness in width, and are effective for den, library or smoking-room curtains.
A great variety of gimps, cords, edgings, galoons and appliqués are procurable for trimmings, each applicable to specific requirements, while a combination of two fabrics in the way of bands or borders, as Figure 118, and the right-hand curtain of Figure 114, is also most effective, and allows an assembling of colors and shadings not easily produced in any other way.
Figures 119 and 120 illustrate two kinds of portière poles for use on a doorway where it is necessary to have the portière swing open as a door, or with a door which it covers. The principle of each can be readily seen without explanation, and they serve a useful purpose where such fixture is desired.
Figure 119 is self-supporting, and is independent of the door unless provided with bracket X. Figure 120 is dependent on the door for support at one end, and is hinged just in line with the hinge of the door. The small bracket at the left of the hinge is equipped with a set screw, which holds the pole rigid, while the right-hand bracket is provided with a large opening through which the pole slides with the opening of door. Portières are usually made to just clear the floor, and should be suspended from rings which traverse freely on the poles. Appliqués look best on plain materials. Materials with prominent patterns are better without them.
[57]
Bed draperies should be planned and constructed to carry out the style and design of the bed itself, and should never appear obtrusive. Care should be particularly exercised in sleeping apartments that the draperies, furniture, floor and wall coverings merge into one complete harmonious whole without a discordant note.
The conformation of the draperies has much to do in determining the artistic atmosphere of a room, and may suggest vivacity, dignity, restfulness, solemnity or depression, according to the design and the style of material. The application of style and design to particular purposes is not governed by rules as fixed as the harmony of color, and doubtless every decorator of experience has seen scores of treatments which have impressed him as being in bad taste and unrelated to their surroundings, yet these treatments must have pleased somebody.
The salesman who told a lady customer that good taste was what she liked best was not far astray in his definition, and it would be folly for any of us to say what is and is not absolutely good taste. We would, however, suggest that the purpose for which a room is used should govern to a very large extent the nature and character of the furnishings, and that the more exclusive the purpose so it should be with the furnishings.
This was hardly the thought prevalent in ancient times, judging from the examples extant, but is more in touch with latter-day thought and tendency.
Students of period draperies soon reach the conclusion that there is very little really new, and we think this is particularly true of bed draperies. In bed draperies the French decorators of the Sixteenth and Seventeenth Centuries are still pre-eminent, and we reproduce for purposes of explanation a few of the best examples of these periods.
Fig 116
Fig 116A
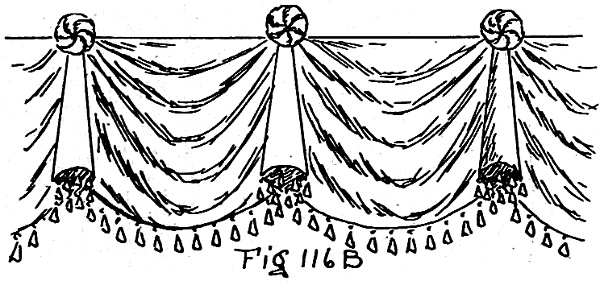
Fig 116B
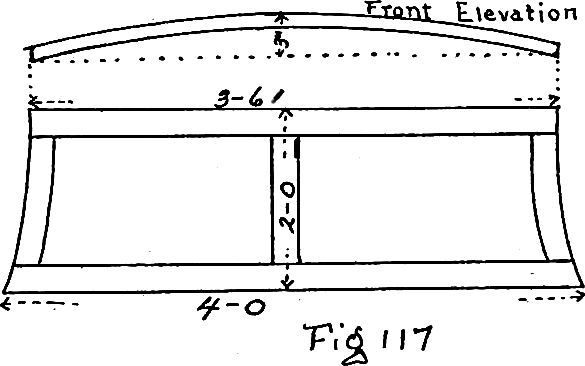
Fig 117
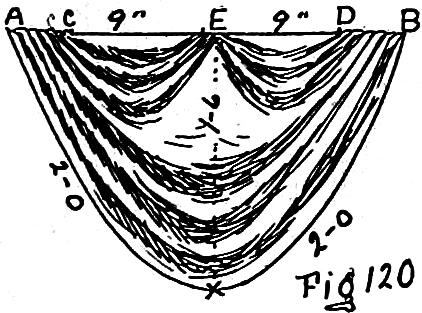
Fig 120
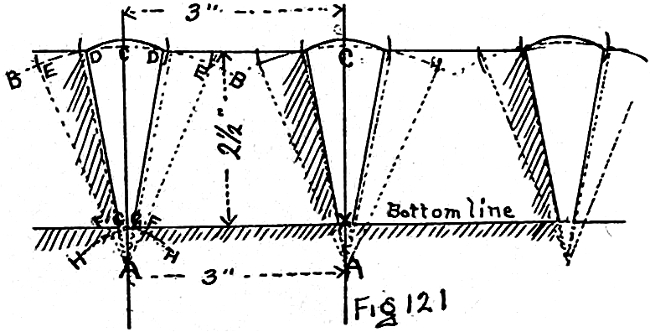
Fig 121
Figure 113 is a type of the elaborately upholstered bed of the Pompadour period and contains much that is graceful and applicable to present-day decoration, the entire canopy arrangement being worthy of reproduction in toto.
While it is not customary at present to upholster beds (head-board, foot and side-rails), except for purposes of exact reproduction, it would not be amiss to explain in passing the steps taken in producing the different styles of tufting shown in our illustrations.
The biscuit tufting of Figure 113 is usually made small and shallow as compared with other styles, the squares composing the tuft seldom running larger than two inches. To mark off the surface of the article for tufting find the centre each way and draw lines as dotted lines 1——1, 2——2, Figure 113A, being careful to make them perfectly perpendicular and horizontal, as governed by the outline of the space to be tufted. Measuring from the centre lines draw other lines every three inches until you reach to within three inches of the outline of the space, thus dividing the surface into three-inch squares, as dotted lines, Figure 113A. Rule diagonal lines, as A, B, C, to cut through the intersections of the dotted lines, and make these diagonal lines sufficiently heavy to be legible when tufting, as the smaller squares enclosed by the diagonal lines outline the size of the tufts and the intersection of the diagonals mark the points for the buttons. (See Figure 113B.) When all the lines have been drawn the article is ready for tufting, but the cover must also be marked for buttoning before it can be applied with any degree of success.
To ascertain the size of the covering needed, count the number of squares diagonally from one extremity to the other, thus from C to C, Figure 113A, numbers ten squares, and ten also from A to A; now take the size of the dotted line squares first marked on Figure 113A (three inches), and multiply the number of diagonal squares by the size of the dotted squares, which gives us the size of the[58] covering as 30 x 30 inches; add an inch all around for tacking, and a piece of covering 32 × 32 will be the size required.
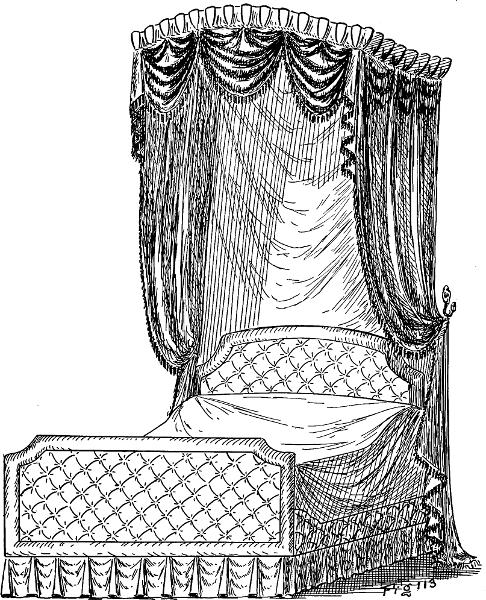
Fig 113
Fig 113A
Fig 113B
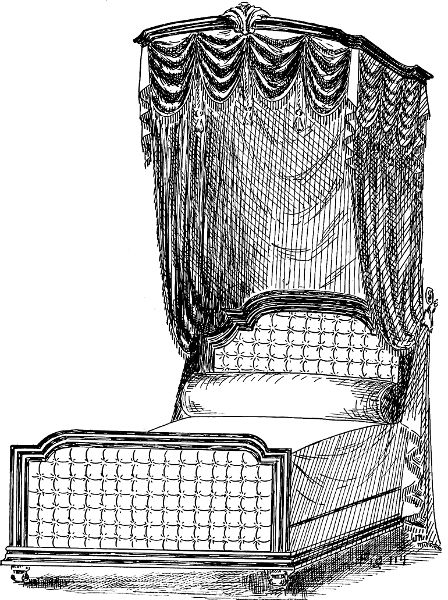
Fig 114
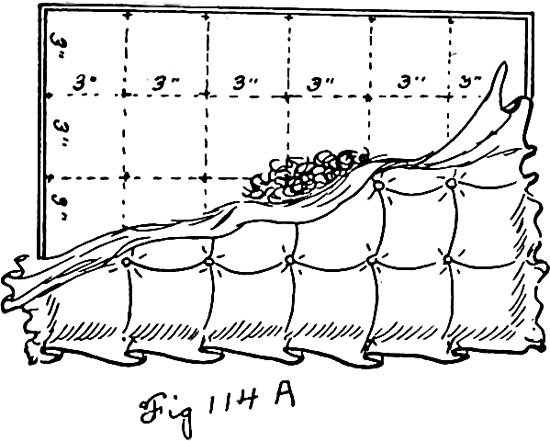
Fig 114A
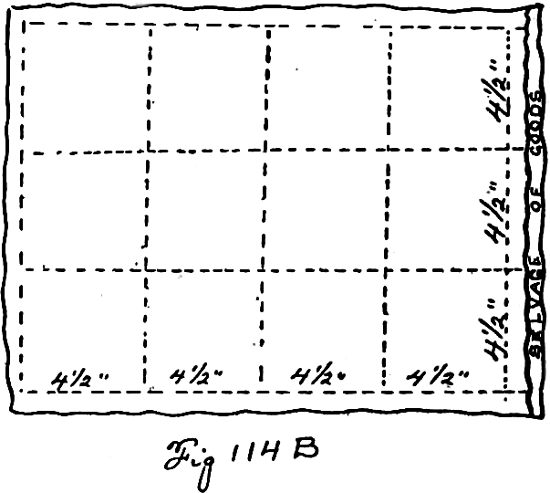
Fig 114B
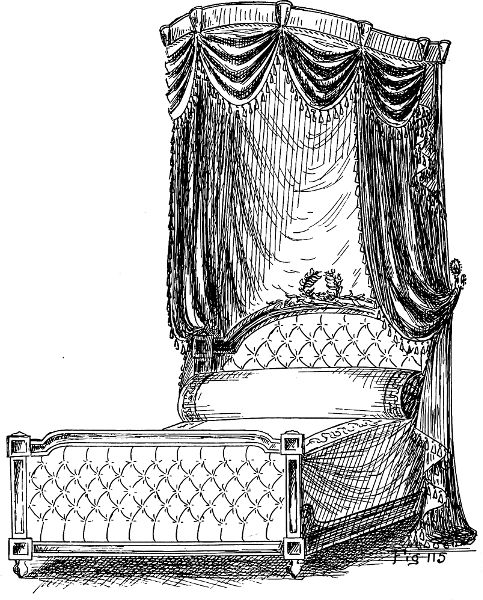
Fig 115
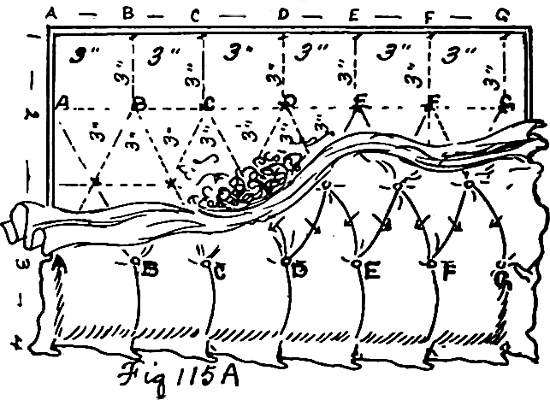
Fig 115A
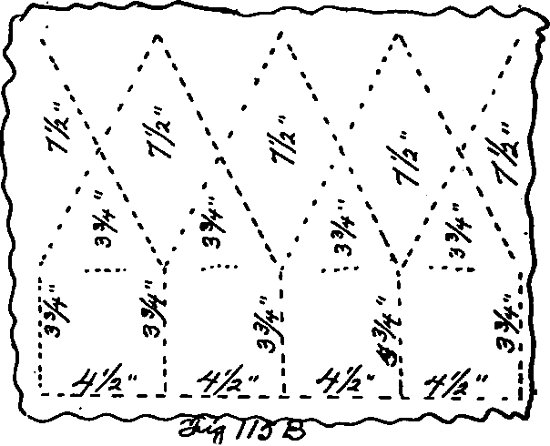
Fig 115B
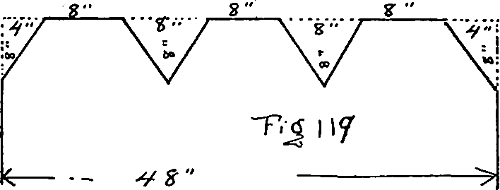
Fig 119
[59]
For spaces such as 113 A, where the surface is longer than wide, it is possible to economize in covering by joining two pieces together on the centre line of tufting, B——B; take width from the lower right hand C to the upper B, nine squares, and the number from B——B to A, upper right hand corner, five squares, and multiply each by three inches, as before, and we find that two pieces, 27 x 15 inches, with tack allowance added, will be sufficient to cover the spaces thus divided by line B——B.
The covering is turned face downward upon the table and divided into the requisite number of three-inch squares, leaving the tacking allowance beyond the outside lines and keeping the lines parallel with the edges of the material, similar to Figure 114B.
Attach the centre mark of the lowest line on your material to X, the lowest button mark on your tufting surface on line A, Figure 113A, and temporarily tack the next marks on the bottom line at X——X, Figure 113B. Stuff the fullness thus allowed between your button and X——X, and then put in button B, as Figure 113B; the space between A——B and X forms a triangular pocket of fabric, which is stuffed up plumply and button pulled into place by following the marks on cover and tufting surface; the rest of the tufting now is a repetition of this procedure, stuffing up the three-cornered pocket, pulling in the fourth button to complete the square, and forming the surplus from button to button into a straight pleat. When all filled the edges are stuffed up plumply and tacked all around, the surplus fullness around the edge being formed into pleats running outward from the outside row of buttons, as Figure 113B.
This is by no means an easy task for a novice, but patience and perseverance will accomplish the result, and the method of square marking for the covering and diagonals intersecting similar sized squares on the article will give the proper allowance for fullness for all sizes and nearly all coverings.
Square or bun tufting, as shown in Figure 114, is marked as Figure 114A, dividing the space into three-inch squares (or larger, if desired) and the covering marked also into squares (as Figure 114B) from one to one a-half inches larger than those on the surface of the article. Thus, for three-inch squares, rule your cover into four and one-half inch squares and add tacking allowance. The size of the covering can easily be ascertained, as you need the same number of four and one-half inch squares of covering as there are three-inch squares marked out for tufting.
Put in the entire bottom row of buttons and the first one of the next row (Figure 114A), forming the triangular pockets, which are stuffed as explained above for biscuit tufting.
The diamond tufting of Figure 115 is made in a slightly different way, but the principle is the same. Rule the cross lines 1——2——3——4 as Figure 115A, line 3, say three inches from the bottom, line 2, six inches above line 3, and line 1 three inches higher again.
Divide lines 1, 2, 3 and 4 into three-inch spaces, as shown on line 1, A——B——C, etc.; rule from B on line 2 to A on line 3, and also to C on line 3; rule from C on line 2 to B and D on line 3, and also from A on line 2 to B on line 3, continuing this until the surface is all marked, as Figure 115A. This will give you a row of intersecting diagonal lines between lines 2 and 3 and marks the diamonds for buttons by following the intersections.
To measure the space for covering, measure from A to B, to C to D, and so on to G, adding one and a-half inches to the distance between each letter for fullness. Measure from 4 to 3 to 2 to 1 in the same way, adding one and a-half inches to each space, so that a panel the size of 115 A, which measures 12 x 18 inches, requires a piece of covering 18 x 27 inches, with an allowance of another inch all around for tacking (20 x 29). Mark the covering, as Figure 115B, which shows the one and a-half inches added to the spaces between the upright lines and also to the spaces between the cross lines.
Put in the first row of buttons and draw the bottom edge of the goods, which lies directly in line with each button, straight down, and tack it temporarily there. This will form a series of pipes all across the bottom; stuff evenly and plumply, and commencing in the centre stuff up all the space between the first row of buttons and the second line; pull the cover down over this by pulling the button mark on the cover down to the button mark on the line, and put in the button, forming the surplus material diagonally from button to button into a pleat, as illustrated (Figure 115A). Continue this row and the rest in like manner, folding the pleats downward and facing each other in pairs, as indicated by arrows. Finish the top with a row of pipes similar to the bottom, stuff up all the edges and tack them, drawing all the surplus fullness into pleats from each button of the outside rows, and rounding the edges down to the place where finished off by tacking.
Beneath the rail of Figure 113 a short piped valance fills the space to the floor. It is slightly pleated between the pipes, so that the pleats fall into festoon shape, and is also an effective valance for cosey corners and chairs. Mark out on a paper, Figure 116, the exact appearance of a portion of the valance, including two pipes and the space between; erect perpendicular lines A and B through the centre of each pipe, measure the width of the pipes at bottom and top, the length from top to bottom, the distance between D——C at the top and the distance around the[61] curved bottom line between A——B at the bottom, recording the measurements as here shown.
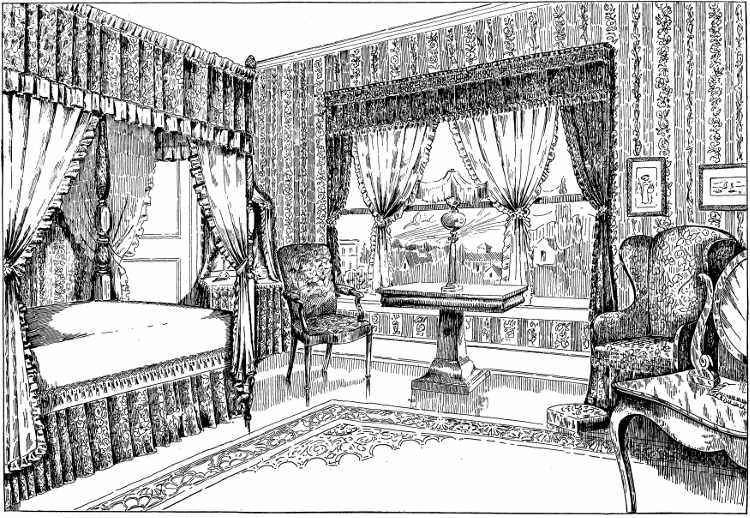
COLONIAL BEDROOM
Take a large piece of paper, and using the longest edge of it as the bottom line A——B, Figure 116A, mark off the distance of the bottom edge of the festoon (1——9); from the centre of this space erect a perpendicular line E——E at right angles to the bottom line, and as long as twice the length of the pipe (2——0); at the top of the perpendicular line rule another horizontal line parallel with the bottom line or the edge of your paper, and with the perpendicular line as your centre, locate points C and D, exactly as on your drawing 116.
With E as your centre and A——B as radii (116 A), strike a half circle to connect A and B; with B as a centre and one-quarter the distance to E as a radius, strike an arc to intersect the half circle and locate point A——1, and repeat at B to locate B——1; rule from B——1 and A——1 to E, from A——1 to C and from B——1 to D, defining the general outline of the festoon-like section between the pipes.
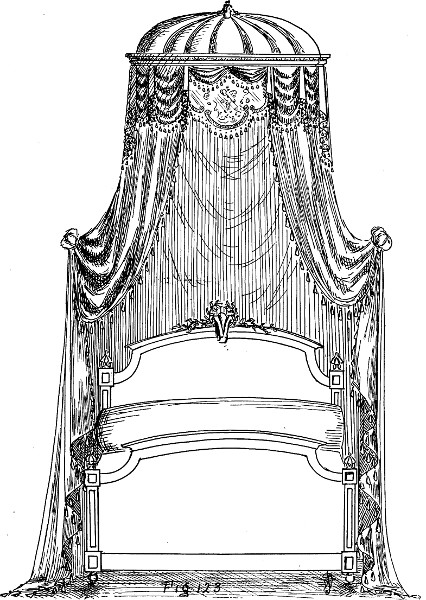
Fig 123
Reverting again to Figure 116 the bottom of the pipe measures four and one-half inches across the face when pressed flat; double this to get the circumference, which would be nine inches; rule a horizontal line from point A——1 (116 A) parallel with the bottom line and nine inches in length; erect a perpendicular line, X——X, from the centre of it, and on the perpendicular mark the length of the pipe as shown on your drawing (1——0); at the top of this line lay out the size of the top circumference of the pipe, which is double the face measurement, and locate points G and G four and one-half inches apart; rule from G to A——1, round out the bottom line from A——1 to B——1 as dotted line, add the trimming allowance between C and G, dropping about two inches to F, midway between lines C and G as dotted line; fold the paper on line X——X and cut out the festoon and half the pipe, as outlined by X——A1——E——B1——D——C——F——G and X, together with the paper folded underneath, which will give you when opened the pattern of two festoons and one pipe, as Figure 116A, which may be repeated indefinitely by joining the pieces at F so that the seams are hidden behind the pipe.
To pleat the festoons shirr from C to F and D to F tightly on a stout thread, fasten F——F together, drawing the pipe together at the back, and fold the top of the pipe down behind to finish even with the top of the festoons. Tack the whole to a slat or to the bottom of the bed itself and straighten out the pipes and pleats to hang nicely and uniformly.
By increasing the depth of the festoon to (2——8) twice the depth of the festoon drawn in Figure 116 (1——4) and adding rosettes, made as explained in chapter on pleated valances and lambrequins, a more elaborate effect is obtained, as Figure 116B, suitable for other purposes where a simple valance is required. The canopy is made on a frame shaped like Figure 117, suspended by brass chains or wire from the ceiling or wall, and supports the curtains at sides and back, in addition to the drapery which completes the canopy. The side curtains are made about a foot longer than[62] the distance from floor to canopy, and caught up with rosettes or loops, as explained in chapter on scarf draperies.
The festoon-like pleats in the top of the curtain are obtained by cutting out sections of the top of the curtain, similar to the piece defined by points E——1, E——1, and F, in Figure 118, the total amounts cut out consuming the fullness allowance, as, for instance, a piece of forty-eight inch material pleated to twenty-four inches would have two triangles of eight inches removed, as Figure 119, and a half triangle of the same size taken off each corner; by shirring the raking edges the pleats are obtained and the fullness consumed.
The drapery of Figure 113 is made up of triple-pleated festoons, made as follows: Sketch out the festoon as you desire to pleat it, either full size on your blackboard or to a reduced scale on paper, the large lower pleats occupying two-thirds of the depth, and the small upper pleats the remaining one-third, as Figure 120; measure the distance around the bottom of the festoon from A to B, the depth from E to X, and also from C to E and D to E, recording the distance on your drawing.
The bottom line and the depth of the festoon pattern, Figure 118, are planned as a regular festoon, so draw the bottom line, A to B, locate the points A1——B1 one-sixth of and above the bottom line, as explained for straight festoons; rule the perpendicular centre line E——X as long as twice the depth recorded on Figure 120, and rule the top line parallel to and almost as long as the bottom line.
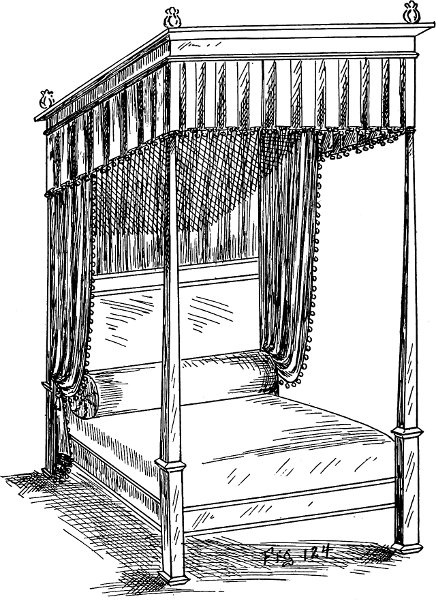
Fig 124
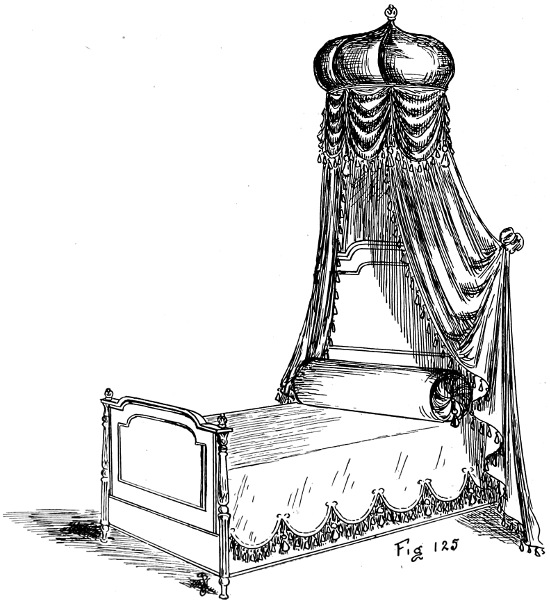
Fig 125
Now take one-quarter of the measurement between C——D, Figure 120, and mark it on your top line, so that half of it lies on each side of your centre line E, thus the distance between C——D is eighteen inches, one-quarter of it is four and one-half inches, and two and one-quarter inches on each side of the centre line locates E1 and E1 four and one-half inches apart.
Now take the distances recorded between C and E and E and D on your sketch, and mark these distances outward on the top line from E1 and E1, which will give you the size of the top of the festoon and locate points C and D on your pattern. Mark F about one-quarter of the distance from E to X on your pattern (Figure 118); rule from F to E1 on each side, A1 to C and B1 to D, add pleating allowance, as dotted lines on raking sides of festoon, hollow out the U-shaped marked at E, as dotted line, round out the bottom of festoon, and cut out the pattern, shirr the edges from E——1 around to E——1 on a stout thread, and pleat the raking outside edges up as an[63] ordinary straight festoon. (See explanation in chapter on French festoons.)
The ruffle which surmounts the drapery and forms a trimming at the edge of the canopy (Figure 113) consists of a piece of material pleated in such a manner that the pleats are smaller at the bottom than at the top. It is made separately, and either joined to the drapery or put on over it. The size and number of the little cone-like pleats are matters of personal taste, and the principle of making is the same for all sizes and shapes.
On a fair-sized piece of paper draw out exactly two pipes and the space between as you desire it to look when finished (see Figure 121). Continue the side outlines of the pipes downward until they meet, as A——A. This, of course, will be nearer or more distant according to the flare of the top of the pipe. Place point of dividers at A, and using the length of the pipe as a radius, strike a quarter circle through and on each side of the top of the pipe, as line B——B; now draw perpendicular lines passing up through the centre of each pipe and at right angles to the straight bottom line of the ruffle.
Place one point of dividers at C, where upright line intercepts the circling line, B——B, and with a little more than D——D as radii, sweep to cross the line B——B on each side; place dividers at the point where your sweep crossed B——B, with the same radius, and strike another line to cross B——B and locate E, and rule from E and D to A on each side of the pipe; with dividers at A, and with the bottom of the pipe as a radius strike another quarter circle as H——H, the points where dotted lines D and D cross H——H locate G——G, and where dotted lines E and E cross H——H, F——F are located; mark the place where the perpendicular line crosses H——H as X, which is shown on the middle pipe, and the pattern is ready for punching.
Note instructions for punching pattern of Figure 107A in chapter on archways, and follow the same procedure with this pattern, punching points E——D——C——D——E at the top, and F——G——X——G——F at the bottom. You will notice that letters E——D——D——E——F, G——G and F outline the pipe and show the lines for folding, while the space enclosed between C——C——X——X is the pattern of the plain piece between the pipes; now by shifting the pattern as explained for Figure 107B, in above mentioned chapter, and marking through the perforations you will have a pattern outlined by the same letters as Figure 122; rule from point to point and you have the complete pattern of one pipe and the space between it and the next one, by repeating this, as shown in Figure 122A, you may make the ruffle any required length, stiffen with wiggin holland or buckram and pleat as indicated by lines in pipes, the shaded portions of Figure 122A going to the back of the pipe, and the points C E——C E and X F——X F meeting and fastened together. The completed ruffle is now sewn to the top of the festoons and the seam finished with a cord, as Figure 113.
Figure 114 illustrates the application of straight top festoons to a molded canopy frame, the roof of which is shirred to a centre in sunburst effect.
Figure 115 shows a ruffle or piped heading similar to Figure 113 with larger spaces between the pipes, and the method of detailing the pattern is the same as already explained.
Figure 123 illustrates a dome shaped canopy supported by a molded cornice, and is more simple of construction than at first appears; the molded cornice needs no further explanation than the front view, Figure 123, and the side view, Figure 123A.
The construction of the dome can easily be followed by Figures 123B and 123 C; a light hardwood circular frame is first marked at intervals around the outer edge where the ribs are desired to be, and a number of straight iron wires about one-eighth of an inch in diameter are inserted by boring holes in the edge of the frame, driving in the wires as C, in 123 D, after which tacks are driven in beside the holes to swell the fibres of the wood against the wire, and the wires bent upright as A and B of this illustration. Each separate wire is bent to take the shape of the rib, and all are fastened at the centre temporarily; when all are thus fastened, commence winding the three wires composing each rib, binding them solidly together with soft twine continuing to the centre, then turn the wires sharply aside, in line with the next rib, to which the ends are then bound, and the winding repeated on each rib.
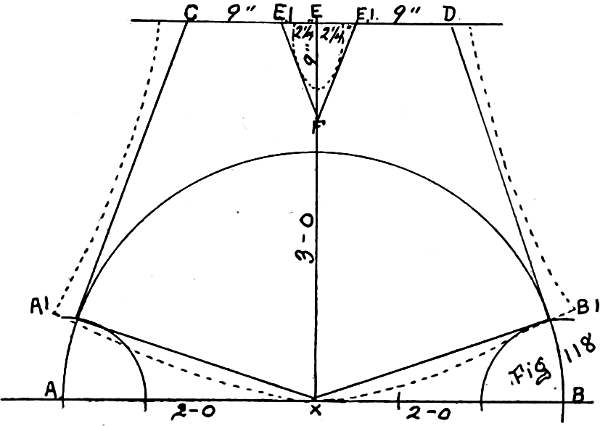
Fig 118
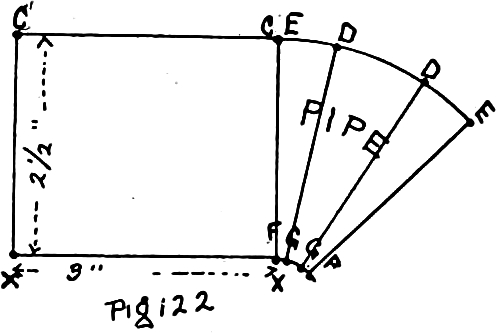
Fig 122
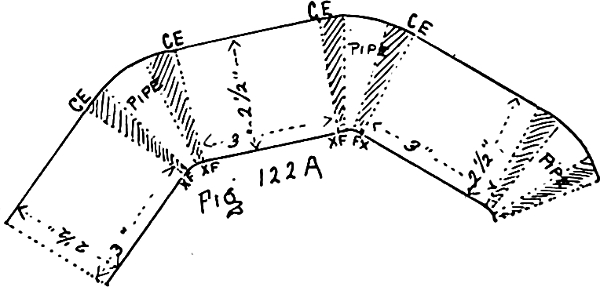
Fig 122A
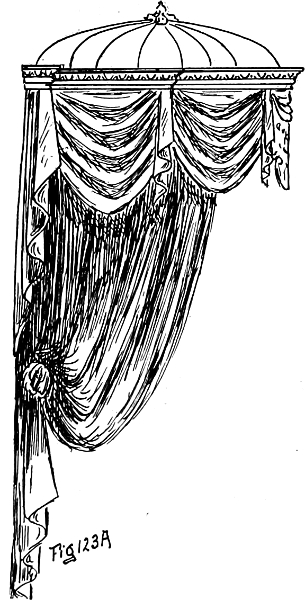
Fig 123A
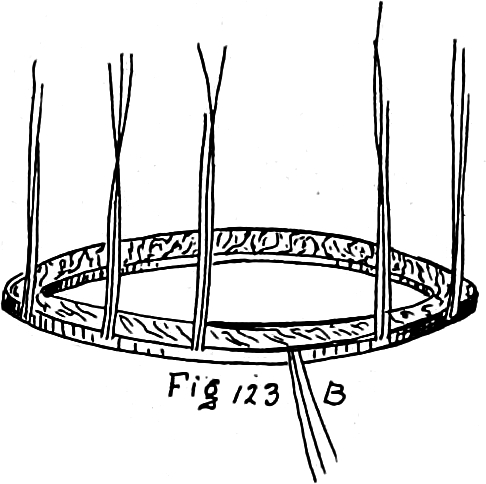
Fig 123B
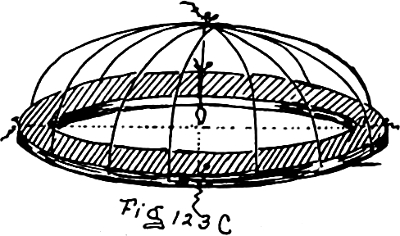
Fig 123C
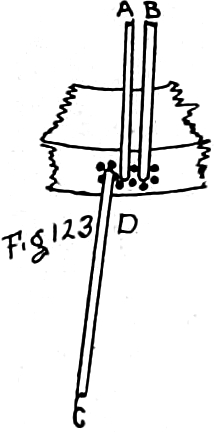
Fig 123D
It is desirable that no wires be permitted to continue across the centre, but that all should turn back, leaving the centre free from the thickness that would[64] be occasioned by the crossing and recrossing of the wires.
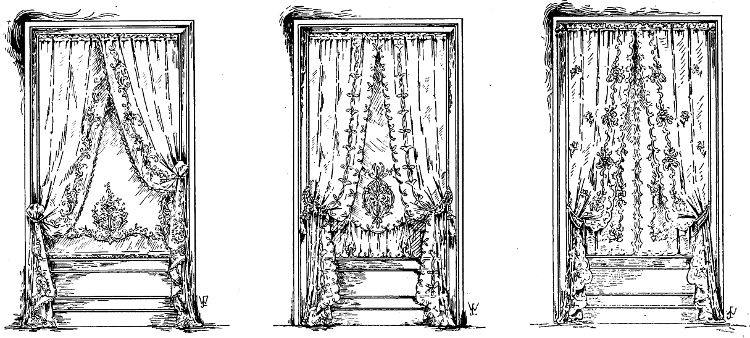
EMBROIDERED LACE CURTAINS AND BONNE FEMMES—IRISH POINT, RENAISSANCE AND MARIE ANTOINETTE.
By crossing twines on the frame and dropping a plumb line over the intersections, the centre of the dome may be kept in line with the centre of the open frame (see Figure 123C).
When the ribs are all in position wire loops are run around the ribbed circle inside, at different heights, to strengthen them and preserve the globular shape. The framework is then covered with canvas, and each panel (the space between two ribs) is padded with some soft material evenly distributed and covered with cotton, after which the covering material is put on, a row of stitching holding all firmly to each rib and a cord covering the stitching.
The drapery beneath the cornice of Figure 123 combines the festoon and straight valance principles which have been already explained in former chapters, and the small drapery above the embroidery is put on separately.
The four-poster of Figure 124 shows the application of a straight box pleat in keeping with the architectural lines of the bed, and any of the draperies shown herewith may be applied to four-post beds if the general outline and style of the draperies conforms to the general construction of the bed itself.
In Figure 125 we illustrate a French canopy which adapts itself very readily to the decoration of brass beds. The dome is formed of panels of buckram or cardboard, cut to shape, and covered with the fabric, plain or pleated; the panels are then sewn together with the baseball stitch, previously illustrated, and a hoop fastened inside the bottom to preserve the shape. If heavy fabrics are desired for curtains, drapery and covering, the dome should be more substantially constructed, as described for Figure 123, dispensing with the molded cornice if desired.
Bed canopies, no matter how light, must be carefully put up and securely fastened to avoid accident.
The back curtains, which appear in almost all of the illustrations presented herewith, are in some cases attached to the side curtains, so that the fabric is continuous from fringe to fringe, those of Figures 123 and 125 being so planned.
The back curtain of Figure 124 is shirred on a rod top and bottom, and stretched into pleats, while those shown in Figures 113, 114 and 115 may be treated similarly, or, as illustrated, pleated into long, sweeping pleats. The material is joined up, allowing nearly half as much again to the width, say a piece 6—- 9 for a 4—- 6 bed, and allow a like quantity (2—- 3) in addition to the required length.
Spread the material out on the table, find the centre of the top, and measure each way on the top edge a distance of eighteen inches; measure down each side from the top corner the distance you have allowed (2——3), and rule from these marks to the extremities of your eighteen-inch marks; add outside of this the allowance for tacking and trimming and trim off the corner, which means that you remove from each corner a piece of material measuring about 20 x 24 inches, and triangular in shape. Tack the straight top to the back of the canopy, centering the goods (3——0) in the space (4——6) and pleat up the biased corners into the remaining spaces at each side.
[65]
Where curtains, while possessing decorative properties, are also to form a complete or partial screen at will, it is essential that their manipulation be simple and easy. For curtains which travel to and fro on a straight pole while hanging at full length traverse cords are effective. This is accomplished by means of two pulleys, as Figure 126, the pulley marked A being a double pulley and B a single pulley. The curtains are pleated up to the required width so that they just nicely fill the space, and are hooked, pinned or sewn to the rings. Place the pulleys in position even with the outer edges of the curtains and thread a small braided sash cord (well stretched) through the single pulley B; carry the doubled cord over to A and measure the distance, the ends will have to fall below A to bring them within easy reach; allow a couple of feet extra on one of the cords, and cut. Without allowing the cords to shift in the single pulley fasten the short cord to D, the right hand corner of the left curtain, and thread the end through the double pulley.
Fasten the longer cord to the corresponding ring at C on the right-hand curtain and thread it through the other groove of the double pulley. By pulling E (Figure 126), the shorter cord, the curtains will separate each way from the centre, and as this cord descends the F cord ascends, the cords traveling in the direction of the arrows, and by pulling F the curtains draw together again.
Adjust the cords so that when F, the closing cord, is taut the curtains will meet exactly in the centre of the pole, and also so that E, the opening cord, is a foot higher than F when the curtains are closed.
Finish the cord ends with a weighted tassel, and, as will readily be seen, it is only necessary to pull the higher tassel at any time to alter the position of the curtains.
To insure easy manipulation, it is necessary to have the rings large enough to travel freely upon the pole, and if the curtains are heavy the rings should be provided with small wheels or rollers which run upon the pole. The rings should also be free from any projections that would catch the cord, and the hooks or pins should have the points bent back into the fabric so that the cord cannot get caught thereon.
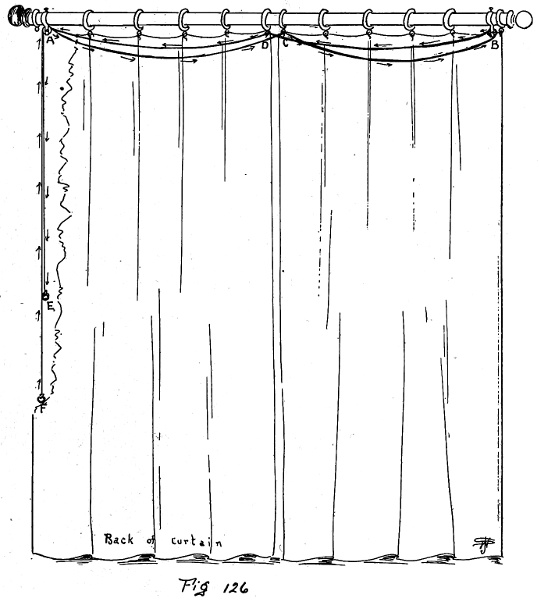
Fig 126
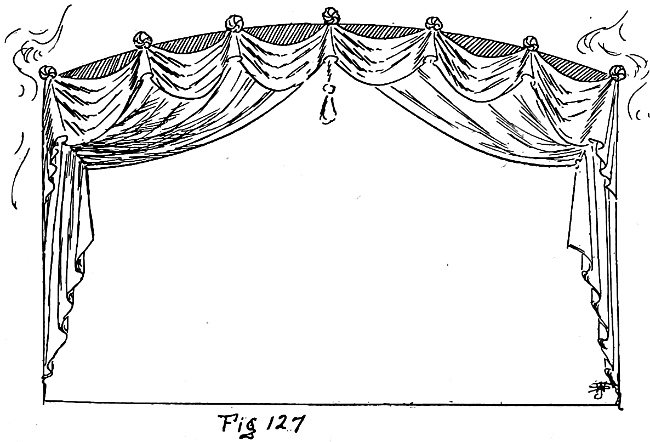
Fig 127
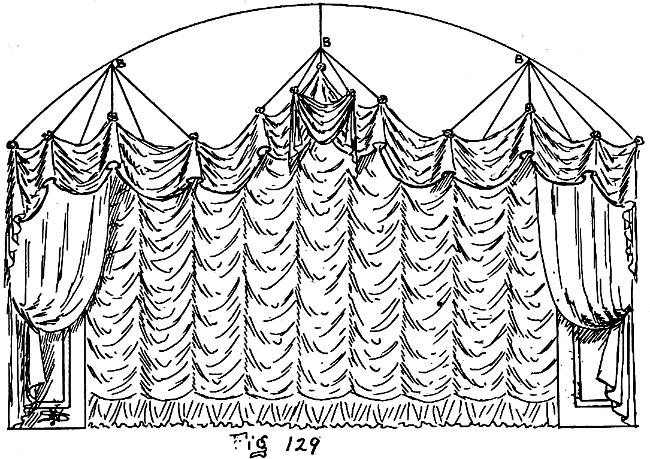
Fig 129
This method is employed for sun or draught curtains, and sometimes for small concert curtains. Another method of curtain manipulation in which the[67] curtains draw up in drapery form is illustrated by Figure 127. To accomplish this effect the pair of curtains are pleated to size, as back view Figure 127A. Spread flat on the floor, and with a cord attached at A, the inside corner of the curtain, a quarter circle is struck from the outside corner to a corresponding position on the front edge of the curtain.
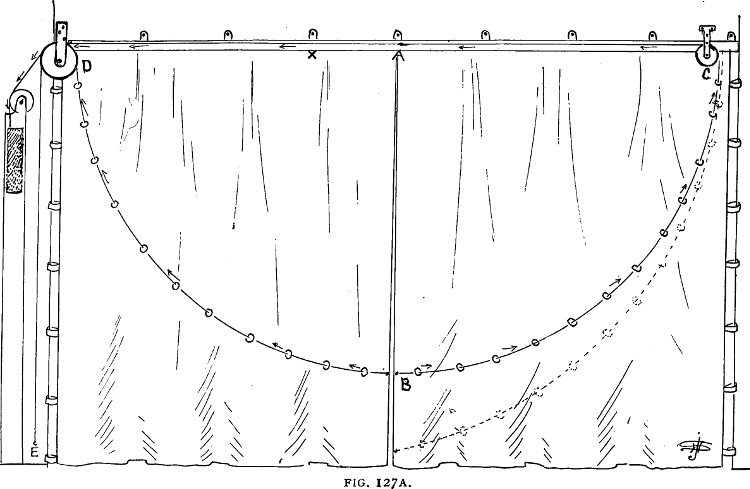
FIG. 127A.
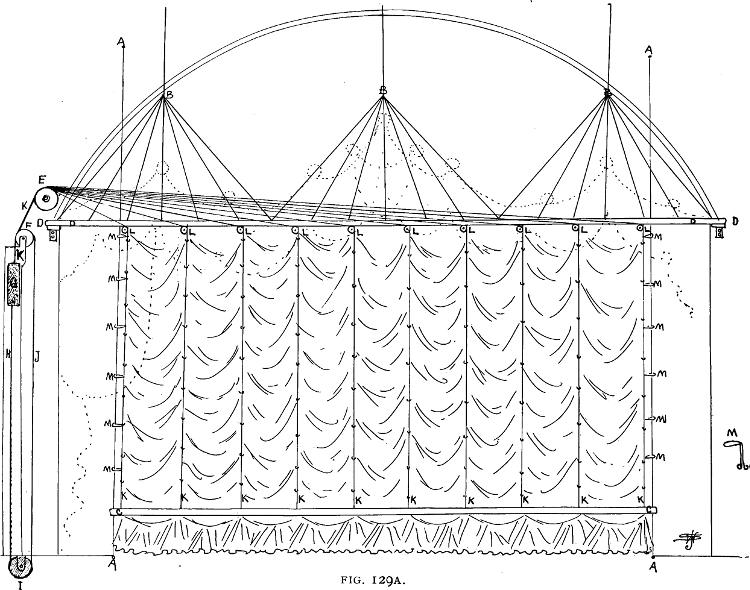
FIG. 129A.
Rings are sewn to this line, and a cord which is attached to B is threaded through the rings, passed over a pulley at C, and across and over a large pulley at D, and brought down to the floor, as E.
A pull on the cord at E now causes the cord to draw up through the rings on the curtain, the material gathering into folds because of its weight, and the release of the cord allows the curtain to swing back again into place. By arranging both curtains in this manner and drawing them simultaneously a pretty draped opening is produced, as Figure 127.
For a heavy pair of curtains, attach the cords, after passing over pulley D, to a counter weight, and either attach a separate cord to the B cord immediately above A, the centre of the curtains, and bring it over D and down to F, so that a pull at F sets the pulley and weight in motion; or arrange as explained later for Figure 129A.
If it is desired that the front edges may draw completely up to the pulley, forming two festoons, as Figure 128, more sweep must be allowed on the front edge than on the top, and can be easily calculated by moving the stationary end of the marking cord out beyond A the distance desired to give the required sag to the bottom edge when drawn up (see X, Figure 127A, and the dotted sweep).
Figure 129 illustrates a drop curtain made after the style of Austrian shades, as explained in the chapter on blinds and shades. The back view (Figure 129A) shows the method of running the lines to a counter weight, which balances the weight of the curtain and is controlled by two lines—J, leading from the weight to the small pulley F, and down to the floor pulley I; H, the other line, leading from the weight down.
As will be readily seen, this line is continuous from the top of the weight around to the bottom of it, and the curtain is raised by pulling line H, which lowers the weight and is lowered by pulling line J.
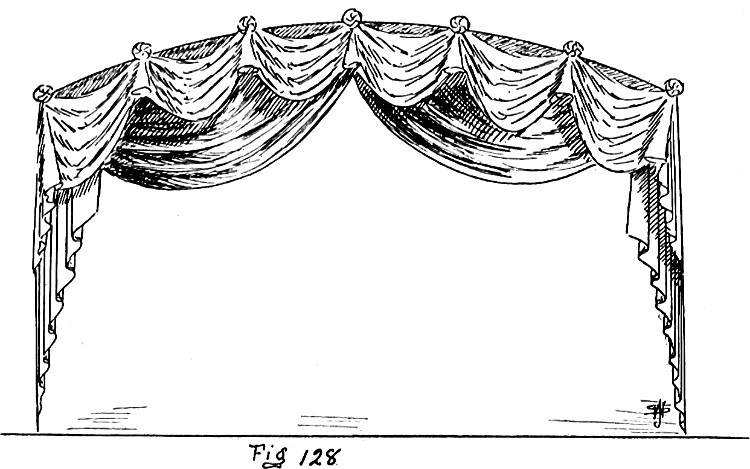
Fig 128
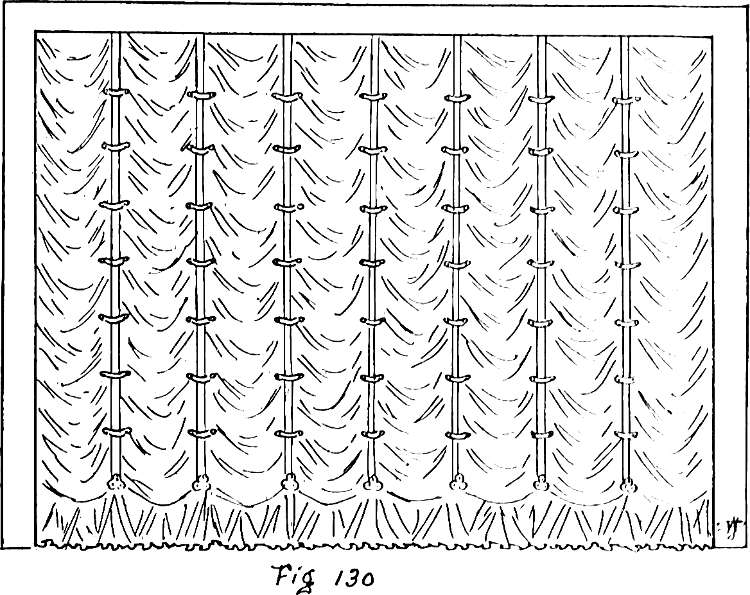
Fig 130
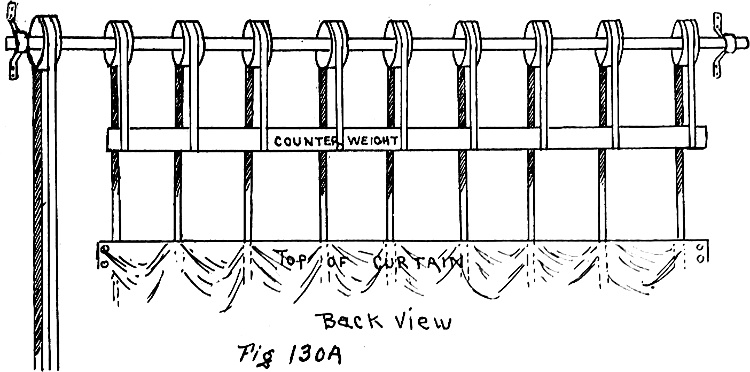
Fig 130A
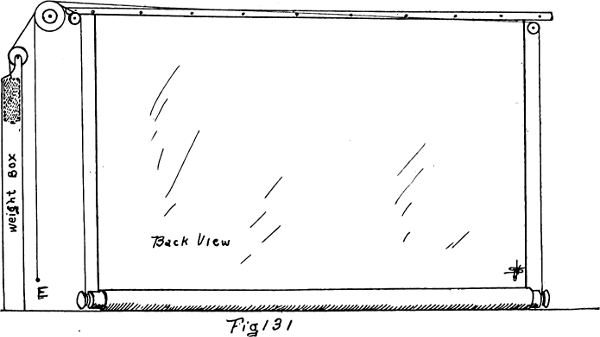
Fig 131

Fig 132
We have used the plans outlined by Figures 127 and 129 for temporary drop curtains forty feet high by eighty feet wide with complete success. The back view of Figure 129A illustrates the method employed for swinging a temporary drop curtain of these dimensions across a hall that had no curtain facilities, bare walls and rounded ceiling, it being accomplished[68] by three groups of stay lines (B) drawn up through the ceiling, each line adjusted to the proper tension while slightly hoisted, and the curtain itself attached to batten D, which is built up of 1 x 4-inch stuff to aggregate 2 x 4 inches. The top of the curtain remains stationary, the bottom shirring to the desired height, the deep flounce forming a decoration to the bottom edge when in either position.
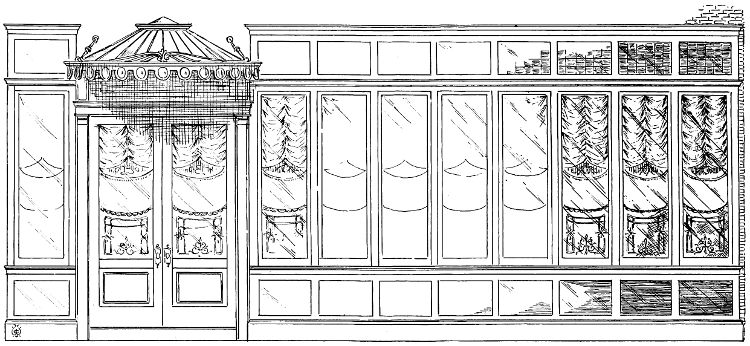
BRISE-BISES SUSPENDED FROM CURVED RODS AND AUSTRIAN SHADES THAT CURVE TO MEET THEM.
The drawn lines K are attached to the bottom batten C, and are adjusted evenly over the individual pulleys L, and all carried over E and attached to G, the counter weight. To prevent the draught from blowing the curtain out small loops of stiff wire, as M, Figure 129A, are attached to the sides of the curtain, and traverse freely up and down the guide wires A—A.
Should a curtain of this sort be desired as a permanent theatre curtain, it may be prettily made as Figure 130, which is drawn up by means of strips of webbing or leather, which pass through covered metal keepers on the face of the curtain and are attached to the bottom batten.
These pass over pulley wheels at the top, as Figure 130A, and are fastened to a bar counter weight which balances the weight of the movable portion of the curtain, and is put in motion by causing the shaft to revolve in the desired direction. The theatre curtain which rolls from the bottom, as Figure 131, is fastened to a batten at the top and a roller attached to the bottom. The method of constructing the roller is shown in Figure 132. A sufficient number of six-inch circles of clear pine are procured to allow of one being placed every twelve inches, and these are sheeted round with ¾ × 2-inch strips of clear, straight pine, kiln dried, each piece securely fastened with screws to every circle it touches, and the joins all made where supported by a circle. The whole roll is then wrapped with a strip of coarse canvas plentifully supplied with a solution of hot glue, care being exercised to keep the wrapping uniform and tight.
The roller is made long enough to contain a large spool at each end, and works equally well at the bottom of the curtain, where it rolls up with it, or at the top, where it revolves in brackets and winds the curtain up. The rope which causes the roller to revolve is first wound around the spool a couple of times when the curtain is altogether rolled up, and as the curtain is unrolled, the spools take up a sufficient quantity of rope, so that pulling the rope causes the spool to revolve and the curtain to roll up.
Some of the more recent theatre curtains are stretched on a frame like a picture and rise flat, like the lower sash of a window. They are not difficult of manufacture, but require that the proscenium and fly loft be as high again as the stage opening, and the curtain is arranged with counter weights and side guides, as Figure 129A.
If you consider the batten D of Figure 129A as the top of the fly loft, and batten C as the top of the curtain, the lines K are correctly placed to raise the curtain until C comes in contact with the pulleys L. The whole frame will have then been drawn up this distance, and it is only necessary to have batten D high enough to permit of the curtain being drawn out of sight.
We show the hand line E on Figures 131 and 127A to illustrate its position if the curtains should be manipulated by hand without a counter weight, but for permanent curtains the plan of 129 A, with the continuous operating line, will be found much better.
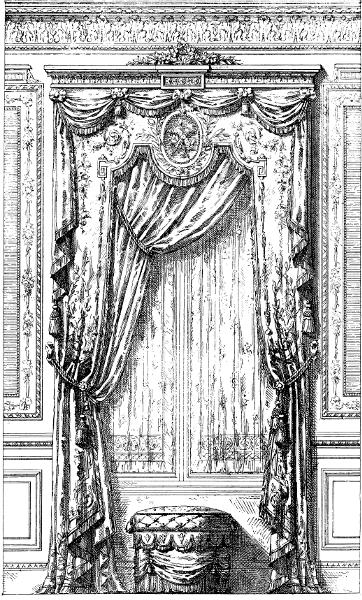
LOUIS XVI
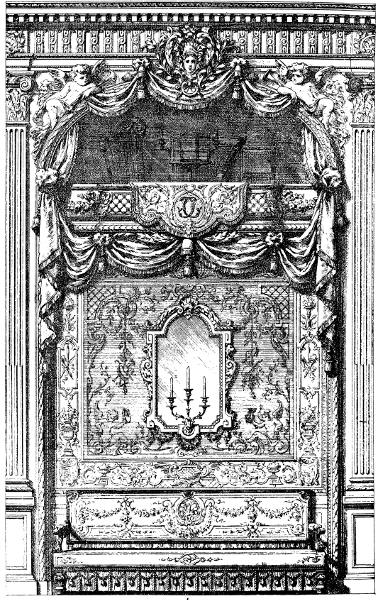
LOUIS XIV
[69]
That there is a knack in the selection and disposition of furniture beyond the haphazard placing of odd pieces inside four walls is a fact admitted by housekeepers generally. That this knack is possessed in a very limited degree by the average housekeeper is impressed again and again on the mind of the observant decorator.
We have heard the statement that houses decorated and furnished by the professional decorator lack that something—that indefinable charm—which can only be imparted by the touch of the homemaker woman. In other words, that man can make houses but woman makes homes. This is beautiful as a theory, but as a matter of fact the average drawing-room—woman’s particular care—contains enough incongruities to shock the artistic sense of the most liberal-minded of decorators.
The writer does not lay claim to any special dispensation of taste nor any extraordinary degree of artistic training, but he has seen scores of rooms which by their furniture selection and arrangement were a jumble of inarticulate profanity and defeated the purpose for which they were intended.
I have in mind the drawing-room of a wealthy dry goods merchant (who is something of a curio hunter), that is, considering the individual pieces, rich and sumptuous, but the assembled whole is such a conglomeration of style, design and color that it gives one the impression of a bazaar.
Another expensively furnished drawing-room which occurs to my mind imparts to the observer a feeling of strangeness. The various pieces are not only unrelated, but are so conspicuously separate in style and purpose that they are not even acquainted.
Then there are drawing-rooms that are so repellent because of their military austerity that the back of the visitor unconsciously stiffens and he feels that his entrance is presumptuous.
We have purposely drawn these descriptions in an exaggerated sense that we might in some measure give point to our statement that every room of a house should have as the fundamental purpose of its creation the comfort of mankind. And as man is many sided in his nature, having many moods and needs, these different moods create the necessity for a varying environment suited to the complexity of the hour.
Thus we have a sleeping-room, a dining-room, a reception-room, an entertaining-room, a cooking-room, and so on, each designed and furnished to create the atmosphere and stimulate the spirits of the occupant to the mood which the environment best serves.
The man who told his friend in confidence that the architect wanted to put a drawing-room in his new house, and he supposed he wpurposeould have to have it, though it was no earthly use to him, for he couldn’t draw a straight line, was in his way thinking pretty close to the line of purpose in home making, which should be the dominant factor in the furnishing of every room.
A sleeping-room should be not only provided with a bed and its complement of clothing, but in its location, furnishings and color theory should suggest restfulness, simplicity and repose. That this might be more easily produced, we would suggest the use of modified color and slight gradations of tone throughout, using a monotone or duotone carpet of a modified shade (a normal color is modified by the addition of white and intensified by the addition of black), a lighter shade of the same color introduced in the movable furnishings, as furniture and hangings, lighter shades still in the side-wall and frieze, and modified to the barest suggestion of a tint in the ceiling.
Avoid stimulating contrasts and keep to the same balance or modification of color where the slight contrasts are introduced.
For the living-room heavier colors and sharper contrasts may be introduced. But the same strength of color should be present in all contrasts, that the sense of balance be maintained. In the living-room will be assembled those with varied interests and purposes. So there will be present more or less of a jumble of different things which for the moment interest the various members of the circle. Consequently more license is permitted in the furnishings. But those things which by their design or construction suggest austerity or dignity should be forever banished from this room. In fact, we know of no room in the modern house where there is space to waste on furnishings which suggest or actually impart discomfort.
The dining-room should be cozily, even joyously, furnished with those colors and designs which suggest strength and satisfaction. No half-way colors or designs will answer here. The tones used must be full, rich, satisfying, and the furniture should complete the suggestion. The prevailing styles of dining-room furniture—particularly of the chairs—seem to have been purposely planned utterly devoid of comfort, that the occupant might not even for a moment be lulled into forgetfulness of the business at hand, but be urged to prosecute it with dispatch and seek comfort elsewhere.
Much the same thought seems to have established the prevailing styles of hall chairs and seats. Truly,[70] if the chance guest who must needs occupy one of them until his identity is established should judge of the hospitality of the host by the comfort of these furnishings, he would make haste to depart while his wearied limbs could still perform their office.
The reception-hall and drawing-room are, perhaps, the two places most anxiously considered in the planning of the house. There seems to be a mistaken idea that these places, which are most seen by strangers, should be furnished as an advertisement of the financial standing of the owner. No matter how much the rest of the house may suffer, these places must be lavishly, even extravagantly, replete with everything that custom ordains as necessary to a stylish house. Against extravagance as to value we have no quarrel, provided all things are in keeping, but we do oppose the garish assembling of costly goods which do not make for comfort or beauty or utility. Have extravagance if you will, but not riot; luxury, but not profusion; comfort, but not stock display.
As to the arrangement of the various pieces of furniture we would strongly advise a study of nature’s scheme. Note the variety of shapes and sizes of the trees of the forest; the broken, sympathetic, undulating surfaces of undisturbed mother earth. Note how well acquainted and even familiar the various parts of the landscape seem to be; how the tall tree nods and reaches down to the short one and the low one reaches up to the high one; how the knoll sweeps gracefully down to the level glade and how the glade runs up to the knoll.
Everywhere is the charm of related variety and harmonious grouping of equalized differences.
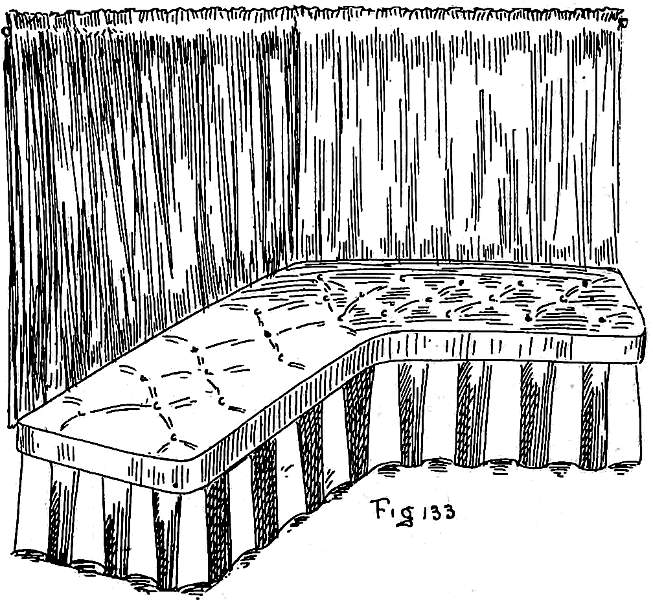
Fig 133

Fig 134
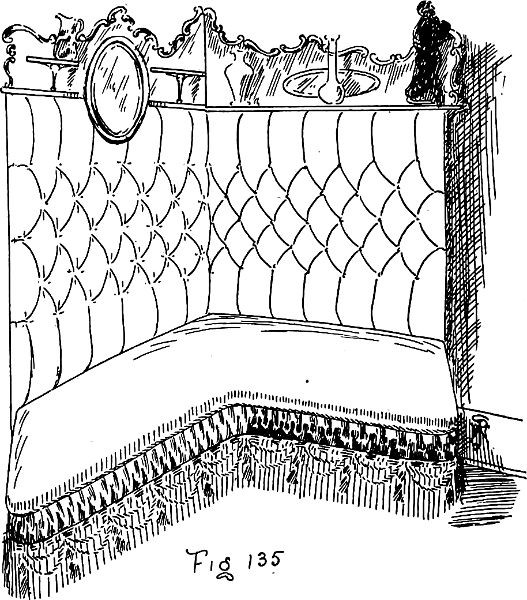
Fig 135
Everything in nature is formed and placed for purpose, and here is the keynote of harmonious interior arrangement. For instance, here is a drawing-room with appropriate and well-chosen pieces of furniture. How then shall we arrange them?
Imagine the room peopled with a chattering gathering of average people. This stout all-over-upholstered armchair would be occupied by one of the portly members of the group, and as these persons would by contrast appear larger and more portly in contact with those of lighter build (a chance of comparison which they studiously avoid), we will dispose the heavier pieces of furniture, if not altogether removed from the lighter and more frail, at least with intermediaries between in the shape of pieces which possess, in a measure, the characteristics of both.
Preserve the balance of the room by distributing the weight much as you would if it were a disk revolving on a central point. If there is a mantel here on the left, over there somewhere on the right would be a good place for the upright piano. If the cosey corner is in the southeast corner, then the eye instinctively seeks a corresponding piece of capacious seat room in the vicinity of the northwest corner. Continue this thought. Seat your imaginary guests in négligé conversational groups, drawing some of the pieces confidentially near to each other, and you will in a great measure have solved the knack of pleasing furniture arrangement.
To reach this consummation we said that the articles were in the first place appropriate and well chosen, and this, of course, must be the basis of the furnishing scheme.
If we might, we would plead for greater simplicity in furniture selection, less of the garishness and more of the subpurposestantiality of goods built to satisfy and to last; not necessarily the cumbersomeness of Mission, but the pleasing styles of Sheraton’s work, where strength was clothed with grace of outline and disguised with unobtrusive ornamentation. We look for a style somewhat similar in character and purpose to grow out of the present Arts and Crafts and Mission,[71] which have appealed so strongly to ornament-satiated appetites; that grace will be added to strength, and chaste ornament to simplicity of construction.
COSEY CORNERS.
All that has been said in regard to appropriateness in general furnishings is true in a concentrated sense of the cosey corner. Applicable and suitable in almost every room of the house, it should be all that the name implies. The simple desire for its possession should be no excuse for its introduction in a location where coziness or even comfort would be an impossibility. A cosey seat should never be placed in a position where its presence would constitute a nuisance, as before a window or in a doorway. It usually appears lonesome away from the wall, and as its atmosphere is retiring it should occupy the least conspicuous position. It is not intended as a single seat, and should therefore be fairly commodious but not oppressively large. And, above all, it should be comfortable.
As to color, the cosey seat and all other large upholstered pieces should follow the dominant color tone of the room, the contrasts being introduced in the smaller pieces.
We illustrate a few of the treatments which serve this useful purpose and conform to the prevailing thought in regard to style, shape and general utility.
Figure 133, one of the common types, is constructed of a bench seat, loose cushion, box pleated valance, and curtain back. In suitable covering this style could be introduced in almost any room of the house, but is most used for den, sitting and bedroom corners.
Figure 135 illustrates apurposen all-over-upholstered seat and back with bric-à-brac shelf. This style is capable of a great deal of elaboration and is much used for reception and drawing-rooms. Made with a polished wood frame instead of the stuff-over, it is much more dainty in rooms where the other furniture is delicate and of the show wood variety.
Figure 134 is a heavier type and more after the style of Arts and Crafts. Built to conform with the other furnishings, this style is very appropriate for dining-room, library, hall, club or den corners and lends an air of solidity to the room it occupies.
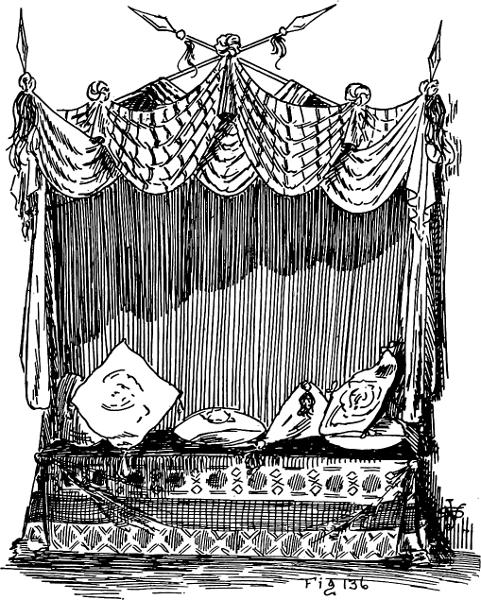
Fig 136
Figure 136 illustrates a den seat with over canopy—the seat is provided with a loose couch throw or cover and the canopy is made up of two scarf draperies and a pair of curtains with a shirred roof of a plain color to match the draperies.
There is opportunity for a great deal of ingenuity in the construction of these fitments, and by following the motif or theme of the general furnishing scheme of a room you will have little difficulty in evolving fitments that will not only suit their environment, but will be an artistic addition to the furniture of the room.
WALL-HANGINGS.
If the walls of a room are covered with a fabric there is usually less difficulty in working out a complete scheme of color harmony, and for that reason the use of fabric wall coverings is usually recommended by the decorator who undertakes the complete furnishing of a room or suite.
Although there are little tricks and wrinkles for the application of special fabrics to special places which are acquired by practice, in the main wall covering is quite simple.
In Figure 137 we show the plan of a room measured for covering. The walls are drawn as if they had been pushed out flat like the sides of a cardboard box. Each wall is measured separately, and the positions of doors, windows, recesses and projections accurately indicated on the plan by the proper measurements.
To cut the sections for a wall such as we illustrate commence with section 1 and each separate section is cut and matched to the preceding one, so that the pattern will be continuous around the room; this requires nice calculation to allow for the quantities of pattern that are consumed by the tacking and back tacking in the angles, but an allowance of two or three inches extra each way will usually be found sufficient to allow of the pattern being matched, provided the lengths have been cut at the same pattern.
Upright seams only are permissible in wall fabrics, and these should be as few as possible and perfectly plumb.
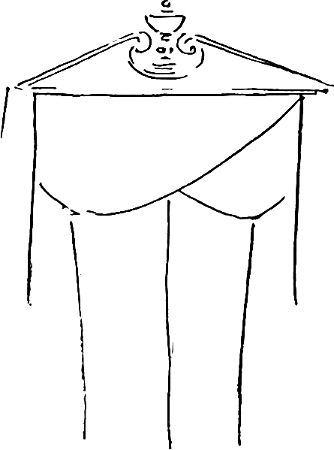
After having cut the first length with about three inches extra for handling, if the next length when matched would cut to waste, try one of the shorter lengths or two of the short ones together—if this still causes waste try the other end of the goods—never cut goods to waste until you[72] have exhausted every expedient you know to avoid it.
Fig 137
Beveled wall strips, as Figure 138A, are placed at top, bottom and both sides of every separate space as well as around all projecting frames, as windows and doors; these are securely fastened to the studding by nails or screws, and all holes in the plaster covered with pasted paper to prevent dust sifting out.
The double lines of Figure 137 illustrate where beveled strips are necessary and provide for two in every angle corner and two also on the face of each projecting corner.
One of those, however, used in each angle, as number 2 of Figure 138B, is only temporarily fastened at first. Commencing with section 1 cover the walls first with shaker or canton flannel lining tacked smoothly and evenly on the strips, as Figure 138; next spread the covering out, attaching it temporarily to the top strip until you get it in place, then commencing in the centre at X tack each way, keeping the edge straight and tight, but not stretched. Drop a plumb line from the top over the centre seam and stretch the seam down as the line indicates, tack it temporarily, and do this with all the seams; now pull down half way between the seams and tack permanently, halve the two spaces thus made and tack again and continue halving and tacking until the bottom is all tacked in place, taking care to stretch the goods so that the pattern is perfectly straight at the bottom.
Now stretch each side and tack it closely into the angles, as the tacks on strip number 1 must be covered by the thick edge of strip number 2, Figure 138B; now take the loose strip number 2 which was removed to allow the tacks to drive close up into the corner.
After matching the exact part of the pattern which is to turn in of the next section, tack the marked edge of goods to the back edge of strip 2, nail the strip in place so that there is no gap between the two angle strips. Cover the wall with lining and stretch the cover across from the tacked side, fasten it temporarily and then commencing at the side which is fastened permanently tack across the top, keeping the top tight, but not stretched, stretch down and plumb the seams and finish as before.
The detail of procedure for Figure 137 would be as follows: Section 1 tacked all around. Section 2 back tacked at B stretched around C and to tack at E. Section 3 back tacked at E and stretched to F. Section 4 backed tacked at F and stretched around G to H. Back tack Section 5 at H, stretch to I. Back tack 6 at I, stretch to J. Back tack 7 at J, stretch around K and L to M. Back tack 8 at M, stretch to N. Back tack 9 at N, stretch around O to angle P. Back tack 10 at A, stretch around S to R. Back tack half of 11 at R and half at P, and stretch each to join at L, which has been chosen as the smallest place for a join to be made by hand.
Fig 138
Fig 138A
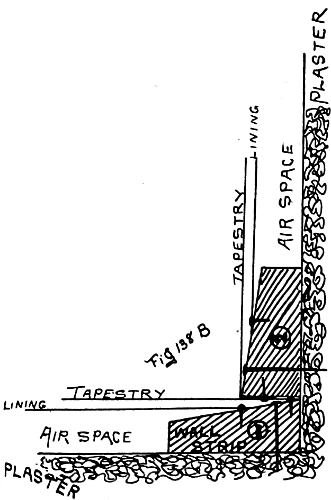
Fig 138B
Finish at top and bottom and around windows and doors with a gimp or molding, and the room is complete with continuous pattern and every tack concealed.
[73]
Awnings are naturally divided into two classes—house awnings and store awnings. Of the first, Figures 139, 140 and 141 illustrate the kinds of windows most frequently met with. Figure 139 is an ordinary square top window, of which Figure 142A is a side view in skeleton, showing the method of attaching the frame to the window, and also the relative size of the awning to the window.
To measure this window for an awning, measure the width of frame from centre to centre (A—A), and half the distance from the top of the frame to the sill, with three inches added (A—B). These measures are simple, but should be carefully taken to ensure a good fit. Take note also of any projections of stone or brick which would prevent the awning fitting closely to the frame all around, and be sure to allow for these when making the awning.
Figure 141 is measured in like manner, and a record also made of the depth from the top of the centre to the top of the straight side of the frame (C—B). The round top (Figure 140) is measured for width and height as the foregoing, but the height of the circular sweep must also be taken. Stretch a tape or cord across at B—B, the spring of the arch, and then measure the distance from this to the top of the frame (B—C). If the windows are so constructed or are in such a position that a projection of three inches more than half the height would not be permissible, a measurement must be taken for projection also; but if there is nothing to interfere with this amount of projection the height measurement will be sufficient to determine the amount of projection.
When ready to cut the goods, mark out on your awning table (which should have a top measurement of at least 5.0 x 8.0, and larger if possible) the measurements as follows: On one end of your table (Figure 143) draw a line across it parallel with the end and eleven inches from it. Now, attaching a tape at A, one end of your line, measure across to B, the projection of your awning (A—B, Figure 139), which is half the height of the window and three inches extra. Place a tack at B, the point thus determined, and then measure up the table the height of the awning (in this case the same as the projection). Place a tack at this measurement (D) also, and chalk a line across the table; fasten the tape at tack D, draw it across to tack B and down to C, the end of the table, as indicated by the heavy line; add a couple of inches for hems, and this measurement represents the length of the top of the awning.
Plate 155 is a ready-reckoner for quantities required for the sizes therein contained when the projection and height are the same. To find the height required for the top of a given size, take, for instance, 3.0 projection by 3.0 high (3.O x 3.0), the top measurement is 4.3; add 1.0 for curtain and the total 5.3 is reached.
To determine the number of widths required to make the width of the awning, refer to the width table, which gives the finished measurement of different numbers of widths when joined together. Cut a sufficient number of lengths the size needed as measured from D to C and join them up to aggregate the width of the top of the awning. To cut the ends draw another chalk line eleven inches beyond point D on your table and mark the projection on it (F, Figure 143) and rule from F to C, the end of the table, cutting through B; snap a chalk line from B to D (as heavy line, Figure 143). Take a flexible slat, and placing it against the tacks at D and B, bend it an inch beyond the chalk line at G; mark the curve thus described as dotted line and repeat on the other side of the line. Cut out along the two curved lines and across at F, which will give you two complete ends, and if the goods are reversible (i. e., the same on both surfaces), by turning one end over these two form a pair.
Should the goods not be reversible, and there are two awnings to make which are the same size, mark one set (as Figure 143), and the next set biased from A to H, and this will give you two pairs of ends. Or, if only one awning is to be made, and the goods are not reversible, each end is planned out separately by ruling the pattern (as Figure 143) and piecing the goods out to fill the space outlined by D—B—C and I.
To assemble the pieces the ends are joined to the top, as indicated by figure 144, the edge of the top forming a binding over the biased edge of the end (see Figure 144A, a cross section of the seam). Scallop the bottom edge as indicated by dotted lines, so that each stripe centres in the scallop (as Figure 144) and sew a two-inch strip or band of the duck on the inside of the awning to receive the iron, as indicated by dotted lines, Figures 144 and 145. Figure 145 also indicates where patches of the same material, about four inches square, are sewn to the top (inside) to reinforce the rings through which the ropes pass, and the method of attaching the rope to the iron, small openings being left in the band for this purpose.
Awning rings are sewn along the top edge at intervals of six inches, and also one at each end of the band, as X, Figures 144 and 145. Mount the awning by sliding the iron through the pocket between the[74] band and the awning proper; thread the ropes through the rings so as to lead to the right side of the awning from inside the room, as Figure 145, and as Figures 142A and B, which show an awning iron in position, but uncovered to show the roping.
Fig 139 Fig 140 Fig 141
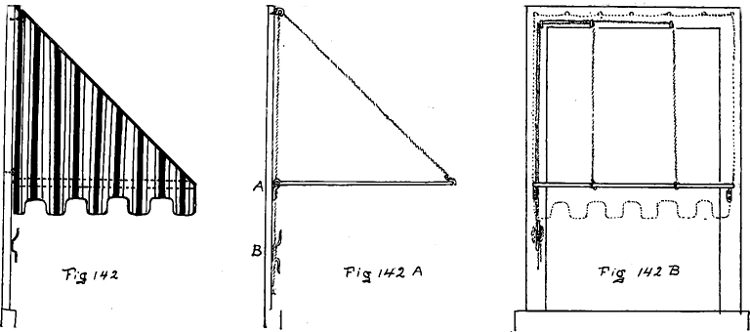
Fig 142 Fig 142A Fig 142B
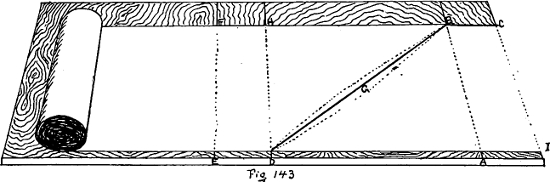
Fig 143

Fig 144 Fig 144A
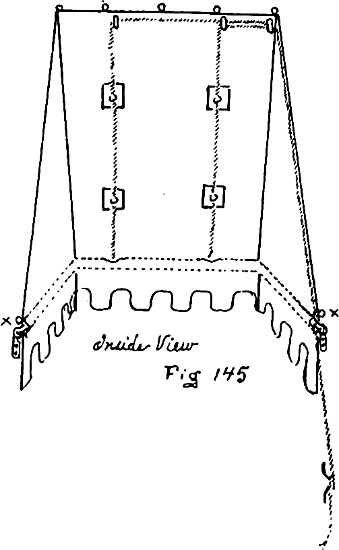
Fig 145
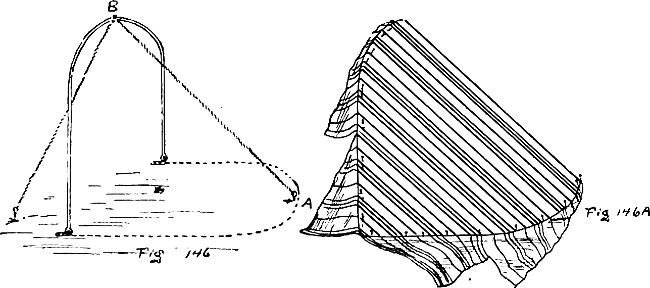
Fig 146 Fig 146A
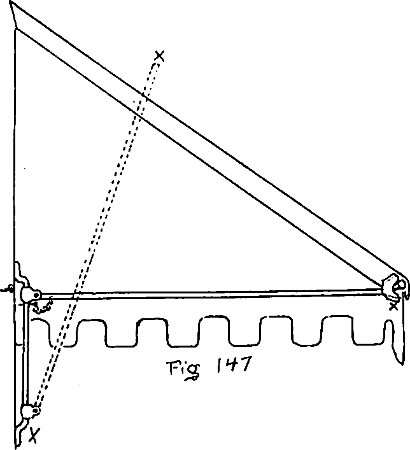
Fig 147
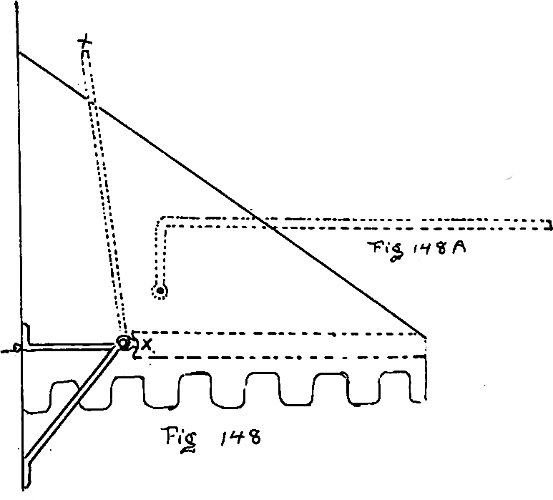
Fig 148 Fig 148A
Fig 149 Fig 149A
Fig 149B
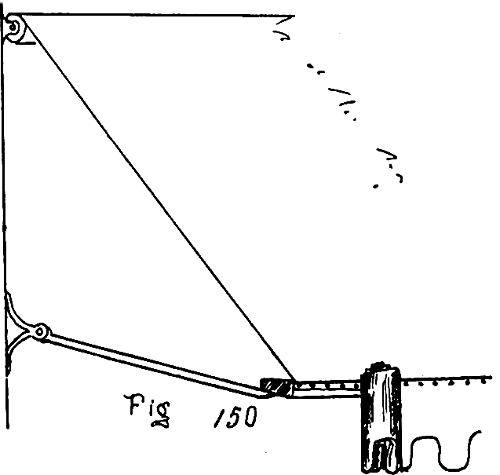
Fig 150
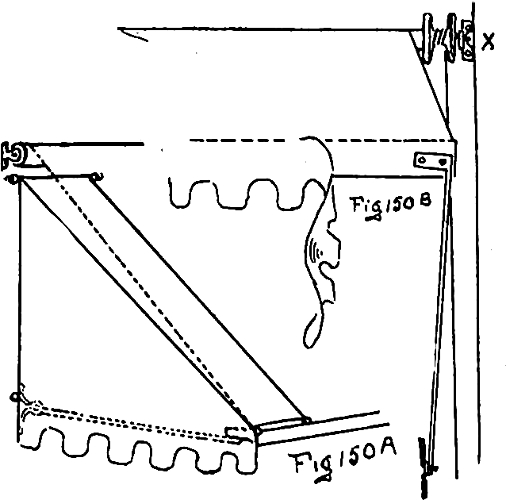
Fig 150A Fig 150B
Fig 150C
[75]
To put up the awning, fasten the cleat B (Figure 142A) in position, then, by measuring the positions of the ropes on the front of the iron, determine where pulleys or screw-eyes will have to be placed to be in line with the ropes; put these in and pass the ropes through them, pull up the awning and fasten the ropes to the cleat. The weight of the awning is now held in position, and it is a simple matter to put in the hooks at the top, one for each ring. Lower the awning until it hangs in position (as Figure 142), the iron supported by the cover. Adjust the feet at A (Figure 142A), so that the iron hangs square and true, and fasten them in place. Test the ropes to see that the awning raises properly and easily, and the job is complete.
For round elliptic or shaped tops, as Figures 140 and 141, we prefer to cut the awning from the iron itself. Fasten the iron to the floor (as Figure 146) and then let it lie flat, as dotted line, while you mark out its shape and dimensions on the floor. Raise it again to the perpendicular and fasten it with a cord, as indicated, so that it will stay in an upright position. Measure the distance from A on the dotted line to B on the iron; allow a couple of inches at each end for hems, and cut a length this size.
Try this on the iron and dotted line, and measure the length for the next piece to join to this one. Repeat this until enough are joined to reach around the iron, and commencing in the centre of the iron and dotted line pin and tack the goods smoothly to the shape thus outlined, working all the fullness out to the corners (as Figure 146A). Mark the line described by your tacks, which have followed the dotted line on your floor, and mark the goods on the edge of the iron all around; allow for seams beyond these marks and cut the surplus away. Turn a half-inch hem around the edge marked on the floor and sew rings to it for the top edge. Cut and scallop a piece long enough to go around the length of the iron and sew this to the edge of the cover where marked on the iron. Lay the scallop and cover face to face and take an ordinary seam, so that when the seam is opened out the raw edges will be on the under side; sew a two-inch band beneath this seam for the iron and patch and rope it as before.
This is the simplest and most certain plan of getting any shape other than square to fit the iron properly.
The foregoing methods apply to all iron-frame awnings where the height equals the projection. It is sometimes required, however, that the projection. be greater than the height, that the necessary shade be obtained and not have the frame so low that it would interfere with ordinary traffic beneath it.
To overcome this difference slides may be used, like Figure 147, which permit the iron to drop to their lower ends, as X—X, dotted bar, when drawing up the awning, and the irons are pushed up and pinned, as illustrated, when the awning is fully extended. Awning covers for irons with slides have a band on the front edge only, as side-bands would prevent the iron from descending the slides. The bottom corner of the awning is held in place by a ring and hook at the top of the slide.
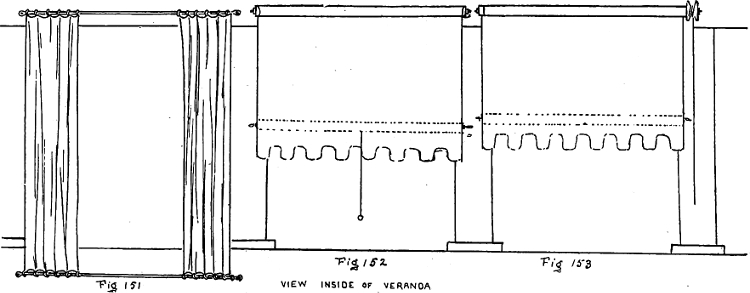
Fig 151 Fig 152 Fig 153
VIEW INSIDE OF VERANDA
| Width | Projection | Feet of Iron |
Yds of Duck |
Projection | Feet of Iron |
Yds of Duck |
| 2-0 | 2-6 | 7 | 3⅜ | 3-0 | 8 | 5⅛ |
| 3-6 | 9 | 5⅔ | 4-0 | 10 | 6¼ | |
| 4-6 | 11 | 7⅛ | 5-0 | 12 | 8 | |
| 2-6 | 2-6 | 7½ | 3⅜ | 3-0 | 8½ | 5⅛ |
| 3-6 | 9½ | 5⅔ | 4-0 | 10½ | 6¼ | |
| 4-6 | 11½ | 7⅛ | 5-0 | 12½ | 8 | |
| 3-0 | 2-6 | 8 | 4½ | 3-0 | 9 | 5¼ |
| 3-6 | 10 | 6 | 4-0 | 11 | 6⅔ | |
| 4-6 | 12 | 7½ | 5-0 | 13 | 10 | |
| 3-6 | 2-6 | 8½ | 4½ | 3-0 | 9½ | 5¼ |
| 3-6 | 10½ | 6¼ | 4-0 | 11½ | 6⅔ | |
| 4-6 | 12½ | 9¼ | 5-0 | 13½ | 10 | |
| 4-0 | 2-6 | 9 | 4½ | 3-0 | 10 | 5½ |
| 3-6 | 11 | 6¼ | 4-0 | 12 | 8 | |
| 4-6 | 13 | 9¾ | 5-0 | 14 | 10½ | |
| 4-6 | 2-6 | 9½ | 4⅔ | 3-0 | 10½ | 5⅔ |
| 3-6 | 11½ | 7⅔ | 4-0 | 12½ | 8 | |
| 4-6 | 13½ | 9¾ | 5-0 | 14½ | 10½ | |
| 5-0 | 2-6 | 10 | 4⅞ | 3-0 | 11 | 6⅞ |
| 3-6 | 12 | 7⅔ | 4-0 | 13 | 8⅔ | |
| 4-6 | 14 | 9¾ | 5-0 | 15 | 10½ |
Figure 148 illustrates another method of obtaining[76] a greater projection than the height by using an extended bracket, the iron throwing up as dotted bar X—X; while dotted bar, Figure 148A, would give greater projection, still on the same bracket, by increasing the length of the bar and lowering the bracket till the straight part of the bar is on a level with the front of the awning.
For awnings wider than 6.0, with a projection of 4.0 or over, the iron is usually made in three sections (as Figure 149), and if more than 9.0 wide a centre support is put in like Figure 149A. Small store awnings may be made as above, but for large sizes roller awnings (as Figure 150) will be found much more substantial and easy of manipulation.
The roller is either made of iron tubing wrapped with canvas and the duck sewn to it, or it can be built up of wood (as Figure 150C), the laps or joints wound with band iron and the whole securely nailed together.
Plate 155
Put an iron hoop on each end to keep the pin from spreading it, and provide one end with a spool (as X, Figure 150B). The rope is attached to and wound upon the spool and the roller put in the brackets. If the roller is long enough to require a centre support, Figure 149B provides an excellent bracket. The side arms are placed in position as indicated in Figure 150, so that they will throw up straight with the edge of the bar in line with the roller (Figure 150B). The bar is made of clear straight pine 2 × 4 inches, and the duck is first tacked to the roller and then to the bar, as Figure 150.
The ends are made and attached, as illustrated by Figure 150A, and need not be further explained. The awning is manipulated by pulling the rope which unwinds, causing the roller to revolve and releasing the rope allows the weight of the awning to make the roller revolve the reverse way, winding up the rope.
Veranda awnings are constructed as are other awnings, and increase the comfort and shade of a veranda, the same rule of proportion as given above being used in the measuring and the feet of the iron attached to the posts of the veranda. In many cases veranda awnings are impracticable, and veranda curtains are used as a substitute. These are constructed to work horizontally (as Figure 151), or mounted on rollers (as Figures 152 and 153). Of the two styles those of Figures 152 and 153 are more preferable, because when not in use they may be drawn up completely, while the other is more or less exposed to the elements at all times.
The rollers may be a spring shade roller mounted in the ordinary way, or a roller with a spool and cord, identical in principle with the roller shown in Figure 150, and the bottom of the curtain is provided with snaps to hold it in place when down.
In Plate 154 we give a table of the ordinary sized awnings, giving the quantities of iron and duck required in their making. We have figured on thirty-one-inch reversible duck, cutting the ends as marked out in Figure 143.
The awning trade is essentially a Summer trade and the season necessarily short, and as customers usually postpone the purchase of these things until they are really needed, this work must be handled quickly to be successful. We have found it a good plan where possible to arrange for recovering and renewing this work for regular customers during the late Winter months, when the workroom is apt to be a little slack.
[77]
Grille work, fret work or lattice work, as it is variously termed, may, when properly applied, serve a very useful and decorative purpose. Like many other decorative articles, however, its uses are not always governed by its limitations, and it is frequently misapplied.
As an aid to decorative fabrics in the artistic reduction of large openings, or as a partial screen or division that will not altogether obstruct either the vision or the light, it is unequalled by any other upholstery adjunct. Setting aside its uses for office railings, partitions, etc., in which we are not particularly interested, we consider it solely as a household fitment.
Unlike other furnishings, such as draperies, chairs, tables, etc., the grille is essentially a part of the room itself, and should conform to the style, color and composition of the wood trimmings of the room, which practically means that the fitment must be made to order.
There are scores of ready-made stock grilles and patterns on the market, some of which can be applied with comparatively little trouble to different purposes, but their greatest drawback as a general decorative stock is their set style and finish, and consequent lack of sympathy or relation to other furnishings.
We have been continuously advocating uniformity or conformity as the foundation of decorative thought, and in no branch of the trade is this more necessary than in the application of grille work. Few people would have the courage to advocate the use of quartered-oak polished doors in a room with white enameled wood trims, and yet grille work made and finished in natural oak is confidently shown by some salesmen as equally suitable for weathered oak dining-rooms, Oriental dens or Louis XVI drawing-rooms.
This, of course, is the salesman or check-book holder’s end of the business, and with incentives in the way of tally sheets and selling percentage, small wonder if he considers the amount of the sale rather than the suitability of the article. It would be better for the trade generally if every salesman could have expert training in the application of the goods he sells, and we believe this is possible to the man who studies and profits by experience. “There is always information for the man who is willing to dig,” but until this is considered possible the decision as to fitness rests with the decorator.
We illustrate suggestively a few designs in which the practical element is as much considered as the decorative.
[78]
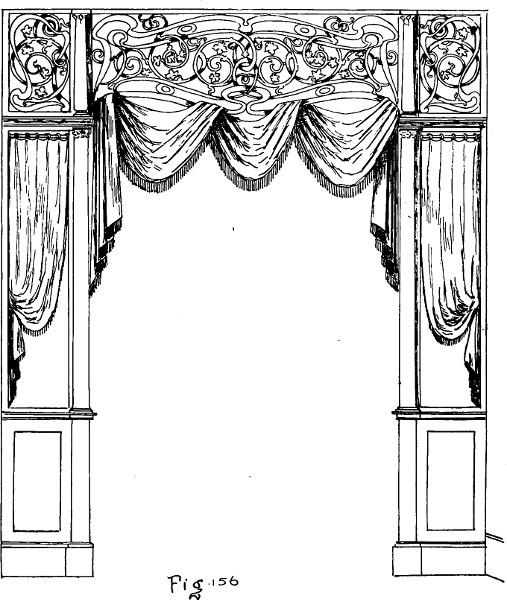
Fig 156
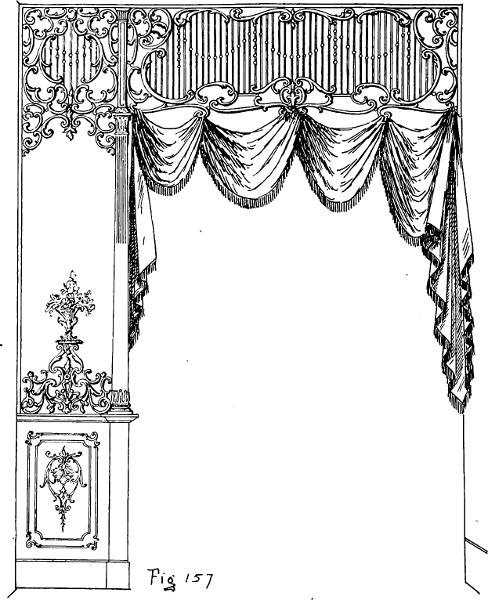
Fig 157
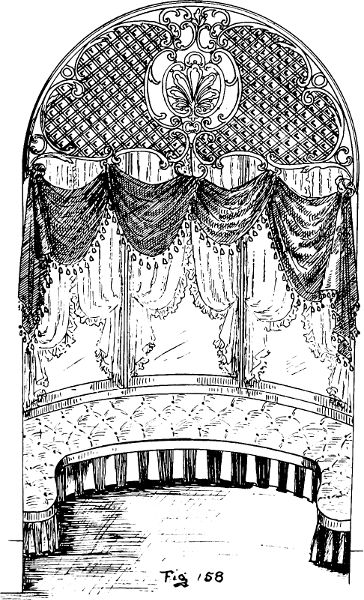
Fig 158
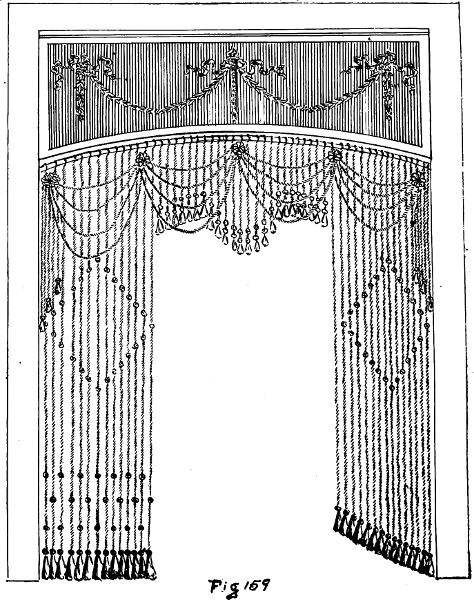
Fig 159
[79]
In Figure 156 grille work is used to break the length of a room and form a partial division. The weight of the whole treatment should be carried out in keeping with the woodwork of the room, and also with due consideration of the size of the room itself, a large room requiring the use of heavier woodwork than a small one, and the columns properly proportioned to the amount of woodwork in the upper portion of the grille which they support.
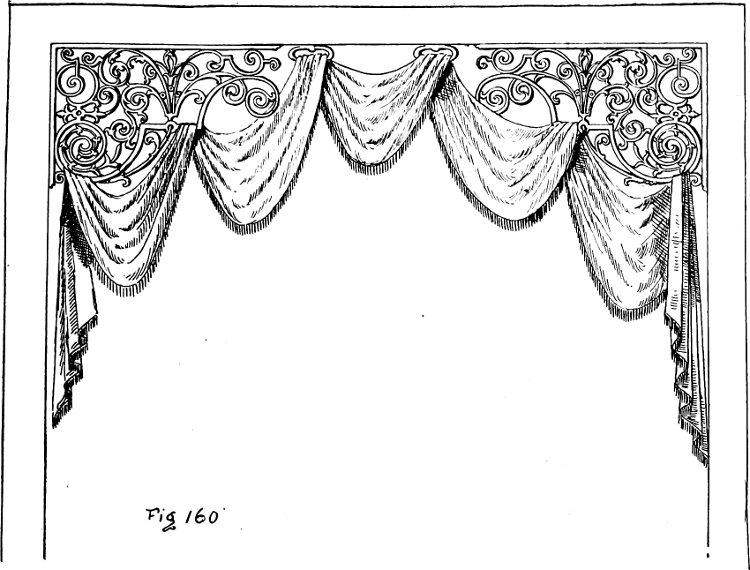
Fig 160
Fig 161
This treatment can be effectually employed to divide a large bay window from the room proper, to divide a hallway, or to reduce the size of a large opening between two rooms.
Figure 157 illustrates another application of the same idea, with one side only supported from the floor. While it is not absolutely necessary that the pattern in grill work should be exactly duplicated on each side of the centre, the balance or symmetry must be retained by having the same body or expanse of woodwork on each side of the centre, or when a drapery is used, as in this case, it should be so disposed as to equalize the appearance of the grille by having the heaviest part of the drapery opposite to the heaviest side of the grille work.
Figure 158 illustrates an archway treated with a grille and drapery forming an entrance to a bow window. Both sides of this treatment balance, and the depth of the whole is determined by the height of the room, sufficient room being provided for a comfortable passage beneath.
High doorways may be reduced in height by using a straight panel of grille work, as Figure 159, and when used in conjunction with a pair of portières the slim appearance imparted to an opening by long, straight portières may be avoided.
Rope portières, as shown in Figure 159, serve much the same purpose of transparent decoration as grille work, and may be effectively employed for doorways, archways, alcoves, etc., and as they can be so easily procured in special colors to match their surroundings, they have become quite popular.
Fig 162
In Figure 160 we illustrate a combination of scarf drapery and grille corners. This idea can be employed in a great many ways, and with different designs[80] of corners (which can be finished to match the desired woodwork), some very effective trims can be produced.
The metal grille shown in Figure 161 is made of strap iron or brass, bent to shape and riveted together in a frame. It is provided with two incandescent lights, serving for illumination as well as decoration, and squaring the arch for straight portières.
This idea of doorway illumination has recently been elaborately introduced by the Parisian decorators in the form of festoons of electric jewels, which scintillate and glow with beautiful prismatic colors.
A door treatment after the style of Figure 162 would form an attractive treatment for club, hotel or ballrooms, and the idea admits of almost endless variation.

Grilles are also made of rattan, the patterns made up in the scrolls and spindles common to rattan furniture, and ordinary manila rope, stiffened with glue, while bent into circles and scrolls, can be assembled into very attractive grilles, which are shellacked and varnished in natural or tinted colors.
Some of the mistakes most frequently made in the application of grille work are characterized as follows:
“Using a design foreign to the style of the room.”
“Using too much grille for the size of the space.”
“Using diminutive designs for large spaces, and vice versa.”
“Poorly-balanced, top-heavy or lop-sided designs.”
“Inharmonious coloring.”
Always use a rule or rod when measuring for grille work; never a tape. Take a pattern of all irregular spaces and fit the pattern into the space to insure its correctness before making the grille.
The prettiest design may be hopelessly spoiled by a poor fit, and measurements should be absolutely accurate.
[81]
The workroom should be cheerful and well lighted; roomy and well-equipped. Some upholstery managers, evidently considering the workroom a disagreeable though necessary part of the department, do not give sufficient attention to its location and furnishing. Perhaps one of the reasons why the average upholstery buyer does not think more highly of the workroom is because of the unsatisfactory comparison it presents to the strictly merchandise end of the business. He has comparatively little difficulty in figuring the percentage of gain on twenty-five or fifty yards of material cut off the piece and delivered, and can easily determine whether the transaction was profitable or otherwise. But send that twenty-five or fifty yards of material through the workroom, and unless he is a practical man, thoroughly understanding the nature and value of the work performed, he is apt to feel that the ratio of profit is uncertain.
We know of but one way to offset this feeling, and that is by a carefully thought-out system of tallying, so that each item that passes through the workroom will be accompanied by a voucher that shows correctly all details of the work performed.
Briefly enumerated, the points to be covered in a system are about as follows:
1. A careful check on every item of material directly or indirectly supplied to the workroom.
2. A careful charging-up in the workroom of every item consumed in the completion of the work.
3. A serial numbered sheet for each workroom order, which is filed and indexed on the completion of the work.
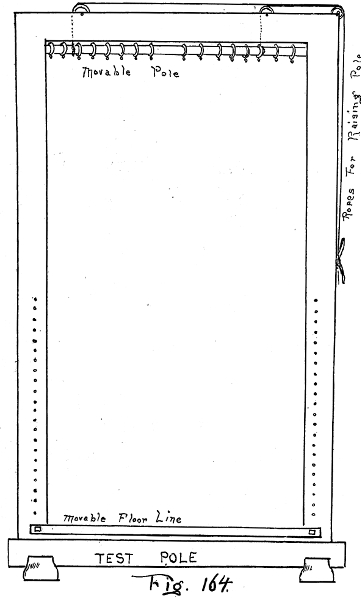
Fig. 164.
4. All goods taken from the department for use in the workroom should be duly accepted, measured, checked and receipted for by the head of the workroom and the receipt immediately deposited in the office.
5. All goods received from the workroom should be examined by the salesman whose order they are, and all surplus goods checked and receipted for by him.
6. All goods taken to the workroom should be accompanied by fullest written instructions, and work should not be commenced until the instructions are accepted by the head of the workroom.
7. All disputes relative to the amount of goods used should be referred to the manager, and on no account should a salesman be permitted to alter the workroom report on any order.
8. On receipt of the finished work the salesman should fill out on workroom voucher his sales number, the amount charged the customer for the completed work as covered by the workroom report, the date and the number of his sales check.
The head of the workroom shall, after having receipted for an order, be held responsible for its execution within the time stated, and should return with the completed order all surplus goods, requiring a receipt for same and depositing the receipt in the office. By having all receipts from department and workroom numbered with the serial numbers of the work-sheet to which the order belongs, it will be possible at any time to verify the quantities reported as having been consumed in the workroom, and a check can be kept on every order.
There is, however, no plan which human ingenuity can devise which will not depend on the honesty and carefulness of those who operate it for its effectiveness, and there is every necessity for carefulness and certainty in connection with workroom management.
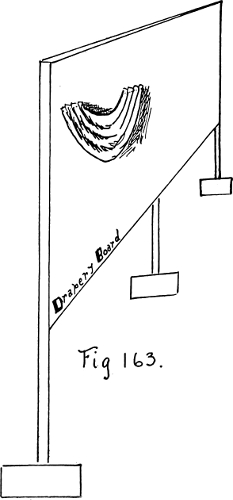
Fig 163.
The work performed by outside men should be[82] just as carefully recorded—a proper sheet should be made out for each order showing the nature of the work and the amount paid for it. The workman should record his time and the materials used, and the sheet should be returned to the office for filing.
With a system such as we suggest the manager has but to compare these reports with his salary and expense list to ascertain the amount earned by the workroom staff.
The equipment of the workroom should at all times be fully adequate to the demands upon it, and the very smallest of workrooms should have at least: A good sewing machine, capable of performing fine or coarse work; a cutting table approximately 5—0 by 12—0; a work table 5—0 by 9—0; a pressing table 3—0 by 6—0; a draping board, a test pole, a steamer and a cupboard for finished work.
As to the sewing machine, almost any reliable make of machine will do the necessary sewing for ordinary drapery work. There are, however, special machines for special kinds of work, such as window shades, awnings, bobbinet curtains, etc., which greatly facilitate their manufacture. Poor machines of any kind (human or mechanical) are false economy.
The cutting table should have a level, smooth top, and should be so situated that the operator can walk all around it. If covered with white table oil-cloth the measuring lines placed upon it from time to time can be washed off, and the top is always smooth and free from slivers.
The work table should have a good, clear, soft wood top, and should be permanently marked in feet, the first foot at one end being again divided and marked in inches. This is the table to which portières are tacked in making, as illustrated in the chapter on portières.
Fig 165
The pressing table should be of a convenient height for pressing, and should be padded to about the thickness that two layers of an ordinary blanket would give it, and then covered with clean white unsized cotton.
The drapery blackboard should be about 5—0 by 15—0, or larger, if convenient, so placed that the top of it can be easily reached. The use of this board has been referred to in the preceding chapters, and the illustration, Figure 163, gives further explanation of its purpose.
The test pole, which is also shown in Figure 164, is used to test the hang of portières before and after cording.
The opening can be set at any desired height, and the portières can be thoroughly examined before leaving the workroom.
The steamer shown in Figure 165 is used for steaming the nap of pile goods which have become crushed, the cross partitions A—A are tightly stretched pieces of heavy cotton which absorb the moisture, and the open top of the box is covered with several thicknesses of the same fabric. The steam enters the intake at X, and follows the direction of the arrows until it finally emerges through the top. The goods are drawn across the top of the box beneath the roller nap side up, and the brush roller is made to revolve so as to lay the nap in the proper direction while it is softened by the steam. The motion of both roller and goods should be steady and continuous from beginning to end, and should be slow or quick according to the amount of steam passing through the fabric.
The quantity of steam should be regulated so that it will just soften the fabric without making it wet. The hair of the brush should be short, even, and fairly stiff. The brushes used in carpet sweepers when joined end to end make good steamer brushes, or the roller can be covered with mohair plush, so that the nap forms a brush.
While it may not be always convenient to construct a steamer large enough to take the width of the goods with one operation, and as complete as the one herein described, the quality of the work performed by one of this kind will repay the effort of building it.
Drapery work that is not worth doing well is not worth doing at all, and it is far better to turn out a perfect job at cost, or even at an occasional loss, than to turn out poor work that pays a big profit. The customer who receives firstclass work will usually return and will be willing to pay you a fair price for your work, so that in the end you may be recouped; but the customer who pays a big price for a poor and unsatisfactory article seldom returns to give you another chance.
It would be a magnificent achievement to make a workroom pay thirty-three and one-third per cent. profit, but the chief value of a workroom lies not in its earning power from a per cent. standpoint, but rather in its power to hold and satisfy critical custom and in the educational suggestiveness finished work produces, and which accounts for a large amount of the yard goods which are sold without passing through the workroom.
Transcriber’s Notes:
Obvious printers’, punctuation and spelling errors have been corrected
silently.