Needlework
Economies
EDITED BY
FLORA KLICKMANN
A Book of
Making and Mending
with Oddments
and Scraps
“A Live Magazine for Women.”
1/-
NET
Monthly
“No praise can be too high for this Magazine. Each article is written with knowledge and insight, and in a practical spirit.”
—Morning Post.
edited by FLORA KLICKMANN.]
“It is a treasure-house of story and article, as well as being an infallible guide to arts and crafts of various kinds.”—Lady’s Pictorial.
“It is brimful of brightly-drawn stories, together with many household hints.”—Daily Telegraph.
“It blends fiction with fashion, and the decorative with the domestic.”—Pall Mall Gazette.
“It concerns itself with any and every interest which a girl may have, or ought to have.”—Westminster Gazette.
On Sale
EVERYWHERE.
Published at 4, Bouverie Street, London, E.C. 4.
EMBROIDERY THREADS
are the closest imitation of Pure Silk made in Rickard’s SYLVAN. The requirements of needleworkers have been carefully studied. Its colours are unsurpassed for brilliancy, silk lustre and finish.
SYLVAN Threads should be used for all rich colour embroidery effects.
Manufactured by
C. A. RICKARDS, LTD., Bradford.
| The Finest FOR ALL CHILDREN’S ———— |

It is essential suitable material should be used for the work selected. The undermentioned wools are highly recommended and will not cause disappointment. All the brands should be procurable at any Needlework Repository. In the event of any difficulty in obtaining a supply please write to
FAUDEL’S LTD., Newgate Street, London, E. C. 1
A.A. PEACOCK FINGERING, The long length Wool, 2,000 yards more in the 6 lb. Spindle than in ordinary yarns. |
The best quality Wool for General Knitting and Crochet purposes, in 2, 3, 4, 6 ply. 4 ply kept in 150 Colours and Fancy Mixtures. |
PEACOCK SHETLAND WOOL, Best English make. |
For Shawls, Opera Hoods, Wraps, Fascinators, etc., in all leading colours. Natural and Clerical. |
PEACOCK ANDALUSIAN, Best English make. |
For Socks, Stockings, Mittens, Gloves, Cuffs, Gaiters, Wraps, Bonnets, and Shawls. |
PEACOCK DOUBLE KNITTING For some years we have been trying to introduce a Yarn with the Wearable characteristics of the best Worsted, combined with the Soft, Strong and Elastic qualities of the best Fingering. We claim in the “Peacock Double Knitting” to have been eminently successful. |
For Golf Jerseys, Hats and Norfolk Jackets, Shooting and Cycling Stockings, Tams, Scarves, Sweaters, Football and Golf Stockings. |
PEACOCK VEST WOOL, Unshrinkable. |
Specially prepared for all Underwear in 2, 3, 4 ply. |
PEACOCK LADY BETTY, A Pure Wool. |
For softness and warmth, used largely for Baby’s first Vests, Shawls, etc., and all useful garments where the best soft wool is needed. |
PEACOCK OSTRICH WOOL, In 1 oz Balls. |
For making, Boas, Capes, Hoods, Muffs, Ruffles, etc. |
PEACOCK SPANGLED WOOL, With Mercerised Thread. |
For Shawls, Vests, Hoods, Children’s Gloves, Bonnets, etc. A very pretty wool. |
PEACOCK ABERDEEN FINGERING, Made in 2, 3, 4 ply. |
A good fingering for all purposes requiring softness, strength and warmth. |
PEACOCK HOMESPUN, or Wheeling Yarn. |
A yarn for Deep Sea Mission and Charity purposes. |
PEACOCK ROYAL SHETLAND FLOSS OR BOA WOOL. |
For Boas, Ruffles, and Shawls, for working on Boa frame. |
| A New Edition (The Fifteenth) now Selling. | Price 7/- net. (by post 7/6). |
The Flower-Patch
among the Hills
With Photogravure Portrait of the Author.
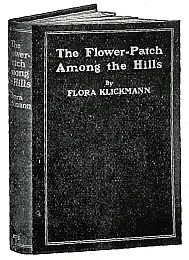
| London: 4, Bouverie Street, E.C., 4. | And at all Bookshops and Bookstalls. |
Price SEVEN SHILLINGS net (by post 7/6).
London:
The Office of “The Girl’s Own Paper & Woman’s Magazine”
4 Bouverie Street & 65 St. Paul’s Churchyard, E.C. 4.
| That Baby will soon be as big and
strong as her sister in
the swing if mother
feeds her regularly upon
Robinson’s “Patent”
Groats. Made nicely
with milk, and sweetened
with a little sugar or
syrup, it has that delicious
flavour which
the little ones enjoy.Girl sitting on the ground |

Possessing valuable flesh and bone-forming
properties, it is extremely nourishing and
easily digested.
——————————
It is also a valuable diet for NURSING MOTHERS, providing the
nutriment that enables mothers to nurse their babies. INVALIDS
and the AGED find it an ideal breakfast and supper food.
——————————
Send for Free Booklet “ADVICE TO MOTHERS,”
Dept. N.E., KEEN, ROBINSON & Co., Ltd., LONDON, E. 1.
Edited by FLORA KLICKMANN
War is a hard, stern teacher, and its lessons are bitter in the learning; yet some of its teaching we badly needed—and not the least important of its many lessons is the one it inculcated on the criminality of waste.
To so many of us “waste” was a word with a comparative meaning. What was waste in one woman was not necessarily waste in another, we argued. It was wrong for the factory girl to let her skirts drop off her for lack of mending; but not wrong for better-off women to discard their clothes directly they showed the least sign of wear, because they could afford to buy more, we said; and, besides, it made it good for trade—that was a favourite argument used by the extravagant to excuse their wanton waste.
But we have all learnt the value of economy of recent years: and we have seen how the saving and thrift of individuals may mean the salvation of the State. It will be a long time before we can ever return to that condition of easy-going plenty that we knew before the war. In any case the cost of all commodities will remain higher in price. The woman who can utilize oddments and make things with her own hands is the woman who will be making money, as she will be supplying one of the most expensive items of modern times—personal labour. The hints in this book are intended as suggestions, which can be developed in many new directions.
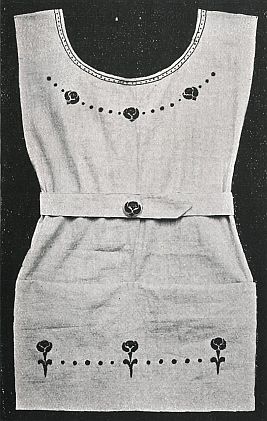
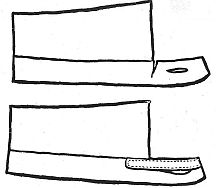
The Brassiere, or bust bodice, is an essential garment for those who wish to keep the form neat in appearance now when the low cut corset is so much in vogue. It has the great advantage of correcting round shoulders in those who are inclined to stoop when walking, and prevents that ugly ridge so often seen in the back of the coat or blouse caused by the top of the corset.
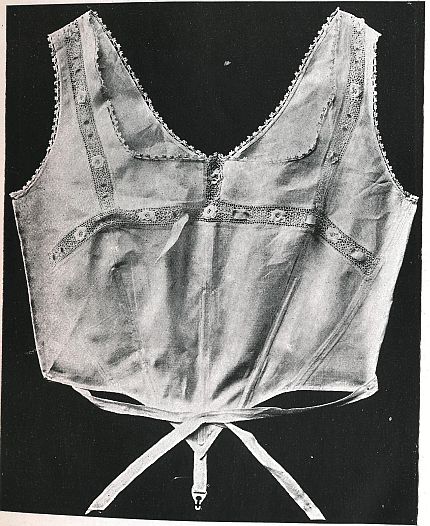
They are so very easily made that every woman and girl should make as many as she requires, for they are expensive articles to buy, and the garments one makes for one’s self are likely to outlast three or four of the bought kind and this, too,[4] at about one-third the cost.
The pattern for the Brassiere shown here is in three parts, the front, side-front and back. Half a yard of 36 inch wide linen or cambric is sufficient. The material used must be strong but fine, and linen is, of course, the best for wearing qualities.
Having cut out the sections, join all seams with a row of stitching less than a quarter of an inch from the edge, open out the seams flat and cover each with a casing made by a strip of the linen with the edge turned inwards, each should then be half an inch wide. Stitch close to the edge at each side. The three centre casings have buttonholes worked in the centre of the casing, in an upward direction, each an inch in length. These are to admit of a strip of whalebone, eight inches in length and which can readily be removed for washing.
Turn in a narrow hem at each side of the shoulder section and stitch in place. Make the insertion and place in position on the front, mark the lines at each side, cut the material along the centre where the various strips are to be, turn in a narrow hem and stitch all round. Then turn a hem all round the edge and stitch.
With the crochet hook, put a row of 8 ch 1 d c into the edge of the hem from the lower edge of the back[5] round to the opposite point and around each armhole. Into each loop put 7 ch 1 d c twice, with 5 ch 1 d c from loop to loop.
Sew a patent fastener to the top edge of the back, and a long strip of tape to the lower edge. The tapes are crossed at the back and brought round to the front to regulate the fit of the brassiere.
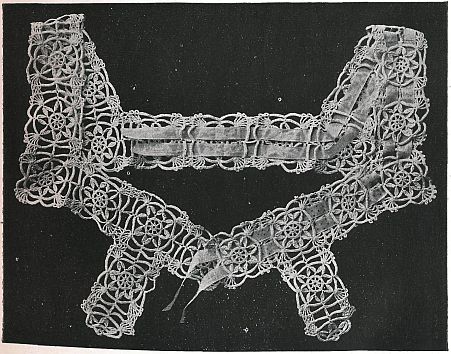
This is the pretty Rose beading in Irish crochet, and is made with Manlove’s Irish lace thread, No. 50, with a No. 6 crochet hook.
Form 6 ch into a ring.
1st Row.—6 ch 1 tr into the ring, 3 ch 1 tr into the ring 4 times, 3 ch 1 s c into the 3rd of the 6 ch.
2nd Row.—1 d c 7 tr 1 d c into each loop.
3rd Row.—5 ch 1 d c into the d c between the petals in last row.
4th Row.—1 d c 10 tr 1 d c into each loop.
5th Row.—Same as 3rd, but 6 ch instead of 5.
6th Row.—1 d c 12 tr 1 d c into each loop.
7th Row.—8 ch, picot 5 of them, 3 ch 1 d c into the 3rd tr on 1st petal in last row; 6 ch, picot 5 of them, 1 d c into the 9th tr on same petal; 6 ch, picot 5 of them, 1 d c into the 3rd tr on next petal; 6 ch, picot 5 of them, 1 d c into the 9th tr on same petal.
8th Row.—Turn with 8 ch and repeat the 4 picot loops as in last row, for 8 rows of the 4 loops.
16th Row.—Turn with 5 ch, 1 tr into 1st loop, 2 ch 1 tr into each of the others, turn.
17th Row.—10 ch 1 d c into the 2nd of the 5 ch at the turning of last row.
18th Row.—Repeat the 4 picot loops over the 10 ch and form 5 rows. Then repeat the 16th and 17th rows and form 8 rows more of the picot loops.
Make another rose and join to the picot loops in the last row to correspond with the joining of the first one.
When the front strip is of sufficient length, make the strip for each shoulder and the front piece, joining each to the loops in the straight strip.
Make the straightening rows at each side with 1 tr 2 ch into each loop and petal along the sides, placing the trs so that the chs may form a straight line.
Work a 2nd row of 2 ch 1 tr into each space of 1st row, then finish with 3 d c into each space.
Now top-sew the insertion in place and join the shoulders with a flat “run and fell” seam.
Sew a piece of tape ending with a loop on the point of the front to fasten the Brassiere to the corset.
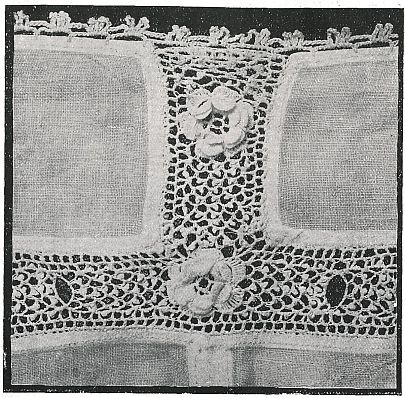
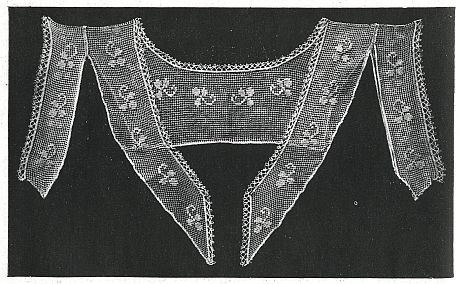
Beautiful Crochet on Household Linen
Machine-made filet net was used in making this pretty yoke, on which the trefoil is worked in darning stitch with Tenax embroidery silk in a moss-rose shade of pink. Other lovely shades can be had in the Tenax silk, and blue, green, or mauve will answer quite as well. The shape is cut out from the net, allowing two meshes for a margin at all edges.
Using No. 70 Peri-Lusta crochet cotton, overcast the two rows of meshes left as a margin with an overcasting through each mesh, then with a No. 5 crochet hook work a row of d c all round the edges, 2 d c into each mesh.
Around the edge of the sleeve part, neck, and fronts of the yoke, work a row of 9 ch loops, 1 into every 4th d c.
Then into each loop put 7 ch 1 d c twice.
The trefoil is then worked in simple darning stitch. Have the wrong side turned towards you while doing the embroidery, as all fastenings of the thread must be made on this side.
The trefoil can readily be copied from the diagram.
Use No. 70 Peri-Lusta Crochet for this pretty yoke.
Form 5 ch into a ring, into which put 8 d c, and close the row with a s c into the 1st d c, 6 ch 1 tr into next d c, 3 ch 1 tr into each d c, 3 ch 1 s c into the 3rd of the 6 ch to close a row of 8 spaces.
3rd Row.—5 d c into each sp.
4th Row.—7 ch, 1 long tr into the 1st ch (thread 3 times over the needle)—the 7 ch stands for a long tr—work off the loops of the long tr, two at a time, but retain the last on the needle; make another long tr through the same ch stitch, work off as before, then work off all the loops together. Make 7 ch, and repeat the 2 long tr through the 1st of the 7 ch, 1 ch, 1 d c into the d c over the next tr in the row below, repeat this long tr loop into the d c over each tr (8 loops).
5th Row.—6 ch, bring these up behind the 1st loop and fasten with a d c on centre of the loop, 10 ch 1 d c into centre of each loop.
6th Row.—12 d c over each 10 ch.
7th Row.—10 ch, 6 triple tr into the d c on centre of 1st loop below, 3 ch between the trs, * 10 ch, 1 d c over the d c on centre of next loop, 10 ch 6 triple tr with 3 ch between into the d c over centre of next loop, and repeat from *.
8th Row.—12 d c over each 10 ch, over each 3 ch put 1 d c 7 ch 1 d c.
To Join the Motifs.
Work the last row to the 3rd group of picots, form 2 of the picots as before; for the 3rd picot make only[8] 2 ch, join to the 3rd picot on preceding motif with a d c, make 2 ch, then continue on to next picot on the motif in hands, and join the next two in the same way; 12 d c over next 10 ch, 6 ch 1 d c into the d c between the two bars on preceding motif after the joining, come back on the 6 ch with 2 ch, 1 d c over the centre of the 6 ch, 3 ch, 12 d c over next chs on the motif, then join next 3 picots as before and finish off the motif.
The extension of the front at each side is formed of a motif and the point. For the point, make the ring as in the centre of the motif, then 6 ch 1 tr into the 1st d c, 3 ch 1 tr into each of next 2 d c, turn.
2nd Row.—9 d c into 1st loop, 5 d c into each of next two, turn, and put three of the long tr loops into the d c’s over the trs in the same manner as in the motif.
4th Row.—Turn, 10 ch, 1 d c into top of long tr loop; put the 6 triple trs into the d c’s as before with the 3 ch between and the two 10 ch loops.
5th Row.—Make the picots and d c’s as in the motif, joining to the 2 lower groups of triple trs as before.
There are 23 motifs in all required, 4 for each front, 5 for the back, 4 for each shoulder and the two extensions.
Stockings re-soled according to the following directions can be worn with slippers, and will be found comfortable.
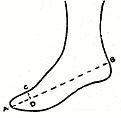
Place the stocking as shown in Fig. 1, cut off the sole at the dotted line a—b; then cut off the toe at the line c—d. As the heel of the sole piece will not lie flat it must be slit, until, when laid out, it resembles fig. 2. Cut pieces to these patterns from the leg of another stocking, allowing turnings as follows:
Fig. 1, the toe piece, ½-inch at c—d where it joins the stocking; fig. 2. ½-inch all round except at the lines a—b, c—b, where ¼-inch only must be allowed. If the stocking is short this can be remedied by leaving the extra length required at fig. 1, a, and fig. 2, d, in addition to the turnings previously mentioned.
Machine the new toe piece to the stocking at c—d (fig. 1), open and press the seam. Machine a—b to b—c, of the sole piece (fig. 2), open and press the seam. Machine this new sole to the stocking, open and press the seam. Fasten down all seams with small slip stitches.
It is advisable to use mercerised cotton or silk, and to leave the tension of the machine rather slack.
In a Christmas parcel sent to me from Italy this year, I found two of the dearest little aprons I have ever seen—much less owned.
AN EASILY SLIPPED-ON APRON.
They were so very unusual and yet so simple of make, that I feel every girl who is fond of aprons would love to have one. To these two I have added one other, equally simple, and which costs but a few pence all told.
An Easily-Slipped-on Apron.
The first one of the three is one of the Italian ones, and is made of two yards of ordinary kitchen roller towel. This particular one is made from unbleached linen, utterly free from coloured stripes or borders.
From a two yard length of towelling, cut off a strip ten inches long, which will be used for the waistband.
At one end of the long length make a three inch hem, this being the front.
Now lay this strip on the table, and measuring 39 inches from the hem, make a dot with a lead pencil, and take this dot as the centre of a circle 33 inches in circumference, which also mark out with the pencil with the help of a compass. Next cut out this circle and neatly turn in the raw edge, making a tiny hem. At the back of the apron, that is the end unhemmed, make three pleats—one box pleat in the centre and two outward turning ones on either side of the centre pleat.
Cut the ten inch strip into two 5 inch ones, and join in the middle to form a long band. Fold this neatly in the middle and point one end, letting the other end be straight.
Join to the back of the apron and stitch on firmly by machine. Put a fastening in the form of a button and button-hole, or hook and eye, or patent fastener, on each end of the belt, to complete the apron.
Slip the head through the circular opening and let the apron fall on to the shoulders, and join the waistband in the front, and there you have the simplest and quickest made apron one could possibly imagine.
The decoration on my little apron consists of a design of three conventional red roses with green leaves and stalk, separated by 5 graduated dots, the largest being in the middle. This occurs across the foot of the apron, about half an inch from the front hem, and again around the neck, but three inches from the edge of the circle. Right round the circle is a line of stitching in brown silk, then a row of green French knots, and then another line of brown, making a narrow band.
In the centre of the belt is a large button covered in linen, and a single red rose, minus the stalk, worked on it.
An Apron with Smocking.
The second apron is also Italian, but this one is more suitable for needlework or knitting, when one’s frock is apt to pick up pieces of thread or fluff from the wool. It is easily made from a piece of white[11] alpaca, 22 inches long by 27 inches wide. A straight piece of material is used, and the edges are scalloped in three inch wide scallops. Down both sides and along the bottom there is embroidered in white silk, a design of leaves, with a centre flower worked in Richelieu openwork, and the effect of this on the alpaca is really very beautiful.
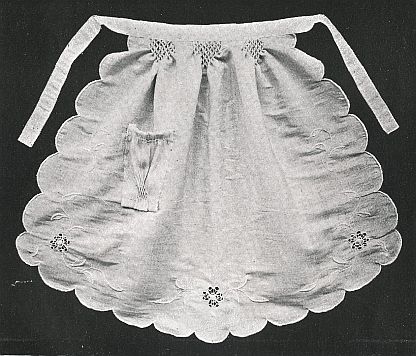
At the top the apron is narrowed by means of three groups of honeycomb or diamond smocking, terminating in points. A tiny pocket on the right hand side has also a little smocking at the base to correspond. This pocket is made from a 6 inch square of the material and is fastened to the apron by means of feather-stitching.
The band consists of a piece of alpaca, one yard long and about an inch wide. This band is stitched all around by machine.
A Pleated Work Apron.
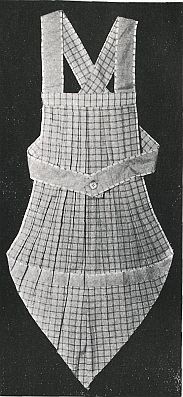
Last of all comes the little odd apron, but I should not be at all surprised if many of you did not prefer it to either of the others.
For this, one yard of zephyr is needed in a pretty check or plaid design, and a quarter of a yard of plain zephyr to match or tone in colour. One of the many that I have made was of white zephyr, with a plaid design of pale blue and brown. To go with this I chose a plain chocolate brown, and it really looked exceedingly pretty when finished.
From the yard of check material cut a strip three inches wide along the selvedge. Then from the remaining piece, cut a strip six inches wide on the width of the material. This will leave a piece 27 inches wide and 30 long. Most zephyrs run 30 inches wide in the single width.
Lay the material flat on the table and turn down a narrow hem, where the selvedge has been cut off, also making a hem the selvedge side as well. Then take two corners of the square and join them together to form a mitre, being very careful to match the design of the material. This forms a pocket, which is useful for holding anything. Next cut the plain material into three strips of 3 inches each, and join into one long piece. Then the 6 inch piece of checked zephyr should be cut into two pieces, each measuring 3 inches wide, and also joined into one long strip.
This leaves you with one long strip of plain, one middle-sized piece of check, and one shorter strip of check.
Take the short piece of check, which measures just a yard long, and cut off a piece of plain one inch shorter. Lay the plain material on top of the check, and tack them together with a line of thread down the centre. Fold the check material over the plain to form a narrow border either side, and stitch with machine. Leave one end of this band rough, and the other end round off, continuing the little border the same as the sides.
From the 60-inch strip of check, cut off a yard length, and the same from the plain, proceeding exactly as before, only finishing off one end quite straight. This makes the shoulder straps and band of the apron, and should leave two strips of material, one check measuring 24 inches and one plain measuring 18 inches. This latter cut into two strips one-and-a-half inches wide, and join into one strip again. Turn down either side of this strip to make a band, and sew along the top edge of the pocket, slanting each end to make a pretty finish.
When this is done, take a stitch with a needle through the centre of the pocket and the apron, and this prevents it from gaping.
Take the top of the apron next and lay in twelve half inch tucks, six going one way and six the reverse, but both facing in towards the centre of the apron. Before doing this, turn down the rough edge to make a neat heading. Sew on the two straps at either end of the top. From the remaining piece of zephyr, cut a strip one-and-a-half inches wide and the length of the top of the apron bib. Turn in each side and both ends, and stitch across the bib top to cover the straps.
To finish the apron, work a buttonhole in the rounded end of one of the strings, and sew a button on the other strap. Then take an iron and pleat the whole apron from top to bottom in half-inch pleats, using the stitched pleats of the bib as a guide.
When wearing the apron the straps should go over the shoulders and cross at the back, and come round the waist and button in the centre front.
The description of this apron may sound a little difficult, but it is really simplicity itself, and very quickly made, besides being very inexpensive.
Hardanger and Cross-Stitch
Edited by FLORA KLICKMANN
This shows some handsome Hardanger patterns, also Natural
Designs in Cross-stitch for Violets, Cyclamen, Creeping Jenny,
Nasturtiums, Daisies, Roses, Fern, Daffodils, Clover, Cherries,
and Wild Birds. The book is uniform in style and price with
“Needlework Economies,” and issued by the same publishers.
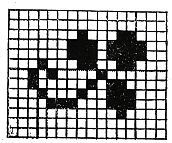
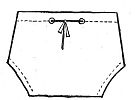
Garments are often discarded as being of no use, just because they are worn in certain parts, whereas a little thought and careful cutting will often transform them into something quite useful. It is often possible, for instance, to make garments for the little ones by using the least worn portions of larger sized clothes. Partly worn woollen vests can be admirably re-made into babies’ pants.
To make these take the old vest and cut along the line A B, shown on the little diagram. This cuts away the most worn part of the garment. Curve out at the bottom, along the lines C D and E F.
The stitches required in the little garments are very simple. Join by seaming together the edges from D to E. Turn down a fold of about ½-inch round the curved portions, and herringbone or machine-stitch. At the top, turn down a hem of 1 inch, and stitch in the same way. Make two eyelet holes in the back of this, and insert a draw-string. A cosy little garment for baby is the result.
A Use for Old Stockings.
A delightfully warm pair of bloomers for a little girl of 5 or 6 can be made from the legs of winter stockings, the feet of which are too worn for further mending. Two pairs are needed. First cut off the legs just above the darns on the heel, then cut up the back seam and lay them open. Now lay your pattern on, and you will probably find that you can just cut the four pieces, bearing in mind that the stocking will stretch, so can be cut considerably narrower than ordinary material. When the seams are machined up (once stitching is quite sufficient), and a hem, wide enough for elastic to be run in, made at the waist and bottom of the legs, you have as comfortable and cosy a garment as you could wish for. If the legs of the stockings are hardly wide enough for your pattern, corners can easily be cut from the ankle or front of the foot, and joined on to each piece. This sounds very lumpy, but the seams can be machined quite narrow (you find they don’t fray out at all), and being of wool are perfectly soft, and will not be noticed in the wearing.
Grandma was cutting out new garments from old, and her little grand-daughter was an interested spectator.
“Grandma,” remarked Mollie, “You do cut and contrive, don’t you?”
“No,” said Grandma, “first I contrive, and then I cut.”
Furs are a very expensive item at the best of times, and increasingly so just now. Yet some additional warmth at the throat and neck is very necessary in the cold weather. The difficulty is admirably settled in the collars here shown. Besides being warmer, they are a change from an ordinary scarf, and with a careful choice of colour, can give a very stylish finish to any coat.
A Collar with very little shaping.
This nicely fitting collar is worked in plain knitting with very little shaping, and is afterwards given a fur-like appearance by means of a Teazle Brush.
Materials required.
3 oz. Teazle Wool. Two No. 8 Celluloid Knitting Needles. A large button mould. Two or three dress-fasteners.
This Collar should be worked at a tension to produce about 6 stitches and 12 rows to the inch.
Cast on 45 stitches.
Work 8 rows in plain knitting.
* 9th Row.—K 5, turn.
10th Row.—K 5.
11th Row.—K 5, lift up the stitch before the next and knit it together with the next stitch (thereby preventing a hole), K 4, turn.
12th Row.—K 10.
13th Row.—K 10, lift up the stitch before the next and knit it together with the next stitch, K 4, turn.
14th Row.—K 15.
Continue in this manner, knitting in 5 extra stitches every alternate row, until all the 45 stitches are on one row again *.
Knit without shaping until the shortest side measures 9 inches.
Finish at the wide edge, then repeat from * to * once.
Knit 9 rows without shaping, then repeat again from * to *.
Knit 9 inches without shaping. Repeat from * to * once more.
Knit 8 rows without shaping. Cast off.
The Button.
Cast on 3 stitches.
Knitting plain, increase once at the beginning of each row until 15 stitches are on the needle.
Knit 6 rows without shaping. Then decrease once at the beginning of each row until only 3 stitches remain. Cast off.
Raise the surface of each piece lightly with a Teazle Brush, until a fluffy effect is obtained.
Cover the button-mould with the small round of knitting and sew it on the right front. Sew dress-fasteners in place on to each front.
If required the collar can be lined with silk or sateen.
A Pretty Sailor Collar.
This sailor shaped collar is a stylish addition to any coat, while at the same time giving the extra warmth so necessary during cold winter days. Worked in plain knitting the shaping will be found quite easy to follow.
Materials required.
3½ oz. Teazle Wool. Two No. 8 Celluloid Knitting Needles. A large button mould. Two or three dress-fasteners.
This Collar should be worked at a tension to produce about 6 stitches and 12 rows to the inch.
Commencing along the lower edge at the back of the collar, cast on 126 stitches.
Knitting plain, decrease once at the beginning and end of every 12th row until 4 stitches have been decreased at each side (leaving 118 stitches in the row).
Then increase once at the beginning and end of every 14th row until two increasings have been made at each side, making 122 stitches on the needle, and 76 rows (6½ inches) from the commencement.
The stitches now require to be divided for the neck opening as follows:—K 42, cast off 38, K 42. On the last 42 stitches, continue for the first shoulder piece as follows:—On the outside edge continue increasing once every 14th row, while at the neck edge, decreasing once every 2nd row until 6 stitches are decreased, then once every following 12th row until 3 more stitches have been decreased.
Knit back to the neck edge then, continuing to decrease once (at the neck) in every 12th row, shape for the front and shoulder as follows:—Knit to within 5 stitches of the shoulder edge, turn and knit back.
Knit to within 5 stitches from the end of the previous row (i.e., 10 stitches from the shoulder edge), turn and knit back.
* Knit to within 5 stitches of the end of the last row, turn and knit back. Repeat from * until only 5 stitches remain in the last short row.
In the next row the stitches require to be all knitted into one row again, but to prevent little holes from appearing at the turnings of the short rows a loop from the row below should be lifted up and knitted together with the next stitch above the turning.
Knit 8 rows without shaping. Cast off.
Join up the wool again at the neck where the 42 stitches were left, then work the second shoulder on these stitches to correspond with the first.
The Button.
Cast on 3 stitches.
Knitting plain, increase once at the beginning of each row until 15 stitches are on the needle.
Knit 6 rows without shaping. Then decrease once at the beginning of each row until only 3 stitches remain. Cast off.
Raise the surface of each piece lightly with a Teazle brush until a fluffy effect is obtained. Cover the button mould with the small round of knitting and sew it on the right front. Sew dress-fasteners in place on each front.
If required the collar can be lined with silk or sateen.
It is always the neck and wrist edges that show the first signs of wear on a knitted sports coat or jersey, and often a garment is discarded as done for just because these parts are shabby or out-of-date.
Have you ever thought of knitting an entirely fresh set of collar and cuffs to replace the soiled parts, or to be added to a collarless jersey or coat? The existing collar and cuffs can quite easily be cut away and the raw edges neatly buttonholed with wool before sewing on the new set.
You will probably not be successful in getting wool the exact colour of your jersey, so it will be best to use a striking contrast, such as purple on a pale blue jersey, or emerald green on a white one; or if you already have two colours in the jersey, or it is of a specially brightly-hued tint, black makes a pleasing contrast. And this year particularly contrasts of colour are very much in vogue, so that your re-modelled jersey will be quite fashionable.
Here is a practical little set that you will find quite easy to make.
The Collar.
This is of the ever-popular sailor shape that will be quite easily adapted to most garments.
“Sirdar” Sports Wool has been used for the making on No. 9 bone needles; or a 5-ply “Sirdar” Scotch Fingering would work up at a similar tension. Three ounces of wool will be sufficient for the set.
Abbreviations Used.
K = knit; P = purl; N = narrow (k two st together); st = stitch or stitches.
Commence from the back edge and cast on 78 st.
K 17 rows plain.
18th Row.—K 8, P to 8 st from the end of the row, K 8.
19th Row.—Knit plain.
Repeat the 18th and 19th rows twice.
24th Row.—K 8, P 4, * K 6, P 6, repeat from * 3 times, K 6, P 4, K 8.
25th Row—K 12, * P 6, K 6, repeat from * 3 times, P 6, K 12.
Repeat the 24th and 25th rows once.
28th Row.—K 8, P 10, * K 6, P 6, repeat from * twice, K 6, P 10, K 8.
29th Row.—K 18, * P 6, K 6, repeat from * twice, P 6, K 18.
Repeat the 28th and 29th rows once.
Repeat from the 24th row once, and then from the 24th to the 27th row once. This completes the pattern.
K 24 rows a plain and a purl row[17] alternately, always working the 8 border st plain in every row.
Now to divide for the neck: K 34, and slip these st on to a safety-pin. Cast off 14 st for the centre of the neck, and on the remaining 34 st knit up the left front of the collar thus: Work 10 rows a plain and a purl row alternately, knitting the 2nd and 3rd st together of every row turned from the neck edge, and continuing the 8 plain border st.
Continue shaping in this way, decreasing also at the border side by purling the 10th and 11th st together of every 4th row turned from the border edge.
When you have worked off all but the 8 border st continue in plain knitting, decreasing from the neck edge only, until only 3 st remain.
Reverse the directions for the right side of collar.
Now pick up all the loops from the neck edge and K 6 plain rows.
The Cuffs.
Cast on 50 st.
K 13 rows plain.
14th Row.—K 6, P to 6 st from the end of the row, K 6.
15th Row.—Plain.
Repeat the 14th and 15th rows once.
18th Row.—K 6, P 4, K 6, P 6, K 6, P 6, K 6, P 4, K 6.
19th Row.—K 10, P 6, K 6, P 6, K 6, P 6, K 10.
Repeat the 18th and 19th rows once.
22nd Row.—K 6, P 10, K 6, P 6, K 6, P 10, K 6.
23rd Row.—K 16, P 6, K 6, P 6, K 16.
Repeat the 22nd and 23rd rows once.
Repeat from the 16th row to the 19th row once. This completes the pattern.
K 16 rows a plain and a purl row alternately, working the 6 border st plain in every row.
K 6 plain rows, cast off.
For a Collarless Coat.
Another simple way of freshening the neck of a collarless jersey coat is to work a strip of plain knitting 4 inches wide and 12 inches long, and stretch it along the neck edge. Cuffs can be worked to correspond.
A pretty striped effect for this style of finish can be arrived at by using two different shades of wool, and working first four rows of one and then four rows of the other.
The Modern Knitting Book
Edited by FLORA KLICKMANN
If you are interested in knitting, this is the book you should
possess. It includes a number of directions for garments for
men and women’s wear, and some delightful patterns for the
little ones, to say nothing of the designs in fancy knitting for
household use. The volume is uniform with this series, and
issued by the same publishers.
Never be tempted to throw away a pair of gloves, however old. That is, until you have decided on their utter uselessness. Because a glove has holey fingers, or a badly torn thumb, or a split palm, it does not signify that it is of no use except for house-work.
Our illustration will show what can be done with gloves that are “nearly hopeless” to most people.
To Mend a Glove worn Between the Fingers.
The first part to go is, as a rule, between the fingers. This more especially is the case with washing gloves, which have a tendency to shrink, and wash-leathers, unless splice-seamed, will always do this.
As the fingers shrink, the space between splits, and it cannot be sewn up because it would make the hand too tight and the fingers too short.
To remedy this, take a reel of strong thread and a small fur needle (three-sided needle) and make a fine net-work between the two fingers.
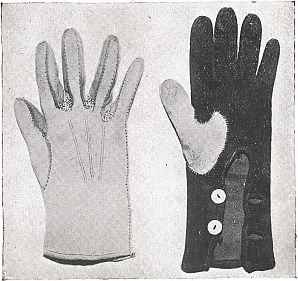
Button-hole the edge of the split as you form the lattice. Insert your needle in the edge of the hole and make one button-hole stitch; then take your needle into the other side of the hole with another button-hole stitch. Then two button-hole stitches, and take your needle up to the top edge of the hole, near where you began.
This forms bars about 1/16-inch apart, and with two button-hole stitches in between.
This completed, turn the glove and do the same thing across from side to side, knotting the thread each time it crosses the under-threads. By this means, a tiny net-work is made.
This net-work is elastic, and will wear and wash into shape and last as long as the glove itself.
Making a Neat Patch.
Next to the fingers, the thumb is the worst problem.
I find that opening carriage doors has an unfortunate knack of splitting a glove, where the thumb joins the palm.
If there is plenty of room, this split I can be neatly joined up, but[19] the better plan is to patch it with a tiny piece of an old glove.
Tack the patch in, and then with fine silk the colour of the glove, button-hole around the edge of the tear, taking up the under-skin as well. This keeps it firm and neat, and the patch may be cut away underneath, just leaving a small margin for stretch.
Adding a New Thumb.
If the top of the thumb wears out, and is unpatchable, an entirely new one can be put in with very little trouble. I have an old piece of chamois leather, which I keep for this very thing, and it answers the purpose beautifully.
Cut out the torn thumb carefully, retaining the shape as much as possible. Split up the seam and lay it flat on the piece of leather or kid which you are using to mend the glove.
Cut around the pattern, leaving a tiny margin, as your sewing is not as fine as that done by an expert.
Then tack the new thumb into the glove around the base.
Button-hole this carefully in, and lastly button-hole the seam up the thumb and across the top. This will be found quite easy.
For coloured kid gloves, I buy scraps of kid from the boot maker, and you can procure quite a nice sized piece for a small sum, large enough to cut any size thumb and to leave a good few scraps for patching.
Always remember in putting on gloves to proceed slowly, pulling on the fingers first and half the palm next, and the thumb last.
Be as careful in taking off as in putting on, and pull each finger and thumb into shape.
Materials Required.
For the hat illustrated a buckram shape was used with the brim slightly curled all round, and deeper at the back than the front, and having a tall crown; 1 ounce of purple wool, and 3 ounces of white 4-ply “Beehive” Scotch Fingering; five No. 14 long steel knitting-needles. The fifth needle is only required for the brim where there are too many stitches for three needles.
Hat shapes alter, of course, from time to time, but the general principles remain the same, and by a little adaptation, this can be made to suit any shape of the “sailor” class.
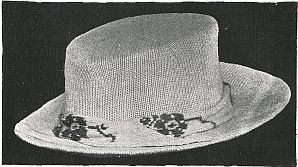
Directions.
Commence by casting on 2 st on each of three needles. Knit 1st row plain.
2nd Row.—Knit twice into each st, thus—knit the st, but retain it on the left needle, twist the point of the right needle round to the back of the st and knit the other side of this st, then drop the st off the left needle. Repeat into every st.
3rd Row, and every Alternate Row.—Knit plain.
4th Row.—* Knit 1, knit twice into next st, repeat from *.
6th Row.—* Knit 2, knit twice into each st, repeat from *.
8th Row.—* Knit 3, knit twice into next st, repeat from *.
Continue in this way, increasing the number of stitches in each section by 1 st before the increase until in the 46th row, there are 24 st in each section, that is 144 st in the row.
Knit 42 rows on the 144 st.
89th Row.—* Knit 11, knit twice into the next st, repeat from *.
90th Row.—Knit plain and repeat these 2 rows until the number in each section is increased to 20, then knit 10 rows of the 240 st.
Use the spare needle to take off some of the stitches, putting 60 st on each of the 4 needles.
Work in ribbing of knit 1, purl 1 all round for 16 rows, then cast off the stitches on 2 of the needles, continue on the other 2 the ribbing for the wide part of the brim, casting off 4 st at the beginning and end of every row (composed of the stitches on the 2 needles), until this piece measures 1½ inches, then cast off.
It will be necessary to fit the covering to the shape to see that it fits evenly, and to add or subtract a row or two perhaps to the part for each portion of the shape, while working.
Stretch the covering over the shape and tack along the line between the crown and brim to the shape, turn the wrong side of the hat towards you and gather up the edge of the covering to fit the shape along the[21] edge of the crown. Sew the knitting securely to this edge of the shape. Headline the hat and press the brim with a warm iron, placing a damp cloth under and over it; iron until the cloths are quite dry.
The Band.
This is made in the new floral knitting, and gives a nice finish to a very useful and becoming hat.
Using the same kind of white wool and 2 needles, cast on 20 st and work 30 rows, 1 plain and 1 purl row alternately, so that there is a right and a wrong side to the band.
31st Row.—Knit 13 (using the white wool), tie on the purple wool close up to the 13th st, and knit 4 p (purple), then finish the row with white.
When using two or more colours in this class of knitting, one of the wools is stretched across the fingers of the left hand just as in crochet, and the wool for the stitch taken from this by inserting the needle under it and drawing the loop through the stitch you are knitting on the left-hand needle. Keep the different wools at opposite sides of your work, so as not to tangle them, and see that the wools on the back of the work are kept even and not pulled too tightly, otherwise the work will pucker.
32nd Row.—Purl 7 w (white), 1 p (purple), 12 w.
33rd Row.—Knit 11 w (always slipping the 1st st), 1 p, 8 w.
34th Row.—Purl 9 w, 1 p, 10 w.
35th Row.—Knit 9 w, 2 p, 9 w.
36th Row.—Purl 10 w, 1 p, 9 w.
37th Row.—Knit 8 w, 1 p, 11 w.
38th Row.—Purl 12 w, 1 p, 7 w.
39th Row.—Knit 7 w, 1 p, 12 w.
40th Row.—Purl 12 w, 1 p, 7 w.
41st Row.—Knit 7 w, 1 p, 12 w.
42nd Row.—Purl 12 w, 1 p, 7 w.
43rd Row.—Knit 7 w, 1 p, 1 w, 2 p, 9 w.
44th Row.—Purl 8 w, 4 p, 1 w, 3 p, 4 w.
45th Row.—Knit 4 w, 8 p, 1 w, 2 p, 5 w.
46th Row.—Purl 4 w, 5 p, 3 w, 4 p, 4 w.
47th Row.—Knit 6 w, 1 p, 2 w, 1 p, 2 w, 4 p, 4 w.
48th Row.—Purl 5 w, 3 p, 1 w, 3 p, 1 w, 3 p, 4 w.
49th Row.—Knit 3 w, 4 p, 2 w, 1 p, 2 w, 1 p, 7 w.
50th Row.—Purl 5 w, 4 p, 3 w, 5 p, 3 w.
51st Row.—-Knit 4 w, 2 p, 1 w, 8 p, 5 w.
52nd Row.—Purl 4 w, 4 p, 1 w, 4 p, 3 w, 1 p, 3 w.
53rd Row.—Knit 3 w, 3 p, 1 w, 4 p, 1 w, 3 p, 5 w.
54th Row.—Purl 10 w, 2 p, 1 w, 3 p, 4 w.
55th Row.—Knit 7 w, 1 p, 6 w, 3 p, 3 w.
56th Row.—Purl 2 w, 5 p, 4 w, 1 p, 1 w, 2 p, 5 w.
57th Row.—Knit 4 w, 4 p, 1 w. 4 p, 1 w, 3 p, 3 w.
58th Row.—Purl 4 w, 1 p, 1 w, 4 p, 2 w, 2 p, 1 w, 1 p, 4 w.
59th Row.—Knit 5 w, 2 p, 2 w, 8 p, 3 w.
60th Row.—Purl 3 w, 4 p, 1 w, 2 p, 10 w.
61st Row.—Knit 11 w, 3 p, 6 w.
62nd Row.—Purl 6 w, 1 p, 13 w.
Knit next 22 rows all white, then repeat from the 31st row three times more, ending with 30 rows of white.
Press this band on the wrong side as in the brim, turn in each end to form an angle, and secure on the[22] wrong side with a few stitches made with the woollen thread, press the ends flat, then place the band round the hat in the manner illustrated and sew in place.
To Wash the Hat.
The covering and band are easily removed from the shape when it becomes necessary to clean the hat.
Make a lather of warm soapy water, immerse the covering and press and squeeze through the hands, but do not rub, until it seems clean, then squeeze out all the water possible and rinse in clean warm water, again squeeze as dry as possible, and place immediately before the fire until nearly, but not quite, dry. Have the wrong side turned out. Press on the wrong side with a hot iron until quite dry, pull into shape, and replace over the buckram.
The band, or covering, if it be made with coloured wool, should have a handful of salt added to the lather and rinsing water.
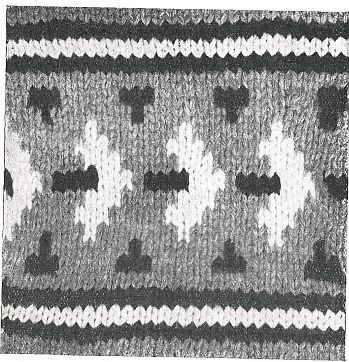
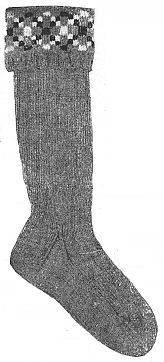
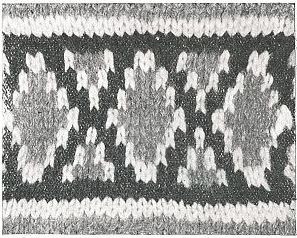
Very pretty effects can be obtained for turnover stocking tops by working in plain knitting in two or three shades of wool. The designs illustrated are worked in grey wool, with black and white introduced just to show the contrast, and when worked in bright colours many of these would be very effective. For instance, saxe blue and a bright brown would be pretty on a grey sock, and emerald green and white on a navy sock is another combination; or the boy’s particular school colours can be introduced, giving a uniform touch to his rig-out.
These tops are not at all difficult to work, and can be added to any sock directions. They are best commenced with six or eight rows of ribbing, as this makes them set well, and when the fancy design is completed the work is turned before commencing the sock itself. Care must be taken to see that you have the correct multiple of stitches for the particular design chosen, and, if necessary, add the required number to give this after the ribbing, decreasing them to the original number again, to get the even rib before commencing the sock.
Another point that should be borne in mind is, that the wools must be allowed to run very loosely, or the design will become contracted. You can also quite easily prevent the wools becoming twisted together in the working, if in changing from one wool to another you weave the wools first over, and then under the shade previously used.
If you find you have the design contracted a little when finished, pressing with a hot iron over a damp cloth will often relieve this. In fact, all knitted garments are the better for being pressed in this way.
The directions given are for a sock for a boy of from six to seven years of age, and the leg measures 11½ inches to the base of the heel when the top is turned over; the foot measures seven inches from heel to toe.
The Sock.
Abbreviations Used.
K = knit; P = purl; N = narrow (decrease a stitch by knitting two stitches together); St = stitch or stitches.
Materials required: 4 ounces of Messrs. J. & J. Baldwin’s 4-ply grey “Beehive” Scotch Fingering, a half ounce each of white and black wool, and four No. 15 steel needles.
With grey wool cast on 64 st, 22 on each of two needles and 20 on the third needle. Work in rib of K 2, and P 2 for 8 rounds. Work one plain round, increasing your number of st to 70, then commence the fancy top, using the three wools as follows:
10th and 11th Rounds.—4 grey (G), 3 white (W), 4 G, 3 black (B). Repeat.
12th and 13th Rounds.—2 B, 2 W, 3 G, 2 W, 2 B, 3 G. Repeat.
14th and 15th Rounds.—2 W, 2 B, 3 G, 2 B, 2 W, 3 G. Repeat.
16th, 17th, 18th, and 19th Rounds.—4 G, 3 B, 4 G, 3 W. Repeat.
20th and 21st Rounds.—2 W, 2 B, 3 G, 2 B, 2 W, 3 G. Repeat.
22nd and 23rd Rounds.—2 B, 2 W, 3 G, 2 W, 2 B, 3 G. Repeat.
24th and 25th Rounds.—4 G, 3 W, 4 G. 3 B. Repeat.
Work a plain round in the grey wool and decrease your stitches to 64 again.
Turn the work, and commence the sock in rib of K 3, P 1.
Work for 5½ inches, then commence shaping for the leg as follows: K 1, N, work in rib to the four last st of the round N, K 1, P 1.
Decrease in this way four times, with 7 rows between each decreasing.
Work an inch without shaping, then divide the st, putting half on to one needle for the heel, taking care that the decreasings made come in the centre of the needle.
The Heel.
Make an extra stitch, so that you have an odd number on the needle (you should then have 29 st), and knit and purl a row alternately (always slipping the first st) until you have worked the same number of rows as you have st on the needle, ending with a purl row.
K 16, N, K 1, turn.
P 5, Purl 2 together, P 1, turn.
K 6, N, K 1, turn.
P 7, Purl 2 together, P 1, turn, and continue in this manner until all the stitches have been worked on to one needle again.
Pick up 14 loops at each side of the heel, and commence working in[25] rounds again for the foot, continuing the rib on the instep needles, but working in plain knitting for the under part of the foot.
In the first round narrow at each side, by taking the two lowest stitches picked up from the side of the heel flap together.
Repeat this decreasing three times, with 1 round between each. Continue the foot without further shaping for 3½ inches, when you will be ready for the toe.
The Toe.
Put half your st on the heel needle, and divide the remainder between the other two needles. Work the toe in plain knitting all round, decreasing at each end of the heel needle, and at the outer end of the other needles every other round, until you have only 20 st left in the round. Place these on to two needles, and cast off both needles together.
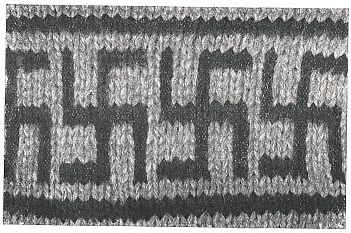
Design No. 2.
For this pattern the number of st used must give a multiple of 8.
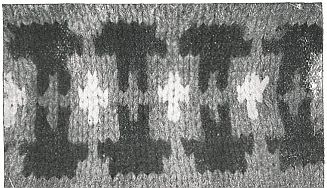
1st and 2nd Rounds.—3 G, 5 B. Repeat.
3rd and 4th Rounds.—1 B, * 1 G, 7 B. Repeat from *.
5th and 6th Rounds.—4 G, * 3 B, 5 G. Repeat from *.
7th and 8th Rounds.—1 G, * W, 2 G, 1 B, 1 G, 1 B, 2 G. Repeat from *.
9th and 10th Rounds.—3 W, 5 G. Repeat.
11th and 12th Rounds.—1 G, * 1 W, 2 G, 1 B, 1 G, 1 B, 2 G. Repeat from *.
13th and 14th Rounds.—4 G, * 3 B, 5 G. Repeat from *.
15th and 16th Rounds.—1 B, * 1 G, 7 B. Repeat from *.
17th and 18th Rounds.—3 G, 5 B. Repeat.
Design No. 3.
For this pattern the number of stitches used must give a multiple of 6.
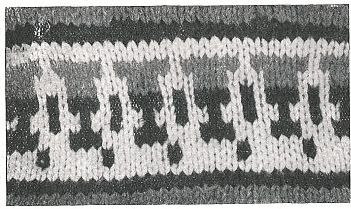
Commence the border by working 2 plain rounds in the black wool, then 2 plain rounds in the white.
5th and 6th Rounds.—1 B, 5 W. Repeat.
7th and 8th Rounds.—1 W, * 3 B, 3 W. Repeat from *.
9th and 10th Rounds.—2 W, 1 B. Repeat.
11th and 12th Rounds.—1 W, 3 B, 1 W, 1 B. Repeat.
13th and 14th Rounds.—1 W, * 3 G, 3 W. Repeat from *.
15th and 16th Rounds.—5 G, 1 W. Repeat.
17th and 18th Rounds.—White.
19th and 20th Rounds.—Black.
4th Design.
For this pattern the number of stitches used must give a multiple of 10
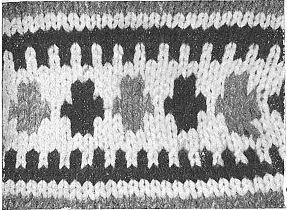
1st and 2nd Rounds.—White.
3rd and 4th Rounds.—Black.
5th and 6th Rounds.—1 B, 1 W. Repeat.
7th and 8th Rounds.—White.
9th and 10th Rounds.—1 W, * 2 B, 3 W, 2 G, 3 W. Repeat from *.
11th and 12th Rounds.—4 B, 1 W, 4 G, 1 W. Repeat.
13th and 14th Rounds.—1 W, * 2 B, 3 W, 2 G, 3 W. Repeat from *.
15th and 16th Rounds.—White.
17th and 18th Rounds.—1 B, 1 W, Repeat.
19th and 20th Rounds.—Black.
21st and 22nd Rounds.—White.
Design No. 5.
For this pattern the number of stitches used must give a multiple of 11.
1st and 2nd Rounds.—White.
3rd and 4th Rounds.—Black.
5th and 6th Rounds.—3 G, 1 W, 2 B, 2 W, 2 B, 1 W. Repeat.
7th and 8th Rounds.—1 W, 1 G, 1 W, 2 B, 1 W, 2 G, 1 W, 2 B. Repeat.
9th and 10th Rounds.—1 B, * 1 W, 2 B, 1 W, 4 G, 1 W, 2 B. Repeat from *.
11th and 12th Rounds.—3 B, 1 W, 6 G, 1 W. Repeat.
13th and 14th Rounds.—1 B, * 1 W, 2 B, 1 W, 4 G, 1 W, 2 B. Repeat from *.
15th and 16th Rounds.—1 W, 1 G, 1 W, 2 B, 1 W, 2 G, 1 W, 2 B. Repeat.
17th and 18th Rounds.—3 G, 1 W, 2 B, 2 W, 2 B, 1 W. Repeat.
19th and 20th Rounds.—Black.
21st and 22nd Rounds.—White.
Design No. 6.
For this pattern the number of stitches used must give a multiple of 8.

1st and 2nd Rounds.—4 B, 4 G. Repeat.
3rd and 4th Rounds.—4 G, 4 B. Repeat.
5th and 6th Rounds.—Black.
7th and 8th Rounds.—3 G, 5 B. Repeat.
9th and 10th Rounds.—2 G, * 2 W, 3 B, 3 G. Repeat from *.
11th and 12th Rounds.—2 G, * 1 B, 3 W, 1 B, 3 G. Repeat from *.
13th and 14th Rounds.—1 G, * 3 B, 2 W, 3 G. Repeat from *.
15th and 16th Rounds.—4 B, * 3 G, 5 B. Repeat from *.
17th and 18th Rounds.—Black.
19th and 20th Rounds.—4 B, 4 G. Repeat.
21st and 22nd Rounds.—4 G, 4 B. Repeat.
Design No. 7.
Only two colours will be needed for this design, and the number of stitches used must give a multiple of 8.
1st and 2nd Rounds.—Black.
3rd and 4th Rounds.—Grey.
5th and 6th Rounds.—1 B, 2 G, 4 B, 1 G. Repeat.
7th and 8th Rounds.—1 B, 2 G, 1 B, 4 G. Repeat
9th and 10th Rounds.—1 B, 2 G, 1 B, 4 G. Repeat.
11th and 12th Rounds.—7 B, 1 G. Repeat.
13th and 14th Rounds.—3 G, 1 B, 2 G, 1 B, 1 G. Repeat.
15th and 16th Rounds.—3 G, 1 B, 2 G, 1 B, 1 G. Repeat.
17th and 18th Rounds.—4 B, 2 G, 1 B, 1 G. Repeat.
19th and 20th Rounds.—Grey.
21st and 22nd Rounds.—Black.
Design No. 8.
This border works out a good deal wider than the others, and would perhaps be more suitable for a man’s stocking; or to reduce the width the stripes from each edge could be omitted. Stitches giving a multiple of 8 will be required.
1st and 2nd Rounds.—Black.
3rd and 4th Rounds.—White.
5th and 6th Rounds.—Black.
7th and 8th Rounds.—Grey.
9th and 10th Rounds.—5 G, 3 B. Repeat.
11th and 12th Rounds.—6 G, * 1 B, 7 G. Repeat from *.
13th and 14th Rounds.—2 G, * 1 W, 7 G. Repeat from *.
15th and 16th Rounds.—1 G, * 3 W, 5 G. Repeat from *.
17th and 18th Rounds.—3 W, 4 G, Repeat.
19th and 20th Rounds.—2 W, * 4 B, 1 G, 3 W. Repeat from *.
21st and 22nd Rounds.—3 W, 5 G. Repeat.
23rd and 24th Rounds.—1 G, * 3 W, 5 G. Repeat from *.
25th and 26th Rounds.—2 G, * 1 W, 7 G. Repeat from *.
27th and 28th Rounds.—6 G, * 1 B, 7 G. Repeat from *.
29th and 30th Rounds.—5 G, 3 B. Repeat.
31st and 32nd Rounds.—Grey.
33rd and 34th Rounds.—Black.
35th and 36th Rounds.—White.
37th and 38th Rounds.—Black.
Good quality washing materials for making children’s everyday frocks are now so very much more expensive than in pre-war days, that the economical woman who happens to have a number of washing skirts of the narrower type so popular a few years ago, would be wise to make some good use of them.
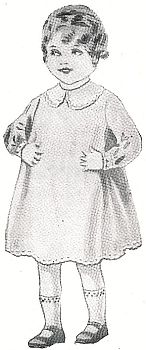
While it is a comparatively simple matter for the woman who makes her own clothes to remodel a full skirt into a narrow design quite successfully, it is not so simple to adapt a narrow design to a wider pattern. Even if one could match the material, it is never wise to use new fabric with old, and the freshness of the new material would only give emphasis to the fact that the other parts were slightly worn.
Here is a suggestion that may not have occurred to everyone. Have you ever thought what really excellent little garments for the children can be made from the best parts of a cotton skirt? As an example, we are showing how the child’s overall illustrated can be cut from a two-piece skirt of quite the narrowest type (this design only measures 1⅜ yards round the hem) without even cutting into the parts that are likely to be the most worn.
Whether the skirt used is made of linen, piqué, casement cloth, or any of the stouter washing fabrics, it would serve admirably for making this little frock that can either be worn as an overall over another frock, or as a little summer play frock without another dress underneath.
The skirt made use of in this instance is a two-gored design, with a seam at each side, and to cut the pattern as shown on the diagram, the hem of the skirt should be unpicked, also the side seams from the waist to just below the hips, or just far enough to allow of the skirt being laid flat out on the table.
Take care to see that[29] you have the skirt placed so that there is an even fold at centre back and front, and the side seams back one another, then lay on your pattern. You will see that in placing the sleeve portion it comes over the side seam of the skirt, giving you two seams in the sleeve instead of one, but the second seam will come on the under-arm so that it will not in any way spoil the appearance of the garment. The collar and cuff portions will need to be lined in order to neaten them, and you will probably find sufficient from the cuttings to cut these out again, or if not, a small piece of white calico could quite well be used for this.
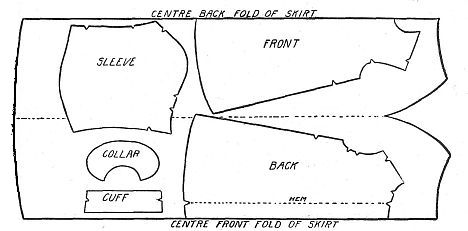
The back of the overall is cut down from neck to hem, and finished with a hem at each side, and fastened with buttons and buttonholes.
Many varieties of trimming could be used for a little overall of this description. French knots worked in a contrasting colour along the hem and round the collar and cuffs would be effective, or some simple cross-stitch animal designs would look well.
Use Clark’s “Anchor” Coton à Broder, No. 12.
A frock for a two-year old has been used as an example, but it would be quite possible to cut a larger size in a like manner, though it might be necessary to put a false hem of some other material.
Stitchery.
If you are interested in Needlework, you will like the magazine “Stitchery” that is being edited by Flora Klickmann. It deals with practically every form of Needlecraft, plain and fancy, including Crochet. It is a high-class publication, printed in the same style as “Needlework Economies.”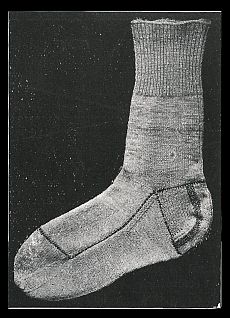
This method of knitting hose renders it an easy matter to repair the heel and toe when these parts become worn. By simply undoing the end stitch of a row of crochet chain stitches, the sole, heel, or toe part can be almost instantly removed by pulling the thread and undoing the crochet. The chain stitches are used to join the different parts, which are worked separately and then joined together.
When the worn part is removed, a piece exactly the same size is knitted and joined to the remainder of the sock with the row of chain stitches. In this way the leg and instep portions, which seldom wear out, may be made to serve for two or three renewals of the parts exposed to wear.
It is just as easy to knit a sock or stocking in the new way as in the old, and the saving effected by the new way is great, especially now, when woollen thread is both scarce and expensive. The same may be said about cotton thread.
The sock or stocking is begun in the usual way, and may be made either plain or ribbed.
The sock illustrated is a full-size man’s sock, and the joinings are shown in the dark line round the heel, along the side of the foot, and across the instep at the beginning of the front toe part.
These joinings were made in black thread on the white sock in order to show the joinings, but in making a sock they must all be worked with the same thread as in the sock. Then the joinings are not visible on the outside, nor is there a seam on the inside, as the row of chain stitches forms a flat line.
Working the Leg.
In the sock shown here 80 st were cast on three No. 12 knitting-needles. On these were worked 4 inches of ribbing—1 plain, 1 purl. Then 5 inches of plain knitting with a back seam.
The Instep.
Divide for the heel, putting 20 st at each side of the back seam, all on one needle. Divide the 39 remaining st on to the two needles, and continue knitting on these (leaving the heel needle for the present), knit and purl alternate rows until the piece is 6 inches long. Put the 39 st on one needle, and leave this part aside for the present.
The Heel.
Cast on 41 st on a needle in “slip loops,” that is, wind the thread once[31] round the top of the thumb, and take over the loop so formed on to the needle.
Knit the 41 loops, purling the 21st for the back seam, which is preserved for the entire heel.
Purl the next row, then knit and purl alternate rows until there are 24 rows in all.
Closing the Heel.
1st Row.—Knit to the 9th st after the back seam, slip the 10th st, k next stitch, pull the slipped stitch over, k 1, turn (leaving 8 st).
2nd Row.—Slip 1st st and pull back to the 10th after the back seam, purl 10th and 11th together, purl next st, turn and repeat these 2 rows until all the stitches at each side have been taken in. Cut the thread, leaving a short end attached.
The Sole.
There should now be 24 st at each side of the heel, and 23 along the top of it. Cast on a number equal to these, 71, with the “slip loops.” K and p alternate rows for 4 rows. Then decrease in every plain row in the 3rd and 4th st from each end, thus:—k 2, sl 1, k 1, pass the slipped st over, k to the 4th st from the end, k 4th and 3rd together, k 2.
Continue until the stitches are reduced to 39, to correspond with the stitches on the instep.
Knit this piece until it is exactly the same length as the instep portion.
The Toe.
Take two additional needles, cast on 20 st on one, and 19 on the other, following after those on the sole needle, making the “slip loops” as before. Join round, and k 2 rows plain.
Decrease in the next round thus:—k[32] first 2 on the sole needle, sl 1, k 1, pass the slipped st over, k to the 4th st from the end of this needle, k 3rd and 2nd together, k 2.
Knit first 2 st on next needle, sl 1, k 1, pass the slipped st over, k remainder of needle, k next needle to the last 4 st, k 4th and 3rd st together, k 2.
Knit 6 rounds. Decrease as before.
Knit 5 rounds. Decrease. Knit 4 rounds. Decrease.
Knit 3 rounds. Decrease.
Knit 2 rounds. Decrease.
Decrease in every 2nd round until there are 11 st remaining on the sole needle. Put back and front needles together, and taking a corresponding stitch from each needle, cast off 2 together. Draw the thread through last loop and cut it, leaving a short end.
The Method of Joining.
Commencing at the back part of the leg portion, place the heel in position, having the wrong sides turned towards you.
With a No. 1 steel crochet hook, make a chain on the end of the thread, insert the hook through the 1st st on the heel, and through the 1st st on the needle of the leg portion, draw a loop through these 2 together, and through the chain on the hook, insert the hook through the next st on the heel, slip off the joined st on the needle, insert the hook through the next st on the needle, draw a loop through the 2 st and the loop on the needle, repeat to the end of the needle, then take up the foot part, and put it in place on the heel. Join in the same way, inserting the hook through corresponding stitches. Continue up the side, across the instep and along to the heel again. Fasten the thread, leaving about an inch of it. Work the end into the following stitches to conceal it.
It can be readily seen that when any part is worn and requires to be renewed, the joining thread can be cut and unravelled as far as required.
To Renew the Toe Portion.
Undo the chain stitches along the front, cut the sole part in a line with the front, unpick the threads to get an even line of stitches, pick these up on a needle, and knit the toe piece exactly like the first one. Join to the front in the same manner.
To Reinforce the Heel and Toe.
It is not generally known that these parts can be so reinforced that their durability is prolonged two or three times. The best method of doing this is shown in the sock illustrated.
“Star Sylko” No. 5, matching the colour of the sock, is worked into the lines of knitted stitches, using a darning needle for the purpose.
Take up one side of each st on the needle, draw the thread through, working in perpendicular rows, come back on the other side of the stitches down to where the 1st row was commenced, and so on. In this way the cotton thread is all on the outside of the woollen knitting, and receives all the friction from the shoe, while it never comes next to the skin. The dark strip down the heel shows where the strengthening stitches have been worked in.
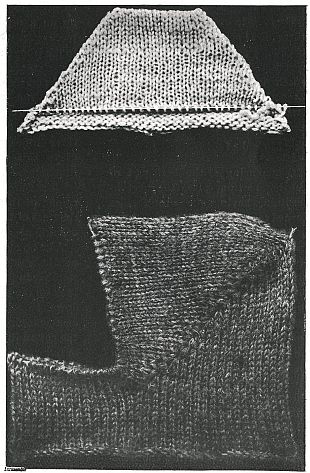
To Re-Knit a Heel and Toe into a Machine-Knit Sock.
In the machine-knit sock the heel and toe are not made in the same[33] way as in most of the hand-knit variety, but usually on the lines of the illustration at bottom of page. In the case of the heel, a portion of the leg has been worked to show how the heel is made straight on to this.
Cut away the heel at its base to the 1st decreasing st. Make a cut across the sole next the heel in a line with the 3rd decreasing at each side.
Turn back 3 rows under the sole, where they must be secured with a flat seam, using a piece of the same kind of thread and a darning needle. Pick up the stitches at the base of the heel on to a knitting needle. Fasten the thread and knit a row. Then purl and knit alternate rows, taking the first 2 st together in every row until the st are reduced to one-third of those in the 1st row.
Continue working a plain and a purl row alternately on these stitches, increasing by picking up a loop at the end of each row from the side of the flap just worked, until you have closed the heel, and have the original number of stitches on the needle. Join to the sole part with a row of crochet chain stitches.
The Toe Part.
This is worked exactly like the heel, picking up one-half of the st round the foot part. Knit the toe part as in the heel, working back to close the toe in the same way, then join to the front part with a row of chain stitches.
When the heel only becomes worn out in a hand-knitted sock or stocking, it is an easy matter to replace the worn-out portion and the adjacent weak parts.
If possible, let the mending thread be a little finer in texture than that used in the stocking, and when not possible to match the thread in colour use white—in fact, many people prefer white heels and toes in their hosiery.
We are illustrating a grey sock re-heeled with white to show clearly how the work is done. Run a coloured thread through each stitch at the base of the heel in a straight line from side to side. In the same way run another piece of thread through the stitches at the top of the sole where it adjoins the heel “closing” portion, that is from the first to the last stitch on the centre of the heel to where the stitches at each side of the heel were raised.
Now count the number of rows in the heel before the “closing” was begun, and the number of stitches at each side of the back seam after the closing was finished. Take a note of these, as the piece re-knitted must fit exactly.
Cut away the worn part that you wish to replace from the second row inside the marking thread, and the second row from each side where the side stitches were taken up. Pick out the cut threads from each side of the heel until you come to the “raised” stitches, which you may leave for the present as they cannot ravel.
Pick out the cut threads from the rows inside the marking threads in the same way. The marking thread should be through every stitch so that they cannot ravel.
Take up the stitches at the base of the heel and re-knit exactly as it was before and close it in the same way. Tie the thread when the last row in the heel closing is done, cut it and work the end in through the stitches.
Thread a darning needle with a length of the same kind of thread and fasten the thread to the beginning of the heel at the right side. * Run the needle behind the next of the “raised” stitches on the sole at the base of that stitch, bring it back to the heel, and running it inwards through the first stitch where it was brought out bring it out through the next heel stitch and repeat from * up to the stitches on the needle which are connected to those on the thread in the same way, slipping off each stitch when joined. Work down the other side in the same way, fasten off the thread and cut it. Work in the end of the thread through a few stitches. Remove the marking threads. This heel will have no seam.

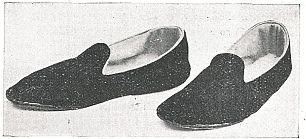
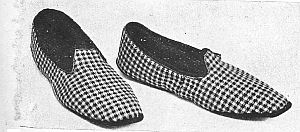
Footwear, like everything else, is exceedingly high-priced at present, and to know how to economize in this direction is a serious problem. But have you ever thought of making your slippers? This is really quite possible. Indeed, there is no reason why very presentable shoes and slippers cannot be made at home. In nearly every household the materials are already at hand. Pieces of velvet, tweed, felt or cloth are all suitable, and to show what can be done in this way we illustrate here two pairs of comfortable slippers made from oddments.
The first is a neat pair made from a piece of left-over dress material, in black and white woollen check, a bit of red flannel for lining and some navy serge coating for the soles, which are formed over the usual cardboard. Then the pair of men’s slippers were built up on a pair of leather soles with fleecy lining. Grey tweed left over from making a boy’s suit was utilised, and a scrap of blue flannel shirting forms the lining.
You will probably see the advantage of making these at home, and any comfortable old slipper can be cut up for a pattern.
They are made in the same way if you make the soles yourself, but with the purchased slipper sole there is a slight difference in the manner of attaching the upper.
The Check Slippers.
In cutting the upper, no turnings will need to be allowed for the upper edge, but allow a margin of a quarter-inch around the side which comes next to the sole. Cut both lining and material the same size.
The Sole.
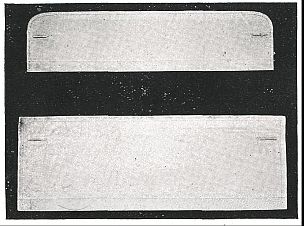
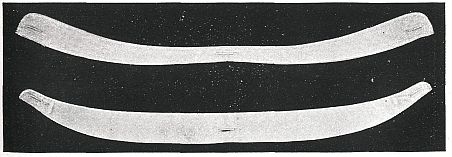
Cut this out in stiff cardboard, then cut a covering for it from the lining material, allowing a half-inch margin all round. Place the cardboard on the centre, and draw the edges of the lining together from opposite sides with crossing stitches, using stout linen thread for this purpose and a coarse sewing needle. The cardboard must be[36] covered smoothly and securely with the flannel and gatherings made at the heel and toe parts. The upper side of this sole is the inside of the shoe, and the stitching underneath. Now lay this sole on another piece of cardboard, and cut out the shape again just one-eighth of an inch larger all round. Lay this on the felt or piece of tweed intended for the outer sole and cut out the shape. Take the cardboard pattern for this sole and cut away a quarter-inch margin around. This smaller shape is put between the inner and outer soles when making up the shoe. Stitch up the side seams in material and lining. Press both seams out flat, place opposite to each other and tack the lining along the top edge to the check material. Now bind the edges together with a strip of ribbon or narrow tape. It is as well to stiffen the back of the slipper a little with an interlining of thin cardboard or tailor’s canvas.
Now take up the flannel covered sole and place the upper over it, having the smooth side of the sole turned from you; sew the edge of the upper very securely to the wrong side of the sole, putting the stitches into the flannel only, and about an eighth of an inch from the extreme edge. Lay the small cardboard sole over the one just put in and secure it with a couple of stitches, place the tweed sole on top of it with its edge overlapping evenly all round. Using thick black thread, the stronger the better, slip-stitch the sole through the inside edge to the upper where it turns in under the first sole. It is necessary to notch the edge of the cardboard stiffening where it overlaps the sole, in order to make it lie flat.
The Men’s Slippers.
The same directions apply to these with the exception of the mode of attaching the ready-made sole. Turn in both edges of the uppers and tack securely around, then top-sew together, place over the sole and stitch the sewn edges to the middle section of the sole, turning back the leather edge for this purpose. No binding was used for this slipper, but the lining had its edge turned in as well as the material, then the lining was tacked with the turned in edge coming a little above the material so as to form a narrow piping around the top.
One of the many expensive necessaries in these expensive days is a man’s white shirt. In many cases the finished article is treble the price it was in 1914. This is partly due, of course, to the increase in the cost of labour, as there is a considerable amount of skilled work entailed in the cutting out and putting together of a man’s white shirt. And the high price is partly to be accounted for by the increased cost of materials.
But with all the care in the world, shirts will still wear out, and must somehow be replaced. Fortunately this difficulty is not such a serious one as it at first appears; a shirt can quite easily be renovated—and without having that amateurish look that so often just spoils things.
Repairing Shirt Tails.
The first parts to go, very often, in a man’s shirt are the tails. Well, the simplest way to deal with this is to cut them off right across, above the weak places. This is really far more satisfactory than patching. A piece of calico or longcloth from another discarded article is not difficult to get. Measure the same size as the portion cut off. Hem round three sides. Run and fell the fourth side to the shirt itself.
Perhaps you did not know, as I did not myself until recently, that many of the essential details which go to make up the shirt, can be purchased separately. In this way a weak front or collar, or the cuffs can be removed, a new one substituted, and you have a new shirt without its cost.
Cuffs are parts that soon show signs of wear, and frayed cuffs gives the shirt—and the man—a weary look. In this case, unpick the cuffs if possible, if not, cut them off close up. The new cuffs can be bought into which the sleeve is inserted, and the shirt regains its sprightly appearance. At the time of writing, the price of these cuffs is 6½d. and 8½d. per pair, and the result is well worth this small expenditure.
Another method of repairing the cuffs is to cut off the frayed cuff, and put on a narrow band. In this case, separate cuffs would be worn. You do not even need to make these bands yourself. They can be bought ready for use.
About Collar Bands.
Most women have, at one time or another, struggled with the shirt collar-bands of their menfolk. When it is your first one, you start off quite happily. After all, you say, it is a simple matter to cut such a band, and will only require a small piece of material. But you soon find out that it is not so simple as it looks, and, being shaped, needs more material than you had thought for. And when you have finished it, you have neither satisfied yourself, nor the owner of the shirt. Men often assume a superior indifference to clothes, but there are certain things about which no indifference is visible, one being the collar band of their shirt. Collar-bands are cut in a scientific manner, and even experienced workers, knowing that they are not very easy to make, will probably be as thankful as less advanced[39] workers, to buy them shaped and stitched, ready for applying to the shirt. These collar-bands can be bought singly or in half dozens, and can be supplied opening at the front or back, according to the fastening of the shirt for which they are needed. The present price of these collar-bands is 3d. each. They are made in white calico, also in sateen for coloured shirts.
When Buttonholes are Torn.
“But,” says someone, “buttonholes are my trouble. You can’t, surely, buy new buttonholes to replace the broken ones?” True, but the case is by no means hopeless. If this is your difficulty two courses are open to you. Either refront the shirt, or else an additional front can be worn outside the white shirt. This latter plan would perhaps be too warm in the summer, though an extra front is a useful addition in the winter. The use of separate fronts and cuffs help to solve the ever-present laundry problem, as these can be sent to the laundry for stiffening and polishing, while the unstiffened shirts can be washed at home, thus effecting a very considerable saving in expense.
If, however, the separate front is objected to, you can buy fronts for letting into worn shirts. There are two kinds, the front in one piece for shirts fastening at the back, and the dividing front for shirts fastening in front. These are supplied square, as shown in the illustration. There are two qualities, price 9½d. and 1/-.
To apply the new front, first tack it on to the old front, then cut it to the shape required, allowing sufficient margin to turn in a fell. Then cut away the unnecessary material at the back from the shirt, leaving here sufficient to turn in a fell. In this way you have practically a new shirt again.
These are the portions that are most likely to show signs of stress and wear. Should any rents occur elsewhere, a little patch must be added.
A Patch may be Necessary.
It is hardly necessary to remind you that it is better to mend and patch with material that is not quite new. Very often a pillow-case that is worn in one part will supply a sufficient amount of sound material for re-tailing a shirt.
In looking through the shirts of your menfolk, you will probably find one wants a new collar-band, another new cuffs, another a front, and so on. They will not all need repairing in every direction. But even if they did, and you had to get several new portions for one shirt, it would be well worth your while, as the cost of these portions is very slight.
Men’s collars are among those articles that one had come to regard as useless as soon as they are torn or worn, and therefore at the first sign of disrepair to be replaced by new ones. Yet collars nowadays are a far more expensive item than they were a few years back; a frequent supply of new collars means a considerable outlay. Before discarding the torn collar, therefore, it is well to see if it is not possible to repair it, and it nearly always is possible.
The tear usually occurs in the little projecting flap for the buttonhole, either where this piece joins the main part of the collar, or the buttonhole itself. Two such tears are illustrated. Now either of these can be very easily mended with a piece of tape. First of all, wash all the starch out of the collar. When quite dry, tack a small piece of tape over the tear, as illustrated, and machine it in place. This makes a perfectly neat mend, and is quite easy to do. Moreover when the collar is starched again, the tape does not show.
We do not, nowadays, spend long hours bending over fine stitchery that is destined for no really useful purpose. To efficiently understand how to mend and how to make is our more practical aim. A distinctive and imperative branch of this knowledge is the art of preventive mending.
From the gracious days of our grandmothers, or our even more remote ancestors, comes a lavender-scented remembrance of patiently executed needlework, almost unbelievably fine; wonderful samplers were made and monumental pictures depicting Bible scenes were toiled over until the last of the innumerable stitches was filled in, and the triumph ready to be framed and hung up on the wall of the best parlour.
Some of us possess examples of these forgotten arts, bead necklaces so finely constructed that, entirely handmade and needle-threaded as they were, they altogether surpass the pretty ornaments of the present day, made upon apache looms. Samplers, too, we fondly cherish, if we are fortunate enough to have had one or two handed down from mother to daughter in our family.
The Day of the Ready-Mades.
But life to-day is more strenuous; the pride of the needlewoman must, in the majority of cases, have a more practical aim. We do not despise the lavender-scented sweetness and tranquility—sometimes we even sigh for the qualities that can only come to perfection in days of unhurried calm—but we recognise the every-day usefulness of the modern needlewoman and applaud the sanity of her methods.
Microscopic stitching is a delightfully interesting pursuit for the woman of leisure. The busy girl or the house-mother, harassed with many cares, would not find such sewing a sedative for tense and weary nerves; but the capable woman with quick, deft fingers and mind alert, finds it both interesting and exhilarating, in its practicality, to sit down and either make or mend something.
Mending and altering are two branches of the great art of Needlecraft which no woman can afford to despise in these days of ready-made frocks and shop-bought costumes. Turnings may be insufficient, buttons sewn on with too scant stitches, hooks and eyes trembling to fall off, but these deficiencies very easily can be put to rights. And the business girl would find herself sorely pressed for time to do the necessary shopping, matching trimmings, and the travelling to and from the dressmaker for fittings-on, while not her time alone but her pocket also would seriously suffer if the ready-to-wear[42] gowns and walking-suits were suddenly to be banished from our drapery stores.
A shop-bought costume that doesn’t fit, however, isn’t cheap at any price. Learn, therefore, how to make alterations in the most common-sense and practical fashion, and take preventive measures, before the garment is worn for the first time, to overcome the little deficiencies that we may expect to discover in the “ready-mades.”
Tools for the Practical Needlewoman.
Chief among the aids for the practical needlewoman, taking first rank among her valuable assistants, comes the sewing-machine. For hard wear and every-day use machine-stitching is generally much neater and stronger than hand sewing, and the pace, of course, is far quicker. Her sewing-machine is a good friend to the busy woman who has most need to practise the art of preventive mending, for strength and speed are two of her chief demands.
It pays to understand one’s sewing-machine, and to treat it with tender care. Rough usage, or careless handling through ignorance of the rightful functions of the different delicate pieces may lead to dire disaster. A handbook of instructions is always given when the machine is purchased: cherish this book, for if it is mislaid you are at sea without your chart. The inexperienced girl who makes her early attempt to fathom the mysteries of the sewing-machine will find that a little personal instruction (which may be had at the depôt of her own make of machine) will be more helpful than an hour spent in trying to solve intricate problems by the aid of the printed page. Later on, however, the printed directions will read lucidly enough when her mind is conversant with the everyday workings of the machine, and an intelligent glance at her useful little handbook will disclose to her the cause and the remedy of the defective action.
Keep the machine scrupulously clean and thoroughly well oiled. To do this is again to recognise the wisdom of preventive measures. An un-oiled, dirty machine will always cause trouble in working, for when the parts do not run smoothly, dropped and uneven stitches are a frequent embarrassment.
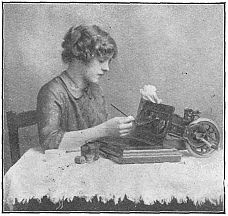
Oil in every part, and open and turn back so that when the oil has soaked through, the clogged dirt may be carefully cleaned away.
A capacious mending basket is a necessity for the practical worker, and it is all the more convenient if it stands upon legs, table height, and can be carried about to be stationed[43] just within comfortable reach of the mender’s right hand.
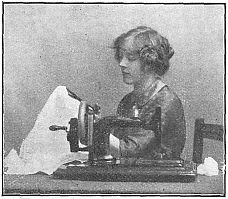
Keep always some tailor’s canvas for use as stiffening, buckram for millinery, white leno, and fine black lining, rolls of old linen and flannel for patching, stray pieces of lace, and left-over lengths of embroidery or insertions. Roll up all oddments in soft, clean muslin with tape or label attached, on which is written a list of the trifles to be found within your treasury.
If you frequently find your tape measure mislaid, try this plan, and thus prevent the long searching that interrupts your sewing. Cut as long a piece off your tape as will stretch from end to end of your machine, and paste it along the front edge of the stand. It thus will be always at hand when required, and will serve at any rate for all the shorter measurements required.
It is a good plan to assemble your hooks and eyes on safety pins. Slip the opened pin through the separate hooks and eyes, then when they are all securely dangling, firmly close your safety pin, and they are ready for use when needed and will not get tangled and twisted together as so often happens if they are kept in a box.
Keep odd buttons in glass bottles. No more hunting in the dark and dust! You can see the button for which you are searching, and by shaking the bottle can bring it near to the top, where it can be easily reached. Bone or pearl buttons for underwear, or any others that are not affected by exposure, may be securely fixed upon a hairpin. Straighten out one of the long hairpins, bend back one end about a quarter or half an inch, run the point through the holes, and when your buttons are neatly crowded together turn up the other end to hold them securely.
Aids to Strength and Durability.
We have heard that in China it is the custom to pay the family doctor to keep his patients in good health rather than to call him in only after illness has laid the sufferer low. Many of us applaud this system, but have neither the opportunity nor, perhaps, the courage, to defy conventions in England.
But why not pursue the same wise course in dealing with household mending? It works admirably.
Take that proverbial stitch that “saves nine” in very good time, even before there is any apparent need for for it, and you’ll find it will work miracles.
Stockings, for instance. The toes and heels of children’s stockings may be neatly darned before they are worn[44] for the first time, for this purpose using crochet silk or mercerised thread, which is less bulky and clumsy than wool. Insist on frequent change of hosiery, and forbid the wearing of any stocking that shows even the tiniest hole. To prevent those long running ladders which are almost impossible to mend, sew a band of silk or cotton, or a border cut from an old stocking, round each hem of the new pair. Hose supporters (chief cause of these destructive ladders) will seldom cut through this double band. Or another excellent plan may be adopted. Take a round brass ring and double crochet closely over it to make a soft, firm covering. Sew this securely into position upon the stocking top with neat, strong stitches, and always insert the clip of the suspender within this ring. You will thus make it impossible for the tension to strain the stocking beyond the area enclosed by the ring.
In the knees of children’s stockings small shields may be placed, pieces cut from other stockings and fastened in so neatly that they are quite inconspicuous and not at all uncomfortable.
The “ready-mades,” whether visiting frocks, walking suits, or underwear, as was hinted in a previous paragraph, cry out loudly for preventive mending. For instance, sleeves should be stitched in by machine, for on ready-made clothes the machine stitching is not always carefully done, and a weak place in the sleeve seam will quickly give way under strain and start an ugly tear.
Embroidery with scalloped or pointed edging should be machined strongly all round the extreme edges, the machine needle patiently following the circuitous course of the pattern. This will double the life of embroidered lace, preventing frayed untidiness and breaks, gaps and tears.
To prevent an embroidery flounce from ragging out before the petticoat itself is any the worse for wear, neatly hem the edge as soon as it threatens to fray or gets torn by an accidental mis-step, and add a bordering of Valenciennes or fine Torchon lace.
Buttons should receive careful attention when any ready-made garment is bought. The trimness of effect and the general prettiness of coat or costume may be entirely spoilt if one of a set of distinctive buttons is allowed to drop off and get lost. Therefore sew on all buttons at the time of your purchase. Stitch carefully with a strong thread; when you have sewn through and through the button half a dozen times, wind your thread round and round the strands which hold the button, between the button and the cloth, making a sort of shank. Treat boot and shoe buttons in the same way.
It is wise to strengthen bed-linen with broad tape laid on at the corners, inconspicuously stitched into position, so that an added firmness is given to the sheets where the clothes-pegs might do most damage.
Look closely into the wool-worked buttonholing at your blanket ends. You may, with advantage, stitch fresh buttonhole edgings that will keep the neat turn-over, when the blanket is in use, for a longer time than if the shop-bought edging were left to suffice.
Remember that half-an-hour spent weekly in preventive mending, will save the busy housewife hours of darning and patching later on.
The value of old Kid Gloves.
With furs advanced 80 per cent. in price in some cases, and every sort of leather and skin at a premium, it is evident that many who would like new furs, and a leather waistcoat for motoring, will have to forego these for a while, now that such items have become so expensive.
Those who are studying economy, however, will find an excellent substitute for the leather, and the fur skins, in the old kid gloves that have got beyond even the cleaner’s kindly aid. It is always the fingers and thumb that go; the remainder of the glove will be a serviceable bit of kid. These pieces can be used in a variety of ways, and since they are impervious to wind, they may save you many a chill—or more serious illness,—if you find a new thick winter coat beyond your purse in these hard times.
Cut off the fingers and thumb, remove the fasteners, cut the glove up to the top at the front opening, and spread it out flat—as you see in the small illustration. There will be a little fulness at the thumb-pieces, but this can be doubled over and stitched down flat.
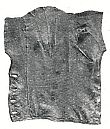
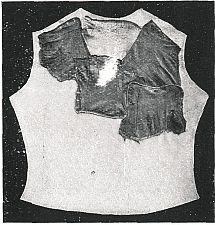
Perhaps your thickest coat is not nearly thick enough for the piercing east winds that come to us in the early part of the year, finding out our weak spots.
For an Under-coat or Waistcoat.
If you wish to avoid the cost of a new big coat, why not make a small sleeveless coat, or a waistcoat to wear under your outdoor coat? For this you will need about 1½ yards of silk for the outside, some thin flannel for the interlining, and some more silk, or other suitable material for the lining. I suggest silk, because this slips on so easily, and the outer coat, in turn, slips on easily over the silk waistcoat. It takes so little material that in all probability you can get enough out of the silk lining of some discarded coat or underskirt. Then of course there are the old gloves. Cut out the silk, outer and lining, and the flannel, by the same pattern. Deal with the flannel first. Onto this stitch the pieces of glove—they merely want pinning in place first of all, and then run the machine round each fragment. Put them on as they will best cover the flannel, it doesn’t matter how irregular it all is, so long as the flannel is completely covered. It doesn’t look elegant, as you are doing it; that again, is unimportant, as it is all hidden by the silk. If you have[46] not enough gloves for your needs, a few bits of chamois leather will help you out.
Then make up the little undercoat, with the glove-covered flannel as interlining, the kid against the lining, and you will find you have something that keeps out the wind in a way a woollen hug-me-tight could never do. And the glove-lined garment takes up so little room that it does not add to one’s bulk; in addition, it is very light in weight—a great advantage.
The idea is capable of various developments. A velvet stole edged with a little fur could be interlined in the same way. It would be light and warm, and a real comfort on cold days. It is quite surprising how the kid interlining adds to the warmth of a garment.
A chest protector, like the one we illustrate, is invaluable for the girl who has a weak chest, and is out in all weathers. This again is quite easy to make.
In a garment like this, or any large surface, it is as well to run the machine down the material after the pieces are all joined up; this “quilts” it and holds it together.
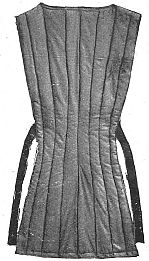
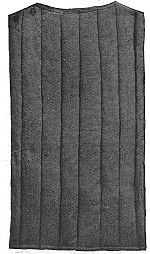
For Men’s Waistcoats.
Many men complain that they feel cold at their back, even though they are wearing the thickest of vests. This is probably due to the fact that the material used in making the back of the waistcoat is many degrees thinner than that used for the fronts. The defect can be easily remedied, however, if you have three or four old pairs of gloves.
Cut out a piece of stout black lining, the size of the back piece of the waistcoat. Stitch the portions of the gloves to the wrong side of this lining. They will not need to come below the strap at the waist-line. Then turn in the edges, and apply this to the inside of the waistcoat (glove pieces inside of course), and run it neatly all round, taking care that it does not show above the top of the waistcoat at the back. It will keep it better in place if you run a line of stitching down the centre of the back, from top to bottom, after the lining has been run on all round.
You will have a perfectly neat looking garment that simply looks like a waistcoat with black lining at the back.
I advise this lining being put on by hand rather than by machine.
The attractive little apron illustrated on this page has been made with the expenditure of very little time and trouble, from a straight-gathered cotton voile skirt.
The simple gathered full type of skirt has been very popular for the summer frock during the last two or three years, and when this has lost its freshness for dress wear, the material will often be found to be in quite good enough condition to turn to account in the manner suggested.
At the top of the page the skirt is shown before its transformation; the two lower figures give the front and back views of the apron when finished, and you will see that it is quite a becoming little garment of the fashionable button-on-the-shoulder style, with straps crossing at the back.
To make the apron, first take your skirt and rip the gathers away from the band at the top, measure 30 inches from the centre front of the skirt folded together, and cut away the extra fulness from the back. The larger portion you have then forms the apron. If the skirt you are using happens to be one that fastens with a seam at the centre front, it will be best to use the back of the skirt for the centre front of the apron, to avoid a seam down the centre.
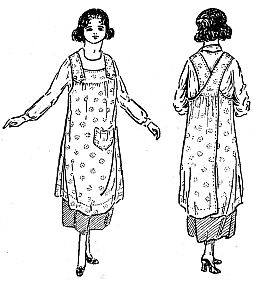
Unless the skirt is a very short one, you will find it will be quite long enough without making any alteration in the hem, but as most skirts have a fairly deep hem, it would be quite possible to let this down if necessary.
To form the curved sides for the under-arm, measure 12 inches along the top edge from the centre front, and cut a half-circle 7 inches deep and 12 inches across in each side of the apron.
Now take the piece you cut away from the back of the skirt, and from this cut a straight double strip 12 inches long and 4 inches deep for the front yoke band, and two further double strips each 17 inches long and[48] 4 inches wide for the shoulder straps. Mitre one end of each of the shoulder straps and slant the other ends, taking 2 inches off the length for the outer edge of the strap. If your skirt should not be full enough to give sufficient material for the double straps, they could quite well be lined with some other material, or could even be made a little narrower.
Finish the back edges of the apron with narrow hems, also the armholes. Gather the front and place between the double yoke band. The backs are also gathered and placed between the slanting ends of the shoulder straps, putting the shortest part of the strap towards the back.
Cross the straps at the back of the apron, and fasten the mitred ends to the yoke band with buttons and buttonholes. Your little apron is then complete.
Provided you are fond of knitting and can work fairly quickly, you will find it a great economy to make your own woollen spencers.
If you are careful to select wool of good quality, you will be well rewarded for the time spent in making, as hand-knitted woollens can always be relied upon to show less shrinkage with constant washing than even the most reliable makes of all-wool woven underwear.
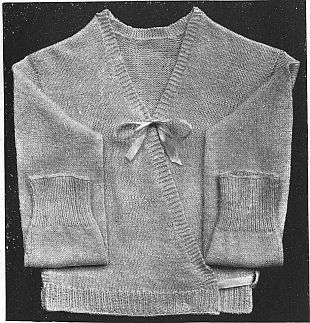
Here is a practical little design that is very easily made, and very comfortable for wearing, the cross-over front giving a double protection over the chest.
Materials required.
7½ ounces of 4-ply white A.A. “Peacock” Fingering, and 4 No. 13 steel needles.
Abbreviations used.
K = knit; p = purl; st = stitch or stitches.
The Back.
The body section is worked in one piece, and is commenced from the back.
Cast on 100 st.
Knit 20 rows of ribbing, 1 plain and 1 purl alternately.
Now commence working a plain and a purl row alternately, knitting plain the first 4 st and the last 4 st of both the plain and the purl rows. These plain stitches prevent the edges of the work from curling up, and give a flat under-arm seam.
Work 60 rows in this way, increasing 1 st in the 6th st from each end of every 15th row. Continue for 5 more rows, which will bring you to the armhole.
86th Row.—Cast off 12 st, p to 4 st from the end of the row, k 4.
87th Row.—Cast off 12 st, k to the end of the row.
Cast off 1 st at the commencement of each of the next 4 rows. This should leave you with 80 st on the needle.
Now work 49 rows, a plain and a purl row alternately, slipping the 1st st of every row. In these rows purl the return rows right across, omitting the four plain st at each end.
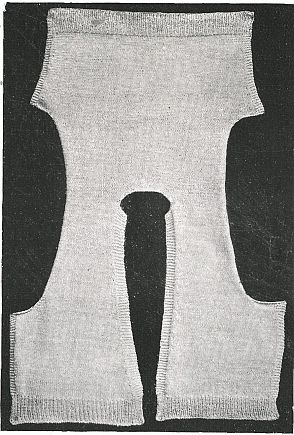
The Front.
To divide the st for the fronts, k 34 st on to a spare needle, cast off 12 st for the back of the neck, and on the remaining 34 st work one front as follows:
1st Row.—Cast off 2 st, k to the end of the row.
2nd Row.—Slip 1, p to the end of the row.
3rd Row.—Cast off 2 st, k to the end of the row.
4th Row.—Slip 1, p to the end of the row, then cast on 6 st to form the front border.
On these 36 st work 30 rows, a plain and a purl row alternately, working the 6 border st plain in every row, and slipping the 1st st when turning from the armhole edge.
In the next row increase 1 st in the 7th st. Work 35 more rows, and increase 1 st in the 7th st from the border edge in every 6th row.
Now in the next 4 plain rows increase 1 st in the 2nd st from the armhole edge, and after working the next plain row cast on 12 st for the front of the armhole.
Now work 60 rows, a plain and a purl row alternately, continuing the increasings from the front edge, with 5 rows between, and working 4 plain st in every row to form the seam from the armhole edge. In the 31st and 51st rows, k the 6th and 7th st from the armhole edge together to decrease a little to shape for the waist. Work 20 rows of ribbing; cast off. Reverse the directions for the right front.
To finish the neck, pick up the back of the 6 st, cast on for the border, k 80 rows; cast off. Stretch this strip round the back of the neck, and sew into position. Sew up the
(Concluded on page 52).
This little petticoat is made to fit a child of from four to five years, and measures 20 inches from the neck to the lower edge of the skirt.

Materials Required.
Five ounces of Messrs. J. & J. Baldwin’s White “Beehive” 4-ply Scotch Fingering, 1 pair of long No. 10 bone needles, and a set of No. 11 steel needles.
Abbreviations Used.
K = knit; P = purl; O = over (put the wool over and make a stitch); N = narrow (knit two stitches together); st = stitch or stitches.
Cast on 291 st.
1st Row.—Plain.
2nd Row.—Purl.
3rd Row.—K 2, * O, K 4, K 3 together, K 4, O, K 1, repeat from * to the end of the row, ending with K 2.
4th Row.—Plain.
Repeat the 3rd and 4th rows 32 times, or until the skirt is the length required.
69th Row.—K 6, K 3 together, * K 9, K 3 together, repeat from * to the end of the row.
70th Row.—Purl.
71st Row.—K 5, K 3 together, * K 7, K 3 together, repeat from * to the end of the row.
72nd Row.—Purl.
73rd Row.—K 4, K 3 together * K 5, K 3 together, repeat from * to the end of the row.
74th Row.—Purl.
You should now have 147 st on the needle. Make a row of holes for the ribbon by repeating K 4, O, N, all the way along and purling a return row.
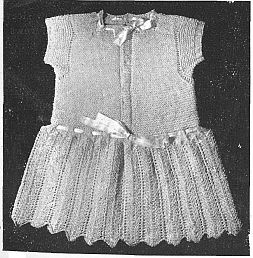
The Bodice.
Knit 48 plain rows, purling[52] the 6th st from each end of the row on the right side of the work.
Now divide for the armholes thus: K 36 st on to a spare needle, K 75, and slip the remaining 36 st on to a spare needle.
On the 75 centre st continue as follows: K 1, N, K plain to the end of the row. Repeat this row 21 times, then work 40 plain rows without decreasing.
This brings you to the neck of the petticoat. To form the shoulder sections, K 15, cast off 23 st (or up to 15 st from the other end of the row), 1 on the remaining st, K 36 rows. Cast off. Work up the other shoulder in the same way.
Now on the 36 st at each side of the work, knit up the backs to correspond with the front, forming the armhole slopes by decreasing 1 st in the first 9 rows turned from the armhole edge in each case. When working the backs, cast off all the st when the neck is reached. Sew the shoulder strap from each side of the front to the 15 cast-off st from the armhole edge of each back, and finish the neck by picking up all the loops along the edge and working 6 rows of ribbing, making holes for threading ribbon in the third row.
The Sleeves.
Pick up on to the No. 12 needles all the loops round the armhole edge, and work 20 rounds, a plain and a purl round alternately, in every other round decreasing 2 st; these decreasings should be made over the top of the armhole slope at each side, thus forming a gusset for the under-arm. Finish with 6 rows of ribbing.
Woollen Spencers
(Concluded from page 50).
under-arm seams, leaving a half-inch opening above the ribbing in the right-hand seam.
The Sleeves.
Pick up the loops round the armhole edge on to 3 needles. Put 18 st from each side of the under-arm seam on to 1 needle (36 st in all), and divide the remaining loops on to the others.
Work 5 rounds, then in the next round decrease 1 st at each end of the under-arm needle. Repeat these 6 rounds twice.
Work for 8 inches without decreasing, then for the next 4 inches decrease 1 st at each end of the under-arm needle in every 6th row. Finish with 30 rows of ribbing, and cast off.
If you wish to have elbow sleeves, finish the sleeve with 15 rows of ribbing after working the 8 inches without decreasing.
The bodice crosses over at the front, and fastens with ribbon ties at the neck and waist. Thread the ribbon from the left front of the waist through the opening in the right-hand seam, and make a slot over the left seam, to correspond by knitting a small strap (12 rows on 4 st), and sewing it on to the seam just above the ribbing; thread the ribbon from the right front through this, and tie the ends together at the back.
Some of the ladies who have headed sewing parties, or collected garments for the soldiers and sailors, during the past few years, could a tale unfold of the mysterious articles that many very willing workers have produced in their anxiety to help. No sooner was war declared than hundreds of women, from every grade in society, stepped forward, ready to make something; but what of the shirts 6 ft. long, the neckbands made of flannel—not ones, nor twos, but dozens of them, calling forth a special warning from the daily Press?
And it must be borne in mind, that many of these needlewomen must have passed through our schools—elementary or secondary—and have spent a couple of hours every week, for six or seven years, “learning needlework”; likewise, the garments required were not novelties, they are worn by men in time of peace as well as war.
Such a result of “learning needlework” gives one “furiously to think.” Has the training in the schools fitted the girls for making and mending garments for themselves and others—remodelling old ones, and generally using the needle as a help towards comfort and economy in the home?
This brings us to a very pertinent question. Is it possible to give the girls at school such a training in the cutting out and making of garments that the work loses it terrors, and comes within the grasp of them all? Experience has proved that cutting out paper garments from elaborate diagrams, bristling with “inches in” and “inches down,” is of very small practical value. The secret of success lies in getting the girls to measure a real wearer, and then to make a pattern, which they can properly “try on” for themselves, from these measurements.
Take, for example, the making of a frock, such as the girl is wearing in the picture. This child of twelve or thirteen, was one of a class of thirty or forty, in which every girl made a similar dress for herself. All measuring, making of patterns, cutting out of the material, fixing and sewing—everything in fact, from beginning to end, was done by the girls themselves.
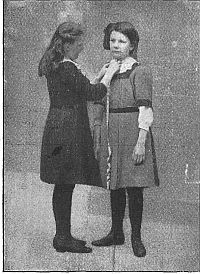
To begin with, they arranged themselves in pairs, and each girl cut a yoke, cuff and sleeve pattern for her companion. It was not necessary to make a paper pattern of the skirt of the frock. No material was cut until the patterns were satisfactory.
A yoke is an exceedingly useful and necessary part of many garments, but it is not, as a rule, considered an easy thing to cut a pattern of one to fit a particular wearer; but these girls found it simple enough, by working on the following plan.
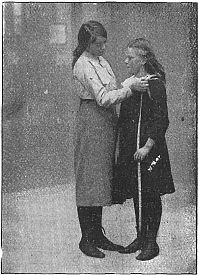
The illustration shows one girl taking the neck[54] measurement of her friend; this is the only one required for cutting the pattern. It should be found, by holding the tape loosely around the neck, so that the head moves easily with it in position.
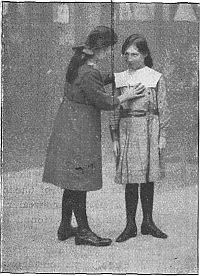
An oblong piece of paper—newspaper will serve quite well—measuring the neck length one way and one-and-a-half times the same the other, was then cut out. Thus, if the neck is 12 in., the paper will be 12 in. by 18 in. (See Fig. 1). The method adopted of getting the yoke from this, will be seen by following each step in the sketches. The two shorter sides were folded together as in Fig. 2, forming a double piece. The two top corners were brought over until they met in the middle, as in Fig. 3, and then the triangular pieces cut off, leaving a double piece, as in Fig. 4. Care must be taken in the next step to bring the slanting edge (A) next to the two open straight edges, over to the bottom edges D; thus A and D lie exactly over each other, and the second slanting edge B covers the fold C.
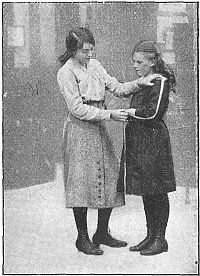
The pattern begins now to look something like a yoke, and is soon[55] complete. Two pieces must be cut off, one to form the neck and the other the shoulder. Fig. 6 shows clearly how this is done, and when it is finished a yoke pattern, as in Fig. 7, is the result. The illustration gives some idea of the “fit” of a yoke cut in this way. The girls were very critical about the neck and shoulder curves, and the width across the back and front; many little alterations were made before the pattern was considered satisfactory, and good enough to cut out the material from.
Having made a satisfactory yoke pattern, the next thing to tackle was the sleeve. An oblong piece of paper was again necessary, and its dimensions were found in the manner shown in the two pictures. The measure was slipped loosely around the top of the arm, and three or four inches added to allow for the arm movement. This gave the width required, and the length was found by holding the measure on the top of the shoulder, as the girl is doing in the illustration, and then carrying it around the bent elbow to the wrist.
When this oblong was folded in half, lengthwise, it faintly resembled[56] a sleeve, but, to shape it properly, two other dimensions were necessary. The next two photographs show the girls getting them. The length of the under-arm sleeve is about three quarters of the full length, and the wrist the same fraction of the width at the top of the arm. The girls discovered these things for themselves, and marked with the rounded end of the scissors, a slightly curved line from the wrist to the under-arm position. This double piece was then cut away.
The shaping of the top of the sleeve requires a little more judgment and care. The pattern was opened out flat, and a convex curve made from one side to the top, joining a slightly concave one starting from the other. Thus they obtained the foundation of any sleeve pattern. It can easily be made wider or narrower, longer or shorter, according to the dictates of fashion.
As the frock the girls made on this occasion had sleeves with cuffs, two or three inches deep, the pattern was shortened accordingly, before the material was cut.
The girls were only beginners, so they cut patterns of the collar and cuffs in paper, and fitted all the parts on the material before cutting out.
The cuff and waistband were straight pieces of material cut to the required sizes.
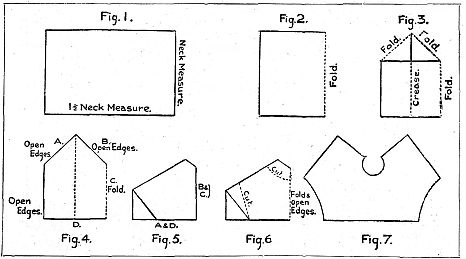
For the collar pattern, the neck length was taken, as for the yoke pattern, and an oblong piece of paper cut out, this length one way and half of it the other. (See Fig. 1). This was folded in half to form a square, and creased across the middle, as in the diagram. One of the two open corners was folded over to the crease, and the triangular pieces thus formed were cut off, as in Fig. 3. A curved line was next marked, connecting one end of the slanting edge, A, with the bottom end, C, of the fold. By measuring the length of the slanting edge A, B, along the fold, a new point D was found, and[57] a curve was made parallel to the first curve, connecting B and D (See Fig. 4). The double paper was cut along the curves, and thus the pattern of half the collar was obtained.
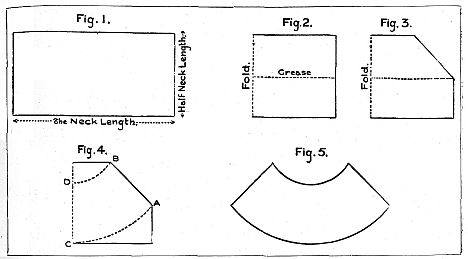
It was found that the collar for the frock fitted better when made in two parts and in double material. Thus, in cutting out the cloth, four pieces, the size and shape of the pattern, were required.
The length required for the skirt was found by fitting on the yoke pattern, and then measuring from the middle of the front straight down, adding two or three inches for the hem.
The frock in the illustration was made from double width serge, and it was found practicable to get the skirt from one-and-a-half widths, the other half serving for the yoke. The pair of sleeves came out of a full width. This planning and arranging involved no end of simple but interesting calculation, and the reality of it all made a strong appeal to the girls.
One point of supreme importance was most carefully impressed—that was—“the way of the cloth”; certainly, if this goes wrong, the garment is ruined, and just as certainly it is a thing that will never be mastered “theoretically”—it must be learnt by actually cutting out of material.
The cutting of the sleeves from one pattern is another bit of “practical politics” which arises when a garment such as this is being made. There is no reason why the pair should not be cut together, so long as the two right, or two wrong sides are placed together. The use of French chalk for marking out the pattern on the cloth was encouraged.
The making up of the frock afforded many opportunities for practice in neat, strong stitching, combined with beauty. Suitable cottons and needles were used, nothing finer than No. 40 cotton will stand the wear and tear of every-day life. Where possible, the sewing machine was used, but the parts[58] sewn with it were first carefully tacked.
The question of decoration aroused no end of discussion and interest the whole time the frocks were being made, and urged many a slow worker on to greater efforts. The yokes, cuffs and collars were stitched with contrasting coloured thread, and the variety of decoration was delightful. Simple hand-worked stitches are generally more effective, as well as more economical, than bought trimmings.
Of course, any difficult stitch or piece of fixing—for example, the placing of the box pleats—was always practised on a piece of “scrap” material or paper, before the frock was tackled; but when the young needlewomen realised they were “trying” a stitch or a piece of fixing, because they needed to use it in the making of the frock, they put a good deal more zest into the work than if it was a mere “needlework exercise.” No new material was ever torn up for these practices—odd bits of any shape or size were used, and a bag of such pieces was always at hand, in sewing lesson, for this purpose.
On the score of both economy and efficiency, one would plead that the tearing up of good flannel and calico for the “sewing lesson” should be rigidly tabooed. Probably no other subject offers such unique opportunities in our schools for inculcating habits of thrift and economy, with increased efficiency in the teaching.
The distress of nations, with its awful promise of misery and poverty in the future, gives this branch of a girl’s education an added importance. Surely we must neglect no opportunity of improving it!
Books of Cheerfulness
By FLORA KLICKMANN
THE FLOWER-PATCH AMONG THE HILLS
AND
BETWEEN THE LARCH WOODS AND THE WEIR
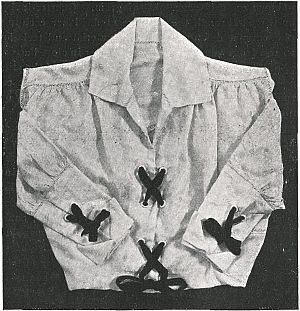
With an up-to-date pattern and good material, the making of one’s own blouses is but a delightful pastime, as well as a very profitable one. The material for the blouse shown here cost very little, just a few shillings would, in fact, pay for the paper pattern, two yards of the material, a dozen little bone rings and two yards of narrow velvet ribbon for the lacings, but the cost of a similar blouse ready-made would be at least four times as much.
The various pieces were all cut out by a paper pattern, which was pinned on the material, and on which there was an allowance of a quarter inch margin. The collar, cuffs, and yoke were cut double. The last three items had their edges all turned inwards, to the depth of the margin allowed, then both pieces of each were tacked together with their edges perfectly even.
The little turned back cuff had the two pieces stitched together on the wrong side on the outer edge and sides, then turned inside out and the edges tacked flat. The inside edge was tacked in between the two pieces of the large cuff and secured with a row of stitching.
The sleeves were joined with a French seam, then both ends were turned into a narrow hem, which was tacked carefully. The edge at the lower end was gathered to fit the cuff with top stitch set evenly, and for this the same kind of thread as used in the faggoting was employed.
The fronts had the edges cased with a piece of the material for a depth of two inches. The back was joined to the fronts in the underarm seam by a French seam as in the sleeve, then the entire top portion of back and front and the armholes were turned into a narrow hem, and tacked securely, the front edges gathered as in the sleeve, to fit the yoke.
Narrow strips of stiff paper were tacked underneath the lines where the different parts were to be joined, and then the faggoting was commenced by beginning at the right[60] front edge, as shown on this page.
Bring out the thread through the edge of the yoke, carry it down in a straight line to top front edge, and insert the needle down through the material, bring it out above the stitch just formed, which you draw up evenly, now repeat this stitch through the edge of the yoke one-eighth of an inch from the first stitch, and so on from one side to the other. Make all joining in the thread on the back of the hem.
When the faggoting is finished, the hems are worked with a row of stem stitch, which keeps them in place and gives a neat finish.
The eyelet holes were next worked, and the method is shown in the diagram. Quarter-inch bone rings are used. Place each in position on the material and tack around, then work over in close buttonhole stitch, having the top of the stitches resting on the material. The centre of the eyelet hole is cut away on the back. The front and cuffs are laced through these holes, which are set opposite each other, with narrow velvet.
At the waist line there is a narrow casing of muslin on the inside, to take the tape, tie-string or elastic, and the lower end is neatly hemmed. The edges of the collar, cuffs, etc., may have a row of machine, or hand stitching on the right side, or they may be joined by stitching on the wrong side and then turned out.
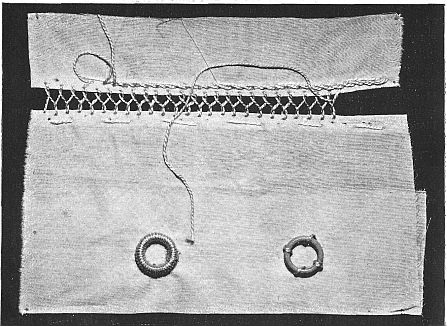
How to decorate the simple garments made at home is a question one frequently meets.
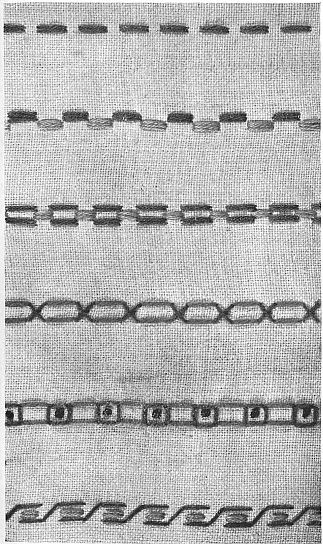
Children’s overalls and frocks, little boys’ tunics, and blouses for the elder girls, usually need some trimming or decoration, and it is often difficult to find just the right kind. This is especially the case with coloured garments, and those for which lace is unsuitable. Many people like a little embroidery, but it is not always easy to get an entirely suitable pattern. Some require more time than the home worker is able to give, and some are more elaborate than is desirable for the garment.
A simple kind of stitchery is usually resorted to, and very often meets the case, and one may see little frocks and tunics of inexpensive materials, with quite a note of distinction given by the pretty stitching on the hems and bands.
The favourite and most frequently seen among the stitches so used, are the French knot, stem stitch and feather stitch. It is with the idea of suggesting other stitches and arrangements, that these diagrams and illustrations are given, and with[62] attention to a very few simple directions, the most diffident worker may be sure of a good result.
One feature of decorative stitchery of this kind, is that it may also be constructional, that is, that where a hem is to be decorated, it need not first be stitched with the machine, the decoration does the work of the machine. This point is not always realised by the home worker, who usually makes the garment with the sewing machine, and then proceeds to decorate it, adding French knots and perhaps stem stitch to hide the machining.
Some machining is often necessary, but much can be dispensed with, without detriment to the garment, and this makes it possible to do, at any rate, part of the home dressmaking, away from the noise and busy atmosphere almost inseparable from a room dominated by a sewing machine.
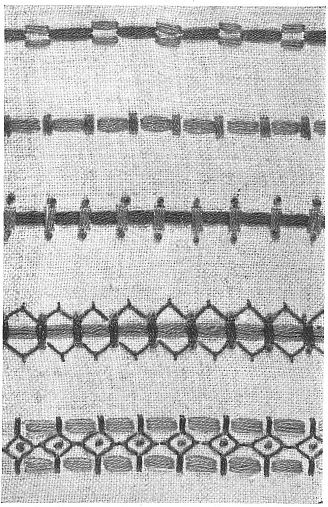
In making a little magyar overall, like that illustrated, for instance, the side seams and opening may be sewn with a machine, the hems and neck prepared as if for machining, and then the decoration applied. The home worker, whose husband has a rooted objection to having a sewing machine at work when he comes home in the evening, cuts out and machines part of her work during the day, and has only the pleasant part to do by hand in the evening, while she is free to talk, or listen to the day’s news.
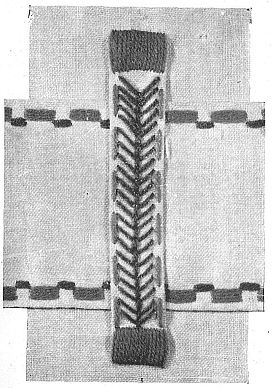
The value of the simple tacking stitch as a trimming is not fully realised. On another page are shown some very distinctive effects in this stitch, and in the frock illustrated the stitch is used in conjunction with the Y stitch which is shown and described.
The worker who has not yet used the tacking stitch as a decorative stitch must be careful on a few points, however. The stitch must not be too long, and the length and spacing must be as even as possible.
A novice might make an experiment on a little garment of brown calico, holland or écru-coloured casement cloth.
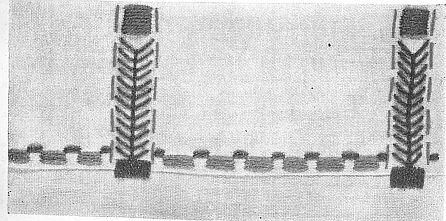
Turn up the hems on the right side of the garment, and with turkey-red embroidery cotton of medium[64] thickness, make the first row of tacking about where the hem would be machined. The first row is the most important and needs the most care.
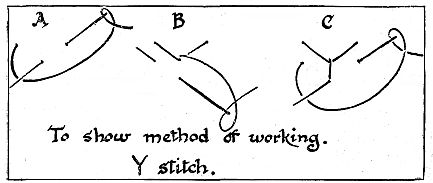
As a general rule no tacking stitch used as a decoration should be more than half-an-inch in length, and the space between proportionately less. The space between may be equal to the stitch, or may be half or a quarter its length, but neither stitch or space should be longer than half-an-inch, or the result may be a series of long threads, apt to become loops if suddenly caught.
For the experiment, make the stitches about one-third of an inch, and the space between either the same or very small—about one-tenth of an inch. An inch measure at hand to test the first few stitches will quickly help the eye to guess the correct length of the remainder without effort. After the first row, the most difficult part is over, as the second and succeeding rows will be exactly the same length.

Three rows of stitching close together will result in a pattern of red oblongs, with regular spaces between them. These may become squares if more rows are added.
All the illustrations on pages 61 and 62 are based on the tacking stitch, and may be applied to the decoration of a hem, or the border of belt or neck.
An illustration on page 63 shows the treatment of the two-inch hem on the child’s frock. The vertical bar repeated at regular intervals round the hem is[65] filled with a variation of the Y stitch, the working of which is shown in diagrams A, B and C on page 64.
The pattern should be arranged on the sleeves, neck and belt, as shown in the sketch.
The position of each vertical bar should be accurately measured, and marked with a pencil, and a line drawn down the centre of each bar will help to keep the stitch equal on each side.
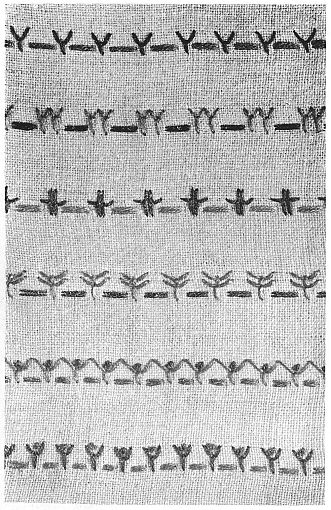
A very delightful little casement curtain is shown on page 95. This would be eminently suitable for the Animal and Bird Nursery, and will appeal to a child; and these little muslin curtains with filet crochet tops are so very effective both from inside and outside the window.
As will be seen, the crochet presents no difficulty, but it must be done evenly to look well. A diagram is given for working the strip, from which the open and solid meshes can be counted.
The heading on the curtain shown is worked in Ardern’s No. 36 cotton. This measures 15½ inches wide by 3 inches deep. To make this a little longer or deeper, a coarser cotton could be used, though, of course, much depends on the individual worker as to the size it actually works out. But filet crochet is best done as closely as possible.
Two of these little curtains would be wide enough for some windows, but it will be quite easy to repeat the design, or part of it, if required. Double crochet is worked along the top and bottom of the curtain strip to give a nice firm edge.
If quite a narrow curtain strip is preferred, the insertion showing the two ducks and the rabbit repeated, would be good. Or this insertion could be used at the bottom of a little curtain, providing there is little or no fulness in the curtain. If used at the bottom of a full curtain, the design would, of course, be completely lost.
This narrower insertion would also look very pretty to trim a white cloth for the tray or table, and it could either be let in round the sides of the cloth, or a strip would look well let in across each corner.
The cock and duck insertion is one that would be very effective where a strip is wanted to hang lengthwise down the sides of a curtain, or for any other purpose where a lengthwise strip is required. A separate diagram is not included for this, as this is merely a different arrangement of the birds, and the illustration is sufficiently large for the number of meshes between each pattern to be counted.
Many people do not care for all-white quilts and bedspreads, considering them cold-looking, even though they undoubtedly give a look of freshness to a bed, when they are first put on.
And there can be no doubt but what there is a need for colour in our furnishings no less than in our dress, in our dull climate. White bedspreads look charmingly cool and refreshing on a hot, sunny July day—but alas, so few of our days, even in July, are hot and sunny; and there are all the other months of the year to be provided for.
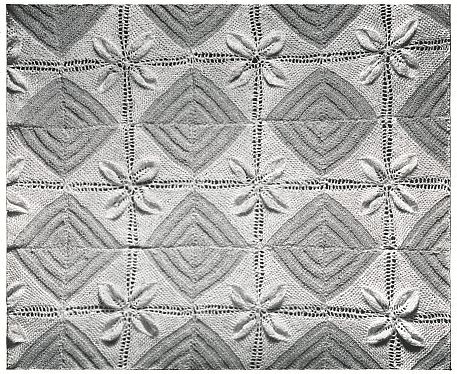
Hence the vogue of the coloured bedspread, with its splashes of pink, or blue, or heliotrope flowers and green leaves on a white ground.
Now that knitting has returned to us, and will undoubtedly stay, we find a revival of the knitted quilt of our grandmother’s day. But once more the objection is raised that the all-white quilt, while undoubtedly handsome, looks chilly, and shows every slightest mark.
Few people know what pretty effects can be obtained from white knitting combined with colour. Strutt’s “Milford” Knitting Cotton comes in several dozen very pretty shades, all guaranteed to wash well.
The counterpane here illustrated is in pale blue and white, and is quite a feature in a pale blue bedroom.
Other colours you can obtain are various pinks, greens, pale cream, with the intervening tones right up to full orange, heliotrope, salmon, half-a-dozen different blues, from palest forget-me-not to navy blue, crimson, fawn, and various tints of brown.
But, undoubtedly, for bedspread purposes, there is nothing like the pinks or the blues.
It is best to use patterns that are worked in separate diamonds or squares, and joined later on. This saves a tanglement of various balls, as is inevitable if several colours are all going at once on a large piece of work. When the work is in squares, each alternate square can be in colour; when the work is in diamonds, that begins with one stitch and increase each row till the widest point, and then decrease to the opposite point. Half the diamond is worked in white, and when the widest point is reached the cotton is broken off and the coloured ball joined on, the remaining half being worked in colour.
The pattern here illustrated is the old fashioned leaf-cluster so often seen in ancient knitted counterpanes.
The bedspread is worked in small diamonds, which are joined together by over-sewing.
Use Strutt’s “Milford” Knitting Cotton No. 8, in white and in pale blue (or any other colour required), and a pair of No. 14 steel needles.
Abbreviations Used.
K = knit a plain stitch; P = purl; O = over, that is, bring the thread forward and pass it over the right hand needle, in order to make an
extra stitch; N = narrow, that is, knit two stitches together.
With the white cotton, cast on one stitch.
1st Row.—K 3 stitches into the one stitch cast on.
2nd Row.—O, K, O, K, O, K.
3rd Row.—O, K, P 3, K 2.
4th Row.—O, K 3, O, K, O, K 3.
5th Row.—O, K 2, P 5, K 3.
6th Row.—O, K 5, O, K, O, K 5.
7th Row.—O, K 3, P 7, K 4.
8th Row.—O, K 7, O, K, O, K 7.
9th Row.—O, K 4, P 9, K 5.
10th Row.—O, K 9, O, K, O, K 9.
11th Row.—O, K 5, P 11, K 6.
12th Row.—O, K 11, O, K, O, K 11.
13th Row.—O, K 6, P 13, K 7.
14th Row.—O, K 7, cast off one (i.e., slip a stitch on to the right hand needle without knitting it, knit the next stitch, draw the slipped stitch over the knit one), K 9, N, K 7.
15th Row.—O, K 7, P 11, K 8.
16th Row.—O, K 8, cast off 1, K 7, N, K 8.
17th Row.—O, K 8, P 9, K 9.
18th Row.—O, K 9, cast off 1, K 5, N, K 9.
19th Row.—O, K 9, P 7, K 10.
20th Row.—O, K 10, cast off 1, K 3, N, K 10.
21st Row.—O, K 10, P 5, K 11.
22nd Row.—O, K 11, cast off 1, K, N, K 11.
23rd Row.—O, K 11, P 3, K 12.
24th Row.—O, K 12, knit 3 stitches together, K 12.
25th Row.—O, K to end of row.
26th, 27th, 28th and 29th Rows.—Like 25th Row. Break off white cotton at end of 29th Row, and join on the blue cotton.
30th Row.—Knit the whole row; end with the last 2 stitches knit together.
31st Row.—Purl, ending with the last 2 stitches purled together.
32nd Row.—Like 30th.
33rd and 34th Rows.—Like 31st.
35th Row.—Like 30th.
36th Row.—Like 31st.
37th Row.—Like 30th.
Repeat from 30th Row twice over, making 3 times in all. Then continue working the purl and plain knitting for alternate rows till you have only one stitch left. Break off the blue cotton and cast off.
In joining the diamonds, use white cotton when uniting the white portions, and blue cotton for the blue portions.
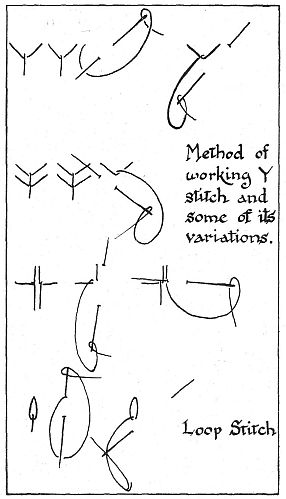
Abbreviations Used.
K = knit a plain stitch; P = purl; O = over, that is, bring the thread forward to the front of the work, and pass it round over the right hand needle, in order to make an extra stitch; N = narrow, that is, knit two stitches together; S = slip a stitch.
Use Strutt’s Knitting Cotton, No. 8, 3 threads, and a pair of No. 12 steel needles.
Cast on 91 stitches for a runner, about 12 inches wide, or 118 for a runner 16 inches wide. If something wider than this is needed, cast on multiples of 27, with an extra 10 stitches.
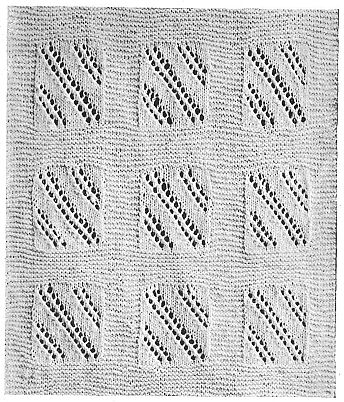
Notice that after the first piece of plain knitting, each alternate row is like the 19th.
Knit 18 rows plain.
19th Row, and each alternate row.—* S 1, K 9, P 17. Repeat from * till only 10 stitches remain on needle. Knit these 10 plain.
20th Row.—* S 1, K 10, O, N, O, N, K 4, O, N, O, N, K 4. Repeat from *, K 10.
21st Row.—Like 19th.
22nd Row.—* S 1, K 11, O, N, O, N, K 4, O, N, O, N, K 3. Repeat from *, K 10.
24th Row.—S 1, K 12, O, N, O, N, K 4, O, N, O, N, K 2. Repeat from *, K 10.
26th Row.—* S 1, K 13, O, N, O, N, K 4, O, N, O, N, K 1. Repeat from *, K 10.
28th Row.—* S 1, K 14, O, N, O, N, K 4, O, N, O, N. Repeat from *, K 10.
30th Row.—* S 1, K 15, O, N, O, N, K 4, O, N, K 1. Repeat from *, K 10.
32nd Row.—* S 1, K 10, O, N, K 4,[72] O, N, O, N, K 4, O, N. Repeat from *, K 10.
34th Row.—* S 1, K 11, O, N, K 4, O, N, O, N, K 5. Repeat from *, K 10.
36th Row.—Like 20th.
38th Row.—Like 22nd.
40th Row.—Like 24th.
42nd Row.—Like 26th.
44th Row.—Like 28th.
45th Row.—Like 19th.
Then knit 19 rows plain knitting. Go back and repeat from the 19th row.
Bedclothes become an expensive item when there are several beds for young people to be made up, as well as those for their elders. Yet warmth is essential, if their health is to be maintained.
In the winter, there usually comes a night of sudden cold, so raw and so intense, that it seems next to impossible to put too much on the beds. Every spare blanket is turned out, and every eider-down, and still there is not enough! Next morning someone is sure to say they never got warm all night!
Of course, eider-downs are ideal. They are warm without being heavy. But real eider-downs are expensive. Here is a substitute that was popular in our grandmothers’ day. It is simply a quilt formed of small bags, sewn together like patchwork, each bag containing a certain amount of snippets and clippings. Very simple, isn’t it? And yet these quilts, that cost practically nothing, are invaluable in the cold weather. Put one of these over the outside of the bed, and the sleeper keeps as snug and warm as though under a couple of down quilts.
One great advantage of this quilt is the ease with which it can be made. A child can always run up a little bag; a child can also cut up snippets, if it is old enough to be allowed to use a scissors. Mother can run round a few bags with her sewing machine, just before putting it away after doing needlework. In this way the bags accumulate in a surprising manner; and joining them together, a few at a time, either by hand or with the machine, is not laborious or brain-wearing work.
The Method I Always Adopt.
For some years now, I have made it a rule always to have one of these quilts on hand. If I do not need it myself, when it is finished, I always know someone who can put it to good use. Any woman who has an elastic family and a non-elastic purse, is glad of one for a gift.
I save every scrap of material that would otherwise be wasted. If it is not new, I have it washed and thoroughly dried. All this waste goes into a bag that I keep hanging up in a cupboard in my bedroom. I never allow a large amount to accumulate, lest moth should get at it. I have seldom more than a couple of handfuls at one time waiting to be dealt with.
On my chest of drawers I keep a box. In this there is always a pair of sharp scissors. When I have a few moments idle—between the lights when it is too dark to see much else, or when my eyes are too tired to do work requiring close attention—I cut up a few of the scraps from the bag into snippets about an inch square[73] sometimes smaller, never larger. I put these in the box.
Then again, whenever I have any bits from dressmaking, or mending, or darning, it has become second nature with me to cut them up there and then into snippets, and put them in the box. In fact, I always have the snippet box on the table beside my work box when I am sewing, and the bits go in as a matter of course as I go along. It keeps me so tidy. Everything comes in useful, even fragments of darning wool, ravellings and basting threads!
I save any scraps of material large enough to make the bags; a useful size is five or six inches by three inches. I run up three sides of these when I have a spare moment; put in a small handful of snippets, and close up the end. These I put in a drawer till I have time to join them together.
I always machine mine together, as it is the quickest way.
Do not fill the bags anything like full, or the quilt will be impossibly heavy. If you fill the bag about a third full, or at most a very loose half-full, that will be quite enough. Each little bag just wants a slight thickness inside, to give the extra warmth, much the same as we sometimes line quilts with a layer of cotton wool between two cotton covers.
The reason we put the clippings in little bags, instead of into one bag, is to keep the stuff evenly distributed over the surface of the bed. Otherwise, every time the sleeper turned[74] over, or disarranged the coverings, there would be the chance of all the clippings slipping over, and collecting themselves on the one side or the other of the bed, or possibly all falling to the foot of the bed.
A quilt made of the bags, not too full, can be shaken and kept thoroughly aired.
Almost any sort of material can be used for the bags, provided it is not too delicate in colour, as one does not want to have a quilt of this sort frequently going to the cleaners. Strong stuffs are best, such as cretonne, serge, stout print, sateen—anything in fact that will stand some wear.
Mix cotton clippings with wool clippings in each bag. Obviously the quilt will not need any lining, as the back will be fairly neat. If you like, you can finish the edge with a cord; but I myself always aim to get the outside bags all of one colour scheme; this in itself makes a certain finish—a kind of border—and I just leave it at that. After all, these quilts are not for ornament so much as stern utility; nevertheless, they can be made to look really pretty, if a little care and taste is expended on the placing of the various colours and designs.

Turn down a hem a little more than ½ an inch, having a ball of wool ready (Andalusian or 3-ply white will do), fasten in the end with a darning needle. Having the working end of wool out at the top of hem, ready for the crochet hook (a coarse steel hook is best), catch up a chain stitch with the hook and * bring the wool across the hook as for doing a stitch, insert the hook at the bottom of hem, catch wool on opposite side, the opposite way to lifting the thread as in crocheting, that is hooking the wool in a downward movement from right to left, draw loop through and up level with the top of line. Take out the hook and make one loop, just drawn up to lie in two straight lines and slip through loop on needle, afterwards doing a chain stitch, and repeat from *. A little practice will soon show that done in this way the stitches are not twisted but lay flat, like the machine finish.
In the days of our grandmothers, eiderdowns were considered a luxury, things to be taken care of and kept well covered. At the present time, however, they are found on nearly every bed, varying from those made of sateen and chintz to those made of satin and silk.

I suppose it is because “familiarity breeds contempt” that we do not take the care of ours that our grandmothers did of theirs, and that therefore they became so much sooner soiled and worn out. If your eiderdown is getting shabby, why not clean it and re-cover it yourself?
If anybody is not willing to give up a little time and trouble to the success of this venture, let them not so much as contemplate cleaning and re-covering an eiderdown at home, for though quite easy it is a little tiresome, and the only two things really needed outside a few yards of chintz are patience and common sense. To explain: patience will be needed, for an eiderdown takes some time to dry when once wet, and common sense to choose the right day on which to do it.
The first thing to do is to choose a hot day, as the eiderdown must be dried out-of-doors, and the brighter the day the quicker it will dry, added to which the sunshine fluffs up the down better than any fire does.
After well brushing and shaking the quilt, whip it well with a little cane to loosen the feathers and to get out whatever dust you can. Have ready a bath half full of warm—not hot—water, into which dissolve a small packet of Lux. Be sure before putting the quilt in that the soap is well melted, as otherwise it is apt to stick in lumps to the covering, whatever it may be.
Dip half of the quilt in first and souse it up and down before dipping in the rest. You will be surprised at the amount of dirt that “pours” out. It seems incredible that an eiderdown could be so dirty without showing it plainly.
When the whole quilt is wet, continue to dip it up and down in the water for some time, gently squeezing it between your hands. It does not matter if the colour runs, as the dye will not affect the down, and as you are re-covering it, why, the streaky case will not be seen.
Let it soak in the water for about an hour, occasionally stirring it in the bath, kneading and squeezing it so as to loosen the dirt. When you think it is clean, empty the bath and refill with hotter water, but no soap. Rinse well and continue[76] in fresh waters until the soap is completely rinsed out.
Wring out thoroughly and hang over the edge of the bath to drain. At the end of twenty minutes wring out again, and it is much better if you can get another person to help with it, as it is much too big to do alone. Next, take it out into the garden and hang it on a line, the higher the better, but anywhere where the wind can blow through it.
And here is needed the patience; for it will take two days—probably three days, and possibly a week—to dry in the open, for an eiderdown is very thick, and the down being close it is difficult for the air to penetrate. Never let it stay out after the sun is off it, as it quickly absorbs the damp and only delays the process of drying. Frequently turn it while hanging on the line, and shake it well to loosen the feathers.
I generally find that three days is enough to dry my quilts thoroughly, but I always leave them spread out on the grass on a clean sheet for one whole day in the sunshine after the drying to fluff up the feathers. It is wonderful how the heat makes them swell and become light and fluffy.
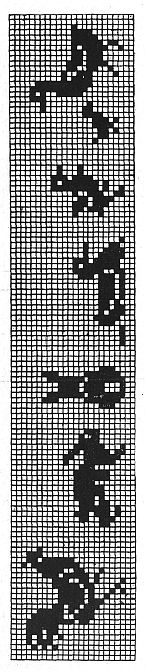
When all this is finished, take your little cane and whip it all over hard, as though you were beating a carpet. Turn it often as this helps to loosen the down inside.
This completes the cleaning process, which is simple but complete, and then you are ready for the re-covering.
The new cover, needless to say, depends entirely upon individual choice whether it is to be satin, silk, sateen or chintz.
I always use a pretty chintz corresponding to the curtains and hangings of the bedroom the quilt belongs to. One side I cover with this, and the other side I use a self-coloured sateen or casement cloth to tone.
It is impossible for me to give the amount of material necessary, as eiderdowns vary tremendously in size. There are many different widths in what is called a double-bedded quilt, as also in the single-bedded ones. For large-sized ones you will have to have a seam down the centre, as no material is wide enough to cover it completely; but, for a single-width quilt, a forty-inch goods will be wide enough.
The last quilt I covered was for a brown room with a china-blue carpet patterned in white, and so I chose a willow-pattern[77] chintz with a reverse side of brown sateen, and it was really one of the most successful I have done.
First of all, machine-stitch the two widths of material together, being careful to match the design on the right side, and carefully press the seam flat. Then spread out on the floor the sateen—also seamed—and, laying the eiderdown upon it, run a tacking thread all round the edge, being careful to stretch the quilt to its fullest, so as not to make the cover too tight. After this run a line of stitching around each and every little eyelet, of which there are many; these hold the cover in position for the next step.
Taking a long thread of a bright-coloured cotton, carefully follow out the design of the quilting, which, in my particular case, was a very elaborate scroll, tacking the stitches right through the quilt to the new piece of material. If the design is very complicated this needs patience; but nowadays eiderdowns are more often quilted in straight lines, with perhaps a diamond centre.
Always tack your pattern on the plain side of the material, as it is so much easier to stitch on the machine later on if there is no pattern to dazzle your eyes.
I would impress on whoever tries this re-covering to be very careful about keeping exactly to the quilting pattern, as on this altogether depends the success of the whole undertaking. It would be most disappointing if, after having finished, you should find that owing to careless tacking the covering was crooked or cramped or drawn. It takes patience and care, but is quite easy and most satisfying.
When you have completed the outlining, lay the quilt on the floor again and tack on the chintz, doing exactly as you did with the sateen, only omitting to outline the quilting, as it is not necessary to have it on both sides.
Next, where the threads outline the eyelets take a stiletto and punch the holes through both sides and button-hole them all round through the double materials. In doing this use silk the colour of the plain-coloured side, as it looks so much nicer than the reverse way.
And now all is ready for the machine. If your quilt is in two colours, thread the machine with the silk matching the sateen and use a bobbin threaded with a shade to match the reverse. Carefully follow out the design which you have outlined, spreading the quilt as wide as possible so as not to get it puckered.
When all the stitching is finished you will be delighted to see that both sides of the quilt are stitched in their own respective colourings.
Take out the tacking threads around the edge, and turning down the edge of the “right side” of the quilt insert a narrow piping cord and sew in by machine. Next turn in the edges of the other side, and hem by hand down to the edge of the cord. This gives a very nice finish as well as a very neat one.
To anybody who desires a frill, though these are not always the prevailing fashion—there being fashions in eiderdowns as in other things—after taking out the tacking thread around the edge of the quilt, insert the frill instead of the cord and stitch firmly by machine. In using a frill be sure to have it made of[78] the two materials the same as the cover, putting the plain to the plain and the fancy to the fancy. Then hem down as with the cord.
A very handsome edge can be made if a thick cord be used similar to those used in upholstery work, but covered tightly with material before sewing to the cover. The pulling tightly of the material covering the cord gives a sort of “cable” effect, and is really very pretty.
When completed I feel sure you will be pleased with the look of your new eiderdown. It costs so little—not more than a few shillings at the outside.
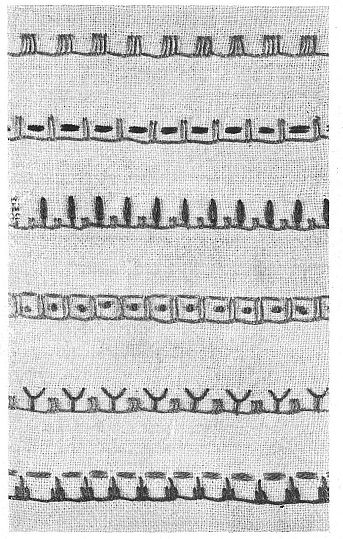
That useful branch of oldtime needlework, the patchwork quilt, has been revived, and this revival is due to the exigency of economy during war-time. The price of all kinds of materials being so very high, and the need for economy so great, have led to many useful devices, in order to maintain a reasonable amount of comfort during these trying times, and not the least of these is the patchwork quilt.

The smallest scraps of cotton, silk, or other material can be utilised and made into coverings, which in many cases may be made very artistic, and durable. In order to carry out the colour scheme of the bedroom for which it is intended, it is necessary to combine only those colours which are found in the other furnishings.
The usual size of a quilt for a double bed is 6 ft. by 5 ft., or if the bed be very large, 6 ft. by 6 ft. The single bed size is 5 ft. by 4 ft. For a child’s cot, 4 ft. by 3 ft. is the average size.
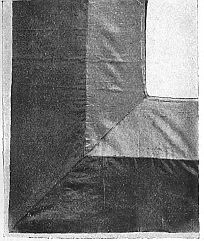
Many of the more artistic kind are made up into bedspread size, which is longer than the quilt, and allows for a fall over each side. The size of a bedspread is usually from 72 to 90 inches, by from 90 to 100 inches.
The pieces of material, which are all of the same kind in each quilt, are cut up into triangles, squares, points, circles, etc., and care must be taken to have the sizes of the different shapes exactly alike. The edges are turned in, then the various pieces[80] topsewn together on the wrong side according to the pattern. It is a good plan to make the quilt in sections, then unite all together.

A quilt of this kind must have a lining, and if wanted to give additional warmth an interlining of some kind. Cotton wadding, strips of old white flannel, or any colour which will not run in the washing, sewn together. Old woollen underwear thoroughly washed and with worn pieces cut away, can be made use of, as well as light colour tweeds, etc., but all pieces must be lightly sewn together with flat seams, then tacked on the lining. See that this lining fits the quilt exactly, turn in the edges of both, tack together, then machine stitch or sew the edges together. Blanket stitch may be worked over the edge with coarse coloured silk, embroidery thread, or No. 5 “Peri-Lusta.”
The quilt is now ready for the “quilting,” without which it would not be complete. This is done on the sewing machine if one be at hand, otherwise hand-sewing[81] with coloured thread, matching or contrasting with the work, is done in running stitch, with here and there a backstitch to make it secure. Use a long sewing needle with “Peri-Lusta” thread, any required colour, No. 8. The lines of sewing can be formed into diamond shape, squares, herringbone shape, zig-zag, or any other form liked.
The following designs are easily made, and will only require scraps of material found lying idle in most households. Old sheets can be made use of for the lining, or perhaps faded casement curtains, which can be washed and bleached, or tinted to match.
Triangles in Three Colours.
This is intended for scraps of silk too small to allow of variety in the shape. They are all cut into triangles, and the colours arranged to form hexagonal shapes. There are only three colours, and of each you will require two triangles to form the hexagonal shape. Place the six triangles with a point of each in the centre, no two of same colour coming together, turn in and topsew the edges of each of two sides together. Make several of this shape before joining together, then topsew all the hexagonals, which will be found to fit into each other. Finish in the manner already directed.
A Variety of the “Star” Shape Design.
The design shown on page 82 is a variety of the “star” shape design, and three colours are used. Each star has a plain six-sided figure in the centre. In the design this centre is green. Then each of these six sides has a triangle in white. The space between the points being filled with pink, the outer edge of which is, of course, twice as long as one side of the centre.
Suitable for Silk Patchwork.
The design at the bottom of page 79 is the very latest design, and is suitable for scraps of silk, the fashionable colours of black and white being combined in the sample. Blue and white, pink and white, green and white, or any other colours can be substituted. The border has an appliqué of roses cut from cretonne.[82] Each motif has its edges turned under, then tacked to the quilt or bedspread when the quilting is finished. The edge is worked over with green “Peri-Lusta” of the same shade as that with which the “quilting” was done, using outline stitch.
To Form a Padded Quilt.
The design at the bottom of page 80 is intended for forming a padded quilt out of small pieces of silk, sateen, or other material. The hexagonal shape is used here, and the lining of contrasting colour is cut to the same size, then five sides of the shape are sewn together, and the little bag so formed is stuffed with vegetable down, then the other side sewn up. One side of this can be silk and the other cotton.
The long narrow strips for the sides are formed of the principal material in strips of the required length, and double the width the band is to be. Sew the edges together, then stuff with the down through one end, sew the corners together, and these must be cut at right angles, so as to give a nice corner. When all the padded pieces are sewn together, a pretty effect is obtained by going over all the seams with black cotton in feather-stitch. Vegetable down is cheap, and about three pounds will be ample for a large size quilt.

Patchwork Appliqué Bedspreads.
Another economical bed-covering is found in the patchwork appliqué. In this bedspread there is no lining required, and cheap cotton material serves for the foundation, or old sheets, casement curtains, bolton sheeting, etc., that have served their purpose can be utilised. They can be tinted any shade desirable and, of course, must contrast with the colours chosen for the appliqué. A deep border turned up on the foundation in the form of a hem is attractive, as seen in the “Fleur-de-lis” design on page 81. Here the foundation is cream sateen, and the appliqué with border cut from similar material, but in a deep shade of pink. The motif is simply outlined with black “Peri-Lusta” in stem stitch, when attaching to the bedspread.
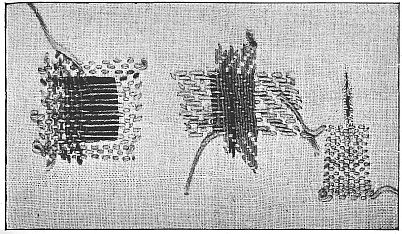
|
||
Fig. 1. Plain Darning. |
Fig. 2. Twill Darning. |
Fig. 3. Darning for a Straight Tear or Gash. |
Now more than ever is it absolutely necessary to preserve our linen household napery, for the price asked for new linen is enormous, owing to its scarcity, and it is said that in the near future it will be almost impossible to obtain it at any price.
It may not be generally known that linen is liable to the attack of minute insects, which bore through it, just as the moth does through wood, and so weaken it that it soon wears into holes, if precaution is not taken to prevent them. When storing linen, camphor, lavender, cedar wood, etc., are just as necessary for its preservation as they are for woollen goods, and it is said that an apple, hung up till quite dry, then studded all over with cloves, stuck in up to the head, is very potent when attached to the top of the drawer of the chest, or hung on the inside of the door, if the chest be made in this way. All linen should be well aired before putting away. The repairs should be made before sending the linen to the laundry, and if it has been stiffened and glazed, the part requiring mending should be steeped in warm water to take out the starch, and then dried.
When a part becomes threadbare, the best method of repairing is to darn it neatly with fine linen thread, obtained by ravelling a piece of the material. In the case of a table cloth this thread can be got by ripping the hem at one end and unravelling the edge for a few rows. Wind the thread on a reel and keep for the repairing of this cloth, then remake the hem.
Fig. 1 shows the method of doing plain darning, and Fig. 2 shows the twill darning or plain damask stitch.
Insert the part to be darned in the embroidery tambour with the wrong side turned towards you, as all darning must be done on this side of the material. The darning should go well up into the sound part of the surrounding material, and the stitches should be small and even.
Run in the lengthwise stitches first, taking care to have them a little loose, as they will shrink when washed, and leave a small loop of the thread at each turning, to allow for the taking up of these threads when working across them. Run the stitches according to the thread of the material in perfectly straight lines, taking up only two or three threads and skipping the same number. In alternate rows take up those threads skipped in the preceding rows.
When the weak portion is covered with the lengthwise stitches and about half an inch beyond it at each end, work across in the same way, taking up and leaving alternate stitches, and having the same space between the rows as at first.

When there is a hole in the linen, it is necessary to cut away the worn edges and make the sides even, then[85] darn as in the preceding case, but have the threads much closer together, continue each lengthwise thread across the hole and darn down below it, leave the loop at the end when turning. (See Fig. 1). The darn when finished should have the threads so close together as to replace the original piece.
For twilled linen fabric Fig. 2 shows the method of proceeding. Begin by working the darning stitch lengthwise across the hole in the same manner as before, then study the material to see how many threads of the fabric are crossed over to form the twill, and proceed to make the crossing stitches, passing over two or three threads and taking up one or two according to the pattern. In each succeeding row advance one or two threads in the same direction.
Even coloured borders can be very successfully repaired, and a correct copy of the original design be obtained in this way, using thread matching in colour with those of the border.
Fig. 3 shows how to repair a rent in the material, or a gash made by a knife, when the edges fit close together. Place a strip of stiff paper underneath the opening and tack securely all round. Darn across the rent, drawing the edges close together, and picking up the threads in each row which were passed over in the preceding. Leave the small loop at each turning as before.
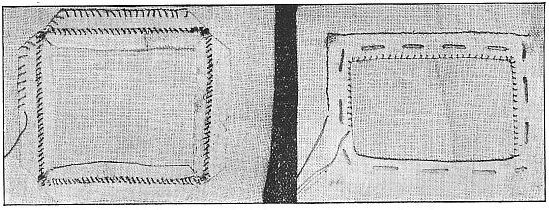
|
|
Fig. 5. A Top-sewn Patch. |
Fig. 4. A Hemmed and Stitched Patch. |
Patching the Linen.
When the piece to be repaired is too large for darning, it must be cut out and replaced with a patch of the same material and, if possible, the patch should be cut from linen which has been in use about the same length of time as that requiring the mending. If new material must be used, then let it be somewhat thinner in texture than the other, for if the same material in a new piece be used the patch would be very conspicuous.
Use fine linen thread and a fine sewing needle when patching. Cut the edges of the hole to a thread of the material, taking away the worn parts completely, cut the patch[86] to fit over the hole and about an inch beyond it each way. Turn in the edges of the hole, making a diagonal slit at each corner, to get a perfect angle and flat seam. Turn in the edges of the patch and tack on the wrong side evenly over the hole, turn to the right side and hem the patch to the edge of the hole with neat small stitches, then backstitch on this right side to the outside edge of the patch, keeping the lines straight and the angle at each corner acute. See Fig. 4.
Fig. 5 shows the inset patch which is less noticeable than the preceding, and suitable for articles which do not have to stand very frequent use and washing. The edges of the hole are arranged as in the preceding, the patch is cut to fit it exactly, with its edges turned in a seam of the same width as that in the hole. Both edges are topsewn together on the wrong side, then the seam opened out and pressed quite flat. If neatly done and the pattern evenly matched, a patch of this kind is scarcely noticeable. The raw edges of the material should be neatly overcast to prevent ravelling.
Darning Damask Table Linen.
When darning damask linen it is quite possible to imitate the design so closely as to render the mending invisible. A close study of the design is necessary to see the number of threads taken up and passed over. In all cases the best thread to use is the ravelling obtained by picking out the threads from the edges of the material.
The illustration page shows the most common damask patterns and the method of darning them. In all cases the lengthwise stitches are worked as in Fig. 2. The pattern is worked by the crossing stitches, taking up and passing over a certain number of threads in each successive row.
The samples are worked with two coloured threads, so that the stitches forming the design can be easily copied.
When doing drawn thread work wind all the pulled threads on a reel, and keep them for mending linen of all kinds, they are the best threads for the purpose.
When Cloths are frayed at the Laundry.
Table cloths and serviettes are usually sent to the laundry, even when the bulk of the washing is done at home, as it is so difficult for the amateur to get the evenly glazed surface that the professional worker gives the cloths. The result is that tablecloths soon show signs of wear and tear, and invariably “go” first down the edges.
As soon as holes and fraying appear at the sides or ends, cut the strip right off, unless it is quite a small rent and can easily be mended. As a rule, when the edges once start to go, they do the job pretty thoroughly. And the best way is to cut off the weak part, before it tears far into the material, and turn a new hem.
If the cloth is then too narrow to use on the dining table, it can be widened or lengthened, by applying a deep hem, which can be joined with fagotting to the cloth. It will be necessary to tack both the cloth that has been cut and re-hemmed, and the new hem on stiff paper to keep it even as you work the faggoting.
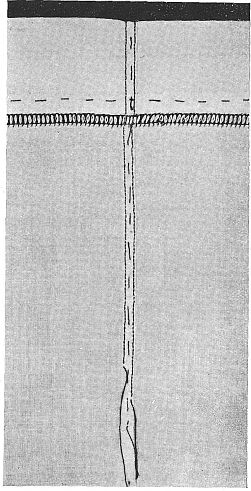
Nowadays, when economy must be the watchword with most of us, a great saving can be effected in our household by paying attention to the requirements of the contents of the linen chest and remembering the old proverb, “a stitch in time saves nine.”
When a piece of bedroom or table-napery shows signs of wear in any part by becoming thin, patching can be avoided by carefully darning the spot with soft cotton or linen thread, running the stitches well up into the sound portion surrounding the weak. But when, as in the case of sheets, a large portion gets thin all over, patching must be resorted to.
The best way to repair a sheet that has become well worn in the centre is to cut it right up the middle and turn the selvedged edges to the centre. Tack these in a flat seam, overlapping the edges for somewhat less than the quarter of an inch (do not turn in the selvedge edge for there must not be a thick seam), using fine sewing cotton of a soft make, stitch along the extreme edge of the seam at both sides, or use the machine if one be handy; in the latter case do not have the tension tight. If the part now turned to the sides shows any holes or any portion of it be very thin, it is better to cut this portion out and replace by a patch.
The piece for this patch should be lighter than the material of the sheet, but of the same kind, and it is always well to keep pieces of the old sheets which can no longer be used for this purpose.
Cut the patch to the required size by a line in the threads of the material, allowing two or three inches beyond the weak edges in the sheet. Turn in the edges neatly along the three sides[88] of the piece which come in on the sheet, tack the two edges together and spread the patch in place on the sheet, making it perfectly smooth, now tack round the three edges. Hem down this side of the patch.
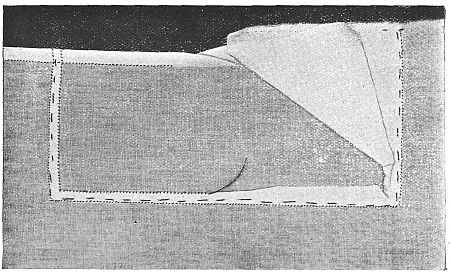
Turn the other side of the sheet and cut away the portion over the patch, leaving half an inch margin, turn in the edges of the margin, snipping the corners to make an angle, tack the seam, then hem or machine-stitch along the edge. The sheet is now ready for hemming the sides, turn in a half inch hem at each side and sew in place. If the sheet has been hem-stitched at both ends a few stitches of this hemming must be undone at each side of the centre seam and then reworked so as to preserve the pattern and give a neat finish to the work.
Books for Little Girls
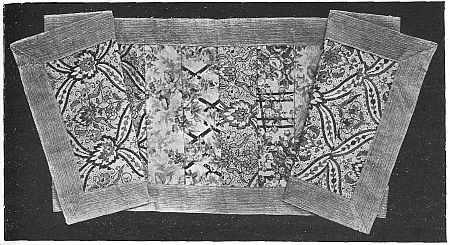
The illustration on this page shows a very effective way of using pieces of cretonne to make a toilet runner. Runners are expensive items to buy, but if you have some pretty pieces of material by you, you can make one with very little trouble and expense.
The one shown is composed of 18 pieces of pretty coloured cretonne, each measuring about 2¼ × 8¼ inches. These are joined together to make a long strip, and the whole is finished with a 1¾ inch hem of blue print, which is machined on.
The border can be of any pretty shade that will tone well with the pieces. Or, if they are of a delicate shade, a hem of unbleached calico would make a delightful finish. This washes excellently, and the soft, creamy tint looks exceedingly well with the pale-coloured pieces.
In selecting the pieces of cretonne to be used, it is essential to employ only those that will launder well. Otherwise with the first wash the whole thing will be spoilt through the colours “running.”
This runner when finished measures 44 inches long by 12 inches deep, but a cloth of any size or shape can be made in this way, and with a little thought and trouble really delightful results can be secured at little or no expense.
If you do not happen to have any fancy cretonne by you, there is no reason why plain coloured pieces should not be used. So long as they are carefully and tastefully blended, quite a pretty cloth or runner can be made. Oddments of casement cloth, linen, cotton poplin, print, can all be saved, and a real economy can be effected by this method of using them.
Beaded motifs as dress trimmings were never more in vogue than at the present time. Beaded bags, hat-bands, belts and ornaments are all expensive articles to purchase, but they are quite easy to make, and the materials cost but a little.
There are two modes of making the hand-made trimmings and bags, and, of course, this kind is worth much more than that made by machinery, as well as being more lasting and artistic.
In beaded crochet a coloured mercerised cotton, fine enough to pass easily through the beads selected, is used with a crochet-hook corresponding in fineness to the thread. The beads are first put on the thread, using a fine sewing needle for the purpose, or waxing the thread end; the beads are then worked into the design with the usual d c.
In the needle-made variety, which we are illustrating in this issue, each bead is attached to the bead immediately below it, and to the one following it. A very fine sewing needle, with fine linen or glazed cotton thread, is necessary.
The Rose Design.
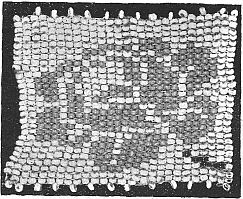
This beautiful design is suitable as a single motif for dress trimming, or as a repeat for tops of bags, etc.
Delft-blue china beads compose the background for the rose, which is of a deep pink colour, with small green stem.
Use fine linen thread and a very fine sewing needle. Thread 29 of the blue beads (or any other colour selected for the groundwork), run the needle back through the 28th bead (that is, insert the needle through the 28th bead, between the 28th and 29th, and bring it out through the 28th between that and the 27th), thread a bead, bring this bead over the 28th, and run the needle back through the 28th, as you did before, but run it through the 27th also; thread another bead, place it over the 27th, and run the needle back through the 27th and 26th beads; repeat with every 2 beads to the end. Turn.
3rd Row.—Thread a bead, run the needle back through the last bead in the 2nd row, thread a bead, run the needle back through the last bead again, in the same manner as before, and through the following bead; thread a bead, and continue as in the 2nd row, introducing the rose beads. After working 7 blue (b), there are 5 pink (p), 3 b, 3 p, 10 b.
4th Row.—9 b, 5 p, 1 b, 6 p, 7 b.
5th Row.—7 b, 6 p, 1 b, 5 p, 9 b.
6th Row.—8 b, 2 p, 8 b, 4 p, 6 b.
7th Row.—6 b, 1 p, 2 b, 1 p, 1 b, 6 p, 2 b, 2 p, 7 b.
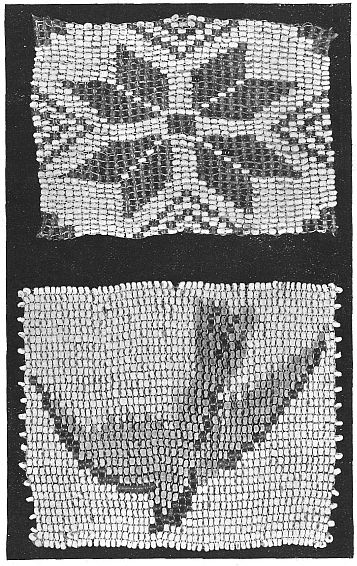
8th Row.—7 b, 1 p, 1 b, 2 p, 2 b, 5 p, 2 b, 2 p, 6 b.
9th Row.—7 b, 2 p, 1 b, 2 p, 7 b, 1 p, 1 b, 2 p, 5 b.
10th Row.—5 b, 1 p, 1 b, 1 p, 5 b, 1 p, 1 b, 4 p, 2 b, 3 p, 4 b.
11th Row.—3 b, 5 p, 1 b, 4 p, 1 b, 2 p, 4 b, 1 p, 1 b, 2 p, 4 b.
12th Row.—4 b, 1 p, 1 b, 1 p, 4 b, 2 p, 1 b, 5 p, 1 b, 6 p, 2 b.
13th Row.—2 b, 1 p, 1 b, 1 p, 4 b, 5 p, 1 b, 2 p, 4 b, 1 p, 1 b, 1 p, 4 b.
14th Row.—4 b, 1 p, 1 b, 4 p, 1 b, 2 p, 1 b, 4 p, 2 b, 6 p, 2 b.
15th Row.—3 b, 6 p, 1 b, 4 p, 3 b, 4 p, 1 b, 1 p, 5 b.
16th Row.—3 b, 2 p, 1 b, 1 p, 4 b, 3 p, 1 b, 3 p, 1 b, 6 p, 3 b.
17th Row.—4 b, 5 p, 1 b, 1 p, 3 b, 8 p, 1 b, 2 p, 3 b.
18th Row.—3 b, 3 p, 1 b, 9 p, 2 b, 5 p, 5 b.
19th Row.—7 b, 2 p, 2 b, 1 p, 1 b, 7 p, 2 b, 2 p, 4 b.
20th Row.—6 b, 2 p, 1 b, 6 p, 1 b, 3 p, 9 b.
21st Row.—8 b, 3 p, 3 b, 1 p, 4 b, 4 p, 5 b.
22nd Row.—4 b, 4 p, 1 b, 4 p, 1 b, 1 p, 1 b, 5 p, 1 b, 1 green (g), 5 b.
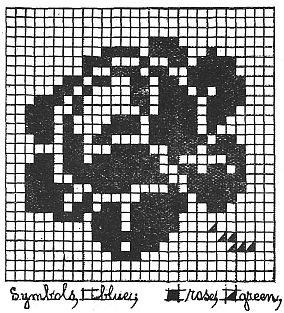
23rd Row.—4 b, 1 g, 2 b, 5 p, 1 b, 2 p, 1 b, 7 p, 5 b.
24th Row.—5 b, 6 p, 2 b, 3 p, 1 b, 3 p, 3 b, 2 g, 3 b.
25th Row.—3 b, 1 g, 5 b, 5 p, 4 b, 3 p, 7 b.
26th Row.—24 b, 1 g, 3 b.
27th and 28th Rows.—All blue.
The bead at each turning is not included in the number given at the beginning of each row; this is the “turning” bead, and must be used in every row as in the 1st and 2nd rows.
A Needle-made Star Design.
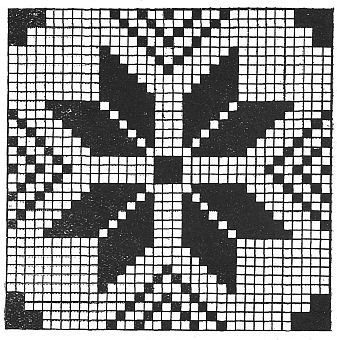
This lovely design can be extended each way. It is made with 2 shades of blue, but any other combination will prove equally attractive if the shades are well chosen.
Light and dark blue were used in the sample, and, of course, the beads are all of the same size and shape.
Thread 4 dark blue (d b), 7 light blue (l b), 1 d b, 2 l b, 1 d b, 2 l b, 1 d b, 2 l b, 1 d b, 2 l b, 1 d b, 7 l b, 4 d b. Turn. In this[93] design the “turning” bead is omitted.
2nd Row.—Thread 1 d b bead, run the needle through the last bead in 1st row at the side next to the 2nd last, draw out the thread, now run it through the 1st bead in this row towards the 2nd bead in 1st row, and put it through that bead; thread another d b and continue on with 2 more d b, then 8 l b, 1 d b, 2 l b, 1 d b, 3 l b, 1 d b, 2 l b, 1 d b, 8 l b, 4 d b.
3rd Row.—2 d b, 11 l b, 1 d b, 2 l b, 1 d b, 1 l b, 1 d b, 2 l b, 1 d b, 11 l b, 2 d b.
4th Row.—2 d b, 12 l b, 1 d b, 2 l b, 1 d b, 2 l b, 1 d b, 12 l b, 2 d b.
5th Row.—10 l b, 1 d b, 4 l b, 1 d b, 3 l b, 1 d b, 4 l b, 1 d b, 10 l b.
6th Row.—10 l b, 2 d b, 4 l b, 1 d b, 1 l b, 1 d b, 4 l b, 2 d b, 10 l b.
7th Row.—10 l b, 3 d b, 4 l b, 1 d b, 4 l b, 3 d b, 10 l b.
8th Row.—10 l b, 4 d b, 7 l b, 4 d b, 10 l b.
9th Row.—10 l b, 5 d b, 5 l b, 5 d b, 10 l b.
10th Row.—10 l b, 6 d b, 3 l b, 6 d b, 10 l b.
11th Row.—4 l b, 6 b d, 1 l b, 5 d b, 3 l b, 5 d b, 1 l b, 6 b d, 4 l b.
12th Row.—1 d b, 4 l b, 6 d b, 1 l b, 4 d b, 3 l b, 4 d b, 1 l b, 6 d b, 4 l b, 1 d b.
13th Row.—1 l b, 1 d b, 4 l b, 6 d b, 1 l b, 3 d b, 3 l b, 3 d b, 1 l b, 6 d b, 4 l b, 1 d b, 1 l b.
14th Row.—2 l b, 1 d b, 4 l b, 6 d b, 1 l b, 2 d b, 3 l b, 2 d b, 1 l b, 6 d b, 4 l b, 1 d b, 2 l b.
15th Row.—1 d b, 2 l b, 1 d b, 4 l b, 6 d b, 1 l b, 1 d b, 3 l b, 1 d b, 1 l b, 6 d b, 4 l b, 1 d b, 2 l b, 1 d b.
16th Row.—1 l b, 1 d b, 2 l b, 1 d b, 4 l b, 6 d b, 5 l b, 6 d b, 4 l b, 1 d b, 2 l b, 1 d b, 1 l b.
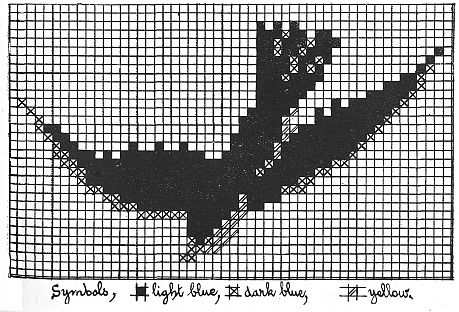
17th Row.—2 l b, 1 d b, 2 l b, 1 d b.[94] 10 l b, 3 d b, 10 l b, 1 d b, 2 l b, 1 d b, 2 l b.
18th Row.—1 d b, 2 l b, 1 d b, 2 l b, 1 d b, 9 l b, 3 d b, 9 l b, 1 d b, 2 l b, 1 d b, 2 l b, 1 d b.
19th Row.—2 l b, 1 d b, 2 l b, 1 d b, 10 l b, 3 d b, 10 l b, 1 d b, 2 l b, 1 d b, 2 l b.
20th Row.—1 l b, 1 d b, 2 l b, 1 d b, 4 l b, 6 d b, 5 l b, 6 d b, 4 l b, 1 d b, 2 l b, 1 d b, 1 l b.
21st Row.—2 d b, 2 l b, 1 d b, 4 l b, 6 d b, 1 l b, 1 d b, 3 l b, 1 d b, 1 l b, 6 d b, 4 l b, 1 d b, 2 l b, 1 d b.
22nd Row.—2 l b, 1 d b, 4 l b, 6 d b, 1 l b, 2 d b, 3 l b, 2 d b, 1 l b, 6 d b, 4 l b, 1 d b, 2 l b.
23rd Row.—1 l b, 1 d b, 4 l b, 6 d b, 1 l b, 3 d b, 3 l b, 3 d b, 1 l b, 6 d b, 4 l b, 1 d b, 1 l b.
24th Row.—1 d b, 4 l b, 6 d b, 1 l b, 4 d b, 3 l b, 4 d b, 1 l b, 6 d b, 4 l b, 1 d b.
25th Row.—4 l b, 6 d b, 1 l b, 5 d b, 3 l b, 5 d b, 1 l b, 6 d b, 4 l b.
26th Row.—10 l b, 6 d b, 3 l b, 6 d b, 10 l b.
27th Row.—10 l b, 5 d b, 5 l b, 5 d b, 10 l b.
28th Row.—10 l b, 4 d b, 7 l b, 4 d b, 10 l b.
29th Row.—10 l b, 3 d b, 4 l b, 1 d b, 4 l b, 3 d b, 10 l b.
30th Row.—10 l b, 2 d b, 4 l b, 1 d b, 1 l b, 1 d b, 4 l b, 2 d b, 10 l b.
31st Row.—10 l b, 1 d b, 4 l b, 1 d b, 3 l b, 1 d b, 4 l b, 1 d b, 10 l b.
32nd Row.—2 d b, 12 l b, 1 d b, 2 l b, 1 d b, 2 l b, 1 d b, 12 l b, 2 d b.
33rd Row.—2 d b, 11 l b, 1 d b, 2 l b, 1 d b, 1 l b, 1 d b, 2 l b, 1 d b, 11 l b, 2 d b.
34th Row.—4 d b, 8 l b, 1 d b, 2 l b, 1 d b, 3 l b, 1 d b, 2 l b, 1 d b, 8 l b, 4 d b.
35th Row.—4 d b, 7 l b, 1 d b, 2 l b, 1 d b, 2 l b, 1 d b, 2 l b, 1 d b, 2 l b, 1 d b, 7 l b, 4 d b.
Repeat from the 2nd row.
The Bird Motif.
This is worked with two shades of blue beads—light and dark—bright yellow, and any colour chosen for the ground-work.
It is a beautiful design for a beaded bag intended for a gift. If used for this purpose there must be a larger number of beads in the first row for a foundation, as the number shown in the diagram (52) only gives a width of 4 inches. Allow 14 beads for each extra inch required. Be sure to keep the bird design exactly in the centre of the background, the depth of the design as worked is 3¼ inches, therefore more rows before and after the bird design will be necessary to increase the depth.
Using a fine linen or glazed sewing cotton, thread 53 beads for the groundwork foundation, turn, run the thread back through the 52nd bead, and, working as directed for the rose design, form the 2nd row of groundwork, which, in the illustration is white. The “turning” bead is not included in the numbers composing the design, but it must be used at the beginning of every row.
3rd Row.—30 white (w), 2 dark blue (d b), 20 w.
4th Row.—21 w, 2 d b, 2 yellow (y), 27 w.
5th Row.—26 w, 2 y, 1 d b, 1 light blue (l b), 1 d b, 21 w.
6th Row.—21 w, 3 l b, 3 y, 25 w.
7th Row.—25 w, 2 y, 4 l b, 21 w.
8th Row.—15 w, 6 d b, 5 l b, 2 y, 24 w.
9th Row.—22 w, 2 l b, 1 y, 12 l b, 3 d b, 12 w.
10th Row.—11 w, 2 d b, 14 l b, 1 y, 4 l b, 20 w.
11th Row.—17 w, 3 d b, 21 l b, 2 d b, 9 w.
12th Row.—8 w, 1 d b, 25 l b, 2 d b, 16 w.
13th Row.—14 w, 2 d b, 6 l b, 1 d b, 20 l b, 2 d b, 7 w.
14th Row.—6 w, 2 d b, 22 l b, 1 d b, 7 l b, 2 d b, 12 w.
15th Row.—11 w, 1 d b, 8 l b, 1 y, 6 l b, 2 w, 10 l b, 1 w, 1 l b, 1 w, 3 l b, 2 d b, 5 w.
16th Row.—5 w, 1 d b, 2 l b, 6 w, 1 l b, 2 w, 1 l b, 2 w, 1 l b, 5 w, 5 l b, 1 y, 9 l b, 1 d b, 10 w.
17th Row.—9 w, 1 d b, 9 l b, 1 y, 6 l b, 19 w, 2 l b, 1 d b, 4 w.
18th Row.—3 w, 1 d b, 2 l b, 21 w, 5 l b, 2 y, 9 l b, 1 d b, 8 w.
19th Row.—7 w, 1 d b, 8 l b, 3 w, 1 y, 5 l b, 23 w, 1 d b, 3 w.
20th Row.—2 w, 1 d b, 25 w, 5 l b, 1 y, 2 w, 1 l b, 1 w, 7 l b, 1 d b, 6 w.
21st Row.—5 w, 1 d b, 6 l b, 1 w, 1 l b, 4 w, 5 l b, 27 w, 1 d b, 1 w.
22nd Row.—29 w, 6 l b, 7 w, 5 l b, 1 d b, 4 w.
23rd Row.—3 w, 1 d b, 4 l b, 8 w, 7 l b, 29 w.
24th Row.—29 w, 3 l b, 1 d b, 4 l b, 9 w, 2 l b, 1 d b, 3 w.
25th Row.—2 w, 1 d b, 1 l b, 11 w, 1 l b, 1 d b, 1 l b, 1 d b, 4 l b, 29 w.
26th Row.—29 w, 4 l b, 1 d b, 2 l b, 1 d b, 1 l b, 11 w, 1 l b, 2 w.
27th Row.—1 w, 1 l b, 12 w, 3 l b, 1 d b, 2 l b, 1 d b, 2 l b, 29 w.
28th Row.—29 w, 2 l b, 1 d b, 3 l b, 1 d b, 3 l b, 13 w.
29th Row.—14 w, 2 l b, 1 w, 2 l b, 1 d b, 3 l b, 29 w.
30th Row.—29 w, 1 l b, 1 w, 1 l b, 1 w, 1 l b, 18 w.
31st and 32nd Rows.—All white.
A very pretty and economical substitute for the silk lingerie ribbon is found in the new crochet ribbons for this purpose. Fine mercerised cotton, or crochet silk thread is used with a fine hook.
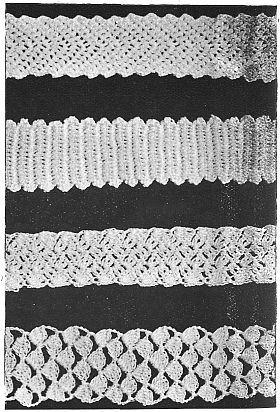
No. 1.
12 ch, turn, miss next ch, 5 d c into next 5 ch, 3 d c into next ch, 5 d c into last 5 ch, * turn with 1 ch, miss 1st d c, 5 d c into next 5 d c, 3 d c into next d c (that is the centre d c of the 3 d c into 1 ch), 5 d c into next 5 d c, miss last d c, and repeat from *.
No. 2.
This is a corded design, and is worked over a single stout cotton thread, such as No. 10. Form a knot on the end of the No. 10 cotton, over the cord put 8 d c, keep the cord gently pulled, to have the stitches close together and the line perfectly straight. Turn, miss 1st 3 d c, 15 d c over the cord into the 15 d c *, 3 d c over the cord alone, 15 d c into the 15 d c; * repeat.
No. 3.
11 ch, turn, miss 1st ch, 1 d c into next ch, 3 ch, 2 tr into same ch as last d c, 1 d c into next 3rd ch, 3 ch, 2 tr into same ch, 1 d c into next 3rd ch, 3 ch, 2 tr into same ch, 1 d c into last ch, * turn, 1 ch, 1 d c into last d c, 3 ch, 2 tr into same d c, 1 d c, 3 ch, 2 tr over each 3 ch except the last, where you put only the 1 d c; repeat from *.
No. 4.
13 ch, 1 tr into the 10th ch, over the tr put 1 d c, 4 tr, 1 tr into the 7th ch, over the tr put 1 d c, 4 tr, 1 tr into the 4th ch, over the tr 1 d c, 4 tr, 1 tr into the 1st ch, * turn, 4 ch, 1 tr into the space between the groups of tr with 1 d c, 4 tr over each, 1 tr over the 4 ch, at the turning 1 d c, 4 tr over this tr; * repeat.
No. 5.
14 ch, 1 d c into the 11th ch, 3 ch, 1 d c into every 2nd ch, * turn, 4 ch,[97] 1 d c, 3 ch into each loop; * repeat.
No. 6.
10 ch, turn, 3 long tr into the 5th ch, retaining last loop of each on the hook until working off the 3rd, then work off all the loops together, and put 1 d c around the top, 3 ch, 3 long tr into same ch as last trs, 3 long tr into 1st ch, 3 ch, 3 long tr into same ch, 1 long tr beside last group, turn, * 5 ch, two groups of long trs with 3 ch between into each 3 ch space, 1 long tr between last trs and following chs; * repeat.
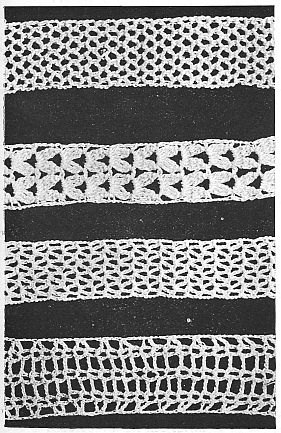
No. 7.
13 ch; into the 10th and 7th, 4th and 1st ch put 2 tr with 2 ch between, 1 tr beside last tr, * turn, 3 ch, into each 2 ch space put 2 tr with 2 ch between, 1 tr between last tr and next chs; * repeat.
No. 8.
15 ch, turn, into the 10th ch put 1 d c, 5 ch, 1 d c, 3 ch, into the 7th ch, 1 d c, 5 ch, 1 d c, 3 ch, into the 4th ch, 1 d c, 5 ch, 1 d c, 3 ch, 1 d c into the 1st ch, * turn, 5 ch, into each picot 1 d c, 5 ch, 1 d c, 3 ch between the picots, 3 ch, 1 d c into the 3rd ch at the turning; * repeat.
The illustrations show the actual size of the crochet ribbons, so the worker can easily gauge what width pattern she wishes to work. These are so varied in design as to give plenty of choice. If a firm, close pattern is preferred, either No. 1 or No. 2 would be suitable, the latter being particularly strong, the padding cord giving extra durability.
For an easily and quickly worked pattern, it would be difficult to find anything to beat design No. 5. This has the very even flat appearance, which renders it particularly suitable for ribbon purposes. Similar in appearance, though somewhat different in the working, is No. 7.
No. 8 is a very lacy pattern, particularly suitable for finer kinds of underwear.
These crochet ribbons will launder excellently.
The fashion of the present day runs towards beads in every colour and design, and although the making of beads is not exactly a needlework economy, it is a dress economy, and that is very nearly related to needlework.
I have been very successful in making all sorts of articles for ornamentation—from beads, sealing-wax, broken china, a little gold paint and some glue, not to mention a little grease and a knitting-needle.
I began my home-made bead-making from necessity, because I was unable to find any beads to match a particular frock I very much wanted a string for. Also, in hunting everywhere for them, I found that the really artistic and barbaric ones ran into a great deal of money, especially if they were large.
Now I wanted an odd shade of blue, which was really no shade at all, because the material was old and had faded to the beautiful tint which it now possesses. I could not procure any that were even remotely like it, and so my idea of making some for myself was born.
To begin with, I bought for sixpence a large box of assorted beads, such as are sold for children to string at kindergarten.
Sealing-wax is an Essential.
At a stationer’s I bought up a whole lot of broken sealing-wax for a very little money, purchasing at the same time two good sticks, one of gold and one of silver. These I carried home and sorted as best I could into shades of different colouring.
You will be surprised to find what a lot of different tones there are to be had in sealing-wax, though, when buying, be careful not to be taken in by the outside of the stick! I bought what I thought was a beautiful shade of lavender, but fortunately was told by the assistant that it was really a dark blue, which had been in the window and faded! Blues will often fade mauve, and reds will become pink. But you will easily avoid mistakes by looking at the box which gives a description of its contents.
Broken China the next Requisite.
Having secured what I wanted at the stationer’s, I next looked through the china pantry and kitchen cupboards to see what I could find in the way of broken china and glass.
I turned out quite a nice little heap from here, and then went to the tool-house, where I had a little store, which I had dug up out of the garden.
I never can understand where all the broken china comes from which is always to be found in every garden when the earth is turned up. I have a small basket full of all sorts, of odd pieces in bright blues, reds, and yellows, which appear to be chips from plates or saucers. I should think it would take a generation of families, and their tea, dinner and breakfast services, to account for the quantity and colouring I have by me.
All this china I washed carefully in soapy water, rinsing in very hot clear water, and drying whilst still hot. By this means the china and glass keeps its shine, and if set in the sun for a little while it will greatly improve the lustre.
Next I sorted the colours, and then, with the aid of a wooden hammer and a piece of felt, I cracked the china into tiny pieces. Be careful in doing this to put the coloured side of the china downwards, and lay on a piece of felt, with another piece on top. Hit gently, but firmly, and where the piece is cracked insert a nail or strong pin in the crack and hit with the hammer. The cracks will split and will leave a nice edge, which is very useful for sticking in the sealing-wax. Break the pieces as small as possible, but leaving the colour to show on one side. If you smash at the pieces they will powder and be of no use at all.
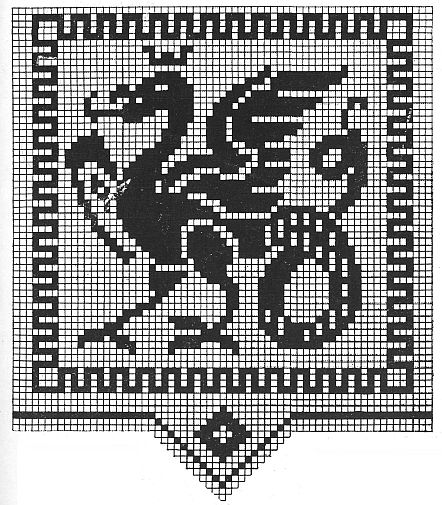
Whatever odd beads you have, or old pieces of coloured paste and imitation stones—which are often to be had in old buckles—spangles and bugles, all are grist to the mill. I have also used broken pieces of pebbles and stones which I found among the gravel, and which were broken by the roller, and which,[100] when chipped very fine, displayed really brilliant colouring. Pieces of flint with a sparkle of mica look beautiful.
Making the Beads.
Having completed this collection, I turned my attention to the bead-making, and I began in this manner:—
I started with a set of six large beads in blues for my chain. I chose the largest beads in my assorted box, irrespective of colour and shape. Taking one of these I slipped it over the end of a steel knitting-needle, using one large enough to hold the bead tightly. This needle I first greased with a rag on which a little lard had been rubbed. This prevents the sealing-wax adhering to anything but the bead.
Next I lit a taper, and, using blue wax, I covered the bead roughly with it, turning the knitting-needle in my hand, so that the hot liquid ran round it. This I plunged into cold water.
Before proceeding, I would like to say that great care must be taken not to smoke the wax when a taper or candle is used; if you will heat the wax in the centre of the flame, you will find that the colour does not become blackened.
As soon as the blue wax had cooled, without hardening, I splashed on some of the gold, and, turning the bead rapidly in the flame itself, the gold mingled with the blue, so forming a sort of marbled effect. This I also plunged into the cold water.
Then I chose a brilliant yellow wax, and, heating it in the candle flame, I squeezed the tip into a sharp point.
This, in turn, I heated, and dabbed it in regular intervals round the bead to form spots. While the spots were still soft, I pushed into the centre of each one a tiny piece of broken china, in a pure turquoise shade, pinching the wax to cover the rough edge.
Do not use the fingers to the sealing-wax more than can be possibly helped, as touching it takes away the glaze.
I made three beads similar to this design, and three in a paler shade of blue, with the same yellow spots, but using pieces of dark red china instead of the turquoise. These I strung with a three-inch length of small yellow beads (which I bought at the same shop as the box of beads came from, and which were also sold for children’s kindergarten work) between each large one, and the chain, when finished, looked truly beautiful. It certainly enhanced the beauty and value of the frock for which it was made.
Making Fancy Buttons.
To match the chain I made four buttons, used to fasten the shoulder-pieces of the bodice, in the same colours and the same design.
To make these, any old buttons that have shanks to them will do, but have shanks they must, as there is no other means of fastening them. I had four old brass buttons, with flat, shiny tops. With an old knife I scraped the face of each so as to make it rough, as the wax adheres better to a rough surface.
I used a piece of cardboard—piece of an old box—and cut four small slits in it large enough to[101] slip the button-shanks through. On the other side I slipped a burnt match into the shank of each, and by this means the buttons were quite firm and did not wobble about.
Then I covered two with dark wax, and two with light wax similar to the beads, scraping away any wax which had overflowed on to the cardboard. Before it was cold I pressed a tiny ring of the small yellow beads round the immediate edge, finishing off with a spot of the yellow wax in the centre of each, and a scrap of broken china in the centre of that, again.
I found the buttons a little rough on the edge, but, with the aid of a nail file, I rubbed them fairly smooth, and they did not notice when sewn on the frock.
I have made buttons and buckles galore from old oddments, using up different coloured beads in an inlaid fashion.
A most effective way is to cover the surface of a button with a thin layer of glue, and to lay the beads on in a design like a mosaic. This is a really beautiful way of decorating buttons, and a very pretty opaque look can be given by sprinkling the beads, while the gum is still wet, with a little of the flitter used in pen painting.
Various Ways of Using Beads.
A very pretty way of using beads also is to hem a skirt with them, simply tacking the hem in the desired depth, and then, with a long cotton and needle, make a stitch through to the right side, slip on a bead, pass the needle through to the wrong side, take a long stitch underneath, and come up on the right side for a bead again. This is a most effective way of finishing a hem, and has the advantage of being much quicker done than ordinary hemming. I feel sure that, once having tried this way, you will confess it is very much prettier than an ordinary hem.
Tops of tassels can be made to match buttons and bead chain in the exact manner that the sealing-wax beads are made themselves.
If a whole set, consisting of chain, buttons, tassel-tops, belt and shoe-buckles, are made to match, you have no idea how lovely they look; and also what a very “Parisian” look it gives to an otherwise plain and rather ordinary frock.
Of course, if you are very industrious, and would like to complete your outfit, I would suggest knitting one of the ever-popular bead-bags.
For this all that is necessary is a ball or two (according to the size of the bag) of coloured knitting silk, and a bunch of small beads, either the same or a contrasting shade. For instance, a golden brown silk, with tiny yellow beads, would look beautiful, especially were it lined with a daffodil lining, and finished off at the end with a bead tassel made to match.
To make these bags you want, as I say, one ball of brown silk, and one bunch of tiny yellow beads, and a pair of fine knitting-needles especially made for this work, and which are about as thick as a hat-pin.
To begin with, thread a needle (a bead needle or darner is best) with the end of your ball of silk, then pull out one little strand of beads and run the needle, darning fashion, into the thread on which the beads[102] themselves are strung. Pull your silk out of the needle, leaving a tiny piece over where the silk and cotton are entwined. Slip the beads along, and you will find they go easily over the joined silk, and so pass, as it were, en masse on to the knitting silk.
According to the size of the purse or bag, whichever you desire to make, so cast on sufficient stitches for one side only, the bag being knitted quite flat, and sewn up the sides when finished.
Having cast on your stitches, knit one row plain and then one row in this manner—
Slip your needle into a stitch; push up a bead; knit the stitch, and so on to the end of the line.
Next row knit plain silk with no beads, as the beads are only wanted one side.
If you do this for about eight inches, for a small bag, and then halve it and sew it up, you can then mount it on a piece of brown silk to make it deeper.
Personally, I think they look much prettier when knitted on four needles; and a very pretty purse I made I knitted first of all to a depth of three inches in plain silk, and then four inches with the beads.
As I came to the bottom I narrowed off as for the toe of a sock, finishing to a point. This point I finished with a tassel of brown and yellow beads which matched the bag itself. With a crochet-hook, I made a tiny edge at the head of the bag, through which I passed a draw string of silk in ordinary chain-stitch, finished at each end with a tiny tassel.
No. 1.
This design in squares is suitable for working either in white or colours. Many useful purposes present themselves for making the design into trimmings for dresses, hats, etc., as well as for the alternate squares in a checked cushion cover. “Tenax” is a lovely silk thread that would be suitable for these stitches.
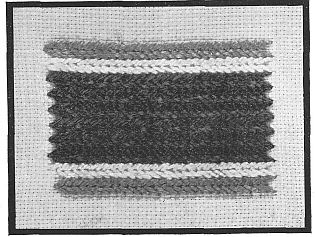
No. 2.
Here each little diamond is worked in simple outline stitch, and each square outlined with backstitch.
No. 3.
This design is very suitable for hat bands and is worked in two colours. The stitch used is stem stitch, worked from left to right, bringing the thread over two of the double threads which form a square, then bringing it[104] out in the centre of the two squares, that is, half-way back on the preceding stitch, and carrying it down over next two squares and so on. Work the crossing lines first, then fill in the spaces, all in same stitch.
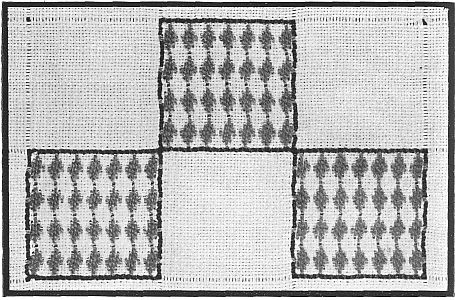
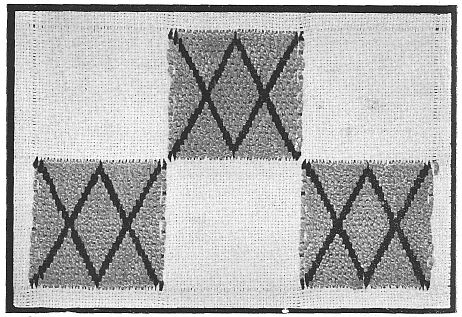
No. 4.
A mosaic design, suitable for trimming sports coats, hats, belts, etc., also for cushion borders, and other household purposes.
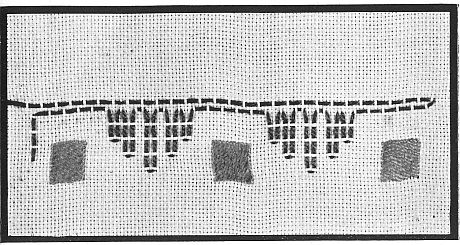
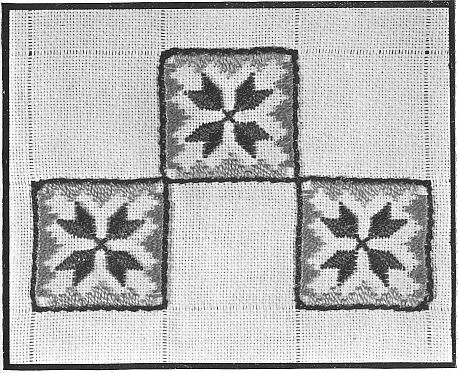
No. 5.
This is the knitting stitch, and is also suitable for trimming, coats and[106] making bands for the new knitted hats. It is made with stem stitch worked diagonally.
No. 6.
Lattice work made of stem stitch. A very beautiful design for present day dress trimming, and easily and quickly worked.
No. 7.
Another design for dress trimming, either with cotton, silk or fine woollen thread. It is just satin stitch combined with simple running stitch.
No. 8.
Like No. 7, this design is used for trimming dresses, and tweed or serge costumes, also worked with fine wool on crêpe-de-chine for blouses, rest gowns, etc.
No. 9.
Another “alternate design” for a checked cushion cover, equally suitable for dress, hat and other trimmings. It also makes a pretty border for table centre, cushion cover, tunic, or curtain.
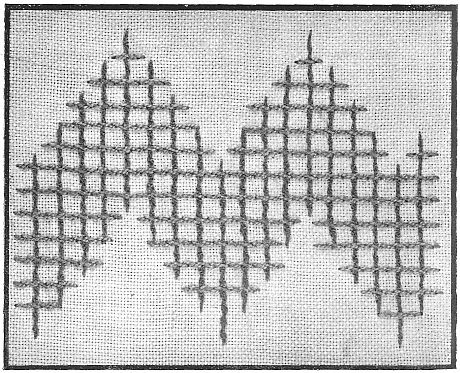
A Crochet Bag Embroidered in Cross-Stitch.
Ecru “Star Sylko,” No. 8, with No. 5 in green and purple for the cross-stitch embroidery were used in making this lovely bag. A pair of ring handles, dark green, give a nice finish.
Commence with 5 ch formed into a ring into which put 6 dc.
2nd Row.—2 dc into each dc.
3rd Row.—* 1 dc into next dc, 2 dc into next dc, * repeat.
4th and every alternate Row.—1 dc into each.
5th Row.—* 1 dc into each of next 2 dc, 2 dc into next dc, * repeat.
7th Row.—* 1 dc into each of next 3 dc, 2 dc into next dc, * repeat.
9th Row.—* 1 dc into each of next 4 dc, 2 dc into next dc, * repeat.
11th Row.—* 1 dc into each of next 5 dc, 2 dc into next dc, * repeat.
Continue on in this way, increasing the number of stitches before the 2 dc into 1 dc by one until there are 182 stitches around, then work 72 rounds more.
In the next 12 rows there are chs at each side.
1st of the 12 Rows.—91 dc into first 91, 3 ch, 91 dc into next half, 3 ch.
2nd Row.—* 91 dc, 5 ch, * repeat.
3rd Row.—* 91 dc, 7 ch, * repeat.
4th Row.—* 91 dc, 9 ch, * repeat.
5th Row.—* 91 dc, 11 ch, * repeat.
6th Row.—* 91 dc, 6 ch, 1 dc into the 6th ch below, 6 ch, * repeat.
7th Row.—* 91 dc, 7 ch, 1 dc into the dc below between the chs, 7 ch, * repeat.
8th Row.—* 91 dc, 8 ch, 1 dc into the dc, 8 ch, * repeat.
9th Row.—* 91 dc, 9 ch, 1 dc into the dc, 9 ch, * repeat.
10th Row.—* 91 dc, 10 ch, 1 dc into the dc, 10 ch, * repeat.
11th Row.—* 91 dc, 11 ch, 1 dc into the dc, 11 ch, * repeat.
12th Row.—* 91 dc, 12 ch, 1 dc into the dc, 12 ch, * repeat.
Take up one of the ring handles and make * 24 ch, bring these across the side of the ring and fasten to the 3rd dc with a dc, * repeat into every 3rd dc up to the chs at the side. Fasten the thread and cut it. Fasten again to the first dc after next chs and work the 24 ch loops over the other handle in the same way.
The design is worked in cross-stitch—green on one side and purple on the other. A diagram is given for this part of the work.
Finish the end of the bag with a tassel made of the combined threads. Line the bag in the usual way with light color silk.
A Black Silk Bag Beaded in White.
This bag is very easily made and requires only one ounce of white porcelain beads with a ball of No. 12 black “Star Sylko.” Cut out the bag to the required size and use the corners of the silk left over to form the four vandyke points. Turn a narrow hem at each side and the top of each point, tack in place. Sew the beads at each side of the point with a very fine needle and the “Star Sylko,” each bead is put on with a “top-stitch,” going through the centre of the hem. When the four points are worked, sew up the sides and bottom of the bag with a French seam, and turning out the right side crease the edge all round and tack it, then sew on the beads as in the points, around the seam. Make a crease around the top of the bag, one and a half inches from the top edge. Tack the points to this crease, one on the centre front and another on the centre back, then one at each side, all with edges overlapping. Now sew the points to the bag with the top-stitch and bead as before.
Make the lining to fit the bag, turn in both top edges and tack in place with the lining edge even with the edge of the bag, top-sew with the beads to join them.
Make a line of running stitches about the quarter of an inch above to top of the points to make the slot for the tie-strings. Turn the bag inside out and sew the lining to the silk front along the line of beads at the top of the points.
Now work a buttonhole at each side of the slot through which the narrow black riband is run, one from each side. Make a small loop of the riband and sew below each buttonhole for the purpose of pulling the bag open when closed.
The Beaded Tassels.
With the No. 12 “Star Sylko” make 5 ch into a ring, 6 dc into the ring, then 2 dc into each dc for two rounds, draw the thread through the last loop and, leaving about a yard of it attached, cut it. Run the end of the thread through the eye of the fine needle and thread 24 beads, sew this into a loop to next dc, and repeat into every 2nd dc. Fasten a thread on the wrong side of the disc and bring it up through the centre ring, thread five beads, sew to a point and bring the thread back again through the beads, fastening off underneath the disc.
There are often small pieces of canvas left over after a piece of work is finished that are too good to throw away (especially considering the present price of canvas) and yet do not seem large enough to make even a tray cloth.
The little handkerchief sachet shown here suggests one way in which such a piece may be used. The bit of canvas employed measured 12 inches by 8 inches, but two pieces half that size would do, joined to form the two sides of the sachet.
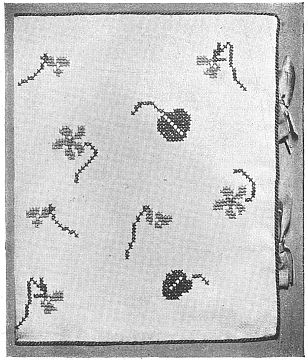
Single violets and leaves are worked in cross-stitch and dotted about over the sachet. “Tenax” Embroidery Thread was used in pretty shades of violet and green, with one stitch of yellow in the centre of each open flower, each stitch being taken over two threads of the canvas. White silk was used to line the sachet, but if you have a bit of pale primrose or pale heliotrope, this would do equally well, and go beautifully with the colour of the violets. The edge is finished with a fine cord, and narrow violet ribbon is used to tie the sachet.
Diagrams are given here for working the nine little designs used on the handkerchief sachet, each blackened square representing a cross-stitch on the canvas. Or you could, if you preferred, work little rosebuds and leaves, or daisies, instead of the violets.
One often wants to make something for a Sale of Work that does not involve too much outlay of time or money. Little sachets of this kind would be just the thing, and would probably find a ready sale. Moreover, they do not entail a great deal of work, which is a big consideration in these busy days.

| ||
The diagrams above
show a bud, a leaf,
and an open flower. |
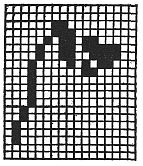 |
On the left, is the diagram
of a delightful
little bud. |
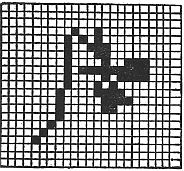 |
These
diagrams are
for the
flowers at the
top right and
bottom left
corner of the
Sachet. Below are shown other flower, leaf, and bud illustrations. |
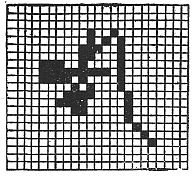
|

| ||
The arrangement of the flowers on the sachet need not, of course, be strictly adhered to. The little buds and blossoms lend themselves to almost any form of treatment. Just two or three of the violets may be used, repeating as desired.
One may be placed at each corner and one in the middle, or they may be arranged in a straight or diagonal strip. The latter would be very pretty.
Pretty boxes have a fascination for most girls. For handkerchiefs, gloves, and the ever-accumulating stock of collars and ribbons, there is no receptacle quite so handy as a box, and, of course, it should be pretty.
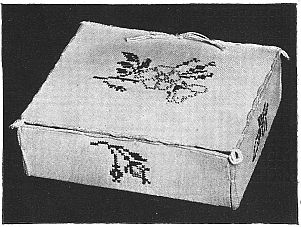
These are expensive to buy, however, and therefore the girl who wants one at little or no cost must make it herself. Moreover, the one you buy is not the only one of its kind, whereas the one you make can be.
The rose-box here illustrated has a little cross-stitch pattern worked on every side, and on the lid. This gives a very pretty and original effect. The designs are worked in pink and green “Star Sylko” on white Hardanger canvas, and the box is lined with pale blue.
To make this box, four pieces of thin cardboard 7 inches by 5½ inches are required for the lid and bottom of the box, four pieces 7 inches by 2½ inches for the sides, and four pieces 5½ inches by 2½ inches for the ends. In each case one piece of cardboard is covered with the lining material, and one piece with the canvas, both of which are cut a little larger than the cardboard. In the case of the canvas the cross-stitch design is, of course, worked on before the cardboard is covered.
Having covered all the pieces, proceed to sew them together in pairs—a canvas-covered piece to a lining-covered piece. Then seam the double pieces together to make up the box. This wants to be done carefully to be quite secure, and, at the same time, neat.
Before attaching the lid, the seams and edges are finished off. In the box illustrated this was done with No. 3 white “Star Sylko,” using three strands, and couching down at intervals with white cotton. This is continued down the corners of the box, and completely covers the seams.
The lid is next attached to the back of the top edge with over-sewing, which must be neat and yet strong. Finally, the lid is edged with No. 3 “Star Sylko” in the same way as the box, making a little loop at each corner, and a knot and ends at the back.
Diagrams for working the rosebud cross-stitch designs are given, though some other flower can be worked if preferred.
White canvas, as shown, gives a pretty, delicate effect, but, of course, this soils very quickly, and for a more serviceable box it would be[112] better to use a colour. Pale blue or pink would be delightful, or the shades can be chosen to follow the colour scheme of the room. If a plain material is used, of which it is not easy to count the threads, the cross-stitch can be worked over Penelope canvas.
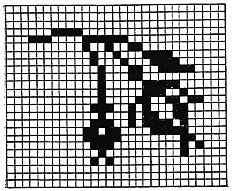
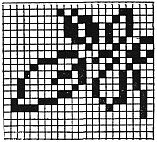
Again, if time is limited, it is not actually necessary to work the cross-stitch designs. Some figured material, such as brocade, can be used, or anything that you happen to have by you; but a thin material should not be employed, or it will tear away when you come to join the pieces together.
A particular attraction about this box is that it costs practically nothing. The outside was made from those odd pieces of white canvas which every girl has, and which are too small for the smallest cloth. The lining was of pieces left over from making a summer dressing-gown. The cardboard was from a collection of old boxes and other odd bits carefully saved, and the quantity of ‘Star Sylko,’ from balls already possessed, was very slight.
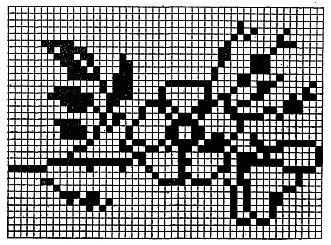
| PAGE | |
| Advantage of Coloured Knitting Cottons, The | 68 |
| Apron you can make from a Summer Skirt, An | 47 |
| Aprons, Three Pretty | 9 |
| Art of Blouse-making, The | 59 |
| Bags, Two Novel | 107 |
| Bead Fancies | 98 |
| Bead Work, Modern | 90 |
| Blouse-making, The Art of | 59 |
| Blankets, To finish the hems of | 74 |
| Brassiere, The | 3 |
| Camisole Yoke of Embroidered Filet Net and Crochet, A | 6 |
| Camisole Yoke, A Pretty | 7 |
| Casement Curtain, The Nursery | 67 |
| Child’s Knitted Petticoat, A | 51 |
| Child’s Overall from a Narrow Skirt, Making a | 28 |
| Collars for Cold Days | 14 |
| Collar, Mending a | 40 |
| Coloured Knitting Cottons, The Advantage of | 68 |
| Crochet Ribbons for Underwear Beadings | 96 |
| Crochet | 96, 67, 3, 6, 7, 107 |
| Cynthia Knitted Stripe, The | 71 |
| Decorative Stitches for Children’s Clothes | 61 |
| Doing up an Eiderdown | 75 |
| Dressmaking, A Practical Way to Teach Girls | 53 |
| Economy Quilt, The | 72 |
| Eiderdown, Doing up an | 75 |
| Embroidery Stitches, Some | 103 |
| Fancy Tops for Socks and Stockings | 23 |
| Freshen a Last Season’s Jersey, To | 16 |
| Gloves, The Use and Abuse of | 18 |
| Handkerchief Box, A Rosebud | 111 |
| Handkerchief Sachet, A Violet | 109 |
| Hat, A Knitted | 20 |
| Jersey, To Freshen a Last Season’s | 16 |
| Keeping out the Wind, For | 45 |
| Knitting | 14, 16, 20, 23, 30, 34, 49, 51, 68, 71 |
| Knitting your own Woollen Spencers | 49 |
| Making a Child’s Overall from a Narrow Skirt | 28 |
| Mending a Collar | 40 |
| Mending a Man’s Shirt | 37 |
| Mending a Sheet | 87 |
| Mending, The Wisdom of Preventive | 41 |
| Modern Bead Work | 90 |
| Nursery Casement Curtain, The | 67 |
| Patchwork Quilts | 79 |
| Patchwork Toilet Runner, A | 89[114] |
| Partly-worn Garments, Utilizing | 13 |
| Practical Way to Teach Girls Dressmaking, A | 53 |
| Quilts | 68, 72, 79 |
| Re-footing Made Easy | 30 |
| Re-heel a Worn Sock, How to | 34 |
| Repairing, Articles on | 18, 37, 40, 83, 87 |
| Repairing Table Linen | 83 |
| Rosebud Handkerchief Box, A | 111 |
| Sheet, Mending a | 87 |
| Shirt, Mending a Man’s | 37 |
| Slippers you can make | 35 |
| Socks and Stockings, Fancy Tops for | 23 |
| Socks, Re-footing | 30 |
| Sock, To Re-heel a Worn | 34 |
| Spencers, Knitting your own Woollen | 49 |
| Table Linen, Repairing | 83 |
| Tacking Stitches, Decorative | 61 |
| Toilet Runner, A Knitted Stripe for a | 71 |
| Toilet Runner, A Patchwork | 89 |
| Undercoat or Waistcoat, An | 45 |
| Use and Abuse of Gloves, The | 18 |
| Utilizing Partly-worn Garments | 13 |
| Violet Handkerchief Sachet, A | 109 |
| Wisdom of Preventive Mending, The | 41 |
Printed for the Proprietors of “The Girl’s Own Paper & Woman’s Magazine,”
by Curtis & Beamish, Ltd. Coventry, England.
THE
HOME ART SERIES
By FLORA KLICKMANN,
Editor of the “GIRL’S OWN PAPER &
WOMAN’S MAGAZINE.”

———————————
FOURTH EDITION.
BEAUTIFUL CROCHET
ON
HOUSEHOLD LINEN
Showing Table Cloths, Toilet Covers, Curtain Tops, Towel Ends, Sideboard Cloths, Tea Cosies, Dressing Table Runners and other items.
120 Pages, fully illustrated.
2/- net (by Inland Post 2/4).
“This attractive manual is issued under the able editorship of Miss Flora Klickmann the well-known authority on Knitting and Crochet.”—The Queen
“A profusely illustrated and practical up-to-date guide.”—London Teacher

———————————————
THE HOME ART BOOR OF
FANCY STITCHERY
With New Ideas for applying Crochet to Lingerie &
Napery, Bead-work and Fancy Stitches for Dress
Trimmings, Feather-Stitching, Smocking, Hardanger
Work, Darned Filet Crochet, Knitting, Macramé
Work, Darned Net, Cross-Stitch, Irish Crochet,
Embroidery on Flannel.
263 Designs.
2/- net (by Inland Post 2/4).
“It is thoroughly practical and will be welcomed by all women who delight in the craft of the needle.”—The Lady
“A practical little book.”—The Birmingham Post
“A most useful manual of fancy work. An extremely valuable addition to the needle-woman’s equipment.”—The Queen
———————————————
Containing Entirely New Designs for Lingerie,
Edgings and Insertions, Borders for Tray Cloths
and D’oilys, Deep Laces for Table Cloths, and
Valances, Motifs for Inlet Work and Irish Lace.
149 Designs.
Demy 8vo, 2/- net (by Inland Post, 2/4).
“It is a book which will be of the greatest interest to needlewomen. Many of the designs are extremely handsome, the advanced worker being as well catered for as those who are not so skilful.”—The Lady
—————————————————————————————
PUBLISHED AT 4, BOUVERIE STREET, LONDON, E.C. 4.
Either of the above Books will be sent, by the Publishers, anywhere in the United Kingdom, post free, on receipt of postal order for 2/4.
THE
HOME ART SERIES
By FLORA KLICKMANN,
Editor of the “GIRL’S OWN PAPER &
WOMAN’S MAGAZINE.”
EIGHTH EDITION.
THE CRAFT OF THE
CROCHET HOOK
A Book of New Ideas in Crochet Work of
various kinds, showing Novel Methods of applying
them to Personal and Household Linen
and Home Decoration.
150 Designs. Demy 8vo,
Paper boards. 2/- net (by inland post 2/4).
“It is a very desirable book for the crochet-woman who is always looking after fresh patterns and fancies.”—The Western Daily Press.
“For clearness, variety, and suggestiveness, it is far in advance of anything previously published.”—The Christian World.
“It has been well planned and carried out.”—The Bookseller.
———————————————
THIRD EDITION.
ARTISTIC CROCHET
Novel Beadings, Insertions and Edgings suitable for
Underwear and Dress Trimmings, Exquisite Floral
Designs in Irish Crochet, also Practical Suggestions,
both simple and advanced, for Tea-Cloths and
Bedspreads.
120 Designs. Demy 8vo,
Paper Boards, 2/- net (by inland post 2/4).
“The practical needlewoman will rejoice in this book of new ideas in Crochet Work.”—The Pall Mall Gazette.
———————————————
Giving directions for Bulgarian, Catalan, Hungarian
and Baro Embroidery, Amager Work,
Hemstitching, Netting, Wool-work, Bohemian,
Carrickmacross, Innishmacsaint and Reticella
Lace, and other forms of Needlecraft.
185 Designs.
Demy 8vo, Paper boards, 2/- net (by inland
post 2/4).
“Women who have no particular taste for ordinary sewing and embroidery need not on that account be deterred from buying this most useful little book. The fact that it is Edited by Miss Flora Klickmann is in itself a guarantee that something interesting is to be expected within the covers.”—The Glasgow Herald.
“It is a perfectly delightful little manual.”—The Lady.
—————————————————————————————
PUBLISHED AT 4, BOUVERIE STREET, LONDON, E.C. 4.
Sold by all Booksellers and Fancy-Work Dealers.
THE
HOME ART SERIES
By FLORA KLICKMANN.

SECOND EDITION.
THE MODERN
KNITTING BOOK
CONTENTS
“It is a book of charming ideas for knitted underwear, coats and wraps, socks and stockings, etc.”—The Pall Mall Gazette.
120 pages.
2/- net
(by post, 2/4)
———————————————

Containing Original Ideas for combining Crochet
with Embroidery and with Fancy Braids, together
with new & unusual Designs for use on Household
Linen, on Underwear, and as Dress Trimmings.
120 pages. 127 Designs.
2/- net (by inland post, 2/4).
“This is a model of what such books should be.”—The Standard.
“Beautiful illustrations are used, and these include some filet mesh motifs which are bold designs for the work which is now so popular.”—The Guardian.
“It is thoroughly practical and full of original and dainty ideas.”—The Christian World.
———————————————
THE
MODERN HOME SERIES
Edited by FLORA KLICKMANN.
THE MISTRESS OF
THE LITTLE HOUSE
What she should know and what she should do when she has an Untrained Servant. 120 pages. 2/- net (by post, 2/4).
“It is full of practical information, pleasantly put, for every housewife.”—The Guardian.
“It is a most useful little volume.”—The Lady.
THE ETIQUETTE
OF TO-DAY
120 pages. Illustrated. 2/- net (by post, 2/4).
Containing The Advisability of Social Customs, Introductions,
Leaving Cards, Paying Calls, “At Homes,” Luncheons, Dinners,
Garden Parties, “High Teas,” Town and Country Visits,
Foreign Travel, Conversation, Letter Writing, In Public,
Christenings, Weddings, Funerals.
—————————————————————————————
PUBLISHED AT 4, BOUVERIE STREET, LONDON, E.C. 4.
Either of the above Books will be sent, by the Publishers, anywhere in the
United Kingdom, post free, on receipt of postal order for 2/4.

FULLY ILLUSTRATED.
Showing Handsome Hardanger Borders
and Corners, also Natural Designs in
Cross-Stitch for Violets, Cyclamen,
Creeping Jenny, Nasturtiums, Daisies,
Roses, Fern, Daffodils, Clover,
Cherries, Wild Birds, with Butterflies
in Hardanger.
This Volume will especially please the worker who
is weary of the old-fashioned conventional cross-stitch
borders. It gives a series of lovely natural designs of
flowers and birds, and fruit and leaves, such as would
be a delightful addition to any woman’s pretty house.
“Many beautiful modes of simple embroidery are described and illustrated in Hardanger and Cross-Stitch, edited by Flora Klickmann, and forming one of a series of which we have more than once noted the excellence.”—The Church Times.
London: “The Girl’s Own Paper and Woman’s Magazine” Office,
4, BOUVERIE STREET, LONDON, E.C. 4.
Do you want to write
for the Press?
The LURE of the PEN
A Book for would-be Authors.
By FLORA KLICKMANN,
It is unique in its own line, breezily written, and crammed full of interest and information for those who read, as well as for those who want to write. Coming from so experienced an Editor it cannot fail to be authoritative.
The Bookman says: “The fresh and original standpoint from which the book is penned, the innumerable new and entertaining stories, the humour, wisdom, expert knowledge and common sense, make the LURE OF THE PEN not only invaluable to the literary aspirant, but also a work of amusement, interest and information to the general reader.”
—————————————————————————————
LONDON: 4, BOUVERIE STREET, E.C. 4; and at all Bookshops.
“A pendant to ‘The Flower-Patch Among the Hills,’ and every whit as delightful.”—The Graphic.

. By .
FLORA KLICKMANN,
A Joy-Book of the Hills.
Overflowing with humour, bubbling
with smiles, yet never out
of sound of the soughing of the
pines, the scold of the squirrel,
the call of the birds, and the
delicious pungent scent of woodsmoke.
A book to laugh over, to think
over, and to be thankful for.
“We are quite glad to hear more of Miss Klickmann’s country holiday, her fellow holiday makers, and her neighbours, human and other; and of the cheerful spirit, not stifled by the distant sound of War.”—The Times.
“Another charming book which shows a keen appreciation both of nature and of the oddities of Mankind. The author’s kindly humour is irrepressible.”—The Spectator.
“The perception of beauty, the descriptive skill, the insight into character, the homely philosophy, the refreshing humour, the sane outlook, the fascinating style, all make a pleasant appeal to lovers of good books.”—The Methodist Recorder.
“Fun, humour (caustic but never unkindly), social satire (shrewd and penetrating, yet singularly pitiful), the reader will find in abundance in these pages.”—Mr. Coulson Kernahan, in the Bookman.
“It is characterised by a delightful sense of humour, and it is written with a light and graceful pen.”—The Glasgow Herald.
“The pages sparkle with humour, and the portraits of various country characters are entrancingly funny. There is more to be learned in the pages devoted to birds than in many a scientific volume.”—The Sphere.
THE “R.T.S.,” 4, BOUVERIE STREET, LONDON, E.C. 4.
And at all Bookshops and Bookstalls.
PRICE SEVEN SHILLINGS NET (by post 7/6).
“It’s dood for me”
Obvious punctuation errors repaired. Varied hyphenation was retained.
Page 11, “Richlieu” changed to “Richelieu” (Richelieu openwork)
Page 28, “occured” changed to “occurred” (may not have occurred)
Page 43, repeated word “for” removed from text. Original read (apparent need for for it)
Page 58, “opportuities” changed to “opportunities” (such unique opportunities)
Page 106, “crepê-de-chine” changed to “crêpe-de-chine” (crêpe-de-chine for blouses, rest)
Page 113, index, “Brassière” changed to “Brassiere” to match text usage (Brassiere, The)