*** START OF THE PROJECT GUTENBERG EBOOK 47585 ***
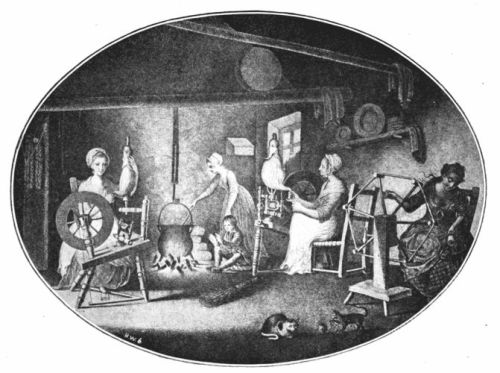
IN OLDEN TIMES THE WOMEN PREPARED ALL THE TEXTILE YARNS AT HOME
THE HOME-MAKING SERIES
CLOTHING AND HEALTH
AN ELEMENTARY TEXTBOOK OF HOME MAKING
BY
HELEN KINNE
PROFESSOR OF HOUSEHOLD ARTS EDUCATION, TEACHERS COLLEGE
COLUMBIA UNIVERSITY, AUTHOR OF "FOOD AND HOUSEHOLD
MANAGEMENT" AND "SHELTER AND CLOTHING"
AND
ANNA M. COOLEY, B.S.
ASSISTANT PROFESSOR OF HOUSEHOLD ARTS EDUCATION, TEACHERS COLLEGE
COLUMBIA UNIVERSITY, AUTHOR OF "FOOD AND HOUSEHOLD
MANAGEMENT" AND "SHELTER AND CLOTHING"
New York
THE MACMILLAN COMPANY
1920
All rights reserved
Copyright, 1916,
By THE MACMILLAN COMPANY.
Set up and electrotyped. Published September, 1916.
Norwood Press
J. S. Cushing Co.—Berwick & Smith Co.
Norwood, Mass., U.S.A.
[iii]
PREFACE
This volume, like its companion, Food and Health, is
intended for use in the elementary schools in those sections of the
country where the home life is of the type described. It is hoped that
both volumes will be used by the home people as well as by those at the
school.
This volume treats largely of the clothing problems and of the
elementary work in sewing which precedes garment making. It also
includes the subject of the leading textile materials,—where they
are grown and how they are manufactured ready for our use. Such topics
as the hygiene of clothing, buying materials and clothing wisely, the
clothing budget, the use of the commercial pattern, the care and repair
of clothing, color combinations, and attractiveness in dress, are
woven in with the lessons on sewing and textiles, in a very simple and
elementary way.
The authors are indebted to the United States Department of
Agriculture, to the Smithsonian Institution, to the Draper Company,
Hopedale, Massachusetts, to the York Street Flax Spinning Company,
Belfast, to the Whittall Rug Company, to Cheney Brothers, silk
manufacturers, and to others, for kind permission to use the pictures[iv]
shown. We acknowledge, also, the permission of the Corticelli Silk
Mills of Florence, Massachusetts, for use of their copyrighted
photographs of silkworms. Teachers will be glad to know that they can
obtain from the Corticelli Mills, at slight expense, specimen cocoons
and other helps for object lesson teaching.
[v]
CONTENTS
[1]
THE PLEASANT VALLEY SCHOOL
This is a story of the way in which the mothers and fathers, the
teacher and pupils, and their friends in the township work together to
make the broad valley in which they live truly a Pleasant Valley. The
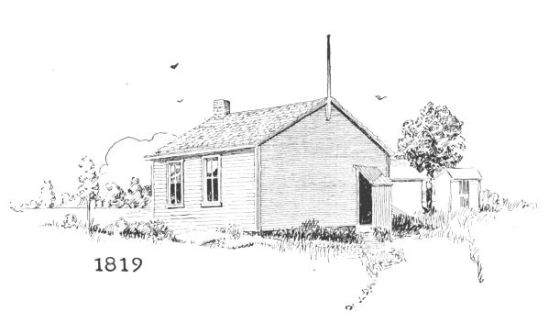
new school stands where the little red schoolhouse was built for those
who are now grandmothers and grandfathers, when the town was first
settled. The old building had become too small for all the young folk,
but everybody loved the place and it was not until a fire had destroyed
it that money was voted for larger and better housing for the school
girls and boys.
These small books can describe only a part of everything that is
being done in and for the school, and for the home people too, for you
know that no town can prosper and no country be great unless the homes are[2]
healthful and happy, where all the members of every family work and
play together. Do you not want to help, too, in your home, and in your
town?
[3]
CLOTHING AND HEALTH
CHAPTER I
THE PLEASANT VALLEY GIRLS LEARN TO SEW.

Fig. 1.—Marjorie Allen, President of
the Girls' Sewing League.
Our clothes are important for they help to keep us well. Shall we
learn how to choose the materials for them, and how to make some useful
articles of clothing? Sewing is an art which all girls should learn. If
we know how to sew, we can keep our clothes in order and always be neat
and attractive in appearance. We can, also, make acceptable articles
and gifts for others. It is useful, too, to know about materials and
about their costs and uses; for, when we buy our clothing and household
articles ready-made, we should know how to tell whether the material is
durable and will wear. The women of the home should know how to[4]
make a dollar buy the very best things. The mothers and grandmothers
of Pleasant Valley are delighted to know that their children are to
be taught at school. If we understand about materials, we will be
able to help a great deal. Do you know that the women of the United
States spend a billion of dollars every year for textile materials
alone? Isn't it interesting to know, too, that our clothing materials
come from plants or animals? Do you know how they are obtained and
manufactured? Do you belong to a sewing club or society? Perhaps you
can form a sewing club at your school or in your town as the girls of
Pleasant Valley did.
Marjorie Allen (Fig. 1) has been made President of the Girls'
Sewing League of Pleasant Valley. All the school girls belong; they
meet once a week and usually sew for their annual fair. Sometimes they
make garments for the little children who come during the summer to
the Fresh Air Home near their town. Marjorie[5] buys all the materials; so
she must know how to buy. She goes once a month with her mother, Mrs.
Allen, to town where there is a good store. Sometimes she orders by
mail.

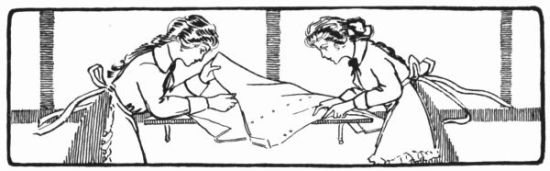
Fig. 2.—Miss James and some of the Pleasant Valley girls. They are sewing
for the League fair.
The girls of the league have decided to make some kitchen towels
and potlifters. These are useful and always sell well. As the girls do
not yet know how to make these articles, they have promised to make
a towel for themselves for school use, on which to learn. Then they
will make others for the sale. Cooking, sewing, and housewifery are a
part of the school work. Besides Miss James, the teacher, will give
credit for the[6] sewing done by the Girls' League. The girls are anxious
to prove to Miss James (Fig. 2) that they can really work outside of
school.
Later the girls hope to make aprons and caps to wear for their
school work in housewifery, and also some petticoats for the children
at the Fresh Air Home. Miss James says she will help them at school to
get started.
Lesson 1
TOWELING AND OTHER COTTON SAMPLES
Marjorie sent for samples of toweling materials. She also went to
the town store to see what it had to offer, and to look for materials
for petticoats and aprons. One day at school all the girls wrote for
samples. Miss James criticized the letters, and chose the best one to
be sent. Perhaps you can do this at your school.
What material is best for toweling? As soon as all the
samples arrived at Pleasant Valley, Marjorie took them to school, and
Miss James spent an hour with the girls studying the materials. The
toweling samples were examined first. What a difference in them! Some
are smooth and feel cold and look almost shiny, and others feel soft
and look more fuzzy on the surface. Do you know why? It is because some
are woven of linen fibers made from the flax plant, and others from
cotton which comes from the cotton plant. Which do you think are made
from cotton? Then, there is a difference in width: some are only 15
inches wide, and others are 18 inches.[7]
Some have a red or blue edge, and others are plain. There is also
difference in price. Which costs more, linen or cotton? Are the prices
not given on the samples? Marjorie and the girls decided that the
towels are to be one yard long. They would like to make four dozen
for the sale and plan to tie them up attractively, half a dozen in a
package. They had $25 left in the treasury from last year. As they will
have many other things to buy, they decided to purchase cotton towels
this year. Later, if there is enough money, they can add some linen
towels. Cotton towels do not absorb the water as easily as the linen.
We call this a difference in the properties of the two materials.
Barbara Oakes said her mother always buys linen towels. Cotton fibers
have a kind of waxy coating which throws off the water. Linen fibers
draw in moisture quickly, and linen materials dry very rapidly. Why,
then, is linen really better for dish towels?
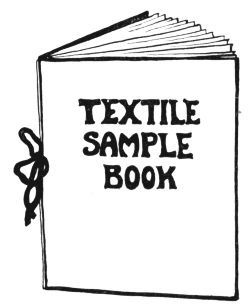
Fig. 3.—The girls made brown
paper books for their textile
samples.
Gingham, calico, and chambray are pretty and useful. Let
us look at some of the other cotton materials. Miss James had many
samples for the girls to see. Grandmother Stark sent over some from her
piece bag. Perhaps your teacher will bring some, and your mother may
send some, too. There are several samples of material for the aprons
and caps. The blue and white, and pink and white stripes and checks
are ginghams; the white with the little spots and thin stripes are
percales. The plain blues and pinks are[8]
chambray; the plain blues and pinks of cheaper grade are ginghams.
Those with printed designs on one side are calicos. The dark brown and
blue samples are heavier and are called denims. Suppose we make a book
of brown paper and mount all the cotton materials we can find. This
book can be kept at the school for reference. Everybody must help. See
if it is possible to write under each sample the name and common uses
of the material as well as its price. Miss James had some smooth brown
paper to fold for a book. She suggested ways to bind it. If each girl
wishes her own book, a number can be made if so many samples can be
obtained. Barbara and Marjorie decide to make their books at home.
There are several varieties of cotton flannel. The
fuzzy soft cotton samples are outing flannels and canton flannels. What
is the difference in their appearance? The canton flannel is heavier,
and it has one twilled surface and one fuzzy surface. It costs 12 cents
a yard and comes about 30 inches in width. Outing flannel, which is
fuzzy on both sides, can be bought from 10 to 35 cents a yard, and it
is 36 inches wide. The flannelette samples are also soft and cost from 8[9]
to 12 cents per yard; but flannelette is only 27 inches in width. It
has a slight nap or fuzzy surface, and is sometimes plain in color
and sometimes printed on one surface. Compare these three materials.
Outing flannel is very dangerous unless treated with ammonium phosphate.
Dissolve one quarter of a pound of ammonium phosphate, which costs about
25 cents, in one gallon of cold water. Soak the clothing in this solution
for five minutes. This is easily done and may prevent much trouble. Can
you tell why outing flannel is dangerous unless it is treated?
Many other cotton materials are useful. Miss James has ever so
many more cotton materials. She told the girls the use and name of each.
Can we learn them all?
Cheesecloth. Thin, sheer, plain weave. Costs from 5 to 12
cents per yard, and comes 1 yard wide. It is used for wrapping
butter or cheese, for curtains, and for many other purposes. It
may be used for baby, too, because it is so soft. The unbleached
cheesecloth costs from 4 to 12 cents and is 1 yard wide.
Crinoline. Something like cheesecloth in appearance and
stiffer in texture. It is used by dressmakers for stiffening parts of
garments. It comes from about 19 to 36 inches wide and costs
12½ cents up.
Scrim. An open mesh weave but heavier than cheesecloth. It
is used for curtains and household furnishings, and comes bleached
or unbleached. What is the difference in their color? Cost, from
12 to 90 cents. Width, from 36 to 45 inches.
Cretonne and Chintz. Printed materials with flowers or designs
on one side, sometimes on both. They cost from 12 to 75 cents per
yard and are used for curtains, covers, cushion tops, etc. They
vary in width from 25 to 36 inches.
[10]
Denim. Strong material and has an uneven twilled weave. It
is used for furniture covers, for aprons, and for floor covering. It
costs from 18 to 30 cents per yard and comes about 1 yard in width.
Your big brother or father wears overalls of this material; perhaps
some of the boys in school do, too.
Gingham. A material used for aprons or dresses, skirts, etc.
It is from 24 to 30 inches wide and costs from 10 to 50 cents per
yard. Fine ginghams are very beautiful. Sometimes they are
plain in color or striped or in plaids.
Percale. A good piece can be bought for 12½ cents per yard, 36
inches wide. It comes plain or printed, and is firm and closely
woven. It is good for aprons or summer dresses.
Ticking. A material used for pillows or mattress covers. It is
striped, is twilled in weave, and wears very well. It costs from
12½ cents per yard up to 50 or 60 cents per yard, and is woven 36
inches wide.

Fig. 4.—The surprise box.
Do you understand what is meant when we read that cloth is woven 36
inches wide? Do you know how cotton cloth is made and where it comes
from? Grandmother Allen told some of the girls; for she knows about all
such things. In our next lesson we shall study where cotton is grown, and
in another learn how it is woven. Another day we will learn the names of
other cotton materials and their uses. Then, we can add them to our book
of cotton samples. The little white box on Miss James' desk is a surprise
box (Fig. 4). Any one who finds a new cotton material different from
those studied at school, Miss James says,[11]
may drop it through the little hole in the cover of the box. What fun the
girls of Pleasant Valley will have when it is opened.
EXERCISES AND PROBLEMS
1. If you were buying kitchen toweling for use at home, what
material would you buy?
2. Name three fuzzy cotton materials and tell their uses.
3. Decide whether you are to make a sample book. Begin to
collect samples of cotton materials for it.
4. Write quickly on the blackboard the names of six common
cotton materials. Ask mother to name six.
Lesson 2
THE STORY OF COTTON GROWING
Do you know that our country produces three-fourths of the cotton of
the world? Where is it grown? Have you heard the story of cotton? Let us
learn about it.
While the girls of Pleasant Valley school waited for the cotton
toweling to come from the store, they studied about where cotton is
grown. Cotton is the cheapest and most important textile fiber. What does
the word textile mean? Look up the word in the school dictionary. More
clothing is made from cotton than from any other fiber.
Where does cotton grow? Perhaps you have lived in the Southern
States. Can you name them without looking at your geography? Can you tell
why it is warmer in those states and why cotton grows[12]
so well there, and not in Northern States? Texas produces more cotton
than any other state. In what other countries of the world do you think
cotton is grown? John Alden and Frank Allen heard the girls studying
about cotton, and they told Miss James that they thought the boys would
like to learn, too.

Courtesy of the United States
Department of Agriculture.
Fig. 5.—The flower and leaf of the
cotton plant. The size of the flower is about four inches across.
How cotton grows. The farmer plants the cotton seeds in
rows,—you have seen corn planted in that way. What color is corn?
The cotton seeds do not look like kernels of corn; but some are fuzzy and
soft and gray or green in color, and others are black and smooth. This is
because there are many varieties or kinds of cotton. Some grow to be five
feet tall like corn; others, ten feet in height. The flowers are yellow
at first and then turn brown or purplish red. There are over one hundred
varieties of cotton. If you do not live near a cotton field, perhaps you
can ask some boy or girl in your school to write to the United States
Department of Agriculture at Washington. This department will send you
some cotton seeds. Perhaps you can plant the seeds in the school garden
and see if they will grow. In the South the planter prepares the fields
about February and plants in April or May. By the middle[13]
of August, the plants are five or six feet high and are covered with
fuzzy little white balls, soft and dry. The cotton fields, or plantations
as they are called, look like fairyland. In the picture (Fig. 6) you will
see the men, women, and children busy picking the cotton and putting it
into baskets. The cotton bolls, as they are called, are brown and dry
looking: but when ripe, they burst, and the woolly looking white ball
pops out of its brown house, or shell (Fig. 7). In each cotton boll there
are about thirty or forty seeds, and the cotton fibers are all attached
to these seeds. The fibers are made into thread and clothing, and the
seeds are used for many purposes.

Courtesy of the United States Department of Agriculture.
Fig. 6.—Picking cotton.
[14]
Cotton fibers differ. We shall learn how the fiber is pulled
from the seeds. This process is called ginning and is done by a machine.
If you have a microscope in your school, look at a cotton fiber under
the glass. Miss James will send for some fibers. You will see that it
looks like a ribbon which has been twisted. The natural twist helps very
much when cotton is twisted or is manufactured into yarn. Cotton is a
wonderful little fiber and varies in length from ½ to 2 inches. The
cotton called Sea Island cotton is the long fiber cotton, and is grown
near the sea, for it needs the sea air. The cotton called Upland grows
away on the uplands and is shorter. These are the principle kinds grown
in the United States.

Courtesy of the United States Department of
Agriculture.
Fig. 7.—Cotton bolls when burst are
about the size of a small apple.

Fig. 8.—Cotton fibers magnified.
The cotton seeds are taken from the fiber. After the
pickers have gone up and down the long rows and filled their bags or
baskets, they empty the cotton into wagons which carry it to the gin
house, where[Pg
15] the seeds are separated from the fibers and the brown
pieces of the pod are blown away as it is separated and cleaned. Long
ago in India and other countries, cotton was ginned by hand. What a long
tedious process, for only one pound could be separated by a person in a
day. The picture (Fig. 9) shows a little girl at school trying to gin
some cotton with a little ginning machine which she has made at school.
While George Washington was President of the United States, a man named
Eli Whitney invented a machine, called the saw gin, for separating cotton
fibers from the seed. This invention has saved much time. To-day cotton
is all ginned by machinery; and so great quantities can be separated
in a day. The machine works in such a way that the cotton fibers are
pulled away from the seeds, and the seeds are kept separate for other
purposes.
The cotton seeds are used, too. Some of the seeds
are kept for planting, just as you keep corn and oats[16]
on your farm; and others are pressed. Cottonseed oil comes from the
seeds when pressed, and is very useful for many purposes, such as salad
oil, soaps, cooking fats, and used for cattle feed. The seed is covered
with a fuzz which is first removed and used for lint. Then the hulls
are removed, and the dry cake which is left, after the oil has been
extracted, is also used for feeding the cattle. Isn't cotton a very
valuable plant? How poor we should be without it, for silk and wool and
linen cost so much more. Cotton is the cheap, useful fiber.

Courtesy of Speyer School, New York.
Fig. 9.—A Pleasant Valley girl trying
to gin some cotton with a little ginning
machine which she has made at school.
[17]
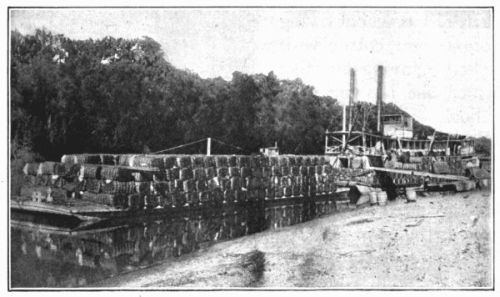
Fig. 10.—Bales of cotton on a steamboat dock ready for shipping.
The cotton is baled and shipped to manufacturers.
After cotton has been freed from the seed, it is sent to the cotton mills
all over the world; some in this country and some in Europe. It is sent
by boats and sometimes by train. In the picture (Fig. 10) you will see
bales on the dock ready to be shipped. In order to ship it safely after
it is ginned, it is pressed into bales like the hay you have on your
farm; and it is covered with coarse cloth to keep it clean, and is bound
with iron bands. The American cotton bales weigh about 500 pounds. This
is the size of a bale: 54" × 27" X 45". See if you can measure off in
your schoolroom a space which will show the size of the bale. When these
bales are taken to the steamboat piers, they are again made smaller by a
machine, called a[18]
cotton compress, which reduces them to 10 inches in thickness. This is so
the bales will not take up so much room in being transported. Sometimes,
however, this pressing injures the fiber. The United States ships cotton
to Liverpool, Bremen, Havre, Genoa, and many other places. Can you find
these on the map and see what a long journey the cotton takes? John
Alden went to the map and traced the journey. He used the pointer and
started from one of the ports of Louisiana. Can you imagine which one?
Which way do you think the steamer sailed in order to reach England as
soon as possible? Perhaps you live near a shipping port and can go with
your teacher to see the cotton loaded on the ships. Notice how the bales
are lowered into the hold. There are large exporting companies which
take charge of shipping bales of cotton. What is the difference between
import and export We import some cotton from Egypt, because it is
a very long fibered cotton and is good for thread, hosiery, and cotton
gloves. Another day we shall study how the manufacturer at the mill opens
the cotton bale and makes it into cloth.
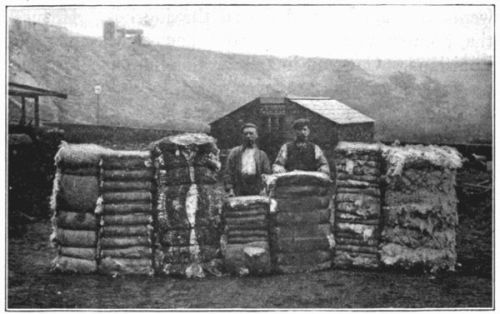
Courtesy of United States Department of Agriculture.
Fig. 11.—Bales of cotton from different countries. The third from the left
is the American bale. The second is Egyptian; the fourth, East Indian.
EXERCISES AND PROBLEMS
1. Where is cotton grown in the United States? Find the
states on the map. Tell why cotton is grown in these states.
2. Examine a cotton fiber with the microscope. How does it
look? Draw a picture of it.
3. Look up the story of Eli Whitney's invention. Why was it
important?
[19]
Lesson 3
THE HEMMING STITCH
Let us begin to make the dish towels. What must we think about in
order to hem them very neatly?
Why is the hemming stitch useful? The hemming stitch
is a very useful one to learn, for it can be used for so many purposes.
Let us learn on something simple—a dish towel or dish cloth for
mother. Then you can perhaps hem something for the sale of your Girls'
League. Mrs. Oakes says she has a dozen new towels ready for Barbara when
she learns how to hem.
The raw edges of material would ravel unless turned and hemmed. The
turning is called a hem. It is held with a temporary stitch called
basting, and then with the hemming stitch which remains. If the edges
were not hemmed, the material would ravel away or look very untidy. The
warp threads run lengthwise of the cloth. The firm selvedge is made by
the filling thread passing around the warp as the cloth is made. It is
this filling thread which will ravel in dish toweling or other material
unless a hem is made.
How is the hemming stitch made? This is how Miss
James taught the girls of Pleasant Valley to hem:
1. Turn hem of desired width. For the towels, one-fourth inch will
be about right when finished. There are two turns because one would
ravel. Turn towards the worker. First, turn one-eighth inch to wrong side
of material. Second, turn one-fourth inch. Turn and pinch to hold until
basted.
[20]
2. Baste. Use one-fourth inch stitches. No. 8 needle is a good size
for this work, and basting thread can be used for this temporary stitch.
Be sure to wear a thimble on the middle finger of the right hand. Little
Alice Allen says she never will learn to use a thimble, but she will if
she keeps on trying. The picture (Fig. 12) shows the even basting stitch
with needle in position. Baste on the edge of the hem. Begin with a knot,
and end with two tiny stitches placed one on top of the other to hold
until hemmed. Remember basting is a temporary stitch.
Fig. 12.—The basting stitch.
3. Hem the edge with the hemming stitch. Look at the pictures (Figs.
13-16) and then follow carefully the directions.

Fig. 13.—The way to hold the
cloth while hemming.
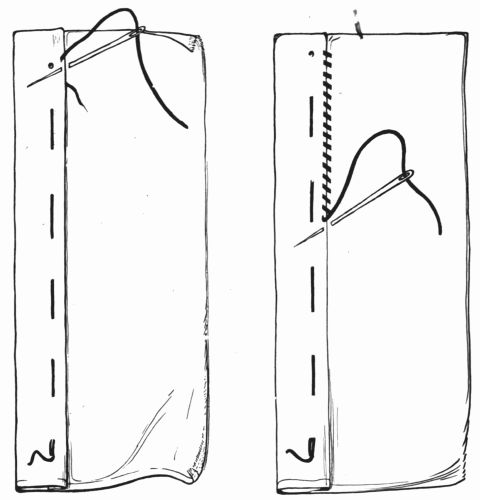
Fig. 14.—This shows how
to start the hemming.
Fig. 15.—The hemming stitch.
Notice the slant of the needle.
Hold the cloth slanting over the fingers of the left hand, with
thumb on top (Fig. 13). Begin without a knot. Put the needle up through
edge of hem and allow one inch of end of thread to lie under the hem
as you pull thread through (Fig. 14). This end will be worked over and
held securely.[21] Now you are ready for the stitch. Point the needle which
is in your right hand towards the left shoulder. The point of the needle
is passed first through the cloth under the edge of the hem, with a tiny
stitch which shows on the right[22]
side. The needle, at the same time,
catches the edge of the basted hem. This makes a tiny slanting stitch on
the right side, so: /. The next stitch is taken about one-sixteenth of an
inch from the first, in exactly the same way. As the thread carries from
one stitch to the next, it makes a slanting line on the wrong, or hem,
side but in the opposite direction from the stitch which shows on the
right side. It slants like this: \
Together these two make this:

The part marked 1 shows on the right side of the cloth; and 2 on the
wrong, where the hem is turned (Fig. 15). When the end of hem is reached,
fasten with two or three tiny stitches. If the thread breaks, ravel out
a few stitches and let the old end of thread lie under the hem. The new
thread can then be started as at the beginning by putting needle in the
hole of last stitch. There will be two ends under the hem to work over.
The picture (Fig. 16) shows how to join a new thread. Find out how many
places the hemming stitch can be used. Try it at home on something before
next lesson.

Fig. 16.—The hemming stitch. Starting
a new thread.
When this stitch has been well learned, it will be possible
for the Girls' Sewing League to make many things.
[23]
EXERCISES AND PROBLEMS
1. Practice turning hems neatly on a scrap of cloth before
starting to turn them on the dish towel.
2. Study the pictures carefully so as to have the stitch exactly
the right slant.
3. Practice hemming on a scrap of cloth for a few stitches before
beginning the towel.
Lesson 4
THE STITCHING STITCH
Shall we try to make a potholder and learn another new stitch?
Holders are very useful to the housekeeper. Mrs. Stark has a bag
with pockets hanging near the kitchen stove and says it makes such a
convenient place to keep holders, for they are always at hand ready for
use. They can be made many sizes. For the cooking class at school, it is
convenient for each girl to have a holder on a tape attached to the band
of her apron (Fig. 17). It is always with her, then, for use. This can
be done by making a loop at the end of the tape and slipping the holder
through the loop. A hand towel attached at the same place is convenient,
too.
[24]
Planning, cutting, and basting the holders. Holders
can be made from old scraps of woolen cloth, from either pieces of
garments which have been worn and cast aside, or new scraps from the
piece bag. Six inches square is a good size. Place several squares, one
on top of the other, according to the thickness of the cloth. Can you
tell why wool makes a better holder than cotton? For appearance we can
cover the holder with some pretty piece of chintz or cretonne; perhaps
you have in the piece bag some pieces which are large enough. Denim is
strong for a covering. A piece of asbestos might be placed inside. Why?
Pin all these thicknesses together, with a cover top and bottom. Now
baste from corner to corner and from side to side. This is good practice.
Make basting stitches of even length such as you made on the towels.
Then baste carefully all around the four sides so that the edges are
held securely. We are going to bind the edge to prevent it from raveling
and to make it strong. Tape is good for binding; and so is a bias strip
of the cretonne cover, or of a pretty contrasting color. What does
contrasting mean?
Cutting and placing a bias strip. Can you learn to
cut a true bias strip of cloth? You have learned that the warp threads
are the strong threads of the cloth and run lengthwise of the material.
To prepare to cut a true bias strip (Fig. 18), fold the warp of the cloth
over so that the warp threads lie exactly on the filling threads. The
fold is a true bias edge. Cut[25] through the fold. A true bias edge is
made by cutting a square from corner to corner. Does it cut the warp or
the filling threads? To make one-inch strips for binding the holder,
measure at right angles to the fold you have just cut. Make a dot, and
rule a light line which will be one inch from the cut edge. These are
true bias strips. Baste the strip or tape carefully around the four sides
of the holder, and allow a little fullness at the corner. The edge of the
strip or tape should be even with the edge of the holder, and the basting
should be one-fourth of an inch from the edge in a straight line for a
guide for the next stitch. Miss James showed the girls how to turn the
corners by taking a tiny plait.

Fig. 18.—Cutting a true bias.
Making the stitching stitch. Now we are ready for a
new strong stitch. It is called stitching stitch, for it is used where
machine stitching might be used, and resembles it in appearance on the
right side. Ask your Grandmother if she remembers when there were no
sewing machines and all Grandfather's shirts were stitched by hand?
Grandmother Allen and Grandmother Stark of Pleasant Valley remember.
Look at the picture (Fig. 19) and follow the directions carefully, and
you will be able to make this stitch.[26] It is started with two or three
tiny stitches, one over the other for strength. The row of stitches you
are to make should be in a straight line just below the straight row of
basting stitches. Hold the cloth in the same way as for hemming, with
the material over the fingers and the thumb on top. Now you are ready
to make the new stitch. The stitch is started at the right-hand end of
the cloth. Make a stitch back over the two starting stitches and carry
the needle forward twice the length of this starting stitch. You will
have a tiny space on the right side between the place where the needle
comes up and the end of the starting stitch. Each time your thread should
fill this space, for your needle should go back into the end of the last
stitch and twice the length forward on the opposite side as it comes
up. See the needle in the picture (Fig. 19). Notice the space.[27]
Look at your work. What is the appearance of the stitch on the wrong
side? On the right side? This stitch is also called the backstitch.
Why?

Fig. 19.—The stitching stitch.
Finishing the holder. Make a row of stitching stitches all
around the edge of the holder, holding the binding securely. Be careful
to catch the corners well. Remove your basting stitches. Turn the tape or
strip over to the other side of the holder and baste. If you have used a
bias strip, the edge must be turned under one-fourth of an inch or more
before basting. This edge is to be held with the hemming stitch. I am
sure that you can all make the hemming stitch by now. If you wish a loop
or long tape for holding the holder, hem it neatly at one side, turning
in the end of the tape to prevent raveling. If you have some colored silk
thread, it will look well to make tiny stars like this * at the center of
the holder and at four places about two inches from the corners on the
diagonals. These will hold the materials firmly together.
Other uses for the stitching stitch. The stitching stitch can
be used for many other purposes. It is a strong stitch for seams. Do
you know what a seam is? Two pieces of cloth sewed together may form a
seam. Look for seams in your skirt, in your sleeve, in your waist. Can
you find any? Some one tell the difference between a hem and a seam.
After this lesson Mollie Stark helped her Grandmother sew some long
seams. Mr. Stark's overalls had ripped, and the sewing machine was being
repaired.
[28]
EXERCISES AND PROBLEMS
1. Practice cutting some bias strips. Be sure they are true bias
edges. How can you tell?
2. Try to make the stitching stitch on teacher's demonstration
cloth, with the large needle and red worsted.
Lesson 5
THE OVERHANDING STITCH
A new game and a new stitch. Let us make the bags with the new stitch
before we learn to play the game.
Perhaps, instead of a potholder, you had rather make iron holders or
bean bags for your League Fair. Have you ever played bean bag game? The
Pleasant Valley school children often play this game at recess. You can
easily make the bags and also the board.

Fig. 20.—The overhanding stitch.
[29]

Fig. 21.—The bean bag board.
Making the bean bag. Bean bags can also be sewed
with the stitching stitch, as it is strong. Cut the bags of denim 14 ×
7 inches, or so as to make a bag 7 inches square. Fold, baste the edges
on three sides, sew them with stitching stitch, and turn inside out.
Fill with beans. Two inches at the middle of one side should not be
sewed until after the beans have been put in. Would you like to learn
the overhanding stitch for closing the edges of that side? The two edges
of the bag are turned in, and the overhanding stitch is made on the
very edge. It is a very simple stitch, and is used for sewing seams or
edges together firmly. The edges are held in the left hand between the
thumb and first finger. The needle in the right hand is pointed straight
through towards the worker as in the picture (Fig. 20), and the needle is
passed through the two edges. The end of the thread is drawn carefully,
and one-half of an inch allowed to lie on the edge. This is worked over.
The needle is pointed with each stitch towards the worker, and the
stitches are placed about one-eighth of an inch apart. Be very careful to
catch both edges, but do not make your stitches too deep. The overhanding
stitch is a strong stitch and is easy to make. It is finished by working
backwards from left to right on the edge with three or four of the same
stitches.
[30]
Playing the bean bag game. The boys will surely wish to help
prepare the board for the bean bag game. Frank Allen and John Alden made
the one used at Pleasant Valley school. Perhaps there is an old box
somewhere which can be braced with sticks and made to stand slanting. The
bottom of the box will have to be cut in holes (see Fig. 21). Each hole
can be a different shape and numbered 5, 10, 25, or 50. The object of
the game is to see how high a score can be obtained by throwing the bags
through the holes. One should stand six feet or more from the board. Each
should have ten turns. Some one must keep the score.

Courtesy of Mrs. E. J. Esselstyn.
Fig. 22.—John Alden's little brother trying for a high score.
The boys will have to help saw or whittle to get the
holes just right. Do you think you can make both[31]
the bags and the game board? The picture (Fig. 22)
shows John Alden's little brother playing the game.
EXERCISES AND PROBLEMS
1. Try to make the bean bag board. Perhaps you can think of an easier
way.
2. Find five places where the overhanding stitch is used and report at
the next lesson.
Lesson 6
PLANNING TO MAKE AN APRON
The girls of Pleasant Valley school decided to make caps and aprons.
They help every day with the preparation of the school lunch. The aprons
will keep their dresses clean, so the girls will look neat and tidy.
The aprons can also be used at home. Let us too learn how to cut them
carefully.
The samples which Marjorie Allen brought from the store have been
examined and studied carefully. The girls know now the difference in
appearance between percales, calicos, ginghams, chambrays, and also how
much they cost. Most of the girls have decided to make pink and white,
or blue and white, checked aprons of gingham. It costs 12½ cents a yard;
and the girls require from two and one-half to three yards, according to
size. They are to make their own pattern for the aprons, as they are so
simple. When they make the petticoats for the Fresh Air children, they
will learn to use a commercial pattern.
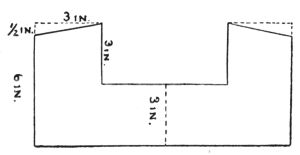
Fig. 23.—The plan for the yoke of the
apron.
Cutting the skirt part. Each girl will need two
lengths for the skirt part of the apron, measuring from[32] the
armhole at chest, to the desired length. No pattern is necessary for this
skirt part. On each length allow four inches extra for hem. Tear one
length, lengthwise; be careful not to tear it crosswise of the material.
The two pieces torn down are to be placed one on each side of the whole
width, with selvedges together.
Planning the pattern for the yoke. Now the yoke pattern is to
be made. Miss James helped the Pleasant Valley girls with the patterns.
You will need a good-sized piece of paper, pencil, and a tapeline.
Measure the width of chest from side to side, just at the armhole in
front. Look at diagram (Fig. 23); this measure is the bottom of the
yoke. Draw a line the length of chest measure across the bottom of your
paper. Measure up six inches, and draw a line at right angles to each
end of the chest line. This is to find the shoulder. Draw a dotted line
three inches at right angles to this, as shown in the diagram. Then draw
a line three inches to form a third side of the square. Do this for the
other shoulder and connect the two lines with a line parallel to the
chest line. You will have a yoke three inches wide in front. The shoulder
lines are too straight; so draw slanting lines just a little towards the
outside or armhole side, taking[33] off one-half inch on shoulder edge. This
is the only pattern needed; for the back pattern is exactly the same, but
is divided in half and cut straight through the center for the opening in
back.

Fig. 24.—Four of the Pleasant Valley
girls wearing their finished aprons.
Cutting the yoke. Lay the pattern on the cloth so that the
width of chest line is on the filling threads of the cloth. Four pieces
will be needed. Can you double your cloth and cut two at once? The yoke
is made double of two thicknesses; that is why we must cut two pieces
for the back and two for the front. Cut the two back portions through
the center back, on the thread of material. Now our aprons are all cut.
Carefully roll up the pieces and material left, for you will need them if
you make the caps.
Basting the skirt part. Let us make the skirt of the apron
first. Pin the widths together, selvedge to selvedge, to form seams. You
all know what the selvedge is. Look in the dictionary. How is it made so
firm? The whole width is for the center front; the half width for each
side. Pin together and baste one-fourth inch seams, to within 8 or 9
inches of each[34] length; this will be left open under each arm. Baste also
one-fourth inch hems at the outside edges of the side lengths which are
raveling. Turn the hems to the same side as the seams, the wrong side.
Now all the basting is done, and next time we shall be ready for a new
stitch. The picture (Fig. 24) shows some of the Pleasant Valley girls
wearing their aprons. Can you guess which is Mollie Stark or Barbara
Oakes?
EXERCISES AND PROBLEMS
1. Look up these words in the dictionary: selvedge,
warp, woof, pattern.
2. Name other materials, besides gingham, suitable for work
aprons.
Lesson 7
USING THE RUNNING AND BACK STITCH ON THE APRON
A new stitch called running and back stitch is very useful for seams
(Fig. 25). It is a quick stitch, and it is strong. Let us learn to
make it on the seams of the aprons. We shall need it later for other
things.
The apron seams are all basted with one-fourth inch seams. The
selvedges have not been removed. Some day we shall learn to make a seam
which will be sewed twice, and then we shall remove the selvedges. A
seam made with one sewing is called a plain seam. The basting is only a
temporary stitch.
[35]
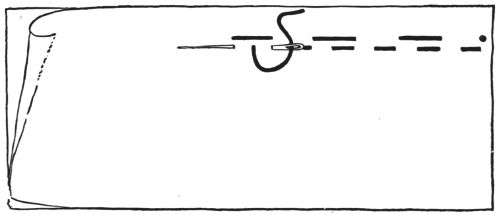
Fig. 25.—A new stitch called the running and back stitch.
To sew seams. Hold the material in the left hand
over the fingers, with thumb on top. You will sew from right to left.
Start with two or three tiny stitches, one over the other, without knot.
Pull needle through after the starting stitches. Now take two or three
tiny running stitches; they are like basting, only much smaller. As you
make the running stitches, the last one is to be twice the length of the
others as the needle is pulled through. This is because the next stitch
is to be backwards—a backstitch to cover half the space. On the
side towards you, your row of stitches should look like running stitches;
on the wrong side, it will be different because of the backstitch. You
should have the stitches in a straight row under the line of basting. The
backstitch, which covers half the space left by the running, is twice
the length of the running stitch on the wrong side. This will bring the
needle up ahead of the stitch and ready for the next group of running
stitches. Both seams of the skirt of the apron are to be sewed to within 8 or 9[36]
inches under the arm. Finish with three tiny stitches, one over another.
Remove bastings, and press open the seams. Can you not take this home and
sew the other long seam there, now that you know how; or can you not do
it at the meeting of the Sewing League? The girls of Pleasant Valley did.
Sometimes they sat under the big oak trees on Friday afternoons and had
their sewing lessons outdoors.

Fig. 26. A gauge for the apron hem.
To hem sides. Hem sides of apron which you have basted, making
small stitches. You know how.
To hem bottom of apron. Turn hem at bottom of apron. The
cloth should be even. Four inches were allowed. The first turn may be
one-fourth of an inch; the second, three and one-half inches. The other
quarter inch allowed is for gathering at top of apron. Pin carefully
and measure, with a tapeline or a gauge. Can you make a gauge? A piece
of cardboard with a notch for one or three inches according to measure
desired, is a gauge. The diagram (Fig. 26) shows how to cut a one-inch
gauge. Can you make a three-inch gauge, and keep your hems even by
following the marked notch? Baste hems carefully after pinning. Hem
neatly.
To gather the top of apron. You are now ready to
gather the top of the widths. They are to fit into the
yoke; and, as they are too wide, we shall have to make[37]
them fit. Gathering is done by making two rows of running stitches (small
basting stitches), one under the other. This is done on each width with
the rows of running stitches one-fourth of an inch apart. Begin with
a knot and have your thread a little longer than the width you are
gathering. You can then draw the material on the gathering threads, and
make it fit the yoke.
Let us put the finished skirts of the apron away neatly, and next
lesson sew on the yokes.
EXERCISES AND PROBLEMS
1. Make a three and one-half inch gauge, using a piece of cardboard
or a stiff paper.
2. Practice gathering on a practice piece of cloth. See how
quickly you can do it, putting in two even rows.
Lesson 8
MAKING AND ATTACHING THE APRON YOKES
The yokes are to be seamed at the shoulders. There are two yokes; one
is for the lining. Let us sew them together and attach them to the skirt
of the apron.
To make the yoke. Pin the two back portions of yoke to the one
front portion. Baste at shoulder seams one-fourth of an inch. Sew with
running and back stitch, which you used for the apron skirt.
Make the lining yoke in same way. Sew two back portions to one
front.
[38]
When both yoke and lining are ready, pin together so that the two
right sides are together and seams match at shoulders. Baste carefully
together all around with one-fourth inch seams only, except across the
bottom at width of chest line. Be careful not to take deeper seams, for
then the yoke will be too small. The chest line width of the yoke is left
open so the skirt can be placed between. The back portions of the yoke
are also left open at the bottom. After basting, sew below the basting
with running and back stitch. Remove the bastings and turn the yoke
inside out. Crease edges carefully. Your yoke will lap one-half inch in
back when finished. Now you are ready to attach the skirt to the yoke.
To attach the yoke. You will attach the front of the yoke to
the front gathered width. Find the center of front yoke. Mark with pin.
Find the center of gathered width. Place the right side of the yoke to
the right side of the skirt width, center to center; and pin. Do not
pin the lining yoke, for it is to be sewed down later to cover the seam
you will now make. Pin the ends of the width to the ends of the front
yoke. Pull your gathering thread until the fullness fits the yoke; then
move the gathers along until they fall evenly. Can you not distribute
the gathers carefully, as you pin them to the yoke? Hold the gathers
towards you, and baste with a one-fourth inch seam, not any more. Now sew
securely with the strong stitching stitch, which you used on the bean
bags.
[39]
To place the yoke lining. You are ready now to cover these
rough edges of the seam with the lining. Turn in one-fourth of an inch to
match the width of the seam taken from the yoke. Baste flat to the seam
so that the edge of the turned lining just covers the sewing of the yoke
seam. Finish with a neat hemming stitch.
Do you not think you can join the two back portions of the yoke to the
skirt portions of the apron without any further help?
EXERCISES AND PROBLEMS
1. Find three places where you think running and back stitch
can be used.
2. Notice other places where gathers are drawn in to fit a space.
Mollie Stark discovered several places on the garments worn by the
children at school.
Lesson 9
HOW TO MAKE A BUTTONHOLE
The apron is now entirely finished, except for fastenings. Shall we
learn to make a buttonhole, and how to sew on buttons? The Pleasant
Valley girls had a contest. Barbara Oakes won a prize at the Pleasant
Valley County Fair.
Practice in making the buttonhole. Long ago little girls were
taught to make buttonholes, when they were five or six years of age.
Grandmother Allen learned at that age. Surely by the time a girl is
twelve years old she should begin to learn how to make
buttonholes. One must practice on a scrap of cloth,[40]
before making the buttonhole on the garment. These
are the steps to consider in practicing:
1. Decide about placing the buttonhole. Is it to be in a vertical or
horizontal position on the garment? How far from the edge?
2. Cutting.
3. Overcasting the cut edges. How deep and how far apart to take the
stitches. Correct position to hold work.
4. Making buttonhole stitch along one edge.
5. Turning corner.
6. Turning and buttonholing opposite edge.
7. Finishing second end.
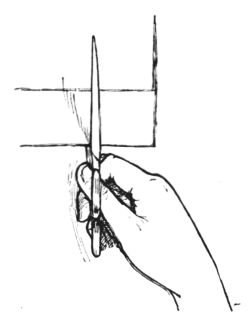
Fig. 27.—Cutting the buttonhole.
Placing the buttonhole. It is important to place the buttonhole
correctly. In some garments, where there is no strain, as in the front of
a shirtwaist or of loose corset cover, the buttonholes can be made to run
up and down. One should decide how far from the edge and exactly where
the buttonhole is needed. Mark the place with pinholes. For the apron
place three buttonholes in the yoke, one in middle and others near each
end, about one-fourth inch from the edge of the yoke at center back.
Cutting the buttonhole. One should cut truly and
exactly, on a thread. If a pair of buttonhole scissors is
not available, fold the material halfway between the pin[41]
pricks which marked its location, so that the pin passes through both
ends of the located buttonhole. Cut from the folded edge to the pin, by
placing the fold well within the opened scissors and cutting evenly (Fig.
27). For the apron cut one-half inch buttonholes and one-fourth of an
inch in from the edge.
Overcasting the buttonhole. You have not all learned
the overcasting stitch. Practice it on a scrap of cloth. Look at the
picture (Fig. 28) carefully. The overcasting stitch is used on edges to
prevent raveling. Hold the buttonhole along the top of the first finger.
Begin without knot, and at the end farthest away from a finished edge; as
at the end of skirt band or edge of waist. Work over end of thread. Point
needle toward left shoulder to make a slanting stitch. Make
about three or four stitches on each[42]
side of the buttonhole (Fig. 29). The depth should be about one-eighth
of an inch. The corner stitches should be taken so that the needle is
pointed at right angles to the cut before the buttonhole is turned.
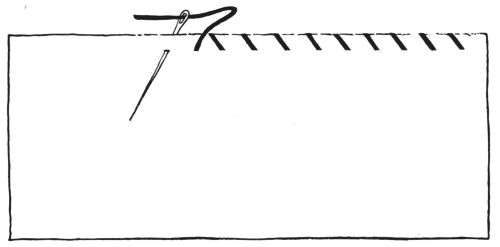
Fig. 28.—The overcasting stitch for rough edges.
Do not forget that, after one side is overcast, it is necessary to
turn the buttonhole around so the other cut edge may be overcast.

Fig. 29.—Overcasting the cut buttonhole.
Making the buttonhole stitch. When the buttonhole has
been overcast, the needle should be in position at the beginning of the
buttonhole where the overcasting was started. Point the needle at right
angles to the edge, and take a stitch one-eighth of an inch deep (Fig.
30). Hold buttonhole so that it lies flat on top of the first finger. Do
not spread it open. Throw the double thread from the eye of the needle,
around the point, in the same direction as the buttonhole is
being worked, from right to left. Draw needle through,[43]
pulling the thread at right angles to and toward the cut edge of the
buttonhole. A little finishing loop called the purl will be formed at
the edge. It is this which prevents the edge of the buttonhole from
wearing. Continue along one edge until the corner is reached. Remember
all stitches are to be the same depth and to have about the space of a
thread between stitches, and the purl is to lie exactly on the edge.

Fig. 30.—The buttonhole stitch.
Turning the corner. There are several ways of finishing the
corners of buttonholes. They may have two fan ends, or one fan and one
bar, or two barred ends. How can we tell which way to plan? A barred
end is stronger than one which has only a fan. One must judge how the
buttonhole is to be used, and then make the proper combination of ends.
The picture (Fig. 31) shows both the fan and the bar. The fan is made
with the same buttonhole stitch. Five stitches make[44]
a good fan. The third one is taken on a line with the cut and is the
deepest, and the two stitches each side are slanting and of a depth to
make an even fan effect at the turn. The fan can be made more easily
by turning the buttonhole so that the end to be worked with the fan is
pointed towards the worker and the cut edge is over the finger.
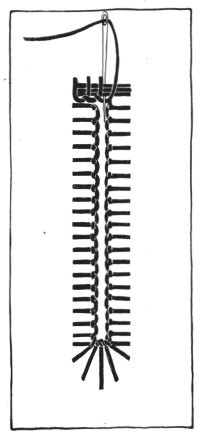
Fig. 31.—The fan end and the bar
end of the buttonhole.
Buttonholing second side. After making the fan, turn the
buttonhole, and along the second side make the buttonhole stitch of the
same depth and evenness as along the first side.
Finishing second end. Practice a bar end. Turn buttonhole so
that the end to be finished lies across finger with fan end towards the
worker. Make two or three small stitches one over the other to bar the
end, these to extend across width of buttonhole stitches. Over these the
blanket stitch is to be placed. This is very easy. Look at the picture
(Fig. 82) of it[45]
on page 138. These stitches are to be taken close together and through
the cloth, around the three barred stitches. This makes a firm finish.
Point the needle towards the worker and make a straight row of blanket
stitches.
Fig. 32.—The pin prevents the button
from being sewed too near the cloth and allows space for buttoning the
garment.
Sewing on a button. Start with a double thread, and make two
stitches one over the other on the right side of the garment. String a
button on the needle, to cover starting stitches. Place a pin on top of
the button. Sew over it with stitches crossed back and forth through the
holes of the button. The stitches should be taken so that the pull of the
button will come on the warp threads of the garment. On the wrong side,
the stitches should appear in parallel bars lying on the woof or filling
thread. On the top of the button, the stitches should cross. Why is it
necessary to sew over the pin? Remove the pin and wind thread around the
stitches under the button. Finish on wrong side with several finishing
stitches.
EXERCISES AND PROBLEMS
- 1. Practice overcasting.
- 2. Practice blanket stitch.
- 3. Practice making buttonhole.
- a. Cutting.
- b. Overcasting.
- c. Buttonholing.
- d. Fan.
- e. Buttonholing.
- f. Bar.
- 4. Practice sewing on one button at home and making one
buttonhole.
- 5. Bring to school garments which need buttons. Sew the
buttons on.
[46]
Lesson 10
THE USE OF THE COMMERCIAL PATTERN
Have you ever bought a real pattern and tried to use it? Marjorie
Allen says she thinks sometimes it is quite like a puzzle. Let
us learn how to cut our petticoats from a real pattern.

Fig. 33.—Learning to cut a free-hand
pattern.
Can you cut a pattern? Perhaps you have cut patterns for
sister's dolls' clothing (Fig. 33). This is probably how you did it. You
pinned the paper to the doll's body or held it in place while you cut
around the armhole, across the shoulder, under the chin for the curved
neck, and then you cut the other shoulder and armhole in the same way.
Under the arm you made a slanting cut towards the feet so the dress or
apron would be wider at the bottom. Try this if you have never done it.
It is good fun. Marjorie dressed a doll for little Alice when she was
sick, and cut the pattern in this way. This is a free[47]
and easy way to make patterns. Some dressmakers make patterns in this way
and do not have to send to the store for a pattern.
Shall we send for a pattern? Patterns are bought by age or
by measure: a nightdress, drawers, or a skirt pattern is ordered for
fourteen year age; a shirtwaist for 34 inch bust measure. Patterns
sometimes give other measures; a dress skirt may state the waist measure,
the length of skirt, and the measure around the hips. For children and
for young girls, the patterns can nearly always be bought according to
age; but, as some girls are large for their age and some small, Miss
James will have to help order the right sizes.
Many good magazines offer patterns for sale. There are, also, stores
or firms which make a business of selling nothing but patterns. Some
patterns are better than others. The simplest are usually the best, if
the figure and its proportions have been kept in mind.
Let us open our skirt pattern. We have bought two: one a
12-year size, and one a 14-year. The smaller girls may use the 12-year
size, and the larger girls the 14-year size. How many pieces are there
for this pattern? Barbara stood before the class, and Julia held the
pieces where she thought they would belong in the skirt. Yes, surely the
strip is for the belt or band. Is it long enough? No, only half. What are
the other two pieces? Yes, one is for the back. Is it large enough? No,
only half. Only one[48]
piece is left. It must be the front. Is it large enough? Many patterns
are made, giving only half a front or half a belt. Such pieces must be
cut double when you wish to have the front or belt in one piece. The
way to do this is to pin the pattern on a folded edge of the cloth. We
will know if we consult the perforations on the pattern, and the printed
directions. We must do this, then, in cutting the front. Let us hold the
pattern to the light. What do you see? Why do you suppose the little
holes or perforations have been arranged in groups or straight rows?
Barbara said she could not understand why. It is all a secret which
the description on the pattern will tell. To-day we shall learn two
things:

Fig. 34.—Laying the pattern
on the cloth. Which do you
think is the fold edge, A
or B?
1. How to tell which portion of the pattern is to be placed on the
warp of the cloth.
2. When to place the half pattern on a folded edge, so as to cut the
portion in one piece instead of in half a piece like the pattern.
The pattern may say the long line of single perforations
is to be placed on the warp threads. Can you[49]
do that when we begin to cut? You will have to be careful to find the
warp and to lay the pattern exactly. The pattern may say the group of
three little perforations or holes at the edge of the front pattern means
that edge is to be placed on a straight fold of the cloth.
It is wise always to study all the pieces of a pattern. The parts are
usually numbered. Can you see how? The description on the pattern tells
the name of each piece. Very often only half of a portion is given. You
will always remember now what must be done when that occurs.
It is a good thing always to know each portion and to hold it up
to the person to see if it is too large or too small. Then you will
understand the parts, before you begin to cut. Sometimes it is necessary
to add to the length or to shorten the pattern. Some patterns say allow
for seams in cutting, and others say seams have been allowed. What
difference will this make when you begin to cut?
Shall we learn to take a few measurements? Then we can judge if
our pattern is too large or too small. It will also help you in sending
for patterns.
The bust measure is easy to take. Pass the tape measure under the
arms, and over the fullest part of the bust, not too tight; bring it to
the center of the back, sloping the tape slightly upward between the
shoulder blades.
The waist measure is a snug measure around the[50]
smallest part of the waist. For girls this measure should not be too
snug.
The skirt measures are taken from the waist line to the floor at the
front, at the sides over the hips, and at the back. For short skirts one
must deduct from the full lengths the number of inches desired from the
floor.
EXERCISES AND PROBLEMS
1. Open a pattern and see if you can tell the different parts. Which
are to be cut on a folded edge? How are you to tell which way the pattern
is to lie on the warp threads?
2. Practice taking a skirt measure; then, a waist measure.
Lesson 11
TAKING MEASUREMENTS AND CUTTING OUT THE PETTICOAT
We understand our skirt patterns. Let us take our skirt measures,
front and back, and, if it is necessary to change our pattern,
we will decide how much to add or take off before cutting the
garments.
To change pattern. If you must add two or three inches to the
length of your pattern, this must be done as you cut. Or possibly you
may wish to shorten the pattern. If you wish to shorten it, take a plait
of one inch about in the middle of your pattern, crease, and pin it. By
taking this plait rather than cutting off the amount from the bottom, the
good flare of the skirt is saved. Do you know what these pieces of the
skirt are called which are wider at the bottom than[51]
at the top? Why is a gore made such a shape? Can you think of the
advantages? In cutting from a pattern in which a plait has been laid, one
must be careful to carry the outline of the pattern evenly at the place
where the fold of the plait comes.

Fig. 35.—The petticoat for the children
of the home.
To lengthen a pattern. Make a straight cut across a gore about
the middle from side to side. Pin or paste a strip of paper the desired
extra length between the two pieces. This preserves the bottom flare. If
length were added at the bottom, the flare would be too great.
To cut the skirts. One must study carefully the economical use
of material. It is like a puzzle to fit the pattern to the cloth, so that
the perforations are obeyed exactly and there is enough cloth for all the
parts.
The girls of Pleasant Valley have decided to make the petticoats for
the children at the summer home. The ladies of the board furnished the
materials. They have chosen gingham for some and outing flannel for
others. The belts are to be made of muslin. The material is all one yard
wide. By folding the outing flannel selvedge to selvedge, and placing the triple[52]
perforations of the pattern of the front gore on this fold, the front
can be cut all in one piece. It is rather a circular gore. Not all gores
are the same shape. See if you can find other shaped gores in dress
skirts. The two back gores of the skirt can be cut from another width.
Be sure to obey the directions for placing the perforations on the warp.
How many lengths of cloth are needed to cut such a skirt? How much will
you allow for hems at the bottom? As the girls of Pleasant Valley had
decided on two inches finished, they allowed 2½ inches extra in cutting.
One must always think about this. All seams have been allowed on their
patterns.
Be sure to lay all the pieces of the pattern on the cloth before
cutting. Find a flat surface. Remember that the wide end of a gore is
apt to cut to better advantage at the end of the piece of cloth. Can
the gores be fitted so as to cut more economically? (Fig. 34.) Pin the
parts carefully, not using too many pins. Mark all the notches with
pencil, chalk, or basting thread. Do not cut notches; one is liable to be
careless and to make them too large. Use long cuts, and make even edges
in cutting. Good shears help.
EXERCISES AND PROBLEMS
1. Draw on the blackboard different shaped dress gores which
you have noticed.
2. With the tiny patterns of the skirt which your teacher has
cut, show how to lay them most economically on the red muslin
which represents your material.
[53]
3. What would you do if you were using a pattern which did not
allow for seams?
Lesson 12
MAKING THE PETTICOATS
Let us begin to sew the petticoats.
Notice all the notches which were marked lightly with pencil, and
follow all the steps carefully:
1. Place the two back portions so that they join the front as the
notches indicate.
2. Pin from the top of the gores.
3. Baste the three gores together with ½-inch seams, beginning at the
bottom. Can you tell why?
4. Sew the seams on the wrong side, using the stitching stitch. The
back seam is to be left open five inches at the top for the placket
opening.
5. Overcast all the seam edges, overcasting the two thicknesses of the
seams together.
6. Turn hems at the bottom of the skirt. First, turn ¼ inch; second,
turn two inches. Baste carefully, laying little plaits neatly where
necessary on account of extra fullness. Always have the seams of the
turned hem lie on seams of skirt. Sew hem with hemming stitch or
featherstitch (see page 120).
7. Finish placket opening. On right side make ½-inch hem, the
first turn 1⁄8 and second ½ inch. Turn hem to inside of skirt. Baste[54]
and hem. On left side of opening make hem ¼ inch finished.
Make first turn 1⁄8 and second ¼ inch. Baste and hem
neatly.
8. To put the skirt on the band:
A. Cut band. Take waist measure; add to it one inch for lapping and
two inches for the turnings, one at each end of band. Cut band lengthwise
of the muslin, with the warp threads, and twice the desired width
finished plus ½ inch for turnings.
B. Gather petticoat ¼ inch from edge, with two gathering threads one
below the other. Divide skirt in half; gather from center front to back
at right side, and from center front to back at left side.
C. Turn in ends of band one inch. Pin center of band to center front
of petticoat, right side of band to right side of petticoat. Pin so that
the edge of band is even with the gathered edge of skirt. Pin ends of
band to the gathered back portions of skirt, with ends of bands to ends
of gathers. Turn gathers towards worker, and distribute in same manner as
when attaching yoke of apron to the apron skirt. Baste ¼ inch from
edge of band, and between the two rows of gathering stitches. Sew with
stitching stitch. Turn band over to wrong side. Turn in ¼ inch.
Baste and hem flat. Overhand[55]
the turned-in ends of the band neatly.
D. Finish with buttonhole and button at back, or with two
buttonholes, to button to waist. If the skirt is to be attached in this
way, a buttonhole should be made in the center front of the band also.
This should be up and down in the band.
The girls of Pleasant Valley had a surprise party, when the aprons
were finished, and went to the Fresh Air Home. This was in June before
school closed. Some of the summer children had arrived. The girls made
cookies at home and had a real party with the children.
EXERCISES AND PROBLEMS
1. Tell how the putting on of the skirt band differs from putting on
the apron yoke.
2. Do you know of any other kind of placket finish besides the
one which you have made in the skirt? Tell where you have seen
it.
REVIEW PROBLEMS
I. Can you make a useful bag on which the following stitches might
be used: basting, running, hemming, stitching stitch, overhanding,
buttonhole?
II. Plan another article, using as many of these stitches as possible,
and cutting the article from a pattern. Try to make this at home for
school credit. Miss James of Pleasant Valley has a kind of score card
which she uses in marking the girls. Perhaps your teacher will give you
credit for your home work.
[56]
SCORE CARD
| Girl's name___________________________ | |
| I. Article______________________________ | |
| A. General appearance | |
| 1. General neatness of sewing | 10% |
| 2. Cleanliness | 15% |
| 3. Appropriateness of material | 25% |
| B. Hand work | |
| 1. Regularity of stitches | 25% |
| 2. Suitability of stitches | 25% |
| | —— |
| | 100% |
[57]
CHAPTER II
THE GIRLS OF PLEASANT VALLEY SCHOOL LEARN
TO MAKE SIMPLE GARMENTS
This year the girls of the Sewing League of Pleasant
Valley will receive credit for the garments they make. Miss James will
help the girls to start the garments at school and will give full credit
if the work is completed neatly. A nightdress, a petticoat, corset cover,
or under slip, and perhaps a white summer dress skirt will be made. The
school board has just furnished a machine, so Miss James is planning to
teach the girls to use it. Many of them can practice at home too. Mrs.
Stark, who has two machines, told Mollie she might bring the girls at any
time for practice. Can you plan to learn to stitch at your school? There
are many things one does not wish to sew by hand, and does not have time
to make in that way. Not long ago Miss Travers, who came from the State
Agricultural College to speak to the Mothers' Club at Pleasant Valley,
told them that often people do not use good common sense about this
question. She said there are times when[58]
one wishes to make garments and articles by hand, but it is foolish to do
so when one has other duties in life to perform which are more important.
Handmade garments are very beautiful to look at, but when they mean the
sacrifice of health, because one has remained indoors to make them, they
appear less beautiful. Miss Travers and the mothers had a long discussion
about the wages paid in large cities to women who do this fine work. Miss
Travers said the wage paid is usually very low.
Lesson 1
SOME COTTON MATERIALS SUITABLE FOR UNDERWEAR
Suppose you order the muslin for your nightdress and, while waiting
for it to arrive, learn about the cotton materials which can be used for
underwear. Can you add a whole page of white materials to your textile
books?
Suppose you open the surprise box on your teacher's desk.
It is quite full. Let us sort the samples and examine the white ones,
especially, to-day; for your underwear is to be made of white cotton
material. Let us look also at the ones which are almost white. They are
unbleached white; the others have been bleached with a chemical to make
them look so snowy white. They have been dipped in a bath of chloride of
lime, and then in another bath of water and sulphuric acid, until the
material has become white.
Do you know how our grandmothers used to bleach
sheets and other unbleached articles which they wished[59]
to have white? Grandmother Allen used to bleach those she made on
her hand loom. Why did they place them on the grass in the sun? What
bleached them? This unbleached sample is muslin; it is for
sheets. Here is some white which is of the same plain weave. The
unbleached is cheaper. It comes one yard wide and can be bought for 5
cents and, in better qualities, up to 15 cents per yard. It wears very
well—better than bleached muslin. Can you tell why? It is used for
sheets and pillowcases. We may later make a pair of pillowcases from this
unbleached muslin. The white muslin can be bought in a cheap quality for
7 cents a yard; and it may also be bought in finer qualities. Here is a
piece of Alpine rose muslin from our sample box. Isn't that a pretty name
for it? It is soft and much finer, and costs 30 cents a yard. Bleached
muslins come in width from 36 to 72 inches. The wide width is used for
sheetings and is woven that width that no seam may be necessary through
the center of the sheet.
This soft, light cotton material is called nainsook. Isn't
that a queer name? It is from an old Hindoo word for a material made and
used in India. Nainsook is used for underwear and clothing for baby. It
comes in several grades. Miss James has some coarser samples, too. It is
soft and is nearly always finished, when woven, with very little dressing
or starch to stiffen it. It comes 27 inches in width and varies in price
from 15 to 50 cents a yard.
[60]
This soft crinkly looking material is called cotton crêpe. It
is used a great deal for underwear and for shirt waists or dresses. It
is considered very economical. Does any one know why? Yes, because it is
easily washed and, when hung out in the fresh air and sunshine, does not
need to be ironed. Think of all the time saved. The little crinkles dry
in place and look well. It costs from 12 to 15 cents per yard, and comes
about 30 inches wide.
This piece is a cambric. It is a firm plain weave and is good
for underwear. This quality is fine, and its name is Berkeley cambric.
Some grades of cambric are coarser and are called cambric muslin. They
are glazed and smooth in finish, and are used for linings and for other
purposes. That name is also foreign, from Cambrai, France. Cambric is
woven a yard wide and costs from 10 to 25 cents per yard. It is very
durable material for underwear, not quite so heavy as muslin, and
strong.
Dimity is thin. Look at this piece. Mollie had a dress made
of it last summer. It is sheer and light, and has little cords or ribs.
It is always easy to recognize on that account. It is used for summer
dresses, sometimes for dainty underwear; but it is not suitable for
underwear which must have hard usage every day. It costs from 15 to 50
cents per yard and is woven about a yard wide. Sometimes it comes in
colors and also with pretty printed figures on it. See, here are some
printed ones. What dainty patterns and colors![61]
Would you like a dress of one of these? Miss James has found two other
thin, sheer, white ones. There are so many I wonder if we can remember
all. This thin one is lawn and is a plain weave. It comes in
inexpensive qualities at 5 cents and in better qualities for 25 cents.
The width varies from 36 to 40 inches. Do you know of anything at home
or in school, made of lawn? Yes, dresses, aprons, curtains. It comes in
colors too; here is a pretty blue. It is smooth and starched and pressed
when one buys it.
This other is soft but not so starched. It is called mull.
That is a Hindoo word, too. Do you remember that cotton was grown in
India many years before we had it in America; that is why the cotton
materials so often have Indian names. Mull is too fine for underwear, but
it is used for pretty white dresses.
Here are two heavy white samples; one is called Indian head,
and the other duck. Such strange names! Do you know their uses?
Perhaps your mother had a skirt last summer of duck or Indian Head. Mrs.
Alden of Pleasant Valley had one. Both these cotton materials wear well.
The duck is used for men's trousers, also; and in very heavy qualities,
it is used for sails or tents and awnings. John Alden's first long
trousers were made of duck. How important he felt! Duck is sometimes
colored blue or other colors. It varies in width from 27 to 36 inches and
costs from 12 cents up. The Indian head is used for the same purposes as
duck and comes in the same width for[62]
about the same price,—15 cents a yard up, according to quality.
Fig. 36.—A towel which Miss James uses
at school.
We shall have time to study about only two more to-day. They are both
heavy. This is galatea, and comes in white, like this sample, or in
colors. It is firm like duck and Indian head. Can you tell for what it
is used? Have you ever seen any before? It is used for dress skirts, and
very often for girls' middy blouses or children's clothes. It washes very
well. It is 27 inches wide and costs from 14 to 25 cents a yard.
The last sample is cotton birdseye or huckaback. It is sold by the
yard or by the piece. It costs less per yard to buy it by the piece of
10 yards. It varies in cost, according to quality, and is woven from 18
to 27 inches wide. We also have huckaback towels made of cotton or linen
or a mixture of cotton and linen. Here is one which Miss James uses at
school (Fig. 36).
I wonder who can go to the board and make a list of all the new white
material we have found in the surprise box. Shall we put them in our
sample book? Who will write the use of each, opposite the name? If you[63]
cannot remember the prices and widths, look on the samples; many are
marked, especially those which have come from the town store. Which do
you think will be best for your nightgowns? Yes, cambric, nainsook, or
muslin. Which will be softest and lightest? Which is the heaviest of
these three? Shall we use the muslin? It is strong and will wear well.
Shall we choose this piece? It is 10 cents a yard. How much shall we
need? We shall talk about it next lesson. Any one who wishes to use the
unbleached muslin which costs 7 cents, may do so; or the finer nainsook
which is 15 cents a yard. How can the unbleached be made white as it is
used?
EXERCISES AND PROBLEMS
1. Look up the story of how cloth is bleached in any of the
library books on textiles, or in the encyclopedia.
2. Add six cotton materials you have just studied about, to your
textile sample books.
3. Decide what kind of white material you wish to use for your
nightdress.
Lesson 2
SELECTING PATTERN AND CLOTH FOR NIGHTDRESS
Suppose you decide about the pattern for your nightdresses,
and send for the cloth and pattern.
[64]
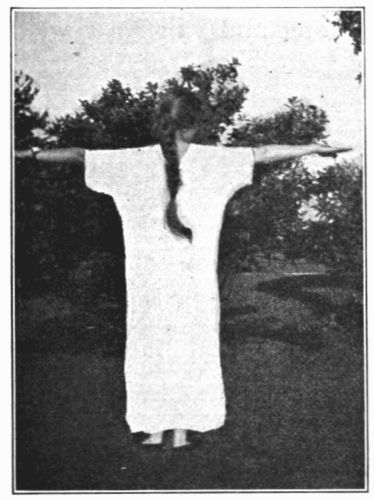
Fig. 37.—A Pleasant Valley girl in a
kimono nightdress.
A kimono nightdress. Miss James has a book of patterns; perhaps
your teacher has. Let us look at them. Here are the nightdresses. This
picture (Fig. 37) is a kimono nightdress; that means the sleeves are
cut with the gown all in one, not made separately and sewed in. This
name kimono is Japanese and means a loose garment. The picture shows a
Pleasant Valley girl in a kimono nightdress. Miss James says there is
only one piece to this pattern and the nightdress is easy to make. The
way to measure for the amount of material for such a gown is to take the
length from the shoulder at the side of the neck to the floor and add
three inches for a hem. This gown can be cut without any shoulder seams,
all in one piece. So you will need twice the length from shoulder to
floor and hem. Why? If the cloth is one yard or more wide, it will not
be necessary to piece the gown; so be sure to choose material which is a
yard wide. Is there any one now who does not know how to measure for the
material for the kimono nightdress? Let all write an order for a kimono
nightdress pattern and for the muslin. Take each other's measures first
and add together the amount of cloth needed. It will be easier to send
one order for[65]
all. The best letter will be chosen to send to the store.
As some girls are large and some small for their ages,
it will be wise to order one pattern 12-year size, and
another 14-year size.
EXERCISES AND PROBLEMS
1. How much cloth will be needed for a kimono nightdress if
the measure of the girl from shoulder to floor is 55 inches? How
much do you suppose the Pleasant Valley girl in the picture needed?
Lesson 3
HOW COTTON CLOTH IS WOVEN
Not long ago we learned how the cotton plant furnishes us with
cotton for clothing. There are many people who help in changing
the cotton from fiber to cloth. While you are waiting for the cotton
material and the pattern, shall we study how cotton cloth is made?
Cotton is used for many things. We learned that cotton is
shipped in bales of 500 pounds each from the United States to all parts
of the world. The manufacturer receives it at the factory and changes
it by many processes into what he wishes to sell. Some manufacturers
make only cotton threads of various kinds, for sewing, knitting, and
crocheting. Others make cotton cloth of one variety or of several
varieties. We know there are many kinds manufactured. Others make
absorbent cotton, gauze, and such things for surgical use for the sick.
Some make hosiery, gloves, towels; and others make knitted underwear, or laces[66]
and embroideries. Others use cotton for war purposes, for guncotton. John
Alden said he did not know that cotton is used for so many things.
Fig. 38.—Miss James' little loom.
Fig. 39.—A small loom made from a
box cover.
The loom for weaving cotton. We have learned that cloth is
made of threads which run lengthwise, called the warp threads, and of
crosswise threads, called the filling or woof. The machine for holding
the threads and doing the work is called a loom. What is the firm edge
which is woven called? Look at Miss James' little loom (Fig. 38). It
shows the warp, and the filling yarn as it passes over and under and
makes the firm edge as it turns each trip back and forth around the edge
threads. If you have never woven a piece of material, suppose you take
a box cover and make a small loom. The picture (Fig. 39) shows one made
at Pleasant Valley School. Did you ever see your grandmother weave on a
loom? Look at the picture (Fig. 40) of a grandmother weaving on a cloth
loom. It is not Grandmother Allen, although she knows how[67]
to weave. The warp threads are rolled up on a big roller at the back of
the loom and are extended to the cloth roller at the front near where she
sits. She holds the filling thread in her hand. It is wound on a bobbin
which fits in the shuttle. She throws the shuttle from side to side and
works her feet to alternate the warp threads, in order that the filling
thread may go over and under, and make the cloth. Look at the shuttle
in the picture (Fig. 41); it holds the bobbin of thread. There are many
kinds of looms. To-day cloth is woven on looms run by machinery. It is
much easier and quicker than working by hand, and so cotton cloth can be
made more cheaply. Frank Allen says he saw a loom at the silk factory he
visited. If it were not for machines, our clothes would cost much more
than they do. Think of all the people who help to give us our cotton
clothes, from the planter who sows the seed to the manufacturer whose men
prepare and weave it. Have you ever visited a cloth factory and seen the
many machines and heard the great[68]
buzzing noise which they make? It is a busy place. Some factories make
only warp, or filling, yarns. They are called spinning factories or
mills (Fig. 46). They send their product to the other manufacturers who
have only weaving machines for making the yarns into cloth. It is about
130 years (1789) since the first cotton mill was started in the United
States, and only a few years longer since the first mill was started in
England. Before that time, people of different countries made their own
looms according to the ways they thought out. As men felt the need of
clothing to[69]
wear, they tried to make cloth; and we find all kinds of primitive looms
as their invention. Can you look up the meaning of primitive? Notice the
two pictures (Figs. 43 and 44) of primitive people weaving. The Indian
girl is holding the shuttle in her right hand; the loom is fastened to
something and is also attached at her belt. In that way the warp threads
are held securely while she passes the filling back and forth. On page
136 you will find a picture (Fig. 81) of a Japanese girl weaving silk.
Notice the loom; find the roller holding the warp yarn. Find the shuttle
which she uses to throw the filling yarn. Can you tell where she rolls
the cloth[70]
as it is woven? Under her elbows in the picture is a cloth roller on
which she rolls up the woven cloth as she weaves and unrolls the warp
from the warp roller. Isn't this a wonderful story? We have not yet
learned how the cotton is made into the warp and filling ready to be
woven. We shall save that part of the story for to-morrow. The Pleasant
Valley girls and boys enjoyed this part of the story about cotton and are
anxious for Miss James to tell some more.
Courtesy of Draper Co., Hopedale, Mass.
Fig. 40.—"In days gone by."

Fig. 41.—The shuttle holding the
bobbin of yarn.

Courtesy of Draper Co., Hopedale, Mass.
Fig. 42.—A weaving room in a modern factory.

Courtesy of Smithsonian Institute, Bureau of American Ethnology.
Fig. 43.—Indian girl weaving a belt by hand.
[71]

Fig. 44.—Another primitive loom and a girl spinning. The distaff with the wool
for spinning is held under the girl's arm.
EXERCISES AND PROBLEMS
1. Try to make a simple loom. Take a piece of
cardboard 10 × 12 inches. Make a row of holes about ¼ inch apart
one inch from the top; another row ¼ inch apart one inch from
bottom. String the warp back and forth from hole to hole so it looks like
the picture (Fig. 39). Weave a piece of cloth with the filling thread
which goes over and under.
2. Visit a weaving factory if you can.
3. See if you can spin a piece of carded wool. Perhaps
you can card some wool with the hand cards which your great grandmother
used, as the Pleasant Valley girls did.
4. Try to collect pictures of spinning. The primitive
peoples did this in different ways.
[72]
Lesson 4
THE SPINNING OF COTTON INTO YARN
How the manufacturer turns the cotton into yarn ready for the weaver.
This is called spinning. Shall we study how it is done?
Perhaps there is some one in your class who has visited a spinning
mill and can tell how cotton is cleaned and made ready for weaving. This
is what the girls of the Sewing League of Pleasant Valley saw the day
they went to visit the mill. The Camp Fire girls went the same day, and
Miss Ashly, their guardian, said that what they learned would count as an
honor.

Fig. 45.—The cotton carding machine, which cleans
the cotton.

Courtesy of Leonard & Green, Boston.
Fig. 46.—A cotton spinning room.
How cotton is prepared for spinning. The girls went to the
lower floor where the cotton is received. They saw the bags and iron
bands removed and the cotton pulled apart by a queer machine called a
cotton opener, or bale breaker, for you remember the cotton was pressed
very hard before being shipped. The cotton is then placed in pickers, or
machines which blow it apart and blow out the[73]
leaves and dust and dirt. As the cotton leaves this machine, it looks
like a big piece (6 ft. wide) of cotton batting rolled in a large roll.
It looks soft and clean. Then the girls watched the men place this roll
at the back of the next machine, called a carding machine (Fig. 45). Here
it was cleaned some more; and such a wonderful thing happened. As it left
the machine instead of coming out as a lap of the roll of cotton like
it went in, it came out in a long thick coil which looked like a rope,
and there were tall round cans ready to receive this continuous line of
cotton rope. How soft and beautiful it looked! What wonderful[74]
machines the manufacturer had. Some one must have made them. Can you find
out who made the first loom run by machinery? John Alden looked it up in
the encyclopedia. Do you know who invented the first spinning machine?

Fig. 47.—Grandmother Allen's
wheel used for spinning wool.
Then the girls visited ever so many machines which wound this cotton
rope on spools. Each machine made the rope thinner and finer until it was
drawn out as thin and round as the manufacturer wished (Fig. 46). Barbara
Oakes noticed this: that these spinning machines not only drew out the
cotton rope and made it thinner, but put in a twist which prevented it
from breaking so easily. Do you remember how the cotton fiber looked
under the microscope? The twist in the fiber helps in the spinning. Isn't
it wonderful to think that such tiny fibers can be made into spinning
yarns, and yarns woven into cloth?
[75]
Courtesy of the Metropolitan Museum of Art.
Fig. 48. —The flax wheel.
How cotton is spun. Did you ever see any one spin by hand? One
day the Girls' League went to Marjorie Allen's grandmother's house. She
took the girls to the attic and showed them her grandmother's spinning
wheels (Fig. 47). There was a large one for spinning woolen yarn. This
she called the great wheel. Then there was a small one called the flax
wheel (Fig. 48) for spinning flax, or linen, into yarn for weaving.
Grandmother sat down and showed them how to spin (Fig. 49). She pressed
her foot on the treadle just like a sewing machine; and the wheels went
round. The flax was on a little holder called a distaff. See the pictures
(Figs. 48 and 49) of the wheels. She held and drew the flax while the
wheels of the machine put in the twist. That is just what the modern
spinning machine does, but it can accomplish much more in an hour than
grandmother did in a day. Still it is a great satisfaction to possess
some of the beautiful old textiles spun and woven by grandmother's hands.
The girls had the pleasure of opening a great chest in the attic and
looking at the hand-woven sheets and coverlets which Grandmother Allen
prizes so highly.[76]
Barbara Oakes and Mollie Stark fairly clapped their hands and said, "How
beautiful the colors are." The coverlets were made of wool and cotton
yarns. Grandmother showed the girls the hand cards which she used when a
girl in helping her mother prepare wool into carded rolls for spinning.
Do you remember that the cotton at the factory passed through a carding
machine to be cleaned and made into a cotton rope? Grandmother told
the girls she used to do the same for wool. She used the little hand
cards and drew the boards with the fine teeth back and forth to clean
the fibers, and then made little rolls for the great wheel to spin. The
picture (Fig. 50) shows how[77]
the hand cards are used. Wasn't that a long, tedious process?

Courtesy of Miss Mary E. Hoag.
Fig. 49.—Grandmother Allen sat at her flax wheel and showed the girls how to
spin.
Courtesy of Miss Mary E. Hoag.
Fig. 50. —Grandmother Allen carding wool by hand.
Perhaps at your school you can have an exhibit of
old industrial things once used in the home. Maybe your grandmother has
something in the attic—some cards, or wheels, or old hand-woven
materials. If you have a Girls' Sewing League, the girls will, perhaps,
send out invitations and invite the mothers and grandmothers. The girls
can prepare some coffee and cookies at school to serve the afternoon
of the exhibit. The Pleasant Valley girls had such an afternoon
entertainment and earned five dollars for their school fund. They will
probably buy some dishes for the school lunch.
[78]
EXERCISES AND PROBLEMS
1. Try to find some pictures of very primitive spinning. Can
you make a spindle?
2. What does the process of carding do to the cotton or wool?
3. Plan an exhibition of old coverlets and other old hand-woven
textiles. Invite your parents and friends.
Lesson 5
CUTTING OUT A NIGHTDRESS

Fig. 51.—Laying the
nightdress pattern on
the cloth.
The patterns and muslin have probably arrived. Suppose you cut out
your nightdress.
Miss James kept a memorandum of the amounts of material needed by each
girl for her gown, and she has divided the cloth. She has, also, cut with
Barbara's help several patterns from the commercial pattern, so that all
may begin to work at once. Miss James has had such nice boards arranged
and fastened with hinges to the walls under the blackboards. They are
so convenient for cutting and can be let down out of the way when not
needed.
Placing the pattern and cutting the material. Let us look at
our patterns. Some girl will, perhaps, read aloud what the pattern says
in the description printed on the outside or on the envelope of this
commercial pattern. Who will hold up the nightdress pattern, showing how
it is related to the figure? Who can tell what the small group of dots on
the edge means? Who remembers how we can tell about laying the pattern[79]
correctly on the warp of the material? Those two things are important.
It is also necessary to plan so as to waste as little as possible. Some
girls will find that their patterns are too long. Measure from the
shoulder at the neck of your nightdress pattern, and see if it is longer
or shorter than your measure. If the pattern is too long, fold up the
necessary portion. If too short, do not forget you must allow extra when
pinning the pattern on the cloth. How much of the whole nightdress does
this pattern give? If only one-half is given, the nightdress must be cut
on a fold; back and front in one with a hole for the neck, as it slips
over the head. How shall we fold the cloth so as to cut on a fold? Which
edge of the pattern shall be placed on the fold? Have you placed it most
economically on the cloth? Not an inch should be wasted. The pattern may
or may not allow for seams. What will you do if it does not? If you must
add for your hem at the bottom, do not forget to mark, with a fine pencil
mark, the allowance for hem beyond the pattern. So you see[80]
there are many things to remember. Can you all cut out your nightdresses
to-day and baste ¼-inch seams under the arms? Pin your seams carefully
before basting. Instead of the sharp angle under the arm, which the
kimono nightdress usually gives, cut a good curve. Your teacher will help
you. The curve makes a better line and is easier to finish. The pieces
left must be rolled carefully, and your name must be written on the
outside of the roll. We may need the pieces later.
EXERCISES AND PROBLEMS
1. Cut a free-hand pattern of a kimono nightdress for your doll.
2. Show, with a piece of newspaper to represent the cloth, how
the pattern can be placed economically.
Lesson 6
THE PARTS OF A SEWING MACHINE
Shall we examine the new machine to-day and learn to run it?
You must practice before sewing your seams.

Courtesy of Wilcox and Gibbs Sewing Machine Co.
Fig. 52.—Single thread machine.
Do you know that sewing machines were invented less than one
hundred years ago? Our great-grandmothers had to do all their
sewing by hand, and some of our grandmothers too. A man by the name of
Elias Howe, of Cambridge, Massachusetts, first thought about the sewing
machine; and since then many different kinds have been invented, to be
run by foot and also by mechanical power,—electricity. We have two
kinds of foot-power machines. One kind (Fig. 52) has only one[81]
thread, which is placed on a spool on top; and the other (Fig. 53), the
two-thread or double-thread, is like the one we have at school. The
double-thread machine is called a lock-stitch machine, because one thread
is on top on a spool and the other is on a little spool called a bobbin
in the shuttle under the plate. The two threads lock together as the
machine works. You will learn how later. The machine with only one thread
on top is called a chain-stitch machine. The stitching made by it rips
very easily; and the ends must be fastened carefully when one stops. The
double-thread machine does not rip easily; and one can stitch on either the[82]
right or wrong side of a garment. On the single-thread machine, one must
stitch on the right side always. Let us look at a machine before learning
to operate it.
What parts do you find below the table? What use is the
connecting rod? What does it connect? Watch how your teacher puts her
feet on the treadle. What makes the wheel above the table turn around?

Courtesy of New Home Sewing Machine Co.
Fig. 53.—Double-thread machine.
You should practice running the machine first without any thread so
as to learn to use the treadle well, and then with paper to see if you
are holding it straight and making rows of pricks which are straight and
even. If one cannot make rows of even pricks, it means the sewing will be
crooked and must be ripped. Some of the Pleasant Valley girls practiced
in this way at home.
What do you find besides the wheel above the table? The shaft
has many parts. Can you name some? Yes, the spool holder, which holds the
spool; the needle bar, which holds the needle and moves up and down; the
foot, which is called the presser foot and can be raised or lowered by
the little handle; the needle plate, through which the needle works; the
feed, which is like[83]
little rough teeth of a comb and helps to push the cloth along as one
stitches. The little attachment near the wheel is for winding bobbins
for the shuttle. The shuttle lies in the shuttle race under the plate.
Suppose we move the plate and take it out. See, the bobbin is in the
shuttle. This is the second thread.
How do you regulate the machine? Jane asked Miss James about
the screws. There are usually two large ones on the double-thread
machines which are important. One screw is to make the stitch larger or
smaller; we say, to regulate it. Miss James showed the girls how to do
this. The second screw is to regulate the tightness of the thread. It
is called a tension. Press your thumb and first finger tightly together
and pass a thread between them. When you do not press very hard, the
thread passes easily. When you press hard, it is difficult to draw the
thread through, and the thread may break. Have you tried? The tension is
regulated by a screw which presses two little plates together. The thread
passes between the plates. When they are loose like your fingers, the
thread passes easily; when tight, it breaks. So, in threading a machine,
we must learn where the tension plates are, in order to pass the thread
between them, and how the screw is turned to make the plates tight or
loose. Your teacher will show you how to turn the screws.
To-day, while some girls are finishing the basting, others may try to
run the machine, in turn. This is what you are to do:
[84]
1. Find all the parts whose names have been put on the
blackboard, above table and below table.
2. Learn to treadle evenly.
3. Learn to raise and lower the presser foot on a
piece of brown paper, and to stitch without thread. Keep the rows of
pricks very even.
EXERCISES AND PROBLEMS
1. Study your machine. Find all the parts above the table; below the
table.
2. What is the purpose of a tension? Show how it operates.
3. Learn to stitch, without a thread, even rows of pricks on brown
paper.
4. See how much you can tell mother about the machine, when you go
home.
Lesson 7
PRACTICE IN THREADING AND RUNNING THE MACHINE
Let us learn to thread the double thread machine and practice
stitching. This requires much care, but is not difficult. The Pleasant
Valley girls enjoyed this lesson very much.
As we learned, there are many different makes of sewing machines. All
are based on the principles of the one invented by Mr. Howe. If we know
the important points to remember in threading a machine, it will be very
easy to follow the book of directions which comes with the machine. The
names of some machines are the New Home, Domestic, Singer, Wilcox and
Gibbs.
Here are the things to think about in threading:
1. Find the spool holder, and put the spool on it.
[85]
2. Find all the little eyes and holes through which the thread must
pass. The book of directions will help.
3. Find the tension. Be sure the thread passes between the tension
plates and pulls evenly.
4. Find the needle, and thread it from left to right, towards the
wheel.
5. Find the shuttle. Look at your book of directions.
Miss James helped Barbara to put the bobbin in its place, and to
thread it into the shuttle. Ask your teacher to help you if you do not
know how.
6. Put the shuttle back in the shuttle holder.
7. Turn the wheel and hold the upper thread. This will bring the under
thread up through the little hole in the needle plate.
Both threads should be on top before beginning to stitch.
Now you are ready to begin to practice stitching with a thread.
Try to remember these things, while stitching with a thread:
1. To treadle evenly.
2. To hold the material on the table at the left hand and to pass it
on lightly. Do not pull it or push it with your left hand.
3. To turn corners evenly. Have the needle down in cloth.
Raise the presser foot and turn the work. Put the foot down and
continue.
[86]
4. Be sure to turn the wheel in the proper direction, or the thread
will break.
5. Practice stitching parallel rows. Make good square corners.
Use some scraps of cloth for this sewing, and practice at
home.
Those who have not practiced on the machine may do so during study
periods, if there is time. We can move the machine into the coat room.
EXERCISES AND PROBLEMS
1. Barbara Oakes does not turn good square corners on her
practice piece. Why?
2. Marjorie says her thread breaks every time she starts. Why?
3. Show some one how you can bring the under thread up
through the needle plate, preparatory to stitching.
4. Practice threading the machine, following book directions
if you do not know how.
5. Practice rows of good straight stitching.
Lesson 8
THE FRENCH SEAM AND ITS USE
What kind of seams shall we make on our nightdresses? How
shall we finish the bottom? The Pleasant Valley girls did most
of this at school in one lesson, but finished at home.
Fig. 54.—The French seam. First sewing near raw edges.
Making French seams on the nightdress. We have
learned that our dish towels had to be hemmed because
of the raveling of material. Anything which is to be
washed a great deal must have its raw edges finished
in such a way that they will not ravel. As nightdresses[87]
are washed often, we must make our seams so that the
edges will not pull out. Who can name other garments
which are washed often? Who can tell what we can
do to prevent edges from fraying? Yes, we might make
small stitches, called overcasting, on the edge of a plain
seam. There is another way, which we shall learn
to-day. It is called a French seam. The French seam
is sewed twice. The seam is basted as you have done,
on the right side of the garment; seams are usually
basted on the wrong side. Then, the seam is sewed
close to the basting stitches. We shall sew ours by
machine. The French seam is used on some garments
made by hand. The first sewing (Fig. 54), then, is a tiny
row of running stitches, close to the basting. After
the first sewing, the basting should be removed and the
edges trimmed to a 1⁄8 inch seam. This must be done
carefully. Then, turn the garment to the wrong side.
Press and pinch the seams evenly so that the sewing of[88]
the seam is exactly on top of the fold as you pinch it.
Next, baste again ¼ inch from edge, and sew the second
time, by machine. This seam is often used on dainty
handmade underwear. Then, the second sewing is
two runs and a back stitch, like that you used on your
aprons, and is made by hand. What must we be careful
about, then, in making the French seams on our nightdresses?

Fig. 55.—The French seam. Second sewing.
Making the hem of the nightdress. How much was
allowed for the hems at the bottom of the nightdresses? Everybody knows
how to turn a hem. The first turning is ¼ inch; and the wide
turning, 3 inches. All use your gauges or tape measures; and turn and pin
and baste carefully before stitching. Who can tell why the tiny plaits
are necessary at the hem turning? Where shall we lay them? Yes, at the
seams and between, if necessary.
Now you will have plenty to do to finish seams and[89]
hem. The Pleasant Valley girls, after this lesson, finished theirs at
home.
EXERCISES AND PROBLEMS
1. Show on a practice piece how a French seam is made:
a. By hand.
b. By machine.
2. Name some garments or articles on which the French seam
might be used. Why?
3. What are the important things to remember in turning the
hems at the bottom of the nightdresses?
Lesson 9
PROTECTION FOR THE BODY AT NIGHT
Do you know that clothes help to keep us well? Mollie Stark
wishes to know what kind of clothing should be worn at night.
What should be done about clothing at night? We have learned
that, in order to keep well, we must think about the right kind of
clothing as well as food. Grown people sometimes forget about this; and
growing girls and boys, too. The body must be kept clean; and clothing
worn next to it should also be kept clean at night as well as during the
day. Who can remember how many pints of water the normal body gives off
each day? It loses about three pints in 24 hours. Can you recall what
becomes of this waste? Yes, some is evaporated, but some is collected by
our clothes; that is why they are soiled as they collect the perspiration
and excretions, although often they do not look[90]
soiled. The day garments should be hung up at night in a place where they
will air and dry out by morning. They should not be shut up in a closet.
Different clothing should be worn at night. A muslin nightdress, like
those you are making, is usually suitable for six or seven months of
the year; but some of us who live in the country or in houses not well
heated require warmer clothing at night. Old people and babies, as well
as sick people, require more clothing because they are not able to resist
the cold as easily. Do you recall why? What is the normal human body
temperature? Why is the human body called a machine?
Fig. 56.—The clothing worn during the
day should be aired at night.
If our day clothing collects waste and should be aired at night,
what should be done with the night clothing during the day? Yes, it
should be well aired. Have you ever noticed how the air of a room is
spoiled by the odor of night clothing and of bed coverings which have not
been properly aired? Some people roll up the nightdress and put it under
the pillow. That nightdress will not smell sweet and clean at night.
Clean clothing is absolutely necessary in order to keep well. We shall
some day learn how to cleanse clothing properly, by washing. Clothing
worn next to the body should be changed once a week at least, and twice or[91]
three times if possible. When one works very hard and
the body sends off more waste, clothing should be
changed more often.
The body which is to wear the clean clothing should be washed every
day. It may not be possible to take a tub bath or a swim in the river or
lake, but one can bathe all over with a bucket of water and a cloth and
soap. It pays, for one feels so fresh; and, then, the waste of the body
is removed by the washing, and the pores of the skin are kept in good
condition. When our skin is in good condition, we do not feel the cold as
much as do those who do not bathe frequently.
Do you remember that we said our clothing must help to save some of
the body heat? That is how clothing protects. Why must some heat be
saved? We also learned that when our body works very hard much heat is
created. Where does it go? It is not all saved. Why? Our clothing helps
to prevent the heat of the body from escaping too rapidly. We should plan
to wear light clothing in summer and heavier in winter, or to adapt our
clothing to the weather. This is only good sense. In summer we have cool
days, and in winter warm ones. People whose habits of living keep them
indoors a great deal should be clothed lightly for a warm house and, when
going out, should protect themselves with extra clothing. The boy or girl
who walks to school rapidly does not require as much clothing as one who
rides. Can you tell why?
[92]
Have you heard that several layers of thin clothing are warmer
than one thick layer? Frank Allen says he knows why. Yes, because of
the layers of air between the thicknesses of clothing. Still air does
not carry the heat away, so we feel warmer with several layers of still
air. Clothing helps to keep the layers of air from conducting the heat
away too rapidly. Porous clothing is always better because air can pass
through and can be collected in the meshes. Loose wool material is warm
because it holds the air between the spaces made by the woolly fibers.
Some day we shall study the wool fiber as we have the cotton, and find
out why it collects air and why woolen clothes shrink. Do you think you
understand why clothes should be changed at night? Can you tell your big
brother at home why? Mollie Stark and Jane Smith told about this part of
the story when they went home from school. Mrs. Stark had invited some
friends in for tea. All enjoyed hearing Mollie's story.
EXERCISES AND PROBLEMS
1. Why is it important to change one's clothing weekly?
2. What care should be taken of the clothing worn at night?
Why?
3. How do clothes help to keep us well? Tell mother or father
how.
4. Look in your teacher's book on physiology. What does it
say about body temperature; about cleanliness of the skin?
5. Write the story of what you think Mollie and Jane told about
this subject at Mrs. Stark's tea party.
[93]
Lesson 10
LACES AND THEIR USE
We must finish the sleeves of our nightdresses, and also the neck.
Shall we use some lace? Do you know that there are many kinds
of lace? How shall we sew it to the gown?
[94]
Imitation Cluny insertion $.12
Imitation Cluny edging .15
Real Cluny insertion .25
Real Cluny edging .18
German "Val" insertion .09
German "Val" edging .09
French "Val" insertion .13
French "Val" edging .13
Fig. 57.—The names and retail prices of a few good laces for underwear.
[95]
Cotton beading $.03
Linen machine-made beading .04
Linen beading .06
Real torchon insertion .24
Real torchon edging .16
Machine-made torchon insertion .07
Machine-made torchon edge .10
Irish crochet insertion .85
Irish crochet edging 1.10
Fig. 58.
[96]
Do you know that there are many kinds of lace? The day Marjorie
Allen took the girls to visit her grandmother, they saw many things
in the attic. Grandmother Allen also showed them some old lace and
undergarments which were decorated with lovely embroidery. It was all
done most evenly with lovely flowers and scalloped edges, and all in
white cotton embroidery thread. There were some dainty old laces, too.
The girls learned the names of some of them. The Sewing League sent for
several samples of modern laces of the same names. There were cluny
laces like these in the sample box. Cluny lace is often quite heavy and
is used on heavy materials. The lighter cluny laces are more suitable for
underwear. The cluny laces are hand or machine made. Which do you think
are more expensive? Have you ever seen any one make lace by hand? It is
sometimes done on a lace pillow with pins to outline the pattern. The
little bobbins of thread are thrown around the pins. Can you get from the
picture (Fig. 59) an idea of how it is done? Torchon lace is also used,
but is not quite so heavy as cluny. It is either hand or machine made.
Both of these are linen laces, but sometimes are imitated in cotton. They
are not so pretty when made of cotton. It is better taste to buy of good
lace the amount one can afford than to buy a cheap imitation. If one can
only pay for a cotton lace, then choose a cotton kind, such as the laces
called valenciennes. The girls sent for French valenciennes and also
for "German Val." lace edging and insertion. What is the difference
between an edging and an insertion? The German valenciennes laces are
somewhat coarser. There are also some samples of Irish crochet lace.
The real Irish handmade crochet is done with a crochet hook, by hand.
The imitations are made by machinery. Marjorie's grandmother has some
real Irish crochet and some real old valenciennes lace. It is handmade
and must have cost a great deal of money. In grandmother's day machines
had not been invented for making lace. Let us look at the samples which
Miss James has. The pictures (Figs. 57 and 58) show some of those used by
the Pleasant Valley girls. Which would you like on your gown? The German
valenciennes wears well and is not expensive. The machine-made linen
cluny or torchon lace is attractive, suitable, and it wears well. Why do
you think a[97]
fine French valenciennes lace does not look well on thick muslin
underwear?
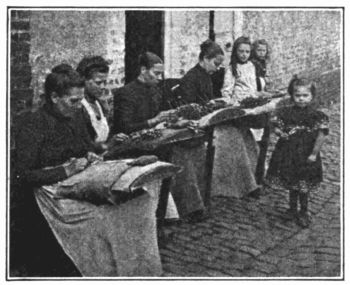
Fig. 59.—Lace being made by hand on
pillows with tiny bobbins of thread.
Besides using lace, what are some other ways of finishing a
garment? We shall send for our laces and also learn another way to
finish neck and sleeves, which will cost less. We can use bias bands of
lawn to finish the rough edges. Cut them 2½ inches wide (see page 25),
and they will be about one inch finished. The feather stitch added will
make a pretty decoration. Scalloping is easy. The gowns might be finished
with the hand scallop around neck and sleeves, if one has the time.
We shall learn how to sew on the lace insertion or edging. The
girls who use lace may decide to have only the edging. If insertion or
beading is used, too, it is sewed on first.
While we are waiting for the lace to come, we can prepare the edges of
the neck and sleeves. If we use a French fell, the sewing will not show
on the right side at all when the lace is entirely in place; besides,
only one sewing is necessary for the hem and lace. This is how it is
done:
1. Turn to the right side of the garment at both neck and sleeve
edges, a hem of 1⁄8 inch. The first turning must, also, be 1⁄8 inch.
Baste very carefully with small stitches.
2. Turn these hems backward to wrong side and crease so that
the edge of the turned hem is exactly at the finished edge of the
garment. This is where the lace is to be sewed. We shall learn
how to sew on the lace next lesson.
[98]
EXERCISES AND PROBLEMS
1. Bring to school all the samples of lace you can find at home.
With your teacher's help compare and discuss their uses. Mount the best
samples for an exhibit.
2. Ask your family and friends to show you any old pieces of lace they
may have.
3. Consult the encyclopedia or other books, and see if you can learn
more about how lace is made. There are several good books all about
lace.
Lesson 11
TRIMMING THE NIGHTDRESS
A new way to sew on lace by hand, and an inexpensive way to
trim the nightdress.
Did you find it very difficult to turn the narrow hem around the
neck of your nightdress? Jane Smith almost cried; but Miss James
helped her a little. It is always more difficult to turn a hem on a
curved edge than on a straight edge. If the turns have both been made
the same width and if the basting stitches are small, there will be no
difficulty. After the hems have been turned backwards and creased to the
wrong side, we are ready to sew on the insertion. Hold the insertion
straight with the right side to the right side of the gown, and with the
edge of the insertion to the edges of the creased hem. Now great care
must be taken. The overhanding stitch is to be used. You learned this
stitch on the bean bags (page 28). In taking the stitch be very careful
to put the needle[99]
through the edge of the hem, the creased edge, and the lace. The
sewing will not be neat unless all these edges are caught by this sewing.
This is important.
If one wishes, it is possible to use only the lace edging without
the insertion. Sew it to the gown in the same way one would sew it
to the insertion. Towards the worker hold the lace just a little full.
Sometimes one can pull the thread at the edge of the lace and use it as
a gathering thread; but, as not much fullness is required, it is very
satisfactory to hold the lace a little full with the thumb as one sews.
Small overhanding stitches will hold the fullness as it is distributed
evenly. The right side of the lace is placed towards the right side of
the insertion so that the two edges of lace and insertion are overhanded
together. Sometimes, if the neck of a gown is too big and one wishes
to make it smaller, tucks can be put in groups at the center front or
back, in number according to the amount to be taken up. In calculating
for tucks, one must remember that the tuck takes up twice the amount
of material as the width of tuck desired, and covers its own width in
lying flat. If tucks are used to make the neck size smaller, it will be
found more satisfactory to put a narrow facing around the neck before
trimming.
To seam the ends of lace, make a plain seam on the wrong side. Lay it
flat, turn under the two edges together, and hem in a narrow hem.
A pretty way to finish the edges of neck and sleeves
is with bias bands. Cut strips as for the pot holder (see[100]
page 25). White, pink, or blue lawn may be used for contrast. Cut the
bands 2½ inches wide. They will look one inch wide finished. Place on the
right side, right of lawn to right of gown. Make ¼ inch seam and stitch.
Turn to wrong side. Turn under ¼ inch and hem to wrong side. Another way
to finish is to baste the band and decorate it with the featherstitch to
hold the turning. This stitch is a pretty decoration (see page 120). It
is placed on the right side and at the bottom of the band. It should be
made with white cotton embroidery thread; #25 D.M.C. cotton is very good
for such finishings.

Fig. 60.—Nightdress with sleeves set in, and
sleeves and neck finished with bias bands.
The neckband will need a tape or a ribbon to hold the fullness of the
band close to the neck. The binding should be started and finished at the
front, and the ends of binding should be turned in (Fig. 60). This will
leave an opening where the ribbon can be run in. This is a satisfactory
finish and is not expensive. The lawn is 12 or 15 cents a yard; and ½
yard will cut enough bands for several girls' gowns. The D.M.C. cotton[101]
will cost only two cents a skein. Send for these in time.
EXERCISES AND PROBLEMS
1. Can you suggest any other finish for the nightdress?
2. If you should wish to add 3 tucks each ½ inch wide at the
bottom of your gown and with ½ inch space between them, how
many extra inches in length would you have to add to your gown
length? The Pleasant Valley girls worked this out in their arithmetic
class.
Lesson 12
CHOOSING A PATTERN AND MATERIAL FOR A WHITE PETTICOAT
Do you think you can send for the cotton material and for a
pattern for a petticoat? What kind of cloth will you use? Perhaps
you would prefer to make a slip instead of a skirt.
Who can remember the names of the best cotton materials for
underwear? What shall we choose for our petticoats or slips? Look
at the pattern book and choose a simple petticoat. We shall learn to
make one with a ruffle. It is very useful in summer to wear under thin
dresses, although some girls may prefer to make a slip which combines
petticoat and waist. What sizes shall we order? How much cloth will be
required? We shall need three lengths of cloth for the skirt. Let us take
our length measures for the skirt, allowing four inches extra for hem
and finishing. Those who wish to make ruffles of the material will need
one yard extra of same cloth or of lawn. Which will be less expensive, a
ruffle of Hamburg embroidery edging[102]
or a ruffle of lawn decorated with a fancy stitch? Which will take longer
to prepare?
The girls of Pleasant Valley School decide on a pattern with five
gores. What does that mean? Would you prefer some other? Why is the
five-gored pattern a good one for the petticoat?
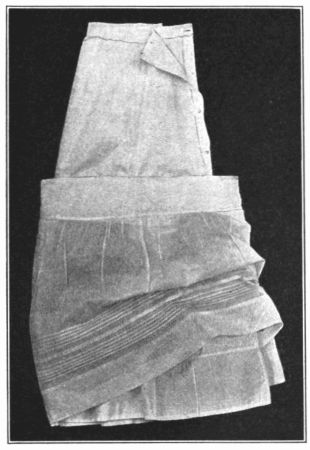
Fig. 61.—A simple petticoat.
The girls choose cambric for their petticoats. Some decide to buy the
lawn and to make the ruffle with a simple decoration. In calculating for
the ruffle, allow 1½ times the width of the skirt. This is full enough.
The depth of the ruffle is according to desire. It may be from 5 to 10
inches deep. Cut it across the warp. Can you tell why? Others may decide
to make a simple ruffle of the same material with a decorated hem; a few
may use the Hamburg ruffle. Which ruffle will you decide to use for your
skirt or the bottom of your slip?
[103]
EXERCISES AND PROBLEMS
1. Calculate how much material you will need for your petticoat
without the ruffle.
2. Calculate the amount for the ruffle.
3. How will the patterns help you to make these calculations?
Lesson 13
LEARNING TO MAKE THE PETTICOAT
The girls of Pleasant Valley have had so much practice that the
petticoat will not be a difficult task. Do you think you will find it
easy too?
Mollie Stark is delighted to make the petticoat, for she needs one to
wear under the new dotted Swiss dress that mother made for her birthday.
She saw in the "Pleasant Valley News" that there will be an unusual sale
of Hamburg edgings; and she thinks she will go to town and see if it is
something she can use. Miss James told the girls that Hamburg edging
which is full of holes and in which the pattern is poor and poorly
embroidered, is not worth buying. The edge is usually very weak and
pulls out after one or two washings. The Hamburg edging called "blind
embroidery" has no holes and is likely to be firmer.
Let us study briefly how the petticoats are to be made:
1. Cut out. Follow pattern, placing economically. Allow extra for
hem, if necessary, and one inch for receiving tuck under which the ruffle
will be placed. Fold pieces left over; they will be needed.
[104]
2. Pin and baste gores. Be careful to match notches—front,
then side gore at each side, then back gore at each side of side gore,
five in all. Pin from top down. Baste from bottom up with bias
edge towards worker. Holding thus prevents stretching.
3. Make French seams by machine.
4. Make hem on bottom. Baste a two or three inch hem as
planned. Stitch. Sometimes dust ruffles of the same cloth or of
lawn are placed on the bottom of the skirt instead of a hem. They
are made about 3 or 4 inches wide and cut across warp of cloth. The
skirt is then cut 3 or 4 inches shorter, and the ruffle makes the length
by being added at bottom under a tuck 3⁄8 inch wide. This ruffle
has ½ inch hem on the bottom edge and is sewed to skirt with a seam
on the right side. The tuck is made directly above it and is stitched
flat to cover the raw edges. A hem at the bottom is enough, and
is suitable for young girls, when a ruffle is to be added above for
decoration and fullness.
5. Prepare tuck on skirt for ruffle. Measure from bottom of
skirt depth of ruffle. At that point make a tuck 3⁄8 inch deep.
Baste and stitch. This must be same distance from the bottom
of skirt all the way around, and on the right side of skirt. It is
not always necessary to use a tuck. A bias band can be used
instead or a beading to cover the raw edges of the ruffle.
6. Prepare ruffle. This may be of lawn with edge hemmed and
decorated with featherstitch, or it may be of Hamburg edging or
of same material with scalloped edge (see page 142). A ruffle of the
same material with a simple ½ inch hem may also be used. The
width of ruffle is half as full again as the width of skirt. The
depth can be 5-10 inches as desired. Divide ruffle in quarters,
and gather.
7. To join ruffle to skirt. Divide skirt in quarters. Pin quartered
ruffle in place. Draw up gathering threads to fit skirt.
Wind thread around pins to hold. Baste. If a receiving tuck has
been made, turn it down over the raw edge of ruffle and baste and
stitch on very edge of tuck. If a tuck has not been made, baste[105]
over the raw edges of ruffle a band of finishing braid or beading or a
bias strip of the same cloth as the skirt, 3⁄8 inch wide; stitch on both
edges.
8. To make placket. Use straight strip 2 inches wide. Start at
waist line, right of strip to right of skirt. Sew all around placket
opening. Stitch. Turn to wrong side. Hem down by hand.
Lap at bottom of opening so it lies flat. Backstitch across the
bottom with a slanting line of stitches. This makes a flat back
with no fullness and is called a bound placket.
9. To finish top of skirt. Cut bias strip of cloth about one inch
wide; sew to right side. Turn over to wrong side even with top;
turn so as to be ½ inch wide finished; stitch on edge, flat. Lap
skirt in back with three buttonholes, one at waist and two below
in placket lap.
EXERCISES AND PROBLEMS
1. Calculate how much ruffling of Hamburg edging will be
needed for a skirt 2½ yards around.
2. Get samples of embroidery and pin to the Bulletin Board,
where all the girls may see them.
3. Practice making a receiving tuck.
4. See if you can plan a section of a dust ruffle for a petticoat.
Make the skirt part of brown paper with tissue for the ruffle.
Lesson 14
HOW TO MAKE A CORSET COVER
The new problem of corset cover is not difficult, if one has learned
all the preceding lessons. Let us study how to trim this garment or the
waist of a slip.
Some of the girls of Pleasant Valley will make combinations of corset
cover and skirt, and others the corset cover (Fig. 62). They decide to
use nainsook and to[106]
trim them with German valenciennes lace. About 1½ yards of cloth
are necessary. They have sent for a simple pattern and will make them
partly by hand. Miss James gave them the following directions:

Fig. 62.—A simple corset cover.
1. To cut. Place pattern economically. Pin and cut.
2. Baste. Pin and baste underarm seams and shoulders. Sew French
seams by machine.
3. Make front laps. On left side make hem ¾ inch wide turned to
wrong side. On right front make hem turned to right side ¾ inch wide.
Stitch this 1⁄8 inch from each edge to form front lap. It could be
run by hand if all handmade or featherstitched with tiny stitches. This
lap is for the buttonholes, which are made vertically, three or four in
the lap. If it is desired to conceal the buttons, make an extra strip for
buttonholes and stitch under the right front lap with the stitching of
hem.
4. Finish bottom. Even the bottom, and make as a finish a narrow hem
¼ inch wide.
5. Gather at waist line. In center fronts and in middle of center[107]
back, gather at the waist line to fit figure. Baste on inside of
waist over these adjusted gathers a straight band ¼ inch wide, with
edges turned. Baste and stitch this top and bottom to hold
gathers. Waist line can, also, be finished, if desired, on right side
with beading or with a band.
6. To finish top of cover and sleeves. Make the same finish as
for kimono night dress. This is neat and attractive. The top of
the corset cover can be gathered to fit the figure, or tiny hand or
machine tucks of 1⁄8 inch in width may be run about three inches
deep each side of the front laps, five or six tiny ones being made on
each side, according to the amount of fullness to be taken in. The
top can be finished with a Hamburg beading for ribbon, sewed on
with a French seam; and then lace may be overhanded on the edge
of it. The finish of the sleeves should correspond to the neck finish.
EXERCISES AND PROBLEMS
Calculate how much beading and lace or lace alone will be
necessary to trim a corset cover. Draw sketch of how it is to be
decorated.
REVIEW PROBLEMS
I. Practice sewing on the machine at home. Learn to turn
good square corners and to stitch straight.
II. Plan to make a slip or some extra garment at home, using the
principles and knowledge gained at school, in sewing seams, trimming
and making.
III. In what ways are you planning to protect your body at
night? How do you ventilate your room? How air your clothes?
[108]
CHAPTER III
LEARNING TO MAKE SOME ATTRACTIVE GIFTS FOR CHRISTMAS OR FOR A BIRTHDAY
PRESENT
Perhaps you would like to surprise mother or father at
Christmas time or to make a birthday gift for grandmother or auntie. All
the Pleasant Valley School girls have made plans for Christmas. Making
gifts is not difficult, if one gives thought and time, and need not be
a great expense, if one is careful to use scraps of cloth. Look in the
attic or in the piece bag to see if there are any scraps of silk. If you
are making a gift for mother, I am sure grandmother will help you to find
something. Giving is much fun when one can make the gift a surprise.
Grandmother Allen and Grandmother Stark are helping the Pleasant Valley
girls with their surprises. It is not the cost of a gift which counts,
but the loving thought which one puts into it. A surprise birthday
pudding or cake, a surprise apron or work bag, are all things into which
we can put loving thought. Who said the "gift without the giver is bare"?
What does that mean? Have[109]
you ever given a gift or received one into which no loving thought had
been put? See how much happier you will feel when you give thought,
too.
The girls of the Pleasant Valley Sewing League think they will make
something for their fair. Miss James has a box full of samples of silk
from a wholesale house, which were given to her. She says the girls may
have them. Some of the pieces are very large and can be used for many
things. Next lesson you might do as they did, and all bring any pieces
you may have and see what can be made from them.
Lesson 1
THE STORY OF HOW SILK IS PRODUCED
Do you know that a tiny little worm gives us our silk dresses, hair
ribbons, neckties, gloves, stockings, and many other useful things? Do
you know how the worm makes the silk? It is a very wonderful story. Let
us study about silk to-day.
In the picture (Fig. 63) you will see one of the silkworms full-grown.
The mother and father were beautiful moths. The mother moth lays the
little eggs on the leaves of the mulberry tree because they are good food
for her baby worms. The sunshine and warmth hatch the little eggs. The
eggs are like pinheads, and are smaller than tiny grains of chopped corn
which you feed your chickens. Your mother hen sets on the eggs until the
warmth makes the chicks grow, but the sunshine starts the tiny moth eggs.[110]
Soon a little baby worm comes out and is as small as a tiny thread. It
grows and grows and eats and eats, until it is about three inches long
and nearly as thick around as one of your fingers, as the picture shows
(Fig. 63). It takes about a month for the worm to grow so large. It must
be tended very carefully and given the right food, or it will die. The
food must be chopped fine. It is like preparing milk for baby; is it not?
They must, also, be kept very clean in order to grow. Cleanliness always
helps animals, as well as people, to grow.

Courtesy of Corticelli Silk Co. Copyright, 1896, Nonotuck Silk Co.
Fig. 63.—Corticelli silkworm, eating.
Have you heard that there are some countries where the silkworm
grows better than in others? Can you name the countries producing the
most silk? You have learned that in your geography. Yes, Japan and China
and Italy. Yes, and France and Asia[111]
Minor, too. Do you think the United States produces very much silk? Why
not? In the countries named, labor is not so expensive. Silkworms require
much care and labor.

Courtesy of United States Department of Agriculture.
Fig. 64.—The houses or cocoons built by
the worms in the branches.
Silk is the most beautiful and the strongest of the common fibers. It
also costs the most. The silk fiber produced by these tiny worms is often
four thousand feet in length. Let us learn how the tiny worm does such a
wonderful thing. He must work as hard as the busy bee.
After the worm is full-grown he begins his busy work. This is
like boys and girls; they, too, begin to work when they are grown. If
well fed and clean, the worm will work well. This is apt to be true of
girls and boys, too. The worm begins by making a house for himself called
a cocoon (Fig. 64). Have you ever seen the cocoons of any moth? If you
will look, you will find them on the trees. Miss James has some cocoons
of the lovely green Luna moth. She put the green worm in the box, and it
has spun a cocoon. We do not find the mulberry worm growing wild in[112]
the United States. In some countries it grows wild, just as our Luna
moth.
When the worm is ready to spin, she throws out two tiny little
threads one from each side of her head. This is a secretion and is
a kind of jellylike fluid. As the air touches it, it hardens. She works
her head back and forth, and the tiny filaments, or threads, as they
are called, are joined together into one. She works and works until she
has built a house of silk threads all glued together so that it seems
like a mass of parchment paper. These houses are about 1½ inches
in length, and are white or yellow in color. In China and Japan these
cocoons are grown and tended very carefully. The outside of the cocoon
is covered with the loose fluffy silk which the worm uses to attach his
home to a leaf or twig. It takes the worm three weeks to make this long,
continuous thread called a cocoon. During that time a wonderful thing
happens. The worm inside the cocoon is changed to a moth like her mother
and father and is ready to leave her home by eating her way out. What
would happen to the long silk thread if she did that? Yes, it would be
broken into small pieces and not be one continuous piece. Some moths are
permitted to come out (see Fig. 65). They then find a mate and soon more
tiny eggs are laid by the mother moth; and all the story begins again.
A sad thing happens when cocoons are grown for
the silk. The moths are not allowed to come out[113]
and break the thread; but are put in a very hot place so they die inside.
The cocoons are then ready to be reeled or wound off. They are placed
in basins of hot water because the gummy secretion of the worm must be
softened. The ends from four or five cocoons are caught together and
reeled, or wound, off together. This makes a strand of raw silk.

Courtesy of Corticelli Silk Co. Copyright, 1895, by Nonotuck Silk Co.
Fig. 65.—Corticelli cocoons from which the moths have emerged.
John Alden told the following story. He said his father read it aloud
the night before when the family gathered about the big open fire. Once
upon a time, long ago, people did not know how to use the beautiful
fibers of the silkworm. We are told that a Chinese empress discovered how
to use it as long ago as 2700 years before the birth of Christ. Every
year, in April, the Chinese people have a celebration in her honor,
because of her valuable discovery. Think of all the riches she added to
her country because of this secret.[114]
It is said that for many years this secret was kept; but later some
monks traveling east to India and Constantinople told others how to reel
the silk fiber. Then the use of silk fiber spread to Greece and Italy
and Spain, and by the fourteenth century was common in France. Since
then, silk manufacture has grown rapidly in importance. John traced the
journey on the map. Will you see if you can trace this journey of silk
manufacture. Where do you think the secret was carried from France?

Courtesy of United States Department of Agriculture.
Fig. 66.—Silk reeling. The cocoons are in the basins before the women.
Can you send for some cocoons and raw silk?
Your teacher will tell you where to write. Raw silk,[115]
as it is wound from cocoons, is made up into hanks like the worsted
which you buy at the store. It is sold in hanks by the pound and costs
from $7.00 to $10.00 a pound. It takes three thousand silkworms to spin
a pound of raw silk. Do you know that for grandmother's dress about two
pounds of raw silk were necessary? Can you tell how many worms were kept
busy?
In another lesson we shall learn how the manufacturer of silk ribbons
or silk material takes the raw silk and makes it into beautiful fabrics.
Now we know about a useful little animal as well as about a plant which
gives us clothing. Silk, however, is more expensive than cotton. Cotton
is sometimes made to look like silk. The cotton fiber is mercerized,
which means soaked in certain chemicals and stretched to make it look
silky. Lisle thread looks somewhat like silk. It is cotton twisted hard
to give it a luster. Another day we shall learn more about these.
EXERCISES AND PROBLEMS
1. Do you know where silk is grown? Write a story of 100 words telling
about it.
2. Why is not more silk grown in the United States?
3. Find on your map of the world the principal countries where silk is
grown.
4. Name some articles made of silk which you use every day; which you
see used.
5. What are some of the other uses which we have for silk?
[116]
Lesson 2
SIMPLE ARTICLES EASILY MADE FROM SILK SCRAPS
There are so many things which can be made from silks. Suppose you
start with something easy. Miss James had some good suggestions. The
little pin-case or the sewing-case are both useful (Figs. 68 and 69). You
know the overhanding stitch; so you can make them quickly. Several of the
Pleasant Valley girls will make them for Christmas gifts as well as for
the fair. Which will you make?
Here are the directions for making both the pin-case and the
sewing-case. They are not difficult if the directions are followed
carefully.
For the Pincase. Cut two circles of stiff cardboard from 2 to 3
inches in diameter, if your silk pieces will permit. The circles must
be exact. Cut two pieces of silk 3 or 4 inches in diameter, so the silk
pieces will be ½ inch larger all around than the cardboard.
¼ inch from the edge, with double thread, make a row of gathering
stitches; slip cardboard within and draw up the silk around the card.
Now crisscross with your thread through the edges of material until
all is held firmly (Fig. 67). Cover both cards. Then hold the two
together, and very neatly overhand with silk thread of a color to match.
Tiny stitches should be taken. Put in a row of pins around the edges
close together. A pretty decoration can be made by working a design
or an initial on the silk if it is a plain color. This can be done
with chain stitch or featherstitch, before the cover is put over the
cardboard.

Fig. 67.—This shows how to cover the
circle, and draw the silk neatly at the edges.
[117]
In the picture (Fig. 68) notice the other cases. They are made
exactly like the pin-case but of circles or of pieces of different shape.

Fig. 68.—Several useful cases: A, pin-case; B, oval pin-case; C, spool-case;
D, darning-case; E, needle-book.
Cases for doilies can be made of two large circles of 12 in. in
diameter. The circles can be tied together with ribbon and the[118]
doilies lie flat between. The case for darning thread is also very
useful.

Fig. 69.—The sewing case
made of three elliptical disks
sewed together.
For the sewing case. This is more difficult. It is three-sided
and is made of three elliptical disks covered as we did the round ones
for the pincase. How many cardboards will you need? Thin cardboard is
necessary. What does elliptical mean? A good size is 4 inches the long
way and 2½ inches across. All the girls know how to draw an
ellipse. Cut the six pieces of silk ½ inch larger all around than
the ellipses, and cover in same way as you did the round disks. If there
are not enough scraps of one color, use a contrasting color for the
lining. After the six pieces have been covered and joined together to
make three ellipses, then the three are to be overhanded together very
neatly, leaving open the third edge, which is the opening of the case
where the spools, etc. are put inside. The case naturally closes itself;
but, when pressed at the ends, it opens easily.
What are some pretty stitches that may be used for
decorating? If one wishes, the sewing case can also be decorated with
a good design like the one in the picture (Fig. 69). Would you like to
make the chain stitch and the featherstitch? They are both useful for
decoration on bags, aprons, dresses for baby, underwear, and many things.
Mollie Stark learned this stitch and used it on a dress for her baby
brother. Mrs. Stark is very[119]
happy to think Mollie is learning how to sew. These are the directions
for making several pretty stitches:
The chain stitch is easy to learn. Begin with a knot. Pass the
thread from the under side up. Throw the thread so as to make an O (see
Fig. 70). Put the needle into the hole where thread came through, and
make a stitch about 1⁄8 inch long. Hold
the cloth over the fingers with the thumb on top. The needle should
be pointed towards the worker, and the point of the needle should be
brought up through the little round O. Care must be taken in pulling
the thread through to have the loop of thread lying flat on the cloth.
The length of stitch should be uniform. What does uniform mean? The
outline of an initial or any drawn design can be followed with this
stitch.
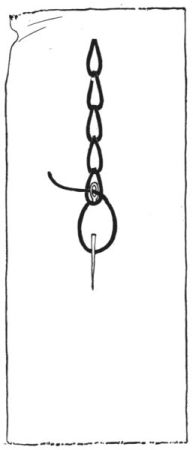
Fig. 70.—The chain stitch.
The featherstitch is very beautiful, when made small and even (Fig.
71). It can be varied by making one or two stitches on each side of a
center line. The length of the stitches and the slant always affect the
appearance. In practicing the featherstitch draw a pencil line on your
cloth as a guide. The stitches are slanting and are taken towards this
line. This stitch is used for decoration in the same way as the chain
stitch.
[120]
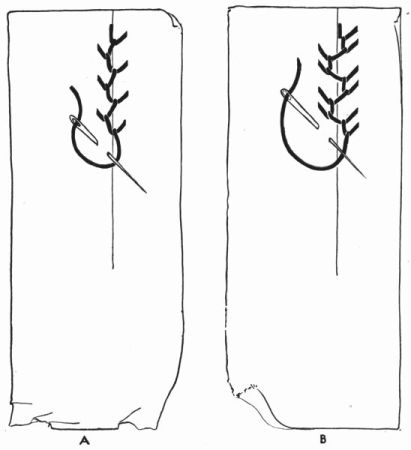
Fig. 71.—A, the single featherstitch; B, the double featherstitch.
The single featherstitch. Hold the work over the finger with
thumb on top of cloth. Work towards you. Start with knot on
under side of pencil line. Draw thread through to right side.
Lay thread on the pencil line and hold with thumb. To right of
thread near beginning, take a small 1⁄8 inch slanting stitch towards
the line of thread. Draw needle through over the loop of thread.
Have it loose and lying flat. For the second stitch, hold thread
again on the pencil mark. Throw thread for next stitch on the[121]
left of the line. Take slanting stitch towards center line. Draw
needle up through the loop, which should lie flat. The next stitch is
taken to the right of the center line directly under the stitch above
it, and should be the same length and slant. The beauty of this stitch
depends on its evenness. A striped material makes a good practice piece.
After the stitch is learned, it is easy to make it on plain cloth;
but one must then keep constantly in mind an imaginary center line.
This is a very useful stitch for finishing hems instead of using the
hemming stitch. The lawn ruffles on our petticoats were finished with
this stitch. The featherstitch is sometimes a straight stitch instead
of slanting. It is taken each side of the imaginary center line as the
slanting one, but the needle is held straight.

Fig. 72.—The outline stitch.
The outline stitch. This is another easy stitch (Fig. 72) which
every girl should learn. It can be used instead of the chain or
featherstitch, as decoration. It outlines, or follows, the design, and so
gets its name. The stitch is taken on the line and is worked from left to
right. Care must be taken to have the stitches all the same length and to
throw the thread in one direction either away from or towards the worker.
The pretty effect will be spoiled if there is a variation. Away from the
worker makes a neat effect. Begin with knot. Draw needle to right side on
the line. Throw[122]
thread away from worker; take a small back stitch on the line,
needle pointing towards the worker. This will make a long thread
on the surface and the short stitch beneath. The effect is much
prettier when the stitches are taken close together.
EXERCISES AND PROBLEMS
1. Name some other articles on which the featherstitch or
chain stitch can be used; some on which the outline stitch may
be used.
2. Draw a picture on the blackboard of the featherstitch, chain
stitch, and outline stitch. Can you show how the needle looks in
position, without looking at your textbook?
Lesson 3
THE NAMES AND USES OF SEVERAL SILKS ARE DISCUSSED
To-day we shall study again about silks. Let us look at those in Miss
James' piece bag; and, also, see how many different kinds we have for our
gifts. Perhaps your teacher has some too.
Such a variety of kinds and colors! Some are soft and light, and
others are heavy and stiff. Do they have names just as the cotton
materials?
Can any one tell the names of any of these silks? Yes, the
plain one is a taffeta. It is plain in color; and the weave is plain,
the same on both sides. Sometimes it comes with printed and woven
figures. What is the difference between a woven and a printed design?
Here is a piece with a printed design. It is a foulard silk. How does
this design differ from the taffeta with the design? Foulard silk is used
for dresses.[123]
Taffeta is also; as well as for linings and for petticoats. A cheap
quality of taffeta does not wear well. It costs from 75 cents to $2.00 a
yard, and is woven 21 inches and wider. Foulards are about 24 inches wide
and can be bought for the same price as the taffetas. Mollie's mother had
a foulard silk dress last summer; so did Grandmother Allen.
Here is a soft crinkling white piece and a dark blue just like it; and
also a black piece. These are called crêpe de chine and are used for
dresses, also; and sometimes for underwear. It is soft and lustrous, and
comes in plain colors and sometimes printed. It costs from 75 cents up
and is woven 22 inches and sometimes wider.
Shall we start another book of materials, and see how many silks we
can learn about?
The piece Barbara Oakes brought is smooth and shiny on the right side.
Does anyone know the name? It is woven in such a way that the filling
thread goes over several threads and under one. Try it on your school
loom. This weave brings most of the filling thread on the surface of the
cloth. The material is called satin, and the weave is the satin weave.
Some cottons are woven with the satin weave, and often in table linen
or damask we see the smooth satin weave. Here is a bit of damask table
linen. Let us compare this smooth part with the satin.
[124]
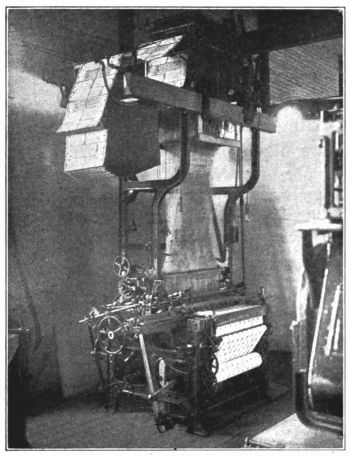
Courtesy of Crompton and Knowles.
Fig. 73.—The Jacquard loom. Notice the cards with
punched holes above it. They affect the pattern.
Can you find the cloth which is being woven?
Satins are used for dresses, linings, trimmings, boxes, and for many
other purposes. They cost $1 to $20 per yard, if very beautiful, and are
woven from 21 to 54 inches wide. Satin is sometimes made of a combination
of linen or cotton, with the silk. It is then less expensive. The woof,
or filling thread, which gives the smooth finish is silk; and it is
that which shows in the finished cloth. This piece of silk, which looks
figured like table linen, only it is made of silk, is called a brocaded
satin. This satin is used for dresses and trimmings, and often for
furniture covering and for hangings in beautiful rooms. It is made on a
loom called a Jacquard. Table damask is made on the same kind of loom.
This wonderful loom (Fig. 73) is able to produce very beautiful patterns,
because of the management of the[125]
perforated cards above the loom which affect the pattern.
The soft white piece is china silk. Little Alice Allen had a dress
made of it last summer. It is a plain weave, and many of such silks are
still woven by hand in China. It is very durable and is used for dresses,
waists, and underwear. It costs $1 for a fairly good quality, and is
woven 24 inches wide.
This piece of silk, also, originated in China. It is called pongee.
Mary Jones had a coat of this last year. It is ecru in color and is soft.
The real Chinese pongee is hand-woven and is made from the silk of wild
silkworms. It is woven 27 inches wide and costs $1 per yard up. This
piece was $1.50 per yard.
This is a queer-looking piece. It is marked in a watery pattern.
The silk has been pressed between hot rollers which are stamped with a
pattern to give that effect. It is called moiré silk, and is used for
trimmings and dresses. It is quite expensive. A good piece will cost at
least $2 per yard and is 22 inches in width.
We shall learn about two more of the most common silk materials. One
is thick, and the other is thin. The thin piece is called chiffon. Who
has ever seen it used? Yes, for veils. It is used for dresses, too, and
for hats and trimmings. Isn't it light and thin and gauzy? It is made in
plain colors generally; sometimes figured. It is 46 inches wide and costs
from $.75 to $2 per yard.
Yes, every one knows this one! It is called velvet.
This piece is all silk, and was a part of Marjorie's[126]
great-grandmother's dress. Some velvets are made of linen and silk, or of
cotton and silk. All silk velvet is very expensive. It often costs $10 a
yard and more. Some silk velvet can be bought for $4 or $5 a yard. It is
woven from 18 to 42 inches wide. Isn't it thick? Do you notice the tiny
ends standing up? It is woven just like some carpet, and the thickness is
called the pile. In weaving, little loops of the filling thread are made,
and after weaving, these are cut to form the pile. Such weaving looks
very difficult. The warp is sometimes linen or cotton. This other thick
piece with a pile is called plush. It has a longer pile than velvet.
There are also cotton plushes. Did your mother ever have a winter coat of
plush? Mrs. Alden had one which lasted for years.
Let us mount our silk samples. Another day we shall
study how they are woven from the raw silk. Isn't it interesting to feel
acquainted with this new family of materials? Notice before next lesson
how many things you see which are made of silk. Have you any in your
schoolroom?
EXERCISES AND PROBLEMS
1. Bring to school all the samples of different kinds of silks which
you can collect. Can you tell their names?
2. Name an expensive silk suitable for a dress, and give its
approximate cost. Name an inexpensive silk suitable for a summer dress;
give its approximate cost.
3. What is plush used for? What is chiffon made of?
4. Start a book of silk samples.
[127]
Lesson 4
MORE USEFUL GIFTS AND HOW TO MAKE THEM
Two more useful gifts: a workbag of silk, and a sewing apron.
Which will you chose to make?
The workbag. Barbara Oakes has a very complete little workbag
(Fig. 74) which grandmother made for her last Christmas. The girls think
they would like to copy it. It is made of a piece of yellow flowered
ribbon which was 8 inches wide; ½ a yard is enough. If you have
scraps of silk, use a strip 8 inches wide × 14 inches long. With the
other 4 inches, if ribbon is used, the circular disks for the bottom are
to be covered. To make:

Fig. 74.—A, a very useful bag. B, the sewing apron.
1. Cut two circles of cardboard 3 inches in diameter. Cut
the silk for covering four inches in diameter. Cover in the same
way as you covered the pin disk. This is the bottom of the bag.
2. Seam the two ends of the 14 inch strip together with two
runs and backstitch (see page 35). Open seams flat. Turn
along one long edge, ½ inch if selvedge of ribbon; if silk, make two
turns: first 1⁄8 inch, second ½ inch. Baste and hold with featherstitch
(see page 120), or cross-stitch (see page 145) At seam of bag[128]
open seam carefully ½ inch on the right side for casing hole for
ribbon. At the opposite side, work a small buttonhole (see page
43) 3⁄8 inch in length. This will be the top of the bag; and the
two ribbons are to be run through the casing so it will draw up.
3. At the other edge of the long strip, fold to the wrong side:
first 2 inches of the strip, and then the 2 inches folded over itself.
Baste carefully. This fold is to form pockets on the inside
of the bag. Every two inches along length of strip, mark with a
pin; and on the right side of bag, featherstitch or cross-stitch in
rows two inches deep, to form pockets on the inside of the strip.
4. Gather the edge of the strip to be sewed to the covered disks.
Divide gathers in half. Pin to disk. Overhand to disk with close stitches
on the inside of bag.
This workbag makes a very useful gift. It can be
filled with a pair of small scissors, emery, needles, and spools of silk
placed in the pockets. The ribbon for drawing top is in two pieces,
½ yard in each. Start one piece from one side and run around
casing until it comes out at the same place it started. Tie in bow. Start
other ribbon at opposite side, and run it all around casing, until it
returns to the same side it started from. Tie in bow.
The sewing apron.—Another useful gift
is a small sewing apron (Fig. 74). It can be made of silk or of dimity
at 12½ cents a yard, and need not then cost more than 15 cents.
Dimity is one yard wide; and 7⁄8 of a yard is
enough. To make:
1. From one selvedge cut a strip 2½ inches wide, lengthwise of
the piece. This is for the band and is cut off before the apron is
made. Remove other selvedge.
[129]
2. Turn 3⁄8 inch hem to right side of apron at the lengthwise
edges of cloth; baste carefully.
3. At one cross wise end turn, hem 1¼ inches wide to right side.
Baste and hem with featherstitching on reverse or wrong side.
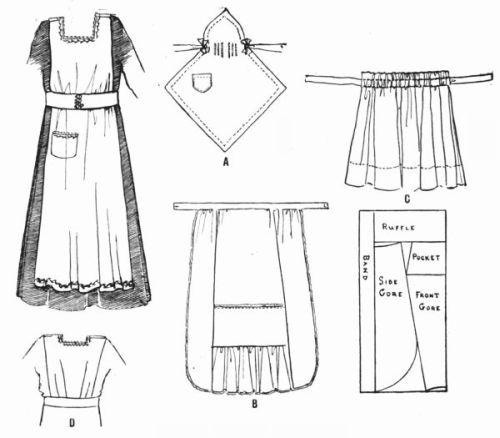
Fig. 75.—Four useful aprons.
4. Turn up at bottom 8 inches to form pocket, so featherstitching
will be on the upper or right side. Baste and overhand edges
the depth of pocket.
5. Featherstitch side hems, catching the pocket to hold securely.
6. Divide large pocket in three by making two rows of featherstitching
like picture.
[130]
7. Put on band. Divide gathered top of apron. Divide band.
Allow band to extend each side of gathers. A space of 12 inches
in center of band is enough to contain the gathers. Put on as you
put on the band of petticoat, but overhand edges of the band
extending beyond gathers.
8. A buttonhole and button can be used to finish, or ribbon may
be sewed to ends of band. This makes a very useful gift.

Fig. 76.—Two cases on which the featherstitch can be used. A, needle
case and bag. B, linen traveling case for overshoes.
Look at the sketches (Fig. 75) of other aprons:
A is made from a square of figured lawn; ½ yard
is enough. It is shaped at one corner for a bib. A
hem is turned at the edge and featherstitched. A few
small tucks make it fit the waist, and ribbon trims it.
[131]
B is made from 2⁄3 of a yard of lawn, as shown in the
diagram. Place pattern economically.
C is made of a width of lawn or silk with a hem at
the bottom and casing at the top.
D is made of glass toweling trimmed with finishing
braid and featherstitching.
Figure 76 shows some useful cases with decorations
of featherstitch.
EXERCISES AND PROBLEMS
1. Plan a gift and surprise mother at her birthday anniversary.
Your teacher will help you.
2. See if you can plan an original gift. Draw a sketch of it.
3. Bring all the suggestions for gifts you can find in clippings
from old magazines.
Lesson 5
COUSIN ANN TELLS HOW SILK IS MADE INTO CLOTH
Last summer Marjorie Allen's Cousin Ann visited her. She lives
at Paterson, New Jersey, where there are many silk mills. She
told the girls of the Sewing League about the way silk is made into
cloth. Shall we too learn how?
Where is silk manufactured? We know that very little silk is
grown in the United States; but we also know that our country leads in
the manufacture of silks and uses more raw silk than any other country in
the world. France is next and produces very beautiful materials. Most of
our silk factories are in the East: in New Jersey, Connecticut, New York,
and Pennsylvania. People have tried to raise silkworms[132]
here. In 1624 some Frenchmen living in Virginia tried, but were not very
successful. Such experiments have usually failed because it costs so much
for labor. In 1747 the governor of Connecticut wore a coat and stockings
made of silk produced on his place. We use about 85 per cent of the silk
manufactured here. What per cent is, then, exported? In 1876, at the
great Centennial Exhibition in Philadelphia, Marjorie's grandmother saw
wonderful exhibits of silk woven in many colors, and even beautiful woven
pictures of silk. Has any one ever seen a woven picture of silk? Have you
ever seen one tiny fiber of silk as it looks under the microscope? What
do you notice?
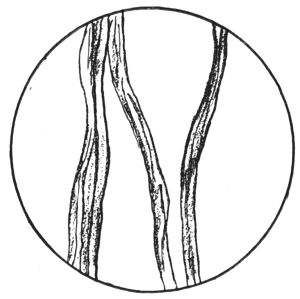
Fig. 77.—Silk fibers magnified.
This is what Marjorie's cousin from Paterson told the girls.
They went to one room at the mill where there were great bales of silk,
weighing about 100 or 150 pounds, but not quite so heavy or large as a
bale of cotton. When opened there were many hanks in each bale; tied up,
five or ten in a bundle. These hanks were taken first to a man called a
throwster. Silk throwing means soaking the skeins to remove more of the
gum, and winding the silk from the skein to a[133]
spool. This is done by soaking in warm water, drying, and then placing
the silk on swifts, or reels. Have you ever seen a reel for winding? (See
Fig. 78.) It holds the skein of silk. The ends are taken, and the machine
unwinds from the skein and winds the silk on spools. In one skein there
are from 75,000 to 200,000 yards of silk. The spools are then placed in
a machine which cleans and twists two of these spool threads together
to form one, and then winds it off on new spools. This twisted silk is
called "organzine." Isn't that a queer name? It means the thread used in
a loom for the warp or strong threads. Why are twisted threads stronger?
Try, and see if they are.

Silk is a most perfect fiber; and does not have to be prepared as
much as cotton or wool. Sometimes it is twisted a very little for the
warp. The filling thread has a queer name, too. It is called the "tram,"
and need not be of so good a quality of silk as the strong warp, nor so
tightly twisted. Cotton spinning is different from silk throwing; but
both mean getting the fibers ready for weaving.
[134]

Courtesy of Cheney Bros.
Fig. 79.—Silk dyeing.
There are many beautiful colored silks. Silk is usually dyed
(Fig. 79) in the yarn in hanks. The poor qualities, however, are dyed
after the silk is woven into the piece. Silk is dyed by dipping the
skeins or yards of silk in great vats of dye. For dyeing, the coal-tar
products (aniline dyes) are used. Did you know that coal could produce
such beautiful colors? That is a long story of the many wonderful things
which can be made from tar. Do you know that 25 per cent of the weight of
the raw silk is made up of the gummy substance? The dyer boils out some
of the gum; and, if he wishes to produce cheap silks and make much money,[135]
he makes up for the weight of gum boiled out, by using tin. The silk is
dipped in bichloride of tin or other substances; and it takes up, or
absorbs, until sometimes it weighs twice or even four times as much as
the boiled-off silks. This tin is bought for silk. Women who do not know
think they are buying heavy silk and are getting a good quality because
it is so heavy. This solution of tin rots the silk, and, when the silk
comes in contact with light and air, it crumbles away. Perhaps you have
at home a sample of silk which has done this. Marjorie's Cousin Ann saw
some petticoats of silk which went to pieces just hanging in a closet.
Sometimes that happens when store keepers keep the petticoats for some
time. One can see the holes by holding the silk up to the light. In order
to know what one is buying one must study about materials and about how
they are made.
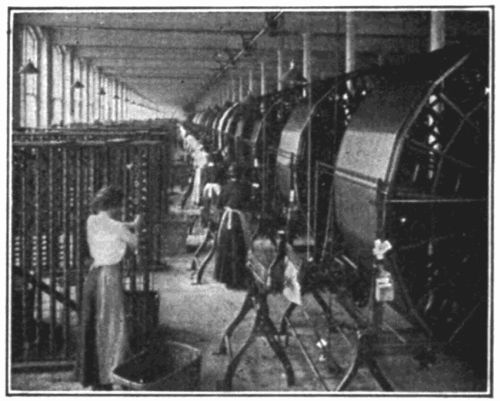
Courtesy of Cheney Bros.
Fig. 80.—Warping or preparing silk
for the loom.
Have you ever seen a picture of silk being dyed in the skein?
Marjorie's cousin says it is done by machinery. See how many skeins are
on the big wheel, or drum as it is called. As it turns, the skeins are
dipped in the vat of dye.
[136]

Courtesy of Cheney Bros.
Fig. 81.—Silk weaving on a hand loom in Japan.
After the warp threads are twisted and wound on spools, the workman
places the spools in racks (see Fig. 80). They are then unwound again on
to a very large roller, as you can see in the picture. The large roller
is then put into the back of the loom, and the warp threads are drawn
through and prepared so they are attached to the roller where the cloth
is to be rolled after it is woven. Do you remember how we found the cloth
and the warp rollers when we were studying[137]
about how cotton cloth is made? For plain silks a loom is used very much
like the looms for weaving cotton cloth (see page 69); but, for fancy
silks and beautiful patterns and designs, the Jacquard loom like the
picture (see page 124) is necessary. This wonderful machine was invented
by a Frenchman, Joseph Marie Jacquard, in 1801. The cards are cut in tiny
holes which regulate the pattern and make beautiful designs. The cards
control the warp threads and regulate which threads are to be up and
which down, as the shuttle passes over and under. The shuttle is lined
with soft seal skin to protect the silk fibers of the filling thread on
the bobbin as they unroll.
Would you too not like to visit a silk factory? Perhaps come
day you may be able to go to Paterson or to some large city, and may see
all the wonderful things which Marjorie's cousin saw. The book pictures
will give you a good idea of how a mill or factory looks inside. It
is a very busy place. Perhaps your teacher may be able to get some
stereopticon or motion picture views to show you, as Miss James showed
the Pleasant Valley children. She used the church lantern. Some of the
mothers and fathers came, too, to hear the story about silk.
EXERCISES AND PROBLEMS
1. Find on your map the most important city in the United
States for the manufacture of silk.
2. Write a story about the silk "throwing."
[138]
3. If there is a silk mill in your neighborhood, plan to visit it
with your teacher.
4. Look up the story of Jacquard, the inventor of the loom
devices for making beautiful patterns.
Lesson 6
THE BLANKET STITCH CAN BE USED IN MANY WAYS
Did you ever hear of a stitch called the blanket stitch? It is
very useful for decoration. We can make some attractive gifts
if we know how to make it. Would you like to try to-day?
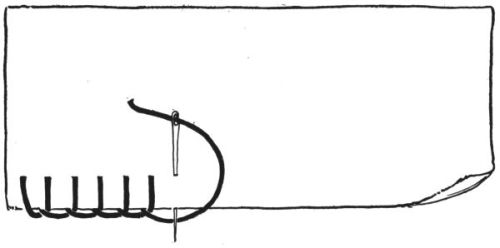
Fig. 82.—The blanket stitch.
Did you ever notice how pretty some verandas look in summer
time? Mrs. Stark of Pleasant Valley has a very attractive, cosy
porch. Yours can look pretty, too, if you will give thought and a little
time to it. You can plant some pretty vines as the girls did at the Ellen
H. Richards house. The cucumber[139]
grows wild and can be transplanted. Perhaps in the attic you can find an
old table, which will do to hold your sewing things. Can you make a cover
for it? Perhaps you can make a porch cushion, too. The blanket stitch
(Fig. 82) will be useful for both.
Did you ever see a material called Russian crash? It is made in
Russia, of coarse linen, and is often woven in the fields. It is not very
wide, 16 or 18 inches only. It is light brown in color. If you cannot
get the crash, perhaps you have some grain or feed bags which will do.
You can dip them in coffee to stain them light brown, as Marjorie Allen
did when she made a cover for the porch table. A piece 1½ yards
long and from 16 to 20 inches wide will make a good-sized table runner to
throw over the old table on the porch. If you use the old bags and the
edges are not selvedges, turn them with one turning ½ inch wide
all around the edges, and baste.
How can you finish the edge of a table runner? You can make
the blanket stitch close together around the edge. A heavy mercerized
cotton thread can be used for the stitch, and will look well if it is
brown in color to harmonize with the linen or bag. The blanket stitch is
used generally for blanket edges which are not hemmed. It is a stitch to
prevent material from fraying, and is taken on the edge of material. When
the cloth is not very heavy, one turning can be made to give firmness to
the edge. This is not necessary on blankets or on heavy materials. The
stitch is worked[140]
from left to right. The edge of the cloth is held towards the worker.
Start with a few running stitches and bring the needle up near the edge.
Have the thread under the thumb. Insert the needle any depth desired
and point needle at right angles to the edge of the cloth, towards the
worker. The needle should come up under the edge and through the loop
made by the thread. The thread will be carried along the edge as the
stitches are made. In finishing a thread, take small tiny stitches on
the wrong side. In starting a new thread, bring it up through the last
loop at the edge. On some materials the stitches can be ¼ or
½ of an inch apart, or taken very close together as we do when we
work on white linen and scallop the edges. The stitches can be ¼
or ½ or even an inch deep, and they can be arranged to form a
pattern. In the picture you will see that the stitches are arranged in
blocks—twelve low ones ¼ of an inch, and 12 of ¾
of an inch. They can also be arranged to form stairs ascending and
descending with a difference of 1⁄8 of an
inch in the depth of each stitch. Suppose you plan to make the block
pattern of the blanket stitch all around the edge of the table runner.

Fig. 83.—The porch cushion, showing
the blanket stitch in block pattern, and
the opening near one end.
Now, can you make a porch cushion? The porch cushion (Fig. 83)
can be made of a strip of crash or of a piece of bagging, 1 yard long
and 16 inches wide. Hem one end with a 1 inch hem and the other with a
½ inch hem, turning both to wrong side. Fold so that the 1 inch
hem overlaps the ½ inch hem. Pin carefully.[141]
This makes a kind of envelope and it can be filled later with a cushion
of bran or excelsior or feathers. Fold so that the overlapping of hems
comes about 4 inches from one end of the cushion. After folding and
pinning, baste carefully through the two thicknesses of material. Work
the blanket stitch all around four sides with the heavy brown linen or
cotton thread. Use the same block pattern as for the table cover. The
cushion is kept closed with three or four snaps sewed on the hems. These
cushions can be made any size for hammock or for porch use. Mrs. Stark
liked Mollie's so well that she made a whole set for her porch, and used
old bags for this purpose.
Can you think of any pretty articles to make for the fair or for
surprise gifts on which the blanket stitch can be used? Have you
ever scalloped the edges of doilies with plain scallop? The white linen
can be cut in circles to fit the size of the plates and the edge marked
in scallops by using a spool. The stitch is exactly the same, but the
stitches are taken very close together and cover the two lines of the
marked scallop which indicate the depth. Doilies are very useful instead
of a tablecloth. They are easily laundered[142]
and save the heavy washing. A bare wooden table which is kept clean
and oiled is very attractive when set with doilies. (See Food and
Health, page 73). Can you make a set sometime as a surprise for mother's
Christmas gift?
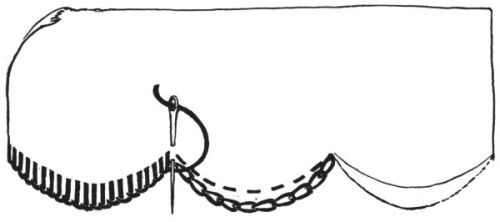
Fig. 84.—Blanket stitch made close together for a scalloped edge.
Pincushion tops, bureau covers, table covers, tray covers,
centerpieces, can all be made with this useful stitch.
EXERCISES AND PROBLEMS
1. Draw a picture on the blackboard of the blanket stitch.
2. Bring to school some article on which the blanket stitch is
used in some way. Have an exhibit of all the articles brought.
Lesson 7
LEARNING TO MAKE THE CROSS-STITCH
Did your grandmother ever tell you how she learned to sew
when she was a girl? Have you seen her sewing sampler? Shall
we learn the stitch she used on her sampler?
[143]

Courtesy of Metropolitan Museum of Art.

Fig. 85.—Two samplers of long ago.
Before the days of sewing machines, the family sewing was all done
at home and by hand. To-day we have factories and shops, and we can buy
many articles of clothing ready-made. All little girls were taught to sew
at home in those days. Sewing was not generally taught at school. Many
long seams were given to the girls to sew. The girls had much practice
and learned to sew very well. Every little girl was supposed to make a
sampler. The picture shows two samplers (Fig. 85). Barbara Oakes has two
samplers which she values very much because her great-grandmother and
grandmother made them. Perhaps you may have one which your grandmother
made. The stitch used for[144]
the samplers was usually the cross-stitch (Fig. 87). Would you like to
learn to make it, too? It is a decorative stitch and is often used for
marking linen. Grandmother and great-grandmother used to mark their
sheets, pillowcases, and other household linens with tiny initials of
cross-stitch. It is possible, also, to make quaint designs of the same
stitch. Perhaps you would like to learn to make such a pattern. It is
necessary to have squared paper and to make the crosses conform to the
figures or initials wished. The picture (Fig. 86) shows how to make the
crosses fit the squares.

Fig. 86.—Cross-stitch designs can be easily made on squared paper. A, initials
for towel; B, design for repetition on table cover or scarf.
Will you try to make a design for the cross-stitch? As the
design is made on the squares, it is necessary to use squared canvas
called Penelope canvas in working this cross-stitch. The canvas is basted
in place and the stitches made over the squares of the canvas, following
the design of the pattern. There are some[145]
coarse materials which can be followed without using canvas. The canvas
is woven so loosely that after the cross-stitch design is finished, the
threads are drawn out. How to make the stitch:

Fig. 87.—The cross-stitch.
Baste the canvas carefully so that the warp of the canvas lies on
the warp of the cloth. The canvas comes in several sizes, some finer
than others, and this makes a difference in the size of the design when
finished. The stitch consists of two slanting lines crossed. On the wrong
side all the stitches may be either vertical or horizontal, but should
be one or the other. Do you know the difference? The canvas is so woven
that one makes the cross over two threads high and two wide. Bring needle
up to right side at lower left corner of the square that the stitch would
form if inclosed (Fig. 87). Pass thread slanting across warp threads, and
take stitch on line with warp, pointing needle towards the worker. When
thread is drawn through, a slanting line of half the cross is made. This
can be repeated across a whole row according to design, and the cross
finished by returning from right to left with the same vertical stitches.
It is necessary to have all the stitches of the design crossing one way:
the ground stitches, or first half, one way; the other half, or upper
stitches, all the other.
[146]
What pretty gifts can be made from the cross-stitch? Towels
hemstitched across the ends and marked with cross-stitch make attractive
gifts for mother or grandmother. A pretty set for a baby is made by
marking bath towel, face towel, and wash cloths with a pretty wreath
design with baby's initial. Bureau covers, table scarfs, pincushions
can be made. Here is a picture (Fig. 88) of a simple hand towel with
cross-stitch initials. The towel is made of huckaback, all linen. You
remember it can be bought in all cotton, too, or a combination. Which is
more expensive? The width varies. The picture shows a small guest towel
18 inches wide. It is easy to learn to hemstitch linen. Shall we try next
lesson? The picture (Fig. 88) shows fancy hemstitching and drawn work. We
shall learn the plain hemstitching.
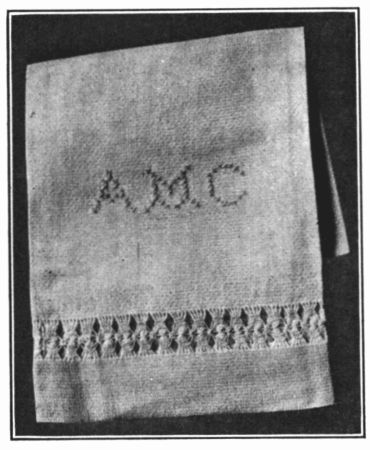
Fig. 88.—A guest towel marked with
cross-stitch.
EXERCISES AND PROBLEMS
1. If any one in your town has an old sampler, try to get it for
a loan exhibit, while the girls are making their cross-stitching.
[147]
2. Make a design for cross-stitch work suitable for an end of
a towel or for any article you wish.
Lesson 8
HOW TO MAKE THE HEMSTITCH
Do you know that some girls are often confused and call the
hemstitch, the hemming stitch? Barbara Oakes used to, but understands
now. You have learned the hemming stitch; now you will try the
hemstitch.
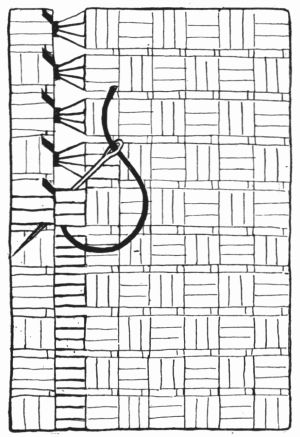
See if you can discover the difference between the hemming stitch
and the hemstitch? Both are used at the top of the hem to hold it
in place, but often the hemstitch is used in other places, too. It is
necessary to draw out some threads of the cloth or linen, before the
stitch can be made. For the hemstitched towel, measure for your hem.
From the raw edge, it will be twice the width of the finished hem plus
one turning of ¼ inch. How much, then, will you measure for a hem
one inch when finished? At the point measured, place a pin. Draw out
three or four of the woof threads very carefully. Be sure to pull out the
whole thread all the way across, when it breaks. Remember how the filling
thread passes at the selvedge, and remove it there as it turns. Then
baste the hem very carefully, turning to wrong side. Baste close to first
drawn thread. Hold work over fingers of left hand in vertical position.
Place needle in edge of hem, and draw thread without a knot under the
edge of[148]
hem just exactly as plain hemming is started (Fig. 89). Throw thread away
from the worker; take up a bundle of the threads by passing the needle
under them and pointing it towards the worker along the edge of the hem.
Again pass the needle under the same bundle of threads, but this time
pass the needle through the under cloth and also through the edge of
the turned hem, just beyond the bundle. This stitch should come between
two bundles of thread. Make the next stitch by taking up a second bundle
of threads. At first, one should count the number of threads so as to
have the bundles uniform; but with practice this is not necessary. As a
rule, the coarser the material, the fewer the number of threads taken
up. This is a simple way of hemstitching. There are other ways. Double
hemstitching means to hemstitch the other side opposite the hem, by
taking up the same bundles. Marjorie Allen made Grandmother Allen a
lovely hemstitched towel for Christmas. She was very much[149]
surprised and delighted to have some of Marjorie's own
work. Marjorie tied it up very daintily in white tissue
paper and used some Christmas seals to hold it fast.
EXERCISES AND PROBLEMS
1. Now that you know the hemstitch, you can use it in many
places. Can you tell how it differs from the hemming stitch?
2. Think of some useful things on which this stitch can be
made besides those mentioned below:—
- Collars
- Bags
- Handkerchiefs
- Cuffs
- Covers
- Doilies
Lesson 9
ANOTHER USEFUL GIFT AND A NEW STITCH
Have you ever noticed how convenient it is to have a place for the
clothespins, on wash day? Would you like to learn to make a clothespin
bag?
How to make another gift. A very useful clothespin bag (Fig.
90) for mother can be easily made with a hammock hook and some ticking.
Mrs. Allen says she cannot keep house without hers. Did you learn about
ticking when you studied cotton materials? Pillow covers and mattresses
are made of it, as it is heavy and strong and wears very well. Put a
piece in your cotton sample book. It is woven 36 inches wide and costs
from 12½ cents up. Notice the weave. It is twilled or striped or
herringbone weave.
[150]
Denim or any heavy material can be used. A square piece is necessary,
28 × 28 inches.

Fig. 90.—The clothespin bag.
Hem. First turning, ¼ inch; second turning, one inch. Stitch
on machine. Miter the corners. The corners are to be sewed securely with
heavy linen thread to the four corners of the hammock hook (Fig. 90). The
hook is hung on the clothesline, and it is very easy and handy to push
along as the clothes are hung up. If one wishes, the bag can be decorated
with a catch stitch.
How to make the catch stitch or herringbone stitch. This stitch
can be used for decoration or for catching the edges of a seam or hem.
Grandmother Allen used to use it on her own flannel petticoats and on
baby Alice's flannel skirts. After the plain seam is made, it is opened
flat and the edges are caught with the loose catch stitch. It is really a
flannel stitch, because, as the flannel may shrink a little, the stitch
allows for this, and holds the hem flat. Flannel hems do not have the
first turning as it is so thick. The catch stitch is then used to hold
the hem. Can you bring one of baby's petticoats to show the class how it
looks?
[151]
The same stitch is used for decoration too. We shall use it for that
purpose on the clothespin bag, before we sew the corners to the hook.

Fig. 91.—The catch stitch.
The stitch is made from left to right. We can use the machine
stitching for a guide. We shall use the stitch on the right side. It
resembles cross-stitch. It is really a series of back stitches placed
alternately above and below the guide line. The spaces between stitches
should be the same and the stitches below the guide line opposite the
spaces above (Fig. 91). This causes the thread to slant and makes the
cross, as it is worked from left to right. To start, draw needle to right
side about 1⁄8 inch below the line of machine
stitch. The first back stitch is taken 1⁄8
inch above the machine stitching. This will make the slanting line, as
the stitch is ¼ inch beyond the starting place. The second stitch
is taken below the line; and the directions as above are followed so that
stitches come[152]
opposite the spaces, above and below. In finishing
an old thread, take two or three small stitches on
wrong side. In beginning a new thread, draw up as
at the start, so as to form the correct cross on the right
side.
EXERCISES AND PROBLEMS
1. This herringbone or catch stitch can be used in many places.
Can you suggest any?
2. Draw a picture of this stitch on the blackboard.
3. Show some neighbor how to make this stitch.
Lesson 10
THE DARNING STITCH
Did you know that sometimes darning is used for decoration
instead of just on the stocking? Let us make a gift using it.
Fig. 92.—The darning stitches
make the initials stand out.
The darning stitch is nothing but fine running stitches placed
alternately under one another so as to fill a space. Miss James has
asked the girls to make linen covers for their cooking notebooks. They
decide to put their two initials on the cover and to work them in outline
stitch. The sketch (Fig. 92) shows how they will make them within an
oblong which is also to be outlined. The darning[153]
stitch will be used as a background to make the initials stand out. It is
a fine running stitch. Any design can be made to stand out by arranging
the darning back of the outlined design. The notebooks will be covered so
that the covers may slip off. This is done by overhanding the edges and
slipping the cover of the book into the pocket formed by the overhanding.
The cover is all in one: a straight piece folded back inside the cover of
book and overhanded at the folds, to hold the book. The picture (Fig. 93)
of baby's bib also shows the use of the darning stitch to make a design
stand out. This is a bib used by little Alice Allen. Marjorie made it for
her, when she was two years old and had a birthday party.

Fig. 93.—The darning stitch makes the
design of the rabbits stand out.
EXERCISES AND PROBLEMS
1. Make a design for your notebook cover.
2. Calculate size of piece of material needed, if both covers are
9 X 6. Allow ½ inch turnings all around.
3. Try to plan a design with a background of darning stitches.
Perhaps you can use it on a Christmas gift for brother.
[154]
REVIEW PROBLEMS
I. Plan a gift for father's Christmas on which the darning or
cross-stitch is used.
II. Look up the story of the history of silk culture and write a
story to be read in school. Perhaps it may be as good as the one
Barbara Oakes wrote. Her story was printed in the "Pleasant
Valley News."
[155]
CHAPTER IV
THE PLEASANT VALLEY GIRLS LEARN TO CARE
FOR THEIR CLOTHES AND TO HELP REPAIR THE
HOUSEHOLD LINEN.
Have you ever noticed that some houses where you visit are always
neat and look well cared for, and that the towels and table linen are
carefully darned or patched? Have you seen what a difference there is
in the appearance of the people who do not care for their houses and
clothing, and those who do? The latter are apt to wear neat-looking shirt
waists, to patch the worn places and darn the holes before they are too
large, and to sew on the buttons before they are lost. The little word
C-A-R-E is responsible for the difference. Have you learned to help at
home to repair and care for the clothing and household linens? "A stitch
in time saves nine." It often saves money and time, too. Do you know
why? Learn how. The Pleasant Valley girls learned to darn and patch and
occasionally Miss James had a "repair day," when all were permitted to
bring their mending. Can you do this at your school?
[156]
Lesson 1
CARE OF CLOTHES
What are some of the things to learn in order to care for one's
clothes?

Fig. 94.—Ethel Allen remembers
about the lesson
on neatness. She is
removing a spot.
Marjorie Allen's Cousin Ann, who lives at Paterson, New Jersey, spends
her summer vacation with Marjorie at Pleasant Valley. Marjorie knows that
she earns ten dollars a week at the office and pays all her own expenses.
She always looks very neat and well dressed. What is the secret? She has
learned how to spend wisely and how to care for her clothing. She learned
much of this at school, and experience has taught her how to manage.
Suppose we learn, too, so as to be able to care for our clothes. Here are
some of the things Marjorie's cousin learned:
1. That clothes, if well brushed, look
better.
2. A well-pressed suit or skirt lasts longer
and looks neater.
3. Stains or spots spoil one's neat appearance and look careless.
4. A patch or a darn is no disgrace. They make one feel more
self-respecting than holes or tears. They help to increase the life
of a garment, too, if taken in time.
5. That being careful each day saves much time; a little care
is worth while.
[157]
Let us study to-day how to do some of these things. Perhaps we can
clean our school coats or some wool garments brought from home.
Brushing clothes. Many people who live in large cities do not
have gardens and yards where they can hang their clothes and brush them.
Often brushing and cleaning must be done on the roofs of houses. How
glad we should be for space and a chance to keep clean. The Pleasant
Valley girls have studied about this. Do you know that it costs to keep
clean? It takes time and energy and much thought. People who live in the
country can keep clean more easily than city people. This is a good way
to air and brush your cloth garments: Hang them on the line, and beat
with a clothes beater. Turn the cuffs or collars and pockets inside out
if possible. Brush with a whisk brush carefully all over. Shake free
from dust and let them hang in the sunshine. They will smell sweet and
clean.
Pressing suits and skirts. A suit or skirt which is kept well
pressed has a neater appearance and keeps its shape for a longer time.
Tailors do this work; but one can learn to do it at home, if no tailor
is near, and can save the money, too, if one has the time. It is a good
general rule to press on the wrong side unless one is using the steaming
process. Then, one presses on the right side, over dampened cloth. Wring
the cloth, place over a portion of the garment, and press with hot irons
until nearly dry. After steaming the garment all over on the right side,
turn to the wrong side[158]
and press dry. Woolen goods will mark or shine if pressed on the right
side without a cloth. This pressing will add to the life of a suit. Good
press boards, tailors' cushions, and sleeve boards help very much if one
has them.
It is always wise to examine clothes before pressing and to remove any
spots which have accumulated. Grease, milk, oil, sugar are common spots
which girls are apt to get on their woolen clothing. The Pleasant Valley
girls studied how to remove these.
Removing stains and spots. Woolen goods which are soiled and
badly spotted can be cleaned by washing in warm water with soap solution
or soap bark. Here are some recipes for making soap solution or soap
bark:
Soap Solution. Simmer (do not boil) one cake of white soap in
two or three quarts of water.
Soap Bark. 1 cup of soap bark or powder in three or four quarts of
water. Let it stand two hours. Strain and pour into the lukewarm water
in which the material is to be washed. Why is lukewarm water used? Wash
and rinse carefully. Always use water of same temperature for rinsing.
What would the shock of cold water do? Bath temperature is about
right.
All woolen garments should be washed and rinsed carefully in lukewarm
water only. Some day we shall try at school. Good pure white soap is best
for woolens. Why do woolens shrink in hot water? Why are they difficult
to cleanse?
Let us examine the school coats to see if we can find[159]
grease. As a rule grease spots can be removed by washing with soap
solution and lukewarm water. Wagon grease can be removed with lard;
then wash in warm water. Grease may also be removed by dry cleaning, or
chemical cleaning as it is called. The cleaning liquid may be benzine or
ether. This is a warning: D-A-N-G-E-R. These must not be used near fire
or an explosion will occur. A bad accident occurred at Pleasant Valley in
just this way when Mrs. Leroy was cleaning her white gloves. Rub the spot
on the wool garment with a cloth or sponge wet with benzine. The grease
or fat spreads when dissolved; a piece of blotting paper under will help
to absorb some of the grease. Care must be taken to use fresh benzine as
each rub removes some of the fat, which will spread if rubbed in again.
It is usually wise to use as a sponge a piece of the same material. Rub
towards the center so as to avoid a ring. The spot cleaned will usually
be lighter than the rest of the garment, which is apt to be soiled.
Sometimes by rubbing the surface near the spot all over, the ring will
not be noticeable. Another way to remove grease is to try a warm iron
and a blotting paper. Place paper on right side, iron on the wrong side
of the cloth. This will remove some grease spots, as the blotter absorbs
it.
Marjorie Allen discovered that sugar spots can be removed with warm
water. Dip cloth in water and wash thoroughly and rinse before pressing.
What does the warm water do to the sugar?
[160]
Milk spots can be removed from some materials with cold water and pure
white soap. Why cold?
Machine oil spots can be removed by washing in cold water and pure
white soap. This will remove most machine oil spots. Barbara Oakes got
some oil on her nightdress while making it, and removed the oil easily in
this way.

Courtesy of Miss Alice Blair.
Fig. 95.—Which way do you arrange clothes in your closet?
These simple rules will help every girl to be neat. Let
us see how many garments you can clean at home after
you have learned to brush, clean, and press one at school.
[161]
Protecting clothes. Marjorie's cousin takes good care of her
clothing while it is in use. When she works about the house she always
wears an apron. Do you? This saves a great deal. You know how to make
some attractive ones.

Fig. 96.—A useful cover to
protect your best dress.
When she removes her clothing it is not thrown in a heap, but is
hung up on skirt or coat hangers. They are very cheap or one can make
them. Barrel staves or even rolls of newspaper, rolled securely and
covered may be used as coat hangers, a cord or ribbon may be tied at
the center. Nails between two points in a closet will keep the bands of
skirts extended, when loops are sewed to the bands. Marjorie's cousin
always airs her clothes at night (Fig. 56), and when necessary washes her
shields and hangs them up to dry. Many girls do not realize how necessary
this is. The odor of perspiration is not neat and is offensive to others.
If one washes one's self carefully with warm water in which borax has
been dissolved this odor will not be noticeable. Marjorie noticed that
her cousin has covers over her good clothes (Fig. 96). This saves a great
deal. Also she is particular about sewing buttons on her[162]
shoes, and braid on her skirt when it is torn. She also washes the yokes
of her dresses and sometimes her own shirt waists. She is going to teach
Marjorie to do this. Some day we shall learn at school. Do you know that
Marjorie discovered that the people at the summer boarding houses near
have difficulty in having their dainty shirt waists carefully laundered.
She is going to practice during the winter and next summer she will earn
some money in that way. It is a good idea. Perhaps some day she may have
a laundry of her own, if she is a good manager and can have help to work
with her.
Fig. 97.—Cousin Ann thinks about
these things.
Cousin Ann told Marjorie that each winter she is particular about
buying a pair of rubbers. She finds they save her shoes because they
prevent the dampness and wet from rotting the thread of the shoes. She is
particular about having her heels straight. Cousin Ann believes that many
girls lose good positions because they are not clean and neat about their
personal appearance. Run over heels are not neat. Ann is careful about
having her shoes resoled when necessary, and so lengthens their life. She
wears an old[163]
pair of shoes on rainy days with her rubbers. Ann knows that wet feet are
dangerous. One may not feel the results at once, but sometime the effect
on health will be felt.
Next lesson let us learn how to keep our clothing darned. You may
bring any garment or towel or other piece of household linen which has a
tear, and we shall learn to darn it.
EXERCISES AND PROBLEMS
1. Carry some of your clothes to the back yard. Brush them,
and hang them in the sunshine.
2. Try at home to press your wool skirt. Steam it; it is not
difficult to do.
3. Do you know of any other way besides those Cousin Ann
tried, of keeping your clothes clean so as to prevent them from
getting spotted?
4. Do you not think that knowing how to launder shirt waists
carefully would be a good way to earn money when the summer
boarders come to your town?
Lesson 2
LEARNING TO DARN STRAIGHT TEARS
What threads of the cloth are torn, in a square tear? in a straight
tear? How can we replace these threads and prevent the article
from tearing further?
[164]

Fig. 98.—These tears run in different directions. Which kind
of a tear will you have to darn in your dress?
There is always a collection of garments needing repairs in any
home where there are boys and girls. What a help it will be to mother
to have some one who can darn some of the tears. Mrs. Alden was very glad
that Florence was learning to darn, for she has so many things to patch
and darn for her family. How many different kinds of tears have been
brought to-day?[165]
Yes, here is a straight tear on this napkin; yes, two straight tears.
Who can tell which threads have been torn in this first tear? Find the
selvedge; the tear runs across the selvedge. In the second straight tear,
the tear runs up and down with the selvedge, or warp. Which threads have
been torn? Here is a garment with a square corner tear. John Alden tore
his overalls climbing over the barbed wire fence. In this tear which
threads have been torn? So we see that in some tears, the warp is torn;
in others, the filling threads; and in others, like the square tear, both
warp and filling threads. Now darning means putting back the threads
which have been worn or torn away. Miss James told her class it is very
useful to keep some black and white wash net in the mending basket. A
little piece basted under the worn or torn place to be darned is a great
help; for it reënforces the weak place and makes it last longer. It is
put on the wrong side of the article to be darned. The picture (Fig. 98)
shows two straight tears: a slanting one, and also a square corner tear.
Everyone knows how to make the running stitch. Darning is fine running.
Begin without a knot and a little beyond the tear for strength. Fill in
the missing thread with rows of stitches close together. The stitches
should extend far enough each side of the tear to take in the worn part
also. In turning at the end of each row, leave a tiny loop. Why? Do not
leave a very large one, but simply one large enough to allow for[166]
stretching and pulling in washing. In passing over the threads at the
torn place, try to make the stitches hold down the threads. In finishing
extend the rows beyond the tear as at the beginning. Either a warp or
woof straight tear is mended in this way. A square tear is a combination
of the two. At the corner there will then be both warp and filling
threads and a double darn like a weave. Can you see from the picture how
this will look? The thread should match as nearly as possible. Sometimes
horsehair or human hair makes a good darning thread when one does not
wish the darn to show, or split silk thread or No. 150 cotton. Ravelings
of the same cloth are sometimes used. The size of the needle will depend
on the fineness of the cloth to be darned. No. 8 is right for ordinary
darning.
Where can you use this darn? Is it the same as stocking darn?
Next lesson every one is to bring from home a stocking, white, brown,
or black. Can you mend one at school to surprise mother or father or
brother? The Pleasant Valley girls did. Mr. Allen said Marjorie darned
his socks so well that he couldn't even feel the darn when he walked!
EXERCISES AND PROBLEMS
1. Show mother how you can mend a straight tear by mending
one for her at home. Perhaps there is a straight tear in her dress,
or in a towel or napkin.
2. Why is it worth while to mend it?
[167]
Lesson 3
DARNING STOCKINGS
We all have stockings to darn each week as they come from the
laundry. Do you mend the small holes at once, or let them grow
larger?
It is always a saving of time and energy to take care of the small
holes; small ones grow to be larger ones if one is not careful. It
pays to mend at once. We will learn how to mend stockings.

Courtesy of H. Brinton Co.
Fig. 99.—The knitting machine.
Caps, stockings,
and underwear are made
on similar machines.
Stocking darning differs from darning the straight or the square
tear, because, as a rule, there is a hole in the stocking. The stocking
material is worn away, and it is necessary to replace it with a small
piece of weaving over and under of warp and filling. A patch or extra
piece of material might be placed under the hole, but that would be
uncomfortable; so a woven piece is put in. The stocking is made of
knitted material called stockinet, not of woven cloth. How do they
differ? Can you think of other articles of clothing made of knitted
material? Yes, mittens, sweaters, caps, underwear. Have you ever seen
a knitting machine? Here is a picture (Fig. 99) of one showing how the
stocking is knitted in the factory to-day[168]
on the knitting machines. In weaving there are two threads. What are
they? In knitting there is only one thread; just like grandmother's
knitting of the stocking round and round as the tiny loops are formed.
Have you ever torn your stocking in a loop and had it run right down the
whole leg of the stocking? Barbara Oakes had this experience. That shows
how the tiny loops are made. If one catches the loop, the raveling is
prevented.
This is how we shall darn our stockings. Use single or double
darning thread, according to the fineness of the stocking, and a darning
needle. Can you thread the big eye by doubling the end of the thread?
Begin on the wrong side without a knot, about ¼ of an inch to
the right of the hole. The stitches are the same fine running as for
other darning, and the rows made close together. Look at the picture
(Fig. 100). The darn is about diamond shape when finished. Why? This
prevents the strain from coming on any one row of loops. A tiny loop is
left at each row in turning, as stockinet is a stretchy material. This
darning should run the same way as the loops, up and down the material.
Care must be taken at the hole. If possible, pass the needle through the
loop at the edge of the hole and extend the thread across the hole to the
loop opposite, and continue with the darning stitch. When the warp is all
in, there will be rows of threads close together extending across the
hole. In fine darning or when[169]
one is darning sweaters or gloves, all the loops at the edge of the hole
should be carefully caught. For everyday stocking darning, one does not
have time to stop for every loop at the edge of the hole.
Fig. 100.—A, the wrong side of the stocking darn putting in the first set of
threads; B, weaving in the second thread.
As we said above, the hole is to be filled in with a piece of woven
material which we are making. The warp (Fig. 100 A) has all been put in;
then we must go over part of the darn and fill in the cross threads,
which are woven over and under the warp threads which have been put in
at the hole. The running stitch is used. The sketch (Fig. 100 B) shows
the portion of the darn to be covered with the running stitches, and just
where the weaving is to be done. You will notice that the first row of
crosswise running stitches is placed a little[170]
below the hole, and the last row extends a little above. Why? At the hole
one must go over and under the warp, alternately, as one does in weaving.
This is all done with one thread which is carried in fine running
stitches to the hole, then passes over and under the warp threads, and
continues with running stitches at the other side of darn; turns with a
tiny loop, continues with running, and again passes over and under the
warp alternately. This is continued until the darn is completed.
Sometimes there are tiny rips in the seams of stockings. They
can be overhanded carefully on the wrong side, taking up only the very
edges of the seam so as not to make a ridge. If the long ladders which
sometimes come in stockings are not too wide, they can be overhanded
together on the wrong side; or, if one has time, they can be darned as a
hole. As a rule this is a waste of time. A worn place near a hole should
be included in a darn, or where several small holes are close together,
darn in one large darn.
What kind of stockings do you buy? Marjorie's Cousin Ann says
it does not pay her to buy very cheap stockings, at 15 cents a pair,
or very thin ones either. She has discovered that if she pays 25 cents
a pair or a dollar for three pairs of a good make, and cares for them,
watching when the tiny holes appear, that she can make six pairs last a
whole year. Ann says that the girls who buy the very thin transparent
stockings are buying stockings all the time; and then, too, they[171]
are often ridiculed by others. One is not well dressed when one is
conspicuous and when one's clothing is noticed and criticized in such a
way.
Next lesson you may bring a stocking which has been darned at home.
Credit will be given for this. Do you think you can darn one all alone?
It is not difficult if one follows carefully the description above. You
may also bring a linen towel or napkin or tablecloth which has a hole.
We shall learn how to patch the holes. The Pleasant Valley pupils had
a darning contest. Mrs. Allen was invited to be the judge. Who do you
suppose made the best-looking stocking darn? Mollie Stark won.
EXERCISES AND PROBLEMS
1. Darn one of father's socks or baby sister's stocking or any
other you can at home. Surprise mother by showing her how
well you can darn, after your school practice.
Lesson 4
PATCHING SAVES CLOTHING AND OTHER ARTICLES
Some holes are too large to darn; they are, then, repaired with
a patch. Would you like to learn how to patch?

Fig. 101.—The patch as it should look on the wrong side in process of hemming.
How to make the hemmed patch. A patch is a
piece of cloth cut larger than the worn hole and used
to cover the hole. The hemmed patch is the simplest
and most useful. It is sewed with the hemming stitch
and so called the hemmed patch because all the rough[172]
edges of the patch are turned under and hemmed flat.
This kind of patch is used on garments or household
articles which are to be laundered. It is a good one
for towels, napkins, or tablecloths, and for underwear.
Perhaps you have some tablecloths, napkins, and towels
which have been brought to patch to-day. Miss
James brought some for her class. For patches some
girls brought pieces as nearly like the towels and napkins
which they brought as possible. It is better to patch
with material which has been used, than with new
material. Why? The hemmed patch is always put
on the wrong side. Cut a square or oblong piece which
will cover the hole, and extend beyond the worn part.[173]
Allow ¼ inch extra all around for turnings. Crease this
patch diagonally. Find the center of the hole of the
worn article. Crease it in diagonal lines for a square
or oblong, according to shape of place to be patched.
Pin patch on wrong side so that diagonal creases of
patch fall on diagonal creases of the article. Turn to
right side. Cut the hole, removing all frayed edges
until it is a true square or oblong, measuring from
the center where diagonal creases cross. After cutting,
make a tiny slanting cut from 1⁄8 to ¼ inch at each corner
on the diagonal creases of the article, and turn under
these cut edges. Pin and baste carefully. Turn to
wrong side. Hold to light to see if the patch is the[174]
same width on all sides of the hole. Trim if necessary.
Remove pins, flatten, turn edges of the patch by
opposites, and baste. The hemming stitch is then used
on both the right and wrong sides of the patch to hold
the edges. This patch is laundered flat and neat. For
next lesson we shall study about the table linen and
towels. We know that some of them are linen. Where
does linen come from? Do you know whether it is a
plant or an animal? There are several reference books
on the shelf. See how much you can discover about
this secret.

Fig. 102.—Hemming the patch in place, on the right side.
EXERCISES AND PROBLEMS
1. Practice making a hemmed patch at home. Mother will
surely have a tablecloth or an undergarment or an apron which
needs a patch. Try to keep the patch very flat.
2. See how much you can learn about linen before next lesson.
Lesson 5
THE STORY OF HOW LINEN IS GROWN
What is the story of our linen materials?
Where do they come from? Would you like to know?
Mollie's Stark's Uncle John has just come to Pleasant Valley. He is
her father's brother and has been in the linen business in Ireland. He
told the Girls' League the other evening about flax and about how it is
made into cloth. This is the story he told. It has also been printed in
the "Pleasant Valley News." Have you read it?
[175]
Where does flax grow? Ireland is a cool country, and flax is
a plant which grows well in cool places. Cotton, we have learned, is
grown in warm countries. Do you know that Russia produces about half
of the world's supply of flax? Find your map of Europe, and see if you
can locate all these countries. The Russian flax is rather inferior in
quality. Ireland and Belgium produce the best quality of fiber. Flax is
also grown in Holland and France, and in Egypt and Italy. The United
States grows some flax; but it is a rather coarse fiber used for crash
and for bagging. The United States grows very little flax and only
for the coarser purposes. This is for the reason that labor is very
expensive; and flax, like silk, needs much care if weeded and grown for
fiber. The care of the worms makes silk expensive. Flax grown for seed or
coarse purposes does not require so much care.

Fig 103.—The flax
plant grows 20 to
40 inches in height.
What is the flax plant? Perhaps your teacher will buy some flax
seed which you can plant in the school garden. The Pleasant Valley girls
did, and it grew quite tall. Then you can really see how the growing
plant looks. Your teacher will have some dry flax to show you. Do you
know how a waving field of wheat or oats looks? Flax is planted thickly
when it is grown for its fiber. It comes[176]
up straight like the wheat and does not branch. When it is planted for
its seed, it is not planted so thickly because it must have more room to
branch and bear seed. Flaxseed is used for many purposes. Flaxseed, or
linseed, oil is used for paints and varnishes, and even for food, in some
countries. Like cotton seed, the dry cake, or meal, left is a valuable
food for cattle. Has mother ever used the oil or the meal for anything at
home?
The flax plant as it grows is from 20 to 40 inches in height. It has
lovely little blue flowers on the stems which branch at the top. Uncle
John knew a little girl at Pleasant Valley who thought the flax came from
the little brown seed pods on top, just as the cotton comes from the seed
pod, or boll. It does not; for the flax fiber is the part of the long
stem which grows just inside of the outside woody portion. So, you see
flax fibers can be from 20 to 40 inches long, according to the height of
the plant. The wonderful part of the story is how the fibers are removed
from the long stems.
How is flax grown? Flax requires much hand labor in its care
while growing. The women and children in Europe weed it and care for it,
on their hands and knees. When it is full grown and the flowers have come
and gone, the tiny seed pods grow where the flowers have fallen, just
like the seed pods your peonies or poppies grow. Before the seeds are
quite ripe, and while the stalks are brownish yellow, the flax is ready
to be pulled. It is not cut like wheat with the reaper and gathered into
bundles, but must be pulled up by[177]
the roots. This is done in clear weather, by hand. The pulled flax is
laid on the ground with the roots together and the stalks parallel. The
stalks are then bound something like the wheat, and stacked in stooks.
You have often seen oats or wheat so stacked.

Courtesy of United States Department of Agriculture.
Fig. 104.—The stooks of flax.

Courtesy of Speyer School, New York.
Fig. 105.—This little girl is rippling flax
by hand at school. Can you see the
seeds?

Courtesy of Woolman & McGowan, Textiles.
Fig. 106.—Flax retting at Courtrai, Belgium.
What is rippling and retting flax? The next process is to
remove all the seeds without injuring the long fibers. The machine for
this looks like a comb made of iron teeth set in a wooden frame. This
frame is placed on a cloth so as to collect all the seed as it falls.
This is called rippling, and is done in the fields. The seed pods are
drawn across the teeth which remove[178]
the seeds. Then the flax is bound in bundles for the next process, which
is retting. This is really the most important part of all, for it means
rotting the outside woody portion of the stem so as to get the flax
fiber. This woody portion is of no value. The flax is sometimes retted
by dew; just left on the ground at night. You know how wet the grass can
be early in the morning. So the dew, rain, air, and sunshine decompose
the outside woody bark. This is a very slow process. More often flax is
retted in water. The bundles are[179]
placed in crates or boxes, and left for about two weeks under water.
If you grow some flax, you can ret it also and remove the fiber. Do
you know what takes place when the woody part decomposes? It is called
fermentation. What have you learned about fermentation? (See Food and
Health.) After retting, the flax is spread to dry in the fields and
is then ready for the next process, called breaking. Just think of how
many things have been done to the fibers of our linen towels and napkins
and dresses, which we use every day. Jane Smith said she never realized
before how many hands prepare our clothing and other materials.
Courtesy of Speyer School, New York.
Fig. 107.—Flax breaking done by hand.
What is meant by breaking flax? Breaking means removing the dry
wood portion which has been decomposed by the retting. This is sometimes
done by means of a hand break. In the picture (Fig. 107) you will see a
little girl of Pleasant Valley breaking flax by hand. Sometimes the woody
part is broken away by passing the flax between rollers of a machine
which is run by power. These power mills are called scutching mills;
scutching means cleaning and[180]
breaking. After this process the flax lies in long bundles of parallel
fibers, something like a girl's hair as it is ready to be braided. The
flax varies in color; sometimes it is gray or of a greenish tint, and
sometimes pale yellow.

Fig. 108.—Flax fibers magnified.
If you have a microscope or a glass at school, examine the flax fiber.
See how it looks, rough and woody. It also looks something like the silk
fibers, straight. It has tiny markings or spots called nodes. Flax is
principally cellulose. Do you know what cellulose means? Look it up in
the dictionary.
So you see that the long fibers are freed from the stem of the flax
plant and are ready for the manufacturer to spin into yarn to be woven
into cloth, or to make it into cord, rope, twine, lace, or thread for
many useful purposes. Isn't this an interesting story? Flax cultivation
is one of the most ancient industries. Think how very useful it is, both
for fiber and for seed. It has been grown for at least 5000 years in
Egypt and in Assyria. Do you remember reading about the ancient mummies
which have[181]
been found wrapped in linen in the tombs of Egypt? In the Bible, chapter
xlii of the book of Genesis, we are told that Pharaoh arrayed Joseph in
vestures of fine linen. Do you know of any other Bible references which
tell of the use of linen in ancient times? Have you ever heard of the
Swiss lake dwellers? Perhaps your teacher will tell you about them, or
you can look it up in the encyclopedia. They too used linen long ago, for
pieces have been found and are in the museums in Switzerland.

Fig. 109.—The mummies of
Egypt are found wrapped in
linen cloth made from flax
long ago.
Next lesson we shall make a large chart for the schoolroom, which
will tell the story of flax. You may bring anything which you think will
help to illustrate that story. We shall also mount on the chart the most
common linen materials which we use in our homes.
EXERCISES AND PROBLEMS
1. Examine a flax fiber with a microscope or a magnifying glass.
What do you see?
2. Look up references which prove the age of flax culture.
3. Perhaps some one near your school has been in the linen
business in Ireland. Perhaps he will come to the school and tell
the boys and girls about it. Try to find some one.
Lesson 6
COMMON LINEN MATERIALS ARE IDENTIFIED
Can we learn to identify at least eight of the common linen
materials?
To-day we shall study about the different linen materials,
and then see what we have to mount on our[182]
school chart. If you prefer, you may make a book of linen materials like
the cotton and silk.
Let us divide the pieces which have been brought to school into
two piles: the thin, and the thicker ones. We have more of the thick
ones. Yes, we all know the heavy coarse linen is called Russian crash.
We used it for our porch cushions or covers. It comes from 18 to 36
inches in width and costs from 15 cents a yard up to 75 cents sometimes.
We know it is used for dresses, and sometimes for toweling and upholstery
uses. It is unbleached in color.
This wide sample is linen sheeting. Our great-grandmothers always
had linen sheets of flax which they grew, spun, and wove, because long
ago cotton was not grown. Some of the Pleasant Valley girls saw these
sheets which Grandmother Allen made. Sheeting comes in several widths,
and costs about $1 per yard up. Cotton sheeting is cheaper.
The one thin one is handkerchief linen. It costs from 60 cents to
$2.00 per yard. What kind of a weave is it? What is it used for? The
other thin piece is called batiste. It, too, is used for waists and
dress linens, and it is fine and sheer. It can be used for handkerchiefs
too. It costs about $1.00 per yard up, according to the fineness, and
is 1 yard or more wide. Batiste is made of cotton, also, and is then
cheaper.
The weave of this piece is different. You have a
cotton sample of the same weave. Yes, it is called[183]
bird's-eye pattern. It is used for toweling and costs about 30 cents
per yard, 24 inches wide.
Here is another piece used also for toweling. You all know its name.
Huckaback is correct. We have also cotton huckaback, and some huckaback
made of half linen and half cotton. It is woven in a pattern which
absorbs easily. The filling thread shows more on the surface than the
warp threads. It is woven 18 inches and wider, and costs 15 cents up.
Every one knows this one. Our tablecloths and napkins are of damask.
It is a lovely material made in beautiful patterns. Sometimes it is all
linen and sometimes a mixture. There is also cotton damask for table
napkins and cloths. It is much cheaper. The cloths are woven 1 yard wide
or wider, and for damask towels from 16 to 36 inches. One can spend a
great deal for beautiful damask towels and napkins.
This plain coarse linen is called butchers' linen, because it wears
very well and butchers sometimes have their aprons made of it. It is
used, too, for dress skirts, and is very satisfactory. It is woven from
27 to 44 inches in width and costs from 40 cents to $1.50 per yard.
The heavy stiff piece is a linen canvas and is used by tailors for
the interlining of cuffs and collars of coats. It costs 25 cents per yard
and is 27 to 36 inches wide.
Suppose our chart is 24 × 20 inches. Perhaps a cardboard or cover of
an old box will do if your teacher has nothing else. Put two holes near
the top in the[184]
middle of the 20 inches side and run a cord through for hanging. At one
edge down one side place the common linen materials with their names and
uses, etc.
Let us see what the girls have brought. Here is a bottle of
linseed oil. Yes, and some flax seeds. Jane has brought a linen collar.
Here is a small china doll wrapped as a mummy. Marjorie's grandmother
has sent some flax which she grew and prepared herself, and a piece of
an old hand-woven towel which she made when a girl. And here is some
hand-spun flax! Notice how rough it looks. We have, also, some cord and
twine and some linen thread. Do you know that Paterson, New Jersey, where
Marjorie's Cousin Ann works in the silk mill, is also a great center for
linen thread manufacture? Thread is made by twisting fine yarns together.
The twisting makes them strong. They are then dyed or bleached white.
Much of our linen thread is unbleached in color. Why?
Suppose we draw a picture of the flax stalk and flower on our chart
and fasten some of the school-grown flax to it. All the other things can
be arranged and fastened too, by punching holes in the cardboard and
tying them on with cord.
What an interesting story it makes. Perhaps the children of the lower
classes would like to hear the story told by one of the seventh grade
girls some morning.
Next lesson you may bring any table linen or towels which are stained;
and we shall learn how to remove the stains.
[185]
EXERCISES AND PROBLEMS
1. Draw a picture of the flax plant, and color the flowers with
your crayons.
2. Prepare the chart telling the story of flax.
3. Look up the story of how linen thread is prepared.
4. See how many linen materials you can find at home.
Lesson 7
REMOVING COMMON STAINS FROM TABLE LINEN
Some of the common stains one finds on table linen are coffee,
tea, fruit, rust, or grass stains. Do you know how to remove them?
When should stains be removed? A good housekeeper always looks
over the clothing and household linens before putting them to soak. Mrs.
Allen says she usually does this on Monday. Do you know why? She spends
this day getting ready for wash day. She bakes and prepares certain
foods for her family for two days; and so the work is easier on Tuesday
and Wednesday, when she washes and irons. Fruit, coffee, or tea stains
on linen should be removed as soon after the stain appears as possible.
If this is not done, then certainly the stains must be removed before
putting the linen into the tub. White clothes are boiled. What will this
do to the stains if they are not removed?
How can stains be removed? Let us try to remove these spots one
at a time. I think we have six or seven different kinds on the articles
which have been brought[186]
to school to-day. Your teacher will show you how to follow the
directions.
Coffee and tea stains are the most common on table linen. To remove,
wash in lukewarm water, and then dip in a solution of washing soda, and
rinse very carefully until all soda is removed. (Washing soda solution
is made of one pound of washing soda to one gallon of water. This can be
kept in glass jars and used when occasion demands.) Tea stains are easily
removed by brushing the spot with glycerine and then washing carefully
in warm water to remove the grease. Rubbing the spot with the bowl of a
spoon is a good way to put on the glycerine.
Fruit stains are also common. An easy way to remove them is to
stretch the fabric, if it is white, over a bowl and pour boiling water
from a height, through the spot. On white wool or silk, lukewarm water is
sometimes all that is necessary; or lukewarm water and a little borax. If
the fruit stains are on colored garments, they are difficult to remove
on account of removing the color also. If the article is of much value,
consult a professional dyer if possible. It is wise to experiment on
the material on another part of the garment, as the inside of a hem or
facing. Make a similar spot and try to remove with different methods.
Often one can discover a way, through experimenting.
Rust stains often appear on table linen or white clothing. To
remove, wet the spot and apply a few drops of oxalic acid or salts of
lemon or cream of tartar[187]
solution, and wash thoroughly. On colored or wool goods of good quality,
one must decide whether one prefers the stain or the color removed. Water
and lemon juice will generally remove the spot, but may take the color
too. Care is necessary for colors.
Grass stains are also common. If the stains are fresh, cold water
will usually remove them. When on white goods or material which cannot be
washed, alcohol may be used. When color will stand it, dyed fabrics which
are grass-stained can be washed with water and a little ammonia, followed
by warm soap solution and careful rinsing.
Here is a garment which has both ink and blood stains on it.
Marjorie must have cut her finger. Blood stains when fresh are easily
removed with lukewarm, not hot water, and a little ammonia. When on
colored silk, wash carefully with lukewarm water only. The ink stains are
more difficult, because the composition of inks varies. Wash at once in
cold water; this often removes some spots. Sour milk or several rinsings
in sweet milk may cause the spot to disappear. Then wash in warm water
and soap to remove the grease. If this does not remove it, try a paste
made of starch, salt, and lemon juice except for colors. If this will
not, try Javelle water. This can be obtained at a drug store. Wash the
spot in the Javelle water, but rinse very quickly and carefully. Repeat
until the spot disappears. These directions are for white materials
only.
[188]
How many would like to try to remove some spots at home, before next
lesson? You may report your successes or failures, and we shall try
to learn the reasons for them. Next lesson we shall learn to wash and
iron this table linen. It will be well to keep it at school until next
lesson.
EXERCISES AND PROBLEMS
1. How many spots have you been able to remove? Tell of
your successes or failures.
2. See if mother or grandmother has any better recipes than
you have learned for spots.
Lesson 8
LEARNING TO WASH AND IRON TABLE LINEN OR BED LINEN
We have studied many things about cleanliness, and we all know how
much cleanliness of clothing and household linen adds to our comfort.
We have learned that sometimes we can wear our underclothes without
ironing and that towels can be washed and dried and will smell sweet
and clean even if not ironed. Table linen, though, must be washed and
boiled and ironed to look well. Our lesson to-day is about how to do
this.
The linen, as well as the cotton, are, as you know, vegetable fibers.
They are strong and able to resist heat and the friction from rubbing.
They have resistance for chemicals also. So cotton and linen may be
boiled, starched, and ironed with hot irons because the fibers are
strong. They may also be treated with acids of a dilute nature when
necessary to remove spots,[189]
as we have learned. For the usual grease spots on the family tablecloths,
soak the cloth in soda water to remove grease (one cup of soda—the
dissolved solution—to a pail of water, see page 186).

Fig. 110.—Mrs. Stark washing out of doors on a warm day. This is the old
way. She has just bought a washing machine.
The processes for washing and ironing. If the stains have
been removed from the table linen, it can then be soaked. Soaking
helps to loosen the dirt when soap is added before the soaking. It
is then unnecessary to rub them as much, and so materials are saved
from wear. These are the processes for washing and ironing: soaking,
washing, rinsing, boiling, rinsing, bluing, starching, hanging, drying,
sprinkling, pulling, folding, ironing.
[190]
1. Soaking. Soak the table or bed linens about 1½ hours in
cold or lukewarm water. Soap is really not necessary as the linen
is not very dirty. All stains should have been previously removed.
2. Washing. Wash with soap on both sides, rubbing on clothes
board or in washing machine. Use hot water.
3. Rinsing. Rinse and soap again to be placed in the boiler.
The dirt is carried away by this rinsing.
4. Boiling. Put the soaped articles in clear cold water. Boil
briskly for five minutes. Add enough soap to keep a suds while
boiling; save small pieces for this purpose. Stir clothes and press
with a stick. Remove from boiler, after boiling actively for five
minutes. Put in clean hot water, then in cold. Rinse once or
twice again thoroughly before bluing.
5. Bluing. Make the blue water from some good blue. Do not
make it too deep. Test on a small doily. Stir the blue before
each article is dipped, so it may not appear streaked on the clothes.
If articles are very yellow it may be necessary to let them stand in
the blue for a little while. If not yellow, dip two or three times.
The next process is starching; but it is not as a rule necessary
to starch napkins, tablecloths, or bed linens.
6. Hanging. Hang very straight after stretching. Do not
pin at corners. Hang ⅓ of the napkin or tablecloth over the line.
7. Sprinkling. Table linen must be sprinkled evenly. Sometimes
it can be taken from the line when half dry, and the process
of sprinkling omitted.
8. Ironing. Linen should be ironed damp and until dry. This
makes the pattern stand out and gives a shine and gloss to the
linen. This takes the place of starch.
9. Folding. Iron napkins partly dry on wrong side; then turn
to right side, and iron dry. Fold edges evenly. In the lengthwise
fold do not fold quite to end, as in the final fold the napkin, handkerchief,
tablecloth, or sheets will appear uneven at the edges.
Fold the tablecloth, or napkins with selvedges together. Tablecloths
may be folded with three, or four, long creases.
[191]
EXERCISES AND PROBLEMS
1. Try to wash and iron the napkins for mother.
2. Try to wash and iron some towels or pillowcases. Is the
process different?
3. Why is it unnecessary to iron some clothes if one is very
busy. Can you give a good reason why it is hygienic not to iron
them.
Lesson 9
THE STORY OF THE MANUFACTURE OF LINEN YARN INTO CLOTH
To-day we are going to study again about our linen tablecloths
and napkins, and learn how the flax fiber is made into cloth
after it has been cleaned at the scutching mill.

Fig. 111.—The flax wheel.
Combing and spinning flax. Uncle John divided his story in two
parts, and told the Pleasant Valley Girls' League about the manufacture
of flax as well as about its growth. The scutched flax is delivered to
the manufacturer. He must first spin the flax into yarn before it can
be woven into cloth. The flax fibers measure from 20 to 35 inches in
length. How are they to be made into one continuous piece for spinning?
The pictures (Figs. 112 and 113) will give a very good idea. Long ago
grandmother or great-grandmother spun the yarn for the linen sheets on
the flax wheel. Marjorie's grandmother sent her old flax wheel to school
for the girls to see. The flax is here on the distaff. If you haven't
a wheel at your school, look at the picture (Fig. 111). The woman is
holding the flax fibers which come from the distaff; and, as her foot[192]
turns the wheel and the flax in her fingers is fed to the spindle, it
is twisted. Spinning of flax is a very old invention. It was once done
with just a spindle like the woman has in the picture on page 71 (Fig.
44). This is the secret of how flax spinning is done to-day. The flax
is opened at the mill and graded according to color and quality. It is
then combed. This process is called hackling (Fig. 112). It is sometimes
done by hand, and the worker draws the flax over the iron teeth of a
comb. The straightened fibers are left and are called line; and the
combed-out fibers are called tow. This first combing process is sometimes
called roughing instead of hackling. The line is then combed again in a
big machine which removes any loose tow. Tow is often put in a carding
machine and made into yarn for coarser purposes; but the long straight
line is used for the better materials. The line, after it is hackled, is
placed on a spread board; and the process is called spreading. You can
see in the picture (Fig. 113) that[193]
the bundles of flax yarn are spread and overlapped as they enter the
machine. Now you know how the yarn begins to be made of continuous
length. The flax comes from this machine in a rope and is something like
the cotton rope or roving as it leaves the carding machine; but flax is
brown and stiff, not so soft as cotton. Can you find in the picture (Fig.
113) the cans ready to receive the flax rovings as they come from the
spreading machine? They are at the back of the machine. The rovings are
then ready to be wound on spools and to be twisted to make them strong.
This is done in the same way as the cotton. The spools are put in at the
top of the machine; they hold the[194]
rovings. The rovings pass over rollers which draw out and twist and wind
the yarn on the spools below. This is called spinning. (Fig. 46 shows the
cotton spinning machines.) Flax spinning is somewhat like this. Perhaps
some day you may be able to visit a flax mill and see the spinning
frames, as the machines are called, at work. Uncle John says that yarns
are made of coarse or of very fine grade, according to the fineness of
cloth desired. Linen thread is made by twisting together two or three of
the linen yarns. Look at the linen thread and see if you can discover two
or three.

Courtesy of York St. Mills, Belfast.
Fig. 112.—Flax hackling done by machine.
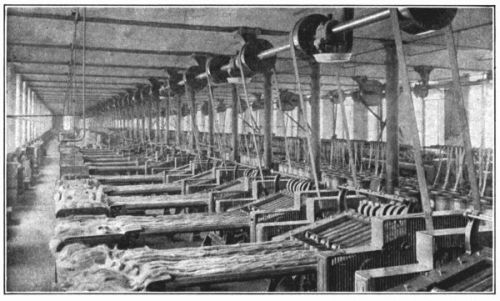
Courtesy of York St. Mills, Belfast.
Fig. 113.—Spreading flax to make it a continuous line.
Weaving linen. After the threads of flax have been
spun, they are wound on spools; and the spools are[195]
put in the big spool holder or skarn in order to prepare the roll of warp
threads for the loom. Do you remember how the cotton warp was prepared
and how the weaving was done? Uncle John says that in Scotland to-day
much of the very fine linen is woven by hand; but we know that linen
weaving by machinery has been perfected there and that very beautiful
materials are produced on the modern looms with the Jacquard harness as
it is called, to produce the wonderful designs. Fine table damask is as
beautiful as fine silk. The French, perhaps, make the most beautiful
designs for table linen, and the Scotch and Irish come next. (See page
124 for Jacquard loom.)
Bleaching linen cloth. Uncle John says there are many things
to be done to the linen cloth after it is woven. If we were to go to
Ireland, we might ride for miles and see the woven linen cloth spread on
the grass in great lengths. This is called crofting or grass bleaching.
Do you remember how we said grandmother used to bleach her linen? Did she
use a chemical? What did the sour milk which she used do to her linen?
What did the oxygen do? Chemicals are sometimes used to-day in the early
stages before the linen is spread on the grass. Uncle John says that from
20-25 per cent, or about ¼, of the weight of the linen is lost
in bleaching. Linen is sometimes bleached in the thread, but more often
after it is woven.
Finishing linen cloth for shipping. After linen cloth
has been bleached, Uncle John says it is ready to be[196]
finished for shipping to the merchants. It is washed by passing the cloth
through a machine called a rub-board. Then it is dried and passed through
a beetling machine. This makes the fibers stand out. Then it is pressed
between rollers to give it a smooth surface. Cotton is sometimes finished
by means of these processes to look like linen and be sold for linen.
When this cotton material is washed, the finishing wears off and it does
not look like linen. Is such material cheaper or more expensive? Is it
honest to sell cotton for linen, and to cheat the buyer? It is all right
if the goods are labeled. Next lesson we shall talk about the buying of
household linens. One must know many things in order to purchase wisely.
Do you see how a knowledge of how things are made will help you, too?
EXERCISES AND PROBLEMS
1. Write a story of two hundred words telling how flax is made
into cloth.
2. Have an exhibit of articles brought from home, showing
different patterns of linen cloth.
3. Perhaps there may be a cord factory near for you to visit.
Tow is sometimes used in making twine. Study how cord is made.
Lesson 10
A TALK ABOUT BUYING LINENS
Have you ever gone shopping with mother? There are some
important things to remember when buying table linen or other
household materials. What are they?
[197]
Marjorie goes with her mother once a year to buy household linens.
This is usually in January, when the big shop in town has a sale. Last
January, when Marjorie's mother was ill, they had to order by mail. The
catalogue from the shop described fully, and Mrs. Allen knew exactly what
to ask for; so they managed without going to town. This can be done if
one knows how and if the store is a reliable one. These are some of the
things Mrs. Allen is teaching Marjorie. Some day she will wish to buy for
her own home; or, if her mother is ill again, she can go alone. It is
always more satisfactory to see what one is buying.
Here are some of the points to be noticed in buying:
1. The first important thing to remember is to buy only what one
needs. Know the shops one patronizes, if possible, and go or send to only
reliable firms. The reliable places are the cheapest in the end. One
learns, too, that some things are better at one shop and some at another.
Reliable stores often have sales, but as a rule bargains are not cheap.
Remember nothing is ever given away.
2. It is wise and cheaper to purchase some new household linen once
each year than to wait and have it all wear out at once.
3. Cost is a good guide. Linen is expensive. If too cheap, beware.
4. Linen is sometimes cheapened or adulterated
with cotton. If the store keeper sells it for union, it[198]
is honest; if he calls it linen, and you pay linen price, it is
dishonest. Ravel and untwist the ends of the warp and filling thread.
Cotton will be fuzzy, linen should be long and lustrous. Round threads
of linen are best. The linen threads appear pointed at the ends when
separated. The all linens made from the tow (you have learned what that
is) are cheaper than those made from the line. Why? They will not last
quite so well.
Wet the linen. Water spreads more rapidly on linen than on cotton. An
old-fashioned test was to moisten with the finger. If you have a sample
of linen at home for testing, use a drop of olive oil. The oil makes the
linen fibers more translucent than the cotton. Why?
5. Another way to know. Linen feels colder than cotton; also it feels
heavier when crushed in the hand.
6. Notice the finish. Is it full of starch which can be picked off?
If so, after the washing you will have a loosely woven material without
starch. It is better to buy a softer linen than one filled stiff with
starch which will crack.
7. Damask by the yard is slightly cheaper than by the cloth. One
dollar a yard is a fair price. Table cloths from 2½ to 3 yards are
a good size for a family of six. A cloth wears about as long as 1½
or 2 dozen napkins. The price of one dozen napkins about equals the cost
of a cloth. Napkins come in three sizes:
5⁄8, 17-22 inches; ¾, 23-27 inches; 7⁄8, 29-31 inches.
[199]
8. Scotch, French, and Irish linens are the best for quality, beauty,
and variety of patterns. German damask is good; but German patterns are
perhaps the least attractive. Unbleached linen will wear much longer, is
less expensive, and is bought by many housewives and bleached as used.
9. For family towels huckaback is the most serviceable, although
damask is used a great deal. Linen towels vary in price from $3.00 a
dozen up, according to size and quality. Dish towels of linen crash are
very serviceable.
10. The microscope is the only sure test for distinguishing cotton and
linen fibers.
EXERCISES AND PROBLEMS
1. Ask mother if she knows any other methods of judging good
linen.
2. When you go to town, price some tablecloths and napkins.
How much will a good cloth and napkins cost?
REVIEW PROBLEMS
I. Plan a systematic way of looking over your clothing and
keeping it in repair.
II. How do you store your winter clothing for protection during
summer? Your summer clothes during winter?
III. How does your knowledge of buying linens help you in
going shopping with mother?
[200]
CHAPTER V
THE PLEASANT VALLEY GIRLS LEARN TO MAKE
MORE GARMENTS
Would you like to learn to make some useful garments? Perhaps, then,
you can help with the family sewing and make some useful garments for
your sister or mother. Some day you may wish to be a seamstress or a
dressmaker and to earn money in that way. Barbara Oakes says she expects
to do so. Now is the time to begin to learn how, and later perhaps you
may go to a dressmaking school.
Barbara Oakes and some of the League girls have a class which meets
once a week for instruction in gymnastics and fancy dancing. In the
spring or early summer they expect to give a dance outdoors. A pageant
will be prepared by some of the members of the Mothers' Club; and the
dance is part of that pageant.
The pageant will picture the history of Pleasant Valley. The Mothers'
Club is planning to have all the people who will, take part. Have you
ever seen a[201]
pageant? It is a pleasant way to learn history and to celebrate an
interesting local event. Pageants have been held in many parts of the
eastern and western states; and in England there have been many pageants.
Perhaps you can plan a pageant for your town. While the girls are
practicing their dancing and gymnastics, bloomers will be very useful,
and the girls have decided to learn to make them. Would you like to learn
how? The bloomers will be useful for school gymnastics, too. You can also
make a middy blouse and a skirt to wear with them, so as to have the
whole outfit.
Lesson 1
THE PATTERN OF THE BLOOMERS
Let us study the pattern which your teacher has brought to school. You
have learned to read patterns. You must also calculate how much material
to order, and what kind.
Let us open the pattern and study its parts. Yes, the long
narrow strips are for the belt; some are for the placket facings. Notice
if the dots indicate where these are to be placed: on a fold of material
or lengthwise of the cloth. There is one other piece. It is the leg; so
two must be cut. Is it possible to cut two at the same time? How, then,
should the material be folded? Notice the perforations. They will help
us to know which part of the pattern is to be placed on the warp of the
cloth. How wide is the width of the pattern at the widest part? If it is
34 inches, then it will be easy[202]
to calculate how many lengths to buy of cloth 36 inches wide. Measure
the length of the pattern and see if it is long enough for you to allow
for fullness at the knee so that there is some to blouse over. If not,
how will you add to the pattern? This extra length must be allowed in
ordering the material. Can you tell how much cloth to order? See if you
can calculate.

Fig. 114.—The bloomers and middy
blouse.
What kind of material will you use? Some of the Pleasant Valley
girls wish wool material because it will be warmer for winter wear. Dark
blue or black serge is very durable, is washable also, and will shed the
dust. Here are some samples. Sateen is also a durable cotton material,
but it is not so warm. It is easier for girls to handle in making than
wool. Bloomers can also be made from gingham, percale, galatea, or
other cotton cloth. Which will you choose? Shall we not write for some
samples of these different materials? The Pleasant Valley girls wrote and
received them in a few days. Perhaps you too are learning how to order
by mail when you are too far away from town to go shopping. Try to make
all the calculations to-day and to learn all about the pattern. Pin the
pieces of the pattern together; also try to hold them up to your figure
or the girl next to you. It helps one to learn where the parts lie[203]
on the body and to locate where the seams will fall. The Pleasant Valley
girls worked in pairs and helped each other with the cutting, fitting,
and planning. This is a good way when each girl does her part.
EXERCISES AND PROBLEMS
1. Open the pattern for the bloomers. Notice the parts, also
the perforations and directions.
2. Calculate how much cloth will be necessary for a pair of
bloomers for yourself.
3. Bring samples of materials suitable for bloomers.
Lesson 2
THE STORY OF WHERE WOOL IS GROWN
While you are waiting for the samples of wool serges, galatea, and
sateen, let us study about wool. Wool is the most important textile
fiber. All girls should know about it, whether you will use wool or
cotton for your bloomers.
In the picture (Fig. 115) you will see a very peaceful scene. The
sheep are grazing and storing up food and energy to be converted into
food for us to eat and clothing for us to wear. Mr. Allen has over a
hundred sheep on his farm. How grateful we should be to the patient
sheep. This animal fiber called wool is a variety of hair, and varies
in fineness. The coarser varieties are called hair. Hair is obtained
from the angora goat, the camel, and alpaca. Perhaps your teacher has
a microscope. Look at the fibers under the glass. You can see how hair
differs from wool. There are tiny[204]
serrations on the wool surface which look like the scales of a pine cone,
lapping one over the other. This is a wonderful thing to see; for it is
on account of these tiny serrations which close up when in hot water
that one must be so careful about laundering woolens. Wool looks wavy in
length. It is fine and has a luster; while hair has a smooth surface and
lies straight.
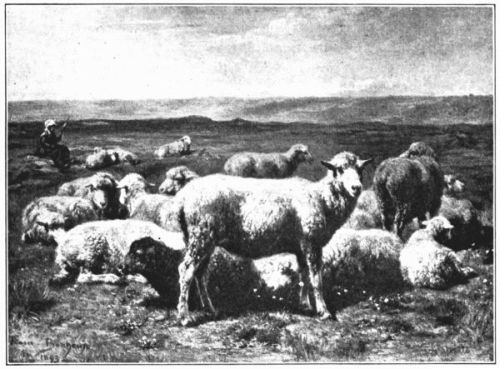
Rosa Bonheur.
Fig. 115.—These peaceful looking sheep provide our wool clothing.
Have you ever seen sheep sheared of their wool? Perhaps it is
done on your farm. Sheep are usually sheared only once a year, in April
or May. If there are only a few sheep, it is easy to use the hand shears[205]
like those in the picture (Fig. 117); but where there are many sheep,
the machine clippers must be used. These clipping machines can be run by
hand or other power. They shear close and save wool. Notice the machine
which the man in the picture (Fig. 118) is using; it is just like the one
Mr. Allen uses. Frank or John sometimes helps. The coating of wool from
one sheep is called a fleece. On the large sheep ranches of the West the
fleeces are tied into bundles, and these bundles are put in sacks holding
about 400 pounds to be shipped to certain wool-purchasing centers where
the buyers examine the wool and buy in quantities.

Fig. 116.—Wool fibers magnified.
What do you know about the sheep industry? Our sheep industry
is very important. The western states, Montana, Idaho, Wyoming, and
Oregon, support about 38 million sheep. That is a large family to shear
and feed.

Fig. 117.—The
hand
shears.
Other countries grow sheep for clothing wools, too. Australia,
England, South Africa, South America, Spain, and Germany all give much
attention to sheep raising.
[206]
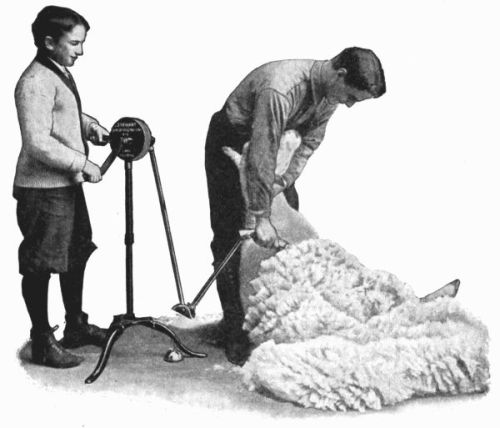
Courtesy of Chicago Flexible Shaft Co.
Fig. 118.—Sheep shearing by machinery.
This industry is very old. We read in the Bible that wool was used
long ago and that King David of Israel wrote psalms as he tended his
sheep on the hillside. Abel, the brother of Cain, was a keeper of sheep.
Can you find these stories in the Bible? Writers of many ages tell about
wool—Pliny, Homer, and Virgil. Alexander too, when he journeyed to
India in early days, saw beautiful woolen shawls being made.
[207]
Some sheep give a better quality of wool than others. The
Merino wool is the very finest. The camel furnishes a beautiful soft
fiber. Then, there is the angora goat of Asia Minor, which provides us
with mohair. This is a lovely soft fiber resembling silk. Can you find
this country on your map? Look for Peru and for Chili. The sheep there
furnish the alpaca and llama wools.
Some wool fibers are long, and some are quite short. The length
of fiber, or staple as it is called, varies. An average length is 7 or
8 inches. How does this compare with the silk or linen fiber? Is it as
long as cotton? The fibers also vary in strength and luster, fineness,
softness, and elasticity. What do these words mean? Can you find them
in your dictionary? The tiny serrations on the wool fiber cannot be
seen with the naked eye. They are, however, very important; for it is
this characteristic of wool which makes it felt, and, because these
tiny serrations interlock, it is possible to make the fine texture of
broadcloth and other fine wool materials. We shall study how later. Do
you think we wish the tiny serrations to interlock when we wash woolen
articles? If they do, what will happen to the garment? Do you know how
this can be prevented? If you have sheep on your farm or near, will you
bring some of the wool to school. It is dirty. Perhaps you can wash it
at school, and see how soft and fine and lustrous it is. You may also be
able to dye some. The center of the wool fiber is rather[208]
porous, and this enables the fiber to take up dye easily.
The wool from some sheep farms varies on account of the differences
in climate, soil, and breed of sheep. The sheep of southern England
produce short and fine wool; while in the north, where it is colder, the
wool is stronger and coarser. Wools from Saxony and Silesia are very
fine. The English and Australian wools are of several qualities. The long
wools come from Lincoln and Leicestershire, and the shorter from Suffolk
and Shropshire. Can you find these places on your map of England? The
long coarse wools are used for carpets and for knitting, because they
are so strong. The short wools used for clothing are about 3 to 4 inches
in length. The long wools, about 10 inches in length, are called combing
wools and are used for materials which are loosely woven like serges,
homespuns, and others.
Next lesson we shall study our samples of woolen materials. Bring all
the scraps of different kinds which you can contribute. Put them in the
surprise box. We shall learn the names of the most common ones. Will you
make a sample book for these too?
EXERCISES AND PROBLEMS
1. Find on the map the principal countries producing wool.
2. If your teacher has a microscope, compare wool and hair.
How do they differ?
3. Why do woolen garments shrink when washed in hot water?
4. Why is wool the most important fiber of commerce?
5. Tell some of the uses of long coarse wools; of the finer wools.
[209]
Lesson 3
SOME OF THE MOST COMMON MATERIALS MADE FROM WOOL
There are many materials made from wool. Let us learn to-day about
those which are used most commonly.
Perhaps some one in the class will sort the pieces in the surprise
box. Mollie Stark sorted those at Pleasant Valley School. Do not sort
according to color, but place them in three piles. We have the thick,
close materials, which are heavy and firm. Then we have the thin, sheer
ones. In the third pile, place the medium weight ones which look strong
and are wiry but not so closely woven and firm as those in the first
pile. Shall we learn about some of each kind?
Let us see what we have in the third pile of wiry, more loosely
woven materials. First we have the serges. Here are several
pieces. Some are fine with the twilled weave, and others are twilled
but the weave is coarser. They are very serviceable and are suitable
for bloomers, or for dress fabrics. Here is a sample of a plaid serge.
Marjorie Allen had such a dress last winter. It is possible to buy plain
colors too. Serges are woven quite wide, from 42 to 54 inches, and cost
from 75 cents to $3 per yard. Cheviots are very similar to serges in
price and width, but are somewhat heavier in appearance. The surface of
some is rather rougher than serge, although there are smooth cheviots
too. Have some samples of serges been sent from the store? You[210]
must examine these, too, to see if you will select one for your
bloomers.
This coarse one in the same pile is a homespun, and this is
a tweed. They are both rough, wiry, loosely woven, and made
of rather coarse yarn. They are rather open in texture and were both
in olden times spun and woven by hand, but are now made by machinery.
Tweed gets its name from a place in Scotland. These materials are very
serviceable, especially for rough wear for suitings, coats, or dress
goods. The color or pattern is not always clearly defined, because the
yarn of which it is woven is mixed in color. Homespuns are somewhat
cheaper than tweeds. They cost from $1 to $3 per yard, and are woven from
42 to 50 inches wide. Tweeds are a little wider, 52 to 54 inches, and
cost from $2 to $4 per yard.
There are four samples in this pile, not quite so heavy. They
are cashmere, challie, albatross, and
henrietta. Have you ever heard these names before? They are all
common wool materials. They are often used for girls' school dresses, for
wrappers, and for baby wear. They are all softer than serges. Cashmere
and henrietta resemble each other. They both have a twilled weave.
Henrietta was originally woven with a silk warp. One can buy silk warp
henrietta to-day. Grandmother Stark has one. Is there a sample in your
box? Cashmere is also soft, and the finer qualities are made from hair of
the cashmere goat. Cashmere is woven 36 to 45 inches in width and can be bought[211]
for from 75 cents to $1.25 per yard. Henrietta is about the same width
and price, except when it has silk warp. Then it is more expensive.
Challie and albatross are about the same weight. I am sure
you have all had a pretty challie dress sometime. Challies are
figured;—sometimes the pattern is woven in and sometimes printed.
It is made sometimes of a mixture of cotton and wool, or silk and wool;
but now challies can be bought in all cotton too as well as in all wool.
They come about 30 inches wide and cost from 50 to 75 cents per yard.
Albatross is also soft and a fancy weave. It too is used for dress
goods and costs about the same as challie, 50 cents to $1 per yard. It is
woven from 38 to 45 inches in width.
Let us now examine some of the heavy ones in the first pile.
Yes, every one knows the name of the heavy fine piece. It is broadcloth
and is used for coats and dress goods. There are also some lighter
weights of broadcloth with a smooth satiny finish. They are called
lady's cloth. A very good broadcloth is expensive, and costs about
$5 per yard. One can buy it for $1.50, but as a rule it is not very
satisfactory under $2 per yard. Broadcloth is closely woven, smooth, and
soft in finish. It is from 50 to 58 inches in width. Has any one at your
house a dress or coat made from this? Examine it and ask how durable
it has been. Father's winter overcoat was perhaps made of melton, or
covert cloth. Mr. Allen had such a coat last year. Examine[212]
the samples. They are both heavy. Melton is about the same width as
broadcloth, 52 inches, and costs also from $2 to $4 per yard for a good
quality. It is used for suits, overcoats, and heavy garments. This is a
standard material and is usually dark blue or black. Uniforms are often
made from it.
Covert cloth is, also, used for overcoats and suits. It is heavy, but
differs from the smooth surface of broadcloth. It is a heavy twilled
cloth.
Felt and flannel are both in this heavy pile, although there are
some lightweight flannels. Felt is not woven, but is compressed, so
that the wool fibers are matted together in a flat mass. It is made 24
to 50 inches in width and costs from 80 cents to $1.50 per yard. I am
sure you all know its use. School pennants are made from it, and so are
some table covers. Flannel is woven. It is finished with a soft surface
which is slightly napped. What does that mean? It is a rather loosely
woven fabric, and is used for many purposes. Can you tell some? Yes,
petticoats, baby garments, waists, dressing sacques, shirts for men. It
costs from 50 cents to $1 per yard. Sometimes it is made of a combination
of cotton and wool, instead of all wool. It varies in width from 27 to 36
inches.
Let us examine some of the thin samples. Here is one which it
is almost possible to see through. It is called voile and is thin and
gauzy, like veiling. This sample near is called nun's veiling. It,
also, has an open mesh weave, and is a common wool material.[213]
They are both used for dress goods, and are made in solid colors. There
are also some printed voiles, but they are usually made of cotton.
Wool voile costs from $1.25 to $2 per yard and is woven from 42
to 45 inches wide; while nun's veiling is narrower, 36 inches wide, and
slightly less expensive, from 75 cents to $1 per yard.
Here are some samples called etamine and grenadine.
They are similar to the voiles, of open mesh weave, and are used
principally for dress goods.
Bunting is another open mesh weave. We certainly all know its use.
Look at the flag flying on your schoolhouse. Bunting is about 24 inches
in width and costs about 35 cents per yard. It is sometimes made from
mohair.
Here are three samples: one called brilliantine; and another,
alpaca; the third, mohair. The brilliantine and mohair do not feel as
soft as the wool serges or cashmeres, but rather more wiry. They are made
from hair of the Angora goat. They are serviceable, for they both shed
dust and wear well. They are used for dresses or dust coats. The Alpaca
is made from the hair of the llama, which is bright, strong, and elastic.
All of these materials are bright and glossy. Here are their prices and
woven widths:
| Alpaca | 36-45 inches | 75 cents-$1 per yard |
| Brilliantine | 54 inches | 75 cents-$2 per yard |
| Mohair | 40-54 inches | 50 cents-$2 per yard |
[214]
There are still some common wool materials we have not
mentioned. Yes, blankets. They are made of cotton as well as
of wool, or of a mixture of the two. They cost from $7 to $30 per pair if
all wool. The combination of cotton and wool can be had for less.
Carpets are also made from wool yarn. They are woven so that the
yarn stands up in loops, and then these loops are cut as in velvet
carpet. In Brussels and ingrain carpets the loops are not cut.
Suppose you plan to arrange your sample books with three columns of
materials made from wool. You may have four or five columns if you prefer
to put the mohairs, alpacas, and brilliantines by themselves, and the
blankets and carpets in a separate column. That is the way the Pleasant
Valley girls arranged theirs. The first will be the heavy materials;
then the medium weight, and then the thin ones. It is easy to sort and
label them now that you know their names, uses, and widths. Before very
long we shall learn the story of how the wool fiber is made into so
many different kinds of cloth. It is treated by different processes in
manufacture in order to get a smooth close finish or a loose wiry finish.
We shall learn how.
EXERCISES AND PROBLEMS
1. Tell the difference between felt and flannel.
2. Name some heavy wool materials; some of lighter weight.
Tell where you have seen them used.
[215]
3. Look up the story of how carpets are made. Perhaps you
would like to study about rugs, too.
4. How do serges and broadcloths differ in appearance?
5. Plan to collect materials for the five columns of the chart.
Mount with prices and widths.
Lesson 4
MAKING A PAIR OF BLOOMERS
Let us begin to make the bloomers to-day.
First, we shall lay the pattern. Some girls have probably
chosen serge for their bloomers, and some have ordered galatea or sateen.
The black or the blue are serviceable. Suppose you cut them out to-day.
You have studied the pattern which your teacher had. Perhaps some girls
will find it necessary to add in length or width. Your teacher ordered
the pattern by size, according to age. 14-year size was chosen. Perhaps
you must make yours smaller or larger. One pattern can be adapted to
the whole class. This you allowed for, in ordering the amount of cloth.
Let us place the pattern carefully. Be sure that the perforations which
indicate lengthwise of the material are placed on the warp. Can you cut
out both legs at the same time? Can you tell where to place the two
strips for the bands, and for the placket facings? Which way of the
material will the length of band and facings be cut? Pin carefully in
place and cut with an even motion. It will perhaps be safer to mark the
notches[216]
with a pencil or with a white thread. Girls sometimes forget—cut
the notches too large and spoil the cloth.
Then we shall learn to make a flat felled seam. The two legs
are to be sewed up on the right side. Be very careful not to make both
legs for the same leg. That is the mistake Marjorie Allen made. Baste the
seam ½ inch wide. Then stitch close to the basting. Cut off one
edge of this seam to within 1⁄8 inch of the
stitching, and lay the other edge of seam flat on the cloth for the fell.
Turn in the raw edge, baste, and stitch flat. This must be done very
carefully, for it is very easy to make a fell which is wrinkled and full
instead of flat (see Fig. 119).

Fig. 119.—The flat fell, showing the three steps in making: A, the seam
stitched; B, one edge cut; C, the turning of the other edge flat, to be basted
and stitched.
Join the two legs together at the center with the same flat fell. Be
sure to have the two leg seams come together. This is important.
[217]
The placket openings lie over the hip. A single strip may be used to
bind this opening, or a regular placket may be made according to your
pattern. If a strip is used, cut it lengthwise of the cloth and one inch
longer than twice the length of placket opening. If cut 2½ inches
wide, the finished facing will be one inch in width. Place the right
side of the strip to the right side of the bloomers. Baste ¼ inch
seams, holding strip all around the placket opening; and then stitch.
Turn to the wrong side, turn in ¼ inch and baste, stitch again.
Care must be taken at the bottom of the placket opening to make the seam
of sufficient width so that it will not pull out.
At the bottom of each leg make a hem, one inch wide finished. Stitch,
leaving one inch open. This is the opening for the elastic band. Run in
the elastic before completing the hem by hand.
Now we are ready for the bands. There is one for the front and
one for the back. If your pattern allows for fullness, gather to fit
½ of your waist measure. It will be necessary to measure your
bands and to allow the two inches for lapping on the back band. The front
band is usually shorter than the back. Fasten the bloomers so that they
lap towards the front.
To put on the band, work in the same way as in putting on the apron or
petticoat band, except the band is turned to the right side for tailor
finish on a garment with flat fells. Begin by placing the right side of
the band to the inside of the front, and also[218]
back of the bloomer portions. Baste, stitch, turn to the right side.
Snaps may be used, or buttons and buttonholes, for closing. Buttonholes
can also be placed at the center front and at the back of the bands, if
the bloomers are to be fastened to a waist. How shall the buttonholes
be placed in cutting for fastening in this way? Do you think it is very
difficult to make the bloomers? The girls who use serge can make the
placket facings and bands of silk or sateen or some lining material which
will be thinner. Only the most experienced Pleasant Valley girls used the
serge—those who had sewed at home.
EXERCISES AND PROBLEMS
1. What are the important things to remember in cutting out
the bloomers?
2. How does the band of the bloomers differ from that put on
the petticoat?
Lesson 5
THE STORY OF HOW WOOL IS MADE INTO CLOTH
The Pleasant Valley boys and girls learned how wool is made into
cloth after it has been sheared from the sheep. Would you like to
know?

Courtesy of M. J. Whittall.
Fig. 120.—Wool sorting.
First, the wool is sorted. Wool sometimes travels a long
distance before it is delivered to the manufacturer. Perhaps the wool in
your skirt was grown in England or in Australia, and was shipped in great
sacks to New York, and then to the manufacturer. As it is[219]
sheared from the sheep, it is dirty and full of burrs, grease, and
perspiration. This grease helps to preserve the wool until the
manufacturer is ready to use it; and, although he buys the wool by
weight and pays for dirt and grease, he prefers to do so because of the
preserving qualities of the grease. Even ⅔ of the weight may be
dirt and grease. The first thing the manufacturer does is to sort the
wool to put the good grades together, and to separate them from the poor
ones. You remember the fleece is the whole coat of[220]
the sheep. Some parts of this coat are better wool than others;
especially the part from the head and upper part of the back and sides.
About seven different grades are separated for different purposes.
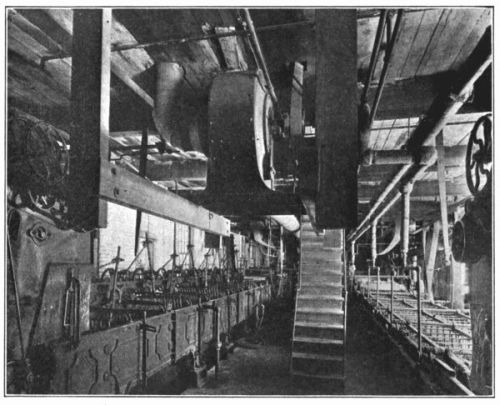
Courtesy of M. J. Whittall.
Fig. 121.—Wool washing or scouring.
The second process is washing or scouring. Wool cannot be
carded and spun until the dirt and grease are removed; so the next thing
the manufacturer does is to remove the grease, or "yolk" as it is called,
by washing. This must be done very carefully so as not[221]
to break or injure the wool. Perhaps you can bring some dirty wool from
your farm to school and wash it. Soft soap is the most harmless. Use a
soft water at a low temperature (120° F.). Can you tell why it must be
low? The washing is done in a series of tanks. You can see them in the
picture (Fig. 121). The wet wool is swished back and forth by means of
wooden forks which carry the wool forward and beat it out. There are
rollers for passing the wool from one tank to another. Then the wool must
be dried. This is done in a kind of wringing machine called a "hydro
extractor." Then it is beaten into a fluffy mass.
Then a strange thing happens. Oil in wool is necessary in order to
help in the spinning and to keep it soft and elastic, so the manufacturer
must return some oil to the wool, after having washed it all out. Olive
oil is used.
If there is any dirt or any burrs left in the wool, they must be
removed. A machine called a burr picker is used to beat out the dirt.
Then the wool is blended. Do you know that the wool skirt which
you are wearing may not be made of all new wool? Wool can be used over
and over again. Old wool rags are pulled apart and mixed with new wool.
If this did not happen, the manufacturer would have to charge much more
than you pay for serge or some woolen materials, as he would have to use
all new wool. That is why some wool materials are so expensive.[222]
If only new wool were used, there would not be enough raised in the world
to clothe everybody. The wool manufacturer, therefore, blends, or mixes,
the wool before it is sent to the carding machine. In blending he knows
just what color, style, and grade of material he wishes to produce, and
he grades accordingly. Cheapness is one of the principal reasons for
blending. Sometimes cotton or jute are mixed in, if the manufacturer
wishes to produce a very cheap material which is not all wool.
Would you like to know the names of some of the all-wool substitutes
which are used in reducing the cost of all-wool materials? Marjorie
Allen's grandmother told her, and Marjorie told the League girls. Shoddy
is one; it is made from old rags, like woolen stockings, flannels, soft
underwear; materials which have not been felted together. Do you know
what felted means? The rags are washed, ground up, and prepared to mix
with the new wool. Mungo is another queer name which is given to woolen
rags which have been felted, as broadcloth or men's suitings. Flocks
is nothing but dust or waste from the clipping machines when cloth is
sheared or clipped in finishing. This is used to fill in. So you see
nothing is wasted.

Courtesy of M. J. Whittall.
Fig. 122.—Wool carding. Notice the round cylinders. The gauzy web is being
delivered into the can in front of the carding machine.
The next process after blending is carding. Do you remember
how cotton is carded? Long ago, when Marjorie's grandmother was young,
wool was carded by hand. Look at the picture on page 77 and see how
Grandmother Allen holds the cards. She is preparing[223]
rolls of wool for the spinning wheel. The manufacturer must prepare the
slivers, or rolls like ropes of wool, for the spinning frames as they are
called to-day. The machine which helps to produce these ropes is called
the carding machine. It also helps to clean the dirt from the wool. The
picture (Fig. 122) will show you how the wool carder looks. There is
a center cylinder and around it revolve small cylinders. They are all
covered with wire teeth which help to pull the wool apart and to cleanse
it. If you were to stand before the machine, you would see a gauzy, filmy
sheet of wool the width of the long rollers as it leaves the machine.[224]
The wide gauzy mass is pulled together as it is drawn through a hole at
the front of the carder and is delivered or wound up in the can, just as
we learned the cotton was delivered. This wool roving is then wound on
spools and is ready for spinning. Do you remember the story of how cotton
is drawn out and twisted and wound on spools? Wool too must be spun and
made into yarn, before yarn can be woven into cloth. The manufacturer
makes woolen yarn and also worsted yarn. Do you know the difference? We
shall study in our next lesson about them.
EXERCISES AND PROBLEMS
1. Ask your grandmother to tell you about sheep raising on
the farm, when she was a girl.
2. Tell why the manufacturer must blend old and new wool.
What are the names of some old rags of wool used for this purpose?
3. Tell how carding was done in olden times. How is wool
carding done to-day? Why is carding an important process
in the manufacture of cloth made from wool?
Lesson 6
SOME FACTS TO REMEMBER IN PURCHASING WOOL CLOTHING
Why does the manufacturer use woolen yarn in weaving some
materials and worsted yarn for others? If one knows this, it
will be a guide in purchasing wool materials. The Pleasant
Valley girls know.
The difference between woolen and worsted yarns.
Before you can answer the question for this lesson, you[225]
must learn the difference between woolen and worsted yarns. Worsted yarn
is prepared from the sheep giving long wool. It is prepared by processes
which comb it until all the short fibers are removed and only the long
straight ones are used. This combing prepares the long wool fibers for
spinning so that they lie parallel. This makes an expensive yarn because
so much is combed away. This fine combed worsted yarn is used for high
grade worsted materials, as some cheviots or fine tweeds, and for
underwear.

Courtesy of M. J. Whittall.
Fig. 123.—Wool combing for high grade materials. There is much waste.
Woolen yarn is not combed to remove the short
fibers. It is, instead, carded a great deal so that the
wool fibers are well mixed and the serrations of the tiny[226]
fibers arranged so that they will interlock, when put in water of high
temperature, and the gelatinous scales are opened up. Woolen yarn is
woven into broadcloths and meltons. After the weaving the cloth is put
into vats where the temperature opens up the serrations and the scales
interlock, and make a close, smooth piece of cloth. This is called
fulling. Isn't this interesting? Do you see why the manufacturer uses
worsted instead of woolen yarn for making underwear? If worsted yarn were
used for making broadcloth, there would not be the same close finish. The
worsted yarn is combed and the fibers are not in position to interlock
as in the woolen yarn (Fig. 124). Can you answer the question now why
worsted yarn is used sometimes and woolen at others?
Fig. 124.—This shows the difference
in the slivers of wool and worsted yarn. A is the woolen yarn, well
mixed; B is the worsted yarn, well combed.
After the yarn has been spun, it is woven into cloth just as cotton
is prepared and woven. Woolen yarn is fuzzy; cloth made from it is woven
loosely and then it is put into vats and shrunken or fulled until the
cloth is compact, as broadcloth.
Worsted yarn when made into cloth is shrunken very little or not at
all. It is woven as it will appear.[227]
Beautiful homespuns and worsted suitings are the result.

Courtesy of M. J. Whittall.
Fig. 125.—The spinning of wool into yarn.
Many fabrics made of wool are of simple weave like the plain homespun,
but complicated patterns are also woven of wool. The yarns are arranged
in the loom in the same way as the cotton about which we studied. Many
beautiful patterns are made in woolen materials, even the complicated
patterns of double cloth weaving like the old-fashioned golf capes, made
of doubh, which were worn a few years ago.
So you can see that the manufacturer must know[228]
whether he is to adulterate his wool cloth with cotton or reduce the cost
of production by using mungo, shoddy, or flocks. Flocks is put in when
the cloth is shrunken or fulled in the vats. The short pieces and dust,
or flocks as it is called, are drawn in as the serrations open and the
cloth is shrunken.
This is all useful to know, for it helps one in purchasing materials.
Most of us cannot afford to buy cloth made of all new wool, but we should
be able to tell whether cloth is made of cotton and wool mixed, or all
wool. We will know by price whether the all wool is new wool or not. No
shopkeeper should sell a cotton and wool for all wool. When we have our
textiles labeled as foods are now labeled, we shall be able to tell.
What have you learned to-day which will help you in purchasing wool
materials?

Fig. 126.—This is the teasel
which is used to brush the nap of the cloth in finishing. These small
thistles are arranged in rows in the machine rollers through which the
cloth passes.
Woolen and worsted yarns are used also in the manufacture of carpets,
rugs, hosiery, blankets, underwear, and also for knitting purposes. Do
you know how to knit? Does any one know at your home? It is a useful and
pleasant accomplishment. Shawls, afghans, caps, and sweaters can all
be knitted. Miss James taught the Pleasant Valley girls to knit bright
scarfs which they wore for tobogganing the next winter. Some girls made
them for sale.
[229]
Points about buying woolen garments. Here are a few things
to think about which Miss Travers from the State College told the
Mothers' Club of Pleasant Valley to remember in buying wool garments or
materials.
1. Wool mixed with cotton should not be sold for all wool. It is a
cheaper fabric. It wears fairly well, but is not so warm. Pull the fabric
apart, untwist the fibers to see if cotton is present.
2. Garments bought ready-made of cotton and wool do not keep their
shape as well as all wool garments.
3. Burning a piece of the fabric will help you to identify the fiber.
Wool burns slowly, chars, and gives off an odor of burned feathers.
Cotton burns quickly with a flame.
4. A good wool material can always be used over again. The inexpensive
is not cheap unless you wish something which does not look well or wear
well but is cheap.
5. Remember that a close twill weave is more durable than a basket
weave. Think about this in buying; for the weave of material affects the
wearing quality.
EXERCISES AND PROBLEMS
1. How is yarn which is to be used for underwear treated in
manufacture? Why?
2. How does this treatment differ from yarn used in the manufacture
of broadcloth?
3. What are some of the things your mother thinks about when
she buys a garment made from wool, in order to get good value
for her money?
[230]
Lesson 7
THE CLOTHING BUDGET
Have you ever thought how much your clothing costs father and mother
every year? Marjorie Allen and Barbara Oakes tried to figure the cost
one day. Girls must begin to learn how to spend wisely, for they will
very soon have the responsibility of being spenders. If you can make
some of your clothing, you will help to reduce the cost. Would you
like to learn to make a budget as well as a simple dress skirt to
wear over the bloomers? Suppose we study to-day about the clothing
budget.
Have you ever tried to calculate how much is spent each year for
your clothing? If not, suppose you try. Girls who know how to make
some articles of clothing can have more for the same amount of money.
Suppose you send for the material for your dress skirts. It is wise to
learn to make a very simple skirt first. Choose a simple pattern. Your
teacher will help you. What material will you use? Perhaps you would like
a middy blouse later to wear with the skirt. Can you name some suitable
cotton materials to use for this purpose? Yes, Indian head, galatea,
duck. You have studied about all of these and should have them in your
sample books. Such a dress will be suitable for school wear. Talk with
your teacher and calculate how much cloth you must buy for your skirt and
middy. While you are waiting for the cloth you have ordered, let us study
how Marjorie's Cousin Ann, who works at Paterson, manages to plan each
year for her clothing.[231]
She has such good plans. Do you know that such a plan is called a
budget?
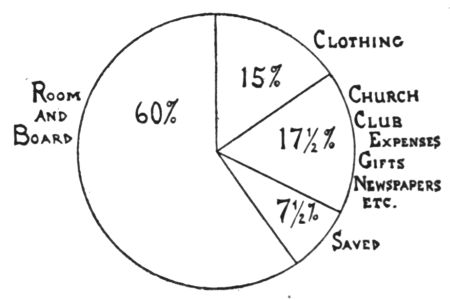
Fig. 127.—Cousin Ann's division of her
money. How much was for clothing?
Would you like to learn to make your clothing budget? Ann earns
$10 per week and her room and board cost her $6 per week, so she has $4
for other expenses. She puts aside $1.50 each week for clothing, and so
has $6 per month or about $75 per year. She lives near her work so does
not have daily carfare, and she goes home at the noon hour for a little
rest and for lunch. The rest of her money she divides in this way: Each
week she tries to save 75 cents or $3 per month. The rest she uses for
church and club expenses, for gifts, newspapers, or occasionally she
buys a new necktie or an extra waist; but usually the $75 supply all
her clothing needs. This is how she manages. She plans for more than
one year, usually trying to keep three years in mind. Ann also goes
to the Girls' Club and has learned to make her waists and some simple
dresses.
The following is what she bought the first year. Remember she had some
clothes to begin with before she started to keep her clothing budget.
Your budget will of course be different from this, but this will show how
Ann manages with $75. Some things which she[232]
needs you may have no use for in your section of the country. Try to plan
what you would substitute. This will at least be a working basis for you,
and will give you some suggestions for making yours. Marjorie Allen and
Barbara Oakes have made their clothing budgets. They have $60 per year
for clothing. What do you think they omitted from this list? The things
marked * are made at home. Ann's mother helps her; but Ann learned to
make clothes at her Sewing Club.
First Year
| 2 union suits (winter) @ #2.00 | $4.00 |
| 3 union suits (summer) @ .50 | 1.50 |
| 1 flannelette nightdress @ 1.00 | 1.00 |
| 1 flannelette nightdress left over | |
| 2 night dresses @.80 | 1.60 |
| *3 corset covers @.50 | 1.50 |
| 2 pairs of corsets @ 2.00 | 4.00 |
| 6 pairs of stockings @.25 | 1.50 |
| 2 pairs of garters @.25 | .50 |
| shoes: 1 high lace @ 3.00 | |
| 2 pairs low shoes @ 2.50 | 8.00 |
| 1 pair rubbers | .75 |
| 1 black sateen petticoat | 1.00 |
| 1 long white petticoat | 1.25 |
| 2 short white petticoats @.75 | 1.50 |
| retrimming last year's best winter hat | 1.25 |
| summer hat (new) | 4.00 |
| 1 straw hat, common wear | .75 |
| 1 umbrella | 1.00 |
| *1 wool dress skirt | 4.00[233] |
| *3 shirt waists: 2 tailored @ 1.00 | |
| *1 fancy @ 1.50 | $ 3.50 |
| 1 winter coat | 12.00 |
| 1 spring coat (left from last year) | |
| 1 pair kid gloves | 1.50 |
| 1 pair wool gloves | .50 |
| 1 wool dress (winter, bought close of season) | 12.00 |
| 1 sweater | 3.00 |
| *1 summer dress | 3.00 |
| *1 white duck dress skirt | 1.00 |
| 1 party dress (left over from last year) | |
| Gloves, handkerchiefs, neckties, collars | |
| received for Christmas. | |
| | ——— |
| Total | $75.60 |
Notice that in the second year some articles are left over from
the year before. This is because Ann has foresight. She is a
good manager, and takes care of her clothes too, and plans ahead.
Do you?
Second Year
| 2 union suits (left from last year, winter) | |
| 2 union suits (left from last year, summer) | |
| 1 new union suit summer | $ .50 |
| 2 flannelette nightgowns (left over) | |
| 2 summer nightdresses (left over) | |
| 1 new summer nightdress | .75 |
| *3 corset covers @.50 | 1.50 |
| 2 pairs of corsets @ 2.00 | 4.00 |
| 6 pairs of stockings @ .25 | 1.50 |
| 2 pairs of garters @.25 | .50 |
| shoes: 1 high laced @ 3.00 | |
| 1 pair low shoes @ 2.50 | |
| 1 pair low left over, half soled @ .75 | |
| 1 pair high laced, half soled @ .75 | 7.00[234] |
| 1 pair rubbers | $ .75 |
| 1 black sateen petticoat | 1.00 |
| 1 long white petticoat (left over) | |
| 2 short white petticoats (left over) | |
| 1 new short white petticoat | .75 |
| 1 winter hat | 5.00 |
| 1 winter hat (left over) common wear | |
| 1 summer hat (retrimmed) | 1.50 |
| 1 new summer hat (second) | 2.00 |
| 1 umbrella (left over) | |
| *1 wool skirt (refreshened) | 1.00 |
| *2 shirt waists (plain) @ 1.00 | 2.00 |
| *1 extra white waist @ 1.50 | 1.50 |
| 2 shirt waists (left over) | |
| 1 winter coat (left over) | |
| 1 spring coat (new) | 12.00 |
| 1 pair kid gloves | 1.00 |
| 1 pair wool gloves (left over) | |
| 1 wool dress (left over) | |
| 1 sweater (left over) | |
| *1 summer dress (left over, remodeled) | 1.00 |
| 1 white duck skirt (left over) | |
| *1 new white duck skirt | 1.00 |
| *1 party dress | 8.00 |
| 1 coat suit, bought end of winter season | 14.00 |
| 2 gingham aprons | 1.00 |
| 1 gingham house dress (ready-made) | 1.50 |
| 1 summer dress | 4.00 |
| | ——— |
| Total | $74.75 |
Try to find below, in the list for third year, the articles left over.
Also new articles which will be of service the fourth year. Do you
not think it is wise to plan in this way? Marjorie and Barbara
have enjoyed making their budgets.
[235]
Third Year
| 2 union suits, winter @ 2.00 | $ 4.00 |
| 2 union suits, summer @ .50 | 1.00 |
| 1 union suit, summer (left over) | |
| 2 flannelette nightgowns @ 1.00 | 2.00 |
| 1 new summer nightgown @ .75 | .75 |
| 1 summer nightgown (left over) | |
| *3 corset covers @ .50 | 1.50 |
| 2 pairs corsets @ 2.00 | 4.00 |
| 6 pairs of stockings @ .25 | 1.50 |
| 2 pairs garters @ .25 | .50 |
| shoes: 1 pair high laced @ 3.00 | |
| 1 pair high laced repaired, left over, @ .75 | |
| 1 pair low shoes (new) @ 2.50 | |
| 1 pair party slippers (new) @ 2.00 | 8.25 |
| 1 pair rubbers | .75 |
| 1 black sateen petticoat | 1.00 |
| 1 long white petticoat | 1.25 |
| 1 new short white petticoat | .75 |
| 1 short white petticoat (left over) | |
| retrimming last year's winter hat | 1.25 |
| 1 winter hat (common wear) | 1.50 |
| 1 summer hat (new) | 5.00 |
| 1 summer hat (remodeled, common wear) | 1.00 |
| 1 umbrella | 1.00 |
| *1 wool skirt | 4.00 |
| *2 shirt waists (plain) @ 1.00 | 2.00 |
| *1 extra white waist @ 1.00 | 1.00 |
| 2 shirt waists (left over) | |
| 1 winter coat (left over 2 years) | |
| 1 spring coat (left over one year) | |
| 1 pair kid gloves | 1.50 |
| 1 pair wool gloves | .50[236] |
| *1 wool dress (remodeled after 2 winters' wear) | $ 3.00 |
| 2 white duck skirts (left over) | |
| 1 party dress left over (refreshened) | 2.50 |
| 1 coat suit (left over) | |
| 2 gingham aprons (left over) | |
| 1 gingham house dress (new) | 1.50 |
| 1 gingham house dress (left over) | |
| 1 summer dress remodeled | 1.00 |
| 1 new summer dress | 4.00 |
| 1 raincoat | 5.00 |
| 1 wool dress (bought towards close of season) | 10.00 |
| 1 pair winter arctics | 2.00 |
| | ——— |
| Total | $75.00 |
EXERCISES AND PROBLEMS
Plan a clothing budget with mother's help, and see how yours
will differ from the above. Perhaps mother spends less for your
clothes or more. Mrs. Allen says that Marjorie is learning to purchase
so wisely that next year she may buy all of her own
clothes. Of course, Mrs. Allen will always be willing to help
when Marjorie needs her.
Lesson 8
PLANNING TO MAKE A DRESS SKIRT OF COTTON MATERIAL
Let us begin to make our dress skirts.
Open the pattern carefully and examine it. How did you order
it, by age or by waist measure? The pattern books usually say order by
age for a girl unless she is large or small for her age; then order by
waist measure.

Fig. 128.—The
simple dress skirt
and shirt waist.
Notice how many pieces you have. Notice whether
some are to be cut on a lengthwise fold: perhaps, the[237]
center front and maybe the center back if it has a panel front and back.
Notice how many gores there are. Do you know what a skirt gore is? Look
at your pieces. A gore is always wider at the bottom than at the top. Can
you tell why? Gores are of different shapes. Style sometimes regulates
the width, for some seasons skirts are very narrow and at other times
very full. The gores help to reduce the fullness around the waist. Do you
understand? Notice how many gores your pattern has. The front panel is
counted as one gore, and the back panel a gore. There are skirt patterns
with three, four, or even eleven or more gores. Perhaps your pattern has
three gores like the one in the picture (Fig. 128). Then the center back
will be cut on a lengthwise fold of material, as there will be two front
gores joining the back with seams at the hips. This is an easy pattern
and suitable for a young girl. One must think of suitability in selecting
the style to be worn. Instead of three, you may have a plain five or
seven gored skirt. Then the center front will be placed on a lengthwise
fold, and there will be two gores each side of the front for the five
gored skirt, and three each side of the front for the seven gored. A five
gored skirt is a simple one.
[238]
Study your pattern. Notice all the notches; also just where
the pattern is to be placed on the warp threads. This is very necessary.
Take your tapeline and measure the skirt length; compare with your own
measures. Your teacher will show you how to take your skirt measure,
at front, hips, and back, from the waist line to the desired length
(see page 50). You have learned how. Pin the tapeline about the waist
and measure from it. If your pattern is too long, it will be wise to
double it over at the center to reduce the length. If too short, add
a few inches at the bottom in cutting your cloth. Remember you must
allow for the hem according to desired width (see page 50 for changing
patterns).
Now lay the pieces economically. Remember the wide end of the
gore usually cuts to best advantage at the end of the cloth. Pin and cut
out after your teacher has approved.
The pattern usually allows from 3⁄8 to 1 inch for seams.
Notice how much. Match the notches, pin, baste, and then try on. If too
loose or too tight, it is possible to stitch inside or outside of the
bastings and so to alter. The seams can be finished by overcasting the
rough edges (see Fig. 28).
If your pattern calls for an opening or placket at one side of the
front, it will be appropriate to make a hem running lengthwise of the
skirt as a finish at the placket, and the skirt will not be seamed with a
simple seam at that place. Turn to the wrong side one inch[239]
for hem along the right front. Baste. Lap this hem over the left side.
Baste flat to the left portion of front, and stitch nearly one inch from
edge, to within 8 or 9 inches of the top. The placket opening on the
under side of front can be bound with a two inch strip, sewing on right
side at the edge and turning to wrong just at the edge. If the pattern
does not allow for a hem on right front and lap finish on the right side
of front, but only for a simple seam, then it will be necessary to face
the right front portion with a strip 1½ inches wide.
Pin the skirt to the belting. It is possible to turn in the
skirt edge at top of belt so that it comes even with the top of the
belt. This makes a slightly raised waist line. Stitch neatly at the top
edge. Turn hem at the bottom the desired width and baste carefully. The
stitching of the hem can be done on the right side for neater finish if
the basting is done with care.
Sew on hooks and eyes. Be careful to attach the hooks so that they
will not show on the outside of skirt.
Mollie Stark was so successful with her skirt that she made one
for her older sister Ruth, and also won the prize at the County Fair
contest.
EXERCISES AND PROBLEMS
1. Study some of the skirt patterns which mother has at home.
Compare with the one used at school.
2. What is a skirt gore? Describe. Draw on the blackboard.
3. Give some suggestions for economical cutting.
[240]
Lesson 9
CLOTHING IN RELATION TO HEALTH
Do you know that clothes help to keep us well? The Pleasant
Valley girls learned how, and we are to study, too.
Well people are usually happy people and they can do many more things
for themselves and for others than sick people. Have you ever thought
about this? All people wish to be well, but many are not because they
forget that it is absolutely necessary to think each day about keeping
well. There are many things which help to accomplish this. One cannot
wait until the end of the month or year to think about keeping well, but
must do so every day, as you have learned. Exercise and good habits,
sleep, proper food, recreation, and proper clothing all have a share.
Clothes are more important than people think. Ill health is often the
result of lack of thought in the protection of the body. Let us study how
clothes affect health. You know clothing helps to keep us warm or cool,
if we dress properly. You have learned how necessary it is to preserve
an even body temperature. Growing girls must think about this, for no
girl is well dressed who does not think about the relation of clothes to
health. Is a dress really beautiful if it is unhygienic? Miss Travers
told the Mothers' Club that clothing should serve our use in the best
way, should be pleasing and artistic, but also comfortable enough to
permit freedom. Did you ever feel sorry for the poor Chinese women[241]
who squeeze their feet? Many American women squeeze their waists as
well as their feet. This prevents proper circulation of the blood and
causes many complaints, loss of hair, and serious troubles, because the
circulatory system cannot carry nourishment to the many parts of the
body.
Perhaps you have noticed some girls wear very thin stockings, low
shoes, and low-necked dresses; really very scant clothing in cold
weather. Is this a good practice, do you think? Why not?

Fig. 129.—Shoes are
important. Why?
Heat and energy are generated by the body. We have learned that it is
a machine. Food, water, exercise, rest, keep it going. Heat and energy
are the result and are needed if the machine is to run well. If the heat
is all carried away quickly because the surfaces of the body are exposed
to the cold, then there is a waste of the energy which should go to
provide for the necessary workings of the body.
Why do we wear clothing? The principal reason is that the body
may be protected from the cold and that the temperature of the body may
be kept constant. It protects also from sharp, hard objects and briers
and stones which might injure the feet. Many people think only of the
decoration. This does affect our choice of clothes too, but should not be
the prime consideration. Miss Travers told the girls of Pleasant[242]
Valley to keep these things in mind in choosing clothes:
Some things to remember in choosing wearing apparel.
1. Adapt your clothing to your work. One cannot do garden and house
work in stiff collars and unsuitable clothing.
2. The condition of health will affect choice. Strong, well people do
not need the same kind of clothing as sick or delicate people.
3 Age makes a difference; young people are more vigorous than old
people. Babies feel the heat or cold more than adults.
4. Clothing should be chosen in relation to climate and temperature;
in winter, one should prevent an undue loss of heat, in summer, clothing
should not interfere with loss of heat.
Some important things about wearing clothing.
1. Wet clothing is very dangerous and should be removed at once. If
this is not possible, exercise, keep moving, until there is opportunity
for a rubdown and change. John Alden always runs when he gets his clothes
very wet.
2. The clothing worn next to the skin should be changed twice a week.
The body gives off impurities which are absorbed by the clothing. This
change is necessary if one wishes to keep well.
3. Clothing worn at night should be aired during the day, not shut up
in a closet or folded and placed under a pillow.
4. Clothing worn during the day should be aired at night. This is
necessary for health. The same underwear should never be worn day
and night both. How do you air your clothes? (Fig. 56.) Many mothers
do not change baby's shirt at night and wonder why he cannot sleep
and is so cross. Sometimes this irritability is due to this very
cause.
[243]
5. Outer garments should be rather closely woven, so that the wind
cannot penetrate and carry the heat away too rapidly.
6. Heavy garments are a great burden. One wearing them is not free to
act or work.
Next lesson we will study about selecting our clothes, shoes,
underwear, and other garments with reference to health.
EXERCISES AND PROBLEMS
1. Write on the blackboard some important things to remember
in choosing wearing apparel.
2. Tell some important things to remember in wearing clothing.
Lesson 10
MORE HEALTH PROBLEMS IN CHOOSING CLOTHES
Clothes help to keep us well. Let us study about the wise selection
and use of them.
Buying shoes. When Barbara Oakes goes to buy a pair of shoes
what do you suppose she thinks about besides the fact that they are
pretty and that she likes or dislikes them? She remembers that they
should fit her feet. She thinks about these things:
1. They should suit her purpose, be adapted to her use.
2. They should fit the instep and heel snugly.
3. They should be straight on the inside line.
4. The heel should be broad enough to balance the body well.
[244]
5. The soles should be strong enough to walk, and thick enough so
dampness cannot strike through.
6. There should be plenty of room for the toes to move. (See Fig.
129).
7. They should be long and wide enough for comfort. Tight shoes are a
strain on the body.
Many girls have "fallen arch." This affects the whole nervous system
and makes them ill. Many are suffering and do not know the cause. Barbara
Oakes was ill for a long time before her mother or the doctor knew why.
It is not necessary to wear an arch supporter or an orthopedic shoe, if
one has normal feet; and one can have normal feet if the above things
are remembered. Some girls choose foolish footwear, and later have much
discomfort and are unable to walk.
Very great care must be taken to keep the feet dry. It is cheaper to
buy a pair of rubbers than to pay a doctor; and rubbers save shoes and
keep the wet from rotting the thread of the shoes. Many women forget that
it is dangerous for a woman to get her feet wet.
Selecting clothing that is healthful. Stockings should be
chosen in relation to climate. It is unwise to wear thin, transparent
stockings on a cold day. If possible have two weights and select
according to weather.
Corsets are important. They may seriously affect health if not worn
correctly. They should fit snugly over the hips but allow freedom at the
waist line. For young girls corset waists are very satisfactory. Great
care should be taken, however, when the first corset is[245]
selected. Jane Smith says her mother tried several for her before getting
exactly the right one. The corset should leave no marks on the body. The
danger is that, unless well fitted, a corset interferes with circulation.
Lacing causes all kinds of troubles. It deforms the body and makes it
hour glass in shape, instead of free and beautiful like Miss James'
picture of the Venus de Milo (Fig. 130). When tight bands or corsets
interfere with circulation, the blood supply for the brain and the other
organs is shut off, and consequently these organs are not nourished.
Most girls wish to preserve the graceful waist line with which nature
has endowed them. Do you? Fat easily accumulates around the waist, but
plenty of exercise, gardening, sweeping, walking, climbing, will prevent
this. Buy a corset which supports your organs, one which does not press
downwards; and arrange the garters so that they will not be too tight and
interfere with the circulation.
Fig. 130.—Notice the
beautiful lines on the figure of Venus de Milo.
Underwear affects health. Do you remember that we discovered
the reason why one should be particular about the kind of underwear worn?
We learned that ill health and fatigue are often caused by weight of[246]
clothing or by tight clothing causing lack of circulation or by clothing
which prevents the skin from being ventilated. Textile materials and
temperature of the body are closely related. We should learn to know
which materials to select. Each person feels the need differently. Old
people and little babies feel the heat or cold more than other people.
Grandmother Stark usually feels cold and wears a shawl about her
shoulders. Underwear must be chosen in relation to climatic conditions
and also for conditions under which one wears them, for indoor or outdoor
work. Each must study her health, the climate, her age, and occupation,
and plan accordingly for the best kind.
Underwear should be chosen which can be easily cleansed, also that
which will permit plenty of air next to the skin. These properties of
materials, as we call them, must be studied.
The body, as we know, loses heat and water every day. Some materials
conduct heat more rapidly than others; and some absorb and retain, while
others eliminate, moisture more readily. Absorption and elimination
differ with different fabrics. Linen is quicker than other fabrics to
eliminate moisture. Wool on a dry body of a person who does not exercise
freely feels warm and continues so as long as the skin does not give off
more moisture than the wool can take up. If the body continues then to
give off moisture, the heat of the body cannot escape and one does not
feel comfortable. If a current of air or a draught occurs,[247]
the heat will be conducted quickly and the bodily temperature reduced
too quickly. So underwear must not only prevent too great loss of heat
by conduction, but must be so constructed as to conserve heat when it is
needed.
Heat is eliminated when materials conduct it. Porosity of materials
prevents too great elimination. The air in the meshes or pores prevents
this, as a still layer of air does not conduct heat readily. A loosely
woven or knitted shawl is warmer under certain conditions than one which
is firmer. Two lightweight garments are better than one heavy one because
of the air space between.
Wool is warm, but irritating to many people. It is not as cleanly
as some fabrics, for it absorbs the body excretions and is not easily
laundered. As it shrinks with use, it has fewer air spaces between the
meshes. Any loosely woven or knitted underwear with air spaces is more
hygienic than the closely woven.
Cotton garments are often woven loosely and so treated in manufacture
that they absorb easily. Silk is very pleasing but costly. Silk and
wool combined are also excellent, but expensive. The great argument for
wool or for wool and cotton is that evaporation is slow unless moisture
and draught are present, and so the bodily temperature is not apt to be
reduced so unduly as through cotton or linen; in other words, one is not
so apt to take cold.
Union suits form an even layer over the whole body[248]
and are considered more hygienic than the double layer
of vest and drawers at the abdomen.
EXERCISES AND PROBLEMS
1. What underwear do you think is the best kind for you to wear
considering your age, work, climate, health?
2. Write a composition of two hundred words about the best kind of
corsets to wear, and why.
3. What important things will you consider the next time you buy a
pair of shoes?
REVIEW PROBLEMS
I. Begin to keep your clothing budget. Ask mother to permit you to
plan it. Do not stop at the end of the year; keep on for at least four
years.
II. In what ways are you definitely planning each day to keep well?
How do clothes help?
III. What facts learned at school can you give mother about wool,
which will help in buying your new winter coat.
IV. Plan a school exhibit of all the work done during the year. Your
teacher will make suggestions about the refreshments and invitations as
well as plans for mounting the work.
[249]
CHAPTER VI
CHOOSING AND WEARING CLOTHES
Have you ever thought that being properly and attractively dressed
helps towards achieving success in life? Marjorie's Cousin Ann says she
knows that the neat, tidy girls who come to the factory looking for
work are more apt to be chosen than those who are careless about their
dress. Cousin Ann, as you have learned, is very particular about her
appearance. She learned long ago that cleanliness of clothing is the
first essential in being well dressed, and that neatness is another
requirement. Cousin Ann knows that it takes time to wash out her collars,
her shields, and stockings every other night; but she also realizes that
she must be particular about her appearance if she wishes to be retained
at the factory. She takes time to mend the tears which sometimes come so
unexpectedly, and the lace which is ripped on her waist, or to sew on the
button which will soon be lost from her coat unless sewed. If she spills
anything on her dress or coat, she tries as soon as possible to remove
the spot. This takes[250]
thought, too, as well as time; but Ann knows that it pays. Have you,
too, thought about these things? One must also know what is suitable and
appropriate for various occasions, and how to choose becoming colors in
materials or hats and gowns if one buys them ready-made. This is really
a study in buying, too, and of knowing how materials are made and can be
tested. All these things were discussed by Miss James and the Pleasant
Valley girls. They were always very glad when Miss Travers came to help
too.
Lesson 1
WHAT IT MEANS TO BE WELL DRESSED
The Pleasant Valley girls have decided that it is worth while learning
about suitable and attractive dress. They are anxious to begin this
study. Suppose we learn some of the things one must think about and study
in order to be properly and attractively dressed.
One does not have to be expensively dressed in order to be
attractively and well dressed. Much depends on appropriateness. It is
not appropriate for a girl to wear jewelry, thin stockings, low fancy
slippers, lace waists, feather hats, to work or to school. How much more
attractive and appropriate is a plain, neat shirt waist and cloth skirt,
a plain necktie and a simple hat, and plain boots or ties. One should not
dress as if one were going to a party when one goes to work or to school.
Do you understand what appropriateness[251]
means? It means wearing the suitable kind of clothing for every occasion.
It is our duty to be as well dressed as possible, for our friends' sakes
as well as for our own; but a well-dressed girl is never conspicuous.
Clothes which would be appropriate in a large city for a reception
might be very inappropriate in a small town. Our daily clothes should
be adapted to our uses, whether in country or city. Would you wear your
party dress for gardening or for tennis or skating?
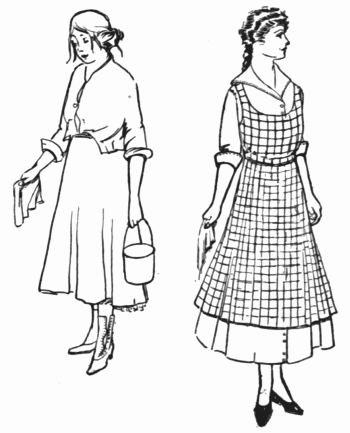
Fig. 131.—Which of these girls looks
ready to do her work?
Criticize your own garments. Try to have them neat and clean,
for this makes one more self-respecting. Try to have your clothes
convenient, neat, graceful, beautiful, allowing for free movements of
the body. Choose something which is not overdecorated but which will
emphasize your charm and personality. Young girls do not need jewelry or
much decoration on clothes, for youth is always charming in itself.
Some girls try to copy every "latest style." Do you? One should not
unless it is a style which will suit one. Cousin Ann heard a talk at the
Young[252]
Women's Christian Association one night. It was on simplicity of dress.
The speaker was from a large department store in Paterson where Ann
lives, and she gave Ann some new ideas about dress. She said simplicity
is not necessarily plainness, but it means being so intelligent that
one knows what to leave off in the way of decoration. She said being
well dressed is knowing what to omit. She also said that trimmings and
ornaments without reason are foolish and spoil a gown. Because one bow
looks well it does not follow that ten will improve one's appearance.
So many girls are really caricatures. They wear every exaggerated thing
and many things which are not refined, as the very low neck, or the very
scant or transparent skirt. This is not beauty of dress, but very bad and
vulgar taste. The speaker said that "beauty of costume is not necessarily
the result of costliness, but of artistic appreciation." Cousin Ann said
several of the members of her sewing club were at this lecture, and
they decided to ask Miss Willing, who leads their club, to talk about
"artistic appreciation." Cousin Ann said she did not quite understand
what the speaker meant. This is what Miss Willing told the girls, and
then they understood perfectly. Perhaps you would like to know, too.
A costume is a work of art. She said we must think of our
costumes as being works of art. Every girl has a style of her own, and
she should study it and dress so as to bring out all her good points and
conceal those not so attractive. One's hair or eyes should be considered[253]
in choosing color. Stooped or narrow shoulders, if they cannot be
corrected, can be made to look less narrow by the plan of the gown. Stout
figures can be made to look less stout. So by choosing the right colors
and correct decoration and right lines, one can often improve one's
appearance. Miss Willing says to understand about this is to have what
the speaker at the Young Women's Christian Association called "artistic
appreciation." One should cultivate artistic appreciation for good
furnishings as well as for appropriate dress. Miss Willing told the girls
another evening about color and good lines, for they are all so anxious
to learn. They never even imagined before that any one ever thought about
such things. Marjorie Allen and the other girls at Pleasant Valley School
are very glad Cousin Ann told them too.
The costume should be the background as it were. Miss Willing
says to remember always that a really artistic costume is one which
makes us say "what a lovely girl!" rather than "what a lovely gown she
is wearing." A costume should not be so strong in color or design that
one thinks only of that. Do you remember how in some rooms we feel the
pattern of the wall paper or of the carpet. When one does, the design is
poor; the wall is the background. Our clothes should make the wearers'
good qualities stand out. They should be subordinate, Miss Willing says.
Do you understand that word?
Miss Willing says the outline of our clothed figures[254]
should be pleasing. Have you ever walked to town and seen girls with
large hats which were not balanced on their heads, and short skirts and
perhaps large muffs? If you watch them as they come towards you down the
street, you will see that the whole outline or silhouette against the
sky or house is poor; they look top-heavy or, we say, unbalanced. Such a
costume is not good. A smaller hat with the short skirt is what is needed
in order to have a balanced figure. The outline of the natural human
figure is most beautiful. Look at the lovely figure of the Grecian woman
(Fig. 132); see how the lines follow her figure. Costumes which make ugly
lumps, as bustles and large muffs, and other ugly shapes are not well
balanced.

Fig. 132.—Notice the
lovely folds of the
Grecian costume.
An artistic dress shows good taste. Do you remember your talks
in your art class about the spaces in a design, and the relation of one
to the other. This is true in dresses too. Tucks, buttons, seams, bands
of trimming all mark off spaces on our bodies (Fig. 133). In order to
have a really artistic dress, there must be a plan about the arrangement
of spaces. A short, stout girl with bands of trimming running around her
skirt and with lines of trimming running up and down the[255]
waist will present a very strange appearance to one who has "artistic
appreciation." Can you tell why this would not be good taste? A stout
figure should wear vertical lines of trimming rather than horizontal;
and the spaces between lines should be such as will make the girl look
smaller rather than larger; so dresses must be really designed, and the
spaces, colors, values, really thought about. Do you know what value
means? Some costumes have contrast in values. Black and white are sharp
contrasts. One sees the black or the white at once. These spots of black
or white jump at one unless there is something to connect the two, as
gray, which would be an intermediate value. Spotty costumes are not good
or restful. Have you seen, perhaps, a white dress with black hat and
gloves and shoes? Did you notice how the black things stand out and the
eye jumps from one spot of black to another? A white dress with white
shoes and gloves and a black hat trimmed with some white, thus carrying
some of the white to the black, would be better.
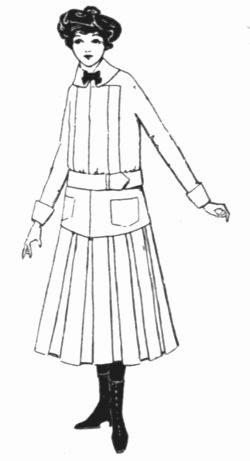
Fig. 133.—Notice the
good spacing and arrangement
of lines.
Miss Willing said this is called studying values. We can study values
of color as well as of black and white. Next lesson we shall learn
what Miss Willing told the girls about color in selecting or making
dresses.
[256]
EXERCISES AND PROBLEMS
1. Why do you think Miss Willing had "good taste" in dress?
2. What can you tell about Miss Willing's talk on artistic
appreciation? What does it mean in relation to dress?
3. Criticize your own garments in relation to line, simplicity,
decoration, appropriateness.
Lesson 2
THE CHOICE OF COLORS FOR CLOTHING
Color is important in choosing or making our clothes. We too
must learn if we would choose as wisely as the Pleasant Valley girls.
Miss James thinks that the Pleasant Valley girls have learned so much
about color in relation to general design in their art classes that they
will be able to understand easily about color in dress too. Colors, they
have learned, have value, with gradations from light to dark. In black
and white the contrast is striking, but when values are closer together
the harmony is closer and less conspicuous.
In choosing your new spring dress be sure to think of your
own characteristics. Your appearance may be injured or improved
according to the color chosen. Color even more than design may spoil the
appearance, and is important to the wearer and to all who come in contact
with her, for color is expression of one's refinement and culture. Every
girl of Pleasant Valley will wish to know how to look her best. Color in
which there has been mixed much gray, as dull blue or dull[257]
red rather than pure bright color, is apt to make the individual
characteristics stand out. This grayness in color forms a background
as it were, or a setting, for the face and shows the figure to best
advantage.

Fig. 134.—Can you find
the middle values of gray?
Artists have a way of expressing this brilliancy of color. Miss
James says they call it intensity. Do you understand what is meant by
color when it is strongest and loudest and most intense? Think of red
of the most vivid brilliant kind; gradually think of it growing grayer
and grayer until it is pure gray. By intensity of a color is meant this
difference in grayness. Very few people can wear very bright red. Miss
James says she must have the "grayed" colors, in dahlia tones of red if
she wishes a dark dress of this color, or in old rose if she wishes a
dress which will be less somber. This is true of all colors; only red is
perhaps the most difficult to use. One learns to use color in its full
intensity only for touches here and there on a gown or a hat, which is
itself not intense in color.
Large people should not wear red. Blue or green are cooling, quieting
colors and so are better adapted to large figures than red and also
better for those whose features are not very pronounced. Blues which are
not very strong, or so grayed that they[258]
have lost half or more than half of their strength, are more interesting
and becoming for large figures for a whole dress.
Yellow is nearest light, and in combination with red gives the oranges
from which we get browns of all kinds and degrees, rich and warm in
effect. Try mixing these colors in your paint box. Green combines yellow
and blue. It is a light, cheerful, and calm color, always restful and
soothing. The yellow-greens are perhaps more cheerful; that is, when more
yellow than blue is used. When more blue is introduced, the greens are
more soothing and cool. Violet is red and blue mixed; a cool and exciting
color, which can be very intense or very subdued.
Choosing color for a dress. Do you think the Pleasant Valley
girls will think before choosing their new gowns whether it is for
school, or for a best dress, for a party or for the house? Even apron
material can be chosen which will make the wearer look unattractive. Why
not look pretty and clean when one is at work too? Miss Willing says
that quiet color in dress is an evidence of good taste. In combining
colors in dress one must aim to obtain the right balance in color. Miss
Willing says, in planning the color scheme for a costume, think about the
dominant or most prominent color and endeavor to bring the others into
harmony with it. Harmony is the result of colors being brought together.
Touches of black help to bring colors together and so harmonize them.
Miss Willing gave several other[259]
suggestions for harmony. Cousin Ann put them down
in her notebook and sent them to Marjorie.
1. When one wishes to use contrasting colors, as yellow and violet,
one can get pleasing harmony by using a large quantity of one color and
a small amount of the other. This subordinate relationship of one color
to the other gives harmony; the more grayed the tone of the large mass
of color, the greater the intensity of color in contrast that can be
used.
2. In combining colors of weak intensity for harmony, a harmony of
costume of one mode, that is one color used in different values, is safe
but is not always so interesting as the contrasting colors.
3. To emphasize a color, a touch of the same may be added to some part
of the costume. Blue eyes seem even more blue with a blue necktie around
the shirt waist collar.
4. Another way to make a good harmony is to use complementary colors.
Red and blue; green, violet, and yellow; green and plum; blue and
orange; purple and yellow-green. One should be used intense, and the
other in a gray tone. For example, in combining color with hair, greens,
particularly gray greens, are very pleasing with auburn hair. Barbara
Oakes discovered that fact with her auburn hair. Violet tends to make
yellow hair look more golden, so care must be taken to have a gray violet
so the gold color in the hair will not be overpowered. "Red" hair is made
to look brighter when a blue costume is worn. So you see one can avoid
unfortunate combinations if one studies the strength of the color of the
hair in relation to the colors to be used.
Learning to combine colors. Miss James had many samples of
gauzy chiffons which the girls learned to handle and to combine so as to
get artistic results, for combinations of complementary and contrasting
colors[260]
as well as for combinations of "one hue." It is only through trying that
one learns. This, too, is a matter of appreciation. Some people have
finer appreciation for color than others. By thinking about this and
learning all you can in school and from books, you too may come to have
real color appreciation.
In choosing the best colors for your figure or for mother's or for
auntie's, you must think about the value and intensity as well as the
other characteristics of color.
Our costumes, as a rule, are worn for different occasions and are
seen against different backgrounds. We say that the backgrounds, as
in rooms, or against rocks or grass or hillside, are of about middle
value—halfway between white and black; in other words, gray. Black
and white costumes, then, will always stand out. White tends to make the
figure appear large; black calls attention to the outlines of figure
and looks best on people with good figures because of this emphasis of
outline. Blue, blue green, and blue violet—if of middle value, very
"gray"—or gray itself are best adapted to stout figures as they are
retiring colors. They seem to melt into the background and do not give
prominence to the figure. A little brighter color may be added and make
the costume more becoming to the face. This should be used through the
center of the gown, not at the edge to draw the eye to the boundaries of
the stout figure. A rose or a flower of contrast at the center of the
belt is an example.
[261]
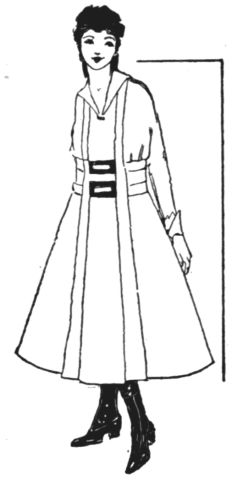
Fig. 135.—Vertical
lines through the center of the costume make the figure appear
thinner.
Studying lines of a costume. Miss James says the best way to
get an effect of height is to place the longest possible vertical lines
through the center of the figure with no points of emphasis as trimming
on the outer parts (Fig. 135). For a slim figure, when one wishes to
appear stout, the outline of the figure should be emphasized at the outer
sides of sleeves or shoulders or skirts, by such arrangement of trimming
that the eye is carried across the figure (Fig. 136).
Miss Willing and the girls had a good laugh about the use of large
plaids and broad stripes for stout people. Plaids or squares certainly
tend to emphasize stoutness, as do bold designs or conspicuous color
combinations.

Fig. 136.—Notice
how the emphasis on the outside of the costume makes the figure appear
larger.
So many things to remember—line, value, color; all-important, if
one is to be attractively dressed. Miss James has decided to permit the
girls to work out the color combinations at school for their new spring
dresses. The subject of color in choosing hats is equally important. Let
us study next lesson about it.
[262]
EXERCISES AND PROBLEMS
1. Study your own characteristics. Write them down. Decide
what predominating color you would like for a spring dress. From
the chiffon colors which your teacher has, combine the appropriate
color combination which you would like.
2. Arrange with the chiffon samples, combinations of complementary
colors, of contrasting colors.
3. Write a composition on the subject of "What makes a girl
well dressed."
Lesson 3
SELECTING A HAT
What can you learn about the care and arrangement of your hair. Do you
know how to choose a hat?
Jane Smith says that some day she expects to be a milliner. Perhaps
she will be. Miss James says she can later go to a school and study
millinery. This means that Jane will learn not only how to make hats, but
about the right lines and colors to use. Jane has a natural deftness of
touch and a good idea about copying and designing; so Miss James thinks
she will make a good milliner. So often hats are unbecoming because the
colors are inharmonious, or the lines out of relation to the face wearing
them. Whether one is old or young, one should think about this.
Give some care and thought to your hair. One day when Miss
Travers came from the State College to speak to the Mothers' Clubs, she
stopped at the school and gave a talk to the girls of Pleasant Valley
School[263]
about their hair and hats. She said that so many women and girls forget
to take care of their hair. It should be washed once a month in hot
water with castile soap and perhaps with the white of an egg, and then
thoroughly rinsed. The comb and brush should be washed once a week.
Marjorie Allen's mother has beautiful hair, and she says she does as Miss
Travers told the girls; and also she brushes her hair carefully to remove
dust, every night before going to bed, and braids her hair in two braids
for the night. This is a very good way to care for one's hair.
Have you ever noticed how some girls nearly lose all their hair
because they burn it or dry it up with the curling irons? One should be
very careful always to test the irons on a paper. Burned hair is not
beautiful. So often girls forget that the becomingness of a hat will
depend on the way the hair is taken care of or dressed.
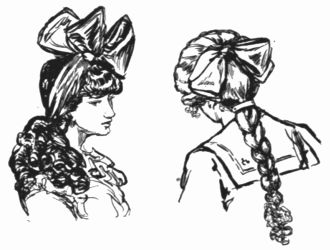
Fig. 137.—Which arrangement of hair
and bow do you think most appropriate
for school wear?
Large bows, out of proportion to the size of the head, are very poor
taste. A bow as well as a hat should suit the face in line as well as
color, and a bow which stands way out in conspicuous angles is not good
in line, as it is not apt to conform to the lines of the face and of the
head wearing it. Have you noticed this?[264]
Perhaps you can try to rearrange some of the bows the girls are wearing
to school so they will be in better taste. Cleanliness of the head and
hair, and a clean, clear complexion, which comes from proper food and
good digestion as well as from cleanliness, are the best backgrounds
for a hat. Any girl who has this charm of cleanliness can with thought
choose a hat which will be becoming. Hats, also, emphasize the defects as
well as the good points of the wearer; so neatness and a becoming way of
arranging the hair will help very much. Perhaps some of the girls would
like to learn to make hats, too. The hat is the most difficult article of
the whole wardrobe to select. Most girls and women wear hats that are too
small and that stand on the top of the head instead of fitting it. Good
taste, Miss James says, in choosing hats means the very thing we have
studied about: artistic appreciation, a knowledge of line and color and
form as well as appropriateness.
Think about the shape and the lines of a hat. Hats should
be chosen or planned, if one is making them, in relation to the whole
figure. Do you stand up or sit down before the mirror in selecting a hat?
Try standing up so you can see your whole figure and the relation of
the hat to the whole. You can tell then if the hat is too large or too
small, whether it overbalances the figure, or if the silhouette will be
pleasing. Marjorie Allen says since she has learned about these things
she is surprised to notice how few people have thought of this question
of the silhouette. Sometimes,[265]
the milliners are to blame too, for they do not always know this secret.
Marjorie says her new winter hat does not please her because of the
silhouette.
Miss Travers told the girls to think especially about lines. The
round-faced girl whose nose turns up a little will look best in a hat
that is slightly tilted in front or with a rolling brim at the side or
front. Barbara Oakes says she discovered that for herself. She had two
hats which rolled in that way; and she liked them better and was more
comfortable in them than in others. She also learned through experience
that she did not look well in narrow hats that bend over the face. Miss
Travers says it is true when one's face is full and the nose retroussé,
that such a shape is not apt to be becoming.

Fig. 138.—One can
select a hat which will make a good silhouette when one sees the whole
figure before a mirror.
Miss James says she noticed that long, thin faces look longer and
thinner in high pointed trimmings. What kind of trimming, then, would you
recommend for a long, thin face? For long faces, a brim worn slightly
forward will cast a shadow and so tend to shorten the length of the face;
and brims that are rolling and wide, counteract the effect of the long,
thin face. Do you see[266]
how very important it is to study the face and its lines?
The way of dressing one's hair may make it difficult to choose a hat.
If the person with the long, thin face also draws back her hair sharply
at the sides, her face will look longer and it will be more difficult to
choose a hat for such a face. If the hair is worn very fluffy when one
has a very round, full face, then the face is apt to look fuller. So you
see hairdressing is very important to study too, if a girl is to look her
best and choose the most becoming hats.
Color, too, should be kept in mind. Some skins are pale; others
are rosy. Black makes the complexion look white and should not be worn
next to a dark, swarthy skin. Browns are apt to look well with auburn
hair like Jane Alden's. She has such a clear complexion. Barbara's
mother, Mrs. Oakes, with gray eyes and hair, will look well in gray.
We have studied about contrasting colors. The contrasting colors for
a person with light hair will be quite different from the colors for a
person with auburn hair. Notice what is said in the lesson about color in
selection of dress. This is true of hats too.
Select a hat that is becoming. In choosing hats aim always to
get what is becoming to you and your style rather than the extremes
of fashion. The latest styles can always be adapted to suit your style if
a milliner knows her business.
Remember that very often hats are not becoming because[267]
they are not worn properly. Sometimes the
wearer forgets and pushes the hat back or to one side; and then its lines
do not conform to the outline of hair and head and face. Study how to
wear your hats. Large hats are often difficult to wear because of correct
balance.
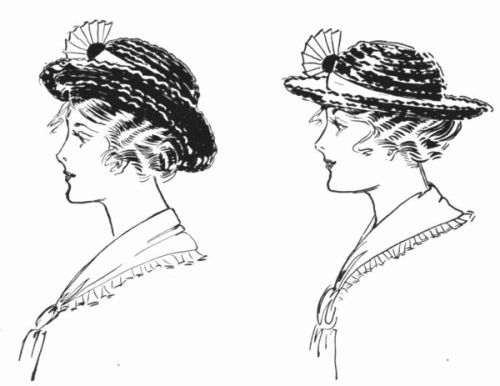
Fig. 139.—Which way
looks better?
If you would like to try to make a simple summer hat, perhaps you
can buy a frame, and with your teacher's help learn to change and adapt
it to your face. It is easy to learn to sew straw on a frame and to
trim with a bow or flowers. Simple trimming for young girls is always
the most pleasing; flowers, wings, quills, and simple bows are the most
suitable.
[268]
EXERCISES AND PROBLEMS
1. What things will you have in mind when you go to the milliner's to
select a new hat, or to have your old hat remodeled? Write a list of the
principal points to be kept in mind in choosing.
2. Bring to school pictures of hats adapted to faces; some that
are not. You can find these in old fashion magazines; perhaps in old
portraits. Pin them on your classroom Bulletin Board. Criticize. Your
teacher will probably have some too. Why is this a good subject to
study?
Lesson 4
MAKING THE MIDDY BLOUSE
The Pleasant Valley girls will make middy blouses and so complete
their gymnasium suits. Will you not wish to complete your suits too?
The girls have found their bloomers and skirts very useful, and are
glad to make the middy blouse too. They will use the same material as for
the skirt.
By this time the Pleasant Valley girls are so expert that they make no
mistakes in laying on their patterns or in cutting out garments. They are
very particular to have the long line of single perforations indicating
the length lying exactly on the warp threads of the cloth. Jane Smith
says she can tell exactly which pieces must be cut double on a fold of
the goods. Can you? The girls sent for patterns for 34 bust measure
and for 38. Some of the girls are quite large for their age—Jane
Andrews and Barbara both are large and will need the 38 size.
[269]
Miss James opened a pattern and held up all the pieces. She pinned
them to the dress form so as to show the relationship of each piece to
the figure. Can you do this, too, before you begin to cut, and so learn
which pieces are to be cut on a fold? Then lay the pattern on your cloth
most carefully and pin ready for cutting. Do not cut until your teacher
says you may. Learn to use a tracing wheel and trace your seams, so all
will match in putting the middy together. This garment will be made
entirely by machine, except the hand processes of basting and gathering.
Hems and facings should be carefully basted before being stitched. Good,
perfect stitching improves all such tailored garments. Poor stitching
spoils the effect.
How to make a middy blouse. After the pattern has been
carefully laid on, and the material cut out, this is the way to make and
finish a middy blouse:
1. Baste, with the seams on the outside, shoulder, and underarm seams.
Try on. If necessary in order to fit more smoothly across the chest,
let the front drop; if extra fullness across the chest is desired, let
out under the arms. The shoulder seams will be finished, but not the
underarm. Mark with tracing or pencil the new seam for underarm if you
must change it.
Make a flat fell seam at the shoulder, ½ inch wide finished.
You have all learned how.
2. The sleeves, which are in one piece, are put in next, before the
sleeves or underarms are seamed. Match the notches, gather the sleeves if
there is any fullness at armhole, and baste in the sleeves so that the
seam is on the right side. Make flat fells, basting the turn which falls
over the sleeves so that it will lie very flat.
[270]
3. Baste seams of sleeve and underarm all in one long seam on right
side. Match at armhole. Make flat fell, turning the fell towards the
front (see page 216).
4. Hem the bottom of the middy with one inch hem.
5. Finish the neck next. Prepare the collar with its facing according
to the notches of the pattern and directions. Sew; turn to right side.
If the collar is to be decorated with finishing braid, this decorating
should be done before the collar and facing are sewed together. Attach
collar to middy, right of center collar to right of the center back of
middy. The seam will then fall on the inside towards the neck and will
be concealed by the facing which should be turned in and sewed over the
seam. Patterns for middies vary, and other methods of attaching collar
may be suggested. A loose ribbon or scarf of silk can be tied under the
collar to form a sailor's knot.
6. Then finish the sleeve. The sleeve may be finished with a half inch
hem and rolled as many are worn, or a cuff can be attached which will be
of the same width as the sleeve or just to fit the wrist. In the latter
case, the fullness of the sleeve must be gathered to fit.

Fig. 140.—Eyelets were
made by some girls, in the front of their middy waists.
The girls of Pleasant Valley School made sleeves of three quarter
length, and attached a turned-up cuff of same width as sleeve. This cuff
was made double: the two pieces sewed together, turned, and attached
to the sleeve with the seam, on the outside of sleeve. The facing,
then, concealed the seam and, when the cuff was turned up, was entirely
concealed. This makes a very neat finish inside the sleeve.
[271]
Some of the girls, those who worked rapidly, made eyelets at the front
of the middy and laced the middy. Eyelets are punched with a stiletto or
sharp point, and are worked like a buttonhole, only perfectly round.
The girls of Pleasant Valley will give an entertainment of calisthenic
exercises as soon as their middy suits are entirely completed. The
boys will also give some exercises with the dumbbells and join in the
folk dancing. "The Pleasant Valley News" has already announced this
entertainment at the Town Hall. Every body in Pleasant Valley is going.
The money will be used to pay for some of the furnishings of the Ellen H.
Richards House.
EXERCISES AND PROBLEMS
1. Draw a sketch of your middy blouse. How will yours differ
from the one in the picture?
2. Try to make another middy at home.
Lesson 5
SUGGESTIONS FOR BUYING GARMENTS OF WOOL AND SILK
Miss Travers from the State College talks to the girls of Pleasant
Valley School about buying clothing, especially of wool or silk.
You, too, will wish to know what Miss Travers said.
Have you ever considered whether it is wise or not to buy your
clothing ready-made? Most of the mothers of the Pleasant Valley
girls make the garments at home with some assistance from the visiting
dressmaker.[272]
What a help the Pleasant Valley girls will be when the dressmaker comes
to their homes. They are not old enough to take full responsibility, but
they will surely be able to assist after the dressmaker has planned. This
will help their mothers, too. Mrs. Allen, Mrs. Stark, and Mrs. Oakes have
already discovered how many good suggestions their daughters have to
give.
It is sometimes wise to buy things ready-made. In our
grandmothers' day this was impossible. Grandmother Stark used to stitch
all Grandfather Stark's shirts by hand and make his overalls. To-day one
can buy good serviceable garments like overalls, rompers, shirts, etc.,
at moderate prices, ready-made. Just what should be made at home should
be determined by the mother, and will depend on her time and duties at
home. Some mothers can so organize their household work that they have
time for some sewing too, and they enjoy the change of work. It pays to
make certain garments because the workmanship is often better and one can
choose one's own materials. This means that the life of the garment is
apt to be longer. This is economy if one has the time and strength; but
it never pays if one sacrifices other things like fresh air, exercise,
some relaxation, for the sake of saving a little money.
What should you consider in buying ready-made garments? Miss
Travers says it never pays to buy flimsy materials, cheap lace edging, or
insertions which are poorly put together and will tear. One can instead[273]
purchase ready-made garments which are plain. It is not always possible
to afford the time to make dainty, fine, handmade underwear, which soon
wears out; but one can often spare the time to construct a few pairs of
more durable drawers, and corset covers, by machine for everyday wear,
when one realizes how much greater will be the life of the garment.
If one is buying ready-made garments, one should think about the
following things:
1. Is the material suitable? will it wear well? is the color
suitable or will it fade very soon?
2. Consider the workmanship. Are the seams well sewed? Is the
stitching very coarse, or does the garment look well finished? Is the
appearance neat, or will it pull apart very soon?
3. The construction should be examined. Is the garment well cut,
or is it cheap because it is scant in fullness? This may not permit of
freedom in movement, and the garment may have to be cast aside because
uncomfortable. Then money is wasted.
4. It never pays to buy anything which one does not need. It is well
to have foresight and to plan for what one will need for the year,
but experience soon teaches one the quantity. It is foolish to buy
unnecessary things because they are pretty. One should learn not to be
tempted.
5. It sometimes pays to wait until certain seasons for purchasing
garments. Between seasons one can get well-made articles of clothing at
considerable[274]
reduction, if one can wait. Winter garments are reduced in January or
February, and summer goods in July or August. It often pays to wait. In
planning one's wardrobe, one can think about this. January is often a
good time to buy household linens or other furnishings at a reduction.
6. The use of garments should guide one in making a selection. It is
necessary to study one's whole wardrobe and to know what is needed. A
girl engaged in business will need an entirely different wardrobe from
one who spends most of her time at home helping mother. The first step,
then, in economy is to know one's needs and to purchase accordingly.
Is the garment needed and suitable for the occasion? Remember about
appropriateness, and buy garments which will render the service needed.
One does not wear silk dresses for housework.
7. Sometimes undergarments are made in sweatshops under very
undesirable conditions for health. The garments are cheap because made
by poorly paid workers under very unsanitary conditions. Do you wish
to wear such garments? As long as women buy the cheap kind made at the
sacrifice of human life, this sweatshop system will continue. One can buy
inexpensive underwear made under sanitary conditions. It is labeled with
a tag of the Consumers' League. This is an organization which is trying
to better the conditions in workrooms and shops in which clothing is made
and to improve wages and working hours. This League[275]
permits the use of its label on white underwear made under the conditions
they approve of: no work outside of factories, no child labor under
sixteen years of age, and obedience to the state labor laws. The labels
are used by firms agreeing to fulfill the above requirements. If you are
purchasing underwear, perhaps you can buy some with the Consumers' League
label. It looks like this (Fig. 141). Miss James wears this kind, and
Mrs. Oakes and Mrs. Allen, too, now that they know about it.
Fig. 141.—Consumers' League Label and Union Label.
8. It is sometimes more economical to decide on a particular color
for a season. One can, as a rule, wear one's clothes to more economical
advantage and look better dressed by choosing a particular color than if
one has a red dress, a blue coat, and a green dress for best. The coat is
probably worn with both dresses and may not look well.
9. Remember, if one has only a limited amount of money for clothes,
one should not try to buy the very latest fashions. Exaggerated styles
live but a short time, and some of us must wear our clothes for a long[276]
time, until they are worn out. If materials are good, one can often have
one's clothes remade, by combination with a little new material of a
contrasting kind. A knowledge of textile materials and values will always
help in selecting either ready-made clothing or materials.
10. Remember you must know about the things you wish to
purchase. Clerks as a rule know very little about the goods they sell.
If you know, you can make the dollars earned buy more than if you were
ignorant.
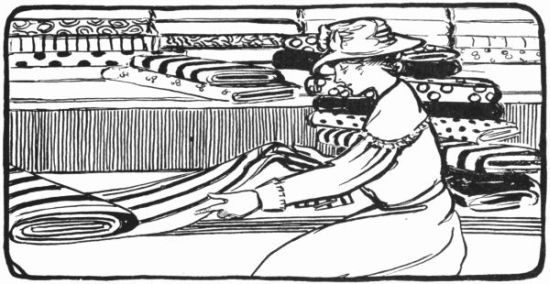
Fig. 142.—It takes much thought to learn to buy intelligently.
What should you think about in buying materials? Here are some
of the hints for purchasing wool and silk materials or garments which
Miss Travers gave the Pleasant Valley girls. Talk them over with your
teacher. See if you agree.
1. Garments made of wool and cotton mixed do not keep their shape as
well as all wool. If one can afford[277]
only wool and cotton, the salesman should tell one in purchasing about
their composition. The mixture should be cheaper. It is often sold for
all wool at a higher price. If one untwists the fibers of the material,
it is possible to detect cotton. Try at school on some ravelings of
garment seams or other materials. The burning test will help one to
decide. We shall learn some tests in our next lesson.
2. Remember wool is an expensive fiber. Do not expect to get all wool
for little money.
3. Remember the weave affects wearing quality. A close twill weave is
often more durable than a basket weave.
Do you remember your lessons about silk; how it is grown and made
by the little worm, and how it is manufactured or spun into thread
or woven into silk cloth? In buying silk one must remember about its
manufacture.
1. Silk is seldom pure. It is apt to be weighted. If the silk feels
heavy in the hand, it does not always mean that it is a good piece of
material and will wear; it may be weighted with tin; up to 30 per cent of
tin is not harmful. A softer, pliable silk is not apt to be so weighted,
and will wear better. Soft silks so woven as to pull at the seams are
not economical. Close weaves are better than loosely woven ones for
wearing.
2. Fray some of the threads of the cloth you wish to buy. Is it
possible to break either the warp or woof[278]
easily? If so, the silk will split along either warp or filling and will
not wear.
3. One should not expect to get bargains in silk. Cheap silk will not
wear. It is better to wear some other material. Is the material made of
reeled silk or of spun silk? You have learned the difference. Articles
made of reeled silk are more expensive.
4. Silk is sometimes adulterated with cotton or artificial silk and
sold for all silk. We shall learn some tests in our next lesson so we may
discover too.
Miss James talked over all these points with the Pleasant Valley girls
and showed them some good and bad materials. The girls decided to be on
the lookout for these things. Will you?
EXERCISES AND PROBLEMS
1. Bring to school garments or materials which have not worn
well. Try to find out why. Your teacher will help.
2. Write a composition about things to think about in purchasing
a new winter suit ready-made. If you must buy from a catalogue,
can you judge about the wearing qualities?
Lesson 6
LEARNING TO USE SOME SIMPLE TEXTILE TESTS
Miss James and the girls of Pleasant Valley tried some simple
tests for materials. Perhaps you would like to try them too?
The Pleasant Valley girls became so interested in
Miss Travers' talk about textiles and how difficult it is[279]
to buy intelligently that they decided to learn to judge materials and to
study about adulterations.
How are clothing materials adulterated? Miss James told the
girls that there are a number of ways of adulterating materials, and
that most women shoppers are so indifferent that manufacturers have been
able to adulterate the materials of everyday use. This increases the
cost of living, for materials do not wear so long. Miss James says that
textiles should be labeled so we may know what we are buying. Some kind
of adulterations are honest if the goods are so marked; but, when sold
for something they are not, the buyers are fooled. The tests help one to
know whether materials are adulterated or not. Let us learn first some of
the methods generally used in adulterating, and then some of the simple
tests.
Weighting is one method of adulterating. This means that something
else has been used beside the material. In cotton and linen material,
sizing or starch is pressed in with the rolling in finishing. After
washing, this material will be found to be very open in mesh instead of
smooth. Notice some of the smooth linen table cloths before they are
laundered. Afterwards you will notice they look quite coarse and have
lost their smoothness. Sometimes glue or clay or gums are used instead of
starch.
Silk is often weighted in the finishing process with sugar and some
with dyes and metals. This is because silk has a property which enables
it to absorb a great[280]
deal of moisture without changing its quality. The manufacturer can
buy salts and dyes for less than silk, and so he often uses a large
per cent of dye or metal in place of the gum washed out of the silk in
manufacture. One can seldom find to-day silks like our grandmothers used
to use. This is because people wish cheap silks; the manufacturer cannot
produce silks for little money, as the raw fiber is so high; and so he
uses other things with silk to weight it.
Fig. 143.—One can
sometimes test materials
by burning.
Materials are also adulterated by combination with other materials.
Did you ever buy a handkerchief marked "pure linen" and discover it was
a mixture of cotton and linen? Cotton is also used to adulterate woolen
materials, and sometimes silk materials; "pure silk" so called, is often
artificial silk.
Adulteration is also practiced when made-over materials or waste is
used to cheapen the cost. We learned about this in studying about wool.
Wool materials should be labeled so that the purchaser will know. It is
not fair to pay the price for an all-new wool material if shoddy and
mungo and flocks, which are all old wool and waste, have been used. The
per cent of new wool should be told and the price made accordingly.
[281]
Silk is sometimes sold as reeled silk when waste from cocoons which is
called spun silk has been used for the woof or filling thread.
In finishing of materials, adulteration is sometimes practiced. In
pressing cotton or linen, a luster is given to the surface. Cotton can
be made to appear like silk or like linen, and is often sold for those
fibers. Cotton can be napped in finishing and made to look woolly as in
blankets or outing flannel, but it is still only cotton.

Fig. 144.—The microscope reveals many things.
How can clothing material be tested? These are the simple tests
which the Pleasant Valley girls learned:
For sizing. This is easy to identify. Pick at the surface with
your nail, and the starch or sizing will easily come off. Hang a wet
piece in the air and see how the gloss looks then. This sizing often
conceals defects in the cloth.[282]
These can be seen if the material is thin, by holding it against the
light.

Fig. 145.—The test for fading.
Burning tests. The girls unraveled the fibers which Miss James
gave them and tested wool, silk, cotton, and linen. They tried both
warp and filling threads. They burned them with a taper. The animal
threads (which are they?) burned slowly, charred, and smelled like burned
feathers. Silk burns to an ash, except when weighted. Then it burns more
slowly. When very heavily weighted, the flame does not burn readily and
the form of the silk will remain. The vegetable fibers, cotton and linen,
burn quickly and with a flame.
Fig. 146.—The test for shrinkage.
Tests with microscope. You have all seen the appearance of the
fibers under the microscope. This reveals many things, and the[283]
unraveled fibers are easily identified. The microscope is the only sure
test for telling cotton and linen fibers. One can sometimes discover
shoddy mixed with the all-wool fiber because of the color. Shoddy is
sometimes made of old colored woolen rags.
Tests for fading. Pin a piece of cloth on a board with thumb
tacks. Cover half with cardboard or heavy paper. Expose to the rays of
sun for several days. Remove paper and notice difference. A piece can
also be exposed near bright light, but not in sun's rays, to see the
effect under ordinary wear. Marjorie Allen tested a piece of cashmere
she was considering for a dress and decided not to buy it, for it faded
quickly near the bright light.

Fig. 147.—The test for strength.
Tests for strength. Try to break either warp or woof threads.
Place the two thumbs together and press down on the cloth which should be
held firmly in the hands. Try both sets of threads. Sometimes a weak warp
or woof can be discovered.
Tests for shrinkage. Barbara Oakes had a white cotton dress
last year which never seemed to stop shrinking. Sometimes we can test
materials for shrinkage. Measure width and length of sample to be tested.
Wash it in hot water and soap. Dry and measure again. Is it narrower and
shorter? In planning for cotton or woolen garments allowance should be
made for shrinkage.
[284]
Fig. 148.—The chemical tests show
many things of use in judging materials.
Chemical tests. Chemicals are used for identifying fibers.
Have you learned in your eighth grade studies about acids and alkalies?
Have you studied at all about chemicals? It is possible to discover
the composition of woven materials by testing them with chemicals.
This is because acids and alkalies affect vegetable and animal fibers
in different ways. Look up the difference between acids and alkalies.
Study with your teacher and try to discover some of the common food and
cleaning materials which we use every day in our homes which are acid or
alkali. Some of these teach us we should know what the soaps and washing
powders which we use will do to our clothes. Your teacher will provide
some chemicals for testing. It is easier to test samples of cloth if they
are fringed at the edges. Here are directions for some chemical tests:
1. Place a piece of white cotton cloth and a piece of woolen material
in small dishes. Cover with 50 per cent solution of nitric acid. The wool
fibers will turn yellow. The cotton remain white. If a piece of wool
cloth was mixed with cotton, how would the test prove it?
2. Boil samples of cotton and wool together; then samples of
cotton and silk together, for fifteen minutes in a 5 per cent solution[285]
of caustic potash. The animal fibers will dissolve, the cotton will
remain. Of what use would this test be?
3. Moisten samples of cotton and of wool with Millon's reagent. Place
in porcelain dishes and heat gently. The animal fibers will become red;
the vegetable are unchanged.
4. Material made of cotton and linen and sold for all linen can be
tested. Place fringed sample in a porcelain dish. Heat gently in 50 per
cent solution of caustic potash for two minutes. Remove with glass rod
and dry between blotting papers. The linen will be dark yellow in color
and the cotton white or light yellow.
So we have learned a few tests of different kinds. There are many
more. When you go to high school you can learn about others. The Pleasant
Valley girls enjoyed making these tests with Miss James' help. Perhaps
you may be able to try them with your teacher.
EXERCISES AND PROBLEMS
1. Try the above chemical tests with your teacher's help.
2. Try some of the other tests for adulterations.
3. Tell four ways in which materials are adulterated.
Lesson 7
HOW PATTERN IS MADE IN CLOTH
Barbara said she never could quite see how pattern is made in cloth.
There seem to be so many different kinds of patterns. Miss James
explained about this. She said there are several ways of making patterns.
Some are printed; others woven; some embroidered. Have you discovered
this?
Patterns are often woven. Do you remember, when you studied
about linen, you learned that the Jacquard[286]
loom has a series of cards above it which are able to control the
pattern? Wonderful silks and beautiful velvets and brocades as well as
damask table linen are made in this way by weaving. Patterns of stripes
and plaids are also made by the loom in weaving. Sometimes the warp or
the filling threads are colored; and this color forms patterns in stripes
or squares. See if you have any pieces in your surprise box in which
pattern is made by colored threads of warp or woof.
Try to find some woven patterns made by the Jacquard loom in silk or
linen. Think of all the beautiful ribbons, silks, tablecloth damasks,
towels, and napkins; all such patterns are woven by the loom. Plain
patterns like basket weave, twill, diagonal, satin weave, are also made
by weaving. See if you can work out some of these patterns on your school
loom.
Some patterns are printed. On the plain woven material,
patterns are printed by means of rollers on which the pattern has been
stamped. The colors are put on by this roller. The picture shows the
machine. Did you ever have a calico apron or dress of percale or cambric
on which the pattern showed on one side only? Many ribbons are printed
with a pattern, but sometimes patterns are put on both sides of the
cloth. Again, printing is sometimes done on the warp threads before the
filling thread is woven in. This makes a dull effect in pattern. Miss
James had a piece of ribbon which was so printed. When it was ravelled
out a little, the printed warp could be seen.
[287]

Courtesy of Cheney Bros.
Fig. 149.—Printing cloth by machinery.
Did you ever see a foulard silk dress with white spots? Do you know
how they are made? There are two. methods. One is called "resist," and
the other "discharge." The first method, "resist," is easy to understand.[288]
The material is printed before it is dyed. The spots are printed with
a chemical which resists the dye when it is put in the dye bath. So
the cloth comes out of the dye with white spots where the chemical was
stamped. The "discharge" method is just the opposite. The cloth is dyed
blue or black or whatever the color is to be, and then it is passed
between rollers something like your wringing machine and the color is
taken out in spots by chemicals. Sometimes, when the chemicals are too
strong or cheap, they eat the cloth. Jane Alden's cousin had a dress from
which the white spots fell out, leaving holes.
Patterns are sometimes printed on cloth by means of wood blocks or
stencils. Perhaps you can do some printing on plain cloth. You can make a
stencil pattern. Cut out the design in it and paint through the holes, or
cut a design from a piece of wood, dip it in color, and print the cloth.
Lovely materials are made by hand in this way. Miss James has a beautiful
English piece of Morris block printing which she values highly.
Many patterns are embroidered. Look in the piece box. Sometimes
embroidered designs are worked on cloth by hand, but many are made by
machine. Miss James has a scarf which came from India. It is embroidered
in gold with little bits of glass sewed on the right side, and held by
the embroidery. This is all hand work. Miss James has a waist with little
spots of white embroidered in silk. This is done by machine[289]
on a loom. Find some piece of material embroidered by machine.
So Barbara Oakes now understands about the patterns. Miss James had
some books to show the girls, too. They looked up in the encyclopedia
about printing of materials and about the other things they wished to
know about patterns. Barbara says to her the most wonderful thing is
the way in which the warp threads of the loom can be controlled by the
Jacquard pattern cards and other devices. The shed of the warp as it
is raised for each filling thread is governed by the devices, and a
different set of threads bobs up for each shuttle throw.
EXERCISES AND PROBLEMS
1. Mount on strips of cardboard, samples of material made:
a. By weaving, plain, stripes, diagonal, etc.
b. By printing, resist, discharge, machine, block, stencil;
c. By embroidery.
2. Look up in the encyclopedia or other books the subject of cotton
printing.
3. Try to find pictures of modern looms and more primitive ones in
which pattern is controlled by the harness which raises the warp threads
and makes the so-called shed.
REVIEW PROBLEMS
I. Look over the fashion pages of your magazines at home and
find:
1. A young woman suitably dressed for business.
2. A girl dressed for outdoor sports.
3. A girl in a party gown.
Tell why you think each is "well dressed." If not, why?
[290]
II. What textile tests would you suggest when buying a silk dress.
Mrs. Stark expects to have one next summer. How will she be able to judge
if it will wear?
III. Can you make another middy at home. Perhaps you are so expert you
can take an order for one.
[291]
THE ELLEN H. RICHARDS HOUSE
Courtesy of Mr. R. J. Planten.
Fig. 150.—The Ellen H. Richards house.
You will be glad to know that all the townspeople in Pleasant Valley
were delighted with the year's work in homemaking in the new schoolhouse.
Mr. Roberts, the President of the Pleasant Valley Bank, was so pleased
with the results both at school and in the homes of the valley that he
gave the house that you see[292]
in the picture (Fig. 150), to be used for homemaking work by the girls,
and for the boys' clubs as well. The house was named for Mrs. Ellen H.
Richards, the great and good woman who lived in Boston, Massachusetts,
but whose friends are found all over the world, and who helped to develop
the teaching of home economics everywhere.
What are some of the facts about clothing and health that a girl
may learn, useful to herself and her family? This is the question at
the beginning of the first chapter. Do you not think that you can all
give an answer to this question now? And would you not like to write a
composition about it? Perhaps your teacher will have a gathering at the
school of all the fathers and mothers; and maybe one of you can write a
little play or pageant connected in some way with household arts for this
closing party of the school year. Perhaps you are able now to design your
costumes and make some of your garments or, at least, to select them more
wisely.
And where is Pleasant Valley? Perhaps you asked this question
when you looked at the picture on one of the first pages. Pleasant Valley
is your own home town; and, though it has really quite another name, it
may still be Pleasant Rivers, or Pleasant Hill, or Pleasant Fields, or
Pleasant Plain. Why not? In this wide country of ours there are many
forms of natural beauty; and even in the dry sections, where trees are
grown with difficulty, there are still the far reaches of the plains and
the beautiful effects of cloud, sunrise,[293]
and sunset. If our own town is ugly and unhealthy, it is not Nature's
fault; for the beauty and home-likeness and the healthfulness of any
place depend upon its inhabitants. Even the simplest and plainest village
or countryside has one kind of beauty if it is kept perfectly clean, and
it costs but little money in many places to plant trees and shrubs and
keep the grass green.
You must see, however, that it is something more than beauty in the
things about us that we have been studying together. You boys and girls
in your school are to be the men and women who will make the homes and
the town the best possible places for successful and happy living. Do
you realize what it means to be citizens of a great commonwealth like
this of our United States? Do you understand the meaning of the word
"commonwealth"? It is a good old word that means a land where all the
people share everything alike and work together for the good of all. We
cannot succeed in doing this unless we begin in our home and in our home
town. More and more must our country stand for democracy for ourselves
and for the whole world, and you must bring to the problems of the
future, bodies strong and clean, and strong hearts and minds.
[295]
INDEX
- Adulteration:
- by combination, 280
- by weighting, 279.
- in finishing, 281.
- Albatross, 210.
- Alpaca, 213.
- Ammonium phosphate for outing flannel, 9.
- Aniline dyes, 134.
- Apparel:
- choosing, 242.
- Apron:
- attaching the yoke, 37-39.
- basting skirt part, 33.
- cutting skirt part, 31.
- cutting yoke part, 33.
- gathering top of, 36.
- hemming sides and bottom, 36.
- material for, 7.
- planning pattern for yoke, 32.
- planning to make, 31-33.
- sewing seams of, 34-36.
- the sewing, 127, 128.
- useful, 129.
- "Artistic appreciation" in dress, 254-255.
- Attaching an apron yoke, 38.
- Basting:
- corset cover, 106.
- gores of petticoat, 104.
- hemmed patch, 173.
- skirt of apron, 33.
- stitch, 20.
- Bathing, 91.
- Bean bags, making, 29.
- Bean bag board, 29.
- Bean bag game, 29, 30.
- Bias bands, to finish, 99.
- Bias strip, cutting and placing, 24-25.
- Birdseye, 62, 183.
- Blankets, 214.
- Blanket stitch:
- how to make, 138.
- uses of, 44, 138, 141.
- Bleaching linen cloth, 195.
- Bloomers:
- bands for, 217.
- making, 215-217.
- material to use for, 202.
- pattern for, 201.
- Bluing, 190.
- Bobbin, 67, 68.
- Boiling linen, 190.
- Brilliantine, 213.
- Broadcloth, 211.
- Brocaded satin, 124.
- Brushing clothes, 157.
- Bunting, 213.
- Butchers' linen, 183.
- Button, sewing on, 45.
- Buttonhole:
- fan and bar ends, 43.
- finishing, 44.
- overcasting, 41, 42.
- placing, 40.
- practice in making, 39.
- stitch, 42, 43.
- turning corner, 43.
- Buying:
- garments, 271-278.
- materials, 276-278.
- points about, 197-199.[296]
- Calico, 7.
- Cambric, 60.
- Canton flannel, 8.
- Carding:
- by hand, 76-77.
- cotton, 72, 74.
- wool, 222-224.
- Caring for clothes, 155-174.
- Carpets, 214.
- Cashmere, 210.
- Catch stitch, how to make, 150-152.
- Chain stitch, 119.
- Challis, 210.
- Chambray, 7.
- Cheesecloth, use of, 9.
- Cheviot, 209.
- Chiffon, 125.
- China silk, 125.
- Chintz, use of, 9.
- Cleanliness of body, 89-92.
- Cloth:
- how made, 74-76, 132-137, 191-196, 218-224.
- how pattern is made in, 285.
- Clothes:
- appropriate, 251.
- brushing, 157.
- care of, 155-163.
- choosing and wearing, 249, 250.
- removing stains and spots from, 158.
- things to learn about caring for, 156.
- why important, 3.
- Clothespin bag, 149-152.
- Clothing:
- budget, 230-236.
- color for, 256-259.
- expense of for a year, 230.
- for body at night, 89-92.
- helps save body heat, 91.
- important things about wearing, 242.
- night, aired during day, 90.
- points about buying, 229.
- ready-made, 271-272.
- relation to health, 240-248.
- selecting healthful, 244.
- several layers of, warmer than one thick layer, 92.
- things to think about in choosing, 242.
- what to do with, at night, 89.
- what to remember, in purchasing wool, 224-229.
- why air at night, 89.
- why changed at night, 90-92.
- why we wear, 241.
- Clothing budget, 230-236.
- Cluny lace, 93.
- Cocoons, grown for silk, 109-114.
- Colored silks, 133.
- Colors:
- choice of, 256-260.
- for clothing, 256.
- for a hat, 266.
- "grayed," 256-257.
- intensity of, 257.
- learning to combine, 259-260.
- to bring out one's characteristics, 256-258.
- Commercial pattern, how to use, 46-53.
- Consumer's League, 275.
- Corsets, 245.
- Corset cover:
- how to make, 106.
- material for, 106.
- nainsook for, 105.
- Corticelli cocoons, 113.
- Costume:
- a background, 253.
- a work of art, 252.
- artistic, 254-255.
- studying lines of, 261.
- Cotton:
- baled and shipped, 16.
- carding, 72, 74.
- fibers, 7, 14.
- how grown, 12.
- how spun, 74, 75.
- loom for weaving, 66.
- picking, 13.
- seeds taken from fiber, 1.[297]
- spinning, 72-77.
- use of, 65.
- use of seeds, 15.
- varieties of, 17.
- weaving, 66-71.
- where grown, 11-12.
- Cotton cloth, how woven, 66-71.
- Cotton crêpe, 60.
- Cotton fibers, magnified, 14.
- Cotton flannel, varieties of, 8.
- Cotton ginning, 15.
- Cotton materials, 7-10, 59-62, 101.
- Cotton plant, 12.
- Cousin Ann:
- her clothes budget, 230-236.
- how she cares for her clothes, 156-163, 249.
- what she learned about dress, 251-256.
- what she told about silk, 133-137.
- Covert cloth, 211.
- Crêpe de Chine, 123.
- Cretonne, use of, 9.
- Crinoline, use of, 9.
- Cross-stitch:
- design for, 144.
- gifts made from, 146.
- how to make, 144, 145.
- use of, 143-146.
- Damask, 183.
- Darning, straight tears, 163-166.
- Darning stitch:
- for stockings, 167-169.
- for straight tears, 163, 166.
- how made, 152-153.
- where to use, 166.
- Decorating, stitches used for, 118-121.
- (See also Embroidery stitches.)
- Denims, 8, 10.
- Dimity, 60.
- Dress:
- artistic appreciation in, 254-255.
- colors for, 258.
- personal characteristics in relation to, 256-257.
- spacing and arrangement of lines, 255.
- use of colors, 255.
- Dress Skirt:
- laying and cutting pattern, 238.
- making, 238-239.
- pattern for, 236-238.
- Duck, 61.
- Dyeing silk, 134-135.
- Ellen H. Richards House, 291.
- Embroidery stitches:
- blanket stitch, 138-141.
- catch stitch, 150-152.
- chain stitch, 119.
- cross-stitch, 143-146.
- featherstitch, 119, 120, 129, 130.
- outline stitch, 121.
- Embroidered patterns, 288.
- Etamine, 213.
- Eyelets, 270.
- Factory, silk, 137.
- Featherstitch:
- how made, 119, 120.
- use for, 129, 130.
- Felt, 212.
- Fibers:
- cotton, 7, 14.
- flax, 180.
- silk, 111, 132.
- wool, 205-207, 226.
- Filling thread, 66.
- Flannel, 212.
- Flat felled seam, 216.
- Flax:
- breaking, 179.
- combing and spinning, 191.
- cultivation an ancient industry, 180-181.
- fiber, 6, 180.
- hackling, 193.
- how grown, 176.[298]
- rippling and retting, 177-179.
- rippling by hand, 178.
- rovings, 193.
- seeds, 184.
- what is the, plant, 175.
- wheel, 76, 192.
- where grown, 175.
- Flocks, 228.
- Folding table linen, 190.
- Foulard silk, 123.
- Free-hand pattern, 46.
- French seam:
- how to make, 87-88.
- use of, 86-88.
- Galatea, 62.
- Garments:
- buying, 271, 278.
- criticize your own, 251.
- points to consider in buying ready-made, 272-276.
- Gauge, for hem, 36.
- "German Val," 94-97.
- Gifts:
- aprons, 129.
- bag, 127.
- clothespin bag, 149-152.
- darning-case, 117.
- guest towel, 146.
- needle book, 117.
- pin-case, 116, 117.
- sewing apron, 127.
- sewing-case, 118.
- spool-case, 117.
- useful cases, 130.
- Gingham, 7, 10.
- Grenadine, 213.
- Guest towel, 146.
- Hair, care of, 262-264.
- Hamburg edging, 101, 103.
- Handkerchief, linen, 182.
- Handmade garments, 57-58.
- Hanging table linen, 190.
- Hat
- becoming, 266-267.
- color, 266.
- how to wear, 267.
- selecting, 262.
- shape and lines of, 264-265.
- trimming for, 267.
- Health:
- clothing in relation to, 240-248.
- underwear effects, 245-247.
- Heels, 162.
- Hem:
- gauge for, 36.
- making on nightdress, 88.
- turning around neck of nightdress, 98.
- Hemmed patch, how to make, 171, 174.
- Hemming stitch:
- for hemmed patch, 171.
- how made, 19-22.
- why useful, 19.
- Hemstitch:
- different from hemming stitch, 147.
- how to make, 147-148.
- Henrietta, 210.
- Herringbone stitch, 150.
- Herringbone weave, 149.
- Holder:
- finishing, 27.
- planning, cutting, and basting, 24.
- Homespun, 210.
- Huckaback, 62, 183.
- Indian head, 61.
- Ironing, 189, 190.
- Jacquard Loom, 124.
- Javelle water, 187.
- Kimono night dress, 64.
- Knitting machine, 167.
- Lace:
- cluny, 93.
- German Val, 94, 96.
- kinds of, 93, 96.[299]
- made by hand, 96.
- names and retail prices of, 94-95.
- other ways to finish instead of using, 97.
- sewing on, 97-99.
- torchon, 93, 95.
- valenciennes, 94, 97.
- Lady's cloth, 211.
- "Latest style," 251.
- Lawn, 61.
- Linen:
- bleaching, cloth, 195.
- finishing, cloth for shipping, 195.
- kinds of, 182-184.
- manufacture of, 191-196.
- weaving, 194.
- where grown, 175.
- (See Flax.)
- Linen canvas, 183.
- Linen laces, 93, 96.
- Linen materials:
- adulteration in, 280.
- how identified, 181-182.
- kinds of, 182-183.
- Linen sheeting, 182.
- Linens:
- how to wash and iron, 188-190.
- points to be noticed in buying, 196-199.
- Linseed oil, 184.
- Loom:
- for weaving cotton, 66-68.
- hand, 67, 70, 71.
- "in days gone by," 68.
- in factory, 69.
- Jacquard, 124.
- primitive, 68, 71.
- Luna moth, 111.
- Materials:
- adulterated, 279, 280.
- buying, 276-278.
- for apron, 31.
- for bloomers, 202.
- for underwear, 101, 106.
- from cotton, 7-10.
- from wool, 209-214.
- linen, 182-184.
- silk, 123-126.
- weighted, 279.
- Measurements:
- how to take, 49-50.
- Melton, 211.
- Middy blouse, how to make, 268-271.
- Mohair, 213.
- Moire silk, 125.
- Mull, 61.
- Muslin, 59.
- Nainsook, 59.
- Nightdress:
- cutting, 78.
- french-seam, 86-89.
- making hem of, 88.
- material for, 63.
- placing pattern, 78.
- trimming, 98.
- Nun's veiling, 212.
- Organzine, 133.
- Outing flannel, 9.
- Outline stitch, 121.
- Overcasting buttonhole, 41, 42.
- Overhanding stitch, 28-30.
- Pageant, 200.
- Parts of sewing machine, 80-83.
- Patch (See Hemmed patch).
- Pattern:
- embroidered, 288.
- for bloomers, 201.
- for petticoat, 102.
- how made in cloth, 285.
- how woven, 285.
- laying for bloomers, 215.
- laying nightdress, 79.
- opening and reading, 47-48.
- opening and studying, 201.
- printed, 286.
- sending for, 47.[300]
- to change, 51.
- to lengthen, 51.
- Percales, 7, 10.
- Petticoat:
- learning to make, 103-105.
- making, for children, 53-55.
- material for, 101, 102.
- pattern for, 102.
- planning and cutting, 48-52.
- Pincase, 116-118.
- Placket, 105.
- Pongee, 125.
- Porch cushion, 140-141.
- Pressing suits, and skirts, 157.
- Printing cloth, 287.
- Protecting clothes, 161.
- Raw silk, 115.
- Removing stains and spots, 158, 185-189.
- Rinsing, 190.
- Rubbers, 162.
- Ruffle, making for petticoat, 104.
- Running and backstitch, 34.
- Running stitch, 165, 168, 169.
- Russian crash, 139, 182.
- Samplers, 143.
- Samples for toweling, 6.
- Satin, 123.
- Scalloped edge, 142.
- Seams, sewing with running and backstitch, 35.
- Serge, 209.
- Sewing, an art, 3.
- Sewing apron, 127-129.
- Sewing case, 118.
- Sewing machine:
- how to regulate, 83.
- how to run, 84-86.
- how to thread, 84-86.
- invented, 81.
- kinds of, 81.
- parts of, 81-83.
- things to remember about stitching with, 85.
- Sewing on lace insertion or edging, 97.
- Shearing sheep, 204-206.
- Shears, 205.
- Sheep, 204.
- Sheep industry, 205.
- Shoes:
- buying, 243.
- care of, 162.
- Shuttle, 67-68.
- Silhouette, 254, 255, 261.
- Silk:
- cocoons grown for, 112.
- dyeing, 133-135.
- fibers, 111, 132.
- how produced, 109.
- kinds of, 122-126.
- moths, 109.
- names of, 122-126.
- raw, 114-115.
- reeling, 114.
- throwing, 132-133.
- weaving by hand, 136-137.
- weighting, 135, 279-280.
- where manufactured, 131.
- winding, 133.
- Silk-scraps, articles made from, 116-122.
- Silkworm:
- life story of, 109-112.
- where grown, 110.
- Sizing:
- test for, 281.
- Skirt pattern, 47.
- Skirts:
- changing and lengthening pattern for, 50, 51.
- pressing, 157.
- to cut, 51, 52.
- to make, 53-55.
- Soap bark, 158.
- Soap solution, 158.
- Spinning, method of:
- in modern factory, 73, 227.[301]
- primitive, 71.
- Spinning:
- cotton, 72-77.
- flax, 191-194.
- silk (See silk throwing).
- wool, 225-228.
- Spinning wheel:
- for flax, 75.
- for wool, 74.
- Sprinkling linen, 190.
- Stains:
- blood, 187.
- coffee, 186.
- fruit, 186.
- grass, 187.
- how removed, 185.
- ink, 187.
- tea, 186.
- when to be removed, 185.
- Stitches for decorating, 118-120.
- (See Embroidery stitches.)
- Stitching stitch:
- making, 25-26.
- other uses of, 27.
- use of, 23.
- Stockinet, 167.
- Stockings:
- darning, 167-169.
- how made, 167.
- kind to buy, 170.
- sewing rips in, 170.
- Studying lines, 261.
- Studying values, 255, 257, 259.
- Suits, pressing, 157.
- Table runner, 139.
- Taffeta, 122.
- Tears, learning to darn, 163-166.
- Textiles:
- for apron, 7, 8.
- weighted, 279.
- Textile sample books, 8.
- Textile surprise book, 10.
- Textile surprise box, opening, 58.
- Textile test:
- burning, 282.
- chemical, 284.
- for combination, 280.
- for fading, 283.
- for finishing, 281.
- for shrinkage, 284.
- for sizing, 281.
- for strength, 283.
- with microscope, 282.
- Threading and running a machine, 84-86.
- Ticking, 10, 149.
- Torchon lace, 93, 95.
- Toweling, material for, 6.
- Towels, material for, 6-7.
- "Tram", 133.
- Tweed, 210.
- Underwear:
- cotton material for, 101.
- relation to health, 245-247.
- Uses of lace, 93-97.
- Valenciennes lace, 94, 96.
- Velvet, 125.
- Voile, 212.
- Warp thread, 67-68.
- Washing and ironing, the process for, 189-190.
- Weaving:
- by hand, with simple loom, 67.
- cotton, 69.
- in modern factory, 69.
- Japanese girl, 69-70, 136.
- linen, 194.
- patterns in cloth, 285.
- silk, 124, 136-137
- wool, 226-228.
- Well-dressed, what it means to be, 250-255.
- White petticoat, 101-102.
- Wool:
- blended, 221.[302]
- carder, 223.
- carding, 222.
- carding by hand, 76-77.
- fibers, 205, 226.
- how made into cloth, 218-228.
- material made from, 209-215.
- sheared from sheep, 206.
- sorted, 218.
- spinning, 225-228.
- quality of, 207.
- variety of fibers, 207.
- washing or scouring, 220.
- where grown, 203-204.
- why it varies, 208.
- Wool clothing, facts to remember about purchasing, 224-229.
- Woolen garments:
- points about buying, 229.
- washing, 158.
- Wool Voile, 213.
- Woolen yarns, 225.
- Workbag, 127.
- Worsted yarns, 225.
- Yarn:
- spinning of cotton into, 72-77.
- woolen and worsted, 225.
- Yoke:
- attaching, 38.
- cutting, apron, 33.
- making for apron, 37.
- placing the lining, 39.
- planning pattern for apron, 32.
Printed in the United States of America.
Transcriber notes:
P.242. "5." changed to '3.".
P.262. 'characterisics' changed to 'characteristics'.
*** END OF THE PROJECT GUTENBERG EBOOK 47585 ***