
Fig. 1.
Transcriber's Note
The cover image was created by the transcriber and is placed in the public domain.
A Manual for Amateurs
BY
CHARLES G. WHEELER, B.S.
"Know what thou canst work at and work at it like a Hercules."
Carlyle.
WITH OVER 700 ILLUSTRATIONS
G.P. Putnam's Sons
New York and London
The Knickerbocker Press
1900
Copyright, 1899
by
CHARLES G. WHEELER
The Knickerbocker Press, New York
TO THE
YOUTHFUL FOUNDERS
OF
"TOTLET TOWN"
WITHOUT WHOSE INSPIRATION THIS BOOK WOULD NOT
HAVE BEEN UNDERTAKEN
The aim of this book is to suggest to amateurs of all ages many things which they can profitably make of wood, and to start them in the way to work successfully. It is hoped that, in the case of boys, it may show them pleasant and useful ways to work off some of their surplus energy, and at the same time contribute toward their harmonious all-round development.
It is not an attempt to teach the arts of architecture, carpentry, cabinet-making, or boat-building. Although not intended primarily to impart skill in the use of tools (something which can only be acquired from experience and observation and cannot be taught by any book), still no one can go through the processes indicated without gaining at least some slight degree of manual skill as well as a fund of practical information and experience.
Many books which give directions for mechanical work (particularly those addressed to boys) have several serious faults, and can be grouped in three classes. Some seem to be written by practical workmen, who, however well fitted to do the work themselves, lack the pedagogical training or the psychological insight necessary to lay out such work with due regard to the mental and physical capacity, experience, and development of youth, or to the amateur's lack of experience in the rudiments of the subject. Others are written by teachers or amateurs who lack the trained mechanic's practical and varied knowledge and experience in serious work. Others (and this last class is, perhaps, the worst of the three) seem to be made by compilers who have apparently been satisfied to sweep together, without requisite[vi] knowledge or sufficient moral purpose, whatever they may have found that would be interesting or attractive, without due regard to its real value. All these writers are constantly falling into errors and making omissions harmful alike to the moral and the manual progress of the readers.[1]
Effort has been made in the preparation of this book to avoid these evils, to keep in line with the advanced educational ideas of the time, and to look at the subject from the standpoints of the teacher, the mechanic, the boy, and the amateur workman. The treatment is neither general nor superficial, but elementary, and no claim is made that it will carry anyone very far in the various subjects; but it aims to be thorough and specific as far as it goes and to teach nothing which will have to be unlearned.
Great care (based upon an extended experience with boys and amateurs) has been taken to include only what can be profitably done by an intelligent boy of from ten to eighteen or by the average untrained worker of more mature years. It is hoped that from the variety of subjects treated he may find much of the information for which he may seek—if not in the exact form desired, perhaps in some typical form or something sufficiently similar to suggest to him what he needs to know.
It is hoped and confidently believed that a work so comprehensive in scope and giving such a variety of designs, with detailed and practical directions for their execution, will be not merely novel, but may serve as a vade-mecum and ready-reference book for the amateur of constructive tastes.
Charles G. Wheeler.
Boston, June, 1899.
| PART I—A WORKSHOP FOR AMATEURS | ||
| CHAPTER | PAGE | |
| I— | Introductory | 1 |
| II— | Tools | 9 |
| III— | Wood | 29 |
| IV— | Working Drawings, Laying out the Work and Estimating | 49 |
| V— | The Workshop | 56 |
| PART II—ARTICLES TO BE MADE IN THE WORKSHOP | ||
| VI— | Introductory | 103 |
| VII— | A Few Toys | 106 |
| VIII— | Houses for Animals | 126 |
| IX— | Implements for Outdoor Sports and Athletics | 141 |
| X— | Furniture | 175 |
| XI— | A Few Miscellaneous Operations | 218 |
| PART III—HOUSE-BUILDING FOR BEGINNERS | ||
| XII— | Some Elementary Principles | 238 |
| XIII— | Simple Summer Cottages | 271 |
| XIV— | A Few Simple Structures | 291 |
| [viii] PART IV—BOAT-BUILDING FOR BEGINNERS | ||
| XV— | A Few Simple Boats | 298 |
| PART V—TOOLS AND OPERATIONS | ||
| XVI— | The Common Hand-tools, and Some Every-day Operations, Alphabetically Arranged for Ready Reference | 344 |
| Appendix— | Matters Relating to Wood, Suggestions about Working Drawings, etc. | 507 |
| Index | 539 | |
It has seemed best to address parts of this book particularly to boys, because the majority of beginners are boys, because boys need more suggestions than men, and because a man can easily pick what he needs from a talk to boys (and perhaps be interested also), while it is usually unprofitable to expect a boy to take hold of a technical subject in the right spirit if it is treated in a style much in advance of his degree of maturity. It is hoped, however, that the older reader also will find enough of those fundamental principles of successful work (many of which do not readily occur to the untrained amateur except as the result of much costly experience) to be a material help to him.
Homer, Iliad.
WOOD-WORKING FOR BEGINNERS
When one has made up his mind to make something, he usually wants to begin work at once; so, as I wish you to read this chapter, I will make it quite short. There is a great deal in getting started right, and there are some things to bear in mind if you wish to do good work, as of course you do.
One thing is not to be in too much of a hurry to begin the actual sawing and pounding. The old Latin phrase, "Festina lente" (make haste slowly), is a capital motto for the beginner. Do not wait until your enthusiasm has oozed away, of course, but do stop long enough to think how you are going to make a thing before you begin to saw.
The workman who thinks first and acts afterwards is the one who usually turns out good work, while the one who begins to work without any reflection (as boys, and even[2] men, have been known to do) is apt to spend much of his time in undoing his work, and usually does not get through till after the one who laid it out properly in the first place.[2]
If Homer, in the quotation at the head of this chapter, had been writing about the way boys' work is sometimes done, he might, perhaps, have reversed the positions of some of the words and made "swiftness" and "numerous strokes" the subjects of his emphasis. He has expressed well enough, however, the way that your work should be done, and it is one aim of this book to give you useful hints to that end.
Do not spend your time in working out a lot of set exercises, like joints and odd pieces that do not belong to any[3]thing in particular, merely for practice. You will be much more apt to put the right spirit into your work when you make complete and useful articles, and you will get the same practice and experience in the end. There is no need, however, to go through a deal of toilsome experience just to learn a number of simple little things that you might just as well be told in the first place. Begin the process of learning by experience after you have learned what you can from the experience of others. Begin, so far as you can, where others have left off.
Before you begin work it may be interesting to look for a moment at the way boys did their work from fifty to one hundred years ago. Have you read the books by Elijah Kellogg? The reason for speaking of these old-fashioned books is because of the picture they give of the time, not so very long ago, when boys and their elders made all sorts of things which they buy to-day, and also because of the good idea they give of how boys got along generally when they had to shift more for themselves than they do nowadays.
The majority of the boys of that time, not merely on Casco Bay, where Mr. Kellogg places the scenes of his stories, but in hundreds of other places, had to make many things themselves or go without. Of course there was a smaller number in the cities and larger towns who had no good opportunity to make things and were obliged to buy what they could afford (out of what we should call a quite limited variety), or to get the carpenter or other mechanic to make what they needed. But the majority of the boys of that time made things well and had a good time making them. The life they led made them capital "all-round" boys. They could turn their hands, and their heads too, to almost any kind of work, and do it pretty well.[4]
Boys did a good deal of whittling then. This habit, as you doubtless know, still clung to them after they grew up, and opening a jack-knife and beginning to whittle was a common diversion whenever the men rested, whether at the country-store or in the barn or dooryard or at their own firesides. You can see the same habit to-day in some places. The boys whittled splint-brooms of birch in Colonial days in almost every household.[3] Among some of the minor articles made by boys and young men were axe-helves and handles of all sorts, wooden rakes, wooden troughs for bread and for pigs, trays, trenchers, flails, rounds for ladders, bobbins, reels, cheese-boxes, butter-spats or-paddles, wooden traps, and dozens of other articles, not to speak of their handiwork in other materials than wood.
For that matter much of the same life can be found to-day in the remoter regions, and I have known young men brought up to this kind of life, who (within my recollection) have, as a matter of course, done all the farm work of good-sized cultivated farms with live stock, cut and hauled wood from their wood-lots, done a good deal of sea-fishing and salting down and drying of fish, tended and mended their[5] fish-nets, weirs, and lobster-traps, and sailed or rowed twenty-five miles to market with their produce and back again with their supplies. They also built their sheds, barns, and houses, and part of their furniture, their dories, big scows, and capital sailboats; made their own oars and rigged their boats; made many of their farm tools and implements; built their waggons and "ironed" them, their ox-sleds and small sleds, and shod them; made some of their tools; did their own blacksmithing, mason-work, brick-laying, and painting; made their own shoes, and did I do not know how many other odd jobs—all with but a limited supply of common hand-tools. This work did not interfere with their going to school through the winter months until they were twenty-one years old, and they still found time for the usual recreations of the period.
Now a young man must have been pretty well developed after going through all that, even if he did not know much about Greek or calculus or was lacking in superficial polish. And it is only the truth to say that quite a number used to tackle the higher branches of study too, with success made all the more assured by their development in other ways, and many, in addition to all this, paid their way through college by teaching or other work. How did they do so much? Partly, I suppose, because their life was so much simpler and less complex than ours. They did not have so many wants and there were not so many interests to distract their minds. Partly because when they wanted something they knew they must make it or go without. They did not draw so much as we do now, but they did a great deal of observing. They examined things like what they were to make and asked questions, and, knowing that where they had so much to do they could not afford to keep trying things again and again, they learned from their relatives[6] and neighbours what was considered the best way to do their work, and having thought it out carefully they went at it with great energy.
To-day we have only to go to a large factory to see a man standing before some machine and doing some simple piece of work, requiring but little thought—the same thing over and over again, hour after hour, day after day, year after year, until he seems to become almost a part of the machine itself, and is not fitted for doing much else. That is the other extreme. Of course we get things cheaper (even if they do not last so long) because of the factory; but how about the workman? Which of these two types is the better-developed man? First you want to be well-developed all-round boys, so that you will not become machines or badly one-sided men. After that—each to his special bent, of course.
Now because we no longer cut down trees ourselves, haul them to the mill to be sawed, or rive or saw or hew them ourselves, leave the wood to season, and then laboriously work it up into whatever we have to make—because we no longer do that, but go instead to a lumber-yard and a mill and have a large part of the work done for us—it is a good thing for us to pause a moment before we begin our work to take in the fact that all the advantage is not with us now, and to think what a capital gymnasium that former life was for strengthening a boy's muscle and mind, not to speak of his morals.
You could not go back to those days now if you wished to, of course (except, perhaps, when you go to some of the remoter regions in vacation), and you are doubtless better off for all the advantages you have now and for all our time-saving contrivances, but the advantage depends partly on how you use the time saved from their laborious tasks, does[7] it not? You can, however, get inspiration from the example of those older boys and from some of their methods, and can put their self-reliant, manly zeal, grit, and perseverance into your work, and have a capital time making the things and more sport and satisfaction afterwards for having made them.
This book does not try to show you a royal road or a short cut to proficiency in architecture, carpentry, cabinet-making, boat-building, toy-making, or any other art or science. It does not aim to cram you with facts, but merely to start you in the right way. It is for those of you who want to take off your coats, roll up your sleeves, and really make things, rather than sit down in the house and be amused and perhaps deluded by reading enthusiastic accounts of all the wonders you can easily do—or which somebody thinks you would like to be told that you can do. It is for those of you who do not wish to have your ardour dampened by finding that things will not come out as the book said they would, or that the very things you do not know and cannot be expected to know are left out.
It does not aim to stir up your enthusiasm at first and then perhaps leave you in the lurch at the most important points. I take it for granted that if you have any mechanical bent or interest in making things, as most boys have, and are any kind of a real live boy, you have the enthusiasm to start with without stirring up. In fact, I have even known boys, and possibly you may have, who, strange as it may seem, have had so much enthusiasm to make something or other that they have actually had to be held back lest they should spoil all the lumber within reach in the effort to get started!
What you want is to be told how to go to work in the right way—how to make things successfully and like a work[8]man—is it not? Then, if you mean business, as I feel sure you do, and really want to make things, read the whole book through carefully, even if it is not bristling with interesting yarns and paragraphs of no practical application to your work. You will not find everything in it, but you cannot help learning something, and I hope you will find that it attends strictly to the business in hand and will give you a start in the right direction,—which is half the battle.
"Man is a Tool-using Animal.... He can use Tools, can devise Tools; with these the granite mountain melts into light dust before him; he kneads glowing iron as if it were soft paste; seas are his smooth highway, winds and fire his unwearying steeds. Nowhere do you find him without Tools; without Tools he is nothing—with Tools he is all."—Carlyle, Sartor Resartus.
You can do a great deal with very few tools. The bearing of this observation lies in "the application on it," as Jack Bunsby would say.
Look at the complicated and ingenious curiosities whittled with a jack-knife by sailors, prisoners, and other people who have time to kill in that way! Have you ever seen the Chinese artisans turning out their wonderful work with only a few of the most primitive tools? But of course we cannot spend time so lavishly on our work as they do, even if we had their machine-like patience and deftness acquired through so many generations.
We cannot hold work with our feet and draw saws towards us or do turning out on the lawn with a few sticks and a bit of rope for a lathe; carve a set of wonderful open-work hollow spheres, each within the other, out of one solid ball of ivory; and the rest of the queer things the Orientals do: but it is merely a matter of national individuality—the training of hundreds of generations. We could learn to do such things after a long time doubtless, but with no such wonderful adaptability as the Japanese, for instance, are showing, in learning our ways in one generation.
Fig. 1.
Examine some of the exquisite work which the Orientals sell so cheaply and think whether you know anyone with skill enough to do it if he had a whole hardware-shop full[10] of tools, and then see with what few simple and rude tools (like those shown in the following illustrations, or the simple drill, Fig. 1, still in use) the work has been done. Mr. Holtzapffel describes the primitive apparatus in use among the natives of India as follows[4]:

Fig. 2.
"When any portion of household furniture has to be turned, the wood-turner is sent for; he comes with all his outfit and establishes himself for the occasion at the very door of his employer. He commences by digging two holes in the ground at a distance suitable to the length of the work, and in these he fixes two short wooden posts, securing them as strongly as he can by ramming the earth and driving in wedges and stones around them. The centres, scarcely more than round nails or spikes, are driven through the posts at about eight inches from the ground, and a wooden rod, for the support of the tools, is either nailed to the posts or tied to them by a piece of coir or cocoanut rope. The bar, if long, is additionally supported, as represented, by being tied to one or two vertical sticks driven into the ground. During most of his mechanical operations the Indian workman is seated on the ground, hence the small elevation of the axes of his lathe. The boy who gives motion to the work sits or kneels on the other side of it, holding the ends of the cord wrapped around it in his hands, pulling them alternately; the cutting being restricted to one half of the motion, that of the work towards the tool. The turning tools of the Indian are almost confined to the chisel and gouge, and their handles are long enough to suit his distant position, while he guides their cutting edges by his toes. He grasps the bar or tool-rest with the smaller toes and places [11] the tool between the large toe and its neighbour, generally out of contact with the bar. The Indian and all other turners using the Eastern method attain a high degree of prehensile power with the toes, and when seated at their work not only always use them to guide the tool, but will select indifferently the hand or the foot, whichever may happen to be the nearer, to pick up or replace any small tool or other object. The limited supply of tools the Indian uses for working in wood is also remarkable; they are of the most simple kind and hardly exceed those represented in Fig. 2; the most essential in constructing and setting up his lathe being the small, single-handed adze, the bassōōlăh. With this he shapes his posts and digs the holes; it serves on all occasions as a hammer and also as an anvil when the edge is for a time fixed in a block of wood. The outer side of the cutting edge is perfectly flat, and with it the workman will square or face a beam or board with almost as much precision as if it had been planed;[12] in using the bassōōlăh for this latter purpose the work is generally placed in the forked stem of a tree, driven into the ground as shown in the illustration."
If we are inclined to feel proud of the kind of wood-work turned out by the average wood-worker of this country or England with his great variety of tools and appliances and facilities, we might compare his work with that done by the Orientals without our appliances. Read what Professor Morse tells us of the Japanese carpenter[5]:
"His trade, as well as other trades, has been perpetuated through generations of families. The little children have been brought up amidst the odour of fragrant shavings,—have with childish hands performed the duties of an adjustable vise or clamp; and with the same tools which when children they have handed to their fathers, they have in later days earned their daily rice. When I see one of our carpenters' ponderous tool-chests, made of polished woods, inlaid with brass decorations, and filled to repletion with several hundred dollars' worth of highly polished and elaborate machine-made implements, and contemplate the work often done with them,—with everything binding that should go loose, and everything rattling that should be tight, and much work that has to be done twice over, with an indication everywhere of a poverty of ideas,—and then recall the Japanese carpenter with his ridiculously light and flimsy tool-box containing a meagre assortment of rude and primitive tools,—considering the carpentry of the two people, I am forced to the conviction that civilisation and modern appliances count as nothing unless accompanied with a moiety of brains and some little taste and wit.... After having seen the good and serviceable carpentry, the perfect joints and complex mortises, done by good Japanese workmen, one is astonished to find that they do their[13] work without the aid of certain appliances considered indispensable by similar craftsmen in our country. They have no bench, no vise, no spirit-level, and no bit-stock; and as for labour-saving machinery, they have absolutely nothing. With many places which could be utilised for water-power, the old country sawmill has not occurred to them. Their tools appear to be roughly made and of primitive design, though evidently of the best-tempered steel. The only substitute for the carpenter's bench is a plank on the floor, or on two horses; a square, firm, upright post is the nearest approach to a bench and vise, for to this beam a block of wood to be sawed into pieces is firmly held (Fig. 3). A big wooden wedge is bound firmly to the post with a stout rope, and this driven down with vigorous blows till it pinches the block which is to be cut into the desired proportions.

Fig.3.—A JAPANESE CARPENTER'S VISE.
From Morse's Japanese Homes.
"In using many of the tools, the Japanese carpenter handles them quite differently from our workman; for instance, he draws the plane towards him instead of pushing it from him. The planes are very rude-looking implements. Their bodies, instead of being thick blocks of wood, are quite wide and thin (Fig. 4, D, E), and the blades are inclined at a greater angle than the blade in our plane. In some planes, however, the blade stands vertical;[14] this is used in lieu of the steel scrapers in giving wood a smooth finish, and might be used with advantage by our carpenters as a substitute for the piece of glass or thin plate of steel with which they usually scrape the surface of the wood. A huge plane is often seen, five or six feet long. This plane, however, is fixed in an inclined position, upside down; that is, with the blade uppermost. The board, or piece to be planed, is moved back and forth upon it. Draw-shaves are in common use. The saws are of various kinds, with teeth much longer than those of our saws, and cut in different ways.... Some saws have teeth on the back as well as on the front, one edge being used as a cross-cut saw (Fig. 4, B, C). The hand-saw, instead of having the curious loop-shaped handle made to accommodate only one hand, as with us, has a simple straight cylindrical handle as long[15] as the saw itself, and sometimes longer. Our carpenters engage one hand in holding the stick to be sawed while driving the saw with the other hand; the Japanese carpenter, on the contrary, holds the piece with his foot, and stooping over, with his two hands drives the saw by quick and rapid cuts through the wood. This style of working and doing many other things could never be adopted in this country without an importation of Japanese backs.... The adze is provided with a rough handle bending considerably at the lower end, not unlike a hockey-stick (Fig. 4, A).... For drilling holes a very long-handled awl is used. The carpenter seizing the handle at the end, between the palms of his hands, and moving his hands rapidly back and forth, pushing down at the same time, the awl is made rapidly to rotate back and forth; as his hands gradually slip down on the handle he quickly seizes it at the upper end again, continuing the motion as before. One is astonished to see how rapidly holes are drilled in this simple yet effective way. For large holes, augers similar to ours are used."
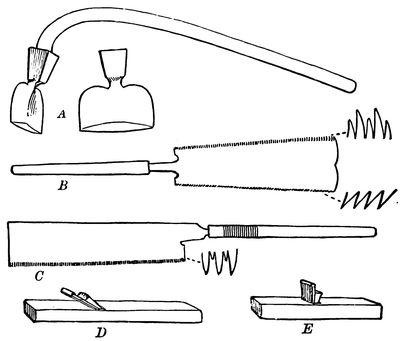
Fig. 4.—CARPENTERS' TOOLS IN COMMON USE.
From Morse's Japanese Homes.
When you are obliged to work some day with few and insufficient tools (as most workmen are at times), you will quickly realise how much you can do with very few in case of necessity, and will more fully appreciate the skill of those Eastern people who do so much with so little. We do not need so many hand-tools for wood-work as our grandfathers and our great-grandfathers, although we make a greater variety of things, because machinery now does so much of the work for us. Wood-workers of fifty years ago had, for instance, dozens of planes for cutting all sorts of grooves, mouldings, and the like, which are now worked by machine at the nearest mill.
Suggestions about Buying.—Do not start in by buying a chest of tools, certainly not one of the small cheap sets. They are not necessarily poor, but are very apt to be. Get[16] a few tools at a time as you need them. In that way you will get all you need in the most satisfactory way.
Besides the fact that you can do good work with few tools there are various reasons which make it better to begin with but few. You will probably take better care of a few than of many. If you have thirty chisels on the rack before you and you make a nick in the end of the one you are using, there is a strong chance that instead of stopping to sharpen it you will lay it aside and take one of the remaining twenty-nine that will answer your purpose, and before you realise it have a whole rack full of dull tools. If you have but few chisels, you will be compelled to sharpen them, and so get into the habit of taking proper care of them—not to speak of the time which is often wasted in putting away one tool and selecting another unnecessarily.
The longer you work the more you will get to rely on a small number of tools only, however many you may have at hand for occasional use. After you have worked for some time you will be very likely to have your favourite tools, and find that certain tools do better work in your hands than certain others which perhaps someone else would use for the purpose, and you will naturally favour the use of those particular implements, which is another less important reason for not starting in with too great a variety. I do not mean that you will imagine you can do better with one tool than another, but that you really can do so. That is where individuality comes in—the "personal equation."
Watch a skilful carver at a piece of ordinary work. See how few tools he spreads before him, and how much he does with the one in his hand before he lays it down for another. You would think it would take twenty-five tools, perhaps, to cut such a design, but the carver may have only about half a dozen before him. He gets right into the spirit[17] of what he is doing, and somehow or other he does ever so many things with the tool in his hand in less time and carries out his idea better than if he kept breaking off to select others.
This shows that confidence in the use of a tool goes a long way toward the execution of good work, which is one reason for learning to use a few tools well and making them serve for all the uses to which they can advantageously be put. In short, if you have but few tools at first you get the most you can out of each tool and in the way best for yourself.
Now I do not mean by all this that it is not a good thing to have a large kit of tools, or that you should not have the proper tools for the various operations, and use them. I mean that you should get your tools gradually as you find that you need them to do your work as it should be done, and not get a lot in advance of needing them just because they seem to be fine things to have, or because some carpenter has them in his chest.
Do not place too much reliance on the lists of tools which you find in books and magazines—the "tools necessary for beginners," "a list of tools for boys," etc. Such lists are necessarily arbitrary. To make a short list that would be thoroughly satisfactory for such varied work as a boy or amateur may turn his hand to is about as impracticable as the attempts you sometimes see to name the twenty-five greatest or best men or the one hundred best books. When you can find half a dozen independent lists which agree it will be time enough to begin to pin your faith to them. The most experienced or learned people cannot agree exactly in such matters. It depends somewhat, for one thing, on what kind of work you begin with, and, of course, somewhat upon yourself also.[18]
Now while, as we have seen, most wonderful work can be done with the most primitive tools, the fact remains that you are neither Chinese nor Japanese, but Americans and English, and you cannot work to the best advantage without certain tools. "Well, what are they? Why don't you give us a list to begin with? That's what we are looking for." Simply because a quite varied experience has taught me to think it better to give you suggestions to help you make the selection for yourselves.
Just as the great majority of boys would agree upon Robinson Crusoe, for instance, as belonging in the front rank of boys' books, but would make very different selections of second-rate or third-rate books, so there are a few "universal" tools, upon the importance of which all agree, such as the saw, hammer, hatchet or axe, and a few others; but beyond these few you can have as many "lists" as you can find people to make them, up to the point of including all you are likely to want. So let your list make itself as you go along, according to your own needs.
It is safe to say, however, that if your work is to be at all varied, such as is given in this book, for instance, you cannot get along to good advantage for any length of time without a rule, a try-square, a straight-edge, a knife, two or three chisels, a hatchet, a gouge, a smoothing-plane, a spoke-shave, a panel-saw, a hammer and nail-set, a bit-brace and three or four bits (twist-drills are good for the smaller sizes), a countersink, a few bradawls and gimlets, a screw-driver, a rasp and half-round file for wood, a three-cornered file for metal, an oil-stone, a glue-pot. An excellent and cheap combination tool for such work as you will do can be bought almost anywhere under the name of "odd jobs." Of course you will need nails, screws, sandpaper, glue, oil, and such supplies, which you can buy as you need them. A[19] section (18 inches or 20 inches high) from the trunk of a tree is very useful for a chopping-block, or any big junk of timber can be used.
You will, however, quickly feel the need of a few more tools to do your work to better advantage, and according to the kind of work you are doing you will add some of the following: a fore-plane, a splitting-saw, a mallet, a back-saw, compasses, one or more firmer chisels, one or more framing-chisels, a block-plane, pincers, a gauge or two, one or more gouges, a steel square, a draw-knife, a large screw-driver, a scraper, a few hand-screws (or iron clamps), a few more bits, gimlets, bradawls, or drills, cutting-pliers or nippers, a bevel, a jointer (plane), a wrench. An iron mitre-box is useful but rather expensive, and you can get along with the wooden one described further on. A grindstone is, of course, essential when you get to the point of sharpening your tools yourself, but you can have your tools ground or get the use of a stone without having to buy one for a long time.
The following list makes a fair outfit for nearly and sometimes all the work the average amateur is likely to do, excepting the bench appliances and such contrivances as you will make yourselves and the occasional addition of a bit or chisel or gouge or file, etc., of some other size or shape when needed. This is not a list to start with, of course, unless you can afford it, for you can get along for a good while with only a part, nor is it a complete list, but merely one with which a great amount of useful work can be done to good advantage. You can always add to it for special purposes.
For further remarks about these tools and others and their uses, see Part V., where they will be found alphabetically arranged.[20]
| 1 two-foot rule. | 1 compass and keyhole saw (combined). |
| 1 try-square (metal-bound). | 1 bit-brace. |
| 1 pair of wing compasses. | 3 auger-bits (½", ¾", 1"). |
| 1 marking-gauge. | 3 twist-drills (1/8", 3/16", ¼"). |
| 1 mortise-gauge. | A few bradawls and gimlets. |
| 1 steel square (carpenter's framing-square). | 1 screw-driver for bit-brace. |
| 1 bevel. | 1 countersink. |
| 1 "odd jobs." | 1 hammer and 2 nail-sets. |
| 1 chalk-line and chalk. | 2 screw-drivers (different sizes). |
| 1 knife. | Files of several kinds (flat, |
| 5 firmer chisels (1/8", ¼", ½", 7/8", 1¼"). | three-cornered, and round |
| 2 framing- or mortising-chisels (1", 1½"). | for metal, and half-round |
| 3 gouges (¼", ½", 1"). | and round for wood). |
| 1 iron spoke-shave (adjustable). | 1 large half-round rasp. |
| 1 draw-knife. | 1 cabinet scraper and burnisher. |
| 1 hatchet. | 1 mallet. |
| 1 block-plane. | 1 pair cutting-pliers. |
| 1 smoothing-plane. | 1 pair of pincers. |
| 1 long fore-plane (or a jointer). | 1 wrench. |
| 1 jack-plane. | 1 oil-stone and oiler. |
| 1 rabbet-plane (¾" or 7/8" square). | 2 or 3 oil-stone slips (different |
| 1 cutting-off saw (panel-saw, 24"). | shapes). |
| 1 splitting-saw (26"). | 1 glue-pot. |
| 1 back-saw (12"). | 2 or more iron clamps. |
| 1 turning-saw (14"). | 2 or more wooden hand-screws. |
| 2 or more cabinet clamps (2' to 4'). |
An adjustable iron mitre-box will be a valuable addition to this list, and a grindstone is of use even when you get most of your grinding done.
A few carver's tools are also convenient at times if you can afford them, as a skew-chisel (½"), a parting-tool (¼"), and a small veining-tool.
General supplies, such as nails, screws, glue, etc., specified in Part V., will of course be required.
There are still more tools than those given above, as you[21] doubtless know, but by the time you have become workman enough to need more you will know what you need. Ploughs, matching-planes, and all such implements are omitted, because it is better and usually as cheap to get such work as they do done by machine at a mill. I also assume that all your heavy sawing and planing will be done at some mill. It is not worth while for the amateur to undertake the sawing and planing of large pieces, the hewing and splitting of the rougher branches of wood-work, for such work can be done almost anywhere by machine at very slight expense, and stock can be bought already got out and planed for but a trifle more than the cost of the wood alone.[6]
Be sure to get good tools. There is a saying that a good workman is known by his tools, and another that a poor workman is always complaining of his tools, that is, excusing his own incompetence by throwing the blame upon his tools. There is also another saying to the effect that a good workman can work with poor tools; but it is simply because he is a skilled and ingenious workman that he can if necessary often do good work in spite of inferior tools, and of course he could do the same work more easily and quickly, if not better, with good ones.
So do not think that because you sometimes see a skilled workman making shift with poor tools that you are justified in beginning in that way, for a beginner should use only good[22] tools and in good condition or he may never become a good workman at all, so make your tools and their care a matter of pride. If your tools are of good quality, and proper care is taken of them, they will last a lifetime and longer; so good tools prove the cheapest in the end.[7]
There are some cases, however, in which it is as well not to buy the most expensive tools at first, as a cheap rule will do as well as an expensive one, considering how likely you are to break or lose it, and a cheap gauge will answer quite well for a good while; but this does not affect the truth of the general statement that you should get only the best tools. There are also quite a number of tools, appliances, and makeshifts which you can make for yourselves, some of which will be described. I advise you not to pick up tools at second-hand shops, auctions, or junk shops, except with the assistance of some competent workman.
Care of Tools.—Keep your tools in good order. You cannot do nice, fine, clean work with a dull tool. A sharp tool will make a clean cut, but a dull edge will tear or crush the fibres and not leave a clean-cut surface. You can work so much more easily and quickly as well as satisfactorily with sharp tools that the time it takes to keep them in order is much less than you lose in working with dull ones, not to speak of the waste of strength and temper.
I assume that you will not attempt to sharpen your tools yourselves until you have had considerable experience in[23] using them; for sharpening tools (particularly saws and planes) is very hard for boys and amateurs, and not easy to learn from a book. So, until then, be sure to have them sharpened whenever they become dull. The expense is but slight, and it is much better to have fewer tools kept sharp than to spend the money for more tools and have them dull. When you get to the point of sharpening your tools, one lesson from a practical workman or even a little time spent in watching the operations (which you can do easily) will help you more than reading many pages from any book. So I advise you to get instruction in sharpening from some practical workman,—not at first, but after you have got quite handy with the tools. You can easily do this at little or no expense. For further points, see Sharpening, in Part V.
It is a good plan to soak tool handles, mallets, and wooden planes, when new, for a week or so in raw linseed oil and then rub them with a soft rag every day or two for a while. If you use wooden planes give them a good soaking. They will absorb much oil and work more freely and smoothly. You can save tool handles from being split by pounding, by sawing the ends off square and fastening on two round disks of sole-leather in the way adopted by shoe-makers. If there is any tendency to dampness in your shop the steel and iron parts of the tools should be greased with a little fat,—tallow, lard, wax, vaseline,—or some anti-rust preparation.
Use of Tools.—It is very important to get started right in using tools. If your first idea of what the tool is for and how it should be used is correct you will get along nicely afterwards, but if you start with a wrong impression you will have to unlearn, which is always hard, and start afresh.[24]
If you can go to a good wood-working school you will of course learn much, and if you know a good-natured carpenter or cabinet-maker or any wood-worker of the old-fashioned kind, cultivate his acquaintance. If he is willing to let you watch his work and to answer your questions you can add much to your knowledge of the uses of the different tools. In fact, so far as instruction goes that is about all the teaching the average apprentice gets. He learns by observing and by practice. Do not be afraid or ashamed to ask questions. Very few men will refuse to answer an amateur's questions unless they are unreasonably frequent. There will be problems enough to exercise all the ingenuity you have after you have learned what you can from others.
But the day for the all-round workman seems to be rapidly passing away and the tendency nowadays is for each workman, instead of spending years in learning the various branches and details of his trade, to be expert in only one very limited branch—or, as sometimes happens, a general botch in all the branches; so unless you find a real mechanic for a friend (such as an old or middle-aged village carpenter, or cabinet-maker, or wheelwright, or boat-builder, or carver), be a little guarded about believing all he tells or shows you; and beware of relying implicitly on the teachings of the man who "knows it all" and whom a season's work at nailing up studding and boarding has turned into a full-fledged "carpenter."
If you can learn to use your tools with either hand you will often find it a decided advantage, as in getting out crooked work, or particularly in carving, where you have such an endless variety of cuts to be made in almost every possible direction, but "that is another story." A bad habit and one to guard against is that of carrying with you the tool you may be using whenever you leave your work temporarily,[25] instead of laying it down where you are working. Edge-tools are dangerous things to carry around in the hand and there is also much chance of their being mislaid.
For directions for using the different tools see Part V.
Edge-Tools.—Bear in mind that all cutting tools work more or less on the principle of the wedge. So far as the mere cutting is concerned a keen edge is all that is required and your knife or other cutting tool might be as thin as a sheet of paper. But of course such a tool would break, so it must be made thicker for strength and wedge-shaped so that it may be pushed through the wood as easily as possible.
You know that you can safely use a very thin knife to cut butter because the butter yields so easily that there is not much strain on the blade, but that when you cut wood the blade must be thicker to stand the strain of being pushed through. Soft wood cuts more easily than hard, because it is more easily pushed aside or compressed by the wedge-shaped tool, and it does not matter how keen the edge may be if the resistance of the wood is so great that you cannot force the thicker part of the tool through it.
You will understand from all this that the more acute the angle of the cutting edge the more easily it will do its work, provided always that the angle is obtuse or blunt enough to give the proper strength to the end of the tool; and also that as the end of the tool encounters more resistance in hard than soft wood, the angle should be more obtuse or blunter for the former than for the latter. Theoretically, therefore, the angle of the cutting edge, to obtain the greatest possible advantage, would need to be changed with every piece of wood and every kind of cut, but practically all that can be done is to have a longer bevel on the tools for soft wood than for hard. Experience and observation will teach these angles. See Sharpening in Part V.[26]
When you cut off a stout stick, as the branch of a tree, you do not try to force your knife straight across with one cut. You cut a small notch and then widen and deepen it by cutting first on one side and then on the other (Fig. 5). The wood yields easily to the wedge on the side towards the notch, so that the edge can easily cut deeper, and thus the notch is gradually cut through the stick. The same principle is seen in cutting down a tree with an axe. You have only to look at the structure of a piece of wood when magnified, as roughly indicated in Fig. 6, to see why it is easier to cut with the grain than across it.

Fig. 5.

Fig. 6.

Fig. 7.
You can often cut better with a draw-stroke, i.e., not merely pushing the tool straight ahead, but drawing it across sideways at the same time (Fig. 7). You[27] can press the sharp edge of a knife or razor against your hand without cutting, but draw the edge across and you will be cut at once. Even a blade of grass will cut if you draw the edge quickly through your hand, as you doubtless know.
If you try to push a saw down into a piece of wood, as you push a knife down through a lump of butter, or as in chopping with a hatchet, that is, without pushing and pulling the saw back and forth, it will not enter the wood to any extent, but when you begin to work it back and forth it cuts (or tears) its way into the wood at once. You know how much better you can cut a slice of fresh bread when you saw the knife back and forth than when you merely push it straight down through the loaf. You may have noticed (and you may not) how much better your knife will cut, and that the cut will be cleaner, in doing some kinds of whittling, when you draw it through the wood from handle to point (Fig. 7), instead of pushing it straight through in the common way, and you will discover, if you try cutting various substances, that as a general rule the softer the material the greater the advantage in the draw-stroke.
Now put the sharpest edge-tool you can find under a powerful microscope, and you will see that the edge, instead of being so very smooth, is really quite ragged,—a sort of saw-like edge. Then look at the structure of a piece of wood as roughly indicated in Fig. 6, and you will understand at once just what we do when we cut wood with an edge-tool. You see the microscopically small sticks or tubes or bundles of woody fibre of which the big stick is composed, and you also see the microscopically fine saw to cut them. Now if the edge of the tool is fine you can often do the work satisfactorily by simply pushing the tool straight through the wood, but do you not see that if you can draw or slide[28] the tool either back or forth the edge, being saw-like, will do its work better?
This stroke cannot be used of course in chopping with the axe or hatchet, splitting kindling-wood, or splitting a stick with the grain with a knife or chisel. In these operations the main principle is that of the wedge, pure and simple, driven through by force, the keen edge merely starting the cut, after which the wedge does the rest of the work by bearing so hard against the wood at the sides of the cut that it forces it to split in advance of the cutting edge, as in riving a log by the use first of an axe, then of an iron wedge, and finally a large wooden wedge (Fig. 8).

Fig. 8.
Practical directions and suggestions about the different Tools and their Uses and the various Operations will be found alphabetically arranged in Part V.
Before you can make anything successfully, you must have not merely wood, but the right kind of wood for the purpose. There are, also, "choice cuts" in lumber, as the butcher says of meat, and judicious selection of the stock often makes all the difference between a good job and a poor one; so let us examine a log and follow it through the sawmill.

Fig. 9.
You have, of course, seen the rings, or circular lines, on the ends of pieces of wood (Fig. 9). These are called the annual rings,[8] and each ring marks a new layer of wood added to the tree, for, as perhaps you may have learned, the trees we use for wood-working grow by adding new layers of wood on the outside. Examine the ends of pieces of wood of various kinds. In some pieces these rings will be very plain. In others they will be quite indistinct.
Notice that the wood nearest the bark, known as the sapwood, usually looks different from the inner wood, which is called the heart (Fig. 9).
In some trees you will see rays, or lines, radiating from the centre, and known as the medullary rays (Figs. 9 and[30] 10), because they spring from the pith (Latin medulla). Sometimes these lines are too fine to be noticed.
You will see from Fig. 10 that the layers of wood are also shown in the lines of what we call the "grain" on the surface of a piece of wood cut lengthways, and that the lines of the grain are continuations of the annual rings. You will also notice at the ends of timber, after the seasoning has begun, cracks radiating from the centre, showing the natural lines of cleavage or separation.

Fig. 10.

Fig. 11.
The way the log is sawed is important, though you might naturally think that the only thing is to saw it any way that will give pieces of the required size and shape.
Why is green wood heavier and softer than dry wood, and the sapwood of green timber softer than the heart? Because of the sap or water contained. The amount of water is sometimes even as much as fifty per cent. of the weight of the wood, but the quantity depends upon the kind of tree, the season, etc. Now the more water the green log contains, the more it will shrink. It begins to dry and[31] shrink as soon as the tree has been cut down. The sapwood shrinks more than the heart because it contains more water, and faster because, being on the outside, it is more exposed. The log shrinks most in the line of the annual rings, that is, around the tree. It shrinks much less in the line of the medullary rays, that is, across the tree. Shrinkage lengthways is too slight to be considered[9] (Fig. 11).
The result of all this unequal shrinking is that the log tends to split, or crack open, at the circumference (Fig. 12), the cracks running in toward the centre, in the line of the medullary rays. If the log is halved or quartered, so that the inner parts are exposed, the drying goes on more uniformly throughout, the cracking is not so bad, and the parts of the log will shrink somewhat as shown in Figs. 13 and 14.

Fig. 12.

Fig. 13.
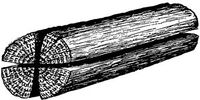
Fig. 14.
The beams, joists, planks, or boards cut from a log have[32] the same tendency to shrink unevenly that is found in the log itself. This causes them to be irregular in shape and to curl or warp more or less, according to the part of the log from which they are taken. A piece cut from the centre of a log will thus hold its shape better than if cut from one side (Fig. 15).

Fig. 15.

Fig. 16.
When a log is sawed into boards or planks (Fig. 16) the middle board shrinks but little in width and in thickness at the centre, but becomes thinner towards the edges. It does not curl, because it is cut through the centre of the log and has no more tendency to curl one way than the other. The outside board shrinks least in thickness and most in width, and all, except the middle one, shrink differently on one side from the other. They become convex toward the pith, or heart, and concave toward the outside. Different kinds[33] of wood shrink and warp to different degrees. You can learn something about these matters by examining the stock in any lumber-yard.
Now to come to the practical application of our brief study of the log and the sawing process: if you merely wish to get the most that you can from a log in the form of boards or plank, have the pieces sliced off in the simple way just shown (Fig. 17). This is the usual way of sawing for ordinary purposes. Boarding for the outside of a house, for instance, cut in this way answers every purpose. By this process the central boards will be good and the outer ones inferior,[10] as just shown (Fig. 16), but for common work all can generally be used.
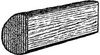
Fig. 17.
Fig. 18.
Fig. 19.
If you wish the highly figured grain[11] often seen in oak, ash, chestnut, etc., you can get it by sawing the log as just shown in Fig. 17. The figure of the grain will be most marked in the outer boards (Fig. 18), because the annual rings are cut more[34] obliquely in them than in the boards at or near the centre. These boards (Fig. 17) will tend to change their shape, as just shown (Fig. 19), but if they are to be firmly fastened in some way, or confined (as in a panel), handsome grain effects can be obtained.

Fig. 20.
Fig. 21.

Fig. 22.
If you wish the beautiful figure formed when the medullary rays show on the surface of the board, as in "quartered" oak, the log should be cut in the direction of the radii, that is, along the lines of the medullary rays (Fig. 20). The more exactly the side of a board is cut on the radial line the more richly the figure of the medullary rays will be shown, as in Fig. 21. This method of sawing is more expensive than the first way, of course, as it requires more labour and wastes more of the wood. The wide board shown in Fig. 21 and either of those in Fig. 22 are examples.
If you wish boards that will shrink the least in width and remain as true as possible, then the log should be sawed on the radial lines as just shown, so that all the boards will be from the middle[35] of the log. Wood shrinks but little in the direction of the radii, as just shown, and middle boards will be alike on both sides as regards heart-and sapwood, etc., and, therefore, have the least tendency to change of shape. The middle board by the method of Fig. 17 will be a good board in these respects.

Fig. 23.
Fig. 24.

Fig. 25.
Various methods of radial sawing, or in which part of the boards are so cut, are shown in Figs. 20 and 26, Figs. 23, 24, 25, and 26 showing the log quartered and various ways of sawing into boards. Thus we see that the middle boards, those passing through or near the centre, are the best for most purposes.

Fig. 26.

Fig. 27.
Split or rift stock is stronger than sawed. If you wish a piece especially tough and durable, as for an axe handle or[36] a stout pin, it should be split out rather than sawed, unless the wood is very straight-grained, because the splitting is sure to be in the line of the fibres, thus avoiding "cross-grain," which cannot well be entirely prevented in sawing. If the grain is straight, there may be no practical difference in the result between sawing and splitting, as in the so-called rift flooring, which is really sawed, but with crooked-grained pieces the difference is marked in such cases as the block shown in Fig. 27, from which four pins can be sawed, while but one can be split out. That one will be straight-grained, however, and stronger than the sawed ones, which will be cross-grained.
Try your best to get well-seasoned wood for your nice work. If it is not dry before you use it, it must of course dry afterwards, which is likely to cause cracks, warping, opened joints, and often the entire ruin of the article you have made. You will have to trust the dealer, or some friend, until you have had enough experience to judge for yourself, for it is no easy matter for an amateur to decide, except in case of very green stock, which is of course wet and soggy.
There are two ways of drying wood in common use. One is the old-fashioned way (commonly known as seasoning, weather-drying, or air-drying) in which the wood is gradually seasoned by the natural process of exposure to the air (but protected from the weather), that is, letting it dry of itself.
Do not believe the statements so common in books that it "takes lumber" some definite time, as one year or two years, "to season." It all depends on the kind of wood, its shape and size, the condition of the atmosphere, and various circumstances. For some rough work (a pig-pen, for instance) there is no advantage in seasoning at all, because the stock can just as well dry after the work is done as before. For many kinds of com[37]mon work one or two years is sufficient for some kinds and sizes of wood; for a nicer grade of work two or three years is none too much, while for very nice indoor work four years or more is not too long for the stock to season. There is very little danger of its being kept too long. It never will get perfectly dry (see Appendix). Whether it is dry enough or not depends on what you want it for.
To save time and money the artificial way (known as kiln-drying) of shutting it up in a room and drying it quickly by steam or other heat is now used, and, so far as drying the wood is concerned, this process can do the work well and much more quickly than the old way—sometimes too quickly. It is no exaggeration to say that in factories where cheap furniture and other common articles are made nowadays, a standing tree is felled on Monday, the log rolled into one end of the factory, and before Saturday night the finished articles made from it, all varnished and complete, are sent out from the other end of the shop—and some articles are turned out even quicker.
In the natural process of air-drying the moisture gradually and slowly works out to the surface and evaporates, until the wood is seasoned, though never absolutely dry, and the stock is firmer, more elastic, and less affected by heat and cold, moisture and dryness, than if kiln-dried. The latter process tends to dry the outside and ends of the lumber too fast for the inside. It certainly lessens the elasticity of the wood and weakens it. Making it so unnaturally dry (as if baked), as is often done, only makes it more susceptible to the atmosphere when taken from the kiln, and, unless it is at once protected from the air in some way, it will reabsorb moisture until it gets into a more natural condition; but that will not fully restore the loss of elasticity (see Appendix). The deterioration in the quality of the wood can be plainly[38] seen by any wood-worker, and is often a subject of remark in regard to oak.
The kiln-drying "takes the life out of the wood," as workmen express it, but just why this is so is not easy to explain, for the structure and properties of wood are very complex. I have seen too many illustrations in my own experience and that of others to have any doubt of the fact, however, and lumber left for years to season naturally, "stands," as the expression is, better than if kiln-dried—a fact which is, I think, generally conceded by wood-workers who have had experience with both kinds.
The gain by kiln-drying, in time and money, is, therefore, more or less offset by impairment of the quality of the wood, so if you can find stock that you know has been seasoning for years by the natural process, buy it by all means for your nice work, even if you have to pay more, regardless of what the dealers in kiln-dried stock or the makers of articles for sale may tell you about the advantages of kiln-dried wood.
On the other hand, if a dealer brags of his new patent "chain-lightning" dryer that will make green wood "dry as a bone" in two or three days, go elsewhere to buy your stock, for wood dried in a few days is not the kind to use for good work. You will probably have to use kiln-dried stock for most, or, perhaps, all of your work, but get it from a slow-drying kiln and keep it for further seasoning as long as you can.
Even if wood has been well seasoned, it is best, before putting it into nice work, to cut it up and dress it approximately to shape and leave it in a dry place for some time for a final seasoning, particularly in the case of thick stock. Do this with kiln-dried stock fresh from the dry-house. Let it have a little time to get into harmony with the atmos[39]phere. Whenever wood has been exposed to damp air, as in a wet shed or cellar, let it stand in the warm shop a while before using it for nice work.
The stock is arranged for seasoning so as to allow the air to circulate around and between the pieces. A common way is simply to arrange them in piles, each piece being separated from those above and below by strips or sticks laid across (Fig. 28). These sticks should be placed directly over one another, and so that the lumber will lie straight, else the weight of the pile, which should tend to make the pieces dry straight, will have the opposite effect and make them permanently crooked. There are other ways of arranging wood for drying, but this method is common and illustrates the most important principles. Stock is sometimes stacked upright, and small pieces are occasionally hung up for such nice work as billiard cues and bows.

Fig. 28.
Seasoned wood is lighter in weight than green, dryer to the touch, usually has a different odour, cuts differently when you whittle it (and the piece you whittle off breaks differently), and it shows a difference when you saw it. It is impossible to define these differences and you will have to learn them by actual work. It is not always easy even for[40] an experienced person to tell with certainty about some pieces until he has "worked" them, so much do the characteristics of different pieces vary. One test is to rap the boards sharply with a hammer. A green board and a dry one of the same kind will "rap" differently,—that is, will have a different vibration and give out a different sound. Of course this cannot be described, but you can judge quite well in this way. It is one of the many things you can learn only by experience. You can ascertain much about the character and condition of lumber by sawing or planing or whittling a piece. This is a good test for dryness, toughness, and elasticity (which you can tell about by breaking the shavings).
Weather-dried timber is usually somewhat darkened from exposure, but kiln-drying lightens the colour of some woods.
Stock with a bright lustrous appearance and of dark hue is generally superior to that of a lighter colour and duller appearance, but such characteristics depend much upon the kind of wood. Green wood is tougher than seasoned wood, but the latter is more elastic. To subject seasoned wood to moisture and heat brings it back, to a certain extent, to its original condition, and renders it for the time being tougher, hence the process of bending wood by the application of steam or hot water (see Bending in Part V.).
Reject "wany" lumber, or that of which the edges or corners have not been squared (Fig. 18), and also boards and planks which have not been sawed to a uniform thickness. It is not uncommon for a board to be considerably thinner than it should be in some part of its length, due to irregularity in sawing.
For plain work avoid "cross-grained" stock, as well as that having knots (which are sometimes "tight" and sometimes "loose"), as it is harder to work and to smooth, is not[41] as strong, and does not hold its shape as well, as a rule. Sometimes it is desirable, however, on account of the beautiful figure of the grain shown in many crooked-grained pieces, as in mahogany for furniture (see Appendix). Bear in mind that when especial strength is required rift stock is best.
Reject wood which smells musty, or has rusty-looking spots, which are signs of decay, or of the attack of fungi, which may spread and under favourable conditions attack other pieces which are sound (see Appendix).

Fig. 29.

Fig. 30.
Reject crooked stock. The worst form is winding or twisting. Of course no one would take such an extreme case as Fig. 29, unless for some very rough work, but even a very slight winding may make much trouble in your nice work. So look particularly for this defect, which you can often detect at once by the eye, but if your eye is not well trained use winding-sticks (see Part V.). Warped or curled stock, with the surface rounded or hollowed (Fig. 19), is also bad, but you will need no instructions to detect this defect by the eye or any straight stick. When boards are rounding on one side and hollowing on the other, it is due either to the way the log was sawed, as we have seen, or to one side having been more exposed and so having dried faster and shrunk faster than the other, causing that side to be concave, while the other became convex. Stock is sometimes crooked[42] lengthways,—either a simple bending in a curve or at an angle, or wavy (Fig. 30), or both,—often due to careless "sticking" (Fig. 28) while the wood was green. Sighting lengthways will of course show these defects.
Reject stock badly checked at the ends, or cracked. There is apt to be more or less of this in most lumber. In seasoning, the pieces dry faster on the outside than in the middle, which causes checks or cracks, usually worse at the ends of the pieces, where the drying takes place most rapidly. The ends of valuable boards and planks are sometimes painted or cleated, which in a measure prevents this result. Occasionally, when the cleat is removed a crack will suddenly extend and even split the board.
Do not take a cracked or partly split board, thinking that you can use the sound end from the point where the crack appears to stop. Possibly you can, but oftentimes and in some kinds of wood it is impossible to tell before the stock is cut where the cracks end. In mahogany, for example, they sometimes are found to extend, or develop, several feet beyond where they appear to stop. Sometimes you can buy wood with such defects at a discount. Unless you are sure, however, that there is enough sound, clear wood outside of the cracks or knots, and unless the discount is pretty large, it will usually be better to buy clear, sound stock for nice work, as the waste is very apt to offset the saving, not to speak of the extra time and labour it takes to work up such material. (See Shakes in Appendix.)
Reject sapwood as far as possible, because it is usually inferior to the heartwood.
In the case of elm and young ash the sapwood is, however, superior to the heart. The heartwood is usually harder and more durable than the sapwood, heavier, of better texture, and commonly of better colour.[43]
"The sapwood is, as a rule, darker in the whitewood class than the heartwood, whether seasoned or unseasoned, but is paler in colour in most hardwood trees which have had time to season. In some of the white, or softer woods, when fresh cut, the difference is scarcely perceptible; but exposure to the air quickly gives to the outer layers a greenish tinge, due to a species of mould fungi which attack them."—Laslett and Ward. (See also Appendix.)
When buying, do not take boards just as they happen to come from the pile. Select them yourself. Most good-natured dealers will let you do this if you do not expect them to unstack a whole pile just for one or two boards. It is better to do this for nice work even if a slight charge should be made for the privilege. When you come to pick out boards you will see the application of what has been said about the ways of cutting the log, and you can tell by the annual rings at the ends of the boards, by the sapwood (when visible), the grain, etc., from what part of the log the pieces were sawed.
Use good, clear stock for everything but rough work. Of course in rough or temporary work you can save expense by using wood from packing-cases, boxes, old fence-rails, or anything that will serve the purpose, but as a rule avoid trying to make nice, new things of wood taken from old work or boxes. The quality of the wood used for boxes nowadays is apt to be poor and hard to work. The wood taken from old cabinet-work is, however, often better than you are likely to buy, but you need to be very cautious about working over old material, for the dirt which has been ground into it is apt to dull your tools, and, moreover, the presence of concealed nails, etc. (which it is sometimes almost impossible to detect), will often injure your tools so much as to more than offset what you save in expense.[44]
Do not buy thick stock with the idea of sawing it into thinner pieces (unless necessary). Of course it can be sawed into thinner or smaller pieces, but you cannot always be sure that these will be as true as the original stock. Suddenly exposing the middle of a piece of wood to the air in this way sometimes plays queer pranks with the shape of the pieces (see Appendix). If you want to use boards for good work buy those which have seasoned as boards, instead of splitting up thicker lumber; and always try to treat both sides of a board alike so far as you can.
Bear this in mind: If you take an inch board to the mill to be planed down to three eighths of an inch, for instance, have it planed equally, as nearly as may be, from both sides. Ignorant hands often simply smooth off, or "surface," one side, and then plane the board down on the other side, when it will sometimes warp badly at once and be useless, perhaps, for the purpose intended.
If you carefully pile and "stick" the stock you have bought (Fig. 28), it will tend to keep the pieces straight and true. Never lay good boards down flat directly upon one another unless they are thoroughly seasoned. It is the best of all ways, however, to keep a pile of thoroughly seasoned stock, but not the way to season it. The top board will warp. Never lay a single board of nice stock flat on its side. Keep short pieces of nice stock standing on end where they will be equally exposed on both sides to heat and cold, moisture and dryness.
The best way to learn about any kind of wood is from the wood itself. It is a capital idea to make a collection of specimens of as many kinds as you can.[12] You will be sur[45]prised to see how varied, interesting, and handsome a collection you can make at little or no expense. (See Appendix.)
The kinds of wood which you are likely to use are commonly known as either hard or soft, the former class from trees with broad leaves, as the oak, the latter from the coniferous or needle-leaved trees, as the white pine. This distinction between hard and soft wood you may find somewhat puzzling at first, for the common whitewood of the hardwood class you will find softer and easier to work than hard pine of the softwood class, but the distinction is based on botanical reasons. The hard woods are usually more durable as well as stronger than the soft. For various woods see Appendix.
Timber.—The word timber is applied in a general way to the log and to the material itself, and to the standing trees. It is also applied more specifically to the larger squared pieces, or "dimension" stock, such as sills, beams, etc.
Lumber.—As the term is used in the United States, lumber consists, according to Webster, of "timber sawed or split for use, as beams, joists, boards, planks, staves, hoops, and the like."
Lumber may be either undressed or dressed, that is, rough (as it comes from the saw) or planed. It is usually sawed in regular thicknesses, and for stock which is in steady demand, such as joists, floor timbers, etc., in regular widths, as 2" x 4", 4" x 6", etc. It is commonly sold in lengths varying from 10 feet to 20 feet. Twelve feet is a common length for boards. Planing (by machine) rough or undressed boards on both sides will usually reduce the thickness of an inch board to about seven eighths of an inch. Other thicknesses will of course be reduced correspondingly. Bear this in mind. The terms 1" board, 2" plank, etc., apply, as a rule, to the stock in the rough state as it comes from the saw. When you buy planed or dressed lumber it will be thinner—that is, the[46] "inch board" that you wish to get for a shelf will not be one inch thick (unless you get it unplaned), but seven eighths of an inch.
You must make allowance for this when you figure on dressed lumber. If for example the board must be one inch thick when planed, you will have to get a thin plank and have it planed down, or pull over the pile until you find a board which happens to be sawed as thick as one inch and one eighth. You can sometimes find boards planed one inch thick, but as a rule you will find the thickness seven eighths of an inch. A similar statement will apply to the various thicknesses of planks also. The sawing is often very irregular, however, and frequently some boards or planks will run thick enough in sawing to give the required thickness when planed, so it is well to look for such when you need pieces a little thicker than planed stock usually runs.
For such work as you are likely to do you will chiefly need boards, planks, and joists. Other forms will be referred to farther on.

Fig. 31.
Boards.—These are one inch thick or less.
Matched-boards, or "sheathing," have a groove on one edge and a corresponding tongue on the other (Fig. 31.) Any number of boards can thus be joined to make a wide surface. The edges of these boards were formerly tongued and grooved by hand[47] with "matching-planes," but now this is done by machine, usually with some form of bead or moulding at one edge (and sometimes in the middle) to render the joint less noticeable.
Planks.—These are thick boards,—more than one inch in thickness. Both planks and boards can be of any width or length, the distinction being merely in thickness.
Joists.—These are the same as narrow planks, but of some fixed width, as 2" by 3", which is the same as a 3" strip sawed from the edge of a 2" plank.

Fig. 32.

Fig. 33.

Fig. 34.
Most of the lumber you will require is sold by the square foot, at so much an M (1000 feet), or so much a foot. The square foot has an area of 144 square inches and is one inch thick, or contains 144 cubic inches, regardless of the shape or size of the piece. That is, Figs. 32, 33, and 34 each equal one square foot by board measure.
Thus a board 12' long, 12" wide, and 1" thick, contains 12 feet, board measure. A board 12' long, 6" wide, and 1" thick, contains 6 feet. A plank 12' long, 12" wide, and 2" thick, contains 24 feet. A plank 12' long, 6" wide, and 2" thick, contains 12 feet, or the same as the board first mentioned. You can bear in mind that in case of boards 12' long the contents in feet is indicated by the width in inches, as you will see from the examples[48] just given. A board 12' long and 7" wide contains 7 square feet. So all you have to do to measure 12' stock is to find the width in inches. If the board tapers in width, measure at the middle. The same is true of planks, only the width in inches must be multiplied by the thickness of the plank. A plank 12' long, 7" wide, and 3" thick, contains 21 square feet. Of course this principle can be quickly applied to pieces whose length is any convenient multiple or fraction of twelve. Thus a board 18' long, 8" wide, and 1" thick, contains 1½ times as many square feet as one 12' long, or 12 feet. A plank 9' long, 6" wide, and 2" thick, contains ¾ as many square feet as if 12' long, or 9 square feet.
Boards less than one inch thick are usually sold by the square foot of surface, regardless of thickness—the price varying according to the thickness, except in cases where an inch board is planed down, when, of course, inch thickness is charged for. There is no distinction made in measuring between a rough board 1" thick and a planed board 7/8" as, of course, they represent the same amount of lumber. The cost by the foot of the planed board is greater because of the expense of planing. In cities, and sometimes in the larger towns, you can find thin boards (½", 3/8", 3/16", 1/8" thick) already planed, and even scraped, for nice work.
Some of the rarer and less commonly used woods are often sold by the pound, as ebony, leopard wood, tulip wood, etc. Pieces turned out in quantities for special uses, as strips, mouldings, etc., are often sold by the "running foot," meaning simply the length, the price varying according to the amount of lumber and labour required. Certain regular sizes and shapes of lumber are sold by the hundred or by the piece. Shingles, clapboards, laths, and the like, are sold in bunches or bundles.
For other matters relating to wood, see Appendix.
Working Drawings.—A simple drawing will often give you a better idea of an object than you can get from any description in words, for drawing is not only a very ancient form of language but one readily understood by people of all countries and all times. It is one of the chief tools of a workman in these days, so of course the quicker you become familiar with it the better, for the day for "rule-of-thumb" work and feeling one's way along step by step is fast giving way to the guidance of the working drawing, which shows one not only exactly what is to be made but exactly how to make it.
When you wish to make some particular thing, you should begin by making rough sketches to express your idea, and from them an accurate working drawing in which every detail and measurement is clearly given. Make all your working drawings carefully to scale (see Appendix), and whenever you can, make them full size. Do not guess at the height, width, and length, but measure, and measure very carefully. Never mind if it takes time. Learn first to do it right, and practice will soon teach you to do it more quickly.
The time to make changes in your plans is when you are making the drawings—particularly the rough preparatory sketches. Making the drawings will, if you make them complete and accurate, show you what you know and what you[50] do not know about the subject. The working drawing should be complete and final.
Begin the making of sketches and detailed drawings with the first article you make, no matter how simple it may be. You can go about the work with confidence, which goes a long way toward success, when you know that you have thought it out to the end and have it all done on paper. For practical suggestions about working drawings, see Appendix.
Laying out the Work.—Try to get the measurements and lines exact, and do not be satisfied with coming within an eighth of an inch. You cannot do good work unless it is laid out right, and cutting exactly to a line will do no good if the line is in the wrong place. It makes no difference how accurately you saw off a board if you have marked it half an inch too short, nor how nicely you make the two parts of a joint if you have laid them out so that they can not fit together. The work is spoiled in either case.
Go over all your measurements a second time. It is a good plan to check them by measuring back in the opposite direction, just as you prove your addition of a column of figures downward by adding again upward. Nothing is easier than to make mistakes in measuring. No amount of experience will prevent the chance of it. It takes but little time to measure twice, much less time than to correct mistakes—as you will discover when you cut off a mahogany board five inches too short and have to go half a mile to the mill and pay a dollar or two for a new piece.
In getting out stock for nice work it is best to make plenty of allowance for the pranks which expansion and contraction may play with the pieces (see Appendix). How to arrange the various parts of your work with regard to this swelling and shrinking, warping and winding, is a matter of practical[51] importance, for a piece of wood can no more keep still than an active boy can, and, although its movements do not cause so widespread havoc as the motions of some boys, you will have to keep a careful eye on its actions if you wish to turn out good work.
This applies not merely to the way green wood shrinks, as we have already seen, but particularly to the way seasoned wood acts. Many people think it is only green wood that causes trouble with wood-work, but there is much difficulty with dry wood—that is, what we call dry wood. It never is really absolutely dry, except when it is baked, and kept baked (see Appendix). The moment you take it out of the kiln or oven, it begins to take up some of the moisture from the air, as we have seen, and swells. If the air becomes more damp, the wood sucks in more moisture and swells more. If the air becomes dryer, it sucks some moisture from the wood, and the wood becomes dryer and shrinks. It is thus continually swelling and shrinking, except in situations where the amount of moisture in the air does not change, or when the wood is completely water-logged.
"What does such a little thing as that swelling and shrinking amount to? Use more nails or screws or glue and hold it so tight it cannot move." Well, it amounts to a good deal sometimes when you cannot open the drawer where your ball is, or a door or a window, without breaking something.
In the days of high-backed church pews with tall doors to every pew, each pew door would swell in damp weather, of course, and in continued dampness the doors of a certain church fitted quite snugly. There was usually no special trouble, however, for, many of the doors being open, the pew frames would give way a little so that the closed doors would open with a slight[52] pull; but if all the doors were shut the whole line would be so tightly pressed together that it would take the utmost strength of a man to start a door. Some boys one day catching on to this idea (though they were not studying wood-work), got into the church one Sunday morning before service and by using their combined strength succeeded in closing every door. They then climbed over the top into their own pew, where they awaited developments, as one after another sedate churchgoer, after a protracted struggle, finally burst open his pew door with a ripping squeak or a bang. You will understand that those boys always remembered the expanding power of wood. I feel sure that I am not putting any boys up to improper mischief in telling this story, because pews are not so often made in that way now, and there is slight danger of their having any chance to try it.
Did you ever see stone-workers split big rocks by drilling a row of holes and driving dry wedges into them and then wetting the wedges, when the stone will split?[13] Do you think nails or screws or glue will stop a force which will do that? You cannot prevent the swelling and the shrinking any more than you can repress a boy's animal spirits. You may be able to crush the wood, but so long as it remains a sound, natural board it must swell and shrink.
What shall you do then? Why just the same as with the boy; give it a reasonable amount of play, and a proper amount of guidance, and there will be no trouble. You must put your work together so as to allow for the expansion and contraction which you cannot prevent. You will find abundant examples, in almost every house, of work[53] which has split or come apart or warped because proper allowance was not made for this swelling and shrinking. So try to avoid these errors so common even among workmen who should know better.

Fig. 35.
For instance, if you were to put cleats on one side of a drawing-board three feet wide, and were to firmly glue the cleats for their whole length (Fig. 35),—you sometimes see such things done,—you would probably not have to wait many weeks before you would hear a report like a toy pistol, and the cleats would be loosened for at least part of their length, because of the expansion or contraction of the board. Similar cases are continually occurring. In such cases the cleats should be screwed, the screws having play enough in their holes to allow for the changes in the board (see Appendix).
You must also make plenty of allowance for planing down edges and surfaces and for the wood wasted by sawing. No rule can be set for these allowances. If you do not leave enough spare wood, the pieces will finally come out too small. If you leave too much you will increase the amount of planing or shaping to be done, but of the two extremes it is better to err on the side of allowing too much.
A rod (any straight stick), say six feet long, and another ten or twelve feet long, with feet and inches marked, are very handy to have when laying out work roughly, or for measuring outdoor work approximately.
Lay out your work from only one edge or one surface[54] of a piece of lumber unless you are sure the edges or surfaces are exactly parallel. Having selected the best edge for a "working edge" and the best surface for the "face," mark them with an X or other mark to avoid mistakes (Fig. 36). This is quite important in laying out a number of pieces, as before the stock is accurately worked into shape you cannot usually rely on the edges being parallel. One mark like a V as shown in Fig. 36 will indicate both the working edge and the face.

Fig. 36.
Estimating.—You must, of course, learn to make your estimates yourself, often a very important preliminary. Prices vary, and you cannot always rely on other people's estimates for your own work. It is a matter of simple arithmetic and of making correct allowance for waste and incidentals.
You can always get the prices easily. Figure the amount of wood required, the number of square feet (see page 47) of each kind, or running feet, as the case may be, and multiply by the price a foot; but after this comes the allowance for waste, etc., which cannot usually be figured exactly, but must be estimated.
For instance, if you wish to make a double-runner, with a seat ten feet long, the board from which to make it will very likely be twelve feet long, in which case you must, of course, buy the whole board. Perhaps you can use the two feet left over somewhere else on the sled, perhaps part may be checked or injured.[55]
There is almost always some defective wood (worthless, except for fuel); some pieces are too short or small to be of use; and very often some quite good-sized pieces are left over, which, so far as the particular job is concerned, are waste,—that is, you must buy them in order to get enough. Such pieces can be used on other work, and are not really wasted in the end.
Just how much to add to the number of feet to cover waste varies, of course, with every job. Some people add a fixed per cent. to their measurements or calculations, which, although not exactly correct for any one job, strikes an average for a good many. It would not be easy to state any such per cent. for the varied work you will do, but the main thing to bear in mind is that you must make a liberal allowance. Just so with the other materials. Remember to allow for waste and for unforeseen extras. Even with experienced people things are very apt to cost more than the estimate.
Make a neat schedule to take to the lumber-yard or mill, specifying the kinds and dimensions of the stock required.
If you have a place where you can build a workshop you will find one described in Part III. If not, try to find a well-lighted shop, both on account of your eyes and your work; one that is dry, or your tools will rust and your work be injured; and one that can be heated, for there will be no time you will wish to use it more than on cold, stormy days.
As a rule, an outbuilding is better than a basement or attic, other things being equal, because a basement is liable to be damp and dark, and an attic is bad about carrying materials and finished work up-and down-stairs. Noise in the top story of a house is usually more disturbing to the occupants than noise in the basement; but all these conditions vary in different places.
Have a lock on the door of your workshop, partly to keep small children from getting cut if they should come in without leave, and partly to prevent your work being interfered with in your absence and the edge-tools used for various domestic purposes by your feminine relatives, who might, in their innocence, mistake your best gouge for a tack-puller or the quarter-inch chisel for a screw-driver.
Of course you will have overalls and jumper or a work-man's apron made of denim, ticking, or some strong cloth. If you use an apron, have a pocket in it. A small slip of a pocket on the outside seam of your overalls above the right knee is also useful for holding a rule. When you have a[57] long job of dirty work before you, a good way is to change your clothes for any "old duds" that you may have. This saves your clothes, and in warm weather is more comfortable and healthful than to wear overalls.

Fig. 37.
Your shop can be all fitted up for you by a carpenter, but it will be better, and better fun, to do it yourself. After the workshop itself is ready the first important thing is the work-bench.
The Work-Bench.—A very simple one (Fig. 37) will answer your purpose for a long time. When you become a pretty good workman and feel the need of something better (for a first-class bench with the best attachments is really a great help toward doing good work), you will still find this first simple affair very useful in some part of your shop.[14] There is no need of a bench being made of stock of exactly the dimensions given, so if you have a pile of boards and joists to draw from without buying, you can, of course, substitute other-sized pieces, provided you use stock heavy enough[58] to make a firm bench. Heavier legs and top (front board) would be better, and in fact there is little danger of making a bench too solid.
Before beginning to work read carefully Marking, Square, Rule, Saw, in Part V., and look up any other references.
The design is for a small bench, 5' 10" long, 2' wide, and 2' 6" high. A larger one can be made on the same principle.[15]
You will require for stock:
1 piece of 3" X 4" joist 10' long.
| 1 | board, | 7/8" | thick, | planed, | 12" | wide, | 12' | long. |
| 1 | " | " | " | " | 10" | " | 12' | " |
| 1 | " | " | " | " | 10" | " | 6' | " |
| 1 plank, | 1½" | or 2" thick, | planed, | 5" or 6" | wide, | 2' 9" long. | ||
| 1 strip, | ½" | to 7/8" thick, | 3" or 4" | wide, | 15" long. |
Pine is good, and almost any cheap wood can be used. Hemlock is not very suitable, unless for the legs. Spruce is cheaper than pine or whitewood, and can be used for economy, but is prone to warp and twist and should be thoroughly nailed.
First make the legs and fasten them together. To do this,[59] take the joist and lay it on two boxes or old chairs (Fig. 38), which you can use temporarily for horses, until you make a pair. See whether either end is cut off squarely. If neither is, mark a line by the square a short distance (perhaps half an inch, according to the condition of the end of the joist) from one end, on one side of the joist. Carry this line around the joist by applying the square to each side successively, and saw off the waste end with the cross-cutting saw. Having one end square, measure from that end 2' 5" and mark a line around the joist as before. Saw this piece off, and using it as a measure (but not as a square), mark and saw off three more pieces. These are for the legs.
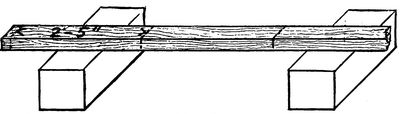
Fig. 38.

Fig. 39.

Fig. 40.

Fig. 41.

Fig. 42.
Next, from the short 10" board, mark and cut off two pieces 1' 10¼" long in the same manner (Fig. 39), seeing first that the end from which you begin to measure is square. You do not need to mark the under side of the boards, but only the top and the edges. Now square a line 1" from each end of each of these short boards, and start three nails on each of the lines by driving[60] them nearly through the board (Fig. 40). (See Nailing.) Next, place the end of one of these boards on the narrow side of one of the legs, and, holding it firmly in position, nail it securely to the leg. You must take pains to keep the leg and the cross-piece "square." Nail only one nail first and then adjust, testing with the try-square before driving the other nails (Fig. 41). Then nail the other end to another leg, and repeat the process with the other board and the remaining legs. This will give two frames like Fig. 42.

Fig. 43.

Fig. 44.

Fig. 45.
Next, fasten the sides to the legs. Take the 10" board and mark and saw off two pieces 5' 10" long in the same way as before (Fig. 43). At distances of 7" and 12" from each end of each board, mark lines across the side with the square and start nails between these lines (Fig. 44). Then, fitting these lines at the outside edges of the legs, nail the sides securely to the legs,[61] as shown in Fig. 45. But drive only one nail through into each leg at first, until you are sure that the frame is coming together square and true throughout. Test the angles with the square. Stand the frame on as level a surface as you can find and sight across the top endways and crossways to see if either corner sticks up or down. If the top is not true, twist the frame enough to make it so, which you can easily do if you have but one nail[62] in each corner. When the top is true and the legs at right angles, drive in the rest of the nails (Fig. 45). Be sure to test the top for winding, as just said (see Part V.), rather than to trust to the way the legs stand on the floor. Floors are often uneven, and the legs may not be cut exactly the same length. Make the top true and the legs can easily be made to fit the floor afterwards. The piece of 10" board left over you can fit to slip in between the sides, as in Fig. 45. If you nail through the sides and top into this piece, it will stiffen the bench. In making a long bench after this pattern, it is well to insert a few pieces of plank or joist between the sides in this manner.
Next, put on the top. Cut two lengths of 5' 10" from the 12" board. Lay them in position, square lines across as guides for the nails (as before), and nail them down to the legs and cross-boards. Also drive carefully a few nails at the edge down into the sides of the bench. Sink all the nail-heads well below the surface (as much as 1/8") with the nail-set (see Nail-Set).
A better bench can be made by using a plank (say a 2" plank, planed) for the front of the top (Figs. 46, 47, 48). This bench with plank front is much better than the common carpenter's bench just described, and the difference in ex[63]pense is but slight. It is easier to do good work on, as it is stiffer, steadier, and much better to pound on.

Fig. 46.

Fig. 47.

Fig. 48.
Of course a thicker plank can be used if available. Hard wood is best. Maple is excellent for a bench-top. Take particular care to select a good sound plank, from the centre of the tree if you can (see Chapter III.), as straight and free from winding as possible, and have it planed so as to be straight and true. This can easily be done at any properly equipped planing-mill.
To make this bench with a plank in front, you can proceed exactly as with the bench just described, except that the front legs should be as much shorter than those at the back as the plank you have is thicker than the 7/8" board used for the top of the bench just described. That is, if your plank is 17/8" thick the front legs should be 1" shorter than the back ones. Pieces must be cut out of the cross-boards in order that the top may be even (Fig. 46).
The simplest way, however, is to make the bench just like the preceding one until you come to the top. Then, after putting on the front plank, raise the back top-board to be flush with the plank, instead of lowering the plank to be flush with the board. You can do this by putting small pieces of board of the required thickness under the back part of the top (Fig. 47).
Some workmen prefer having the back board of the bench top lower than the front by an inch or so, with a strip fastened on the back, and sometimes at each end, so as to be level with the top of the front plank, thus forming a sort of tray (Fig. 48) where tools, nails, small bits of work, etc., can remain when in use, keeping the front plank clear for the actual operations. The work, if large, can be rested on the back strip as well as the front part, both being on a level.
The bench can be all filled up underneath with shelves, drawers, cupboards, compartments, or in any way that you wish, but at first, and for a simple bench like this, it is as well to have only one shelf, as shown in the frontispiece. You can[64] easily put this shelf in after the bench is put together. You can tell better whether you want drawers and compartments after you have worked for some time and wish to make a more complete bench.
A nice bench should, of course, be built independently of the shop,—that is, be complete in itself, so that it can be readily moved. But a common bench can sometimes be best built against the wall, using the side of the building to support the back. Sometimes one or both of the ends of the bench can be advantageously carried to the walls of the room, thus requiring legs only in the middle or at one end. But such arrangements are not to be advised if you are likely to wish to move the bench before you have used it enough to pay for making it.
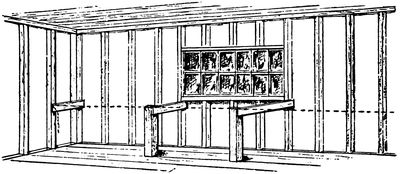
Fig. 49.
Figure 49 is merely suggestive. The process of construction is the same as already shown, except that you omit some of the legs and the back side-board, a saving sufficient to allow you to use a plank for the front of the top. As the floor is likely to be uneven, you can first saw the posts a little too long, stand them in line, stretch a cord or a chalk-line (see Chalk-Line) along the line of the front edge of the bench at the proper height for the tops of[65] the posts, cut the posts off where this line crosses them, nail on one end of the cross-boards at right angles, and then fasten the other end to the wall-studding, sighting and testing to have the top straight and true, as in the case of the bench already described. If instead of vertical studding the joists of the wall run horizontally (as is often the case), you can easily nail cleats on the wall if there is no horizontal timber at the right height to nail to.

Fig. 50.
Bench-Vise.—The kinds shown in Figs. 50, 56, 57, though not as good as some more improved forms, are in common use by carpenters, and will answer your purpose very well for ordinary work—until you get to the point of building a first-class bench.[66]
At a distance of about 14" from the end of the bench and in the middle of the side board mark the point a (Fig. 45). Bore a hole at this point (see Boring) if you have a bit a trifle larger than the screw of the vise. If not, using this point as a centre, describe a circle (see Compasses) with a diameter a trifle greater than that of the vise screw, and remove the wood within the circle (see Boring and Paring.) Now take the piece of 1½" or 2" plank which is to make the movable jaw of the vise, and mark a line lengthways along the centre of each side (Fig. 51). At a distance of about 8" from one end mark a point upon this centre line and make a hole for the vise screw as before. The nut for the screw must now be fastened in position on the inner side of the bench, the vise screw passed through the movable jaw and the side board, and the handle plate fastened upon the face of the jaw.
Fig. 51.

Fig. 52.
You can now open and close the vise by the screw, but the movable jaw needs to be made steady and the end projects above the top of the bench. Screw the vise tight together and slide the movable jaw around until it is in the position shown in Fig. 52, when the centre line on the back side of the jaw will cross the edge of the leg a few inches from the floor, according to the width of the jaw and the degree of slant given it. When the jaw is in this position, mark from the back side the lines indicated in Fig. 52, and saw off the projecting ends of the jaw by these lines, which will give the shape shown in Figs. 37 and 50.

Fig. 53.

Fig. 54. Right.

Fig. 55. Wrong.
Next take the small strip, and marking points upon its side as shown in Fig. 53, bore holes with a 3/8" or ½" bit. Screw the end of the strip to the edge of the movable jaw (being careful to get it at right angles with the vertical edge of the jaw), as shown in[67] Figs. 50 and 53 (see Screws). Just above and below where this strip crosses the post of the bench nail small blocks (a trifle thicker than the strip) so that it will pass easily between them. Cover these with a longer piece, making a slot, as shown in Fig. 53, through which the strip can slide freely. If the two blocks are no thicker than the strip, you can put pieces of paste-board between them and the post to make the slot wide enough to let the strip slide through freely. Fit a pin or piece of dowel to the holes in the strip. The use of these holes and the pin is to keep the face of the jaw approximately parallel to the side of the bench. Contrivances for this purpose can be bought. After the jaw is all fitted, bevel or round the edge on the face side at the top (see Bevelling), and you can also bevel or round all the front edges if you wish. The vise is now in working order.[16]
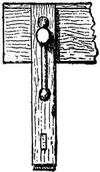
Fig. 56.

Fig. 57.
The important point with this vise (and in fact with any vise)[68] is to have the inside surface of the jaw parallel with the surface of the side of the bench, so that the wood will be pressed equally at all points, else it will slip just when you wish it to be securely held. Be sure that the vise is not open more at the top than at the bottom (see Figs. 54 and 55).
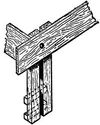
Fig. 58.

Fig. 59.
The holes bored in the side of the bench are to support the end of a long board (Fig. 50).
If you cannot afford to buy a vise, or have to work where there is none, there are a number of makeshifts with which you can get along quite well, though not as rapidly or conveniently.

Fig. 60.
Carpenters often nail a piece on the side of the bench (Fig. 60),[69] which holds boards for planing fairly well, for common work, but tends to bruise the ends of the boards a little against the cleat, and requires a knife, or something, driven in at the other end of the boards to hold them with any degree of security. Another cheap substitute is shown in Fig. 61. This holds boards of regular sizes quite well. Thin pieces can be held tighter by wedging, as shown.

Fig. 61.

Fig. 62.

Fig. 63.
Another simple contrivance, and more of a vise, is easily made by boring a couple of holes in a board, say 6" wide and 12" long, and screwing it loosely to the side of the bench (Fig. 62), making the holes in the board larger than the diameter of the screws so that it will be free to play. By inserting the piece to be held in the end and double wedging the opposite end (Fig. 63)[70] the piece will be held fairly well (see Wedges). For thin boards, blocks can be inserted to make the jaw parallel with the side of the bench. An upright vise made on this principle is often used to hold saws for filing.
If you can find an old wooden hand-screw, you can use one jaw (sawing off the ends if necessary) for the nut to go inside of the bench, leaving the other for the movable jaw, using one screw to tighten or loosen the vise and the other to keep the jaw parallel with the side of the bench. You will require no description to contrive something of this sort. Vises on somewhat this principle can be bought, attachable and detachable at will.
The jaw in Fig. 64 can be hinged upon the strip at the bottom and the latter fastened to the side of the bench. The jaw can then be tightened or loosened by the screw. This gives a square grip only when the jaw is vertical (Fig. 65). You can put in blocks, however. The longer the jaw the less objectionable the slanting grip becomes, of course.
Always try to devise some such expedients, which you can think up for yourself, when you are without the regular appliances, for even a poor vise is better than to hold pieces in the hand or to push them against chairs or tables or the wall.

Fig. 64.

Fig. 65.
For nice work by far the best vise of moderate cost is that shown in Fig. 143, which has been in use for a long time by wood-workers of the better class.
There are a number of excellent iron vises (some with jaws of wood, and also with an "instantaneous grip"). Some of them are admirable, but quite costly compared with the common screw.[71]
You can work quite well with a good-sized common iron vise by fitting wooden blocks or leather or rubber to the inside of the jaws, to save marring your wood-work, though a regular vise for wood is much to be preferred.
Bear in mind when doing work that requires to be held at unusual angles, or in fashioning odd-shaped pieces, that you can usually get the angle or position required by a combination of hand-screws or clamps with the bench-vise as suggested in Figs. 66 and 67.

Fig. 66.
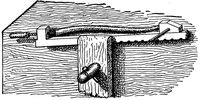
Fig. 67.

Fig. 68.

Fig. 69.

Fig. 70.
Bench-Stop.—You must have something on the forward end of the bench-top to push your work against for planing and other operations. A simple and good way is to use one or two stout screws (Fig. 68). These can be screwed in so as to project about a quarter of an inch, which will answer for the greater part of your work, and the height can be changed when necessary with the screw-driver. The heads of the[72] screws will be sharp enough to hold the work, and a stop of this kind will answer your purpose very well for common work. The wooden stop (Fig. 69) has the advantage of not making any nicks in the end of the wood, which is important in nice work, such as furniture, but for common work screws are just as good, except that, as they are left permanently sticking from the bench, you may dull your tools against them or scar your work. This applies to a common bench. Of course for a really nice bench with a tail-screw the regular stops should be used (Fig. 143).

Fig. 71.
Carpenters sometimes nail a small piece of board, with a V-shaped notch at one end, to the top of the bench to hold boards or joist for planing on the edge (Fig. 70). Simply nailing a strip across the end of the bench (Fig. 71), and setting the nails well in, will do to push boards against for planing for common work.

Fig. 72.

Fig. 73.
Iron contrivances (which can be raised or lowered) can be bought for a small sum and are convenient for common work, especially for thin pieces. Sink them deeply enough in the bench-top so that when lowered nothing will project to injure the tools or the work.
The old-fashioned bench-stop shown in Fig. 69 consists merely of a square stick of hard wood, one or two inches square, fitted quite tightly to a hole in the top of the bench, so that it will slide up or down by a blow from the mallet or hammer. This stop will not damage the work or the tools. To make the mortise for this bench-stop, see Mortising. Take care to keep within the lines, so as not to make the hole too big. You can easily make it larger if too small.[73]

Fig. 74.

Fig. 75.
The stop should fit tightly and should be set with a very slight slant toward the work (Fig. 72),—that is, the mortise should be cut slightly slanting. The stop should be of hard wood, such as maple. If the top of the bench is only of board thickness, screw cleats of hard wood on the under side to give more bearing surface (Fig. 73), or the continued pushing against the stop will be liable to get the hole out of shape so that the stop will slant the wrong way, when the work will be apt to slip or, in case of a thin board, jump over the stop (Fig. 74). If the stop wears loose in the hole, a saw kerf is sometimes made lengthways in one side and a bent piece of springy wire inserted, or a flat spring fastened on the side (Fig. 75). A loose stop can easily be wedged (preferably from underneath), and it is sometimes made loose on purpose, the wedging tightening the stop and at the same time giving the required slant (Fig. 72). An iron plate with teeth can be screwed on top of a wooden stop (Fig. 76), or a screw can be inserted (Fig. 77).

Fig. 76.

Fig. 77.

Fig. 78.
Two strips, like Fig. 78, can be nailed or screwed on the top of the bench so as to separate V-fashion (Fig. 79). Two wedges,[74] like Fig. 80, can then be made of such a taper that when fitted between the strips their inner faces will be parallel. By tapping in the wedges on each side of the work to be held (Fig. 79), it will be securely fastened without injury. If the inside edges of the strips and the outside edges of the wedges are slightly bevelled, which you can do with a plane or a knife, the wedges cannot jump out of place. The best way to fit this contrivance is to make the wedges first, place them in position on the bench with the square sides inside (facing each other), and then fasten the fixed strips outside of them. Pushing the work tends to tighten this vise. This is much better for permanent use than the notched board shown in Fig. 70. If you have a good vise you will not often have occasion to use such contrivances, but they are sometimes useful as makeshifts.

Fig. 79.

Fig. 80.
The top of a good bench should be as true and as smooth as possible (see Plane and Scraper). Rub it with linseed oil, wipe it off with a rag, and after a few days give it a couple of coats of shellac (see Finishing).

Fig. 81.
You should place your bench so that when you stand at it you will face the light and not have it come from behind you. If it can come from the forward end of the bench and also from behind the bench, as shown in the frontispiece, it will be best, for a[75] cross-light is often very useful, not merely that you may have light enough, but also that when testing your work with the try-square, straight-edge, and the like, any inaccuracy may be detected by the light passing through the crack between the testing tool and the work, and also when sighting by the eye alone. Fasten the bench firmly to the floor (and wall if you can) with screws, cleats, or L irons.[17]
Avoid chopping on the bench top or whittling it or boring holes or marring it by saw-cuts or chisel-marks. Do not use paint, varnish, or glue at the bench if you can help it. If necessary to do so, clean the bench-top carefully when you get through. Lumps of hardened glue will hinder you and deface your work.
Filing-Bench.—You cannot do much of such varied wood-work as you will undertake without having to do a good deal of metal work. It is a poor plan to do such work at the vise you use for your wood-work, or even at the same bench. It scars and defaces the wooden vise and the bench, and the particles of metal are bad for your wood-work and for the tools. It is much better to have another bench—if nothing more than a wide shelf or a box—for such work (Fig. 81). You will find suggestions in the illustrations.

Fig. 82.

Fig. 83.
An iron vise is the proper thing for holding metal. There are many different kinds at various prices, but one of the simple patterns will probably answer every purpose. If you[76] have room for only one bench this vise can be put at the back part of one end.
A small vise can be made of a hand-screw, the hand-screw itself being held in any desired position in the large bench-vise, but metal jaws are better for working on metal. You can make a rough sort of vise for metal-work with a piece of stout board or plank (Fig. 82). Find a couple of pieces of iron with screw holes, as you can probably do in a pile of waste iron junk, and screw them on the board and the bench to form metal jaws. The vise can be tightened or loosened by means of a big screw or bolt; or the board can be loosely fastened in the middle and tightened by wedging below (Fig. 83). A screw with a handle to turn it by and a nut for the thread is better, of course. Another form, such as you will find in use by leather-workers, can be easily made (Fig. 84), and works[77] with the foot, the connection between the jaw and the treadle being made by a strap or rope. You can make a vise in some of these ways that will answer quite well for most of the metal-work you will have to do for some time, although such contrivances are less reliable and less convenient than a regular iron vise.

Fig. 84.
An anvil is often useful and is sometimes combined with a vise. It should have a flat steel surface and also a tapering rounded (conical) point. An old flat-iron does quite well. You can easily find some way to keep it in position on the filing-bench. You should have some sort of anvil, even if nothing better than a junk of old iron (which you can of course find somewhere), for you will be continually wanting to straighten nails, bend wire, and pound pieces of metal. Try to find a flat plate of thick sheet iron—¼" thick if you can—to fasten on the top of the filing-bench (Fig. 81). It is very handy for many anvil uses, straightening metal and nails, and for much pounding.
Finishing-Bench.—Have also a finishing-bench (Fig. 91) if possible,—if nothing more than a shelf or box,—to keep the regular work-bench neat and clean for its proper uses, for even a skilful workman can hardly avoid making a mess when it comes to using paint and varnish.

Fig. 85.
Now, while there are many of you who can afford either singly or by two or three clubbing together to fix up a shop in first-rate style, there are also many who cannot afford even so cheap a bench as that just described. What can you do in such a case? Only one thing—patch up a bench out of whatever old stuff you can find. Patched-up makeshifts are not to be recommended, except in case of necessity, but when it comes to the pinch, and a matter of having a bench made of whatever old materials you can find or having no bench at all, by all means make one of boxes[78] and anything that can be worked in. For of course the boats, skis, squirrel-houses, and so on, must be made!

Fig. 86.
But, whatever you patch up, make it solid and strong. Do not try to work at a rickety, shackly apology for a bench that shakes and jumps and sidles all over the room every time you saw or pound or plane. You can probably get all you need in the way of boxes, packing-cases, and such material, at very little or no expense. The illustrations (Figs. 85 and 86) are merely suggestions, for you must use your own ingenuity, according to the materials you can find. Most experienced workmen have often been obliged to work at much worse benches than these, frequently with no bench at all.
Those of the boxes which you do not use whole you should take apart carefully (see Withdrawing Nails). This will add to your supply of nails. Use nails freely in fastening the boxes and boards together and to the wall or floor wherever allowable. A few screws will add much strength.[79]
The bench shown in Fig. 86 calls for one good board for the front of the top.

Fig. 87.
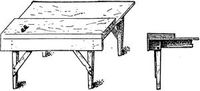
Fig. 88.
Some of you live in the crowded parts of the city, in flats or small houses where there is no possible chance for a shop of any kind. Whatever wood-work you can do must be carried on in the kitchen, or some other living-room, where even a small bench may be out of the question. Still you would like to make such small work—model boats, for instance—as can be carried on in such limited quarters. If you are forced to use the kitchen table for a bench, try, for the first thing, to brace or block or screw it to make it steady, for unsteadiness is the greatest hindrance to doing good work at such a bench.
You can fit a good board to the table-top with cleats, and a stop to hold the work (Fig. 87). If you can now get a common iron vise, you can get along quite well for small work, and the board and attachments can be quickly taken off and put away when the table is needed for domestic purposes. You can easily contrive some way to attach wooden pieces or leather or rubber to the inside of the jaws of the vise, to save marring your wood-work. A fairly good bench can often be made from an old table (as a kitchen table) by screwing a plank on top and a board[80] on the front side, and bracing the legs (Fig. 88). The plank should be screwed on from underneath.

Fig. 89.

Fig. 90.
If you can get hold of an old bureau or chest of drawers you can arrange a serviceable and compact little "parlour shop" for small work. If you cannot fasten permanent attachments to the bureau, you can fit a removable board (Fig. 87), and you will be equipped for such work as can be suitably done under such circumstances—and that includes quite a long list of small things. The drawers can be fitted with compartments and trays, according to what you have to keep in them and your own ingenuity, but make the arrangement simple. Figs. 89 and 90 are merely suggestions.
The best way to arrange your tools and supplies depends somewhat upon the circumstances, but the main point is to have the most convenient place for each thing and always to keep it in that place when not in use. The first part of this proposition is almost as important as the last. It is nearly as bad as being disorderly to keep the glue-pot in one corner of the shop, the glue in another corner, the glue-brush in the third corner, and the water in the fourth,—which is no exaggeration of the way some very orderly people stow away things, and is about equal to the arrangement of the person, of whom you may have heard, who always kept everything in its place and that place the floor! The workshop interior shown in the frontispiece and in Figs. 91 and 92, and the various other illustrations, furnish suggestions which may help you in the arrangement of your shop.[81]

Fig. 91.
Have everything where you can lay your hand on it in the least possible time, the tools used the most the nearest to you, tools that go together, as bit-brace and bits, kept near together. Have all the common tools right within reach, and not put away in chests and out-of-the-way drawers, just because you have seen somebody pack away his tools in a highly polished chest, inlaid with forty kinds of wood, and containing ninety-three separate compartments and trays and seven secret drawers, the whole cornered and strapped and decorated with shining nickel plate! Do not be dazzled by that sort of thing, which is not an evidence of true system and orderliness, but merely shows poor taste and a great lack of appreciation of the value and importance of time. Time may not be exactly money in your case, but it may be even more valuable, and can be spent much better than in running around after tools and supplies, and making[82] ingenious tool-chests. To be practical, five minutes a day saved by having things convenient and in place means about twenty-five hours in a year—which means a boat, a sled, or a lot of Christmas presents. So study out the best arrangement for your particular shop and then keep things in order. When working keep only the tools in actual use lying around on the bench. As soon as you are done with a tool for the operations actually in hand, put it back in place, and so avoid the confused litter seen in so many shops.

Fig. 92.
Hang saws against the wall on pegs, or nails, or at the end of the bench. Hang all tools which you put on the wall well above the bench, to be out of the way.
Lay planes on their sides or ends, for obvious reasons, or arrange a little block to raise one end of the plane slightly from the surface of the bench or shelf. The last way is usually more convenient than to lay the plane on its side or[83] end. Keep planes either at the back of the bench or against the wall, or on a shelf under the front of the bench.

Fig. 93.
Such tools as squares, bit-braces, and the like are usually most accessible on the wall, in some such arrangement as shown in the frontispiece. A convenient way to arrange such tools as chisels, gouges, and the like, is to keep them in racks either against the wall or fastened to the back edge of the bench, according to circumstances. Keep each tool in a particular place in the rack and you will soon learn to reach for it instinctively without any waste of time.
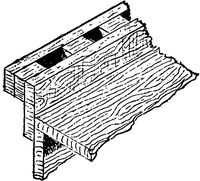
Fig. 94.
Bits can be kept in a drawer or box, care being taken to arrange them in racks or between partitions, or they can be stuck on end in the racks at the back of the bench. A good way is to stick each bit point downwards in a hole bored by itself. Various forms of tool-racks, which you can easily arrange for yourself, are suggested in Fig. 93.

Fig. 95.

Fig. 96.
Fig. 94 shows a rack to fit on the back of the bench, an excellent way, in common use with movable benches. Get a board,[84] say 3" or 4" wide and the length of the bench, a strip from ¼" to ½" thick, perhaps 1" wide, and the length of the bench, and a strip ½" thick, perhaps 1" wide, and perhaps two thirds of the length of the bench. Saw from this last strip a number of blocks from 1" to 2" long. Arrange these along the top edge of the board, according to the kinds and sizes of the tools, as shown in Fig. 95. Then lay the long strip on them (Fig. 96) and nail it through each block with wire nails long enough to reach perhaps two thirds through the large strip. You can put this rack together by first nailing at each end. Then all the intermediate blocks can easily be fitted in place and nailed one at a time. The whole can then be screwed to the back of the bench so that the tools will be at the back (Fig. 94). You can make part of this rack solid and bore small holes of various sizes for bits, gimlets, nail-sets, and such tools, which would drop through the larger spaces. Good metal tool-racks and-holders can be bought, but the home-made ones answer every purpose.

Fig. 97.

Fig. 98.
The large steel square can be hung very well with nails[85] or small blocks of wood bevelled toward the wall (Fig. 97). For the try-square nail a rectangular block against the wall (Fig. 98). A smaller block nailed in front will hold another smaller square. Slanting saw-kerfs in another block will hold scrapers (Fig. 99). Always keep your oil-stones in shallow boxes for protection from dirt. You can easily make one, or cut a depression in a block to fit the stone, with another for a cover. Fasten one end of your strop to a strip of thin board (Fig. 100) with a hole by which to hang it. You can then use the strop lying flat on the board or loose in your hand for curved edges.
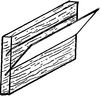
Fig. 99.
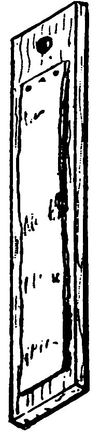
Fig. 100.
Do not keep nails and screws after the usual domestic fashion,—all sizes, shapes, and kinds mixed up promiscuously with a lot of metal rubbish and carpet tacks in some old box or pail. You will waste twice as much time trying to find what you want as it takes to keep them in separate boxes, or trays with divisions. A good way is to use either small open boxes or flat open boxes with divisions, so that they can be reached as conveniently as possible. Tin boxes or canisters or pails (of various sizes), such as cocoa, coffee, lard, and such substances come in, are good. Put labels on them and arrange them neatly in some accessible place, as on a shelf over or at the end of your bench, or in a cupboard or a drawer.
Keep scrap boxes for old pieces of metal (iron, brass, etc., in separate boxes), so that you will know just where to look for what you want. Keep a brush for cleaning off the bench and the work, a broom for the floor, and a box for shavings, sawdust, and chips.[86]
Any workman is liable to cut or pound his fingers, so have a small box in a handy place with some neatly rolled bandages of cloth, some surgeon's plaster, and a bottle of witch-hazel (hamamelis) or some other preparation for cuts or bruises. In case of a bruise, or if you pound your nail, put your finger at once in as hot water as you can bear. Do not, as is often done, put glue on a cut, because of danger of infection, for the glue is made, as you know, from animal refuse and is not always in a pure state.
Do not leave oily rags lying around in your shop to get wadded into a pile in some corner and catch fire by spontaneous combustion. Either put them in the stove at once, or, if you want to keep a few, put them in a stone jar or covered tin box. Matches should always be kept in a covered metal box in a wood-working shop.
Lay in a supply of strips, waste junks, and odd pieces of wood, which you can usually get at any shop at little or no expense. They will be very useful until you accumulate a stock from your own work.
Chopping-Block.—A good solid chopping-block is a great convenience, so watch for a chance to get a section of a tree, which you can often do when one is felled.
Straight-Edge.—You should have at least one; two are very useful—one two or three feet long and another five or six feet long. Making them is simply a matter of skill in planing. When you can plane well enough make some yourself of well seasoned, straight-grained white pine or mahogany, or other wood which holds its shape well. Until you can do it accurately, however, get some good workman to make one, for a straight-edge that cannot be relied on is really worse than none at all. (See Straight-edge.)
Bench-Hook.—The bench-hook (Fig. 101) is very useful to[87] hold work firmly for sawing, planing, etc., and also saves some marring of the bench-top. Before beginning work read carefully Marking, Rule, Square, Saw, and Plane, in Part V., and look up any other references.

Fig. 101.

Fig. 102.
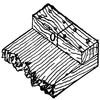
Fig. 103.

Fig. 104.
Take a board, say 15" long x 6" wide, of some good wood like white pine, making both ends square. The surface should be planed true (see Truing Surfaces). With the square mark the line a b (Fig. 102) accurately, say 2" (or the width of any blocks you may already have for the end cleats) from each end, but on opposite sides. The cleats c (Fig. 101) must be true and the edges square. Bore the holes in the cleats with a bit a little larger than the screws (see Boring). Hold the cleats exactly in place at the cross-line a b and start holes in the board with a gimlet or bit a little smaller than the screws. Countersink the holes (see Countersink). Use screws long enough to get a good hold on the board but not long enough to go through it. If board and cleat are each 7/8" thick, 1½" screws will be suitable. Screw one of the middle screws in each cleat firmly to a bearing (see Screws), keeping the cleat as nearly on the line as possible. Adjust each cleat exactly in place, in case it has slipped, hold it firmly, and drive the remaining screws. Before screwing on one of the cleats mark a line around it in the middle with the square, as shown in Fig. 103, marking first across the[88] edge o (against which the work is to be pressed), from that line squaring across the top, and then across the outer edge. After this cleat is screwed on, carefully saw it in two exactly on the line. By letting the saw run in the kerf thus made, you can cut pieces off square. Sometimes one cleat is made shorter, so that you can saw clear through a piece without damage to the bench (Fig. 104). See Mitre-board, page 92. Two bench-hooks are useful for long work.
Horses or Trestles.—These are to lay stock on for marking and sawing, to put large work together on, and are convenient for various uses (Fig. 105).

Fig. 105.
Before beginning work read carefully Marking, Rule, Square, and Saw, in Part V., and look up any other references.
The proper height for your horses, as for the bench, depends somewhat on your own height, and may be anywhere from 18" to 2' 3". Experiment with boxes to find the most convenient height. If too low, you will have to stoop over too much. If too high, it will be awkward to rest your knee on a board, to saw, and to fit work together.

Fig. 106.

Fig. 107.

Fig. 108.

Fig. 109.
If you have a piece of fairly good joist, from 1½" × 3" to 3" × 6", you can use it for the tops of your horses. Saw off two pieces from 2' to 3' long. Mark the best sides for the top. Mark each end like Fig. 106 (showing top and bottom) with the pencil, measuring carefully so that the bevel or slant will be the same for both legs (see Bevel). Holding the work in the vise, with saw[89] alone or saw and chisel remove the pieces marked, so that the end will have the shape shown in Fig. 107. If you use the chisel, look out for the direction of the grain at each corner and cut well outside of the line, until you find which way to push the tool in each case (see Paring, etc.). Trim these cuts as accurately to the lines as you can. Get out eight pieces for legs, of such a length that the horses will be of the height decided on. First make them all of a width, then saw one piece off the right length and mark the others by it—not each new piece by the one last marked. Nail or screw these legs in place with 2" nails or 1¾" screws, keeping the inner edges of the tops of the legs even with the tops of the horses (Fig. 108). See Nailing and Screws, and look out for splitting. Get out the cross-braces of board and saw the ends at a bevel to correspond with the slant intended for the legs. See that the ends of these cross-braces are cut at the same bevel. Use the bevel if you have one. If not, first square each end with the square and pencil, and then measure carefully equal distances on one edge before drawing the slanting lines (Fig. 109). Nail or screw these on (Fig. 110), adjusting the legs to the bevels just cut. Saw or plane off the projecting ends of the legs on top. If you plane, do so both ways to avoid splintering (see Plane).

Fig. 110.

Fig. 111.
Now stand the horses on their legs (Fig. 111). If they should happen to stand firmly and evenly, see first if it is not due to unevenness of the floor. If the floor is true, and they stand steadily in different positions, you can throw[90] up your caps, for you will have beaten the average workman. To make them stand evenly, see Scribing, Winding-sticks, etc., in Part V. Make the tops of the horses as smooth as you can. Scrape them and keep them scraped (see Scraper), for you will be continually dropping glue or varnish on them, to harden and deface your nice, smooth work. Wipe them off as carefully as the bench-top. These easily made horses will answer your purpose for a long time.[18]

Fig. 112.

Fig. 113.

Fig. 114.

Fig. 115.
Fig. 116.
Mitre-Box.—Great care is necessary to make an accurate wooden mitre-box (Fig. 116), although the process is simple. Do not make it of spruce or any wood liable to warp or twist. Pine or mahogany is good. Use stock from a mid[91]dle board if you can (see Chapter III.). A mitre-box can be of any desired size.
Before beginning work read carefully Marking, Rule, Square, Saw, and Plane, and look up any other references.
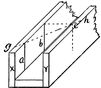
Fig. 117.

Fig. 118.
A good size is from 1' to 2' long and from 3" to 6" square (inside), according to the work for which it is to be used, and of stock 7/8" thick. The pieces must be prepared with care, so that the edges shall be square and the surfaces true, particularly on the inside, for when the box is put together the sides must be parallel and square throughout with the bottom, on the inside. Test each piece with the square. Use care in screwing the sides to the bottom to keep them exactly in place (see Screws). Nails can be used, but screws are better. Lay out the lines for the sawing from the inside, with the steel square if you have one, or with the end of the tongue of the try-square. Mark the line a on the inside of the side x (Fig. 117), squaring from the bottom. Mark the point b at a distance from a just equal to the distance between the sides. Square a line at this point from the bottom, on the inside as before. Carry this line across to the side y, squaring from the inner surface of the side x, and mark the point c on the inner side of the side y. Also from the point c draw a vertical line on the inside of y corresponding to the line a. Carefully mark the line g h, which will give the mitre. The lines should be laid out from the inside, because it is against the inside surfaces that the pieces to be cut in the mitre-box will bear.
Another way is to square a line m n (Fig. 118) across the top[92] side of the bottom piece, before putting together, and to lay off from one end of this line a point o on the edge, at a distance equal to the width of the bottom, thus fixing the points m, n, and o. Next fasten on the sides, square upright lines on the inside of one side from the point m and on the inside of the other side from the point o. The diagonal line pq (Fig. 119) will represent the mitre.

Fig. 119.
Fig. 120.
The cuts for the saw to run in should be made with a back-saw or a panel-saw. In a similar manner square on the inside two upright lines opposite each other, draw a line across the tops of the sides to meet these lines (squaring from the inside as before), and make a saw-cut, as shown by the middle line in Fig. 116. This will be very useful to saw strips squarely across. You can put buttons on the outside near the lower edge to catch against the front edge of the bench-top if you wish, or use the mitre-box on the bench-hooks when necessary to hold it firmly.

Fig. 121.
A very useful mitre-board for sawing strips, mouldings, and the like, can be made with two short boards, one wider than the other, being sure that the surfaces and edges are true and square (Fig. 120). This can be of any size. A good size is from 1' to 2' long, 6" wide (in all), and of stock 7/8" thick, but it is better to[93] make the narrow piece thicker, perhaps 1¼" or 1¾". Mark the lines first on the bottom of the narrow piece, then on the edges, and lastly on the top, as with the mitre-box just shown, to ensure the lines being at the correct angles with the surfaces against which the wood to be sawed will rest. An excellent plan is to make saw-kerfs for mitres in the cleat of a bench-hook (Fig. 121), in the way just shown.

Fig. 122.

Fig. 123.
Shooting-Board.—This is useful for squaring edges and small surfaces and ends with the plane, and for jointing edges, the plane being pushed forward on its side (see Shooting-board, in Part V.). It can be of any wood which holds its shape well. Clear white pine or mahogany is good. If carelessly made it will be of but little use. The stock must be planed free from winding. Several forms are shown in Figs. 122, 123, and 124.
Fig. 124.
Before beginning work read carefully Marking, Rule, Square, Saw, Plane, in Part V., and look up any other references. The construction is plain (Fig. 122). Approximate dimensions are given, Fig. 122 being made of 7/8" stock, Fig. 123 of ½" and ¼" stock, and Fig. 124 of 7/8" stock. Screw the pieces together from[94] the under side (see Screws). See that the stop or cleat a is put on at right angles to the edge b. Mark the lines for this accurately with knife or chisel. A groove is sometimes cut for this stop, but this is a refinement that is not at all necessary if you do your work well. This board must have a rabbet or groove cut out of the upper piece, as shown, to give room for shavings. In Fig. 123 the top board overlaps the ends of the cleats a trifle, which (with the spaces between the cleats) allows the escape of the shavings. Arrange some way to hold the board firmly on the bench. Care is necessary in using the shooting-board not to plane slices from your left hand. Guides, to attach to the plane to ensure square edges, can be bought and used instead of the shooting-board. Some of them are serviceable, particularly those adjustable at various angles.
Fig. 125.
A mitre shooting-board (Fig. 125) is also useful. It requires to be made with even more care than the board just given, but on the same principle. The angular stop or stops must be fitted to make the angles exactly 45°. A sawed mitre holds glue better than a planed mitre, but sawed mitres often require trimming with the plane to get a perfect fit.[95]
Form for Rounding Sticks.—You will be continually wanting to make sticks eight-sided or round. A form to hold the pieces for planing is a great convenience.

Fig. 126.
Before beginning work read carefully Marking, Gauge, Plane, and Nailing, in Part V., and look up any other references.
Fig. 127.

Fig. 128.

Fig. 129.
Take two strips and plane off (or even chisel or whittle) one corner of each, first gauging lines equidistant from the corner for a guide. Then nail the two strips together, with the bevels facing each other, to make a trough as shown in Fig. 126. Put a screw in one end to push the work against, push the form against the bench-stop or screw it in the vise, put the piece to be "cornered" or rounded in the V-shaped trough, and it will be firmly held with the angle upward. Two or three of these for larger and smaller pieces will be very useful. They are quickly made of waste strips. If you think 2' the right length for one of these forms, for instance, make it a foot or so longer, and after it is made saw off the extra length in one or two pieces, which will serve as an extension for holding a long stick (Fig. 127). If your bench has wooden bench-stops you can make some stops with notches in the top (Fig. 128) for this purpose.[96]
For making pieces tapering, as well as eight-sided or rounding, you have only to modify this idea by planing off the corners in a tapering way (Fig. 129). See Rounding Sticks.

Fig. 130.
Level and Plumb.—Before beginning work read carefully Marking, Rule, Square, Gauge, Saw, and Plane, in Part V.
To make a plumb like Fig. 130, take a piece of straight wood from 3" to 5" wide and 4' or 5' long with the edges straight and parallel. Gauge a line down the middle of the side, exactly parallel to the edges, and cut the notch shown at the bottom. Make a saw-kerf at the upper end of the line and another beside it in which to catch the end of the line, or fasten the line around a nail. (See Plumb.)
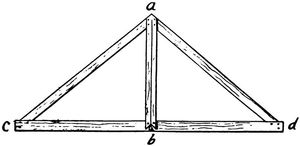
Fig. 131.
To make the level shown in Fig. 131, it is essential that the bottom board c d be straight on the lower edge. The two braces a c and a d should be of the same length. The strut a b should be nailed across at the middle of c d and at right angles to it. The essential thing is to have the line a b exactly at right angles to c d, the object of the braces a c and a d being to stiffen the board c d, and to keep the lines a b and c d at right angles to each other. The plumb-line is hung and used as in the case just given, the board c d being used for horizontal work. (See Level.)
Cabinets, etc., for Tools and Supplies.—A tool-chest, though a very convenient (and in fact necessary) thing for a[97] workman who is moving around from place to place or who needs a safe receptacle in which to lock his tools in a factory, is not at all necessary in a private shop, nor half as convenient as to have the tools where they can be more readily reached. It is quite a piece of work to make a good one, and it will be better to defer such a job until you feel the need.
An old case of drawers, or bureau, or cupboard, or some such receptacle, if you can find one, will be useful in your shop. A bureau, in fact, makes a good tool-cabinet or substitute for a tool-chest, but if you keep tools in drawers make compartments, trays, or divisions, else the edge-tools may be damaged, not to speak of the inevitable confusion.
You do not need a tool-cabinet for half a dozen tools, but when they begin to accumulate it is a good thing to have and a good thing to make, if there is occasion to keep your tools locked up or if you have limited room. Otherwise it is just as well to keep the common tools as already shown. A cabinet is fully as useful for miscellaneous articles like brads, hinges, etc., as for tools.
Before beginning work read carefully Marking, Rule, Square, Saw, Plane, Nailing, and Screws, and look up any other references.
Fig. 132.

Fig. 133.
Perhaps you can find a good box, wide and shallow, all made, or if deep you can saw off part to make it shallow (Fig. 132). This will answer perfectly for a shop. For the house you would of course make a cupboard of new wood. The size must depend on circumstances. Get two boards for doors that will just cover the open side of the box, unless the box cover will do, which is unlikely. If the edges are not good you must allow extra width for jointing. Lay these boards in position and mark the lengths (on the side next the box) by the box itself, not with the[98] square, for the box may not be square. From the lines just made mark the edges with the square, and, with the straight-edge, connect these edge marks by lines on the face sides. Saw off by these lines. Mark the box and each door in some way (Fig. 133), as "top," and "R" (for right) and "L" (for left), or by marks, as X, O, #, etc., to prevent finally putting them on wrong side out or wrong end up, as is very likely to happen if you neglect to mark them.

Fig. 134.

Fig. 135.

Fig. 136.
Now for hinges. The best thing, on account of the weight to be hung on the doors and the poor quality of the wood generally used for boxes, will be iron strap-hinges made for work of this sort, screwed on the outside (Fig. 134). Two will do for each door. Next to this come the common iron hinges. If the sides of the box are thick and firm, three of the common long and narrow kind (Fig. 135) will do for each door. If the sides are thin and flimsy, nail or screw a strip inside of each edge and use wider and shorter hinges (Fig. 136). To fit the hinges, see Hinges. The doors being hung, take them off while fitting up the case. Gauge a pencil line around the outer edge and each end of the inside surface of each door, where it fits against the edge of the box, as a limit beyond which racks or tools must not project or the door will not shut (Fig. 137).

Fig. 137.

Fig. 138.
The fitting up of the cupboard must depend on its size and what and how many tools or supplies are to be kept in it. Shelves[99] you can simply make of the right size and nail into place from the outside, using the rule and square to get them in the right positions. The illustrations are merely suggestions which you can alter or improve upon to suit your particular case. Fig. 138 shows another form, and Fig. 139 a small cabinet with one door, with suggestions for the arrangement of the tools, but the matter of fitting up you must, of course, contrive for yourselves, according to the circumstances. Do not attempt to put full-width drawers into these wide, shallow cabinets, as is often done. It takes an expert to fit drawers that are wide and short (from front to back) and they are not always satisfactory even then. If you wish drawers, either put in a row of narrow ones, or use the simple device described below (Figs. 141 and 142), and shown in Fig. 139. (See Drawers in Part V.)

Fig. 139.
To fasten the doors you can hook one on the inside and put a button (which you can whittle out) on the outside to hold the[100] other. If you wish to lock, hook one door inside and lock the other to it (see Locks). A padlock with staples and iron strap is easier to put on. To make a cupboard of boards instead of using a box, you simply make a box yourself (see Box-making in Part II.) and then proceed as above.

Fig. 140.
Fig. 140 shows a good form of cabinet. Make a tight box, perhaps 2' × 3' × 6" to 9", the sides and ends of 7/8" stock, and the top and bottom (i.e., the front and back of the cabinet) of ½" stock. Saw it open carefully on the line a b c about 2" or 3" from the top or face, according to the thickness of the box, first marking the ends or the sides so that you can finally put them together again in the same positions. When nailing the box together omit all nails which could interfere with the sawing. They can easily be put in afterwards. (See Box-making, in Part II.) Carefully smooth the edges after the saw. Reckless and hasty planing will spoil the joint. Fit two strap-hinges, or three of the common kind. Fit up inside as you wish, and fasten with hasp, padlock, or a lock working on the principle of a chest lock.
All these cabinets must be firmly fastened to the wall, for they will be very heavy when filled. Do not trust to a couple of nails or screws, the way amateurs so often put up shelves and cabinets in the house. A ledge of some sort below is a great help (Fig. 140) to relieve the screws or nails of the weight. If the back is not very strong, do not trust wholly to it, but add cleats outside or inside. If in the house, stout screw-eyes of heavy wire in the sides of the cabinet, through which you can screw to the wall, are good (Fig. 140).
Good shelves can be made by arranging empty boxes one on top of another, or by taking a wide, thin (flat) box and fitting[101] shelves across it, like a bookcase, and then fastening the whole to the wall.

Fig. 141.

Fig. 142.
A small drawer can be fixed under a shelf, anywhere in your shop, on the principle often used in sewing-machine tables and the like, by taking a small box of suitable shape, strengthening one corner if necessary (Fig. 141), and pivoting it with a screw at that corner (Fig. 142).
First-class Bench.—You can do all the work you will be equal to for a long time on such a bench as has been shown, but some day you will want a first-class bench, such as Fig. 143. Do not attempt anything of the sort at first, however, though if you can afford it, such a bench is good to begin with. A few details are given in the Appendix.

Fig. 143.
Other Appliances.—A number of other appliances and contrivances will be found, under their respective headings, in Part V.[102]
A FEW ESSENTIALS TO SUCCESSFUL WORK
Do one thing at a time. Finish one job before you start two or three others.
First learn to work well, then ability to work quickly will come of itself.
Plan your work to the end before beginning to use your tools.
Make drawings carefully to scale before beginning any but the simplest work.
Lay out the work carefully on the wood with sharp, accurate lines, according to the drawings, measuring everything with exactness at least twice.
Cut the work accurately with sharp tools to the lines you have laid out.
Keep testing the accuracy of the work with the square, straight-edge, rule, level, or plumb.
Keep your tools sharp and in good order.
Have the most convenient place for each tool and always keep it in that place when not in use.
Do your work thoroughly and strongly. Do not half make it. Do not half fasten it together. The only time you will regret thorough work is when you have to take it apart again.
Even if you are able to use tools quite well, you may still not know how to go to work to make some particular thing, so it is quite important to know how to lay out, put together, and finish different kinds of work.
The number of things you can make is legion. The number it is worth while for you to make is much smaller. Amateurs often say that the work they do themselves costs more (even counting their own labour as nothing) than to hire the work done, and it is one aim of this book to prevent that undesirable result, in some cases at least.
The number of things which you can make more cheaply than you can buy grows smaller every year. Many things can now be bought ready-made for less than you would have to pay for the materials. It is foolish to take the time and money to make many of the games and toys, for instance, sold so cheaply nowadays. A wheelbarrow is in itself a good thing to make, but it can be bought so cheaply that it is hardly worth while to make one. It is true that some of these things you can make better, although not cheaper, than you can easily buy (a sled perhaps); but, as a rule, your time can be better spent than upon this class of objects, and you will find but few such given here.[104]
Things like whistles, pea-shooters, and clappers, which are so familiar to every boy and require no more instruction to make than is handed down and around from boy to boy, are not given here, as a rule. A few other things which you might perhaps look for, such as tennis rackets and snow-shoes, are omitted, because they require more special knowledge and skill than most beginners can be expected to have. It is easy enough to see how to make a tennis racket, for instance, so far as the general idea is concerned; but simply bending a loop, fastening it to a stick, and lacing the loop, does not make a tennis racket. The holes for the stringing must be made in a particular way, the stringing must be done properly, and the whole affair must balance or "hang" right, or be of little use. It is better to buy such things.
You boys, and many of your elders, like to try all the new-fangled ideas as fast as they come out, and it is well that you do, but you (as a class) accept them "for keeps" only after they have stood the test of many trials. A large book could be filled with descriptions of the novelties which have appeared within my remembrance, but out of this number I can count on my fingers all that have come to stay. You will find all the novelties you can attend to (and more) in the magazines, etc., so I have been rather conservative in my selection, knowing that you will permanently accept but the best of the new ideas and come back in the end, year after year, to the same old things, with only such additions as have stood the test of actual use.
The objects included embrace a sufficient variety of types to form a basis of experience and practice, in different kinds of work and in various details, from which you can launch out into any of these new plans, or any experiments of your own which you may wish to try, and thus supply for your[105]selves the information lacking in many of the popular descriptions.
Before you make anything bulky measure your shop door or window to see that you can get it out after you have made it. This may seem a superfluous caution, but there have been many cases where people have spent much time in making things which could not be taken from the room in which they were made without tearing out the door or window casing. Even Robinson Crusoe, you know, built a boat so far from the water that he could not launch her.
Do not be deceived by all the complicated, new-fangled variations of familiar things which abound in the popular publications. Try to make everything as simple as you can. Look askance on contrivances that are all tangled up with springs, and levers, and complicated mechanism, and study them well before you begin to make them.
First figure the cost of the object you intend to make. This book is not to do your work for you, but to put you on the right track to do it yourselves, so read Estimating, page 54, and the whole of Part I had best be read before you begin to make the things described hereafter.
Fig. 144.
Wooden Swords, Knives, and Daggers.—Before beginning work, read Marking, Knife, Whittling, Paring, Rounding Sticks, Rasp, File, and Sandpaper, and look up any other references. The construction of those shown in Fig. 144 is too obvious to require special description. First cut the general outline as shown, then round or pare or[107] shave to the thickness required. If you have a bow-saw or scroll-saw, it will save much time in shaping the outlines, or you can have them sawed at the mill. If you stain these weapons with various colours, as red, black, yellow, etc., and in various patterns, and shellac them neatly (see Finishing), you can turn out quite a formidable array of awe-inspiring weapons. They should be made of some straight-grained and easily whittled wood. Nothing is better than white pine.

Fig. 145.
To make a sword like that shown in Fig. 145, first select a piece of straight-grained wood (ash or any strong wood) about 2½' in length, 3/16" thick, and 1" wide. About 4" from one end make a mark. From this mark taper the edges to the other end. Do not taper the stick too gradually. Then draw a line along the centre of each side and taper from this centre line to the edges, leaving the edges about 1/16" thick. Next get out two pieces of wood 1/8" thick and 4" long (some dark-coloured wood can be used for contrast). Nail one of these pieces with brads on each side of the 4" space left for the handle. Next get a piece 4" long, ¼" thick, and ¾" wide (see Fig. 145). Mark it as shown, making the marks for the holes (3/16") so the outside edge of one will be just 1" from the outside edge of the other. Then[108] bore these holes carefully (see Boring) and cut out the wood between them with a knife or chisel (being careful about splitting) and shape the outside as marked. Slip the blade through the hole in the guard you have just made up to the handle and nail the guard to the blade.

Fig. 146.
Wooden Snake.—This imitation reptile (Fig. 146) if well made will (when grasped at the middle) by a slight movement of the hand undulate and writhe in a very lifelike manner, as you may know, so do not be eager to terrify your feminine relatives, or those of other boys, too much.
Fig. 147.
Before beginning work read carefully Marking, Rule, Knife, Saw, and Rounding Sticks. The snake can be of any size—say from 2' to 6' long and from 1" to 2" in diam. Select a piece of straight-grained wood,—white pine or any wood easy to work. First see that the stick is square, then make it hexagonal (six-sided), then taper it to the general shape of the snake, and finally round and smooth it (Fig. 147). Remember not to use sandpaper in the smoothing, as the grit will dull the tools yet to be used. The head you must whittle or carve according to your ingenuity and skill. The mouth can be cut with a fine saw.
The snake having been shaped, mark pencil lines lengthways[109] along the middle of the top and bottom (except at the head), and cut with a knife a little slit or groove merely wide enough to hold a fine cord (like fish-line). This can be done with a fine saw (as a back-saw), using the teeth only at one end of the saw blade, but much care is required and the stick must be firmly clamped or held in the vise. You will probably do it more easily with the knife. Mark equal spaces (Fig. 148) of ½" to 2", according to the diameter of the snake, from the neck to within a short distance of the end of the tail. If you make these marks as near together as ¾", the snake will look more natural, as the notches will not have to be so wide, but you will have to cut more of them. Number these sections so that you can finally put them together again in the right order. With the knife or chisel notch in to the centre from each side at each of the marks, or use the saw and knife or chisel, until the body of the snake is cut into sections (Fig. 148). Put the sections together again by sinking a fine strong cord in the longitudinal grooves in the top and bottom. Set the cord in place with glue (see Gluing), and fasten with little staples (which you can make of bent pins), or something of the sort, at the end of each section.
Fig. 148.
Set beads in the head for eyes. Sandpaper the whole with fine sandpaper (see Sandpaper). Paint in imitation of whatever kind of snake you prefer (see Painting), using red for the inside of the mouth.
Windmills.—These are made in a great variety of forms. A few patterns which can be readily constructed of wood are given below. Bear in mind to make them strong, as they are under very great strain in a violent wind, and, also, that the larger they are the stronger they must be; for little models, you know, are much stronger in proportion than large structures made after the same designs. Dimensions are given merely to help illustrate the principles of construction. The windmills will work just as well if made[110] larger or smaller, within any reasonable limits. They should be made of straight-grained white pine, whitewood, or some wood easy to work.[19]

Fig. 149.

Fig. 150.
Before beginning work read carefully Marking, Rule, Square, Saw, Knife, and Paring, and look up any other references. In case of using heavy stock, see also Draw-knife, Spokeshave, and Plane. To make a very simple form (Fig. 149), take two sticks, say 8" x 1" x 1", and halve or notch (see Halving) each piece at the centre (Fig. 150), so that when put together they will form a cross with arms of equal length. Bore a hole through both pieces at the centre to loosely fit the pin upon which the vanes are to turn (see Boring). Upon the ends of each stick mark diagonal lines (Fig. 150) slanting in opposite directions, or so that, if you revolve the cross edgeways and look in turn upon each of the four ends, the lines will all slant the same way. This[111] is essential, for the next operation is to shave each of the sticks down towards these lines until perhaps 1/8" thick (Fig. 150), and you can readily see that if these vanes are not turned the same way the windmill will not revolve. When this shaping is done fasten the sticks together with brads (see Nailing). The remaining part is very simple (Fig. 151), perhaps 1' long and ½" thick, with the broad vane made thin, as the only object of this is to act as a weather-vane to keep the windmill headed toward the wind, and if made thick and heavy the whole affair will not balance well.

Fig. 151.
The revolving cross you can now fasten with a nail or screw upon the end of the part last made (Fig. 151) so that it will revolve freely. Find the point at which the whole windmill will balance over your finger or a stick, and bore a vertical hole through the horizontal stick at this point. Through this hole loosely screw or nail the windmill on the end of a stick, slightly rounded to prevent friction (Fig. 151). Sandpaper the whole with rather fine sandpaper (see Sandpaper).
You can paint in one or more colours, if you wish (see Painting). The vanes can be painted in light and dark bands crossways, causing an appearance, when revolving, of concentric rings (like a target). By having two axles or spindles (Fig. 152) two sets of vanes can revolve at once, and, by slanting the vanes of the two sets in opposite ways, the two will revolve in contrary directions.
Fig. 152.
Fig. 153.
The weather-vane can be made of two pieces (Fig. 153).
A more elaborate affair (Fig. 154) is made on similar principles, but requires more care. The construction is obvious. Before beginning work read carefully Marking, Rule, Square, Saw,[112] Plane, Knife, Spokeshave, Drawshave, Rounding Sticks, and look up any other references. The general dimensions of the one illustrated are: length of main frame (in which spindle turns) 9", height of one end 4½", height of the other end 2½"; length of weather-vane (from main frame) 10", width at end 4½"; length of revolving fans 1', width at ends 2". The spindle is held in the main frame on a slant (Fig. 155) to lessen any tendency to slip out, so the hole through which it passes should have a corresponding slant (see Boring). The revolving fans or vanes are reduced to round pins at the small ends and fitted tightly into holes bored in the head of the spindle, all the vanes being turned to have the same slant. Care will be required to bore these holes so that the vanes will be equidistant and revolve in the same line.
Fig. 154.

Fig. 155.
The weather-vane is set in a slanting groove cut in the bottom of the main frame (Fig. 155), and fastened with a couple of nails or screws. You can cut this groove by making two saw-kerfs and paring out the wood between with a chisel. The bent nail or wire shown on the top of the spindle in Fig. 154 is to keep the latter from jumping out of the frame from a sudden change of wind. The vanes should all be shaved down until they are quite thin at the ends.
Set up and finish this windmill like the one just described.

Fig. 156.
Fig. 157.

Fig. 158.
A form which is good practice in whittling, and upon which you can also exercise your artistic faculties, is the "Happy Jack"[113] shown in Fig. 156. Before beginning work read carefully Marking, Rule, Square, Saw, Knife, Rasp, and File, and look up any other references. Fourteen inches is a good height for the figure itself. The outline of body and head can be sawed from a ¾" board and the edges trimmed and rounded and the details cut with a knife, or rasp and file can be used for the edges. The arms are made of separate pieces. Bore holes in the outer ends of the arms to hold the paddles (see Boring). Also bore holes lengthways into the arms, from the ends next the body, and into these holes tightly drive the ends of a stiff metal rod long enough to also pass through the body at the shoulders (Fig. 156). Before actually driving this rod into both arms you must bore the hole through the body. The holes in the arms should be smaller than the rod, so that it may drive in tightly without danger of getting loose, but the hole in the body must be larger than the rod, that the latter may revolve easily in it. Bore in from the centre of each shoulder as carefully as you can, until the holes meet, rather than attempt to bore clear through from one[114] side. Put in the rod and drive on the arms, but not quite up to the shoulders. In driving on the arms be sure to keep the holes for the paddles in the right positions, so that the paddles will be in line as shown—that is, so that when one points directly upwards the other will point directly downwards. Also bore a hole upwards between the legs for the rod upon which the figure turns, and screw or nail a piece of metal (Fig. 157), with a hole for this rod, on the bottom of the legs (Fig. 156). Fig. 158 shows a way to put on the hat. The paddles can be made from a shingle, which will save the labour of tapering the thickness towards the ends. The paddles must be set obliquely, or turned part way around, as in the case of any windmill. When set at the proper angles the man will spin around while the paddles are revolving. Sandpaper the whole (see Sandpaper), and paint in various colours (see Painting).
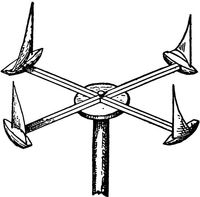
Fig. 159.
A set of boats to sail around in a circle is not hard to make (Fig. 159). Before beginning work read carefully Marking, Rule, Square, Saw, and look up any other references.
Take two sticks from 2' to 4' in length, and from ¾" to 1¼" square, of any fairly strong wood. Halve these sticks at the middle (see Halving) and fasten them together in the form of a cross, strengthening the joint (weakened by the halving) by nailing or screwing on a piece of board above or below, as shown in Fig. 159.
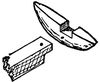
Fig. 160.
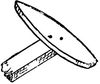
Fig. 161.
The boats can be whittled from a piece of board on edge and fastened to the ends of the sticks by halving (Fig. 160), as well as nails or screws, or they can simply be flat pieces of board shaped as in Fig. 161 and screwed or nailed on top of the sticks.[115] In the first case the halving had best be done before the sticks are fastened together. One mast with a simple leg-of-mutton sail will answer for each boat. A little experimenting will show you how much to haul in the sheet. Each boat must, of course, "come about" and "jibe" once in every rotation of the apparatus. Sandpaper with rather fine sandpaper (see Sandpaper), and paint as you wish (see Painting). The whole affair is balanced and pivoted on top of a pole in the same manner as the windmills just described, which see.

Fig. 162.

Fig. 163.

Fig. 164.
A steamer with screw propeller can be made from a piece of board on edge, shaped as shown in Fig. 162, a small windmill with short and broad fans (Fig. 163), serving for the screw. Before beginning work read carefully Marking, Rule, Square, Saw, Knife, Spokeshave, and look up any other references. This boat must be made of a board so as to give a thin section (Fig. 164), in order that the screw may not be shielded from the wind, for this vessel must always head to windward or the screw will not revolve. To ensure this the fore and aft sail must always be kept set and the sheet close-hauled. This sail answers the purpose of the weather-vanes of the windmills just described. It can be made of tin or[116] any sheet metal, or even of thin wood. The rest of the rigging and the smokestack you can arrange as you wish. The bottom of the rudder can be supported by a little strip extending aft from the keel. For the other details of the work, see the windmills already described.
Water-wheels.—An undershot wheel, turned by the water passing beneath (Fig. 165), can be easily made. It can be of any desired size, and of any wood readily worked.
Before beginning work read carefully Marking, Rule, Square, Saw, and look up any other references.

Fig. 165.

Fig. 166.
Fig. 167.
One like Fig. 166 can be made by simply nailing a set of small boards or paddles in a radial arrangement between two disks of wood. A dowel or broomstick will do for the shaft and should be fitted tightly in the hole bored through the wheel (see Boring), but should turn freely in the bearings at the side. It will make a rather neater job to shape the paddles as in Fig. 167, so that when put together the wheel will look like Fig. 166, but this is not at all necessary, and it will work just as well to make plain rectangular paddles and simply nail the disks on the outside edges (see Nailing). If you have no saw with which to get out the disks you can have them sawed at the mill, or you can work them[117] out by describing the required circles and sawing a hexagon outside of the line with a common saw, when the circle can be finished with shave, hatchet, chisel, or knife (see Paring). Divide the circumference of each disk into as many parts as there are paddles and draw lines on the side to the centre, by which to nail the paddles in the right position. Start the nails on these lines and drive them nearly through before placing the paddles in position. Then nail one disk to the paddles, turn the wheel over and nail on the other disk. It is essential to a neat job that the paddles should all be of the same width. First make one edge straight. From this edge gauge the desired width on all the pieces (see Gauge) and saw or plane or trim, with knife, chisel, or shave, exactly to the line. If you make the paddles as shown in the cut, first square lines across at equal distances from one end (Fig. 167), and with a gauge set at a point equal to the thickness of the disks make lines parallel to each edge, and with the saw or saw and chisel, or even a knife, remove the pieces marked (see Paring).

Fig. 168.

Fig. 169.
The overshot wheel (Fig. 168) is harder to make, but is a livelier wheel. It is put together upon the same principle as the wheel just shown, except that the paddles, which do[118] not project beyond the circumference of the disks, are not placed radially, but so that, with the addition of another set inserted to connect them, they form buckets.

Fig. 170.
To lay off the lines for the buckets, divide the circumference of each disk as before, and from the centre describe a small circle, as shown in Fig. 169. From the points on the circumference draw lines tangent to the small circle. These lines will give the positions for the bottoms of the buckets. To complete the buckets mark from the circumference equal distances on these lines, and from these last points draw lines as ab to the next points on the circumference. First, nail together with only the bottoms of the buckets (on the lines ca). Then fit in the other pieces, to complete the buckets, on the lines ab. The ends of these last pieces should properly be bevelled (see Bevelling) to make a fairly tight joint. The rest of the work is the same as for the undershot wheel. A larger form (but harder to make) is suggested in Fig. 170. See note under Windmills, above.

Totlet Town.
Play Village.—It is capital fun for several young people to design and build a miniature village, and it is certainly an instructive and quite inexpensive pastime. Such a village, planned and made recently by a family group of half a dozen youngsters, and facetiously named "Totlet Town," was constructed entirely of old boxes and packing-cases of all sizes up to three feet long, waste pieces of board, shingles,[120] etc.; but when painted and arranged in a corner of the lawn, with dirt roads, and paths, small evergreen shade trees and hedges, well-sweeps, miniature fences, and other accessories, it made so pretty a picture as to be the admiration of all who saw it. If you have as good a time in making such a village as these young people did, the experiment will be a success. You can easily think up many additions to the suggestions here given.

Fig. 171.
The buildings were made by selecting boxes of the desired proportions, sawing out spaces for the doors, adding the roofs and any other alterations. The chimneys were made of blocks painted red. The doors were made of pieces of board and hinged with leather. Bay-windows and the like were made of blocks of the required shape nailed to the boxes. The windows and blinds were represented by painting. Some of the roofs were shingled with pieces of shingles. A suggestion for a light-house is shown in Fig. 171.
Considerable care in the use of the tools is called for to make these buildings neatly. Much of the effect depends,[121] also, upon the care with which the painting is done (see Painting), and the taste used in the selection of the colours. Brighter colours are suitable for a little village of this sort than would be in good taste for real houses. White with green blinds is good, of course; or yellow can be used. The roofs should be painted. Red roofs are very effective.
Before beginning work, read carefully Marking, Rule, Square, Saw, Plane, Nailing, Withdrawing Nails, etc.
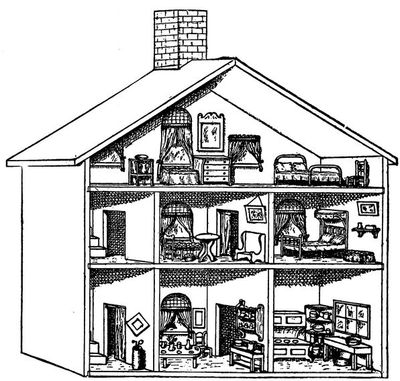
Fig. 172.
Dolls' House.—The house shown in Fig. 172 is quite easily made, and a shallow affair like this has the advantage[122] of being more convenient than a deep one about arranging the contents.
Before beginning work read carefully Marking, Rule, Square, Saw, Plane, and look up any other references.
Pine and whitewood are suitable, or any wood can be used that is not hard to work.
It can be made of any desired size. Three or four feet wide and a little higher in the middle will probably be suitable for ordinary cases, and twelve or fifteen inches will be a good depth (from front to back).
The construction is plain. The roof and sides are to be cut from dressed stock of uniform width, and from ½" to 7/8" in thickness.
Carefully true one edge, if it is not already true, and get out the bottom board, then the upright sides, and then the roof. The bevels at the highest point of the roof and where the roof joins the sides you must mark with the bevel (taking the slant from your drawing), or you can find it by arranging two strips to cross at the desired angle and marking the bevel by them (see Bevelling). To saw these bevels requires much care. Draw lines by the square on both sides, as well as the angle on the edge, and putting each board in the vise saw carefully and steadily.
The three floors should be narrower than the outside of the house by just the thickness of the stock to be used for the back, and rectangular openings must be sawed from one of the back corners at the head of the stairs to allow the dolls to pass from one story to another. If the sides of the house are 14" wide, make these floors 13½" wide, and use ½" or 3/8" stock for the back. Also mark and saw out the windows. To do this, first bore a series of holes inside of the line (see Boring) and cut out whatever wood may be necessary until you make a slot in which to start the saw. Any roughness left from the holes can be trimmed with knife, chisel, or file (see Paring). Nail these parts[123] together, just as in making a box, carefully sighting across the face to see that the front and back do not wind, or use winding-sticks (q. v.). Also test with the square to see that the sides are at right angles with the bottom. Get out stock for the back carefully (with the boards running up and down) so that the boards will be square at the bottom, and when these pieces are fitted in place to form the back they will ensure the house being square. The slant by which to cut the top of the back can be laid off by measurement from your working drawing or the back can be put in place and the lines marked directly from the under side of the roof. When fitted, nail the back securely in place, first cutting the windows as before. Then fit in the upright partitions, first cutting the doorways. The staircase can be made easily if you have, or can saw from the corner of a larger piece, a triangular strip which can be cut in short sections to use for the steps. Nail these to a thin strip of board (from the under side) and fasten the whole in position (Fig. 173). The chimney can be made of a block with a notch sawed to fit the roof, or it can be made of four pieces, box-fashion. Glass for the windows can be held in place by gluing strips of cloth or paper around the edges, or thin strips can be nailed around with fine brads. Thin strips can be nailed around the window openings on the outside, if you wish.

Fig. 173.
All the pieces should be neatly planed and scraped before putting together, and, when entirely put together, the whole should be carefully sandpapered with fine sandpaper. The parts coming on the inside had best be sandpapered before putting together, however, but be sure not to do this until all cutting with the tools has been done. Set all the nails carefully (see Nail-set). The whole can be painted in one or more colours (see Painting), and portieres, window drapery, etc., can be added[124] according to your taste and the materials at command. The inside can be papered, if preferred.
A more thoroughly workmanlike way is to groove the bottom into the sides, the upright partitions into the floor boards, and to cut rabbets around on the back edge of the sides, roof, and bottom, into which to set the backboards. This involves a good deal more work and care in laying out the work (see Grooving). If you have the pieces got out at a mill it can be easily done, however.

Fig. 174.
It may be a convenience to screw castors on the bottom. A door (with a door-bell or knocker) can be added to the front of the hall, if thought best.
A house which can be closed is shown in Fig. 174. The construction is quite similar to the preceding. A strip must be fastened above and below the large doors, as shown, that they may open without striking either the roof or the floor on which the house stands. The little door, representing the entrance to[125] the house when closed and shown in the closed half, can be made to open independently and can have a bell or knocker.
If this house is made quite deep (from front to back) it can easily be divided lengthways by a partition and made into a double house, the back side being made to open in the same way as the side here shown.
The sizes and shapes of these houses and cages will depend upon the animals for which they are built and the places you have to put them. Frequently they can be built to advantage against the side of a building, or a fence, or in a corner, and boxes can be utilised in various ways.
Make the houses, cages, and runways as large as you can afford, for there is much more danger of the pets being cramped and crowded than of their having too much room.
Wire netting or wire cloth (held in place by staples) should be freely used, as ventilation is very important for the health and comfort of the animals. Special openings should always be made for cleaning the houses or cages in case all parts cannot be conveniently reached from the doors, for cleanliness is of the utmost importance in all such structures. The floors of the larger houses should always slant or have holes provided for drainage. Covering the floors with sheets of zinc will promote cleanliness. In the smaller cages removable pans or trays can often be used (Fig. 190). Houses and cages with wooden floors should always be raised from the ground on posts, blocks, or stones, to avoid dampness. Clean sand scattered over the floor and frequently renewed will contribute much to the cleanliness of the cages. The bedding should also be changed frequently.
In the case of those animals which use their teeth for gnawing, the corners and angles can be protected by tacking[127] on strips of wire cloth, tin, or zinc, but there is no need to do this over the flat surfaces. In the case of cages or houses (and the runways) which have the ground for the floor and are to be inhabited by animals that will burrow or dig their way out, the wire netting should be continued underground to a considerable depth, or it can be carried down a little way and then bent to lie horizontally, forming a sort of wire floor, over which the dirt can be replaced, and the animals will be unable to tunnel their way out; but in all such cases care must be taken to proportion the mesh of the netting and the size of the wire to the strength and escaping powers of the animals.
Houses for animals often look pretty when made in imitation of real houses, but when you do this choose simple types of good proportions, and do not try to copy all the little details of the large houses. Avoid "gingerbread" work, and do not cover your houses with meaningless jig-sawed scroll work and rows of towers and pinnacles, and do not use all the colours of the rainbow in painting them.
For houses, hutches, boxes, cages, etc., which are to be kept out of doors or in some outbuilding, ordinary machine-planed stock of fair quality is sufficiently good, and planing and smoothing by hand is usually a waste of labour; but if you wish to make a small cage or box to be kept in the house, and to be nicely finished or painted, good clear stock should be used, and the final smoothing done by hand.
In case you wish to make several cages or boxes of the same pattern, as, for example, like Fig. 178, it is much less work to go through the process with two or more at a time than to make each separately.
A house for pets should not be built, as is sometimes done, on a platform or base projecting beyond the base of the house, as this tends to collect and retain moisture and[128] dampness, but should be clear of any platform, like an ordinary dwelling-house, so that the rain will be shed directly upon the ground.
When two or more boards are required for each side of the roof it is usually better to lay them up and down, as in Fig. 187, rather than horizontally or lengthways, because a roof laid in this way is better about shedding the water, which tends to collect in the cracks if the boards are laid horizontally. For the rougher structures the hinges can be screwed flat upon the outside (as shown in Fig. 179), but for nice work they should be fitted in the usual way. (See Hinges.)
Before beginning work upon these cages and houses, read carefully Marking, Rule, Square, Saw, Plane, Nailing, and look up any other references.
Fig. 175.

Fig. 176.
Cheap and serviceable cages and houses can be built by simply driving posts or stakes into the ground and fastening wire cloth or netting to them, much as you would build a fence. This wire-fenced enclosure can be covered with a wooden roof if desired. A runway and playground can easily be made in this way.
A more portable arrangement can be made by putting together wooden frames covered with wire. Very simple forms are shown[129] in Fig. 175. By putting together four or more of such frames a cage can readily be made which can be covered with a wooden roof or with wire (Fig. 176). If these frames are fastened with screws or screw-eyes and hooks, the whole can quickly be taken apart if desired.

Fig. 177.
A very simple cage can be easily made, on the principle of the common chicken coop, with a few boards or slats and a little wire netting (Fig. 177), but a house of this sort is not especially desirable except for economy of materials and labour. The construction is too simple to require description.

Fig. 178.

Fig. 179.
A much better form is that with upright sides, or with one slanting side. Figs. 178 and 179 show an excellent arrangement, easily made. It can be made any desired size or proportions and is suitable for quite a variety of animals. If small, ½" stock will be thick enough, but if large, 7/8" stock should be used. The construction is similar to that of a common box (see Box-making, page 219). One corner of each end should be sawed off slantingly (Fig. 178), and a rectangular piece cut from the opposite corner, as shown, before the box is nailed together. The bevelling of the edges of the top and front boards can be done after the box is put together (see Bevelling). For making the door, see Doors, in Part V. The hinged board at the bottom gives access for cleaning. If for indoors, and to be finished or painted,[130] clear stock should be selected and the outside carefully smoothed. (See Plane, Scraper, Sandpaper, Finishing, and Painting.)
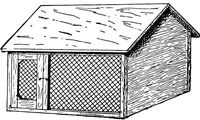
Fig. 180.
For something more like a house, the design shown in Fig. 180 is good and of simple construction. This can be made of any size from that of a small box to a small house. For the latter, see Part III. (House-building for Beginners).

Fig. 181.
To make a little house of this pattern first get out the bottom of the required dimensions, and then the ends, which are alike and to be nailed to the ends of the bottom. Take pains to be accurate in getting out the pieces, or the house will be askew when put together. The construction of the sides is plain. The door can be made as in Fig. 180 (see Doors), or the sides can be entirely of wire and the door placed at the end (Fig. 181). The roof is simply nailed down in place, one side being got out as much wider than the other as the thickness of the stock, so that one will lap over the edge of the other at the ridge. If the angle formed at the top is not a right angle, however, the edge of the narrower roof-board must be bevelled according to the angle (see Bevelling).
A house of this sort can be made with one end closed, while[131] the other remains open (Fig. 182). This is a good arrangement for many animals. First get out the floor, then the pieces for the closed end, cutting out the doorway and a window, if one is desired. These openings can be cut as shown on page 122. Next get out the framework for the open end and fasten it in position. A door can be fitted wherever desired and the roof put on, as just shown.
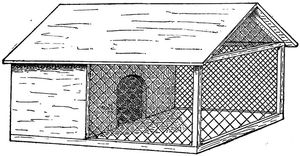
Fig. 182.

Fig. 183.
A house or cage, chiefly open-work, with two sleeping-boxes or nests (Fig. 183) is similar in general construction. This is suitable for indoors (as in an outbuilding). If to be left exposed to the weather, a solid roof can be added, or it can be covered with canvas or something of the sort when necessary. The construction is similar to that of those already described. This cage can be used for pigeons and other pets, and can be made of any size, according to circumstances. For the door, see Doors and Hinges, in Part V. The box attachments can best be made at the same time, just alike[132] (see Box-making, page 219), and fastened to the sides of the house, the doorways having been cut in the sides before the house was put together. If these boxes or nests cannot be readily reached for cleaning, they should be hinged to the main house, or have special openings with lids or doors, so that they can be kept clean. The ridge-pole is simply a strip of board placed horizontally between the upper ends of the rafters.

Fig. 184.
Rabbit Hutch.—A simple rabbit-house, or hutch, can be made by putting together a good-sized box, partitioning off one end, to be closed by a door, and leaving the rest open, except for the necessary wire sides (Fig. 184).

Fig. 185.
This is made just like a box (see Box-making, page 219), the other details being similar to those already shown. A sliding-door (Fig. 185) can be inserted, if desired, to cover the hole between the closed and open parts. The hutch should be raised from the ground to avoid dampness, and proper arrangements for cleanliness made, as referred to above.
A more elaborate hutch (Fig. 186) can be constructed in a similar manner to the houses already shown. Access to the open part can be had by means of the doors or lids on top. For the doors, see Doors and Hinges. The slides for the door at the end can be made by cutting a rabbet at the edge of a square stick, as shown, or the rabbet can be formed by using strips of different widths, letting the wider lap over the narrower so as to form the[133] rabbet. Both doors can be made to swing in the usual way, of course, if preferred. Where the two sides of the roof meet at the top, the edges must be bevelled (see Bevelling).
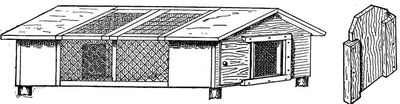
Fig. 186.
Kennel.—There are many kinds of dog-houses, and the style and size must, of course, depend upon the dog and the situation.

Fig. 187.
A good kennel (Fig. 187) for a small dog can be made very much as you would make a box (see Box-making, page 219). If for a very small dog the ends, sides, floor, and sides of the roof can each be made of one piece, but ordinarily these parts will each be made of two or more pieces. Matched boards are suitable. First get out the bottom, then the sides and ends. If you use boards with square edges you must of course use pieces of different widths, so that the cracks between them will not meet at the corners, or put posts at the corners. This is the best way to do with matched boards, if the house is at all large. Nail these parts together. It will be easiest to cut the slant[134] at the top of each end—the gable—so that the sides of the roof will meet in a right angle. This looks well and saves the need of bevelling the edges of the roof-boards. An opening for the doorway should be cut in one of the ends before the roof is nailed on. If you do not use matched boards, a strip should be nailed on the inside at each side of the doorway, to keep the boards together. The roof-boards for one side should be as much longer than those for the other as the thickness of the stock. The same applies to the width of the saddle-boards which cover the extreme top. If the roof is not made of matched boards, battens should be nailed over the cracks as shown in Part III.

Fig. 188.
For a large dog a kennel should be built more like a real house and not so much like a box. A structure with a frame (Fig. 188) can be built of any size suitable for a kennel, and will be more durable than the preceding form.
For the frame, small joists, or strips of plank of any size from 1½" × 2" to 2" × 3" can be used. First get out the sills or bottom pieces of the framework, nailing them together at the corners to form a rectangular frame, as shown in Fig. 189.

Fig. 189.

Fig. 189a.
Then get out the corner posts and fasten them in place, and on top of them fasten the plates (a second horizontal frame like that at the bottom); and see that all this framework is rectangular and free from winding. The sills and plates can be halved at the corners (see Halving), but this is not really necessary in so small a house, as the boarding adds strength to the joints. The frame can be temporarily held in place until the boarding is put on by nailing on as many diagonal strips (Fig. 189) as may be required. Two[135] rafters at each end should next be put in place, their ends having been cut at an angle of 45° (see Mitreing) and the upper ends being nailed to a strip of board which serves for a ridge-pole. An intermediate rafter on each side will add stiffness to the roof. The floor should next be laid, as it will be inconvenient in so small a house to do this after the sides are put on. The sides and ends should be boarded with sheathing or matched boards laid vertically, cutting out the doorway and a small window in the back gable for ventilation. The roof can next be laid with the boards running horizontally, or lengthwise, as this house is to be shingled. The shingles can be dipped in creosote stain or paint to good advantage before laying. After the roof has been shingled the saddle-boards can be put on and the house will be ready for painting (see Painting). Another form of doorway is shown in Fig. 189a. For the various details of a framed structure of this sort, see Part III. (House-building for Beginners).
The author of House and Pet Dogs gives the following suggestion:
"The best device is an ordinary single kennel forty-eight inches by thirty-three inches, with an A roof, but with a detached bottom of the same size as the outside ground measurement of the kennel. This bottom is hinged by two stout strap-iron hinges to the side of the kennel, and is provided with two wooden axles, to which are fitted four wooden wheels, say four inches in diameter. When closed it looks like any other kennel on wheels. It[136] can be easily moved by one person from damp spots, etc.; and by turning the kennel back upon its hinges the bedding can be daily sunned and aired and the kennel washed and purified without trouble. The wheels also serve to keep the bottom clear of the ground, and allow of a free circulation of air beneath."
Squirrel House.—The small squirrel house, or cage, shown in Fig. 190, is made like a box (see Box-making, page 219), with the exception of the roof. The construction is similar to that of the houses already described.

Fig. 190.

Fig. 191.
It can be made of 7/8" or ¾" stock. The dimensions of the bottom can be made to agree with those of any baking-pan you may have, as shown. The slide in the roof can be made of zinc[137] or tin. That in the side can be of either zinc or wood. After the wire cloth has been nailed on a strip of wood can be nailed around the front edge as a moulding. The little sleeping-box in the upper corner can be readily reached from the slide in the roof and connects with the floor of the house by a little door and a flight of steps (Fig. 191). The latter can be made as shown in Fig. 173. The most difficult part of this house to make nicely is the joining of the roof-boards. These must be bevelled at the ridge and the tops of the ends must also be bevelled where they join the roof (see Bevelling). For other details, see the houses already described.
A more elaborate affair, shown below, can be made quite large and will give room for a whole family of squirrels. This house is, however, considerably more difficult to make than the others shown in this chapter, and if you have[138] not already acquired some skill as a workman you had best be content with a simpler design.

Four or five feet by about three feet will not be too large for the ground dimensions of the main part of the house. Regular sills can first be nailed together for the bottom of the main house and ell in the way shown in Fig. 189. These sills can be from 1½" × 2" to 2" × 3". Perhaps an easier way is that shown in Fig. 192, in which three cross cleats or sills are laid and the floor nailed directly to these. When the lengthways boards shown in Fig. 192 are nailed to the floor boards and the sills the bottom will be sufficiently stiff for a squirrel house. The sides and ends of the ell can be made of boards nailed together like a box, the openings for the doors, windows, etc., being first cut out; but the main part of the house should have posts at the corners to which the boarding at the ends is to be nailed. Rafters should also be put in at each gable. Plain sheathing will look better for the outside of this house than that with beads. After the outside has been boarded and the upper floors put in, the roofs and the cupola can be added. If the cupola is too difficult it can be omitted, as it is a luxury to which the average squirrel is unaccustomed.

Fig. 192.
The stairs, the openings in the floors, the doorways, the[139] sleeping-box, the revolving wire cage, the tree, and the swing in the cupola, are shown in Fig. 192. The stairs can be made as shown in Fig. 192; strips nailed vertically at the outside corners of the house, as in a real house, will give a more finished appearance. The window casings can be made by nailing strips on the outside. The glass can be held in place by strips, or small rabbets can be cut as in a window sash. For the shingling of the roof, see Part III. (House-building for Beginners). Each door can be made of a single piece of board, cleated (see Doors). For any other details, see the houses just described and also Part III. (House-building for Beginners), and Painting.

Fig. 193.
Several cages of various sizes can readily be built together, as shown in Fig. 193, which is merely a suggestion, for, of course, the shape, size, arrangement, and number of compartments must depend on the number and kinds of animals and the situation. Various combinations will suggest themselves as occasion calls for them.
If you have such creatures as frogs, turtles, lizards, etc., a water-tank should be provided. This can easily be made by taking a tightly made flat box and caulking the cracks, or pouring hot tar or pitch into them and also tarring or painting the whole surface of the outside. A board can be fitted[140] slantingly from the bottom to the edge, at one or both ends, to form an incline by which the users of this miniature pond can crawl in and out of the water. The box must, of course, be sunk in the ground inside of the cage.
For larger houses, as for hens, etc., see, also, the principles of construction of somewhat larger structures in Part III. (House-building for Beginners).
Travelling Cage.—A small box (Fig. 194) in which to carry a kitten, a squirrel, a bird, or any small animal, when travelling, is often very useful and much better than the bags and baskets so often used for the purpose.
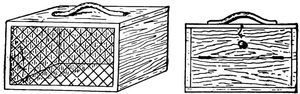
Fig. 194.
All that is necessary is to make a small box of ½" stock (see Box-making, page 219), with one side open (to be covered with wire cloth or netting), and the opposite side made in two parts, the upper of which is hinged to serve as a door or lid. Strips of moulding can be nailed on with brads along the edges where the wire is fastened, the door can be fastened with hook and screw-eye or catch, and a handle fastened upon the top. It is a good plan to round the edges of a box which is to be carried around. If this box is neatly got out and put together and carefully smoothed and finished it will look well and serve for many years.

Fig. 195.
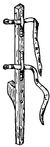
Fig. 196.
Stilts.—There is very little to say about the manufacture of stilts. The construction is obvious (Figs. 195 and 196), the size and arrangement depending on your own size and skill. The handles can either be long, or reach up as high as the hand, or short and strapped to the legs.
Tilt or See-Saw.—One of small size is shown in Fig.[142] 197. The exact proportions given are not necessary, provided you make it strong and so that it will not tip over.

Fig. 197.

Fig. 198.
Before beginning work read carefully Marking, Rule, Square, Saw, Nailing, in Part V., and look up any other references.
Fig. 199.

Fig. 200.
First make the standard (Fig. 198) of any sound plank 1¼" to 2" thick and 12" or more in width. Get out the pieces to the dimensions before beginning to put together, the ends of the braces H being cut at a mitre (see Mitring). Square the line EF across the plank B at the middle (Fig. 199). Drive three or four stout wire nails (3" to 4" long, according to the thickness of the plank) nearly through the plank on this line. Stand the piece A on end under these nails and drive them through firmly into it (Fig. 200), keeping the two boards at right angles. Bore holes with a ¼" bit (see Boring) in each end of the pieces H, as shown, taking pains not to get them too near the edge. Screw these braces in place with screws from 2¼" to 3¼" long (according to the thickness of the plank), keeping the piece A at right angles with the plank B (see Screws). Screw this frame[143] on the cross-pieces C and D, as shown. Nails can be used throughout, but screws are better. With plane, draw-knife, or spoke-shave (see Part V. for these tools), round the top edge of A.

Fig. 201.
The tilting-plank should be of spruce, ash, hard pine, or any strong wood, and had best be from 1½" to 2" thick, according to the length, which can be 12' or 14'. It should of course be planed. Next get out a few cleats 7/8" square, or thicker, and screw them on the under side of the tilting-plank at the middle (Fig. 201, which shows the under side of the plank), so that the spaces between them will be a little wider than the thickness of the upright piece A—just enough to allow the plank to tilt freely. Nail strips on the edge, to keep the plank from slipping off sideways, shaving a little from the edges of A at the top if necessary. Finally run over the edges with a plane (see Plane), and sandpaper the plank to prevent slivers.
Simply paint or oil and varnish (see Painting or Finishing).
A larger and more elaborate affair, adjustable to different heights, is shown in Fig. 202.

Fig. 202.

Fig. 203.

Fig. 204.
First get out the main pieces to the dimensions (Figs. 203, 204, 205). The upright pieces should be mortised into the planks on which they rest (Fig. 206) (see Mortising). Gauge a line[144] lengthways along the centre of each side of the uprights (see Gauge) and mark points (say 6" apart) on these lines for holes for the iron rod on which the tilting-plank rests, taking pains to place them alike on the two uprights. Then bore ¾" or ½" holes (see Boring), according to the size of rod you can get. Next fit the cross bar at the top. This can simply be nailed down or fitted between the uprights (Fig. 207), or made with a shoulder (Fig. 208), which will add to the stiffness of the frame. The rest of the construction of the standard is plain, and similar to that just described.
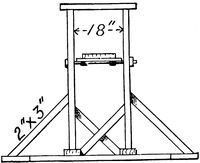
Fig. 205.

Fig. 206.

Fig. 207.

Fig. 208.
Iron rods can be used for braces, if you wish (Fig. 209).[145]
The tilting-plank should be 16' or 18' long, and of 2" plank. A thread with nut on one end of the iron rod on which the plank rests will keep the rod from slipping out of place. The plank can be fastened to the rod by iron straps or even staples, or a box-like bearing can be quickly made (Fig. 210). Washers can be placed between the plank and the uprights if necessary. Smooth the edges with a plane (see Plane) and sandpaper the plank. Simply paint or oil and varnish (see Painting and Finishing).

Fig. 209.

Fig. 210.
Skis.—To make as perfect skis as possible they should be of rift stock, that is, split out instead of sawed; but this may seldom be practicable for you and is not really necessary. Good straight-grained sawed stock will answer, but be sure that you get clear, strong stock—air-dried if possible. Always avoid kiln-dried stock for anything which is to be put to sudden and violent strain, if you can get that which has been naturally seasoned (see Chapter III.).
Ash is very good (white ash the best); spruce, light and strong; oak, strong but heavy. Any strong and elastic wood will do, if not too heavy. If you can get stock which is naturally sprung in a good curve upward and is satisfactory in other respects, take it, for a convex curve upward underneath the foot gives spring and elasticity and helps prevent the skis from becoming hollowed too much by the weight of the body. This curve is not necessary, but the better ones are purposely so made. Skis are sometimes used in very rude forms—as two strips of wood with the[146] front ends shaved down and bent up at an angle. Small ones can even be made of staves from barrels, but these are very unsatisfactory.
Before beginning work read carefully Marking, Rule, Square, Draw-knife, Plane, Spokeshave, in Part V., and look up any other references.
Fig. 211.

Fig. 212.
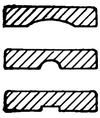
Fig. 213.
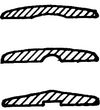
Fig. 214.
First get out the pieces of the required size. The length for a man is usually about 8' and the width about 4", though they are used even as long as 12' or 13'. From 5' to 8' long and from 3½" to 4" wide will probably be right for you, but the dimensions depend on your size, of course. Next taper the forward ends, as shown in Fig. 211. You can mark both edges alike by drawing the curve free-hand or with a spline (see Spline) on a piece of stiff paper, from which you can cut out a pattern for drawing the curve on the wood. Next make the pieces thinner towards the ends (Fig. 212), noticing that the forward end is thinner than the after end and is shaved down more quickly so that the stock may be thin where the toe bends up. This requires great care unless the grain is very straight, for a little hasty slashing will make too deep a cut (see Paring, etc.). Good forms are shown in Figs. 213 and 214, the former showing sections at the middle and the latter nearer the ends, but as the toe is approached the top should become flat for[147] ease in bending. This shaping can best be done by the draw-knife, spoke-shave, or plane.
Fig. 215.
Fig. 216.
Fig. 217.
Bend the points of the toes upwards about 6" above the horizontal line to ensure their riding clear of obstructions, but there is no gain in curling them up a foot. For the process of bending, see Bending Wood. Then turning the skis over, gauge (see Gauge) parallel lines for the grooves on the bottom. Work the grooves out with the gouge or with the saw and chisel (see Gouge and Grooving) unless you chance to have the plane designed for this purpose.[20] Make these grooves shallower as they approach the toe, leaving no groove where the toe bends up.
Fig. 218.
Balance the skis lengthways on a stick or your finger and put stout leather straps just forward of the balancing point. These can be riveted or even screwed to the edges of the skis (Fig. 215), but a better way is to put them through slots cut in the wood (Fig. 216). Gauge accurately for the slots, marking on both edges, and bore in from both sides (see Boring). The slots must then be cleaned out with chisel and file (see Mortising). An easier way and fully as strong is to cut grooves (Fig. 217) with saw and chisel and cover them with thin strips securely screwed on (Fig. 218). Some use a[148] second lighter strap to go above the heel. This can be screwed to the edges if you use it. Strips screwed across under the instep (Figs. 219 and 220), or behind the heel (Fig. 221), to prevent the foot sliding back are sometimes used.[21] For racing the Norwegian skis are turned up at the rear end also.
Fig. 219.
Fig. 220.
Fig. 221.
Fig. 222.
The pole, like the skis, must be of light, strong stuff, and can be round or eight-sided (see Rounding Sticks). To shape the tapering end make the stick uniformly eight-sided for the whole length first and then plane each side down at the end to get the taper. The hole in the disk must not be quite so large as the diameter of the pole, so that it cannot slip up farther than the tapering part (Fig. 222). Many dispense with the disk.
Finally smooth skis and pole with scraper (see Scraper) or glass, and sandpaper (see Sandpaper), and finish with plenty of raw linseed oil or with oil, shellac, and varnish, in successive coats (see Finishing). If open-grained wood is used it can be filled to good advantage with a coat of good wood-filler well rubbed in (see Finishing), and the bottoms can also be rubbed with wax or tallow, if you wish.
Toboggan.—This is now commonly made of narrow strips, in principle much like several skis placed side by[149] side—an easier form to make than the older pattern, formed of one or two wide pieces, as originally made by the Indians.
White oak and hickory are probably the best woods. Ash, maple, birch, basswood, or any hard wood which can be bent and has elasticity can be used. As in the case of the ski, to make the best possible the pieces should be rift, or split out, rather than sawed, to ensure straight grain; but, as this may be out of the question for you, be sure to select the straightest-grained clear stock you can find, for, besides the bending of the ends, there is great strain put upon it in coasting. For the same reason use air-dried stock and avoid kiln-dried if possible.
Probably the best and most scientific way to fasten the parts of a toboggan together is the old way adopted by the Indians of binding or lashing with thongs. This gives great elasticity and allows the toboggan to adjust itself to the inequalities of the surface to a greater degree than is possible with the tightly fastened joints now in use. You can try this way instead of that given below, if you prefer, but be sure to cut little grooves in the bottom for the thongs or cords to fit in, or they will be quickly worn through.
Before beginning work read carefully Marking, Rule, Square, Saw, Plane, in Part V., and look up any other references.
Fig. 223.
The size can vary from 3' long by 1' wide to 10' or 12' long by 20" to 22" wide; 4' long by 15" or 16" wide is good for a single toboggan; 8' long by 18" is a good size for three or more persons. You will probably find the stock most readily in the form of 12' boards. One-half inch in the rough will be thick enough, though you may have to take inch (rough) or 7/8" (planed) boards. Let us make an 8' toboggan (Fig.[150] 223). Have the stock planed and sawed in strips about 10' long, 2½" wide, and not less than ¼" nor more than 3/8" in thickness. If they are tapered a little in thickness for 12" or 15" at the forward end they can be bent more easily, but do not shave them down too much (see Plane and Drawshave). Smooth the bottom surfaces of the strips with plane and scraper (see Scraper). It is hardly necessary to plane the upper surfaces by hand, as the planer will leave them fairly smooth, though they will look a little nicer smoothed by hand. Plane the edges. Next get out eight cross-bars or cleats 18" long × 3/8" thick and from 1½" to 3" wide. If wide they can be tapered at the edges, and if narrow, the edges should be rounded (Fig. 224). Get out also two or three cleats 18" long, ¼" thick, and 1¼" wide, and one piece 18" long and about ¾" × 7/8" (half of a hardwood broomstick will do).
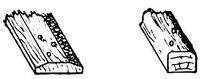
Fig. 224.
The long strips must now be bent at the forward end (see Bending Wood). After they are bent take the eight cleats and, laying one across the strips as it is to go, mark points for three holes at each strip (Fig. 224). Bore 3/16" or ¼" holes in the cross strips and countersink them very carefully (see Boring and Countersink), so that the heads of the screws will be very slightly lower than the surface—sunk barely enough to prevent any corners or edges from sticking above the surface. Take great care not to countersink too deeply, for the long strips are so thin that the screws may come through on the under side. Mark and bore the other seven cleats by this first one.
Now take one cleat, to be put on at the rear end 8' from the beginning of the curve. Screw one end of this cleat in place (see Screws), test with the square, and screw the other end. Then put in the intermediate screws, driving them all firmly home, and saw off the ends of the long strips just beyond this cleat. Square lines across every foot to the curve at the front, and screw on the other cleats. The length of the screws (which[151] can be quite stout) should be such that they will almost, but not quite, go through to the under side of the toboggan. Be careful about this or the points will have to be filed off. Then screw the smaller cleats on the inside of the curve. Screw the remaining (stouter) cleat on the outside of the curve at the place where the curve is to end, and then saw off the projecting ends of the strips by this cleat. By thongs, belt-lacing, or strong cord at the ends of the cleat last put on fasten the curve (which will naturally tend to straighten somewhat) in the required position to the cleat beneath (Fig. 225).

Fig. 225.
Side hand-rails can be fastened at each side on top of the cross-cleats (Fig. 223). A common way is to make every other cross-cleat thicker (say 7/8") and fasten the side bars to these with large and stout screw-eyes, or notches can be cut on the under side of these thicker cleats before they are screwed on, and by passing thongs or cord through these notches the side-bars can be lashed in place. The side bars you can plane round or eight-sided (see Rounding Sticks) out of strips of any strong wood.
Sandpaper the bottom and finish with plenty of raw linseed oil, or with oil, shellac, and varnish, in successive coats (see Finishing). If open-grained wood is used it can be filled to good advantage with a coat of good wood-filler well rubbed in (see Finishing), and the bottom can be waxed or rubbed with tallow, if you wish.

Fig. 226.
If you are willing to put in the labour you can bevel or slope off one side of each of the long strips (except the two outer ones) so as to leave the strip thickest in the middle (Fig. 226). Unless you are willing to take pains enough to do it nicely (which will take some time), it will be best not to attempt it at all, or to have it done at a mill. If you have a good hill[152] you can go well enough with the flat strips and it is not important to round them unless you are scoring fractions of a second against time. Another way is to curve the cross-cleats slightly (Fig. 226), leaving the long strips flat.
Some toboggans are made with low runners about an inch high.

Fig. 227.
You can, as you may know, patch up a sort of toboggan of barrel-staves, with which, though not a very workmanlike arrangement, you can have a lot of fun at no expense. You can get a high speed with this simple contrivance (Fig. 227) on a steep hill. It is not good, however, unless the pitch is steep. You can even get a good deal of sport from this apparatus in the summer on a very steep grassy knoll.
Wooden Guns and Pistols.—A gun on the principle of that shown in Fig. 228, the projectile power being furnished by elastic (rubber) cord, is easily made.
Fig. 228.
Before beginning work read carefully Marking, Rule, Square,, Saw, Spokeshave, Knife, in Part V., and look up any other references.
First saw the outline of the gun from a straight-grained pine or whitewood board. This can be quickly and cheaply done at any wood-working mill. The gun can then be finally shaped with the spoke-shave and knife. The rasp and file can be used (see Rasp and File.). Much of the shaping can be done with the draw-knife (see Draw-knife), and, in fact, the whole can be whittled out with a knife if other tools are wanting.[153]
Fig. 229.
Fig. 230.
The most difficult parts of the work are the groove for the arrow and the arrangement of the trigger. Much care is needed to cut an accurate groove with a gouge (see Gouge), and, unless you are skilled, you can get a truer result by having this done by a carpenter or at a mill. A mortise (see Mortising) must be cut for the trigger long enough to allow it sufficient play (Fig. 229). The arrangement of the trigger is shown in Fig. 229. The elastic underneath the barrel (at the lower end of the trigger) must be sufficiently powerful (combined with its additional leverage) to balance the elastic which propels the arrow, so that the trigger will remain in position and hold the upper elastic drawn, until the pressure of the finger on the trigger releases it.

Fig. 231.
Fig. 232.

Fig. 233.
The barrel of the gun is sometimes built of three pieces (Fig. 230, showing section) of thinner stock, which obviates the grooving but makes more work otherwise. The groove can be left open on top (Fig. 230) or covered with a thin strip (Figs. 231 and 232). In the latter case a depression must be made in the barrel, so that when the strip is put on there will be a long slot in which the string can play back and forth (Fig. 232). With this arrangement you can make a notch (Fig. 233) to hold the cord when drawn. The trigger can be of wood or wire, pivoted on a screw or nail, so that when pulled the string will be pushed up and released (Fig. 233).
A tube is sometimes fastened to the barrel, as in a real gun,[154] and a plunger is sometimes fitted to the tube to start the arrows, or bullets in case they are used (Fig. 234).
Fig. 234.

Fig. 235.
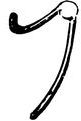
Fig. 236.
The ends of the elastic cord can be fastened to screw-eyes at the muzzle. A piece of leather thong or cord inserted at the middle of the upper elastic cord will wear better than the rubber at that point.
Another form of trigger is shown in Fig. 235, which can also be made of stiff wire (Fig. 236).

Fig. 237.
To finish the gun nicely, it should be scraped (see Scraper) and sandpapered with fine sandpaper (see Sandpaper). It can then be finished with oil and shellac or varnish (see Shellac, Varnish, Finishing).
These same methods of construction can, of course, be applied to a pistol.

Fig. 238.
A bow-gun or crossbow (Fig. 237) can be made on the same principle, using a bow instead of the elastic, and inserting it in a hole made through an enlargement of the under side of the barrel (Fig. 238).[155]
Sleds.—Common sleds can be bought so cheaply that it is hardly worth while, as a rule, to make them. Many are so poorly made, however, and will stand so little rough usage, that a few suggestions may be of value if you should wish to make a really serviceable one yourself.
Take the dimensions from any sled which suits you. Avoid making your sled too high, however, as one ten or twelve inches high will coast no better than a low sled, and requires much more bracing to be strong.
Before beginning work read carefully Marking, Rule, Square, Saw, in Part V., and look up any other references.
Fig. 239.
The runners and cross-pieces should be of straight-grained oak, maple, ash, or other strong wood; 7/8" stock will do. Mark the runners carefully on the wood, according to your working-drawing (Fig. 239), and before sawing them out bore the holes for the rope (see Boring). Saw out the runners, or have them sawed by machine, and see that the curves are the same on each.
Fig. 240.
Get out three cross-pieces (Fig. 240) about 2" wide, and from 7/8" to 1¼" thick, with a shoulder at each end as shown. Mark and cut the mortises (see Mortising) in the runners (Fig. 239).
Put these parts together, forming the frame of the sled (Fig.[156] 241), driving a pin through each mortise and tenon and adding the L irons shown in Figs. 241 and 242.
The seat may be thinner than the runners, and is to be fitted between them and to be screwed to the cross-pieces (see Screws). The thickness of the stock for the seat must be borne in mind when laying out the mortises in the runners.

Fig. 241.

Fig. 242.
Machine-planed stock is, of course, as smooth as is necessary for a sled, but smoothing by hand (see Plane, Scraper, and Sandpaper) will give a nicer surface. The runners can be shod at the blacksmith's with half-round irons, or round steel can be used with iron at the ends. In case of steel spring irons the runners can be slightly grooved on the edge, so far as may be necessary to keep the irons in place. The irons can be ½" to 5/8" in diameter.
Finish with paint (see Painting) or with oil, shellac, and varnish (see Finishing).
A "double-runner," "bob," or "traverse" sled can be built to good advantage. The sleds can be made as just described, or ready-made ones can be used. See that they are well put together, of the same width, and securely braced, as the strain upon them is great. The length of the double-runner is a matter of choice, of course. As to the height and width, however, if the coasting is straight, smooth, and comparatively safe there is no objection to a high seat, with a comfortable foot-board on each side for the[157] passengers' feet, if you wish. But if you are going to coast on long, rough hills, with sudden curves and pitches to be taken in uncertainty and at whirlwind speed—the kind of coasting for real fun and exhilaration—avoid the luxurious top-heavy double-runners frequently seen. Make the sleds rather broad (18" is not too wide for the "track" of a 16' sled; which is a very long sled, however), and keep the height of the top-board down to about 10" or less.
Before beginning work read carefully Marking, Rule, Square, Saw, in Part V., and look up any other references.

Fig. 243.
The seat-board can be from 8' to 16' long, and about 12" to 14" wide. Board thickness is sufficient for a short seat, but if long a 1¼" plank should be used. If you have in mind to make a very long sled you should consider, before beginning, that you must either use a quite thick plank to get the necessary stiffness, which will add to the weight of the double-runner, or the plank must be stiffened or "trussed" with rods beneath like a bridge, which will add to the expense and labour. It should be of strong, elastic, straight-grained wood, free from bad knots or defects, as the strain upon it is great. It should not be too yielding and springy, however, or it may sag inconveniently. Clear hard Southern pine or ash is good. A plank of stiff spruce of good quality will do. The rear end can be rounded, as shown (Fig. 243).[158]
Machine-planing is sufficient for the sides of the seat-plank, but the edges should be planed carefully (see Plane), and the angles slightly rounded off with the plane, spoke-shave, or rasp and file (see Spokeshave, Rasp, and File) to prevent splinters.
Fig. 244.
Fig. 245.
To enable the front sled to turn properly, get out two pieces of 2" plank, as shown in Fig. 244, about 3" wide and as long as the width of the sled, one being tapered toward the ends on the under side. The tapering is important, as it diminishes the friction when the front sled is turned. Screw one of these pieces firmly across the top of the front sled and the other across the lower side of the seat-board (see Screws), a hole being bored through the centre of each cross-piece (as well as through the seat-board and the top of the front sled) for the king-bolt upon which the front sled turns. Find these centres accurately and bore carefully with a bit 1/16" larger than the king-bolt (see Boring). The front sled should turn very freely and easily, and have plenty of play, but the bolt should not fit loosely enough to make the double-runner rickety.
A washer can be inserted between the cross-pieces. Sometimes a thick rubber washer is used to lessen the shock (Fig. 245).

Fig. 246.
To give the ends of the rear sled freedom to play up and down (without turning sideways) in passing over the inequities of the surface the arrangement shown in Fig. 243 (and enlarged in Fig. 246) is good. Do not make this of 7/8" stock. Pieces of plank[159] should be used, the dimensions being so arranged that the seat-board will be equally raised from the front and rear sleds. The pins at the ends of the cross-piece should be not less than 1" in diameter (1¼" is better) and should be carefully cut (see Paring and Rounding Sticks). The best way is to have them turned to fit the holes in the rocker-shaped pieces. The latter should be long enough (about 1') to prevent danger of the wood breaking apart near the hole and to allow for screwing firmly to the seat-board.

Fig. 247.
Another way, sometimes adopted, is to use two cross-cleats with two bolts (queen-bolts) and thick rubber washers (Fig. 247), the bolts being loose enough in the holes to allow the necessary amount of play. Ropes or chain can be fastened from the rear sled to the seat-board, to prevent too much dropping of the former.

Fig. 248.
Many arrangements for steering have been invented. A cleat at the forward end of the seat-board to brace the feet against, the sled being guided by the ropes held in the hand (Fig. 248), is a simple way, though requiring more strength and steadiness of arm, when the coast is rough or dangerous, than is possessed by many steersmen. The brace for the feet should be bolted to the seat-board or strongly screwed from above and beneath. Another equally simple way is to screw the brace for the feet upon the forward sled (Fig. 243), cutting a shallow gain in the tops of the runners to hold it more securely. In this way of steering the arms can reinforce the legs, or the steering can be done by the legs alone. It is a very effective method, which gives a high degree of control of the forward sled without cumbersome tackle and leaves the seat-board free of obstructions.[160][22]
Fig. 252.

Fig. 253.
In case of a high double-runner, running foot-boards along each side can be added. A simple way to fasten these is by means of pieces of strap-iron bent as shown in Fig. 252 and screwed to the under side of the seat-board, with the foot-boards fastened to the projecting arms (Fig. 253). The dimensions to which the irons should be bent depend upon the height and size of the double-runner, but you should take pains that the space between the edge of the seat-board and the foot-board is such that the feet cannot become caught.
The problem of contriving a perfectly successful brake for a double-runner has not yet been solved. Like all other apparatus for emergencies it should be as simple as possible. Unless it is sure to work it will be worse than not to have one, as you will come to rely on it. The steersman is usually the one who first realises the need of braking, and when practicable he is the one upon whom it naturally devolves. If he steers with the hands he can brake with the foot against a lever as shown below, but if he steers with the feet it is pretty risky business trying to brake also with the foot and, unless you can contrive some way by which[161] he can safely and quickly brake by hand (not an easy thing to do), the brake had best be worked by the rider at the rear. This has some obvious disadvantages. A few ideas are given below, but are not recommended as thoroughly satisfactory.
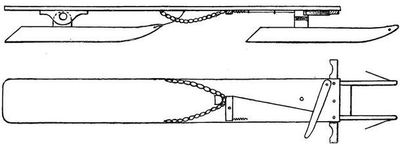
Fig. 254.

Fig. 255.
The simple and primitive way, so often used in the country by drivers of heavily loaded sleds, of dropping a chain under the runner is an effective method of braking, provided you have some sure method of dropping the chain under the runners. Fig. 254 shows a method which can be worked from either the forward or rear end of the double-runner. In the plan, or top view (Fig. 254), the details of the arrangement (being beneath the seat) would ordinarily be represented by dotted lines, but in this case, on account of the small size of the drawing, they are shown by full lines, as they would look if the seat-board were transparent. A way of holding up the middle of the chain is shown in Fig. 255. A small block a, perhaps 3" long, is screwed to the under side of the seat and the chain is held against it by the pivoted bar b (which is pivoted to the seat-board by a bolt and is kept in position by the spring), and on the under side of which a piece of metal is screwed at one end, which prevents the chain from dropping. The end of the bar b[162] is connected by a wire with the lever in front. When the lever is pushed by the steersman's foot the bar b is pulled away from the block a and the chain falls by its own weight under the runners of the rear sled, which quickly brings the double-runner to a standstill. Fig. 256 shows the bar held in position by the spring. Fig. 257 shows the position of the bar after the lever has been pressed, with the open space which allows the chain to drop. The same apparatus can be worked from the rear end of the double-runner by simply having the wire to be pulled led back (Fig. 258), where it can be worked directly by the hand or you can contrive a lever to be raised.

Fig. 256.

Fig. 257.
Fig. 258.
A method of braking sometimes used is by means of a crooked lever formed from an iron rod, one end of which is pulled up by the hand while the lower part has one or more prongs which dig into the surface and stop the sled. Fig. 259 shows a form sometimes used, and Fig. 260 a top view showing position of the handle and prongs when not in use. Any blacksmith can arrange this apparatus, which is attached to the rear sled. A similar arrangement can be contrived to work by the steersman's foot if desired. One prong, attached to the under side of the seat-board, can be arranged as suggested (side view) in Fig. 260a.

Fig. 259.

Fig. 260.
Fig. 260a.
The double-runner should be thoroughly oiled, and a coat of shellac, followed after a day or two by a coat of varnish, will add[163] much to its durability as well as to its appearance. Lubricate the working parts with soap or tallow.
If you have a gong, it should be worked by someone other than the steersman.
The rear sled is sometimes arranged to swivel like the front sled and to be steered by a second steersman, somewhat after the fashion of a long hook-and-ladder truck. This gives good command of the double-runner on curves.
Gymnastic Apparatus.—It will, in most cases, be out of the question for you to attempt to put up any building roomy enough for a "gym," but sometimes a number of you can club together and get the use of some vacant room in which satisfactory apparatus can be fitted at moderate expense. Some of it may be rather primitive compared with the mechanism of a modern college gymnasium, but will answer the purpose so far as getting up muscle is concerned. Most of you can find a place for one or more pieces of apparatus, either indoors or out. Much outdoor apparatus can be supported on posts driven into the ground, or even by fastening to trees. The outdoor apparatus is usually easier and cheaper to make, but has the obvious disadvantages of not being usable in bad weather or winter, to any great extent, and will not last so long on account of exposure to the weather. If, however, you fix things the right way and take the movable parts indoors during the bad weather, such a "gym" will last until it is outgrown, or until the next generation grows up to build a new one. If indoors have the room well ventilated. Often the second story of a barn makes a capital gymnasium. The few simple[164] pieces of apparatus given here will be treated independently, as it is of course impossible to tell how you will be obliged to arrange them. You can vary the designs or proportions to suit the circumstances.
White ash, hickory, oak, hard pine, and for some purposes fir, spruce, and white pine, are suitable for gymnastic apparatus. For everything which is to stand violent strain or wrenching, as the horizontal bars, vaulting poles, and such things, use air-dried stock, if possible, avoiding kiln-dried, as the latter is more brittle and inelastic, and often utterly unfit for such uses (see Chapter III.). Of course for such parts only the toughest woods should be used, as white ash, hickory, oak, spruce.
Parallel Bars.—A useful form (and not beyond the skill of an amateur) is shown in Fig. 261. The height must, of course, depend upon the gymnast, and can range from 3' 6" to 5' 6", the width inside (between the bars) from 14" to 19", and the length from 6' to 8'.

Fig. 261.
Before beginning work read carefully Marking, Rule, Square,[165] Saw, Plane, in Part V., and look up any other references.
The base of the apparatus can be simply made of 2" × 6" planks, as shown in Fig. 261, and fastened by screws (see Screws), or, as shown in Fig. 262, the pieces can be halved at their intersections (see Halving), in which case thicker stock may be used. For a small pair of bars the planks for the base can be somewhat lighter.

Fig. 262.
The upright posts should be of strong wood not less than 2" × 4" (unless for a very small pair of bars) and should be mortised at top and bottom, as shown in Figs. 263 and 264 (see Mortising). These joints should be pinned.
The bars themselves should be of the best white ash (hickory, oak, hard pine can be used), not less than 2" × 3" (unless for a small pair of bars). The arrangement and object of the iron braces is plain.

Fig. 263.

Fig. 264.
After the apparatus is all fitted together, take off the bars and carefully round the top edges for the entire length (see Rounding Sticks). The ends which project beyond the posts can[166] also be rounded on the under side (i.e., made elliptical in section, as shown), if desired.
Machine-planing is sufficient for this apparatus, except for the bars themselves, which should be carefully smoothed by hand (see Plane, Scraper, Sandpaper), although, of course, the whole will appear more nicely finished if smoothed by hand. The square edges should be "broken" (i.e., slightly bevelled or rounded) so as not to be too sharp in case of contact with them.
The whole apparatus can be simply oiled thoroughly, or can be given in addition one or more coats of shellac or varnish (see Finishing), but a coat of oil is sufficient for the bars themselves, as they will be polished by use.
This arrangement has the advantage of being portable, but of course the base can be omitted, if desired, and the posts fastened directly to the floor. If mortises cannot be cut in the floor, blocks can be screwed to the floor around the base of each post so as to form a socket into which the post will fit.
Parallel bars can be readily made for outdoor use by simply setting four upright posts (not less than 3" × 4") firmly in the ground, at the same distances apart as specified for the movable bars described above, and fastening the bars to the tops of the posts by mortise and tenon, as already shown (Fig. 263). The posts should reach 3' or more below ground, both on account of the frost and to give increased steadiness, and the earth should be thoroughly tamped down around them with a sharp-pointed bar or stick. This apparatus should be thoroughly oiled and can be varnished (see Finishing). The posts should be of good thickness at the ground, but can be tapered toward the top, on the outside, to the thickness of the bars.
Horizontal Bar.—A design suitable for the amateur wood-worker is shown in Fig. 265.
Before beginning work read carefully Marking, Rule, Square, Saw, Plane, in Part V., and look up any other references.[167]
First make the upright posts or guides. These are somewhat like a trough in shape, side boards about 6" wide being screwed (see Screws) on the sides of a 2" × 3" joist. Fig. 266 shows sections in the middle and at each end, blocks being inserted at the ends for strength. The joist can be of any strong wood. The side boards, which serve as guides for the bar, had best be of hard wood. Hard pine, oak, maple, ash, or any strong wood can be used. You will require two of the joists and four side boards, all sawed squarely off the exact height of the room.[23]
The usual way would be to get out the pieces a little too long and, after they are fastened together, to saw off the ends so as to give the required length. Gauge lines on each side of the upright pieces (see Gauge) and intersect these lines at regular distances by others squared across and around three sides of the uprights, thus determining the places for the holes for the pins which hold the bar in position. These can be bored from each side with a 3/8" bit (see Boring).
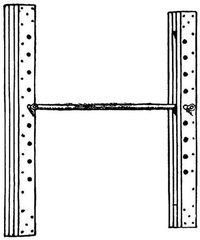
Fig. 265.
Fig. 266.
Another way sometimes adopted when you have one or two stout timbers on hand or already in position for the posts is to screw two upright cleats of plank to the inner side of each timber, thus forming the groove for the bar, as shown in section in Fig. 267.
Fig. 267.
The uprights can now be fastened in place, taking care to have[168] them exactly vertical and in line with each other. The distance apart will depend on the length of the bar. The uprights can of course be mortised into the floor, or the wood-work above, if the conditions admit, but it will usually answer every purpose to hold each end in place by four cleats firmly screwed to the floor or ceiling. It is usually simpler to have these uprights extend to the ceiling, but this is not necessary, and in some cases it may be advisable to brace them to the floor only, by wooden or iron braces, in some of the ways already shown, or they can be guyed with wire rope and turnbuckles.

Fig. 268.

Fig. 269.
The bar you had best have made or buy already made, in which case you can arrange the dimensions and position of the uprights to fit the bar. It can be from 5' in length to perhaps 6' 9" (6' is a good length), and should be not less than 1¾" in diameter, nor over 2". It should be of the best clear, straight-grained white ash or hickory (air-dried, not kiln-dried). One having a steel rod for a core is the best. The ends can be left square and bound with a square ferrule or band of iron of the right size to slip easily up and down in the grooves of the upright guides (Fig. 268). Any blacksmith can arrange this, as well as the pins to hold the bar. This apparatus can be finished in the same way as the parallel bars just described.
A suggestion for a post for outdoor apparatus is given in Fig. 269. The post should be set in the ground at least 3' and the earth well tamped down around it with a pointed bar or stick. The lower ends of the braces can themselves be set in the ground or abut against heavier posts set in the ground. This apparatus[169] should be protected from the weather as in the cases described above.
Vaulting Apparatus.—You can buy iron standards or bases, and of course the whole apparatus, for high jumping and pole vaulting, but it is a simple matter to make a pair of uprights that will answer the purpose satisfactorily (Fig. 270).
Fig. 270.

Fig. 271.
Before beginning work read carefully Marking, Rule, Square, Saw, Plane, in Part V., and look up any other references.
Take two straight sticks 10' or 12' long and about 2½" square. Taper each piece with the plane until about 1½" square at one end. Make each base of two pieces of board about 4" wide and perhaps 3' long, as shown in Fig. 270, or halve two pieces of plank (see Halving). Mortise the larger ends of the posts into these bases as shown in Fig. 271 (see Mortising).
Before fastening the posts to the standards, mark a line along the middle of one side of each post. On this line lay off feet and inches from the bottom and carefully bore a quarter-inch hole through the posts at each of these points (except, of course, those near the ground) for the pins which are to support the cross-bar or cord (see Boring). Then fit the posts in the mortises and brace them by three braces each. The ends of the braces can be cut at a mitre and screwed in place, or the blacksmith will make iron braces for a small sum (Fig. 271). Finish like the other apparatus already described.
Vaulting poles should be round, very straight-grained, from air-dried (not kiln-dried) stock of light, strong wood, as spruce, free from knots or any cross-grained, weak spots. The thickness should of course depend on the length, but should not be[170] less than 1¼" for an 8' pole (which is quite short), and the pole should taper toward each end (see Rounding Sticks).
Spring-Board.—A form not difficult to make is shown in Fig. 272. The framework can be made of any strong wood, but the spring-board itself should be of the best quality of clear, straight-grained white ash.
Before beginning work read carefully Marking, Rule, Square, Saw, Plane, in Part V., and look up any other references.
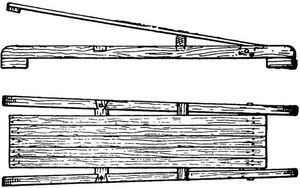
Fig. 272.
First make the base or framework. Get out two pieces of 2" × 3" plank for the outside pieces (to stand on edge) and screw blocks of the same plank at each end to raise the pieces from the ground as shown. Place these pieces so that they spread apart slightly at the forward end (Fig. 272), being about 22" apart at the rear end. Fit a cross-tie to connect these stringers at about 2' from the forward end.
Another cross-bar, resting on the stringers, is placed nearer the rear end, and about 1' from the rear end a piece of 3" × 4" joist is fitted between the stringers and held in place by a bolt passed through it and the stringers. This should be loose enough to allow the block to turn.
The spring-board can be made of five strips of 7/8" stock, 4" wide and 6' long, screwed to a cleat at the forward end, and securely bolted to the block at the rear end.
This apparatus can be finished as in the cases described above.
Vaulting-Horse.—A simple affair (Fig. 273) can be easily[171] arranged by making a box, perhaps 5' long and 8" or 10" square, which can be supported by flaring legs of joist as shown in the illustrations.

Fig. 273.
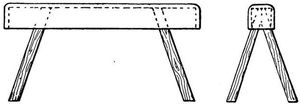
Fig. 274.
First make the box (see Box-making, in Part II.). The corners and edges should be rounded (Fig. 274), and the whole padded and covered with such materials as you may have at hand or can afford for the purpose. Laying out and sawing the bevels for the tops of the legs is the hardest part of the job. Transfer the bevels carefully from your working drawing to the wood, and saw as exactly to the lines as you can. See also Scribing. Unless you have had much experience some paring will probably be required to make all the legs fit. To make the horse stand evenly see Scribing, Winding-sticks, etc. The other general directions given for the apparatus described above will suffice for this horse.
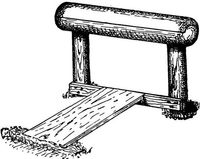
Fig. 275.
A horse for outdoors (Fig. 275) can be simply made of a log, perhaps 1' in diameter, smoothed[172] and with the ends rounded, and mounted (by mortising) upon posts set in the ground (see Mortising). The top can be covered with rubber, as indicated in the illustration.
The posts should be set at least 3' in the ground, and the earth well tamped around them with a pointed bar or stick.
The apparatus can be finished as in the cases given above.
Giant Swing.—This piece of apparatus is excellent for outdoors, and affords considerable sport (Fig. 276).

Fig. 276.

Fig. 277.
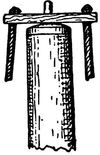
Fig. 278.
You must have a pole or mast from 15' to 25' long and from 6" to 10" in diameter at the lower end. At the smaller end there should be an iron ring or ferrule. This can be heated and driven on, when it will shrink so as to fit tightly and save the end from splitting. The upper end of the pole should first be squarely sawed off (see Saw). The swing ropes, of which you can have two or four (as you wish), can be fastened by hooks to a pivot set into the top of the post (see Boring), the latter being firmly set up in the ground. The blacksmith can quickly fix a pivot with hooks or pins and with a washer, to which you can fasten the ropes (Fig. 277). The lower ends of the ropes can be fastened at the proper height to sticks for handles. Loops can also be made in which to rest one leg if you wish. Of course you must have plenty of room for swinging around. In setting up the pole dig a hole 3' or 4' deep and after placing the pole tamp the earth compactly down around it with a pointed bar or stick.
A cheaper way, but hardly as good, is to drive a 1" or ¾" rod[173] in the top of the pole, and get out a stout piece of hard wood, 3" or 4" square and 1½' or 2' long, with a hole in the middle to fit the rod, and smaller holes near each end for fastening the ropes by a knot (Fig. 278). A washer can be put under the wooden bar, or the top of the pole may be slightly rounded.
Other Apparatus.—There are, of course, other useful forms of apparatus involving more or less wood-work, such as hanging poles, fixed upright and slanting poles or bars, and various contrivances which you can readily arrange without more special instruction than has been given.
Ladders are of course good, but it is usually as well for the amateur to buy these. A suggestion for a framework for hanging rings, trapeze, poles, rope ladders, and the like, with fixed ladders and horizontal bar, is given in Fig. 279.

Fig. 279.
Do not make such framework too light. Fasten the joints with[174] bolts rather than screws or nails, and suspend the hanging apparatus from eye-bolts passing through the timber and with washers under the nuts. The dimensions for such framework must depend upon the circumstances. The suggestions about the construction of the other pieces of apparatus given above will assist you in designing and constructing something to suit the circumstances.
Some article of furniture is frequently one of the first objects upon which the beginner (particularly the amateur of mature years) tries his hand; and boys, as well as their elders, sometimes confidently undertake pieces of cabinet-work which would tax to the utmost the skill of an experienced cabinet-maker, only to be discouraged by the unsatisfactory result.
Do not be beguiled by the captivating sketches and descriptions in the popular magazines and papers which tell you how someone, at an expense of perhaps only $2.98, easily made a roomful of desirable furniture out of packing-cases, old bedsteads, barrels, soap-boxes, broomsticks, and the like, with only the household hammer, saw, and screw-driver, and a liberal supply of putty, coloured varnish, and the occasional help of the "village carpenter."
That sort of work does very well for your feminine relatives if they wish to amuse themselves in such ways or to contrive makeshifts to save the expense of furniture made in the usual way. You can very well help them in such work, or do it for them, and some very neat, cheap, and serviceable things can be made of such materials (particularly with the use of cloth)—but that is not the way for you to begin your cabinet-making. Learn to do good, plain, simple, useful work in the simplest, most straightforward, practical, workmanlike way. When you can do that, if you[176] wish to exercise your ingenuity in patching up useful articles from discarded ones you will know how to do it properly.
Be sure to begin with simple articles, avoiding attempts at elaborate decoration. Do not spend your time in making a useless object merely because you think it is pretty. Think first whether your design is suited for the purpose intended. If you start to make a case for your books, select or make your design accordingly, and do not be misled, by the multitude of overelaborated articles with which the market is flooded, into making a parlour bric-à-brac cabinet, all built up of turning, and jig-sawing, and machine-made carvings, too complicated and fragile for practical use, with the result that the books continue to be stored on a closet shelf or on the floor.
Next look to the block-form or general proportions of the object. The importance of this is often wholly overlooked by the average amateur,—sometimes because he is too engrossed in trying to make the details pretty,—but it is essential in making a handsome piece of furniture. No amount of exquisite carving, inlaying, or decoration of any kind (however beautiful in itself) will make an ill-shaped, badly proportioned article a thing of beauty; while a well-shaped and well-proportioned object will be pleasing to the eye even if free from decoration of any kind.
Of course, no rule can be given for designing a handsome piece of furniture any more than for painting a beautiful picture, but when you have sketched out the general shape and proportions and think you have done as well as you can, there is one thing it is well to bear in mind—that the average amateur is much more likely to spoil the appearance of his work by adding too much so-called ornamentation than by leaving the work too plain. When you become proficient enough to add carving, or other form of decoration,[177] to your work, by all means use any skill you may have in such ways, but even then remember not to use such ornamentation too freely. Avoid "gingerbread" work, meaningless jig-sawed decorations, and machine-made carvings, turned out by the gross.
Look at some of your great-grandmother's furniture (if you are fortunate enough to be able to do so) and think how long it has lasted, and compare it with the cheap modern furniture after the latter has been in use for a few years. How much of the latter would be in existence now if it had been made when the ancestral articles were? The durability of the old things is partly due to the quality of the wood and its seasoning. The use of whole pieces (instead of scraps of all kinds of stuff glued up with cheap glue), the way the articles were put together, and the generally honest work put into them had much to do with it.
Bear in mind in undertaking a piece of cabinet-work that you must hold yourself to a higher standard in the matter of accuracy of detail, in order to produce a really satisfactory result, than is necessary for much of the other work often done by amateurs. Many slight inaccuracies, which are of little consequence in the rougher kinds of work, become such gaping and conspicuous defects in cabinet-work as to detract much from the satisfaction that should be taken in home-made articles. Remember, then, that while it is easy to make your furniture strong, it is by no means easy to produce close, accurate joints, smooth, true surfaces, square, clean-cut edges, and a good, smooth finish. Choose, therefore, simple forms, easily put together, for your early attempts; for it is much better to make a modest and unpretentious article well than to make an elaborate one badly.
First and foremost, when you come to the actual work, use thoroughly seasoned wood. This is essential to making[178] permanently satisfactory furniture, as you will learn after you have spent much time in making an article out of half-seasoned stock, only to see the ruin of your carefully executed work begin as soon as the finish is dry, or even before.
Although it is very easy to tell you to use nothing but properly seasoned stock, you will doubtless sometimes be deceived, however, as it is by no means an easy matter for the beginner to determine; but you can at least try your best to get wood in suitable condition, for it will be time well spent. (Read the remarks on seasoning in Chapter III.)
Be content with the more easily worked woods in your early attempts. Do not buy highly figured, heavy, and hard San Domingo mahogany (no matter how beautiful) for your first table or bookcase—nor even quartered oak, nor mottled walnut burl, nor wavy maple—but begin with plain, straight-grained material, easy to work.
White pine is often considered rather cheap and common in appearance, but it is suitable for many things in the way of furniture. It is one of the best woods to "stand," or hold its shape, and if not desired of the natural colour (which, is, however, suitable and attractive for some objects) it can be painted. It can also be stained, but is not to be compared with whitewood in this respect.
Whitewood is, like pine, easy to work, durable, can be obtained in wide boards, can be painted, and takes a stain exceedingly well.
Black walnut is good to work and is well suited for furniture, though its sombre hue is not always desirable.
Cherry, when soft and straight-grained, is easy to work and is often (when highly figured or wavy) one of the most beautiful woods. It is easy to finish.
Mahogany is a wood of great beauty and durability, and holds its shape exceedingly well, but the beginner should[179] confine himself at first to the lighter, softer, straight-grained varieties, which can be easily obtained. You can then try the more highly figured and harder kinds, which will tax your skill in smoothing them.
Oak in its softer, straight-grained forms is well suited to the work of the beginner. It is durable, and an article made of oak will stand more abuse without serious defacement than most of the other woods used for furniture. When quarter-sawed it is more difficult to smooth than plain, straight-grained oak, but as you acquire skill you will find quartered oak one of the most satisfactory woods. Oak can be stained if desired.
Many other kinds of wood are sometimes used, as sycamore, ash, birch, beech, maple, rosewood, butternut, ebony, etc., but these woods you can try for yourself, if you wish, as you progress in skill, and thus learn their peculiar characteristics.
An important point, not always realised by the amateur, is that the stock for good furniture should be planed true, that is, free from winding. Buy stock that is as true as you can find (see Chapter III.) and have it planed to be as true as possible. Have as much of this truing done by machine as you can afford, for it is not worth while to spend an hour in working down a surface by hand (see Truing Surfaces, in Part V.) when a machine will do it in five minutes. There are, of course, cases in which this accuracy is not essential,—and judgment must be used, as in all intelligent work,—but, as a rule, it is highly important that the surfaces should be reasonably true if you wish to do your work as it should be done. The pieces, when fitted, should come together easily and naturally, and not require to be sprung or twisted or bent in order to be able to put the article together.
Your furniture should always be hand-planed and scraped,[180] for, though the slight hollows and ridges left by the planing-machine may not be noticeable while the wood is in its natural state, as soon as the surface is finished and begins to have a lustre these inequalities become conspicuous. This applies to any small irregularities of the surface. You cannot get the surface too smooth. You will be surprised at first to see how noticeable slight defects in the surface become in the finished work.
Curved edges occur often in furniture. Many of these curves can be cut with a turning-saw or a keyhole-and compass-saw, but the easiest way (and the most accurate, until you have acquired considerable skill with the saw) is to have them cut at a mill by a jig-saw or band-saw at but slight expense. Have a piece of waste wood put on the under side to prevent the burr, or ragged edge, left by the sawing. These curves can be smoothed with the spoke-shave alone, or spoke-shave and file, or file alone, according to the conditions, as you will soon learn by experience, the final finishing of the surface being given with fine sandpaper.
Put the different parts of your article of furniture completely together once (without glue or nails) to see that everything fits right, that the joints close properly, and that the whole job is as it should be, before putting together permanently.
This often seems to the amateur a needless precaution (and it occasionally is), but, although it takes some time, it is the practice with skilled workmen and therefore a precaution which should not be neglected by the beginner. You will discover the importance of this when you carelessly assume that all the parts of a writing-desk, for instance, will come together properly, or that you can easily correct errors as you go along, only to find, when you have the work nearly put together that something is wrong. In the effort[181] to mend the trouble you will be apt to loosen the parts already fastened, or will have to take the whole apart, which, when glue or nails are used, is particularly discouraging, and apt to damage the quality of the work.
Be particular to clamp the parts of your work together thoroughly when using glue and to allow time enough before removing the clamps (see Clamps and Gluing).
Care should be taken in putting your work together to get it "square," that is, to prove the accuracy of the right angles. In some cases this is of course essential to having the work come together at all. In others, the appearance will be much injured if the article tips to one side or is slanting or twisted. In all cases it is essential to the proper closing up of the joints. It will not do to assume, as the beginner often naturally does, that because the parts of the work seem to be accurately made that the whole, when put together, will, therefore, be square. It must be tested. You will be surprised to see how much "out of square" and how winding the result of your most careful work will sometimes be if you do not test it as you put the parts together. In addition to the obvious way of applying the square (see Square) to the angles, using the large steel square when you can: there are many cases in which measuring diagonals is a good test, altering the angles of the work until the two opposite diagonals are equal, when the work will, of course, be rectangular. This is a good way for large "case" work, using a stick, or fitting two adjustable sticks, after the manner described on page 167, between the angles, when the latter can be altered until the diagonals are equal.
At the same time that you are testing for squareness you must also look out for winding, by sighting across the front or back, using winding-sticks, if necessary.[182]
When your work has a back fitted in, as in the case of a bookcase or cabinet, this will help you much in the final adjustment.
Do not attempt to put your case work together in an upright position, but upon horses horizontally, or flat upon its back or face.
It is well to use corner-blocks in the angles of your furniture, in places where they will not show (see Corner-blocks, in Part V.).
After you begin to acquire some proficiency in your work, a little beading or chamfering can sometimes be used to good advantage, but it is well not to be too lavish with this kind of ornamentation.
Wall-cabinets and other articles to be hung on the wall can be neatly attached to the wall by brass mirror-plates screwed upon the back. These should usually be sunk into the wood so that the back will be smooth.
Your furniture can be finished with oil or wax alone, or with shellac or varnish, as described in Part V. In the case of articles to be hung against wall-paper or where any delicate fabric will be exposed, it is well to avoid finishing with oil alone unless the greatest care is used, for a very slight surplus of oil will quickly soil the paper. For the work of the amateur nothing is better than shellac.
When your work is made of parts which can be readily separated, such parts as are joined without glue or nails, it is best to take the work apart before finishing. Unhinge doors and take off locks, escutcheons, mirror-plates, handles, and the like. Take out removable shelves, backs, and all detachable parts. Finish all these parts separately and then put the work together again. You can finish the separate parts better and more easily, but of course this can only be done with such parts as are readily separable.[183]
In some cases it is desirable to stain your furniture, but as a rule you cannot improve on the natural colouring, which deepens and mellows with age. If you wish mahogany-coloured furniture, use mahogany, or, if you cannot afford that, simply paint or stain some cheaper wood of the desired colour, but do not try to imitate the grain of the mahogany. There are two objections to these attempts at imitation. First, they are not honest; and, in the second place, the deception is usually a failure.
Finally, be simple and honest in all your designing, your construction (which above all things should be strong and durable), and your finishing. Do not put in your room an object which appears at a distance of ten feet to be a mahogany or black walnut centre-table, but which on closer examination turns out to be a pine washstand in disguise.
There are, as you know, hundreds of articles of household utility, other than those here given, which are suitable for the amateur to make, but it is hoped that the suggestions about those which are included in this chapter will be of service in the construction of other objects.

Fig. 280.Fig. 280.
Book-Rack.—A simple rack for books (Fig. 280) can be of any length desired, about six inches wide, and of half-inch stock (or slightly thinner), but the dimensions can be varied according to circumstances.
Before beginning work read carefully Marking, Rule, Square, Saw, Plane, in Part V., and look up any other references.
Be sure that the bottoms of the ends are accurately cut. The other edges can be rounded if you wish (see Spokeshave and[184] File). The hinges should be sunk in the wood, so that they will not injure the books (see Hinges).
See end of introduction to this chapter for directions about smoothing, putting together, and finishing. See also Scraper, Sandpaper, and Finishing, in Part V.
Desk-Rack.—An easily made arrangement to put on the back of a table or desk is shown in Fig. 281, and can be made of stock of from ½" to 7/8" thickness, according to the size of the rack.
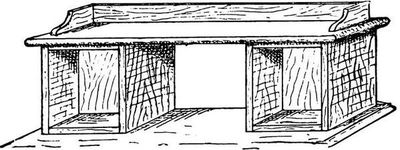
Fig. 281.
Before beginning work read carefully Marking, Rule, Square, Saw, Plane, in Part V., and look up any other references.
Fig. 282.
Fig. 282a.
First make the two boxes (see Box-making, page 219), and then the shelf above them. This can be fastened to the tops of the boxes by screws from underneath. The edge can be slightly rounded. The rail or guard at the back and ends of the shelf should be made independently. The back and ends can be joined as shown in Fig. 282, and the whole then fastened to the shelf by screws (see Boring and Screws) from underneath before fastening the shelf to the boxes, or it can be dowelled on, as shown in Fig. 282a (see Dowelling).
Partitions can be fitted in the boxes, forming pigeon-holes or compartments, if desired. These partitions can be nailed in[185] place or, to be more workmanlike, can be fitted in grooves (see Grooving and Shelves).
See end of introduction to this chapter for directions about smoothing, putting together, and finishing. See also Scraper, Sandpaper, and Finishing, in Part V.
Hanging Book-Shelf.—A wall-shelf (Fig. 283) is useful and good practice for the amateur. It should not be made too deep (from front to back). Half-inch stock is heavy enough, if the shelf is not more than two feet long.

Fig. 283.
Before beginning work read carefully Marking, Rule, Square, Saw, Plane, in Part V., and look up any other references.

Fig. 284.
This shelf can be simply put together by nailing, setting the nails carefully (see Nailing and Nail-set). Carefully mark lines (using the square) by which to nail the pieces in their proper places. It is not worth while to use glue if the parts are put together in this way. A stronger and more workmanlike way is to groove the lower shelf into the sides and the sides into the upper shelf (see Grooving). In this case glue should be used and the work tightly clamped (see Gluing and Clamps). It will be much stronger to fit a back between the two shelves and the sides. This should properly be set in a rabbet cut around the space, as shown in Fig. 284 (see Rabbet).
See end of introduction to this chapter for directions about[186] smoothing, putting together, and finishing. See also Scraper, Sandpaper, and Finishing, in Part V.
Wall-Cabinet.—An open cabinet or hanging case for books, magazines, or other small articles (Fig. 285) can be of any desired proportions, but should not be very large. Half-inch stock is sufficiently thick.

Fig. 285.
Before beginning work read carefully Marking, Rule, Square, Saw, Plane, in Part V., and look up any other references.
This case should have a back. Rabbets should be cut to receive the back, as in the case of the wall-shelf just shown (see Rabbet), the top and middle shelves being narrower than the lower shelf by the thickness of the back.
This case can simply be nailed together (see Nailing and Nail-set), but it will be better to groove the shelves into the sides (see Grooving).
See end of introduction to this chapter for directions about smoothing, putting together, and finishing. See also Scraper, Sandpaper, and Finishing, in Part V.
Hanging Bookcase.—A simple and useful case for the wall (Fig. 286) can be made on much the same principle as the small case just shown. It is well not to make such cases very large, and, unless quite small, stock from ¾" to 7/8" in thickness will be suitable.

Fig. 286.
Before beginning work read carefully Marking, Rule, Square, Saw, Plane, in Part V., and look up any other references.[187]

Fig. 287.
Instead of a back, strips can be screwed on vertically (Fig. 286), being sunk so as to be flush with the back of the case (Fig. 287).
See end of introduction to this chapter for directions about smoothing, putting together, and finishing. See also Scraper, Sandpaper, and Finishing, in Part V.
Wall-Shelves.—An easily made arrangement is suggested in Fig. 288. The design can easily be varied if you wish.

Fig. 288.
Before beginning work read carefully Marking, Rule, Square, Saw, Plane, in Part V., and look up any other references.
The construction is extremely simple, the shelves being merely screwed on from the back.
Get out the back and the shelves, and smooth them. Mark lines across the face of the former at the places for the shelves,[188] bore holes through the back from the face for the screws (see Boring), and countersink the holes on the back (see Countersink). Screw the shelves in place (see Screws) to see that everything is right, then take apart and finish.
See end of introduction to this chapter for directions about smoothing, putting together, and finishing. See also Scraper, Sandpaper, and Finishing, in Part V.
Pipe-Rack.—A modification of the shelf arrangement just described makes a good rack for pipes and other articles for smoking (Fig. 289).

Fig. 289.
Before beginning work read carefully Marking, Rule, Square, Saw, Plane, in Part V., and look up any other references.

Fig. 290.
This differs from the article just described only in the shape of the shelves, which have openings in the edge for holding pipes. These openings can be made either with a fine saw or by boring holes and cutting in to them from the edge (Fig. 290).
See end of introduction to this chapter for directions about smoothing, putting together, and finishing. See also Scraper, Sandpaper, and Finishing, in Part V.

Fig. 291.
Wall-Shelves.—A quite simple form is shown in Fig. 291, having a small box with lid. A combination of this[189] form with the design for a pipe-rack can easily be made if desired.
Before beginning work read carefully Marking, Rule, Square, Saw, Plane, in Part V., and look up any other references.
The construction is plain from the cases already described. The hinges should be sunk in the edge of the lid (see Hinges).
See end of introduction to this chapter for directions about smoothing, putting together, and finishing. See also Scraper, Sandpaper, and Finishing, in Part V.
Wall-Cabinet.—The cabinet shown in Fig. 292 should be rather small, for if large it will look clumsy. It can be made of half-inch stock.

Fig. 292.
Before beginning work read carefully Marking, Rule, Square, Saw, Plane, in Part V., and look up any other references.
The construction is quite similar to the preceding cases.
If you have no board wide enough for the back, two can be joined (see Jointing and Gluing).
The cupboard is simply a box without front or back (see[190] Box-making, page 219) screwed to the back from behind (see Boring and Screws). The shelves at the sides of the cupboard and the bracket underneath it can be screwed from the back and from the inside of the cabinet, as in the preceding cases.
The door (see Doors) can be fitted and hung (see Hinges) after the whole has been put together.
See end of introduction to this chapter for directions about smoothing, putting together, and finishing. See also Scraper, Sandpaper, and Finishing, in Part V.
Corner-Shelves or Cabinets.—A simple form of hanging corner-shelves is shown in Fig. 293. This can be of any size, of course, but such articles look clumsy if made very large. Half-inch stock is heavy enough unless the case is quite large, when ¾" or 7/8" thickness can be used.
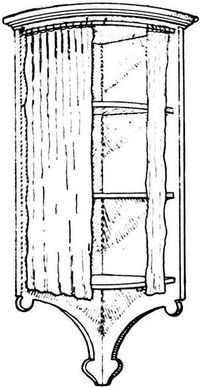
Fig. 293.
Before beginning work read carefully Marking, Rule, Square, Saw, Plane, in Part V., and look up any other references.

Fig. 294.
One of the sides can be made wider than the other by the thickness of the stock, so as to lap over and secure a tight and strong joint at the back. The top board (with rounding front) can simply be nailed down on the sides (see Nailing and Nail-set),[191] or, to be more workmanlike, a rabbet (Fig. 294) can be cut around the edge of the top on the under side into which to fit the sides, which can be screwed in place (see Rabbet, Boring, Countersink, and Screws). This rabbet should not come quite to the front edge of the top.
The shelves can be screwed in place from the back (see Screws), carefully marking lines with the square, for boring the holes, before putting the case together, and countersinking the holes upon the back.
This case (being fastened by screws) can be taken apart for finishing.
See end of introduction to this chapter for directions about smoothing, putting together, and finishing. See also Scraper, Sandpaper, and Finishing, in Part V.

Fig. 295.
A standing cabinet like Fig. 295 can be made in the same manner as the hanging cabinet just shown, but can, of course, be larger. Stock from ¾" to 7/8" in thickness can be used. The rail at the top can be made and put on as directed for the desk-rack shown in Figs. 281 and 282.
Medicine-Cabinet.—Any small cabinet can be used for medicines by simply arranging the shelves in any convenient manner. A simple way is to have a series of horizontal[192] grooves on the inside of each side, into which the shelves can be slipped at any desired distance apart. A design for an easily constructed medicine-cabinet for the wall is shown in Figs. 296 and 297.

Fig. 296.
Before beginning work read carefully Marking, Rule, Square, Saw, Plane, in Part V., and look up any other references.
A good size for a small cabinet is to have the main box-part, the cabinet proper, about 15" wide, 20" high, and 7" deep. It can be made of ½" stock. The construction is like that of the other cases already shown. The joints should properly be grooved (see Grooving and Gluing), but the whole case can be nailed together, although the result will be inferior (see Nailing and Nail-set). The back should be set in a rabbet as in the cases already shown. The arrangement of the hinges is shown in the illustration (see Hinges).
The partitions can be of thin stock (¼" or 5/16"). The doors can have thick cleats, shaped as shown in Fig. 297 (enlarged in Fig. 297a), with holes bored down from the top for homœopathic phials. Care must be taken not to bore the holes through (see Boring). Stop boring before the spur comes through and clean out the bottoms of the holes with a gouge.

Fig. 297.
Fig. 297a.
Fig. 298.
A small drawer can be fitted to one of the small compartments, as in Fig. 297 (see Drawers). If the edges of the doors are made to lap slightly where they come together, rabbets being cut on opposite sides of the edges (Fig. 298), the joint will be tighter,[193] but a little space must be allowed or the doors may bind. The rest of the details are like those of the cases already described.
See end of introduction to this chapter for directions about smoothing, putting together, and finishing. See also Scraper, Sandpaper, and Finishing, in Part. V.
Bookcases.—A plain case (Fig. 299) can be made of any desired size. If quite small ¾" stock can be used, but ordinarily 7/8" thickness will be best. The method of construction is practically the same as in the cases already described.

Fig. 299.
Before beginning work read carefully Marking, Rule, Square, Saw, Plane, in Part V., and look up any other references.
The shelves can all be fastened in, if desired, but a good way[194] is to groove the top and bottom shelves into the sides and make those between movable (see Shelves, in Part V.).

Fig. 300.
The back can be fitted by simply cutting a rabbet on the back edge of each side for the entire length (see Rabbet), and making the shelves of such a width that they will not project beyond the rabbet. A narrow piece can be screwed from the back lengthways, above the upper shelf, as shown in Fig. 300. The rest of the back can then be screwed in place (see Boring and Screws). The back, being too wide to be made of one board, can very well (for a plain case of this sort) be of matched boards or sheathing.[24] Do not force the back too tightly into place,—that is, crossways of the boards. Allow a little play for the expansion and contraction.[195]
See end of introduction to this chapter for directions about smoothing, putting together, and finishing. See also Scraper, Sandpaper, and Finishing, in Part V.

Fig. 301.
A "knock-down" method of putting together with tenons and wooden pins (Fig. 301) is not very difficult, but requires care and accuracy. In the case of the bookcase just shown, the upper and lower shelves can be pinned through the sides, which will hold the case firmly, and the other shelves can be movable (see Shelves). A case fastened in this way can be readily taken apart. This method can be applied to other designs for bookcases and cabinets.
Before beginning work read carefully Marking, Rule, Square, Saw, Plane, in Part V., and look up any other references.
The general principle is that of the mortise and tenon (see Mortising). If you cut the mortises for the pins before cutting the tenons on the ends of the shelves you will avoid the liability of splitting the tenons. The pins should taper and the angles of the pins and tenons be very slightly bevelled, that is, the sharp edge taken off.
Fig. 302.
The ends of these shelves can be slightly "cut under" or bevelled inwards (see Fig. 302, which is exaggerated), on the same principle that the ends of floor boards and the like are sometimes slightly bevelled, to ensure a closely fitting joint.
See end of introduction to this chapter for directions about smoothing, putting together, and finishing. See also Scraper, Sandpaper, and Finishing, in Part V.
A good form for an open bookcase suitable for the [196]beginner to make is shown in Fig. 303. This design is suitable for a low, or dwarf, bookcase of whatever length may be desired. If of quite small size it can be made of 7/8" stock throughout, but in most cases a thin plank (perhaps 1¼" to 1½" thick) had best be used for the ends.
A curtain can be added if desired.

Fig. 303.
Before beginning work read carefully Marking, Rule, Square, Saw, Plane, in Part V., and look up any other references.
The curves of the ends can be sawed by hand (see Turning-saw and Keyhole and Compass Saw), or better by band-saw and jig-saw at a mill, and smoothed with spoke-shave and file (see Spokeshave and File). The shelves (at least the upper and lower ones) should be grooved into the sides and glued (see Grooving and Gluing), although, as in the other cases already described, nails can be used, but the result will be inferior (see Nailing and Nail-set).
The plainness of the upright edges of the ends can be relieved by a little beading (Fig. 305), which you can do yourself or have moulded at the mill (see Beading).
Little brackets, screwed under the lower shelf at each end, as shown in Fig. 306, add to the stiffness of the case. A back can be fitted into rabbets as described above, but in this case it had best not come above the top shelf, a rabbet being cut on the under edge of the latter as well as in the sides. The bottom shelf can simply be made narrower and without a rabbet.
See end of introduction to this chapter for directions about[197] smoothing, putting together, and finishing. See also Scraper, Sandpaper, and Finishing, in Part V.
The bookcase shown in Fig. 304 can be of any desired size and proportions. It can be of 7/8" stock, although the upright ends can well be of thin plank.

Fig. 304.
Before beginning work read carefully Marking, Rule, Square, Saw, Plane, in Part V., and look up any other references.
This case can simply be nailed together (see Nailing and Nail-set), but the more workmanlike way is to groove the sides into the top and the bottom shelf into the sides (see Grooving). The second shelf from the top can be grooved into the sides, and the upright partition forming the cupboard can also be grooved in place. This process involves careful laying out and accurate cutting. The other shelves can be removable. The base-board can be bevelled or curved on the top edge (or moulded by machine) and can be mitred at the corners. It can be fastened with fine nails (see Nailing and Nail-set). The front piece can be glued as well as the mitred joints. A moulding can be nailed around the top as shown, being mitred at the corners.[198][25]
Fig. 305.
The other details of construction do not differ from those of the cases just given, except in the matter of making and fitting the door, for which see Doors in Part V.
A common way of making the sides of such cases is to make the side itself of board thickness, and to face the front edge with a strip (which can be glued on) from 1¼" to 2" wide, according to the size of the case, in the way shown in Fig. 305 (see Gluing). This gives a wider edge to the side and the shelves can fit behind the facing strip.
Beading can be worked on this strip, as shown (see Beading).
See end of introduction to this chapter for directions about smoothing, putting together, and finishing. See also Scraper, Sandpaper, and Finishing, in Part V.
Desk and Bookcase.—Various combinations of book-shelves with a desk can be arranged. A useful form for a small one is shown in Fig. 306. The height is of course regulated by the necessary position of the desk-lid when dropped. The general principles of the construction are the same as those of the cases already shown.
Before beginning work read carefully Marking, Rule, Square, Saw, Plane, in Part V., and look up any other references.
The wing, or attachment at the side, can be grooved into the[199] side of the main part.
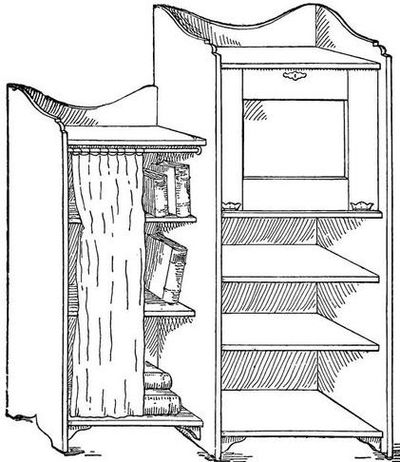
Fig. 306.
The back should reach across from one part to the other, which will give stiffness to the whole.
The desk-lid, which should be set in perhaps 3/8" from the front edge of the case, can be prevented from dropping too far by chains fastened inside to the lid and the sides of the case. Various other arrangements can be bought for holding a desk-lid in the proper place.[200]
The inside of the lid must of course be smooth. If panelled as in Fig. 306 the panel must be thick enough to be flush with the frame on the inside (see Doors). There will be more or less of a crack around this panel, but this is unavoidable. Lids of this sort are sometimes made with a smooth surface (without frame or panelling), but this requires some form of cleating to prevent warping (see Cleats).
The small brackets under the lower shelf will help to stiffen the case.
A few shelves can easily be arranged in the desk compartment. If you wish a number of pigeon-holes and compartments, a good way for the amateur to fit these is to make an independent case of pigeon-holes and compartments, without front or back, of thin wood (perhaps ¼"), and of such outside dimensions that it will just slip into the desk-space. This open box-like arrangement can be nailed together with fine brads.
The best way to make it is by fitting all the divisions into grooves, but to do this by hand requires more work and care than can be expected of the ordinary amateur. The grooving can be done by machine. A convenient arrangement is to have rows of parallel grooves into which the division boards can at any time be slipped to form compartments of any desired size.
See end of introduction to this chapter for directions about smoothing, putting together, and finishing. See also Scraper, Sandpaper, and Finishing, in Part V.
Music-Case.—The construction of the form shown in Fig. 307 is like that of the examples already shown. The sides, top, and bottom should be of ¾" or 7/8" stock, but the shelves can be thinner.

Fig. 307.
Before beginning work read carefully Marking, Rule, Square, Saw, Plane, in Part V., and look up any other references.
This case can be simply nailed together (see Nailing and[201] Nail-set), but the more workmanlike way is to groove the bottom shelf into the sides and the sides into the top, as in the cases already shown (see Grooving).
A moulding at the top can be made as in the bookcase shown in Fig. 304.
For various ways of putting in the shelves, see Shelves, in Part V.
The back can be thinner (¼") and should be fitted in a rabbet cut around, as already shown in the illustrations.
See end of introduction to this chapter for directions about smoothing, putting together, and finishing. See also Scraper, Sandpaper, and Finishing, in Part V.
Plant-Stands.—The form shown in Fig. 308 is of quite simple construction and is useful to hold a large flower-pot. It should be made of 7/8" stock. The top can be from 8" to 12" square.

Fig. 308.
Before beginning work read carefully Marking, Rule, Square, Saw, Plane, in Part V., and look up any other references.
Simply make a box (see Box-making, page 219), without top and bottom, with the grain of the four sides running up and down. Before putting together saw the curves at the bottom. As the grain of the four pieces all runs up and down, these sides can be glued together without nailing (see Gluing). Screw four cleats around the inside of the top[202] (Fig. 309) with holes bored in them for screws with which to fasten on the top from underneath (see Boring and Screws). Round the top edge as shown (see Spokeshave and File), and smooth the surfaces. Then, having shaped the edge of the top as shown in Fig. 308, fasten it in place and the stand is ready to finish.
Fig. 309.
See end of introduction to this chapter for directions about smoothing, putting together, and finishing. See also Scraper, Sandpaper, and Finishing, in Part V.
The form shown in Fig. 310 is made upon a similar principle, and can be of a larger size than would be satisfactory for the first pattern.
Much care must be taken to so lay out and cut the slanting edges of the sides that the pieces will come together accurately. After the top has been fastened on, a little piece of moulding can be put around beneath the edge of the top as shown, provided you have the skill to do it neatly. The corners must be mitred, and the moulding fastened on with fine brads, which must be set (see Nailing and Nail-set).[26]

Fig. 310.
See end of introduction to this chapter for directions about smoothing, putting together, and finishing. See also Scraper, Sandpaper, and Finishing, in Part V.[203]
Tables.—A plain table, which although not especially ornamental is serviceable for many purposes, is shown in Fig. 311. It can be made of any size and proportions and the details can easily be varied.

Fig. 311.
Before beginning work read carefully Marking, Rule, Square, Saw, Plane, in Part V., and look up any other references.
The construction is too simple to require special description. The legs and the cleats at the top should be of plank thickness, the rest of 7/8" stock. The legs can be halved where they cross (see Halving), or for a rough job can be simply nailed (see Nailing). The cleats at the top of the legs should be nailed or screwed to the legs, and will act as cleats to the top, which is fastened to them. The boards forming the top can be simply laid with the edges touching, for a rough job; but where a good surface is required the joints should be glued (see Jointing and Gluing) and the surface smoothed afterwards.
Extra cleats can be put under the top if needed for stiffness, and additional lengthways stretchers can be added to connect the upper part of the legs.
The whole should be planed and sandpapered and can be shellaced or painted. The remaining details do not differ from those of the subjects already shown.
See end of introduction to this chapter for directions about smoothing, putting together, and finishing. See also Scraper, Sandpaper, and Finishing, in Part V.[204]
A table of simple construction and neat appearance (Fig. 312) can be of any desired size and proportions.
Before beginning work read carefully Marking, Rule, Square, Saw, Plane, in Part V., and look up any other references.
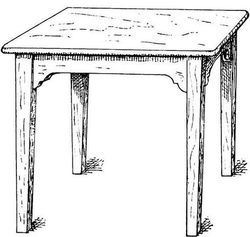
Fig. 312.
The legs can be from 1½" to 2½" square, according to the size of the table. After being squared and cut to a length they should be tapered toward the bottom by planing down two opposite sides and then the other two. The tapering, however, should not extend to the tops of the legs, but to a point a little below the bottom of the rails, or cross-bars, which connect the legs. On the two inner sides of the legs mortises must be cut to receive tenons on the ends of the rails which connect the legs, as shown in Fig. 313 (see Mortising). These rails can be of 7/8" stock, the curves on the lower edge being cut with the turning-saw or compass and keyhole saw, and finished with spoke-shave and chisel or file. The curves can be omitted, of course, if preferred.
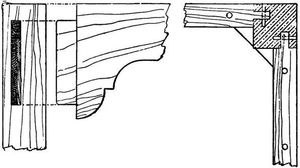
Fig. 313.
Do not try to put this table all together permanently at one operation. First put together two legs and the connecting piece,[205] then the other two legs and the connecting piece, and finally join these two sides by the remaining rails. Glue the joints (see Gluing) and the parts should be securely clamped (see Clamps) until dry. Corner-blocks can be put in at the angles (see Corner-blocks).
Holes must be bored in the rails by which to fasten the top. If the rails are not too deep, vertical holes can be bored, countersinking deeply if necessary. Deep countersinking can be done by first boring a hole large enough to admit the head of the screw to the depth required, when the hole can be continued with a smaller bit. If the depth of the rail is too great for this process, the hole can be made by a species of counterboring, making first a larger hole in the side of the rail (on the inside), an inch or so from the top, and boring down into this hole from the top. A slanting cut can be made from below with the gouge to allow the screw to be slipped into the hole (Fig. 314). Another way is to screw cleats on the inside of the rail with a vertical hole through which the top can be screwed on (Fig. 315).

Fig. 314.
Fig. 315.
The top, if too wide for one board, should be glued up before being dressed off (see Jointing and Gluing), and the edge shaped and smoothed. Then, laying the top face downward on the horses or bench, place the frame upside down upon the top. When in the exact position mark a line around the inside of the frame, continue the holes in the frame a little way into the top, using a bit a trifle smaller than the screws, and then screw the frame securely to the top (see Boring and Screws), measuring carefully to see that you use screws which will not protrude through the top of the table. Depend entirely on the screws to hold the top on. Do not fasten a table-top on with glue (see[206] Laying out the work, in Chapter IV.). If the table does not stand even, see Scribing and Winding-sticks. The final scraping (see Scraper) of the top can well be left until the table is put together, when the whole, after being scraped, can be carefully sandpapered with fine sandpaper (see Sandpaper).
The remaining details do not differ from those of the articles already shown.
See end of introduction to this chapter for directions about smoothing, putting together, and finishing. See also Finishing, in Part V.
An excellent centre-table for the amateur to make (Fig. 316) is useful for many purposes. About three feet square on top is a convenient size.
Before beginning work read carefully Marking, Rule, Square, Saw, Plane, in Part V. and look up any other references.

Fig. 316.
Get out four legs, from 1½" to 2" in diameter, according to the size of the table. They can be tapered slightly, as in the preceding case. Groove one side of each leg to receive the end of the cross-partition shown in the cut (see Grooving). These partitions can be ½" to ¾" thick. One of them can extend across (diagonally) from post to post. The other can be in two parts, reaching to the centre; or the partitions can be in four parts, meeting in the centre. This framework of legs and cross-partitions can be bound together at the top by cleats screwed on top (Fig. 317), holes being made in the cleats by which they can in turn be screwed to the top of the table. The lower shelf, or[207] shelves (being made in four parts), can be fastened up from underneath, cleats, also, being used if necessary. The shelves can be of ½" stock. The upper shelves can be fitted after the rest is put together and can rest upon cleats underneath, to which they can be fastened. The shape of the top is shown in Fig. 317a.

Fig. 317.

Fig. 317a.
The remaining details do not differ from those in the preceding cases.
See end of introduction to this chapter for directions about smoothing, putting together, and finishing. See also Scraper, Sandpaper, and Finishing, in Part V.
Small Stand.—A simple arrangement shown in Fig. 318 involves more difficulties than many of the other articles shown, but is not beyond the skill of the careful amateur. A good size is about 13" or 14" across the top and 17" or 18" high. Such a stand is useful to hold a flower-pot.

Fig. 318.
Before beginning work read carefully Marking, Rule, Square, Saw, Plane, in Part V. and look up any other references.[208]
The top can be of ½" or 5/8" stock and the legs of 7/8" stock, the lower part tapering in thickness to 5/8" at the bottom. The curves can all be sawed at a mill for a small sum, and smoothed with spoke-shave and file (see Spokeshave and File). The underside of the top can be bevelled at the edge (Fig. 319). This can be done with the spoke-shave. The file can be used to good advantage in the rounding of the extreme edge, finishing with sandpaper, but not until after the top surface has been finally smoothed (see Spokeshave, File, and Sandpaper).
Fig. 319.

Fig. 320.
The curved frame under the top and connecting the legs is to be made in four pieces, the legs being fitted between them (Fig. 320). These curved pieces should be got out a little too long and the ends carefully sawed to make a tight joint with the legs. Be sure that all these parts fit accurately before you finally put them together. Screw them together, toeing screws into the legs. Use glue at the joints of the curved frame and the legs, but do not glue the frame to the top.
The remaining details do not differ from those in the preceding cases.
See end of introduction to this chapter for directions about smoothing, putting together, and finishing. See also Scraper, Sandpaper, and Finishing, in Part V.
Small Table.—Fig. 321 shows a good form for a small stand suitable for various purposes, which, although not as easy to make as it looks, is not too hard for the amateur who has acquired some familiarity with his tools. It can be made of any desired height or proportions.
Before beginning work read carefully Marking, Rule, Square, Saw, Plane, in Part V., and look up any other references.[209]
Get out the top as in the small stand last shown. The thickness can vary from ½" to 7/8" according to the size of the table. The legs should not be fastened directly to the top, but to a cleat framework to be screwed to the top (Fig. 322). This helps prevent the top from warping. The legs can be round or six-sided and should be tapered (see Rounding-sticks). A tenon or dowel should be made at the upper end of each leg to fit into a hole in the cleat framework.

Fig. 321.

Fig. 322.
Fig. 323.
Fig. 324.
The hexagonal shelf at the bottom can be of ½" stock and should be notched or grooved into the legs, the extreme angles of the shelf being cut off (Fig. 323). A fine screw toed from underneath through the shelf into the leg (Fig. 324) will strengthen the joint, and after the whole is fastened together, little brackets can be screwed with fine screws in the angle between the lower shelf and the leg. All the joints should be glued except where the cleats are fastened to the top, in which case screws alone should be used. Much care is required to make all these joints accurately, and to put the whole table together properly.
The remaining details do not differ from those in the preceding cases.
See end of introduction to this chapter for directions about[210] smoothing, putting together, and finishing. See also Scraper, Sandpaper, and Finishing, in Part V.
Footstool or Cricket.—A common low seat or cricket (Fig. 325) can be made of 5/8" or 7/8" stock and of any desired size.
Before beginning work read carefully Marking, Rule, Square, Saw, Plane, in Part V., and look up any other references.

Fig. 325.
The hardest part of this job is to cut the bevels where the sides meet the top and at the ends of the stretcher between the sides (see Bevelling). You will probably find it easier to lay out and cut the ends of the sides before they are tapered. The edges of the top can be slightly rounded.
After the parts are nailed together (see Nailing) set the nails (see Nail-set). The remaining details do not differ from those of the cases already described.
See end of introduction to this chapter for directions about smoothing, putting together, and finishing. See also Scraper, Sandpaper, and Finishing, in Part V.
Fig. 326.
Out-Door Seat.—The construction of the plain chair shown in Fig. 326 is too obvious to require special description.
Before beginning work read carefully Marking, Rule, Square, Saw, Plane, in Part V., and look up any other references.
This seat can be made of thin plank. The most difficult part is the bevelling of the joints (see Bevelling).
The remaining details do not differ from those in the preceding cases. For the painting see Painting, in Part V.[211]
Bookcase and Lounge.—"Combination" articles of furniture are, as a rule, frequently undesirable on the ground of taste, and often are not as convenient as to have the parts made separately. But the amateur may sometimes find it desirable to join two or more different pieces to fit some particular spot or for some special reason. Examples are given in the bookcase and desk (Fig. 306), in the combination for a corner (Fig. 328), and in Fig. 327. These are given as suggestive of the kind of combinations that can be suitably undertaken by the amateur, and many simple arrangements can readily be contrived when desired.

Fig. 327.
Before beginning work read carefully Marking, Rule, Square, Saw, Plane, in Part V., and look up any other references.
The new principles involved in this design are merely in the combination. The bookcase and the cupboard (which can be open if desired) are similar to those already shown, and the lounge is simply a shelf or box-like arrangement connecting the two. The back of the lounge is merely a board fastened by screws. The appearance of the article depends much upon the[212] upholstering. This should not be done until after the finishing of the wood-work.
The remaining details are not different from those of the articles already shown.
See end of introduction to this chapter for directions about smoothing, putting together, and finishing. See also Scraper, Sandpaper, and Finishing, in Part V.

Fig. 328.
Another combination, suitable for a corner, is shown in Fig. 328. The principles involved are the same as for the other articles already described and the construction is obvious.
Table and Settle, or Chair-Table.—This is an excellent form of table for the amateur to make and is useful for many purposes (Figs. 329 and 330). If of moderate size, it can be made of 7/8" stock, but if large, and to be subjected to rough usage, thin plank will be more suitable for the ends and top. Another good form of chair-table can be made on the same principle by making a narrower seat, or a heavy chair, and attaching a circular top by hinges to the back of the arms of the seat.[213]

Fig. 329.

Fig. 330.
Before beginning work read carefully Marking, Rule, Square, Saw, Plane, in Part V., and look up any other references.
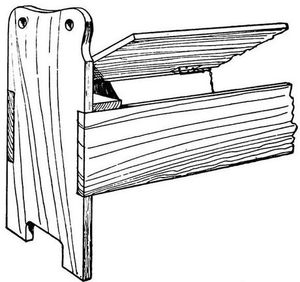
Fig. 331.
The framing of the lower part is similar to that of a box. Get out the upright ends and the front and back of the box part and fit them together as shown in Fig. 331, a rabbet (see Rabbet) or groove being cut to receive the bottom. The lid, which forms the seat, can be arranged as shown (see Hinges). The top, made like any table-top and fastened by screws to the deep cleats shown (see Screws), is pivoted to either side of the upright ends by pins when a seat is desired. When you wish to use the table and the top is lowered, it can be held in place by inserting pins in the other two holes also. The pins should not be less than ½" or ¾" in diameter. Care must be used in laying off the points for making these holes (see Boring).
The remaining details are not different from those of the articles already shown.
See end of introduction to this chapter for directions about smoothing, putting together, and finishing. See also Scraper, Sandpaper, and Finishing, in Part V.
Cabinet for Guns, Fishing-Rods, Etc.—A convenient form is shown in Fig. 332. The construction is similar to that of the bookcases and cabinets already shown. The stock for the case itself can be 7/8" in thickness, for the larger divisions ¾", and for the small partitions ½".

Fig. 332.
Before beginning work read carefully Marking, Rule, Square, Saw, Plane, in Part V., and look up any other references.
If you make the doors with glass panels, as shown, these can be set in rabbets cut on the inside of the door frames and held in place by strips of "quarter-round" moulding. The doors can be fitted between the sides or can lap over the edges of the sides, as you prefer (see Doors). The drawers can be omitted if too difficult to make well (see Drawers), and small boxes of various sizes stored upon the shelves can be used as a substitute.[216]
The remaining details are not different from those of the articles already shown.
See end of introduction to this chapter for directions about smoothing, putting together, and finishing. See also Scraper, Sandpaper, and Finishing, in Part V.
Picture Frames.—These are often undertaken by the amateur, but making them well is much more difficult than it seems to the beginner.
Before beginning work read carefully Marking, Rule, Square, Saw, Plane, in Part V., and look up any other references.

Fig. 333.
If you buy the prepared mouldings so much in use, they will, in most cases, have to be mitred at the corners, which is an operation by no means easy for the beginner, particularly when the moulding is sprung or twisted, as is often the case. Those joints which do not close properly must be trimmed with the plane, for which purpose the mitre shooting-board is useful (see page 94), and all four joints should fit accurately before finally putting together, so that none will have to be sprung or twisted in order to close up. At the same time you must guard against winding by sighting across the face, and the angles must be tested with the square. The clamping together is important in such work. This can be done by laying the frame flat, nailing strips a short distance outside of each of the four corners, and driving in wedges between these strips and the frame until the joints are firmly held (Fig. 333). This can also be done by putting blocks at the corners and passing a doubled cord around, which, by inserting a stick, can be twisted until the frame is held tightly. But making mitred frames of moulding is not suitable work for the beginner and should be deferred until you have had some experience (see Mitring).
Fig. 334.
For a plain frame nothing is better than a joint with mortise and tenon (Fig. 334), the rabbet (see Rabbet) at the back being cut through to the ends of the shorter pieces (those having the tenons), but being stopped before reaching the ends of the longer pieces (those having the mortises), as shown. The latter should be got out too long, so as to overlap a little at the ends (Fig. 334). This enables you to take the frame apart more readily when fitting, and with less danger of injury to the work. The projecting ends can be sawed off after the frame has been glued together (see Mortising, Gluing, and Clamps). The final planing and smoothing of the front surface and the edges should be done after the frame is glued together, careful attention being paid to the direction of the grain (see Plane, Scraper, and Sandpaper).
After a frame of this kind is all done, an inner moulding with a row of beads, or some other simple form, can easily be fitted to the rabbet, if desired.
See end of introduction to this chapter for directions about smoothing, putting together, and finishing. See also Finishing, in Part V.
Wooden Chain.—White pine or any other easily whittled straight-grained wood can be used. Take a stick of any length and from 1" to 2" square. If very small the whittling is more difficult.
Fig. 335.

Fig. 336.

Fig. 337.
Before beginning work read carefully Marking, Rule, Knife, in Part V.
Fig. 338.
Mark as shown (Fig. 335), and remove the wood at the corners, forming four rabbets, giving a section of the piece the shape of a Greek cross (Fig. 336). Next lay out the links, alternating as shown in Fig. 337, and allowing space enough so that they can have some play when cut. By notching in from the outside and finally cutting away the wood within the links, they can be separated. The whittling must be done carefully, of[219] course, and wholly by cutting with a sharp knife. If you try to do it by prying or twisting with the blade, you will be likely to split the wood. Finally, round and smooth the links (Fig. 338), doing as much of this as you can before the links are separated. Use fine sandpaper (see Sandpaper). Leave the chain in the natural wood or oil and shellac (see Finishing).
Ball and Block.—White pine or any other easily whittled, straight-grained wood will do for this whittling exercise (Fig. 339).
Before beginning work read carefully Marking, Rule, Knife, in Part V.

Fig. 339.
First get out a cubical block, each edge of which may be, perhaps, 1½" or 2" long. Gauge a line around each side parallel to the edge and about ¼" from it (see Gauge). Cut straight in on these lines and then make slanting cuts to meet those first made. Remove the wood on the same general principle as in cutting a notch, gradually shaping the middle part into spherical form; while the cuts which are parallel with the sides finally meet and form four posts between the top and bottom. The wood must be removed by cuts, not by prying. Trim the ball to be as nearly spherical as you can. If you wish to make the ring or handle shown on top, additional length must be allowed in getting out the original block. The whole can be sandpapered with fine sandpaper (see Sandpaper) and finished with oil or shellac (see Finishing).
Box-making.—In laying out common boxes, bear in mind that the sides, top, and bottom usually lap over the ends,—the sides over the ends, and the top and bottom over the sides and ends (Fig. 340). Sometimes, however, to avoid joints showing on the front, the front and back are[220] made to lap over the top (Fig. 341), occasionally the ends lap over the back (Fig. 342), and other arrangements are sometimes made. Do not rely on glue for these common square joints in box-work, but place your dependence on nails or screws.

Fig. 340.

Fig. 341.
Either lid or bottom or both can sometimes project slightly to good advantage (Fig. 343). In nice work, however, the bottom is more often set in so as not to show, either simply fitting in between the sides and ends or into a rabbet (see Rabbet) cut in the lower edge (Fig. 344, showing box bottom up).
Fig. 342.
Fig. 343.
The lid or cover can be hinged to the top edge of the back of the box, or a narrower lid can be used and hinged to a strip fastened at the back of the box (Fig. 345). Plain lids of this sort, for everything but rough or temporary work, should[221] be cleated, either by end cleats, by framing, or simply by cleats on the under side (see Cleats and Doors).

Fig. 344.
Fig. 345.
Remember that the joints will be held more tightly (for a permanent box) if you "toe" the nails (see Nailing).
Mitring is a common way of making box-joints. It is, however, one of the poorest of all ways in point of strength, and unless done with much skill,—more skill than the average amateur usually acquires,—the joints are very liable to come apart, or at least gape open, and be weaker and look worse than the common, squarely fitted joint first shown.
Glue can be used and is a help. Mitred joints can, however, be strengthened by splines or keys or pieces let into saw-kerfs (see Mitring).
A mitred box is hard for an amateur to put together, particularly when it is to be glued. The whole process should be rehearsed before gluing. Everything must fit exactly before you begin to finally put the box together. If you get one corner out of place, all four will probably be thrown out of position before you get through puttering with them, and the glue become cold and the operation be spoiled. Only a skilful amateur can make a box with nicely fitted mitred joints that will hold permanently.
There are various other ways of making joints by machine (see Joints). The rabbeted joint shown in Fig. 346 can be[222] made by hand very well, but so much quicker with a circular saw that you will save much time by having it done at a mill. It is a good, strong, neat joint and shows less wood at the end than the common way. When it is allowable to round what little end wood there is (Fig. 345) it makes the joint quite inconspicuous. Glue can also be used to advantage with this joint on account of the shoulder.
Dowelling the corners is a method sometimes used. It is easier than mitring, but by no means a strong joint, unless skilfully made. The principal advantage of dowelling is in cases where it is objectionable to have nails show. But, as a rule, there is not much gain in trying to conceal joints. Certainly not unless you can do the work in the best of style.

Fig. 346.
Learn first to make the common, plain joints accurately, and you can then attempt the more difficult ones with some chance of success. The joints can sometimes be reinforced to good advantage by triangular corner-pieces or posts, glued and screwed in place.
There is no better or more workmanlike way of putting boxes together than by some form of dovetailing (see Dovetailing), but this process is hardly one for the beginner to undertake, and should be postponed until he has acquired considerable skill, for, though the principle of laying out and cutting dovetails is easy to understand, much exactness is required in the execution.
Where the box does not open at the top but lower down, as in Fig. 347, the best way is not to make the two parts separately, but simply to put together a tight box and then saw it apart wherever you wish to have it open.[223]
Be careful to gauge accurately the line by which to saw it open (see Gauge), and not to drive any nails too near this line. Any which you omit can easily be added after the sawing. Saw the box open very carefully on the line. Smooth the edges after the saw, but take pains not to plane away the wood too hastily, for a very little carelessness will spoil the joint and necessitate a general truing of the edges.

Fig. 347.
Fig. 348.
A good form for a plain chest is shown in Fig. 348. The construction is the same as in the other cases. The bottom can be fitted to a groove cut around on the inside and can be inserted when the box is put together, or for a rougher job can be simply nailed in place.
A simple form of tool-chest is shown in Fig. 349. This can be made of any size desired and of any wood. It is usually as well to make a good-sized chest, for the cost is but little more than to make a small one. Hard wood will be much more durable than soft. Stock from ¾" to 7/8" in thickness will be suitable.
Unless you have had considerable experience you had best be content with the simpler joints rather than to attempt dovetailing the corners, as shown in the cut. It is not necessary to cut a rabbet for the bottom, because of the base-board or moulding which is to be nailed around the bottom, and the latter can be nailed or screwed directly to the edge, before the moulding is put around. The rest of the construction of the chest is obvious and[224] like the cases already shown. If the moulding around the lid is to be arranged as shown, it will be best to fit the lock first, as it will be easier to attach the hasp of the lock before the moulding has been added (see Locks and Hinges).

Fig. 349.
At about two or three inches from the top, fasten a ledge on the inside of the front and back. This can be about ¼" thick by ½" deep and is for the sliding-tray, shown in the cut, to rest upon. This tray can be of soft wood, from ¼" to 3/8" in thickness, and can be divided as you wish. It will often be advantageous to arrange the lid and the top tray so that tools can be fastened on the inside of the lid. Saws and various flat tools are often thus disposed of, being held in place by straps, blocks, and buttons. You can also arrange a rack around the inside of your chest for such tools as chisels, gouges, etc. When kept in trays, such tools should be separated by divisions. The various details of making such a[225] chest do not differ from those of the articles just described in the preceding chapter on Furniture.
In nailing together rough boxes for packing or some temporary purpose, you do not need to devote much thought to the arrangement of the pieces with reference to the direction of the grain, so long as you put them together in a way that your common-sense tells you will be strong. Examination of a few packing-cases will show you all you need to know for such work. But when you make a better grade of box, to be glued, regard must be paid to the direction of the grain and the matter of expansion and contraction. In the majority of boxes and chests the grain of the sides and ends should run in the same way—horizontally or around the box, as shown in the illustrations.
This gives a strong edge all around at the top of the box and permits the use of glue (with some joints) where the sides and ends meet, as the parts glued will thus naturally tend to expand and contract alike. When the grain goes in opposite directions (i.e., at right angles), such joints, unless short, should not be glued. Where the top board is fastened to the sides and ends of the box, as in Fig. 347, it should not be glued, except in the case of a small box, and the grain should run lengthways, so that there will be as little change as possible due to the expansion and contraction (see Chapter IV. on Laying Out the Work, and Appendix).
When several boards are required to cover the top or bottom of a box, if you wish to have as few cracks as possible and to avoid the swelling and shrinking across the grain as much as you can, lay the boards lengthways of the box, but if you merely wish for strength, lay them crossways.
Care must be taken about testing the angles with the square, and guarding against winding (see Winding-sticks), in[226] making nice boxes, as with all framed work. If the bottom and top are got out accurately they will, of course, assist in the matter of getting the box square, and for common work carefully fitting the bottom (or bottom and top) in place will be all the "squaring" required. In nice work where the joints are glued, waste pieces should be placed over the joints (across the grain of the sides) before applying the clamps, not merely to prevent the work being marred by the clamps, but also to distribute the pressure and ensure as close a joint as possible (see Clamps).
The final smoothing of the outside of a box should be done after it is permanently put together, allowing plenty of time, if glue is used in the joints, for it to dry before dressing off the surfaces. The inside must, of course, be smoothed before putting together.
The variety of forms in which boxes are made is too great for all to be specified, but the same general principles apply to nearly all forms of box-work. In the case of chests or large boxes, you will often see them with the sides and ends panelled, but this is rather an elaborate form for the beginner to attempt and had best be avoided by the inexperienced worker. A form which is not too hard for the amateur is shown, however, in Fig. 350, the sides and ends being fitted to grooves or rabbets cut in posts at each corner.

Fig. 350.
The work of getting out the stock for boxes and making the joints can be done so quickly and accurately (and usually cheaply) by a circular saw or other machine that much time is saved, when making nice boxes, by having the parts sawed[227] at a mill. The remarks made at the end of the introduction to Chapter X. (on Furniture), in regard to getting out your work, putting together, smoothing, and finishing, apply equally to making the better class of boxes and chests, and the general details of the work do not differ from those of the articles shown in that chapter. See also, Marking, Rule, Square, Saw, Plane, Nailing, Nail-set, Screws, Hinges, Locks, Scraper, Sandpaper, and Finishing, in Part V.
Toy Boats.—A few suggestions about the wood-work of the hulls of toy boats may be useful to the beginner. The details of rigging and discussion of the merits of the various types and designs are matters which do not come within the scope of this book, and you can easily find information upon these points.
Making your boats yourself is half the fun, of course, and capital practice with tools as well as a valuable introduction to the building of model yachts, which you may undertake later, and to the general subject of boat-building and sailing. Making different types and sailing them is both interesting and instructive.
You will quite often see little boats fitted up as exact copies in miniature of real vessels, with all the complexity of fittings, rigging, and minor details found in the larger boats. These models are often interesting specimens of skill,—as pieces of handiwork,—but the time can usually be spent to better advantage in some other way. If you wish actually to sail your boats, leave out everything which is not essential to successful sailing.
Very little skill, and no instruction, is required to make the simpler forms of toy boats familiar to the small boy who lives near the water. Almost any scrap of shingle or piece of wood upon which a little mast can be raised will sail,[228] as the small boy well knows. The difficulties begin when something more like a boat is attempted, and the first and greatest of all difficulties is that of the design, as you will discover later if you attempt scientific model yacht-building. But advanced model yacht-work requires much skill—more than can be expected of a beginner. At first, in beginning to make toy boats, copy any successful boat as nearly as you can.
After you get beyond making boats of shingles and scraps of board, you may very likely make something like Fig. 351, which is too simple to require special description; but when you begin to build regular boats you will find enough to tax your wood-working skill to the utmost. You had best begin with simple forms and not make your first attempts too large.

Fig. 351.
One way of making the hull (as of course you know) is to cut it from a solid block of wood of the required size. Another way is to build it up of layers of board laid on one another horizontally (Fig. 352).[27]
Fig. 352.
The greatest care must be taken in the selection of the[229] wood. It should be free from knots, checks, and bad grain, and above all things must be thoroughly seasoned. Nothing is better than the best quality of clear white pine. Mahogany is excellent, but is more costly and harder to work.
Take a simple model of the fin-keel type (Fig. 353). First you must have the design or drawing giving the different plans or views. If the drawing is smaller than the actual size you wish to make the boat, it must, of course, be enlarged and a full-sized working drawing made.[28]
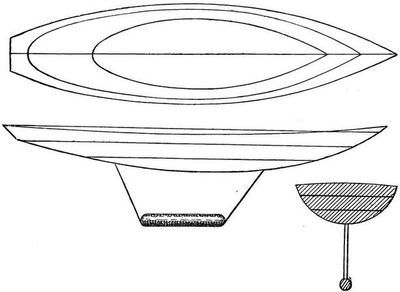
Fig. 353.
Before beginning work read carefully Marking, Rule, Square, Saw, Plane, Chisel, Gouge, Spokeshave, Paring, etc., and look up any other references.

Fig. 354.
To cut the hull from a solid block, first prepare the block of the right dimensions, and plane it, making sure that the sides are true and square with one another. The sheer plan must now be transferred to the sides of the block, either by copying it on the wood by the use of transfer paper placed between the drawing and the wood, by cutting out a pattern, or by fastening the drawing itself on one side of the wood and a reversed duplicate on the other side. In the same way transfer the half-breadth plan twice to the top of the block, on each side of a line drawn along the centre, reversing the pattern for one side, of course. Also continue the centre line down each end and along the bottom.
If the top and side outlines can be sawed to the lines marked with a band-saw or jig-saw, the expense will be but slight and considerable labour will be saved. Saw down on the lines 1—1, 2—2, 3—3, etc. (Fig. 354), nearly to the sheer line shown in Fig.[231] 355. In your first attempts at making small boats it may be well to omit the deck sheer, leaving the top flat (Fig. 354), as this simplifies matters in the beginning. Also, saw off the superfluous wood shown by the shaded parts of Fig. 355. Now clamp or wedge the block, bottom up, firmly on the bench, in case you have no vise arrangement by which it can be properly held, and rough it out approximately to shape with a wide chisel (see Paring) or the draw-knife (see Draw-knife).

Fig. 355.
The operation of shaping and hollowing out is slow work and requires much care. A little haste may spoil the work of hours. As the bottom begins to approach the desired shape you must have something more than the eye by which to gauge your cutting, for a very little deviation from the true curve may spoil your boat. It is very important to get both sides of the boat alike. On card-board or stiff paper, mark a series of patterns of the different sections shown on the body plan. Cut out each of these patterns so as to save the part which is the reverse of the shape of the section of the boat, thus forming a series of templates, which you can apply to the hull at each section to test your cutting, until the templates just fit the wood at their respective sections, when the shape of the hull will, of course, agree with the plan.
The spoke-shave, and sometimes the plane, can be used to good advantage in the final shaping (see Spokeshave). Especial care is[232] required not to slice off too much, and you will, of course, work, as a rule, from the centre (or amidships) towards the ends. The block can be held in the lap or between the knees for this shaping, but it is better for all kinds of crooked work to have the material firmly held by a vise or some other contrivance, so that not merely the hands of the worker are free, but the whole body as well.

Fig. 356.
This form of hull is simple to make, in that the curves of the outside are all convex. There are no concave surfaces and reversed curves. The surface can be finally shaped by the use of the rasp, followed by a file, and finally smoothed with scraper or glass (see Scraper). Do not use sandpaper until the hull is finished.
The inside must next be hollowed. Gauge a line around the upper side, ½" from the edge, except at the bow and stern, where a greater distance should be allowed (Fig. 356). The hull must now be held firmly in some way. If you cannot contrive to clamp it firmly without bruising the outside, you should arrange some blocks (padding them with cloth or leather) in such a way that it can be held securely. It is better to spend an hour in fastening the block firmly than to attempt to steady it with one hand and to cut with the other. In all the shaping of the boat, both hands should be free if possible. Grasp the blade of the tool with the left hand, or lay the hand across it, so as to exert a back-pressure on the tool. This gives great control of the tool (see Paring).
Fig. 357.
Bore one or more holes (according to the size of the boat) downward from the top (Fig. 356), being very careful not to bore too deeply, but to leave at least half an inch of wood below the[233] hole (see Boring). Now run a groove with the gouge around the deck, inside of the line marked, and hollow out the inside with the gouge, cutting towards the middle. The holes bored will help in this process. Cut down straight from the line marked on the upper side until the thickness of the sides of the hull is reduced to perhaps ¼ of an inch (Fig. 357). The object of the increased thickness at the gunwale is to stiffen the sides and give a better bearing for nailing down the deck. Below this point make the thickness as uniform as you can, except for a narrow space at the very bottom where the keel is to be fastened, where it is often well to leave a thicker ridge (Fig. 357).
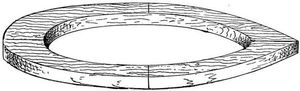
Fig. 358.
Extreme care is required in hollowing the inside. It is best not to attempt to make the sides thinner than one fourth of an inch, unless you are a pretty good workman with a fair degree of patience, for it is hard to repair the damage if you cut too deeply. Templates can be made for the inside. You can tell quite well whether you are making the thickness uniform by the sense of feeling, gauging the thickness between the thumb and finger. Do not try to cut away too much at the bow and stern, as it will weaken the boat, but leave a sufficient body of solid wood. Smooth the inside neatly with a flatter gouge (if you have it) than that with which you removed the bulk of the wood.
Next, with a thin strip or batten, mark the line for the sheer of the deck by the saw-kerfs already made and remove the wood[234] carefully to this sheer line. The outside can now be thoroughly sandpapered, first with, perhaps, No. 1½, and finally with No. 00. Get the surface as smooth as possible (see Sandpaper). Next paint the outside and inside with two coats of white lead and oil (see Painting). It is a good plan to apply a coat of hot oil first.
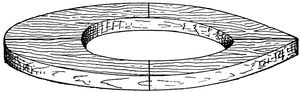
Fig. 359.

Fig. 360.
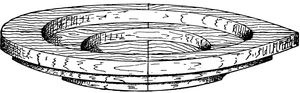
Fig. 361.
Now to make this same simple model by the method of layers you will readily see that if you take a piece of board of a thickness equal to the distance between the water lines in the sheer plan (Fig. 353), and cut from it pieces of the shape of the water lines as shown in the half-breadth plan (Fig. 353), and also cut out the centres of the two upper pieces as shown in Figs. 358, 359, 360, and then fasten these pieces one upon another as shown[235] in Fig. 361—you will see that you have built up the general form of the boat, and saved much of the labour of shaping and hollowing.
Before cutting out these layers, a centre line must be accurately marked along both sides and at the rounded ends, so that the layers can be put together in the correct positions. Also, for the same reason, mark the midship lines across each side and on the edges, as shown. In drawing the inside lines (for the part to be cut out), care must be taken to leave sufficient thickness at the sides to allow for the final shaping. The sawing of the layers had best be done at a mill with a band-saw and jig-or scroll-saw, but can be done by hand, of course.
The boards or planks must be accurately dressed so as to make as perfect joints as possible when put together. If not convenient to make the thickness of the boards agree with the water lines of the plan, you can easily draw in new water lines to agree with the thickness of the board you may have—say, ¾" or 7/8" apart. Glue must now be applied to the joints, and the pieces firmly clamped together between boards, or laid flat (bottom side upwards) and weights applied. It is best not to cut out and glue up more than two or three layers at a time, lest they become bent or sprung. Care must be used in applying the pressure to make it uniform and not cause the somewhat flexible sides to be sprung or twisted out of shape (see Gluing and Clamps). Do not delay this building-up operation needlessly. Do not leave the pieces lying around for a fortnight. Keep them all clamped up in the proper position, or under pressure, if you can, until the whole form is glued together, as such pieces spring out of shape very easily.
After the glue is thoroughly dry, complete the shaping of the outside and inside as in the case of the solid block, care being taken to pare off the projecting angles on the outside gradually, so as not to cut within the curve marked on the plan.
The fin (when flaring at the top and not too thin) can also be made of wood, glued and screwed on, the lead being screwed to[236] the bottom with brass screws.[29] Be sure that the fin is in line with the centre line of the boat.
Unless the boat is quite small it is best to fit in two or three deck beams to connect the sides and support the deck (Fig. 357). These should be of thin stuff (perhaps 3/16" thick and ½" wide), set on edge and very slightly arched, the ends being fitted into gains cut in the sides, and nailed with fine brads. They can also be glued.
The deck should be of thin stuff (perhaps 1/8" planed). Mark carefully on the piece the deck outline and cut it approximately to shape, but well outside of the line. Fasten small blocks of wood to the under side of the deck wherever any attachments for the rigging are to be fastened. Paint the lower side, and when dry bore a row of holes with a very small brad-awl (see Awl) all around the edge, 1/8" inside of the line. Smear the top edge of the hull with thick white lead, or white lead putty, and nail the deck in place with very fine wire brads, perhaps ½" in length. Care must be used not to split the deck or drive the nails through the sides of the hull. Fine brass screws can be used if necessary. The overhanging edge of the deck can be trimmed down carefully with chisel, plane, or knife. The outside of the deck can now be painted.
The rudder can be fixed in a brass tube, the ends of which can be set in lead. The mast can also be stepped in a brass tube, or simply pass through the deck to the bottom, where it can be stepped in a smaller hole, which must be bored with care lest it go through.[237]
When you come to making models of less simple form—those having hollows and reversed curves in their outside form, as the majority of boats do—the difficulty of shaping accurately is much increased and more care is required, but the principle of construction remains the same.

Fig. 362.
Suppose, for example, you are ambitious enough to undertake such forms as those which compete for the America's Cup, for instance, you will find it difficult to carry the process of building by horizontal layers below a certain point (Fig. 362) but the keel and lower part can be added by gluing (or gluing and screwing) a piece of board or plank on edge (or two pieces, if necessary) to the bottom. The lead can, in turn, be fastened to the lower edge of the keel by screws. Models of such yachts are not always the best forms for toy boats, however desirous you may be to reproduce in miniature these famous boats.
House-building in its simple forms, and on a small scale, is very suitable work for the beginner in wood-working.
One of the most important things to bear in mind is not to be too ambitious in your early attempts. Content yourself with the simplest forms until you have attained sufficient skill to undertake more difficult buildings.
All the work of such structures as are here shown can, in case of necessity, be done by one person alone; but—unless, perhaps, in the case of the smallest and simplest houses—it is much better for two or more persons to join forces, as much time will thereby be saved, for the lumber can be handled much more easily and quickly by two than by one. This will be the best way if the building is to be done by boys, in which case by all means have some system for carrying on the work.
You know men usually work under the direction of a head man, or foreman, and, when there is no head man, they defer as a matter of course to the one of their number who is the best fitted to take charge of the work. Choose one boy master-builder, foreman, or boss, letting him assign to each[239] his part of the work and leaving to him the decision of questions that arise in regard to the details. If one of you is clearly more of a mechanic than the others, choose him foreman; otherwise it will be a good plan to have the office filled by each in turn for perhaps one day apiece. Let the foreman divide the work as fairly as possible. That is, instead of having one boy saw off all the boards while another drives all the nails, arrange regular "shifts" at short intervals, letting the two change places and work perhaps every hour. This plan will prevent much confusion and perhaps disagreement, which might even cause the work to be given up—an unfortunate result which sometimes happens to boys' undertakings.
It is not simply starting in with an understanding that you are to take turns when one may think he is tired of what he happens to be doing, but it is the regular rotation of work and responsibility at fixed intervals that will ensure harmony and a successful completion of the work.
The situation is a very important matter which will be spoken of in treating of the larger structures farther on, but there is one thing which should be borne in mind for even the smallest play-house in the back yard of a town lot, and that is not to build it in a hollow where the water will collect to make it damp or uninhabitable. A flat roof should also be avoided, as it is much harder to keep tight than one which has sufficient pitch to shed the water freely.
You can determine the kind of a house to build and its general dimensions according to the requirements of the case, but you will, of course, wish it to be attractive in appearance, however small it may be; and therefore, in making the drawings, it is essential to have in view the block-form, or general shape and proportions. If these are not pleasing and agreeable to the eye, your house will be unattractive,[240] for nothing you can do in the way of ornamentation or elaborate details will make up for poor shape and proportions.
To design a building (however small) with a pleasing and attractive exterior is, however, no easy task. If you can make a perspective sketch of your proposed house with reasonable accuracy, it will be a great help, as the regular working drawings (the plan, elevations, etc.), however well made, often fail to give one a clear mental picture of how the structure as a whole will look.
A little model will be of the greatest service in determining whether the shape and proportions of your house are good. A model is easily made of paste-board with sufficient accuracy for this purpose. It is quite remarkable how different many objects appear when actually made, from the way one thinks they will appear, in spite of the most careful drawings; therefore do not despise this simple precaution of making a model in cases where attractive appearance is an element, for it may save you from putting up a structure which will be a continual eyesore.
The amateur (like many professional builders) is much more liable to make his work too elaborate and with too many attempts at ornamentation than to make it too plain. So give your first attention to the block-form, and then to the details. Do not cover your house with an embroidery of jig-sawing, fanciful turning, superfluous brackets, and the like, in the effort to make it pretty or to imitate the vulgar details of inferior summer cottages. The amateur is also liable in the case of very small buildings to make them too tall in proportion to their ground dimensions. A tall, narrow house is seldom homelike or attractive, whether it be six feet square or sixty.
Finally, be simple and modest in your designing, avoid meaningless "gingerbread" work, do not set your house[241] up on stilts, as it were, but hospitably near to the ground; have generous doors and windows, avoid flashy and gaudy colours in painting, cultivate plants and vines to run over the outside, and keep the surroundings neat and tidy.
The variety of small structures from which to select for your early attempts is almost endless. You can find many ideas for your designing and the construction in every town and in various publications. Only simple types will be treated here, involving merely such principles of construction as you can readily apply to such other designs as you may wish to carry out. As it is impracticable to repeat all the suggestions and details under each structure treated here, the prospective builder who should begin with any of the later examples had best read these chapters through from the beginning before starting on the actual work.
One of the simplest and most easily built small structures that you can make is that with a single-pitched or shed or "lean-to" roof; that is, with the roof slanting only one way. This style of construction, though commonly applied to a rather humble class of buildings, is by no means to be despised, the ease with which it can be built by boys or amateurs being one of its marked advantages. You will find this simple form of building capitally suited to many purposes, and a good type with which to begin.
A Play-house or Play-store.—You know that an ordinary wooden building has a framework of timbers,—a kind of skeleton upon which the boarding is nailed. This will be shown in the following chapters, but a very small house or cabin, like that shown in Fig. 363, suitable for a play-house for boys and girls, can be built very well in a simpler way by making the four sides separately and then nailing them together as you would do if making a box. There is no[242] floor (except the ground), and the roof is to be nailed down on top of the four sides as you would nail the cover on the box.
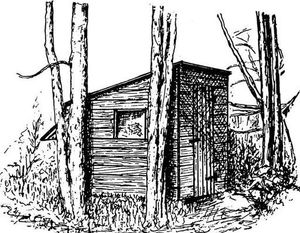
Fig. 363.
Before beginning work read carefully Marking, Rule, Square, Saw, Nailing, in Part V., and look up any other references.
Fig. 365 shows one of the sides (inside view). It is made of boards running horizontally, with an upright cleat at each edge, and another cleat at the top.
Fig. 366 shows the back (inside view), made in the same way as the sides, except that each cleat is set back from the edge 1¾", thus forming a rabbet in which to fit either side when the house is put together. The third, fourth, fifth, and sixth boards from the top are not nailed to the cleats, but are omitted, to leave space for a large open window.[243]

Fig. 364.

Fig. 365.

Fig. 366.
Fig. 367 shows the front (inside view), four upright cleats being[244] used and a large opening left for the doorway.
Fig. 367.
First estimate the stock you will require (see Chapter IV.),[30] and try to get dry wood without too many large knots.
You can get along very well for such work as this on the floor, or even the ground, with a couple of boxes for horses, but a bench and horses are a great convenience.
Make the sides first, disregarding the slant for the roof. Take a matched-board and square off one end of it, if it is not already square. Then measure 5' 10"[31] from that end, mark across by the square, and saw the piece off. Use this piece (5' 10" long) as a measure to mark the lengths of enough pieces to make the two sides. If you saw them off as you measure them, one by one, be sure to mark all the lengths by the first piece, and not by the one last sawed, or they will probably, vary in length.
When you put the boards together to form the sides, be sure that the ends are in line. Use the edge of a straight board for a straight-edge to get them in line, or drive them against the side of the room, if that is straight, or temporarily nail a straight-edged[245] board to the floor and keep them driven up squarely against it.
Make sure, also, by testing with the square or by measuring, that each side of the house when made is a rectangle and not a rhomboid, or the whole house will be askew when put together.
When you fit the matched edges be sure to make the joints as tight as you can, but do not pound directly on the tongued and grooved edges with the hammer. Take a short piece of waste boarding, fit it to the tongue or groove wherever you wish to strike, and hit this waste piece with the hammer.
You will see that there is no need of sawing out a square hole for the window, as you can put in short pieces at each side of the window-space.
Nail the upright cleats at the edges with 1½" nails, driving two into each board in the way shown in the cut, bearing in mind that the cleats must all be on the inside of the house, and also to have the tongues of the boards uppermost when the house is put together. Mark the front edge of each side in some way to prevent any mistake. The reason for putting the tongues upward and the grooves downward is because the joints will shed the water better, as otherwise each groove would be a little trough into which the rain could soak. Measure 5' 6" from the bottom on the front edge of each side and 4' 6" on the back edge. Draw a straight line on the outside between these points and it will give the slant for the roof. Saw the boards and cleats by this line and then fit and nail the top cleats as in Fig. 365, or nail the top cleats first and saw the boards off by them.
Next make the back in the same way, setting the cleats 1¾" away from the edges. Leave out the boards at the window-space.
Make the shutter, and trim off its tongued and grooved edges (see Paring, etc.) before nailing the back of the house together, as you can thus determine more easily the space to be left open. Also trim off the tongued edge of the board coming next below the shutter. Leave the open space a little wider than the shutter[246] (say ¼" wider) to allow for possible swelling of the boards. When you nail the cleats on the drop-shutter, be sure to use nails long enough to clinch (see Nailing), or use screws (see Screws).
The front is to be made in the same way, the width of the door-space being 27½", and of the boarding at each side, 21¼". Have the two inner cleats project about an inch inside the edge of the doorway for the door to hit against when shut (Fig. 367), and "toe" or clinch the nails for these cleats, or use a few screws, so that the slamming of the door will not loosen them.
Now the four sides are ready to put together. Find a spot as nearly level as you can for your house. Do not, however, put it in a hollow where the floor will be flooded with water when it rains. Hold up the front and one side in the right position, press them closely together at the corner, and drive in a couple of nails to hold them until you can get the other parts in place. Then fit on the other side and the back in the same way. Try the four corners with the steel square, and when you have them right nail all the corners strongly with 2½" nails. If you have no large square, measure the diagonals with a stick, altering the angles at the corners until the diagonals are equal. Toe the nails at the corners, and, in fact, if you can do it neatly, it will be stronger to toe the nails throughout the work.
Now get out boards 6' long for the roof, to run from side to side. When you nail them on have them project 1" all around. Cover the roof with roofing-or sheathing-paper. Lay it in strips from side to side, beginning at the back and letting the second strip overlap the first, as shingles are laid. Three strips will cover the roof once. Of course you can cover it with as many layers as you wish to pay for. Fasten the paper with roofing nails or tacks. Drive them close together, but only where the strips lap and at the edges of the roof. You can bend the edges of the paper down over the edge of the roof to cover the joint underneath and nail neat strips of wood outside to cover the[247] edges of the paper, or you can simply nail the paper around the edge of the roof.
In making the door (Fig. 368) clinch the nails which fasten the cleats, or use screws, and trim off the tongued and grooved edges, as with the drop-shutter.
Now hang the door and drop-shutter with two strap-hinges each. Place the door and shutter exactly in position (shut), and tack them temporarily in place with a few nails, or wedge them. Then carefully placing each hinge so that the pin on which it turns is just in line with the crack between the door and the door-frame, mark points for the screws. Bore holes for the screws and fasten the hinges in place (see Screws).
Put a latch, a catch, or a hasp and padlock on the door, and a hasp or screw-eye and hook on the inside for the shutter. Also fix a brace to hold the shutter when lifted, or you can arrange a rope to pass up from the outside of the shutter and around a pulley to the inside of the house, where it can hang down and be used to hold the shutter up by fastening it round a cleat or a couple of nails.

Fig. 368.
You can fix a shelf inside under the open window at the back (Fig. 364, Plan), resting on cleats nailed to the sides of the house, and also put in a seat at one or both sides, supporting the middle by a short post or a short piece of board on edge.
A few strips will serve to hold the lights of window-glass in place. The house is now ready to occupy.
Of course you can save a good deal of labour (and lose some experience) at slight expense by having the boards sawed off squarely of the given lengths at a mill,—often where you buy the wood. In this case, remember to make a list of the number of boards of each length to take to the mill.
If you would like to be able to move your house or to take it apart and store it during the winter, you can fasten the four sides and roof together with screws, or hook them together on the inside with stout screw-eyes and hooks. You will find this way[248] in very common use by builders and contractors in the little portable tool-houses, offices, and shops which they take apart and move from place to place.

Fig. 369.
Play-store or Booth.—A good form for a simple play-store or booth (Fig. 369) can, if small, be constructed on the same box-like principle as the little building just shown, and the details of construction are so similar that special directions for this design are unnecessary. If large, it should, however, have a frame, which you can readily pattern after that shown in Fig. 371.
Fig. 370.
Before beginning work read carefully Marking, Rule, Square, Saw, Plane, Nailing, Screws, Painting, in Part V., and look up any other references.
By using heavier cleats, as 2" × 2" or 2" × 4", on the ends, those on the front and back can be omitted, and the boards nailed directly to the sides. An arrangement for one end (that with the door) is suggested in Fig. 370, 2" × 2" or 2" × 4" joist being used.
A shelf or counter can be fitted inside the drop-window for the[249] display of your wares.
This general shape can often be advantageously used for a quite good-sized building—a little cottage, for instance—and when an addition to a larger structure is desired, it is sometimes the best form for the purpose, for its shape renders it more easily attached than any other form of ell (Fig. 391).
A building of this style, however suitable as an attachment to a larger structure, will not be an attractive object in some situations. It will not stand alone, regardless of the surroundings, as well as some other forms. Therefore it is well to consider, before deciding to build anything of this kind larger than the play-houses and stores just shown, whether your house will have a building, a fence, or a wall for a background; or a steep bluff or ledge under which it will nestle, or trees or shrubbery behind or around it. In such cases it will often be attractive in appearance. If, however, it is to be put in a prominent place where it can be viewed from all positions, it may be better to select some other type.
Frame for Larger Building with Lean-to Roof.—While the simple box-like arrangement described above is suitable for a very small structure, it must be discarded for a frame of some sort when you undertake a larger and more permanent building.
Before beginning work read carefully Marking, Rule, Square, Saw, Plane, Nailing, Screws, Painting, in Part V., and look up any other references.
This frame can be put together as shown for the framed structures described farther on, the only difference being at the top. A simple method of framing is shown in Fig. 371.[250]
Fig. 382 shows a simple way of fitting boards around the edge of the roof where it overhangs, and other arrangements for this detail can be found in the various illustrations. It is not necessary to have roofs overhang, even for a large building, but it is usually desirable on the ground of appearance and for shedding the water away from the walls.

Fig. 371.
For matters relating to the foundation, see pages 259-264.
Play-house or Cabin.—The house shown in Fig. 372 can be put together in the way already shown.

Fig. 372.
Before beginning work read carefully Marking, Rule, Square, Saw, Plane, Nailing, Screws, Painting, in Part V., and look up any other references.
The ground dimensions can be 5' or 6' × 7' or 8'. The ends must be made higher than the sides, as shown, to allow for the slant of the roof. Mark lines, using a straight-edge, to give the slant for both sides of the roof, and saw the boards off by these lines. A short cleat can be added at the top in the middle to stiffen these top boards.[251]
Fig. 373.
After the sides and ends are put together, get out two boards, of the shape shown in Fig. 373, to rest in four rectangular notches cut in the front and back sides of the house. These pieces are to support the roof-boards, and their upper edges are to be cut at the same angle as the top of either end of the house. Nail these pieces firmly in place at each end (Fig. 374).

Fig. 374.
Now get out boards for the roof, to run from end to end and about 4" longer than the house. Begin to nail them on at the top, and have the roof overhang the sides and ends 2" all around.
You can easily put in the window-sash, either by hinging it so as to swing open, or by having it slide to the right or left on strips nailed above and below it, as shown in Fig. 369.
The roof-boards can also be laid the other way by putting in a ridge-piece in the form of a piece of studding or joist of any size[252] not less than 2" × 2" (Fig. 377), or even a board on edge, to which the upper ends of the roof-boards can be nailed.
Fig. 375.
Another form of roof, but arranged in the same way, is shown in Fig. 375.
You will require a compass-saw for the curves, or you can have them sawed by a band-saw, or the wood can be trimmed to the line with the hatchet and draw-knife or chisel (see Paring).
Another way to put any such little structure as this together is to have the sheathing run up and down and the cleats horizontally. This makes a neater structure than the way just given. The general principle of the construction is the same, the four sides being made separately and then fastened together.
Play-house, Store, or Cabin.—The design shown in Fig. 376 can be carried out in the manner already described.

Fig. 376.
Before beginning work read carefully Marking, Rule, Square,[253] Saw, Plane, Nailing, Screws, Painting, in Part V., and look up any other references.
The ground dimensions can be 6' or 7' × 8' or 9'. In making the ends where they are cut off at the top to give the slant for the roof, inside cleats should be used. Mark lines, using a straight-edge, for the slant for both sides of the roof, and saw the boards off by these lines. It will be convenient and will look well to make the angle at the top a right angle. At the top saw out a notch in which to rest the ridge-pole, as shown in Fig. 377.

Fig. 377.
After the sides and ends are fastened together, nail the ridge-pole in place and get out short boards for the roof. Cut these for one side of the roof so as to be about 2" longer than the slant of the end of the house, and make those for the other side of the roof as much longer as the thickness of the boards, so that they[254] will lap over at the top, as shown in Fig. 377. Nail them on, beginning at one end, so that the roof will overlap the ends and sides 2" all around.
Nailing upright strips at the corners, as is commonly done on wooden houses, and as is shown in the picture, will give the house a more finished appearance. The other details are similar to those already shown.

Fig. 378.
This house can have a floor, which can be made of 2" × 4" studding simply nailed together and floored over (Fig. 378), forming a sort of platform to which the sides and ends can be nailed when the house is put together; and the best way to make the whole structure is that shown in Fig. 377, the boards running vertically and cleats horizontally. In case of using a platform floor with this last method of construction, the lower cleats can be raised from the bottom so as to rest on the floor, as shown in Fig. 378. This makes the putting together of the house quite [255] simple, as the fitting of the sides and ends and floor in their proper places obviates the need of testing with square or measuring diagonals. The lower cleats on the sides and ends are not really necessary, however, except for convenience in putting[256] together and taking apart, as the vertical sheathing can be nailed directly to the floor-frame or sills, as shown in Fig. 377.
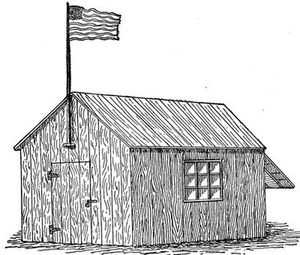
Fig. 379.

Fig. 380.

Fig. 381.
The whole can then be levelled (see Level and Plumb), being blocked up underneath as may be required.[257]
The design is also suitable for a larger structure, in which case a frame should be made as shown in Fig. 389.
Another very, similar design is shown in Fig. 379, and can be put together according to the principles already shown. The boarding runs vertically and the cleats horizontally, as shown in Fig. 377.
Figs. 380 and 381 show other simple arrangements, the ground dimensions of which can be, perhaps, 8' × 12', and which can be put together in the same way as the preceding cases, with or without a floor, and with the boarding running vertically or horizontally.

Fig. 382.

Fig. 383.

Fig. 384.

Fig. 385.
If a stove is to be used, the smoke-pipe can be arranged to pass through the side of the house, as in Figs. 382, 383, etc. If to pass through the roof, it should be soldered or riveted to a sheet of metal, as galvanized iron, the upper edge of the latter being [258] slipped under the roof covering while the lower edge laps over it (Fig. 384), on just the same principle that shingles are laid, the idea being, of course, that the water will run down over the metal without leaking through, just as it runs down over the shingles. This simple principle must always be observed whenever metal is used to prevent joints leaking. With such small houses as these it is usually easier and safer about leakage to have the pipe run through the side of the house. If to go through the roof (particularly when there is no special roof covering but boards), it is a good plan to have the pipe pass through the roof near the ridge, so that the upper edges of the metal sheet can be slipped under one of the saddle-boards (Fig. 385). In any case, an air space must be allowed between the smoke-pipe and the wood,[259] and it is always well to have a collar an inch or two outside of the pipe. Any tinsmith or metal-worker can arrange these details.
Round drain-pipe set in cement is often used for a cheap pipe or chimney, and answers the purpose very well.
Fig. 383 also shows the way to lay sheathing-or roofing-paper in case you wish to use it for a temporary structure. It also gives a suggestion for a window-shutter to be raised by a cord passing through to the inside, where it can be fastened to a cleat.
A Workshop.—A small building, like that shown in Fig. 386, from 8' to 12' wide by 12' to 18' long, will be suitable for a workshop or for various other purposes.

Fig. 386.
While it will do for a little play-house without a floor, like those described at first, to rest directly upon the ground, a better structure like this should have some sort of underpinning.
It is not customary to lay a stone or brick and cement foundation for such a structure as this, because the building is not usually worth it. It can very well be rested upon stones at the corners and middle of the sides or upon posts set in the ground. If the[260] soil is sandy and large stones abundant, it can be rested upon piers of stones. So far as supporting the building for one season is concerned, simply resting it upon stones laid on top of the ground is sufficient, but the action of the frost will move the stones and heave the building more or less out of place, which will require it to be occasionally levelled and blocked up. A hole can be dug to a depth of about three feet, so as to be below the action of the frost, and a pier of flat stones built up. If the soil is of clear, well-packed sand, a pier of this sort will last for some time before being thrown out of shape by the frost, although, of course, if laid in cement (or if bricks laid in cement are used), it will be much more permanent. If the soil is clayey, the foundation, of whatever kind, should be carried to a depth of three feet or more and cemented, and even then it will be liable to be heaved by the action of the frost. This involves considerable labour and perhaps expense, and for such a small building it will usually be better to rest it upon flat stones laid on the surface, or to block it up in some way so as to be clear of the ground, and then level it whenever necessary, which is not difficult with so small a structure.[32]
While brick piers built upon a foundation of stone laid in cement and carried to a depth of three feet or more is doubtless the best underpinning you can have (next to a regular foundation wall), it is not always advisable to incur the necessary expense and labour, and a common and usually satisfactory way for a building of this sort is to rest it upon posts set in the ground. But before placing the posts the exact position of the building must be determined.
Having fixed upon the position of the building, proceed to[261] stake it out. First measure off with the tape, or rod, or even a string, the length of one of the sides of the building, and drive a stake at each end of the line. Stretch a line between these stakes and measure off the length of the end of the building from each stake, as nearly as possible at right angles with the first line. You can do this approximately with the help of a "mason's square," or large triangle, which you can make yourself of thin strips of wood nailed together in the form of a right-angled triangle with sides 6', 8', and 10' long, or the sides can be 3', 4', and 5' long.[33] Whatever method you use, be sure that the figure is rectangular, and move one or two of the stakes, if necessary, until the diagonals are of equal length.
If the ground is uneven, keep the tape horizontal when[262] measuring, and to determine the points required drop a plumb-line from the end of the tape which is raised from the ground.
Having in this way accurately fixed upon the lines for the four sides of the house, continue these lines a few feet (perhaps 4 or 5 feet) beyond the corners to the points marked E (Fig. 388), and drive a stake at each of these points. You can easily get these eight stakes in line by sighting from the four first driven. Next drive in one of these outside stakes (the one where the ground is the highest in case the surface is uneven) until it sticks out of the ground a few inches, and then drive the other seven until their tops are level with the top of the first. This you can determine by applying the level to a line stretched taut from the top of one post to the top of another. Drive a nail into the top of each stake to hold the string, or cut a notch for the same purpose. Now if strings are tightly stretched between these stakes, they will intersect over the four stakes first driven at the corners of the house. These four stakes you can now remove when you dig the holes for the posts, and the exact position of each post and its height above the surface will be determined by the intersection of the strings from the outside stakes. The strings can be taken off while you are digging and replaced when you are getting the posts in position.

Fig. 388.
Next dig a hole at one corner, about 18" in diameter and about 2½' or 3' in depth. In this hole set a post about 6" in diameter, sawed off squarely at the upper end, and of such a length that[263] when pounded down to a firm and upright bearing the top of it will reach the string stretched between the levelling stakes. When you fill up the hole put in only a little earth at a time, "tamping" each layer compactly around the post with an iron bar or stick before adding more earth. Contrary to what one might naturally think, the earth can be tamped more compactly with a bar or stick than with a heavy joist.
Set another post in the same way at the next corner, fixing it accurately in position by means of the strings, as in the case of the first post, and seeing that the distance from the outside of this post to the outside of the first one is that required by the plan.
Set the other corner-posts in the same way, testing all the distances (including the diagonals) as before. You can try the height of each post now and then as you dig, and thus avoid making too deep a hole.
If you prefer, you can set all the posts in the right positions at first, but without trying to level the tops, merely seeing that the tops all stick up above the line. You can then strike a horizontal line all around with a cord, and saw all the posts off by this line—a process which you very likely have seen when watching the work on a pile-bridge or wharf. Sawing off the posts squarely will be much easier, however, before they are set in the ground.
The posts may be of locust, cedar, cypress, or chestnut. Locust is considered very durable, but is the most expensive. Cedar is excellent, and will be perfectly satisfactory. Chestnut will do very well for a house of this sort, and is comparatively cheap. If you do not mind the slight increase in cost, cedar is better. If you wish to be as economical as possible, chestnut will answer.[264][34]
The reason for selecting wood of greater natural durability for the posts than for the rest of the house is to withstand the greater exposure of the posts to alternate moisture and dryness. Timber will last for centuries if placed in a sheltered position and exposed to a free circulation of air. It will also last for a long period when immersed in fresh water or sunk underground, so as to be beyond the influence of atmospheric changes. But the alternate exposure to dryness and moisture, as in the case of posts partly above and partly below ground, or piles for a wharf or bridge, causes decay in a comparatively short time (see Appendix).
If your site is too rocky for posts, you will be saved some digging, but must provide a level and stable foundation in some other way. It rarely happens that the surface will be quite level, and you must use stone or timbers for underpinning. If there are one or two corners that must be raised, owing to inequality of the surface, and you cannot find large stones that will be sure to stay in place, you can rest the raised parts of the house upon posts securely braced. Rock is not the most desirable foundation for a building with a regular underpinning and cellar—the biblical parable to the contrary notwithstanding—and there is no foundation superior to sand or gravel (only the sand or gravel must be confined and not free to slide or move). But as your house merely rests on the surface, and has no cellar to be dug or drained, there is no disadvantage in putting it on a rock, provided you support it properly. Do not rest one end of it on a pile of loose cobble-stones, five feet high, only to have the stones slip some wet, stormy night and let the building down.
Having the foundation set, the next thing is the frame,[265] which for a small building of this kind can be made of almost any kind of wood which you can readily obtain, provided, of course, that it is dry enough and not weakened by large knots or other defects.
Before beginning work read carefully Marking, Rule, Square, Saw, Plane, Nailing, Screws, Painting, in Part V., and look up any other references.
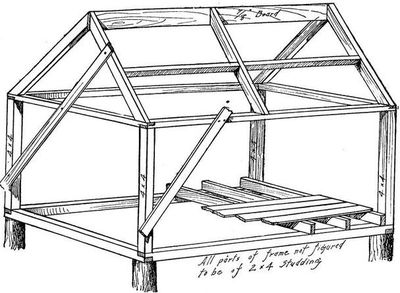
Fig. 389.
The sills, or the lower timbers of the frame which rest upon the foundation, should be got out first, and can be of 4" × 4" stock, and halved at the ends (see Halving) (Fig. 389). Upon these sills is to be set up a 4" × 4" post of the desired length at each corner.[266][35]
On top of these are placed the plates, which can be of 2" × 4" studding laid flat and halved at the ends. Be sure to get out these pieces before beginning to put them together. Toe-nail the posts to the sills and nail the plates directly down on top of the posts, keeping the latter in a vertical position by temporarily nailing on strips of board diagonally, adjusting these until the posts are vertical and at right angles to the sills (see Plumb and Square).
Next put in vertical studding (2" × 4") at each side of the door-space, and at the sides of the window-spaces, allowing a little more space than the exact widths of the door and window-frames. In the same way horizontal studding should be fitted in above the door-space and above and below the window-spaces, and in any places where it will be a help in stiffening the frame or for nailing on the boarding. Another way is to first fit in pieces of joist horizontally, either midway between the sills and plates (except at the window and door-spaces), or running the entire length above and below the windows. Just where and how many of these pieces are to be put in depends upon the arrangement of the doors and windows, and pieces of vertical studding can be fitted in at each side of the door and window-spaces and wherever advisable. Short braces, with their ends sawed at an angle of 45°, can also be fitted at the corners, where the corner-posts meet the sills and plates, and be nailed in place to help stiffen the frame.
It will be a convenience in working to lay the floor next. For this you will require a number of floor-joists. If the building is only 8' or 10' wide, 2" × 4" studding will do; but if the width is as great as 12', 2" × 6" will be better. These are to be placed on edge on top of the sills, as shown. Place one at each end against the corner-posts (to which it can be nailed), sawing off each end so that it will be flush with the outside of the sill. Distribute these floor-joists so that they will be about 18" apart, and hold them in position by "toeing" a nail through them at each end[267] into the sill beneath, or nailing them to the studding when practicable. Before laying any of these floor-joists trim them off on the under edge, which will rest upon the sills, if necessary to ensure a level surface on top for the floor. Do not neglect this, as such joists frequently vary in width. Now measure the diagonals again, before laying the floor-boards, to be sure that the base of the house is rectangular. If one diagonal is longer than the other, push those corners towards each other until the diagonals are of equal length.
Next lay the floor-boards, lengthways of the building, driving them together tightly by pounding on a waste piece, and nailing them firmly to each floor-joist with two nails. If your floor-boards are not long enough to reach the entire length of the house, you will take pains, of course, to saw them of such a length that the ends of the boards will meet over the middle of one of the floor-joists, arranging the joints so that they will alternate or come at different points of the floor. Saw off neatly all projecting ends of the floor-boards.
You will frequently wish to use more force in driving the floor-boards to a tight joint at the edges than you can easily apply with the hammer. You can easily apply all the pressure required by using two short boards on the principle of the toggle-joint. Arrange these as shown in Fig. 390, one end resting against a temporary cleat or any firm object and the other against the edge of the floor-board. By stepping upon this toggle-joint at its apex, the floor-board will be forced into place. A common way is to pry the board into place with a chisel driven down at the edge.

Fig. 390.
If the building is to be used in cold weather, by all means lay[268] double flooring. The under floor can be of cheaper stock and laid less carefully. Between the two lay sheathing-or roofing-paper, and you will have accomplished much towards keeping the room warm.
The frame is now ready for the roof-timbers. These can be of 2" × 4" studding, except the ridge-board, which can be any common board about 6" wide.
To obtain the length of the rafters and the angle at which the ends are to be cut, you can easily make a full-sized pattern on the floor by simply laying off a right-angled triangle of the required height and base, which will give the length of the rafters and the angle at each end, after cutting off a little piece at the upper end to represent one half the thickness of the ridge-board; or two pieces of the rafter stock can simply be laid on the floor in the right relative positions for the roof, when their points of crossing can be marked on each edge and the bevel marked on the sides of the pieces. The bevel at the lower end can be found in a similar manner. Take off enough at the upper end to allow for one half the thickness of the ridge-board, and saw off one rafter as marked. This will serve for a pattern by which to mark the others. The end rafters and the ridge-board (which should first be sawed the length of the house) can easily be nailed in position by two persons, one at each end, being temporarily stayed in place by a board nailed outside (Fig. 389).
The roof-boards can be nailed either lengthways, or up and down. If the former way, the rafters must be put quite near together to give sufficient support to the boards. If the latter, purlins, or lengthways stringers, should be added between the ridge-board and the side-plates, as shown. If the roof is to be shingled, the boards can as well be laid lengthways—otherwise they should be laid up and down. If not to be covered in any way, matched-boards (or battened joints) should be used. If well painted, such a roof will last for some time, but shingling is much better.[269]
Saddle-boards should be put along the ridge, as they add much to the tightness and durability of the roof.
The sides require to be sheathed before covering the roof, leaving open spaces for the door and windows. Shorter pieces can be used above and below these spaces. The boarding can be put on vertically and battens (narrow boards 2" or 3" wide, or strips of "half-round" moulding) nailed over the cracks, as shown in Fig. 391, or, of course, the sides can be clapboarded or shingled if preferred, in which case the boarding can be put on horizontally.
The door can be made of boards, cleated, as already shown, or one can be bought ready-made. A casing should be nailed around the door-space, previously putting at the bottom a threshold upon which the lower ends of the casing can fit. This you will at once understand by examining the arrangement of these details in almost any dwelling-house. The arrangement of the windows (which you can buy ready-made of almost any desired shape and size) does not differ from the cases already shown.
The smoke-pipe can be arranged as shown on page 258.
A few floor-beams put across on top of the plates and wholly or partly floored over will provide a loft useful for storage. If the building is for a shop, this will be a good place to keep lumber.
The roof can be covered according to the methods already shown, but shingling will be much better. If a building is worth shingling at all, it is usually best to use a good quality of shingles. The cheapest ones are apt to be unsatisfactory for a permanent building, but, on the other hand, for such structures as these it is not necessary to get an extra quality, for some knots or defects at the thin ends where they will be covered by two or three layers may do no harm. Cedar shingles are better than spruce.
It is a good plan to lay roofing-paper over the roof before shingling. Begin the shingling at the eaves and work upward. Lay a row the length of the roof, letting the butts slightly overhang the edge. Directly on top of this row lay another, breaking[270] joints with those underneath; that is, lay the first row double, taking pains that the spaces between the shingles of the lower layer are covered by the shingles of the upper layer. Leave a slight space (perhaps 1/8" to 3/8") between the shingles in laying them. This gives room for swelling, and allows the water to run off freely. If the edges are close together at the lower end, the tendency is to dam up these water-courses and retain the moisture, which is injurious. Some people pare off the edges to make the butt-ends narrower, in order to obviate this; but simply laying the shingles slightly apart answers the purpose. Fasten each shingle with two shingle nails (one near each edge, within perhaps 1"), far enough up from the butt to be covered by the next row of shingles. Common shingles can be laid about 4½" to the weather, that is, with that portion of the length exposed at the butt. If shingles of extra length are used this distance can be varied accordingly. Lay the butts of each row by a chalk-line or against the edge of a narrow board, which can be adjusted and temporarily held in place by two strips nailed to the board and to the ridge of the roof. The upper ends of the top row of shingles can be trimmed off and saddle-boards can be put on at the top, letting the edge of one overlap the other.
It is doubtful economy to paint shingles after they are laid. The paint tends to clog the spaces between them. It is better to dip them in paint before laying. A much better way is to dip them in some one of the prepared "creosote stains," which can be had in a great variety of colours. These are excellent, although, except to obtain some desired colour effect, it is hardly worth while to use any preparation on the roofs of such buildings as these. Cut nails are considered better than wire nails for shingling, on the ground of durability. Take pains to keep the lines of the rows straight and at equal distances apart.
For the painting, see Painting, in Part V.
If this building is for a workshop, various suggestions about the interior arrangement will be found in Part I.
"The cottage is one of the embellishments of natural scenery which deserves attentive consideration. It is beautiful always, and everywhere; whether looking out of the woody dingle with its eye-like window, and sending up the motion of azure smoke between the silver trunks of aged trees; or grouped among the bright cornfields of the fruitful plain; or forming grey clusters along the slope of the mountain side, the cottage always gives the idea of a thing to be beloved: a quiet life-giving voice, that is as peaceful as silence itself."—Ruskin, The Poetry of Architecture.
"Cottage Row."—The little houses shown in the accompanying illustrations[36] afford excellent examples of what can be done by the beginner. These were built by boys, and form, with others, a most interesting little village or street, known as "Cottage Row." They are small, but have many of the details of larger houses. They are shingled and clapboarded, have regular doors and windows, and are very attractively fitted up inside with curtains, cupboards, shelves, tables, chairs, lounges, bookcases, and other articles of furniture. The walls are hung or covered with prettily figured cretonne or calico.
These little structures are good models for boys' first attempts at house-building, in that they are simple, modest, and unpretentious, and have a homelike air which does not pertain to many more elaborate and pretentious houses. The visitor is attracted by their neat, trim, inviting appearance, and wishes to enter.
Houses of this character can easily be made by two or more boys working together; and by the united forces of a number of boys a very attractive little village can be built (and much simple carpentry be learned at the same time), in which many pleasant hours can be spent.

Such houses as these can be framed and put together[272] without difficulty by the methods already shown. It will not add very much to the expense to have the parts of the frame which show on the inside of the house planed by machine, and this will much improve the appearance of the interior. Shingling the roofs, putting casing around the windows and doors and at the corners of the houses, and clapboarding or shingling the sides, adds much to the attractiveness of such small structures, as you can see from the illustrations.

Fig. 390a.
The windows and casings you can buy ready-made, or the latter you can make yourself. The doors and casings you can also buy, or make. The door-casings and window-casings should be nailed in place before the sides are clapboarded. The tops of these casings should always be protected by strips of sheet lead, the upper edges of which[273] are slipped up under the clapboarding (Fig. 390a), thus covering the crack where the casing joins the side of the building and shedding the water—on the same principle as shown in Figs. 384 and 385. This is important, as the rain will drive through such cracks, even though they seem very tight. Tonguing and grooving can be used in such cases, but flashing with lead is a simpler process. The same precaution should always be taken where roofs or attachments join a building in such a way as to expose a crack through which the water can leak. Zinc, or even tin, can be used, but are inferior to lead. The corner-boards and the water-table (the horizontal board at the bottom of the house) should also be nailed in place. The latter should have the top edge slightly bevelled, to shed the water. All these pieces having been carefully nailed in place, the clapboarding or shingling of the sides can be done.
It will cost but little to sheath the outside with sheathing-paper, and the house will be much tighter and dryer. This should be put on under the casings, corner-boards, etc., so as to avoid a crack where these boards and the clapboards or shingles meet.
Laying clapboards, unlike shingling, is begun at the top. Lay the upper row by a line, as in shingling, keeping the clapboards in place by a few nails in the upper part only. Then slip the clapboards for the next row up from underneath under the first row until only the desired amount of the clapboards is exposed. The first row can then be firmly nailed near the lower edge with clapboard nails. This will hold the next row in position while the third row is put in place, and so on. The thin edge of[274] the upper row can be finally covered with a strip of board or moulding. The clapboarding can be continued to the very bottom of the house. If, however, a water-table is used at the bottom, the lower edge of the bottom row of clapboards should be slightly bevelled to fit closely down on the slanting upper edge of the water-table. Be careful to lay the clapboards in line and at equal distances apart, as variations in the alignment are quite noticeable. Examine the clapboards of any house on which they are used. In arranging them break joints at the ends, that is, do not have the joints of one row directly under, or very near, those of the rows above and below. Do not saw the ends by eye. Mark them accurately with the try-square and knife and saw them carefully with a fine saw, trying to make as close joints as possible.

A fair quality of clapboards should be used, but a few defects near the thin edges which are to be covered may do no serious harm for such structures as these.[275]
When you begin to attempt more ambitious structures, such as modest summer cottages for camping in vacations, for hunting-or fishing-lodges, or for family use,—such houses as are often undertaken by older boys or men with a taste for amateur carpentry,—there are a number of things to be considered before beginning to do any actual work.
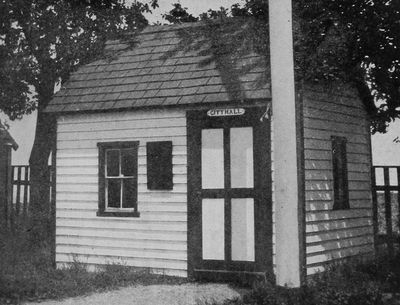
Do not begin a house you cannot pay for. If you find that the more elaborate plans suggested will exceed your means, do not let them tempt you to run in debt, but content yourself with the simplest plan.[37] You will find it perfectly comfortable, and whenever you can afford the expense you can easily add to it and improve it. That is the best principle to go on, morally as well as financially.[276]
In addition to points already spoken of in the preceding pages, bear in mind, in making your plans, to use only simple forms for your first efforts. Avoid dormer windows and complicated roofs (especially combinations producing "valleys") and bay-windows, and the like, at first. Such arrangements add many difficulties for the beginner. When you can make a plain, simple building, with everything snug and tight, and can lay a plain roof that will not leak, you can then attempt such variations of form with a fair chance of success, but do not be too ambitious in your first attempts. A simple piazza can often be added to good advantage, if desired.

It is well to ascertain the sizes of the ready-made doors and windows which you can buy in the place where your house is to be built, before drawing your plans.
If there is a choice of situations in which to place your[277] house, a few suggestions about the selection of a site may be of value.
If you are going to build in the mountains, or the pine woods, or on rocky islands or promontories in the ocean,—in places where there are almost no unsanitary conditions, where the climate is so invigourating, the air so purifying,—there is no need to think of many precautions important in a cleared and settled country. As much sunlight and circulation of air as you can get, pure drinking water, and the simple precaution of not building in a hollow or on the edge of a swamp, are about all the sanitary points you need consider in such places.
In selecting a site in any ordinary country or seashore region, first make sure above all things of dryness, sunlight, pure air, and pure water.
Avoid building a cottage for regular occupancy in a dense thicket, not merely on account of the mosquitoes and other insects, but because the thicket shuts out the sun and cuts off the free circulation of air which there should always be in summer around and through a house. Of course, for shooting or fishing, a lodge, camp, or cabin must be built wherever required by the circumstances. Sunshine is very important in securing dryness and in purifying the air.
You will naturally reject wet land. Avoid also soil that retains moisture,[38] even though it may not be actually wet to step upon, for land saturated with moisture may be the unsuspected source of serious diseases. There is air in the ground, which may be the means of spreading dampness and foul gases.
Do not place your house in a depression or in the bottom of a valley where dampness is likely to settle. At the seashore there will, of course, be fogs from the ocean at certain times and places,[278] but they are not harmful, except to navigation; and at the mountains more or less dampness at night is very common. Do not try to find a place where there is no dampness at all, but except at the seashore or mountains reject situations where there are mists at night, avoiding particularly the vicinity of wet marshes and swamps, stagnant pools of fresh water, boggy ponds, sluggish rivers and brooks, on account of the malarious vapours which are liable to hang over them.
Do not try to keep cool by hiding your house where the sun will not shine upon it. The southern or south-eastern slope of a hill usually affords a most desirable site as regards both coolness and sunlight. If you can also find a site on the top of a little mound or knoll, so as to secure the free drainage of the water in every direction, it will be advantageous.
The main points in regard to water are to have it pure and to have plenty of it.
In regard to pure water, and pure air also, if you are planning to build in a little settlement or near other cottages the question of drainage (sewerage) from the neighbouring houses becomes of the utmost importance. A breeze from the sea, the mountains, or the pine woods is pure in itself and to a certain degree a scavenger, but do not throw upon it the work of purifying a naturally unhealthful situation.
This matter of drainage you can arrange for yourself on your own land, but the arrangements of your neighbours you will have to take as you find them; therefore guard carefully against contamination of your drinking water and of the air through proximity to the cesspools, privies, or sink drains of the neighbouring cottages. Exactly how far a well or spring should be from such sources of pollution it is impossible to state without knowledge of the particular spot, for it depends upon the slope of the ground, the kind of soil, the direction of the underlying strata, and other circumstances. In some cases a distance of twenty feet might be perfectly safe, while in others two hundred would be highly dangerous. One hundred feet or more is near enough[279] under ordinary conditions. There is no greater danger than that from defective sewerage, and the danger usually begins before the senses are aware that there is any trouble. This subject is better understood now than formerly, but still, until the subject forces itself upon their attention, the majority of people pay but little regard to it. It is a fact well established among medical men that some of the worst forms of sickness are nothing but filth diseases, to which the dwellers in summer cottages are sometimes even more exposed than those in town houses. Remember that air as well as water is an active agent for spreading the germs of disease.
As to the position in which to place the house itself after the spot has been chosen much will depend on circumstances. Consider the sun, the prevailing winds, and the views in relation to the rooms, the windows, and the piazza. An unsheltered piazza facing the west is apt to be very hot at the time of day you are likely to use it the most, though, of course, the wind or other considerations may make such a position desirable.
The subject of the necessary underpinning for such simple structures as are here shown has been already treated in the preceding chapter. In most cases you will find posts set in the ground, as there described, an excellent way (except, of course, upon rocky ground), but brick or stone piers are almost always more desirable, if you can afford the cost of the materials (which can be obtained almost anywhere), and the work of laying piers for such a purpose is not very difficult; but whether to use posts or piers should, of course, depend upon the character and permanence of the building.
Having fixed upon the position of the building, proceed to stake it out (including the piazza if there is to be one), as shown in the chapter immediately preceding.
The foundation being ready, the frame is next to be considered. You have probably noticed in the old houses[280] built by our forefathers their massive construction,—the great size of the timbers and the way in which they are heavily braced and mortised and pinned together. With the modern facilities for cutting wood into small pieces by machinery has sprung up a style of building of which you will see examples on every hand, and which when carried to its extreme in the cheapest houses makes a structure so flimsy that it is literally held together by nothing but nails. A scientific modification (adapted to modern conditions) of the old-fashioned "braced" structure, retaining its advantages and remedying its defects, is undoubtedly superior (expense being no object) to a "balloon" frame that will only hold together by having the outside boarding nailed on to it as fast as it is put up. If the more cheaply built "balloon" structures of to-day had been put up in the days of our Pilgrim or Puritan ancestors not a stick of them would now be standing. A lighter arrangement than the old-fashioned frame and one more easily built is, however, in our day probably better adapted for the construction of a large class of buildings of moderate size and moderate cost.
This is said about braced and framed structures that you may not be led to think that the light construction advocated here for you would be the best for all wooden structures. Your house will be so small, and the construction of a braced and mortised frame is so difficult for amateurs, that a lighter and easier arrangement will be best for you to use, however ill-suited it might be for a large mansion or ware-house. This system of construction will be perfectly satisfactory and sufficiently durable for a little summer cottage.
A little house well suited for summer use, or for a winter camp, is shown in Fig. 391.
Before beginning work read carefully Marking, Rule, Square,[282] Saw, Plane, Nailing, Screws, Hinges, Painting, in Part V., and look up any other references.
The main house (which contains the general living-room) can be framed as shown in Fig. 389. The "lean-to" addition (which contains the kitchen) can be framed as shown in Fig. 371. If both parts are built at one time, only four sills should be used for the entire structure, and the corner-posts and upright studding of the "lean-to" on the side next the main house should be omitted.
The sides of this house are battened, i.e., the joints of the vertical sheathing are covered with strips nailed over them—in this case with strips of "half-round" moulding. This is an easy and quite inexpensive way to finish the outside, and while hardly equal to clapboarding or shingling in some respects is a very good way for structures of this kind.
As you will see from the illustration, the rafters of both the house and the ell project or overhang at the eaves. This is not really a necessity for any structure, and you will sometimes see quite large buildings without any overhang of the roof whatever, but, as a rule, it improves the appearance of the house, and is a help in shedding the water farther from the walls. It is only necessary to let the rafters project at their lower ends, making all project equally, and to nail a board to their ends, as shown. The overhang at the ends of the house can be arranged in the same way, short pieces of studding being nailed in the outside angle of the roof and ends, with strips nailed upon these.
If the ground slopes, as in this case, lattice-work is good to cover the space below the sills.
The remaining details have been treated in the preceding cases.
The simple structure shown in Fig. 392 is suitable for various uses, and can be constructed in the way already described.
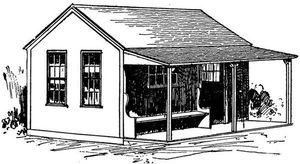
Fig. 392.
The piazza is, however, a new problem, but not a very difficult[283] one after the processes already described. A simple way, suited for rustic structures or rough cabins, is to set the piazza posts in the ground to a depth of two or three feet, sawing the tops off at the height of the piazza roof, and simply nailing a system of floor-timbers for the piazza floor to these posts and the side of the house and flooring it with boards, while the roof of the piazza is supported on the tops of the posts. This is not a good way, however, for a carefully built house.
A strip of joist or plank can be spiked to the side of the house at the proper height, and to this can be nailed a system of floor-timbers for the piazza floor (see page 287), the outer corners and middle resting upon stones or posts in the same way as the rest of the building. This is then floored crossways, the whole having a slight slant outwards to shed the water. Upon this platform are raised the piazza posts, and at the top of these is nailed a roof system, which is covered with boards in the same way as the floor beneath. Enough slant should be given the roof to enable it to shed the water freely.
The other details do not differ from those already described.
Before beginning work read carefully Marking, Rule, Square, Saw, Plane, Nailing, Screws, Hinges, Painting, in Part V., and look up any other references.[284]
An excellent form for a small structure is that shown in Fig. 393. This has a hip-roof, which is the only essential difference between it and the types already shown.

Fig. 393.
Before beginning work read carefully Marking, Rule, Square, Saw, Plane, Nailing, Screws, Hinges, Painting, in Part V., and look up any other references.

Fig. 393a.
This roof is somewhat more difficult to make well than the simple kinds, but is not beyond the skill of the amateur. Up to the plates the construction is the same as that already shown. In this roof, however, the ridge-board is short and the end rafters (called hip-rafters) incline towards it (Fig. 393a). Laying out the upper bevels of these rafters will require careful planning. After you have succeeded in laying them out, cutting the bevels at the ends,[285] and fitting them in place, the shorter jack rafters can readily be put in place.
The shingling is more difficult at the corners than in the other roofs shown, as the shingles must be cut. It is well to cover each hip with a line of shingles, laid parallel to the hip and along each[286] side of it. Boards can be used to cover the hips, as shown in one of the illustrations of "Cottage Row."

Fig. 394.
Another form, embodying the same roof construction, but larger and correspondingly more difficult, is shown in Fig. 394.

Fig. 395.
A small cottage for summer use (Fig. 395) is not more difficult than the cases already shown, except in the matter of size.
Before beginning work read carefully Marking, Rule, Square, Saw, Plane, Nailing, Screws, Hinges, Painting, in Part V., and look up any other references.[287]
The process of staking out and setting the foundation has been already described under A Workshop, pages 259-264.
The frame can be built upon the same general principle as shown in Fig. 389, the dimensions of the stock depending upon the size of the house; but the directions given in these chapters are intended only for small structures. The sills should be 4" × 6" or 6" × 6", the corner-posts can be 4" × 4" or 4" × 6," the floor-timbers and rafters 2" × 6", although, if the house is quite small, 2" × 4" will do for the rafters, which can be braced by "collar beams," or simply horizontal pieces of board nailed across in the upper part of the roof.
Arrange the studding according to the doors and windows. As this house is not to be lathed and plastered, it is not essential that the studding should be at any exact distance apart.

Fig. 396. END ELEVATION.

Fig. 397.
The essential difference between the frame of this house and that shown in Fig. 389 consists in the projection of the second-story floor-timbers over the piazza, the ends resting upon an outer plate on top of the piazza posts (Fig. 396). The arrangement of the attic floor-beams, the rafters, and the side-plates is shown in Fig. 397.
The frame for the piazza floor can be arranged as follows: Fasten a strip of 2" × 4" joist along the side, spiking it through into the sill. On this fasten an arrangement of floor-timbers, such as is shown in Fig. 398, the inner cross-beam and lengthways stringers resting in gains, as shown in Fig. 399. The details of the arrangement can be varied according to the height you wish the piazza floor to be relatively to the floor inside.[288]
For a quite small structure, or for a temporary one, it will answer to make this piazza-floor system of 2" × 6" stock simply sawed square and spiked together, on the principle shown in Fig. 378, but for a good house which you wish to be permanent, it is better to put a little more labour into the piazza.

Fig. 398.

Fig. 399.
Another way is to have the main sills extend under the piazza as well as under the house proper. This is a more thorough way as regards stiffness, but extra pains must be taken to prevent the water working down on the sills where the house and piazza join, as this will tend to rot this portion of the sills. With this arrangement of sills an extra sill, or cross-sill,[289] should be added under the juncture of the body of the house and the piazza. The ends of this sill can rest in gains cut in the end-sills, and the middle can be supported by one or more posts.
For the stairs, which can be put wherever you wish, take two pieces of plank, 2" × 9" or 10", and of sufficient length. Having determined the points for the top and the bottom of the stairs (by laying off on the floor in the same way as for the rafters, page 268), lay one of the planks on the floor in the proper position and mark the notches for the steps and the bevels for the ends. After these "notch-boards" or string pieces have been cut and put in place, you can easily get out and nail on the "risers" and "treads." Examination of any common stairs will show you how to arrange these details without difficulty. You can mark on a stick the height from the top of the lower floor to the top of the upper. Divide this distance, on the stick, into as many parts as you wish to have steps, and you can use the stick as a gauge by which to determine the points for sawing the notches for the steps.[39] It is best to have the treads not less than 9" wide, and 10" is better, while 7½" or 8" will do for the risers. A "header," or cross-piece, must be securely fastened between the second-story floor-beams where they are cut off to make the opening at the head of the stairs.
The partitions inside require no directions, being simply made of studding to which sheathing is nailed.
The remaining details do not differ from those of the preceding cases, and the interior fittings you can arrange without further instructions. A regular brick chimney will, of course, be a desirable feature if you can afford it.
By the slight modification of having the roof overhang on[290] each side, two piazzas will be provided and space given for larger chambers (Fig. 400).
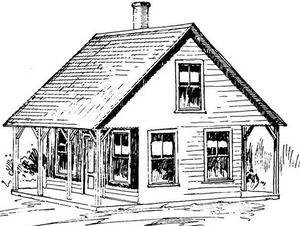
Fig. 400.
The construction differs from that of the design just shown only in the arrangement of the framing for the second story.
The floor-beams of the second story will overlap at each end and the rafters be correspondingly longer, and the end-plates can be omitted and the end-studding continued up to the rafters, except where interrupted by the window-spaces. This house, like the others, can be clapboarded, shingled, battened, or sheathed, as you may prefer.
Summer-houses.—A form which is quite easy to build, and which is attractive when overrun with vines, is shown in front elevation (Fig. 401) and in side elevation (Fig. 402).
Before beginning work read carefully Marking, Rule, Square, Saw, Plane, Nailing, Painting, in Part V., and look up any other references.
The construction is simple. The frame can be of 2" × 3" stock (planed), except the sills, which had best not be smaller than 2" × 4" (on edge). Cross floor-beams can be inserted, as in the floors of the little houses first shown.
The upright members can, however, rest upon posts set in the ground and the floor be dispensed with. Where the parts of the frame cross they can be halved (see Halving). The square joints can be nailed together. The roof can be solid or made of slats several inches apart, resting upon rafters.

Fig. 401.
The strips for the lattice-work can be about 3/8" thick, and from 7/8" to 1¼" wide. These can be got out at any mill in long or short strips, which you can cut off as you put them on. Do not lay them too closely together. Put one strip on at the desired angle. Then cut off one or more short pieces by which to gauge the[292] distance for laying the next strip, or get out a piece of light thin boarding of the width of the space between the lattice strips and hold it beside each strip as a guide by which to lay the next one.
This lattice-work, although each strip is so slight, will give the frame great stiffness and strength.

Fig. 402.
The joints of such framework as this should properly be painted before being put together (see Painting), and it also is a more thorough and neater way to lay the lattice-work strips on supports of some kind and paint them before putting on. They will then only require touching up with paint after the house is done.
The rustic summer-house, or arbour, made of sticks in their natural form, shown in Fig. 403, is in some respects more difficult to build than the preceding, because the ends of so many of the pieces have to be cut at an oblique angle.
Before beginning work read carefully Marking, Rule, Square, Saw, Plane, Nailing, Screws, Hinges, Painting, in Part V., and look up any other references.
First make a platform, as for the other floors, or the upright posts can rest upon posts set in the ground and the floor be dis[293]pensed with. Plates can be placed on top of the posts, and rafters extend from the plates at the top of each post to the apex of the roof. These plates and rafters will make a framework on which to nail the sticks which form the roof covering. The remaining details are apparent. Much care is required, however, to put this house together properly, not merely in cutting the angles at the joints, but in sighting, measuring, and testing to ensure its coming together without twisting or winding.

Fig. 403.
Instead of making this house six-sided, it can, if desired, be made rectangular like the preceding one, but keeping the same arrangement of the details. This makes a very pretty design, and in respect to joining the pieces is much easier to make. Another pretty plan is to build a hexagonal, octagonal, or circular house of this sort around a tree trunk. If the roof is fitted too snugly to the tree trunk, the growth of the latter may split the roof apart before the rest of the house is past its usefulness, so you should arrange this part to allow for the growth of the tree.
Bath-house.—A plain bath-house (Fig. 404) can well be made with a lean-to roof and put together on the same simple principles already shown; so that additional[294] instructions for this design are unnecessary. A good way for such a building is to sheath it vertically as shown, but any of the other methods can, of course, be adopted.

Fig. 404.

Fig. 405.
Boat-houses.—By using the same simple system of framework shown in Fig. 389 you can make an inexpensive boat-house (Fig. 405).
Before beginning work read carefully Marking, Rule, Square,[295] Saw, Plane, Nailing, Screws, Hinges, Painting, in Part V., and look up any other references.
The inclined slip or platform upon which you haul the boats up from the water requires simply two or three timbers for stringers, running down towards the water, with 2" planks nailed across, as shown. The simplest way to square the ends of these planks is to nail them in place, allowing a little extra length, and then saw the ends all off at once by a line.

Fig. 406.
A house of this kind can be built to extend over the water (for[296] boats which are to be kept in the water) by arranging a foundation of stone or piles in the water, or by digging a little dock into the shore under the house.
In these cases there must, of course, be an additional door of the ordinary kind for entrance on the shore end of the house, and it will be convenient, if the house is long enough, to floor over this end. A narrow floor or platform can also be extended along one or both sides to facilitate handling the boats and getting in or out of them.
The sill at the water end will have to be omitted, of course, a piece of studding being fitted in at each side of the door-space, but these details you will have no difficulty in arranging if you have studied the preceding examples.
A larger and more elaborate boat-house, or club-house (Fig. 406), having a loft for storage as well as a balcony, can be constructed on the same general principles already explained.
Before beginning work read carefully Marking, Rule, Square, Saw, Plane, Nailing, Screws, Hinges, Painting, in Part V., and look up any other references.

Fig. 407.
The end-plate for the end shown in the illustration cannot run across from side to side, because of the doorway opening on the balcony, but can be made in[297] two parts to extend from the sides to upright studs at each side of the doorway. A simple way of arranging the frame at the floor of the second story is shown in Fig. 407.
Unless this building is very small (in which case it can only be used for the storage of oars, rigging, etc.), the sills should be of 4" × 6" (on edge) or 6" × 6" stock, and the floor-beams of 2" × 6" stock. 4" × 4" or 4" × 6" will do for the corner-posts, and 2" × 4" for the studding and rafters for such a small structure as is advisable for the beginner to attempt.
If you should, however, build anything large, the posts, the lower floor-beams, if unsupported in the middle, the plates, and the rafters should be heavier. If your house is to be used by many people and heavy boats are to be hauled in and out, it is much better to err on the side of having these timbers too heavy rather than too light. But these designs are only intended for comparatively small structures.
The outer floor-timbers for the balcony had best be mortised into the posts (see Mortising). The top rail around the balcony can be of 2" × 4" studding, laid flatways, and with the upper angles bevelled (see Bevelling). The balusters can be simply square pieces nailed into place. The rail and balusters can, however, be obtained in a great variety of forms at a wood-working mill, if you prefer to buy them. The braces under the balcony can be of 2" × 4" stock. All these outside parts should be planed by machine.
The remaining details do not differ from those of the houses already described.
Boat-building, like many other kinds of work, can be done (even in its simplest stages) more quickly, more easily, and, of course, more cheaply, by two persons than by one, so it will be economy of money, time, and labour to find someone to join forces with you. Do not, however, give up your plans for lack of a fellow-workman, for nothing is given here which cannot be done by one person with, perhaps, a little help once in a while about holding or lifting something.
If these boats seem rather simple compared with many which you have seen, and you fail to find here some form you have in mind to build, it is to be remembered that boat-building is by no means easy, and that many an attractive design would prove too difficult for the average beginner to finish successfully. The experience gained in building such boats as these will help you in more difficult boat-building. These simple models are not offered as being in themselves the best there are, nor are the ways shown for building them in every case such as would always be used by a regular boat-builder; but boat-building involves a variety of difficulties, not merely in the designing, but also in the execution.[299]
It takes a good workman to turn out a really successful round-bottomed boat (except by the use of canvas), therefore a few simple types of flat-bottomed boats are all that are treated here. When you have become skilful enough to attempt the more advanced forms, you can easily find a number of excellent books on boat-building from which to gain the needed information. The intention here is to show wood-working processes which you can use in making these simple craft, but not to go into the details of designing or of rigging, subjects which are far too complex to be satisfactorily treated, even for the beginner, in a hand-book on wood-working.
While it is practicable to make a good punt, or flat-bottomed rowboat, entirely by rule of thumb, or "cutting and trying" as you go along, still you should accustom yourself, even in the simplest forms, to lay the work out on paper correctly first, as this is really essential, in order to work to good advantage when you come to the more advanced forms.
Scows and Punts.—A flat-bottomed boat, if made with care, may be not merely good-looking, but light, strong, and useful, and sometimes superior for some purposes to a round-bottomed boat.
Boats of this class are easily and cheaply built and by no means to be despised. They are safe, capacious, and comfortable, and the flat bottom permits much freedom of movement by the occupants, making them good boats for fishing and general use on ponds and rivers, as well as for transporting loads.
Before beginning work read carefully Marking, Rule, Square, Saw, Plane, Nailing, Painting, in Part V., and look up any other references.[300]
The process is to first get out the sides, then the ends, next to fasten the sides and ends together as in making a box, then to nail on the bottom, and finally to put in the seats and any other fittings. Almost any kind of soft wood can be used for a boat of this kind. Pine is excellent. Care should be taken to select clear, straight-grained stock, free from knots, checks, and other defects, and thoroughly dry.
Fig. 408.
For the sides, take two boards, for example, 14' long, 14" wide, and 7/8" thick, planed on both sides. Both edges should be "jointed" and the ends squared and sawed accurately. Mark, saw, and plane the slant at each end of these boards as shown in Fig. 408. The ends must next be got out. In this case they can be 4' long and 4¼" wide. Nail together the sides and ends just as in making a flat box. Use three nails (3" or 3½" long) at each corner. It is safest to bore holes for the nails (see Boring). Copper nails are best for boats, but galvanized iron answers very well for common boats of this kind. Next place this frame, bottom up, on horses or boxes or a flat floor and plane down the projecting edges of the end pieces to agree with the slant of the sides.
Pieces for the bottom are now to be sawed from boards about 6" to 8" wide. Mark and saw one piece and use it for a pattern by which to mark the lengths of the remaining pieces. You can take the length directly from either end, allowing a trifle (say 1/8") to spare, for planing the ends after they are nailed. Having[301] sawed the required number of pieces, which will depend on the width of the boards, nail them on carefully. Before nailing, thoroughly paint the bottom edge to which they are to be nailed with thick white-lead paint. See that the edges of each board are straight, paint the edges as you lay them, and nail thoroughly with 2½" nails. Do not put the nails so close to the edge as to cause splitting. The edges of the pieces which come together at the angles of the bottom must be fitted carefully with the plane (see Bevelling), to make as tight joints as possible. The boards should be pressed closely together as they are nailed. They will assist in keeping the sides and ends of the boat at right angles, but it would be well to test the angles with the large square, or by measuring the diagonals, when you nail on the first two boards.
A quicker way is to nail on all the boards (not sawing them accurately to a length) and then to saw the ends all off by a line.
A good way is to use, for the bottom, plain sheathing or matched boards, if obtainable without the bead or moulding commonly worked on the surface, which would be apt to cause leakage. The sheathing can be planed down on both sides to a thickness of 5/8", which will remove the moulding, but this is rather thin for the bottom of a boat as large as this, though an excellent way for a narrower boat.
When the bottom is all nailed on, turn the boat on each side and plane off any irregularity in the ends of the bottom boards, so that they will be flush with the sides.
A cleat from 4" to 6" wide should be laid along the middle of the bottom to stiffen it, as shown. The nails should be driven through the boards and clinched. Wrought nails, or some kind that will bend over and not break, must of course be used for this. This cleat is often nailed on the outside instead of the inside.
Nail a seat at each end directly on top of the sides and ends as shown. From 12" to 18" in width will do. The seat for rowing (about 8" or 9" wide) can rest on cleats, as shown.

Fig. 409.

Fig. 410.
Next screw a cleat, about 2" deep, 7/8" thick, and 10" long, to the[302] insides of the gunwales at the places for the rowlocks (see Screws). Common iron rowlocks can be bought almost anywhere, and the way to put them on is obvious (see Boring). A substitute for them can be arranged easily by simply boring two holes, 3½" apart, for the insertion of round thole pins of hard wood. Another simple way (Fig. 409) is to make two mortises or slots, 3½" apart and 1½" long × 5/8" wide, to hold thole pins (Fig. 410). The cutting can be done wholly in the cleats by sawing and paring.
Insert a ring-bolt at the end by which to fasten the boat, or a staple can be driven in, or a hole bored at the end of the seat.
If care has been taken to make close joints, the wood will swell on being put in the water and in a short time the boat should be tight. Unless made for some temporary purpose, however, a boat that is worth making at all is worth painting. It should be painted carefully with lead paint, both inside and out, two or three coats, being careful to work the paint well into the wood and the cracks (see Painting).
Instead of laying the bottom boards tightly together, as directed above, they can be laid slightly apart, so that the cracks between them will be about 1/8" wide. These can then be caulked with oakum, cotton-batting, or wicking, or something of that nature. Roll or twist the material into a loose cord, unless already in that form, and force it into the cracks with a putty-knife, screw-driver, case-knife, or anything of the sort. A regular caulking-iron is not at all necessary for a small boat. A piece of hard wood will do. Be sure to fill the seams thoroughly and tightly with the oakum or other caulking material. Then apply white lead plentifully to the caulked seams. But the method first given is usually satisfactory if you do your work with care.[303]
Pitch or tar can be used in making the bottom of a boat of this kind tight.
A form which is a decided improvement on the preceding is shown in Fig. 411. The process of making this punt will be first to get out the cross-board which goes in the middle, and next the sides and ends. These pieces having been put together, the bottom is nailed on, and finally the seats and other fittings are added.

Fig. 411.
The one here described is small, but large enough for two good-sized boys. The dimensions are given merely to help illustrate the process. As much larger boat as may be desired can, of course, be made upon the same principles.
Before beginning work read carefully Marking, Rule, Square, Saw, Plane, Nailing, Painting, in Part V., and look up any other references.
Care should always be taken to select clear, straight-grained stock, free from knots, checks, and other defects, and thoroughly dry. Pine is excellent, but almost any good wood can be used for a boat of this sort.
Fig. 412.
Fig. 413.
Fig. 414.
First get out carefully a board, perhaps 3' long, or the width of the boat (at the middle), and of the shape shown in Fig. 412, removing a small piece at each lower corner, to allow for the[304] passage of any water which may leak in. Get out each side of the boat, 10' 4" long, of ¾" stock, carefully squaring the ends. After these are cut, mark a distance of 3' from each end towards the centre on the edge of one of the boards and a distance of 3" on the ends, measuring from the other edge, and mark the curves shown in Fig. 413, which should sweep easily from the edge of the board without any abrupt turn. If you cannot draw a good curve free-hand, take a spline or thin strip of wood, bend it on the side of the board towards one end till you get a good curve, hold it in position, and using it as a ruler mark the line with a pencil. You can cut this curve and use it for a pattern by which to mark the other curves. These curves can be band-sawed or cut with the draw-knife or hatchet and plane (see Paring). Whatever method you adopt, the curves should finally be run over with the plane to remove irregularities, and care must be taken to keep as accurately to the line marked as possible. The top edges must also be jointed, although it is not material that they should be absolutely straight. Mark a line with the square across each board at the centre. Next get out the end pieces, 2' long, 3¾" wide, and of 7/8" stock (Fig. 414). Bevel the ends of these pieces at the same angle as the centre board already sawed, from which you can mark the angle.
An easy way to put this boat together will be to put the sides and ends together, and then, by spreading the sides apart, to put the middle board in its proper place. Bore holes for 2½" screws at each end of the sides (see Boring) and screw the sides and ends together loosely (see Screws), not driving the screws home, but leaving their heads sticking beyond the sides perhaps an eighth of an inch. Now lay the boat (so far as made) bottom side up on the[305] horses or boxes, or even with one end on the floor and the other raised by a box, and, spreading the sides in the middle as much as may be necessary, push the middle board up into place, getting it exactly opposite centre lines previously marked on the sides and so that the bottom edge of the board is just even with the inner edge of the bottom of the sides. This piece can now be nailed in place by three nails at each end.
Now, on looking at the ends where the sides are screwed, you will see that spreading the sides has caused the joints (purposely left loose) to open slightly at the inside, and that the ends require to be slightly bevelled or trimmed to make a close joint. Unscrew one end, do the necessary trimming with the plane, replace the piece, and screw it into position again, driving the screws home and adding one or two nails. Do the same with the other end and the boat will be ready for the bottom.
But before the bottom is nailed on, the lower edges of the sides must be bevelled with the plane, owing to the sides flaring outwards. The degree of bevelling required can be determined by laying a board across (Fig. 415). At first it will only touch the outer angles of the edges, and the planing must be continued until it bears flat on the entire edge.

Fig. 415.
Now get out of 7/8" stock the bottom boards, the edges of which should be carefully jointed to fit together as tightly as possible. These boards should be thoroughly nailed to the sides of the boat with 2¼" or 2½" nails, care being taken not to nail too near the edges of the boards, lest they split. As the sides are only ¾" thick you will have to be careful in driving the nails or they will split the sides. Before you finish nailing the first bottom boards, test the symmetry of the frame by measuring the diagonals. These should be equal. If not, you can easily make them so with your hands, and tack a couple of strips diagonally across the gunwales to keep the frame in position until the bottom is nailed on. Also sight across the gunwales to see that the frame is true.[306] If it winds, correct the error by blocking it up where needed.
Sheathing can well be used for the bottom of this boat, as for the one just described, if you can get it without the moulding. The bottom can also be caulked (see page 302), but if you cannot get the sheathing the way first described will answer every purpose.
After the bottom is nailed on, turn the boat on each edge and plane off any irregularities at the ends of the bottom boards, so that they will be flush with the sides.
Next nail a strip, about 3" or 4" wide and ¾" thick, lengthways on the middle of the bottom, on the inside. Fasten this to each board with a couple of nails driven through and clinched on the outside. This will serve to stiffen the bottom.
Next deck over each end with a seat 12" wide nailed directly on top of the sides. Put in a seat, or thwart, 9" wide and 7/8" thick, next to the middle brace, as shown. Cleats can be nailed to the sides under this seat. This should be a fixed seat, nailed to the cross brace and to the sides of the boat, which will assist in stiffening the sides.
You can nail a gunwale strip, 2" wide by 7/8" or ¾" thick, on top of the sides and reaching from one end seat to the other, or you can put a somewhat smaller strip around the outer edge of the gunwale, which is quite as good a way. It is not really necessary to put any gunwale strip on so small a boat, but if omitted a cleat must be screwed on for the rowlocks (Fig. 409). If you put the gunwale strip on top, it will make a more workmanlike job to first plane the edges of the gunwale so that they will be horizontal across the boat, in the same way that you planed the bottom edges to receive the bottom boards.
Put the centre of the rowlocks about 12" aft of the centre of the boat, raising them an inch or so above the gunwale by means of a cleat (Fig. 416), as shown.
Fig. 416.
At a distance of about 28" from the bow, you can, if desired, put in a 6" thwart between the gunwales or a little lower, and in the middle of this thwart bore a hole for a small mast,[307] putting below and slightly forward upon the floor a block with a smaller hole. Sailing does not amount to very much in a boat of this sort, but a small sail is often very useful when going before the wind and adds to the fun.
This makes a very useful and safe boat for a couple of boys for river or pond work.
If you wish to make a larger one you will have no difficulty after studying the process given above. The only difference need be in the dimensions.
For one 12' long you could make the beam at the gunwale (outside) 3' 6" and at the bottom 2' 10", the beam at the bottom of the ends (outside) 2' 10" (same as amidships)—the ends to flare upward at the same angle as at the centre, the boards for the sides being 14" wide.
Fig. 417.
For one 14' long, you could make the beam 4' at the gunwale, 3' 4" at the bottom, the same at the ends, and the sides could be made of boards 15" wide. Stock ¾" thick is sufficiently heavy for the sides of a boat 14' long.
The seats for a larger boat than that described can be arranged to rest as shown in Fig. 417, and an extra mould or cross-board not far from each end can be used, as shown.

Fig. 418.
A piece of keel or skag can be added at the stern end, if desired, as shown in Fig. 418. This will assist in rowing straight. Fit a piece of 7/8" board to the curve of the bottom, keeping the straight edge parallel with the top. Square off the end in line with the stern, nail the skag firmly to the bottom, and nail a stern-post, 7/8" × 1¼" or 1½", securely to the stern and the skag. A rudder can be hung to the stern-post if desired. A centre[308]-board is sometimes added to a punt, being arranged in the way shown on page 330. A lee-board is often used on punts and scows. It is merely a centre-board lowered outside of the boat instead of in the centre.

Fig. 419.
Small Rowboat.—A simple form of skiff, or common flat-bottomed rowboat (Fig. 419), called by various names, is similar to the punt at the stern, and the mode of construction is similar. The boards for the sides are not cut away on the bottom at the bow, as in the punt, but are left full width and drawn together to form a sharp bow. The ends are usually, but not always, cut off with a slight slant at the bow, which gives a rake to the stem (Fig. 420).
Fig. 420.
Before beginning work read carefully Marking, Rule, Square, Saw, Plane, Nailing, Painting, in Part V., and look up any other references.
Care should be taken to select clear, straight-grained stock,[309] free from knots, checks, and other defects, and thoroughly dry. Pine is excellent. Any good wood can, however, be used.
Make a middle mould (Fig. 421), as in the case of the punt just described, and proceed with the construction in a similar manner, until you come to the bow.
Fig. 421.
Fig. 422.
Screw the sides to the stern-piece (Fig. 422) without driving the screws completely in, but leaving a little play to the joint (see Screws). Next put the middle mould in place by lines previously squared across each side. Nail the middle mould in position. Then, letting someone draw the bow ends of the sides together (or if you are alone, binding them together temporarily), release the stern-piece and plane its ends to make close joints with the side pieces, as in the case of the punt already described. When these joints are fitted, paint them with white lead and screw or nail the sides securely (and permanently) to the stern board.

Fig. 423.
Draw the fore-ends together and fit a piece of hard wood in the angle at the bow as shown in Fig. 423. You can cut this piece approximately to shape with a hatchet and then plane the surface down until you get an accurate fit. When you have made it fit, paint it and also the sides where they bear against it. Afterward screw or nail the sides firmly to this stem-piece, letting each end of the stem project a little. Screws are best (brass screws if for salt water), but nails can be used. Do not drive them all in line, but add a second row farther from the edge and alternately arranged. If a piece of hard wood is not available, a block of soft wood can be used, but it should be somewhat larger.

Fig. 424.
Another pattern of stem-piece can be used (Fig. 424). Much pains should be taken in making this post. The rabbets on each side should be cut with care, trying to get the sides alike and to[310] cut accurately to the lines marked. When the cutting is nearly done, put the piece in place and you can then note any changes which may be required to make tight joints. When you finally have a good fit, paint and fasten in place as described above.

Fig. 425.
Still another form of stem-piece is shown in Fig. 425. One side of the boat must be got out longer than the other to allow for the lapping over at the bow, the stem-post being first fastened to the shorter side and then trimmed if necessary, until the side which laps over fits accurately.
When the boat is fastened together to this extent, it will frequently be found that the bottom has too much curvature lengthways, according to the degree to which the sides flare outward and bend up at the ends. This you can remedy by trimming off the sides in the middle, first carefully marking the desired line. Measure accurately, in doing this, to be sure that the two sides will be alike. In removing the superfluous wood do not attack it hastily with hatchet or draw-knife, for wood often splits in a way surprisingly different from the direction in which the grain appears to run (see Paring). It is sometimes best to remove the wood with the splitting-saw, but stop all such processes some distance outside of the line, and rely upon the plane for the final shaping.
The lower edges must be bevelled off accurately, ready for the bottom boards, the same as in the case of the punt (Fig. 415). Next nail on the bottom, using common boarding or sheathing as in the case of the punt just described, and put in the stiffening strip of board along the middle of the floor.
If the middle mould comes in such a position that it will be in the way if left in place permanently, you can simply tack it into position with a couple of nails at each end, leaving the heads protruding enough to draw them out easily. When you have put in the seats and any other braces necessary to ensure the sides[311] keeping their position, you can draw the nails and take out the centre mould.
Fit seats at bow and stern, putting them two or three inches below the gunwale and resting them on cleats.
In case you use the stem-piece shown in Fig. 423, saw or plane off the projecting ends of the sides at the bow smoothly and screw (or nail) on a cutwater made of some hard wood and with a sharp edge. Fasten strips along the gunwale,—"wale strips,"—as already shown.
A skag can be put on at the stern, if desired, as described on page 307.
Such a boat can be sailed by adding a centre-board (see page 330) or by bolting on a keel several inches in depth. A small sail-boat can be made in this way by making the stern narrower, proportionately, the sides higher, and decking over the bow and stern. The decking can extend over all the top, if desired, except a well-hole around which can be fitted a coaming or wash board. The keel can be of plank fitted carefully to the shape of the bottom, its lower edge being horizontal towards the after part, which will make it quite deep at the stern. A rudder should be added for sailing.

Fig. 426.
Skiff or Flat-bottomed Canoe.—A double-ended skiff, batteau, or flat-bottomed canoe (Fig. 426), known by various names, can be easily made by simply carrying the process[312] already described a little further, and drawing the sides together at the stern as well as at the bow, thus forming a boat sharp at both ends. This is an excellent type for the amateur, whether in the form of a small canoe or a quite good-sized boat for rowing, or even light sailing. Such a boat is light, easily propelled, buoyant, does not pound the waves when meeting them so much as the punt, and the sharp stern is good when running before a sea.
Before beginning work read carefully Marking, Rule, Square, Saw, Plane, Nailing, Painting, in Part V., and look up any other references.
Care must be taken to select clear, straight-grained stock, free from knots, checks, and other defects, and thoroughly dry. Pine is excellent, but almost any good wood can be used for a boat of this sort.
The sides can be bent into place around a mould in the middle and brought together at both ends and two end-posts fitted. In other respects the process differs so little from the preceding that complete description is needless.
The two stem-pieces, which you can fit in the manner already shown, will, theoretically, be alike. Practically, there should not be more than a very trifling difference required in their shape. Having found the shape for one, get the other out just like it. If it does not fit perfectly, it can be trimmed until it does fit; but if the first one fits right and the second fails to do so by more than a trifling degree, you had best look the boat over and verify your work, and you may find that you have cut something too long or too short or got something in the wrong place. Paint the ends of these sides where they will be in contact with the stem and stern with white lead.
The sides and ends can be put together as follows: Take either side, screw it securely to the stem-pieces at each end. Dip the screw points in white-lead paint. Next screw either end of the other side to the corresponding stem-piece, which will leave[313] the sides separated at an acute angle, with one end of one side not yet fastened to its corresponding bow-or stern-post. The ends being alike it does not matter which is called the bow or stern. To fasten this remaining joint, it will be necessary to spring or bend the sides. If you have someone to help you, you can easily put the midship frame into position and bend the sides around it until the unfastened end comes into the correct position against the stem-piece, to which it can be held and screwed firmly. If you can get no help, you can hold the sides in position by using a rope doubled and inserting sticks at top and bottom by which the rope can be twisted and shortened (see Clamps).
Another way is to put a box or joist, perhaps a couple of feet long, between the sides, to prevent making too much strain on the end fastenings, and, having secured the unfastened end, the frames can then be laid flat, the sides drawn farther apart, and the midship frame forced into position. The latter will be in position when it agrees with the lines previously drawn on the sides and when the bottom is flush with the inner corners of the lower edges of the sides. Nail the sides to it with 1¾" or 2" nails, or it can finally be removed if not needed for stiffness.
The remaining details do not differ from those previously described. The rowlocks can be placed wherever desired in the way already described, but if the boat should be too narrow for this arrangement, they can be fastened to outriggers, which the blacksmith can easily contrive.
A flat-bottomed canoe can be made on this same principle, the only difference being to have less beam and to use a paddle or paddles instead of oars.
A very successful small canoe, suitable for quiet waters, can be made of quite thin wood (perhaps 3/8" to ½" in thickness), the outside being covered with canvas. In case of building so light a craft as this, however, it is best to insert regular ribs at distances[314] of about a foot to give the necessary stiffness, and to lay the bottom boards lengthways. The ribs can be bought in any large town on the water, or you can fashion them yourself. Natural bends are always preferable, but you can make knees (on the general principle shown in Fig. 433) of straight-grained stock, which, though clumsier and not so strong, will serve the purpose. Care must be taken in fastening on the bottom not to split either the bottom or the sides. But the canvas will be the main reliance in keeping the boat tight. The canvas can be put on in three pieces, first the sides, and then the bottom. Cover the sides down to the bottom and let the bottom piece lap up over the sides two or three inches and the edges be turned under. Stiffen the gunwale by a strip.
A light, removable board, or grating of slats, should be laid inside along the bottom, on the cross-frames.
If well made and kept well painted so as to protect the canvas from wear at the exposed points, a light canoe of this sort will last many years and be a very useful boat. It must be kept out of the water and under cover when not in use.

Fig. 427.
A simple and cheap flat-bottomed canoe (Figs. 427 and 428), but not canvas-covered, is not difficult to make by the process already described. First make the frames and the[315] stem-and stern-posts, then get out the sides. These parts are put together and then the bottom is put on, the well-hole coaming fitted, the boat decked, and finally the minor fittings added.

Fig. 428.
First make the centre frame like Fig. 429, the bottom strip being of 7/8" stock, 1¼" deep, and the side pieces of ¾" board. Screw the pieces together with two screws at each angle. Care must be taken to make this frame symmetrical or the boat will be one-sided. You can draw the outline of the frame carefully on a piece of stiff brown paper, drawing a vertical centre line and measuring both ways for accuracy. Lay this pattern on the bench top, or on a smooth floor, and place the pieces for the frame on the drawing so that the outer edges just coincide with the outline of the drawing. Hold them firmly in position and screw the angles securely together. Tack a waste piece across near the top to help keep the frame in shape until in position. Next get out two frames like Fig. 430, taking the dimensions from your plan, two more like Fig. 431, and two like Fig. 432. To make the stem-and stern-posts, take two pieces of joist, about 2" × 4" and of sufficient length, and with the chisel and saw cut a rabbet on each side of each piece, on the principle shown in Fig. 424. Give these rabbets a good coat of white-lead paint.
Fig. 429.
Fig. 430.
Fig. 431.

Fig. 432.
The sides are got out in the way already shown. On them mark the position for the centre mould. Insert and nail into[316] place the two next largest frames, at the proper places, and so on until all are in position. All, except the centre one, will require to have their edges slightly bevelled with the plane to fit the sides. You can do this best as you put them in place. Paint the edges of the frames with white lead before nailing them in position. Next fit pieces of ½" board to form the coaming around the well-hole, and fasten them to the three middle frames. The details of this you can easily arrange for yourself. The general idea is expressed in Figs. 427 and 434.
Before proceeding further with the deck, thoroughly paint the whole of the inside of the boat with white lead, working it well into all the joints and cracks. After giving it a few days to dry, look the inside over carefully for any holes or defects to be stopped. After filling any there may be, give the entire inside another coat, working it well into all crevices as before. Do not neglect this part of the work, as it will not be easy to get at the inside (except in the middle) after the deck is put on.
On the middle of the deck stretch strips of ½" wood about 4" wide from the coaming of the well to the stem-and stern-posts, tapering the pieces as they approach the ends and resting them on the tops of the frames, to which they should be firmly nailed.
If you wish to sail, a stiff brace or thwart can be put in for the mast, with a block for a step.
One or more strips, 1" × ½", can now be placed longitudinally on each side of the deck and nailed to the frames.
Additional deck-beams, running from gunwale to gunwale, and having the requisite arch or convexity, can be put in if needed. A few brackets can also be put under the deck, reaching from the sides to the coaming, if needed.
A keel about one inch square, or deeper at the centre, if desired, can be fitted along the entire length of the bottom. It had best be fastened on with screws. If your boat is to be used in deep water only, you can make the keel 3" or 4" deep in the middle, rockering it up towards the ends, and the boat can be sailed without a centre-board.[317]
Cover the deck with canvas, fastened with small tacks to the coaming and to the sides. The edges of the canvas can be drawn down over the gunwale for about half an inch, the edge being finally covered by a gunwale strip screwed from stem-to stern-post. A piece of half-round 7/8" moulding is good, although any small strip will do. Dampen the canvas and then give it at least two coats of paint. A wooden deck can be put on if preferred.
Canvas-covered Canoes.—To make a really good canoe wholly of wood requires a degree of skill much greater than can be expected of the beginner, or than is attained by the average amateur. Any boy or amateur can, however, with the help of canvas and with a very few tools and at slight expense, make some simple varieties which will serve the purpose satisfactorily. The canoe is sharp at both ends, requires only a paddle, and is light enough to be easily handled ashore. If carefully made, a canvas canoe will be strong, durable, and not difficult to mend, though repairs are seldom necessary if proper care is taken. If canvas of good quality is used, it will not be easily punctured or torn as one might think, but will stand an amount of banging around, running into snags, dragging over obstacles, and abuse generally, that would badly injure any but the best of wooden canoes.
The variety of designs for canoes which has developed or been evolved from the more primitive forms is in these days almost endless, and the number of types from which to choose is confusing. The purpose for which the canoe is to be used will help you somewhat in selecting the type—whether for paddling only, or sailing, or for cruising and general use, and whether for a river or small pond, or for the deep and rough water of a lake or bay. All these matters must be considered in determining the beam, depth, shape of the midship section, the draught, degree of sheer,[318] whether to have keel, centre-board, or neither, and other points. This is too complex a subject to be treated in a hand-book on wood-working, and you can easily obtain the desired information, as well as detailed instructions for drawing the plans, from some good book on the subject.
A caution against making the framework too light and without sufficient stiffness may not be out of place. One frequently sees canoes, made by young boys, of such flimsy pieces and covered with such weak cloth that one is surprised that they can live in the quietest mill-pond, which is really testimony to the tenacious strength of a canvas-covered boat when properly made. A certain degree of flexibility is one of the desirable features of these boats, but they should always have sufficient stiffness to maintain their general shape in all weathers and in all waters to which a canoe is suited; therefore be sure to make a frame which will keep its shape of itself without relying upon the canvas to hold it together.
It is quite common to see these boats which (otherwise well built) lack stiffness lengthways—that is, in the longitudinal vertical section. Such boats after a little use become bent up in the middle, or "hog-backed." This is entirely unnecessary. Be sure, before putting on the canvas, that your frame is stiff enough lengthways to keep its shape permanently. If by any fault in your planning you find that it is not so, be sure to add extra stiffening braces inside before putting on the canvas, or your boat will probably be a failure.[319][40]
Canvas-covered boats should always be kept out of the water and under cover when not in use, as long-continued exposure to the water will be injurious.
An easily constructed paddling canoe, 14' or 15' long, and with beam about 30", will first be described.
It should be understood by the novice that this first form of construction here given is not that adopted by the professional boat-builder. It is given simply as a process by which one untrained in the more regular methods of construction can turn out a cheap and serviceable canoe, and at the same time acquire experience which will be of use if he should later attempt the more scientific, but also more difficult, details of construction used by regular boat-builders.
Before beginning work read carefully Marking, Rule, Square, Saw, Plane, Nailing, Painting, in Part V., and look up any other references.
Care should be taken to select clear, straight-grained stock, free from knots, checks, and other defects, and thoroughly dry.

Fig. 433.
Having made your working drawings for a canoe of the size and proportions which you may think best to adopt, begin the actual work by getting out moulds (Fig. 433) upon exactly the same principle as in the case of the flat-bottomed canoe just described, except that they will be of curved outline, as this is to be a round-bottomed[320] boat. Get out also a bottom strip or keelson with stem-and stern-pieces, which can be alike.

Fig. 434.
The arrangement and method of fitting these parts is evident from the illustrations. The keelson can be laid along the edge of a plank or some flat surface and blocked up towards the ends to give the desired degree of curvature or rocker. First fit in place the centre mould and then the two at the ends of the well-hole (Fig. 434), with the stem- and stern-posts (Fig. 435). These can be temporarily tacked or stayed in place until you are sure the positions are right. The coaming frame or wash board around the well-hole can now be put on, which will hold the three middle frames securely, and the two deck-strips running lengthways from the well-coaming to the tops of the stem-and stern-posts can be attached (Fig. 435). Next fit the two gunwale-strips, putting in also the remaining moulds or frames. After this the lengthways ribbands are to be fitted around the moulds from bow to stern (Figs. 435 and 435a, showing section at end of well). This will complete the shape of the boat.

Fig. 435.

Fig. 435a.
Great care must be taken with all this adjusting of the framework,[321] measuring, sighting, and testing in every way you can think of, to see that all the curves are "fair," without sharp or irregular turns, and also to see that both sides of the boat are alike. This is very important. The pieces may be all of the correct lengths, but still the boat may be one-sided, or twisted, or have a list.

Fig. 436.
A glance at Fig. 436 will show (as an exaggerated example) that pieces of the right dimensions can easily be put together in such a way that the boat may be ill-shaped,—an unfortunate result which is sometimes seen in home-made boats, due to lack of care in testing the angles and curves when putting the work together.
The ends of these strips will be more securely fastened to the stem-and stern-posts if depressions or "gains" are cut in the posts to receive them (Fig. 437), but this is not absolutely necessary if the ends are properly bevelled and carefully screwed to the stem-and stern-posts.

Fig. 437.
For additional stiffness, insert a series of ribs (Fig. 435), from 3" to 6" apart, according to their size and stiffness, from bow to stern. Barrel-hooping can be used and if sound is excellent, or strips of ash, oak, or elm, about 7/8" × ¼", can be used. It will not be necessary to bend these around a form. Those near the middle can be at once bent into place. As the ends of the boat are approached, the ribs will require to be rendered more pliable before being put in place (see Bending Wood). The ribs can be nailed or screwed to the keel and finally be fastened to the rib[322]bands, at their intersection, with copper nails clinched or riveted. Cheaper fastenings can be used, however, but copper is the best.
To hold such pieces in place temporarily, clamps can be easily made which will be sufficiently strong for the purpose (see Fig. 548).
When all these parts are fastened together, the frame will be complete.
To make a first-class job, the entire frame should be thoroughly painted, or at least given a soaking coat of oil, or it can be varnished.
For the canvas, get firm, closely-woven duck or sail-cloth of good quality and of sufficient width to reach from gunwale to gunwale. It is not necessary or advantageous to get the heaviest-weight grade, but beware of covering your boat with light drilling or the like, which, although you can make it water-tight, will not be sufficiently durable for anything but a boat for temporary use.
Find the middle of the canvas, lengthways, and stretch it on this line directly along the keel, the frame of the boat being placed bottom up. Tack at each end, and then, starting at the middle, strain the canvas around the boat, working along a little way at a time towards each end alternately and tacking to the top or inside of the gunwale as you proceed. Do not try to cover the top with the same piece as the bottom. If you can get a large needle and some stout cord, you can pull the canvas into place by lacing the edges across the top or deck of the boat, working from the middle towards the ends. In lieu of a needle use an awl or a nail. By lacing in this way and by manipulating the canvas with the hands you can, if you are careful, stretch it to fit the frame so that it will be smooth to a point considerably above the water-line. At the upper part, as you approach the deck line or gunwale, you may be unable to prevent some fulness, which you can dispose of by pleating if necessary. At the ends some little folding under may also be required, but you need have no great difficulty in adjusting the canvas neatly and so as to make tight joints. It is a good plan to cut a shallow rabbet on[323] each side of the stem-and stern-posts, just deep enough so that when the edge of the canvas is folded under and tacked, the surface of the canvas will be flush with the side of the post (Fig. 437). Small tacks should be used—not large carpet-tacks. Copper are best, but galvanized ones can be used. In all parts where leakage could occur, the tacks should be driven closely together, so that their heads touch, seeing that a good coat of lead is laid on the wood underneath. After the bottom of the canoe has been covered, the deck can be treated in the same way.
When the canvas is all on, dampen it slightly and paint thoroughly, painting, also, the coaming around the well-hole and the exposed parts of the stem-and stern-posts (see Painting). The dampening is supposed to cause the first coat of paint to penetrate the canvas more thoroughly than if the canvas is quite dry. Oil is sometimes applied before painting. After it has dried thoroughly, apply another coat. Do not spare the paint, for though the canvas absorbs a great deal, which adds to the weight of the boat as well as to the cost, it is really essential in making a good canvas-covered boat that it be well painted.
A light removable flooring, or grating of slats, should be placed on the bottom of the well, resting on the frames.
To make a canvas canoe with a keel, you have only to make the keel of a piece of 1¼" or 1½" stock (with a depth of, perhaps, 1¼" or 1½"), thinning it somewhat towards the ends so that it will join smoothly with the stem-and stern-posts. It can be fitted to these posts as shown in Fig. 438, and screwed directly to the keelson.

Fig. 438.
Particular care must be taken that the keel be got out straight and that it be fitted exactly on the centre line. In this case the canvas may be put on in two parts, being nailed to the keelson on each side of the keel; or the canoe can be made as previously described and the keel simply screwed on outside of the canvas, the latter being first thoroughly painted. Oak is excellent for a keel, but is rather heavy for a light canoe. Ash will do. Pine can be used. The keel will wear better if got out so that the concentric rings (annual rings) of the wood will be horizontal or parallel with the bottom of the boat and at right angles to the screws with which the keel is fastened on. If these layers incline slightly upward at the bow the keel will wear better.

Fig. 439.
A more advanced form of construction, and one more in line with the methods of a regular boat-builder, is shown in Fig. 439, the essential difference between this and the form previously described being that regular bent ribs are substituted for the frames made of board, and the latter, after serving as moulds around which to build the boat, are[325] taken out, the bent ribs being sufficiently stout to ensure strength and stiffness.
If you attempt this method the ribs must be carefully bent (see Bending Wood). Oak, ash, or elm is suitable for ribs. If a cooper's shop is within reach you can get the material there. It must, of course, be of good grain and free from flaws.
The process of construction is similar to that already shown. A suggestion for the arrangement of deck timbers (which can be of oak, ash, spruce, or any strong wood) is shown in Figs. 439 and 440, and for putting in a curved wash board or coaming in Fig. 440. For the latter a thin piece of straight-grained oak, elm, or ash can be used.

Fig. 440.

Fig. 441.
An excellent way to make a canvas-covered canoe is shown in Fig. 441. The essential principle of this consists in having a stiff gunwale, stiff keelson (inside the ribs), and ribs stout and numerous enough to ensure a permanently strong and stiff framework without the assistance of the lengthways ribbands. The outside is then sheathed with very thin strips of basswood, pine, or any reasonably strong and light wood (perhaps 3/16" thick and 2" or 3" wide), fitting them carefully to the shape, but without any attempt to make water-tight joints. If this boat, which is complete in all respects except that of being water-tight, is then covered with canvas as already described, the result will be a strong, smooth boat, without the irregularities of surface which are a necessary feature of the unsheathed form.[326]
This method is adopted in making canvas-covered canoes after the model of the birch-bark canoe, and the result is an admirable boat, which, while perhaps hardly equal to a genuine "birch" of Indian manufacture, is certainly the next thing to it for an open paddling canoe. Of course, if you can work up your design after the model of a real birch, you will have accomplished as much as you could wish in this line—but to design and construct a good canoe upon the birch model is not an easy thing for the beginner to do, and had best not be attempted until after considerable experience in simpler and less graceful forms. This mode of construction can well be applied, however, to a canoe of almost any type. The sheathing can be painted and the canvas laid on the fresh paint.
Another form of construction is to omit the keelson and fasten the frames and ribs directly to the top of the keel, having previously cut a rabbet for the canvas (as in case of the stem-and stern-posts) on each side of the keel at the top; the canvas by this arrangement being put on in two parts, one on each side of the keel.
It is, of course, possible to construct a canoe with nothing but two gunwale-strips, stem-and stern-posts, a strip for a keelson, and a number of barrel-hoops for ribs; and such affairs are quite often put together by boys, but they are apt to be of light and flimsy construction and to lack sufficient stiffness to keep their shape after being used for a while. A certain degree of flexibility and lack of rigidity is desirable in a canvas-covered boat, and, in fact, it is to this quality that it owes much of its merit; but it should have enough stiffness to hold its general shape permanently.
An extremely simple method is to omit the stem-pieces and simply bend the keelson up at each end to meet the gunwales at bow and stern, where all the lengthways pieces[327] can be fastened to a block, canvas being stretched over the whole as already described. A canoe which turns up so excessively on the bottom at bow and stern has some disadvantages, but still a useful and cheap boat can readily be made in this way. It should have a quite flat cross-section in the middle.
Most canoes can be sailed on the wind, often very successfully, by having a deep keel—which can be rockered or increased in depth towards the middle—or by adding a centre-board. But the latter is quite a nice operation, particularly so in case of making your first boat (see page 330).
The holes and the steps for the masts should be arranged before the canvas is put on, fitting extra thwarts across if needed, and it is a good plan to fit tubes for the masts. In case of sailing, the steering can be done with the paddle, or a rudder can be used (in which case a straight stern-post should be put in, for which a knee is good) and lines be led forward to the well-hole from a yoke at the top of the rudder. Many arrangements have been devised for steering sailing-canoes, but these details, as well as those for the rigging, can be found in any good book on the subject. If you are a novice, begin with a simple leg-of-mutton sail (Fig. 448).
Fig. 442.
It is better to buy oars than to try to make them. You may, however, have occasion to make a paddle. A good shape is shown in Fig. 442, but you can choose from a variety of forms.
The length can readily be determined from some paddle which suits you or you can experiment with a strip of wood. Five inches is a good width, and 5' to 5½' a good length, but these are matters of individual preference. Spruce is a good wood for[328] your first attempt at paddle-making. It makes a good paddle and is easier to work than birch, beech, or maple, or any of the harder woods. Pine can be used. Use a centre line in making your pattern. After the pattern is marked on the wood have the outline sawed at a mill or do it yourself with the turning-saw, or make a series of saw-kerfs to the line with the hand-saw and remove the superfluous wood with the draw-knife, spoke-shave, or chisel (see Paring). Having the outline correct, mark a line along the middle of the edge of the blade, and gradually and carefully shave the surfaces down towards this middle line, also tapering the thickness towards the ends. The draw-knife, spoke-shave, plane, rasp, file, scraper, and sandpaper can be used (see all of these tools in Part V. and also Paring and Rounding Sticks). Great care is needed to trim a paddle nicely to shape. A little hasty cutting may ruin the work.
Fig. 443.
The double-bladed paddle can be made of a single piece, or two pieces can be joined by a ferrule (Fig. 443). The double-bladed paddle can be from about 7' to 8' or 9' long and the blades are made broader and shorter than that of the single paddle. A couple of round rubber rings on each end of the handle will stop some of the dripping of water from the blades as they are raised.
Small Sail-boat.—The boat shown in Fig. 444 is a good form for the amateur to attempt, and makes a serviceable craft for sheltered waters. From twelve to sixteen feet is a good length, and the beam should be wide, as shown. The depth can be from twelve to sixteen inches.
Before beginning work read carefully Marking, Rule, Square, Saw, Plane, Nailing, in Part V., and look up any other references.
Care should be taken to select clear, straight-grained stock,[329] free from knots, checks, and other defects, and thoroughly dry. Pine is excellent.

Fig. 444.
The general principle of construction does not differ from that of the flat-bottomed boats already described, and detailed directions are therefore omitted. The sides should each be of one ¾" or 7/8" board. The arrangement of the details is obvious. Knees can be used to good advantage. The deck should be of wood, the boards (½") resting on cross-beams or carlins, reaching from gunwale to gunwale (as already shown) and slightly arched. Around the well-hole, brackets can be used (Fig. 445). The deck can be covered with canvas.

Fig. 445.
This boat, as shown in the illustration, is planked across the bottom like the other flat-bottomed boats already described, but the bottom boards can run lengthways instead, if preferred. In this case knees should be inserted, or cross-frames of some kind, to reach across the bottom and to which the bottom boards can be nailed. The bottom boards should be not less than ¾" thick and the edges must be carefully jointed (see Jointing). They can be laid[330] slightly apart and the seams caulked (see page 302). Strips of flannel laid in thick white-lead paint can be placed between the edges of the sides and stern and the bottom boards, or the edges can simply be painted.

Fig. 446.
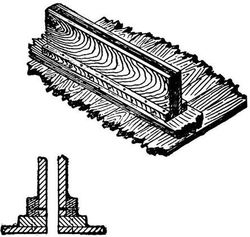
Fig. 447.
The construction of the case or trunk for the centre-board can be understood from Figs. 446 and 447. By either method of construction the trunk consists of two upright posts, or "headledges," cut with shoulders at the lower end, and sides of board screwed to these posts. A slot is sawed through the bottom of the boat of sufficient width and length to give the centre-board free passage—that is, of the dimensions of the opening at the bottom of the trunk. To cut this slot several holes can be bored close together until an opening is made sufficiently large to start the saw. By the arrangement shown in Fig. 446, a plank is taken and a slot is cut in it enough longer than that in the bottom of the boat to include the lower ends of the headledges, which should fit snugly. The sides of the trunk are screwed to this plank from underneath, and the plank is in turn screwed to the bottom of the boat. The headledges can be additionally fastened from the edge of the plank, horizontally. Unless the bottom of the boat is straight, the plank must be accurately fitted to the curve on the[331] under side,—not an easy task (see Scribing and Paring). All the joints should be laid in thick white-lead paint, and at the bottom flannel can be laid in the seam, with lead, or caulking can be resorted to.
By the method shown in Fig. 447, the headledges and sides are fitted to a board on the bottom, or to the keelson, and, after being put in place, strips of plank are fitted lengthways on each side at the bottom and bolted or screwed to the bottom and to the sides of the trunk. The lower edges of these strips must be fitted to the curve of the bottom and the whole made tight, as just shown. Much care must be taken with this work to make tight joints. The inside of the trunk should be painted before putting together, and holes be bored carefully for all the screws (see Boring and Screws).
The centre-board itself can be of wood or of galvanized plate iron and is pivoted at the forward lower corner, and can be raised and lowered by a rod attached to the after corner.
Remember to paint the inside of the boat carefully with at least two coats before putting on the deck, and also that copper nails and brass fittings are better than those of galvanized iron (particularly for salt water) if you can afford them.
The coaming or wash board can be of ½" oak, ash, or elm. The deck can first be laid, lapping slightly over the space to be left open. The line for the coaming can then be marked on the deck, and the projecting wood sawed or trimmed to the line, when the coaming can be bent into place and fastened.
The gunwale-strip, like the stern-post, the rudder, and the tiller, should be of hard wood, as oak. Hackmatack is good for the stem.

Fig. 448.
The mast should be of spruce. A strong thwart, with a hole in it, can be fitted across between the sides, just under the deck, and a block with another hole fastened to the bottom. The place at which to step the mast must depend upon the style of rig you adopt.
One who is used to sailing a boat will not seek for information[332] on this subject in a manual on wood-working, but for the novice it may be well to state that a leg-of-mutton sail (Fig. 448) is undoubtedly the simplest, easiest, and safest rig for the beginner, and it will be wise to learn to manage this rig first. The spritsail (Fig. 449), with or without the boom, is an easily managed sail, which works well with this boat. Either of these rigs can be unshipped in a moment, the mast, sail and all being lifted out when desired. For other styles of rigging you should consult someone used to sailing or some book on the subject.
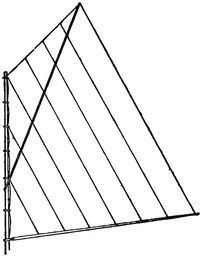
Fig. 449.
For the painting, see Painting, in Part V.
Small Ice-Boat.—The main framework of even the most elaborate ice-boat consists merely of a lengthways centre timber or "backbone" and a cross-piece or "runner-board" (Fig. 450), the whole resting on three runners, one of which acts as a rudder.[333]

Fig. 450.
Before beginning work read carefully Marking, Rule, Square, Saw, Plane, in Part V., and look up any other references.

Fig. 451.
A small boat can be made as shown in Fig. 451. The dimensions can easily be altered. The particular rig given is merely for illustration, for this is not a book on sailing, and you can find all the facts you need about rigging in any good book on the subject. If you are a novice you had best be content with a[334] simple leg-of-mutton sail (Fig. 448), which is, for the beginner, the safest and most easily managed. A spritsail (Fig. 449) or some other simple form can be used if desired. If you know how to sail a boat, you can adopt such rig as you think best.

Fig. 452.
First get out the backbone. Get a piece of clear spruce, or pine, perhaps 12' × 3" × 4". A round spar may be used. Be careful to select good lumber, as great strain is put upon it. A piece which has naturally sprung lengthways should be placed with the convex edge upwards. Next get out the runner-board, perhaps 6½' × 2" × 9", of spruce. Pine is also good, or any strong wood will do. Choose a clear, sound plank. If naturally sprung in a bow-like curve, put the convex side upwards. Smooth the pieces sufficiently to avoid splinters and roughness. Thin the runner-plank on top each way from the centre down to about an inch in thickness at each end, if you can have it sawed at the mill. It is hardly worth while to do this by hand. Fasten the runner-board, at exactly the middle of its length, across the backbone, at a point perhaps 6½' from the stern end, with a strap-hanger (Fig. 452) screwed up with nuts and broad washers on the under side. If you cannot afford this, put a bolt through both pieces (see Boring), tightening underneath with nut and washer, and putting cleats on the runner-board (Fig. 453). Be sure that one edge of the runner-board is straight and at right angles to the backbone. Nail a piece of board, 18" long and 3" wide, across the stern end of the centre timber. Add the two side pieces a b and c d (Fig. 450), of 2" spruce joist, nailing them firmly in place, thus forming the sides of an irregular box (see Nailing). Turn the frame over and nail a bottom on this box, laying the boards crosswise and nailing to the backbone as well as to the sides and end.[335]

Fig. 453.
Next, to make the runners, get out six pieces of oak, or other hard, strong wood, 9" × 3" × 4". Mark with the square from the straightened edge of the runner-board the positions for the inner blocks, equally distant from the backbone, screwing them in place (Fig. 454), with one screw in each. Measure across with a stick from one to the other at each end to see that they are just parallel, and also test their being at right angles to the runner-plank, which in turn must be at right angles to the backbone, in order that the runners may be parallel and not slewed sideways. Having tightly screwed these inner blocks, brace them with angle blocks, as shown. The outer blocks can next be fitted, leaving just space enough for the runners to play freely, but not loosely, between the blocks. The holes for the pins for the runners can be bored in the outer pieces before they are screwed on. Then, using these holes as a guide, those in the inner blocks can be bored in line. The runners themselves should be carefully made and fitted, for they are a very vital part of the boat. On the large boats they have usually been made of oak, with a shoe of cast iron at the bottom attached by bolts, but this is quite a piece of work for a small boat and you can get the blacksmith to work out the whole runner, with a hole bored for the pin-bolt. Make a pattern about 18" or 20" long, rocking very slightly in the middle and more quickly near the ends. The hole for the pin should be back of the middle, so that more of the shoe will be in front of than behind the pin. This is to lessen the shock when the runner strikes an obstruction. The cutting edge may have an angle of about 45° for trial (Fig. 455). If too blunt or too sharp you can alter it. It will take considerable filing to get the edge true, straight, and uniform (see Filing). Finish with an oil-stone.

Fig. 454.

Fig. 455.
The rudder-runner can be a little shorter. Screw a piece of 2" oak plank on top of the rudder-blocks and on top of this fasten a plate or socket to which is attached a piece of gas-pipe about a foot long, for a rudder-post. At the top of the rudder-post screw an elbow and a short piece of pipe for a tiller (Fig. 456). If suitable gas-pipe cannot be found, the blacksmith can fix an arrangement that will answer, but it must be strongly fastened to the rudder-blocks, and there should be some kind of metal bearing between the wooden top of the rudder and the under side of the backbone, if nothing more than a washer. The two surfaces of wood should not rub against each other. Wind the handle of the tiller with cord, cloth, or bicycle tape.

Fig. 456.

Fig. 457.
Stay the bowsprit (or forward end of the backbone) by stout wires to the runner-plank. These can best be of wire rope passed through eye-bolts or attached to iron straps and tightened with turnbuckles, but to save that expense strong wire can be used. Notches can be cut at the edges of the runner-plank and the backbone, and wire be wound around to hold rings to which the wire guys can be fastened, but it is hard to make such an arrangement taut and to keep it so. Next fasten a mast step with square hole to the backbone (Fig. 457), forward of the front edge of the runner-plank. Put in eye-bolts at ends of the runner-plank and at the bow for shrouds and a few inches from the stern of the backbone for the main sheet. Wire rope is best for the shrouds, but common wire or rope can be used. For the mast and spars use natural sticks of spruce. The sides of the box can be built up higher at the stern with boards,[337] if you wish, to prevent being thrown off by the sudden movements of the boat. A rubber washer under the backbone where the rudder-post passes through is sometimes used to lessen the jar when passing over obstructions. A curved piece of wood fastened on the under side of the backbone just in front of the rudder will act as a fender for the rudder, in case of slight obstructions.
The whole boat can be oiled, painted, or varnished if desired (see Finishing and Painting).
If you use a cat-rig, spritsail, or other rig without any head-sail before the mast, it would be well to place the runner-plank further forward.

Fig. 458.
The latest and best way to brace the frame of an ice-boat is to strain guys of wire rope (Fig. 458), tightened with turnbuckles, omitting the side pieces, and fastening a car or box to the backbone, but this arrangement, though lighter and more elastic, is more expensive and not so easy to make for a small boat as the one just described.
A somewhat simpler way to arrange the framework is shown in Figs. 459, 460, and 461. In place of the runners already described a cheaper arrangement can be made by the blacksmith of 5/8" bar iron, steeled, and bent up at the ends, as shown in Fig. 461.[338]
A much smaller affair can be made by simply arranging two pieces of joist or plank in the form of a cross (bracing them so far as may be necessary), putting cleats under each end of the shorter cross-piece or runner-board and fastening common skates to the cleats, using another pivoted skate at the stern for a rudder. The runners of the skates should be ground, or filed, as shown above.
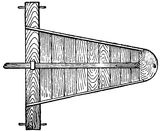
Fig. 459.
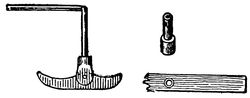
Fig. 460.
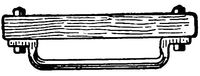
Fig. 461.
The details of such a small ice-boat you can work out for yourself by modifying and simplifying according to your ingenuity the suggestions for a larger boat given above. The hardest part to fix is the rudder-post and tiller. Some iron arrangement is best, but something can be contrived in the following manner, which is not, however, recommended as very satisfactory. Fasten the rudder skate upon a piece of board in which is cut a mortise. Into this mortise a short piece of hard wood, like a large broomstick with squared end, is fitted for a rudder-post. The upper end of the rudder-post, squared just like the lower end, is fitted into a mortise cut in the tiller piece. A washer should be placed between the skate-block and the backbone, and the rudder-post should turn freely in the hole in the backbone, but not loosely enough to wobble around. Cut the mortise in the tiller and fit to the post before cutting off and shaping the tiller, to avoid danger of splitting. An extra block may have to be put under the backbone at the rudder to level the boat so that the skates will bear properly on[339] the ice, for if the stern is much lower, so that they drag by the heels, the boat will not sail properly. Wooden arrangements of this sort are, however, only justifiable as makeshifts, and require good workmanship to be strong and effective.

House-Boat.—A house-boat consists of two parts, one of which (the boat) is essentially like the scow or flat boat already described, and the other (the house) is usually much the same as some of the little structures described in Part III. (House-building for Beginners), however expensively and elaborately it may be arranged and fitted up. The advantages of the house-boat for camping, shooting, fishing, and for some kinds of excursions are too well known to require explanation. It is an excellent thing for two or more to build together. It may not be out of place to suggest that, in the desire to have the house sufficiently large and convenient, you should not be misled into making plans which will necessitate building a large boat. Dimensions (on paper) for such things are quite deceptive, and to build a large boat, even of such a simple type as the scow or[340] flatboat, is quite a serious undertaking for the beginner—as regards both labour and expense.
If you can find a scow or flatboat already built, of suitable dimensions and which is sufficiently tight, or can be made so by caulking, you have only to proceed to build the house upon it. If, however, the boat as well as the house is to be built, you can proceed to build the boat in the way already described (page 299). Additional suggestions may be found in Figs. 462 and 463.
Before beginning read carefully Marking, Rule, Square, Saw, Plane, Nailing, in Part V., and look up any other references.

Fig. 462.
Two-inch plank should be used for these boats, which are intended to be from 14' to 20' long. After putting together the sides, ends, and bottom, as already described, 2" × 4" joists can be laid lengthways on the bottom, as shown, which will afford an underpinning for the house, will distribute the weight over the[341] bottom, keep the floor raised above the water which may leak in or collect from the rain, and also stiffen the structure of the boat. Before laying these joists, notches should be cut on the under edges with the saw or hatchet, in several places, to allow the water to pass through, as in the case of the boats already described.

Fig. 463.
The illustrations show a general system of construction for the house, which can be followed, or you can make such alterations as you think desirable. In addition to the suggestions in the accompanying illustrations, further details and suggestions will be found in Part III. (House-building for Beginners). Most of the details are matters of personal preference, and can readily be arranged without more detailed description. The roof had best be covered with canvas, put on as one piece (being sewed previously if necessary). If laid in paint and then given two or three coats of paint, much as in the case of the canvas-sheathed canoes already described, a tight and durable roof will be the[342] result. After the edges of the canvas are tacked under the edge of the roof, strips of moulding can be nailed around under the edge.
An even simpler way to make the roof is to have it flat, but slanting slightly towards either bow or stern. An inclination of 3" is enough, with tight canvas roof, to shed the water.
The remaining details of the construction of the house have already been treated. The interior arrangements you can contrive as desired.
Either, or both, of the ends can be decked over, or the whole can first be decked over and the house built on the deck. In this case, access to the hull, for stowage, can be had by hatches, or trap-doors inside the house. If both the ends are to be decked, the hull can very well have one or two lengthways divisions of plank, for stiffness and strength,—that is, insert between the ends one or two pieces of the size and shape of the sides, in which case the lengthways joist already spoken of will be omitted. This is a good way. In case of decking, nail a strip of moulding on the outside along the juncture of the house and the deck, so as to make a tight joint, which should be well painted.
If one or both ends are undecked, a removable grating of slats (a part of which is shown in Fig. 462) will be useful.
It is well to have at least one window at the bow end of the house, for the boat will of course lie with bow towards the wind and it will be a good thing when housed in a storm to be able to see to windward, as you cannot well keep the door at that end open, while the after door will usually be sufficiently sheltered to be left open. Many modifications of these simple plans can be made. The roof can be extended over either end, which is easily done without altering the system of construction. This is very convenient under some circumstances, and will add but little to the expense. The frame can even be covered with canvas, but this will be inferior to wood, except in point of lightness. A solid roof is best, however, in any case.
Sweeps must, of course, be provided for rowing, sculling, or[343] steering, and a mast can easily be added, on which sufficient sail can be hoisted to be quite a help in going before the wind. If a mast is used, the door at the bow end of the house can be at one side of the end so that the mast can be close to the house, to which it can be fastened. A rudder can be added, if desired, with a skag.
The whole craft should be thoroughly painted (see Painting).
Houses are sometimes built on rafts. This will do very well if the raft is a good one, like a float. A float can be easily made, if you have the materials, by laying a thick flooring on logs or heavy timbers and providing greater buoyancy than such a platform naturally has by fastening under it, between the timbers, as many empty and sealed barrels or casks (oil-barrels are good) as may be necessary. When the float is stationary and under ordinary circumstances, there is, of course, no need to fasten the casks in any way except to fence them around so that they cannot roll or slide out, as their buoyancy will prevent their escaping, but it is easy to fasten them by chains or otherwise if needed. This makes an excellent foundation on which to build a house, and has some advantages over a boat for a stationary arrangement, but is obviously not as well suited for moving around as a scow or flatboat.
Anvil.—An anvil is often useful and is sometimes combined with a vise. It should have a flat steel surface and also a tapering, rounded (conical) point. An old flat-iron does quite well.
Auger-Bit.—See Bits.

Fig. 464.
Awl.—The Brad-awl is the simplest boring tool you will use. Unlike gimlets and bits, it does not take out any wood, but merely presses it aside out of the way, which is good for nail and screw holes, because the elasticity of the woody fibres tends to make them spring back and close around the nail or screw, thus helping to keep it in place. The awl should always be a trifle smaller than the nail. Bore with the cutting edge across the grain of the wood, on the same principle as in driving nails (Fig. 464), lest the wedge shape of the tool cause the wood to split (see Nailing). Press the awl straight down in this position until the point is well into the wood, when you can twist it a little, at the same time pushing it further into the wood. There is always risk of splitting thin wood near an[345] edge, unless you use great care. The brad-awl can be sharpened easily. See Sharpening and also Boring.
Do not buy combination awls with "tool-chest handles," filled with an assortment of awls and little chisels, gouges, screw-drivers, saws, etc. Such affairs are sometimes useful, but the loose tools are apt to become lost or broken, and the money can be used to better advantage in other ways.
It is well to have a variety of sizes of awls, fitted into hardwood handles. An awl handle into which awls of various sizes can be fitted, somewhat as a brace holds bits, answers very well, if you have to carry your tools from place to place, but for shop-work it is more convenient to have each awl in a separate handle.
The Marking-awl or Scratch-awl is simply an awl with a round, sharp point used for marking in carpentry, but for very close work a knife or chisel is better. See Marking.
Axe.—This is such a common tool that it needs no description, and is, moreover, seldom required for amateur work.
Back-Saw.—See Saw.

Fig. 465.
Beading.—A tool for scraping beading, reeds, and the like, can be made by filing the reverse of the shape required on the edge of a piece of saw-blade steel, taken from a broken saw or scraper, and inserting this blade in a kerf sawed in the end of a piece of wood (Fig. 465). To change the position of the blade,[346] one or both of the screws can be loosened and then tightened after the blade has been adjusted. This tool is pushed forward with both hands, much like a scraper, the shoulder of the block bearing against the edge of the board as in using the gauge (Fig. 466). Tools for this purpose can be bought.

Fig. 466.
It usually produces the best effect not to carry this beading to the extreme ends of an edge, but to stop a short distance from the ends and with a chisel cut the beads to a square and abrupt end (Fig. 305). See Plane.
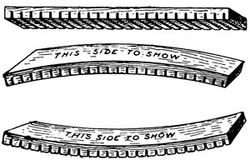
Fig. 467.
Bending Wood.—To bend a piece (without steaming or boiling) which is to be fastened so that but one side will show, make a series of saw-cuts of equal depth (Fig. 467) across the piece, and partly through it, on the back side (the side which will not show), first running a gauge line along the edge (see Gauge), that the cuts may be of equal depth. This will practically, so far as bending is concerned, make the piece thinner, and it can readily be bent and fastened in position. The nearer together and the deeper the cuts are the more the piece can be bent—that is, up to the breaking-point. Hot water can be used on the face side. Such curves can sometimes be strengthened by driving wedges, with glue, into the saw-kerfs after the piece is bent to the desired curve (Fig. 468).
Fig. 468.
To make a small piece of wood pliable, so that it will bend to any reasonable extent (which, however, depends much upon the kind of wood), soak it for some time in boiling water, when it can usually be bent into the desired shape. It must be securely[347] held in position until the moisture has entirely left it, or it will spring back to (or towards) its original shape. This drying will take from several hours to several days, according to the size of the piece and the condition of the atmosphere. There is almost always a tendency to spring back a little towards the original shape, so it is well to bend a piece a little more than you wish it to remain, except where it is to be fastened so that it cannot spring back.
Wood which naturally bends easily (particularly thin pieces) can often be made pliable enough by simply soaking in cold water, but hot water is usually more effective. Anything which you cannot manage with the hot water you can take to a mill or a ship-yard and have steamed in a regular steam-chest, which is really nothing, in principle, but a big wooden or iron box, with a steam-pipe running into it, in which the pieces are kept until the steam has made them pliable. Wood is now bent for many purposes by "end pressure," but this is impracticable for the amateur.

Fig. 469.
To bend the ends of pieces like skis, hockies, etc., a big kettle or common wash-boiler full of boiling water can be used. An apparatus for long sticks, as ribs for a canoe, can be made with a piece of iron pipe of suitable size. Plug one end tightly and stick it firmly in the ground, so that the pipe is fixed in a slanting direction. Put water in the pipe, build a fire underneath, put the sticks in the pipe, stuff a rag loosely in the upper end and the apparatus will be in working order (Fig. 469).

Fig. 470.
You must often have some sort of form or mould for bending[348] the piece and for holding it while drying. For some kinds of bending, where there is no occasion to be accurate, you can often bend a piece around some corner or common object, as a barrel, log, etc., and tie it in place until dry, or fasten it with cleats, but for nice work you should make a form or mould. If you wish to bend ribs, for instance, which should be accurate in shape, you can cut a piece of board or plank to fit the concave side of the desired curve. Fasten this piece upon any flat surface, as an old plank, and bore holes for wooden pins around the curve at such a distance from the pattern piece or mould that the piece to be bent can be firmly wedged against it, as shown in Fig. 470; or you can attach blocks instead of pins—any arrangement by which the bent piece can be wedged in place. A strap of hoop iron or other metal or even a thin piece of wood can be placed outside of the stick to be bent, to prevent the wood splitting or splintering on the outside, as it is liable to do if bent much, unless of good quality and straight grain, but there is no need of doing this in many cases.

Fig. 471.
Another way is to have the mould or form in two parts, as the two parts of a board or plank through which the curve has been sawed (Fig. 471). The piece to be bent is put between the two forms, which are then pressed together by clamps, wedges, or a lever. This is a good way for short pieces which cannot easily be bent, or which do not readily cling to the required curve.

Fig. 472.
Another form of bending-mould is shown (an inverted view) in[349] Fig. 472. In this case the pieces to be bent are held in place by easily made clamps.
A simple way to make a form for bending strips is to cut the curve out of a piece of plank, or boards nailed together (Fig. 473). The end of the strip is then caught against the cleat and the piece bent around the curve. If it tends to spring off the curve, you must contrive some way to clamp, wedge, or even tie it in place. As a piece must be left on the form until dry and set, if you have a number to bend, it may be better to make a form wide enough to bend them all at once. Take any boards, or build a curved addition on the end of a box, and contrive a wider form on the same principle (Fig. 474).

Fig. 473.

Fig. 474.
For ribs, and the like, the stock should be got out so that the annual layers will be at right angles to the direction of the nails with which the pieces are to be fastened, or parallel with the curved sides of the pieces.
Bevel.—This is similar to the square, but with a movable blade which can be set at any angle. When permanently fixed at an angle of 45°, it is called a mitre-square. The bevel is useful, not merely to mark any desired angle, but to repeat some[350] angle already formed, to which you apply it, moving the blade until it fits the angle, when the tool can be applied to another piece and the angle repeated. The directions about holding the head of the square close to the edge apply also to the use of the bevel (see Square).

Fig. 475.
To obtain an angle of 45° with the bevel, place it against the inside edge of the large steel square (Fig. 475), setting the blade at such an angle that it will intercept equal distances on both arms of the square.

Fig. 476.
On this same principle, for other angles, observe the figures intercepted by the blade, as shown in Fig. 476. Note that for this angle the figures are 2 and 4, and you can get the angle again at any time by setting the bevel at those figures. You can also set the bevel by laying off the required angle with compasses on a straight-edged board, to which the bevel can be applied. The angle should be so laid out on the board that it will not be necessary to try to set the point of the compasses exactly at the edge, which is of course impossible. See Bevelling.

Fig. 477.
Bevelling.—To bevel the edge of a piece with the chisel,[351] draw-knife, spoke-shave, plane, or even knife, first mark parallel lines to work to with a pencil-gauge (see Gauge) rather than a spur-gauge, so as not to leave a scratch to disfigure the work after the bevel or chamfer is cut (Figs. 477 and 485). Then pare the edge down gradually to these lines, or prepare the way by first scoring the wood with cuts (Fig. 615), being sure to trim off in the direction of the grain; but in bevelling both end and side, as in Fig. 478, first cut the end, because of possible chipping at the corner, and in cutting the end you can work from each corner towards the centre. In paring a bevel across the grain, push the chisel as shown in Fig. 479, as it is the easiest and cleanest way to cut, and prevents splintering.

Fig. 478.

RIGHT.WRONG.
Fig. 479.
A simple bevel (Figs. 477 and 478) is usually best made with the plane, whenever there is room to use it. Plane bevels in end wood from both edges and you can often slant the plane to good advantage like the chisel in Fig. 479. See also Chamfering.
Bit-Brace or Bit-Stock.—This tool requires no description. The ratchet brace is useful for boring in awkward places where it is difficult to use a common bit-stock. There is also a contrivance for extending the bit-brace to bore in places which cannot be reached by the common brace alone, but this you will[352] seldom require. An angular bit-stock, with a "universal angle" adjustment, is useful. By this the bit can be pointed in different directions, while the bit-stock is turned continuously in the ordinary way, thus enabling a hole to be conveniently bored in an out-of-the-way corner. See Boring.
Bits.—The auger-bit (the sizes of which are arranged by sixteenths of an inch) so commonly used with the bit-brace, consists, at the cutting end, of a spur, two scoring-nibs, and two cutting-lips. You will see from Fig. 480 that the spur a, acting like a gimlet point or a screw (which it is), starts the bit by drawing it into the wood so that the scoring-nibs b make a circular cut around the circumference. As this cut deepens, the cutting-lips c slice away the wood to be removed in the form of shavings, which are brought to the surface as the boring proceeds.
This bit can be sharpened with a file, the scoring-nibs being sharpened from the inside, lest they be made to score a circle too small for the rest of the bit, while the cutting-lips are filed from the under side.

Fig. 480.

Fig. 481.
The centre-bit is a useful tool, particularly for very thin stock. The spear-like point a (Fig. 481), acting as a centre, the point b cuts a deep ring, and the edge c, which is bent so as to form a flat chisel, scoops out the pieces of wood, and so a round and smooth hole is made. This bit does not cut very well with the grain. It can be sharpened with a small oil-stone. It is well to bore a trial hole with this bit in a piece of waste wood when exactness is required, because the spur is not exactly in the centre, so that the hole cut is a trifle wider than the diameter of the bit.
The expansion-bit has an adjustable contrivance that enables it to bore holes of various sizes, but such tools are hardly necessary for beginners, though very convenient and often used by carpenters.[353]
The gimlet-bit is a common form, but is easily dulled and bent and is likely to split delicate work. The quill-bit is excellent, except for end grain. Shell-bit, gouge-bit, pod-bit, spoon-bit, duck's-bill-bit, etc., are names applied to simple tools good for boring small holes. They are easily sharpened with a stone, work quickly and leave a smooth hole, but do not cut so well in end grain. They are not as much in use as formerly, the twist-drill taking their place for many purposes.
Reamers, or tapering bits (half-round, square, octagonal, conical), are useful to enlarge holes and occasionally to make them conical. Reamers for metal are also useful.
For other forms of boring implements, see Awls and Twist-drill. See also Boring and Countersink.
Block-Plane.—See Plane.

Fig. 482.
Boards or Planks, Laying Exposed.—In laying boards or planks to be exposed to the weather, place them (unless they are from the middle of the tree) so as to have the outer side exposed—that is, the side farthest from the heart should be put outside or uppermost. If put the other way the action of the atmosphere, water, etc., will tend to separate and loosen the layers and fibres (Fig. 482).
Boring.—In boring with the bit-brace, after the bit has gone a short distance into the wood, stop and, keeping the brace in position, test carefully from in front and from one side to see whether the bit is at right angles to the surface. Repeat this test and alter the position of the brace as many times as may be necessary until you are sure that the bit is going through[354] at the right angle. A common way to do this is to stand squarely in front of the work and judge by the eye whether the bit is at right angles with the work, and then to stand at either side at right angles to the first position and judge of the angle again. The direction of the bit can be tested more accurately by applying the square. Few people can bore accurately without some such test.

Fig. 483.
Some workmen rest the chin on the left hand on top of the handle of the brace, to steady it (Fig. 483), and to increase the pressure, and sometimes the shoulder is applied.
To remove a bit from the wood, give the brace a turn or two backward, which will loosen the spur, and then either pull the bit straight out, if it can be done easily without turning the brace, or, as you pull it out, keep turning the brace as if boring, thus[355] bringing out the chips, which, if you remove the bit by turning the brace backward, will be left in the hole.
In boring through a board or timber, watch to see when the spur of the bit begins to come through on the other side; when it does, turn the piece over and bore in from that side, or clamp a piece of waste wood on the other side and bore right through into it. Either way will prevent splintering or a ragged or "burred" edge, where the bit leaves the wood.
In boring a hole of any depth with the grain, i.e., in the end of a piece of wood, withdraw the bit, after it has entered the wood a short distance, to clear the chips from the hole, reinsert, bore, and withdraw again, and continue in this way until you reach the required depth. This will save injuring the bit, and will make the boring easier.
In boring with small bits, particularly when there is danger of splitting, as with the gimlet-bit, draw out the bit and chips once in a while.
When the position of a hole must be exact on both sides of the wood it is well to mark the position accurately on each side and bore from each side until the holes meet.
Frequently holes must not be bored through a piece, but must stop at a certain depth. Suppose you have to make a dozen holes 2" deep. Take a wooden tube if you have one, or bore a hole through a block of wood of such length that when pressed against the jaws of the brace two inches of the end of the bit will project beyond the tube or block (Fig. 484). Then bore until the end of the tube touches the surface of the wood, when the hole will, of course, be 2" deep. Metal attachments can be bought for this purpose. See Awl, Bits, Twist-drill.

Fig. 484.
To cut a hole larger than any bit you have, bore a series of smaller holes just within the circumference of the desired circle,[356] and trim to the line with the gouge or finish with keyhole or compass-saw.
Bow-Saw.—See Saw.
Brad-awl.—See Awl.
Bruises, To Take Out.—Small bruises in wood can be taken out by wetting the place with warm water, or even with cold water, and rubbing down the grain with sandpaper if necessary. If that is not sufficient, a hot iron, as a flat-iron, held near the bruise, the latter being covered with wet blotting paper or several thicknesses of brown paper, will often remove a quite large dent. The operation can be repeated until it has no further effect.
Brushes.—It is well to have a brush of some sort for cleaning off work, the bench, etc. A sash brush is good.
For most of your painting, shell acing, etc., you will usually get along better with small flat brushes than with large round ones, except for very coarse work. Those with flattened handles are convenient. From one to two inches in diameter will usually be large enough, unless for such work as painting the outside of a house, when something larger will save time. For painting small or narrow surfaces, the brushes used for "drawing" sashes are good, and for drawing lines "pencil" brushes will be required. A good brush for glue can be made by soaking one end of a piece of rattan in hot water and then pounding the softened part, when the fibres will separate, making a stiff brush.
Bull-Nosed Plane—See Plane.
Calipers.—Calipers, which are "inside" or "outside," according to whether they are to find the diameter of a hole or the outside diameter of an object, are very important in some work, as turning, but, though very useful at times, are not nearly as important for the work of the beginner as compasses.
Carving-Chisel.—See Carving Tools.[357]
Carving Tools.—A few carving tools are often very useful for general wood-work. It is convenient to have these carving tools fitted in handles of a different pattern from your other tools. An octagonal shape is good. A carving-chisel is very useful in working on odd-shaped pieces, because the cutting edge is bevelled on both sides. A carver's skew chisel will be, perhaps, more generally useful for your work than one ground squarely across. A parting-tool, sometimes called a "V tool," is occasionally convenient, though hardly a necessity for most plain work. A small veining-tool (like a very small gouge) is often useful.
Centre-Bit.—See Bits.
Chalk-Line.—See Marking.
Chamfering.—A chamfer is the surface formed by cutting away the angle made by two faces of a piece of wood.

Fig. 485.
In cutting the ends of a stop-chamfer (Fig. 485), take care not to cut quite down to the line at first, as you will be very apt to cut a little too deep and leave a tool mark which cannot be removed. In the case of long stop-chamfers, use the plane whenever you can, so far as it can be used without hitting the wood at the ends. The draw-knife can often be used to remove the wood, being followed by the plane. The plane can be used slantingly, so as to cut nearer the ends, and a bull-nosed plane will cut nearer still, but the extreme ends will have to be trimmed to shape with the chisel or other tool. See also Bevelling and Paring.
Chisel.—The firmer-chisel is meant for light hand-work, for paring off wood and trimming to shape, and can be used for light mortising, though the mortise-chisel is intended for that purpose.[358] It is often an advantage to have the long edges of such a chisel bevelled on the same side as the cutting basil, as it can be used more conveniently in some places. Taking off the corner of the basil when grinding, often answers the purpose.
The framing-chisel is stouter than the firmer, has a stronger handle to stand heavy blows of the mallet, and is meant, as the name indicates, for framing, mortising, and other heavy work.[41] See Mortising.

Fig. 486.
Fig. 487.
The straight-bent chisel is shaped as shown in Fig. 487, and is very useful for cleaning out corners, grooves, and other places where the common firmer-chisel cannot be used to advantage.
A skew-chisel is simply ground slanting, instead of squarely across, and is useful for corners and odd work. See Carving Tools.
There are other forms, seldom needed by the amateur, as the corner-chisel, which is used for cutting or paring angles and corners.
Those chisels and gouges which have the handles fitted into sockets at the upper end of the iron, instead of the iron being stuck into the handle, and with ferrules at the upper end where they are struck by the mallet are, of course, the strongest for heavy work, although the lighter handles are just as good for light work.
Do not let your left hand get in front of the edge of the chisel[359] while working, for the tool may slip and give you a bad cut, and in most cases the left hand should be kept on the lower part of the chisel to help control it, which is not easily done with one hand. In some cases, as in paring the edge of a piece directly downward towards the bench, it may be proper to hold the work with the left hand and use the chisel with the right; but as a rule, particularly for beginners, first see that the work is securely fastened or held from slipping by vise, clamp, or other expedient, and then keep the left hand on the chisel, which will steady and guide the tool, and, incidentally, prevent the hand from being cut. See Paring and Sharpening.
Circular-plane.—See Plane.
Clamps.—Long clamps (cabinet-clamps), shown in the accompanying illustrations, are extremely useful in making glued joints and in various clamping operations. Many, of different lengths, are to be found in wood-working shops. Although much work can be accomplished without them, if you can afford a pair or more of medium length, or longer, they will be very useful. Wooden clamps will answer every purpose, although steel ones are better, but more expensive.
Fig. 488.
To clamp two or more flat pieces together, as in making a "glue-joint," or in clamping framework, as a door or picture-frame, lay the work across the horses, which should be so placed that their tops will be as nearly level, or in the same plane, as possible, and apply the clamps as shown in Fig. 488, always[360] putting pieces of waste wood between the edges of the work and the clamps. Place the clamps so that either the flat side of the bar or the corner, as shown, will lie against the surface of the work, thus keeping it from bending towards the bar when the screw is tightened. The number of clamps to be used must depend on the size of the work, but there is not usually much danger of an amateur's work being clamped too securely.[42]
If you have to glue a flexible strip, put a stiff piece outside between it and the clamp to distribute the pressure.
You will often find by sighting across the surface of the work as you tighten the clamps, particularly in the case of door-frames, picture-frames, and the like, that the surface is winding. When this happens, move one or more corners of the work up or down, as the case may be, in the clamps, and thus take out the winding. A little experimenting will show how to do this. In the case of framed work, such as doors or picture-frames, test the angles with[361] the square as soon as the joints are brought to a bearing. If the angles are not right, as will often be the case, move one end of either one or both of the clamps to the right or left, as the case may be, and you can easily change the angle until the square shows it to be right, when the screws can be tightened and the joints should close accurately. In clamping nearly all kinds of "case" work, such as bookcases, cabinets, boxes, and the like, these directions about moving the clamps until the angles are correct and the work free from winding are applicable.
In such cases as that shown in Fig. 488, waste no time in trying to get the surfaces exactly flush with each other at the joint before partially tightening the clamps, lest the glue become set. Any slight alteration can best then be made by tapping with the hammer near the joint, whenever either piece needs to be raised or lowered, putting a block under the hammer if the dent will not be removed by planing (see Gluing). The clamps can then be screwed tighter.

Fig. 489.
In such cases as gluing the joints of a box, put stout blocks or cleats over the joints before tightening the clamps (Fig. 489), to distribute the pressure. This applies to all cases of clamping where the pieces to be glued are not heavy enough to resist the change of shape from the pressure of the clamps, and pieces of waste wood are almost always required in any case to prevent bruising of the work.

Fig. 490.
You can contrive home-made clamps out of any strong pieces of wood of suitable length, by nailing or screwing a block at each end (Fig. 490), when the work can be tightly wedged to a close[362] bearing by driving home the double wedge shown, using, if necessary, one or more blocks, B, when you use the clamp for smaller work than that for which it was made. By keeping such clamps for future use, you will soon have enough to answer very well until you can afford to buy the regular cabinet-clamps.
On the same principle, a simple clamp, derived from the Orient, can be made by boring a series of holes in two stout strips—just as the holes are bored in the sides of a ladder, but nearer together. The work to be glued is laid on one of these strips in the same way as shown in Fig. 490. The other strip is then placed directly above and stout pins put through corresponding holes outside of the work, which can then be wedged against the pins in the way just shown.
Another way, which can be applied to many cases, is to put a stout cord, doubled, around the work, and inserting a stick between the two parts of the string, turn it around until, the doubled cord thus becoming shortened, the parts of the work are drawn together. This can only be done where there is room to swing the stick around, as, for example, to tighten the rounds of a chair by drawing the legs together (Fig. 491).

Fig. 491.
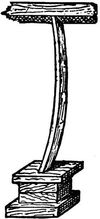
Fig. 492.
You can often apply pressure, when no more convenient means are at hand, by making use of the elasticity of a board or pole. Suppose, for example, you need to press two blocks tightly together, as shown in Fig. 492. Place them on the bench or floor and spring in a board or pole between the top of the upper block and a beam of the floor above, as shown. Of course this board must be a little longer than merely[363] to reach between the two points, as it must be sprung into place bent, when in the effort to straighten itself out again it will cause pressure on the blocks. Pieces should be placed outside the blocks when scarring of the surface is to be avoided. The pressure can be applied in any direction, always supposing that you have something firm to press against.
Pressure can often be obtained by a lever, and many applications of the wedge will suggest themselves in your work. Even if you have a shopful of clamps and hand-screws and vises, these applications of the simple mechanical powers often come into play (see Fig. 390). See also page 71.
Adjustable wood-carver's clamps can be bought for holding pieces in position on the bench, and are useful, but by no means necessary, as common clamps, or various devices, can be used.
The small iron clamps which can be used in place of hand-screws are very useful.
For other suggestions about clamping, see Hand-screws.
Fig. 493.
Fig. 494.
Cleating.—A simple way to join two or more pieces of board or plank to make a wider piece is to cleat them. If short, they can be cleated across the ends. This can also be done to keep a single board from warping (Fig. 493). Such a cleat should not be glued unless the width is very slight, on account of the expansion and contraction across the board being so much greater than that lengthways of the cleat (see pages 50-53). Screws (which are best), nails, or dowels should be used, as they will give some play to the pieces. A groove can also be made in the cleat, into which a tongue on the end of the board is fitted. Grooves can be cut in both cleat and[364] board and a tongue or spline inserted (Fig. 494). These are operations best done by machinery. This end-cleating does very well on small work and where the tendency to warp is not too great. For heavier work, as doors, cleats on the side are better, but they are sometimes in the way, and not always desirable on the ground of looks. This is a strong way. Side cleats should be fastened with screws (see Screws) or clinched nails (see Nailing), but not with glue, for the same reason as in the case of end cleats. If the cleat is wide enough, do not put the screws in a straight line, but "alternate" them (Fig. 368). See Jointing and Doors and Panels.
Clinching-Nails.—See Nailing.
Compasses.—Wing compasses, or those with arc and set-screw, are easy to adjust accurately and will not slip, but, whatever kind you get, be sure that the points stay where you put them and do not spring away or wobble around.
The chief uses of this tool are to strike circles, to lay off angles and arcs, to take off measurements from a rule or some object, to lay off measurements, and to "scribe" in places where a gauge can not be used (see Scribing). In using compasses, particularly those which are not set by a screw, hold them and swing them around by the top at the hinged joint, rather than grasp them near the points, which may cause them to move or slip.

Fig. 495.
Circles or circular arcs can be struck roughly, as you doubtless know, with a string and a nail at the centre, the string being loose around the nail. This method is not very accurate, for obvious reasons, and is only suitable for rough work. A more accurate way is to drive two nails through a strip of wood at a distance apart just equal to the radius of the required circle, one[365] nail being driven into the wood to act as the centre, the other doing the marking (Fig. 495). Instead of the marking nail a hole can be bored for a pencil. You can use a stick of this sort repeatedly by changing the position of the centre nail, or of the marking point. The same can be done with a brad or stout pin and a pencil, using stiff paper, card-board, or zinc instead of a stick. By such expedients you can do a great deal of work without buying compasses.
Compass-Saw.—See Saw.

Fig. 496.
Corner-Blocks.—These are merely small pieces of pine, or other wood which holds glue well, with two adjacent surfaces at right angles. Hot glue is applied to them and they are rubbed into interior angles of cabinet-work, to strengthen and stiffen the work (Fig. 496), and are very useful for this purpose. They are got out in short pieces, lengthways of the grain, and can be freely used in places where they will not show, as inside of the base-board in Fig. 304. The shape can be varied according to the conditions of the joint. Apply hot glue plentifully, place the block where it is to go, and rub it back and forth several times, when it can be left for the glue to dry.
Corner-Chisel.—See Chisel.

Fig. 497.
Countersink.—This tool, to be used with the bit-brace, for enlarging the outer part of a hole, thus forming a cavity or depression for receiving the head of a screw (Fig. 497), is quite important, as being much more convenient than to use gouge, chisel, or knife for the purpose. See page 205.
The rose form of countersink is common and good. The Clark double-cut countersink (for wood only) cuts smoothly and is easily sharpened. A countersink for metal is useful.[366]
Cracks, To Stop.—See Holes, To Stop.
Cross-Cut Saw.—See Saw.
Cutting-Pliers.—A pair of these will often be useful in connection with wood-working operations.
Dents, To Take Out.—See Bruises.
Dividers.—See Compasses.
Doors and Panels.—It is important to have some understanding of the theory of framing panels, doors, and the like. The simplest form of door is, of course, a piece of board. This will do for some cases, but it is liable to warp or wind,—if a large door, sometimes to such a degree as to be useless. It is also, if large, liable to swell or shrink so as to be either too loose or too tight, and to break. Cleating can be resorted to (see Cleating), but will not prevent the swelling and shrinking, nor is a cleated door especially ornamental. Besides, there are limits to the width of ordinary boards. Several boards can, however, be joined, edge to edge, and cleated on one side, in which way a large door can be made (Fig. 405), and, if the boards are not fitted too closely together, there may be no trouble caused by the swelling and shrinking. Another way to make a very strong door is to make it of two thicknesses, or layers, one running up and down and the other crossways, or diagonally, the two thicknesses being firmly nailed or screwed together.

Fig. 498.

Fig. 499.

Fig. 500.
All such arrangements are, however, suited for the rougher class of work. When we come to nicer work we must have something more scientific, that will swell and shrink as little as possible and that will look better. So, instead of using a broad flat surface with the boards all running one way, we try to overcome the faults of the flat door by framing the pieces together. Suppose, for a theoretical case, that you make a door like Fig. 498. It will not warp or curl because of the cleats at the top and bottom, but it will swell and shrink in width because there is such a wide surface of board to be affected by the atmosphere, etc., and it may[367] become winding. To lessen these objections the middle part of the board can be removed—all but a strip at each edge (Fig. 499). It will not now swell and shrink much in width because most of the board has been removed. This frame will hold its shape quite well, but it is only a frame, not a door. How can you fill up this open frame to make a door, so as to avoid the trouble about warping, winding, swelling, and shrinking? First, however, as this frame is considerably taller than it is wide, you will readily see that it will be a better arrangement to make it as shown in Fig. 500, with the cross-pieces between the uprights, according to the usual custom in such cases. Suppose, now, that you fill up the open space with a thin board, fastened on one side (Fig. 501), instead of the thick wood which occupied the space[368] at first. The thin board will tend to warp and twist, but, being thin, it will not exert force enough to change the shape of the thick frame. That will prevent the warping and winding from doing much harm. If the screw-holes in this thin piece are reasonably loose, they will allow play enough for the board to expand and contract without putting any strain on the frame. This arrangement does not, however, look very nice on the side to which the board is screwed, though it can be used in some situations. Suppose, finally, that you cut a groove around the inside edge of the frame of the door (Fig. 502) into which this thin board can be fitted loosely, making the groove deep enough to give the board room to shrink and swell in width without dropping out or pushing against the frame. You now have a complete door (Fig. 503), and the warping, winding, swelling, and shrinking will do as little harm as possible. That is all there is to the theory of framing doors, panels, and the like.

Fig. 501.

Fig. 502.

Fig. 503.

Fig. 504.
The panel should fit closely into the groove, but at the same time be loose enough to slide in and out as it expands and contracts, and should not be wide enough to reach to the bottom of the grooves, but room be left for all possible change in width, as shown in Fig. 504, which shows sections on the line AB. All this is important and has many applications to other things than doors. It is not very uncommon for amateurs, ignorant of these simple principles, to make a door-frame properly, but in fitting the panel to make it the full width of the space from the bottom of one groove to the bottom of the opposite, and also to make it such a snug fit in the groove as to be stuck tight, all with the idea of making such a good fit as to prevent any of the gaping cracks so often seen, but really taking the very course to[369] ruin the work. So important is it that the panel should have play, that it is quite common in nice work to rub wax or tallow around the edge of the panel, lest some of the glue from the joints of the frame should cause it to stick when the frame is glued up. If the panel is badly fitted or stuck, it may buckle or split, or the frame be split or forced apart at the joints.
There are many more elaborate ways of arranging the details of door-framing and panelling (too numerous to be described here, as they will not often be required by the beginner); but if you understand the general principles upon which this simple door is put together, you will understand the principles upon which all panelling is based; and, though you may never do much of it, it is quite important to have a clear understanding of the theory, which is really quite simple—for it has many applications which may save you much trouble, labour, and expense.
The best way to fasten the frame of a door together is by mortise and tenon (see Mortising). This method is almost invariably adopted for house doors. Dowelling is often used for smaller doors, but is inferior to the mortise and tenon.
A common way nowadays to make light doors, and such as are not to be subjected to much strain, is to run the grooves in the stiles through to the ends and cut tongues or short tenons on the ends of the rails to fit these grooves, as shown in Figs. 508 and 509. The whole door, panel and all, can thus be quickly got out and fitted accurately with a circular saw at any wood-working mill, without any hand-work being required, except the smoothing of the pieces and the putting together. In this way you can have a door made for a small sum, smoothing and putting it together yourself. Such a door is not fitted, however, to stand great strain. A house door made in that way would last but a short time. Any heavy door, or one to have much strain, or liable to be slammed, should be framed with mortise and tenon. You can have grooving for a door-frame done at the mill very cheaply and do the mortising yourself, or you can have the mortising done[370] by machine at slight expense. Sometimes the grooving and mortising are combined,—an excellent way (Fig. 592).
In using any of these methods mark distinctly one side of each piece for the "face" and lay out all the work from that side only. If the job is to be taken to a mill, see that the work is all gauged from the face side.

Fig. 505.

Fig. 506.
In laying out such work never cut off the stiles (Fig. 505) to length at first. Leave them too long (Fig. 507). The projecting ends will be useful when you knock the frame apart for gluing, after first putting it together to see if everything fits. Besides, the extra length makes the ends stronger for the mortising and less likely to split out. The rails in door-framing and panelling are usually wider than the stiles.
In laying out a door or panelled frame, place the stiles together, with the inside edges uppermost, and square lines across the edges to mark the positions for the rails (Fig. 506). Carry these lines across the faces of the stiles, and mark the rails and stiles with some symbols to indicate the way they are to be fitted together (Fig. 507).
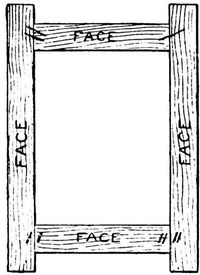
Fig. 507.
The whole should be put together once to see that everything is right before beginning to glue. Before putting together permanently, the panel and the inside edges of the frame (the edges which come next the panel) must first be planed and smoothed, as this cannot well be done afterwards.
Then fit the panel in the grooves of the rails (Fig. 508), glue[371] the tenons of one end of the rails and the grooves or mortises of the corresponding stile (see Gluing), taking care not to put any glue where it may cause the panel to stick, and fit these parts into place (Fig. 509). Drive the rails home. Then glue and fit the other side of the frame in the same way (Fig. 510)—all being done as quickly as possible. Finally clamp the frame securely (see Clamps). The tongued and grooved joint represented in the accompanying illustrations is not as good as a mortise and tenon, as already stated, but is shown as a simple way for making a light door. Leave the work to dry, and when dry remove the clamps. Saw off the ends of the stiles, and dress off the surface of the frame with the plane (see Plane), after which you can smooth with scraper (see Scraper) and sandpaper (see Sandpaper), and the door or panel will be done. When there is objection to the end of a tenon showing on the outside edge of the stile, and a blind mortise is not desired (see Mortising), the end of the tenon can be cut a little short and the mortise-hole on the edge plugged with a piece of wood, with the grain running the same way as that of the stile. Fit the piece with a very trifling bevel on the edges, glue, drive tightly into place, and when dry smooth off (Fig. 511).

Fig. 508.

Fig. 509.

Fig. 510.

Fig. 511.
It is hardly worth while to work out the grooving or grooved and tongued joints by hand in these days when it can be so[372] cheaply done by machinery. If obliged to do it by hand, you should have the proper plane for the purpose, as it will be very difficult and slow work otherwise.
A panel is sometimes made flush with either side of the frame, by having a deep rabbet on that side, as in the case of a desk lid, for instance, but this is a form which can well be avoided by the beginner.
Dovetailing.—This is an operation requiring considerable skill to do well and, with the exception of an occasional single dovetail, is not frequently required in the work of the beginner. It is, however, a valuable, workmanlike accomplishment and a thoroughly scientific method, of which the amateur should have some understanding, even if he should never use it.

Fig. 512.
The common form, such as is used in joining the sides of a box (Fig. 512), can be done as follows: Mark the lines ab (Fig. 513) completely around each piece, at a distance from the end equal to the thickness of the stock. Lay off the lines cd on the end of the piece A. Lay off the oblique lines ec on both sides of the piece. With the back-saw cut by these oblique lines (ec) to the lines ab. Fasten the piece in the vise, end upward, for the sawing. With the chisel, cut out the parts to be removed (marked m), as in cutting a mortise (see Mortising), undercutting very slightly at the end (Fig. 302). When this cutting has been cleanly done, lay[373] the piece A on the end of the piece B in the way it is finally to go, so that the pins just cut will rest exactly in position across the end of the piece B. Mark around the pins, forming the oblique lines fg, from the ends of which square the lines gh on both sides of the piece. Remove the wood as before, taking care not to cut on the wrong sides of the lines which mark the pins, or the dovetailing may come together too loosely. When exactly fitted, apply glue, fit together, and when dry smooth off with plane, scraper, and sandpaper, as may be required.

Fig. 513.

Fig. 514.
Lap or drawer dovetailing (Fig. 514) is similar to the preceding form, but the ends of the pins or dovetails on the piece forming the side of the drawer are shortened, and the recesses in the front piece which are to receive them are not cut through. First the side piece A (Fig. 515) is marked and cut on the principle just shown, the pins being shorter; then the piece B is marked and cut to fit.
Practised workmen in dovetailing usually (unless symmetry of the pins is required) determine the bevels for the pins of the first piece by eye, but the beginner would best not attempt to lay off angles or saw by eye.
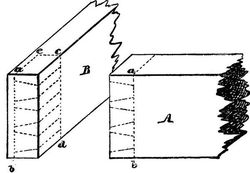
Fig. 515.
Mitre dovetailing (blind or secret dovetailing) is used in cases where it is desired to conceal the dovetails, the result looking like an ordinary mitred joint, but this is difficult work for the beginner.[374]
Dovetail Saw.—See Saw (Back-Saw).
Dowelling.—Dowels are merely round sticks of different diameters and usually of hard wood. They can be bought ready made and can be used instead of nails or screws, or instead of mortising, dovetailing, etc. They can be used simply as pins or in many cases can be split and wedged, though the holes must be tapered with a gouge if wedges of much thickness are to be used (Fig. 516).

Fig. 516.
A common use of dowels is to fasten the frames of tables, chairs, bedsteads, and various domestic articles.
The use of dowels for such purposes is not to be recommended, however, although very common in cheap work and in much work which is not cheap in price. The mortise and tenon is usually much to be preferred. Dowelling, to be really good, has to be skilfully done, while it is a very common way to stick the work together in any manner that will look right on the outside. A dowelled joint is not, as a rule, as scientific a form of construction as a well-planned mortise and tenon,—a statement which you can easily prove for yourself by comparing some article of your grandmother's or great-grandmother's time, and which is still strong, with some modern dowelled chair, which is in so many cases all to pieces and thrown on the woodpile after a short term of service. The gaping joints and dropping apart of modern dowelled work can be seen on every hand. There are some cases, however, where the use of dowels is scientific and just what is required. For example, split dowels, wedged dovetail fashion like wedged tenons, are often very useful (see Mortising).

Fig. 517.

Fig. 518.
To find the centres for boring, so that the holes bored in the two pieces shall be in line, you can cut off the heads of some small wire brads so that they will be pointed at both ends. Stick the brads into one piece where the centres of the holes should [375] be. Then press this piece against the other in the position it is to take when the work is done and the brads will of course prick holes in the second piece exactly corresponding to those in the first piece (Fig. 517). Instead of brads, small shot can be used in a similar manner. It is well to take a round-pointed awl, or some such tool, and carefully prick a small hole with it at each of the points marked. This is to start the spur of the bit exactly at the point, as the spur sometimes has a way of working off to one side, so that the hole may not be in exactly the right place. The hardest part, however, is to bore the holes exactly at right angles to the surface, as a slight deviation in either or both may make a bad angle where the two holes meet. You can sometimes lay the pieces flat on the bench and arrange boards or blocks so as to guide the bit straight. The dowels must be thoroughly dry. It is better to have them a trifle too large, rather than too small, for you can easily trim them down to a snug fit. Scratch them lengthways with the toothed-plane, or with the edge of a file. Countersink a little hollow around the opening of each hole (see Countersink), to catch the surplus glue which would otherwise form a rim around the dowel (Fig. 517). Before gluing you should fit the work together once, as it is very awkward to make changes after the gluing is begun. When the parts fit accurately, take the joint apart for gluing. Brush a little glue around[376] the inside of one of the holes, dip one end of a dowel in the glue and drive into place. Wipe off the superfluous glue and repeat the process with each of the dowels in that half of the joint. Leave this to dry a day, or more if you can. Then clean any hardened glue from the dowels and glue them, as before, into the other piece, this time putting glue on the flat surfaces which are to come together. The whole should be firmly clamped and left to dry (see Gluing and Clamps). Dowels are sometimes used in joining the edges of pieces, as in Fig. 518, and in many other joints too numerous to be specified (see Joints and Jointing).
Dowelling looks very easy, but it is usually hard for the beginner to bore the holes straight and to make the pieces fit accurately.
Dowel-Plate.—A steel plate with various holes of such sizes that pins made by driving blocks of wood through them will drive snugly into the holes made by the corresponding bits. This is useful in fitting dowels.
Drawers.—The making of well-fitting and smoothly running drawers is an operation requiring much skill—more skill than can be expected of the beginner, or, in fact, than is attained by the average workman. The beginner should, however, have some understanding of the work, even if he does not attain a high degree of skill in its execution.
Bear in mind that it is much easier to make a drawer which is narrow and long (from front to back) run smoothly than one which is wide across the front, but shallow from front to back.
The more accurately the case which holds the drawers is made, the easier it is to make smoothly running drawers. In good work having more than one drawer, a horizontal frame is fitted beneath each drawer for it to run on. These frames, as well as the whole case, should be free from winding, and it is also important that the stock for the drawers should be true. The front and sides of a drawer should be got out to fit very snugly in their places. The piece for the back is narrower than the front piece, to allow[377] for the bottom (Fig. 521), and is often cut off at the top also. The front, sides, and back can be put together with any suitable form of joint. Dovetailing is by far the best way, but it is difficult for the beginner (see Dovetailing). The joints shown in Fig. 519 can very well be used for ordinary work. These can be quickly made by machinery (see Joints). See also Gluing and Clamps.

Fig. 519.
A groove for the bottom must be cut on the inside of the front and of the sides (Fig. 520). The insides of the pieces must be smoothed before putting the drawer together. When these parts are fitted, slip the bottom (previously fitted) into place. It should be got out with the grain running across the drawer, or parallel with the front (Fig. 521), and should be glued at the front edge only, the rest being free to swell and shrink, which saves the drawer from injury.
Fig. 520.
Fig. 521.
Be sure that the drawer is rectangular (putting in the bottom will assist in this) and free from winding. When put together and dry, carefully smooth the front and the sides. A little trimming with the[378] plane may be required to make the drawer run freely, but care should be taken not to plane away too much. A drawer which is a trifle larger at the back than at the front will run better than if larger in front, as it will be less likely to bind or catch. Small slides, between which the drawer runs, are fastened at each side outside the drawer, at the bottom, and must be adjusted carefully.
Thin blocks or "stops" can be fastened on the cross-frame so that the inside of the drawer front will strike against them when the drawer has been pushed in as far as it should go, or the drawer can be stopped at the back.
A simple way to attach a drawer under a shelf, bench, or table is shown in Fig. 143. The contrivance shown in Figs. 141 and 142 can sometimes be used in place of small drawers.
Bayberry tallow is excellent to rub on the sides of drawers.

Fig. 522.
Draw-Knife or Draw-Shave.—The draw-knife or draw-shave is very useful for slicing off large pieces and for trimming wood into odd shapes. It can be obtained with folding handles, adjustable at different angles, for use in places which can not be reached by the blade of the old-fashioned draw-knife; but the latter is good enough for all ordinary purposes. Choose a[379] medium-sized or large one. It is in principle simply a knife or very wide and short-bladed chisel with a handle at each end, and can be used with the flat side or the bevel against the wood as the character of the work may require. Having but a short bearing surface to guide its course, it is very prone to follow the grain and cut deeper than you wish, so you must take special pains to cut with the grain, stopping and cutting the other way, whenever necessary. Attachments can be bought for guiding the draw-knife in chamfering and such cases.
The draw-knife can often be best used with an oblique stroke—either drawing it sideways across the work at the same time that you pull it towards you (Fig. 522), or holding it obliquely across the work and pulling it straight towards you (Fig. 523).

Fig. 523.
It is one of the most dangerous tools if carelessly left lying around, and should be kept hung up out of reach of all small children. See Paring, Bevelling, and Chamfering.
Draw-Shave.—See Draw-knife.
Drill.—Drills for metal only are often useful to the wood-worker, but the one most important for the amateur is the twist-drill. See Twist-drill.
Drill-Stock.—There are various patterns of drill-stocks, some of them automatic, for holding drills of different sizes for small holes. Hand drills with revolving handle, like an egg-beater, can be used for small drills. See Bit-brace.
Duck's-bill-Bit.—See Bits.
Expansion-Bit.—See Bits.
File.—The file is a piece of hard steel with rows of ridges or teeth cut obliquely on the surface. When cut in one direction only it is called single-cut, but when there are two oblique rows of teeth crossing each other it is called double-cut. These ridges incline towards the end or point of the tool, so that the file, like the saw, plane, and scraper, cuts when pushed forward. Files for wood have wider teeth than those for metal, so do not use a[380] wood file on metal or a metal file for wood. The slab-sided shape (Fig. 524) is perhaps the most useful, if you can have but one file. A round "rat-tailed" file is also useful, and various other shapes if you can have a variety. For metal, the triangular, flat, the half-round, shown in Fig. 525, and the rat-tail are best. Files are very important for smoothing or rounding edges and curving surfaces.
Fig. 524.
Fig. 525.
Before beginning to file, be sure that the wood is firmly secured so that it will not slip and so that you can use the file with both hands. Hold the tool with the right hand, thumb uppermost, and steady the end with the left hand, thumb uppermost (Fig. 526), or with the fingers or palm. To file squarely across, push the tool steadily and evenly straight forward, without rocking up and down, and pressing only on the forward stroke.

Fig. 526.
In filing rounded surfaces, a rocking motion is often helpful and the way and direction in which to file in such cases must depend upon the shape of the work and the grain of the wood, as you will quickly learn. See Rounding-sticks.
Press lightly the first time you use a new file, until the fine edges of the teeth have been worn a little, as a violent filing on the first strokes may damage the cutting edges of the teeth.[381]
When a file becomes clogged with wood-dust or other substances, soak it in hot water a little while and then brush with a stiff brush. A file-card is useful. A piece of dog-fish skin, if you can obtain it, cuts somewhat like a file or coarse sandpaper, and is useful for curved surfaces where you wish to use the tools after smoothing.
Filing.—See File.
Filing (of Saws).—See Sharpening.
Finishing.—To acquire a high degree of proficiency in finishing indoor wood-work requires long training and practice, but the simpler processes can be undertaken to good advantage by the beginner.
There are a number of ways from which to choose. Simply rubbing thoroughly with linseed oil gives a good, soft, permanent finish, which some prefer to anything else, but you should be sure that all superfluous oil is rubbed off. Do not hang a recently oiled book-shelf or cabinet against the wall-paper of the room, for fear of defacing it. An oil finish, unless rubbed a good deal, has the disadvantage of getting soiled and collecting dust and dirt, but it is easily sandpapered and renewed and is certainly in better taste than a coarse, shiny, cheap varnish.
An old-fashioned way is simply to apply a mixture of turpentine and beeswax, rubbing it as long as your strength and patience will allow. Melt some beeswax in a can or saucepan and, when melted and taken from the stove, pour in enough turpentine to make it the consistency of paste. Then apply with a brush or cloth and rub in and clean off the excess with a stiff brush or cloth, scrubbing the work as you would a stove. This makes a beautiful finish, soft and lustrous. It shows spots, however, and, though it is so easily applied, it requires continual renewing and rubbing to be kept in good condition.
To make a hard and durable coating on the surface of the wood some kind of varnish is required. There is nothing better[382] than shellac for the purpose of the amateur. It is not very hard to use, and there is certainly nothing which gives a finish of nicer quality. The surface dries quickly and the coat hardens more rapidly than most kinds of varnish. For some cases, as a boat, it is well to shellac first and finish with good varnish.[43] Shellac is cut (dissolved) in alcohol, and can be bought prepared, but it is better to cut it yourself, to diminish the chance of adulteration with cheaper substances. Orange shellac will do for most of your work. Into an open-mouthed bottle put some of the shellac (which comes in flakes and looks somewhat like glue) and pour over it enough grain alcohol (95 per cent. grade) to somewhat more than cover the shellac. Cork the bottle and leave in a warm place until the shellac is cut. Shaking will hasten the process. Wood alcohol can be used and is cheaper, but work done with it is not so good. It is a deadly poison taken internally and on account of the fumes it is best not to use it for a long time in a close room. If the tawny tint of the orange shellac is objectionable, white (bleached) shellac can be used, but this it is well to buy already prepared. It is a little harder to use than the coloured kind.
Use a flat bristle-brush and not a soft camel's-hair brush, unless for the last coat. One from one inch to two inches wide will be probably suitable for most of your work. For large surfaces, however, a larger brush is better. After using, always clean the brush thoroughly with alcohol.
Always shellac in a warm, dry place, free from dust—never where it is cold and damp; but on the other hand do not leave the work close to a hot stove or it may blister.
The shellac should be quite thin. It should flow very freely from the brush. Of the two extremes, it is better to have it too thin rather than too thick. Three or four thin coats give a much[383] better result than two coats of thick, gummy shellac. Never try to thin it with anything but alcohol. Keep the bottle corked to prevent evaporation of the alcohol and to keep out the dust.
Before beginning to shellac, see that the work is free from dust. Pour a small quantity of the shellac into a small dish of glass or earthenware, not of tin. Before applying to the wood, wipe the surplus shellac from the brush on the edge of the dish, so that it will not drip, and then lay on the coat as evenly and smoothly as possible, working from the top or from one end or side, and with the grain, so far as possible.[44] Do not apply the brush at first exactly at the edge of the surface, lest the shellac collect too thickly at the edge, but apply the brush first a little way on the surface and then work from the edge. Work quickly and lightly. Begin and end the strokes of the brush gradually—lighten them at the end—so as to avoid a "lap" when the strokes begin again. Do not work over the coat after it has begun to set or try to patch up spots. Simply lay it on as well as you can and let it go at that. If it is not right you will know how to do better next time.
Give each coat plenty of time to harden before applying another—twenty-four hours is none too long. Do not put on five or six coats in a day as is sometimes done. The outer coat hinders the drying of the shellac underneath, by keeping the air from it,—just as with paints,—and the way to do durable work is not to put on a fresh coat until the previous one is thoroughly dry and hard. Shellac dries very quickly so that you can touch it, but does not get really hard throughout for some time, so do not be in haste to put on a second coat.[384][45]
If there are holes, cracks, or defects of any kind to be filled up, this is the time to do it—after the first coat is hard. One way to do this is to hold a hot iron close to a piece of shellac directly over the hole, which will be filled with the melted shellac. The surplus can be carefully pared off after it is hard. Another way is to use wax coloured to match the wood. The wax can easily be coloured by melting and adding a small quantity of whatever dry colour—burnt umber, for instance—may be required. Do not use putty in such cases.
When the first coat is hard, skim over the surface with very fine sandpaper (00), to remove any roughnesses, and apply the second coat. This is sometimes sufficient. If not, sandpaper and shellac again, and a fourth time if necessary. When you have a sufficient "body" of shellac on the wood, you can much improve the quality of the surface by rubbing it down with powdered pumice-stone and oil, which will remove the "shiny" effect and leave a softer and finer surface. To do this, take a bit of felt or haircloth, and wet it with thin oil (kerosene will do, or petroleum, or linseed oil thinned with turpentine or benzine, but the latter is dangerous to have around), take up a little of the pumice, and carefully and evenly rub over the surface, with the grain, renewing the oil and pumice as may be needed, or they can be sprinkled on the work. But be careful to rub evenly and not too long on any one spot, for it will be hard to repair the damage if you should rub through to the wood. Wipe the whole off thoroughly with soft cloth. This process will be sufficient for most amateur work. For some work simply rubbing down with the finest sandpaper wet with oil is enough. In using sandpaper for rubbing down nice work, split it—that is, remove the outer layer of paper, which will leave the sanded layer thin and pliable and less likely to scratch or rub through the finish. A handful of tightly squeezed curled hair can be used.
If varnish is to be used over the shellac as in case of a boat, simply sandpaper the shellac and do not rub with pumice and oil.
With fine-grained wood, such as cherry, the process given[385] above is all that will be required, but with coarse, open-grained wood, like oak, a good many coats will be needed to fill the pores and give a smooth surface. Therefore a "filler" is often used to fill the pores of the grain. This is cheap and can be bought in the form of paste (either light or dark), which you can apply according to the directions on the can. Rub it into the wood thoroughly, let it stand until it begins to set, or stiffen, then rub it off with a bit of burlap or any coarse material, across the grain (lest you wipe it out of the pores). After it has become hard enough, sandpaper, and clean off any that may remain on the surface. Then shellac as described. The filler can have the shade of the wood, or sometimes, as in oak, the figure of the grain can be brought out finely by using a filler somewhat darker than the hue of the wood. Be sure to clean off the filler thoroughly, using a tool to clean out the angles and corners, or the finished surface will have a cloudy or muddy appearance.
The general directions given for shell acing apply also to the use of varnish, but varnishing is in some respects harder for the amateur to do well. Consult the dealer about the kind of varnish and the brush best suited to the particular piece of work you have in hand. The final coat of varnish can be rubbed down with pumice or tripoli and water. Rotten-stone used with oil (petroleum is good) is excellent for giving a soft polish.
French polishing is often attempted by the amateur, but it should be learned by taking a lesson from a practical polisher, and not from a book. The general idea of the process is as follows: A wad or pad of wool is made and on this is poured thin shellac, adding whatever alcohol may be necessary. This wet pad is then covered with a piece of clean linen, a drop of oil put on the outside to prevent the shellac from sticking, and the pad is then quickly passed over the surface with a circular motion, or with longer strokes in the form of the figure 8, or in some cases simply back and forth. After doing this for a while a very thin coat will have been deposited. This is allowed to dry for a short time, when the process is repeated, again and again, until a[386] sufficient body of the polished finish has been formed. The details of the process vary with different finishers. It is quite easy to polish a small flat surface or such an object as the arm of a chair, but it is much harder for an amateur to successfully polish a large flat surface, like a table-top, except after much practice. A first coating of shellac applied with the brush and skimmed over with sandpaper will save labour in the polishing process.
Before refinishing old work it should, if the surface is in bad condition, be scraped down to the wood, using the scraper and finishing with sandpaper. A chisel (used like the scraper) is sometimes convenient to remove a thick body of old varnish. If the surface does not need scraping, it should be cleaned, either by washing with soapsuds or it can be scrubbed clean with the finest sandpaper, split, using oil or water as the case may be, but seeing that the work is wiped off perfectly dry before applying a new coat. Pumice can be used, as already described, and a stiff brush, like a nail-or tooth-brush, is excellent for cleaning out corners and carved work.
For simply brightening and cleaning furniture, a mixture of equal parts of linseed oil and turpentine with a minute quantity of japan is excellent. It should be well rubbed and carefully cleaned off. This will make scratches and bruises less conspicuous, and will make the article look fresher for a time, but it is only a cleaner and not a substitute for refinishing.
Firmer-Chisel.—See Chisel.
Fore-Plane.—See Plane.
Framing-Chisel.—See Chisel.
Gauge.—There are many kinds of gauges in the market, but they all depend on the same principle, having a block, head, stock, or fence, to slide along against the edge of the wood, and a bar, beam, or stem, which slides through the block, can be set to project from it at any required distance, and which has near its end a spur or marking point (Fig. 533). The stem has the divisions of a rule marked upon it, so that the spur can be readily[387] set at the required distance. In some gauges the spur or marking point is sharpened to an edge parallel with the head, rather than to a point, as it is more certain to make a clear, sharp line, and is best when slightly convex on the side toward the head (Fig. 527). This gives the spur a tendency to run the line away from and not toward the edge where the head is, thus helping to keep the head close up to the edge. Sometimes a round point is used, and occasionally a knife point or blade for cutting thin stock into strips; and sometimes a wheel with sharpened edge. A form of gauge adapted for gauging from curved as well as straight edges is also made. Do not trust the accuracy of the scale marked on a common gauge, for if the spur is at all out of place, as is sometimes the case, you cannot rely upon the scale. Test by measuring from the head to the spur with the rule.

Fig. 527.
The mortise-gauge has two spurs, one of which is movable and can be set at any required distance from the other, so that two lines can be marked at once, as for a mortise. This is a time-saving tool, and very convenient, but not a necessity for amateur work.
There are gauges with long beams or stems and with long heads for gauging across wide spaces, but when you need anything of the sort you can easily make it and use with it either pencil, awl, or knife, as may best suit the case in hand.
If you wish to draw a line two inches from the edge of a board, for example, you can mark off two or more points at the required distance and with a rule and pencil draw the line through these points. If you were to make the points so near together as to touch, you would have the line without needing the ruler. This is what the gauge does. It makes a continuous measurement and a continuous mark, which is of course the line required.
The only gauge you need for rough work is a rule (or even a stick) and a pencil. To draw a line, for example, two inches from the edge of a board, take the rule in one hand, and lay the[388] end flat on the surface of the board so that it laps over two inches from the edge (Fig. 528). Place the forefinger underneath, against the edge, so that the end of the rule will remain two inches from the edge, and simply slide rule and finger along the edge, holding a pencil at the end of the rule with the other hand to make the mark. The finger must be kept evenly pressed against the edge. This is only suited for rough work, or for getting out stock approximately to shape, and of course cannot be depended upon for accurate measurement.

Fig. 528.

Fig. 529.

Fig. 530.
Something more accurate, with which you cannot get splinters in your finger, can easily be made, when needed, in this way. To run a line two inches from an edge, for example, and parallel to it, simply take any short stick and cut a piece out of it at one end so that the distance from the shoulder to the end will be just two inches, as shown in Fig. 529. Apply this to the edge of the piece and slide it along on the same principle as the rule and finger, being careful to keep the shoulder pressed up to the edge and the pencil or knife held firmly against the end. Instead of cutting out a piece you can nail one piece on another (Fig. 530). The latter is better for straight work because the head or fence is longer and so can be more securely pressed against the edge. An objection to this gauge is the need of making a new one for every measurement, but where there is occasion to[389] keep repeating a measurement it is particularly convenient and quickly made.

Fig. 531.

Fig. 532.

Fig. 533.
For another home-made gauge (Fig. 531) cut a recess in one side of a block just wide enough to hold the rule and just deep enough so that the flat side of the rule will project a trifle above the surface of the block. On this side of the block fasten a small strip, with a screw, so that when the two pieces are seized in the hand the rule will be held fast at the point to which it is adjusted. This is more accurate than to use the hand alone. You can readily contrive such arrangements, which will be quite accurate if carefully used, but it is not worth while to spend much time over such makeshifts (except in case of necessity), for a fairly good gauge can be bought for a small sum.
The gauge is usually an awkward tool for the beginner to use. He finds it hard to keep the stock firmly against the edge while sliding it along, and lets the spur dig or plough deeply into the wood—the spur tends to follow the grain of the wood and when the grain runs toward the edge the result is often as shown in Fig. 532, the stock being pushed from the edge. The stock is then pushed back and the wobbly process continued. To avoid these errors, the gauge, held well in front of you in one hand, should be tipped or inclined from you so that the spur will be[390] drawn along the surface (Fig. 533) and will make but a slight scratch. Then, keeping the stock or head firmly pressed against the edge, push the gauge steadily from you, watching carefully to see (1st) that the spur does not begin to dig into the wood instead of lightly scratching it, and (2d) that the head does not slip away from the edge. This will prevent the point catching or jumping and will insure a good mark, which can easily be deepened by going over the line a second time if necessary.
It is easier to mark a line when the spur is near the head of the gauge than when it is run out to some distance. The guiding power of the fence or head is greater over a point near to it than over a point at a distance, from which you can readily see that, conversely, the longer the head or fence, the easier the gauging becomes—that is, for straight lines, which is much the most common use of the gauge. In gauging from a curved edge, a long fence, unless curved, would be impracticable.
Where it will injure the work to have the gauge marks show (as when the work is to be finished with shellac or varnish), be careful not to carry them farther than necessary, as very slight scratches show plainly after finishing. Otherwise, in cases where the marks will not show or do no harm, as in rough framing, it is as well to run them past the required points, as it is quicker to do so and the juncture of lines which cross is more distinct.
Gauge from the same side of the wood in laying out mortises or any lines intended to be in the middle of a piece of wood, or at a fixed distance from one edge, else if the edges are not exactly parallel (as is often the case) the markings will differ. See also Scribing.
Gimlet.—The gimlet is useful, cheap, and good for boring where the hole does not come near the edge, but near the edge or in thin wood great care must be taken to prevent splitting. If necessary to use it in such a case, keep turning it backwards for every turn ahead and do not try to force it through the wood. It is better, however, to use some other tool if you can (see Bits[391] and Twist-drill), for the tapering form of the gimlet gives it a wedge-like, prying action upon the woody fibres.
Gimlet-Bit.—See Bits.
Glazing.—An old chisel can be used to clean off old putty before setting glass. On new work, see that the rabbet or shoulder where the putty is to go is primed with lead paint before putting on the putty (see Painting). You can buy glazier's points, to hold the glass in position under the putty, for a trifle, or very small brads can be used. No special directions are necessary for using the putty.
To set common glass in furniture, as in bookcase doors, it is better to fasten it in place with small strips, not pressed too tightly against it. Strips of plain moulding are good. To set plate glass in furniture, the same means can be used for small pieces, but large plates, as for a mirror, should be held in place by little strips of soft pine, one or two inches long, bevelled on one side. The other side being glued, these strips can be lightly pressed into the crack around the glass. These short pieces, glued to the frame on one side and with the bevelled side wedging the glass into place, hold the latter securely, but, owing to the softness of the wood, not too rigidly.
Glue.—See Gluing.
Gluing.—Glue is made from refuse animal matter, and also from parts of fishes, the latter being known as fish glue. It comes in sheets or cakes or flakes, to be dissolved and used hot, or already prepared in liquid form.
The majority of practical mechanics prefer the former (i.e., "hot" glue) for nice work, although the use of liquid glue has increased much of late years. Hot glue is probably preferable if all the conditions are just as they should be, but if not so, liquid or "cold" glue may be better.
Buy the best grade. It is the cheapest for good work, and you will not use enough to make the price much of an obstacle. The[392] only sure test by which to buy glue is to get a little and see how it holds. A good way to prove the quality of your glue is to soak it over night, or as long as may be necessary, in whatever quantity of water you think it will absorb. The more it will swell without dissolving, the better the quality. Poor glue will dissolve.
You cannot positively tell good glue by the colour, for there are many kinds (and for more than one purpose) and many makers, but whatever the colour, the glue should be clear looking and not cloudy or muddy. Do not use glue that has a mouldy or otherwise disagreeable or offensive smell or a bad taste.
To prepare hot glue, break the glue into small pieces, and soak it in all the cold water it will absorb for perhaps twelve hours, when it will have become swollen and softened and will look and feel somewhat like jelly. Then put it in the inner glue-pot (see Glue-pot) and cause the water in the outer vessel to boil for several hours. It is quicker to dissolve the glue at once without soaking, but the result does not seem to be quite as good as by the former method. The glue to be right for use must be thin enough to drip from the brush in a thread or stream, without collecting in drops like water, and you can tell something about its being in condition to use by testing it between your fingers. Do not weaken its strength, however, by diluting with more water than is necessary.
It is important to keep the glue and the glue-pot clean, and if the odour from your glue becomes offensive at any time clean out the glue-pot and make fresh.
Glue loses strength by repeated meltings, so do not dissolve too much at a time, and after heating it over two or three times throw away any that is left in the glue-pot, cleaning the latter thoroughly. On work which you are very particular about mix fresh glue each time.[393][46]
You can make a good glue-brush of a stick of rattan. Soften the end in hot water and pound it with the hammer until the fibres separate. For corners, cracks, holes, and the like use sticks, which you can whittle to any required shape.
Although apparently too simple an operation to need much explanation, and often ignored in books on wood-work, as if anyone could of course glue two pieces together, the operation, to be really successful, calls for more knowledge of the principles involved than beginners or amateurs usually possess. Do not daub a thick layer of lukewarm glue on the pieces, and then slap them together as you would make a sandwich, after the usual domestic fashion. Done in this way the pieces often stick for a while, but there is nothing certain about it.
We have seen that wood is full of little holes (pores, as they are commonly called), or spaces between the fibres (see Fig. 6). The glue becomes worked into these little pores and that is what gives it such a firm hold on the wood, somewhat as plastering is forced (purposely) into the cracks between the laths.
So you must have the glue thin, that it may fill these little cavities and get a "grip" on the wood; you must have it hot, that it may the more easily penetrate these open spaces before it becomes chilled; you must have the wood warm, that the glue may not be chilled and begin to set before it has a chance to penetrate the interstices of the wood; and you must press the pieces together so hard as to expel the body of glue from between them, forcing it into the pores and squeezing outside what will not go in, to be wiped or scraped off afterward. For what you want is not to have the two pieces held together by a layer of glue between them, lightly sticking to each surface and separating[394] the two in proportion to the thickness of the layer; but to have the two surfaces as close together as possible, held so by the tenacity of the glue reaching from the cavities of one surface to those of the other. The closer the surfaces are forced together the better, as the glue will be less exposed to the atmosphere.
You will see from all this that gluing should be done in a warm room of an even temperature.
While with hot glue it will not do to change the relative positions of the pieces after putting together, you can have considerable time to get them in position if the liquid or cold glue is used. Where several places in the same piece of work have to be glued together at the same time, it is frequently very hard to get around with the hot glue before that first applied has begun to set, unless you have help. In such cases, cold glue is a great convenience. If your shop is not warm or if you cannot have your glue hot, you had better use the liquid glue. It takes much longer to set than the other. In cold weather it should be slightly warmed. It can be thinned with vinegar or acetic acid, or what you wish to use at once may be thinned with water. Do not pour water into the can of glue, as it will not keep so well.
You will also readily see that it is much easier to make good glued joints in soft wood than in hard, for the former is more readily squeezed to a fit by the clamping, while with the latter it is quite essential that the pieces should fit with extreme accuracy before clamping (see note under Clamps).
Before beginning to glue have everything laid out, fit the pieces together, clamp them up just as if you had put on the glue, and see that everything comes together right—i.e., rehearse the gluing process before using the glue itself. This is a very important point, particularly when there are several pieces to be glued, for you will have no time to waste after you have begun to use the glue.
Do not spread the glue on too thick. Take the dirt off both pieces, then, while putting the glue on one, have the other warming slightly at the fire. The moment the glue on the brush leaves[395] the glue-pot it begins to cool. If it fairly begins to set before you get the two pieces together, your joint will not be good. You will have to take it apart, scrape off all the old glue, and begin over again. So you will see there is no time to be lost when once you begin and it will be too late then to correct any mistakes in the fitting of the wood-work. Good workmen always put the work together and take it apart again before gluing.
Do not wipe off the glue which squeezes out from a glued joint (unless for some special reason) nor wash it off with water. Let it harden, and clean it off after the joint has set. It helps protect the joint.
Do not be in haste to unclamp your work. When to release it depends on the kind of wood, the kind of work, and the circumstances under which the gluing is done, and no exact time can be set. If for some temporary and unimportant purpose and in soft pine, for instance, you can unclamp in a few hours or even less, but for important work, which is to hold permanently, twelve hours is scarcely time enough even for soft wood and hot glue, and twenty-four hours is none too long, for though the glue dries quickly to the touch, it takes considerable time to get thoroughly hard. It is safer to allow more time for hard wood. The thickness of the stock makes a difference also. Large junks and blocks and boards glued flatways require more time than ¼" stock, thin strips, or little splinters. You can tell something by the condition of the glue that is squeezed from the joint. Liquid glue sets much more slowly, and twenty-four hours is soon enough to release the work under average conditions. The warmth and dryness of the air make a good deal of difference. Under unfavourable conditions more than forty-eight hours may be required.
If for any reason you cannot clamp a joint, after applying the glue rub one piece back and forth upon the other a few times.
Rub wax, soap, or tallow on any part which must not be stuck by surplus glue which may exude from a joint, as in the case of a panel which may become stuck by the glue used in fastening the frame (see Doors and Panels).[396]
To glue two pieces where the surface is to be planed or trimmed at the joint, do not glue them together after they are planed or trimmed, but glue them first, and plane or trim them afterwards, taking care to have the grain of the pieces run in the same direction (see Jointing).
To glue pieces end to end, or as in a mitre,—that is, "end wood,"—first size with thin glue to stop the pores, else the glue will be quickly soaked up. Then, after allowing this coat to stand, glue in the ordinary way. But glued joints in end wood are seldom good and are to be avoided.
A great deal of glued work comes apart, and a great many mistakes in putting work together are caused by not understanding, or not bearing in mind, the way wood expands and contracts and warps and winds from heat and cold, dryness and moisture. This is an important matter if you wish to do good gluing. Do not think that all that is necessary is to have your wood dry and that then you can glue the pieces together in any relative positions. Veneers or thin pieces are sometimes successfully glued with the grain of the pieces running at right angles, as seen in chair seats, but as a rule avoid gluing wide pieces together with the grain running at right angles. See Laying out the Work, in Chapter IV.; also Jointing.
Glue-Pot.—This can be bought of copper, iron, or tin. A medium-sized one is more useful than a very small one. Have a cover to keep out dust and loose particles.
If obliged to make shift without a proper glue-pot, always use two dishes like a regular glue-pot, with water in the outer one, on the principle of the double boiler used for cooking, else the glue will be sure to burn and be spoiled. Two cans, such as are used for tomatoes or other vegetables, can be used on a pinch, one being larger than the other and fastened in place with wire or in some way to keep the smaller can from moving around too much; but a regular glue-pot is much better. See Gluing.
Fig. 534.
Gouge.—This tool is similar to the chisel, except for the[397] curvature across the blade. The common gouge has the bevel on the convex or outer side and is known as an "outside" gouge. This is the more useful for ordinary work. The "inside" gouge has the bevel on the inner or concave side. Although very useful for many purposes, it is less important for general work and is harder to sharpen. Gouges are of various degrees of curvature, Fig. 534 showing a "flat" and a "quick" curve. Those of moderate depth and curvature will be more useful for your work than very deep or very flat ones.
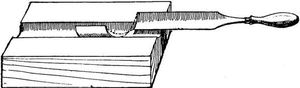
Fig. 535.
In using the common or "outside" gouge, light, short strokes should usually be made, for only the bevel of the tool bears on the wood, which makes this gouge quite hard to control.
You can often apply the principle of the sliding or sideways cut in using the gouge, as with the chisel, to good advantage. You can roll the gouge around with your hand from side to side so as to make it cut slantingly. This is particularly useful to give a clean cut when gouging across the grain (Fig. 535). In some cases, in working out a moulding, for instance, you can hold the tool at an angle with the work and get a better result than to push it straight forward lengthways (Fig. 536).

Fig. 536.
Be careful not to scoop out little hollows below the required[398] depth of the cut, and keep the direction of the grain in mind the same as with the chisel. The little inequalities left by the gouge can be reduced easily by the file, curved scraper, or glass and sandpaper. See Sharpening.
Gouge-Bit.—See Bits.
Grindstone.—When you get to the point of having a grindstone, get one which is somewhat soft and fine, for if too coarse it will produce a rougher edge than is desirable for your tools.
Do not allow your grindstone to become softened in spots by being left partially immersed in a trough of water, as it will wear away irregularly. With the best of care a stone will, however, become untrue after continued use, not merely in its circular outline, but the face will become hollowed and uneven. It must then be trued, either by some one of the contrivances now made for the purpose, or by simply turning the stone into the correct shape by holding the end of a piece of soft iron, as a piece of pipe, against the surface, without water, moving the iron as occasion requires, until the stone becomes true.
Grooving.—Grooves of different dimensions are often required for various purposes in wood-working. By far the best way, as a practical matter, is to take the work to a mill and have the grooving done by machine, which is not expensive. It can be done by hand with the planes devised for the purpose (as the plough), but though these are valuable tools, they are largely superseded, or becoming so, by machine-work, and it is usually fully as well for the amateur to take such work to the mill as to buy the tools.
In some cases the sides of the groove can be sawed by the hand-saws and the material removed by the chisel, but this is not easy if the groove is long. Pieces are sometimes clamped beside the line to guide the saw and sometimes even attached to the saw itself, or to a piece of saw-blade. The lines for the groove can be scored with the knife or chisel and the wood between removed by the chisel, much as in cutting a mortise.
In nice work, as fitting a shelf in a bookcase, it makes a better[399] joint not to fit the entire end of the shelf into a groove, but to cut a tongue or wide tenon on the end of the shelf, with a shoulder at each side and the front edge, to fit into a corresponding groove, as shown in Fig. 284.
Half-Round File.—See File.

Fig. 537.

Fig. 538.
Fig. 539.

Fig. 540.

Fig. 541.

Fig. 542.

Fig. 543.
Halving.—This joint shown in Fig. 537 is a common, simple, and good way of joining two sticks when they cross at right angles or obliquely. Place the sticks in position and mark the width of each upon the surface of the other, using a knife or chisel for scribing. With small sticks the wood can be removed with the knife, first cutting a notch at each side and then paring off the wood between (Fig. 538). With large pieces the lines should be marked by the square, the depth (one-half the thickness of either[400] piece) by the gauge. The lines at the outside of the space can then be sawed down to the gauge line, taking care to keep just on the inside edge of the line. The wood between can be pared out with the chisel down to the gauge lines. When the halving is at the ends of the pieces or at the end of one piece (Fig. 539), the process is the same, except that the wood can be entirely removed by the saw. Other forms involving bevelling and dovetailing are shown in Figs. 540, 541, and 542. This principle of the lap joint is often carried a little further and we have the open mortise and tenon (Fig. 543), which can successfully be applied to a mitred joint and can also be dovetailed, and boxes are now made by machine with the corners entirely made up of a continuous series of these joints (Fig. 544). See Joints.
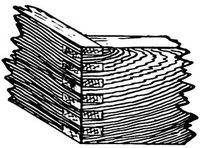
Fig. 544.
Hammer.—The hammer is made in many forms, but the common kind used by carpenters will usually answer your purpose, and is too familiar to require description. For general use select one of medium size and weight. Remember that the face of the hammer-head, although harder than the nails it is meant to drive, is not intended to pound every piece of hardened steel you may run across, nor to break up boulders when you are after minerals. For the use of the hammer see Nailing.
Hand-Screws.—Hand-screws are of great use in clamping work that has been glued and for holding pieces in any required position. Wooden hand-screws are probably the most generally useful, but a couple (or more) of the simple iron clamps will be of great service at times, as they can be used more advantageously than the wooden ones in some kinds of work. Get medium-sized[401] hand-screws rather than small ones if you can, as they will be generally more serviceable.
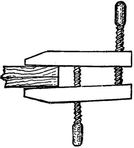
Fig. 545.

Fig. 546.

Fig. 547.
To open or close a hand-screw, hold it at arm's-length in front of you with a handle in each hand, and with a twirling motion revolve it toward or from you, as may be required, to increase or decrease the opening between the jaws. The screws should be greased or rubbed over with black-lead, soap, or bayberry tallow.
To hold two pieces together with uniform pressure is of course necessary for gluing and various other operations, but a little practice will show you how to adjust the hand-screws so that the jaws will bear on the wood evenly. The main point to remember is to keep the jaws parallel. The final tightening is given entirely by the outer screw, so, in adjusting the screws, leave the jaws open a little at the tip as in Fig. 545, that when the final pressure is put upon the outer screw the jaws will bear on the wood with an even pressure (Fig. 546). If the jaws were adjusted to bear evenly before tightening the outer screw, the final result would be as shown in Fig. 547.
Fig. 548.
In clamping together finished work or pieces which could be injured by the pressure, always put pieces of waste wood between the work and the hand-screws. In case of delicate work, like carving or mouldings, a piece of soft [402] pine placed between the surface and the hand-screws or clamps will enable considerable pressure to be applied without injury to the work.
A simple home-made clamp, suitable for such work as temporarily holding in place parts of the frame of a boat, for instance, is shown in Fig. 548. See Clamps and also Figs. 66 and 647.
Hatchet.—The hatchet is too familiar to need description. A common, medium-sized hatchet, that can easily be swung with one hand, is all that the beginner will ordinarily require, although there is quite a variety of hatchets and axes for various purposes.
The main thing in the use of the hatchet, besides keeping your fingers out of the way, is to look sharply after the direction of the grain of the wood, as it is not easy to stop a blow in the wrong place, for the hatchet is not so easily controlled as some other tools. Experience is the best teacher in the use of a hatchet. For removing superfluous wood with the hatchet, see Paring.
Hinges.—There are many varieties of hinges for various purposes. The common kind, like that shown in Fig. 135, had best, for neatness' sake, on moderately heavy work, be narrower than the thickness of the stock, so as not to extend across the edge. The hinge should be sunk in the wood of one or both of the parts to be hinged—in the case of many boxes, for instance, one half of the hinge when shut is usually sunk in each part, but in some kinds of work the whole thickness may be sunk in one part. The hinge can be held in position on the edge (in the case of the box) so that the centre of the pin on which it turns is in line with the back of the box, or sometimes a little outside. Marks can be made with the knife or chisel at the ends of the hinge, and the recess in which it is to fit marked with the square and gauge. This wood should be removed with the chisel, first making cross cuts to break up the grain, as in Fig. 614. Fit the other hinge or hinges in the same way. Next lay the lid exactly in position on top of the hinges and mark by them and cut the recesses in the top in the same way. Hold the hinges in place with two or[403] three screws each and see whether the cover opens and shuts as it should. Make any needed alterations, and finally screw the hinges firmly in place. Another way is to place the lid exactly in position (shut) and mark directly from the hinges, on both box and cover at the same time, the points from which to lay out the recesses. It will be well to look at a properly fitted hinge for a similar purpose before beginning your work, since one rule cannot be laid down for all cases.
For strap-hinges, T-hinges, and the like, see page 247.
Holes and Cracks, To Fill.—The simplest way to stop holes, cracks, checks, and the like, in painted work, is with putty, always applying it after the first coat of paint and never before (see Painting), but this method should not be used for other than painted work, and the nicer the work, the less desirable the use of putty becomes.
For nice work, as furniture, which has not been finished, small holes or cracks are often stopped by putting a daub of hot glue on the smooth end of a piece of wood of the same kind as the article, and with a sharp chisel, held nearly at right angles with the surface, scraping off fine wood-dust, which, mixing with the glue, forms a paste with which the crack can be more than filled. When hard, the surplus can be pared and scraped off.
Plaster of Paris (calcined plaster), mixed with very thin hot glue, is excellent for stopping cracks and holes of considerable size. It can be mixed with water only, but this is not as good.

Fig. 549.
Fitting in a plug of wood is a good way when the hole is of such shape that you can do so, making the grain of the plug run the same way as that of the piece to be plugged. Taper the plug slightly, so that when driven in it will fit tightly and not be flush with the surface, but project above it (Fig. 549). Dip in hot glue, and drive well in. When dry smooth off. If the hole is[404] irregular, trim to some shape to which you can fit a plug. In nice work take pains to have the plug a good match for the rest of the wood.
Slight cracks at the end of a piece can often be plugged and at the same time secured against further splitting by sawing directly down the crack, so as to remove it and substitute a straight saw-kerf. In this kerf a slip of wood can be fitted and glued.
Wax, and also melted shellac, can be used to stop holes and cracks in finished work. For this, see under Finishing.
Jack-Plane.—See Plane.
Jointer.—See Plane.

Fig. 550.
Jointing.—This term is applied to the act of straightening and making true the edges of two boards or planks which are to be joined to make a tight joint, with glue or otherwise. It is, also, popularly applied to straightening the edge of one piece only, as to "joint" the edge of a board. This you will often have to do, and for jointing two edges which are to be glued particular care will be required. Assuming that the edges have been got out nearly straight, the only plane you will require is the fore-plane,—or better, the jointer, or even the "long" jointer if the piece is long and you are fortunate enough to have these tools,—and it should be set fine, although if the edge is very crooked and you have to[405] work off much superfluous stock, the iron can be set to make a coarse shaving at first.
In shooting or jointing edges it is customary to hold the finger under the sole of the plane as a guide (Fig. 550). This helps in regard to the common fault of tipping the plane sideways so as to plane off more on one side than on the other (Fig. 551). This trouble may be aggravated by a wrong position of the left hand on the fore part of the plane in case you use a wooden plane (see Fig. 624 for correct position). Keep testing across the edge with the square (Fig. 640). The shooting-board can be used to advantage for short pieces (see Shooting-board), and attachable guides can also be obtained.
Fig. 551.
The jointing should be done with long, deliberate, steady strokes. Any hasty, hit-or-miss slashing away with the plane will be sure to result in a bad joint, and you can easily get the edge into such shape by three or four careless strokes that it will take you a good while to get it straight. Try also to avoid planing the edge rounding, from end to end (see Plane, Figs. 635-637). Sight along the edge. Also test with straight-edge, looking toward the light. If any shines through, the edge is not yet accurate and the process must be resumed.

Fig. 552.
If you are jointing two edges, as for a "glue-joint," first examine the pieces to see which edges will best go together, according to the purpose for which they are intended. Look at the end grain so as to arrange it in different ways if you are building up a piece of selected parts (Fig. 559). If merely joining two or more boards to make a wider one, notice the way the grain runs lengthways, and the way it crops up to the surface, for you will have, for everything but the roughest work, to plane the surface over after the joint is glued, and if the grain runs in two or three different ways it will be harder to make the surface smooth. There are cases, however, in handsomely figured wood, as quartered oak or mahogany, where you will arrange[406] the grain in the way that will look the best, but in such cases you expect to go through extra labour for the sake of having the article as handsome as possible. With soft, straight-grained white pine or whitewood, these matters are of less importance. When you have the pieces laid together in the best way, mark on the surface right across the joints (Fig. 552) so that you will know how to put the pieces together, for you will forget how they were arranged after you have moved them around a few times.

Fig. 553.
Joint each edge separately. For nice work it is well to joint the edges of the successive pieces alternately from opposite sides,—that is, if in planing the edge of the first piece the marked (or face) side of the board is towards you, plane the edge of the next piece with the face side of the board against the bench, or away from you. This helps to counteract the result of any tendency to tip the plane to one side or any inaccuracy in setting the plane-iron. See Shooting-board.
Then, putting one piece in the vice with the jointed edge upwards, lay the other edge upon it in the proper position and see if the two edges touch throughout. If not, one or both must be planed with thin, careful strokes until they do fit, for the joint will not be good unless the edges coincide. Remember, however, that it takes more than merely touching to make a good joint. The surfaces of the boards must be in line (in the same plane). Of course this really depends upon the edges being square. Test by holding a straight-edge, the square, the edge[407] of the plane, or anything straight, against the surface of the boards (Fig. 553).[47]
Do not be misled by the directions you may see in "amateur" books and magazine articles which tell you, for cases like this,—when you wish to glue up the lid of a desk, for instance,—to plane and sandpaper your boards carefully on the sides and then fit the edges together, after which you "have only to glue the edges and the job is done." That is not the right way to make a glued joint, as you will find out for yourself after you have planed a few dozen boards the second time. The skilled workman seldom attempts to do this except in repairing or some case where the surface of the pieces must be preserved. The practical work-man's way (which is the way for you), is to glue first and plane afterwards. The best way, practically, is to glue up the rough boards before they have been planed at all, and then have the whole planed down as one piece by machine to the required thickness. Of course you should get the surfaces as nearly in line as you can, to avoid needless planing afterwards, but give your special attention to making the joint hold (see note under Clamps).
Sometimes the edges of boards to be glued are purposely planed, hollowing lengthways, so that the two pieces touch at the ends, but do not quite come together in the middle, the idea being that a clamp at the middle will force the joint together for its whole length and will give a stronger result than to attempt to make both edges exactly straight. If there is to be any open place in the joint before gluing, it is better to have it at the middle than at the ends, but there is a difference of opinion as[408] to whether there is any advantage in springing boards to fit in this way.
Before gluing hardwood edges, it is well to tooth them over with the toothed-plane, if you have one. (See Plane.)
See Plane, Gluing, Joints, Cleating, Dowelling, etc.
Joints and Splices.—There are many kinds of splices and joints used in the different branches of wood-work, a few of which are here given.

Fig. 554.
The common square butt-joint (Fig. 554) is the simplest way to join two pieces at right angles, as in making a box or frame, and is used for all common work. Glue is of but little use with this joint. Rely wholly on nails or screws.

Fig. 555.
To make a better joint, cut a rabbet at the end of one piece and you have a joint (Fig. 555) which shows less end wood, and can be helped a good deal by gluing, on account of the shoulder.
Fig. 556.
Another way is shown in Fig. 556. Some strength and stiffness is gained by the tongue and groove, but a groove near the end introduces an element of weakness.

Fig. 557.
A much stronger way and a tighter joint (Fig. 557) is often used for cisterns, water-tanks, and horse troughs, but the projecting ends are objectionable for most purposes. See Halving, Mitring, Dovetailing, and also Box-making, page 219.
In nailing any such joints as those just shown, remember to always bore holes for the nails wherever there is danger of splitting. See Awl, Bits, Boring, Nailing.
There are many ways, besides those just mentioned, for joining sticks and timbers at right angles, which is something you[409] will often have to do, whether for a kite or some small framework or for the timbers of a building.
Fig. 558.
To join two or more boards or planks to make a wider surface, several methods can be used. Cleating, though strong and suitable for all such work as drawing-boards, rough doors, and the like, is often undesirable, both on account of the looks and because the cleats may be in the way (see Cleating). The simplest way, without cleats, is to glue the jointed edges (see Jointing and Gluing). Dowels can be used with this joint (see Dowelling), or grooves can be cut and a strip or spline or tongue inserted (Fig. 558). This last way can be done at the mill quicker and better than by hand. The edges can also be halved, or a rabbet cut in each edge from opposite sides. The boards can also be "matched" (see page 46), in which case it is not usual to glue them. All of these joints can best be made by machine.
Fig. 559.
To avoid the warping and change of shape to which wide pieces are subject, particularly when they are not middle boards (see Chapter III), they are often built up of selected narrower pieces (Fig. 559). This is done for many things,—the frames of machines, the tops of sewing-tables, drawing-boards, chopping-blocks, etc. Masts, bows, fishing-rods, and the like are sometimes built up of selected pieces, the idea being that a better result can be obtained by combining selected smaller pieces, that flaws and defects (which are apt to occur in larger pieces) can be avoided, and that sometimes the grain can be arranged to better advantage. This is doubtless true, but there is always the objection that glued joints may give way. If you can get a piece which is practically perfect, it is probably in most cases better than a glued-up combination, for it is not easy to improve on Nature[410] when you can get her best specimens; but unless you can get first-class stock of the dimensions required, it is better to "build up" with smaller pieces of selected stock.
Where the ends of two pieces come together and you wish to make a close joint, you will, of course, saw the pieces off as squarely as possible, using the square or perhaps the mitre-box. If you mark and saw them with exactness, and if everything about their arrangement is straight and square and true, the ends will come together exactly and make a close joint, but as a practical matter this frequently will not happen, however careful you may be. For nice work, the workmanlike way in such cases is to plane or pare the ends until they fit, but for rougher work the expedient of sawing the ends to fit can be resorted to. To do this, put the ends together as they are to go (Fig. 560), keep them from moving, and saw straight down through the joint. As the saw will leave a kerf of uniform thickness, the pieces can now be pushed together and the ends will fit, unless the joint was very much open, in which case you have only to saw again, and if necessary repeat the operation until the ends fit. This is a very useful expedient in case of need, but should not be relied on as a regular way to make joints, lest it engender a careless and inaccurate method of work. This applies also to joints which meet at any angle.
Fig. 560.

Fig. 561.
In some cases, where only one side of each piece shows, as in laying floor-boards, it is usual to undercut the ends slightly—that is, to make the joint a little open at the bottom, which gives a tight and neat joint on the side which shows (Fig. 561, which is exaggerated).
Another way to make an end joint is by bevelled scarfing or splaying (Fig. 562). You will see the ends of the clapboards on[411] old houses joined in this way, and it doubtless makes a better joint in many cases than the common square or butt-joint, but it is more work. Strips of moulding are often cut in this way.

Fig. 562.

Fig. 563.

Fig. 564.
There are many ways of splicing two or more pieces so as to get greater length, many of them, such as are used in bridge-building and roof-framing, being quite complicated. You will rarely, however, in such work as you will do at first, have occasion to do more than nail strips (fish-plates) on the sides of the pieces or make a halved splice or scarfed joint (Fig. 563). The latter is often made longer than that shown and fastened in various ways. A joint for a brace is shown in Fig. 564.
See Cleats, Doors, Dovetailing, Dowelling, Gluing, Halving, Mitring, Mortising, Nailing, etc.
Keyhole Saw.—See Saw.
Knife.—An excellent knife for shop work is a sloyd knife. A good shoe-knife will do very well. This is better for shop work than a jack-knife. It will not close on your fingers for one thing. For general purposes, however, a pocket-knife is the best thing, as you cannot carry a sloyd knife around with you. In buying it get a good plain knife with not more than two or three blades and of the best steel you can afford. Do not waste money in trying to get your whole kit of tools into the compass of one jack[412]-knife handle. In selecting a knife, open the blades and sight along the back to see that each blade is accurately in line with the handle, as they are sometimes fastened at a slight angle, which weakens the knife.
An immense variety of work can be done with a common pocket- or jack-knife, which is the best emergency tool for either the beginner or the skilled workman. One great thing about whittling is that you cannot rely on squares, rules, or compasses to get your work right, but must be independent, think quickly, look sharply, and rely on your own faculties. A knife is so easy to sharpen that there is not much excuse for using a dull one. See Sharpening.
In cutting, always keep your left hand behind the blade, and as a general rule cut from you, for the tool may slip and cut you instead of the wood. There are cases where you have to cut towards you, but there is never any need of getting your left hand in front of the cutting-edge.
Level.—A spirit-level is important for some work, but not often necessary for the beginner, as a substitute can easily be made. A horizontal or level line being at right angles with a vertical line, a home-made level can be made by using the principle of the plumb-line, as shown on page 96. When the plumb-line hangs freely on the line ab, which is at right angles to cd, the latter line (cd) must of course be level. The frame should be several feet long for levelling large work, as it can be adjusted more accurately than if small.
Linseed Oil.—See Finishing and Painting.
Locks.—Use locks of good quality or none at all. Never put very cheap locks on good work. There are many varieties of locks, some to be screwed on the outside of the wood, others to be sunk in recesses cut in the side of the wood, others still to be let into mortises—chest-locks, door-locks, cupboard-locks, drawer-locks, etc.
To fit a chest- or box-lock (not a mortise-lock), place the lock[413] in the right position, mark around the part required to be sunk in the wood, which can be cut away with gouge and chisel, the keyhole having been bored quite through the wood and trimmed to a neat outline which will conform to the shape of the key. When the lock has been screwed in its recess, put the "hasp," or part which is to be on the lid, into its place in the lock, just where it will be when the chest is locked. Then close the lid, and by slightly pressing you can make a mark on it to show where to put the hasp. Sometimes you can mark the place with a pencil, or by putting transfer-paper between the hasp and the wood, or by rubbing blackened grease on the plate of the hasp. The plate of the hasp should be sunk in the lid to be flush with the surface, and may then be screwed on, bearing in mind the thickness of the lid when selecting the screws. A mortise-lock is fitted in a similar way, but let into a mortise (see Mortising).
To fit a common drawer-lock, determine the place for the keyhole and place the lock in position on the inside as before. With a pencil mark the outline of the box-part of the lock, which bears against the wood. Cut away the wood within this line, making a recess slightly deeper than the thickness of the box-part of the lock. The hole must be bored for the key, as before. Put the lock into place and mark the outline of the outer plate, not merely on the inside of the drawer front but also on the top edge. Cut away the wood with the chisel to let the plate sink flush with the wood. When the keyhole is shaped, try the lock and if it works, screw it on. Close the drawer and turn the key hard to raise the bolts (the tops of which have been previously rubbed with blackened grease, such as can be scraped from an oil-stone, or using transfer paper), which, pressing against the wood, will mark the places for the mortises into which they are to slide. Cut these mortises and the drawer can be locked.
The variety of locks and their arrangement in regard to fitting is so great that it will be best for you to examine a well-fitted[414] lock for the same purpose that the lock you have to fit is intended, for one rule cannot be given for all cases.
Mallet.—The mallet, which is merely a hammer with a wooden head, is made in various forms and sizes, from the big beetle of the wood-chopper to the ladies' carving mallet. It is used to strike the wooden tool-handles.
For heavy work a mallet with the handle put through the head from the outside, like the handle of a pickaxe, is good because the head cannot come off. A rounded head with the handle on the end (like a potato-masher) saves having to notice how you hold it, as it is equally effective in any position. A mallet of this type can be turned all in one piece. Hickory or lignum-vitæ or any dense, hard wood is good for a mallet.
You do not gain force by using the mallet instead of the hammer, but the softer and more yielding blow of the mallet saves the tool-handle.
Marking.—For all rough work the ordinary carpenter's pencil, sharpened flatways, like a screw-driver, is the most convenient and durable instrument. For nicer work, where you need more accurate lines, the common round pencil (medium hard or rather soft) is all you need, but for nice, close work (such as marking accurate joints), a knife, the corner of a chisel, a marking-awl, or a scriber of some sort is necessary. There is no need to buy any tool for this, although they are to be had—nothing is better than a common pocket-knife or a chisel. Keep your pencils sharp by rubbing them on a piece of fine sandpaper, or an old file.

Fig. 565.
In scribing with the chisel, the edge is drawn along with one[415] corner slightly raised and the flat side next the straight-edge, holding the tool either like a pencil or for deeper scoring as in Fig. 565.
In all marking and scribing, whether with pencil, awl, knife, chisel, or other tool, be sure that the marking edge is kept close up to the rule, straight-edge, or square, as it will often tend to follow the grain of the wood and run off the line, and will sometimes force the straight-edge or square out of position if the latter is not held firmly.
Do not try to stop lines which meet at a given point, but let them cross one another when they will not show in the finished work, as it is quicker to do so and the crossing of two lines marks a point more accurately than a dot. For work to be finished, however, scoring the surface with lines should be avoided wherever they will show, as they will become conspicuous after the work is finished.
THIN RULE—FINE WORK.
Fig. 566.

THICK RULE—ROUGH WORK.
Fig. 567.
In marking lines with a straight-edge or ruler you must be careful that it does not slip. If it is long you can put weights on it. To mark a line accurately through given points, the ruler should not quite touch the points, but be pushed almost up to them and equally distant from each (Fig. 566). This will give you a clear view of both points so that you can be sure that the pencil or whatever you mark with will go as nearly as possible through the centre of each. Bearing the pencil against the edge of the ruler, you can slant it a trifle till the pencil-point will just coincide with the given point on the wood, and, keeping the same inclination, move the pencil along the ruler, and it should also go through the second given point. This applies to a regular ruler with a comparatively thin edge, and to fine work only. In marking by a[416] thick edge, or where extreme nicety is not required, you will of course put the straight-edge right up to the points and run the pencil-point along in the angle (Fig. 567).
Besides marking lines, the straight-edge (in some form), is used to determine whether a surface is true. See Straight-edge.
For rough, off-hand marking, particularly on undressed stock, chalk is often best. Sticks, shaped like school-crayons, of graphite or some black composition, are good for rough marking.
The chalk-line is used for distances too great to be covered conveniently by a straight-edge and in places where the latter could not so well be used. The chalk-line is a chalked cord drawn taut between the two points to be connected. It is better to use a small cord than a large one, and blue chalk is often preferred to white. Fasten one end of the cord with a loop around an awl or nail at one end of the desired line, and from this point chalk the cord, holding it between the thumb and the chalk so that the cord will bear on the flat side of the chalk in such a way as to wear it away evenly without cutting it in two. Then draw the chalked cord tight to the other end of the desired line and, holding the end down with one hand, lift the cord from as near the middle as practicable with the thumb and forefinger of the other hand and let it snap back on to the surface. The cord should be raised squarely from the work and not pulled slantingly to one side or the line will not be straight.
Marking-Awl.—See Awl.
Marking-Gauge.—See Gauge.
Matching-Plane.—See Plane.
Measurements and Measuring.—For various suggestions, see Rule, and also pages 47, 48, 50, 167 (footnote), 244, and 261.
Mirror-Plates.—A good way to fasten such articles as mirrors, cabinets, etc., to the wall is by mirror-plates, which you can buy or make yourself of brass. These should be sunk in the wood so as to be flush with the back side of the shelves. After[417] being fitted, they should be taken off during the process of finishing the work.
Mitre.—See Mitring.
Mitre-Board.—See Mitring and also page 92.
Mitre-Box.—If you can afford it, an iron mitre-box which will cut at various angles will be very useful. You can make one yourself of wood. You can get a carpenter to make you one for a small sum, but the iron ones are better. See page 90.
Mitre Shooting-Board.—See page 94.
Mitring.—A common joint is the mitre (Fig. 568). Its only advantage is that it shows nothing but a line at the angle and the "end wood" is entirely concealed. It is a weak joint at best, even when made by a skilled workman, and is particularly hard for an amateur to make well. The slightest variation in one of the corners of a frame or box throws the whole structure out of shape and in attempting to correct the error the other joints are apt to be opened, and if the whole is finally got together in a fashion it is often after bother enough to have accomplished much good work in some other way.

Fig. 568.

Fig. 569.

Fig. 570.
The mitre is particularly unscientific for wide pieces used flatways (Fig. 569), as the inevitable expansion and contraction of the pieces is very apt to cause an open joint. If the wood is not quite dry, so that it shrinks, the joint may open permanently toward the inside corner, for when the wood shrinks in width the pieces will become narrower and so separate at the joint, leaving[418] a crack, tapering from the inner to the outer corner. Even if the wood is thoroughly seasoned it will expand and contract more or less. When it expands, the joint will tend to open at the outer corner (Fig. 570). When it contracts it will tend to open, as just shown (Fig. 571), at the inner corner.
Fig. 571.

Fig. 572.

Fig. 573.
Of course there are some cases, as in making a picture frame of prepared "mouldings," when mitring is the only way in which the frame can be put together, and there are some other cases in which it is the most proper and suitable joint, but as a general rule, for amateur work, particularly in framing where strength is a consideration, avoid the mitre. Other and better forms for anything like a box are shown in Figs. 554, 555, 556, 557.
Fig. 574.
The mitre is sometimes strengthened for box work and the like by fitting a spline or tongue with the grain running across and not lengthways of the joint (Fig. 572.) This, properly glued under pressure, makes a good joint and one much superior to the plain mitre. But, though easy to do with machinery, it is a slow and careful job to make such a joint by hand, and if a case arises where you wish it done you had best take the work to a factory, where a circular saw is all that is needed.
The principle of halving shown in Figs. 539 and 543, can also be applied to a mitred joint.
Saw-kerfs are often made (Figs. 573 and 574) into which small[419] strips are tightly fitted and glued. This is a good way and easily done, once having got the mitre properly put together. A combination of the mitre with the joint shown in Fig. 555 is shown in Fig. 575. See also Dovetailing and Joints.

Fig. 575.

Fig. 576.
To lay off a mitre, or the lines by which to cut the intersection of any two pieces at any angle, a simple way is that shown in Fig. 576. The pieces are laid one above the other at the desired angle. Then the points of intersection are marked on each edge. Lines connecting these points will give the desired angles for sawing. The square can be used to help in determining the points accurately and to project them to the upper side of the top piece.
Mortise and Tenon.—See Mortising.
Mortise-Chisel.—See Chisel.
Mortise-Gauge.—See Gauge.
Mortising (Mortise and Tenon).—If you can get out two pieces and fit them together accurately with a mortise-and-tenon joint, and do the work well, you will be competent to handle a great many of the difficulties of ordinary wood-work.[420]
You will often have occasion to use this joint. The mortise is the hole in one of the two pieces to be joined. The tenon is the pin or projection in the other piece, shaped to fit the mortise.

Fig. 577.

Fig. 578.

Fig. 579.
To lay out a mortise and tenon (Fig. 577), select and mark the working faces for each piece. First take the piece in which the mortise is to be cut (Fig. 578). Square two lines, ab and cd, across the face and the same distance apart as the width of the piece on which the tenon is to be cut. Carry these lines across the side X (ae and cf) and also across the side opposite to X (that is, the side where the tenon will come through).
Next take the tenon-piece (Fig. 579) and measure from the end a distance a little greater than the width of the face of the mortise-piece, and at this point square a line, gh, across the face of the tenon-piece. Continue this line, gi, around the piece, with the square.
Now take the gauge and, setting it at the distance from the face settled upon for the mortise, scribe the line jk on the side X and also on the side opposite X. Also from the face of the tenon-piece, without changing the gauge, mark the line lm on the side X, on the opposite side, and on the end. Set the gauge[421] to measure from the face to the other side of the mortise,—that is, add the width of the mortise to the figure at which the gauge was set,—and scribe another set of lines, op and rs, in the same manner as before, remembering to gauge all the time from the same face.
In the coarser kinds of work, where marks on the surface do no harm, the gauge marks can be run across the other lines, as being easier and more distinct, but in fine work, especially that which is to be finished, care should be taken not to make scratches that will be seen when the work is finished. The parts to be cut away are indicated by cross marks (Fig. 580) and it will be seen at once that the tenon and mortise are laid out correctly.
Fig. 580.
To cut, take first the mortise-piece and fasten it securely by vise or clamp in a convenient position. The simplest way to remove the wood is to bore a series of holes with a bit of a diameter as nearly the width of the mortise as you have (Fig. 580), but a trifle smaller. This removes a large part of the wood with but slight danger of splitting. The rest can easily be trimmed away to the lines with the chisel, taking care not to jam the chisel down lengthways of the mortise when the latter is blocked with chips or firm wood, or the wood may split off at the side of the mortise.

Fig. 581.
To cut out the wood with the chisel only (or to trim the ends of the mortise after using the bit), bear in mind the way the chisel acts when you drive it into the wood. If both sides of the chisel were bevelled (as is the case with carving chisels), it would tend to go straight down into the wood, and if held vertically would make a vertical cut (Fig. 581), but the chisels you use for mortising are flat on one side and bevelled on the other. Being one-sided in this way, the edge of the tool is forced by the inclined bevel to slide off, so to speak, more or less, in the direction of the side which is flat. You can prove this easily by holding a chisel across the grain of a board and driving it in. If you hold the tool lightly, you will see that as you drive[422] it in it will incline to cut under, always on the side which is flat (Fig. 581).
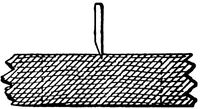
Fig. 582.
This shows how to go to work to cut a mortise so as to keep the sides square and true. If you put the chisel at the end, flat side outward, the cut will tend to run under and make the hole too large below the surface. If you turn the tool the other way, it tends to slip in towards the middle of the mortise. So, to cut out the wood, take a chisel just a trifle less in width than the mortise, and, beginning near the middle of the mortise, hold the chisel as in Fig. 582 and make successive cuts, working toward the end, first in one direction and then in the other, giving the chisel handle a slight pull toward the centre of the mortise each time you move it, to loosen the chips (Fig. 583). You can thus work safely toward the ends, which will be left slanting (Fig. 584).

Fig. 583.
Fig. 584.
Fig. 585.
After cutting about half through the piece in this way, turn it over and repeat the process from the other side, the result being a hole like that shown in Fig. 585. Now turn the chisel around with the flat side toward either end of the hole, and you can pare down the ends to the line without danger of undercutting (Fig. 585).
Care must be taken not to jam the chisel down lengthways of the grain until the hole is practically cleared of wood, or the side[423] of the mortise may be split off. Use the chisel lengthways of the grain only at the end of the process, to pare the sides of the mortise evenly, with light strokes, down to the line.
In all the use of the chisel, take pains to hold it vertically as regards the sides of the mortise—that is, do not tip it over sideways, or the mortise will be slanting or too wide at the bottom.
The common firmer-or paring-chisel can be used for all light mortising, but for heavy work the regular mortising-chisel should be used (see Chisel).
To cut the tenon, simply saw carefully on the line gh and its opposite (Fig. 579) and then on the lines lm and rs. Be careful not to cut beyond the line, so as to make the tenon too small. It is easy to trim it a little with the chisel if it is too large. Cut a little bevel around the end of the tenon, so that it will drive through smoothly without catching and tearing the sides or ends of the mortise. When it goes through properly and the tenon and shoulder fit snugly, the projecting end of the tenon can be sawed off after the whole job is done.
The tenon should be just large enough to drive through with a slight pressure and fit snugly without any wobbling around. It should not be so tight as to require much force to drive it home, or there will be danger of splitting out the sides of the mortise.
Fig. 586.
Fig. 587.

Fig. 588.
There is no absolute rule as to how wide to make the mortise and tenon in proportion to the width of the pieces. It depends on the kind of work, the kinds of wood, the kind of strain to be put on the joint, and various circumstances too complex to be gone into here. If the tenon is very thin it will be weaker than the sides of the mortise (Fig. 586). If very thick, the sides of the mortise will be too thin and will be weaker than the tenon (Fig. 587). One third of the width is as thin as a tenon is often made. It will then sometimes be weaker than the sides of the[424] mortise, as you can see from Fig. 588. But it all depends on what the joint is for. If it is to stand violent wrenching, the tenon in this case might break before the mortise-cheeks, and had best be made a little thicker, with the sides of the mortise a little thinner; but, on the other hand, if the joint is merely to hold the tenon-piece in position, as in case of a post resting on a sill, one third is plenty wide enough for the tenon, as it will be best not to weaken the sill by cutting any larger mortise than is necessary. Sometimes the tenon-piece is simply let in to the other piece for its full width. This is called housing (Fig. 589). Two thirds of the width of the piece is thicker than you will be likely to have occasion to make a tenon, as this leaves the cheeks of the mortise very thin. It is wholly a matter of judgment (between, say, one third and two thirds of the width), according to the conditions of each job.

Fig. 589.
Fig. 590.
The length to which a mortise can safely be cut is also a matter of judgment according to circumstances. If the tenon is thin, the mortise can be longer than if the tenon is thick, as the cheeks will be thicker and stronger, but, as a rule, avoid trying to make very long mortises, unless the tenon is very thin and the wood very strong, as there will not be strength enough left in the cheeks of the mortise (Fig. 590). Six times as long as it is wide is about as long as it is well to make a mortise under ordinary circumstances, though, as just said, it all depends on the conditions of the particular piece of work.
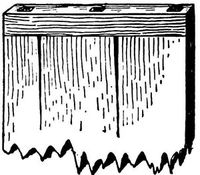
Fig. 591.

Fig. 592.
When a wide piece is to be mortised into another piece, two or more tenons are sometimes cut, thus avoiding too long a mortise, but this will not do for very wide pieces, unless some of the tenons are fitted loosely, for the expansion and[425] contraction of the wide piece may cause it to buckle or split if all the mortises fit snugly (Fig. 591).
In such cases as a door-frame or when the end of a board is to be fitted into the side of a post, a tongue and groove is often used in addition to the tenon, and this (known as "relishing") is a good way to do (Fig. 592).

Fig. 593.
The mortise and tenon given above is a very simple form. Sometimes the tenon is short and does not go through (Fig. 593). This is a common form, and is used a great deal in the best work. It is sometimes called blind mortising, the tenon being known as a "stub" tenon.
Mortise and tenon joints are sometimes merely fitted together, but can also be glued (see Gluing), pinned, wedged, or dovetailed and fastened with a key.
To pin a mortise and tenon, simply mark a point with square and gauge upon each side of the piece containing the mortise (Fig. 593), fit the tenon in place, and bore in from each side (or in rough work bore right through from one side until the spur appears on the opposite surface) (see Boring). Then drive through a snugly fitting pin and trim off the projecting ends. The pin should be slightly pointed before driving, on the same principle[426] that the end of the tenon is bevelled. It is not necessary to round the pin. An eight-sided one is just as good.
Do not use too large pins. In ship-building, bridge-building, and old-fashioned house-framing pins and treenails from 1" to 1¾" or more in diameter, are used. Dowels of various sizes will usually answer for such framing as you may have to do (though a rift-pin is stronger). For such work as pinning a joint in a chair, you will not need anything larger than a ¼" hardwood pin.
You must use judgment as to how near the edge to place the pin. If you put it too far from the edge, its hold on the tenon will be weak and the end of the tenon may break out (shear). If you put it too near the edge, the sides of the mortise may tear or split out.

Fig. 594.
Sometimes, particularly in timber work, to insure a snug fit at the joint, "draw-boring" is resorted to (Fig. 594). The hole for the pin is not bored through the tenon as just shown, but is bored a trifle nearer the shoulder of the tenon than the other holes (in the mortise-piece). The result is that when the pin is driven through it draws the tenon-piece down to a snug fit at the shoulder. But this has to be done with judgment. If the hole in the tenon is too much out of line, driving the pin through tends to split (strictly speaking to shear) the end of the tenon, and too much strain is put on the pin.
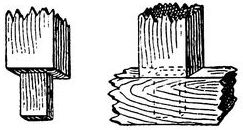
Fig. 595.

Fig. 596.
In the mortising just shown, there are only two shoulders where the tenon begins—that is, the tenon is made by only four cuts. This is good for all common or rough work. In nice work a shoulder is also cut at each edge of the tenon (Fig. 595). This[427] makes a neater-looking joint, as these shoulders cover the ends of the mortise completely. When the joint comes at the end of the mortise-piece, the tenon can extend to the edge on the outside and the mortise be cut clear out to the end, forming an open mortise-and-tenon joint (Fig. 543), or a wide shoulder can be left on the outside of the tenon—the tenon itself being made narrower (Fig. 596). This course is adopted in doors and frames of various kinds (see Fig. 334).

Fig. 597.

Fig. 598.
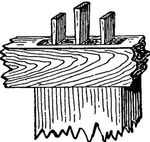
Fig. 599.

Fig. 600.

Fig. 601.
A good way to fasten tenons is to wedge them. This can be done whether the tenon goes through the mortise-piece or only part way, as in a blind joint. The wedges can be driven between the tenon and the ends of the mortise (Fig. 597), or, as is often better, driven into cuts made in the tenon itself, thus spreading the tenon toward the end, dovetail fashion, making it extremely difficult, or impossible, to pull it out of the mortise. Before wedging, the mortise should be cut under or enlarged toward the side on which the tenon comes through (Fig. 598). The wedges can[428] then be dipped in glue and driven as in Fig. 599. To spread the tenons themselves, one or two or even three saw-cuts should be made in the tenon, lengthways and farther than the wedges will extend (Fig. 600). The tenon and mortise having been properly glued, the tenon is fitted in place, and the wedges, previously prepared of some strong wood and tapering quite gradually, are dipped in the glue and driven down into the saw-cuts, thus spreading the end of the tenon into a dovetail until it fills the mortise (Fig. 601). It is often best to drive the outer wedges nearer the edge of the tenon than is shown in Fig. 600, lest the tenon-piece be split.

Fig. 602.
The process is much the same when the tenon does not go through the mortise-piece (Fig. 602). The mortise is undercut as before, and saw-cuts are made in the end of the tenon. The wedges are carefully planned and cut so that, when the tenon is finally in place, they will be of the right size to spread it so as to fit the mortise. The wedges must not be too long, so as to interfere with the tenon being driven home or to break off. When you are sure the whole will go into place and fit snugly, glue everything, start the wedges in the cracks, and drive the tenon quickly to place. This will of course drive in the wedges, which will spread the tenon at the end and fix it firmly. In fact, if well done, you cannot get it out again.
There are other forms of mortise and tenon, but they will be seldom required by the amateur. See Joints.
Nailing.—To drive nails, hold the hammer near the end of the handle. Do not, as is often done by boys and amateurs,[429] grasp it close to the head. The nearer the end of the handle you take hold, the harder blow you can strike, just as the longer the handle, the harder the blow. Use light strokes—mere taps—in starting the nail. After you are sure it is going straight you can then use more force to drive it home. Do not try to sink the nail-head quite flush with the wood. Leave that for the nail-set. You may think that any slight depression you may make if the hammer strikes the wood will be too slight to be seen, but that is not so, as the slightest dent or depression will probably show in finished work.
The head of the hammer should be swung back and forth through an arc of a circle of which the wrist is the centre. Do this carefully and steadily and you will send the nail in quicker and straighter than when you flourish the hammer wildly around in the air and bring it down with a ferocious bang somewhere in the vicinity of the nail, as boys of all ages have been known to do.
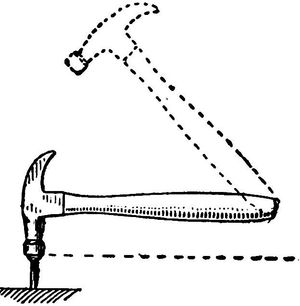
Fig. 603.
Now, remembering that the hammer-head will (and should) swing around in an arc of which your wrist is the centre, you must see that your wrist is in such a position that the hammer-head can strike the nail squarely—that is, the hammer-handle, when the head rests squarely on the nail-head, must be in a line parallel with the flat surface of the top of the nail (Fig. 603). If the wrist is much above or below this line, the nail will be struck slantingly, and either be driven crooked or bent (Fig. 604).
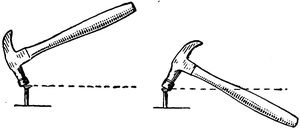
Fig. 604.
First place the hammer in the correct driving position, and then swing it back and forth as nearly in the same curve as you can. Practise this motion a little on a soft piece of board to see how squarely you can dent the board and how nearly you can hit the same dent with successive strokes.
Frequently a nail does not drive straight, but becomes bent and goes in the wrong direction. If you withdraw it do not, as a rule, try to drive another in the same hole, but start it in another place. Sometimes a nail will be bent because the face of the hammer-head has glue or grease on it. In such a case rub it on a piece of fine sandpaper or in the ashes or the ground.
Holes should always be bored when there is any chance of splitting, or when slender nails are driven into hard wood (lest they bend), but remember that the hole, particularly in the inner piece, should not be quite as large as the nail. With nails having large heads it does not matter in hard wood if the holes in the outer piece are about as large as the nails, provided the latter drive tightly into the inner piece.
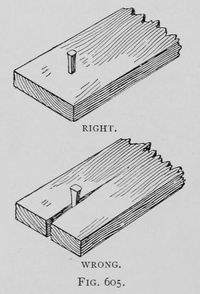
Fig. 605.
The hole made by a brad-awl is better, when it does not split the wood, than one made by a bit or drill, because it does not remove the wood but merely presses it aside, so that when the nail is driven the fibres tend to spring back to their original position and close in around the nail, helping to hold it in place.
In driving the old-fashioned nails, which have two sides parallel, while the other two incline toward the point or taper, they should be used on the same principle on which you use the brad-awl. If placed the other way, the wedge shape of the nail[431] will tend to separate the fibres and split the wood (Fig. 605). With nails having two sides smooth and two rough, as you pick them up you can tell by the fingers which way to hold them, the rough sides going across the grain and the smooth sides with it.
Nails will drive into hard wood easier if you touch the points to grease, tallow, lard, or soap.

Fig. 606.
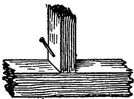
Fig. 607.
Fig. 608.
"Toe" Nailing.—If you wish nails to hold as much as possible, toe them—that is, slant them (Fig. 606). You can see at a glance that the board will be held much tighter than if the nails were driven straight up and down. Of course you cannot always drive nails this way, and there are many cases in which you would gain nothing, but it takes only a moment longer to toe nails, and it is often very useful where you wish to be sure that the work will hold together. There are many cases where you cannot nail any other way, as when you fasten a stud to the top of a sill (Fig. 607), and you can see at once that it is advantageous. Of course this is not a good method for work which you may wish to take apart again.
Slanting the nails helps to draw one piece tightly up to another, as is often desirable for a tight box or a floor (Fig. 608). You can increase this effect, after you have driven the nail part way in, by drawing the hammer towards you as you strike, or in the direction towards which the nail points, thus bending the upper part of it toward the other piece, which tends to make a tight joint.
Clinching Nails.—The way to clinch nails is simply to drive them through against a heavy hammer, or any solid metal object, held on the other side. As the point comes through it is gradually turned[432] over or hooked around into the wood and when the head is driven home the point will be firmly embedded in the wood. Another way is to simply strike the projecting ends with light, slanting blows. This will gradually bend or curl the point over to one side, and as it bends over you can pound more directly downward until the hooked end of the nail is buried in the wood. Clinching is very useful for many purposes, as in nailing cleats on a shed door. It is usually best to bend the nails over in the direction of the grain, rather than across it.
Whether to clinch or toe the nails must depend on the work. Clinching is better for anything that is to be slammed or subjected to violent treatment, while in many cases toeing is better, and frequently you cannot reach the points of the nails to clinch them.
Fig. 609.
Blind nailing is resorted to in order to have a clear, smooth surface, as in floors laid with matched-boards. Each board is nailed just above the tongue, with the nails slanting through the solid part of the board (Fig. 609). This holds the board down and tends to force it closer to the adjoining board. The grooved edge of the next board entirely conceals the nailing and leaves an unbroken surface.

Fig. 610.
Another form of concealed nailing, known as "sliver" nailing, is sometimes practised in inside work (sometimes in putting up "inside finish"). A little shaving is raised with the gouge (an inside gouge is best) or a narrow chisel, where the nail is to go, and curled away sufficiently to drive and set the nail (Fig. 610). Hot glue is then dabbed into the groove, the shaving (which is only raised at one end and not detached from the wood) is pressed back into place, and the spot rubbed with sandpaper drawn around a flat block until the shaving is firmly glued where it belongs. This takes but a moment or two,[433] and when the work is finally smoothed and finished the place cannot be detected, if the operation has been properly done. This is convenient to know in case you have to drive a nail where there is objection to its being seen.
See Withdrawing Nails.
Nails.—There are many kinds of nails, many more than is worth while to specify here, as you will probably use those of wire for most of your work. When another kind would be preferable (as is the case for some purposes) it will be specified. The nails in common use before the introduction of those of wire were known as "cut," being stamped from a sheet of metal, and "wrought," the latter kind being much older and originally forged by hand into shape, one by one (hence the name), but now commonly made by machine. The expressions three-penny, eight-penny, ten-penny, etc., indicate the length, and come from an old custom of so designating the lengths, but you need only to call for them by the length, as 2 inch or 2¾ inch, in order to get what you want, and you can easily select whatever degree of stoutness you need. Copper or galvanised nails and tacks will be needed for your boat-building, copper being preferable, particularly for salt water.
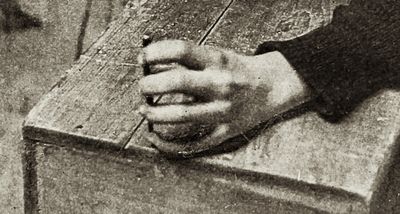
Fig. 611.
Nail-Set, or Punch.—The nail-set, for sinking nail-heads below the surface, is quite important, and it is well to have a[434] large one and a fine one. The end of the set or punch must not be allowed to become rounding or it will be all the time slipping off the nail-head and punching holes in the surrounding wood. A slight conical depression in the end of the set is good. Do not use a file for a nail-set, for the end is too hard and will dent the face of the hammer-head.
When setting nails, hold the nail-set firmly against the little finger, placing the latter on the wood close to the head of the nail, as shown in Fig. 611. This will keep the set from slipping off the nail-head and damaging the work.
Nippers.—A pair of these will often be of use in wood-working operations.
Odd-Jobs.—A very simple combined tool known as "Odd-jobs" can be used as a marking-gauge, mortise-gauge, scratch-awl, try-square, T-square, depth-gauge, mitre-square, spirit-level and plumb, inside-square, and beam-compass. It is well suited to much amateur work, and is cheap.
Oil.—Sperm oil is good to use with your oil-stones. Kerosene is good. Lard oil can be used. All thick and gummy oils should be avoided. Never use linseed oil or any similar vegetable oil, as it is not a good lubricator, and gums the stone. Glycerine thinned with turpentine or alcohol is sometimes used, and even turpentine alone. For oil for finishing and painting, see Finishing and Painting.
Oil-stone.—It is very essential to have a good oil-stone. They can be found of many degrees of fineness. Those of very fine and hard grain, which give a keen edge but cut very slowly, will not be found so well adapted to your use as those of moderate coarseness and softness, which cut faster. The stone known as Red Washita is good to use for wood-working tools, as it cuts rapidly. It should be free from hard spots. The Arkansas stone produces a very fine edge, but is of so fine texture that it is not so well adapted for your tools as a coarser stone, unless you happen[435] to find a quick-cutting one. The Turkey stone will produce a keen edge, but is not so good for your use.
Some stones (and excellent ones) cut best with water. When first trying a new stone use water, and if the surface does not become at all glazed or polished it will not be necessary for you to use oil.
The stone should always be kept covered when not in use, to protect it from the dust and dirt. Set it in a block with a cover or make a box for it. Always wipe it clean after using, to remove the paste of ground stone, steel, and oil left on the surface.
When an oil-stone becomes unevenly worn, it can be trued by rubbing it around on a sheet of sandpaper fastened on a flat surface, like the side of a board. Water can be used in this operation.

Fig. 612.
In addition to the ordinary flat oil-stone, slips of stone of various shapes are useful, a common and useful form being that shown in Fig. 612, wedge-shaped on one edge and convex on the other. If you have V-tools, carving gouges, or other tools sharpened on the inside, you must have slips of stone of various shapes with which to sharpen them. See Oil and Sharpening.
Painting.—You can paint your work very satisfactorily—perhaps not quite as well or quickly as a skilled painter by trade, but well enough for all practical purposes if you observe carefully a few simple principles. If you disregard them and think, like many amateurs, that anyone can paint right off the first time without any knowledge or thought, your painting will be botch-work.
Keep your work well painted. It is cheaper in the end to paint frequently and keep the work protected from the decay and damage due to exposure—not to speak of the better appearance.
Do not use cheap paint, unless, of course, for some cheap or temporary purpose, and it is most important that the first or[436] "priming" coat should be of good quality. If you are obliged to use inferior paint at all, use the best for the first coat and the poorer quality outside rather than the reverse, but it is economy of money and time to use good paint throughout.
Prepared liquid paints are the simplest, handiest, and cleanest for amateur work, and (if you do not try to economise on the quality) the best for you to use for many purposes, but for outside work (work exposed to the weather) you can probably do no better than to use the best quality of white lead and oil,[48] coloured if desired, which costs less, is more durable, and which you can easily mix yourself, or buy already mixed of a painter. If you need but a little, you can get a pot of paint with suitable brush at a paint shop, returning what you do not use and paying by weight. But if you have much painting to do, it is better and cheaper to have your own brushes and paint. The prepared paints of any colour you can also buy in the form of paste, to be thinned when used, which is usually cheaper than the prepared paint in liquid form.
The white lead you can buy by the pound, ground and already thinned with oil, or, what is perhaps more reliable, ground in the form of paste ready to be thinned with oil or, if for inside work, with turpentine. White lead, which is also the basis or an ingredient of the prepared paints, is a poisonous and unhealthful substance. There is, however, but slight danger (practically none) from such painting as you will do. But it is well to wear old clothes when you paint, and carefully wash the hands and face as soon as the work is done, and in case of continued indoor painting to see that the room is well ventilated. The mere odour from a can of paint is enough to make some people feel ill, as you may know, while it can be used for a long time by others apparently without harm.
In regard to coloured paints, the simplest way is to buy your[437] colours ready mixed in oil, to be thinned for use, or in liquid form of any desired colour, prepared to use upon opening the can. You can, however, colour or tint your paint yourself with various dry colours, which you can buy in the form of powder at the paint shops for a few cents. It takes but very little of most colours. Do not stir these dry colours directly into your paint, but first mix them with oil or turpentine.
It requires considerable knowledge of colours and their combinations to know how to mix different colours or shades to produce some particular shade, or to match some tint, but when the exact shade makes no difference you will have no great difficulty in producing the colour you wish. Test the shade of your paint on a piece of wood. The way it looks in the paint-pot is often very deceptive. In making a shade darker, especially when tinting white paint, be careful to add but a very little of the darker pigment at first and be sure that it is thoroughly mixed, or you will be likely to find after you have begun to paint that you have a much darker shade than you intended. It is surprising how small a quantity is sometimes needed to tint a whole canful of white paint—the merest dab of chrome yellow will tint a quart of white paint to a good cream shade. Remember that it is much easier to add a little more colour if the result is not dark enough than to lighten the shade if too dark.
Linseed oil (either raw or boiled) is required with which to mix the lead and thin it to the proper consistency. Raw oil is best for outside work that is exposed to the weather, as it is more penetrating and more adhesive, although slower in drying than boiled oil. Boiled oil does very well for inside work where it is not exposed to the weather. There is some difference of opinion, however, in regard to the use of the two kinds.
Turpentine is also used for thinning paint. It makes the paint flow easily and is freely used for that reason, but it probably detracts from the durability of all paint if used lavishly and should never be used for outside work. It is commonly used for inside work and causes the paint to work more freely and smoothly[438] from the brush and to dry more quickly. It gives the paint that dull, soft, or "dead" appearance often desired in inside work, instead of the shiny surface which is produced when mixed with linseed oil alone.
It is usual to add to the paint something else, known as a "dryer," to cause it to dry more quickly. Japan is one of the best of these preparations, but be careful to use very little of any form of dryer, as it is undoubtedly injurious to the durability of the paint and liable to cause cracking and checking. Avoid all kinds of "chain-lightning" dryers. Do not add a dryer to the colour until just before you use the paint and only to the amount you are to use at one time.
Another ingredient, which is not injurious to use, is zinc, but zinc paints are considered inferior. Red lead is commonly used to paint iron and is considered very durable for that purpose. Black japan varnish is often used. Iron must always be dry and it will be better to have it warm also.
Be sure that your work is thoroughly dry before beginning to paint, else the wood will be liable to decay, or the paint to peel, or both. Do not paint wood before it is thoroughly seasoned. Look the work over carefully and see that it is ready in all respects, before applying the paint. See that the surface is free from dust.
Look over the work for any knots or streaks of resinous or pitchy matter and wash them with a coat or two of shellac, to "kill" the turpentine and prevent its oozing through and spoiling the paint.
Try to mix enough, and only enough, paint for the coat you are about to put on, but do not mix a great quantity in advance with the idea of keeping it on hand.
The first coat should be thin rather than thick—with plenty of oil to saturate the wood. The oil will be quickly drawn into the wood, and you can readily see that the first coat should be thin to properly soak into the surface. If thick, the paint will not be sufficiently absorbed, but the oil will soak in quickly, leaving too[439] much residue of the pigment on the outside. Work this first coat well into the wood. Take up but little paint, and draw the brush carefully over the edge of the pail,[49] or over a wire stretched across the top, to remove any superfluity of paint, and begin the painting at the highest part of the work, or the part farthest from you, to prevent spattering or dripping paint over the freshly covered surface. Begin, also, at one end or side of the surface, working toward the other end or side, drawing the brush back and forth both ways to distribute the paint as evenly and smoothly as possible, and try not to leave any part of a surface untouched until another time, or it will be likely to show a "lap" where you end and begin—that is, if you cannot cover the work entirely at one time, leave off where there is some natural line or break in the work. Finish the side or the end and do not leave off right in the middle of a flat surface. This does not matter quite so much in the priming, but will show plainly in the later coats.
After this coat has had time to dry thoroughly, carefully putty the holes and cracks. Remember never to use the putty until after at least one coat of paint has been applied and dried. The reason for this is that the fresh wood will quickly absorb the oil from the putty, leaving it dry and crumbly, while if a coat of paint has been put on first and dried, the wood will be already charged, so to speak; the pores will be more or less choked up and the bulk of the oil will remain in the putty.
Paint with the grain of the wood, or the long way of the work, using a large brush for large surfaces and finishing all corners, mouldings, and edges with a small brush. In doors or panel-work first paint the panels, then the rails, then the styles (see Fig. 505). You will thus follow the construction of the work and the grain of the wood, and where you daub the paint beyond the part you are painting (as you will have to do), the daub will be wiped out neatly when you paint the next part.
Paint joints in outside work, tenons and mortises, shoulders,[440] etc., before putting together, with good white lead. It is not always customary to paint the hidden parts of joints before putting together, particularly in cheap work, but it is well to do so in all work which you wish to have endure, in all framework exposed to water and the weather, and in boat-building. Exposed work quickly decays at the joints and seams because the water and dampness collect in such places and do not run off or evaporate as readily as from a smooth surface, so the more you can protect these hidden parts with paint, the better, and the labour is but slight.
When you have paint left in the paint-pot which you wish to keep for use another time, pour just enough raw linseed oil over the top to cover it completely. This thin layer of oil will exclude the air and keep the paint from hardening. When you wish to use it again, pour off the oil or stir it into the paint, according to whether the latter requires more oil or not. When you get through painting, if you are going to do more in a short time, it will do to leave the brush in the paint, but do not leave it standing or resting on the bottom of the can, as that tends to bend the ends of the bristles and get the brush out of shape. Rig a wire hook on the handle and hang the brush so that the bristles will be covered by the paint, but without touching the bottom. If you are not going to use the brush again for some time, it should be cleaned and put away. Turpentine is often used, but kerosene answers every purpose. Be careful to wash out all the paint, however, as a very little left between the bristles will stick them together so as sometimes to ruin the brush. Another way to keep brushes which are in use is to hang them from the handles in a can partially filled with oil, the whole being kept covered. Water can be used instead of oil. Arrange it so that the hairs will be just covered.
The first coat especially should be given plenty of time to dry, for it is the foundation and basis of the whole operation and the firmness and durability of the painting depends much upon it.
Each succeeding coat should have plenty of time to dry before[441] applying another, bearing in mind that applying a second coat, before the first is fully hard, excludes the air from the under layer of paint and causes it to dry much more slowly than if left exposed as it should be. In such cases, the outside surface may often seem to be dry and hard while the paint underneath remains comparatively soft. When the first layer finally does dry, the tendency is to crack the surface of the outside, which has dried first. You can find an extreme illustration of this point in some old paint and varnish shop where some convenient place on the wall has been taken against which to slap and work brushes. You can find daubs of old paint and varnish, sometimes an inch thick, made up in this way of hundreds of layers slapped on before the previous ones were dry, the inside remaining soft in some cases after twenty years.
Paint dries, as a rule, more quickly in a warm temperature than where it is cold, and more quickly where it is dry than where it is damp. So, if you are obliged to paint where it is cold or damp, you will be justified in using more dryer than where it is warm and dry.
Sandpaper nice inside work after the first coat and between each two successive coats. Pumice can be used for old inside work to be repainted. Steel wool can also be used.
Keep a rag with you, when painting, to wipe off the spattering which you will be sure to make. It is not easy to get daubs of paint off after they are hard.
Turpentine will take the paint from your hands, but common kerosene will clean them satisfactorily when the paint is fresh, and is probably better for the hands.
Panels.—See Doors and Panels.
Panel-Saw.—See Saw.

Fig. 613.
Paring.—In paring or trimming a piece of wood to a line, if there is much surplus wood to be removed, you can sometimes chop pretty boldly with the hatchet until you get near the line, provided you watch the direction of the grain carefully to see[442] that the split cannot run up to the line; sometimes you can chop safely in one direction but not in the opposite (Fig. 613), but as a rule keep well away from the line for the first cut. Even wood that appears to be quite straight-grained will often split differently from the way you expect.
Fig. 614.
To trim a piece of wood, like the edge of a board, down to a line, with a hatchet, for instance, you can first score the piece with a series of short cuts, stopping short of the line, to break up the grain of the wood, and then trim these loosened chips off down to the line with the plane, chisel, draw-knife, or whatever tool may be suitable. The main point is to cut in such a direction that the grain will not cause the cuts to extend farther than the line or to run into the main piece of wood (Fig. 614). The same principle can be applied often in trimming and removing superfluous wood with a chisel, a draw-knife, or a knife. The cuts can often be made with the saw to better advantage (Fig. 614). It takes a little more time to make these cross-cuts with hatchet, knife, chisel, or saw than to whack away furiously lengthways, as if you were chopping kindling, but after you have spoiled a few pieces by splitting beyond the line you will conclude that the former is the more workmanlike and reliable way.[443]

Fig. 615.
This same principle is applicable to making chamfers or bevels with a chisel or knife (Fig. 615). You will find frequent occasion to apply this principle of breaking the grain into small pieces before making the final cuts in many kinds of work. It is in constant use in "roughing out" carving.
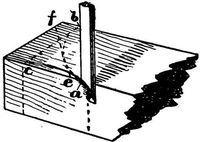
Fig. 616.
To trim to a curve as shown in Fig. 616, begin at the edge just outside of the end of the curve and work with the grain from a to b. It is often a help in such cases to first remove part of the wood with the saw, as on the lines bc and then ef. Finally trim the curve smoothly close to the line. Frequently this can be done to better advantage with the work held in the vise instead of lying horizontally on the bench.
Paring off superfluous wood down to a given line or trimming off an irregular edge with the chisel is very easily done provided the grain of the wood is straight, or runs in the same direction, even if slanting, as in Fig. 617, because you can then cut with the grain. It is often better, however, to cut across the grain, or diagonally, with the chisel, as the wood is less likely to be split by the tool.

Fig. 617.
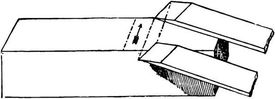
Fig. 619.

Fig. 620.
When the grain runs in several directions, and keeps cropping up to the surface and dipping down again as shown in Fig. 701, it becomes more difficult to pare the surface smoothly with the[444] chisel. In such a case remember the sliding or drawing stroke and traverse the surface with a diagonal crossways motion (Fig. 619) that will trim off the fibres with a slanting stroke without causing them to be torn up. Slant the cut so that if the wood should tend to split, it will be in the direction of the part cut away and not towards the piece to be kept—i.e., so that the chips will split and not the body of the wood. Reverse the chisel and cut in the opposite direction when a change in the direction of the grain requires it. Some pieces are, however, so extremely irregular that you cannot do this, but must slice away the best that you can and leave the rest to other tools. In cutting off a corner or rounding or bevelling an edge you can use the slanting cut (Fig. 620).
In using the chisel for paring, let the left hand, which is nearer the cutting-edge than the right, act as a brake or countercheck or drag to check the progress of the tool. It is largely by the varying balance of these two forces—the pushing forward of the tool with the right hand and the checking and controlling with the left—that correct and effective control of the tool is gained. The left hand should in many cases rest upon or grasp the wood as well as the blade. See Chisel.
Paring-Chisel.—See Chisel.
Parting-Tool.—See Carving Tools.
Pencil.—See Marking.[445]
Pincers.—There are various kinds of pincers, pliers, and nippers. A pair of common pliers and also cutting nippers will be very useful.
Plane.—A plane is in principle (roughly speaking), as you will readily see, nothing but a chisel stuck through a block of wood or iron. Small or narrow surfaces may be smoothed to a certain degree by the chisel, the knife, or even the hatchet, but for large surfaces something is needed which can be more exactly controlled than the knife, ax, or chisel, held in the hands. So, to hold the chisel firmly in one position and to apply force to it more advantageously, it is firmly fixed in a block of convenient size and shape and becomes a plane.
A very short block will prevent the chisel cutting deeper at one point than another, but the tool will follow the irregularities of the surface and, though it may make the surface smooth, it will not make it level, or flat; so the block is made longer, that it may not go down into all the little hollows, but plane off only the higher parts.
The two essential parts of a plane are the iron and the stock. The bottom surface of the stock is called the sole or face (ab in Fig. 621), the wedge-shaped hole where the iron goes is called the throat (c), and the slot at the bottom through which the edge of the iron projects is called the mouth (d).

Fig. 621.
Bear in mind that the shape of the cut made by the plane will be a reversed copy of the shape of the cutting-edge. If the edge is rounding, the cut will be hollowing. If the edge is hollowing, the cut will be rounding. If the edge is straight, the cut will be straight. If the edge is nicked, ridges will be left on the wood.
If buying new, you will do best, as a rule, to get iron planes, though very good ones can be had with wooden stocks, but with the convenient appliances of the iron planes. Some workmen[446] still prefer the old wooden planes, but it is better to buy iron ones.

Fig. 622.
The jack-plane is used for coarse work and to rough off the surface with large shavings, ready for the other planes. Fourteen or fifteen inches is a good length. The edge of the iron is not ground squarely across, like the chisel, but is rounded slightly so as to cut deeper in the middle (Fig. 622). Heavy shavings can be cut and the rough outside of a piece of wood taken off quicker and easier than with a more squarely ground iron, but it does not leave the surface smooth, as the strokes of the jack-plane form a series of hollows and ridges (Fig. 623, exaggerated). After taking off the rough surface with the iron projecting considerably, you can of course set the iron finer, and by going over the work several times you can take off the worst of the ridges, but without a great deal of labour you can never get a really smooth surface with a plane that cuts hollows. A common use of the jack-plane is for "traversing," or planing across the grain, which is often the quickest and easiest way to reduce a surface to the desired shape, and for cleaning off where pieces have been glued together. If you should use a jack-plane to do the work of a fore-plane, have it ground more squarely across like the fore-plane.

Fig. 623.
If you use an old-fashioned wooden plane, take the handle in your right hand, laying your left over the top and side, just a little in front of the iron, with the thumb towards you and the fingers on the farther side, as shown in Fig. 624. This position allows you to bear weight on the fore part of the plane when necessary and to control the tool to the best advantage. This applies to the old-fashioned wooden planes. If your plane is[447] iron, there is a handle or knob for the left hand which you simply grasp in a natural way.
Push the jack-plane forward steadily an arm's-length. Then stop and start afresh for another arm's-length stroke. When drawing the plane back tip it on the farther edge. The cap or break-iron can be set quite far back from the edge for rough work, about one eighth inch, but much nearer for finer work.
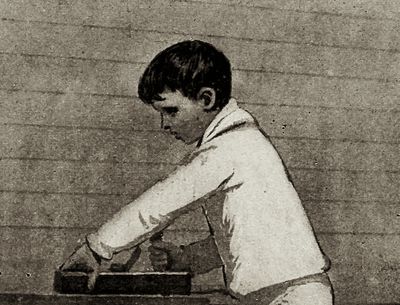
Fig. 624.
In these days when almost everything is planed by machinery with greater or less smoothness, you will probably not have much use for a jack-plane unless you find you have a good deal of rough planing to do yourself.

Fig. 625.
The fore-plane or trying-plane is longer and larger than the jack-plane. Eighteen to twenty-two inches is a good length. It is used to straighten and level the surface after the worst roughness has been taken off. The surface having been roughed off by the jack-plane, the fore-plane is not required to take off such heavy shavings and the iron is therefore ground squarely across like a chisel, but very slightly rounded at the corners (Fig. 625). It is held in the same way as the jack-plane,[448] but the stroke should be long and steady, for the fore-plane, which is long, will straighten the surface, and smooth it also. The iron can project more for soft and loose-grained woods than for hard, and the cap or break-iron should be nearer the edge for hard woods.
The jointer (22" to 30" in length) or long jointer (from 24" to 30"), is still longer than the fore-plane and correspondingly more accurate for making a surface level and true, or for shooting the edges of boards. Twenty-four inches is a good length. It is very useful for making joints to be glued, and is used in the same way as the fore-plane, the stroke being continued steadily the whole length of the piece if possible.
The smoothing-plane is used, as its name indicates, for the final smoothing of the surface, so far as it can be done with a plane. It is from five to ten inches long.
It is an invaluable plane to the amateur, and the beginner can get along very well for a great deal of work with no other, for stock can be bought ready planed and can easily be trued and jointed, when necessary, at any wood-working mill or shop at slight expense.

Fig. 626.
A plane with a short stock, as the smoothing-plane, will make your work smooth, but it is hard to make it straight and level or true with such a tool, because, being short, it will follow the larger irregularities of the surface and will only plane off the smaller inequalities. It will go up and down over the hills and[449] valleys of the wood, so to speak, while a longer plane cannot do this, but will cut off the tops of the hills until the surface is made level, as shown in Fig. 626. The smoothing-plane is therefore merely to smooth the surface after it has been straightened by a longer plane, or in cases where smoothness only is essential and it is not required that the surface should be true. Small pieces can, of course, be straightened and trued by the smoothing-plane alone.
A wooden smoothing-plane can be held as shown in Fig. 627. An iron plane can be used by laying the hand naturally over the knob for the purpose.
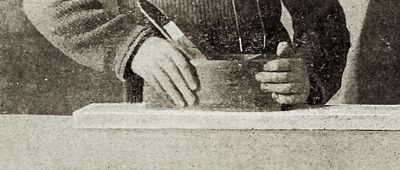
Fig. 627.
The block-plane is small and is meant chiefly for planing across the ends of pieces (for planing "end-grain"), but it is also frequently useful in other directions. The iron is usually set at a more acute angle with the face of the stock than in the other planes and with the bevel upwards, and the width of the mouth is often adjustable, which is a convenience. A block-plane is made which can, by means of a detachable side, be used as a rabbet-plane. The block-plane makes a quite good substitute for a smoothing-plane for amateur work and is a very useful little tool.
The toothed-plane is about the size of the smoothing-plane, but the iron is corrugated or scored with grooves lengthwise, so that one side of the cutting-edge of the iron, instead of being smooth, is notched into little teeth somewhat like a fine saw[450] or the edge of a file, and the iron is inserted in the body of the plane almost vertically. This plane makes scratches all along its course instead of taking off shavings. It is used in veneering and in gluing other surfaces. It can frequently be used to good advantage to break up the grain where two edges or surfaces are to be glued together, so that the glue may hold the two rough surfaces together more strongly, upon somewhat the same principle that the plastering on a lathed wall holds its place tightly through the hold it gets on the cracks between the laths, intentionally left for the purpose. The toothed-plane is used for this purpose in veneering. The idea upon which this tool is based originated with the Orientals, who have for ages scratched or toothed the joints of their wood-work.
It can also be used to subdue a refractory piece of crooked grain which you wish to get smooth, but which may crop to the surface in such a way that you cannot plane it without chipping the grain. By scratching the surface thoroughly in all directions with the toothed-plane set very fine, the obstinate fibres can be broken so that the surface can be smoothed with the scraper, not using the smoothing-plane. As a matter of fact, however, if you cannot smooth a piece of wood, the trouble is usually with the edge of the plane-iron or its adjustment, or with your manner of planing, for a very keen edge is supposed to be able to cut the most obstinate grain, unless, of course, the wood is extraordinarily hard.
The bull-nosed-plane has the iron close to the fore end of the stock, to work into corners and awkward places which cannot be reached by the smoothing-or block-planes. The iron is reversed. A very small plane (perhaps four inches long) of this kind is useful.
The circular-plane is used for planing curved surfaces, the sole being now made of a thin, flexible metal plate and adjustable so that either concave or convex surfaces can be smoothed. It is very useful at times, but is not essential for an amateur.
The rabbet-plane, which is used to cut rabbets, as the name in[451]dicates, is a useful tool, but in most cases you can dispense with it by having rabbets cut at a mill.
A router, for cleaning out and smoothing the bottoms of grooves and depressions, is very useful at times.
There is a variety of other planes for special purposes, as the plough, matching-planes, hollow and round planes, beading-planes, etc., as well as various combination and "universal" planes. Many of these are excellent, but, as a rule, are not important for the amateur in these days, as the work they do can be so easily and cheaply done at a mill. You will seldom feel the need of buying any of them, unless you live where you cannot reach a factory.

Fig. 628.
You will find it important to bear in mind the purpose of the cap or dull iron screwed upon one side of the cutting-iron, in what are called "double-ironed" planes. A plane with a single iron, like a chisel, will cut satisfactorily and easily for straight-grained, soft wood, and for hard wood when planing with the grain, but many pieces of stock are difficult to plane, because the grain does not run in the same way, but turns and twists, cropping up to the surface and dipping down again in all sorts of curious and perplexing ways. In planing them the wood is likely to be continually chipping or tearing and breaking off below the surface, instead of planing smoothly like a piece of straight-grained pine, leaving dents and rough hollows over the surface. The natural tendency of the plane-iron is to split the wood in front of the iron in such cases (Fig. 628). To remedy[452] this the plane has a double iron. An iron or cap with a dull edge is screwed on to the face of the cutting-iron (Fig. 629) so as to help bend and break off the shavings before the split gets fairly started (Fig. 630), when the iron can cut it smoothly off. The thickness of the shavings is greatly exaggerated in the cuts for the sake of illustration.

Fig. 629.
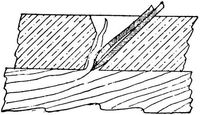
Fig. 630.
The cutting edge is said to have "lead" in proportion to the distance it is in advance of the cap-iron. The cap can be set some little distance from the edge for the jack-plane, as far as an eighth of an inch, but with the fore-plane and smoothing-plane it must be set quite close to the edge, the distance varying according to the character of the wood. The more crooked or cross-grained the wood, the nearer the dull iron is brought down towards the edge of the sharp one. The nearer the edge, the smoother the result, but the harder to work the plane.
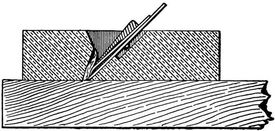
Fig. 631.
Something more than the break-iron is required, however, to insure breaking the shavings. There must be an angle, against which they can be broken, close in front of the cutting edge and above the shaving. This angle is the forward edge of the mouth or slot in the sole through which the iron projects (Fig. 631). Thus the width of the mouth makes a difference in the smoothness of the surface, for a narrow mouth is necessary to ensure the shaving being readily broken by the cap. With a wide mouth, the shaving will not be broken by the cap in time, because there is no corner against which to break it.[453]
With straight-grained wood this does not make so much difference, but with crooked and broken grain narrowness of mouth is quite essential to a smooth surface, provided that the opening is wide enough to allow the shaving to pass through freely. Rough and knotty wood requires the mouth very narrow and the iron set very fine (i.e., projecting but very little from the sole) and the cap quite near the edge.
The modern iron planes have simple appliances for setting or adjusting the projection of the iron from the sole and thus regulating the thickness of the shaving. If, however, you are obliged to use the old-fashioned wooden planes, you raise the iron in the same way that you loosen it for removal, by lightly tapping on the top of the fore end of the stock, keeping hold of the plane with the left hand so as to prevent the iron falling through if loosened too much. When the iron is raised enough, fix it in place by tapping on top of the "chip" (Fig. 621, e) or wedge which holds it in place. To lower the cutting edge, loosen as before and, checking the edge with the finger, let it project the required distance, which you can tell about by looking along the sole (Fig. 632), and fix in place by tapping the "chip" as before. This is the process used in removing the iron for sharpening and replacing it, the chip being removed as well as the iron. Any carpenter will show you the operation. Always hold the plane in the left hand in all these adjusting operations. Do not strike or tap any part of it while it rests on the bench or on anything solid.

Fig. 632.
To smooth a rough piece of wood, use first the jack-plane, to remove the rough surface and superfluous wood, and then the fore-plane, to straighten and smooth the surface. If there is no need to have the surface true, but only smooth, you can omit using the fore-plane and follow the jack-plane at once by the smoothing-plane. With ordinary machine-planed stock you do not usually need the jack-plane, though it is sometimes useful in reducing a piece of wood to a given shape.
Before beginning to plane, see that all dirt or grit which might dull the tool is brushed from the surface.[454]
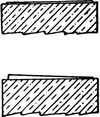
Fig. 633.
Turn the plane over and sight along the sole (Fig. 632), not merely to see that the iron projects to the required degree, but also to see that it projects equally, lest one side or corner of the iron should cut more deeply than the other, and thus make a groove or scratch on the wood (Fig. 633). The latest iron planes have appliances to adjust any inequality of this sort, but if your plane is not so arranged a little tapping on one side of the upper end of the iron will correct the trouble. Try the plane on a waste piece before beginning on nice work.
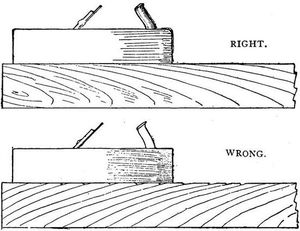
Fig. 634.
Plane with the grain, as a rule, and the fibres will be cut off cleanly where they crop up to the surface and your work will be left smooth. If you plane against the grain, some of the fibres will tend to splinter or chip off just below the surface before they are cut off (Fig. 634).
Stand behind the work with the plane before you. Plane with the arms (and from the shoulder), not with the whole body. Try to shove the plane straight ahead, also to plane as equally and evenly as possible over the surface; for while it is comparatively easy to get a surface smooth it is quite another thing to keep it true or to make it true if warped or winding.

Fig. 635.
Fig. 636.

Fig. 637.
The natural tendency, and a common fault, is to begin and end the stroke as shown in Fig. 635. Rolling the body back and[455] forth, instead of pushing steadily with the arms from the shoulder, aggravates this trouble. The result of this way (which is unconscious at first) is that the surface after planing is apt to be as shown in Fig. 636. To prevent this, press down with the left hand on the forward part of the plane during the first part of the stroke, and with the right hand on the rear part of the plane during the last part of the stroke (Fig. 637).
In planing wood which is dirty or rough, it is best to lift the plane from the work when drawing it back for a fresh stroke, or to draw it back so that only the point touches the board, or to draw it back on edge, but in planing small surfaces of clean wood it is not usually worth while to take this precaution.
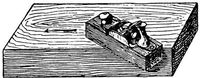
Fig. 638.
In planing pieces with crooked grain, turn the piece when practicable, so as to plane as much of it with the grain as you can. But many pieces are so crooked in grain that you cannot do this. So at times it is well to turn your plane sideways to get[456] a slicing cut and cross the grain at an angle (Fig. 638); but as a rule the plane should be pushed straight forward.
A few drops of oil rubbed over the face of the plane will make it run more smoothly, particularly on hard wood.

Fig. 639.
Test the accuracy of your planing of broad surfaces with a straight-edge, the blade of a square, or the edge of the plane itself (if straight). By applying such a straight-edge across the surface or lengthways or diagonally you can tell whether your work is straight and true (Fig. 639). Also "sight" with your eye. If the surface is large or long, winding-sticks can be used (see Winding-sticks). In planing edges test lengthways with the eye and straight-edge of some sort, and crossways by applying the try-square (Fig. 640). (See Jointing.)

Fig. 640.
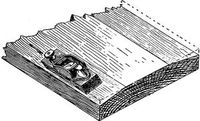
Fig. 641.
It is, of course, harder to plane a broad surface, as the side of a board, than a narrow one, as the edge. When planing a flat surface, as a board, be careful not to plane off more at the edges than elsewhere (Fig. 641), as you will be quite likely to do if[457] you allow the plane to tip sideways over the edge instead of keeping the sole parallel with the flat surface.
When planing across end-grain with the block-plane or smoothing-plane, either secure a waste piece of wood at the side where the planing ends, to prevent the edge chipping off, as shown in Fig. 642, or plane from both edges toward the middle (Fig. 643).
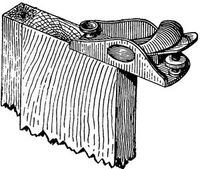
Fig. 642.

Fig. 643.
The use of the straight-edge will give the necessary clue to the process of making warped surfaces true. (See Truing Surfaces.)
Whenever you make nice articles from wood planed by an ordinary cylinder planer, the wood will seem quite smooth just as it is, but do not neglect to smooth it carefully so as to take[458] out all the "planer-marks" or those little corrugations across the grain left by the machine will often show clear across the room as soon as the work is finished. See pages 44, 45, and 46, and also Sharpening.
Planing.—See Plane, Jointing, Truing Surfaces.
Plank, Laying.—See Boards, Laying.
Plough.—See Plane.
Plumb.—You can make a plumb-line by merely hanging any weight at the end of a cord, when the cord will of course be vertical as soon as it stops swinging (Fig. 644). For convenience in using hang the cord on a board as shown in Fig. 130. When the cord hangs exactly on the line or at the apex of the notch the edge of the board will be vertical.
A long board will give a more accurate test than a short one in most cases, just as a long plane will make a straighter edge than a short plane, for the long board will bridge over the irregularities of the surface to be plumbed. For example, to take an exaggerated case, the post plumbed as at a (Fig. 645) is vertical, taken as a whole; while the same post plumbed as at b leans over, because the short board happens to be placed where the surface of the post is not straight.

Fig. 644.
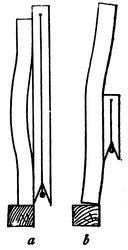
Fig. 645.

Fig. 646.
When the plumb-line is used to determine a point exactly over or under another point, as in surveying, the bob is shaped with a[459] point like a top (Fig. 646). For making the plumb, see page 96. (See also Level.)
Pod-Bit.—See Bits.
Punch (for Nails).—See Nail-set.
Putty.—Common putty is (or should be) a mixture of linseed oil and whiting of about the consistency of dough. A mixture of white lead worked in with the whiting is, however, superior for some purposes, and is better when but one coat of paint is to be put on after the puttying. To colour putty, stir the colouring matter in a little oil and then work and knead it into the putty until the whole is coloured. Keep putty under water. Do not leave it wrapped in the paper in which you may take it from the painter's, for the oil will be absorbed by the paper and the putty will quickly become dry and hard. Use a square-bladed putty-knife for flat surfaces, and do not use your fingers. See also Holes, To Stop.
Putty-Knife.—An old case-knife can be used (better if reshaped squarely across or to an obtuse angle), or, in fact, any knife, but a regular putty-knife is best.
Quill-Bit.—See Bits.
Rabbet.—A rabbet is a recess or rectangular groove cut lengthways in the edge of a piece of board, plank, or other timber (Fig. 284). It is usually better for the amateur to get such work done at a mill, when practicable, rather than to do it by hand. The rabbet-plane is, however, a very useful tool to have. In some cases, as at the end of a piece, the saw can be used, the lines for the rabbet having been carefully marked with a knife or chisel. The chisel can also be used to make a rabbet, much as in cutting a mortise, taking pains when driving the chisel down next the line not to cut under or jam the wood beyond the line. In the final trimming to the line, the chisel should be held with the flat side toward the line. In removing the wood with the chisel, it is often best to pare across the grain rather than with it (see Paring).[460]
A strip of wood can be clamped across the piece exactly on the line as a guide for the saw and the sawing be done with the heel or rear corner of the saw, keeping the latter close up to the gauge stick, and pieces are sometimes even clamped to the saw itself to guide it, but such arrangements, though useful expedients under some circumstances, are hardly the most workmanlike methods.
Rabbet-Plane.—See Plane.
Rasp.—The rasp—only used for wood—is a sort of coarse file, but instead of ridge-like teeth it is studded with projecting points, which tear off the wood more quickly, but also more roughly, than the file. It is extremely useful to remove surplus wood and to get curved objects roughly into shape. One good-sized half-round (or "slab-sided") rasp will be a great help. See File.
Rasping.—See Filing.
Reamers.—See Bits.
Repairing Furniture.—To repair thoroughly—to make things as strong as when new and to leave no sign of the mending—often requires more skill and ingenuity and more general knowledge of wood-working than to make new articles. Skill in repairing comes not merely from general knowledge of wood-working, but from experience and ingenuity in applying your knowledge to new problems. You will rarely have two jobs of repairing just alike, even if of the same kind, and the variety is almost endless. It is, therefore, impossible to give rules to cover all the different cases. In fact, to attempt to give complete directions for repairing would be to describe the majority of operations used in wood-working, and the reader is referred to other parts of the book for whatever information it may contain. Suggestions on one or two points may, however, be of use.
Suppose the arm of a chair comes off, after having been stuck on with glue perhaps a dozen times. How is it usually mended each time it comes off? The family glue-pot, containing the dregs of all the glue used since it was bought, is put on the stove,[461] a little water poured in, and as soon as the glue gets warmed into a thick paste a lot of it is daubed on to the joints, on top of the thick coating they already have, and the arm pushed as nearly into place as it will go. It is then usually left for a few hours and sometimes even tied on with a string while the glue dries. Of course it sticks for a while and then the usual result follows.
Now how should you go to work to do this properly? First clean off all the old glue. This is important. You want to put the fresh glue on the wood, not on top of the old glue; but do not scrape away the wood in getting off the glue so that the parts will no longer fit. Next, see whether the pieces will fit together as they should. If they will, then contrive some way to clamp them in place while the glue is drying. Sometimes hand-screws will do this, sometimes clamps, sometimes a rope twisted, and often it will take all your ingenuity to contrive any arrangement, but clamped they must be if you wish to be sure of a good job.
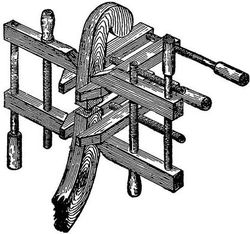
Fig. 647.
The pieces often make an angle with one another, or are curved, so that the clamps or hand-screws will not hold, but slip as fast as you tighten them. In such a case the method shown in Fig. 647 can often be used. Screw a hand-screw firmly on each side of the joint, rubbing chalk on the insides of the jaws to help prevent slipping, and putting on the hand-screws so that the jaws will be parallel. Then, by using two other hand-screws, those first put on can be drawn towards one another and the joint firmly closed. Then proceed to glue the parts as with new work. For the way to do this see Gluing.[462]
In patching old work with new wood, pains should be taken to have the wood match as well as possible, and, as a rule, pare or trim the new pieces after they are glued in place rather than before. Staining to match the older parts is often required (see Staining). See also Holes, To Stop.
The repaired joint may never be quite as strong as a new one, therefore it is well to reinforce it with a block glued and screwed on the under or inner side, in cases where this can be done without injuring the appearance, as inside of the frame under a chair, sofa, or table.
It is not uncommon, particularly in work which has come apart several times, for the tenons to be too small. If you can glue on thin pieces to make the tenon larger, trimming them afterwards to fit, it will be the best way; but if the conditions do not admit of this, a little muslin, laid in glue, can sometimes be wrapped around the tenon as the latter is fitted to place. The same can sometimes be done with round pins or dowels. The expedient of splitting and wedging tenons and dowels can often be applied in repairing (see Mortising and Dowels).
Sometimes you may find it necessary to use screws in places where the heads will show. In such cases first make, when possible, a neat round or square hole with bit or chisel of sufficient diameter to admit the head of the screw and deep enough to allow a shallow plug to be inserted after the screw has been set (see Holes, To Stop). The hardest part in finished work is to make the patch match the rest of the work.
See also Gluing, Clamps, and whatever other operations may be required.
Ripping-Saw.—See Saw.
Rivets.—In heading rivets hold another hammer or piece of metal, or have someone else do so, against the head of the rivet while upsetting the other end.
Rounding Sticks.—It is often required to round sticks for poles, masts, spars, arrows, and a great many other purposes.[463] First plane the piece until it is as nearly square, in section, as you can make it. Then use the form shown on page 95, which will hold the squared stick firmly while you plane off the corners, making it eight-sided. Be careful not to plane the corners off too much, for the eight sides of the stick should be as nearly alike as possible. Next, if the stick is large enough, plane off each of the eight corners so that it will be sixteen-sided. This is about as far as you can go in this way, unless the stick is very large. Set the plane quite fine for taking off these corners or you may plane off too much before you know it. The rest of the rounding you must do with light, fine strokes, testing by eye and by passing your hand over the work (for you can judge a great deal by the sense of touch). The rasp and file can often be used to good advantage. The spoke-shave is good for the final smoothing, followed by the scraper or glass (both of which can be curved) and sandpaper. The latter can be used crosswise as well as lengthwise. Cut it in strips and pull it back and forth around the stick, much as bootblacks put the final polish on shoes with a strip of cloth (Fig. 648).

Fig. 648.
To hold large sticks for this final shaping and smoothing you can put them in the vise, but if there are several, and large, it is better to contrive some way to hold them after the fashion of the centres of a lathe. For one centre, drive a nail or screw through a block or stick of wood and screw the block in the vise (Fig. 649). Make the other centre in the same way and fasten it at such a distance from the first centre that the stick will just fit in between the two. Just how to fasten this second centre will depend on the length of the stick to be rounded and the arrangements of your shop, but you can easily contrive some way to hold it. The stick held between these centres will be clear of everything and can be turned around without trouble. The middle can be supported, if[464] necessary, by a piece of board or a strip lightly nailed to the bench-top.
Masts and spars should be "natural sticks," if possible, and the final shaping and smoothing will be all they will require, for which some such apparatus as that just described will save time and trouble.

Fig. 649.
To round small sticks, as spars for model boats, arrows, etc., the same process should be followed so far as the small size of the sticks will allow, as you can of course shave more accurately with the plane, on account of the long guiding sole, for the same degree of effort, than with any "free-hand" tool like the knife. But when the stick is quite small it is hard to hold it firmly, and it is also too much covered by the plane. In such cases turn Japanese. Fasten the plane bottom-up in the vise (or even hold it in your lap if you have no vise) and pull the stick along the sole of the plane instead of pushing the plane over the stick. But look out for your fingers when you do this, for a plane-iron in this position has a great appetite for finger-tips.
In filing a short, round stick, one end can often be rested on the bench and the stick turned around towards you as you file.
A good way to finish the shaping of such small sticks is to hold your knife with the edge downward close against the side of your leg just above the knee. Then pull the stick up steadily between your leg and the knife. The leg acts as a sort of gauge to steady both the stick and the knife and with care you can cut a very even shaving in this way.
One very important thing to bear in mind in all these rounding[465] operations is that you will rarely find wood with absolutely straight grain, except in "rift" stock or natural sticks (and in these there are often seemingly unaccountable twists and crooked streaks); so you need to keep constant watch of the direction of the grain, for even a slight turn of the stick will often bring the grain wrong with relation to your tool, and one false cut running in too deep, or even across the stick, will spoil the work.
Router.—See Plane.
Rule.—A rule with which to lay out your work and measure your stock is one of the first tools of which you can make use. A two-foot rule, folding once, is the most convenient for shop-work, but the more common kind, folding to six inches in length, is more convenient to carry around away from the shop. One brass-bound (with brass edges) is more durable, but hardly as convenient to use as the common cheap kind, which will answer every purpose until it breaks.
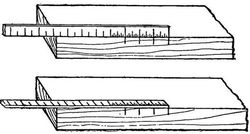
Fig. 650.
To mark distances with the rule for accurate work, lay the rule on edge so that the divisions marked on it will touch the wood and not be an eighth of an inch above it, as they are when the rule lies flat (Fig. 650). You can thus mark the points more accurately.
Sandpaper.—The fineness of sandpaper is indicated by numbers—00 (the finest), 0, ½, 1, 1½, 2, 2½ and 3 (the coarsest). You will use the fine and medium numbers more than the very coarse ones, and will seldom require coarser than 1½. Test sandpaper, when buying, by rubbing the sand a little with your hand to see if it is securely stuck on, and tear the paper a little to see if it is strong.
Never use sandpaper until all the cutting with the tools is done.[466] Sandpaper with the grain, except for work which is to be painted.
The proper use of sandpaper, as a rule, for such work as you will do, is merely to give a little extra smoothness, to take out little scratches, to round edges, and the like, but not to cut away the wood and scrub it into the shape you wish. To use it much, except to skim over your work, is apt to get you into a slovenly style of working, and the result will lack the sharp accuracy of good work. Do not rely on the sandpaper to remove the defects in your work. Do the work right and you will need but little sandpaper, except in a few operations which will be specified when there is occasion.

Fig. 651.
For flat surfaces it is well to fold the sandpaper over a flat block of cork or wood (Fig. 651), the edges of which have been slightly rounded. If the surface is curved, the block should be curved correspondingly. A piece of thick rubber or leather which can be bent to fit the surface is excellent. Care should be taken not to round the corners and edges of the work when sandpapering.
In sandpapering any very delicate piece of work, when the edge might get rounded or the surface scratched by the stiffness of even the finest sandpaper, as in rubbing down finished work, split the paper, which you can easily do by removing the outer layer of paper from the back, when the remaining part to which the sand adheres will be much softer and more flexible.
Saw.—Saws are used for cutting across the grain and with the grain and there are various kinds for special purposes.
The cross-cutting saw is used, as the name indicates, for cutting across the grain of wood and for ordinary work. The blade is usually thicker at the teeth than at the back, to stiffen it and to enable it to pass through the wood more freely. From 18" to 24" is a good length for a cross-cutting saw (or more commonly called panel-saw) for your work, with about eight to ten teeth to the inch.[467]
Fig. 652.
Examine the teeth (Fig. 652) and you will see that they are pointed and sharp, somewhat like the point of your knife, and that they cut across the fibres much the same as your knife does when you hold it upright and draw it across a board.
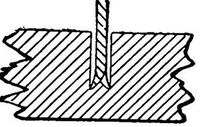
Fig. 653.
You will notice, also, that the teeth are alternately bent outwards,—one tooth being bent out to one side, the next to the other side,—this spreading of the teeth (which is called the "set") making the saw wider at the points of the teeth than elsewhere. You will also notice that the sharp cutting edge of each tooth is on the outside. This set, and the way the teeth are sharpened, makes the cut wider than the thickness of the blade, thus giving the saw "clearance" and enabling it to slip back and forth easily and without "binding" (Fig. 653). As a practical matter of fact, however, it is nothing uncommon for a saw to bind in the cut, either from not sawing straight or from the wood closing on the saw (see Fig. 695). The teeth not only cut or break off the fibres in parallel lines at the points of the teeth, but also tear off and remove the bits of wood (i.e., the sawdust) between these parallel cuts.
The degree to which the teeth are set and the number of teeth to the inch depend upon the use to which the saw is to be put and the kind of wood to be used. Of course the finer the teeth the smoother the cut. Cross-cut saws are usually sharpened differently for soft and for hard wood, but little set being required for the latter, while the former needs a wider set to give the blade clearance, because the fibres of the looser-textured soft wood are bent aside by the tearing action of the saw teeth and are not so cleanly cut off as in the hard wood.
We have examined the teeth of the cross-cut saw and have seen that they cut across the grain of the wood very much as the point[468] and edge of a knife, and that the fibres, being cut or broken or torn off in fine pieces, are removed from the kerf by the teeth. Now to saw in the direction of the grain, instead of across it, we use a saw based on a different principle. As we used little knives to cut across the grain, so we use little chisels to cut with the grain. Look at the teeth of the ripping-saw and you will see that they are little chisels sharp only at the end (Fig. 654), though not as acute as chisels for obvious reasons. These sharp ends, which are square (Fig. 655, showing set) or may be oblique, cut or tear off the fibres, and the front edges of the teeth push the pieces out of the cut. The teeth of the cross-cut saw are filed so that the front cutting-edge is drawn across the wood in the most effective way, much as you would draw the knife-point across, while the teeth of the ripping-saw are pointed forward at a more acute angle so that the cutting-edge is pushed through the wood, somewhat as you push a chisel.
Fig. 654.
Fig. 655.
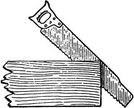
Fig. 656.
The ripping-saw cuts only on the down stroke. It is not suitable for use directly across the grain, as it tears the fibres when pushed across them much more than the cross-cut saw. The ripping-saw usually has larger teeth than the cross-cut saw. From 5½ to 8 points to the inch will do for your work. The ripping-saw usually cuts best when held slanting rather than at right angles with the board (Fig. 656), as you can easily understand when you think how a chisel works best in paring at the end of a board.
If the cut closes up after the saw so as to "bind" it, drive a[469] wedge (or even a screw-driver or chisel) into the crack so as to open it enough for the saw to work freely. Binding of the saw from this cause is very common in making long cuts. When you come to a hard knot in splitting you can sometimes gain by taking the cross-cut saw to cut through it.
You will probably get most of your splitting done at a mill and will not have to depend on hand ripping-saws so much as your grandfathers did.
The back-saw should have, for your use, from 10 to 16 teeth to the inch and be perhaps 12 inches long. The blade is very thin to insure a finer and more accurate cut than can be made with the common saw, and therefore requires care in using. It has a back (whence the name) made of a thin piece of brass or iron put on so as to give the blade the necessary firmness.
This is an exceedingly useful tool, with which and a common panel saw you can do a great deal of work without any other. The back-saw must be used with care, for the blade is so thin that a little wrenching will spring it out of shape in spite of the strengthening back.
In the compass-saw the blade is very narrow, being about one inch at the broadest part and diminishing gradually to about a quarter of an inch at the other end. It is about fifteen inches long and is employed in cutting curved forms. As the blade is narrow and tapers towards the back and the teeth have a wide set it will cut a small circle. Notice that the teeth of the compass-saw are a sort of a compromise between those of the ripping and cross-cut saws, which enables them to cut freely either way of the grain, as is of course necessary in sawing curves.
The turning- or bow-saw is much better for any work with which the bow will not interfere, and is a very useful tool at times. Get one with handles which turn so that the blade can be turned to saw at an angle with the frame. You will need a few extra blades of different widths. The main thing to be borne in mind is to make the cut square with the surface. It is easier to follow the line than to secure a cut at right angles to the surface.[470]
The keyhole-saw, which is even smaller than the compass-saw, is used for cutting quicker curves, as for a keyhole. It has a handle like that of a chisel, with a slot cut through from end to end. There is a screw on one side, so that the blade may be fixed at any length, according to the size of the hole to be cut. A good kind, which can be used for both compass-and keyhole-saws, has a handle into which various blades can be fitted.

Fig. 657.
Compass-and keyhole-saws are difficult for beginners to use without bending, twisting, or breaking their thin and narrow blades. Most of your curved sawing can be done better with a turning-saw or at a mill by a band- or jig-saw. If done at the mill, have a piece of waste wood put on the under side to prevent the burr, or ragged edge, left by the sawing.
A common way to test saws, when buying, is to take the handle[471] in one hand and bend the point of the saw around in a curve sideways and then let the blade spring back, which it should do without being permanently bent or sprung.

Fig. 658.
Do not saw from one side of the line. Have your eyes above the line so that you can look on both sides of the saw (Fig. 657). This will help you to keep the saw-blade at right angles with the surface of the wood.
Hold the saw firmly with the forefinger pressed against the side of the handle to help guide and steady it (Fig. 657).
Having placed the saw just at the outside edge of the line and on the farther side of the piece, seize the wood with the left hand and hold the thumb against the blade (above the teeth) to help start the cut in the right place (Fig. 658). Aside from the danger of the saw jumping and damaging the wood unless guided by the thumb, it is liable to cut your left hand.
You can make a little notch with the knife or chisel on the[472] outside of the line, to help start the saw, in the case of nice work, if you wish. Cut straight in just on the line and then make a sloping cut to meet this from outside the line (Fig. 659). First draw the saw gently backwards, guiding it by the thumb, with as little pressure on the wood as possible until you see that the cut is started right, then push it gently forward, and after a few easy strokes in this way to get the cut started right, keep on with long, steady strokes, but not long enough so that the end of the saw enters the kerf, lest it catch and the saw buckle. The saw should cut most on the downward motion, not on the up stroke.

Fig. 659.
With a sharp saw, there is nothing gained by bearing down heavily on the teeth, which may spring the saw and make crooked work. Rather let the saw run of itself with an easy, light stroke, guiding it carefully, and not letting it press on the wood on the up stroke. The more hastily and furiously you saw the poorer the result will probably be.
When you begin to run off the line, as you will be pretty sure to do, twist the saw a little with the wrist as you go on, which will bring it back to the line, because of the kerf being wider than the thickness of the saw-blade.

Fig. 660.
Beginners are apt to bend the saw over to one side. You can tell whether it is cutting at right angles with the face of the board by testing with the try-square as shown in Fig. 660. Such a test as this is, however, too inconvenient for ordinary practical work and you should learn as quickly as you can to hold the saw-blade correctly.[473]
At the end of the cut, as at the beginning, saw gently with quick, light strokes, and hold the piece which is being cut off with the left hand, lest it break off and splinter one of the two pieces.
If the saw "binds" or does not work easily, you can for your rougher work put a little tallow, butter, lard, or lubricating oil on the blade, but beware of doing this for your nice work, or it will deface it when done. If the binding is caused by the springing together of the wood (Fig. 695) the crack should be wedged open.
Do not get into the habit of sawing a little way outside of the line and then trimming off the superfluous wood with your knife or a chisel. That is not a good way to learn to saw by a line. Try your best to make the cut where it should be (even if you do make mistakes for a good while) and thus get into the habit of doing it right without having to rely on any other tool than the saw.
Many pieces of wood can better be screwed in the vise for sawing instead of being laid on the horses, and this position is often preferable. In this case you grasp the wood with the left hand and use the saw as already described. (See Sharpening).
Saw-Filing.—See Sharpening.
Sawing.—See Saw.
Saw-Set.—Various contrivances can be bought for setting saw teeth. When you get to the point of needing one you can easily find a variety from which to select.
Scraper.—The scraper is made of saw-blade steel (frequently from an old saw) and may be of any shape or size to suit the work required of it. A common form for scraping flat surfaces is rectangular like a postal-card, and a good size is from 2" × 4" to 3" × 5".
A piece of glass makes a good scraper for almost every purpose except where a flat, true surface is required. It is good to smooth the handle of a paddle, for instance, but not good for scraping the top of a nice table. For many rounded surfaces glass is fully as good as a steel scraper, but for general use the latter is much better. The following directions may be of use when you wish[474] to break glass to use for a scraper: "Take the back of a knife, or the smooth, straight edge of any piece of iron fixed with tolerable firmness for a moment, then, taking the piece of glass in both hands, rest its edge midway between them on the edge of the iron; let the upper edge of the glass lean from you, and push it gently along the iron, so as slightly to indent the edge of the glass; then, reversing its position so as to make it lean towards you, draw it smartly along the iron, and you will find it separated by a clean fracture directly across, forming a line more or less curved, and leaving one edge of the glass much sharper than the other. By a little practice, and by pressing a little more with one hand than the other, almost any curvature that the work to be done may require may be achieved" (Lord and Baines, Shifts and Expedients of Camp Life).
The edge of the scraper is turned over so as to form a sort of hooked edge or angle (Fig. 661), which when pushed over the surface scrapes off thin shavings. To smooth a flat surface the scraper can be held with both hands, between the fingers and thumb (Fig. 662), and pushed along in the direction towards which it is inclined. Sometimes one end of the scraper is held between the thumb and fingers of the left hand and the palm of the right hand applied below to push the tool along. As a rule scrape with the grain, and it is often advantageous to hold the scraper obliquely to the grain when pushing it forward. In case of some crooked and twisted grain you will find it best to scrape in any and in all directions.

Fig. 661.

Fig. 662.
You can make scrapers yourself by filing and grinding pieces[475] of old saw-blades. It is very convenient to have a number of them with edges of various degrees of curvature (both convex and concave), but these you can make as you need them. A scraper is sometimes set in a stock and guided by handles like those of a spoke-shave, and sometimes set in a stock like a plane and used in the same manner. A scraper of the latter sort is often useful to assist in keeping the surface true when scraping, as its flat sole prevents its following all the undulations of the surface as readily as the hand-scraper, with which one is apt to make depressions by scraping too much in some particular spot. But so far as smoothing the surface goes there is nothing better than the common hand-scraper or so easily taken care of. For sharpening the scraper, see Sharpening.
In many large places you can get your wood for nice work scraped to a satin-like finish by a machine made for the purpose, but this is hardly worth while for ordinary work. You can also have it smoothed very nicely by sandpapering machines, but this is not advisable if there is to be any cutting of the wood afterwards, as the grit left in the pores of the wood will quickly take the keen edge from your tools.
The best test for smoothness alone is to run the fingers over the surface with a light touch. Great acuteness of touch can be acquired in this way. Any experienced wood-worker can at once detect inequalities with his fingers that he could not possibly see. Irregularities in curves can be detected in the same way.
Bead cutters or scrapers and reed scrapers and fluters can be bought of various patterns. You will hardly need to buy anything of the sort for some time, as you can make one when required. See Beading.
Scratch-Awl.—See Awl.

Fig. 663.

Fig. 664.
Screw-Driver.—The screw-driver is too familiar to need description, but in buying one see that the end is shaped like either of those shown in Fig. 663 and not as shown in Fig. 664. Cheap screw-drivers are often made in the latter way. If ground with[476] a short bevel (Fig. 664) it will bear only on the top of the slot in the screw and will be all the time slipping out, on the principle of the inclined plane, while if the sides are parallel or concaved slightly the end will remain at the bottom of the nick of the screw. This is also a help in extracting screws, as it saves the need of pressing against the screw so hard to keep the screw-driver from slipping out of the slot. It is well to have screw-drivers of different sizes, as it is difficult and often impossible to use a screw-driver with an edge much too large or too small.
Remember that a long screw-driver is always preferable to a short one, except where lack of space makes a short one necessary. The reason for this is in the fact that in using the screw-driver you do not, as a practical matter, keep it exactly in the line of the screw, but keep wobbling it round more or less, which gives a leverage in the form of a crank-like action as you turn the handle. The longer the screw-driver the larger the circle or wobbling curve you describe with your hand and the greater the leverage (Fig. 665).

Fig. 665.
A screw-driver to be turned by the bit-brace is very useful for driving screws rapidly and with force, on account of the greater leverage gained by using the brace instead of the common handle. This is particularly useful where they need to be driven in very hard or when tight screws have to be loosened. It also saves much time when many screws are to be used. It is not advisable to buy automatic screw-drivers. They work satisfactorily for light work, but are not suitable for such wrenching and straining as your screw-drivers are liable to be subjected to. You want screw-drivers to which you can apply all your strength. See Screws.
Screws.—There are many kinds of screws. You will use the[477] common wood-screws for most of your work. These are either flat-headed or round-headed, and of steel (either bright or blue or bronzed or nickled) or of brass. When others are required they will be mentioned. It is doubtful economy to buy second-hand or waste screws, but a pound or two of "mixed" screws, which you can get at any hardware store, will be very useful when you want some odd screw for some special purpose. Many of the screws in the "mixed" lots, which are sold very cheap, are defective, but you can often find among them just the peculiar screw you need, and so save time and money.
Nails are often used where it would be better to use screws, which will, as a rule, hold the pieces more securely. When work becomes loose, screws can be tightened, while nails usually have to be redriven.
To make a screw drive easily, rub the point on a piece of common soap. Oil is objectionable for nice work on account of the spot made by it. If screws are to be used in places where they may rust, it is a good plan to warm them slightly and then dip them in melted tallow or lard. They can also be inserted and removed more easily for this treatment. Try to keep the screw-driver from slipping from the slot of the screw (see Screw-driver).
Fig. 666.
In boring holes for screws, considerable discretion must be used. The hole in the outer piece (the one nearer the head of the screw) should be large enough to allow the screw to slip through freely—that is, you should not screw it into both pieces, but only the inner one, the screw acting somewhat in the nature of a clamp to bind the outer piece to the inner by pinching it tight between the screw-head and the inner piece (Fig. 666). How much of a hole to bore in the piece into which the point of the screw enters depends on circumstances. The stouter the screw the less hole required. The softer and larger the piece and the farther from the edge the less hole required. If the piece is small or liable to split, the hole must be carefully made—the more carefully in proportion to the slenderness of the screw, as a slim[478] screw is liable to twist off in hard wood unless a sufficient hole is provided. Brass screws are very apt to do this, and much care must be used, particularly with slender ones in hard wood. If the hole is a bit too large, they will not hold. If a trifle too small, they will twist off, which is very annoying, especially in such cases as hinge-screws, for instance, where the place for the screws cannot well be changed. The hole should be somewhat smaller than the diameter of the screw. In good-sized pieces of soft wood there is frequently no need of any hole.
In rough work, especially in soft wood, the screws may be pounded part way with the hammer, driving them home with the screw-driver. Some theoretical workman will be quite sure to tell you never to do such a thing as that, so be sure to understand what is meant. Theoretically there may be some loss of holding power by that process, but practically the screws will hold just as well for the cases in which you are advised to do that way. Judgment must be used about all such things and theories are only of value when used by the light of common-sense. For example, if you are screwing the top on a mahogany table or framing a nice boat never think of using a hammer to start your screws, but if you are putting cleats on an old shed door or screwing up a packing-case do not spend an hour and a lot of strength driving screws all the way with a screw-driver when you can do the work in half an hour by driving the screws three quarters of the way in with the hammer. Good practical workmen are just as certain to use the hammer in such cases as they are careful not to use it for nice work or where the full holding power of the screw is needed.
Flat-headed screws almost always should be countersunk (see Countersink), for neatness if for no other reason, and in hard wood you should cut the depression for the head of the screw with the regular countersink made for the purpose. This should be done for nice work in soft wood where a good surface is required, but for common work in soft wood there is no need, as a rule, for the head of the screw will sink itself easily until flush with the surface.[479]
If a screw hole requires to be moved a little, but not far enough so that a new hole can be bored without the bit slipping into the old hole, plug the old hole with a wooden pin dipped in glue, and when dry bore the new hole where required.
See Screw-driver.

Fig. 667.
Scribing.—Compasses are often used for scribing a line parallel to another line or surface, whether regular or irregular, in places where the gauge cannot be used. Suppose, for instance, you wish to cut the edge of a board to fit the undulating surface shown in Fig. 667. Run the compasses along with one point on the surface and the other making a mark on the board, and the line on the board will be parallel with the surface.
Fig. 668.

Fig. 669.
Another example is that of making a table, bench, chair, horse, or any four-legged object stand evenly. If it stands on three legs, which is a common fault and likely to occur in your first attempts, do not hastily saw one leg shorter by guess, and, making it too short, saw another and so on until it stands firmly, when the top will probably be all out of level. If there is any true surface on which you can stand the article (right side up), you can level the top by wedging under the legs until the corners of the top are equally distant from the surface on which the object stands.[480] Then setting the compasses at a distance equal to that at which the end of the shortest leg is raised (Fig. 668), scribe around the other legs, which can then be cut off.[50]
See also Winding-Sticks and Marking.
Setting Saws.—See Sharpening.
Sharpening.—Before attempting to sharpen your tools yourself it would be well to read the advice given on page 22 under Care of Tools.
The general process of sharpening edged tools is first to grind them to as keen an edge as possible on the grindstone, or the emery-wheel, then to smooth down the coarse edge left by the grindstone by rubbing on a fine stone with oil or water, and finally stropping on leather. The grindstone must be kept wet while grinding or the heat caused by the friction of the tool on the dry stone will ruin the temper of the steel. Besides, the water carries off the waste particles of stone and steel. Stand on the side towards which the top of the stone turns. The tool can be ground with the stone turning from you, and, in fact, this usually seems the natural way to a novice, but it is usually more difficult to grind uniformly in that way and too thin an edge (a "wire-edge," ragged but not sharp) is apt to be produced, the removal of which is difficult without further damaging the edge and delaying the final sharpening.
To grind the point of a knife, it can be moved back and forth lengthways with a curving motion, while resting flat on the grindstone, and to grind the straight part of the blade, it can be allowed to bear very slightly harder near the edge of the stone than elsewhere, as it is passed back and forth.[481]
To grind a chisel, grasp the handle with the right hand, hold the blade in the left hand with the fingers uppermost and near the cutting-edge. The arms and wrists should be kept as rigid as possible, the former at the sides of the body, so that the tool may be held firmly against the motion of the stone. Lay the chisel with slight pressure quite flatly on the stone and then raise the handle until the bevel touches the stone. As you grind keep moving the tool slowly back and forth across the stone, which helps keep the edge of the tool straight and prevents the stone being worn away too much in one place. Use plenty of water.
The common way of holding the tool on the stone is the one just described, but it can also be held at right angles to this position, so that, in the case of a chisel, for instance, the grinding action of the stone instead of being from the edge toward the handle is from side to side of the blade. The tool is ground quicker and easier by this means, and it is a good way to reduce the edge to shape, finishing the grinding by the regular method.
You will see that the curvature of the stone will tend to give the bevel a slight curve, in whatever position the tool is held, which is advantageous in the common way of grinding. When held so that the stone grinds from side to side of the blade the tool must be continually turned a little in the hand so that each part of the edge will bear in turn on the stone, as, the tool edge being flat, and the surface of the stone rounding, the tool would otherwise be ground hollowing. It is harder to hold the tool in this way, however, without its slipping or making nicks or grooves in the stone, and you had best learn to grind in the ordinary manner.
Try to grind squarely across the chisel—that is, to have the cutting-edge at right angles to the lengthways edge of the tool. Apply the square at intervals to test the accuracy of the grinding.
The angle for grinding the bevel of such tools as the chisel is about twenty-five degrees, but when used for very hard wood the angle should be slightly greater, or the edge may be broken.
Do all the grinding on the bevel. Do not apply the flat side[482] of the tool to the grindstone. Any slight burr or turning over of the edge on the flat side should be taken off by the oil-stone.
If the edge is badly nicked or broken, you can first straighten or grind it down roughly on the side of the stone or by holding it nearly at right angles to the stone—but with the latter turning the other way—before grinding in the regular way.
To tell when the tool is ground sufficiently, hold the edge in front of you toward the light. If the edge can be seen as a bright shining line it is a sign that the tool is dull. It will not be sharp until this bright line has been removed, and the edge has become invisible, for a really keen edge cannot be seen by the naked eye. Bear this in mind, as it is the final test and the simplest way to tell when to stop grinding.
In grinding on a grindstone and in rubbing on an oil-stone, the great difficulty is to keep the same angle between the tool and the stone, as the natural tendency in moving the tool is to rock it back and forth and thus alter the angle between the blade and the stone. An arrangement can be bought which preserves the desired angle without effort on the part of the grinder. A little ingenuity will enable you to rig up a guide or gauge with a piece of board which will enable you to replace the tool on the grindstone at the same angle.
The plane-iron is sharpened in the same way as the chisel, only, being wider than most of the chisels you are likely to use, it requires more care to sharpen. The plane-irons can be ground to a somewhat more acute angle than the chisels, although the jack-plane, which is used for rough work, may require more strength at the edge.

Fig. 670.
In rubbing the edge upon the oil-stone, do not attempt to smooth down the whole bevel made by the grindstone, but first lay the tool lightly on the stone as shown in Fig. 670a, then raise the handle until the upper part of the bevel is very slightly raised,—barely enough to clear the stone (Fig. 670b),—and then proceed with the whetting, thus making a second or little bevel at the edge (Fig. 671).[483]

Fig. 671.
The tool must be moved back and forth very steadily or instead of a second bevel the whole edge will be rounded (Fig. 672) and will not have the requisite keenness. The angle of this second bevel is usually about ten degrees greater than the long bevel, or thirty-five degrees, although the angles of sharpening should be varied slightly according to the hardness of the wood and the kind of work to be done; but where you have only few tools and must use them for all kinds of work you cannot always, as a practical matter, pay much regard to such variations, as of course you cannot keep regrinding your tools every time you begin on a new piece of wood. Just how acute to make the edge you must learn by experience, according to the conditions of your work. An edge suitable for delicate work in white-pine would be immediately ruined if used upon lignum-vitæ.

Fig. 672.
Any little wire edge which is produced on the flat side by the process of rubbing on the oil-stone can be removed by drawing the flat side of the iron over the stone once, but be sure that you do not raise the handle at all, as the slightest bevel on the flat[484] side of the edge will spoil it. After the tool has been sharpened a good many times on the oil-stone this smaller bevel (the oil-stone bevel, so to speak) will become so wide that it is a waste of time and strength to rub it down. The chisel must then be reground and a new bevel made on the oil-stone.
It is a good plan to have a separate stone or "slip" for the outside bevel of gouges, because it is so hard to avoid rubbing hollows in the stone, which injures it for the other tools. Care must be taken also with very narrow or pointed tools lest the stone be grooved or nicked. Gouges can be rubbed at right angles with the stone, rolling the tool with the left hand, or by the use of a slip they can be rubbed as described below. For rubbing gouges on the inside, i.e., on the concave surface, rounded pieces of stone, called "slips," are used. These can be bought of various sizes and shapes to fit the various curves. Do not think, however, that you must try to find a slip that will fit each gouge as exactly as if it had been shaped by the gouge itself. The curve of the slip may be a little "quicker" or sharper than that of the tool, but must not be flatter or of course it cannot be made to bear on all parts of the curve.
In rubbing with the slip, hold the tool upright in the hand and rub the slip up and down, moving the slip and not the tool. If you rest the tool against the bench, it will steady it and also avoid any probability of your finger slipping on to the edge. The more common "outside" gouges are not rubbed on the inside, except the merest touch of the slip to remove any wire edge or burr. The draw-knife is also rubbed with a flat slip, in the same manner, resting it on the bench.
In rubbing the knife on the oil-stone give it a circular motion rather than simply back and forth, particularly for the point. The straight part can be allowed to bear a little more heavily near the edge of the stone as it is passed back and forth.
It is much the best way to sharpen tools frequently, as soon as they begin to get dull, when they will require but little rubbing on the stone, rather than to let them get into such condition that[485] it is a long and hard job to whet them; and of course the more careful you are to keep them sharp, the better work you will do.
To test the sharpness of your tools, cut across the grain of a piece of soft pine wood. If the cut is clean and smooth, the tools are sharp, but if the cut is rough or the wood torn, further sharpening is needed. The reason for using soft wood, which at first thought might not seem to require as keen an edge as hard wood, is because the fibrous structure of the soft wood, being more yielding, offers less resistance to the tool and so is torn or crushed apart except by a very keen edge, while the firmer structure of the hard wood can be cut smoothly by a tool which would tear the soft wood. The difference is somewhat like that between cutting a fresh loaf of bread or cake and a stale one.
The edge left by the oil-stone can be improved by stropping on a piece of leather on which a little paste of lard and emery or some similar composition has been spread. This is better than to strop knives and other tools on your boots. Any piece of leather such as barbers use, or even a piece from an old boot, will answer. For flat edges see that the strop rests on a flat surface, so as not to tend to round the edge, as it may do if held carelessly in the hand. See Oil-stone and Strop.
Saw Filing is particularly hard for boys and amateurs to do satisfactorily and you are advised not to undertake it until you have become quite familiar with the use of tools, for it does not need to be done very often, costs but little, and there are very few places where you cannot get it done.
It is not difficult to understand the theory of setting and filing saw teeth, but to fix a saw in really good shape is hard for an amateur,—and for that matter you will find but a small proportion of good workmen who are experts in saw filing. Even in very small villages there is almost always some mechanic who has the knack of putting saws in order better than anyone else and who therefore makes quite a business of such work and people bring their saws to him from all the country round, even though they may be able to fix them tolerably well themselves, so great[486] is the advantage in the quality of the work and the saving of time in having a saw in perfect condition. You had best do the same, and have your saws fixed whenever they get dull. The expense is but slight, and there is nothing that will conduce more to good work, and to your own success and satisfaction, than to have your tools in first-rate working order.
When you get to the point of filing and setting your saws you are advised to take a lesson from a good saw-filer. There are few persons so situated that they cannot do this, or at least watch someone go through the process, and thus learn much more readily than by reading about the process in a book. In fact, it is one of those things that it is so hard to learn from a book that merely a few remarks on the subject are given here.
The saw is firmly fastened in a saw-clamp, expressly for the purpose, so that it will not shake or rattle. The teeth are "jointed," or reduced to the same level, by lightly passing the flat side of a file over their points, lengthways of the saw. The saw can also be jointed along the sides after filing, but this is frequently omitted.
For a cross-cutting saw the file (a triangular saw-file) is held at an angle with the blade depending upon the particular form of tooth adopted, as you will see by examination. The handle being grasped in the right hand, the point of the file should be held between the thumb and forefinger of the left hand (Fig. 526). The file must be pushed across with an even, straight stroke, without any rocking or up and down motion, pressure being applied only on the forward or pushing stroke, the tool being drawn back very lightly or lifted entirely on the back stroke. The filing is begun at one end of the saw, filing only the teeth which bend away from you (i.e., every alternate tooth), carefully keeping the file at the proper angle, pressing only on the tooth you are filing, but keeping the tool lightly touching the adjacent tooth, and making allowance for the fact that when you file the alternate set the passing file will take off a little from the teeth first filed. The saw is then turned around and the process repeated[487] with the other teeth. If you look lengthways along the edge of a panel-saw that has been properly filed and set, an angular trough or groove will be seen along the whole length, so that you can slide a needle along in it from one end of the saw to the other.
The ripping-saw is usually filed squarely across the saw (at right-angles to the blade), as you will see at once on examination of the teeth (Figs. 654 and 655), but sometimes at a more acute angle.
The teeth are set by bending every other tooth outward, first setting those on one side and then those on the other. You should do this with some one of the various adjustable tooth-setting contrivances sold for the purpose, as it requires a skilled workman to set teeth in any other way, and any attempt on your part to do so without some instrument adjusted to the purpose will probably result in damaging the saw.
For soft and loose-fibred wood more set is needed than for hard wood, because the fibres, which are quite cleanly cut or broken in the hard wood, in the more yielding soft wood are bent aside by the teeth to close in upon the blade with considerable binding force; and less set is required by fine work than for coarse. The angles and points of saw teeth can be more acute for soft than for hard wood.
To sharpen the scraper you must have a sharpener or burnisher. The edge of a chisel or any piece of very hard steel can be used after a fashion, but it is better to have a regular tool for the purpose, which can be made easily from an old three-cornered file, such as is used for filing saws, by grinding off the teeth and slightly rounding the angles on the grindstone until the whole tool is smooth. Two opposite edges of the scraper are ground or filed and the edge then turned over by the burnisher. Some workmen grind the edges with an obtuse bevel and use only one angle of each edge. Others grind the edges square and use both angles of each edge. The bevel gives a slightly keener scraping edge than to grind the steel square, but it requires more frequent[488] sharpening and the squared edge turned over on both sides is likely to be more satisfactory.
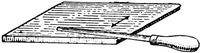
Fig. 673.
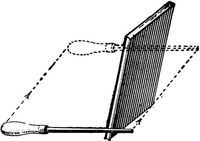
Fig. 674.
First grind or file the two opposite edges squarely across and slightly round each corner to prevent scratching the wood. If there is a burr at the edge it can be removed by rubbing the scraper lightly on the oil-stone, but this is advisable only for final scraping of very fine work. Having thus got the edge at right angles and smooth, lay the scraper flat on its side near the edge of the bench and rub the burnisher back and forth a few times in the position shown in Fig. 673, which is almost flat on the scraper. This rubbing bends a little of the steel over the edge. Do this on each opposite edge of the two sides, giving four edges thus curled over. Next, holding the scraper as shown in Fig. 674, draw the burnisher with a firm, even stroke, once or twice, lengthways of the edge, as shown. The scraper can be laid flat on the bench, if preferred, slightly projecting over the edge. Notice that the tool should be drawn with a slightly end to end motion, as shown, which helps turn the edge. This turns a fine scraping edge, which will take off shavings. All four edges are treated in the same way. After one edge gets dull, use another. When all four are dull, resharpen with the burnisher as before, without grinding or filing the edge. This can be done a few times, but soon the edges will get worn off and rounded, and the scraper then needs refiling.
Shellac.—See Finishing.
Shell-Bit.—See Bits.[489]
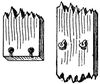
Fig. 675.
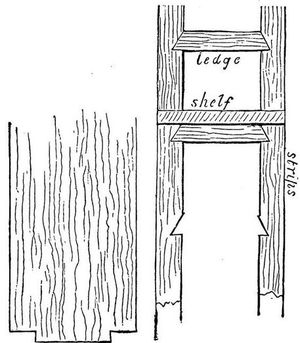
Fig. 676.
Shelves.—Examples of shelves fitted permanently into place are given in Chapter X. (on Furniture). Removable shelves can most easily be fitted to rest on cleats screwed to the sides of the space, but this arrangement does not always look very well and the position of the shelves cannot be changed so readily as by using screw-eyes driven into the sides under the shelves (Fig. 675), recesses of the right shape being cut on the under side of the shelves so that the screw-eyes will be sunk and not be conspicuous. The position of the shelves can quickly be changed by screwing the supports higher or lower as may be required. Pins and other contrivances to fit in a series of holes can be bought for this purpose. A common way to adjust shelves is shown in Fig. 676. The construction is obvious. The vertical strips can be laid on edge side by side, clamped together, and the notches laid out and cut as if there were but one piece. Where a circular saw is available the notches are cut on the side of a narrow piece of board which is then sawed into the desired strips or "ratchets."
Shooting-Board.—The shooting-board is very useful for[490] jointing edges, particularly for short, thin stock. The carpenter or cabinet-maker will make you one for a moderate price, or you can make one yourself as soon as you become a good enough workman (see page 93).

Fig. 677.
To use it, the board to be jointed is laid flat on the raised part of the shooting-board, where it is firmly held with the left hand, with the end of the board pressing against the stop of the shooting-board, and the edge to be jointed lapping over the edge of the raised part. The planing is done with the plane lying on its side on the lower part of the shooting-board (Fig. 677). The cutting-edge of the plane thus being at right angles with the surface of the board, the edge will be planed squarely across. The shooting-board should be fastened on the bench in some way, to prevent it from slipping around.
Attachments to keep the sole of the plane at right angles to the surface of the piece can be had at any hardware store, and serve[491] the same purpose as a shooting-board for thick stock, but not equally well for thin pieces.
You can reverse the sides of two pieces to be jointed for gluing, as described on page 406, giving a joint like that shown in Fig. 678 (which is exaggerated). The iron of the plane is sometimes purposely set to project unevenly beyond the sole.

Fig. 678.
If you have many joints to make, you can have the edges jointed at slight expense at any wood-working mill on a planer made for the purpose. See Jointing.
Smoothing-Plane.—See Plane.
Smoothing Surfaces.—See Plane, Scraper, Sandpaper.
Splices.—See Joints and Splices.
Spline.—A flexible strip, used as a ruler, for drawing curves. See Marking.
Splitting-Saw.—See Saw.
Splitting Wood.—We have seen how a log in drying cracks along the radial lines (page 31), thus showing the natural lines of cleavage or separation in the direction of the medullary rays, that is, radiating from the centre. From this we see that the wood will, of course, split most easily and smoothly on the radial lines. Like all wood-choppers you can often make practical use of this fact in splitting wood with a knife or chisel, or in splitting fuel with an axe. The next easiest way to split wood is as nearly as may be on the line of the annual rings, or tangential to the line of the medullary rays, in the same direction as when the layers separate in forming "cup shakes" (see Appendix). This way is sometimes easier than to rive a stout log through the centre.
Spokeshave.—The spoke-shave is very useful for smoothing small curved and irregular surfaces. Metal spoke-shaves of various patterns can be bought with various adjustments for different curves, etc. Also a "universal" spoke-shave can be had, with[492] movable handles and detachable bottoms which can be adapted for curved or straight work, and a width gauge by means of which it can be used for rabbeting.
The spoke-shave is a very useful tool and works upon the same general principle as the plane, but lacking the long flat sole of the plane is used only for irregular surfaces, which its short and sometimes curved face enables it to smooth with great ease. It also acts on the same principle as a draw-knife with the addition of a guiding stock. It bears somewhat the same relation to the draw-knife that the plane does to the chisel.

Fig. 679.
Grasp the tool firmly, bearing downward with both hands and pressing forward with the thumbs, pushing the tool from you so as to cut like a plane (Fig. 679). Of course it can also be drawn towards you when the circumstances of the work render it advisable. See Paring and Sharpening.
Spoon-Bit.—See Bits.
Square.—This tool is one of the most useful in the list, for the importance of having your work "square" can hardly be over-estimated.
The try-square should have a metal strip on the inside edge of the wooden arm, head, or beam, or the handle can be wholly of metal. Get a medium-sized try-square (9- or 10-inch blade is good) rather than a very small one, as it is much more useful; and a graduated scale, like a rule, on the blade is sometimes serviceable.[493]

Fig. 680.
The primary use of this tool is to test or "try" the accuracy of right-angled work—hence the name. The one special point to bear in mind in using it for this purpose is to be sure that the[494] head or beam is pressed firmly against the edge or side to which it is applied, determining the accuracy of the angle by the position of the blade (Fig. 680).

Fig. 681.
You will also use the try-square continually for marking straight lines across boards or timbers at right angles to one side or one edge (Fig. 681). In using it for this purpose be sure not merely to press the head of the square firmly against the edge of the board, but to keep it securely in the same position. When the blade is placed correctly on the given point do the marking as by any straight-edge. Another way is to place the point of the pencil or knife directly on the given point and slide the square along until it bears on the pencil or knife. Then, keeping the head of the square firmly against the edge, the line can be drawn along the blade.

Fig. 682.
The try-square sometimes is made with the end of the head or beam next the blade cut on a bevel. By placing this bevel against the edge a try-square of this construction can also be used as a mitre-square (Fig. 682).
If you buy a second-hand square, or if a square has been wrenched, you can test its accuracy by marking a line with it across a surface from a straight edge, then turning the square over and repeating the operation; the two lines should coincide. But the edge from which you rule must be perfectly straight, or the test will be of no value. If, however, you buy new squares[495] made by the best makers they will be as accurate as any test you can apply to them.
Beginners, particularly young beginners, are very apt to be so engrossed in making the line along the blade that they forget to keep the head in position, or let it slip, when the blade will of course cease to be at right angles with the edge or side (Fig. 683).

Fig. 683.
The framing-square, "steel-square," or large two-foot carpenter's square, is a very useful and important tool; not merely for framing and large, heavy work but also for small work, and it is of great value in many mechanical operations. Even an iron square is very useful, but a nickel-plated steel-square is the best, as the figures are more distinct and it is less likely to rust. The long arm makes a good straight-edge. See also page 181.
Staining.—When you stain wood, do it for the sake of the colour, preserving the beauty of the grain, and not to try to imitate a more expensive wood. It is better, as a rule, to use good wood of a handsome colour and leave it as it is to mellow with age than to stain or colour it, but there are times when you will wish to stain wood.
The main point to bear in mind for successful staining is to colour the wood itself, not to put on a superficial coat of coloured varnish. For instance, the fumes of ammonia (or the liquid itself) will give oak in a very short time the same dark colour which the ammonia in the air will produce after years of exposure. This is a natural process—merely anticipating the change caused by time.[496]
There are a number of ways of staining dependent upon such chemical processes carried on in the wood itself. These ways are the best, as you can readily see. Having got the right colour, the wood can be oiled, shellacked, varnished, or waxed in the usual way. By this method the natural grain of the wood is not obscured. In fact, the figure of the grain is sometimes made more conspicuous.
Another way is to wash the wood with some thin stain of the desired colour, after which you can finish in the usual way. This is a good method, for the wood itself is coloured to some distance below the surface, and after it is finished it will take considerable bruising to expose its original colour. This method also sometimes enhances the beauty of the grain.
The poorest way to stain, but a very common one with amateurs and in cheap work, is, instead of staining the wood itself, to cover the surface with coloured varnish or shellac. This is often the cheapest and quickest way of getting a desired colour, but it is decidedly the poorest way. Of course, no coating of colour put on outside can be as durable as colour imbedded in the substance of the wood itself, and scarring or injury to the coating exposes the original colour beneath. Besides this, the grain and character of the wood are necessarily obscured by a coloured coating. Wood finished in this way almost always has a cheap, artificial look, and you can usually detect the fraud at a glance. There are many cheap "varnish stains" or coloured varnishes, but you will do well to avoid them, unless for the cheapest and poorest work.
There are two things you will wish to do in staining. One is simply to darken or enrich the natural colour of the wood, so as to give it at once the rich, deep, mellow tone produced by age. This is always the best way to do when it will give the colour you want. But if you want to change the colour entirely—to make pine wood red or green, or cherry black, you must use some chemical process that will develop a new colour in the wood, or must apply a regular stain.[497]
Raw linseed oil alone, well rubbed in and allowed to stand before applying shellac or varnish, will deepen and bring out the natural colouring in time as well as anything else, but it takes a good while. Repeated applications, each thoroughly rubbed in and the excess rubbed off, and after standing some days or weeks, given a light rubbing down with fine sandpaper, then another oiling, and so on, will in time give a surface of beautiful colour, as well as a soft and attractive lustre. But to carry out this process may take months, so that you will not be very likely to practise it; but you see the result sometimes on old wooden tool-handles and plane-stocks which have been so treated. If you do not care about deepening the colour greatly, one or two applications, allowed to stand a week or two before finishing, will often be sufficient and will make a great difference in the looks of your work, and take off that raw, fresh look peculiar to recently cut wood.
If your work is such that you can defer the shell acing for a year or so, as in the case of some pretty piece of furniture to remain in the house, there is no way you can develop the richness of the wood better than to oil it and let it stand to mellow, with occasional applications of oil and rubbing down. Then finally rub down with fine sandpaper and shellac in the usual way.
To hasten the process we must apply something stronger than oil. If the work is of oak, shut it up in a box or tight closet, with a dish of strong ammonia on the floor. Do not stay in the box or closet yourself, as it is dangerous. A simpler way is to wash the work with the ammonia, more than once if necessary. Have the room well ventilated when you do this, and do not inhale more of the fumes than necessary. Wetting the wood is sometimes a disadvantage, however, in glued-up work, and it "raises the grain," which must be rubbed down with fine sandpaper before finishing.
To deepen the colour of mahogany or cherry, simply wash it with lime-water (a simple solution of common lime in water) as[498] many times as may be necessary, which is cheap and effective. After this process, thoroughly clean out all cracks and corners before sandpapering, for particles of the lime which may be deposited will spoil the appearance of the work when finished. This process preserves the natural appearance of the wood. The only drawback is the necessity of getting the work so wet. Some days should be allowed for the water to evaporate before shellacking. To get a darker shade, apply in the same way a solution of bichromate of potash in water.
Whitewood takes stains finely—much better than pine. Oak will stain almost any colour, but the individuality of the wood—the character of its grain and structure—is so strongly marked that it is poor taste to attempt to stain it to imitate other woods. If you stain it, stain it just as you would paint it, simply for the colour.
A good way for indoor work, such as a piece of furniture or anything of the sort you may wish to colour, is to mix dry pigments with japan and then thin the mixture with turpentine, or turpentine alone can be used. After the work is coloured in this way put on a couple of coats of varnish. For outside work you can use oil. This is a cheap way and wears well. It applies only to the cheaper woods which you do not care to leave of the natural colour. For black inside work you can use ivory-black, ground in japan and thinned with turpentine. Ivory-black or bone-black are superior to lampblack, but the latter will do very well for most purposes. Dragon's blood in alcohol is used to give a colour similar to mahogany. Alkanet root in raw linseed oil will give a warm and mellow hue to mahogany or cherry.
There is an almost endless number of recipes for staining, but such others as you need you can learn from some finisher or painter, for the limits of this book do not allow fuller treatment of so extensive a subject.
Steel-Square.—See Square.
Steel-Wool.—Long, fine steel shavings done up in bundles[499] can be used instead of sandpaper for some purposes. There are various degrees of fineness. This is good for cleaning off paint and for smoothing curved surfaces, but should not be used until all work with the edge-tools is done, because of the particles of the metal. It can be used for "rubbing down" in finishing.
Straight-Bent Chisel.—See Chisel.
Straight-Edge.—There are no definite dimensions for a straight-edge. Any piece of wood that is straight and convenient to use can be so called; the size and the length depending on the work for which it is to be used, from a common ruler to a long board. The edge of a large carpenter's square is handy for short work. Clear white pine or straight-grained mahogany is good for straight-edges, but a straight-edge is not the easiest thing for a beginner to make, and you will do well to find something straight to use for a while until you acquire the skill to make one—or get the carpenter to make you one, which he will do for a very small sum or for nothing.
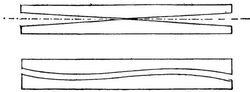
Fig. 684.
To test a straight-edge, mark a line by it, then turn the straight-edge over and see if it still coincides with the line, or mark another line and see if it coincides with the first one. Try your straight-edges by this test once in a while, as they are liable to become crooked. In turning the edge over, however, do not reverse the ends, as in case of an undulating curvature the curves may agree and give you the impression that the edge is straight when it is not. In the first case shown in Fig. 684 (exaggerated) this would not happen, but in the second case (also exaggerated) it might. See Marking.
Strop.—A piece of hard, smooth leather on which to strop your tools you can easily procure. It can be fastened on a piece[500] of wood (see page 85). Spread on it a paste of sweet oil and emery, lard oil and crocus powder, or some similar preparation. A pine board on which "air-dust" has accumulated can even be used. See remarks under Sharpening.
Tacks.—Tacks are sold as one-ounce, two-ounce, and so on according to size.
Do not use tacks for fastening wood to wood, but only for fastening leather or cloth or the like to wood. The pointed wedge-shape of the tack tends to split thin wood, and is not at all suitable to fasten two pieces of wood together, particularly in thin wood or near the edge. Possibly you may have seen some disastrous results from the attempt to tack pieces of wood together.
Tape-Measure.—This article (preferably of steel) is often useful, though not nearly as important for an amateur to buy as many other things.
Tenon.—See Mortising.
Tenon-Saw.—See Saw (Back-Saw).
Tool-Racks.—See page 83.
Toothed-Plane.—See Plane.
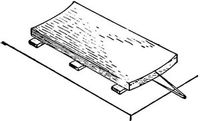
Fig. 685.
Truing Surfaces.—To true a curved or warped surface, as of a board, lay it on the bench with the rounded side down and wedge it firmly underneath to make it as nearly level as possible. Then scribe a line with the compasses across each end of the board at the height of the lowest point of the surface (Fig. 685).[501] Cut a depression or kind of rabbet at each end down to this line (Fig. 686). Next, by the use of winding-sticks placed on each of these rabbets you can easily see whether they are in line (see Winding-sticks). Alter the rabbets if necessary to get them in line. Draw lines on each edge connecting the bottoms of the rabbets, and plane away the superfluous wood down to these lines. When this is done the top of the board will be true or in the same plane. Test it by placing the straight-edges in different positions on the surface and sighting as before, correcting any errors. One side of the board being made true in this way, the other can be made parallel by gauging a line all around the edge, measuring by the thinnest point of the board, and planing off the superfluous wood in the same manner as the first side.

Fig. 686.
You can sometimes facilitate the process of planing off the superfluous wood by making cuts with the saw and removing part of it with the chisel, or by planing across the grain (the jack-plane is good for this purpose), or paring across the grain with the chisel, or any such method, always being careful not to cut quite as deep as the intended surface, so that all the marks and cuts can be removed by the final planing. See Plane, and also page 179.
Try-Square.—See Square.
Turning-Saw.—See Saw.
Turpentine.—See Finishing and Painting.
Twist-Drill.—The twist-drill is much better than the gimlet-bit. It makes a good hole, bores easily, is not easily dulled, can be used upon metal, and one kind in common use can be easily kept in order by simply sharpening the ends. There are various patterns. A little care is necessary, however, particularly in hard wood, as they are liable to be snapped by bending. See Bits.
Varnish.—See Finishing.
Veining-Tool.—See Carving-Tools.[502]
Vise.—See page 65. For vise for metal-work, see page 70.
Warping, To Remove.—Of course the simplest way to straighten a warped board is to put a weight on it, but the difficulty here is that it usually will stay straight only while the weight is on it, unless you leave it longer than the patience of the average amateur lasts. To do this (or to warp a straight board either) with some chance of success, (1) heat one side, or (2) wet one side, or (3) wet one side and heat the other, or (4) wet both sides and expose one to the fire (Fig. 687). But do not be too sure that the result will be lasting. Sometimes it will and sometimes not. Another way is to thoroughly soak the board, press it into shape between clamps or under a weight, and leave it until dry; a week or more is none too long, and boiling water is better than cold. Simply laying a board down on a flat surface will often cause it to warp, because the two sides of the board will be unequally exposed to the action of the atmosphere. Planing off one side only, or planing one side more than the other, often produces the same effect. See pages 50-53 and Appendix.
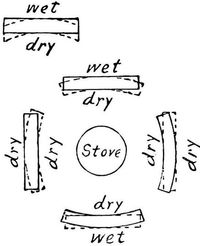
Fig. 687.
Wedges.—Wedges are in constant use for lifting or separating heavy bodies, as doubtless you know, and the principle of the wedge comes in in using the axe, hatchet, chisel, knife, and the other edge-tools (see page 25). Besides this use of the wedge you will often find it valuable to tighten or clamp objects of various kinds, or to hold them firmly in place.
If you wish to split objects or tear them apart, use a single wedge, for the increasing thickness of the wedge applied at one point tears or splits the wood apart. But if you merely wish to[503] squeeze, or press, or hold firmly, or move, without damaging the shape of the wood, use double wedges,—that is, two wedges having the same inclination or taper and pointing opposite ways. You will see that the sides of the double wedge (that is, the outsides of the wedges) will be parallel no matter how hard you drive the separate wedges, so that the pressure will be exerted without injuring or jamming the surfaces against which the wedge bears (see Fig. 333). Short, flaring wedges do the work more quickly, but require harder blows to drive, and are more liable to slip. Long, tapering wedges work more slowly, more easily, and are not liable to slip. You will also use wedging to secure tenons and dowels (see Mortising, etc.).
Whittling.—See Knife.
Winding-Sticks.—Two straight-edges, each of equal width throughout, can be laid on edge, one across each end of the surface to be tested. Stand back a little and look across the top edge of one to the top edge of the other, and if these edges agree you may know at once that there is no winding where you have placed the straight-edges (Fig. 688). By putting them in different positions you can finally determine whether the whole surface is true or not.
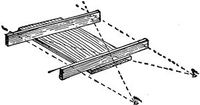
Fig. 688.

Fig. 689.
It is more accurate to use winding-sticks considerably longer than the width of the piece to be tested, as then any warping or winding will be exaggerated and more easily seen (Fig. 689). If the upper edges of the sticks are thin, or "feather-edged," it is easier to tell exactly when they are in line, but this does not ordinarily matter, except in work requiring extreme accuracy.[504]

Fig. 690.
To find, for example, when the legs of a table, chair, or the like are cut so that the article will stand evenly, turn it over with the legs sticking up, put straight-edges on the ends of the legs, sight across these (Fig. 690), and trim one or two legs until the edges are in line. See Scribing for other methods.
Warping or winding of short pieces can be detected by simply laying one straight-edge diagonally from corner to corner (Fig. 691). This will show at once which parts require to be planed to make the surface true.

Fig. 691.
Withdrawing Nails.—When withdrawing nails place a block under the hammer-head as shown (Fig. 692), using more blocks, if necessary, as the nail is withdrawn.
To draw the nails from boxes, pry up a board, together with the nails, a short distance—perhaps ¼"—and then with a sharp, quick blow of the hammer pound the board back into place, not striking the nails but the board between them. This will usually leave the nail-heads projecting a little above the surface, so that you can draw them as shown in Fig. 692, and thus save splitting or defacing the boards and bending the nails, as usually results from smashing or wrenching boxes apart. The quick blow drives the board back before the motion has time to communicate itself to the nails, on somewhat the same principle that[505] a bullet makes a round hole in a window pane without smashing the glass.

Fig. 692.
Wood-Filler.—See Finishing.
Wrench.—A strong wrench is often very serviceable in wood-working operations.
Collection of Specimens of Wood.—Waste pieces of all the common woods can easily be obtained at the wood working shops. Have some system about the size and shape of the specimens. Some kinds you may be able to get only in pieces of such shape as you can find among the odds and ends of the shops, and many rare foreign and tropical woods you can obtain only in quite small pieces, but even these will show the character of the wood and add value to the collection. Waste scraps of veneers of rare woods can be glued on blocks of pine.
The specimens will be most valuable if you can get them out so as to show a longitudinal section along the medullary rays (or through the heart), a longitudinal section at right angles to the medullary rays (or tangential to the annual rings), and a cross section (Fig. 693). It will be an advantage also to show not only the heartwood but the sapwood and bark. If you cannot get such large pieces of even the common woods, a collection of small flat blocks will be well worth making.
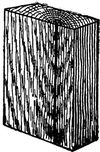
Fig. 693.
The specimens will show to best advantage if polished (one half of each side can be polished) or finished with a dull lustre, and they will be good objects on which to practise finishing (see Finishing in Part V.).
All the information you can pick up about the strength, durability, toughness, elasticity, and uses of the various woods will be sure to come in play sooner or later. The gradations of hardness, density, weight, toughness, elasticity, etc., are almost endless.[508]
Notice, therefore, the weight, colour, hardness, density, and characteristic odour of the specimens; the proportion of heart to sapwood, and the colour of each; the size and condition of the pith; the character of the grain, whether coarse or fine, close or open and porous; the number, arrangement, size, and colour of the medullary rays (when visible); the width and character of the annual rings (when visible), whether wide or narrow, with many or few ducts or resin canals. You will find many things to notice in some woods. Use a magnifying-glass if you can.
Notice also about the bark. Hunt up all the woody stems you can, compare the bark of the different specimens, noting its colour, taste, odour, surface, thickness, and the different ways it cracks and is cast off; and notice how easily you can learn to tell the common trees by the bark alone. Sections of small stems or branches will often show the character of the wood well.
Note what you can about the character and habits of the trees themselves; the height, diameter, age, and the shape and peculiarities of the leaves. In this connection, a collection of leaves will also be interesting to make. You can soon learn to tell the common trees by their leaves.
Notice how, in some trees, as the pines, spruces, firs, the stem grows right straight up to the top, forming a spire-shaped tree. This is called an excurrent trunk (Lat., excurrere, to run out). Notice how, in other trees, like the elm, oak, etc., the stem branches again and again until it is lost in the branches. This is called a deliquescent stem (Lat., deliquescere, to melt away).
Study the shape and arrangement of the different kinds of trees as shown in outline against the sky; best, perhaps, when the leaves are off. You can learn to tell the common trees by their outline. Do they look stout, firm, strong, and rugged, or delicate, yielding, and graceful? To a certain extent you can thus form an idea of the character of the wood, as in comparing the pine, with its comparatively light top and slender leaves, with the heavy growth which the trunk of the oak has to sustain in wind and snow.[509]
Preservation of Forests.—Forests are of great value from their effect upon the climate, making it more equable. They tend to cause abundant and needed rainfall and to preserve the moisture when fallen, releasing it to the rivers gradually, and thus preventing abnormal freshets and extreme droughts. By absorbing and parting with heat slowly they cause the changes of temperature to be less sudden than in the open country. They temper the heat, and they serve as a protection, or "wind-break," to adjacent land. Trees, with other vegetation, are essential to the purification of the air. All this is in addition to the obvious uses of supplying fuel and wood for an almost endless variety of purposes, not to speak of the value of trees for shade and as features of the landscape.
The reckless rate at which the forests of the United States are being destroyed is becoming a serious matter, not merely because of depriving wood-workers of the materials with which to work, but because of the influence of the forests upon the climate, the soil, etc., upon which so much of the welfare of mankind depends. At the present rate of destruction many generations cannot pass before the supply of wood will be practically exhausted. It is every year becoming more difficult to obtain native lumber of the best quality and large size.
One of the most serious aspects of the matter, however, is in regard to the washing away of the soil, which owes not merely its origin but its preservation to the forest and other vegetable growths. Professor Shaler tells us that "it is in this action of the rain upon the bared surface of the ground that we find the principal danger which menaces man in his use of the earth."
The individual wood-worker may not have control of any forest or wood-lot, but he can at least use his influence indirectly, when opportunity offers, toward needed legislation to restrict, or at least regulate, the improvident waste now going on, and he can in many cases take advantage of Arbor Day to plant at least one tree toward preserving the balance required by nature.[510]
Common Woods and Some of their Characteristics.—There are many things to be considered by the beginner when choosing his wood. Many of these points have been treated in Chapter III. (to which the reader is referred), but a few additional remarks about the various kinds may be of use.
One important thing, however, to be borne in mind before beginning, is to select straight-grained, plain, rather soft, and easily worked stock. With this and with sharp tools you will have every chance of success, while with hard, crooked-grained wood and with dull tools you will be well started on the road to discouragement and failure.
It may be remarked, incidentally, that beginning with soft woods, such as white pine, calls for even keener-edged tools than can be got along with for harder woods, like oak. This, however, though it may seem a disadvantage, is really a good thing, for it compels one to keep his tools sharp. You will soon find that it is impossible to do even passable work in the softer woods without sharp tools, while with harder wood you may succeed by brute force in mauling the work into tolerable shape without being sufficiently impressed by the fact that your tools are dull and require sharpening.
Besides the familiar fact that the heartwood is usually better than the sapwood,[51] it may be useful to remember that, as a rule, the wood from a young tree is tougher than that from an old one; the best, hardest, and strongest in the young tree usually being nearest the heart, while in an old tree the heart, having begun to deteriorate, is softer and not as good as the more recently formed growths nearer the sapwood. If the tree is in its prime the wood is more uniformly hard throughout. The sapwood, as a rule, is tougher than the heartwood, though usually inferior in other respects; and timber light in weight is sometimes tougher than heavy wood, though the latter is often stronger and more durable and preferable for some purposes. The application of these[511] statements varies much according to the kind of wood and different circumstances, for the growth and structure of trees is a very complex matter, and the diversities almost infinite.
It may be well to bear in mind, considering the great variety of purposes for which the amateur uses wood, the distinction between the elasticity needed for such purposes as a bow or horizontal bar, and the toughness required for the ribs of a canoe, or the wattles of a basket. In the former case the material must not merely bend without breaking, but must spring back (or nearly so) to its former shape when released, as with lancewood or white ash; while in the latter case it must bend without breaking, but is not required to spring back to its original form when released, as with many green sticks which can be easily bent, but have not much resilience. These two qualities are found combined in endlessly varying degrees in all woods. Elastic wood must necessarily have toughness up to the breaking-point, but tough wood may have but little elasticity.
Earliest of all trees, historically, come the pines—the conifers—and then the broad-leaved trees. The conifers, or needle-leaved trees, include the pines, firs, spruces, cypresses, larches, and cedars. As a rule they contain turpentine, have a comparatively straight and regular fibre and simple structure, are usually light, flexible, and elastic, and the wood is more easily split or torn apart than that from the broad-leaved trees, and is easily worked. The wood of the broad-leaved trees is more complex in structure than that of the conifers and, as a rule, harder, and for many purposes stronger and more durable.
Besides the woods in general use there are many which have merely a local value where they grow, and a long list could be made of the woods which have but very limited uses, as well as of those which, from their scarcity, hardness, small size, or other peculiarities are practically out of the question for the beginner or the amateur, except on rare occasions.
The following list makes no claim to completeness, but may be of some use to the beginner.[512]
Apple.—This wood is used for turning, such as handles, etc., and for other small work. It is handsome, fine-grained, and somewhat hard.
Ash.—This is a valuable wood, of which there are a number of varieties. It is used for agricultural implements, carriage-building, floors, interior finish, cabinet-work, etc. Ash is flexible, tough, and elastic. It is good to stand a quick and violent strain, as that put on a horizontal bar in the gymnasium, although in time it becomes brittle. White ash is the variety best suited for such purposes. It is good for oars and the like. Ash is of a rather coarse and usually straight-grained texture, and most varieties are not difficult to work.
Basswood.—The wood of the American linden, or basswood, is soft and light in substance, white or light brown in colour, is easily bent but not easily split, free from knots but prone to warp, and is used for cabinet-work, carriage-work, and for various minor articles. It can be obtained in boards of considerable width.
Beech.—This close-grained wood, hard, firm, strong, and taking a good polish, is extensively used for machine-frames, handles, plane-stocks, some kinds of furniture, and a variety of minor articles, but will not often be needed by the amateur. The medullary rays are noticeable.
Birch.—The birch, of which there are many species, is widely distributed in North America, and furnishes an important wood, which is used for a great variety of purposes,—for furniture, floors, interior finish, turning, and a long list of minor articles. It is close-grained, and most varieties are hard and strong, but not difficult to work, and are susceptible of being given a smooth satiny surface and a fine finish. The uses of the bark of the canoe birch are familiar to all. This tree is good not merely for canoes, but its wood is used for paddles, skis, and the like.
The black birch is especially esteemed for furniture and interior[513] work. It is of a beautiful reddish- or yellowish-brown colour, and much of it is beautifully figured with wavy and curly grain. It is frequently stained in imitation of mahogany, a deception much assisted by the resemblance in grain, and not easily detected if skilfully done.
Black Walnut.—Large black-walnut trees are practically almost as thoroughly exterminated in America as the bisons of the Western prairies. The wood can be obtained, however, though it is not abundant in very wide boards. It is durable, usually straight-grained, moderately strong and hard, not difficult to work, holds glue well, and can be given a fine finish. It holds its shape well, and is an excellent wood for many purposes in interior finishing, cabinet-work, and for various minor articles. It has been very extensively used for gun-stocks. Its sombre colour is not always admired, but it is an excellent wood for amateur work. When mottled or in the form of burl it is, of course, harder to smooth. The English and Italian varieties of walnut have long been used.
Boxwood.—This wood is distinguished for its extremely compact and even grain. It is hard and heavy, is used in turning, wood-engraving, and the like, but is not likely to be required by the amateur.
Butternut.—This wood, found in North America, has a rather coarsely marked grain, is soft, light, of a yellowish-brown colour, and when finished makes a handsome wood for furniture and interior work.
It is easily worked, but is not the easiest material for the amateur to smooth satisfactorily, because of the peculiar texture of the wood, which tends to "rough up" unless the tools are very keen.
Buttonwood.—See Sycamore.
Cedar.—This tree, found quite abundantly in the United States, furnishes a wood which is exceedingly durable, particularly where exposed to the alternations of moisture and dryness,[514] as when inserted in the ground or in situations near the ground, and is very valuable for fence-posts, foundation-posts for buildings, railroad ties, shingles, pails, and the like. Some varieties of cedar are used for building purposes and interior fittings.
The varieties of white cedar are light, of good grain and easy to work, soft, and not particularly strong, but durable and admirably adapted to such purposes as boat-building, for which it is largely used. Red cedar, which is in many respects similar to the other varieties, is distinguished by its colour and by its strong fragrance, which, being obnoxious to insects, makes it excellent for chests and closets. It is used for pencils.
Cherry.—This is a valuable wood for the amateur. It is found extensively in the United States. It is fine-grained, of moderate hardness, not difficult to work, and of a beautiful reddish-brown or yellowish-brown colour. It has a satin-like surface when smoothed, and can be given a beautiful finish. The black cherry is especially esteemed. It can be obtained, so far as it has not been exterminated, in quite wide boards. Cherry mellows and grows richer in colour with age. The varieties having a wavy texture are especially beautiful. It is much used for cabinet-work, interior finish, and for many purposes. The beginner should select only the softer and straight-grained varieties, as some of the harder and denser kinds are exceedingly hard to smooth.
Chestnut.—The value of this wood to the amateur lies chiefly in its durability. It lasts well in or near the ground or exposed to the weather. It can be used for framing, for posts for a fence or to support a building, and for similar purposes. It is soft, coarse-grained, not very strong, but is not difficult to work.
Cottonwood.—This is a soft, light, close-grained wood, used for woodenware, boxes, pulp, etc.
Cypress.—This wood is found in North America, Mexico, parts of Asia and Europe. It is a valuable material, yellowish[515] or yellowish-brown in colour, very durable when exposed to the weather or in contact with the soil, light, soft, easily worked, and is used for general lumber purposes for which pine is used, but to which it is superior for withstanding exposure. It is used for interior finish, doors, clapboards, shingles, cabinet-work, boat-building, posts, and a great variety of purposes. It takes a fine finish. The cypress of the Southern United States is of large size, and the wood is of beautiful figure and colouring. Valuable varieties are found upon the Pacific coast.
Deal.—See Pine and Spruce.
Ebony.—The excessive hardness of ebony renders it unsuited for amateur work. It is also expensive. It is very hard and solid, with black heartwood and white sapwood, and is used for furniture, turning, and small articles.
Elm.—This useful wood, strong, tough, and durable, usually flexible, heavy and hard, is extensively used in some of its varieties for boat-building, the frames of agricultural implements, yokes, wheel-hubs, chairs, cooperage, and many other purposes. Some species are very good for continued exposure to wet. The rock elm is a valuable variety, esteemed for flexibility and toughness as well as durability and strength.
Fir.—See Pine and Spruce.
Hemlock.—This wood, valuable for its bark, is cheap, coarse-grained and subject to shakes, brittle and easily split, and somewhat soft, but not easy to work. It is unfit for nice work, but can be used for rough framing and rough boarding, for which its holding nails well renders it suitable.
Hickory.—This wood, found in the eastern parts of North America, is highly esteemed for its strength and great elasticity. It is hard, tough, heavy, and close-grained. It is largely used for carriage-work, agricultural implements, hoops, axe-helves, and the like. It is hard to work. The shagbark is especially valued for timber.[516]
Holly.—This wood is quite hard, close-grained, and very white, though it does not retain the purity of its colour. It is used for small articles of cabinet-work and for turning.
Lancewood.—The use of this wood for bows, fishing-rods, and such purposes has been extensive. It is distinguished for its elasticity.
Lignum Vitæ.—The extreme hardness, solidity, and durability of lignum vitæ make it of great value for pulley-sheaves, balls for bowling, mallets, small handles, and turned objects. It is too excessively hard for the beginner to use.
Locust.—The wood of the locust of North America is hard, strong, heavy, exceedingly durable, and of yellowish or brownish colour. It is a valuable wood, and is used extensively for posts for fences and for the support of buildings, for ship-building, and for other work to be subjected to exposure or to contact with the ground. It is used in turning, but not extensively for interior work.
Mahogany.—This highly valuable wood, which did not come into general use until the eighteenth century, is found in the West Indies, Mexico, Central America, and some other regions. It is very durable. The colour is found in a great variety of shades from golden-brown to deep reddish-brown. Some varieties are light and quite soft, even spongy, while others (the best) are very hard and heavy, close-grained, and strong. In some kinds the grain is quite straight, in others curved and twisted into an endless variety of crooked shapes, the latter being the most beautiful for ornamental work, but more liable to change of shape than the straight-grained varieties.
The straight-grained varieties change their shape but little,—less than most woods,—and are therefore excellently suited for the framework or structural parts of cabinet-work, for pattern-making, and the like. The so-called baywood holds its shape well and is easily worked, but is not especially beautiful. The better grades of mahogany grow darker and richer in colour with[517] age, but some varieties become bleached and lustreless with exposure.
It is of the greatest value for interior finishing, for furniture, and for cabinet-work generally, and is also used for many other purposes.
The term mahogany is used in commerce in a rather comprehensive way. Mahogany from San Domingo has long been highly esteemed, but is now difficult or impossible to obtain. The light-coloured variety known as white mahogany is much valued for its beauty.
Mahogany is excellent for holding glue. It can be obtained in wide pieces, thus often saving the necessity of gluing. It can be given a beautiful dull finish or a high polish, as may be desired.
The beginner should only attempt the plain, softer, straight-grained kinds of mahogany at first. The other varieties require much skill to smooth and, in case of the harder pieces, even to work at all; and these, however beautiful they may be, should be deferred until considerable proficiency has been attained.
Maple.—The maple grows freely in the United States, and is much used for a great variety of purposes, the sugar or rock maple being especially esteemed. It is close-grained, hard, strong, heavy, and of a light yellowish-, reddish-, or brownish-white colour (sometimes almost white, though found in varying shades), and can be smoothed to a satin-like surface and be given a good finish. It can be stained satisfactorily. The curly or wavy varieties furnish wood of much beauty, the peculiar contortion of the grain known as "bird's-eye" being much admired. Maple is extensively used for cabinet-work and interior finishing, floors, machine-frames, work-benches, turning, and a great variety of miscellaneous articles.
There are a number of varieties of the maple. The beginner should confine himself at first to the softer and straight-grained specimens, as the other kinds are hard to work and to smooth.
Oak.—Of all the broad-leaved trees the oak is probably the[518] most valuable, and has for ages stood as a type of strength. It is widely scattered in various parts of the world, and nearly three hundred varieties have been noted.
Oak is distinguished for its combination of useful qualities. It is hard, tough, elastic, heavy, durable, stiff (except after steaming, when it readily bends), and durable when exposed to the weather or to the soil. Oak is more or less subject to checking. It is strongly impregnated with tannic acid, which tends to destroy iron fastenings.
American white oak. This important variety is found in North America, and from it is obtained most excellent timber. It is used for a variety of purposes too great to be specified, from the construction of buildings and ships to furniture and agricultural implements, carriages, etc. It is an invaluable wood.
British oak has long been held in the highest regard for its combination of valuable qualities, and has been used for more purposes than can be here mentioned.
The live oak, found in southern parts of North America, may be mentioned as a valuable wood, very strong, tough, and durable, which, before the introduction of iron and steel in ship-building, was extensively used in that business; but it is excessively hard and unsuited to amateur work.
Varieties of red oak are extensively used, but, though valuable, are of inferior quality to the white oak. Other varieties largely used in England and on the Continent are seldom marketed in the United States.
Pear.—The wood of the pear tree is somewhat like that of the apple tree. It can be readily carved.
Pine.—First and foremost among the needle-leaved trees comes the pine, of which about seventy species are known. The white pine, known in England as yellow pine and also as Weymouth pine, is widely distributed in America, and is, or has been, our most valuable timber tree, but seems to be doomed to rapid extinction, at least so far as the wide, clear boards and planks of[519] old-growth timber are concerned, which are now exceedingly hard to obtain.
There is no better wood for the beginner than clear white pine for all purposes to which it is suited.
It is light, stiff, straight-grained and of close fibre, easily worked, can be easily nailed, and takes a good finish. When allowed to grow it has reached a large size (as in the so-called "pumpkin" pine), furnishing very wide, clear boards, of beautiful texture and with a fine, satiny surface. It is of a light yellowish-brown colour, growing darker with time. It is soft, resinous, and of moderate strength. Pine is cut into lumber of many forms, and is used for inside finishing of houses, for many purposes of carpentry and cabinet-making, for masts and spars, for clapboards, shingles, and laths, doors, sashes, blinds, patterns for castings, and a long list of different purposes. It holds glue exceedingly well and takes paint well.
Other varieties, as the sugar pine, the Canadian red pine, the yellow pine, etc., grow in America. White pine is also found in Europe. The Scotch pine or Norway pine, known also as red, Scotch, or yellow fir, and as yellow deal and red deal,[52] is the common pine of the North of Europe, hence its name, Pinus sylvestris, pine of the forest. It is hard, strong, not very resinous, and is extensively used.
Southern or Hard Pine. This very important timber is found on the Southern Atlantic and Gulf coasts of the United States. It is very hard, heavy, and resinous, with coarse and strongly marked grain. It is durable, strong, and not easily worked by the beginner, and is hard to nail after seasoning. It is extensively used for girders, floor-timbers, joists, and many kinds of heavy timber work, including trestles, bridges, and roofs, for masts and spars, for general carpentry, floors, decks, and interior[520] finish, railway cars, railway ties, and many other purposes, and, in addition, for the manufacture of turpentine.
Other varieties of hard pine are sold and used successfully for the same purposes, all under the common name of hard pine, Southern pine, Georgia pine, yellow hard pine, etc. Another variety of hard "pitch" pine (Pinus rigida), often confused with the Southern pine, is heavy, resinous, and durable, but not suited for the better class of work.
Plum.—This is a fine-grained, hard wood, used for turning, engraving, etc.
Redwood.—The two varieties of the giant Sequoia of the Pacific coast are the Sequoia sempervirens and the Sequoia gigantea or Wellingtonia. The former, the most important tree of the Pacific coast, is of immense size (supposed to reach a height of even four hundred feet), red in colour, rather soft, light, and moderately strong, easily worked and finished, and very durable when exposed to the soil. It is used for general lumber purposes, carpentry, interior finish, posts, tanks, shingles, and a great variety of uses.
The S. gigantea or Wellingtonia, which has the largest trunk in the world, is also red in colour, coarse-grained, rather weak, soft and light in texture, and of great durability when exposed to the soil. It is used for lumber and general building purposes, posts, shingles, etc. These are the "Big Trees," thought in some instances to be even five thousand years old, and of which the familiar stories are told about a stage-coach having been driven through a hollow tree, and about twenty-five people having danced at one time upon a stump.
Rosewood.—This wood, of handsome grain and colouring, has been much admired and extensively used for veneering. It is hard and heavy and of a peculiar texture, which seems oily to the touch. It is not well suited to amateur work, and is expensive.[521]
Satinwood.—This handsome yellowish-brown wood is hardly to be considered by the amateur except for the occasional use of a small piece.
Spruce.—The wood of the spruce, of which there are a number of varieties, is quite abundant, is light and straight-grained, and comparatively free from large knots. It is largely used for many of the same purposes as white pine, to which it is inferior for interior finish and fine work, but superior in strength, hardness, and toughness. Both white and black spruce are extensively used for carpentry, interior finish, flooring, fencing, and inferior wood-work generally. It has the great disadvantage of curling and twisting and springing badly, and is not as nice to work as white pine. Spruce of good quality makes good paddles, spars, and the like, and is valuable for such work. The wood of the Norway spruce is known in England as white deal.
Sycamore.—This handsome wood, found in various parts of the world, and of a light yellowish or reddish-brown colour, is esteemed for interior work. The medullary rays are noticeable. It is rather hard, but not very difficult to work. It is not durable for outside work exposed to the weather. Known also as Buttonwood.
Walnut.—See Black Walnut.
Whitewood.—Like white pine, whitewood is an excellent wood for the early attempts of the beginner.
Whitewood, which is by no means white, but greenish- or brownish-yellow, is the name applied to the wood of the tulip tree. This tree attains a large size, thus furnishing wide boards, which are of such straight and even grain and so free from knots as to be of great use for many purposes. It is brittle and soft, but light and very easily worked. It is not, for most purposes, as reliable a wood as white pine, but is extensively used in the wood-working arts. It is more liable to warp and twist than pine. It takes a stain exceedingly well.[522]
Willow.—An important use of this wood is for baskets. It will not often be required by the beginner, except for whistles.
Yew.—This wood, like lancewood, is distinguished for its elasticity, and is highly esteemed for bows and the like.
Many other woods can be alluded to, as catalpa (for posts and the like), elder (for various small articles), dogwood (for turning and the like), gum (for various common articles), hornbeam or ironwood (for mallets, handles, wheel-cogs, etc.), poplar (for pulp), sassafras (for posts, hoops, etc.), teak (from the East, strong and valuable), tupelo (hubs of wheels, etc.), and a great variety of others which cannot be specified, as they are but seldom required by the amateur and never needed by the beginner.
Felling and Seasoning.—A tree should usually be cut for timber at or near its maturity, as a young tree has too much sapwood and will not be as strong and dense or durable, while an old one is likely to get brittle and inelastic and the centre of the heartwood is liable to decay, being the oldest portion. A young tree, though softer and not so durable, furnishes a tougher and more elastic wood, and sometimes has a finer grain.
Trees differ so much, and the uses to which the wood is to be put are so various, that no exact ages can be set for cutting—probably from fifty to one hundred years for good timber, to make a rough statement. Some trees furnish excellent timber at a much greater age than one hundred years. Pine is thought to be ripe for cutting at about seventy-five or one hundred years of age, oak at from sixty to one hundred years or more, and the various other woods mature at different ages.
Midwinter, or the dry season in tropical regions, is usually preferred for felling, because the sap is quiet. Decay sets in more rapidly in the sapwood and between the wood and the bark during the period of active growth, because of the perishable nature of the substances involved in the growth. Midsummer is considered equally good by some.[523]
The various methods of cutting the log into the lumber of commerce have been treated in Chapter III., to which the reader is referred. In this connection it will be noticed that, although boards cut through or near the middle are, as a rule, the best, when they contain the pith they are sometimes valueless in the centre, as well as when, in the case of an old tree, decay has begun at that point.
As the water evaporates gradually from green wood exposed to the air but protected from the weather, one might infer that in time it would evaporate entirely, leaving the wood absolutely dry, just as the water will entirely disappear from a tumbler or a tea-kettle. This is not so, however. The drying goes on until there is only about ten to twenty per cent. of moisture left, but no amount of open-air seasoning will entirely remove this small per cent. of moisture, the amount varying with the temperature and the humidity of the atmosphere. It can be got rid of only by applying heat, kiln-drying, baking, currents of hot air, vacuum process, or some artificial method of seasoning. After having completely dried the wood by any of these methods, if it is again exposed to the atmosphere, it absorbs moisture quite rapidly until it has taken up perhaps fifteen per cent., more or less, of its own weight. So you see that, though you may by artificial means make wood entirely dry, it will not stay in this unnatural condition unless in some way entirely protected from the atmosphere at once, but will reabsorb the moisture it has lost until it reaches a condition in harmony with the atmosphere. Recent investigations show that the very fibre or substance of the wood itself imbibes and holds moisture tenaciously, this being additional to the water popularly understood to be contained in the pores or cavities of the wood.
There are various other methods besides kiln-drying (referred to in Chapter III.) of seasoning and of hastening the drying process. Wood is sometimes soaked in water before being seasoned. This assists in removing the soluble elements of the sap, but it is doubtful whether the process improves the quality of the wood.[524] Smoking and steaming are also resorted to. Small pieces can readily be smoked, which hardens the wood and adds to its durability,—a method which has been known for centuries,—but care must be taken not to burn, scorch, or crack the wood.

Fig. 694.
Decay and Preservation.—Timber decays fastest when alternately wet and dry, as in the piles of a wharf, fence-posts, and the like, or when subjected to a hot, moist, close atmosphere, as the sills and floor-timbers situated over some damp and unventilated cellar. Fig. 694 shows the decay caused by alternate wetness and dryness, while the parts above and below are still sound.
Wood lasts the best when kept dry and well ventilated. When kept constantly wet it is somewhat softened, and will not resist so much, but it does not decay. Recently, upon cutting a slab from the outside of a large log taken from the bed of a river, where it had lain for one hundred years or more, the interior proved as sound and clear as could be found in any lumber-yard. Undoubtedly, however, such long submersion lessens the elastic strength of timber after it is dried. That is not, however, an extreme example of durability. Wood has been taken from bogs and ancient lake-dwellings after being preserved for ages. Piles were taken from the Old London Bridge after about 650 years of service. Piles placed in the Rhine about 2000 years ago have been found quite sound during the present century; and piles are now regularly used, as you doubtless know, for the support of the most massive stone buildings and piers, but only[525] where they are driven deep in the ground or below the low-water line. Many examples of the durability of wood kept dry are found in European structures. Timbers put into the roof of Westminster Abbey in the reign of Richard II. are still in place, and the roof-timbers of some of the older Italian churches remain in good condition.
Thorough seasoning, protection from the sun and rain, and the free circulation of air are the essentials to the preservation of timber.
Many preparations and chemical processes have been tried for the preservation of wood.
Creosote is one of the best preservatives known. Insects and fungi are repelled by its odour. The modern so-called "creosote stains" are excellent, not very expensive, and easily applied. They are only suitable for outside work, however, on account of the odour.
Coal-tar and wood-tar or pitch, applied hot in thin coats, are also good and cheap preservatives for exposed wood-work.
Charring the ends of fence-posts by holding them for a short time over a fire and forming a protecting coating of charcoal is another method which has been extensively used.
Oil paint will protect wood from moisture from without, and is the method most commonly in use.
In the case of any external coating, however, which interferes with the process of evaporation, as tar or paint, the wood must be thoroughly dry when it is applied, or the moisture within will be unable to escape, and will cause decay.
Lumber as well as the living tree has enemies in the form of insects and worms, but the conditions best for the preservation of the wood, as referred to above, are also the least favourable for the attacks of animal life and of fungi.
As soon as the tree has been felled and dies, decomposition begins, as in all organic bodies, and sooner or later will totally destroy the wood. The woody fibre itself will last for ages, but some of the substances involved in the growth soon decay. The[526] sap is liable to fermentation, shown by a bluish tint, and decay sets in. Fungi are liable to fasten upon the wood. Worms and insects also attack it, preferring that which is richest in sap. Thus we see that the danger of decay originates chiefly in the decomposition of the sap (although in living trees past their prime decay begins in the heartwood while the sapwood is sound), so the more the sap can be got rid of the better. There are, however, some substances found in various trees, aside from those elements especially required for their growth, which render the wood more durable, like tannic acid, which abounds in oak and a number of trees, particularly in the bark. There is no advantage in getting rid of the turpentine and other volatile oils and the resinous deposits found in needle-leaved trees, particularly in the case of those woods in which they abound. Care should be taken, however, not to use a piece of pine badly streaked or spotted with resinous deposits in a place where it will be exposed, as the turpentine or resinous matter will be apt to ooze out and blister the paint.
Wet rot is a decay of the unseasoned wood, which may also be caused in seasoned wood by moisture with a temperate degree of warmth. It occurs in wood alternately exposed to dryness and moisture. Dry rot, which is due to fungi, does not attack dry wood, but is found where there is dampness and lack of free circulation of air, as in warm, damp, and unventilated situations, like cellars and the more confined parts of ships, and in time results in the entire crumbling away of the wood. There are several forms of dry rot. One of the most common and worst of dry-rot fungi attacks pine and fir. Fungi also attack oak. Creosote is used as a preventive, to the extent to which it saturates the wood.
Effects of Expansion and Contraction.—Cracks, curling, warping, winding, or twisting are due to nothing but irregular and uneven swelling and shrinking. Some kinds of wood shrink much in drying, others but little. Some, after seasoning, swell[527] or shrink and curl and warp to a marked degree with every change in temperature and dryness. Others, once thoroughly air-seasoned, alter much less in shape or size under ordinary circumstances.
We have already seen that the heart side of a board tends to become convex in seasoning, owing to the shrinkage of the other side, and that if one part swells much more than another the wood becomes out of shape,—warped, curled, or twisted. If one part shrinks much faster than another, cracks usually result in the quicker shrinking portion. If you stick one end of a green board into the hot oven of the kitchen stove, the heated end will crack and split before the rest of the board has fairly begun to dry. We have seen illustrations of this in the seasoning process, as shown in Chapter III.
Exposure of one side of a seasoned piece to either dampness or heat will thus cause the piece to curl. The dampness swells the side affected or the heat shrinks it so that the convexity will be on the dampened side, or the concavity on the heated side, as the case may be.
If lumber were of perfectly uniform texture, hung up where it would be entirely unconfined and free to swell or shrink in all directions, and equally exposed all over the surface to exactly the same degrees and changes of heat and cold, dryness and moisture, it would simply grow larger or smaller without changing its form or shape. There would then be no curling, warping or winding. As a matter of fact, however, wood is not uniform in texture, but exceedingly varied, some pieces being extremely complex in structure; neither is it always free to expand and contract in every direction, nor equally exposed on all sides to the alternations of heat and cold, moisture and dryness.
To come to the practical application of these facts, we have seen (in Chapter III.) that boards for nice work should be planed down equally, as nearly as may be, from both sides; that the mere dressing off of the surface by hand will sometimes cause a board to warp badly; and that it is better to buy stock of as nearly[528] the required thickness as possible, than to plane it down or split it. It should also be noted that when a board is being sawed in two or split lengthwise with a saw it sometimes springs together behind the saw with so much force that the crack has to be wedged open in order to continue sawing (Fig. 695). Sometimes the crack opens wider instead of closing (Fig. 696). You see from this that you cannot always be sure when you split a board that the parts will retain the shape they had in the original board. In working up large pieces into smaller ones, unexpected twists and crooks will often be found in the smaller pieces which did not exist in the original stock. Sometimes mahogany, for instance, will act in this way very markedly. Strips sawed off from a board, for example, will sometimes immediately spring into very crooked forms, as shown in Fig. 697 (which would not be exaggerated if the pieces were drawn of greater proportionate length).

Fig. 695.
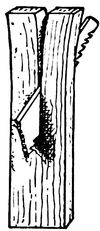
Fig. 696.
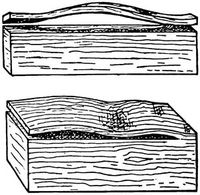
Fig. 697.
Fig. 698.
In splitting stock flatwise, i.e., making two thinner boards out of a thick board or plank, a similar result often follows. The latent power set free, so to speak, by suddenly exposing the middle of a board, plank, or other timber to the atmosphere sometimes causes curious developments. It being necessary one day to split for a picture frame a large mahogany board, 1" thick by 2' square,[529] with a circular hole already sawed from the centre, the pieces warped and twisted as the sawing went on (Fig. 698), until, just as they were nearly separated, the whole thing "went off" with a report like a toy pistol, breaking into a dozen pieces and scattering them around the shop.
In very crooked-grained wood you will frequently find uneven and undulating forms of warping and twisting that you do not find in straight-grained pieces, but such wood is often of the most beautiful figure for indoor work. Where the grain is crooked, cropping up to the surface as in Fig. 701, the cut-off ends of the fibrous structure, so to speak, are exposed in places to the atmosphere. These open ends, "end wood," thus brought to the surface are more susceptible to moisture and dryness than the sides of the bundles of fibrous tissue, which tends to produce unequal swelling, shrinking, and warping.
You will see if you look at the ends of logs and stumps that the heart is frequently not in the centre, in some cases taking such a devious course throughout the stem as to make the grain so crooked that no method of sawing will remove the tendency to warp or twist, just shown. Such trees may show a beautiful grain. Even in straight trees the pith is not usually quite straight, and is apt to take a somewhat zigzag course, due to the crooked way the tree grew when young (Fig. 699).

Fig. 699.
Imagine, for an exaggerated illustration, that you could see with X-rays the pith as crooked as Fig. 699. that shown in Fig. 700. Imagine that from this tree you could saw out the board indicated, keeping with it the whole pith or heart as if it were a wire rope woven in and out of the board, so that the appearance would be somewhat like that shown in Fig. 701. Bear in mind that the annual rings are layers of wood, so to speak, which may vary in thickness, growing around the heart. You will see that these layers, or rings, as they dip below or rise above the surface of the board, will cause the grain to form[530] various patterns, perhaps somewhat as shown in Fig. 701, which makes no claim to accurately showing the grain in this case. In fact, all such variations of grain in lumber are due to the surface of the piece being at an angle with the layers.

Fig. 700.

Fig. 701.
In addition, the knots caused by branches, the twisting of the stems screw-fashion (as is seen in cedar), wounds, and other causes, often produce very crooked and tangled grain, and the wood of many broad-leaved trees is sometimes extremely complicated in texture, especially when all these irregularities occur in the same piece. It is the nature of some kinds of mahogany, from whatever cause, to have the fibres strangely interlaced or running in very different directions in layers which are quite near each other.
The warping, twisting, and cracking is obviated in many cases where it is objectionable (as in the wooden frames of machines, the tops of benches) by building up with a number of smaller pieces, of which you will often see illustrations. To do this to the best advantage, the pieces should be selected and put together so that, though the grain will run in the same direction lengthways, the annual rings at the ends will not run together as in a whole beam, but will be reversed or arranged in various combinations, so that the tendencies of the different parts to warp or twist will counteract each other. Instead of a single board, which would naturally become warped in one large curve, a number of strips can be glued up with the grain of the strips arranged in alternate[531] fashion (Fig. 559), so that in place of one large curve the warping will merely result in a slightly wavy line.
Where but one side of a board is seen or used and where the full strength is not needed, warping and twisting can be largely prevented by lengthways saw-cuts on the back or under surface, as in a drawing-board, the crossways strength required being secured by the cleats. Doors and most forms of panelled work also illustrate these matters of swelling and shrinking (see Doors and Panels).
Fig. 702.
Shakes.—Heart-shakes are cracks radiating from the centre in the line of the medullary rays, widest at the pith and narrowing toward the outside, and supposed to be chiefly caused by the shrinkage of the older wood due to the beginning of decay while the tree is standing (Fig. 702). Slight heart-shakes are common, but if large and numerous or twisting in the length of the log, they injure the timber seriously for cutting up.
Fig. 703.
Star-shakes are also radiating cracks, but, unlike the heart-shakes, the cracks are widest at the outside, narrowing toward the centre (Fig. 703), and are often caused by the shrinkage of the outer part due to the outside of the tree drying faster than the inside, as it naturally does from being more exposed after being felled; but they are sometimes owing to the beginning of decay and other causes.
Fig. 704.
Cup-shakes are cracks between some of the annual rings, separating the layers more or less (Fig. 704), sometimes reaching entirely around, separating the centre from the outer portion, and are supposed to be caused by the swaying of the tree in the wind (hence sometimes known as wind-shakes), or to some shock or extreme changes of temperature, or other causes.
Combinations of the various shakes may be found in the same log.[532]
A Few Suggestions about Working-Drawings.—Drawing is far too extensive a subject to be even briefly treated in a manual on wood-working, but a few general remarks on matters connected with working-drawings may be of help to some.
While an ordinary picture gives a correct idea of how an object looks, we cannot take accurate measurements from it. When we need dimensions, as in practical work, we must have some drawings which will show us at once the exact shapes, sizes, and positions of the various parts. In addition to the picture to give us the general idea, we have for working purposes what are called elevations, plans, sections, etc.
In such a case as that of the little house shown on page 242, the picture (Fig. 363) shows us the appearance of the building, but for purposes of construction, working-drawings should also be made. The view of what you would see if you stood directly in front of this house, with only the front visible, is shown in Fig. 364, and is called the front elevation. Stand opposite either side or end, and the view seen is represented in Fig. 364 as the side elevation. In the same manner the rear elevation is given. Next imagine yourself in the air directly above the house. This view is called the plan.[53] In this case, as the view of the interior is desired, the view is shown as if the roof were removed. If the sides or ends are not alike, as is sometimes the case, two side or end views may be needed. In the case illustrated, inside elevations are also given, to show the construction.[533]
Elevations, whether one or several, must always be taken at right angles to the plan. Although commonly, in simple work, confined to representations of each side or end, they can be taken from any point of view that may be at right angles to the plan. They may be taken from the corners or at any angles that may best show any complicated details of the object. If the object is quite simple, one elevation and the plan, or two elevations without the plan, may be quite sufficient, as the elevation or plan omitted can in such cases be understood at once.
Always make your drawings full-sized when the object to be made is not too large. You are much less likely to make mistakes in taking your dimensions and measurements from a drawing the actual size of the object than where you have to take them from a smaller drawing, and you also can get a better idea from a full-sized drawing just how the object will look. It is a safe-guard, with a drawing which is symmetrical, to lay it out from a centre line, measuring to the right and left.
If you make a drawing of which each line is one half the length of the same line in the real object, it is called a "half-size" drawing, and is said to be drawn on a scale of 6" to the foot. If "one fourth size," the scale is 3" to the foot. The scale is often expressed as an equation, viz.: 2 in. = 1 ft., or ¼" = 1'.
If the drawing is not made with accuracy, it is necessary to put the dimensions upon it, and this is often done for convenience and quickness of execution in the case of drawings which are accurate.
Details inside of an object, that is, such parts as cannot be seen or properly shown in the elevations or plan, are often shown by dotted lines, as in Fig. 597. Sometimes dotted lines are used in the same way to show the back of an object, to save making extra drawings. Too many dotted lines, however, are confusing, so if the parts that do not show on the surface are not quite simple and cannot be clearly shown by dotted lines on the plan and elevations, it is usual to make another kind of drawing especially to show such details. This is called a "section" (Lat., sectio,[534] from secare, to cut), and represents what would be shown if the object were cut apart or sawed through at the place where the view of the details is wanted. The surface supposed to be cut is usually indicated by parallel lines crossing the surface, independent parts, as those of different pieces, frequently being shown by changing the direction of the parallel lines, as in Fig. 504.
When both sides of an object are alike, labour and space are often saved by making a drawing of one side or one half only, from a centre line. The same way is sometimes adopted in making sections, and an elevation and section can sometimes be combined in this way in one drawing.
As soon as you become used to plans and elevations, you can by combining the plan and elevations in your mind quickly imagine the form of the object represented, and often, unless it is complicated, get fully as good a conception of it as from a picture, and a more accurate knowledge of its proportions and details, so that in many cases there is no need of having a picture at all in order to construct the object. It is often a convenience to have a picture, however, and frequently an assistance in forming a correct idea of something you have never seen. Where the appearance of the object is of consequence, as in the case of a house or bookcase, for instance, the picture is of the first consequence, for you must have a correct representation of the general appearance of the object before you begin to make the working-drawings. You will soon find that merely having an idea in your mind is not always sufficient from which to make working-drawings, although the first step in the process. You will often find that when the idea in your mind is put into the form of a picture, it does not look at all as you thought it would, and that if you had started at once on the working-drawings without first making a sketch or picture, the result would have been unsatisfactory and sometimes entirely impracticable.
Even making a sketch or picture that just expresses your idea will not always result in the completed object being just what[535] you wish. Strange though it may seem, it is a fact, practically, that the completed object often looks quite different from what the sketch leads you to expect. That result, however, is something which cannot be helped, so you need not give it any attention, only do not be surprised if once in a while you find that what you have made is not just what you thought it would be. First make the best design you can, then accurate working-drawings, then work carefully by the drawings, and if the result is not always exactly what you expected, you can console yourself with the thought that your experience is only that of architects, designers, carpenters, and workmen in all lines, and that no one can foresee all the conditions by which a piece of projected work will be affected.
Oblique or parallel projections are often used, from which measurements can be made. Such projections are not true representations of the objects as they appear to the eye, but they are often used because readily understood and easily drawn. They often answer every purpose from a practical point of view. Figs. 120 and 344 are examples.
Another way of representing objects for practical purposes is that shown in Figs. 121 and 407, and known as "isometric[54] projection" or "isometric perspective." This method is incorrect so far as giving an accurate picture is concerned, for the object is always represented as being too large in the farther parts, because the inclined lines are drawn parallel instead of converging; but it is often very useful from a practical point of view, because by it all that is required can frequently be expressed in one drawing.
Isometric perspective will not readily give the correct dimensions except in the lines which are vertical or which slant either way at an angle of 30° with the horizontal,—i.e., you cannot take the other dimensions right off with a rule as from a plan, and therefore, so far as obtaining correct dimensions is concerned, it is practically not useful for other than rectangular objects; but[536] so far as merely showing the general shape or conveying the idea of the form it can often be advantageously used in representing many objects containing curved lines. Isometric projection has the advantage of being easy of execution, and of being so pictorial that it is almost always easy to see what is meant.
A First-Class Bench.—The construction of the bench shown on page 101 is not difficult to understand, but considerable skill is required to make a really good one. The arrangement of the vise is shown in Fig. 705, which is an inverted view (as if looking up from underneath). The vise is kept parallel by the stout bars of hard wood, parallel to the screw, which slide through mortises cut in the front of the bench-top, and are further guided by the cleats screwed to the under side of the top, where it is thinner than at the front edge. In case of using such a vise where the bench-top is not so thick in front, the thickness can easily be made sufficient by screwing a stout cleat on the under side where the vise comes. In this cleat can be cut the mortises for the slide-bars. The end-vise or "tail-screw" shown in Fig. 143 involves rather more work, but slides upon a similar principle. Perhaps the best way for the amateur is to make the end-vise in the same way as the main vise, adding the movable stop.

Fig. 705.
There is no better way to make the front of this bench-top than to build it up of narrow boards on edge, planed true, and thoroughly glued and bolted together. The planing and truing can best be done by machine, however. If well put together, such a bench-top will defy changes of weather and will stand a great deal of hard usage. The back part of the top can be thinner, but can very well be built up if desired. An excellent way to[537] fasten the frame of such a bench together is with bolts, by which the parts can be drawn to a firm bearing.
It is impossible to make such a bench too rigid. If so stiffly framed that it cannot change its shape, and if the top is carefully trued, you will have something which will be a great help to good work.
[1] These criticisms are meant to apply to the class of manuals, compendiums, and so-called "Boys' Books" and "Amateurs' Books," in the popular sense of the word, and not to the many admirable works on sloyd, manual training, and the various special branches of wood-working.
[2] An old gentleman whose help, on account of his accurate workmanship, I once frequently obtained when "rushed," was an extreme example of this systematic way of doing work. I would give him perhaps three hours' work, which he would agree to have done at the end of that time. Looking in after an hour or so I would find the work apparently untouched, which was a little provoking, of course, as the average workman would have had it perhaps one third done. But instead, this old gentleman would be apparently only "puttering around," touching up his saws, fixing his planes, whetting his chisels, looking over the wood, and not getting ahead a bit. Going off in disgust (until I got acquainted with his ways, I mean), I would return at the end of the three hours, to find that the work had been ready some time and done to perfection. While he was at first apparently accomplishing nothing he was really getting everything in perfect shape to do the work and laying out in his mind every detail of the whole process, so that when he began the actual work it almost did itself, and he forged right ahead of the average workman, who would either have been behind time or slighted the work in order to get it done, and in most cases have made some mistake to be corrected in some part of the process. I never knew that man to make a mistake. Why? Not because his ability was extraordinary, but because he concentrated his mind on the work and thought it out clear through before he began. Now I know the average boy too well to expect him to have the patience to do just as this workman did. It would be unreasonable. But it is the true way to do good work, so try to think it all out as far as you can and to get ready before you begin. The work will go ever so much more quickly and easily.
[3] "It has been said that the snow-shoe and canoe as made by the Indians could never be improved. To these might be added the split birch broom, or splinter broom, also the invention of the Indians, but made in every country household in New England in Colonial days. The branch of a large birch tree was cut eight feet long. An inch-wide band of the bark was left about eighteen inches from one end, and the shorter and lower end was cut in fine pliable slivers up to the restraining bark band. A row of slivers was cut from the upper end downward, turned down over the band, and tied firmly down. Then the remainder of the stick was smoothed into a handle. These brooms were pliable, cleanly, and enduring, and as broom-corn was not grown here until the latter part of the past century, they were, in fact, the only brooms of those days. They were made by boys on New England farms for six cents apiece, and bought by the country storekeepers in large numbers for the cities' use."—The Chautauquan.
[4] Quoted, by kind permission, from Turning and Mechanical Manipulation.
[5] Quoted, by kind permission, from the valuable and entertaining work on Japanese Homes and their Surroundings (copyright. 1885), by Edward S. Morse.
[6] If you are so situated, as possibly a few of you may be, that you cannot get the benefit of modern methods, but must do all the rough work that your grandfathers did, you will require a few additional tools, but these you can readily select from the descriptions given farther on.
[7] There are many reliable makers of tools. Among them the following can be named, and their tools can be obtained almost anywhere: Saws—Henry Disston. Chisels and gouges—Moulson Bros.; Buck Bros. Planes—Stanley; Moulson Bros. (plane-irons); Wm. Butcher (do.); Buck Bros. (do.) Files—P. S. Stubs. Rules and squares, levels, gauges, spoke-shaves, etc.—Stanley Rule & Level Co. Braces—Barber. Bits—Jennings. Knives (sloid)—Taylor. Carving tools—Addis; Buck; Taylor.
[8] So called because in the common trees of temperate climes one layer is added each year.
[9] Although the shrinkage lengthways is not usually noticeable as affecting the length of a board, it shows slightly by its effect in causing the pieces to spring, or become bowed lengthwise, as you will see in many boards which have been left free to spring while seasoning.
[10] In addition to the curling, the outer boards will be poorer because they contain a greater proportion of sapwood, which is usually inferior to the heartwood.
[11] By this is not meant the figure or flashes shown by the medullary rays, or "silver grain," seen in quartered oak and some other woods, but the figure of the grain without the medullary rays, as seen in plain oak, etc.
[12] The forests of North America, exclusive of Mexico, are now believed, according to Sargent, to contain four hundred and twenty-two species of plants, besides numerous varieties, which can fairly be considered trees.
[13] The peculiarity of the wood is that the water is not simply drawn in to fill up what we call the pores, as in chalk or any ordinary porous inorganic substance, but enters into the very fibre of the body, forcing apart the minute solid particles with an extraordinary force which does not seem to be fully understood.
[14] If you can afford to buy one ready made, you cannot do better than to begin with such as are sold for sloyd or manual-training schools, but do not get a very small one unless you are only going to do very small work. Get one as large as you can afford. A second-hand bench can often be bought for a small sum, but be sure that it is firm and steady.
[15] The reason for making this bench 5' 10" long, instead of cutting a 12' board into two lengths of 6' each, is that it is hard to get boards sound and square at the ends, and so it is best to allow a few inches for waste. Of course your bench can be of any desired length. Six or eight feet is suitable for ordinary work, but there is no objection to making it as much longer as your space and material will admit. The height should bear a proper relation to the height of the workman. No definite height can be given. Try moving a plane back and forth. If your right elbow, when holding the plane, is slightly bent and your back about straight, the height will be not far from right. Do a little simple work at a table, trying different heights, and you can soon tell what will be satisfactory. If the bench is too low, you cannot manage your work well and your back will get tired from bending over, not to speak of becoming round-shouldered. If the bench is too high, it will be hard to manage your work, you cannot plane well, and your arms will be tired from holding them up unnaturally high. A bench for heavy work like carpentry is usually rather lower than one for cabinet-or pattern-making, while a carver's bench is usually higher.
[16] This vise is fitted slanting, so that the slide at the bottom comes on the outside of the leg and at the same time in the centre line of the movable jaw in line with the screw. A common form has the movable jaw upright, the sliding bar being mortised into it and sliding through a mortise cut in the leg, as shown in Figs. 56 and 57. If you wish to make this kind, study Mortising, in Part V., and lay out and cut the mortise in the leg before nailing the cross-board to it (Figs. 41 and 42). This is the most difficult part of the bench to make nicely, and you can spend a good deal of pains upon it. If you have not yet the proper tools to make this mortise you can mark it out and have it cut for a very small sum at a wood-working mill or shop. When nailing the cross-board upon the legs, bear in mind to put this leg in the right place. Fig. 58 shows a simple arrangement with an additional post, or two posts can be put together and one half the notching done in each (Fig. 59).
[17] In case your bench is in the house and you wish to deaden the sound and vibration from your work you can put rubber cushions under the legs.
[18] Fig. 112 shows a nicer pair of horses. Take two pieces of pine, or any wood not likely to warp, 2" × 3" (or 4") × 2½' or 3', mark with rule, square, and gauge (see Gauge), and cut with saw and chisel the shallow gains (Fig. 113) for the legs. Make them the same depth at the top as at the bottom (Fig. 114), and clean them out as accurately to the lines as you can. Get out eight legs, and regulate their length as before. Saw the upper ends on a bevel (Fig. 114) corresponding to the slant they are to have. Nail or screw them in place. You can glue the joints for additional strength. Fit on cross-pieces and finish the work as described above. If you ever need horses for very heavy work you can make the legs of plank or joist with the tops cut like Fig. 115.
[19] You can attach your windmill to a building or set it up on a pole, or you can easily make a small trestle-work tower, built of small sticks, on the top of which you can place the windmill, with a small keg (to represent a hogshead or tank), and thus have a very good imitation of the large mills used for pumping water. Small windmills, if you wish to go further into the subject than comes within the scope of this book, can be used to do any light or "play" work by having them turn a bent shaft (or any eccentric movement), connecting with a piston-rod or revolving drum; or various other attachments can be applied, according to your ingenuity.
[20] All of this work can be done cheaply at any mill, leaving the rounding or bevelling of the edges and the bending of the ends for you to do yourself, and for that matter the rounding or bevelling can be done by machine.
[21] Mrs. Alec Tweedie says of the way skis are worn in Norway:
"The toes are fastened by a leather strap. Another strap goes round the heel in a sort of loop fashion, securing the foot, but at the same time giving the heel full play. A special ski boot is worn over enormously thick horsehair stockings. This boot has no hard sole at all, and, instead of being sewn at the sides, the large piece of thick leather which goes under the foot is brought well over the top and secured to what might ordinarily be called a leather tongue. At the back of the boot is a small strap, which is used to fasten the ski securely to the boot. Once fixed on the ski, the boot is so secure no fall can loosen it, and the only way to extricate the foot is to undo the three straps."
[22] Various contrivances for steering with a wheel or cross-bar are sometimes used. These work well if properly attached, and for reasonably safe coasting can be recommended, but where a "spill" is likely to occur, it may be well to consider the chance of being injured by these obstructions in front of the steersman.

Fig. 249.

Fig. 250.
Fig. 251.
Fig. 249 shows the king-post squared at the lower end (and tapering) to be fitted to a tapering mortise in the cross-cleat of the forward sled and held down by the screw and nut at the extreme end. A wheel is attached to the upper end. Any blacksmith can make an arrangement like this, or the bottom of the king-post can be split (Fig. 250) and screwed to the front sled, and the top can be made with a bar instead of a wheel (Fig. 251).
[23] You can get this height by taking two sticks whose combined length is somewhat greater than the height of the room. By letting the ends lap over one another in the middle, the sticks can be slipped along on each other until they just reach from floor to ceiling. Hold them tightly together (or fasten them with a clamp) when in this position and you will have the exact length required.
[24] This method of putting in a back answers very well for the beginner, and is often used in cheap work, but, unless quite small, the really workmanlike way is to make a panelled frame, which is screwed in place as one piece. The degree to which the panelling is carried depends upon the size and shape of the back. When you become able to make your work more neatly and accurately than can be expected of the beginner, you will do well to construct the backs in this way, but it involves much more labour and is hardly worth while for such simple work as you will do at first.
[25] A more workmanlike way is to work all such mouldings on the edge of the top, making it as much thicker as may be required, thus avoiding putting on the moulding across the grain of the piece to which it is fastened, which is not a scientific form of construction; and for that matter it is a more thoroughly workmanlike way to work all mouldings on the solid wood.
The top can be made of two thicknesses, the moulding being worked on the edge of the under piece before the two are glued together. Various forms of moulding can be worked on the edge by a moulding machine at almost any wood-working mill.
[26] See footnote on page 198.
[27] Still another way sometimes used for model yachts is to build the hull much in the same way that a real vessel is built—making a framework or skeleton and covering it with little planks, but this method (though a good one in some respects) requires more skill than can be expected of the average amateur, and this mode of construction should not be attempted until you become a skilful workman and accomplished in the building of regular model yachts.
If your boat is quite small it will probably be easier and better in most cases to cut the hull from a solid block; but if much more than two feet in length it is usually better to build it in layers.
Either of these methods can be used in any case, but for a small boat the building in layers is more difficult, while for a large one it is hard to find a block that will be sufficiently free from defects.
[28] In making the plans for a boat, three views are usually drawn, known as the sheer plan, the body plan, and the half-breadth plan. These correspond to the "front or side elevation," "end elevation," and "plan" in ordinary drawings, and give side, end, and top views of the boat,—or of one-half of it, which is all that is needed, as the sides are of course alike. Several equidistant horizontal lines are drawn across the plans. One of these represents the line of the water when the boat has its proper load. It is called the load water-line. The other lines being parallel to it represent other imaginary levels, at equal distances apart—like the lines which would be made by the water if the boat sunk deeper or floated higher. Other lines are also added to show vertical and horizontal, longitudinal and cross-sections, at regular intervals, and also other longitudinal sections, but these details you will find fully described in works on yacht-(and model yacht-) building.
[29] The fin can be cut from sheet metal (brass or sheet-iron) and inserted in a thin saw-kerf cut exactly in the centre of the bottom, being set in thick white lead, or it can be riveted to thin plates screwed to the bottom of the boat, or lips can be bent over alternately on either side of the upper edge of the fin and screwed to the bottom.
The amount of lead required for the bulb at the bottom of the fin can be determined by loading the hull with weights until it is sunk to the water line. The weights will, of course, represent the weight of lead required. This can be cast in a mould and riveted to the bottom of the fin.
[30] To find the number of square feet in the cleats, first find the number of "running" feet, that is, the total length of the cleats if they were stretched out in a long line, like one of the rails of a railroad track. Then, as the cleats are 3" wide (or one fourth of a foot), it will take four running feet to make one square foot. Therefore divide the number of running feet by four and the quotient will be the number of square feet.
[31] Boards twelve feet long will be the best to buy for this house, because you can get two lengths from each board without waste. You could not be sure, however, of getting two lengths of exactly six feet from each twelve-foot board, because the ends are frequently checked or damaged in some way; so it will be safest to make the length 5' 10", as given above.
[32] If you have only small stones or blocks upon which to rest it, the building can be put together directly upon the ground, the sills being rested temporarily upon any material at hand, and then the supports adjusted underneath.
[33] You can mark a point on one string 3' from one stake and a point on the other string 4' from the same stake, and then increase or decrease the angle made by the two strings until another string exactly 5' long will just reach from the marked point on one string to that on the other. This process is based on the principle of mathematics that if the two sides of a right-angled triangle are respectively 3 units and 4 units in length, the length of the hypothenuse will be 5 units. Another way, if you are fond of mathematics, is to find the length of the diagonals of the plan of the house by extracting the square root of the sum of the squares of the two sides. (The square described on the hypothenuse of a right-angled triangle is equal to the sum of the squares described on the other two sides.) You can measure the diagonal directly from a plan if you understand mechanical drawing well enough to make an accurate plan on a scale of perhaps ½" or 1" to a foot. Then take one tape, or string, measuring the width of the building, with one end held on the stake C (Fig. 387), and another tape measuring the length of the diagonal, with the end held on the stake D. Drive the stake A at the point where the two tapes meet when brought together. Reversing the positions of the tapes will give in the same way the fourth corner B. The distance A B should equal C D.

Fig. 387.
[34] The part of the post which is embedded in the ground is sometimes charred or painted to preserve it from decay. This can be easily done, but the process is advisable only with thoroughly seasoned wood. It is highly injurious to green timber, as by closing the pores and obstructing evaporation from the surface it prevents the seasoning of the wood and causes fermentation and decay within (see Appendix).
[35] These posts, and even the sills, can be built up if necessary of 2" × 4" studding, two pieces being placed side by side and nailed together, but this is not so desirable as regards strength, its only advantage consisting in the readiness with which the joints can be made by simply cutting one of the two pieces shorter than the other.
[36] Obtained through the courtesy of Mr. Charles H. Bradley, Superintendent of the admirable Farm School on Thompson's Island, in Boston Harbour, where this little village was built.
[37] If that is too expensive, some of those given in the preceding pages will probably answer your purpose.
[38] "Soils which are naturally porous, from which rain rapidly disappears, are known to be the healthiest for the sites of houses. In this the action of the soil oxidizes all organic impurities, the resulting product is washed away by the rain, and the soil remains sweet and wholesome."—Latham.
[39] To find the number of steps for a given situation, find the height, as just shown, from floor to floor, 102" for example. Assume, for trial, a satisfactory height for each step, as 7". Divide 102 by 7, which gives 144/7 for the number of steps. To make the number even, call it 14, and you have only to divide 102 by 14 to get the exact height of each step.
[40] Unless too heavily loaded, a canvas-covered canoe will float in case of a capsize, but some form of air-chambers is desirable and a safe precaution in any small boat. It is hardly safe to rely upon your ability to build water-tight compartments in the ends of canvas (or wooden) boats, as is sometimes recommended—that is, as a part of the regular construction of the boat. It is not easy for an amateur to do this. It is better to have the air-tight compartments made separately and independent of the boat itself. Copper boxes or air-tanks fitted to the space at the ends are the best and the only really reliable expedient, but they are expensive. Light wooden boxes covered with canvas and thoroughly painted can be used, as well as galvanised boxes or even varnish cans sealed and painted. Any such contrivance can be made tight at first, but is always liable to become leaky (except by the use of copper tanks), particularly as it is usually concealed from examination.
[41] Mortise-chisels with great thickness of blade (Fig. 486) are not likely to break, and the width of the sides bearing against the sides of the mortise tends to make the cutting more accurate.
[42] You may be told that perfect joints do not require much clamping, but a perfect joint is impossible, and as a practical matter, only the skilled workman or the most accurate machinery can make even a good joint of much length, so great is the difficulty of avoiding little inaccuracies. Besides this, there is always the liability to more or less springing or change of shape on the part of the pieces. The joint which was good when you stopped planing may not be as good by the time the glue has set, particularly if the gluing does not immediately follow the jointing. In addition to this, the pressure from clamping at only one or two points, or at points too far apart, may force the joint to open elsewhere. Do not infer from this that even the beginner should be content with a poor joint, with the idea that it can be squeezed and jammed to a sufficiently good fit by applying muscle to the clamps. Of course this jamming or mashing of the fibres to fit occurs, to a microscopic degree, in even the best joint, and it can sometimes be done to a perceptible extent with soft wood, but to do this intentionally is very unworkmanlike, and the greatest care should be taken to make as good a joint as possible before gluing and applying the clamps. Do not, however, flatter yourself that you can make so accurate a joint that you can afford to neglect proper clamping, unless, in such cases as that shown in Fig. 488, you adopt the old-fashioned way of rubbing the two edges together and then leaving the rest to the glue, but this is not so good a process for the beginner, except with small pieces, such as corner-blocks (see Corner-blocks). See Jointing.
[43] Shellac is, strictly speaking, a kind of varnish, but it is so different from many kinds of varnish in common use that it is quite commonly spoken of as shellac, in contradistinction from what is popularly known as varnish, and the term is so used here.
[44] In shell acing doors or panel work, first shellac the panels, then the rails, and finally the styles (see Fig. 505), because daubs or runs can be wiped off and covered better when you thus follow the construction of the work.
[45] As an extreme illustration, it may be interesting to note the way the best lacquer work (which is so durable) is made by the Japanese, an article being given, as Professor Morse tells us, one coat a year, the finest work having twenty-one coats and the artist rowing out to sea for miles each time to make sure that all dust is avoided.
[46] Two pieces properly glued are often stronger than one solid piece—that is, the glued joint is stronger than the wood itself, as you will probably discover some day when you have occasion to break apart a piece of good gluing; but after a long time the glue is apt to deteriorate in adhesive or cohesive force, particularly if the joint has not been protected by paint or varnish, so do the best work you can if you wish it to last. Nevertheless, in important work it is usually safest to take a whole piece when you can, rather than glue up two or more pieces, except in cases, perhaps, where the matter of warping, etc., is concerned, when it may be better to build up the desired shape of pieces selected for the purpose.
[47] It may be useful to know, although not suitable work for the beginner, that there is no better way to joint edges (to make glued joints, as in Fig. 552) than with a first-class circular saw, run by one who knows how to use it. The minute roughnesses left by the saw assist the glue to hold, and as inconspicuous and strong joints as possible can be quickly produced in this way by a good workman with a first-class saw, but do not expect a satisfactory result except under these conditions.
[48] This seems to be the common opinion among experienced men. There are, however, many painters of experience who prefer the prepared liquid paint for outside work, and it certainly saves trouble.
[49] It is not a good plan to wipe brushes on the sharp edge of a tin can, as it injures the bristles.
[50] Another method of doing this is to find a true surface to stand the legs on and measure the distance the free leg rises from the surface—1" for example. Do nothing to that leg, of course, or to the one diagonally opposite, but saw ½" from each of the two other legs. Suppose, for example, the legs a, b, and c touch (Fig. 669), and d rises ¾" from the floor. Make a and c each 3/8" shorter. Of course you cannot hit it exactly by this method, but a few strokes of a tool will finish the work.
[51] In elm, ash, and hickory the sapwood is sometimes considered better than the heart.
[52] The term deal, though often loosely applied to the wood of the pine and fir, properly refers to planks of these woods cut more than 7" wide and 6' long—usually 3" thick and 9" wide. The term is common in Great Britain but not in the United States.
[53] This definition of elevations and plan as being representations of what you would see if you stood opposite the sides or above the top of the object, is merely a rough explanation of the general meaning of the terms. As a matter of scientific accuracy the elevation is, strictly speaking, not the way the side would appear if you looked at it from one position, but the way it would appear if you could look at it from directly opposite every point of it—as if you could have an infinite number of eyes, one being opposite every point of the object. The elevation shows the front or side or end as it really is, not as it looks, either in the form of an exact copy if the object is small, or of a small copy made in the same proportion if the object is too large to be represented full size.
[54] Gr., equal measure.
The Boy with an Idea Series.
I. The Young Mechanic. Practical Carpentry. Containing directions for the use of all kinds of tools, and for the construction of steam-engines and mechanical models, including the art of turning in wood and metal. By the author of "The Lathe and its Uses," etc. Authorized reprint from English edition, with corrections, etc. Illustrated, small 4to, cloth extra $1 75
"A valuable book, eminently useful to beginners, and suggestive even to the experienced and skilful."—Albany Journal.
II. Amongst Machines. By the author of "The Young Mechanic." Embracing descriptions of the various mechanical appliances used in the manufacture of wood, metal, and other substances. Profusely illustrated. 8vo, cloth $1 75
"A book of wondrous fascination, written in a clear, bright, pointed style. A volume to be commended above a dozen stories."—Boston Traveler.
III. The Boy Engineers. What they did and how they did it. By the author of "The Young Mechanic." 8vo, with 30 plates, cloth extra $1 75
"An eminently useful and timely book. We heartily commend this volume."—National Journal of Education.
"A book of a class that can only be praised; the style is simple and easy, but manly and thoughtful."—Literary World.
IV. The Boy with an Idea. By Mrs. Eiloart. A vivid narration of the feats and freaks of a boy of an active turn of mind, who "wanted to know," and not content with knowing, wanted always to do. 8vo, cloth extra, illustrated $1 50
"An exceptionally attractive and wholesome book, that will fascinate all the bright boys, and stir up the dull ones."—Boston Journal.
V. Learning to Draw; or, The Story of a Young Designer. By Viollet le Duc. Translated by Virginia Champlin. 8vo, with 130 illustrations $2 00
A work full of practical suggestions, not only for the student of art or of decorative designing, but for students and teachers in other departments. The author's theories of the art of teaching are both original and practical.
G. P. PUTNAM'S SONS, Publishers, New York.
Books for the Country
OUR INSECT FRIENDS AND FOES. How to Collect, Preserve and Study Them. By Belle S. Cragin. With over 250 illustrations. 8o, $1.75
Miss Cragin sets forth the pleasure to be derived from a systematic study of the habits of insects, and gives many points which will be of practical value to the beginner. She gives comprehensive descriptions of all the more important species to be found in the United States, together with illustrations of the same.
AMONG THE MOTHS AND BUTTERFLIES. By Julia P. Ballard. Illustrated. 8o, $1.50.
"The book, which is handsomely illustrated, is designed for young readers, relating some of the most curious facts of natural history in a singularly pleasant and instructive manner."—N. Y. Tribune
BIRD STUDIES. An account of the Land Birds of Eastern North America. By William E. D. Scott. With 166 illustrations from original photographs. Quarto, leather back, gilt top, in a box, net, $5.00.
"A book of first class importance.... Mr. Scott has been a field naturalist for upwards of thirty years, and few persons have a more intimate acquaintance than he with bird life. His work will take high rank for scientific accuracy and we trust it may prove successful."—London Speaker.
WILD FLOWERS OF THE NORTHEASTERN STATES. Drawn and carefully described from life, without undue use of scientific nomenclature, by Ellen Miller and Margaret C. Whiting. With 308 illustrations the size of life. 8o, net, $3.00.
"Anybody who can read English can use the work and make his identifications, and, in the case of some of the flowers, the drawings alone furnish all that is necessary.... The descriptions are as good of their kind as the drawings are of theirs."—N. Y. Times.
THE SHRUBS OF NORTHEASTERN AMERICA. By Charles S. Newhall. Fully illustrated. 8o, $1.75.
"This volume is beautifully printed on beautiful paper, and has a list of 116 illustrations calculated to explain the text. It has a mine of precious information, such as is seldom gathered within the covers of such a volume."—Baltimore Farmer.
THE VINES OF NORTHEASTERN AMERICA. By Charles S. Newhall. Fully illustrated. 8o, $1.75.
"The work is that of the true scientist, artistically presented in a popular form to an appreciative class of readers."—The Churchman.
THE TREES OF NORTHEASTERN AMERICA. By Charles S. Newhall. With illustrations made from tracings of the leaves of the various trees. 8o, $1.75.
"We believe this is the most complete and handsome volume of its kind, and on account of its completeness and the readiness with which it imparts information that everybody needs and few possess, it is invaluable."—Binghamton Republican.
G. P. PUTNAM'S SONS, 27& 29 West 23d St., New York
Obvious punctuation, spelling and hyphenation inconsistencies have been corrected. In ambiguous cases, the text has been left as it appears in the original book.
