This eBook is for the use of anyone anywhere at no cost and with almost no restrictions whatsoever. You may copy it, give it away or re-use it under the terms of the Project Gutenberg License included with this eBook or online at www.gutenberg.org
Title: Home Occupations for Boys and Girls
Author: Bertha Johnston
Release Date: May 10, 2012 [eBook #39663]
Language: English
Character set encoding: ISO-8859-1
***START OF THE PROJECT GUTENBERG EBOOK HOME OCCUPATIONS FOR BOYS AND GIRLS***
| Note: | Images of the original pages are available through Internet Archive. See http://archive.org/details/homeoccupationsf00johniala |
FOR
BOYS AND GIRLS
BY
BERTHA JOHNSTON
EDITOR OF THE "KINDERGARTEN MAGAZINE"
ASSISTED BY
FANNY CHAPIN
FORMER KINDERGARTEN DIRECTOR OF THE CHICAGO LATIN SCHOOL
PHILADELPHIA
GEORGE W. JACOBS & CO.
PUBLISHERS
Copyright, 1908
By GEORGE W. JACOBS & CO.
Published October, 1908
All rights reserved
Printed in U. S. A.
Teach him. He is naturally clever. From his earliest years, when he was a little fellow only so big, he would build mud houses, carve out boats, and make little wagons of leather, and frogs out of pomegranate rinds, you can't think how cleverly.
Aristophanes, 421 B. C.
The plan of this book has special reference to the Mother when comes the woful plaint, "I don't know what to do! Mama, what can I do now?"
Is she busy in the kitchen? She has right there material for the little one's happy employment. Is she mending the stockings? She can give him needle and thread and, with the aid of this book, a word of suggestion. In spare moments both mother and children can together prepare papers, cards, etc., for future occasions.
It will be found upon examination that although some of the articles described herein require material peculiar to certain localities, very many more may be made of things to be found in every home, whether the city flat or the remote country homestead. Usually a choice is possible. One may use the cardboard, paper, etc., saved from the scrap-basket or may send to supply houses for material partially prepared. It is an undoubted advantage for the child to be trained to see the possibilities in the raw material lying at hand. It stimulates his inventive imagination and makes for efficiency and the power to cope with emergencies.
The child accustomed to looking upon odds and ends of wire, paper, weeds, seeds, and grasses as hiding delightful secrets which he may learn to unravel and utilize, may be readily trained to regard all Nature as a vast storehouse open to his investigation, and a continual source of inspiration.
The child, habituated to mastering the raw material of his immediate environment, will not be discomfited if thrown upon an unknown shore, whether arctic or tropical. He will recognize everywhere about[Pg 6] him possibilities for shelter, food, clothing, and transportation and will know how to use them.
But the child must be trained to perceive the beautiful and the ideal as well as the useful. Into each article here described, even the simplest, enter the elements of beauty, proportion, harmony of line and color, and good, true workmanship, leading surely, even if unconsciously, to an appreciation of the best wherever found.
In making an article as a gift for child or adult, thought for others is cultivated and the frequently needed help of older brother or sister encourages the spirit of goodwill and kindliness.
The festival occasions are especially valuable in developing the sense of interdependence and large-mindedness.
Among a people proverbially wasteful it is certainly the part of wisdom to train the child to economy for the sake of future service. The contents of the city garbage barrel are found by business men to be worth sorting and classifying and everything proves to be of some use. Why should not the child be taught, before throwing away the discarded picture book, to ask if there is not a use for it still? A nation so trained will preserve its forests and save its Niagaras. It will see things material and things spiritual in their true relations.
We would suggest that a little cupboard be placed within easy reach of the child. Here he may keep his own scissors, paste, pencil and papers, ready for use when the propitious moment of inspiration seizes him.
Too much exactness must not be required of the very young child, but as fast as he is able to do good work insist upon the best of which he is capable. Train [Pg 7] him always to try to surpass himself. Above all, let him be happy in the doing.
The ideas offered in this volume have been garnered from various sources. Practical experience in the home has suggested many, and actual daily work in the kindergarten has given rise to others. A few, such as the thimble biscuit party and croquet with peas, are among the recollections of happy childhood.
It is a pleasure to acknowledge the obligation to Miss Fanny Chapin, of Chicago, a kindergartner of long experience, for the comradeship of thought which made the book possible. Miss Chapin also contributed the directions for making feather flowers, many of the holiday suggestions, and other items scattered through the book.
The conversion of corks into a set of furniture was learned from a German playmate twenty-five years ago. Imagine the interest with which we discovered a set, almost identical, at the German exhibit of the recent International Kindergarten Union.
The candlesticks of tin or cardboard, brightened with colored tissue-paper, varied to suit particular occasions, is a regular feature of the festival dinners at the Gertrude House, Chicago.
To one and all to whom, consciously or unconsciously, we may be indebted for any suggestions, we express our thanks.
A perusal of this little volume will show that it is far from exhaustive of the topics treated. It is largely a book of suggestion. If it stimulates the child to new investigations and experiments along similar lines; if it reinforces the spirit of brotherly kindness in the home; or if it helps to solve any of the problems of the mother, the hopes of the authors will be accomplished.
Bertha Johnston.
CONTENTS
| CHAPTER | PAGE | |
| I. | The Secrets of the Market Basket | 11 |
| II. | Mother Nature's Horn of Plenty | 39 |
| III. | Saved from the Scrap Basket | 53 |
| IV. | The Sewing-Basket | 69 |
| V. | The Paint Box | 73 |
| VI. | Dolls and Doll-Houses | 80 |
| VII. | Plays and Games | 92 |
| VIII. | Festival Occasions | 107 |
| IX. | The Key Basket | 141 |
| X. | The Child's Library | 149 |
| XI. | Kindergarten Materials—The Gifts | 155 |
| XII. | " " —The Occupations | 164 |
The busy but thoughtful mother will find in the contents of the market basket many possibilities for happily employing the creative instinct of her child. We give a few suggestions which demand activity of both mind and body.
Seed-Markers (No tools needed but the fingers)
Remove the rim of wood which binds the box into shape, that the little tacks may not injure the child. Then let him tear the sides and bottom into little slats which can be used as seed-markers. Older children can write upon them the names of seeds, and when planted put one of these slats into the ground to indicate where the seeds may be expected to come up.
The little child enjoys the sense of power that he feels simply in being able to tear these boxes apart, but let there be a thought back of the action if it seem to degenerate into pure destructiveness.
Toy-Fences (Employing fingers only)
Split the boxes with the fingers into pieces wide or narrow, as desired, and the slats thus made can be turned into fences for the play farm in the sand-box, or for borders for small flower beds. (1) Stick them into [Pg 12] the sand or earth side by side, to suggest a plain board fence; or (2) Put very narrow ones at short intervals apart to suggest a picket fence.
Toy-Fences (Scissors, tacks)
If old enough to use scissors, let the child cut the boxes apart with long scissors and use for fences as before. (1) Side by side for board fence. (2) Cut into very narrow strips for picket fence. Use the rim of the basket for the rail to unite the pickets, fastening them with the tiny tacks which are already in it. Pickets might be one inch apart. Cutting the tops of the pickets into points will complete the resemblance to a real fence. Put the rails about one-half inch from top.
Boxes for tacks, seeds, etc. (Scissors, paste, paste-sticks, ribbon, 8½ inches long, 1½ inches wide, wall-paper, pan with water)
Take two pieces of a box, each measuring 2 × 5 inches. Soak in water till soft. Place one directly across the middle of the other, and bend the four projecting ends up perpendicularly into box form. (1) Hold the sides in place by winding the ribbon around the four sides, till they meet, and paste the one overlapping end over the other. (2) Cut a piece of wall-paper (obtainable often from a wall-hanger's shop) into a strip 1½ × 8½ inches and wind around, pasting one end over the other. If the child is inexperienced the paper may be cut of exactly the height of box. If skillful in so doing, let him cut the strip ½ inch wider and turn down over the top to give a little finish. This gives practice in neatness and skill.
Let the child observe how a Swedish matchbox is made—the wood held together by strips of thin but tough [Pg 13] paper—and then carry his thought to the far-distant land which sends us the magic wands that give us light with safety. And all carried in a tiny box made of wood and paper. Decalcomanias might be used for decoration of the plain wooden box.
Let the child experiment in making boxes of different shapes and sizes for his collections of seeds, stones, etc. This cultivates his ingenuity and practical imagination.
Picture Frames (Scissors, thumb-tacks, gold paint, water-colors, glue)
Cut three slats, each 1 × 8 inches, to make triangular frame. Unite with thumb-tacks, one at each of the three corners. To place them exactly the right way may take a little experimenting, which helps develop the child's sense of proportion and arrangement. When joined, cut off the projecting parts at the top to give pointed effect. Good for pictures of Indians, as wigwam is suggested. Decorate by gilding or painting. Can be painted with Ivory paints or water-colors.
Chicken-Coops (Scissors, glue)
Remove the rim, bottom (in one piece) and two adjoining sides of a berry box. This leaves two sides remaining which are already bent into correct form for coop. Cut the bottom of the box in half from corner to corner. This gives the triangular back of the coop which must be glued on. The slats must now be made and put into place. Cut three slats each ⅜ inches wide. (1) In each of the two front edges of the coop cut three horizontal slits ⅜ inches deep; slip the slats into these and cut off the projecting ends. The slats at the top will necessarily be shorter than those [Pg 14] at the bottom. (2) Or an older child can cut in each of the two edges 3 notches ⅜ inches deep and ⅜ inches high and glue the slats into these, thus:
Paste-Sticks (Boxes, scissors)
Cut sides of boxes into slender pieces which can be put aside and used for paste-sticks when pasting is the order of the day. They will prove to be better than brushes.
Wagon (Thumb-tacks, button-molds, skewers, glue, small, slender nails)
Take two boxes. Remove rims. Bend down one side of each of the boxes so that it is horizontal. Lap one of these exactly over the other and join with thumb-tacks. This makes the body of coal wagon. For wheels use (1) large wooden button-molds or (2) the cardboard circles round which ribbons come. Make axles of skewers. Glue axle to bottom of wagon, slip on the wheels and insert small, slender nail to keep wheel from coming off. If skewers are not at hand whittle a slender piece from a stick of kindling wood, whittling the ends until slender enough for the wheels to slip on. Paint spokes on the wheels and paint the wagon, using any paint at hand.
| Candy-Boxes | } | (Fancy paper, crinkled-paper or silk, glue, paint) |
| Button-Boxes |
Take a berry-box and dye with Diamond dyes. Line it with crinkled paper or dainty flowered wallpaper or silk. To do this, fold the paper or silk one inch over on itself from the top, for hem. Gather or pleat the silk near the top with silk of same color and glue to the inner side of the basket near the top, leaving a little projecting edge for ruffle. Leave the lower ends free. The silk should be two inches wider than the depth of the basket and one and one-third times as long as the four sides of the basket. Now take a square of cardboard the size of the bottom of the basket and cover it smoothly with a square of silk, folding the silk neatly over the sides and catching it across so as to be smooth on the right side. Put this silk square down in the bottom of the basket and it will hold the sides of the lining firm. A basket may be lined with paper in the same way, using glue to hold it in place. As paper can not very well be gathered, the top may be glued down smoothly or the paper may be pleated.
Hanging-Basket (Lead from tea-box, ribbon or wire, earth, seeds)
Line a berry box with the lead, fill with good earth and plant vines or flower-seeds. Suspend by ribbon or wire.
Dolls' Furniture (Spools, scissors, glue)
1. Table.—Make a table by cutting a slat from a basket into an oblong 2 × 3 inches and glue to spool for dining-table.
2. Bed.—Soak a few moments and when flexible cut an oblong 2 × 6 inches and bend one end up 1½ inches [Pg 16] to form head of bed. Bend the other end up ½ inch to form the foot. Glue two spools to the bottom of this for legs, one at each end.
3. Chair.—Make chairs for the same set by cutting a piece of the box to measure 1 × 2 inches. Bend across the middle so that a right angle is formed and glue one side to a spool. The other half forms the back of the chair. Such furniture may be colored with dyes or Ivory paints.
Shelling Peas (Tin pans)
Let the child help Mother to shell the peas for dinner. Children enjoy work of this kind when coöperating with the mother or father. They like to do what Mother is doing when she is doing it too. This will be an excellent time to tell Hans Andersen's story of the "Five Peas that Dwelt in a Pod". As a reward let the child plant a few peas in a box or out-of-doors.
Pea-Pod Boat (Pan of water, peapods)
Give a small child a dish-pan filled with water and a peapod for a boat, with peas for passengers and he will entertain himself for a long time. Let the frequency with which he is allowed this privilege depend upon his care in keeping himself and his surroundings dry, thus leading to neatness and self-control.
Pea Furniture (See chapter on kindergarten occupations)
Numeral [Pg 17] Frame or Abacus (Hair-wire, cardboard stationery box)
Get ten slender pieces of wire about six inches long. Put one pea on the first, two on the second, three on the third, etc., until you reach the last, on which place ten. Take an empty stationery box, and cut away the bottom leaving the four sides intact as a frame. Into this frame insert the ten wires, the one with one pea at the top, then No. 2, 3, etc. The child can then practice counting the different combinations up to ten.
Instead of peas such a series of units could be made by stringing cranberries or rose-haws on a waxed thread.
Potato Horse (Three potatoes, slender sticks or tooth-picks, raveled string or coarse black thread)
Take large potato for body of horse, a smaller one for the neck, and another for the head. Join them with sticks broken to convenient length. Four other sticks make the legs, two little ones the ears and the string or thread the flowing tail. The tail can be attached to a tack or pin and inserted.
Squash or Sweet Potato Animals (Crooked-neck squash or sweet potato for each animal, slender sticks)
Insert sticks for legs into crooked-neck squashes and convert into animals of various kinds, the kind depending upon the size of the neck and general shape. Sweet potatoes by their queer shapes will often suggest animals: pigs, dogs, etc., or ducks, swans, ostriches, and birds. Use tacks or shoe buttons for eyes. Dolls can be made also.
Mat (Husks, needle, thread)
Take four smooth husks and press between blotting paper for 24 hours. Then tear into ¼ inch strips. Lay eight of these on the table. Take eight more and weave these under and over the first eight, making mat for doll-house. Put again between blotters. The next day, slide the strips together till they lie smooth and even, and close together. Fasten by sewing the outside strips lightly to the interlacing ones. Cut the extending parts off about one inch from outside strips.
Feathers (Husks, scissors)
Take a dozen leaves of the husks; cut slits slant-wise down the edges about ¼ inch apart. Let dry 24 hours. Then use as feathers for Indian head dress, using design on copper cent as model.
Corn-Crib (Cobs, hammer, nails, cover of starch-box)
To a small piece of thin wood like the cover of a starch-box nail four short cobs of equal length for legs (half an inch or an inch long). Around the four sides, on top, nail a row of slender cobs for the walls of the corn crib. Make roof of cobs or lay a piece of cardboard across. Nail from below, through the board. It will require a little thought to determine just where the nail must go in order to run through the board and into the cob above, but tell the child that he is a little carpenter and must make careful measurements. [Pg 19] Ask if he can think why the crib is raised thus from the ground. (To preserve the corn from the rats and mice.)
Toy-Raft (Cobs, rim of berry-box, tacks)
Lay six or more cobs of equal length side by side upon the table. Take a piece of binding-rim of a berry-box as long as the row of cobs is wide. Lay it across the row near one end and nail it fast to each cob. Nail a similar piece across the other end. This will make a serviceable toy-raft. Stick in a skewer for a mast and make a sail-boat. Paste on the mast a triangular piece of paper or muslin for a sail.
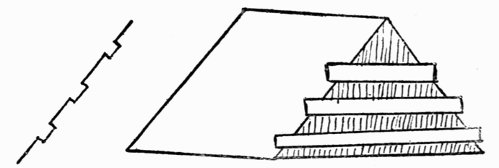
Zig-Zag Fence (Cobs only)
Lay down half a dozen cobs in zigzag fashion, with their ends not quite as far apart as the length of the cobs. Then across every two ends lay another cob, and so build up the fence.
Post-Fence (Cobs, tacks, skewers, slats)
Lay several cobs in a row a few inches apart as posts. Unite them by laying across them two rows of skewers or kindergarten slats. Join with tiny tacks. Use in the sand-table or dolls' farm.
House (Cobs, nails)
(1) Take two cobs and place them opposite to each other. Place two others across the ends of the first two, at right angles to them. Then two more directly over the first two and so on, building up alternately for log cabin. This is the first simple building experiment of the little child. Two such cabins put together will make a two-roomed house. Thus made it will be crude with wide interstices between the [Pg 20] logs, but this forms no objection to the child.
(2) When he does manifest the desire for something better made—a house which will not admit the rain and snow—a more solid house can be made thus: Place three cobs end to end to form three sides of a square. Directly upon these lay three more, and nail firmly to those beneath at the ends, with slender nails. Build up in this way as high as desirable. One side has, however, been left open. Now put in the fourth wall but leave place for the doorway. Do this by making the lower part of the wall of cobs so short that they do not even go half way across the opening. Take two such short cobs and nail each to the side of the house. A little space will be left between them, say of two inches. Take two more of same length and place on top of the first two and nail in place. The third cob may be long enough to extend straight across the little house making the top of the doorway. Put another and another on top until the last row is reached. Roof with similar logs or with cardboard. The child can be trained a little in forethought when led to save anything like corncobs for possible use in the future.
Furniture (4 short cobs, 4 long slender ones, tacks, cheesecloth, fine cord, cotton batting)
Take four short cobs for sturdy legs. Nail to these four slender cobs for bed-frame. In the inner part of the long sides of the bed hammer small tacks about ¾ inches apart. Then string cord from one tack across to the opposite one and so on, to make springs. Make mattress of cheesecloth stuffed with cotton. Other furniture can easily be made in similar manner.
In[Pg 21] this work, as with other suggestions here given, older children will need to help younger ones and thus the spirit of helpfulness and sympathy is exercised.
Portieres (Kernels of corn, straws, needle, coarse thread, pan)
Soak corn in pan of water over night or till soft. Get inch-long pieces of straw at kindergarten supply store, or, if obtainable in the country, get the straws entire and let the children cut them into inch pieces. In all this work it is desirable to let the child do as much as possible himself. Later, when familiar with materials and simple processes, let him use the prepared bought material.
Now, let him string the corn and straws alternately. He can then vary by stringing first one kernel and one straw; then two kernels and one straw; then three, etc. This gives practice in counting, and exercises also his sense of taste and proportion and his invention. A pretty effect can be secured by using kernels of the two colors, red and yellow.
Suspend a number of such strings in the doorway; they may be all of the same length or may be very short in the middle of the doorway and gradually get longer as the jamb is approached.
Designing (Red and yellow kernels)
On a rainy day let the child employ his inventive skill in making designs of the red and yellow kernels on a flat table. He can lay them in squares, oblongs, crosses, etc.
There are few American children who need to be told how to pop corn; they see it done before they are able to do it themselves. But this fascinating occupation is not known to many children outside of the United States. Perhaps it is well that our children should appreciate their privilege in this respect.
If a popper is unobtainable, corn can be quickly and deliciously popped by putting a tablespoonful of butter in a deep kettle and when it is hot dropping in a cupful of popcorn. Shake or rather stir to keep from burning and in a short time the kettle will be full of the white popping fairy-like kernels. Salt or sugar can be sprinkled in as desired.
Balls (Corn, popper, sugar, molasses or water)
Make a thin syrup by boiling together equal quantities of sugar and water or two cupfuls sugar, one of molasses or syrup, one teaspoonful vinegar, and butter size of an egg. Cook until it hardens when dropped in water, then pour it over 8 quarts of popped corn as quickly as possible and mold into balls, making about twenty. If made with strawberry syrup the color will be a beautiful red.
Festoons (Popped corn, needle, coarse thread)
Thread the kernels to adorn walls or picture frames or Christmas tree.
Boat (Walnut shell, pan of water, toothpicks, candle-wax)
When busy with her baking the mother can give the [Pg 23] three-year-old in his high chair a half walnut shell for a boat. An older child can elaborate into a sail-boat by cutting a triangular piece of paper for a sail, glueing it to a toothpick for mast, and then melting a drop of wax from a candle and inserting the mast while the wax is still warm. A burnt match can be shaped into a mast also.
Such a fleet of tiny vessels would prettily set a table for a farewell dinner to one going abroad.
Surprise Walnuts (English walnuts, baby-ribbon, tiny dolls or animals, glue)
Open a number of walnuts carefully so as not to break the shell. Remove the meats and fasten the two sides together with a tiny strip of ribbon, which serves as a hinge, glueing the ends of the ribbon to the inside of the half shells. Ribbon need be only an inch long or less. Put a tiny doll or a wee china rabbit or kitten inside the shell and tie around with ribbon. Little china animals come in sets of five or six.
A little verse of greeting or a conundrum can be written and put inside if the toys are not available.
A group of little children could be kept busy and happy for an afternoon making some of these little souvenirs for a home dinner or for a fair.
Nut-Animals (Peanuts, toothpicks)
The imagination of most children will quickly perceive resemblances to all kinds of creatures in the queer shapes of peanuts. Take such a peanut and stick into it four bits of toothpicks for legs and two tiny ones for ears. If the toothpicks are not sharp or strong enough to penetrate of themselves, make incisions with a sharp pin.
One common shape suggests a cat, seated. Two vertical [Pg 24] pieces would make the front legs and two horizontal pieces the back legs resting on the ground. Eyes and mouth can be inked in. Another shape hints at an owl with sharp, curved beak. Another will make a hen. Once started on this line of experiment, the child will discover likenesses for himself. These creatures can be used in the toy farm.
Peanut party (See page 103 )
Candlestick (Apple, candle)
Cut in the top of a rosy apple a hole of right size to hold a candle. Appropriate for Thanksgiving.
A carrot can also be used thus, but a part must be cut away at the bottom so as to secure a firm base.
Baskets (Orange, smaller fruits)
Cut an orange horizontally partly through the middle from each side so as to leave a part in the centre which can be cut into a handle. Hollow out the interior and put raisins, small nuts, etc., in it.
Lantern (Large red pepper, knife)
Hollow out a large red pepper and cut into it eyes, nose and mouth, making a miniature Jack-o'-lantern. This makes a pretty table decoration.
Let [Pg 25] the child help as much as possible by making these little table decorations. If you want boy and girl to love home, give them a share in making it interesting and attractive. Do not discourage them if their efforts are a little crude at times. It is the spirit of good-will which makes the blessed home.
Garden (Shell, earth, birdseed)
Cut an egg-shell in half horizontally, with a sharp pair of scissors, and three days before Easter put into it a little earth, place in this a little canary seed, or a single pea or bean, and a little plant will delight the child.
Doll's Cradle (Shell, ribbon half an inch wide, paste, cardboard)
Take a smooth white egg and blow it. To do this make a tiny pin-hole in each end, and by blowing into one end steadily the contents can be emptied out of the other. Draw lines lengthwise and crosswise around the shell, dividing it into four equal parts. Then, following the line, cut away the upper quarter toward the small end. This leaves a cradle with a small canopy. Paste the ribbon neatly around for a binding round the edge. Rockers can be made by cutting curved pieces ¼ inch wide out of thick cardboard, although such a cradle will rock without rockers.
Mattress for above. (Thin white ribbon, milkweed down, needle, sewing silk)
Cut and sew the ribbon into a tiny mattress for this fairy cradle, and stuff with milkweed down. If the [Pg 26] ribbon is just the width of the cradle the edges of the mattress can be neatly overcast. A tiny doll may then be placed within the cradle.
Boat (Goose-egg, leatherette paper, kindergarten slats)
Blow the egg as described above. Cut in half lengthwise. Cut the paper into strips ½ inch wide. In each side of the shell cut an indentation ⅜ inches deep and ⅜ inches wide for oarlocks. Then bind neatly with the paper strips. Cut the slats (or a piece of berry box will do) into tiny oars and paste a seat across, which is also cut out of a slat.
Careful handling is required for these dainty toys, and if the child seems to get nervous let her do only a little at a time; but much neatness and skill is exercised in the making, and it is good practice for older children. The wise mother soon learns to detect the difference between the poor work which is the result of pure nervousness and that which is the consequence of carelessness. The latter should never be permitted to stand. See to it that what the child does is up to his best capacity.
Humpty-Dumpty Eggs (Shell, shot, water-color paints, a bit of cotton-batting, and a bit of tough paper)
Take a shell and empty of contents as described above. Enlarge the hole at one end sufficiently to drop in a dozen tiny shot obtainable at hardware store. Paste over the opening the bit of paper, and on that a little cotton to simulate hair. Paint upon the surface eyes, nose, and mouth. A comical little toy which always regains its balance, however placed, is the result. In playing with this the child unconsciously imbibes [Pg 27] a few ideas about equilibrium, equipoise, etc. Tell him you want him to be a man that, however placed, will always be able to get upon his feet again.
Foot-ball, or rather it might be called Breath-ball (Egg-shell, water-color paints)
Take an empty shell and paint to resemble a football or in some college or High School colors. See page 99 for directions for game.
Toy Lamp (See under Doll-Houses)
Turtle (Raisin and five cloves)
Take a plump raisin and stick into it five cloves for head and legs.
Man (Raisins or prunes, toothpicks)
Make a man by running a toothpick through three raisins for a body. Into the top one stick two other toothpicks, with two raisins each for arms and two other toothpicks with raisins make the legs. Each leg has a projecting raisin for a foot and another large raisin makes the head. These are fun-makers for a children's party, one at each plate.
Stringing (Squash seeds—dried, strong thread, needle)
Little children can be happily occupied making chains [Pg 28] of squash, pumpkin, and water-melon seeds that have been saved and made soft by soaking awhile in water. The black seeds of the water-melon alternate prettily with the white seeds of the other gourds. Variety can be introduced by stringing several of one color and then several of another, counting by twos, threes, etc. This gives exercise in counting, in pleasing grouping of colors, and so exercises both the invention and the taste of the very little child.
Designing (Black seeds, white seeds)
Let the child make designs of the seeds upon the table. Place a black one for a centre and a white one on each side. Repeat this figure for a foot or more, placing the groups an inch apart and observe the effect. Tell him thus to make a design for the frieze of the room. Another effect is produced by placing a white seed as a centre and placing four or five around it. Vary still further by placing a circle of black seeds around the whole. These few examples will serve to indicate the endless variety that can be secured, and is a training in invention and taste. Let the child always have in mind a design for some particular purpose, as of wall-paper, oil-cloth, etc. Lead him to observe similar effects in carpets, wall-paper, etc. The best of these attempts can be made comparatively permanent by pasting upon small sheets of tinted bristol-board. The chief value in preserving any such work is for purposes of comparison as the child improves.
Counters
Save out 24 white and 24 black seeds for counters in checkers, go-bang, etc.
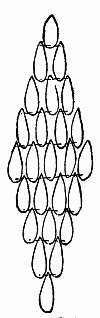
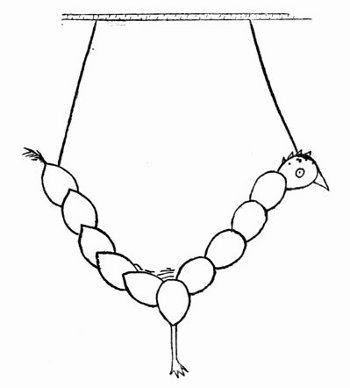
Squash-Seed[Pg 29] Chicken (25 seeds, white thread, two quill toothpicks, bit of red flannel, feather from duster)
Take 25 squash seeds and soak till soft. Take five of these and place side by side with pointed ends up. Above these place four, their wide ends coming between the points of the others. Above these place three in the same relative position. Above these put two, and above these and between them place the squash-seed which is to be the head of the chicken.
Now, beneath the original five, place four, pointed ends up; beneath these put three, then two, then one. If these are rightly placed, the pointed ends of one row come just at the sides of the wide end of the seeds above.
Run a thread through the lower end of the two and the upper end of the three; then through the lower end of three and the upper end of the four; continue thus till all have been united. The result thus far will be a double pyramid of the seeds. Draw an eye in the middle of the head, paste or sew on a bit of quill for a bill and a bit of flannel for a comb. Attach a few feathers from the duster for a tail. Take two more seeds and sew to the middle of the row of five for the thigh of the legs, and to each sew a quill for the rest of the legs, cutting into points at one end for toes.
Make another chicken like the above and suspend the two face to face upon a slender stick by running a thread through the head and one through the tail. When the stick is moved the chickens assume very realistic attitudes. A comical toy, made with no expense save that of time and patience. (See illustrations.)
Pincushion or Penwiper (Five plump apple-seeds, sharp pen-knife, black thread, stiff card, square of muslin, emery or cotton batting)
Save out five seeds, and cut the cuticle of the large end into two tiny points to simulate the ears of [Pg 31] a mouse. Knot the thread and run a tiny bit through for a tail. Paste these upon a visiting card, and near them paste a tiny bag made of white muslin to simulate a flour-bag. It can be stuffed with cotton or with emery for needles or pins. Or the card can be sewn upon several layers of cloth as decoration for a penwiper.
Imitation Water
Muskmelon seeds placed in an undulating line in the sand-box suggest water.
Hammering (Old-fashioned bar soap, hammer, nails)
A wee child will entertain himself for a long time by hammering nails into a bar of soap if the proper tools be given him. In this simple activity he exercises both mind and body. It requires good coördination on the part of the little one to strike the nail just right, and he enjoys not only the exercise itself, but also the pleasure of imitating the carpenter who uses the hammer so skilfully.
Drawing (White soap, window-pane)
On a day when he must stay indoors, give your child a piece of white soap and let him show you what he can draw upon the window-pane. Ships and trees, houses and flowers have a fairy-like appearance when drawn with this commonplace material upon the impromptu background of glass. This allows the freedom of movement found in blackboard work. It gives scope to the child's imaginative powers and should add nothing to the housekeeper's cares, being readily [Pg 32] removed with a damp cloth. It may reveal creative possibilities in some otherwise "mute, inglorious" artist.
Moving-Van (Cereal-box, glue, two skewers, 4 button-molds, 4 nails or strong pins)
Take a box (Quaker Oats or Force, etc.). Cut out doors and side openings for a moving-van. It may be well to draw these first. For a model, look at any van or grocer's wagon. It will be seen that models are numerous and various. If more explicit directions are required we give the following, although it is always well to have the child use his own mind as far as possible before going to others for ideas.
Remove the top of the box, which becomes the front of the wagon. The bottom of the box will be the back of the wagon. This bottom will be found to consist of two layers of cardboard. Remove the outer one and cut the inner one once through the middle to make two doors. On each side of the wagon cut an oblong window ½ inch from the top, ½ inch from the bottom, and ½ inch from the front. Let it be two inches wide. Place a seat across from one window to the other; fasten with glue. It may be just a straight piece one inch wide, or may be two inches wide, folded once through the middle lengthwise to give a back.
For wheels use wooden button-molds, two inches wide, or circles sawed from a broom handle. For axles use wooden skewers or cut a piece from a stick of kindling wood about ¼ inch wide. Whittle the ends till they are slender enough to hold the button-molds. Then[Pg 33] put on the wheels, inserting a slender nail or pin outside to keep them from coming off the axle. Glue the axle to the box. If wheels are cut from broom-handle, a nail can be driven through the centre for an axle and then pushed into the side of the box, or a nail pushed through a button-mold directly into the box will hold.
Punch two holes into the front of the wagon, tie cord through and the wagon can be drawn along. It may be painted if desired. For horses, trace a picture of a horse from some book or advertisement on cardboard, cut out and harness to wagon.
Lantern (Box, scissors, candle, pencil)
Draw on the box holes to represent eyes, nose and mouth. Then cut these out. Cut holes near the top of box to put wires through for carrying the box. Use a wire about two feet long, put the ends through the holes and bend up. Let a little of the wax drip from the end of the candle to the bottom of the inside of the box, and when a soft centre has been made push the candle down and it will stand firm. Only older children should use these, lest harm result. But children do make them at election times for transparencies. The openings may be lined with colored tissue paper.
House (Cereal box, paste, scissors, wall-paper, etc.)
Remove one broad side. Stand box on one long narrow side as room of doll's house. Cut an opening in the remaining broad side for a window. Furnish with paper furniture. (See page 85.)
Lantern (Cheese, knife, candle)
After the interior of one of these round, red cheeses has been scooped out and eaten by the family, the discarded red shell will make a fine Jack-o'-lantern, if the proper holes for eyes, nose and mouth be cut into it and a candle inserted inside. The candle may be inserted in a socket cut into the bottom of the rind, or it may be made to stand firmly in a bed of wax or tallow melted from its own lower end.
Play for Baby (Fine table salt, spoon, bottle, small box or pan)
If clean fine sand is not at the moment available, give the baby a box containing a heap of salt and a teaspoon and bottle, and he will be happy for a long time, passing the salt from one bottle or box to another. To the young mother this may seem akin to foolishness, but in thus playing simply with sand or with salt the baby is exercising faculties and working out baby problems which he should be given opportunity to try. He is becoming acquainted with his environment, his little world.
Burnt-Match Safe (Mustard box, oil paints, brush, ribbon, nail, hammer)
Punch two holes near the upper edge of a discarded mustard box, the holes to be opposite each other. These may be made by hammering a nail through [Pg 35] the tin, holding the box firmly against a block of wood or stone for pressure.
With oil paints, one color, begin at the top to paint the box, graduating from light to darker tones as the bottom is approached. Lighter tones may be secured by mixing the blue or red with Chinese white. A flower design may be painted by one skilled in the use of the brush.
Tie ribbon through the holes by which to suspend the box, and the result is an article both useful and pretty.
Flower-Pot (Can, ivory paints, brush)
Paint an empty can with green or brown ivory paint and use as flower-pot for growing plant. Children love to handle a paint-brush, and this offers a legitimate occasion for such occupation. A small hole should be punched in bottom of can for drainage.
Hanging-Basket (Can, nail, hammer, cord, raffia)
Punch holes for suspending as described above. Then make a covering of raffia as explained on page 46 and hang up by the cord.
Wheels (Covers of baking-powder tins, nail, hammer)
With the nail, hammer a hole through the centre of the cover, placing upon a stone step or other brace. The little wheels may be used to complete toy wagons that the child is making.
Toy Dishes (Tin foil from cream-cheese wrappers, etc.)
Take the tin foil, and by simple squeezing and pressing and shaping, a little practice will enable one to [Pg 36] make it into tiny pitchers, goblets, pans, etc., for dolly's table.
Toy Mirror (Tin foil, scissors)
Smooth carefully with the fingers and cut a piece of the tin foil into the shape and size to fit a little cardboard bureau.
A larger piece will simulate water in the sandbox park.
Toy Money (Tin foil, coin, scissors)
Smooth the tin foil with the thumb nail, place a cent or a nickel beneath, and press and smooth again, making an impression of the coin that may be cut out and used in playing store.
Toy Cutlery (Tin foil, scissors)
Cut tiny knives, forks and spoons out of the tin foil for the paper-dolls' table.
Save all corks and they may be used in a variety of ways.
Toy Raft (Cork, wire or hairpins)
Run several corks on a piece of wire to resemble a log; make several such and then tie together to make a raft, tying between the corks.
Toy Boat (Circular flat cork, tacks, wire, toothpick, paper)
Insert a toothpick in one of the large flat corks that sometimes cover pickle glasses. Paste a paper triangle upon this for a sail and set afloat in a dishpan sea.
Flower-Rack[Pg 37] (Flat cork, pencil)
Take a flat piece of cork such as is used by entomologists upon which to impale insects, or any flat, thin piece of cork will do if several inches in diameter. Such cork may be easily perforated by a slender pencil. Make a number of perforations several inches apart, and then the cork may rest upon a water-filled saucer or other deep dish, and the stalks of single flowers may be inserted into the holes so that they are supported by the cork.
Furniture (Circular corks, pins, worsted of pleasing color, cashmere or silk goods)
Into the upper side of a round cork about one inch in diameter insert five to seven pins. Twist and weave the worsted in and out, under and over those pins, so as to make a firm, solid back to a little chair. The ends of the worsted may be neatly disposed of by threading on a needle and running in and out for a few stitches till concealed.
For legs, insert four strong pins, and wind these round and round with the worsted, finishing neatly by running with a needle in and out.
If the seat seems too plain it may first, before the chair is made, be covered with silk or cashmere. To do this cut the cloth into a circle somewhat larger than the diameter of the cork. Run a gathering thread around the circumference, and putting the cork in the centre draw the thread and so gather beneath the seat. To make a really neat finish the edge should be turned in before gathering.
Swimming-Float (Dozens of corks, strong canvas cloth, measuring 20 × 36 inches, needle, thread)
Make two strong canvas bags, measuring about 18 × 20 [Pg 38] inches. Fill these with corks to act as floats. Unite the two bags by a strong band of canvas about 7 × 20 inches in size, and let the children use when in bathing.
Cork in Art
In making models of world-renowned buildings, such as churches, cathedrals, temples, etc., cork is used in large and small pieces.
In Germany it is used in making pictures. A sky background is painted in water-color, and the flat pieces of cork are cut into shape and glued on to represent walls and towers of buildings. The foliage of trees is represented by the more spongy pieces of cork, and the effects secured are interesting and beautiful. The children may like to experiment and see what they can do in this direction.
Cork Doll (See page 81 )
Many of the articles named under the Market Basket Division of this book could be classified also under the above head. In addition we present the following:
Collections (Stones, small boxes)
Collect various pretty little stones and pebbles on river shore, coast or roadway, and classify in different ways—according to color, shape, size. This exercises the child's observing powers and trains him in detecting differences and resemblances. Keep in small boxes.
Bottled Pebbles (Pebbles, plain glass bottle)
Put some pretty pebbles in a glass bottle filled with water which intensifies the color. Send to some sick friend, especially some one from the prairies who may seldom see stones. It is always well for the child to have some definite object in view when he does anything.
Toy Path-Markers
Use pebbles in the sand-box for outlining the little paths in the wee park or farm.
Jackstones
Pebbles of right size and shape make good jackstones.
Toy Vegetables[Pg 40] (Small square of cheesecloth, needle, thread, pebbles)
Make tiny cheesecloth bags and use pebbles as potatoes, apples, etc., in play with the little wagons made by the child. In playing store with them comes opportunity for counting and measuring. Tiny boxes can be used for quart and pint measures, and the child may be shown that two pints make one quart, etc.
Paper-Weight (Large, smooth stone, oil-paints)
If you find a large, smooth stone of pretty tone, let the older child decorate it with a little picture done in oil paints.
Collections (Shells, small boxes)
Collect and classify according to color, shape, etc., and keep in separate boxes.
Bottled Shells (Shells, bottle)
Put little shells in bottle of water to bring out lovely colors. (See Bottled Pebbles above.)
Border for Sand-Table
Place small shells along little paths in sand-table, sometimes with concave side up and vice versa.
Larger shells, as clamshells, make fine borders for roads and paths in the country. They outline the road on a dark night.
Water-Color-Cups
Collect and save shells to give to some artist friend as extra cups for his water-color paints.
Ramekin Dishes[Pg 41]
Large shells make serviceable individual dishes for baked fish, etc. Appropriate for fish dinner.
Individual Salt and Butter Dishes
These can be made of the smaller pink and yellow shells found on many coasts. Let the children collect shells for this purpose, and use for fish dinner.
Toy-Boat
A small shell is often found which, with the little natural seat found at one end, at once suggests a little boat. Have the children collect and save for those far from the shore.
Pin-Tray (Scallop shell, oil-paints)
Paint a marine view in oils inside a shell for pin-tray.
Pin-Cushion (Small piece of satin or velvet, saw-dust, glue, two perfect scallop-shells)
Make a small pin-cushion of satin or velvet, filled with saw-dust, and glue between a pair of scallop shells, so that it fits in between as they open out.
Piano Scarf (Several dozen small, thin, yellow shells found on Atlantic coast, one yard Nile green India silk, strong sewing silk)
Hem the silk an inch deep at each end. Sew to one end a fringe of shells made as follows:
The shells usually have a tiny hole in them when found. If not, one is easily pierced by a strong needle. Take twelve lengths of strong sewing silk, white, each 20 inches long. To each of these tie twelve shells at intervals of an inch each. You will then [Pg 42] have twelve strings of shells, which are to be sewed to the scarf as a fringe, putting them about three inches apart. Sew two rows of shells directly on the scarf itself, putting them about four inches apart each way. If desired, in making the fringe some of the strings may be shorter than others, arranged so that the long and short ones alternate.
Needle-Case or Penwiper (Squares of chamois skin or flannel, sewing-silk, paint)
Cut bark into circles, squares, oblongs, etc. Decorate with gold lettering or borders of gold. Make several leaves of flannel or chamois skin and sew the bark on to these as a cover. The flannel may be scalloped. An appropriate sentiment to write upon penwiper cover is "Extracts from the pen of—" putting in the name of the recipient. The leaves and cover may be sewed together with a cross-stitch.
Handkerchief-Box (Punch, several strands of raffia)
Cut two pieces of bark 6 × 6 inches. Cut four others 3 × 6 inches. Along the edge of these punch (with a conductor's punch or one that can be bought at a kindergarten supply place) holes an inch apart and ¼ inch from edge. Sew the four narrow pieces to the square for bottom and sides of box. Sew remaining square more loosely to one side as cover. Sew with strands of raffia, sewing through the holes already made. If desired to give a more finished appearance punch more holes along edge of box and lid, making them ¼ inch apart. Then hold a fine basket reed or piece of raffia along the edges and overcast. If [Pg 43] lavender or sweet grass is obtainable, that will be even better than reed or raffia for the edge, lending its fragrance to the gift. The box can be still further finished by lining with dainty silk. Make glove box in same way, but longer in proportion to width.
Pencil and Paint-Brush Box (Bark, raffia, needle or crochet hook)
This is cylindrical. Cut a piece of bark 5 × 8 inches. Punch in it a series of holes ¾ of an inch apart, and ½ inch from edge of each short side. Place these so that one edge overlaps the other and the holes coincide with one another. Then sew together with raffia. Use a short needle or none at all. Raffia can be drawn through holes with a crochet-hook. Punch holes in the lower end of this cylinder and cut a circle of same size as diameter of cylinder out of cardboard. Punch corresponding holes in this and sew the bottom in. Strengthen top by overcasting over a twist of raffia, sweet grass or sweet clover.
Canoe (Bark, pencil, thread, paper, paraffine)
Fold strong piece of bark and cut an outline of a canoe, rounding the ends. Sew the ends closely together with stout thread, overcasting the edges with same. Make watertight by lining with paper dipped in melted paraffine. Paraffine may be bought at grocer's.
Fan, modeled after East Indian pattern (Bark, kindling wood, dye, gold paint)
Cut two stiff pieces of bark into hatchet-shaped trapezoid. Punch row of holes in the narrowest side, whittle [Pg 44] a handle of pinewood, and sew it to the narrow edge of bark over and over through the holes.
The handle may be stained with some natural dye and fan decorated with gold paint.
Picture-Frame (Bark, punch, sweet grass)
Cut two pieces of bark 4 × 5 inches, one of smooth bark, one of the outer bark with pleasing markings. Punch holes around the edges of each ¾ inches apart. In the rough outside piece cut an oval 2½ × 3 inches. Around this inner oval punch holes near together and bind this around with sweet grass overcast with fine raffia. Now sew the two pieces of bark together, first cutting into the back piece a slit near the bottom into which to slide the photograph.
In using sweet grass as binding it is well to wind the bunch first with thread to hold the pieces together, and after the grass is firmly sewed the temporary thread can be cut away. The bunch of grass thus used may be about as thick as half the little finger.
Punch may be bought at kindergarten store, or conductor's punch will do.
Darning-Egg
A smooth well-shaped gourd (mock-orange) makes a serviceable darning egg.
Hanging-Basket (Large gourd, soil, plant)
Clear the gourd of fibre and seeds, after cutting off the top rim evenly. Pierce the top with two holes through which to attach cord for hanging, fill with a light, loose soil, and plant in it a drooping, trailing plant. Cut a hole in the lower end to allow for drainage. Let[Pg 45] the country child save gourds of good shape to present, thus filled, to city friends.
Sweet-Potato Vine
Put a sweet potato in sandy loam in a hanging basket and water occasionally. It will produce a beautiful, graceful vine.
Carrot-Top
Cut off the top of a young carrot evenly and place it on top of a pot filled with sand. Moisten well, and keep in the dark till it has begun to sprout; when the leaves appear take it out, and the word "Carrot-top" will acquire a new meaning, the result is so pretty.
Turnip
Take a turnip and clean the outside, taking care not to injure the parts from which the leaves spring. Cut a piece off the bottom and scoop out the inside, leaving the top intact. Fasten string or wire to it so as to hang it upside down. Fill and keep filled with water, and soon the leaves will sprout and curl up, forming a beautiful natural hanging basket.
This flexible fiber, long used by florists, is now also used a great deal in the schools for the educational hand-training it affords. It can be obtained at kindergarten supply places.
Reins[Pg 46]
Take three to six strands and braid into reins for playing horse. As the ends of the strands are approached (each is about a yard long) begin to weave in a new strand, as inconspicuously as possible. Do not have the strands all exactly the same length to begin with, because if you reach the end of all at the same time it makes it difficult to weave in new ones neatly.
Mat
Take such a long braid as described above, and holding one end flat, turn it round and round spirally but flat, and sew with thread to make a mat for the tea-pot. By bending up a little as you sew you can make a basket.
Picture-Frame (Cardboard, raffia, thread and needle)
Cut a circle of cardboard 5 × 5 inches in diameter. From the centre cut out a smaller circle three inches in diameter. This leaves a circular cardboard frame. Wind this round and round smoothly with the raffia. Paste another circle on the back to give a good finish, but in this second circle cut a slit up which to slide the photograph.
Woven Mat (Loom, raffia)
Thread a little loom with raffia warp as described on page 90. Then weave the woof (also of raffia) back and forth to make a mat or a case for hanging basket. To make the latter the right size have the warp threads as long as the can is around the circumference, and have the width about the same as the height of the can.
The raffia can be colored with Diamond dyes and wee rugs made for the doll-house on tiny looms.
Grace Hoops[Pg 47] (See under Plays and Games)
Festoons and Wreaths (Leaves, fresh or dried, thorns or needle and thread)
City children may need to be told what seems to be handed down to the country child from generation to generation, that leaves may be made into wreaths for the head or decoration for the room either by overlapping one upon another and fastening together with a thorn or sharp twig, or by stringing together on a stout thread.
To Dry or Press (Blotting paper, two small smooth boards, strap, wax or linseed oil)
Gather and press pretty autumn leaves thus: Have ready two boards measuring about one by two feet. Put the leaves between sheets of blotting paper and place these between the boards and then strap them tightly together, or if no straps are convenient, put the boards beneath a heavy weight (a book will do). Change the paper every day or so till sure that they are quite dry.
To preserve and brighten the colors after drying dip in melted wax and press a moment with a hot iron, or clear, boiled linseed oil will do in place of the wax, using, however, as little as possible.
Decoration for Curtains
Pin to lace curtains in attractive arrangement.
Transparency (Leaves, bolting-cloth, 1 yard white India silk, sewing silk, needle)
1. Take a piece of bolting-cloth twice the length of the largest leaf and fold over evenly. Open again and [Pg 48] place the leaves upon the bolting-cloth artistically in a row; fold the cloth over again and baste. Bind the edges with white ribbon, and at the two upper corners sew the ends of a narrow ribbon with which to suspend the transparency in the window.
2. Or, if preferred, sew the bolting-cloth transparency as a border to the end of a yard of India silk as a scarf for shelf or piano.
Frieze of Leaves (Leaves, cartridge or other strong paper of good tone, glue)
A pretty frieze for a room can be made by pasting leaves on a long, foot-high strip of paper which forms a background. The effect will depend largely upon the harmony between the color of the leaves and the background, as well as upon the arrangement of the leaves. They may be arranged in an irregular line, or may be placed so as to form artistic groups of twos and threes or fours.
Collections of Leaves
When the collecting instinct is upon him, let the child collect and classify leaves according to shape. See if he can tell by the leaf what tree it came from, and if he recognizes the different varieties of leaves.
Four-Leaved Clovers
Look for four-leaved clovers when on your country walks, and save to press and afterwards use in writing letters of good-will as decoration for paper, pasting on at upper left hand corner; or use to decorate place cards for dinners. It will hardly be necessary to state that the four-leaved clover has for long years been the symbol of good-luck.
Shadow Game[Pg 49] (See under Sun and Shadow )
Feather Flowers (A large goose with many white feathers, beeswax, spools of wire of different sizes, aniline dyes, though vegetable dyes are preferable if obtainable, strong scissors suitable for cutting wire, spools of strong white cotton thread, spool of milliner's green-covered wire)
Pluck the breast of the goose. (Feathers come out very easily.) The feathers, being very light, fly about and therefore it is best to do the plucking in an uncarpeted room or one in which the floor has been covered with a large sheet.
Classify the feathers according to size, and arrange in bundles of about thirty by winding a stout thread around the quills. Thus they are ready for the dyeing process.
Dye according to directions on packages. For deep green of leaves and for calyx immerse for several minutes; for more delicate tints immersion for a second is sufficient.
Suppose we select for our first effort a carnation. Choose a real one for a model. Having selected about twenty feathers of the required sizes and colors, cut the ends to resemble the form of the petal and then pink the edge as in the real flower. The actual number of petals required will depend upon the size of the flower copied and must be left to the judgment of the maker.
Take the measure of the length of stem required on the wire and double it (wire must be twice as long as stem). Wind tightly and evenly around it the green milliner's wire to make the stem.
Soften [Pg 50] the beeswax by heating slightly in a pan till soft enough to mold between the fingers. Shape it into the form of the calyx, inserting the stem at the lower end, and pushing it far enough to insure firmness. Wrap this soft calyx form round with green feathers to represent the flower copied. Upon accuracy at the beginning depends the success of the flower, therefore it is necessary to observe the natural one closely. The green feathers must entirely cover the calyx mold, the upper ones curving back a little as in the genuine calyx.
Take some colored petals and insert between the calyx and the wax mold, pushing the quill end of the feather firmly into the wax. Arrange the petals spirally, beginning at the bottom and building gradually up to the top. The larger feathers are used first, growing smaller toward the top. Complete the flower by inserting the stamens and pistil, which are made by tearing one small feather into narrow strips and curling these by drawing once over a scissors blade.
The simplest flowers to make are: Carnation pinks, violets, sweet peas, fuchsias, roses and Easter lilies. With the proper amount of time, patience and perseverance, any flower can be successfully made.
If leaves are desired, cut green feathers into the required shape and attach.
Indian Headdress (Large turkey feathers, glue, cardboard, paint)
Save large feathers from turkey or rooster and make Indian headdress by glueing upon cardboard cut to proper shape. For model look at copper cent.
Pressed Morning-Glories (The flowers, white tissue-paper, scissors, book or pressing boards)
Press the flowers between a fold of thin tissue-paper. The delicate flowers will adhere to the paper, which is sufficiently transparent however for the morning-glory to be visible through it. When dry, cut the paper from around the flower and pin to curtains, lambrequin, etc., as desired, or attach to letter paper.
Soldier-Flowers (Milkweed blossoms)
The small blossoms of the milkweed may be made to stand in rows and columns like soldiers, two by two, four by four, etc., giving practice in counting.
Rosaries (Haws, stout thread, needle)
When the beautiful red rose-haws ripen let the children string them, making rosaries to send to city friends.
Stringing (Scissors, needle, thread, cranberries, nuts, etc.)
Save the straw from rye and let the children cut it into one-inch lengths for stringing alternately with cranberries, nuts, beads, etc. Use to decorate the room, to make portieres, and to decorate the child himself when dressing up.
Blowing Bubbles (Straw, soapy water)
Hollow straws several inches long may be used to blow tiny bubbles of soapy water in the absence of a clay pipe.
Blue-Prints (Leaf, blue-print paper, running water, small oblong of glass)
A package of blue-print paper can be bought at any photographic supply place for from 15 cents up, or can be had in the sheet from an architect's supply store. It must be carefully protected from the light till ready for use.
Take a square of the paper and place upon it a leaf or flower or inconspicuous weed that makes a good shadow on the sidewalk or window sill. Place this in pleasing position upon the paper and put quickly in the bright sunshine, holding it in place with the small pane of glass (common picture glass will do). Leave exposed to the sun for about ten minutes, then pour cold water over it for a moment or so, and the "shadow" will be seen to be permanently "fixed" in light blue against a darker blue background.
An artist acquaintance has a hundred or more such prints of leaves, plants and flowers beautifully mounted in a Japanese blank-book, the paper of which makes an exquisite background. She finds these shadows of the flowers and commonest weeds suggestive in her designing.
Shadow Game (Smooth fence in sunshine; branch with leaves.)
1. Several children sit in row, facing smooth board fence. Another group of children form their opponents. Of these one walks behind seated row in such a way that his profile is visible on fence. Seated children guess opponent from shadow cast.
2. One child casts on wall shadow of leafy branch. Opponents guess name of parent tree.
or
Work with Scissors and Paste
What is known as free-hand cutting has been for some time recognized as of genuine educational value and is a source of great pleasure to the child when once he learns his capacity in this direction. When he tries, by means of paper and scissors, to express an idea, to illustrate some story, or to indicate something that he has seen, his notions of form and proportion become more definite and precise, and he learns to express action with remarkable skill and power. He learns to appreciate beauty of outline as seen in mountains and trees against a clear sky, and to recognize such beauty as there may be in what artists know as the "sky line," when darkness deepens and the mammoth buildings of a city loom up black against the sunset heavens. The definiteness of observation and skill with the hand acquired in this free cutting serves the child in many ways when in the school grades.
Many an otherwise useless piece of paper may, with the help of scissors, give the child hours of pleasure.
But before he is able to use the scissors the child may receive pleasure and benefit from the use of paper alone.
Tearing Paper (Any bit of paper)
Give the children small pieces of paper and let them try to tear these into simple definite shapes. Make a shoe, stocking, snowman, tree, ladder, cat, etc. Watch that they do not grow nervous in doing it. After a little practice they will become surprisingly expert. Paste what they make on a good background to save and compare with later efforts.
This is a really educational occupation which involves absolutely no expense, as any clean piece of paper may be so used. Will employ the child happily when traveling.
The very youngest children, if they want to tear the newspaper, may be asked to tear it into tiny pieces which brother and sister can use in playing "hare and hounds."
Cutting Paper
Let the child begin the cutting by making a snowball out of white paper, and then a snowman. These need only crude outlines, such as are within his capacity. Then lead him on, little by little, to cut a picture of the cat and of the dog, and illustrations to his favorite stories, as the "Three Bears." This is beloved in the kindergarten, requiring, as it does, pictures of the chairs, the bowls, etc. Those who have not seen children do this kind of work will be surprised at the capacity developed.
If he is afraid to attempt the freehand work, give the child pictures to cut around, as simple outlines of a cat seated, or a piece of fruit. Then encourage him to cut without the outline. Both efforts may run along [Pg 55] together. If a line be drawn, be sure that it is heavy and distinct enough to be readily seen and followed.
| Birthday Candles | } | (Red paper, blank card, colored crayon) |
| Firecrackers |
Out of red paper let the child cut six (or any number desired) narrow strips for red candles, to represent birthday candles. Place in a row upon a white card, to serve as place cards at a child's party. Draw a bit of yellow at end of each candle to hint at a flame.
The same may be turned into firecrackers for a "Fourth of July" festival, a line being drawn to suggest a fuse.
Soldier-Caps (Newspaper, pins or paste)
Take brown wrapping paper or newspaper and cut a square. Place before you and fold from back to front, making an oblong. While still folded make another fold by turning the left edge so that it exactly meets the right edge. Open this much out and there is a crease running from top to bottom. Now take the upper left hand corner and make it touch the bottom of this crease; take the upper right hand corner and make it touch the lower end of this crease. This gives a pointed cap, still unfinished. To finish cut a slit, an inch deep, up from each lower end of the cap and then fold a kind of hem up from the bottom and paste the ends over neatly. Turn the hat over and fold a similar hem on the other side. Turn in the corner and finish by pasting neatly.
Plume for Hat (Paper as above, scissors, paste or pin)
Take a strip of paper 6 × 12 inches. Make a fringe [Pg 56] or series of cuts in this about four inches long and ½ inch wide, and then roll it up and attach to hat with paste or a pin.
Epaulets for shoulder may be cut in similar way.
The cutting of these fringes gives practice in the use of scissors.
The articles whose making we will now describe do not come under the head of free-hand cutting, as they usually require cutting according to measurement, and really definite directions. They are given in general in the order of difficulty in the making.
Chains (Scissors, paper, paste, toothpick)
Let the little child begin by cutting strips of some bright paper or smooth wrapping paper into lengths of ½ by 3 inches. Make a ring of one of these, putting a wee bit of paste on the under part of one end and sticking it fast to the other end by overlapping. Through this ring run another strip and paste into a similar ring, and so make a long chain of them wherewith to decorate the child's small person or the room. To make paste see page 169.
It is well to have a small pomade box, obtainable at a druggist's, in which to keep the paste. It can then be covered and kept moist until the next time for using. But a little fresh mucilage or paste can at any time be put into a butter dish. A toothpick will make a good paste-stick, which the child can handle more easily than a brush. Show him that a tiny bit of paste will suffice and that more makes the pretty ring mussy.
If mother is sewing and the child restless and no bright colored paper convenient, let the child cut strips [Pg 57] of newspaper right at hand and make the rings. His imagination will readily convert them into links of gold.
Mask (Paper of any color, scissors, chalk, cord)
Cut an oval out of paper (or dress-lining) and in it cut holes for eyes, nose, and mouth, fitting first to the child's face to insure getting them in the right places. Put a hole in the middle of each side through which to tie the string which fastens it around over the head. To add to the fun the mask may be colored with chalks.
Newspaper Wrappers (Smooth brown wrapping paper, pencil, ruler)
Take smooth pieces of brown wrapping paper. Cut oblongs 8 × 12 inches. From one narrow edge then measure an inch down on each side and make a dot. Make another dot at the middle of this same narrow side. Then draw a curve from dot to dot and cut along the line. This makes the curved edge of the wrapper. The curve may be cut free hand by a skilful hand, or drawn with a compass. Put some mucilage all along the edge of the curved side about ½ inch wide and let dry. Make a dozen of these and give to father for a present, all ready for use when he wants to mail a paper. They can be made more complete by affixing a one-cent stamp on the right hand side where the curved edge begins.
Papers for Baking Pans (Brown paper, scissors, pencil)
Give child paper and baking-pans, and let him cut papers ready for your use when making cake. Let him do measuring.
Book-Mark[Pg 58] (Fine white or tinted paper)
Take a piece of dainty paper and cut into an oblong 1 × 6 inches. Fold lengthwise and cut a small triangle from each end so as to leave a point when opened out. Now cut a circle in the middle of the paper (which is still folded) and cut other shaped openings, diamonds, triangles, etc., along the fold, ½ or ¾ inches apart. Open and you have a simple openwork bookmark the little child can give father for birthday. A little experiment will show how to secure variety and intricacy of design.
Fringed Bon-Bon Papers (White tissue paper, colored ink or water-color paints, candy, verse of poetry)
Cut a sheet of tissue paper into little oblongs 4 × 5 inches. Dip each narrow end ¾ of an inch into ink, red, green, etc., or into water-color paints, and let dry. Then cut this colored margin into narrow slits, making fringe. Copy some appropriate couplet on a narrow slip of paper and place it with a piece of candy inside the paper, giving the fringed ends a final twist. The making of these at home for some future occasion, such as a birthday party, will afford a happy hour's amusement.
Paper Money (White paper, pencil, scissors, cent)
Place the cent beneath the paper and then press on it with the bottom of the pencil, rubbing at the same time with a circular motion. Soon the impression of the coin will appear on the paper. Cut out and use in playing store.
Snowflakes[Pg 59] (White paper, mucilage, a ten-cent box of mica crystals or five cents' worth of alum powder)
A six-pointed star must first be made of white paper. To make this take piece of the paper from 3 to 6 inches square, according to the size of the star. Fold the paper once and cut an approximate half circle. Then fold this in thirds, pressing the folds to make creases. If opened out the circle would be marked by six equi-distant creases radiating from the centre. Do not, however, open, for you are now ready to cut. Before doing this, observe if possible some real snowflakes, with microscope or magnifying glass, or even with the naked eye. Notice the form and hexagonal structure. This is seen best if the flake is caught on some woolen fabric. Then look into an unabridged dictionary and study the picture of the magnified snowflake crystal. Then cut tiny triangles, circles, etc., into your folded circle so that when opened out it will suggest an enlarged snowflake with its six varied points. A delicate appearance is secured by cutting delicate tapering points, or, if the points be broad, cut holes in them to give a lacey effect. We do not give more definite directions for cutting, as the great fascination of the occupation consists in the experiments with their many surprises.
(1) Now take the paper snowflake and brush it lightly over with a thin, transparent mucilage, and then sift over it some mica crystals obtainable at a toy-store, one box being sufficient for many flakes. After drying, cover the other side in the same way. Suspended from the Christmas tree, these are very effective.
(2) The flakes can be made in another way, thus: [Pg 60] Make a solution of alum water, dissolving five cents' worth of alum in a pint of water. Be sure it is all dissolved. Then put the flakes in a shallow dish (granite ware or some material that the acid will not injure). Cover with the solution and put in a place slightly warm, so that the gradual evaporation of the water will help in the slow formation of the crystals. When finally evaporated the lacey "cut-out" will be found covered with alum crystals. Cover during evaporation with some light protection from the dust.
Tailless Kite (Two sticks, 3½ feet long and ½ inch wide, a ball of strong but thin twine, two pieces tissue paper, knife, flour paste)
Get the sticks from the saw-mill. Cut a notch in the two ends of each stick as a catch for the framework of twine which will be put on later. On one stick make a pencil mark about seven inches from the top. Put the middle of the second stick across the first at this mark and bind the two together firmly at right angles to each other. You now have a skeleton in the form of a cross. Number the ends of the sticks 1, 2, 3, 4, making the top 1, the right hand end 2, the bottom 3, and the left hand 4, and the place where they join 5.
Now bend the second stick (the cross piece) into a bow and tie a piece of twine from end to end like a bow-string. You must get the curve of the bow just right, so that the distance from the middle of the bow-string to the joinings of the sticks is the same as from the joinings of the sticks to the top of the main stick, i. e., seven inches.
Now carry twine all around, from end to end of the skeleton, to make a framework for the paper; put [Pg 61] this twine through each notch and around the end of the stick several times to strengthen. Now paste together, end to end, lengthwise, the two pieces of paper, to make one long piece (a single piece is not large enough). Place the paper on the floor or broad table, and lay the frame upon it. The paper will not be as long or wide in all places as the framework, hence, fold it over the twine framework experimentally, and cut off in places where it is too wide. Allow enough for secure pasting. Use the cut-off corners to lengthen in other places where necessary, by pasting on. If two colors of paper are taken, the effect is very pretty, the corners being arranged to match each other. The best paste is made by a judicious mixture of ordinary flour and water.
Now the belly-band must be tied on, as the flying string is attached to the belly-band. The belly-band is attached on the outside or convex side of the kite, being attached at 5 where the two sticks join; and at 3. It must be just as long as the distance from 5 to 2 added to the distance from 2 to 3. When tied at both ends put your pencil through the loop and move it so that the pencil rests upon the figure 2. The cord will then make an angle coinciding with 5-2 and 2-3. At the angle 2, attach the belly-band.
In flying the kite it is important to have a very long flying-string.
Go-Bang Board (Bristol board, ruler, ink, pen, button-molds, water-color paints or colored inks)
Get a piece of bristol board or clean cardboard at stationer's and cut it 18 inches square. Divide by straight lines into small squares ¾ inches each way.
To [Pg 62] draw the straight lines in ink turn the ruler upside down and run the penholder against the edge, which is a little raised from the paper. This keeps the ink from blotting.
Four is the smallest number that can play with much success, and each should have about a dozen counters. These can be made of the smallest sized button-molds, each set of 12 painted a different color, or distinguished by a ring of a particular color drawn upon its upper surface with ink or paint. Small flat buttons may also be used.
To win the game each player must succeed in getting a certain number of counters (number previously agreed upon), say four, five or six, in a straight row, either horizontally, vertically or obliquely. If he gets three in a row, then the next player should stop this opponent's progress at one end of the line by putting one of his own men there, and must depend upon his neighbor to close the other end of the line. One player must not give warning to another of the prospective success of a third. Each must keep a lookout on his own account.
Checker-Board (Bristol board or any stiff, smooth cardboard, smooth, glazed paper of two colors, red and black, paste, scissors, ruler)
Cut from the cardboard a square of 15 inches. Draw a line parallel to each side one inch from the edge for a border. From each colored sheet of paper cut 32 squares of 1¾ inches each. Paste eight of these in a row, alternating colors, and arranging so that they just touch the top border line. Make eight such rows, one beneath the other, and finally giving 64 squares.
For checkers, button-molds of small size may be used. [Pg 63] Twelve will be needed of one color and twelve of another. Paint these with water-colors. Flat porcelain buttons may also be used.
Toy Screen (Tinted cardboard, punch, worsted or ribbon, 4 small pictures)
Cut four pieces of pale blue Bristol board 3 × 4 inches. Punch two holes in the two long sides of two of these, and in one side of each of the remaining ones. Tie the four panels together with the ribbon or worsted so as to make a tiny screen, first pasting on each panel a miniature picture of a Madonna and Child or some other similar subject. Suitable for child to give as Christmas gift. Must be done neatly.
Fan (Bristol board, pencil, worsted, two slats, scrap picture)
Cut two pieces of tinted Bristol board into ovals, 6¾ × 8 inches. Make a series of pencil dots ¼ inch from edge of oval and one inch apart. Through these, holding the ovals together, punch holes. Sew together with worsted, using the overhand stitch. Having gone around once, if cross-stitch effect is desired, go around again the other way, going thus through each hole a second time. For handles take two long slats and glue on to each side of the fan from the centre down to the point of the oval, and beyond. Paste a pretty scrap picture over the centre to finish off. Tie the worsted around the ends of slats in a pretty knot to hold them together. Baby ribbon may be used instead of worsted.
Cardboard Animals (Glue, blocks or spools, picture-books, cardboard, tissue paper)
Find models in picture-books, or get from Butterick Fashion [Pg 64] Co. their animal pictures, or same may be had from kindergarten supply stores. Trace outline upon tissue paper, using soft pencil. Turn paper over on cardboard and trace firmly again around the outline. This leaves impression of picture. Cut it out and glue it to block or spool, or attach a cardboard brace to one side to make stand.
Candlesticks (Squares of bright tissue paper, Bristol board, rubber bands)
Cut circle of stiff cardboard 5 inches in diameter. Draw upon it two diameters at right angles to each other. From the centre cut along each of these diameters for a little less than half an inch. Bend up the corners thus made and insert a candle.
Cut pieces of tissue paper 12 inches square; place the circle holding the candle upon the tissue paper, fold the latter around the circle and the candle, and put a rubber band around to hold in place. The appearance is improved if two colors of tissue paper be used. The effect up and down a table of these simple candlesticks is most festive. Colors may be changed to suit special occasions.
Chinese Toy (Three thin pieces of cardboard 2 × 2½ inches in measurement [visiting cards will do], 6 lengths of taffeta binding or baby ribbon, ¼ inch wide × 3 inches long)
The following toy can be made with little expense and very little trouble if directions are followed explicitly. It may be well to have an older child read each statement as the less experienced one tries to follow. A child who enjoys attempting things that are a little difficult will enjoy working this out.
Place [Pg 65] the three cards one beneath the other, narrow sides facing each other.
Letter the cards respectively A, B, C.
As they lie on the table, write on upper side of each card "right," and on the under side write "wrong."
Then place each card so that the "right" side is up.
Take card A and on right side at middle of top place figure 1 and at each lower corner place a figure 2.
Do the same with Card B.
Turn B card over and on wrong side of B put figure 3 at each upper corner and figure 4 at middle of lower edge.
Do same with card C on wrong side.
Now we are ready to unite the cards by the ribbons.
Take one strip of ribbon and paste one end on right side of card A at figure 1. Run it beneath the card and bring it out so as to paste the other end on the right side of card B at figure 1.
Take two strips. Paste one end of each at 2 on card A. Run beneath card B and turn up over so as to paste on figure 2 of card B.
A and B are thus loosely united and the toy may be considered finished, but it is more mysterious if made longer, as follows:
Turn over and at each figure 3 on card B paste the [Pg 66] ends of two strips of ribbon. (As ribbons already placed are loose this can be readily done.)
Run beneath B and bring up so as to paste the ends on each figure 3 of card C.
Take another strip. Paste the end on 4 of card B. Run ribbon beneath card C and turn up so as to paste on figure 4 of card C.
This completes set of three. Others can be added ad infinitum by ingenious children.
To operate (if the word be not too pretentious a one in this connection) take hold of one of the cards at either end and keep turning it up and down so that first one narrow edge and then the other is uppermost. The remaining cards should fall in a continuous cascade.
The rough sides may be finished by pasting on each a pretty paper lining cut just to fit. (See illustration.)
Chinese Kite (Kindergarten slats, paper, glue)
Take a firm, light paper (druggist's paper will do). Cut two oblongs, 7 × 10 inches. Cut off all the corners by an oblique line of three inches. Fold each oblong lengthwise. Place the folded edges back to back, still folded. Take two slats and place one under one oblong and over the other, horizontally. Do the same with the other slat, but reversing the under and over positions. Take four strips of paper, which should be about one inch wide. Paste two strips over the splints, one on each side, to hold them in place. Place a third strip from top to bottom of the folded oblongs to hold them together. (They meanwhile lying back to back.) Turn the oblongs over and [Pg 67] place the remaining strip in corresponding position. The result is a four-winged kite. Tie a cord around the slats and it is finished.
Ash-Tray (Cigar bands, glass saucer, photographer's paste, square of felt)
For some time past children who are under the sway of the collecting instinct have acquired from friends or by purchase the bright colored bands that come around cigars and then have utilized them thus: Make an ash receiver by getting at a stationer's a glass dish and its accompanying piece of felt. Paste bands in pleasing positions upon the under side of the glass. (Photographer's paste shows no discoloration.) Meanwhile, the felt should have been thoroughly wet, stretched to fit the under side of the dish, and hung up to dry. When dry, paste upon the under side of the dish and trim off neatly the projecting corners.
Pen-Tray (Materials same as above, except that stamps or embossed letter-heads are substituted for cigar bands)
There are many who do not wish to encourage smoking, and to such we suggest a pleasing modification of the above.
Buy the glass dish and felt above mentioned, and instead of the bands paste upon the dish canceled postage stamps or letter-head monograms, etc., for a pen-tray. A smooth glass saucer and any piece of bright-colored felt that may be in the house may of course be used.
Scrap-Book[Pg 68] (Colored paper-muslin, heavy sewing silk or worsted, paste, paste-stick)
Cut paper-muslin of pretty colors, pink, blue or tan, into pieces 8 × 13 inches (six pieces in all). Fold each one over once and fit together to make a book, the cover being of a color different from the body of the book. Sew all together by overcasting the back with stitches ½ inch apart in one direction, and then going back in the opposite direction through the same holes, thus securing a cross-stitch effect. Show the child how to paste scrap-pictures neatly in this book. He may keep it for himself or give it to the children's ward in a hospital or to some younger friend. A very little paste or glue will suffice; a bit in the centre and towards the corners of a picture.
If the child has collected a large assortment of cards before beginning to make the book, let him classify them, putting together on one page animals, on another plants, on another pictures typical of the different seasons, etc. He may in this way suggest a house, putting on one page kitchen furniture arranged in some logical order; on another page the furnishings of bedroom, etc. Pictures for this purpose may be cut from magazine advertisements, trade journals, etc. In the same fashion a store may be furnished with articles for sale, the counter, scales, and desk. This gives practice in selecting and arranging. Good taste may be inculcated even from such small beginnings.
While busy with thread and needle, the mother may find it necessary to suggest some happy employment for the little one who asks for something to do. What do the contents of the sewing-basket hint?
Spinning Button (Button, thread)
Show the child a button strung upon a strong thread about 12 inches long. Then hold the thread firmly between thumb and finger of each hand and twirl it rapidly, drawing it suddenly taut. The button whirls round, making a pretty spinning figure.
Stringing Buttons (Buttons, waxed thread)
If baby is so old that he is not tempted to swallow a pretty button, give him a strong thread waxed at the end to make it stiff, and let him make a chain of buttons. They may be strung according to size or color or shape, giving practice in counting, in arrangement, and in choice.
Buttons as Counters (Buttons)
Save disused buttons of the same kind and let the child classify into two or more sets to be used as counters in games like checkers or go-bang. See page 62.
Button-Mold Wheels[Pg 70] (Molds, brush, water-color paints)
Give the child four wooden button-molds of the same size and let him paint spokes upon them so that they will be ready any time to use as wheels for a toy wagon. Call him a little wheelwright.
Button-Mold Tops (Molds, match or toothpick, gilding or paint)
Paint or gild a button-mold and then stick through the hole a toothpick or burnt match whittled to right size and show the child how to spin it.
Button-Mold Counters (See page 62)
Toy Furniture (See page 15)
Toy Tree Boxes (Spools, green paint, matches, green paper, scissors, paste)
Let the child paint an empty spool green, to be used as a tree box. Insert a burnt match to which has been pasted some green paper, previously fringed, to represent foliage. The child can make a row of such trees as a little boulevard up which he can draw an empty match box for a carriage.
Spool Tower Target (A number of spools, ball)
Pile a number of spools one on top of another and let the child try to knock them down with his ball.
Toy Road Roller[Pg 71] (Spool, cord, toy horse)
Tie a cord through a spool and hitch it as a road roller to the Noah's Ark horse.
Pulley Elevator (Narrow cardboard box, such as a corset box or shorter one, spool, cord, another small box, either saved or made, narrow enough to fit inside the larger one, skewer)
Stand the large box on its narrow end and near the top punch a hole on each side so that the holes are opposite to each other. Take a spool and run through it an axle made of a slender piece of wood like a skewer. Then put the ends of the axle in the holes in the box. This makes the pulley. Use the smaller box as an elevator. Tie a string to this little box in such a way that you can hold it up evenly. To do this you must punch a hole in each of the opposite sides. Then tie one end of a longer string to the middle of the first named, and put the other end over the pulley. Revolve the spool by pulling one end of the string and the box will be raised.
Matching Colors (Spools of silk or cotton of various colors, silk and cotton fabrics of different colors)
Have a color game, asking the child to try to match the colors on the spools with those in the fabrics.
Breastpins (Broken needles, sealing wax, candle)
Take a large broken needle, such that it is intact except for the eye. Show the child how to make a pretty pin for dolly by melting the wax a little in the candle flame, inserting the head of the needle, and molding into shape the bit of wax that adheres.
Threading Needles[Pg 72] (Needles, thread)
If eager to do something, give the child a number of needles with thread of white and black, and let him thread them and put them into a cushion so that they will be all ready for your use some morning when you are in a hurry to sew on a button or take a stitch in Tommy's little shirt.
Thimble Biscuits (See page 104)
Drawing Scissors (Scissors, paper, pencil)
Give the child scissors and paper and let him place the scissors on the paper and draw the outline around them. Then tell him to cut out this outline. Make several such and play at keeping cutlery store. Draw scissors open at different angles and tell names of angles; right, acute, obtuse.
Guessing Distances (Ruler or tape measure)
Let the children guess the height and length of various objects in the room. Verify by measuring with the tape-measure. Tell them of Oliver Wendell Holmes, the great poet, who, whenever he drove into the country, carried a tape-measure with which to determine the girth of any large tree he saw.
Let children measure the size of the panes of glass, window-frames, etc.; have them tell how many feet it would take to carpet the floor.
Tell them to put father's hat on the floor, near the wall, and guess its height.
Such little exercises develop the powers of accurate observation in a way that may prove very helpful in an emergency.
or
Expression with Pencil or Brush
Let the child early be given charcoal or colored chalks, and later the three pigments—red, blue and yellow—wherewith to express his ideas. Allow him some choice in the medium he uses—as pencil, charcoal or brush—as one may be best suited to his purpose one time, and another one at another time.
Encourage the child to tell a story by painting or drawing. The earliest graphic method by which man conveyed messages to one at a distance was through picture-writing.
Painting From the Real Object (Paints, chalk or charcoal)
Place before the child an apple, banana or flower of simple form and let him copy directly from the object without previous drawing. Encourage his efforts, however crude the results at first. It is more educative to draw from the real object than from a copy. Give him at first three colors only, in paints, till he learns how to get other colors by mixing these. For [Pg 74] this purpose point out beautiful sunsets and cloud effects in Nature.
Life Stages of Seedling (Paper, paints, seedling)
Place before the child a bean or pea. Give him an oblong of paper 3 × 8 inches. Fold it into four parts. In the first let him draw or paint the seed as he sees it. Then let him plant the seed. In a day or so let him paint a picture of the seedling, after having grown so as to show the development of the seed leaves. Draw two other pictures to show later stages of growth. This gives a picture history of the little plant and while so occupied the child is learning to observe and note that which he sees.
Calendars (Water-colors, brush, paper, calendar pad)
Draw circles, squares, etc., and let the child fill in the outlines with color. A tiny calendar may be pasted in the center and ribbons put through wherewith to hang it up.
In filling in these figures show the child how to hold the brush lightly so as to secure freedom of stroke. Let him make long strokes beginning at the top of the paper and moving from side to side slowly downward, or rather as rapidly as is consistent with neatness. Have enough water on the brush so that the color will not dry from one long stroke before you are able to go back and carry it on to the next stroke. Practice making a clean, smooth surface.
Nature Pictures
Let the child fill one sheet thus with blue, a picture of the sky. Another sheet may be covered with green, [Pg 75] a meadow. Still another sheet may have the upper part blue and the lower green.
Prism (Secure glass prism from kindergarten store or from some candelabra you may have at home)
Place in sunlight and let child observe colors and the order in which they appear; always in the same order—the cold colors at one end, the warm ones at the other. Let the little child try to catch and hold the lovely "light-bird."
Pigments (Water-color paints, glasses of water)
Dissolve a little red, yellow and blue paint in three separate glasses. Then, by mingling these—the primary colors—show how the secondary colors—orange, green and violet—may be obtained.
Transparent Papers
Get at a kindergarten store the transparent papers and isinglass used in color work. By overlapping one upon another different hues may be obtained. This may be done also, though less effectively, with colored tissue papers; but these are not so pure in tone.
Color-Top
Color tops may be procured at kindergarten stores. With the top come paper circles, of standard colors, with their tints and shades, giving a great variety. These are so slit that by placing two or more on the top according to directions and revolving the top, any tint or hue may be mathematically produced.
If [Pg 76] the child has made his own button-mold top, let him cut circles of white paper and slip them over the axis of the top. Make a dab of color here or there on the paper with paint or chalk. Whirl around and observe the effect. This will lead up to a better understanding of the above-mentioned color-top which is manufactured by the Milton Bradley Co.
Toy Wagons and Houses
If the child has made wagons or houses of wood or cardboard, let him paint them in broad, free strokes. It is desirable that the little child be given work which involves the free movement of the larger muscles which such work demands. This may not appeal to one as belonging under the head of art, but we learn from Mr. Pennell that in Sicily the wagons of the peasants are beautifully decorated with landscapes and other pictures, and that the artists are particular to make their names conspicuous.
In any case a certain artistic feeling is required in choosing the colors and rightly applying them even in house-painting and wagon decoration. And meanwhile the child is learning how to wield his instruments.
Place Cards
Take a clover leaf and practice painting from it until able to make a copy good enough to paint upon a place card for the table. If the drawing be correct, just a flat wash of color will do for the painting at first.
An autumn leaf will do for a Thanksgiving card.
See Festival Occasions for other ideas.
Tops[Pg 77]
If a button-mold top has been made, it may be painted in concentric rings or the entire surface may be neatly colored.
Match-Safe
This has been described upon page 34.
Designs for Rugs (Paper, brown or white, paints or chalk)
Let child draw or paint design for toy rug he is making for doll-house. He may make an oblong of one color, and at each end draw lines across, which are to be woven in another color. There may be one line at each end, or two, or three, etc. The arrangement of these lines and their distance apart allow much scope for taste and judgment.
Designs for Wall-Papers, Oilcloths, Etc. (Parquetry papers, paste, etc.)
1. Have child observe oilcloth designs and then with kindergarten parquetry papers try to make similar ones for doll-house.
2. Having made pasted designs, let him copy same in water-colors.
Design for Stained Glass Window (Transparent paper, scissors, white paper, paste)
Cut a circle out of the white paper. Fold it once, which gives a half-circle; fold again, which gives a quarter-circle. Holding it folded, cut several ellipses, triangles, etc., into the folded edges. Open out and you have framework of a rose-window. On the back of this paste a piece of transparent paper (see page 75), red or green or yellow, and let the light shine through. [Pg 78] Hang in window for transparency. Suitable for Easter gift. Vary by cutting like cathedral windows. (See illustrations in dictionary under "Tracery.")
Chased by a Goose (Pencil, paper)
Once some boys lived in a house (make a dot) surrounded by a strong fence (draw circle round the dot). A short distance off was a large pond (an oval, a little below and to the right of the circle). One day the boys ran down to the pond (draw curved line from house to pond) and began to splash in the water and to throw it at each other (a number of oblique lines from right hand end of pond). Some distance off lived some Indians in two wigwams (two oblique lines meeting at the top and next to them a similar pair, like two tents, just below the pond). When the Indians saw the boys throwing the water out [Pg 79] they began to chase the boys, running up a zigzag path (from each tent draw an oblique line to the right for a short distance and then turn to the left till it meets the pond). The boys ran as fast as they could up a winding path parallel to the one they ran down (draw curving line parallel to first one), and then ran to the left partly around the fence surrounding the house. They had to run around the barn, too (an oblique line to the left and then another to the right till it meets the circle again), and when they looked behind them they found they had been chased by a goose!!!
A little practice will make this easy for the story teller. The original dot and circle form the head and eye of the goose. The curving path is the neck. The water splashing out makes the tail feathers. The wigwams and the zigzag path form the legs and feet, and the path around the barn makes the bill.
What little girl does not love a doll? The more variety in their size and style the better pleased is she. Below are a number of suggestions for simple home-made dollies that may be prepared as a birthday or other surprise by older brothers or sisters.
1. Clay-Pipe Doll
Ink in the eyes, nose and mouth on the back of the bowl of a pipe; dress in calico gown and apron, and put on a sunbonnet to conceal the top of the pipe.
2. Clothespin Doll
Ink features upon the head of the clothespin and clothe as either boy or girl.
3. Wishbone Doll (Wishbone, sealing-wax, material for trousers)
Clothe the two limbs in trousers and ink in the features upon the flat joining bone. Feet may be made of sealing wax melted, pressed into shape and attached while still warm.
4. Peanut Doll (Peanuts, sewing-silk, glue, thread and needle, silk for dress)
Make [Pg 81] into Chinese doll. Take one peanut and ink in the features, making the eyes slanting. Glue on a queue of braided silk. String together several peanuts to make the body. To the upper one add on each side one or two as arms and string several together to make legs. Dress in wide-sleeved jacket and wide-legged trousers of Oriental design.
5. Yarn Doll (Skein of white cotton yarn)
Cut the skein into lengths of 12 inches. Double the skein over in the middle and tie a string tight around about two inches from the top, forming a neck and so making the head. Tie another string further down for a waist line, but leave out a few threads on each side, of which to make two arms. Tie these near the ends to indicate wrists. Before tying the wrists cut the threads to right lengths for arms. The features may be put in with ink.
6. Cork Doll (16 or more corks saved from olive bottles, etc., smooth wire or hairpins—three in number)
String several corks upon the wire or hairpin for head and body. Through the second cork from the top run a hairpin sideways for arms, and fasten two corks upon each projecting end, cutting off any of the wire that may extend beyond the cork. Through the lower cork of the body run another hairpin and fasten two corks upon it for legs. Turn the end corks sideways to suggest feet. Dress the doll as desired.
7. Paper Doll (Fashion papers and catalogues, scissors, paint, paste)
Most little girls find great pleasure in making their own paper dollies and the garments therefor. Fashion papers [Pg 82] and catalogues afford many dolls for cutting out, and tissue paper, crinkled paper, the lace paper found in candy boxes, etc., form the raw material for beautiful Parisian gowns.
Dolls may of course be cut out of white paper and beautiful countenances painted upon them, or holes may be cut in the head for eyes, nose and mouth.
8. Rag Doll (White cotton cloth, cotton batting, paints, scissors, needle, thread, water-color paints or blueing and red ink, raveled rope, etc.)
Cut a large newspaper pattern of a doll. Then double the cloth, pin the pattern upon it and cut the two sides for the doll. Run neatly around with close stitches, beginning at the neck, and when nearly finished turn inside out, stuff with the cotton batting, and sew up the head. Paint in the features or use blueing for eyes and red ink for mouth and cheeks. Ravelings of rope will make silky hair, and fingers may be indicated by stitches.
1. Cigar-Box House (Small cigar-box, paste, scissors, pictures, etc.)
A cigar-box, small as it is, will give great delight to a child who is aided in furnishing a little room. Stand the box up on the long side. Paper with wall paper of a small design. Then furnish with things made by the child himself; pictures cut from catalogues, and other accessories as described below.
2. Pasteboard-Box House (Four pasteboard boxes, glue, paint)
Select [Pg 83] four strong pasteboard boxes of uniform size. Boxes such as the "Martha Washington Candles" are packed in will do. They measure 7 × 11 inches. Lay aside the covers and remove any paper which may be attached to the inside of the box. Spread a thick paste of Spaulding's glue or furniture glue over the surface of one side of a box. Fit one side of a second to this glued surface and put aside to dry. The third and fourth boxes are treated in the same manner. When securely glued in pairs place the boxes with open sides facing you. Cover upper outside surface of one pair of boxes with a thick coating of glue and set the second pair on top of these in the same position.
Now, one has a pasteboard house of four rooms—two upstairs and two downstairs. When securely fastened together cut in the partition separating the two upper rooms a door four inches high and three wide. Two windows measuring 3 × 4 inches, two inches from floor, may be cut in the back of the house. The same treatment may be given the rooms downstairs. One may arrange a kitchen and dining-room downstairs and a parlor and bedroom upstairs.
Oil paints, such as are used in painting furniture, which come already mixed in small cans, may be used for painting the exterior of the house.
In using this paint it is well to remember always to put sufficient paint on the brush to cover the entire surface of the wall of the house, from edge to edge, without lifting the brush. A strict observance of this rule insures a neatly painted surface. If desired, one may use yellow, green, or any light color for the interior.
Remnants of cartridge paper or paper decorated in small designs can often be obtained of paper-hangers for [Pg 84] a small sum. It may be fastened to the floor to serve as a large rug.
3. Soap-Box House (Three wooden soap-boxes, nails, saw, paint)
Take three soap-boxes, wooden. Remove the covers from two and place one upon the other to make a two-story house. Put in partitions thus: Take a thin piece of board (from a smaller box), saw to needed height and depth and nail it in place by driving nails from above, below or the side, as the case may require. A stiff piece of cardboard (taken from a large box) may be made to serve as partition. If cut to the right size the pressure from top and bottom will hold in place.
By taking two small boxes for the upper floor instead of one large one the space which would be naturally left between can be made into a hallway. Stairs may then be made of stiff cardboard, folded into steps, with a strip of obliquely-cut paper pasted along the edges of the steps to keep them in place.
If windows and doorways are desired they must be cut or sawed in after being drawn where desired in pencil.
The third box is for the gable roof. It is to be placed on top of the upper floor so that its sides slant for the roof. Put in place and then mark off all that needs to be sawed away. When ready to be fixed permanently put in place and nail through.
The furnishing of the little house gives much scope for ingenuity and invention as well as for the exercise of good sense and good taste.
The exterior of the house can be painted with house paint, and this gives occasion for the broad use of [Pg 85] the larger muscles, and physiologists tell us that the little child should exercise the larger muscles and nerves while the finer ones are still undeveloped.
Tiling (Corrugated packing cardboard, tacks, hammer)
The roof may be given a tiled effect by covering with corrugated packing cardboard saved from packages. Tack this on.
Papering
1. Paper with wall-paper. Scraps of it may be saved when the home is being papered.
2. Oil-cloth effects may be obtained by pasting on floors or walls designs made with the kindergarten parquetry papers. (See page 168.)
3. Friezes may be made in the same way by using circles and squares in rows, alternately or successively.
1. Cork. (See page 37.)
2. Block (Blocks of wood or kindergarten blocks, cubes and oblongs)
Glue these blocks together, three cubes making a little chair, and cubes and oblongs making a bed or sofa. Get the carpenter to saw a number of blocks of different shapes and sizes and let the child use his invention in putting them together. The furniture may be painted or gilded.
3. Paper or Cardboard
Take a piece of paper 1 × 2 inches. Fold crosswise. Make [Pg 86] a dot ¼ inch from the folded edge and ⅛ inch from right hand edge. Make dot ¼ inch from fold and ⅛ inch from left hand edge. From open edges opposite fold make two parallel cuts to these dots. These cuts make the four legs. When opened out a table is seen with two extensions for drop-leaf. Cut one of these extensions off and a chair is made. If the original paper is longer and wider it can be made into a bed, what were the leaves of the table being bent up into the head and foot of the bed. An ingenious child can vary and elaborate this furniture ad infinitum. The backs can be cut into fancy form and arms given to chairs and sofa.
Use one of these paper chairs for a model, place on cardboard and draw around the outline and so obtain a stiffer bit of furniture. Rockers can be drawn, added to the feet, and cut out, thus making a rocking chair.
Pictures and Clocks (Trade journals, scissors)
Cut from trade journals and attach to walls.
Lamp (Twist spool, toothpick, half egg-shell, wax)
Paste a bit of paper on top and bottom of twist spool. Through this stick a toothpick, which the paper should hold firmly. Upon the top of the toothpick fasten a half egg-shell for a globe with bit of wax or glue.
Stove (Cardboard, black ink or paint)
Make oblong box of cardboard. Turn upside down and cut openings for top of stove. Make a small hole in the back of the stove and insert in it a piece [Pg 87] of paper rolled into a stove-pipe and pasted. Cut openings in front for the grate and ovens, leaving a door for the latter. Ink or paint black.
Windows (Thin white paper, oil, glue)
Brush a piece of white paper over with ordinary machine oil, or olive oil, or dip it in the oil and when dry glue in for windows, telling the children that not very long ago that was the only way in which light was admitted to many houses before glass became so common.
Isinglass may also be put in for windows.
Doll's Bedstead (Cigar-box, glue, gilt-headed tacks)
Saw the cover of box into two pieces, one for the head and one for the foot. Fasten in place to the box with the decorative tacks. Legs may be attached if desired.
Curtains (Cheesecloth or lace, needle, thread)
Cut small squares of cheesecloth and let the child hem and put in windows for curtains. Do not insist on very fine sewing for beginners. Curtains may be edged with lace, or the entire curtain may be made of lace, tacked or glued to inside of window.
Telephone (Two spools, nail, tin mucilage top, string, small flat block)
Take a flat piece of wood about two inches square. Glue to it the flat end of small spool. That is the 'phone. Another spool is the receiver hanging, when not in use, upon a nail driven into the wood. The mucilage top has the slot into which to drop the imaginary nickel.
Grocery Store (Wooden soap-box, small cardboard box, scales, toy barrels, tiny pill boxes, sand, pebbles, etc.)
A small wooden box makes the store. A smaller cardboard box turned upside down will make the counter, or small pieces of wood can be nailed together by the little amateur carpenter. Buy toy scales or make some as described below. Small barrels can be obtained at toy store or little bottles and boxes can be filled with small quantities of tea and sugar, with tiny bags of pebbles for potatoes, apples, etc. Cranberries make acceptable play apples. Corn and nuts also will find places. Tacks can be hammered in on which to hang tiny brooms, and by hammering in two long nails and laying a narrow board upon them a shelf can be made for the canned vegetables. Let the children make their own brown paper bags, looking at a real one for a model.
Scales (Two small square cardboard boxes, made or bought, twine, skewer or other slender stick of wood or metal)
In each of the four sides of a box make a small hole near the top. Take two pieces of twine each four times the width of the box. Tie one of these through two opposite holes of the box and the other piece through the two other holes, being sure that the strings when tied are of equal length. These two strings cross each other. In the middle, exactly where they cross, tie one end of a string three inches long. Raise the box by this string and it should hang exactly true. Arrange the other box in the same way.
Now [Pg 89] take the skewer and exactly in the middle tie a string of three inches. To the ends of the stick tie the ends of the twine already tied to the boxes. Raise the skewer by this string and the boxes should hang evenly, like scales. If they do not, slide one or the other back and forth until they do balance.
Use in the toy grocery store. Playing store is always a fine opportunity for indicating lessons of honesty in business. Train the child to give fair weight and measure, even in play.
Merry-Go-Round for Dolls (Cardboard, large ribbon spool, stiff paper or kindergarten folding paper, slender pencil, tiny flag)
Cut two circles of cardboard, one five inches in diameter; the other, ten to twelve. Using the smaller one as a base, stand on it a large ribbon spool (spool around which baby ribbon comes). Glue the large circle to the other end of the spool, parallel to the other lower circle. Make a hole in each circle. Run a slender pencil through the upper cardboard, then through the spool, and then through the lower circle, making an axis round which the spool may revolve, carrying with it the upper circle.
On the upper circle paste alternately animals cut from paper or cardboard, and benches also cut from cardboard. Elegance may be added by gilding the spool and letting a tiny flag float from the point of the pencil. Cut out paper dolls for a ride.
Dolls' Park (Starch-box, earth, moss, twigs, tiny mirror, etc.)
Fill the box with earth and sand for a foundation, and then with moss, twigs, elder-berry sprigs, etc., [Pg 90] fill in the fairy-like details. A toy swan or boat adds to the reality.
Rugs for Doll-House
1. Make the loom by taking a slate and knocking out the slate so as to leave the frame intact. Hammer a row of small nails half an inch apart along the two narrow sides. Then make the warp by stringing strong cord back and forth across the nails. Tie first around one corner nail; carry to and around the two nails opposite, then back and around the next two, and so back and forth till it is all strung. The rows of cord should be parallel.
2. Instead of a slate, looms of various sizes may be roughly made of four narrow pieces of wood measured, sawed, and nailed together at the corners. A curtain slat could be so used, or wooden boxes will furnish raw material for such. A loom 4 × 6 inches is a good size for a beginner.
For woof, use coarse worsted or ribbon to begin with, or colored cheesecloth torn into narrow strips.
Use the fingers at first, later a bodkin, weaving under one cord of the warp and over one, back and forth, till a tiny rug is made. Fasten ends by weaving in and out a short distance into body of rug. At first make rug all of one color, or a rag-carpet effect can be obtained by tying into a long string worsteds of various colors. If a plain color is used a border can be made by running in a strand or so of a different color.
Let the child employ his artistic and creative abilities in making designs for the rug with paints or crayons. Draw an oblong of one color with stripes across the ends, one, two or three in number, at different distances apart. Variety can be secured by taking [Pg 91] up two threads at a time or running under one and over two, etc. Warn the child not to draw the threads too closely or the rug will have the shape of an hour-glass when finished.
A washcloth can be made thus by weaving it of narrow pieces of cheesecloth.
Take the rug or cloth off the loom by raising carefully over the nails.
3. Another simple kind of loom is made by taking a piece of cardboard measuring 6 × 8 inches. Draw a row of eight dots half an inch apart. Opposite these, and six inches away, draw another row. With strong cord sew through these a set of straight stitches, six inches long and half an inch apart. This makes the warp. Run the worsted woof under and over these cords as in any weaving, and tear the cardboard away when finished.
In playing games children learn lessons of fair play, of mutual forbearance and patience, and of letting a playfellow "have a chance," which they learn in no other way. Apart from the important bodily exercise and development gained in the active physical games, the demand upon mental and moral qualities is of immeasurable value.
A child should never be permitted to cheat at a game, even "in fun." A game loses significance as a game when one person does not "play fair." The child to whom even the thought of so doing is impossible begins the race of life with an immense advantage, for we believe that the foundation for all real life is character.
We give a few games which have been tried with success either in the home, the kindergarten, or the playground. Some of these plays require materials; others do not. In some cases instructions are given for making the required materials.
Circle Tag
One person stands in the center of a ring of children and each one in the ring holds out his right hand. The one in the middle tags one of the hands and [Pg 93] the owner immediately gives chase till he catches the pursued.
Vary by having both tagged and tagger skip, hop, etc., instead of run.
Racing Tag
Players form circle. One goes outside the ring and runs or walks around, suddenly quietly touching another player, who immediately races with him, going around the ring in opposite direction.
Vary by having contestants bow three times as they pass each other.
Wood, Iron or Paper Tag
One child chases another who touches for goal anything made of wood, or iron, or paper, etc., as has been decided upon beforehand. If the pursued is caught before he succeeds in touching such object, he becomes "it." The goal may be a wooden stick or tree, or an iron rake, or a paper book, etc.
Japanese Tag
Form a long line of children, one following closely behind another in a march or run. One child outside the line is "it." He tries to tag some one in the line. The leader endeavors to prevent this by twisting his file rapidly in and out in a curving line, and, by so throwing out his arms, as to protect the threatened one, as the line twists and turns with him. If one is tagged, the leader becomes "it." The leader and his train of children must of course be alert in mind and active in body.
Cross-Tag
Of a group of children the one who is "it" chases any [Pg 94] one he chooses to begin with, but if another child runs in between the chased and the chaser, the chaser must follow the one who has thus run in between. If he shows signs of fatigue a third child may run across between the two, etc., he then being chased until the tagger succeeds in catching some one, who in turn becomes "it."
Allied to the tag games are the racing games, of which we give only two.
Potato Race (Twelve potatoes, two tablespoons)
Place six potatoes in a row about three feet apart. Place six others in a parallel row some distance away. Give two players each a spoon, and at a signal they start to race. Each player runs up his row, picking up the potatoes, one by one, carrying each in turn to a given point, then coming back for another potato, till all are thus carried. The left hand must not assist. The one who first gets his potatoes safely to the spot decided upon wins.
Clothespin Race (Handful of clothespins)
Arrange the children in two rows, equal in number. Give the first child a handful of clothespins, laid straight. At a signal he passes them down the line. If one is dropped it must be picked up by the one dropping it and put as before with the others and then passed on. Reaching the end of the line, they are at once passed back again to the starting point. The side wins which first get back all the pins.
Kinds of Bags (1. Ticking or strong calico, strong thread, needle, baking-beans. 2. Felt, sewing silk)
1. Make a strong bag of bright colored material, 6 × 8 inches in size. Fill with the ordinary baking-beans and overhand the top.
2. Take a piece of felt or any pretty strong material which will bear the wear and tear of the game. Cut into two circles 5 or 6 inches in diameter. Sew together on the wrong side, with a seam of one fourth inch. Then cut in the center a small circle half an inch in diameter. Turn the odd-shaped bag inside out, fill with beans and overhand the small circular opening with close stitches of silk. These bags can be more easily caught than balls by little hands.
Kinds of Games
Children usually hand down familiar games from one generation to another. Here are a few:
1. Children stand in a circle with one in the center who throws the bag to each in turn all around the ring, or else tries to catch some one napping by throwing it unexpectedly.
2. Vary by having children stand in a row and the leader throws to each in turn. Or children stand in opposite rows and every one in one line has a bag which all throw in unison to the child opposite. These in turn throw back in perfect rythm.
3. Vary again by tossing into the air in unison. The accompaniment of music is always a thing to be desired in such rythmic games.
4. One [Pg 96] child stands in center of ring and tries to catch the bag as it is tossed across to some one on the other side of the ring.
The games just described may be played with balls as well as with bean-bags, and thus require more co-ordination on the part of the child's muscles. We give a few other games in addition.
Counting-Ball
Let one child bounce the ball, striking it from above with the palm of his hand and counting one, two, etc., until he fails to hit it, when another child takes a turn.
Guess-Ball
A row of players number off from one end 1, 2, 3, 4, etc. The last number steps in front of the row a distance such as may be needed to secure certainty of aim and touch on the part of those who throw the ball. The player in front stands with his back to the others. Those in the row now begin to pass the ball sideways from one to the other. The player in front having counted a given number, the one who happens to hold the ball at the time must at once throw it at the player in front. If struck, the latter turns quickly and tries to judge from the attitudes of the various players which one threw the ball. If he is right, places are exchanged. If he guesses wrong, the game continues as before.
Cup and Ball (Cardboard, worsted, funnel)
Make the ball by cutting from cardboard two circles [Pg 97] about two inches in diameter. Inside the large circles draw smaller ones about one-half inch in diameter. Cut the smaller circles entirely out, thus leaving a hole in the middle of each large circle. Keep these two large circles together. Now, with a needle, wind worsted round and round through the opening in the two circles until it is completely filled, so that the needle cannot be pushed through. Hold in the left hand, and with sharp pointed scissors cut the worsted at the edge of the circles, spread the circles a little apart, and tie a strong thread firmly around the worsted between the two cardboard circles. Then tear the cardboard circles away and a pretty ball remains. Tie this ball, with a string twelve inches long, to a kitchen funnel, and let the child try to catch the ball in the funnel.
Ring-Toss (Small wooden box, broom-handle or dowel, nail or glue, embroidery rings or hoops of small keg)
Saw a foot from a broom-handle or dowel (a child's broom will best serve the purpose). Glue or nail this to a box. Let the child practice tossing over this post rings taken from a small keg; or embroidery rings may be used. These may be wound around with bright colored strips of lining or with ribbon. The rings should be graduated in size.
Grace-Hoops (Basket reeds, raffia)
Make a wand of three or four basket reeds cut into two foot lengths. Wind these more or less loosely with string, just so as to hold them together. Then wind around and around closely and smoothly with a strand of raffia so as to bind firmly together. If [Pg 98] held smoothly, several strands of raffia may be used at one time. If reeds are not to be had lilac branches may be used instead. The result should be a wand firm and stiff.
Make the hoops by soaking the reeds first in water for an hour to make flexible. They should be cut into lengths of about 2½ feet. Curve several into a hoop and tie. Then wind smoothly and firmly with the raffia. The ends of the latter may be disposed of by threading upon a large needle and running it a short distance in and out of the part already wound.
Two wands and one hoop are required for each player. One tosses a ring from her two wands to her opponent, who must catch it upon her own wands.
This once popular game cultivates both alertness and grace.
In the kindergarten the children use wand and ring in playing "knights." One child holds the ring while the little knight gallops around the circle on an imaginary steed and tries to capture the ring on his lance (wand), as at an old-time tournament.
Croquet with Peas (Peas, hairpins or double-headed tacks, nail or match, toothpick, cork, cover of starch-box)
Bend hairpins into shape or use double-headed tacks as wickets. Insert into the cover of a wooden starch-box for ground. For a stake use a nail or a painted match-stick. Sharpen this to a point and insert it in a hole previously made by hammering in a nail. Make mallets by inserting matches or toothpicks into heads made of small pieces of cork. Use peas for balls.
Put the whole outfit in a box and give to little sister for her doll's birthday.
Egg-Shell Game [Pg 99] (Egg-shell, long table, four tumblers)
Blow an egg-shell and paint with some college colors as a foot-ball. Take four tumblers and place two at one end of a long table for goals and two at the opposite end for goals, the two which make a pair being four inches apart. Divide the party into two competing groups. Those on one side must try to blow the shell between the tumblers of their opponents. These must try to defend their end of the table and at the same time try to blow the shell between the tumblers of their opponents. This makes a merry game for young people.
Cherry-Stone Game (Save and dry a dozen or more cherry-stones)
Scatter the stones lightly on the table. They will fall so that some lie closely together, others far apart. The first player selects any two stones and draws his finger between them so that he touches neither. If he succeeds thus far he must then try to snap one (with thumb and middle finger) so that it strikes the other. If this succeeds also the two stones belong to him and he has another turn, continuing until he either touches a stone in trying to draw a finger between two or fails to make one of the two hit the other. The second player will not fare so well, because the remaining pairs will lie closer together than those first chosen, so that great care will be needed in drawing the finger between two. Sometimes it is necessary to use the little finger. At the end the player having most stones wins the game. The stones may be dyed or painted if desired. The game suggests tiddledy-winks and crokinole.
Donkey Game[Pg 100] (Picture of a donkey, minus a tail, and one dozen separate tails. These may be bought in large sheets for ten cents, but may be cut out of paper if drawn first by skilful hands)
Pin the picture to the wall in some spot where it will not deface it. Give each player a tail with a pin sticking through it. Blindfold him. Turn him around three times and send him in the direction of the picture to pin the tail on the donkey. The one who succeeds in fastening a tail nearest to the proper place wins the game.
Blowing Out the Candle (Candle in candlestick)
Place a candle on the table. Blindfold a player, turn him around three times about six feet from the candle. Then let him try to find his way towards it and blow it out. He may have three trials.
The Countess of the Huggermuggers (Two candles in candlesticks)
Give two players each a candle. They take places about eight feet apart. Then each takes a step forward at the same time and makes a solemn bow without smiling; then another step and bow; and then a third. Then one says solemnly, "The Countess of the Huggermuggers is dead." The other one rejoins, "I am very sorry to hear it." The first one replies, "So am I." Then each takes three steps backward, with a bow each time, and all without a smile. Whoever smiles must give up his place to another player.
Rope and Sandbag[Pg 101] (Rope ten feet long, with handle at one end which may be made by knotting the rope, and a sandbag or other weight at the other. Sandbag may be made of strong goods sewed into a bag and filled with sand. In a kindergarten a weight has been improvised out of a child's rubber shoe)
Some one stands in the center of a circle of children and swings the rope so that the weight just grazes the ground. The children must be sufficiently attentive and agile to evade the rope by jumping over it as it passes them. Do not begin until the rope has acquired momentum enough to move with a degree of regularity.
Omnibus Swing (Strong rope or chain, staples, soapbox, wooden plank, nails)
If fortunate enough to have a barn or summer-house, or a playroom with a strong beam in the roof or ceiling, place a pair of strong staples in the beam (hammock hooks would serve the same purpose) a few [Pg 102] inches apart. Six feet from these place another pair of staples in the beam. From each pair of staples or hooks suspend a loop of rope so that it comes about one foot from the floor.
Take a plank about eight feet long and one foot wide and cut four notches in it, two on each side, about six inches from the ends. Place the plank so that it hangs held by the two ropes, which slip into the notches in the plank, the notches keeping the ropes in place. Upon this several children can swing back and forth lengthwise, and so play at rowing, riding, trolleying, etc., as imagination dictates. If a soapbox be nailed at one end the baby may be put into this for a safe ride.
Anagrams (Tinted Bristol board, black ink or paint, heavy pen or brush)
Cut the Bristol board into 1-inch squares and let the child paint or draw upon these squares the letters of the alphabet, one letter to each square. There should be at least a dozen of each letter and many more A's, E's and S's, as these letters occur frequently in English words. Two games may be played with these letters as follows:
1. Give the child the four or five letters that compose a word and let him try to put them together in the right way as: H-s-e-r-o (Horse).
2. Several players are needed for this game. The cards must be placed upside down in a box so that the letters are not seen. Each player takes a letter in turn, the first time round, and places it in the centre of the table. At the second time round, each, as he takes a square from the box, tries to form a word with it, either by using a letter from the central pool or by taking away an opponent's word. If he takes from [Pg 103] an opponent he must take an entire word. As he forms a word he places it before himself, the aim being to get five or ten words before any opponent does. If he can form no word he puts his letter in the pool. The number of words making the game must be agreed upon beforehand. For example: In the pool are placed in turn the letters g, b, f, t. Player I, continuing, draws from the box the letter a and with the letters in the pool can form bat, which he places in front of him, leaving g and f in the pool. Player II draws an l, and as he can form no word, he puts it in the pool. Player III draws an e and takes away the bat of No. I, turning it into beat. Player II draws an o, which with the g from the pool, he turns into go. Player I then draws again, and so the game continues until one player has, we will say, five words, the number agreed upon, and so wins.
Weighing Honey
One child crouches, clasping his hands beneath his knees tightly. Two older persons then take the handles of the honey-jar (the child's arms) and swing him back and forth, counting one, two, three, etc., with each swing until the hands give way. The number of counts tells the number of pounds in the jar.
Peanut Party (Several quarts of peanuts, and a pretty little bag measuring 6 × 8 inches for each guest)
Before the little guests arrive, hide the peanuts in corners, under cushions, and in all possible hiding-places, singly, or two or three together. At a signal all of the children begin to search for the peanuts. The [Pg 104] one finding the most wins. Give a reward of a peanut doll. (See page 80.)
In no such games of competition is it a good plan to have expensive prizes. That plan ministers to a weakness inherent perhaps in human nature, but one to be discouraged—the desire to win, not for the sake of success, but for the sake of the prize. The giving of a valuable prize engenders feelings of envy and caters too much to the gambling instinct. It tends to destroy the spirit of fun and play which is the real object of a social gathering.
A part of such an entertainment would appropriately be the making of peanut taffy or of peanut animals. (See page 23.)
Spider-Web Party (Balls of pretty twine, one color for each guest)
Take a ball of twine and to the end attach a card bearing the name of one guest. Then unwind it, twisting it around different articles of furniture, chairs, table-legs, door-knob, chandelier, etc., till the thread is judged to be long enough. Then cut, and to this end tie some trifling gift. Arrange in this way one ball and gift for each child expected. When the time for playing the game arrives, give to each child the card bearing his name, to which twine is attached. At the signal for beginning, each one follows up his line, unwinding and disentangling it as he goes along, till the end of the cord bearing the gift is reached. As each little visitor receives something, there is no unwholesome spirit of rivalry.
Thimble-Biscuit Party (Dough, silver thimbles)
While making biscuits for supper give the little child a silver thimble to use as a biscuit cutter, first rolling [Pg 105] the dough to a thickness one-third the height of the thimble. When he has made a good array put them into the oven. They will bake quickly and to the child will seem to surpass the best cake made.
Invite a group of little children to a thimble-biscuit party. A dough of flour, water or milk, a little salt and baking powder will be sufficient and the little workers will be very happy making the wee biscuits. Only silver thimbles should be used.
While the biscuits are baking a few games, notably "Hide the Thimble," will pass the time. Served with a little jam or milk they will make a delicious repast, with dolls and Teddy Bears for company.
Butterfly Party (White paper, oil paints, in tubes)
Uncovering the tube, make a dab of paint with it near middle of a sheet of paper. Immediately beneath make a long stroke of another color. Now fold over lengthwise along the middle of the long line of paint. While folded press and smooth with finger over the first spot. This when opened will be the head of the butterfly. Keep paper still folded, however, and press along the line of paint to make body and then make a side pressure to make the wings. Open out, and there is the general suggestion of a beautiful butterfly, which, held up so that the light shines through, may be really very pretty. A little experiment will show how improvements can be made. Any color may be used. Invite your friends to an evening butterfly party and give a prize for the best one made; the prize may very suitably be something in butterfly form; a penwiper, or lamp-shade, or something similar.
Autograph Picture (Ink, paper, coarse pen)
At the butterfly party, autograph portraits also may [Pg 106] be made. With a coarse pen, filled with ink, each person writes his own name in turn. Take the flowing autograph, fold it lengthwise through the middle and crease, making special pressure at the top and drawing out slightly at the side. Open up and the result is a queer portrait of the owner of the autograph with suggestion of head and arms.
Enclose autograph on two sides by straight lines; when folded and then opened, the portrait will be framed.
Festivals have always held an important place in the life of home and community. The anniversary of the day of birth, or of marriage, the day of graduation, or of coming of age—what opportunities they offer for strengthening the ties of kinship, for creating hallowed associations that may often prove bulwarks of safety in later days of temptation and sorrow!
Christmas, Easter, Thanksgiving, are now National holidays with us, and our celebration of these beautiful festivals is one more link in the chain which binds us to all races and creeds; for the return of the sun at the winter solstice, the renewal of life in the spring, the ingathering of fruits in the autumn, have appealed to all peoples as fitting occasions for the expression of religious joy and for mutual congratulations upon dangers past and the results of work accomplished.
In the joy of such occasions, we must not let them degenerate into the mere mercenary exchange of material gifts.
Christmas is preëminently the children's day, when we annually remind ourselves of the divinity inherent in all childhood, and desire to bring joy to all children and goodwill to all peoples.
Easter means most to the adult who has experienced sorrow and disappointment and has known something of the anguish and awe and deepening of life that comes with the message of Death. The pleasure of the child in the hare and the Easter egg must [Pg 108] not be allowed altogether to overbalance the wondrous symbolism of the Easter lily.
The National holidays—Washington's Birthday, Memorial Day, Independence Day, etc.—take us outside the limits of the home and remind us that, as we thank the men and women of the past for the privileges of the present which we owe to their sacrifices and aspirations, so we should realize our obligations towards the future.
In celebrating these different festivals, let the child bear his small part. We give a few ideas of things which he may do or make. It is these early impressions which are the lasting ones. The actual service demanded of the child counts much in the formation of character, though even more important is the spirit which radiates at such times from the parents and friends who celebrate or prepare to celebrate these recurrent holidays. It is the "spirit which giveth life," here, as everywhere.
The suggestions will be given in the order in which the holidays come in the year. Where an article is described in another part of the book, it will not be repeated, but the page number will be given for reference.
Place Cards at Table (White card, pressed four-leaf clover, or paints)
1. Having found and pressed four-leaved clovers in the days of summer, paste one lightly to each place card as symbol of good-luck.
2. Copy a clover-leaf with paints and write on card some appropriate quotation signifying good-will.
Decorated Note Paper[Pg 109] (Writing paper, leaf, paste or paints)
Paste a real clover leaf (or paint one) on the writing paper upon which you may be writing a New Year's letter to your friend.
Calendar (12 oblong blotters, white or colored, ribbon to match, 1 inch wide and about ¾ yards long, tiny calendar pad, paste)
Take the calendar pad apart and paste the leaf for each month upon one of the blotters. Then tie the blotters together with the ribbon. This makes suitable New Year's gift. (See also page 74.)
New Year's Bells (Red cardboard, scissors, paste, ribbon)
Cut out a bell and paste a calendar pad on it. Or cut 12 small bells and paste one leaf of calendar pad on each, stringing all together with ribbon.
Good-Luck Pigs
With our German population the pig signifies "good-luck," and at New Year's pigs, big and little, made of various materials, are quite in order. A favorite candy, made of sugar and bitter-almond, is in the shape of a pig, and is used to present to friends at this holiday time. Many suggestions already given may be carried out with the pig idea in mind.
Midnight Watching
If friends stay up to watch the Old Year out, any of the above-named articles may be made by the children for souvenirs. A poem which may suitably be read at this time is Tennyson's "Ring Out, Wild Bells;" also, Longfellow's "The Poet's Calendar." A timely [Pg 110] topic for discussion is the never-answered question: When does the new century begin—with January 1, 1900, or 1901? Timothy Dwight, President of Yale College, 1795-1817, wrote some clever verses apropos of the subject when he helped usher in the 19th Century.
Save lace papers from candy and soap boxes and they will prove useful when St. Valentine's Day comes in making Valentines. With these papers and scissors, paste, scrap pictures of flowers, doves, etc., the children will spend happy hours in making these dainty souvenirs. We give a few directions for making some such.
Single Hearts (Red cardboard, lace paper, scrap pictures, scissors, paste)
Cut a heart out of the cardboard and around the edge paste a border of lace paper, fulling slightly and attaching it to the under side of the heart. In the centre of the upper side of the heart paste a pretty scrap picture. This makes a simple but effective Valentine.
Chain of Hearts (Red cardboard, scissors, scrap pictures, paste, red ribbon)
Cut several hearts out of the cardboard, and, after punching holes in the top and bottom of each one, string them together, pasting a scrap picture on each one if that added touch is desired.
Double Hearts (Red cardboard, scissors, paste, strip of red paper)
Cut two hearts of different sizes. Then take a narrow [Pg 111] strip of red paper measuring ¼ × 1 inch and fold it into thirds. While still folded attach one end of this paper to the centre of the upper side of the large heart and the other end to the centre of the lower side of the smaller heart. This unites the two, one resting on top of the other, the paper acting as a kind of spring to raise one above the other. Instead of a small heart a scrap picture may be thus attached on the larger heart.
In cutting out these hearts it may be necessary first to cut a pattern out of newspaper, making several trials before a satisfactory model is secured.
Lacy Valentine (Gold or silver paper, white tissue paper, scrap pictures, paste)
Cut from a sheet of gold or silver paper a piece measuring 5 × 7 inches. Fold this once through the middle so as to make a book of 3½ × 5 inches. Cut a piece from the tissue paper of 3½ × 5 inches. Fold this two or three times and cut into it tiny perforations—oblongs, diamonds, circles, hearts, etc. Then open out and observe the lacey effect. Practice this until something pretty and dainty is secured. Then upon the centre of the book paste a scrap picture and attach the tissue paper by its edges to the Valentine in such a way that the picture shows a little between the perforations. A narrow strip of stiff paper folded in three, to give the effect of a spring as described above, may be used at each corner. Inside of the booklet paste other pictures as fancy dictates. Also write therein some appropriate lines.
Spider-Web Design (Gold or silver paper, Bristol board, scrap picture, paste, scissors)
Cut a circle of gold or silver paper, three or four inches [Pg 112] in diameter. Fold once, making a semi-circle; fold once more making a quarter-circle. Beginning at the point of the folded paper, make a tiny cut from one edge towards the other, but do not cut the point entirely off. Turn the paper and make a second cut parallel to the first about ⅛ inch away, the cut being from the other edge of the paper. Turn again and make a third cut. Each time the cuts grow in length owing to the increasing width of the triangle or quarter-circle. Continue thus until the circumference of the folded circle is reached. Then open out and you have a silver spider-web effect. Take a square or circle somewhat larger than the web, and in its centre paste a pretty bird, flower, or maiden. Then paste the web upon this background, putting the paste along the edges of the web, but leaving the centre free, so that the child can raise it and peer through the slits at the picture beneath.
Let city children send to country cousins scrap pictures, colored papers, etc., and sample Valentines, so that their friends may have the pleasure of making and giving.
Valentine Dinner
Soup: Put into the clear soup the noodle hearts, which may be purchased at a grocery store, or have a vegetable soup, slicing the vegetables and cutting them into little hearts with a knife.
Meat: Make chicken or beef croquettes, molding them like hearts.
Vegetables: Slice the boiled carrots and potatoes and cut into heart shapes.
Bread: Cut into hearts.
Salad:[Pg 113] Upon green lettuce leaves place hearts cut from beets.
Dessert: Ice cream may be obtained in the form of a Cupid or something similar, and cake may be decorated with white icing having pink hearts outlined upon it. The peppermint candies in the shape of hearts, which have sentiments printed upon them, may be passed either at the beginning or the end of the meal. Cut in half, placing the halves in separate dishes; then pass one dish to the girls and the other to the boys, and by matching halves partners may be found. Let the children, however, remain unconscious of the distinction of sex as many years as possible.
In making preparations for the dinner let the children help.
Place Cards for Dinner (Red paper, white cardboard, scissors, pencil)
Cut a heart from the red paper. From the white, cut an arrow, drawing it after a pattern found in some book. Making two slits in the heart, run the arrow through it. On the reverse side of the heart write the name of the guest.
Decorations for Valentine Dinner (Red cardboard, red ribbon)
Cut about two dozen hearts all of same size, or graduated in size. String these upon the red ribbon and suspend over the table.
Luncheon Card (1. Picture hatchet, cardboard, scissors, paints; 2. Same—also white or reddish brown paper)
1. Find[Pg 114] a picture of a hatchet and use it as a model from which to cut one about two inches long. Paint this in colors resembling the real hatchet, and upon the reverse side write the name of the guest.
2. From a piece of white or reddish-brown paper cut a one-inch square. Paint so as to resemble cherry wood. Roll so that one edge overlaps the other a trifle, simulating the trunk of a tree. As they overlap cut a tiny slit through the two. Cut out a tiny cardboard hatchet, paint as above, and insert in this slit so that it holds the two edges together. Before fastening in this way, an appropriate quotation may be written inside, and the name of the guest on the outside. It should stand up if rightly made.
Decorative Cherries (Paraffine, spool of wire, not too fine, green cloth or paper, carmine oil paint, brush, paste)
Purchase at the grocer's cakes of paraffine such as is used for preserving purposes. Heat a cake in a dish so that it is soft enough to model into balls the size of a cherry. While still pliable make a slight depression in its surface. Having previously rolled the wire in the green tissue paper, and cut into inch strips for stems, insert this into the cherry at the depressed part of its surface. Cut out cherry leaves of paper, or better dark green cloth, place a little paste on these leaves at the back and arrange a stem on each one. When the stem of the cherry is firmly fastened in the fruit, paint the surface with carmine oil paint. This gives a polished appearance to the surface like the natural cherry.
The stems of the green leaves may be trimmed about the stems of the cherries in twos or threes or more, according to the number of cherries used.
Paper Chains[Pg 115] (Colored paper in sheets or cut into strips, paste, small brushes or sticks)
The making of paper chains, in contrasting or uniform colors, is a delightful pastime for children of all ages. Very little children may easily learn to make one loop at a time, and, with assistance, are soon able to fasten several loops together.
Kindergarten Supply Stores furnish strips of colored paper already cut, and put up in packages. These strips measure 36 inches in length. It is very easy, however, to cut strips from large sheets of paper, and it is an excellent lesson in accurate cutting for children over ten years of age.
These paper strips may measure one or two inches in width and the entire length of the sheet. Cut the long strips into short strips measuring four inches in length. Holding the four inch strip in the left hand, put a very little paste on the under surface of one end of the strip. Overlap the pasted end of the strip to its unpasted end, and hold firmly until fastened. You now have one paper loop. Through this loop is placed another four inch strip—the paste is added in the same manner. Now you have two loops. Continue doing this until you have the chain the required length. These chains are very effective when used in decorating.
For Washington's Birthday, red, white and blue paper would be used for the chains.
Bonbonnieres (White tissue paper, red and blue aniline dyes)
Very attractive bonbonnieres may be made by cutting oblong shaped sheets of white tissue paper, measuring 6 inches in length and 5 inches in width. Fringe [Pg 116] the shorter edges of the paper, making fringe 1 inch deep.
Dissolve any good red and blue dyes in boiling water, and place in separate dishes. Dip one fringed end of tissue paper into the red dye for one second, and dip the other fringed end into the blue dye. Shake these ends gently in order to let the water drip from them. When they are dry, place a large sized candy in the centre of the paper, and gathering up the fringed ends, twist them close to the candy, thus forming a feathery effect in two colors. These are very pretty when arranged on the table either in quantity or singly.
Tents (White shelf paper, paste, match stick, red, white and blue paper)
Groups of white tents, made of white shelf paper, capped at the top with tiny American flags, may be placed at short distances from the centre piece of a luncheon or supper table with good effect.
The large sheets of shelf paper may be bought at any grocer's. Cut them into four-inch squares. Place the paper before you on a flat surface, an edge nearest you. Fold the front edge to the back edge of square; crease the paper at the fold, open the paper and fold the right edge to left edge of square; crease the fold again. Open the paper and turn the square so that a corner points towards you. Fold this front corner to the back corner, so that the two points exactly meet.
Crease on the fold, open the paper, and fold the left corner to the right corner of the square. Crease on the fold. Open the paper; before you you have a square of paper, with eight folds across its surface, a fold running front edge to back edge, from right edge[Pg 117] to left edge, from right corner to left corner, from left corner to right corner. Turn the square of paper over so that all the folds on the surface of the paper are on the upper side of the square. Place the square with a corner toward you.
You will now see eight folds running from the four edges and four corners to the centre of the square. Crease with thumb and forefinger of right hand the fold running from lower right edge to centre of square. Place this right hand fold of square forward so that it lies along the fold which extends from the corner directly in front of you to the centre of the square. Follow the same directions in folding the crease that runs from the lower left edge to centre of square. These two folds touch now on the fold that runs from front corner to centre of square. You will see a small triangle extending below the two folds which thus meet in front of you. Fold this small triangle back toward the centre, and underneath the two folds that meet in front of you. One half of your tent is folded. The same directions must be followed in folding the other side of the square.
The two small triangles must be carefully folded so that the tent will stand evenly when finished. You will see when the front and back part of the tent is finished that you have the right and left corners to dispose of. Fold these corners underneath the tent, so that when it is placed in an upright position it will stand firmly. To make the tent stand well, crease the edges that run from the four corners to top of tent, thus making an exact pyramid. The use of a little paste in securing the folds is of great assistance.
To represent the tent pole, a wooden match, gilded, may be used. To this attach a tiny American flag made of pliable red, white and blue paper.
Paper Lanterns[Pg 118] (Scissors, red, white and blue paper, liquid gold paint, box of small candles, circular box covers, baby ribbon—red, white and blue)
Lanterns made of red, white and blue paper, each of one color only, ornamented with gold paint and tied with the red, white and blue baby ribbon, are extremely pretty for supper decorations. When suspended from the chandelier above the centre of a supper table, a lighted candle in each little lantern, the effect is charming.
In view of entertainments where decorations are called for, it would be well to lay aside all small circular box covers that find their way into the household. The small box covers that measure 2½ inches in diameter may be taken as a standard size. These box covers form the bottom of the lanterns.
Cut from the colored paper an oblong piece measuring 8 inches in length and 5 inches in width. Lay the oblong piece of paper before you with its long edges running right and left. Draw a pencil line the length of the paper ¾ of an inch from the upper edge; ¾ of an inch from its lower edge draw another line which will be parallel to the first.
From the upper pencil line to the lower pencil line draw 15 lines ½ inch apart. These upright lines will form 14 narrow oblongs. Use very sharp pointed scissors, and cut away each alternate oblong. Paste the two short edges of the oblong paper together, one end overlapping the other. The body of the lantern is now finished.
Let a little wax drip from a candle on the inside of the circular box cover at its centre. When a little bed of soft wax is formed, place an unlighted candle on it in an upright position. Place a thick coating of Spaulding's glue on the inner surface of circular[Pg 119] rim of the box cover, and carefully fit the body of the lantern into it.
When the paper lantern is securely fastened, gild heavily the outside rim of the box cover and the upper and lower circular bands which form top and bottom borders of the lanterns. In the top circular band punch four holes equal distances apart, through which the ribbons are run.
Place Cards (White cards, water-color or oil paints, brush)
Paint a picture of shamrock upon the card. It may be copied from some picture, if not from the real plant. If not possible to find a picture, our wild-wood-sorrel (Oxalis acetosella) is supposed to be the same as the shamrock and may be used for model. Some authorities believe the white clover to be the original shamrock.
Flags (Irish flag, green paint, gold paint, brush, scissors, slender sticks)
If one Irish flag is bought the children may copy it, painting a number, one for each guest, or for decorating table. Glue flags to sticks.
Ribbon Flags (Green satin ribbon, one inch wide, wooden toothpick)
Cut the ribbon into oblongs to make wee flags. Glue to tiny flagsticks and put at places at dinner table.
Shamrock Plants
The real shamrock is now brought over and may be[Pg 120] purchased in March. A little plant makes an appropriate souvenir. Or several weeks before the day, children may plant shamrock seed in tiny pots for use on the 17th.
Potato Race
A potato race is an appropriate game for St. Patrick's Day. (See page 94.) Give cork doll for prize to winner of race (page 81), as souvenir from Cork.
St. Patrick's Dinner
Have as many green vegetables and side dishes as possible. Spinach will color the soup. Green vegetables and salads are easy to obtain and ice cream may be colored with pistache. Irish flags may be suspended over the table.
Dinner Souvenir (Blotting paper, souvenir postcards, green ribbon ½ inch wide)
Give each guest a blotter made thus: Buy souvenir postcards with pictures of Killarney and other Irish views. Cut the blotting paper into sheets of same size as cards. Place together. Punch hole at one end and tie together with ribbon.
Egg Shell Garden (See page 25)
Sponge Garden (Small, clean sponge, birdseed)
A few days before Easter, sprinkle the sponge with birdseed. Keep damp and the seeds will sprout and cover the sponge with growing blades of green.
Easter Eggs[Pg 121] (1. Diamond dyes, a dozen eggs. 2. Small figured calico, lye, boiling water)
1. Boil the eggs hard and dye with the colors according to directions on package, which may be had at drugstore, price five cents.
2. Wind strips of the bright calico around the eggs and boil in water strongly saturated with lye. The lye extracts the color, which will be found printed upon the eggs.
Place Cards for Easter Breakfast (1. White paper, scissors, paints. 2. Plain white cards, paints)
1. If possible secure a real Easter lily for a model. If this cannot be obtained, a picture of one will answer. From the paper cut, freehand, if possible, the shape of the lily and paint it lightly; just a little shading and the golden center. Place the guest's name upon the reverse side. It may be necessary to draw the lily first before cutting, but the freehand cutting is a good exercise.
2. Decorate a white card with the picture of a lily, or a tulip, using water-color paints. Below the flower write an appropriate flower motto.
Celluloid Place Cards (White celluloid, scissors, pencil)
Get from a dictionary or natural history a good picture of a butterfly with open wings. Draw a pattern from this and then outline a number of these on the celluloid and cut out. These dainty, spirit-like butterflies will make suitable place-cards, having the name of guest on the reverse side.
Cut Easter lily of celluloid in same way.
Easter Chicken[Pg 122] (Yellow worsted, black beads, quill toothpick, cardboard, wooden toothpicks, or picture-wire.)
Make a yellow ball as described on pages 96-7 for the body of the chicken. A smaller ball makes the head. Sew on the beads for the bright black eyes; cut the quill into shape of a bill and sew into place. Let wooden toothpicks form the legs; or, better still, take picture-wire made of several strands. Wind some of this around the body, letting the ends of the wire extend about 1½ inches below the body; sew to the body to keep in place. Then pick out the ends of the wire a little to suggest toes and wind the legs with worsted. Sew chicken to a card.
Easter Card (Parquetry circles used in kindergarten, paste, gray card, scissors)
The little child may make an Easter card by pasting upon a neutral-tinted card pictures of tulips made of the kindergarten parquetry papers. Cut in half either red or yellow circles. Place so that the lower ends touch and the upper ones are a little apart, suggesting a tulip. A strip of green paper will represent the stem and an older child can cut leaves of the green paper and paste on. Have a real tulip from which to copy. Child may give this to Father on Easter morning.
Toy Screen (See page 63)
Make dainty screen as described, and paste on each panel a tiny Easter picture (Perry pictures may be had by addressing firm in N. Y. City). Give to Mother on Easter morning.
Church Window Transparency (See page 77)
We give no special suggestions for the celebration of Memorial or Decoration Day. The ideas given under the headings of the other patriotic holidays, as Washington's Birthday and Fourth of July, may be used also for this holiday, but it is not a day for mere play.
If the parents plan to go to the cemetery let the child accompany them and carry flowers, preferably those of his own raising or plucking.
Reading
It would be well also on this day to read some great piece of patriotic literature, either prose or poetry, which will help the older children to realize the great debt which we owe to the preservers of our country, to whom we dedicate this day. Lincoln's Gettysburg address should be read. Also Lowell's "The Present Crisis." "Bugle Echoes," compiled by Francis F. Browne, contains 150 poems of the Civil War, both Northern and Southern.
Badge (Sheets of red, white, and blue paper, scissors, paste)
A simple badge may be made for the children to wear in this fashion:
1. Cut a circle ¾ inches in diameter out of the red paper. Cut also from the red, white and blue sheets strips of 2 × 5 inches. Paste the three strips together at the upper end like ribbons, letting them spread a little apart at the lower end. Paste the circle at the upper end to finish off.
2. Another style may be made by placing the three[Pg 124] colors so that one lies directly above the other. In this case the blue is 5 inches long, the white four inches, and the red three inches. Fasten to dress or coat with a safety pin.
Firecrackers (Red paper, hemp string, paste)
Get large sheets of red paper to be found at department stores or wholesale paper houses, measuring about 35 inches in length and 26 inches in width. From each one cut thirteen 2-inch strips, cutting the length of the sheet. Fold each strip once across the width of the strip, and cut through the center at the fold. This gives twenty-six 2-inch strips of paper, the width of the small sized firecrackers.
Hold a strip of paper between the thumb and forefinger of the left hand. Moisten the thumb of the right hand a very little, and roll the end of the strip towards the left, as one does in rolling a paper taper. Keep the strip rolled tightly until the other end of the strip is reached. If the cracker seems too loosely rolled unroll it a short distance, and gently pull the strip into form again.
Place a little paste on the under side of the loose end of the strip, and press the pasted end firmly on the rolled surface of the cracker. Hold this until it adheres to the surface of the cracker. Cut the hemp string into three-inch pieces. Dip one end of the string into the paste, then insert this pasted end into one end of the cracker at the little opening which is found at the very center. Hold this firmly for a moment, or until the string is securely fastened.
Tie six or eight firecrackers into bunches with red,[Pg 125] white and blue ribbons, and lay them over the white surface of the luncheon or supper table.
Firecracker Card (See page 55)
Drums (Small wooden boxes, liquid gold paint, Spaulding's glue, red, white and blue baby ribbon, small sticks for drum sticks)
The market basket will, from time to time, furnish the housekeeper with small circular boxes labeled: Electro-Silicon Silver Polish. These wooden boxes, measuring 8 inches in circumference and 12 inches in height, make, when prettily ornamented, very attractive drums.
Remove the cover of box, and place on its inner rim a coating of Spaulding's glue. Place the cover on the box again, and put aside until it is fastened. Place the box on a sheet of stiff white paper, and holding it firmly, draw a pencil line around its edge. Now remove the box, and you will see that you have outlined a circle. Using this circle as a model, draw a second circle. Cut out these circles, following the pencil very accurately. These two circles form the two heads of the drum, and are to be pasted on the top and the bottom of the box. Gild the circular surface of the box. Cut strips of red or blue paper, measuring 8½ inches in length and 1½ inches in width. Brush the under surface of these strips with paste, and place one strip at the top and one at the bottom of the drum, ¾ of an inch above the rim of the drum. These strips answer to the wooden bands which hold the drum heads in place. Red, white and blue baby ribbon may be carried from the upper to the lower edges of the drum if desired to represent the cords which hold the drum securely.
Little[Pg 126] wooden sticks, gilded and tied at the side of the drum form the drumsticks.
The smaller Electro-Silicon boxes, measuring 2¾ inches in circumference and 1 ⅓ inches in height, may be used in the same way.
Rosettes (Red, white and blue tissue paper, a strong needle, white sewing silk, white library paste or well-made flour paste)
Lay nine sheets of tissue paper one upon another, alternating the colors, red, white and blue. Fold these sheets together very smoothly once, thus making 18 smaller sheets if they were cut apart, but do not cut. Lay a silver dollar or fifty-cent piece (depending upon the size required) at the upper left-hand corner of paper. Draw a pencil line around the rim of the silver piece. Move the piece of money to the right and draw another circle. Continue this drawing circles until you have covered the surface of the paper.
Thread a needle with the sewing silk, knot the end of the thread and take several firm stitches through the center of each circle in order to hold the sheets of paper together. With sharp scissors cut out each paper circle, and fringe by cutting, but not too finely, from the edge to within ⅛ of an inch of the center of the circle. Hold the knot on the under side of the circle between the thumb and forefinger of the left hand. Slightly moisten the forefinger of the right hand and brush gently over the fringed surface toward the center of the rosette. At the back of each rosette put a bit of paste, then lay rosettes on strips of paper one inch in width. Do not overlap the rosettes, but arrange to allow the edges to touch.
These strips of rosettes may be used as festoons. As[Pg 127] decorations for cakes or dishes of fruit they can be used most effectively.
Shields for Luncheon Cards (Cardboard, red and blue paper, baby ribbon—red, white and blue, gold paint, water-color paints—red and blue)
Attractive luncheon or supper cards, suitable for patriotic occasions, may be made in the form of shields. Turn to the fourth page of Webster's Unabridged Dictionary, and find the shield used as the American Coat-of-Arms. This shield, enlarged to a size measuring 2½ inches in length and 2½ inches in width across the upper part, forms an excellent model. If one does not draw habitually, use tracing paper when tracing the pattern. If one uses watercolor paints successfully, paint the deep blue band across the upper part of the shield, and the twelve red stripes running from the band to the lower edge of the shield. For those who do not paint, dark red and blue paper may be substituted very successfully. A touch of gold paint on the edge of the shield adds greatly to the effect.
Write each guest's name on a card measuring 2½ inches in length and 1½ inches in width. Attach a card by means of red, white and blue ribbon to upper corner of each shield.
Rockets (Red, white and blue paper, paste, gold paint, slender wooden sticks)
Rockets are made in the same manner as firecrackers, excepting that the paper strips are cut wider, viz.: 3 or 4 inches in width, and more strips are required to give the proper size. This may be left to the maker's discretion.
When the rockets are rolled and pasted after the manner[Pg 128] of the firecrackers, insert the sharp point of a pencil into the center of one end of each roll, and gently push out this center to the distance of two inches. This will give the pointed end of the rocket. These pointed ends may be gilded, as well as the slender sticks which are inserted at the other ends.
The words "parade" and "procession" are associated in the minds of most American children with long lines of soldiers, and the small boy will play for hours putting his tin soldiers in rank and file, or marching with his comrades, with pans for drums.
In these later days, when the spirit of the Peace Congress is in the air, it is well that the children should become interested in struggles and battles of a different and higher order and in the parades in which long lines of honorable workers take part.
In this country all self-respecting people are workers in one way or another, and though in the course of progress of coöperative movements and combinations, among many kinds of workers, there may have been much of injustice, such movements have also been accompanied by self-sacrifice, courage and generosity of a high order. In time the good will far out-weigh the evil. As Labor Day approaches, the children, especially if the father expects to take part, will be readily interested in the day and what it should mean—the solving of the great problem of the twentieth century. Meanwhile let the children feel the beauty of Walt Whitman's lines:
The Labor Day parade is a revival, or survival in modern guise, of the mediæval processions of the Guilds. Such a procession is charmingly represented in Wagner's delightful opera, "Die Meistersinger," wherein, on a festival day, we see the bakers enter, bearing the insignia of their trade, enormous pretzels and other cakes. The cobblers march in with gigantic boots and slippers suspended from tall poles; the butchers carry hams and festoons of sausages, etc. The child may imitate such a parade in his play.
In talking with the child, emphasize the obligation to do good, true work and to take pride in such. Let fidelity and trustworthiness be his watchwords.
Parade (Poles or broom handles, wrapping paper or newspaper, scissors, tacks, rakes, spades, etc., flags and banners)
Let the children cut from the paper large outlines of shoes, boots, hams, saws, try-squares, clocks, watches, enormous pens, knives, forks, etc., and fasten with pins or tacks to the poles. Then march to the tune of some stirring air.
Some may be able to secure small garden rakes, spades and toy brooms to carry. The American flag and banners should also be carried.
Toy-Processions (Trade catalogues, toothpicks, paper dolls, etc.)
Cut out paper dolls and let each one carry a tiny toothpick upon which has been pasted a picture cut from some catalogue. These catalogues will furnish pictures[Pg 130] of shoes, carriages, saws, hammers, watches, furniture, etc. Be sure that little American flags are also carried. Dolls may be glued to spools for standards.
Place Cards for Dinner
1. (Bristol board, scissors, paints, brush)
Make place cards of Bristol board, which may be cut into shape of shoes, watches, etc., and painted accordingly. The name of guest may be placed on reverse side. Or, on plain white card, paint a picture emblematic of a trade and write upon it also some quotation from a writer of democratic spirit.
2. (Tiny cast-iron rakes, spades and hatchets—1 cent each.)
As a souvenir, give each guest a tiny cast-iron spade, rake and hatchet tied together with cord. Or, for a joke, these may be placed by each plate instead of knife, fork and spoon.
3. (Pen and ink or pencil, white card.)
Draw on a plain, white card a picture of an ant, bee or beaver as emblematic of labor. Use for place cards.
4. (Frances S. Osgood's poem, "Labor," white cards, pen and ink.)
On each card write one stanza of this beautiful poem, and after the close of the meal let each guest in turn read the lines on his card. It would be well for every child to commit this poem to memory. It is long, but sings itself easily into the mind. The word-pictures it calls up are exquisite and the learning of it, little by little, would not be an unhappy task.
This is the festival which is given over to all kinds of merry pranks and is dearly loved by the children. It is an opportunity to teach them to discriminate between the fun which is kindly and that which is malicious and productive of needless pain.
Ducking for Apples and Nuts (Large pans or tubs, apples, nuts, pennies)
Let the children, young and old, for once get themselves wet, if necessary, in ducking for the nuts and apples floating in the water. With a little suction some of the children will be able to get pennies from the bottom of the tub.
Fortune-Telling
1. With Needles. (Needles, pan of water)
Name a needle for yourself and one for a friend, and put in the water, but not together. If they move safely across, it betokens good luck. Two needles meeting indicate life partnership.
2. With Toy Ships. (Pan of water, nut ships as described on page 22 )
Name one little vessel for yourself and one for a friend and set them afloat. If they come to port on the other side all is well.
3. With Apple Rinds. (Apple, knife)
Pare an apple so that the skin comes off in one long piece. Toss over the head upon the floor, and the form it takes will give the initial letters of the name of one's future mate.
4. With[Pg 132] Cake. (Cake, thimble, ring, penny, etc.)
Bake a cake, hiding in the dough a thimble, a ring and a penny. When cut, the recipient of the ring is fore-doomed to marriage; the one getting the thimble will be a spinster; the one receiving the penny will have the pleasures and responsibilities of wealth.
Apple-Biting Contest (Apple suspended from a string)
1. The apple is set swinging and two people, standing opposite each other, try as it passes to seize and hold it in the mouth. They must not touch it with the hands.
2. Tie an apple by its stem to the middle of a string about a yard long. Then two people, each taking one end of the string in the mouth, begin, at a signal, to gather it as fast as possible into the mouth, and so to reach the apple. This belongs to the one reaching it first.
Refreshments
Apples, nuts, popcorn, cider, gingerbread and doughnuts are suitable for lighter refreshments. Baked beans and plain ice-cold rice pudding were once eaten with decided relish at a New York City Hallowe'en party, the city people evidently enjoying the contrast between this feast and the usual caterer's service. Serve fruit from a kettle suspended from three cross-sticks, a la witch.
Decorations
Jack-o'-lanterns of pumpkins; strings of apples, popcorn and cranberries, and toy brooms hung here and there, as reminders of the witches who are said to[Pg 133] be abroad, will add to the occasion. The pumpkins should be cut to resemble skulls.
Reading
Have some one read "Tam O'Shanter's Mare" (Burns); also some good ghost story. Thomas Kendrick Bangs' "Ghosts Which I Have Met" contains some good stories, all absurd. Choose a good reader for this.
Place Cards
1. (White or tinted cards, Palmer Cox Brownies, ink, pen)
The Brownies are delightfully funny little people without a suggestion of anything coarse or evil. The children love them. Let the older ones copy and cut them out to use as invitation cards for the Hallowe'en party or for place cards.
2. (See "Pricking," page 165.)
Since witches are always associated with the pricking of pins, this is an appropriate occasion for using the kindergarten pricking. Outline some of the Brownies on tinted cards and prick as directed on page 165.
3. (See Pumpkin Jack-o'-lantern cards, page 135.)
Place Cards (White paper or cardboard, brush and paints or pen and ink)
1. Cut out a turkey, copying from some picture if necessary. (Picture may be found in dictionary.) If[Pg 134] skilful with brush or pen, indicate the feathers, eye, etc.
2. Draw picture of a pumpkin. Cut it out. Paint in deep orange tones with shadings of brown. Cut into it eyes, nose and mouth, suggesting Jack-o'-lantern.
3. On white cards write stanzas from Whittier's poem, "The Pumpkin Pie," and let each guest read his stanza in turn.
4. Cut as many triangles as there are guests and paint each to resemble a slice of pie. One side of triangle should be curved.
5. Find a simple figure of a Puritan maiden and draw in outline; then cut out and paint or draw in black ink the important lines. Use as place card.
6. Make little walnut boats (see page 22), and on each sail write name of guest.
7. Find picture of Mayflower and copy on white card. On reverse side write a stanza of "The Breaking Waves Dashed High." Let each guest read his lines. (Or parts of "Hiawatha" about Mondamin may be used.)
Table Souvenirs (Tiny cast-iron gardening tools, 1 cent each)
As described under Labor Day, these tiny penny tools may be put at each place, the hatchet representing the knife, the rake the fork, and the spade the spoon. Attach name of guest to set.
Butter Modeling (Clay modeling tools, firm butter)
If any child has acquired a little skill in clay modeling, let him try his hand at modeling out of firm butter some form expressing a Thanksgiving thought.[Pg 135] It may be a piece of fruit, or some animal. Get clay modeling tools at art store.
Center Piece (Pumpkin, knife, fruits and vegetables)
Hollow out a pumpkin in such a way that a part of the rind is left as a handle to the remaining part, which serves as a basket. Into this basket put a variety of fruits and vegetables, emblematic of the bounties for which we are grateful.
Jack-o'-lantern (Pumpkin, knife, candle)
We doubt if any boy needs to be told how to cut a face in a pumpkin. A sharp knife will soon make the cuts for eyes, nose and mouth in the rind, the seedy contents having been previously removed. A hollow may be cut in the bottom of the interior to hold the candle, which can be made still steadier by melting a little from the bottom and letting it drip into this hollow, forming a waxy bed into which the candle may be inserted.
Candlesticks
See pages 24 and 64 for those made of apples and of cardboard and colored papers.
Room Decorations
1. Corn Stalks. (Strong cord and needle, hammer and tacks.)
Stack cornstalks in the corners of the rooms in effective positions, two or three to a corner. Those living in cities may find it well to secure these from farmer friends some time before the holiday.
2. Unhusked Ears of Field Corn. (Strong cord.)
The corn husks must be turned back from the ears and cut off from them without loosening the separate leaves.[Pg 136] Then a number of these husks may be strung upon a strong thread or string alternating with the ears of corn. Hang along the upper part of the wall as a frieze. The rich, warm tones of the brown and yellow are very effective.
3. Cranberries and Brussels Sprouts. (String, needle.)
Run upon a string half a dozen cranberries, then a Brussels sprout; then more cranberries, etc., and suspend this as a festoon along mantelshelf, in chandelier, or over window.
4. Autumn Leaves. (See page 47.)
5. Autumn Boughs. (Oak boughs.)
Oak boughs, with the rich red and russet leaves still upon them, are very handsome in the autumn. The beautiful branches may be gathered by the young people and hung in parts of the room where most effective.
Place Cards
1. (Sheet black paper, Chinese white water-color paint, brush.) Cut a stocking from the black paper (obtainable at kindergarten supply store). With the paint, paint in white toes and heels. On the reverse side write some appropriate quotation and name of guest. Stockings may be about four inches long.
2. (White paper, black ink or crayon.) Cut a rough figure of a snowman out of white paper, put in features with black ink or crayon, and write name on reverse side.
3. (Water paper, water-colors, scissors, spray of holly.) From real holly or a picture of same, paint a spray[Pg 137] of green leaves and red berries. Cut out around the edges and use as name card.
4. (Red cardboard, scissors, pen, ink.) Draw an outline of a bell on cardboard and cut out. An appropriate sentiment may be written upon one side and name of guest upon the other.
Surprise Nuts (See page 23)
Snowflakes for Tree (See page 59)
Snowball (White cotton batting, snowflake crystals from toy store, white cotton cloth, sewing thread, mucilage)
Cut two circles of cotton cloth, stuff with the batting, after sewing into shape of ball. Cover lightly with snowflake crystals, first dipping ball lightly into thin mucilage. Suspend from tree.
Candles (Paraffine or old candles, kettle, soft cotton string, small box of sand, pencil)
Candles have sometimes been made in the kindergarten in either of the following ways:
1. Heat a pound of paraffine (bought at grocer's), or melt up some old candle ends in a kettle. Place in front of the child a cigar box containing about a quart of moist sand, smoothed level. Then with his pencil let him press into the sand, making a deep, hollow mold just the width of the pencil. Now let him hold a short piece of string so that it hangs down into this mold. An older person will then pour some of the melted wax into the mold. It will cling to the string, and in a moment or two will cool enough to be drawn out, making a little candle that can be used for the[Pg 138] Christmas tree, or put into a clay candlestick, also made by the child. (See below.)
2. Put the kettle containing the melted wax before the child and let him dip into it a piece of string about four inches long. Then let him take it out in a moment and lay it aside to cool. A very little wax will cling to it. Meanwhile he dips in another string and puts aside to cool. When cool he takes up the first one and dips it in a second time, and a new coat of wax adheres. He proceeds thus until the candles are as large in diameter as desired (about ½ inch at base). The candles may be put into clay candlesticks, also made by the child.
Candlesticks (Clay, a tin or china candlestick to use as model)
Let the child take a candlestick and copy in clay; it should be of simple form, a mere cylinder, with just enough of a base to make a firm standard.
Candlesticks (Cardboard, scissors)
Cut small squares of cardboard. The candles may be made to stand temporarily upon these by melting the lower ends of the candles and letting some of the wax drip upon center of the cards, and then pressing the candle down upon the melted wax. These may be placed upon the table on Christmas morning.
Christmas Carols
Let the children learn some simple old carol, as a secret, and Christmas morning have them sing it softly and sweetly to awaken father. A full program of songs suitable for this most beautiful of days will be found in the little book, "The Children's Messiah," compiled by Mari Ruef Hofer, price 20 cents. It[Pg 139] gives also the address of a firm publishing stereopticon views for illustrating the program suggested.
Spider-Web Party (See page 104)
Arrange the twines of several colors as described on page 104, and at the end place the gifts belonging to each child.
Popcorn (Popcorn, popper, thread, needle)
Pop the corn and string into festoons with which to decorate the tree.
Christmas Bells (Red cardboard, scissors, thread, needle)
Make bells as described on page 109, only make them of various sizes. String, and use to decorate table or tree, or to festoon from the center of the ceiling to the corners and sides of the room.
Kindergarten Lanterns (Red, gold, or silver paper, scissors, thread, paste)
Take a kindergarten square of pretty paper or make a square of some attractive wrapping paper. Fold once into an oblong. Now cut a series of parallel lines from the fold toward the edge, stopping each about ½ inch from edge. Open and paste one end so that it overlaps the other, the cuts running vertically. This makes the lantern bulge out a little at the fold, giving a Japanese lantern effect. Suspend by a thread tied to the upper edge or paste a narrow strip of paper on for a handle. Use as decoration for Christmas tree.
Paper Chains (See pages 56 and 115)
Reading[Pg 140]
Read a part or the whole of Dickens' "Christmas Carol," "The Chimes," or "The Cricket on the Hearth;" or "Is There a Santa Claus," by Jacob Riis; or "The Birds' Christmas Carol," by Kate Douglas Wiggin. Longfellow's "Arsenal at Springfield" and "A Christmas Hymn," by A. Domett, are also appropriate.
or
Household Duties and Responsibilities
Train the children little by little to bear certain light responsibilities in the home. Even in a home in which all the household tasks are done by trained servants let the girl and boy have some small duty to perform, if it be nothing more than to keep the match-safes filled. They will thus acquire an interest in the home which can be aroused in no other way.
Indeed, every child, boy and girl, should be trained to do easily and well the common household tasks upon which depend so much of the happiness and well-being of the home. Such knowledge and skill often prove of use in unexpected emergencies and make for general efficiency. The ancient symbol of the housewife's office is her bunch of keys, hung at her waist or placed in the key-basket, so we have used this latter phrase as our chapter heading.
Here are a few brief directions for the usual home tasks in which both boys and girls may to some extent be trained.
Table Setting[Pg 142] (Usual dishes and cutlery)
Different homes vary in unimportant particulars in the placing of the dishes. The following is a common arrangement for the dinner table:
At each place lay the fork vertically at the left-hand side, the knife vertically at the right, and the soup-spoon to the right of the knife. This places each utensil so that it is ready for the hand which uses it most. Put the teaspoons to the right of the soup-spoon, and the napkin to the left of the fork. Place the glass just above the knife, the butterdish above the fork, and the individual salt-cellar, if used, between the two.
Father and mother sit at the ends of the table. Put carving-knife and fork at father's place; also the soup ladle, as father serves the soup and carves. Mother pours the coffee and tea and serves the vegetables. Therefore the soup and dinner dishes must be placed before the carver, and the needed vegetable dishes and cups and saucers at the mother's place. Here, too, must be placed the sugar bowl and cream pitcher.
In the United States it is customary to serve most vegetables upon individual saucers. In England they are usually served upon the plate.
If salad is to be served, oil and vinegar cruets may be put on.
The dessert is usually served by the mother, and the necessary dishes must, therefore, be placed at her end of the table.
If possible, always have flowers or a growing plant in the center of the table, but do not have it so high that it obscures the view of those persons sitting on opposite sides of the table.
Upon special occasions, particularly if the guests are[Pg 143] many, it is convenient to indicate the place of each person by a "place card" bearing his name and decorated in some appropriate fashion. Suggestions for such place cards will be found on other pages of this volume.
Table-Serving (Tray)
Train both boys and girls to wait on the table quietly and quickly. Then they can save mother many weary steps. Remove soup-tureen first; then the individual dishes. After the meat-course, remove first the platter and vegetable dishes; then the plates, saucers, etc., from each individual place; then, if there is no salad course, the bread and butter dishes, cruets, etc., from center of table. Next the table must be crumbed. Do this by quietly removing crumbs from each place with crumb-knife and tray or by brushing with folded napkin. If salad is served, crumbing takes place after that course.
Hold all dishes to left of guest, so that he may easily help himself with his right hand.
Dish-Washing (Hot water in quantity, dish pan, wire tray, drainer, washing-soda, soap, dish-mop, washcloth, towels in plenty, both coarse and fine)
If two people are to work together, let one collect the dishes and dispose of the left-over food, while the other washes the kettles and saucepans. Get these heavy cooking utensils out of the way the first thing; then the drudgery part is over before the workers are tired out.
Dishes in which potatoes, cereals, or eggs have been cooked should be put to soak, not in hot, but in cold or tepid water; they are then readily cleaned. Fill with water as soon as emptied.
Keep[Pg 144] a little washing-soda on hand, dissolved in water in a canning-jar, for cleansing greasy dishes. Have hot water in abundance, and, putting a little soda in with it, scrub the kettles briskly with the wire-brush that comes for the purpose, or with mop, dish-cloth or chain dish-cloth. Wipe dry with a heavy towel.
Meanwhile the other worker is collecting, scraping and classifying the other dishes. Before beginning to wash, have all the dishes assorted according to kind and size and placed convenient to hand. When putting away remnants of food it is well to have for the purpose a series of pitchers ranging from three inches to about nine in height. This gives sizes suited to any quantity which may be left over of soups, milk, liquid vegetables, etc. They take less room than bowls, and the graduated series ornaments the shelf.
A wire strainer should be kept in the sink to prevent the larger particles of waste, indissoluble parings, coffee grains, etc., from going down the drain. This saves plumber's bills.
When ready for the washing, begin with the glasses and wash quickly in hot water, either clear or soapy, as preferred. Have at hand a second dish-pan in which is placed a wire rack. Put the glasses in the rack, rinse with hot water, and dry rapidly while still wet and hot. It may be necessary to keep them in the water a moment or two to get them really heated through. In washing glass pitchers put a silver spoon in them before placing in the hot water. This prevents breakage. Treat canning-jars in the same way.
Next wash the silver, having the water soapy and piping hot, in order to get a good polish. Keep spoons, knives and forks in separate groups and all pointing in the same direction.
The[Pg 145] smaller, less greasy dishes follow the silver, and then the heavy china. Here, again, let dishes that have held eggs or starchy foods soak awhile in cold or tepid water. Rinse greasy dishes well.
Conclude by scrubbing tables and sink with cloth, brush, soap and sapolio as needed. Put the scrapings in the garbage pail and pour hot water and soda down the pipe to remove the last vestige of grease. Hang up the shining dish-pans, after washing out the towels and dish-cloth in soap and water, if they require it.
A can of Babbitt's Potash of Lye may take the place of the washing-soda.
Bed-Making (Two sheets, blanket, comforter, cover)
Put the lower sheet on with the right side up. Tuck it in neatly at the corners much as one would fold in the corners when wrapping up a box in paper. Place the upper sheet upon this with the right side down. This brings the two right sides together. Let the broad hem in each case be at the head of the bed. That of the upper sheet should just reach the head of the mattress.
Place the blanket with its upper end about six inches from the head of the bed. Then comes the comforter, placed in the same way. Fold the sheet down from the top just where the blanket ends. Tuck all in neatly at the sides and the foot. Now put the spread smoothly over all. It may be tucked in or may hang down as desired. Place the pillows with the closed ends of the cases together.
If an extra coverlet is to be placed at the foot of the bed, fold it in thirds so that the sleeper may reach down and draw it up over himself without rising to the floor.
To[Pg 146] put on a bolster-case easily, turn it wrong side out and then roll it up over the bolster.
Train children to air beds every morning by shaking up bed-clothing and extending it over footboard and chair.
Washing (Toy tub or tin basin, toy washboard, basin for boiler, soap, bit of blueing tied in bag, strong cord for line)
Put dolls' clothes or a few dustcloths or handkerchiefs in tub of warm water after soaping well. Let soak awhile, then rub out on the little washboard or between the hands, put into the boiler with cold water and just bring to a boil. Rinse in warm water or wash vigorously in warm water if necessary; then rinse in warm and then in cold water; put the blueing in a basin of cold water till the water is slightly tinged; remove the blueing bag and rinse the clothes in the water. (The blueing is to counteract the tendency of white goods to grow yellow with time.)
Hang up to dry in the air and sunshine.
Tell the children that the clothes must always be sorted, white body clothes being in one class, bed-linen in another, table linen in another; woolens must be washed by themselves with care to keep the water of moderate temperature and the rinsing water of the same degree of heat as the washing water. Flannels must be dried as rapidly as possible. Colored garments must be washed by themselves.
Ironing (Two irons, holders, ironing blanket and sheet, iron-stand, cake of beeswax or candle)
Before ironing the clothes must be sprinkled lightly with cold water, smoothed out and rolled up tightly for half an hour. Meanwhile pin the blanket to[Pg 147] the ironing board and cover smoothly with the sheet. The iron must not be so hot as to scorch the clothes. Try it on a piece of paper. If it seems dirty or rough, rub it on the beeswax to make it clean and smooth. (In place of wax a candle will serve the purpose if wrapped around with a piece of clean cotton cloth.) If the garment seems too wet, put a piece of white cloth over it and iron till somewhat dry. Then the iron may be placed directly upon the garment.
Starch is prepared by wetting and dissolving it in cold water and then pouring upon this boiling water and boiling until clear and smooth. The young child will not need to starch anything, however.
Sweeping (Broom, whisk-broom, hair-broom, sheet, sweeping-cap)
Let the little worker don sweeping-cap and apron, and then proceed to dust carefully small articles and books, place them on the bed and cover with an old sheet. Put furniture which is movable in the hall after dusting. Open the window. Then sweep the rugs on both sides and place outside. Pin up the curtains. Then dampen a newspaper and tear into small pieces; throw these on the floor to absorb the dust. Wet tea-leaves may be used for the same purpose.
Sweep, holding the broom rather closely to the floor and taking short strokes, raising as little dust as possible. Then leave the room for awhile, for the dust to settle.
Dusting (Dusters of cheesecloth, clean pieces of old silk, chamois-skin)
On returning to the room after sweeping, wipe off the baseboard, then the furniture, always working from[Pg 148] the top down. To reach high corners where cobwebs may lurk, pin on the brush of the broom a cap of cheesecloth and sweep along the edges of the ceiling. For corners under heavy furniture, a small whisk brush or soft hair brush may be needed.
Rub off mirrors with a damp cloth, drying and polishing with chamois-skin or crumpled newspaper. Highly polished furniture may be dusted with soft silk or chamois-skin.
Even small members of the family may be given a share in this work. Little boys and girls can be shown how to dust chairs and furniture within reach of the little arms and hands. It may take more time at first on the mother's part than if she did the work herself; but in the end she is more than repaid. The little child need not be required to do much, but let that little be done thoroughly, if only the legs and rounds of one chair.
Every child should be encouraged to possess his own books even in this age of public libraries. Birthdays and Christmas afford occasions when the parent can increase the little library, and later the child may be trained how to choose wisely his own purchases. When he is limited in the books he possesses public libraries open up opportunities for a wide range of reading.
We give a brief but varied list of books from which the parent may select such as suit her child's particular needs. The discriminating taste in reading must be cultivated from the earliest years if the child is to read with profit and pleasure in youth and maturity.
All children should be allowed to read a few at least of the traditional fairy tales. They teach many important life lessons in an impersonal way; they develop the imagination and widen the sympathies. The successful business man, the progressive physician or lawyer, and the truly successful minister is he who understands human nature, who can put himself in the other person's place; and to do this he requires a cultivated imagination. The fairy tale also lifts the child from the restricted life of his environment into the region of boundless possibilities. It increases his sense of power over untoward circumstances. Acquaintance with fairy lore also familiarizes one with many[Pg 150] allusions to be met with in reading all great writers.
A love of poetry should be the heritage of every child, because of the inspiration it gives amidst the sordid cares of life, and because of the innocent pleasure and refreshment it affords in hours of loneliness and weariness. The child's first book of verse should, of course, be Mother Goose. After this there are many valuable compilations of good poetry that may be used.
A varied library to be found in one large volume is "The Children's Book" compiled by Scudder. It includes selections from Mother Goose, from Grimm's fairy tales, from old English fairy tales, the Arabian Nights, and Hans Andersen. There are also several of Maria Edgeworth's famous moral stories, a great many of Æsop's fables, many of the old English ballads, etc. An excellent compilation of verse is Roger Ingpen's "One Thousand Poems for Children," which contains all the old favorites of children as well as a large number of the best-known poems by standard authors.
Standard books on science and nature should be in the home, and the child's library should include a few books with stories from real life leading up to biography, history, and travel.
The little one's sense of humor must be accorded recognition. Mother Goose supplies such a need in part, and Lear's Book of Nonsense may be added. The Sunday funny sheet should be censored before being put into the hands of the child. Expurgate anything that expresses disrespect to old age; that makes light of honor and integrity; or that is coarse in drawing, color, or subtle suggestion. If the child when grown is to appreciate the delicate humor of a Charles Lamb, his taste must not be dulled when he is young.
It[Pg 151] is a pity for a child to grow up without knowing and loving the "Pilgrim's Progress." To give him this pleasure the book should be read to him or put into his hands when about ten years old. Otherwise the psychologic moment has passed and he may never learn to care for the great English classic.
The great mediæval legends should also be known to the child. They are interwoven with much of history and literature and give a glimpse into a rapidly receding past.
We include in our list a charming wee volume, "The Young Folks' Book of Etiquette," by C. S. Griffen, which the mother, wearied of repeating from day to day the same admonitions as to manners and morals, will find a great assistance in seconding her efforts. The child will enjoy both the text and the pictures.
For the child's Bible reading we recommend Moulton's edition of the Old and New Testaments. The language is identical with that of the familiar old volume, but the text is condensed so that each story is given in the form of a continuous narrative, and objectionable passages are omitted. It may thus safely be put into the hands of very young children, who enjoy the simple, dignified style.
Music also must form a part of the child's library. The list appended covers a variety of needs.
Adventures of Pinocchio, translated from Cullodi by Cramp (an Italian classic loved by children). Æsop's Fables. Alice in Wonderland, Lewis Carroll. Among the Farmyard People, Clara D. Pierson. Boys' Odyssey, W. C. Perry. Curious Book of Birds, Abbie Farwell Brown. Fairy Tales, Hans Christian Andersen. Fifty Famous Stories Retold, Baldwin. Folk Tales from the Russian, Blumenthal. Gods and Heroes, Francillon. (Greek legends.) Household Stories, Anna C. Klingensmith. Heroes Every Child Should Know, Hamilton Wright Mabie. In the Days of Giants, Abbie Farwell Brown. (Norse legends.) Japanese Fairy Tales, translated by Williston. Jungle Book, Kipling. King Arthur and His Court, Frances Nimmo Greene. Knights of the Silver Shield, R. M. Alden. (Includes "Why the Chimes Rang.") Little Black Sambo. (Beloved by young children.) Mother Goose (Altemus edition), including a few fairy tales. Nights with Uncle Remus, Joel Chandler Harris. Norse Gods and Heroes, A. Klingensmith. |
Among the Night People, Clara D. Pierson. (Exceptionally good.) Arabian Nights Entertainments. Bimbi, Ouida. (Collection of beautiful tales.) Book of Saints and Friendly Beasts, Abbie Farwell Brown. Bow-wow and Mew-mew, Georgiana M. Craik. Norse[Pg 152] Tales, Hamilton W. Mabie. Peterkin Papers, Hale. (Afford pure, wholesome humor.) Peter Rabbit, The Tale of, Beatrix Potter. Saints of Italy Legends, Ella Noyes. Story of Siegfried, Baldwin. The Boys' King Arthur, edited by Lanier. The Red Book of Romance, edited by Lang. The Red Fairy Book and others of same series, edited by Lang. Tanglewood Tales, Hawthorne (Greek Legends). The Oak Tree Fairy Book, edited by Clifton Johnson. The Pilgrim's Progress, Bunyan. The Stars in Song and Legend, Jermain G. Porter. The Wonder Book, Hawthorne. Wagner Story Book, Frost. Wandering Heroes, Lillian J. Price. Water Babies, Charles Kingsley. Wizard of Oz, Baum. |
|
Childhood of Ji-Shib the Ojibwa, A. E. Jenks. Children of the Cold, Frederick Schwatka. (Life among Esquimaux children.) Cuore, de Amicis, translated by Mrs. Lucas. (Experiences of a school boy in Italy.) Each and All, Jane Andrews. Five Minute Stories, Laura E. Richards. History of the Ancient Greeks, C. D. Shaw. |
Lolami, the Little Cliff-Dweller, Clara K. Bayliss. Ten Boys of Long Ago, Andrews. The Chinese Boy and Girl, Bishop Headland. The Snow Baby, Mrs. Peary. Seven Little Sisters, Jane Andrews. Story of Joan of Arc for Boys and Girls. Story of My Life, Helen Keller. Story of Troy, M. Clarke. |
A Year in the Fields, Burroughs. Everyday Birds, Bradford Torrey. First Book of Forestry, Filibert Roth. Friends in Feathers and Fur, Johonnot. Grasshopper Land, Margaret Morley. How to Attract Birds, Neltje Blanchan. Lady Hollyhock and Her Friends, Margaret C. Walker. (Tells how to make dolls out of flowers.) Plant Relations, Coulter. |
Pussy Meow, S. Louise Patteson. The Bee People, Margaret Morley. The Hall of Shells. The Stars in Song and Legend, J. G. Porter. The Training of Wild Animals, Frank C. Bostock. Trees in Prose and Poetry, Stone and Fickett. Ways of the Woodfolk, William J. Long. Wilderness Ways, William J. Long. Wild Animals I Have Known, Seton Thompson. |
Book of Nursery Rhymes, New Collection of Old Mother Goose, Charles Welsh. Children's Book, The, compilation by Scudder. (Prose and verse.) Child's Garden of Verses, Robert L. Stevenson. The Chinese Mother Goose, Bishop Headland. (Charmingly illustrated with photographic pictures of Chinese children with their parents.) Golden Numbers, Kate Douglas Wiggin. (Choice collection of miscellaneous poetry; beautifully bound.) |
Little Rhymes for Little Readers, Wilhelmina Seegmiller. Lyrica Heroica, edited by W. E. Henley. One Thousand Poems for Children, Roger Ingpen. (A very full collection.) The Listening Child, L. W. Thacher. (Compilation of short poems suitable for children over six.) The Posy Ring, Kate Douglas Wiggin. (Choice collection for young children.) The Robin's Christmas Eve. (Old English ballad.) |
An Apple Pie, Kate Greenaway. At Great Aunt Martha's (Pictures), Kathleen Ainslie. (Illustrations of wooden dolls.) Book of Nonsense, Edward Lear. (Highly recommended by Ruskin.) |
Dean's Rag Books. (For very young children; will wash and iron.) Jingleman Jack (Pictures and verses about the trades), O'Dea and Kennedy. Four and Twenty Toilers, Lucas. (Hard to procure.) |
Children's Messiah, Mari Ruef Hofer. Children's Singing Games, Old and New, Mari Ruef Hofer. Christmas-Time Songs and Carols, Mrs. Crosby Adams. Finger Plays, Emilie Poulsson. Holiday Songs, Emilie Poulsson. Merry Songs and Games for the Use of the Kindergarten, Clara B. Hubbard. Music for the Child World, Mari Ruef Hofer. Two vols. (Music every child should know.) Nature Songs for Children, Fanny Snow Knowlton. Primary and Junior Songs for the Sunday-school, Mari Ruef Hofer. |
Small Songs for Small Singers, illustrated, W. H. Neidlinger. Song Stories for the Kindergarten, Mildred and Patty Hill. Songs and Games for Little Ones, Walker and Jenks. Songs and Games of the Mother-Play Book, Froebel. Songs Every Child Should Know, Dolores Bacon. Songs for Little Children, Eleanor Smith. Two vols. Songs of Childhood, Field de Koven Song Book. Songs of the Open, Seeboeck. Songs of the Child World, Jessie L. Gaynor. St. Nicholas Songs, the Words from St. Nicholas Magazine. |
A Year of Sunday-school Work, Florence U. Palmer. Beginnings, A. W. Gould. Pamphlet. Tells of the beginnings of world, man, sin, language, death, law, etc., according to the Bible, according to Science, and according to old myths. Bible for Young People, Century Co. Kindergarten Sunday-school Stories, Laura A. Cragin. (New Testament.) |
Old and New Testament for Children, edited by Richard G. Moulton. Old Testament Bible Stories, Walter L. Sheldon. Stories from the Lips of the Teacher, O. B. Frothingham. Stories of the Patriarchs, O. B. Frothingham. Wonder Stories from the Gospels, Katherine Beebe. |
Friedrich Froebel, after observing and studying thoughtfully the play and playthings of little children, selected from among these, and arranged in logical order, a certain series which should help develop the little one in mind, body, and spirit through childlike play. This series of related playthings is known as the kindergarten "gifts."
All children of all races play ball, and the first kindergarten gift to be given, even to a very little child, consists of six soft worsted balls in the colors red, orange, yellow, green, blue, and violet.
The second gift is an oblong box containing a wooden ball or "sphere," a cube, and a cylinder, with several slender axles and beams to assist in the little plays.
The third gift is a box containing a two-inch cube divided horizontally and vertically into eight one-inch cubes.
The fourth gift is a similar cube divided horizontally into eight oblong blocks.
The fifth gift is evolved from the preceding ones and is a five-inch cube divided into inch cubes, half cubes, and quarter cubes.
The sixth gift is a cube of the same size divided so that it contains cubes, oblongs, and plinths.
The third, fourth, fifth, and sixth gifts are derived from the geometrical solids.
The[Pg 156] seventh gift is derived from the geometrical surfaces, and consists of wooden tablets in shapes of circles, squares, triangles, etc.
The eighth gift represents the geometrical line and is made up of wooden sticks in lengths of one, two, three, four, five, and six inches. They may be had in two thicknesses and either colored or uncolored.
The ninth gift, derived from the edge of the circle, consists of metal rings, half rings, and quarter rings, in several sizes.
The tenth gift, derived from the geometric point, is the lentil.
Kindergartners differ as to the amount of emphasis to be placed upon the geometric side of the "gifts," and as to whether or not they should always be presented in a certain logical order. To appreciate their full value the mother must read her Froebel or take a kindergarten course. We give below some simple methods of using them, from which the child will derive both pleasure and benefit. What follows should be entirely clear, especially if the mother has the "gifts" before her as she reads.
First Gift Balls (Rubber ball 1½ inches in diameter, wool in six primary colors, crochet-hook)
These balls can be made by taking a rubber ball and crocheting around it a case of worsted; or a case can be crocheted and then stuffed with loose wool or cotton. In the latter case to insure a good shape it is well to crochet over a ball till nearly finished; then take the rubber ball out and fill with the cotton or wool and then complete the ball. Then crochet a string about eight inches long and attach to the ball, for suspending it. The ball can then be swung, raised, lowered, made to hop like a bird, swing like a pendulum, revolve[Pg 157] rapidly like a wheel. The child may play that it is a bucket being raised or lowered. See how steadily he can raise it.
The balls lend themselves to many color games.
1. Place them in a row, let one child blind his eyes, another one removes one of the balls and the first one, opening his eyes, tries to think which one is missing.
2. Let children observe the colors through a glass prism and try to arrange balls in similar order. Ask child if he can tell which colors are uppermost in the rainbow, the cold or the warm ones.
3. If the mother is sewing on a colored dress, let the child try to pick out the ball resembling it in color.
4. Play hiding the ball, as in hide the thimble.
5. Play store, letting him tell you which ball will best represent a lemon, an orange, a red apple, etc.
Second Gift Plays
Throughout his life, Froebel felt with keen pain all that was discordant or inharmonious in human society. Beneath all differences and misunderstandings lay, he believed, the possibility of adjustment, or reconciliation. Relations most strained might be brought into harmonious union. This great idea is typified by the second gift. The hard wooden sphere is round, curved from all points of view, with no angles or edges, and is easily moved. The cube is a complete contrast to the sphere, inasmuch as it stands firmly, has flat faces, angles, and edges. The cylinder combines the characteristics and possibilities of the other two. It has flat faces as well as a curved one, and can both stand and roll. It forms a bond of connection between the other two which at first sight seem irreconcilable.
Three[Pg 158] of these forms have small staples inserted in side, edge, and angle so that they may be suspended, swung, and revolved. There are also perforations through each one admitting the insertion of the axles, when needed for certain plays.
If an axle be put through cube or cylinder and it be revolved rapidly, you can see, in the swift moving figure, the spirit, as it were, of the other forms—an experiment fascinating to young and old.
A little imagination will turn the box in which these blocks come, into a boat, car, engine, etc., pins, matches, tacks, wire, etc., being called in as extras.
The little wooden beam may be placed across, held up by the axles and upon this the blocks may be suspended as objects for sale in a store.
The box with its cover may be used to illustrate the three primary mechanical principles, the pulley, or wheel, the inclined plane, and the lever. The pulley is made by placing the cylinder on an axle, tying a little weight to one end of a cord and drawing it up over the cylinder. Let the child play the weight is a bucket of water being drawn up from a well.
Play loading a boat and use the cover for a plank, inclined from the deck to the ground, up which to roll a barrel (the cylinder).
Play that the cube is a heavy piano box and show how to raise it by using a stick as a lever.
The students of a kindergarten training school made fine derrick cranes with this box of blocks, and no two were exactly alike.
Games with Second Gift Ball
1. Let children sit crossed-legged on the floor in a circle and let one child roll the ball across to another child.[Pg 159] He in turn rolls it straight over to some other child and so on.
2. Let one child sit in the center of a circle and roll the ball to each child in turn, who rolls it back to him.
3. Let several children stand in the center of a ring and try to catch the ball as it rolls swiftly by.
4. Let children stand in center and try to avoid being touched by the ball as it rolls along.
5. Draw a circle on the floor and let the children try in turn to so roll the ball that it will stop inside of the ring.
6. Place the cube in the center of the circle. Put the cylinder on top of the cube and balance the sphere carefully upon the cylinder. Then let the children try to hit this target with another ball.
Many are the lessons in self-control, fair play, patience and kindness which the children practice in playing these simple games, in addition to the physical exercise and training in alertness, in seeing correctly and in acting quickly.
Second Gift Beads
Mrs. Hailmann, a kindergarten training teacher, some years ago added to the "gifts" the so-called "second gift beads," much loved by wee children.
These are perforated wooden beads in shape of the sphere, cube and cylinder. They come in two sizes and may be had in colors or uncolored. A shoe lace comes with them for stringing.
In delightful plays with these beads the child learns to distinguish form and color, and has practice in simple designing.
At first let him have a number of different kinds and[Pg 160] let him thread them as he pleases. Observe him and see if, of his own initiative, he will distinguish either form or color. After a while he will probably, without suggestion, begin to string them in some sort of order—one sphere, one cube, one sphere, one cube, etc. Two spheres, two cubes, two cylinders, etc.
When he begins to see differences, give him two forms only and let him arrange. Later give him others. Too many at first will be confusing.
Besides the stringing, these beads may be used in other ways. Make a fence by putting two cubes and a sphere, one on top of the other for a post, and then join these to similar posts by running toothpicks or burnt matches through the perforations.
Place cubes and cylinders, one on top of another, and use as tree box with tiny twig or elderberry branch for tree. If making a toy village of blocks or cardboard, these little beads will make good lampposts.
The Pegboard
The pegboard, an additional gift devised by Mrs. Alice H. Putnam, can also be had in two sizes, the large one to be preferred. The board is perforated with holes at regular intervals and is accompanied with colored pegs, which the child loves to insert in the openings.
He may arrange them in ranks for soldiers, according to color, two and two, or four and four, learning thus to count.
A flower-bed with red flowers in one corner and green bushes in another may be made.
He may play that the pegs are kindergarten children playing follow the leader, some with red dresses, some with blue waists, etc.
A birthday cake with candles may be represented, or[Pg 161] a line of telegraph poles, if father has gone on a journey, and over the imaginary wires a message may be sent.
The pegboard is also loved by very young children.
Plays with the Other Gifts
The third gift cubes may be built by the little child into houses, furniture, wagons, etc. It is very simple, and yet when handling it the child learns something of form and number and gains skill with his tiny hands.
The fourth gift expresses "proportion." Each block is twice the length of those in the preceding gift and half as high. He can build with it objects impossible with the first divided cube. The two may often be used in conjunction.
The fifth gift requires a decided increase in the child's powers of coördination. He can make with it a very great variety of objects. Only a kindergartner can appreciate its many possibilities.
The sixth gift lends itself peculiarly to buildings of a certain type. It expresses less strength and more grace than the preceding ones.
In playing with these "gifts" under direction of a teacher, the child, if making the grocery store, proceeds to make the counter, the scales, the money desk, etc., in succession, and is not allowed to take the first structure apart in disorderly fashion and then make the next one, but is supposed to build the counter, or other article, by gradually transforming the thing already made, removing the blocks in ones, or twos, or threes in an orderly way. Each block is supposed to have some relation to the whole. For instance if a shoe store has been made and one unused block remains, it[Pg 162] may represent the footstool used in such a store.
Froebel thought in this way through simple play to help the child little by little to feel the relatedness of all life.
Seventh Gift Plays
With the seventh gift tablets the child makes designs or "beauty forms," becoming familiar with certain geometrical forms and exercising his powers of invention in pleasing design.
In using the tablets, which are in both light and dark stains, do not give too many at first. Give him for instance one circle, representing a picture of a ball, and let him lay a row of such for a frieze design for a gymnasium.
Give a circle and four squares, and let him place one above, one below, one to the right and one to the left, touching the circle. This will suggest a unit for a tile for a playroom fireplace.
Tell him to change the top square so that its angle touches the circle; then change the lower one in the same way; then the right, then the left. This transformation gives an entirely new design.
The other tablets may be employed in the same way, the different kinds of triangles offering opportunity for much variety.
Eighth Gift Plays
The sticks may be used in representing designs in which the straight line prevails. The lines may be placed in vertical or horizontal position. Sticks may be arranged as soldiers, standing two and two in straight vertical lines; or as fences in horizontal position.
They[Pg 163] may be classified as to length. Let the child sort them as wood for the woodpile, putting together those of same length. Or play he is in the store to buy a cane and sees those of different lengths, some for men, some for children.
For designing give the child four sticks of one length and let him make a square. Give him four of another length and let him make a larger square. Then with these eight sticks let him make two oblongs of the same size. Give him these exercises as puzzles, but do not let him play with the sticks until he gets nervous in trying to keep them in position.
Play With Lentils
These are necessarily few and simple. Let the child make circles, squares, etc., by putting the lentils in rows. He can also represent the mass of a tree's foliage by placing a number of the lentils in a mass.
The kindergarten gifts proceed, as will have been observed, from the solid through other forms to the point. The objects made with these are but temporary, and the same material may be used again and again.
Parallel with these Froebel devised what he calls the "occupations," which put into permanent shape the ideas expressed by the gifts.
Among the occupations (we will not name all) are: Peaswork, pricking, sewing, weaving, parquetry, pasting, cardboard modeling, sand and clay modeling.
These are arranged in reverse order to the gifts; that is, they proceed from the point to the solid.
Peaswork (Good well-dried peas, wooden toothpicks or hair-wire)
Soak the peas for 10 or 12 hours till soft. Then make a cane of one pea and one stick.
Two peas and one stick will make a dumb-bell.
Three of each will make a triangle.
Make a square in the same way, and then by adding to this other peas and sticks a skeleton chair can be made. All kinds of furniture and geometrical forms may be thus manufactured. The wire or toothpick must be inserted in the cheek of the pea. Watch the child carefully to see that he does not get nervous over the work. Assuming that the peas are in good condition,[Pg 165] there should be little trouble if the forms made are simple.
Pricking (Thin white cardboard, long pin, several folds of cloth or a piece of felt)
Froebel recognized the appeal this pastime makes to the mystery-loving child. As sometimes used it may be injurious to nerves or eyesight; but used judiciously the child of five or six will find it a source of harmless entertainment.
Let mother or older brother draw on cardboard a simple strong outline. Provide a strong steel pin (hat-pin or mourning-pin will do) and a piece of folded cloth for a cushion. Follow the outline by pricking in it a succession of holes. The rough side is the right side of the decorated card. The card may be hung up as a transparency, or may be made up into blotter or calendar; or, if the outline be that of a vegetable or a fruit, it will make up into a Thanksgiving place card.
Very beautiful effects are produced by pricking the surface as well as the outline, a form of embossing, but this is a great strain on the nerves. Let the child work for only a few moments at a time, and be sure that the light is good and the drawing is distinct.
Sewing (Cardboard, worsted, silk or chenille, needle, punch)
It is a disputed question now whether or not the cardboard sewing of the kindergarten, once considered so essential, should be used at all. Some condemn it entirely; others use it sparingly. Many replace it with sewing on cloth and other materials soft and flexible, which lend themselves to the kind of stitching required later in everyday sewing. We cannot now[Pg 166] enter into the discussion, but common-sense rules here as elsewhere.
Cards with designs already drawn and perforated may be bought, but the mother need not feel that she must depend upon these. Old visiting and invitation cards may be used for the purpose. We give a few examples of objects pretty and useful which may be made of this material. These will suggest others to the active-minded child. Get punch at kindergarten supply store; from 50 cents up.
1. Gift Card. Cut a square of cardboard 5 × 5 inches. With a needleful of red worsted let the child sew upon this card three straight candles in stitches one inch long. You may first punch in the bottom of the card three holes as guides. Put them in a row equidistant from each other. Make parallel to these a row of three dots in pencil. The child will push the needle through one hole from below and put it through the dot above, making his own hole. So proceed till finished. A flame may be drawn with yellow chalk at the upper end of each candle, to make it more realistic. This card may be used to stand a candlestick upon, or to send as a birthday card.
A similar card with the red stitches lying horizontally will picture firecrackers ready to be set off. Use as a mat for a match safe.
2. Cover for Medicine Glass. Draw a circle five inches in diameter. Cut this out. Parallel to the edge draw a circle four inches in diameter. Make dots about ½ inch apart along this second circle. Punch holes through these dots. With worsted, ravelings or chenille let the child sew once around this circle. Then go around the other way to fill up all the gaps left the first time. Use as cover for glass of medicine. Line the bottom with clean, white paper.
Vary[Pg 167] by overcasting, or from a central hole take long radiating stitches to the holes in the circumference like the spokes of a wheel.
3. Toy Umbrella. The above circle with spokes may be made into a toy umbrella if a slender stick be run through for a handle. Stick a pin about an inch from the top to keep the umbrella part from slipping down.
4. Bookmark. Cut an oblong card 2 × 6 inches. Draw upon this a row of parallel oblique lines about one inch apart and one inch long. Punch holes through the ends of the lines at the bottom, sew one slanting line to show the child, and let him finish the row. A similar oblong will make a napkin ring if the ends be brought together and tied with the ends of the worsted.
Squares, oblongs, crosses, etc., may thus be punched and sewed.
If no punch is obtainable, make the holes with a coarse needle or strong pin.
Paper Tearing (See page 54)
Paper Cutting
This is another Froebelian occupation. Some suggestions have been given elsewhere. (See page 54.) We will speak here of a more definite series of progressive steps.
Take a square of white paper. Fold once to make an oblong. Keep folded and fold once more, which gives a small square. From the corners of this square cut pieces, large or small. Keep these. Open the paper and lay it down. Then arrange around it the cut-off corners to make a design. They may be arranged[Pg 168] in a variety of ways. The pieces cut off the corners may be of various shapes.
Vary another square by cutting into it, after it has been folded, triangles or other figures. Open and arrange around it these cut-off pieces. When a satisfactory design has thus been made, it may be pasted on a pleasing background of paper.
In kindergarten training, checked paper is provided and the cuttings are made from lines drawn upon this according to a progressive system.
Parquetry (Colored papers, paste, kindergarten slat or match for paste-stick)
This occupation has its parallel in the tablets. The designs made temporarily with the circles, squares, etc., of wood may be put into more permanent form with the parquetry papers. These are circles, squares, triangles, etc., of colored papers, the unit of size being the inch. There are 1,000 in a package, embracing the six colors—red, orange, yellow, green, blue and violet, with two shades and two tints of each, besides neutral tones, and black and white.
1. Easter Card. Give the child an oblong piece of gray cardboard, six inches long, and some yellow circles. Let him paste a row of circles for dandelion heads and then chalk in the green stems. Give to father for an Easter card.
Red and yellow circles may be cut in half and so arranged as to suggest tulips. (See page 122.)
2. Frieze. Let the child make designs for a frieze for the doll-house parlor, arranging circles and squares successively or alternately on a strip of paper. Or he can make a design for the doll-house kitchen oilcloth by pasting squares or circles (one square or circle surrounded by others) in a square unit.
An[Pg 169] inexpensive paste for this work may be made of gum tragacanth. Buy five cents' worth of the powdered gum. Put a tablespoonful into an empty mucilage bottle and fill with water. In a few moments it will dissolve and thicken. Use more or less, according to thickness desired.
Weaving (Colored kindergarten weaving mats, weaving needle)
This is one of the most popular of kindergarten occupations.
Primitive man early learned to interlace the branches of trees to make for himself a shelter, and to weave together coarse fibres to make his crude garments. In course of ages great skill was acquired in thus using all kinds of flexible materials; artistic baskets were produced of raffia and reeds, and fine garments of linen, wool and cotton. Beautiful effects in color and form were introduced, the designs usually having a symbolic meaning.
Froebel devised, for the expression of this natural tendency, a series of exercises with colored paper, which gave practice in selection of color harmonies, in designing, in counting, and which led to skill and neatness in work.
Loom-weaving has been described on another page. (90.) In many kindergartens it now entirely supersedes the paper-weaving, which we will here briefly describe.
1. If you do not care to buy the regular kindergarten weaving mats, you may use smooth gray or brown wrapping paper cut into four-inch squares. In such a square cut two slits ½ inch apart and one inch long. From some pretty paper cut a strip one inch wide and two inches long and insert in the slit in the mat,[Pg 170] pasting the ends of the strip to the under side of the mat.
2. Cut three or four slits in similar mats and weave into them one-inch or half-inch strips, using narrower ones as the child gains skill. Weave such a strip under one and over one; then weave another, under two and over two, etc.; thus a variety of effects may be produced and the child meanwhile has practice incidentally in simple counting. Such a mat may be used to cover a glass of drinking water or medicine glass.
3. A larger mat may be made of pretty paper cut into comparatively fine slits. Paste upon this mat a square of smooth paper as a kind of lining; fold cornerwise and paste two edges together, making a kind of cornucopia.
4. Scent-Bag. A scent-bag may be made by putting between the mat and the lining described above a thin piece of cotton-batting, sprinkled with scent.
5. Oilcloth or Felt. Instead of paper, mats may be woven of plain oilcloth or of felt. Have two colors of each material, one for the mat and one for the strips.
On a 5-inch square of the material draw four parallel lines one inch apart and one inch from the top and bottom. Then using these as guide lines, cut four slits and weave in and out as with the paper weaving. Ribbon may be used for the woof if desired. Such a mat may be used for a lamp-mat or for a flower-pot mat.
Among the reasons for discarding the paper-weaving are the following: The colors are somewhat intense, and it is not always easy to secure good harmonies; the[Pg 171] care necessary to avoid tearing the delicate paper and soiling the delicate colors is often a trial to highly-strung children. Therefore they should not work at it too long at a time. A weaving needle comes with the kindergarten weaving papers.
Paper-Folding
We give here only a very few of the innumerable forms which may be made by folding paper according to exact directions. Mother may conduct such a little play while she is sewing and the child is on the floor or at the table. But directions must be exact and explicit. After once having told what to do in quiet, distinct, clear language, do not repeat. Train the child to hear accurately the first time.
Papers in many tones may be obtained from the kindergarten supply stores, but any exact square of white paper or of smooth brown wrapping paper will do.
Place the simple open square before the child, the edge directly in front of him. Call it a tablecloth and ask where the different members of the family sit. If able to wield the scissors, let him fringe the edge all around.
1. Book. Give a second square and, showing him which are the front corners, tell him to take hold of these and fold the paper over so that the front edge is just on a line with the back edge. Let him iron the table cloth (crease the fold with his thumb nail) so as to make a sharp line when opened. This makes a little book or tent. Ask what he can read in the book; who camps out in the tent; etc.
2. Window. Make another tent. Keep the tent in front of the child and tell him to open it and then to fold the left side over so that the left edge exactly[Pg 172] meets the right edge. Crease and open, and the result is a window with four panes. Have the child tell what he plays he can see through it.
3. Tunnel. Fold a square once through the middle as before. Open and notice the sharp line made by the crease. Now fold the front edge to meet exactly this line. Open and then fold the back edge to meet this line. Open in such a way that the form when standing makes a little tunnel. Roll a marble under it.
4. Barn. Fold a square into sixteen little squares by making a tunnel in one direction and then folding a tunnel in the other direction, so that the creases cross each other at right angles. Open out and cut from the left edge and from the right edge three slits along the horizontal creases to the first intersecting vertical crease. (See illustration.) Now fold No. 1 over No. 2 so that one little square exactly covers the other and paste or pin together. Do the same at the other end. This draws the paper into shape of gable roof. Place remaining flaps so that one overlaps the other a trifle, as shown in the illustration. Then cut a door in the side. (See illustration.) This[Pg 173] can be made of a large sheet of strong paper and will house very large paper animals.
5. Sailboat. Place a square of paper directly in front of you. Fold the front edge backward to meet exactly the back edge and crease. Open and fold the left edge over to meet exactly the right edge and crease. Open.
Turn the paper over so that the under side is uppermost, and place so that a corner is directly in front of you. Fold the paper so that the front corner exactly meets the back corner and crease. Open and fold so that the left corner exactly meets the right corner.
You now have a square crossed by two diameters and by two diagonals. Number the corners thus: 1, 2, 3, 4, and the center 0. Take the corners and hold in one hand so that 1-0, 2-0, 3-0 and 4-0 are back to back. Then crease in that position. The form is a square. Lay down so that the folded corner faces you. Fold the loose back corner down to meet the front corner. Then turn over and again fold the remaining back corner down to meet the front corner, and two sails become visible. Fold back one-half of the hull to make a base, and the little boat will stand and move if breathed upon. It can be made water-tight by dipping in melted paraffine. Melt the paraffine by putting it in a double boiler with boiling water beneath.
Cardboard Modeling (Cardboard, knife, pencil, scissors)
This is another of Froebel's materials which is much used in the kindergarten. The regular kindergarten cardboard comes in large sheets measured off into inches, half inches and quarter inches by red and blue[Pg 174] lines. These are to assist in the accurate cutting and folding of the stiff paper. The tinted Bristol board obtainable at stationery stores is also much used.
With this simple material older children acquire skill of both hand and eye. The higher school grades are now using it to a great extent in making geometrical figures, thus gaining practice in making objects after first making the working drawings for the same. A tinsmith who has had kindergarten training will find himself better equipped for his life work because of this early experience in cutting and measuring.
The directions here given assume that the unruled cardboard is used.
To score is to make a long shallow cut or scratch in the cardboard with a knife, so that it will bend easily. We give a few simple objects in the order of their difficulty.
1. Book-Mark. Draw an oblong 1 × 8 inches. Cut it out and punch a series of holes down the middle, one inch apart. Run a bit of baby ribbon in and out and thus make a simple book-mark.
2. Toy Wash-Bench. Draw and cut an oblong 1 × 6 inches. Draw a line straight across this one inch from each end, and then score these lines lightly. Bend and you have a wash-bench for doll's house.
3. Sugar-Scoop. Draw and cut an oblong 2 × 4 inches. Draw a line lengthwise through the middle. Score this line, and cut along the score one inch from each end. Score again from each end at right angles to the previous crease. Bend up the scored ends and the side, and paste the flaps together. This may be used for the toy grocery store.
4. Box. Read these directions through once. Then[Pg 175] begin and work along as you read again, and all will be clear.
Cut out a square measuring 4 × 4 inches. Place squarely before you, and then on the front edge, one inch from each side, make a dot. On the back edge, one inch from each side, make a dot. Unite the dots at front and back by straight lines. This gives two vertical lines.
Now, on the right hand edge, one inch from each end make a dot, and do the same on the left hand edge. Unite these dots by straight lines, which gives two horizontal lines crossing the ones previously made at right angles. With a sharp knife, and ruler to keep it straight, score along these lines so that they may be readily bent.
Now, from the right edge cut along each horizontal line a slit one inch long. From the left edge cut along each horizontal line a slit one inch long. These cuts will give four flaps. Bend up the four oblong sides and fold each flap over inside the box and paste.
A little experimentation on the part of older children will show how to elongate one side so as to make a cover.
Differences in the proportions of the original piece of cardboard will make boxes of different proportions.
5. Work-Box. Draw a five-inch pentagon. Look up in a geometry to find the rules for doing this.
Upon each side as a base erect another pentagon. Score at the line of junction and bend the side pentagons till the edges meet. In these edges punch holes opposite each other, and through these tie baby ribbon to hold them together.
Clay Modeling[Pg 176] (Potter's clay, oilcloth or small smooth board, curtain pole)
Clay is one of the important kindergarten materials, and if used with care need give but little trouble. Buy at kindergarten supply store or art shop.
Take a yard of table oilcloth and sew tapes to the corners so long that the oilcloth may be tied to a table and thus held smooth and firm. When not in use keep rolled up on a curtain-pole, broom-handle or dowel. This preserves it from untimely cracking. Upon this oilcloth the child can easily work with the clay, and the small pieces which may stick to it are readily wiped off with a damp cloth. If preferred, a small board about a foot square may be used instead of oilcloth. The child soon learns not to scatter the pieces. It is well for him to wear a little apron when making his small works of art. When finished with the clay, let him remove as much as possible from the hands as a rule, what remains may be rubbed away with a brisk clapping of the hands or is washed off very readily.
1. If his first impulse is to pound and thump the clay, show the child how pretty things may be made by gently pressing and molding the clay between thumb and fingers. If he is still interested in pounding, show him how to make a sphere by rolling the clay between the palms, and then by striking it four times hard against the table it is transformed into a rough sort of cube which further effort will improve.
2. If he inclines to make a number of balls, show him if possible one of the cheap clay marbles, and tell him to make some like it, though his will have no glazing.
3. If you see that he is rolling the clay into long lengths,[Pg 177] suggest that he make a snake or links of a chain.
4. Older children may be shown how to roll it with the palm into long slender cylinders. Then coil these round and round spirally upon themselves and so build up a jar, as certain primitive races do. Then smooth it outside and inside until well shaped.
5. Bowls and crude vases are easily made, and these when dried may be painted and used to hold matches or pencils.
6. Sometimes, to stir the imagination, break off a rough piece of clay and ask the child if it looks like anything to him. If it suggest a bird or fish or fruit, show him how the crude form may be made more nearly perfect.
7. Take a bit of clay and upon it press another bit, and so little by little smooth and press and build up a plaque ½ inch high and four inches square. Upon this as a background, build up in the same way, little by little, a raised leaf, or a geometrical figure, such as a square or a Maltese cross. If a leaf is made, copy from a real leaf.
When thus interested, let the older children read Longfellow's beautiful poem, "Keramis," and the work of the potter will have a meaning it never had before.
The children who thus make crude efforts to express the beautiful gain in power little by little, and will have added capacity to appreciate the wonderful works of art to be seen in every gallery. They will gain in discrimination as to what is really beautiful, and will know how to choose those decorations and ornaments which will make their homes truly artistic.
Clay lends itself so readily to the slightest turn of[Pg 178] thought, and is so easily employed by the smallest pair of hands, that it is one of the best materials to give to the little child. He soon learns to tell with it what he may be able to say in no other way.
When ready to put away, break into small pieces, put the pieces together, knead a little till made into a mass, punch a few holes in the mass, fill these with water, put into a stone jar and cover with a damp cloth. Or put the clay into a cloth, dampen, and then, twisting the four corners of the cloth together, drop the mass on the floor. Do this several times and it will be found welded together. Then put into the stone jar. Disinfect clay by exposing to sunshine.
Sand-Table (Kitchen table, saw, boards, nails, zinc)
From Germany we have finally learned the value of the sand-table and the sand-pile as means of development to the child, not to speak of their virtues as pure givers of joy.
Sand-tables may be bought at kindergarten stores, or one may be made of a kitchen table by sawing off the legs to the size which brings the table top within reach of the child. Then the top should be fenced in with boards, from three to six inches high, to keep the sand in. It is a good plan to line the table with zinc, since it is sometimes desirable to have the sand pretty wet, although it generally suffices to make it just damp enough to mold readily. It can be dampened with a sprinkling-can.
1. The child will play a long while without much suggestion. A little pail or bottle to be filled and emptied and refilled will furnish material for his embryonic experiments.
2. A tiny cast-iron spade (price one cent) will add materially to his happiness.
3. Shells[Pg 179] and patty-pans of different shapes and convolutions suggest bakery plays, and mother must sample the baby's cookery. When houses and forts and churches are the order of the day, paths must be laid and bordered with stones and shells; twigs and elderberry branches make tiny trees for tiny orchards; and a little pan of water or a bit of mirror makes a wee lake. The kindergarten building gifts make substantial structures, bridges, park-benches, etc. A winding river can be painted with blue paint on the zinc. When the child's imagination flags, a word from the mother or a timely story will start a new series of plays next time.
4. Older children will enjoy reproducing in the sand the hills and valleys of their environment, the roads, woods and streams which they know, etc.
5. Tell of the western plant which, when uprooted from its loose hold in the desert sand, is sent flying by the wind over the sand, and wherever it touches makes a perfect spiral. Let the children make such spirals with a coiled piece of wire.
6. Having noticed the impression made upon the sand by the patty-pans, the child can be led to make designs with them by making a row of impressions equal distances apart, arranging these in twos, in threes, etc.
INDEX
| PAGE | |
| Abacus, | 17 |
| Acquiring Skill with Brush or Pencil, | 74 |
| Aiming Games, | 95, 96, 97 |
| Anagrams, | 102 |
| Apple-biting Contest, | 132 |
| Apple Candlestick, | 24 |
| Apple-seed Penwiper, | 30 |
| Applied Art, | 76 |
| Ash Tray, | 67 |
| Autograph Picture, | 105 |
| Badge, | 123 |
| Baking Pan Papers, | 57 |
| Balls, | 96, 156 |
| Barn, Paper Folding, | 172 |
| Beads, Second Gift, | 159 |
| Bean Bag Games, | 95 |
| Bean Bags, To Make, | 95 |
| Bed-Making, | 145 |
| Bedstead, Dolls, | 87 |
| Bells, | 109, 139 |
| Berry Baskets or Boxes, | 11 |
| Birchbark, | 42 |
| Biscuit, Thimble, | 104 |
| Block Furniture, | 85 |
| Blowing Bubbles, | 51 |
| Blowing Out Candle, | 100 |
| Boat, | 22, 26, 36, 41 |
| Blue Prints, | 52 |
| Bon-bon Papers, | 58, 115 |
| Booklist, | 151 |
| Bookmark, | 58, 174 |
| Border for Sand-table, | 40 |
| Bottling Shells, | 40 |
| Bottling Stones, | 39 |
| Boxes, | 12, 15, 174 |
| Breastpin, | 71 |
| Bristol Board, | 61 |
| Brush, Pencil or, | 73 [Pg 182] |
| Bubbles, | 51 |
| Burnt Match Safe, | 34 |
| Butter Dishes, | 41 |
| Butterflies, | 105, 121 |
| Butterfly Party, | 105 |
| Butter Modeling, | 134 |
| Buttons, | 69 |
| Button-Box, | 15 |
| Button Mold Tops, | 70 |
| Button Mold Wheels, | 70 |
| Calendar, | 74, 109 |
| Candle, Blowing Out, | 100 |
| Candle Design, | 55 |
| Candle Making, | 137 |
| Candle Sticks, | 24, 64, 138 |
| Canoe, | 43 |
| Cardboard, | 61 |
| Cardboard Animals, | 63 |
| Cardboard Modeling, | 173 |
| Cardboard Sewing, | 165 |
| Carols, | 138 |
| Carrot Top, | 45 |
| Celluloid Butterflies, | 121 |
| Center Piece, Pumpkin, | 135 |
| Cereal Boxes, | 32 |
| Chains, | 56, 115 |
| Chased by a Goose, | 78 |
| Checkerboard, | 62 |
| Cherry Stone Game, | 99 |
| Chicken Coop, | 13 |
| Chicken, Easter, | 122 |
| Chicken, Squash Seed, | 29 |
| Child's Library, The, | 149 |
| Chinese Kite, | 66 |
| Chinese Toy, | 64 |
| Christmas, | 136 |
| Cigar-Box Bedstead, | 87 |
| Cigar-Box Dollhouse, | 82 |
| Circle Tag, | 92 |
| Classifying, | 39, 40, 48 |
| Clay, | 176 |
| Clay-pipe Doll, | 80 |
| Clock, Paper, | 86 [Pg 183] |
| Clothespin Doll, | 80 |
| Clothespin Race, | 94 |
| Clover, Four-leaf, | 48 |
| Collecting, | 39, 40, 48 |
| Color Top, | 75 |
| Colors, Matching, | 71 |
| Cork, | 36 |
| Cork Doll, | 81 |
| Corn, | 18 |
| Corncobs, | 18 |
| Corncrib, | 18 |
| Cornhusks, | 18 |
| Cornstalks, | 135 |
| Counters for Games, | 28, 62, 69 |
| Countess of the Huggermuggers, | 100 |
| Counting Ball, | 96 |
| Cover for Medicine Glass, | 166, 170 |
| Cradle, Egg Shell, | 25 |
| Cranberries, | 136 |
| Croquet with Peas, | 98 |
| Cross Tag, | 93 |
| Cup and Ball, | 96 |
| Curtains for Dollhouse, | 87 |
| Cutlery, Toy, | 36 |
| Cutting Paper, | 54, 167 |
| Darning Egg, | 44 |
| Decorated Note-Paper, | 109 |
| Decoration Day, | 123 |
| Decorative Cherries, | 114 |
| Decorative Leaves, | 47 |
| Designs, | 21, 28, 77 |
| Dinner Souvenirs, | 120, 130, 134 |
| Dishes, Tin-foil, | 35 |
| Dish-washing, | 143 |
| Distances, Guessing, | 72 |
| Doll Furniture, | 15, 37, 85 |
| Doll-Houses, | 82 |
| Doll Park, | 89 |
| Dolls, | 80 |
| Donkey Game, | 100 |
| Drawing, | 31, 72 |
| Drums, | 125 |
| Ducking for Apples, | 131 [Pg 184] |
| Dusting, | 147 |
| Easter, | 120 |
| Easter Card, | 122, 168 |
| Easter Chicken, | 122 |
| East Indian Fan, | 43 |
| Edam Cheese Lantern, | 34 |
| Egg-shell Boat, | 26 |
| Egg-shell Cradle, | 25 |
| Egg-shell Game, | 99 |
| Egg-shell Garden, | 25 |
| Eggs, Humpty Dumpty, | 26 |
| Egg-shell, To Blow, | 25 |
| Egg-shells, | 25, 26, 99 |
| Eighth Gift Plays, | 162 |
| Elevator, Toy, | 71 |
| Epaulettes, | 56 |
| Experiments with Color, | 75 |
| Expression with Pencil and Brush, | 73 |
| Fairy Tales, Myths, etc., | 151 |
| Fan, | 43, 63 |
| Feather, Corn-husk, | 18 |
| Feather Flowers, | 49 |
| Felt Mats, | 170 |
| Fence, | 11, 19 |
| Festival Occasions, | 107 |
| Festoons, | 47 |
| Firecracker Designs, | 55 |
| Firecracker, Imitation, | 124 |
| First Gift Balls, | 156 |
| Flags, | 119 |
| Flower-Pot, | 35 |
| Flower Rack, | 37 |
| Flowers, Feather, | 49 |
| Flowers, Pressing, | 51 |
| Foot-ball, Egg, | 99 |
| Fortune Telling, | 131 |
| Fourth of July, | 124 |
| Frieze, | 48, 168 |
| Fringed Bon-bon Papers, | 58, 115 |
| Furniture, | 15, 20, 37, 85 |
| Games and Plays, | 92, 157, 158, 161 [Pg 185] |
| Gift Card, | 166 |
| Gifts, Kindergarten, | 155 |
| Go-Bang Board, | 61 |
| Good Luck Pigs, | 109 |
| Gourds, | 44 |
| Grace Hoops, | 97 |
| Grocery Store, | 88 |
| Guess Ball, | 96 |
| Guessing Distances, | 72 |
| Hallowe'en, | 131 |
| Hammering Soap, | 31 |
| Handkerchief Box, | 42 |
| Hanging Basket, | 15, 35, 44 |
| Hearts, | 110 |
| History and Biography Books, | 152 |
| Home Tasks, | 141 |
| Honey, Weighing, | 103 |
| House, Cob, | 19 |
| House, Doll's, | 33, 82 |
| Household Duties, | 141 |
| Humpty Dumpty Eggs, | 26 |
| Imitation Water, | 31 |
| Independence Day, | 124 |
| Indian Head-dress, | 50 |
| Ironing, | 146 |
| Jack O'Lantern, | 135 |
| Jackstones, | 39 |
| Japanese Tag, | 93 |
| Key-Basket, The, | 141 |
| Kindergarten Materials—Gifts, | 155 |
| " " —Occupations, | 164 |
| Kite, | 60, 66 |
| Labor Day, | 128 |
| " " Dinner, | 130 |
| " " Parade, | 129 |
| Lacy Valentine, | 111 |
| Lamp Mats, | 170 |
| Lamp, Toy, | 86 [Pg 186] |
| Lantern, | 33, 34, 139 |
| " Toy, | 24 |
| Learning to Observe, | 73 |
| Leaves, to Dry and Press, | 47 |
| Lentils, | 163 |
| Library, The Child's, | 149 |
| Looms, | 90 |
| Man, Prunes, Raisins, | 27 |
| Masks, | 57 |
| Matching Colors, | 71 |
| Matchsafe, | 34, 177 |
| Mats, | 18, 46, 170 |
| Medicine Glass Cover, | 166, 170 |
| Memorial Day, | 123 |
| Merry-Go-Round, Dolls', | 89 |
| Midnight Watching, | 109 |
| Mirror, Toy, | 36 |
| Money, Toy, | 36, 58 |
| Morning Glories, Pressed, | 51 |
| Moving Van, | 32 |
| Music Books, | 154 |
| Nature Books, | 153 |
| Needle Case, | 42 |
| Needles, | 71 |
| New Year's Bells, | 109 |
| " " Day, | 108 |
| Newspaper Wrappers, | 57 |
| Numeral Frame, | 17 |
| Nuts, | 22 |
| Occupations, Kindergarten, | 164 |
| Oilcloth Mats, | 170 |
| Oiled Paper, | 87 |
| Omnibus Swing, | 101 |
| Orange Basket, | 24 |
| Paint-Box, The, | 73 |
| Paint-Brush Box, | 43 |
| Painting from Object, | 73 |
| " Wagons or Houses, | 76 |
| Paper, | 54 |
| Paper Chains, | 56, 115 [Pg 187] |
| Paper Cutting, | 54, 167 |
| Paper Doll, | 81 |
| Paper Folding, | 171 |
| Paper Furniture, | 85 |
| Paper Lanterns, | 118 |
| Paper Mats, | 169 |
| Paper Money, | 58 |
| Paper-Weight, | 40 |
| Papering House, | 85 |
| Papers for Baking Pans, | 57 |
| Park for Dolls, | 89 |
| Parquetry, | 168 |
| Parties, Suggestions for, | 103 |
| Paste, | 169 |
| Pasteboard Doll House, | 82 |
| Paste Stick, | 14 |
| Path Borders or Markers, | 39 |
| Pea Furniture, | 164 |
| Peanut Animals, | 23 |
| " Doll, | 80 |
| " Party, | 103 |
| Pea Pod Boat, | 16 |
| Peas, | 16 |
| Peaswork, | 164 |
| Pebbles, | 39 |
| Pegboard, | 160 |
| Pencil Box, | 43 |
| Pen Tray, | 67 |
| Penwiper, | 42 |
| Perforating or Pricking, | 133, 165 |
| Piano Scarf, | 41 |
| Picture Books, | 153 |
| Picture Frames, | 13, 44, 46 |
| Picture Story, | 78 |
| Pictures of Seedling, | 74 |
| Pigments, | 75 |
| Pincushion, | 41 |
| Pin Tray, | 41 |
| Place or Luncheon Cards, | 76, 108, 113, 119, 121, 127, 130, 133 134, 136 |
| Plays or Games, | 92 |
| Plays with Gifts, | 161 |
| Plumes for Hat, | 55 |
| Poetry Books, | 123, 153 [Pg 188] |
| Pop-corn Balls, | 22 |
| Pop-corn Chains or Festoons, | 22, 139 |
| Portieres, | 21 |
| Post Fence, | 19, 160 |
| Potato Horse, | 17 |
| " Race, | 94 |
| Pressed Leaves, | 47 |
| Pressed Morning Glories, | 51 |
| Pricking, | 133, 165 |
| Prism, | 75 |
| Prunes, | 27 |
| Pulley, Toy, | 71 |
| Pumpkin Basket or Center Piece, | 135 |
| Races, | 94 |
| Racing Tag, | 93 |
| Raffia, | 45 |
| Rafts, | 19, 36 |
| Rag Doll, | 82 |
| Raisins, | 27 |
| Ramekin Dishes, | 41 |
| Reading, | 123, 133, 140, 177 |
| Red Pepper Lantern, | 24 |
| Reins, | 46 |
| Ring Toss, | 97 |
| Road Roller, Spool, | 71 |
| Rockets, Imitation, | 127 |
| Room Decorations, | 132, 135 |
| Rope and Sandbag, | 101 |
| Rose-haw Chains or Rosaries, | 51 |
| Rosettes, | 126 |
| Rug Design, | 77 |
| Rugs, | 90 |
| Sailboat, | 23, 36, 173 |
| St. Patrick's Day, | 119 |
| " " " Dinner, | 120 |
| St. Valentine's Day, | 110 |
| " " Dinner, | 112 |
| Salt, | 34 |
| Salt Dishes, | 41 |
| Sand, | 178 |
| Sand Table, | 178 |
| Saved from the Scrap Basket, | 53 [Pg 189] |
| Scales, Toy, | 88 |
| Scent Bag, | 170 |
| Scissors, Drawing, | 72 |
| Scrap Books, | 68 |
| Screen, Toy or Miniature, | 63, 122 |
| Second Gift Plays, | 157, 158 |
| Second Gift Beads, | 159 |
| Seedling, Drawing of, | 74 |
| Seed-markers, | 11 |
| Seeds, | 27 |
| Seventh Gift, Tablets, | 162 |
| Sewing, | 165 |
| Sewing Basket, The, | 69 |
| Shadow Game, | 52 |
| Shamrock, | 119 |
| Shells, | 40 |
| Shields, | 127 |
| Snowball, | 137 |
| Snowflakes, | 59 |
| Soap, | 31 |
| Soap Box Doll House, | 84 |
| Soldiers Caps, etc., | 55 |
| Soldier-Flowers, Milkweed, | 51 |
| Spiderweb Party, | 104 |
| " Valentine, | 111 |
| Spinning Buttons, | 69, 70 |
| Sponge Garden, | 120 |
| Spools, | 70 |
| Squash Animals, | 17 |
| Squash Seed Chicken, | 29 |
| Stained Glass Windows, | 77 |
| Sticks, Kindergarten, | 156, 162 |
| Stones and Pebbles, | 39 |
| Stove, Toy, | 86 |
| Strawberry Boxes, | 11 |
| Straws, | 51 |
| Stringing, | 21, 27, 51, 69, 136 |
| Sugar Scoop, | 174 |
| Suggestions for Parties, | 103 |
| Sun and Shadow, | 52 |
| Sunday-School Helps, | 154 |
| Surprise Walnuts, | 23 |
| Sweeping, | 147 |
| Sweet Potato Animals, | 17 [Pg 190] |
| Sweet Potato Vine, | 45 |
| Swimming Float, | 37 |
| Swing, Omnibus, | 101 |
| Table Serving, | 143 |
| Table Setting, | 142 |
| Tablets, Kindergarten, | 162 |
| Tag, | 92 |
| Tailless Kite, | 60 |
| Target, Spool, | 70 |
| Tearing Paper, | 54 |
| Telephone Toy, for Doll House, | 87 |
| Tents, Paper, | 116 |
| Thanksgiving, | 133 |
| Thimble Biscuit Party, | 104 |
| Threading Needles, | 72 |
| Tiling, Doll House, | 85 |
| Tin Cans, | 34 |
| Tin-foil, | 35 |
| Top, | 70, 75, 77 |
| Tower Target, Spool, | 70 |
| Toy Vegetables, | 40 |
| Transparency, | 47 |
| Transparent Papers, | 75 |
| Tree-Boxes, | 70 |
| Tunnel, Paper, | 172 |
| Turnip Basket, | 45 |
| Turtle, | 27 |
| Umbrella, Toy, | 167 |
| Valentine Party Dinner, | 112 |
| Valentines, | 110 |
| Vegetable Animals, | 17 |
| Vegetables, | 45 |
| " Toy, | 40 |
| Wagon, | 14, 32 |
| Walnut Boats, | 23 |
| " Surprise, | 23 |
| Washing, | 146 |
| Washbench, Cardboard, | 174 |
| Washington's Birthday, | 113 |
| Water-color Cups, | 40 [Pg 191] |
| Water, Imitation, | 31 |
| Waxed Leaves, | 47 |
| Weaving, | 90, 169 |
| Weighing Honey, | 103 |
| Wheels, | 14, 32, 35 |
| Windows, | 77, 87 |
| Wishbone Doll, | 80 |
| Work Box, | 175 |
| Worsted Mats, | 90 |
| Yarn Doll, | 81 |
TRANSCRIBER'S NOTE:
Obvious printer's errors in the original publication have been corrected without comment.
Inconsistencies in the author's spelling, use of hyphens and other punctuation are retained as in the original work.
Blank pages have been removed, resulting in some missing page numbers.
***END OF THE PROJECT GUTENBERG EBOOK HOME OCCUPATIONS FOR BOYS AND GIRLS***
******* This file should be named 39663-h.txt or 39663-h.zip *******
This and all associated files of various formats will be found in:
http://www.gutenberg.org/3/9/6/6/39663
Updated editions will replace the previous one--the old editions will be renamed.
Creating the works from public domain print editions means that no one owns a United States copyright in these works, so the Foundation (and you!) can copy and distribute it in the United States without permission and without paying copyright royalties. Special rules, set forth in the General Terms of Use part of this license, apply to copying and distributing Project Gutenberg-tm electronic works to protect the PROJECT GUTENBERG-tm concept and trademark. Project Gutenberg is a registered trademark, and may not be used if you charge for the eBooks, unless you receive specific permission. If you do not charge anything for copies of this eBook, complying with the rules is very easy. You may use this eBook for nearly any purpose such as creation of derivative works, reports, performances and research. They may be modified and printed and given away--you may do practically ANYTHING with public domain eBooks. Redistribution is subject to the trademark license, especially commercial redistribution.
To protect the Project Gutenberg-tm mission of promoting the free distribution of electronic works, by using or distributing this work (or any other work associated in any way with the phrase "Project Gutenberg"), you agree to comply with all the terms of the Full Project Gutenberg-tm License available with this file or online at www.gutenberg.org/license.
1.A. By reading or using any part of this Project Gutenberg-tm electronic work, you indicate that you have read, understand, agree to and accept all the terms of this license and intellectual property (trademark/copyright) agreement. If you do not agree to abide by all the terms of this agreement, you must cease using and return or destroy all copies of Project Gutenberg-tm electronic works in your possession. If you paid a fee for obtaining a copy of or access to a Project Gutenberg-tm electronic work and you do not agree to be bound by the terms of this agreement, you may obtain a refund from the person or entity to whom you paid the fee as set forth in paragraph 1.E.8.
1.B. "Project Gutenberg" is a registered trademark. It may only be used on or associated in any way with an electronic work by people who agree to be bound by the terms of this agreement. There are a few things that you can do with most Project Gutenberg-tm electronic works even without complying with the full terms of this agreement. See paragraph 1.C below. There are a lot of things you can do with Project Gutenberg-tm electronic works if you follow the terms of this agreement and help preserve free future access to Project Gutenberg-tm electronic works. See paragraph 1.E below.
1.C. The Project Gutenberg Literary Archive Foundation ("the Foundation" or PGLAF), owns a compilation copyright in the collection of Project Gutenberg-tm electronic works. Nearly all the individual works in the collection are in the public domain in the United States. If an individual work is in the public domain in the United States and you are located in the United States, we do not claim a right to prevent you from copying, distributing, performing, displaying or creating derivative works based on the work as long as all references to Project Gutenberg are removed. Of course, we hope that you will support the Project Gutenberg-tm mission of promoting free access to electronic works by freely sharing Project Gutenberg-tm works in compliance with the terms of this agreement for keeping the Project Gutenberg-tm name associated with the work. You can easily comply with the terms of this agreement by keeping this work in the same format with its attached full Project Gutenberg-tm License when you share it without charge with others.
1.D. The copyright laws of the place where you are located also govern what you can do with this work. Copyright laws in most countries are in a constant state of change. If you are outside the United States, check the laws of your country in addition to the terms of this agreement before downloading, copying, displaying, performing, distributing or creating derivative works based on this work or any other Project Gutenberg-tm work. The Foundation makes no representations concerning the copyright status of any work in any country outside the United States.
1.E. Unless you have removed all references to Project Gutenberg:
1.E.1. The following sentence, with active links to, or other immediate access to, the full Project Gutenberg-tm License must appear prominently whenever any copy of a Project Gutenberg-tm work (any work on which the phrase "Project Gutenberg" appears, or with which the phrase "Project Gutenberg" is associated) is accessed, displayed, performed, viewed, copied or distributed:
This eBook is for the use of anyone anywhere at no cost and with almost no restrictions whatsoever. You may copy it, give it away or re-use it under the terms of the Project Gutenberg License included with this eBook or online at www.gutenberg.org
1.E.2. If an individual Project Gutenberg-tm electronic work is derived from the public domain (does not contain a notice indicating that it is posted with permission of the copyright holder), the work can be copied and distributed to anyone in the United States without paying any fees or charges. If you are redistributing or providing access to a work with the phrase "Project Gutenberg" associated with or appearing on the work, you must comply either with the requirements of paragraphs 1.E.1 through 1.E.7 or obtain permission for the use of the work and the Project Gutenberg-tm trademark as set forth in paragraphs 1.E.8 or 1.E.9.
1.E.3. If an individual Project Gutenberg-tm electronic work is posted with the permission of the copyright holder, your use and distribution must comply with both paragraphs 1.E.1 through 1.E.7 and any additional terms imposed by the copyright holder. Additional terms will be linked to the Project Gutenberg-tm License for all works posted with the permission of the copyright holder found at the beginning of this work.
1.E.4. Do not unlink or detach or remove the full Project Gutenberg-tm License terms from this work, or any files containing a part of this work or any other work associated with Project Gutenberg-tm.
1.E.5. Do not copy, display, perform, distribute or redistribute this electronic work, or any part of this electronic work, without prominently displaying the sentence set forth in paragraph 1.E.1 with active links or immediate access to the full terms of the Project Gutenberg-tm License.
1.E.6. You may convert to and distribute this work in any binary, compressed, marked up, nonproprietary or proprietary form, including any word processing or hypertext form. However, if you provide access to or distribute copies of a Project Gutenberg-tm work in a format other than "Plain Vanilla ASCII" or other format used in the official version posted on the official Project Gutenberg-tm web site (www.gutenberg.org), you must, at no additional cost, fee or expense to the user, provide a copy, a means of exporting a copy, or a means of obtaining a copy upon request, of the work in its original "Plain Vanilla ASCII" or other form. Any alternate format must include the full Project Gutenberg-tm License as specified in paragraph 1.E.1.
1.E.7. Do not charge a fee for access to, viewing, displaying, performing, copying or distributing any Project Gutenberg-tm works unless you comply with paragraph 1.E.8 or 1.E.9.
1.E.8. You may charge a reasonable fee for copies of or providing access to or distributing Project Gutenberg-tm electronic works provided that
1.E.9. If you wish to charge a fee or distribute a Project Gutenberg-tm electronic work or group of works on different terms than are set forth in this agreement, you must obtain permission in writing from both the Project Gutenberg Literary Archive Foundation and Michael Hart, the owner of the Project Gutenberg-tm trademark. Contact the Foundation as set forth in Section 3 below.
1.F.
1.F.1. Project Gutenberg volunteers and employees expend considerable effort to identify, do copyright research on, transcribe and proofread public domain works in creating the Project Gutenberg-tm collection. Despite these efforts, Project Gutenberg-tm electronic works, and the medium on which they may be stored, may contain "Defects," such as, but not limited to, incomplete, inaccurate or corrupt data, transcription errors, a copyright or other intellectual property infringement, a defective or damaged disk or other medium, a computer virus, or computer codes that damage or cannot be read by your equipment.
1.F.2. LIMITED WARRANTY, DISCLAIMER OF DAMAGES - Except for the "Right of Replacement or Refund" described in paragraph 1.F.3, the Project Gutenberg Literary Archive Foundation, the owner of the Project Gutenberg-tm trademark, and any other party distributing a Project Gutenberg-tm electronic work under this agreement, disclaim all liability to you for damages, costs and expenses, including legal fees. YOU AGREE THAT YOU HAVE NO REMEDIES FOR NEGLIGENCE, STRICT LIABILITY, BREACH OF WARRANTY OR BREACH OF CONTRACT EXCEPT THOSE PROVIDED IN PARAGRAPH 1.F.3. YOU AGREE THAT THE FOUNDATION, THE TRADEMARK OWNER, AND ANY DISTRIBUTOR UNDER THIS AGREEMENT WILL NOT BE LIABLE TO YOU FOR ACTUAL, DIRECT, INDIRECT, CONSEQUENTIAL, PUNITIVE OR INCIDENTAL DAMAGES EVEN IF YOU GIVE NOTICE OF THE POSSIBILITY OF SUCH DAMAGE.
1.F.3. LIMITED RIGHT OF REPLACEMENT OR REFUND - If you discover a defect in this electronic work within 90 days of receiving it, you can receive a refund of the money (if any) you paid for it by sending a written explanation to the person you received the work from. If you received the work on a physical medium, you must return the medium with your written explanation. The person or entity that provided you with the defective work may elect to provide a replacement copy in lieu of a refund. If you received the work electronically, the person or entity providing it to you may choose to give you a second opportunity to receive the work electronically in lieu of a refund. If the second copy is also defective, you may demand a refund in writing without further opportunities to fix the problem.
1.F.4. Except for the limited right of replacement or refund set forth in paragraph 1.F.3, this work is provided to you 'AS-IS', WITH NO OTHER WARRANTIES OF ANY KIND, EXPRESS OR IMPLIED, INCLUDING BUT NOT LIMITED TO WARRANTIES OF MERCHANTABILITY OR FITNESS FOR ANY PURPOSE.
1.F.5. Some states do not allow disclaimers of certain implied warranties or the exclusion or limitation of certain types of damages. If any disclaimer or limitation set forth in this agreement violates the law of the state applicable to this agreement, the agreement shall be interpreted to make the maximum disclaimer or limitation permitted by the applicable state law. The invalidity or unenforceability of any provision of this agreement shall not void the remaining provisions.
1.F.6. INDEMNITY - You agree to indemnify and hold the Foundation, the trademark owner, any agent or employee of the Foundation, anyone providing copies of Project Gutenberg-tm electronic works in accordance with this agreement, and any volunteers associated with the production, promotion and distribution of Project Gutenberg-tm electronic works, harmless from all liability, costs and expenses, including legal fees, that arise directly or indirectly from any of the following which you do or cause to occur: (a) distribution of this or any Project Gutenberg-tm work, (b) alteration, modification, or additions or deletions to any Project Gutenberg-tm work, and (c) any Defect you cause.
Project Gutenberg-tm is synonymous with the free distribution of electronic works in formats readable by the widest variety of computers including obsolete, old, middle-aged and new computers. It exists because of the efforts of hundreds of volunteers and donations from people in all walks of life.
Volunteers and financial support to provide volunteers with the assistance they need are critical to reaching Project Gutenberg-tm's goals and ensuring that the Project Gutenberg-tm collection will remain freely available for generations to come. In 2001, the Project Gutenberg Literary Archive Foundation was created to provide a secure and permanent future for Project Gutenberg-tm and future generations. To learn more about the Project Gutenberg Literary Archive Foundation and how your efforts and donations can help, see Sections 3 and 4 and the Foundation information page at www.gutenberg.org
The Project Gutenberg Literary Archive Foundation is a non profit 501(c)(3) educational corporation organized under the laws of the state of Mississippi and granted tax exempt status by the Internal Revenue Service. The Foundation's EIN or federal tax identification number is 64-6221541. Contributions to the Project Gutenberg Literary Archive Foundation are tax deductible to the full extent permitted by U.S. federal laws and your state's laws.
The Foundation's principal office is located at 4557 Melan Dr. S. Fairbanks, AK, 99712., but its volunteers and employees are scattered throughout numerous locations. Its business office is located at 809 North 1500 West, Salt Lake City, UT 84116, (801) 596-1887. Email contact links and up to date contact information can be found at the Foundation's web site and official page at www.gutenberg.org/contact
For additional contact information:
Dr. Gregory B. Newby
Chief Executive and Director
gbnewby@pglaf.org
Project Gutenberg-tm depends upon and cannot survive without wide spread public support and donations to carry out its mission of increasing the number of public domain and licensed works that can be freely distributed in machine readable form accessible by the widest array of equipment including outdated equipment. Many small donations ($1 to $5,000) are particularly important to maintaining tax exempt status with the IRS.
The Foundation is committed to complying with the laws regulating charities and charitable donations in all 50 states of the United States. Compliance requirements are not uniform and it takes a considerable effort, much paperwork and many fees to meet and keep up with these requirements. We do not solicit donations in locations where we have not received written confirmation of compliance. To SEND DONATIONS or determine the status of compliance for any particular state visit www.gutenberg.org/donate
While we cannot and do not solicit contributions from states where we have not met the solicitation requirements, we know of no prohibition against accepting unsolicited donations from donors in such states who approach us with offers to donate.
International donations are gratefully accepted, but we cannot make any statements concerning tax treatment of donations received from outside the United States. U.S. laws alone swamp our small staff.
Please check the Project Gutenberg Web pages for current donation methods and addresses. Donations are accepted in a number of other ways including checks, online payments and credit card donations. To donate, please visit: www.gutenberg.org/donate
Professor Michael S. Hart was the originator of the Project Gutenberg-tm concept of a library of electronic works that could be freely shared with anyone. For forty years, he produced and distributed Project Gutenberg-tm eBooks with only a loose network of volunteer support.
Project Gutenberg-tm eBooks are often created from several printed editions, all of which are confirmed as Public Domain in the U.S. unless a copyright notice is included. Thus, we do not necessarily keep eBooks in compliance with any particular paper edition.
Most people start at our Web site which has the main PG search facility: www.gutenberg.org
This Web site includes information about Project Gutenberg-tm, including how to make donations to the Project Gutenberg Literary Archive Foundation, how to help produce our new eBooks, and how to subscribe to our email newsletter to hear about new eBooks.