
The Project Gutenberg EBook of Ontario Teachers' Manuals: Household
Science in Rural Schools, by Ministry of Education Ontario

This eBook is for the use of anyone anywhere at no cost and with
almost no restrictions whatsoever.  You may copy it, give it away or
re-use it under the terms of the Project Gutenberg License included
with this eBook or online at www.gutenberg.org


Title: Ontario Teachers' Manuals: Household Science in Rural Schools

Author: Ministry of Education Ontario

Release Date: February 10, 2007 [EBook #20557]

Language: English

Character set encoding: ISO-8859-1

*** START OF THIS PROJECT GUTENBERG EBOOK ONTARIO TEACHERS' MANUALS ***


Produced by Sigal Alon, Turgut Dincer and the Online
Distributed Proofreading Team at http://www.pgdp.net (This
file was produced from images generously made available
by The Internet Archive/Canadian Libraries)
|
page
|
|||
| Preface | |||
|
Three Short Courses in Home-making |
|||
|
Introduction |
|||
|
A Library on Home Economics for the Rural School |
|||
|
Twenty Lessons in the Care of the Home |
|||
|
Suggestions to the Teacher |
|||
|
Equipment |
|||
|
Reference Books |
|||
|
Lesson I: Arrangement and Care of the Kitchen |
|||
|
Lesson II: Care of Cupboards and Utensils |
|||
|
Lesson III: Care of Foods |
|||
|
Lesson IV: Disposal of Waste |
|||
|
Lesson V: Making Soap |
|||
|
Lesson VI: Setting and Clearing the Table |
|||
|
Lesson VII: Waiting on Table |
|||
|
Lessons VIII and IX: General Cleaning of a Room |
|||
|
Lesson X: Care of the Bed-room |
|||
|
Lesson XI: Care of Lamps |
|||
|
Lesson XII: Prevention of Pests |
|||
|
Lesson XIII: Removing Stains, Bleaching Fabrics, and Setting Colours |
|||
|
Lesson XIV: Washing Dish-Towels, Aprons, etc |
|||
|
Lesson XV: Ironing |
|||
|
Lessons XVI and XVII: Care of the Baby |
|||
|
Lesson XVIII: Cost of Food, Clothing, and House |
|||
|
Lesson XIX: How to Keep Accounts |
|||
|
Lesson XX: Care of the Exterior of the House |
|||
|
Reference Books |
|||
|
Twenty Lessons in Cooking |
|||
|
Suggestions to the Teacher |
|||
|
Abbreviations and Measurements |
|||
|
Table of Level Measurements |
|||
|
Comparisons Between Weights and Measures |
|||
|
Reference Books |
|||
|
Lesson I: Discussion of Foods and Cooking |
|||
|
Recipes |
|||
|
Lesson II: Preparing and Serving Vegetables |
|||
|
Recipes |
|||
|
Lesson III: The Value of Carbohydrates in the Diet |
|||
| Recipes | |||
|
Lesson IV: Fruits and Vegetables |
|||
|
Recipes—Open-kettle Method; Cold-pack Method; Single Process Method; Intermittent Method |
|||
|
Lesson V: Fats—Vegetables—Continued |
|||
|
Recipes |
|||
|
Experiments in Using Starch for Thickening |
|||
|
Conclusions Based on the Foregoing Experiments |
|||
|
Lesson VI: Cereals |
|||
|
Recipes |
|||
|
Lesson VII: Classification of Foods—Reviewed |
|||
|
Black-board Summary |
|||
|
Lesson VIII: The Planning and Serving of Meals |
|||
|
Examples of Well-chosen Menus |
|||
|
Lesson IX: Milk |
|||
|
Recipes |
|||
|
Lesson X: Soups |
|||
|
Recipes |
|||
|
Lesson XI: Eggs |
|||
|
Recipes |
|||
|
Lesson XII: Simple Desserts—Custards |
|||
|
Recipes |
|||
|
Lesson XIII: Batters and Doughs |
|||
|
Recipes |
|||
|
Lesson XIV: Batters and Doughs—Continued |
|||
|
Recipes |
|||
|
Lesson XV: Meats |
|||
|
Recipes |
|||
|
Lesson XVI: Baked Pork and Beans—Baking-powder—Biscuits |
|||
|
Recipes |
|||
|
Lesson XVII: Butter Cakes—Plain Yellow Cake—Cocoa— Coffee—Tea |
|||
|
Recipes |
|||
|
Lesson XVIII: Yeast Bread |
|||
|
Recipes |
|||
|
Lesson XIX: Serving a Simple Dinner Without Meat—Baked Omelet—Macaroni and Cheese |
|||
|
Recipes |
|||
|
Lesson XX: Sugar |
|||
|
Recipes |
|||
|
|
|||
|
Twenty Lessons in Sewing |
|||
|
Suggestions to the Teacher |
|||
|
Reference Books |
|||
|
Lesson II: Hemming Towels |
|||
|
Lesson III: Hemming Towels—Continued |
|||
|
Lesson IV: Bags |
|||
|
Lesson V: Bags—Continued |
|||
|
Lesson VI: Bags—Continued |
|||
|
Lesson VII: Bags—Continued |
|||
|
Lesson VIII: Bags—Continued |
|||
|
Lesson IX: Darning Stockings |
|||
|
Lesson X: Patching |
|||
|
Lesson XI: Cutting Out Aprons or Undergarments |
|||
|
Lesson XII: Aprons or Undergarments—Continued |
|||
|
Lesson XII: Aprons or Undergarments—Continued |
|||
|
Lesson XII: Aprons or Undergarments—Continued |
|||
|
Lesson XII: Aprons or Undergarments—Continued |
|||
|
Lesson XII: Aprons or Undergarments—Continued |
|||
|
Lesson XVII: Methods of Fastening Garments |
|||
|
Lesson XVIII: Methods of Fastening Garments—Continued |
|||
|
Lesson XIX: A Padded Holder for Handling Hot Dishes—Binding |
|||
|
Lesson XX: A Cap to Wear with the Cooking Apron |
|||
|
|
|||
|
Household Science Equipment |
|||
|
Household Science Cabinet |
|||
|
Materials Required, Stock Bill, Tools, Directions for Making |
|||
|
Equipment for Rural School Household Science Cabinet—No. I |
|||
|
Equipment for Rural School Household Science Cabinet—No. II |
|||
| The Hectograph | |||
|
|
|||
|
The Rural School Lunch |
|||
|
The Box Lunch |
|||
|
Contents of the Lunch Box |
|||
|
Sandwich Making |
|||
|
Suggestions for Sandwich Fillings |
|||
|
Suggestions for Planning |
|||
|
Suggestions for Desserts |
|||
|
Packing the Lunch Box |
|||
|
Rules for Packing |
|||
|
Equipment for Packing |
|||
|
|
|||
|
Serving a Hot Dish |
|||
|
The Method |
|||
|
Suggested Menus |
|||
|
Suggestions for Hot Dishes for Four Weeks |
|||
|
|
|||
|
Recipes Suitable for the Rural School Lunch |
|||
|
Useful Bulletins |
|||
|
|
|||
|
Household Science Without School Equipment |
|||
|
First Method |
|||
|
Second Method |
|||
|
|
|||
|
The Fireless Cooker |
|||
|
Directions for Fireless Cooker—No. I |
|||
|
The Outside Container |
|||
|
The Insulating Material |
|||
|
The Inside Container |
|||
|
The Kettle |
|||
|
Extra Source of Heat |
|||
|
Covering Pad |
|||
|
Directions for Fireless Cooker—No. II |
|||
|
Method of Making |
|||
|
Directions for Fireless Cooker—No. III |
|||
|
Method of Making |
|||
|
|
|||
|
Use of the Fireless Cooker in the Preparation of Lunches |
|||
|
|
|||
|
Special Grants for Rural and Village Schools |
|||
This Manual is issued for the purpose of encouraging the introduction and furthering the progress of Household Science in the rural schools of this Province. There are 903 urban and 5,697 rural schools, and 45.87% of the school population is in attendance at the latter schools. The value of Household Science as an educational and practical subject has been recognized, to some extent, in the urban schools of the Province but, up to the present, little attempt has been made to give the subject a place among the activities of the rural schools.
There is a wide-spread impression that it is not possible in Household Science to give any instruction that is of value without the provision of separate rooms, elaborate equipment, and specially trained teachers. Where these conditions exist, of course, the best work can be accomplished; but, even where they cannot be realized, much may be done toward giving definite, useful instruction in the cardinal principles of home-making, which should be learned by every girl. There is certainly not a single rural school where some practical work in sewing and some valuable lessons in the care of the home may not be given. As for cookery, it is doubtful if there is a single school so small and so helpless that it is unable to use the hot noon-day lunch as a method of approach to this branch of the subject.
Students of the physical welfare of children are rapidly coming to the conclusion that a warm mid-day meal greatly increases the efficiency of the pupil and determines viiito a large extent the results of the afternoon's study. There are other benefits to be derived from a school lunch well prepared under proper conditions. In many communities it has been the means of bringing about a healthy and satisfactory co-operation between the school and the home, of developing a higher social life in the neighbourhood, and of introducing into the school a Household Science course, which has proved as great a benefit to the farmer's wife as to his children.
This Manual deals entirely with conditions that exist in our rural schools and outlines only such plans and schemes as can be carried out, even in adverse circumstances, by alert trustees, sympathetic inspectors, and resourceful teachers.
Permission has been obtained from the Bureau of Education, Washington, U.S.A., to make use of a recently issued bulletin—"Three Courses in Home-making for Rural Schools", and of various bulletins issued by State Agricultural Colleges. The freest use has been made of this material, and the permission to do so is hereby gratefully acknowledged.
Only such theory as can be readily assimilated has been given; and the teacher is advised for further information and help to consult the Manuals issued by the Department of Education on Household Management and Sewing. Those who wish to become thoroughly competent and to earn the highest Departmental grants should attend the Summer Schools provided by the Department of Education. Under certain conditions the expenses of teachers attending these courses are paid by the Department.
Nothing has been included or recommended that cannot be accomplished in the average rural school; and trustees, teachers, and inspectors are urged to make a beginning ixby selecting the lessons that appeal to them as being most suitable to the districts in which their schools are situated.
By careful planning and a wise use of the time before and after school and during recess, the regular organization of the school need not be interfered with; and, in addition to the educational and social advantages to be derived from undertaking this work, much benefit will result from the increased interest taken in the school by the parents and the general public.
It is not essential that the lessons in this Manual should be taken exactly in the order given. Any other arrangement called for by the peculiar circumstances of the school is admissible.
The Inspector of Manual Training and Household Science is ready at all times to visit rural schools for the purpose of conferring with the Public School Inspectors, the trustees, and the teachers regarding the introduction of Household Science as a regular subject of the school curriculum.
The three brief courses in home-making outlined in this Manual have been especially prepared for use in elementary rural schools. They are in no sense complete outlines of the subjects with which they deal; rather, they indicate a few of the important phases of food study, sewing, and the care of the home with which the pupil in the elementary school should become familiar. The underlying thought for each problem should be: "Will this help the pupils to live more useful lives, and will it lead to better conditions in their homes?"
The lessons are purposely made simple, and the plans are definitely outlined, so that even the inexperienced teacher may be able to achieve a certain measure of success. The experienced teacher will find in them suggestions that may be of value in the further development of the course.
The teacher who desires to use this course will necessarily have to adapt it to her own community, and it is hoped that she may be able to do this with but little alteration. While conditions of living and choice of foods differ in various parts of the Province, the general principles of nutrition, the rules of sanitation, and the methods of cooking and serving are much the same for all.
002Owing to the difficulty of securing time on the programme for frequent lessons in home-making, each of the courses has been limited to twenty lessons. Some teachers may not be able to have a greater number of lessons during the school year, and they may find it well to carry the three courses through three successive years. In other schools, where more frequent lessons can be given, it may be well to offer all three courses during one year. The courses in cooking and the care of the home can be advantageously combined, as many of the problems in both are related. The lessons in sewing may be given on another day of the week, or it may be well to give them early in the year, to be followed, later, by the cooking lessons. Thus an opportunity will be furnished for the making of the cooking aprons and the hemming of the towels.
It is most desirable that periods of at least forty minutes should be provided for all the practical lessons. Longer periods will be necessary for some of them, such as the preparation and the serving of a meal. If no practical work is undertaken in the lesson, a forty-minute period is sufficient.
In addition to the text-books recommended as sources of special reference for the rural teacher, the following books, bearing on home economics or on methods of teaching, are suggested for the rural school library. These books have been chosen with the threefold purpose of providing references for the teachers, reading matter for the pupils, and a lending library for the parents.
|
Laundering. Balderston, L. Ray. Pub. by the Author. Philadelphia |
$1.25 |
|
Country Life and the Country School. Carney, M. Row, Peterson & Co., Chicago |
$1.25 |
|
How the World is Fed. Carpenter, F. O. American Book Co., New York |
0.60 |
|
How the World is Clothed. Carpenter, F. O. American Book Co., New York |
0.60 |
|
How the World is Housed. Carpenter, F. O. American Book Co., New York |
0.60 |
|
How We Are Clothed. Chamberlain, J. F. Macmillan's, Toronto |
0.40 |
|
How We Are Fed. Chamberlain, J. F. Macmillan's, Toronto |
0.40 |
|
How We Are Sheltered. Chamberlain, J. F. Macmillan's, Toronto |
0.45 |
|
Bacteria, Yeasts, and Molds in the Home. Conn, H. W. Ginn & Co., Boston |
1.00 |
|
The Boston Cooking-school Cook Book. Farmer, F. M. Little, Brown & Co., Boston. (McClelland, Goodchild & Stewart, Toronto) |
1.80 |
|
The Rural School Lunch. Farnsworth, N. W. Webb Pub. Co., St. Paul, Minn. |
0.25 |
|
Clothing and Shelter. Kinne, H., and Cooley, A. M. Macmillan's, Toronto |
1.10 |
|
Foods and Household Management. Kinne, H., and Cooley, A. M. Macmillan's, Toronto |
1.10 |
|
Means and Methods of Agricultural Education. Leake, A. H. Houghton, Mifflin Co., New York. (Thos. Allen, Toronto) |
2.00 |
|
Rural Hygiene. Ogden, H. N. Saunders, Philadelphia |
1.50 |
|
Health and Cleanliness. O'Shea, M. V., and Kellogg, J. H. Macmillan's, Toronto |
0.56 |
|
Rural Education. Pickard, A. E. Webb Pub. Co., St. Paul, Minn. |
1.00 |
|
Manual of Personal Hygiene. Pyle, W. L. Saunders, Philadelphia |
1.50 |
|
Feeding the Family. Rose, M. S. Macmillan's, Toronto |
2.10 |
|
Food Products. Sherman, H. C. Macmillan's, Toronto |
2.00 |
The purpose of this course is to give the pupils instruction in various household tasks, in order that better living conditions may be secured in the homes. The beauty and sacredness of an ideal home life should receive emphasis, so that the pupils may be impressed with the importance of conscientious work in the performance of their daily household duties. They should have some insight into the sanitary, economic, and social problems that are involved in housekeeping, so that they may develop an increased appreciation of the importance of the home-maker's work.
The two most important things to be taught are "cleanliness and order". Too much emphasis cannot be placed on the value of fresh air and sunshine and the necessity for the free use of hot water and soap. The value of property should also be emphasized. Economy in the purchase and handling of house furnishings and equipment should be considered. Instruction should also be given in the care of foods and clothing and in the care and arrangement of furniture. Simple instruction in the care of babies should be given, since the older children are often responsible, to some extent, for the care of the younger members of their families.
In some of the lessons more subjects may be suggested than the teacher will have time to take up in a single period. In that case it will be well for her to choose the subject which seems most vital to the immediate needs of 005the community. In many cases she may be able to give an increased number of lessons. Practice and drill in all of the processes involved in housewifery are essential to successful training.
If a cupboard and a table have been arranged for the use of the cooking classes, most of the suggested work can be carried out with the school equipment. Where there is no equipment in the school and school conditions do not approximate home conditions, it may be possible to secure permission to give the lesson after school hours in the home of one of the pupils who lives nearby.
In each lesson the teacher, while giving the pupils helpful general information on the subject under discussion, should strive to impress on them the importance of doing some one simple thing well.
The rural teacher who is eager to make her school-room an attractive place may devote some time in these lessons to such problems as the hanging and the care of simple curtains, the care of indoor plants, the arrangement of pictures, the planning of storage arrangements for supplies and of cupboards for dishes, and the preparations for the serving of the school lunch.
In order to teach these lessons effectively, it is desirable to have the following simple equipment on hand. Additional special equipment may be borrowed from the homes.
|
Broom, 1 |
Dust-pan, 1 |
|
|
Cloths for cleaning, 6 |
Garbage can (covered), 1 |
|
|
Dish-cloths, 2 |
Lamp, 1 |
|
|
Dish-towels, 12 |
Oil-can, 1 |
|
|
Dust-brush, 1 |
|
Rural Hygiene. Brewer, I. W. Lippincott Co., Philadelphia |
$1.25 |
|
The Healthful Farmhouse. Dodd, H. Whitcomb & Barrows, Boston |
.60 |
|
Community Hygiene. Hutchinson, Woods. Houghton, Mifflin Co., New York. (Thos. Allen, Toronto) |
.65 |
|
Foods and Sanitation. Forster, G. H., and Weigley, M. Row, Peterson & Co., Chicago |
1.00 |
|
The Home and the Family. Kinne, H., and Cooley, A. M. Macmillan's, Toronto |
.80 |
|
Housekeeping Notes. Kittredge, M. H. Whitcomb & Barrows, Boston |
.80 |
|
Practical Home-making. Kittredge, M. H. The Century Co., New York |
.70 |
|
A Second Course in Home-making. Kittredge, M. H. The Century Co., New York |
.80 |
In arranging the kitchen, the three things of most importance are the stove, the sink, and the kitchen table. If there is no sink in the kitchen, there will be some other place arranged for washing the dishes, probably the kitchen table, and this must be taken into consideration when the furniture is placed. As most of the work is done at the stove and the table, both these must be placed where they will have a good light, and they should be close to each other, so that but few steps are necessary for the worker.
In furnishing the kitchen, the housekeeper will find a high stool very useful, as it will enable her to wash dishes, prepare vegetables, and do other work while seated.
All the furniture should be kept so clean and free from dust that the kitchen will have a neat and attractive appearance. A vase of flowers or a potted plant, and a washable table-cover to be used after the dishes have been put away, will help to make this room a pleasant place for the family. Special attention should be given to the ventilation.
The kitchen should be thoroughly cleaned after each meal. If it has become dusty or disarranged, it should be put in order before the next meal is to be prepared. While the cooking is under way, everything should be kept in an orderly condition. As soon as the meal is completed, the left-over food should be covered and put away; the scraps and waste material should be gathered and disposed of; and the dishes, pots, and pans should be scraped, and washed in hot, soapy water, then rinsed in clear, hot water, dried, and put away. The table should be scrubbed, the 008stove cleaned, the floor swept and scrubbed whenever necessary, and everything put neatly in its place.
Care of the coal or wood range.—All spots should be removed from the range by wiping it with old paper. If it is in bad condition, it should be washed with soap and water. If it is oiled occasionally, blacking will not be necessary; but if blacking is used, it should be applied with a cloth and rubbed to a polish with a brush, just as the fire is being started. The ashes and soot flues back of the oven and underneath it should be cleaned out once a week.
Directions for building a fire.—To build and care for a fire in the coal or wood range, close all the dampers, clean the grate, and remove the ashes from the pan. Put on the covers and brush the dust off the stove. Open the creative damper and the oven damper, leaving the check damper closed. Lay some paper, slightly crumpled into rolls, across the base of the grate. Place small pieces of kindling wood across one another, with the large pieces on top. Lay pieces of hardwood or a shovelful of coal on top of the kindling, building so as to admit of the free circulation of air. If the stove is to be polished, rub it with blacking. Light the paper from below. When the fire begins to burn briskly, add coal or wood: then add more when that kindles. When the fire is well started and blue flame is no longer seen (about ten minutes), close the oven damper. Close the creative damper when the fire is sufficiently hot. Brush the stove and the floor beneath it as soon as the fire is started. Polish the stove. If the fire becomes too hot, open the check damper. Fill the tea-kettle with fresh water and set it on the front of the range.
Care of the sink, wash-basin, and garbage pail.—A neglected sink or garbage pail may be a fruitful source of 009disease, in addition to attracting water-bugs and other pests. Scraps should never be left in the sink. After washing the dishes it should be thoroughly cleaned, a brush and scouring material being used. The nickel part may be washed with hot soap-suds, wiped dry, and polished. Water should never be left in the wash-basin. Both the soap-dish and the wash-basin should be scoured daily. The garbage pail should be emptied and washed every day, and carefully scalded once or twice a week.
It will be well to have this lesson succeed or follow a cooking lesson, for then the pupils will have a keener interest in the problems of the kitchen. (See Twenty Lessons in Cooking, Lesson I.)
Cleanliness and order are the two points to be considered in this lesson. The doing well of each simple household task and the thoughtful arrangement and planning of all parts of the house should be emphasized as being of great importance to the housekeeper's success.
Begin the lesson with a discussion of the purpose of the kitchen; then discuss its arrangement from the standpoint of convenience for the work that must be done there. Emphasize the importance of having the furniture so arranged that the work may be done quickly and easily, and that the kitchen may be given a comfortable and attractive appearance. Let the pupils arrange the furniture in the school-room. Discuss and demonstrate the care of the stove by the use of the school stove. Assign each pupil a time when she is to look after the stove on succeeding days and grade her on her work. Let each pupil bring a report from 010home as to what she is doing to help in the care of the home kitchen. Make a specific assignment for home work.
What is the purpose of the kitchen?
What are the principal articles of furniture in the kitchen?
How should we arrange these things?
Can we make any general rules as to arrangements?
Why is it difficult to keep the kitchen clean?
At what times kitchen most apt to become disarranged?
Why is it important to keep the kitchen in good order?
In what order should the kitchen be at the time we begin the preparation of the meal?
How should the floor be cleaned? The utensils?
What should we do with any left-over food?
How should we take care of the stove after the meal?
It is of the utmost importance that cupboards and other places where food is stored should be kept free from dirt and scraps of food. Ants, cockroaches, mice, and other pests infest dirty places where food is kept, and render a house unfit for human habitation. It requires constant care and watchfulness on the part of the housewife to keep the cupboards clean. She must look over the shelves daily, wiping them off whenever they need it, and giving them a thorough cleaning at least once a week.
The housekeeper should know how to care for the various utensils used and understand the simplest and best methods of keeping them clean. Utensils should never be put in the cupboards until perfectly clean and dry. Particular attention should be paid to the care of milk vessels. 011Pans, pails, pitchers, or bottles in which milk has been kept, should be rinsed in cold water, washed in strong, clean soap-suds, rinsed in clean, boiling water, and dried in the sun. If utensils have become discoloured or badly coated, they should be specially scoured. If something has been burned in a kettle, the kettle should be cleaned by filling with cold water, adding washing-soda, and boiling briskly for half an hour; after that a slight scraping ought to remove the burned portion. If the kettle is not yet clean, the process should be repeated. If a kettle has been used directly over a wood fire and becomes blackened with soot, it should be rubbed off with a newspaper and then with an old cloth. Kettles should be dried well before being put away. With proper care they seldom become rusty. If an iron kettle has rusted, it should be rubbed with kerosene and ashes, then washed in strong, hot, soda-water, rinsed in clear hot water, and dried on the stove. If a kettle is very rusty, it should be covered thoroughly with some sort of grease, sprinkled with lime, and left overnight. In the morning it should be washed out with hot soda-water and rinsed in clear, hot water. A new kettle is generally rusty, and should be greased thoroughly inside and out and allowed to stand for two days; then washed in hot soda-water.
Bath-brick should be used for scouring iron utensils and steel knives and forks. If iron pots and frying-pans are scrubbed with a piece of bath-brick each time they are used and then washed in hot soap-suds, they can be kept in good condition. Tinware and steel knives and forks may be cleaned by scouring with ashes, but only fine ashes should be used on tinware. The brown stains on granite utensils should be scoured off; and this ware should be carefully handled, in order to avoid chipping. Coffee-pots 012and tea-pots should be cleaned daily, the grounds removed, and the interior of the pots washed out thoroughly. The tea-kettle should be washed and dried overnight and left uncovered to air.
If school lunches are served or cooking lessons are given at the school, it will be well to use this lesson to get the cupboards in readiness. If it is impossible to do this at school, arrange to have such a lesson in one of the homes outside of school hours. Be sure that the housekeeper is in sympathy with the work and is willing to co-operate.
Assign each pupil a task in the cleaning, the scouring of the dishes, and the arrangement of the cupboard. Set a definite amount to be done and carry out the plans, leaving a clean and neatly arranged cupboard at the end of the lesson.
Several important points must be borne in mind if foods are to be kept in a good condition. Most foods change easily. Vegetables and fruits lose water, wilt, and become unfit to eat. Flour and corn-meal become mouldy. Potatoes decay and sprout. Some foods, such as milk, turn sour. Eggs become tainted, and fat grows rancid. With proper care in handling, storing, and keeping, this spoiling can be prevented.
The spoiling of foods is due to the presence of micro-organisms; and if foods are fresh and sound and kept cool 013and clean in every way, they will not spoil readily, because such conditions are unfavourable to the development of the micro-organisms. On the other hand, if foods are roughly handled and bruised, decomposition will take place readily, for micro-organisms develop in the bruised portions. Care must, therefore, be taken to select foods wisely, handle them carefully, wash them if they are not already clean, put them in clean receptacles, and keep them in a clean, cool place. All pots, pans, and dishes in which foods are kept or cooked should be thoroughly cleansed and rinsed well, so that no fragments stick to them which may decay and cause possible infection to the next food that is put in. Every part of the kitchen and store-rooms should be kept clean, dry, and well aired. Light is the best germicide and purifier known.
Covered receptacles should be secured for all foods. Those that are mouse-proof and insect-proof are essential to a well-kept pantry. All bottles and cans should be neatly labelled and so arranged that each one can be conveniently reached. The outside of the bottle or case should always be wiped off after it has been opened and food has been removed from it. The shelves on which the cases are kept should be wiped off every day. If supplies of fruit or vegetables are kept on hand, they should be looked over frequently, and whatever shows even the slightest suggestion of spoiling should be removed. Bread should be kept in a covered tin box, and the box should be washed out once or twice a week and frequently scalded and aired.
If cooking lessons are to be given, it will be well to take this lesson on the care of foods in connection with 014the first cooking lesson, and to make it a means of arranging for the materials that are to be kept on hand and of determining how everything is to be handled.
Devote a large part of the lesson to a discussion of the necessity for care in the handling, storing, and keeping of foods. If facilities permit, devote a few minutes to the putting away of foods that are to be used in the next cooking lesson or in the school lunch, discussing the reasons for such care.
If the daily disposal of waste is attended to, there will be no undesirable accumulation of garbage. Scraps of food that cannot be utilized for the table should be fed to the pigs or the chickens and should not be allowed to stand and gather flies. A covered pail or pan should be used for holding the garbage, until final disposal is made of it. Those portions that are badly spoiled and will be of no value in feeding the stock should be burned at once. Waste vegetable substances, if suitable, should be fed to the stock, and if not, should be buried in a thin layer on the ground at some distance from the house, so that they may enrich the soil.
Old papers that are badly soiled should be burned, but all others should be kept for use in cleaning the stove, starting the fires, etc. Empty cans should be well washed 015and buried, so that they will not prove a breeding-place for flies. It is well to pierce them through the bottom immediately after opening them, so that they will not hold water. Dish-water should be emptied at some distance from the house, unless there is a drain nearby. All receptacles that hold water should be carefully emptied, and all depressions in the soil should be filled, in order to prevent mosquitoes from breeding. All waste water should be used on the garden.
Protection of the water supply.—Only the water from deep wells should be used for drinking purposes, because all surface water and water in shallow wells becomes dangerous through seepage from compost, pig-pens, privies, and other places where decayed organic matter may accumulate. In order that the water may be kept clean, the well must be supplied with a tight-fitting top which need not be opened and a metal pump to bring up the water. A well platform that allows the water spilled on it to run back into the well is unsafe, for any filth carried on the platform in any way will be washed directly into it. Rats, mice, and other animals get into the well if the top is not tight, and these, in addition to being unpleasant, are liable to introduce disease germs.
Simple disinfectants.—Sunshine and fresh air are nature's disinfectants and should be freely admitted to every part of the house. Windows should be left open whenever possible. The windows in the sleeping rooms should always be opened at night. The interior of the house should be kept perfectly dry. Decay does not easily take place in dry places. A damp cellar should be drained, and the grounds around the house should not be allowed to drain into the cellar. Coarse coal ashes should be used to fill in around the house, on the walks, etc., to help in 016securing thorough drainage. Wood ashes may be used as a simple disinfectant to cover decayed organic matter. Whitewash is a good disinfectant and should be frequently used both inside and outside the house and on all out-buildings. Kerosene and creosote also make good disinfectants.
Care of out-of-door closets.—The privy should be so arranged that it may be cleaned often and all excreta disposed of in a safe way. The building should be so well constructed that there will be no cracks for the admission of flies. In a poorly constructed building, old paper can be pasted over the cracks, to make the structure fly-proof. Dry earth, street dust, or lime should be frequently sprinkled over the excreta, and the seat should be closed, to prevent the entrance of flies or mosquitoes. The seat should be washed frequently, and both the seat and the floor scrubbed at least once a week.
It will be well to teach this lesson at a time when improvements are necessary in the care of the school-house. The discussions in regard to out-of-door closets will, of course, be taken when the girls are alone with the teacher.
Discuss the disposal of waste, the care of garbage, etc., in the home and the school. Talk over the care of waste from the school lunch and discuss methods of keeping the school in a sanitary condition. Follow this by a general cleaning of the school-house.
|
6 lb. fat |
1 pt. cold water |
|
|
1 can lye |
1 tbsp. borax |
Some time before this lesson is given ask the pupils to bring scraps of fat from home. See that these are in good condition, and weigh them, to determine the portion of the recipe that can be made. Ask one of the pupils to bring sufficient borax for the recipe.
Let the pupils look the fat over and put it on to melt, watching it carefully. While it is heating and cooling, discuss the process of soap-making, the cost of materials, the care necessary in the making of soap, and the importance of its use. Get ready the other materials, and a box for moulding the soap, and let the pupils work together. After the soap has hardened and been cut, have it put away on a shelf to dry.
The following points must be remembered when a meal is to be served: The dining-room must be clean, well aired, sufficiently lighted, and in good order.
The table must be perfectly clean and covered with a clean white cover (table-cloth, doilies, paper napkins, or oil-cloth).
A vase of flowers or leaves or a small potted plant, in the centre of the table, will help to make it attractive.
The table should be prepared with everything necessary for serving the meal, but only those foods should be placed on it that will not be spoiled by standing. If there is danger of the food attracting flies, cover it carefully.
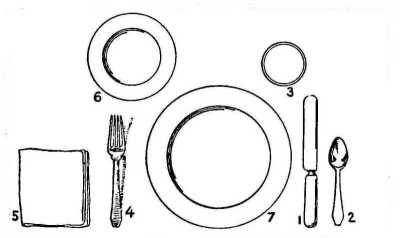
Plates for everyone who is to partake of the meal should be arranged at equal distances from one another, and half an inch from the edge of the table.
The knife should be placed at the right of the plate with the cutting edge toward the plate, and one inch from the edge of the table.
The fork should be placed at the left of the plate with the tines turned up, and one inch from the edge of the table.
The spoon should be placed, bowl upward, at the right of the plate, to the right of the knife. It should be placed one inch from the edge of the table. Spoons and forks for serving should be placed at the right and left of the dish to be served, or in another convenient position. No one should have to use the personal fork or spoon for serving.
The napkins should be folded simply and placed at the left of the fork.
019The tumbler should be placed at the upper end of the knife.
The cups and saucers should be placed at the right of the plate with the handle of the cup toward the right.
The bread-and-butter plate, if used, should be placed at the upper left hand of the fork.
The salt-cellars and pepper-shakers should be placed near the centre of the table or at the sides, where they can be conveniently reached. Individual salt-cellars, if used, should be placed immediately in front of the individual plate.
The chairs should be placed at the table after it is set. Care should be taken not to put them so close to it that it will be necessary to move them after they are occupied.
If possible, arrange to give this lesson before Lesson VIII in the series of "Twenty Lessons in Cooking" is given; then the emphasis in that lesson may be put upon the food to be served, proper combinations, etc., while this lesson gives the drill in the arrangement and handling of the dishes.
It is desirable to give the pupils a thorough drill in table setting and table service, since much of the pleasure derived from eating depends upon the attention paid to these processes.
Be careful to see that everything necessary is on hand to set the table simply but daintily. For class practice a small table may be set for four. This will necessitate a table-cover, four or more dinner plates, four bread-and-butter plates, four tumblers, four cups and saucers, four knives, four forks, four teaspoons, four napkins, a saltcellar, a pepper-shaker, a platter, one serving spoon, and 020one serving fork. If these things are not already in the school, probably they can be brought from home by the pupils. If linen cloths are not used and cannot be afforded on the tables in the homes, the pupils should be taught to use a white oil-cloth.
Have a diagram made on the black-board by one of the pupils of the arrangement of an individual place at the table.
The process of table setting should be demonstrated with the materials at hand, and the work should be adapted to home conditions.
If there is no available table in the school-room, the desk tops may be used for individual places.
Reasons for the arrangement of the table should be given—the convenience of placing the knives and the spoons to the right, the forks to the left, the cup and saucer and the tumbler to the right, the use of the napkin, etc.
The one who is to wait on table must be careful to see that everything is in readiness before the meal is announced, so that she can do her work easily, without subjecting those at the table to unnecessary delay. She should have water, bread, and butter (if used), hot dishes ready for the hot foods, and dessert dishes conveniently at hand. She must see that her hands are perfectly clean and her hair and dress in order. A clean, neat apron will always improve her appearance. The room should be clean and neatly arranged.
If the meal is to be a family one and all are to sit at the table together, plates will be passed from one to another as they are served: but it will still be well to have one person appointed to wait on the table. She should be ready to supply more bread, water, etc., when it is necessary, and to change the plates for the dessert course. She should rise from the table quickly and quietly, in order not to disturb others, and should take her place again as soon as the necessary service has been rendered.
The following rules should be observed: Hold the tumblers near the bottom, being careful not to touch the upper edge. Fill only three-quarters full.
Put the butter on the table just before the meal is announced, and serve in neat, compact pieces.
Cut the bread in even slices, pile them neatly on a serving plate, and place it on the table, covering it with a clean napkin or towel, if there are flies about or there is danger of dust. If preferred, the bread may be cut at the table as required. Place the dessert dishes at one end of the table or, better still, on a side table, until it is time to use 022them. When carrying the dishes to and from the table, be careful not to let the fingers come in contact with the food. Learn to place the hand under the dish. In particular service a napkin is used between the hand and the dish, or a tray, if the dish is a small one. The tray should be covered with a napkin or doily.
When a dish is being passed, hold it at the left of the person to be served and at a convenient height and distance. Be sure that each dish is supplied with a spoon or a fork for serving, and turn the handle of the spoon or the fork toward the one to be served.
If a plate is to be placed in front of a person, set it down from the right. Never reach in front of others at the table.
When a course is finished, remove the dishes containing the food first; then the soiled plates, knives, and forks. Be careful to handle only a few dishes at a time and not to pile them. If another course is to be served, remove the crumbs from the table, using for the purpose a napkin and plate, or a crumb tray and brush, and brushing the crumbs lightly into the plate. Fill the tumblers, and arrange the dishes and forks or spoons quickly for the next course.
When the meal is over, the chairs should be moved back from the table, the dishes neatly piled and carried to the kitchen sink, the table wiped, the crumbs brushed from the floor, and the room aired.
Let this lesson be a continuation of the previous one, placing emphasis on the method of waiting on table. The same articles will be required as were used in the last lesson. In addition to these the pupils must be careful to have clean aprons for this lesson.
Have the table set, as a review of the work of the last lesson; then have four or six of the pupils seat themselves and go through the forms of serving one another to any simple meal upon which the class may decide. Family meal service should be explained and demonstrated first; then service where there is one waitress. Have the pupils, in turn, act as waitresses and serve all the others, offering and placing the food, removing the soiled dishes, filling the tumblers, etc.
Rooms which are in constant use should be swept and dusted every day. A thorough cleaning of each room in the house will be necessary every week or two, even though the room is swept and kept in order daily. First, all cupboards, drawers, and other receptacles in which articles collect should be cleaned; then all large movable articles should be dusted and moved out of the room; those that are not readily movable should be dusted and covered. The floor should be swept with the windows open; the ceiling and walls should be brushed with a covered broom, and the dust allowed to settle. The floor should then be wiped with a damp cloth on the broom.[A] The wood-work should be 024cleaned with a damp cloth and a soap that is not too strong. Soda or sapolio should not be used. The furniture should be carefully uncovered, and everything arranged in perfect order.
[A] If the floor is of unfinished-wood, it will require a thorough scrubbing. After sweeping the floor and allowing the dust to settle, a small portion at a time should be scrubbed with a floor-brush and soap. When scrubbing, the grain of the wood should be followed. The scrubbing-water should be changed frequently. For rinsing and drying the floor, a cloth should be wrung out of clear water.
The things that are highest should be dusted first, and care should be taken to collect all the dust in the dust-cloth. After collecting the dust, the cloth should be shaken out-of-doors, washed thoroughly, and boiled. The dust-cloth should be dampened before using on all surfaces except the polished furniture and windows.
Sweeping should be done with short strokes and the broom should be kept close to the floor, so that the dust will not be scattered. The corners of the room should be swept first, the dust gathered in the centre, and then swept into the dust-pan. The dust should be burned, for it may contain disease germs. Loose hairs and fluff should be removed from the broom after using, and it should also be washed periodically.
Small rugs should be cleaned out-of-doors. They should be swept, beaten, and re-swept, then rolled until ready to be put on the floor. If the rug is a large one and cannot be removed, it should be wiped over with a damp cloth, rolled, and the under side of the rug and the floor beneath it should be wiped.
After the room has been cleaned, the windows should be arranged so that a supply of fresh, clean air can come constantly into it. This is essential to every room in the house, if perfect health is to be maintained.
It will be well to have Lesson IX given in one of the homes some day after school hours, if possible. If that 025cannot be arranged, the school-room may be utilized as the place for practice.
Devote Lesson VIII to a discussion of the methods of cleaning and to various short tasks in connection with the school-room. In Lesson IX have the pupils go through the entire process of cleaning a room. Assign some portion of the task to each one of them, so that all may take part in the work. Supervise the work carefully, assign home practice, and have each pupil clean a room at home once a week for a month.
As soon as one is dressed in the morning, the windows in the bed-room should be opened wide to air the room thoroughly, and the bed-clothes should be removed and put on chairs before the window to air. The night clothing should also be aired. The slops should be emptied, and the chamber should be washed with cold water, using a special cloth. The basin should be washed in warm, soapy water, which should then be poured into the chamber and used for washing it. The toilet articles should be washed, then the basin rinsed and wiped dry. The slop jar should be washed out thoroughly, and both the slop jar and the chamber should be cleaned frequently with chloride of lime or some other disinfectant. The pitcher should be filled with fresh water, and all the articles arranged neatly on the wash-stand. If the towels are soiled, clean ones should be supplied. The mattress should be turned 026and the bed made carefully; the lower sheet being tucked under the mattress all around, and the other covers tucked in at the bottom and sides of the bed. The bed should be kept free from wrinkles and smooth in appearance, and the pillows should be well shaken and arranged at the head of the bed. The floor should be swept, the furniture dusted, and everything put in place. The windows should be left partly opened, so that the bed-room may be well aired. Fresh air is always necessary, but especially during sleep, when the body is repairing itself, and it is important that the room should be well aired during the day and the windows left open at night.
When the room is to be thoroughly cleaned, the frame of the bed should be dusted, the mattress turned, and the bed should be made. The window shades should be dusted and rolled up. The curtains should be well shaken and covered, if one has a dust sheet. All the small articles on the bureau, table, and shelf should be placed on the bed, and the whole covered with a sheet. The tables, chairs, and any other movable furniture should be dusted and placed outside the room or covered. The rugs should be rolled and cleaned out-of-doors. The room should be swept and dusted. As soon as the dust has settled, the covers should be removed, and the furniture, rugs, and all the small articles should be restored to their places. The shades should be adjusted, and the room left in perfect order. The broom and everything else that has been used in the work should be cleaned and put back into their places.
It may be possible for the teacher to give this lesson in her own bed-room or in the bed-room of one of the neighbours. If this is not feasible, the only way to make 027it effective is to have the pupils report each day on the work they do at home.
Illustrate each process and give the reasons for everything that is done. Emphasize the importance of the sanitary care of the bed-room, a regular time for doing the work, and the benefit of having each member of the family care for her own personal belongings and her own portion of the bed-room.
Directions for cleaning and filling lamps.—A bright light comes from clean burners that allow a good draught. This means constant care on the part of the one who looks after the lamps. In the daily cleaning, first dust the chimney shade and the body of the lamp. Wash the chimney. If sooty, clean with a newspaper before washing. Next, turn the wick high enough to show all the charred part; cut this off, making it perfectly even, then rub with a piece of soft paper. Wipe the burner and any other part of the lamp that may be oily. Dry with another cloth. Fill the body of the lamp with oil to within an inch of the top, leaving plenty of room for the gas that may be generated from the kerosene, as this gas, in a lamp that has been used many times without refilling, may be a source of danger.
028When lighting the lamp, turn the wick down, allowing the chimney to become heated gradually. If it is necessary to move the lighted lamp, turn the wick low. The flaring up of the flame smokes the chimney. Do not leave a lighted lamp in a room where there is no one to watch it. When putting out the light, blow across the chimney, never down into it, as this might send the flame down into the kerosene.
About once a month give the lamp a thorough cleaning. Spread out a newspaper and take the lamp apart. Wash the chimney and the shade in hot water, dry with a towel, and polish, using soft paper. Boil every part of the burner in water to which two tablespoonfuls of soda have been added. Insert new wicks if the old ones are dirty, and put the parts all securely together again. Keep an old pan and some cloths exclusively for this purpose, and be very careful not to allow the dirty hands or a drop of kerosene to come near any food.
Have a regular time in the day for cleaning the lamps, preferably immediately after all the morning work has been done after breakfast. Do not fill the lamps near the kitchen stove. Do not light a match while the oil-can is near, and never fill a lamp while it is lighted or while near another one which is lighted. If a fire is caused by kerosene, smother it with a heavy rug or a woollen garment, and do not attempt to put it out with water.
It will be well to give this lesson just before some evening entertainment at the school-house. If there are no lamps at the school have a few brought in from neighbouring homes. Secure an old pan and some cloths to use in cleaning.
Discuss with the pupils the cost and properties of kerosene and the danger of having a light or too great heat near a can of kerosene. Explain the draught by means of which the kerosene can be made to burn on the wick and the danger if the burner becomes clogged up and the draught is cut off. Have the lamps taken apart, the burners boiled, the chimneys cleaned, and the body of the lamps filled and wiped off. Then have the lamps lighted, to see that they burn properly.
Household pests are annoying, dangerous to health, and destructive to property. They carry disease germs from one person to another and from the lower animals to human beings. Absolute cleanliness is essential, if the house is to be kept free from pests. As a rule, they flourish in dark, damp, dirty places. With proper care the housekeeper can keep her house free from them and, if they are noticed, she should know how to exterminate them.
A few simple methods of extermination are here given:
Bedbugs.—Kerosene should be poured into all the cracks, and a brush, dipped in kerosene, run briskly over all surfaces. Care must be taken to have no fire in the room while this is being done. The windows should be open, and the room should be kept free from dust. In four days this should be repeated, in order to kill any bugs that may have just hatched.
030Cockroaches and water-bugs.—A solution of one pound of alum to three pints of water should be poured into all the cracks. Insect-powder and borax are also effective. Absolute cleanliness and freedom from dampness are necessary, if the house is to be kept free from cockroaches.
Ants.—Oil of cloves or pennyroyal on pieces of cotton-batting scattered about in the places where ants appear will drive them away. Saturating the nests with coal-oil will destroy them. Food which attracts ants should be removed from places which they are able to reach.
Rats and mice.—These are best exterminated by the use of a trap or some preparation such as "Rough on Rats". Traps should be set nightly and should be scalded and aired after a mouse has been caught. Rat holes may be stopped by sprinkling with chloride of lime and then filling with mortar or plaster of Paris.
Mosquitoes.—These breed in swampy places, or in old barrels or kegs or tin cans which hold stagnant water. Therefore, if the swampy places are drained and the grounds about the house are kept free from stagnant water, the housekeeper will, as a rule, not be troubled with mosquitoes. Empty barrels or kegs should be inverted, and old tin cans should have a hole punched in the bottom, so that they will not hold water. All high weeds near the house should be cut down and destroyed, so that they will not provide a damp place in which to harbour mosquitoes. If it is impossible to get rid of all standing water, the breeding of mosquitoes can be checked by pouring kerosene oil on the water. One ounce of oil on fifteen square feet of water is sufficient, and this will have to be renewed at least once in ten days. The doors, windows, and ventilators of the house should be well screened, as a protection against mosquitoes.
031Flies.—These are one of the greatest carriers of typhoid and other germs, as well as filth of all sorts. They can be got rid of only by destroying the breeding places and killing the flies as rapidly as possible. Materials that attract them should not be exposed in and about the house. The house should be well screened with wire mesh or mosquito netting, in order to keep out the flies. A fly swatter should be kept at hand. The stables should be cleaned daily. Manure piles should be screened, and every effort should be made to kill the larvæ by frequent spraying with kerosene, creoline (dilute creosote), or lime.
Fleas.—These will be troublesome if cats or dogs are kept in the house. These pets should be given frequent baths, the rugs on which they lie should be brushed and shaken daily, and the floors should be washed with soap and water and wiped with kerosene.
Moths.—These are apt to develop in woollen clothes unless the garments are thoroughly shaken and absolutely protected by wrapping in newspapers before being put away. Woollen garments that are used only occasionally should be kept in a light, dry place, examined frequently, and hung in the sun occasionally. Moths or carpet beetles can be exterminated by the use of kerosene.
Give this lesson at a time when the pupils are asking about household pests or when the school is suffering from them. It would be well to have it in the spring, just before the school closes, so that the pupils may immediately put into practice what they learn. It may be desirable to devote their efforts to the destruction of one particular pest; for example, a fly crusade may be inaugurated.
If there are pests in the school-room, discuss their habits, what seems to attract them, where they come from, etc. Have the pupils report any that they may have at home. Explain why they are dangerous, tell how they can be exterminated, and assign to each pupil the task of exterminating one household pest. Have her report, each day, the success of her efforts. Continue this work for several weeks.
As garments and household linens are apt to become stained and thus lose their attractiveness, it is well to know the remedies for the most common stains and the principle upon which their removal depends. All stains should be removed as soon as possible. Boiling water will loosen and remove coffee, tea, and fresh fruit stains. The stained spot should be held over a bowl, and the water should be poured upon it with some force. Cold water will remove stains made by blood or meat juice. Soaking will help in the removal of blood stains. Rust stains may be removed by wetting the stained spot with lemon juice, covering it with salt, and placing the stained fabric in the sun. Stains from stove blacking, paint, and grass may be removed by soaking in kerosene and washing well with soap and water. Ink stains may be removed by soaking in water, removing as much of the stain as possible, and then soaking in milk. Stains from cream and other forms of 033grease may be washed out in cold water, followed by warm water and soap.
White cotton and white linen materials may be bleached by exposure to the sunshine while still damp. If they are left out overnight, the bleaching process is made effective by the moisture furnished by dew or frost. A stream of steam from the tea-kettle may also help in the bleaching process.
Some colours are set by the addition of a small amount of acid to the first water in which they are soaked, while others are set by the use of salt. It is necessary to try a small amount of the material before dipping in the entire garment, in order to be sure of satisfactory results. Vinegar should be used for blues, one-half cup to one gallon of water. Salt is most effective for browns, blacks, and pinks. In most cases, two cups of salt to one gallon of cold water will be sufficient.
The towels used for drying dishes or the linen used for some school entertainment may have become stained with coffee, fruit, or some other substance. Make this the basis of a lesson, and let the pupils bring from home other things which are stained. Each pupil should have an article on which to practise. This lesson should be preliminary to the lesson on laundry work.
Examine the various articles from which stains are to be removed. Discuss the method of removal, and let each pupil work at her own stain until it is as nearly removed as possible.
Dish-towels should be thoroughly washed at least once a day. Wash one piece at a time (the cleanest first) in warm, soapy water and rinse in clear water in another pan. Hang in the sun, if possible, so that the air will pass through. Boil at least once a week in soapy water, to keep them fresh and white. Sunshine and fresh air are valuable for the purposes of bleaching and purifying.
Wash the aprons in hot, soapy water; boil, rinse, and blue slightly. A small amount of thin starch may be desirable. A thin starch may be made as follows:
|
2 tbsp. starch |
½ tsp. lard, butter, or paraffin |
|
|
4 tbsp. cold water |
1 qt. boiling water |
Hang the articles in the sun to dry, shaking well before putting on the line, and folding the edge of each over at least six inches. Be sure to have the line clean. When dry, fold carefully. A short time before ironing, sprinkle well.
It may be desirable to give this lesson earlier in the course, if cooking lessons are being given and dish-towels 035are in use, or if the aprons are badly soiled. Other articles may be washed, if time and facilities permit.
Discuss briefly the need for laundry work and the general principles. Let the pupils take turns at washing the towels or aprons; examine each article after it is washed, and give careful directions for the boiling, blueing, and starching. While these processes are being completed, let some of the pupils prepare the line. Let two of them be appointed to bring the towels in, before going home from school.
To do good ironing it is necessary to have a firm, unwarped ironing board. This should be covered with some thick woollen material and a white cotton cover that is clean, smooth, and tightly drawn. The thick cover should be tacked on, while the top cover should be pinned, so that it may be easily taken off to be washed. A heavy iron-holder should be provided; and the irons should be clean and smooth. For this purpose paper should be kept at hand, as well as a piece of beeswax, sandpaper, or salt. A small cloth should be used to wipe the iron after using the beeswax. A newspaper should be spread on the floor, to protect any pieces that may hang down while being ironed. The coarser towels should be ironed first, as the longer the irons are used, the smoother they become. Starched pieces should not be ironed until the irons are very hot. If the article is first laid smooth, it will be easier to iron it and keep it in 036shape, and every piece should be ironed until it is perfectly dry. As soon as the ironing is completed, the articles should be hung up to air.
Arrange to have the ironing lesson just as soon after the laundry lesson as possible. It will probably be easy to borrow the necessary equipment from homes near the school. Each pupil may be directed to bring something that will contribute toward the equipment, and one may be instructed to have the fire ready and another to put the irons on to heat before the lesson hour.
Call the pupils together early in the morning or at some time previous to the lesson period, and give them directions for sprinkling the articles to be ironed. When the class hour comes, demonstrate the method of ironing, folding, and hanging the articles, and let the pupils take turns in doing the work.
Because young girls are fond of little children and must help their mothers often with their baby brothers and sisters, they should know how to care for them. It is essential that they should understand the following points: The little body needs protection. The head is soft, and the brain may be injured by hard bumps or pressure. The skin is tender and is easily irritated by the bites of insects, friction, and so on. Kicking and wiggling are necessary 037to the development of the muscles, but the baby should not be played with all the time; and it is well for it while awake to lie quiet for part of the time. It should not be made to sit up until ready to do so. A desire to creep should be encouraged. Standing or walking should not be taught the baby until it tries to stand or walk itself, and then it must be helped very carefully.
The baby should have plenty of fresh air and should be allowed to spend much of its time out-of-doors. In cold weather it must be warmly covered and sheltered from high winds. Its eyes should always be protected from strong sunlight.
Regular hours should be observed for sleep, and the baby should be put to bed early in the evening. If the house is not well screened in summer, a mosquito bar should be put over the crib. The clothing should be light and loose, so that the body can move freely.
Perfect cleanliness is necessary to keep the baby's skin in good condition; and a daily bath should be given. A morning hour, midway between the meals, is usually the best time for this. The baby should be taught to use the chamber before the bath and after the nap. Everything should be ready before it is undressed. The room should be very warm. The water should be only moderately warm, and should be carefully tested to make sure that it is not too hot. The towels and covers for the baby should be at hand. The head and the feet should be washed first, and the body soaped before putting the child into the bath. Little soap should be used, for even the best soap is strong and is apt to irritate the delicate skin. The bath should be given quickly, and the body wrapped at once in a blanket or towel and kept covered as much as possible while it is being dried.
038The baby should be fed in small quantities at regular intervals and given plenty of cold water to drink. Not until it is eleven or twelve months of age should it be given solid or semi-solid food. Even then, milk should continue to form the basis of its diet, and of this a considerable quantity should be used—about a quart a day from the twelfth month on. As the child grows older a more varied diet will be necessary. The most hygienic methods of food preparation should always be observed.
Certain foods should never be given; for example, fried foods, pastries, condiments, pickles, preserves, canned meats, fish, pork, sausage, cheap candies, coarse vegetables, unripe and overripe fruits, stimulants, foods treated with a preservative or colouring matter, and half-cooked starches.
The teacher should talk with the pupils, in order to see what points in connection with the care of the baby it is necessary for them to know, so that they may do their work at home intelligently.
It will probably not be possible to have anything more than a class discussion of the points in question, but the pupils' home experiences ought to make this discussion vital. If there is a nurse in the neighbourhood who can be secured to give one lesson on the care of the baby, the teacher should supplement her own lessons by an additional lesson given by the nurse.
It is of great importance that children should learn in an elementary way the value of property. This will prepare them for the knowledge of the cost of living that is essential. They should learn that the cost of food can be decreased by having gardens, and by the proper choice, care, and handling of foods; that taking care of clothing will reduce another item of expense; and that the owning of one's own house and lot is something worth working for, in order to obviate the necessity of paying rent.
The teacher will have to acquaint herself thoroughly with conditions in the community, so that she can talk intelligently with the pupils, emphasize the right points, and give constructive help.
Begin with a discussion of the cost of food; how much the pupils earn or spend during the week; and why it is worth while to cook and sew well and to look after property. Continue such discussions from time to time, in connection with other school work.
It is well for every one to keep a written record of all money received and all money spent. Children should be taught to do this as soon as they are old enough to have 040money in their possession. A simple little note-book in which all expenditures are entered on the right side and all receipts on the left side, with the balance drawn up each week or month, will prove an easy and satisfactory method of keeping accounts. If the little girl learns to do this with her pennies, she will be better able to take care of the more important household accounts when she is in charge of a home. However, there will be no real incentive for her to keep accounts unless she is endeavouring to save for some good purpose. If she learns to save for the future purchase of a book, a dress, or some little treat, she will feel that her account-keeping is worth while. As a housekeeper, she will appreciate the importance of saving for some future benefit to the family.
In order to make the lesson of vital interest, introduce it at a time when the pupils are saving for some specific purpose—material for a dress to be made in the sewing class, refreshments for a party for their mothers, a school library, or something else that will be a pleasure and help in the work of the school.
After discussing the sources of income of the pupil and of her family, and the means of increasing and taking care of that income, discuss simple methods of keeping accounts, illustrate these on the black-board, show how to balance the accounts, and see that each pupil has a small book suitable for the purpose. It may be necessary to make or to rule this book as a portion of the class exercise.
Closely allied to the housekeeper's work within the home is the care of the exterior of the house and its surroundings. It is absolutely necessary that the grounds be kept neat and clean. In addition to this they should be made attractive by the careful selection of a few trees and shrubs suitably placed. While the gardens at the rear of the house may be planned solely for the pleasure and use of the family, in planning the lawn at the sides and front the neighbours and passers-by must be considered. The grounds should be a picture of which the house is the centre, the trees and shrubs being grouped to frame the picture.
In placing shrubs, the effect of the whole landscape should be considered. As a rule, shrubs should be placed in corners, to hide outhouses from view, or to screen other places which should be shielded. The centre of the lawn should be left free, and in no case should a shrub be placed in the middle of an open space in a lawn or yard. A few flowers should be planted among the shrubs, to give colour at different seasons.
The exterior of the house must be considered, if the picture framed by the shrubs and vines is to be a pleasing one. The house should be painted in a soft brown or dark green to blend with the landscape of oaks and pines. The paint will help to preserve the house, but its colour must be carefully chosen to give a pleasing effect.
The general plan of the grounds and local conditions in regard to soil and climate will determine to a large extent the kind of shrubs to be used. Many beautiful shrubs which have been introduced from foreign countries do 042well in Ontario, but our native shrubs serve all decorative purposes. For damp ground there is no better shrub than the red osier dogwood. This shrub will do well on almost any kind of soil. The swamp bush honeysuckle grows quickly and is suitable for clay land; so are the black elderberry and several species of viburnum. The hazel which may be obtained from the woods makes a good dense shrub, and the wild rose also has possibilities. The common barberry is an attractive shrub; but, as it assists in the formation of wheat rust, it should not be used in rural sections. The lilac may be used where a high shrub is desirable. The common arbor vitae or cedar of the swamps makes a good evergreen shrub. It serves well as a shield for both winter and summer and thrives with moderate care. The weigela, forsythia, and spiræa are also excellent shrubs.
The ground at the back of the house should be used for vegetable gardens with flower borders. For this purpose a deep, rich soil is necessary, and every square foot of space should be utilized. Every family should learn to make use of an increased number of vegetables and fruits and to cook them in a variety of ways. No crops should be allowed to go to waste. A family of five people could be entirely provided with vegetables for the summer and autumn from a garden less than fifty by seventy-five feet.
The attractiveness, as well as the usefulness, of the borders depends upon the choice and arrangement of flowers. These should be chosen with due consideration as to height of plants, colour of blooms, and seasons of blooming. The tallest plants should be placed at the back of the border; for a border six feet wide none of the plants need be over five feet in height. There can be a riot of colours, if the flowers are arranged in clumps of four to 043six throughout the entire length of the border. In a well-planned flower border some flowers should be in bloom each month. Hardy perennial flowers should predominate, with enough annuals to fill up the spaces and hide the soil. The well-tried, old-fashioned flowers will give the best satisfaction. Every four years the flower borders need to be spaded, well manured, and replanted.
The following lists of flowers for borders may be suggestive:
Perennials.—Bleeding-heart, carnations, chrysanthemums, columbine, coreopsis, dahlias, gaillardias, golden glow, iris, larkspur, oriental poppies, peonies, phlox, pinks, platycodon, snapdragon.
Biennials.—Forget-me-not, foxglove, Canterbury bells, hollyhock, sweet-william, wallflower.
Annuals.—African daisy, ageratum, aster, calendula, calliopsis, balsam, candytuft, cornflower, cosmos, marigold, mignonette, nasturtium, petunia, poppy, stock, sweet alyssum, sweet-pea, verbena, zinnia, annual phlox, red sunflower, cut-and-come-again sunflower.
Each home gardener should study garden literature, in order to assist in solving the garden problems; for the day has passed when one needed only to scratch the soil with a shell, plant the seeds, and receive an abundant crop. Today successful gardening depends upon intelligent management of the soil and crop and upon persistent labour.
The teacher should, if possible, visit the homes of all the pupils, in order to make herself familiar with the condition in which their grounds are kept. She may be able to secure permission from one of the housekeepers to use 044her grounds as the practice place for the lesson, or it may be more desirable to give this lesson at the school and to conduct a school garden as a model home garden.
Discuss the arrangement and care of the home or school grounds. Have the class tidy the lawn and garden chosen for the lesson, supervising the work carefully. Assign the tidying up of the home lawns or work in the home gardens for the coming week. Let this lesson serve as a means of interesting the pupils in home gardening, if that has not already been taken up, or of emphasizing the relation of gardening to the housekeeper's work, if they are already interested in the former.
|
Bush Fruits. Card. Macmillan's, Toronto |
$1.75 |
|
When Mother Lets Us Garden. Duncan. Moffat, Yard & Co., New York |
.75 |
|
A Woman's Hardy Garden. Ely. Macmillan's, Toronto |
1.75 |
|
The Beginner's Garden Book. French. Macmillan's, Toronto |
1.00 |
|
Productive Vegetable Garden. Lloyd. Lippincott Co., Philadelphia |
1.50 |
The teacher should learn how the pupils live in their own homes, what food produce is grown for home use, what foods they use, and how they prepare and serve their foods. The instruction given in the lessons should be based on this knowledge, and the possibilities for the improvement of accepted methods of cooking should be considered. Those foods should be used in the recipes which the pupils can afford to use at home. They should be encouraged to grow in their gardens a variety of garden produce, and to keep chickens, pigs, and cows.
Elementary principles of nutrition and sanitation should be taught. Simple meals, with plain but well-cooked dishes, should be planned. Variations should be suggested, and the value of a mixed diet emphasized. Care should be taken not to waste time on points that are unrelated to the homes of the pupils, except as such points may be necessary to raise their ideals.
All the work should be done carefully. The sanitary handling of food and care in the storage of foods should be insisted upon. Careful attention should be given to the dish-washing, care of the dish-towels, etc., emphasizing the points in sanitation involved. The pupils should be drilled faithfully in all points connected with the handling of anything that comes in contact with the food.
Proper methods of sweeping and cleaning should be employed, and thoroughness must be practised in every detail of the work. Constant drill in these processes should be given.
046The order in which the lessons are to be given will be regulated, in part, by the season of the year in which they occur, the locality, the foods obtainable, and any special local needs. However, care must be taken that the lessons are given in proper sequence, so that the pupils may see the relation of one to another and may appreciate the value of each. It may be necessary to combine two lessons or to give only part of a lesson. In some of the lessons more recipes are suggested than can be prepared in a brief period. In every case the choice of a recipe will have to be made by the teacher. Wherever it is possible, simple experiments should be performed to show the composition of, and the effect of heat on, food.
No attempt has been made to give a complete set of recipes; but those included here are chosen as illustrating the subjects to be discussed in the lessons. The teacher who desires to make use of a greater number of recipes will do well to supply herself with one of the text-books listed. Level measurements should be used in the preparation of all the recipes, and all the directions should be carefully followed.
The first few lessons are more fully outlined than the others, furnishing suggestions for methods of procedure that may be adapted to later lessons. The teacher should have a detailed plan for every lesson, outlining her method of work, the leading questions for the discussion, and the home assignments which she desires to make.
Foods that are in common use are suggested for the lessons outlined. There will necessarily be exceptions to their use in different localities. If any foods used in the homes are harmful because of the manner in which they are prepared, the teacher should do all in her power to 047correct the situation, but she must, at the same time, be careful not to be too radical. If the lessons given are not followed by home practice, the time devoted to them will be, to all intents and purposes, wasted. Simple meal service should be introduced wherever it is possible, and as much instruction on the furnishing and the care of the kitchen should be included as time permits.
By the time the course is completed, the pupil should be able to keep her kitchen in a sanitary condition and should have a sufficient knowledge of food values and of the processes of cooking to enable her to provide simple, wholesome meals for her family.
For the teaching of food values, it will be helpful to secure the set of sixteen food charts which may be obtained from the Superintendent of Documents, Government Printing Office, Washington, D.C., price one dollar.
It will be shown later how the school luncheon may be managed with very little interference with the ordinary organization of the school. Where definite instruction is given in Household Science, a place must be provided for it on the school time-table, as is the case with the other school subjects. In sewing and household management lessons of forty minutes each are sufficient, and these can be arranged for at the times found to be most convenient. If each pupil keeps her sewing in a box or bag, it may often be used as "busy work" when the pupil has finished her assigned work or while she is waiting for the teacher, who may be engaged with another class. Lessons in cookery should be, if possible, at least one hour in length, and should be given at a time when this period can be exceeded, if the character of the lesson renders it desirable; for example, in those cases where the cooking 048is not completed at the expiration of the time assigned. For this reason the last hour on Friday afternoon has proved a very suitable time. In some schools the lesson is commenced at half-past three and runs on until completed, and in this way only half an hour of the regular school time is taken. The possibilities of a Saturday morning cooking class should not be overlooked.
| tbsp. | = tablespoonful | oz. | = ounce |
| tsp. | = teaspoonful | lb. | = pound |
| c. | = cupful | min. | = minute |
| qt. | = quart | hr. | = hour |
| pt. | = pint |
| 3 tsp. = 1 tbsp. | 12 tbsp. (liquid) = 1 c. | |
| 16 tbsp. = 1 c. (dry measure) | 2 c. = 1 pt. |
| 2 c. butter, packed solidly | = 1 lb. |
| 2 c. sugar (granulated) | = 1 lb. |
| 2 c. meat, finely chopped | = 1 lb. |
| 2⅔ c. brown sugar | = 1 lb. |
| 2⅔ c. oatmeal | = 1 lb. |
| 4¾ c. rolled oats | = 1 lb. |
| 4 c. flour | = 1 lb. |
| 2 tbsp. butter | = 1 oz. |
| 4 tbsp. flour | = 1 oz. |
| 9 or 10 eggs | = 1 lb. |
| 1 lemon (juice) | = 3 tbsp. |
|
Household Management. Ontario Teachers' Manual. The Copp, Clark Co., Ltd., Toronto |
$0.19 |
|
Domestic Science. Austin, B. J. Lyons & Carnahan, Chicago. Vol. I |
.60 |
|
Vol. II |
.60 |
|
Principles of Cooking. Conley, G. American Book Co., New York |
.52 |
|
Home Economics. Flagg, G. P. Little, Brown & Co., Boston. (McClelland, Goodchild & Stewart, Toronto). |
.75 |
|
Lessons in Elementary Cooking. Jones, M. C. Boston Cooking School Magazine Co., Boston |
1.00 |
|
Food and Health. Kinne, H., and Cooley, A. M. Macmillan's, Toronto |
.65 |
|
The School Kitchen Text-book. Lincoln, M. J. Little, Brown & Co., Boston. (McClelland, Goodchild & Stewart, Toronto) |
.60 |
|
Food and Cookery. Metcalf, M. L. Industrial Education Co., Indianapolis |
1.00 |
|
Household Science and Arts. Morris, J. American Book Co., New York |
.60 |
|
The Science of Home-making. Pirie, E. E. Scott, Foresman & Co., Chicago |
.90 |
|
Elements of the Theory and Practice of Cookery. Williams, M. E., and Fisher, K. R. Macmillan's, Toronto |
1.00 |
Foods.—The body uses food to build and repair its tissues, to provide heat and energy, and to regulate the body processes. Foods differ from one another in their composition and in their ability to assist the body in the performance of its varied functions. These differences have led to the classification of foods into five groups, which are spoken of as the five food-stuffs or food principles.
Cooking.—While some foods can be used as they occur in nature, most of them are made more acceptable by the application of heat. Heat softens the structure of vegetables and fruits, makes tender the tissues of meat, prepares starch for digestion, develops the flavour in many foods, and destroys the parasites and germs that may be present. The five food-stuffs are differently affected by heat—some require slow cooking, others require intense heat. Hence, it is necessary to study cooking, in order that each food may be properly prepared.
The stove.—A knowledge of the construction of the stove and the methods whereby heat is obtained is imperative if one is to be a successful cook. For all stoves three things are necessary—fuel, a supply of oxygen, and a certain degree of heat, known as the kindling point, whereby the fire is started. The supply of oxygen is regulated by dampers and checks so arranged as to admit or cut off the draught of air.
051The creative dampers are doors or slides that come below the fire box. When open, they admit the entrance of air, increase the draught, and facilitate combustion.
The oven damper is a flat plate which closes the opening into the chimney flue, to decrease the drawing of the draught. When the oven damper is closed, the heat from the fire remains in the stove and passes around the oven.
Checks are doors or slides higher than the fire-box, which, when open, allow the cold air to pass over the fire, retarding combustion.
A stove is also provided with means for disposing of the ashes, soot, and the gases formed. All parts of the stove are so arranged that they may be kept clean.
There should be provided for this lesson (from the homes of the pupils or the school garden), some fruit or vegetable in season that can be cooked by dry heat. Each pupil may be able to bring an apple or a potato. The teacher should be sure to have an oven that can be well heated for baking and to have the fire well started before the lesson begins, so that the oven will be ready for use.
Lessons in geography and nature study should be correlated with the cooking lesson, to give the pupils an opportunity to study the source of foods and the reasons for cooking them.
One of the pupils should write the recipes on the black-board before the lesson hour.
Discuss very briefly the food that is to be cooked and the method of cooking it. Have as many apples or potatoes baked as there are members of the class or as the baking-dish will hold.
Assign tasks to special members of the class.
As quickly as possible put the vegetable or fruit in the oven to bake.
While the baking is in process, take up a general discussion of foods and cooking and a special discussion of the food which is being used and the method of cooking that is being employed.
Give as thorough a lesson on the stove and combustion as time permits. Examine the baked article and discuss the methods of serving it, the time for serving, and so on.
Use the finished product for the school lunch or have it served daintily in the class. Encourage the pupils to bring a dish to school in order to take the results of their 053work home for the family meal, if a school lunch is not served or if they do not need a lunch. Give careful directions for washing the dishes and supervise the housework carefully. (See pages 52, 53, Household Management.)
What food have we on hand for use to-day?
Does this food need cooking? Why?
How shall we prepare it for cooking?
How shall we prepare the oven?
How shall we care for the fire?
How long will it be necessary to cook this food?
(Time the baking carefully and discuss more thoroughly at the close of the lesson.)
How can we tell when it is cooked?
How shall we serve it?
For what meal shall we serve it?
Of what value is it to the body?
Home assignment.—The pupils should prepare the baked dish at home and at the next lesson report the result of their work.
Water and mineral matter in vegetables. How to prepare and serve uncooked vegetables—lettuce, cress, cabbage, etc. Cooking by moist heat. How to boil, season, and serve beet tops, turnip tops, cabbage, sprouts, kale, spinach, mustard, or other vegetable greens.
Water.—All fluids and tissues of the body contain large quantities of water, therefore water is regarded as one of the most important food-stuffs required by the body. Practically all foods contain some water. Fresh vegetables and fruits provide the body with a high percentage of water.
Water is a valuable medium for cooking. As it heats, small bubbles are formed, which continually increase in number and size, but gradually disappear. Some time before the boiling-point is reached, an occasional large bubble will rise to the surface and disappear. The water has then reached the simmering-point, 185°, a temperature frequently made use of in cooking. When many bubbles form and break, causing a commotion on the surface of the water, the boiling-point, 212°, has been reached.
Mineral matter.—Mineral matter is a second food-stuff that is needed by the body, but the amount required is very small. If a variety of food is used, there is generally sufficient mineral matter in the diet. Fruits and vegetables, especially fresh green vegetables, are comparatively rich in mineral matter. Mineral matter builds up the bones and certain tissues, such as the hair, teeth, and nails, and regulates the body processes by keeping the blood and digestive fluids in proper condition.
Green vegetables.—Green vegetables hold an important place in the diet, because they contain valuable mineral matter. They also contain a high percentage of water and considerable cellulose. With few exceptions they should be eaten raw, because the mineral salts, being soluble, are lost in the water in which they are cooked and because the cellulose serves its purpose best in the crisp form. Cabbage is rendered much more difficult of digestion by cooking. 055Spinach, beet tops, etc., are more palatable when cooked. The delicately flavoured vegetables should be boiled in a very small amount of water, so that they need not be drained. Thus the mineral matter will be retained when the vegetables are served.
There should be provided for the lesson (from the homes of the pupils or the school garden), some fresh vegetables in season; one that can be cooked by boiling and one that can be served uncooked with a simple dressing.
One of the pupils should write the recipes on the black-board before the lesson hour.
| ½ | tbsp. salt | ½ | tbsp. flour |
| 1 | tsp. mustard | 1 |
egg or yolks of 2 eggs |
| 1½ | tbsp. sugar | 1½ |
tbsp. melted butter |
|
A few grains pepper |
¾ | c. milk | |
| ¼ c. vinegar | |||
Discuss the heating of water and apply the facts to cooking. Have the pupils observe and describe the heating of water.
If a new tin sauce-pan or other bright tin vessel is at hand in which to heat the water, the changes which take place as the temperature increases will be more readily apparent, and the pupils will enjoy watching the process.
Discuss why one vegetable is to be cooked and another served uncooked.
Emphasize the cleaning of the vegetable, its structure, composition, and the effect of the boiling water upon it.
After the vegetable has been put on to cook, discuss the method of seasoning or dressing the vegetable which is to be served uncooked, and have it prepared attractively to 057serve on the plates. Especial emphasis should be placed on the use and importance of fresh, green vegetables.
Continue the discussion of vegetables, letting the members of the class suggest others that may be prepared as salads or cooked in the manner being illustrated, and write the list on the black-board for the pupils to copy in their note-books.
When the cooked vegetable is tender, have it drained, seasoned, and served, and serve the uncooked vegetable at the same time.
When ready for serving, let the pupils arrange their plates and forks carefully, then let them all sit down except the two who pass the vegetables. Be sure that they eat carefully and daintily.
Emphasize the careful washing of the dishes, etc., as on the previous day.
How shall we prepare our vegetables for serving?
Of what value is hot water in cooking food?
How must the vegetable be prepared for boiling?
Does this vegetable contain any water?
Will it be necessary to add any more?
Will it be necessary to cover the sauce-pan?
How hot must the water be kept? How can one tell when the water is sufficiently hot?
How can we determine when the food has cooked long enough?
How shall we serve this vegetable?
How does boiling compare with baking—
In the time needed?
In the matter of flavour?
In the amount of fuel used?
In the amount of work necessary?
Home assignment.—Practice in the boiling and the serving of vegetables.
Potatoes as a source of carbohydrates. The choice, cost, care, composition, food value, and cooking of potatoes, baked squash, steamed squash.
Carbohydrates.—A third class of food-stuffs required by the body is known as the carbohydrates, or sugars and starches. This class of foods is used as fuel, for the production of heat and energy in the body. Excess of carbohydrates may be stored in the body as fatty tissue.
Potatoes.—Potatoes are a cheap source of carbohydrates. They are also valuable for their mineral matter and for the large quantity of water which they contain. Three fourths of the potato is water. The framework of the potato is cellulose, which is an indigestible carbohydrate material. Potatoes have only a small amount of cellulose, however, and they are comparatively easy of digestion. When dry and mealy, they are most digestible. When used for a meal, potatoes should be supplemented by some muscle-building food, such as milk, cheese, eggs, fish, or meat.
At some previous period the teacher should have discussed with the pupils the use of potatoes and learned from them the different ways in which they cook them in their homes. She should determine upon some recipes for the lesson that will increase the variety of ways in which potatoes may be served and that will improve the methods used in the homes.
059Each pupil should be asked to bring one or two potatoes for the lesson. The best methods of cooking and the means of securing variety should be emphasized.
|
6 potatoes |
1 tbsp. butter |
|
|
¼ c. hot milk or cream |
1 tsp. salt |
Baste with fat every 10 minutes, when the meat is basted.
Allow about 40 minutes for the potatoes to cook.
Scrub and pare a potato. Examine a thin cross-section.
Grate the potato. Remove the coarse, shredded portion. Examine.
Examine the liquid and note any sediment.
Heat the liquid and stir until boiling. How has it changed?
Examine the portion of the grater. How has the colour changed? Why?
Discuss the composition and structure of the potato. Read over and discuss the recipes that are to be used.
Make assignments of work. After the potatoes have been put on to cook, have the class examine a raw potato, following the directions given.[A]
[A]Squash is another vegetable containing a high percentage of carbohydrate. The recipe for squash can be used at this time or in some other lesson.
If one of the recipes requires the use of the oven, be careful to have the potatoes for it prepared first and as quickly as possible. It may be necessary to proceed with another class, assigning one pupil to take charge of the baking. Special attention should be given to the careful serving of the potatoes.
Home assignment.—Before the next lesson, each pupil should be able to report that she has cooked potatoes at home, using the recipes learned in class.
Food value and use of fruits. Reasons and rules for canning. How to can and use such vegetables as beets, beans, tomatoes, and carrots, and such fruits as figs, grapes, apples, and peaches. The drying of fruits and vegetables.
Fruits impart palatability and flavour to other foods and exercise a favourable influence upon the digestive 061organs, though their food value is low. They contain a high percentage of water and only a small percentage of nutrients. Most fruits are eaten raw and are exceedingly valuable to the body because of the fresh acids they contain. Cooking softens the cellulose of the fruit and, therefore, renders some fruits more easy of digestion. The cooking of fruit is of value chiefly for the purpose of preservation.
The drying of fruits.—Fruits are dried so that they may be preserved for use. Bacteria and moulds, which cause the decay of fruits, need moisture for development and growth. If the moisture is evaporated, the fruits will keep almost indefinitely. Fruits and vegetables can be easily and inexpensively dried. When dried fruits are to be used for the table, they must be washed thoroughly and soaked for several hours, or overnight, in water, so as to restore to them as much water as possible. They should be cooked, until soft, in the same water in which they are soaked.
Canning and preserving.—Other methods of preservation are desirable, in order that vegetables and fruits be made of value for a longer period of time than through their ripening season. Canning is one of the methods most commonly employed in the home, being both easy and satisfactory. Fruit which is to be canned is first sterilized by boiling or steaming, in order to destroy all germs and spores. This can be adequately accomplished by boiling for twenty minutes, but a shorter time is sometimes sufficient. In order to ensure complete success, all germs must also be destroyed on the cans and on everything which comes in contact with the food. This will be effected by boiling or steaming for twenty minutes. The jars, covers, dipper, and funnel should all be placed 062in cold water, heated until the water comes to the boiling-point, boiled five minutes, and left in the water until just before sealing. As for the rubbers, it will be sufficient to dip them into the boiling water. After the fruit has been put into the can, it must be sealed so that it is perfectly air-tight. In order to do this, it is necessary to have good covers, with new, pliable rubbers, and to see to it that they fit tightly.
When the jar is to be filled, it should be placed on a board or wooden table, or on a cloth wrung out of hot water, and should be filled to overflowing.
Sugar is not essential to sterilization and is used only to improve the flavour. Both fruits and vegetables can be canned without sugar. However, fruits canned with a large amount of sugar do not spoil readily, for germs develop slowly in a thick syrup.
Methods of canning.—The simplest method of canning is the "Open-kettle Method" employed for small, watery fruits, such as berries, grapes, tomatoes, etc. The fruit is boiled in an open kettle (which permits of the evaporation of some of the water in the fruit) and transferred at once to a sterilized jar, which is immediately sealed.
Another and safer method, which secures more complete sterilization without serious change of flavour in the fruit, is that known as the "Cold-pack Method". After being transferred to the cans, the vegetable or fruit is subjected to an additional period of heating of considerable length, or to three periods of briefer length on three successive days. If the three periods of sterilization are used, the process is known as the "Intermittent Method".
The Single Process Method is described in the recipe for canned beets. The Intermittent Process proves more satisfactory for canned beans.
The teacher should ascertain what fruits and vegetables are most abundant and select for canning those that the class can provide.
Each pupil should be asked to bring some vegetable or fruit, some granulated sugar, and a jar in which to can her fruit. If the school does not possess enough kettles or sauce-pans in which to do the cooking, they may be borrowed from the homes.
Only one fruit or one vegetable should be taken up at a time, for the preparation necessarily varies slightly, and the different methods will prove confusing. It is not necessary to confine the choice of fruits and vegetables to those mentioned in the recipes included here. The teacher will find it better to base her instruction on the products of the particular time and place. The principles of canning should be taken up at some other period, if possible, in order that the cooking lesson may be devoted entirely to the practical work.
| 6 qt. grapes | 1 qt. sugar | ½ c. water |
If possible, let each pupil can a jar of vegetables or fruit for her own home. If the class is large, let the pupils work in groups of two or three.
Begin the lesson with a very brief discussion of how to prepare fruit for canning.
Let the pupils proceed with the practical work as quickly as possible. Demonstrate the method of filling and sealing the jars.
Assign the care of the jars and the intermittent canning on succeeding days to members of the class, and hold them responsible for the completion of the work.
The drying of some vegetables can be undertaken at school, and carefully followed from day to day. It will furnish the pupils with an interesting problem.
Preparation of white sauce to serve with vegetables. How to boil, season, and serve such vegetables as lima or butter beans, string beans, onions, cabbage, corn, beets, turnips, or carrots.
Fats.—Butter belongs to the class of food-stuffs known as fats. It increases the fuel value of those dishes to which it is added.
Fats supply heat and energy to the body in a concentrated form. For this reason they should be used in a limited quantity. Fats undergo several changes during the process of digestion, and the excessive use of them interferes with the digestion of other foods and throws a large amount of work upon the digestive organs. Cooked fats are more difficult of digestion than uncooked fats, and other foods cooked with hot fat are rendered more difficult to digest.
Vegetables.—Vegetables should be used when in season, as they are always best and cheapest then. They are better kept in a cold, dry, and dark place.
If the vegetables contain starch or tough cellulose, they will require cooking; as raw starch is indigestible, and the harsh cellulose may be too irritating to the digestive tract.
In old or exceedingly large vegetables the cellulose may be very tough; hence a long period of cooking is necessary. They should be cooked only until they are tender. Longer cooking may destroy the flavour, render the vegetables difficult of digestion, and cause the colour to change. In very young vegetables the cellulose is delicate and, if young vegetables do not contain much starch, they may be eaten raw.
When cooked vegetables are served, they are usually seasoned and dressed with butter (for one cup of vegetables use ½ teaspoonful of salt, ⅛ teaspoonful of pepper, and ½ tablespoonful of fat), or a sauce is prepared to serve with them.
It may be well to have a preliminary lesson devoted to simple experiments with flour, liquid, and fat, in order to determine the best method of combining the ingredients in the white sauce. However, if the lesson period is of sufficient length, a few of these experiments may be performed in connection with it.
There should be provided for the lesson some vegetable that is improved by serving with white sauce, and sufficient milk, butter or other fat, flour, and salt for the sauce and the experiments. Discuss with the pupils the fat that is used in their homes, in order to know what is available.
The recipes should be written on the black-board before the lesson hour.
|
1 qt. onions |
2 tbsp. butter |
|
|
White pepper |
¼ tsp. salt |
1. Boil ¼ cup of water in a small sauce-pan. While boiling, stir into it ½ tsp. of cornstarch and let it boil one minute. Observe the result. Break open a lump and examine it.
2. Mix 1 tsp. of cornstarch with 2 tsp. of cold water and stir into ¼ cup of boiling water. Note the result.
3. Mix 1 tsp. of cornstarch with 2 tsp. of sugar and stir into ¼ cup of boiling water. Note the result.
4. Mix 1 tsp. of cornstarch with 2 tsp. of melted fat in a small sauce-pan and stir into it ¼ cup of boiling water. Note the result.
1. Starch granules must be separated before being
used to thicken a liquid:
2. The liquid which is being thickened must be constantly stirred, to distribute evenly the starch grains until they are cooked.
|
2 tbsp. butter or other fat |
1 c. milk |
|
|
3 tbsp. flour |
¼ tsp. salt |
|
| ⅛ tsp. pepper | ||
Review the facts on boiling vegetables learned in the previous lesson. Let the pupils put water on to boil and prepare a vegetable for cooking. If experiments are to be made, they can be performed while the vegetable is cooking. If the experiments have been made previously, they can be reviewed in discussion at this time. Prepare a white sauce by demonstration, using the method which seems most practical. Have the vegetables drained, dried, and added to the white sauce. When well-heated, serve.
What facts regarding the boiling of vegetables did
we learn in the last lesson?
Does the vegetable that we are to cook to-day differ
in any marked way from those we cooked before? Should we follow the
same rule in cooking it?
Should we add the flour directly to the cold milk?
To the hot milk?
How shall we combine the white sauce?
With what other vegetables can white sauce be used?
Home assignment.—Each pupil should prepare some vegetable and serve it with white sauce, before the next lesson.
Kinds, composition, care, and general rules for cooking cereals. Oatmeal, cracked wheat, corn-meal porridge, rice. Fruits to serve with cereals—stewed prunes, stewed apples, or apple sauce.
The term "cereals" is applied to the cultivated grasses—rice, wheat, corn, rye, oats, and buckwheat. They are widely grown throughout the temperate zone and are prepared in various forms for use as food. Cereals contain a 071high percentage of starch and a low percentage of water, with varying proportions of mineral matter and fat. In addition to the four food-stuffs already studied, cereals contain a small amount of another food-stuff known as protein—a muscle-building material. For the most part, the cereals contain a large amount of cellulose, which is broken up during the process of preparation for market and requires long cooking before being ready for use by the body. The digestibility of the cereals depends upon the amount of cellulose which they contain and the thoroughness of the cooking. Cereals are palatable, and they are valuable, because in cooking they can be blended in various ways with other substances. They are beneficial also to the body, because their cellulose acts mechanically on the digestive organs by stimulating them to action. Cereals are made more attractive by serving with fresh or cooked fruit.
The cereals should be discussed in a nature study or geography lesson, and two or three kinds that are in common use should be brought from home by the pupils. If cereals are not generally used as breakfast foods, the lesson may be a means of introducing them. Some pupils should bring a little milk and sugar, to serve with the cooked cereal. Apples or prunes should be brought, to cook and serve with the cereal.
| 3 c. boiling water | ¾ c. oatmeal | |
| ¾ tsp. salt | ||
Add the oatmeal slowly to boiling salted water.
Follow the recipe for oatmeal, using ¾ c. of cracked wheat.
| 4 c. boiling water | ¾ c. corn-meal | |
| 1 tsp. salt | ||
Add the corn-meal slowly to boiling salted water.
Boil for 10 minutes, stirring constantly, then cook slowly for three hours longer, preferably over water. Serves six to eight.
| 3 qt. boiling water | 1 c. rice | |
| 2 tsp. salt | ||
| ½ lb. prunes | 1 qt. cold water |
| 10 small apples | ½ c. sugar | |
| ¾ c. water | ||
| 10 small apples | ½ c. sugar | |
| ¾ c. water | ||
As soon as the class meets, discuss the recipes briefly and put the cereals on to cook at once. Prepare the fruit. While the long cooking of the cereal is in progress, discuss the composition, food value, and methods of using cereals. Then go on with another lesson and call the class together, for serving, later in the day. Serve the fruit and the cereals together.
Those foods which build up and repair the muscular tissues of the body are called protein foods, muscle builders, or flesh formers. Meat, fish, eggs, cheese, milk, cereals, legumes, and nuts are classed as protein foods.
Those foods which serve solely as fuel for the body—providing heat and energy—are classed under two groups: the carbohydrates (sugar and starches), which the body is able to use in relatively large quantities; and the fats, which the body cannot use in such large quantities, but which yield a large amount of heat and energy. Protein also serves as fuel, though tissue building is regarded as its special function. Sugars and starches are abundant in fruits and vegetables. Fats are found in meats, fish, milk, 074and in some vegetable foods. Heat-giving food may be stored in the body as fatty tissue.
Mineral compounds must be present in our food, to help in the regulation of the body processes and to enter into the composition of the structure and the fluids of the body. Mineral compounds are best supplied by fresh green vegetables, fruits, and milk.
Water is absolutely essential to the body, is present in large quantities in many foods, and is combined with many other foods during the processes of cooking.
One or more of the food-stuffs sometimes predominate in a single food. For example, rice is almost entirely carbohydrate, and butter is almost pure fat. Occasionally, we find a food that contains all the five groups of food principles. Milk is an example of such a food, containing all five food principles in such proportions as to supply all the nourishment which a baby needs during the early months of its life. As the child grows older, foods rich in both carbohydrates must be added to the diet. Wheat contains all that the body needs for nourishment except water, which is easily added in cooking.
| 075 Protein foods | Carbohydrate foods |
| Meats | Sugar |
| Fish | Honey |
| Poultry | Syrup |
| Eggs | Vegetables: |
| Cheese | Potatoes |
| Milk | Parsnips |
| Cereals: | Peas |
| Wheat | Beets |
| Oatmeal | Carrots |
| Rye | Cereal preparations: |
| Legumes: | Meals |
| Peas | Flours, etc. |
| Beans | Fruits |
| Lentils | Prepared foods: |
| Peanuts | Bread |
| Nuts | Crackers |
| Macaroni | |
| Jellies | |
| Dried fruits | |
| Candy | |
| Milk | |
| Fat foods | Mineral foods |
| Cream | Fruits |
| Butter | Vegetables: |
| Lard | Spinach |
| Suet | Tomatoes |
| Fat meats | Onions |
| Fish | Turnip tops |
| Salad oil | Cauliflower |
| Nuts | Cereals: |
| Chocolate |
Grits and other coarse preparations |
| Milk | |
| Eggs |
Choice of food.—The diet must be carefully chosen, to give a needed variety and to combine the foods properly so that one may have a right proportion of all the food-stuffs. Each meal should contain some protein food, some fats or carbohydrates, some mineral matter, and water. All five forms of food-stuffs should have a place in the day's diet. The greater part of the water which the body needs should be taken between meals.
Review the foods discussed in the previous lessons and sum up the classification of foods, being sure that the 076pupils can name common examples of each. Discuss simple combinations for the different meals, using dishes already prepared in the course and creating an interest in other recipes to be prepared in succeeding lessons.
There are five food principles:
1. Water—builds and repairs the tissues, regulates the system—
found in all food-stuffs.
2. Mineral matter—builds and repairs the tissues, regulates the system—
found in vegetables, fruits, cereal, and so on.
3. Carbohydrates—give heat and energy to the body—
found in sugar and starches.
4. Fats—give heat and energy to the body—
found in cream, nuts, pork, and so on.
5. Protein—builds and repairs the tissues—
found in meat, eggs, cheese, seeds.
Always choose a diet carefully:
1. To give variety.
2. To combine the foods properly, so that they will contain adequate proportions of each food-stuff at every meal.
Experience has shown that some foods are more acceptable at one time of day than other foods, and that certain combinations are more pleasing than others. The choice of foods will also depend upon the season of the year. For example, breakfast is, as a rule, made up of simple foods that are not highly seasoned nor subjected to elaborate methods of cooking. A fruit, a cereal, and bread, with, 077possibly, eggs or meat, are served at breakfast. A hot beverage is added by most people to this meal.
Fundamentally, dinner consists of a hot meat or other protein dish, with one or two vegetables. Soup, salad, and a sweet dessert are often served. The soup is served before the meat course, and the salad and dessert follow it. The dessert may be a fruit, a cookie or other pastry, a pudding, or a frozen dish.
Lunch or supper may be a very simple meal, consisting of a soup with crackers, one protein dish (eggs, milk, or meat) with bread and stewed fruit, or a salad, with a simple dessert.
| No. I | Apple sauce | Oatmeal |
| Sausage or bacon | Toast | |
| No. II | Baked apples | Cracked wheat |
| Eggs in the shell | Corn muffins | |
| No. III | Stewed figs or berries | Corn-meal porridge |
| Poached eggs | Toast |
| No. I | Pork chops | Mashed turnips |
| Potatoes | Bread | |
| Fried apples | Rice pudding | |
| No. II | Beef or mutton stew | Spinach or turnip tops |
| Biscuits | Cornstarch pudding | |
| No. III | Baked beans | Cabbage salad |
| Grape sauce | Bread and biscuits |
| No. I | Stewed apricots or other fruit | Buttermilk or sweet milk |
| Whole wheat bread | Peanut cookies | |
| No. II | Omelet | Bread |
| Creamed potatoes | Fresh fruit | |
| No. III | Cream of carrot soup | Cottage cheese |
| Biscuits | Syrup |
The table should always be neatly set, with individual places arranged for each one who is to partake of the meal. Each place should be wide enough for a plate, with a knife and spoon at the right and a fork at the left side. A tumbler should be placed at the point of the knife and a napkin at the left of the fork. Everything on the table should be perfectly clean, the napkin should be neatly folded, and all the articles should be uniformly arranged, in order to give a neat appearance to the table. A flower or plant in the centre will add to its attractiveness. Salt, pepper, sugar, vinegar, and anything of the kind that may be needed with the meal should be arranged where it can be easily reached. Fresh water should be poured into the tumblers just before the meal is served. The bread, butter, and so on, may be put on the table several minutes before the meal is announced, but the hot dishes should be placed immediately before the family is seated.
If Lesson VI, entitled "Setting and Clearing the Table" as outlined in the course on the Care of the Home has been given, this lesson may be devoted to what to serve and how to serve it, or it may precede the lesson on "Waiting on Table". The manner of serving may be demonstrated in the next lesson, in connection with the course on the Care of the Home.
079Simple equipment for family service will be required, if the form of serving is to be taken up. For class practice, a table for four may be arranged. This will necessitate a table-cover, four dinner plates, four bread-and-butter plates, four tumblers, four cups and saucers, four knives, four forks, four teaspoons, four napkins, a platter, one serving spoon, and one serving fork.
Discuss meal service from the standpoint both of choice and combination of foods and of the method of service. Let the class plan a meal, then go through the form of serving that meal at table. In the absence of a table, the top of a desk may be used. Later in the course, the teacher should plan to combine this lesson with one on cooking and have the food served. In each cooking lesson, suggestions for serving the food should be made, and each dish cooked should be carefully served. Interest in this lesson may be increased by allowing the pupils to make original menus, and, if they are having some lessons in drawing, simple menu cards may be planned and executed.
Care, cost, and food value of milk. Value and use of sour milk—cottage cheese, curdled milk. Rice or cornstarch pudding (plain, caramel, or chocolate).
Milk contains all the food-stuffs which the body requires, except starch, and, therefore, is capable of sustaining life for comparatively long periods. It is one of the most important protein foods; but it contains so small a 080percentage of carbohydrate (milk sugar) that for the adult it must be supplemented with carbohydrate foods. For the baby, milk is a perfect food, and it is a valuable adjunct to the diet of all children. One quart of milk should be allowed for the diet of each child daily, after the twelfth month; and the diet of the adult should be supplemented by the use of milk. The greatest care should be exercised in protecting milk from dust and dirt, for it is easily contaminated and may be the means of carrying disease germs to the body. The changes which milk undergoes when souring do not render it harmful. For many people buttermilk is more easy of digestion than sweet milk, because of the changes produced by souring, as well as the absence of fat. Sour milk is of value in cooking, producing a tender bread which can readily be made light by the addition of soda—one teaspoonful of soda to one pint of sour milk that has curdled.
In the preparation of cheese, the whey is separated from the curds, thus extracting most of the water, sugar, and mineral matter, and leaving a substance rich in protein and fat. Cheese is of value in cooking, for it increases the food value of those foods to which it is added.
The teacher should make inquiries a few days in advance, to be sure that one quart of sour milk can be secured, and, when it is brought, she should examine it to see that it is in proper condition to make cottage cheese. She should arrange to have about one quart of sweet milk and such other supplies as are necessary for the pudding, brought by the pupils.
An opportunity may be afforded to discuss the use of left-over cereal by the preparation of a rice pudding, if 081the teacher provides some cold cooked rice for the lesson. In the absence of cold rice, the cornstarch pudding may be prepared.
| ½ c. rice | ⅓ c. sugar | |
| 2 c. milk | ⅛ tsp. salt | |
| 2 eggs | ½ tsp. vanilla |
|
¼ c. sugar |
||
|
5 tbsp. cornstarch, or ½ c. flour |
||
|
1 tsp. vanilla, or other flavouring |
||
|
3 c. milk |
||
|
1 egg |
||
As soon as the class meets, demonstrate the method of making cottage cheese. Show the separation of curd and whey, by adding vinegar or lemon juice to sweet milk. While the cheese is draining, make assignments of work and have the rice or cornstarch pudding made.
In this lesson and in those following emphasize the use of protein foods.
Discuss also the food value of skimmed milk and sour milk and the purposes for which these may be used in cooking.
Use the cottage cheese and the pudding for the school lunch.
Cream soups. Cream of carrot, potato, or onion soup, green pea soup. Toast, croutons, or crisp crackers to serve with soup.
Cream soups.—The strained pulp of cooked vegetables or legumes, with an equal portion of thin white sauce, is the basis for cream soups. The liquid for the soup may be all milk, part vegetable water and part milk, or all vegetable water.
A binding of flour is used to prevent a separation of the thicker and the thinner parts of the soup. This is combined as for white sauce and is stirred into the hot liquid just before the soup is to be served. The soup should be made in a double boiler and kept in this utensil until it is served.
083 Four tablespoons of flour to each quart of soup is a good proportion to use for thickening all vegetable soups that are not of a starchy nature; half that amount will be sufficient for soup prepared from a very starchy vegetable.
The value of the vegetable water should be impressed upon the pupils, and it should be pointed out that these soups are an excellent way of using the cooking water and any left-over vegetables. From these, attractive cream soups may be prepared, and a combination of flavours often gives good results.
Accompaniments.—Crisp crackers, croutons, soup sticks, or bread sticks are served with cream soups, and are valuable because they necessitate thorough mastication, thus inducing the flow of saliva and aiding in the digestion of the starchy ingredients of the soups.
As a basis for the soup, the teacher should secure a vegetable that the pupils use in their own homes, and crackers or bread to serve with the soup.
If dried peas are used, they should be allowed to soak overnight and be put on to cook early in the morning.
It will be well to have the cooking of the carrots begun before the lesson period. If the carrots are cut up in small pieces, they will cook more quickly.
|
1 c. cooked carrots |
4 tbsp. flour |
||
|
2 c. vegetable water |
2 tbsp. butter |
||
|
2 c. milk |
Salt and pepper to taste |
||
|
1 pt. milk or milk and water |
1 tbsp. flour |
|
|
2 tsp. chopped onions |
1 tsp. salt |
|
|
3 potatoes |
⅛ tsp. pepper |
|
|
1 tbsp. butter |
2 tsp. chopped parsley |
| 1 | c. split peas | 3 | tbsp. flour |
| 2½ | qt. water | 1½ | tsp. salt |
| 2 | tbsp. chopped onion | ⅛ | tsp. pepper |
| 3 | tbsp. butter | 1 | pt. milk |
Devote a few minutes to a discussion of cream soups and a review of the cooking of vegetables and white sauce.
Divide the work among the members of the class, assigning enough to each pupil to keep her busy, arranging the work so that the soup and its accompaniments will be ready for serving at the same time.
Eggs are a very valuable food, because of the large amount of protein and fat they contain. Though lacking in carbohydrates, they furnish material for building up the muscles and provide heat and energy to the body. If cooked at a low temperature, eggs are very easily and very completely digested. Combined with other foods, they serve as a thickening agent (for sauces and soups) and as a means of making batters light (popovers and sponge cake). They add flavour and colour and increase the nutritive value of other foods.
The lesson on eggs furnishes one of the best opportunities to teach the muscle-building foods. If eggs are scarce, it may be well to give this lesson at some other time. Each pupil should be asked to bring an egg; one or two should bring a little milk; and sufficient bread should be provided to toast for the poached eggs. The teacher should not undertake to give too many recipes in 086this lesson, but should try to make the pupils familiar with a sufficient variety of ways of using eggs to make egg cookery interesting. The necessity of having a moderate temperature for the cooking of eggs should be emphasized.
|
3 hard-boiled eggs |
6 slices toast |
|
| 1 c. medium white sauce | ||
| 1 egg | Pepper | |
| ¼ tsp. salt | ½ tsp. butter | |
| 1 tbsp. milk | ||
|
1 egg |
1 tbsp. milk or water |
|
|
⅛ tsp. salt |
½ tsp. butter |
|
| Cayenne or white pepper | ||
Devote one half of the class period to a discussion of the structure of the egg and the effect of heat upon it. Use simple experiments or watch the poached egg, to make a study of the changes produced in the egg by the application of heat. If the pupils are sufficiently experienced, let them work together in small groups, first scrambling an egg, then making an omelet. Demonstrate the cooking of the omelet before the entire class. Serve the egg dishes carefully while hot.
[A]The omelet recipes given are for individual portions. To make a large omelet, multiply the quantity of each ingredient by the number of eggs used. The best results will be obtained by making an omelet of not more than four eggs, as larger omelets are difficult to cook thoroughly and to handle well. A two-egg omelet will serve three people. A four-egg omelet will serve six people.
A custard is a combination of eggs and milk, usually sweetened and flavoured, and either steamed, or baked as cup custard, or cooked in a double boiler as soft custard. The whole egg may be used or the yolks alone. The yolks make a smoother, richer custard.
The eggs must be thoroughly mixed, but not beaten light, the sugar and salt added, and the milk scalded and stirred in slowly. The custard must be strained through a fine sieve and cooked at a moderate temperature. It is desirable to strain a custard, in order to remove the cords and pieces of the membrane which inclosed the yolk. The cup custard should be strained before cooking, the soft custard may be strained afterwards.
A soft custard is cooked over water and is stirred constantly until done. When done, the froth disappears from the surface, the custard is thickened and coats the spoon and sides of the pan, and there is no sign of curdling. If the custard is cooked too long, it becomes curdled. If 089it becomes curdled, put it into a pan of cold water and beat until smooth.
A steamed or baked custard is done when it becomes set and when a silver knife will come out clean after cutting it.
This lesson will furnish an opportunity for a review of milk and eggs. The pupils should arrange to bring the necessary materials from their homes.
| 1 qt. milk (heated) | ¼ tsp. salt | |
| 4 eggs or 8 egg yolks | 2 tbsp. caramel or | |
| ½ c. sugar | ½ tsp. nutmeg |
|
1 pt. milk (heated) |
⅟16 tsp. salt |
|
|
4 egg yolks |
½ tsp. vanilla extract |
|
| 4 tbsp. sugar | ||
|
4 egg whites |
¼ c. powdered sugar |
It may be possible to teach two or three recipes in this lesson. The baked custard may be put into the oven while the soft custard or floating island is being made. Serve at the school lunch.
Batters.—Batters are mixtures of flour or meal and a liquid, with salt or sugar to give flavour, butter to make tender, and steam, air, or gas to make light.
One scant measure of liquid is used with one measure 091of flour for thin, or pour, batter. One measure of liquid is used with two measures of flour for a thick, or drop, batter. One measure of liquid is used with three measures of flour for a soft, or bread, dough. One measure of liquid is used with four measures of flour for a stiff, or pastry, dough.
Before mixing a batter, the oven or griddle should be at the proper temperature, with the fire well regulated and in good condition. The oven should be tested by putting in a piece of white paper or two tablespoonfuls of flour, which should brown in three minutes. The pans should be prepared by greasing with lard, salt pork, or beef dripping. All the materials should be measured and ready before beginning to combine the ingredients. When the batter has been mixed and beaten until smooth, it should be baked at once.
The teacher will be better prepared to give the lesson on batters if she first makes herself familiar with the kinds of breads that are used in the homes of the pupils and the methods followed in their preparation. The simple, general methods of preparing batters should be taught. The teacher should not attempt the preparation of more than one or two batters in this lesson.
| 2½ c. flour | 1¼ tsp. soda | |
| ½ tsp. salt | 1 egg | |
| 2 c. sour milk | ||
|
3 c. flour |
¼ c. sugar |
|
|
1½ tbsp. baking-powder |
2 c. milk |
|
|
1 tsp. salt |
1 egg |
|
| 2 tbsp. melted butter | ||
Discuss batters briefly. Have all measurements made, the fire regulated, the pans prepared, and so on. Demonstrate the mixing and cooking of Griddle Cakes. Serve the cakes daintily after they are cooked.
Methods of making batters light.—Batters are made light by beating air into them, by adding eggs into which air has been beaten, or by entangling gas in the batter. Gas is secured by using soda and sour milk in a batter (one teaspoon of soda to one pint of sour milk), or soda with molasses (one teaspoon of soda to one cup of molasses), or soda with cream of tartar (one teaspoon of soda with two slightly rounding teaspoons of cream of tartar). The soda should be mixed well with the other dry ingredients, then the sour milk or molasses added, the whole beaten up quickly, and baked at once.
Baking-powder is a preparation containing soda and cream of tartar, and may be used in place of soda if sweet milk is used. Two level teaspoonfuls of baking-powder should be used with one cup of flour.
This lesson is a continuation of the lesson on batters. Care should be taken not to undertake more than can be done well in the time available.
|
1 c. graham flour |
1 c. milk |
|
|
1 c. flour |
1 egg |
|
|
¼ c. sugar |
1 tbsp. melted butter |
|
|
1 tsp. salt |
4 tsp. baking-powder |
|
¼ c. butter |
¾ c. milk |
|
|
¼ c. sugar |
2 c. flour |
|
|
1 egg |
3 tsp. baking-powder |
|
2 c. flour |
1 tsp. salt |
|
|
4 tsp. baking-powder |
2 tbsp. fat |
|
| ¾ to 1 c. milk or water | ||
|
2 c. flour |
½ tsp. salt |
|
|
½ tsp. soda (scant) |
1 c. sour milk (scant) |
|
| 2 tbsp. shortening (lard or other fat) | ||
Have the oven and pans prepared and all the measurements made. Demonstrate the mixing of the muffins and, while these are baking, the mixing of the biscuits. Have one pupil take charge of the baking of the muffins and another of the baking of the biscuits. When the breads are done, have the class sit down and serve them to one another, or to all the pupils at the school lunch hour.
Composition and food value. How to make tough cuts of meat palatable. Pork chops with fried apples. Beef or mutton stew with vegetables and dumplings. Rabbit stew. Bacon.
Meats are rich in protein and usually in fats, but are lacking in the carbohydrates. They build up the muscular tissue, furnish heat and energy, are more stimulating and strengthening than any other food, and satisfy hunger for a greater length of time. For the most part, meats are a very expensive food. One cannot perform more labour by the use of a meat diet than on a diet of vegetable foods. Those who use large quantities of meat suffer from many 095disturbances of the system. Hence it should form a very small part of the diet. The cuts of meat that come from those portions of the animal's body that are much exercised are tough, owing to the development of the connective tissues, but they contain a high percentage of nutrition. For the same reason, the meat from older animals is apt to be tough. The flesh of chickens, turkeys, and other fowls is very nutritious and is easily digested if not too fat.
The flavour of meats is developed by cooking. Dry heat develops the best flavour, hence the tender cuts are cooked by the processes known as broiling and roasting. Tough cuts of meat require long, slow cooking in moist heat, hence they are prepared in the form of stews and pot roasts or are used in meat soups.
After the teacher has found out what meats are used in the homes or what the school can afford to use, she should determine upon a method of cooking that will make the meat palatable, digestible, and attractive. If it can be prepared as a stew, she should use a recipe in which vegetables are also used and, if possible, have dumplings prepared to serve with the meat, as a review of the lesson on batters.
|
2 lb. beef or mutton |
¾ c. carrot cut in dice |
|
|
1 qt. water |
4 potatoes cut in ½-inch slices |
|
|
Salt, pepper, flour to dredge |
1 tsp. salt |
|
|
1 onion, cut in slices |
¼ tsp. pepper |
|
|
½ c. turnip cut in dice |
½ c. flour |
|
| ¼ c. cold water | ||
|
2 c. flour |
½ tsp. salt |
|
|
4 tsp. baking-powder |
2 tbsp. fat (lard or butter) |
|
| ¾ c. milk or water (about) | ||
If the meat is to require two or three hours' cooking, arrange to have the lesson divided and given at two periods through the day. Half an hour before opening the morning session or a portion of the morning or noon recess may be sufficient time to put the meat on to cook and to prepare the vegetables. When the second class period is called, the vegetables should be added to the partially cooked meat and the dumplings should be made. It would be well to serve the completed dish at the lunch period. There should be as much discussion regarding the kinds of meat, their food value, and the methods of cooking as time permits; but it may be necessary to complete this discussion at some other class period.
Should it be possible for the teacher to give additional lessons on meat, it might be well to devote one lesson to the preparation and cooking of poultry, directions for which may be secured from any reliable cook-book.
Peas, beans, and lentils which are dried for market contain a high percentage of protein, carbohydrate, and mineral matter. They form an excellent substitute for meat and are much cheaper in price. The digestion of leguminous foods proceeds slowly, involving a large amount of work: on this account they are not desirable for invalids, but they are satisfactory for those who are well and active. The dried legumes must be soaked overnight in water and then cooked for a long time, in order to soften the cellulose and develop the flavour.
It will be necessary to plan this lesson several days in advance, if the beans are to be baked. As they will be prepared and put on to bake before the lesson period, the Baking-powder Biscuits may be made during the lesson, to serve with them.
|
1 qt. navy beans |
2 tbsp. molasses |
|
|
1 tbsp. salt |
1 c. boiling water |
|
|
½ tbsp. mustard |
½ lb. fat salt pork |
|
|
3 tbsp. sugar |
Boiling water to cover |
Have the beans washed and put to soak the night before the lesson is to be given. Assign to one of the pupils the task of putting them on to simmer early the next morning. Call the class together for a few moments when the beans are ready to bake. Assign one of the pupils to attend to the fire and the oven. Let the beans bake all day. If the lesson is to be given late in the afternoon, the beans may be ready to serve, or the cooking may be continued on the second day and the lesson completed then. It would be well to serve the dish at the lunch period. Have the biscuits prepared to serve with the baked beans.
Cakes.—Cakes made with fat resemble other batters, except that the fat, sugar, and eggs are usually larger in amount and the texture of the baked batter is finer and more tender.
When preparing cake, first get the pans ready. Grease them or line them with greased paper. Make sure that the oven is at the proper temperature. For a small cake, the oven should be hot enough to brown a piece of unglazed 100paper or a tablespoonful of flour in three minutes. Bake a small cake from twenty to thirty minutes. When done, the cake will shrink from the sides of the pan; the crust will spring back when touched with the finger; the loud ticking sound will cease; a fine knitting-needle will come out clean if the cake is pierced; and the crust will be nicely browned. When the cake is removed from the oven, let it stand in the pan for about three minutes, then loosen, and turn out gently. Do not handle while hot. Keep in a clean, ventilated tin box in a cool, dry place.
Cocoa.—Chocolate and cocoa are prepared from the bean of a tropical tree. This bean is rich in protein, fat, carbohydrate, mineral matter, and a stimulant called theobromine. In the preparation of chocolate the seeds are cleaned, milled, and crushed into a paste. In the preparation of cocoa much of the fat is removed, and the cocoa is packed for market in the form of a fine powder. Cocoa is more easily digested than chocolate, because it contains less fat. Though the amount of cocoa used in a cup of this beverage is not large, when prepared with milk it serves as a nutritious food. It is slightly stimulating as well, because of the theobromine present and because it is served hot.
Coffee and Tea.—Coffee and tea have no food value when prepared as beverages. They contain stimulating properties that are harmful to the body if taken in large quantities and, on this account, they should be used with discretion. They should never be given to children or to those troubled with indigestion. If carelessly prepared, both coffee and tea may be decidedly harmful to the body. Coffee should not be boiled for more than eight minutes. 101Tea should never be permitted to boil. Fresh, boiling water should be poured on the leaves and left for three minutes. It should then be strained off and kept hot until used.
It may be wise to give this lesson on some special occasion, as it is well adapted to serve for the refreshments for a mother's club or a little class party.
| ½ c. butter | 2 | tsp. baking-powder | |
| 1 c. sugar | 1½ | c. flour | |
| 2 eggs | 1 | tsp. spice or | |
| ½ c. milk | 1½ | tsp. flavouring |
|
¼ c. butter |
½ | tsp. soda | |
|
½ c. brown sugar |
1¾ | c. flour | |
|
1 egg |
1 | tsp. ginger | |
|
½ c. molasses |
½ | tsp. cinnamon | |
|
½ c. milk (sour if possible) |
Salt |
| ¼ c. cocoa | 1 c. water | |
| ¼ c. sugar | 3 c. milk |
| 1 tsp. green or 2 tsp. black tea | |
| 2 c. boiling water (freshly boiling) |
Begin the lesson period with a discussion of the methods of preparing cakes, and put the cake in the oven as soon as possible. While it is baking, prepare the cocoa. If the cocoa is not to be served for some time, it can be kept hot or re-heated over hot water.
Yeast bread is made light by the presence of a gas produced by the action of yeast in the sponge or dough. Yeast is a microscopic plant which grows in a moist, warm temperature and feeds on starchy materials such as are present in wheat. A portion of the starch is converted into sugar (thus developing new and pleasant flavours), and some is still further changed, giving off the gas upon which the lightness of the bread depends. If the yeast is allowed to work for too long a time or the temperature is very hot, a souring of the dough may result. This souring can be prevented by kneading the dough thoroughly, as soon as it has risen well or doubled in bulk, or by putting it in a very hot oven to bake, when it has reached this stage. The yeast plant thrives in a heat of about the same temperature as our bodies. A little extra heat will only make it more active, but boiling temperature will kill it. Cold makes yeast inactive, though it does not kill the plants.
Yeast develops in a natural state on hops and other plants. It is prepared for market in the form of dry or moist cakes. The latter must be kept very cold. For home use, a liquid yeast is often prepared from the dry cakes. This has the advantage of being more active.
When the yeast has been added to a batter, it is spoken of as a sponge. When the batter has had enough flour added, so that it may be handled, it is called a dough. If the bread is to be made in a few hours, the yeast is made up at once into a dough. If it is to stand overnight, a sponge is often made first. More yeast is required for quick rising. In ordinary circumstances, one yeast cake is 104sufficient for one quart of liquid. Thorough kneading and baking are both essential to the success of the bread.
Arrange to have the class meet the afternoon before, in order to begin the process by making the sponge, and to come early in the morning to care for the dough. Begin the study of flour, yeast, and bread in a previous class period, correlating the work with geography, nature study, or some other subject. Either white or whole-wheat flour may be used for the breads.
| 1 dry yeast cake | 2 tsp. salt | |
| 1 c. warm water | 2 tbsp. sugar | |
| 1 c. flour |
2 tbsp. lard or butter |
|
| 1 qt. water or milk (scalded) | ||
| Flour enough to make a soft dough | ||
|
2 c. milk or water (scalded) |
||
|
2 tsp. salt |
||
|
1 tbsp. lard or butter |
||
|
¼ cake compressed yeast (1 cake if set in morning) |
||
|
¼ c. water (lukewarm) |
||
|
Flour, white or whole wheat |
||
If the class is large, prepare two or three bowls of sponge, so that all can have some practice in stirring and kneading. Do not make too large a quantity of bread to bake in the oven, unless arrangements can be made to do some of the baking at the home of one of the pupils. Use the bread for the school lunch or divide it among the class to take home.
Plan a bread contest, so that each pupil will be interested in making bread at home.
At some previous time the teacher should discuss with the pupils the plans for the dinner. It may be well to let them invite the members of the school board or others interested in their work to partake of the dinner. They should decide on the menu, with the help and suggestions of the teacher, and should choose foods that they can bring from their homes. The main course should consist of such a vegetable dish as baked beans, an omelet, or macaroni with white sauce and grated cheese. To accompany this there should be potatoes and a fresh green vegetable, such as spinach or cabbage, and a hot bread.
A simple dessert which the pupils know how to make should be chosen. One duty should be assigned to each pupil, and she should be entirely responsible for that portion of the dinner. The teacher should supervise all the work carefully.
Instructions for making the menu cards may be given in a drawing lesson.
| 2 tbsp. butter | 1 c. milk, heated | |
| 2 tbsp. flour | 4 eggs | |
| ½ tsp. salt | 2 tsp. fat | |
| Pepper | ||
| 1 c. macaroni, noodles, or rice | ||
| 2 tbsp. fat | Pepper | |
| 3 tbsp. flour | 1½ c. milk | |
| ½ tsp. salt | 1 c. grated cheese | |
|
2 c. buttered bread crumbs (two tbsp. butter or other fat) |
||
Food value and cooking. The use of peanuts in candy. Peanut cookies, or peanut, molasses, or fudge candies, to be made for a special entertainment.
Sugar is valuable to the body as a source of heat and energy. While it is easy of digestion, it is very irritating to the body if taken in large quantities and, on this account, it should be taken in small quantities and preferably at meal time or with other food. Two or three pieces of candy taken at the end of the meal will not be hurtful, but when eaten habitually between meals, it is sure to produce harmful effects.
Sugar is present in many fruits and in most vegetables. Milk contains a large percentage of sugar. In preparing foods to which the addition of sugar seems desirable, care should be taken not to add it in large quantities.
108As it is desirable to have a discussion regarding sugar and its value to the body, the preparation of cookies or candy for some school function or Christmas party may be undertaken in conjunction with this lesson, which should be given at a time when it will mean most to the pupils. The work should be so planned that they will learn something of the principles of sugar cookery, as well as the specific recipes they are using.
| 1 c. fat | 3 c. flour | |
| 1 c. sugar | 3 tsp. baking-powder | |
| 2 eggs | 1 tbsp. cinnamon | |
| ¼ c. milk | ½ c. sugar |
|
2 tbsp. butter |
3 c. flour |
|
|
¼ c. sugar |
2 tsp. milk |
|
|
1 egg |
½ c. finely chopped peanuts |
|
|
1 tsp. baking-powder |
½ tsp. lemon juice |
|
|
⅛ tsp. salt |
2 doz. whole peanuts shelled |
|
1 c. sugar |
1 c. peanuts in the shell |
| 2 c. molasses | 1 tbsp. vinegar | |
| ⅔ c. sugar | ¼ tsp. soda | |
| 2 tbsp. butter | ||
|
2 c. sugar |
1 tbsp. butter |
||
|
1 c. milk |
½ c. nuts, broken up |
||
Devote, if possible, a separate period to the discussion of the food value and cooking of sugar; then assign two recipes for the practical work, allowing the pupils to work in groups. Assign only as much work as can be carefully supervised. Do not undertake both the cookies and the candy.
The teacher should be familiar with the conditions in which the pupils live, should know how much money they can afford to pay for materials, what materials are available, what previous experience in hand work they have had, whether they can afford to have sewing-machines in their own homes, and to what extent they make their own clothes or buy them ready-made.
The lessons should be planned to furnish hand training, to give pupils practical instruction in the care of their own clothes, and to provide an opportunity for preparing the apron for the cooking lessons. The lesson course should tend to develop habits of thrift, industry, and neatness. The pupils should be encouraged to learn to sew, both to improve their own home conditions and to give them suggestions as to a possible means of livelihood. If sewing-machines are available and are in use in the homes, it is well to have lessons given in machine sewing and to have the long seams run by machine. If the pupils cannot have sewing-machines in their own homes, the lessons given should be limited to sewing by hand. In some schools, it may be necessary to simplify the lessons; in others, an increased number of articles may be prepared in the time allotted. Should the apron and cap not be needed for the cooking class, an undergarment (corset cover) may well be substituted.[A]
[A]Should the teacher feel that an apron or corset-cover is too large a piece for her pupils to undertake, and should she desire to have more time spent on the first ten lessons. Lessons XI to XVIII may be omitted, two periods each devoted to both Lessons XIX and XX, and three lessons used for the making of a simple needle-book or other small piece.
111For each lesson the teacher should have in mind a definite plan of procedure. The lesson should be opened with a brief and concrete class discussion of the new work that is to be taken up or the special stage that has been reached in work that is already under way. Though individual instruction is necessary, it should not take the place of this general presentation of the subject-matter, which economizes time and develops the real thought content of the work. Whenever possible, the teacher should endeavour to correlate this work with the other subjects on the curriculum.
New stitches may be demonstrated on large pieces of scrim, with long darning-needles and coarse red or black yarn. The scrim should be pinned to the black-board with thumb tacks, and the stitches made large enough for all to see without difficulty. A variety of completed articles should be kept on hand, in order to show additional application of points brought out in the lesson. Each class may be given the privilege of preparing one article to add to this collection, and a spirit of class pride and valuable team work may be thereby developed.
During the lesson, posture, neatness, and order should be emphasized. Application can be secured by making the problems of interest. Care must be taken that none of the work demands unnecessary eye strain. Each lesson should be closed in time to have one of the members of the class give a brief summary of the steps that have been covered.
Since the class period for sewing in the rural school will necessarily be brief, the pupils should be encouraged to continue their work at some other period. However, no work outside of the class period should be permitted until the pupil has mastered the stitch and can be trusted to do the work in the right way. The privilege of sewing may be 112made the reward for lessons quickly learned, home practice may be assigned, or the class may meet out of school hours. All outside practice must be carefully supervised, the pupil bringing her work to the teacher for frequent inspection.
If it is possible to keep on hand a permanent equipment for sewing, the following should be provided for a class of twelve:
| Approximate cost | |
|
Scissors, 1 dozen |
$3.00 |
|
Thimbles, 1 dozen |
.50 |
|
Tape-measures, 1 dozen |
.60 |
|
Emery, 1 dozen |
.50 |
|
Boxes for work, 1 dozen |
1.00 |
The teacher who is to give lessons in sewing should secure a helpful elementary text-book or some bulletin that deals with the teaching of sewing.
|
School Sewing, Based on Home Problems. Burton, I. R. and M. G. Vocational Supply Co., Indianapolis |
$1.00 |
|
Handbook of Elementary Sewing. Flagg, E. P. Little, Brown & Co., Boston. (McClelland, Goodchild & Stewart, Toronto) |
.50 |
|
Constructive Sewing, Book I. (paper) Industrial Book & Equipment Co., Indianapolis |
.60 |
|
School Needlework. Hapgood, O. C. Ginn & Co., Boston |
.50 |
|
Handicraft for Girls. McGlauflin, I. Manual Arts Press, Peoria. Ill. |
1.00 |
|
Home and School Sewing. Patton, F. Newson & Co., New York |
.60 |
|
A Sewing Course. Woolman, M. S. Frederick A. Fernald, Washington |
1.50 |
|
Sewing. Department of Education of Ontario |
.20 |
Preparation and use of working equipment: Needles, pins, thread, tape-measure, thimble, scissors, box for work. Talk on cleanliness and neatness (care of hands, etc.). Discussion of hemming. Hems folded on sheets of paper.
A hem is made by twice turning over the edge of a piece of cloth toward the worker, and then sewing it down. It is used to finish a narrow edge. In turning a narrow hem the first fold must not be so deep as the second, in order that the hem may lie smoothly. If the hem is a wide one, the first fold can be much narrower than the second.
The teacher should have interested the pupils in the sewing lessons before the first meeting of the class, and each pupil should be asked to bring with her the box in which to keep her materials and such other equipment as is required. If the school is to furnish the equipment, the teacher should be sure that there is an adequate supply on hand.
It will probably be necessary to have the towels to be used in the cooking classes hemmed, and the pupils should be interested in doing this work. If some of them wish to hem towels for use in their own homes, it may be desirable to allow them to do so. Flour or meal sacks will answer. It may be well to have each pupil hem a towel for home use, as well as for school use, in order to impress upon her the desirability of having hemmed dish-towels for daily use. The towels may be planned during this lesson, and the pupils may arrange to bring the material from home, 114if they are to provide it; but it will be well for the teacher to have on hand material for one or two towels. Plain paper will answer for the practice folding of the hem in the first lesson.
The teacher should devote a few minutes to a talk on cleanliness, emphasizing its importance, and the necessity for exercising care in handling the sewing materials. This should be followed by a discussion regarding the care of the hands and the condition in which they should be for the sewing lesson. Each pupil should inspect her own hands and show them to the teacher.
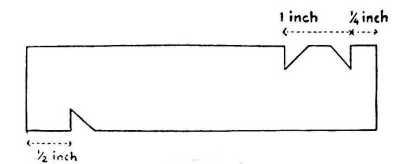
When all the pupils have their hands in a proper condition for sewing, the teacher should look over their supplies with them, give them suggestions as to how they are to keep these, and let them arrange their boxes.
Next, she should tell them what their first work is to be, show them the material for the towels, and discuss with them the best method of finishing the ends. (See Lesson II.)
Before turning the hem, the pupils should make a gauge from heavy paper, notched to indicate the depth of the hem. A few minutes should be devoted to practice 115in measuring and turning a hem of the desired depth on a sheet of paper. This should give practice in the double turning necessary—first, the narrow turn to dispose of the cut edge; second, the fold to finish the edge.
When the lesson is finished, the boxes should be put away in systematic order, and all scraps should be carefully picked up from the desks and the floor.
Turning and basting hems. Hemming towels of crash, sacking, or other material, for use in washing and drying dishes at home or in school.
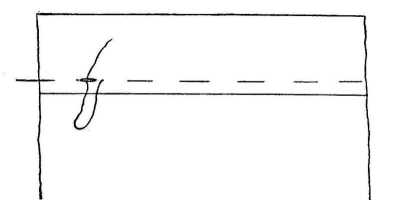
Basting is used to hold two pieces of material together until a permanent stitch can be put in. It is done by taking long stitches (one-fourth inch) from right to left and parallel to the edges that are to be basted together. In starting, the thread is fastened with a knot; when completed, it is fastened by taking two or three stitches one over the other.
The teacher should have the necessary materials on hand or should see that they are supplied by the pupils. The articles needed will include material for the towels, white thread for basting and hemming, and gauges for measuring.
The teacher should also have a large square of unbleached cotton or canvas, 18 by 18 inches, and a large darning-needle and coloured worsted thread, to use for demonstration purposes. The canvas should be fastened to the black-board, where the class can see it easily.
As soon as the class is called, the supplies are at hand, and the hands are in a proper condition, the teacher should demonstrate the basting-stitch, with a large needle and thread, on the square of canvas that has been fastened on the wall. Materials for work should be passed. Each pupil should straighten the ends of her towel by drawing a thread. Then she should turn and baste a hem three eighths of an inch in depth.
At the close of the lesson, the pupils should fold their work carefully and put it neatly in their boxes.
Overhanding (also called overseaming or top sewing).—The edges to be overhanded are held between the first finger and the thumb of the left hand, with the edge parallel to the first finger. The needle is inserted just below and perpendicular to the edge. The needle is 117pointed straight toward the worker. The stitches proceed from right to left, each stitch being taken a little to the left of the preceding stitch. The stitches should all be straight on the right side, but they will slant a little on the wrong side. They should not be deep. It may be desirable to use this overhanding stitch at the ends of hems, to hold the edges of the material together. The overhanding stitch is also used for seams, for patching, and for sewing on lace.
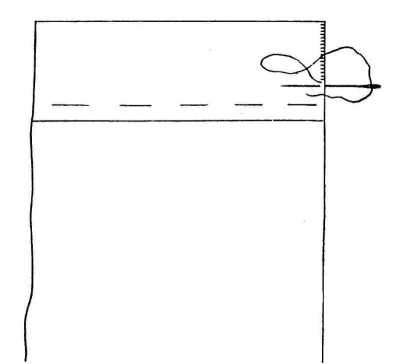
The overhanding of narrow hems is not always necessary, but the ends may be made stronger thereby, and the stitch is a valuable one for the pupils to know.
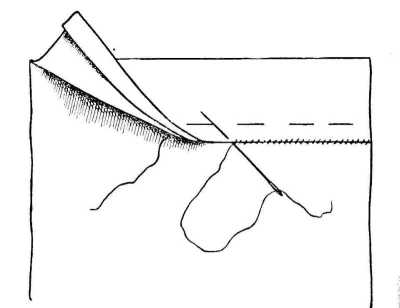
Hemming.—The hemming-stitch is placed on the inside of the hem. The end of the basted hem is laid over the first and under the second finger of the left hand, with the folded edge outside and the material toward the worker. It is held in place with the thumb. The stitch is begun at the end of the hem. The fastening of the thread is concealed by slipping it underneath the hem in the inside fold of the material. The needle is pointed over the left shoulder, a small stitch is taken by inserting the needle through the material just below the hem, then through the folded edge. This is repeated, making the next stitch nearer the worker and moving the goods away from the worker as necessary. Uniformity of slant, size, and spacing of the stitches is important.
Before this lesson is given, all the pupils should report to the teacher, having both ends of their towels basted, so that they will all be ready to proceed at once with the new stitches.
The teacher should begin by demonstrating on the large square of canvas with the large needle and heavy thread the stitches to be used. After overhanding the end of the hem, the hemming-stitch should follow with the same thread. The pupils will probably not be able to finish the hemming in this first lesson, so provision should be made for additional time. This can be required as an outside assignment, if the pupils have mastered the method during the class period. The teacher may also be able to give them some supervision while she is looking after other classes.
A school bag. Bag (made of material obtainable) to hold sewing materials. Measuring and straightening the material for the bag. Basting the seams.
The basting-stitch will be used as a review of work in the second lesson.
Some time before the lesson, the teacher should discuss with the pupils the kind of material they will be able to provide for their bags and, if the material has to be purchased, she should suggest something that is suitable, washable, and inexpensive. The bag should cost only a few 120cents. The dimensions of the finished bag should be about 12 by 18 inches.
The pupils should get out the materials they have brought and determine upon the size and shape of their bags. It will not be necessary to make them uniform. The teacher should help the pupils to use their material to the best advantage. It should be straightened, pulled in place, and measured carefully. When the bags have been cut out, the sides should be basted.
Running is done by passing the needle in and out of the material at regular intervals. Small, even stitches and spaces should follow consecutively on both sides of the material. The stitches should be much shorter than those used for basting, the length being determined largely by the kind of cloth used.
When running is combined with a back-stitch, two or more running-stitches and one back-stitch are taken alternately. The back-stitch is a stitch taken backward on the upper side of the cloth, the needle being put back each time into the end of the last stitch and brought out the same distance beyond the last stitch.
The teacher should be sure that all the pupils are ready to report, having the sides of their bags basted ready for stitching.
The teacher should first demonstrate the running-stitch with the back-stitch, and the pupils should begin to sew the sides of the bag, using this stitch. They should commence sewing three quarters of an inch from the top of the bag, so that there will be a space left for slits in the hem through which to run the cord.[A] The seams will doubtless have to be finished outside of the class hour, and may be assigned for completion before the next lesson.
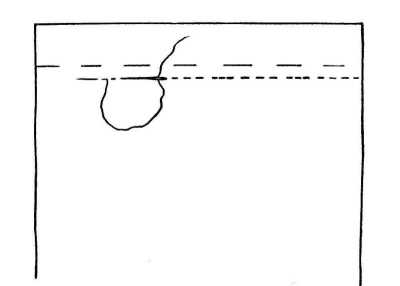
[A]The draw-string, or cord, is to be run through the hem from the inside of the bag, and it will be necessary to leave three quarters of an inch of space at the ends of the seams, to provide slits as outlets for the cord.
Overcasting is done by taking loose stitches over the raw edge of the cloth, to keep it from ravelling or fraying.
The teacher should be sure that all the pupils are ready to report, having the sides of their bags neatly sewed with the running-stitch.
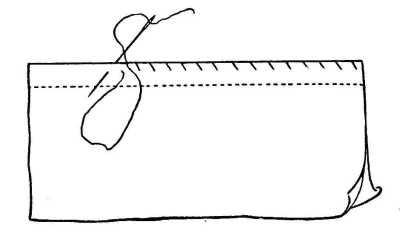
The teacher should demonstrate the method of overcasting and explain its use. She should have the pupils trim the edges of their seams neatly and overcast them carefully. After the seams have been overcast, she should discuss the depth of the hem that the pupils expect to use 123and the method of turning and basting it. They should then measure, turn, pin, and baste the hems, using the gauge for determining the depth of the hem. If the bags are deep enough to admit of a heading at the top, a deep hem (about 2½ inches) can be made, and a running-stitch put in one-half inch (or more) above the edge of the hem, to provide a casing, or space, for the cord. If it is necessary to take a narrow hem, the hem itself can be made to answer as space for the cord; in this case the hem should be made about one-half inch deep.
Review of the hemming-stitch and the running-stitch.
The pupils, having the hems basted, should report to the teacher.
The teacher should review briefly the method of making the hemming-stitch and the running-stitch, asking the pupils to describe these stitches and to demonstrate them on the large square of canvas before the class. The basted hems should then be sewed with the hemming-stitch.
After the hem is finished, the pupils should run a basting thread around the bag, to mark the location of the running-stitch, which is to be half an inch above the hem. They should measure for this carefully.
124If there is not time to do all the hemming in the class period, the hemming-stitch and the running-stitch (which is to provide space for the draw-string) should be assigned for outside work, and each pupil should bring in her finished hem at a designated time before the next class period.
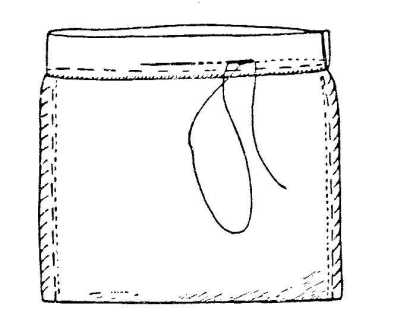
To make a cord, it is necessary to take more than four times as much cotton as the final length of the cord will require, for some of the length will be taken up in the twisting of the cord. It will be easier for two to work together in making a cord. The cord should be doubled, the two lengths twisted together firmly, and the ends brought together again and held in one hand, while the 125middle is taken in the other hand, and the lengths are allowed to twist firmly together. The ends should be tied, and the cord run into the bag with a bodkin or tape-needle. If one cord is run in from one side and another is run in from the other side, each cord running all the way around, the bag can be drawn up easily.
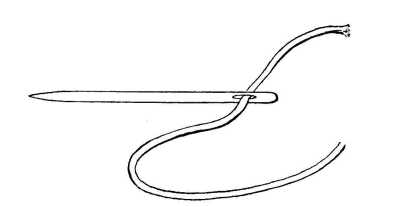
In place of the cord, narrow tape may be used. Take two pieces of tape, each piece being twice as long as the width of the bag plus two inches. Run one tape in from one side and a second from the other side, each tape running all the way around. Join the tape ends in the following manner:
1. Turn a narrow fold on one end of the tape to the wrong side, and on the other end of the tape to the right side.
2. Slip one fold under the other and hem down the folded edges.
If the pupils are not able to supply cords for their own bags, the teacher should have a sufficient supply of cord on hand. She should be sure the bags are in readiness for the cord before the class period.
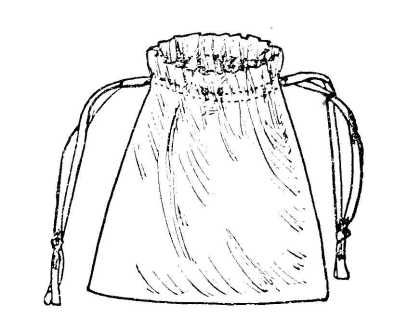
The teacher should begin the lesson by describing the method of making the cord, estimating the amount necessary, and demonstrating the process with the assistance of one of the pupils. The pupils should be numbered, so that they may work in groups of two. After they have completed the cord and run it into the bag, methods of finishing the ends neatly should be suggested to them.
Use of a darning-ball or gourd as a substitute for a ball. Talk on the care of the feet and the care of the stockings.
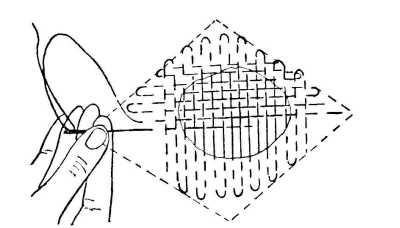
This lesson will involve running and weaving. Darning is used to fill in a hole with thread, so as to supply the part that has been destroyed or to strengthen a place which shows signs of weakness. A darning-ball, a gourd, or a firm piece of cardboard should be placed under the hole. The darn should extend one quarter of an inch beyond the edge of the material, beginning with fine stitches in the material, making rows running close together in one direction, then crossing these threads with rows that run at a right angle to them. Care should be taken alternately to pick up and drop the edge of the material around the hole, so that no raw edges will be 128visible, and to weave evenly in and out of the material and the cross threads.
Each pupil should provide a pair of stockings with a few small holes and a gourd or ball of some sort that she can use as a darning ball.
When the class meets, the teacher should discuss briefly the care of the feet and of the stockings, and demonstrate the method of darning, on a large piece of coarse material, with heavy yarn and a needle. If the pupils finish one darn during the lesson period, more darning should be assigned for practice out of class.
This lesson will involve measuring, trimming, basting, and hemming. A patch is a piece of cloth sewed on to a garment to restore the worn part. The material used for the patch should be as nearly like the original fabric in colour and quality as possible. In placing the patch, the condition of the material about the hole must be taken into consideration, as well as the size of the hole. The worn parts around the hole should be removed, and the hole cut square or oblong. The patch should be, on all four 129sides, an inch larger than the trimmed hole. The corners of the hole should be cut back diagonally, so that the edges may be turned under. The patch should be matched and pinned to the wrong side of the garment, leaving the edges to project evenly on all four sides. The edges of the material around the hole should be turned in and basted to the patch. The edges of the patch should be turned in so that they extend, when finished, one-half inch from the edge of the hole. The patch and the cloth should be basted together and hemmed.
[A]Used when special problem comes up.

The lesson on patching should be given at any time in the course when it can be applied to an immediate need. If a pupil tears her dress while playing at school, or if she wears a torn apron, the teacher can announce a patching lesson for the next sewing class, and request each pupil to bring a torn garment and the material for the patch from home. It may be desirable to use two or three periods for this lesson.
The teacher should demonstrate the process of patching on a large piece of cotton. The pupils should practise placing a patch on a piece of paper with a hole in it. Each step should be assigned in succession—examination of the article to determine its condition, calculation of the size and preparation of the patch, placing the patch, trimming the article around the hole, basting the patch and material together, and hemming the patch.
When cutting out an apron, the length of the skirt should first be measured, and to this measure 6 inches should be added for the hem and the seams. One length of the material corresponding to this length should be cut. This should be folded lengthwise through the middle. Three quarters of an inch should be measured on this fold, and the material cut from the end of the selvage to this point, in order to slope the front of the apron. When the waist measure is taken, 3 inches should be added to it (1 for the lap and 1 at each end, for finishing). This makes a strong piece at each end for the button and button-hole. Two pieces of this length and 2½ inches wide should be cut lengthwise of the material for the belt. A measure should be made from the middle of the back of the waist line, over the shoulder, to a point 5 inches to the right to the centre front and on the waist line. Two pieces of the length of this measure and 4½ inches wide should be cut lengthwise of the material for the shoulder straps. A piece 9 by 12 inches should be cut for the bib, 131the longer distance lengthwise of the material. These measurements allow one quarter of an inch for seams.
Before the lesson the teacher should see if arrangements can be made to secure the use of one or two sewing-machines, so that the pupils may sew all the long seams by machine.
At a previous lesson she should discuss the kinds of material suitable for the aprons. The pupils should consider whether their aprons shall be white or coloured, and whether they shall be of muslin, cambric, or gingham. Each pupil will need from 1½ to 2 yards of material, according to her size. The taller ones will need 2 yards.
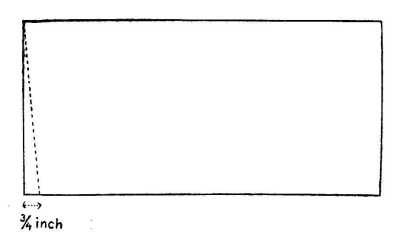
There should be on hand a sufficient number of tape-measures, pins, and scissors, so that the pupils may proceed with the cutting of their aprons without unnecessary delay.
132The apron to be made is to have a skirt, with a bib and shoulder straps, in order to be a protection to the dress, the skirt, and the waist.[A]
[A] If the pupils are very inexperienced and find the sewing difficult, it may be advisable to omit the bib and straps and to make the simple full-skirted apron. If a machine is not at hand to use for the long seams, the limited time may make the simpler apron necessary. This will give more time for the various steps. Lessons XIV and XV may then be omitted, Lesson XVI made more simple, and less outside work may be required.
As soon as the class meets, the pupils should take the measurements for their aprons. One measurement should be assigned at a time, and the reason for each measurement should be given. The pupils should have explicit directions as to the measurements, as they are apt to become confused if the directions are not clear. They should work carefully, so that the material does not become crumpled or soiled and, at the conclusion of the lesson, they should fold it carefully and put it away neatly. All threads and scraps of material should be carefully picked off the floor and the desks, and the room left in order.
An uneven basting forms the better guide for stitching. In uneven basting, the spaces are made about three times as long as the stitches. The stitch should be about one eighth of an inch and the space three eighths of an inch.
In addition to the apron material which has been cut out in the previous lesson, each pupil should provide her own spool of thread (number sixty white thread will probably answer for all the work), a piece of cardboard 5 inches wide for a gauge, and pins to use in fastening the hem.
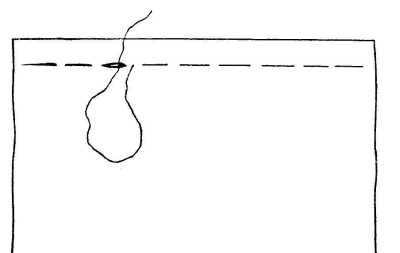
As soon as the class meets, the pupils should prepare a 5-inch gauge, to guide them in turning the hems of the skirts of their aprons. They should make a half-inch notch in the measure for the first turn in the material. A half-inch edge should be turned up from the bottom of the skirt, then a 5-inch hem should be turned, pinned, and basted carefully with uneven basting. The gauge should be used for both measurements.
In gathering, a stitch much like running is employed. Small stitches are taken up on the needle, with spaces twice as great between them. The top of the skirt should be divided into halves, and each half gathered with a long thread, fine stitches one quarter of an inch from the edge being used. The middle of the belt and the middle of the top of the skirt of the apron should be determined upon. The belt should be pinned to the wrong side of the apron at these points, and the fulness drawn up to fit (approximately one half of the waist measure). The skirt and the belt should be pinned, basted, and sewn together.
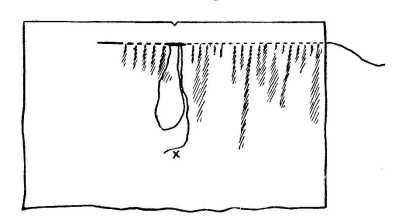
If the hems have been completed in the skirts, the pupils are ready to gather the skirts and attach them to 135the belt. It will be well to have a supply of pins on hand, to use in fastening the skirt and belt together.
The teacher should first demonstrate the method of gathering and assign that portion of the lesson. When the skirts have all been gathered, she should show the pupils how to measure, pin, and baste the skirt to the belt.

A 2-inch hem should be turned across one short end of the bib. This should be basted and hemmed. The bottom of the bib should be gathered, the method employed for the top of the skirt being used, and sufficient thread being left to adjust the gathers easily.
If the pupils have completed the skirts and attached them to the belts, they are ready to make the bibs. They 136should be provided with a 2-inch marker, for use in making the hems in the top of the bibs.
The teacher should guide the pupils carefully in the making of the bibs, reviewing their knowledge of basting, hemming, and gathering.
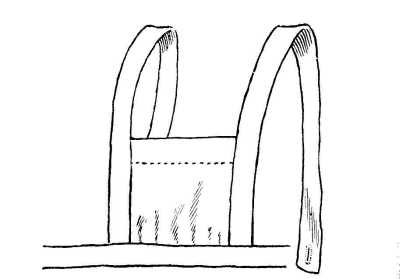
One end of one of the straps should be placed at the bottom of the bib. The edge of the strap should be pinned, basted, and sewed to the right side of the bib with a running-stitch. The other long edge of the strap should then be turned in one quarter of an inch and the side 137turned in one inch. The strap should then be folded through the middle for its entire length and the free side basted to the wrong side of the bib and hemmed. The remaining edges of the strap should be overhanded together. The other strap should be sewn to the other side of the bib in the same way.
The bibs should have been completed before the pupils report for this lesson.
As soon as the pupils report for the lesson, the teacher should explain the method of attaching the straps to the bib and tell them how to finish the former. As they proceed with their work, she should supervise them carefully and assign the unfinished portion to be done out of class.
The middle of the bottom of the bib should be determined, and pinned to the middle of the upper edge of the belt, to which the skirt has already been attached. The belt should be fastened to the wrong side of the bib. The gathering string of the bib should be drawn up, leaving 2 inches of fulness on each side of the middle. The bib should be pinned, basted, and sewn to the belt. The remaining long edges of the belt should be turned in one quarter of an inch, and the ends one inch. The edges of the other belt piece should be turned in in the same way, 138and should be pinned over the belt to which the skirt and the bib have been attached (with all the edges turned in), and basted carefully, to keep the edges even. The skirt and the bib should be hemmed to this upper belt, and all the remaining edges should be overhanded.
The bib and the straps of the apron should be completed before the pupils report for this lesson.
The teacher should guide the pupils carefully in the various steps necessary in fastening the bib to the belt and in completing the belt. If the hemming and overhanding is not completed during the class hour, they may be assigned as home work.
This lesson should teach neatness in dress, through a consideration of the best methods of fastening garments. The position of the button is measured by drawing the right end of the band one inch over the left end. The place for the button should be marked with a pin on the left end of the band. A double thread is fastened on the right side of the band, drawn through one hole of the button, and back through the other, and then taken through the band close to the first stitch. A pin should be inserted on top of the button under the first stitch, left there until 139the button is firmly fastened in place, and then removed. Before the thread is fastened, it should be wrapped two or three times around the threads holding the button, between the button and the cloth, then fastened neatly on the wrong side with a few small stitches one on top of another.
Each pupil should come to the class with her apron as nearly completed as possible, and with three buttons to sew on it, for fastening the belt and straps.
The teacher should discuss the best methods of fastening garments and should demonstrate the method of sewing on buttons. The pupils should sew one button on the left end of the apron band in the middle of the width about 1 inch from the end, and another button 4 inches from each end of the band, to hold the shoulder straps.
Directions for making the button-hole.—Measure carefully the position for the button-hole, lengthwise of the band, so that the end will come one quarter of an inch from the edge of the garment. Mark the length of the button-hole on the material by putting in two lines of running-stitches at the ends. To cut the button-hole, insert the point of the scissors at the point marked by the running-stitches nearest the edge of the garment, and cut carefully along the thread of the material to the row of stitches marking the length at the other end.
| (a) | (b) | (c) |
| Starting the button-hole | The button-hole stitch | The finished button-hole |
To make the button-hole, use a thread of sufficient length to do both the overcasting and the button-holing. Beginning at the lower right corner, overcast the raw edges with stitches one sixteenth of an inch deep. Do not 141overcast around the ends of the hole. As soon as the overcasting is done, proceed with the button-holing without breaking the thread. Hold the button-hole horizontally over the first finger of the left hand and work from right to left. Insert the point of the needle through the button-hole (at the back end), bringing the point through, toward you, four or five threads below the edge of the button-hole. Bring the doubled thread from the eye of the needle from right to left under and around the point of the needle, draw the needle through, and pull the thread firmly, so that the purl is on the edge. At the end of the button-hole, near the end of the band, make a fan, by placing from five to seven stitches. The other end of the button-hole should be finished with a bar made by taking three stitches across the end of the button-hole, then button-hole over the bar, taking in the cloth underneath and pulling the purl toward the slit. The thread should be fastened carefully on the under side of the button-hole.
For this lesson it is desirable to have small pieces of cotton on hand, to use as practice pieces for the button-holes.
The teacher should demonstrate the making of a button-hole, illustrating each step of the process on a large piece of canvas. The pupils should sew two small strips of cotton together and cut a button-hole one quarter of an inch from the edge, and lengthwise of the material, to work for practice. When the button-hole has been sufficiently perfected on the practice piece, the pupils should make three in the apron—one in the right end of the band and one in the end of each shoulder strap.
A holder 6 inches square will be satisfactory for handling hot dishes. It can be made of quilted padding bound with tape, or of two thicknesses of outing flannel covered with percale or denim and bound with tape or braid. If made of the outing flannel and covered, it should be quilted, by stitching from the middle of one side to the middle of the opposite side in both directions, in order to hold the outing flannel and the outside covering together. The tape that is to be used for the binding should be folded through the middle lengthwise; then, a beginning being made at one corner of the padding, the edge should be basted, half on one side and half on the other. Right-angled corners should be formed. When basted all around, the tape should be sewn on each side with a hemming-stitch.
If the holder is to be suspended from the apron band, a tape of from 27 inches to 36 inches in length should be attached to one corner. The raw edge at one end of the tape should be turned in. The end should be so placed that it overlaps the corner of the holder about half an inch and it should be basted to the holder. The tape should then be secured firmly to the holder, hemmed down on one edge, across the bottom, and up the other edge. The other end of the tape should be finished with a 2-inch loop. The raw edge should be folded over, the tape turned 2 inches down for the loop, and basted in place. This should be hemmed across the end. One quarter of an inch up from the end, the double thickness of tape should be back-stitched together, and the edges of the tape should be overhanded from there to the hemmed end.
Each pupil should provide sufficient denim, percale, huckaback, or other washable material to cover the two sides of a holder 7 inches square, and enough outing or canton flannel for a double lining. About 1½ yards of straight tape one-half inch wide will be needed for the binding and for suspending the holder from the apron.
The pupils should first carefully measure and turn the material for the covering of the holder and then prepare the lining, basting it all together. They should then put in the running-stitch and finish with the binding. 144If it is not possible to complete the holder in one period, a second lesson period should be provided, or arrangements may be made to have supervised work done outside of the lesson hours.
The simplest cap to make will be the circular one. A pattern should be made by drawing with a pencil and string on a piece of wrapping-paper a circle 21 inches in 145diameter. The material for the cap should be cut carefully around the circle and finished with a narrow hem. A tape to hold the draw-string should be placed 1¼ inches inside the edge of the hem. A small piece of cardboard cut about one-half inch wide should be used for measuring the position of the tape. Bias strips three quarters of an inch wide should be prepared for the tape, or a commercial tape three eighths of an inch wide may be purchased. The outer edge of the tape should be basted first and the edges joined; then the inner edges should be basted, the edge being kept smooth. Both edges should be neatly sewn with the hemming-stitch by hand or on the machine. An elastic should be inserted in the band, carefully fitted to the head, and the ends fastened neatly.
This lesson will give a good opportunity to make a cap that will answer for a dust cap or serve as a part of the cooking uniform. If such a cap does not seem desirable and the former lesson has not been completed, the cap may be omitted and the work on the holder continued.
The pupils should first make the pattern for the cap and then cut out their material. The hem should be basted and stitched with the hemming-stitch. The bias strip should be basted on and sewn with a running-stitch. It will probably not be possible for the pupils to complete the cap in one class period; but, if the material has been cut out and the work started, they may be able to complete it at some other time. The stitches are not new, and the work will serve as an excellent test of the skill they have acquired in the course.
The introduction of Household Science into rural schools has been hindered by the prevalent impression that the subject requires equipment similar to that in the Household Science centres of towns and cities, where provision is made for the instruction of twenty-four pupils at one time and for from ten to fifteen different classes each week. Owing to the expense and the lack of accommodation, it is not possible to install such equipment in rural schools. For this and other reasons it has been concluded that the subject is beyond the possibilities of the rural school. That this is not the case is shown by the fact that many rural schools in the United States, and some in Saskatchewan, as well as a number in our own Province, are teaching the subject successfully, with equipment specially designed to meet existing conditions.
The accommodations and equipment required may be classified as follows:
1. Working tables
2. Cupboards and cabinets for storing the utensils
3. Stoves
4. Cooking and serving utensils
1. The provision for working tables is conditioned by the space available, and every effort must be made to economize this space. The equipment may be placed in the basement or in a small ante-room. In one school in the Province very successful work is being done in a large corridor. When a new school-house is being erected, provision should be made by building a small work-room off the class-room. The possibilities of a small, portable building, in close proximity to the school, should not be overlooked.
147Where the school is provided with a large table, this may be made of service. When used as a working table it should be covered with a sheet of white oil-cloth. When used as a dining-table a white table-cloth may be substituted for the oil-cloth. If the school does not possess a table, two or three boards may be placed on trestles, if the space at the front or the back of the room permits, and these may be stored away when not required. A table with folding legs, such as is shown in Figures 22 and 23, may also be used.
The top of the cabinet containing the utensils or an ordinary kitchen table closed in as a cupboard underneath, may be made to serve. Long boards, about eighteen inches wide, placed across the tops of six or eight desks, provide good accommodation. These should be blocked up level and should be provided with cleats at each end, in order to prevent movement. When not in use they may stand flat against the wall and occupy very little space. Separate boards, resting on a desk at each end, may also be placed across the aisles. Each of these will provide working space for one pupil. Tables which drop down flat when not in use may be fixed to the walls of the school-room. As schools vary in many respects, it is not possible to outline a plan which will suit all; but that plan should be chosen which will best meet the requirements of the particular school.
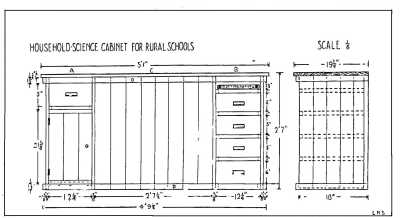
1502. The cupboards and cabinets to contain the utensils may take various forms. A kitchen cabinet costing from twenty-five to thirty-five dollars may be obtained from a furniture store, or one may be made by a local carpenter. A large packing-case painted brown outside and white inside (for cleanliness) is satisfactorily used in some schools. If covered with oil-cloth, the top of this may be used as an additional table. A few shelves placed across a corner of the room and covered with a door or curtain may be used, or it may be possible to devote one shelf of the school cupboard to the storing of the utensils. It is desirable to have a combination cupboard and table, which will contain most of the equipment, including the stove. Figure 24 is a working drawing of such a cabinet, which may be made by a local carpenter or by the older boys of the school.
The directions for making this cabinet are as follows:
Obtain two boxes and cut or re-make them so that each is 30 inches high when standing on end, 12¼ inches across the front inside, and 18 inches from front to back. These will form the two end Sections, A and B. Inside the sides of these boxes nail 1 inch × ⅞ inch strips, to form the slides for the drawer. The slides come within ⅞ of an inch of the front edge. Rails may be nailed across the front. Guide pieces should be nailed to the slides, in order to keep the drawers straight. Divide Section A for one drawer and cupboard. The drawers may be made out of raisin boxes cut down to the required size. To the front of each drawer, nail a piece of beaver board or pine a little larger than the drawer front.
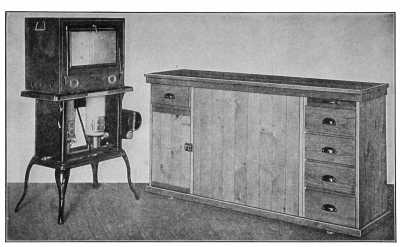
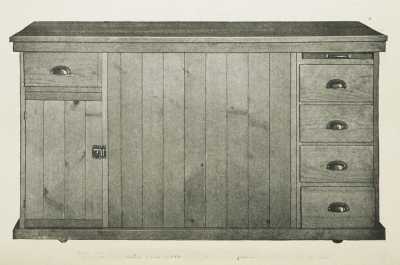
153Use any handles that may be conveniently obtained. Cut two pieces 4' 9½" × 1½" × ⅞". Space the Sections as shown, and nail these pieces firmly to the fronts of the larger boxes, A and B, top and bottom. Four end pieces 18" × 1½" will be required. Fill in Section C, in this case, 2' 7½", with the pieces from the box lids or with ordinary flooring. Make a door for the cupboard from similar material. The top is best made from good, clear, white pine. Screw battens across, and screw the whole firmly to the box top from the inside. If more table space is required, make a similar bench top, which can rest on top of the cabinet when not in use. When required, it may be placed over the desks. Steel or glass shoes or wooden skids or battens should be fixed under the cabinet, so that it can be pulled away from the stove and replaced easily. The dimensions given are for a two-flame-burner oil-stove which is 30 inches high, 31 inches across the front, and 16 inches from front to back. The middle Section, C, and the total height of the cabinet may be enlarged or reduced to fit other sizes of stoves.
The material required for, and the approximate cost of, such a cabinet, labour not included, are as follows:
|
2 boxes @ 25 |
$0.50 |
|
5 raisin boxes @ 5 |
.25 |
|
5 handles at 45c per doz. |
.20 |
|
1 cupboard latch |
.15 |
|
or 1 turn button |
.02 |
|
About 9 sq. ft. flooring |
.25 |
|
About 8 sq. ft. pine for top |
.50 |
|
Pieces for battens, etc. |
.25 |
|
Steel shoes |
.10 |
154Figure 27 shows another type of equipment and the space it occupies in the class-room when not in use.
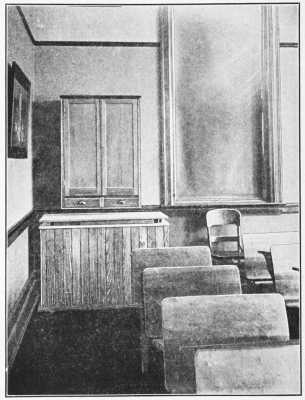
The cupboard and the back of the cabinet contain the equipment necessary for teaching twelve pupils at one time and also for serving one hot dish at the noon lunch to twenty-four pupils. One drawer contains linen, etc., and the 155other, knives, forks, and spoons. The dimensions of the cupboard and the cabinet are shown in Figures 28 and 29, and the construction of each is such that it can be made easily by any carpenter.
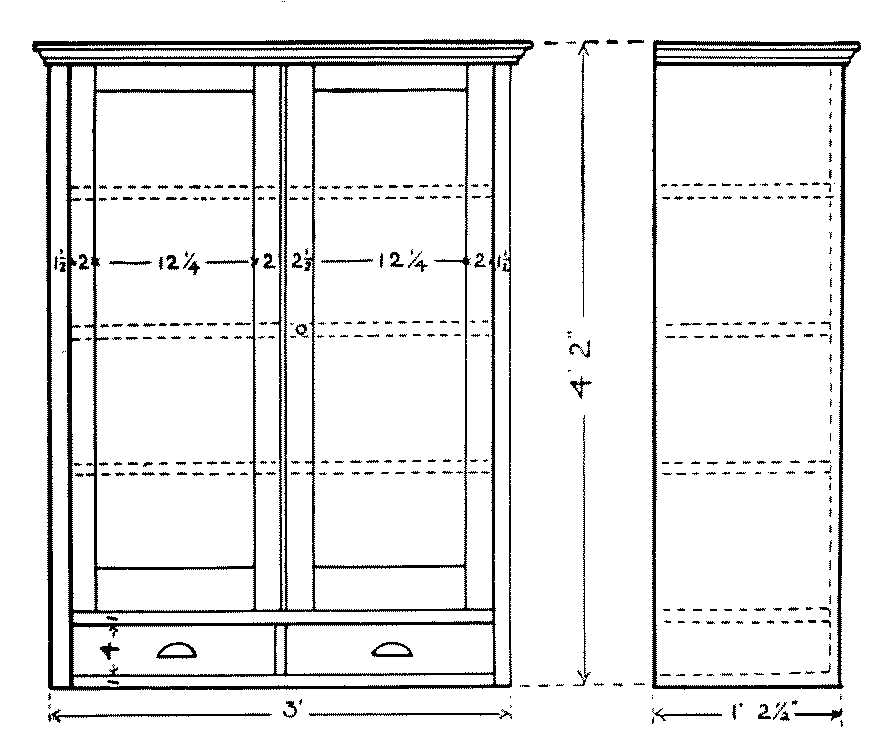
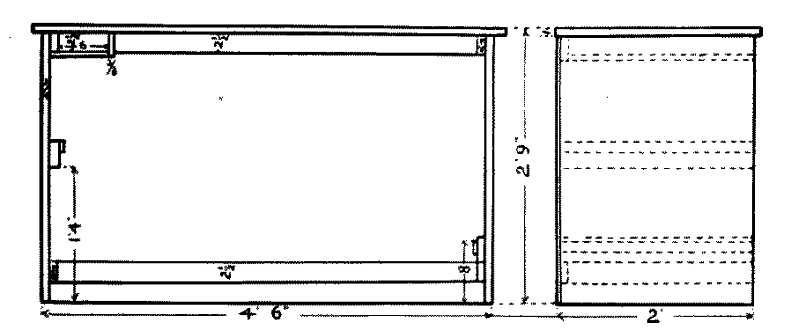
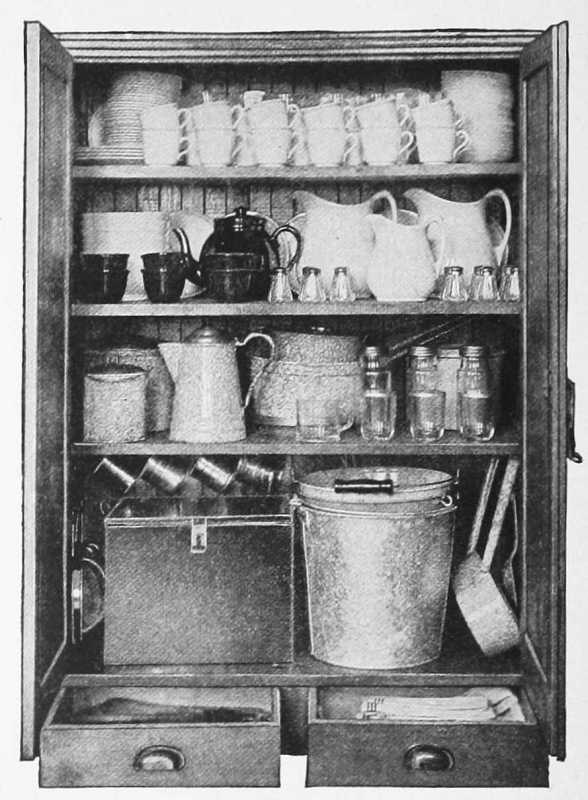
Figure 30 shows the cupboard and drawers open and the method of storing the equipment. The shelves may be covered with white oil-cloth or brown paper, in order to obviate the necessity for frequent scrubbing. The cupboard may be fixed to the wall with mirror plates or small iron brackets, or it may be screwed through the back.
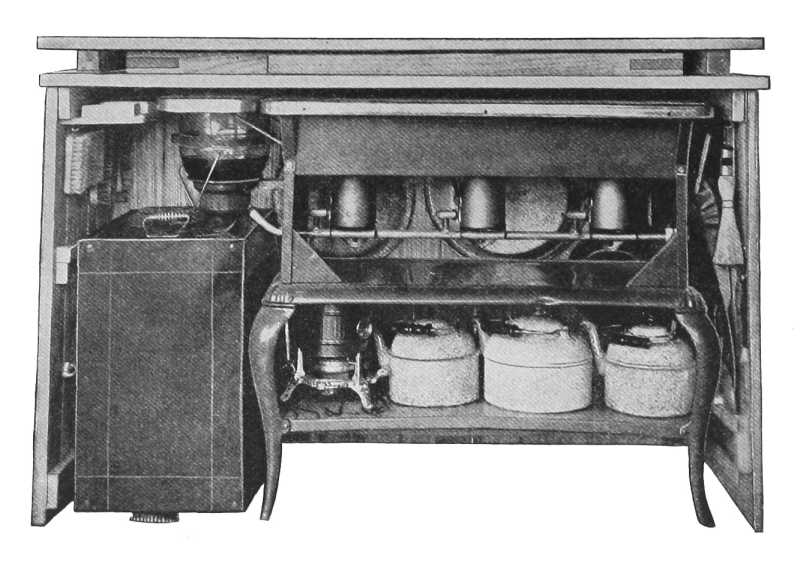
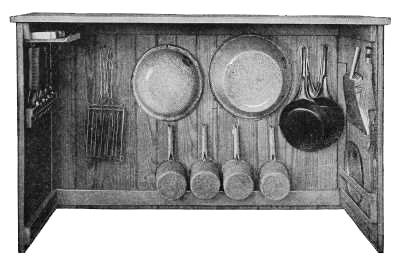
159Figure 31 shows the back of the cabinet, with the three-flame-burner stove-oven, the one-flame-burner stove, and other utensils in place. The folding table, previously described, rests on the top of the cabinet. Figure 32 shows the back of the cabinet with the stove and oven removed. The method of storing utensils and the construction of the cabinet are clearly shown.
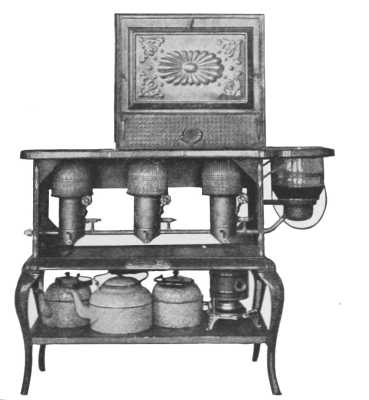
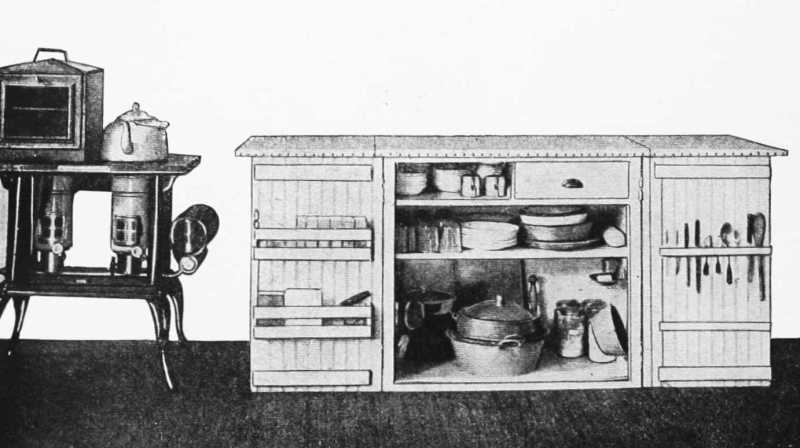
161Figure 33 shows the three-flame-burner oil-stove with the shelf underneath containing three kettles and the one-flame-burner oil-stove.
Another type of equipment is shown in Figure 34. Each end of the top of this cabinet drops down when the cupboard doors are closed, space being thus economized. The top of the table may be covered with oil-cloth or zinc carefully tacked down on the edges.
The directions for making this cabinet are as follows:
| Lumber: | ||
| 7 pieces ¾" × 4" × 14' | yellow pine ceiling | |
| 6 pieces 1" × 4" × 12' | yellow pine flooring | |
| 1 piece 1" × 12" × 12' | ||
| 1 piece 1" × 8" × 12' | No. 1 common white pine | |
| 1 piece ½" × 6" × 14' | ||
| 4 white pine laths | ||
| Hardware: | ||
| 7 pairs 1½" × 3" butt hinges | 1 lb. 8d finishing nails | |
| 3 cupboard catches | 1 lb. 6d finishing nails | |
| 1 piece zinc (27" × 39") | ¼ lb. box 1" brads | |
| 2 pieces zinc (21" × 27") | ¼ lb. box 1¼" brads | |
| 1 drawer pull | 1 box tacks | |
| 2 ft. stopper chain | ||
| Lumber | Cut into the following pieces: | Finished Dimensions | Use |
| 1" × 8" × 12' | 2 | 13-16" × 2" × 32½ | Top side rails |
| 2 | 13-16" × 2" × 18½ | Top end rail | |
| 4 | 13-16" × 2" × 29¾" | Frame posts | |
| 1 | 13-16" × 2" × 30⅞" | Bottom side rail | |
| 2 | 13-16" × 2" × 18½" | Bottom end rails | |
| 1 | 13-16" × 5" × 14⅜" | Drop door | |
| 2 pieces, 1" × 4" × 12' flooring | 7 | ¾" × 3¼" × 32½" | Flooring (bottom) |
| 5 pieces, 1" × 4" × 14' yellow pine ceiling | 24 | ¼" × 3¼" × 31¼" | Ceiling (ends and side) |
| 1" × 12" × 12' | 3 | 13-16" × 10¼" × 32½" | Shelf |
| 1 | 13-16" × 8" × 32½" | Shelf | |
| 3 | 13-16" × 1¾" × 31¼" | Casing | |
| 2 | 13-16" × 1¾" × 14⅜" | Casing | |
| 1 | 13-16" × 5" × 14⅜" | Drawer front | |
| 1 | 13-16" × 5" × 14⅜" | Drawer front | |
| 2 pieces, 1" × 4" × 12' flooring | 8 | ¾" × 3¼" × 36" | Top |
| 2 pieces, 1" × 4" × 14' yellow pine ceiling | 10 | ¾" × 3¼" × 22⅞" | Doors |
| 2 pieces, 1" × 4" × 12' flooring | 12 | ¾" × 3¼" × 24" | Swing tops |
| ½" × 6" × 12' | 2 | 7-16" × 5" × 19⅝" | Drawer slides |
| 1 | 7-16" × 5" × 13½" | Drawer back | |
| 4 | 7-16" × 4¾" × 13½" | Drawer bottom | |
| ½" × 6" × 12' | 1 | 7-16" × 4½" × 13½" | Partitions |
| 3 | 7-16" × 4½" × 10" | Partitions |
| Rule | Steel square | |
| Lead-pencil | Plane | |
| Saw | ½ Chisel and | |
| Hammer | Screw-driver |
I Cutting and Squaring Stock—
Cut the stock only as needed, in the following order, and square up according to the directions previously given.
| 1. Frame; rip the 1" × 8" × 12' piece for the frame material | |
| 2. Bottom | 6. Casing |
| 3. Ends and sides | 7. Doors |
| 4. Shelves | 8. Swing tops |
| 5. Top | 9. Miscellaneous pieces |
II Assembling—
Frame:
|
1. Check up the dimensions of the pieces squared up for the frame. |
|
2. Lay out and cut the lap joints in the top side rails and frame posts, as shown in the drawing. |
| 164
3. Nail the frame together. |
|
4. Test the corners of the frame with a steel try-square and brace it by nailing, temporarily, several strips diagonally across the corners. |
Bottom:
|
1. Cut seven pieces of flooring 32½" long for the bottom and plane off the groove of one piece. |
|
2. Turn the frame upside down and nail this piece with the smooth edge projecting ⅞" over the front side of the frame. Nail the rest of the flooring so that each piece matches tightly. |
Ends:
|
1. For the back, cut eleven pieces of ceiling 31¼" long. |
|
2. Plane off the groove edge of one piece of ceiling and nail it on the back of the frame even with the end. |
|
3. Nail the rest of the ceiling on the back. Be sure that each joint matches tightly. |
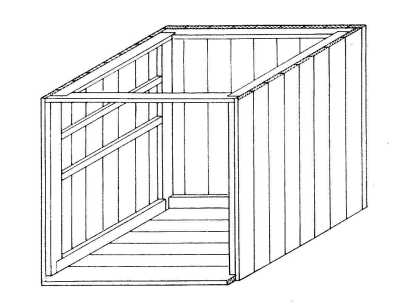
Shelves:
|
1. Make four strips (¾" × ¾" × 16½") and nail two of them inside, across each end, 15" and 24" from the bottom. These strips hold the shelves. |
| 165
2. From a 1" × 12" piece cut two pieces 32½" long; fit and nail them in for the upper shelf. |
|
3. Make the bottom shelf of two pieces, one 10¼" wide and the other 8" wide. When these boards are nailed in place, the shelf is narrow enough to allow the doors, with pockets on, to close. |
|
4. Make two strips; one 13-16" × 1" × 16½" and the other 13-16" × 1-¾" × 20½", and nail them to the top shelf for drawer guides. |
Top:
|
1. Cut eight pieces of flooring 36" long for the top. |
|
2. Plane off the groove of one piece and nail it on the top of the frame, so that the smooth edge and the ends project 1" over the front side and ends of the cabinet. |
|
3. Nail the rest of the flooring on for the top, being sure that each joint matches tightly. The last piece must also project 1" over the back side. |
Casing:
|
1. Nail the casing, which is 1-¾" wide, on the front of the cabinet. |
Doors:
|
1. Make each door ¾" × 14⅜" × 22⅞" from five pieces of ceiling 22⅞" long, held together by cleats at the top and bottom. |
|
2. Fit each door carefully, then hang them with butt hinges. Fasten a cupboard catch on each door. |
Drop Door:
|
1. Make the drop door 13-16" × 14⅜" and hinge it with a pair of butt hinges. Put on the stopper chain and catch. |
166 Swing Tops:
|
The swing tops are each made from six pieces of flooring 24" long cleated together. |
|
1. Plane off the groove edge of one piece and match them all together. |
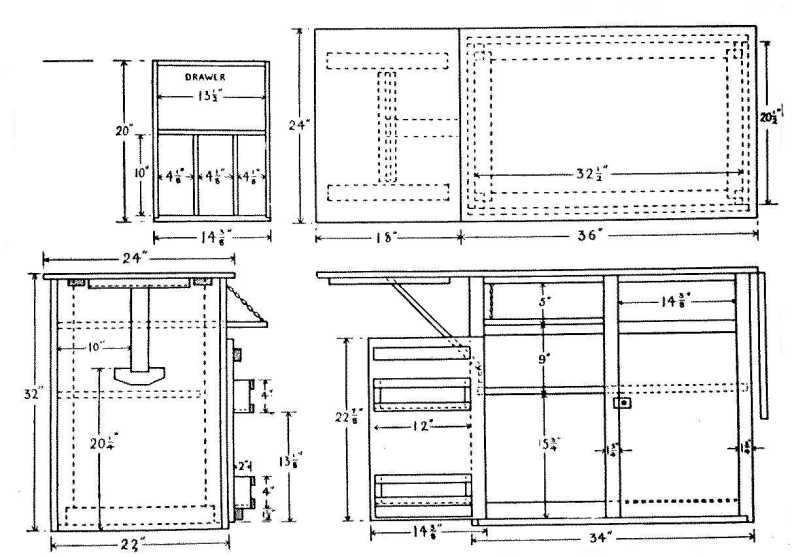
| 167
2. Make the cleats ¾" × 2" × 15" and nail the top to them. (See the drawing for the position of the cleats.) |
|
3. Rip off the tongue edge and plane it so that the top is exactly 18" wide. |
|
4. Turn the cabinet upside down on the floor and fit the swing tops. Hang them with a pair of butt hinges opposite the ends of the cleats. |
|
5. Make a T-brace with a nailed cross lap joint from two pieces, one being 13-16" × 2" × 14", the other 13-16" × 2" × 16½". The long edge of the T and the leg must be bevelled 13-16" on one side. Fit and hang a T-brace with a pair of butt hinges on each side of the swing tops. |
|
6. Make two brace cleats and fasten them to the ends of the cabinet, so that the swing tops are held level and even with the top of the cabinet. |
Putting Zinc on the Top:
|
1. Unscrew the swing tops from the cabinet to put the zinc on. |
|
2. Place the piece of zinc, 27" × 39", on top, extending 1½" over the edges all around. |
|
3. Hold the zinc firmly in place and make a square bend along the front edge with a hammer or mallet, bending the edge of the zinc up under the top. |
|
4. Punch a straight row of holes 1" apart through the zinc and tack it on. |
|
5. Bend the back edge, punch and tack in the same manner as the front edge, but be sure the zinc fits snugly on the top. |
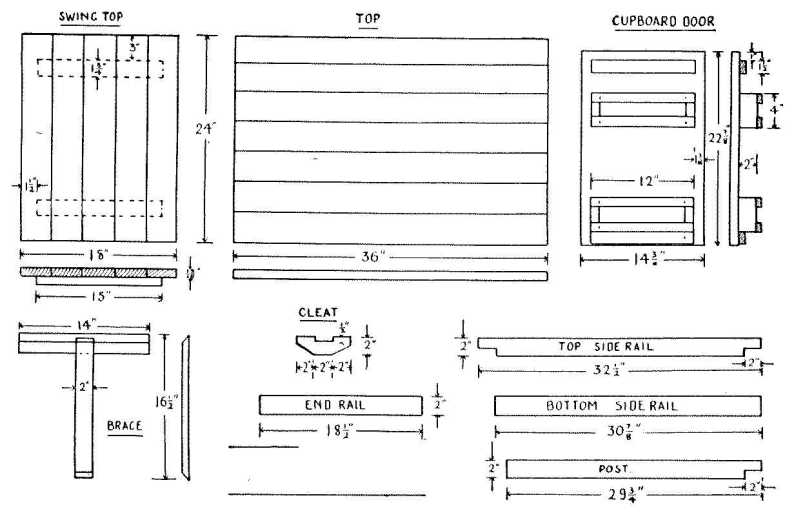
| 169
6. Bend the ends of the zinc the same as before, but be very careful to fold the corners neatly. |
|
7. Put the zinc on the swing tops in the same manner. |
|
8. Fasten the swing tops again to the top of the cabinet. |
Drawer:
|
The drawer front, 13-16" × 5" × 14⅜", with lap ⅜" × ½" cut out on the ends. |
|
1. Nail the sides, ½" × 5" × 19⅝", to the lap of the front and to the ends of the back. |
|
2. Nail the bottom in between the sides ⅛" from the lower edge. This allows the drawer to slide on the edges of the sides. |
|
3. Put the partitions in the drawer as called for by this plan. |
The racks for covers and pie tins shown in the drawings are made from two pieces, 13-16" × 2" × 4", one piece 13-16" × 2" × 10½" for the bottom, and two pieces of lath 12" long for the sides. These racks may be placed on the doors as shown, or may be changed to suit the equipment.
III Finishing—
|
1. Set all the nails and putty the holes. |
|
2. Sandpaper the cabinet carefully. |
|
3. Paint or stain and wax the outside of the cabinet, to harmonize with the surroundings where it is to be used. |
|
4. Paint the inside with two coats of white enamel. |
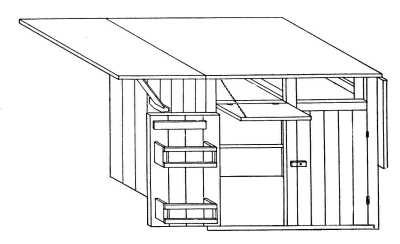
171Before putting on the enamel, apply a coat of ordinary white-lead paint and allow it to dry thoroughly. If desired, the outside of the cabinet may be finished in white enamel, though this is somewhat more expensive than the paint or stain recommended above.
All the Household Science Cabinets shown have a two-fold purpose. In the first place, they furnish storage space for the utensils and working space for the pupils. In the second place, they offer a most interesting manual training project for a boys' club. The members can make any one of them, thus correlating their practical wood-work and the domestic science of the girls and, in this way, exhibiting the co-operative spirit of the home and the school.
3. In some cases it may be possible to use the school stove for cooking purposes. Some schools use natural gas for heating and, where this is the case, provision for cooking may readily be made. Other schools situated on a hydro-electric line, may, as has been done in one case, use electricity as a source of heat. At present, however, the majority of schools may find it best to use one of the many oil-stoves now on the market. One-, two-, or three-flame-burner stoves may be obtained for general use. The two-, or three-flame-burner stoves are recommended, as they are less likely to be overturned. The one-flame-burner stove, however, is often useful as an additional provision. A good grade of oil should be used, and the stove should be kept scrupulously clean, constant attention being paid to the condition of the wick. Any oil spilt on the stove when it is being filled should be carefully wiped off before lighting. If attention is paid to these details, the stove will burn without any perceptible odour.
4. The number of the utensils and the amount of equipment depend upon the community and the number of 172pupils to be considered. By careful planning few utensils are needed. They should be as good as the people of the neighbourhood can afford and, in general, should be of the same character as those used in the homes of the district. All the table-cloths, towels, dish-cloths, etc., required should be hemmed by the pupils. Articles for storing supplies may be bought or donated. Glass canisters with close lids are best, but as substitutes, fruit jars, jelly glasses, or tin cans will serve the purpose. It is an easy matter to secure an empty lard-bucket or a syrup-can for flour or meal, empty coffee-cans for sugar or starch, etc., and baking-powder or cocoa-tins for spices. Each should be plainly labelled.
Several typical lists of equipment in Household Science are given here. These may be modified to suit particular circumstances. Considerable expense may be saved if the pupils bring their own individual equipment—soup-bowl, cup and saucer, plate, spoon, knife, fork, and paper napkins. This plan is not advised unless it is absolutely necessary, but, if followed, an effort should be made to have the articles as uniform as possible.
The following equipment is that contained in the cabinet illustrated on page 152 and is sufficient for giving organized instruction to six pupils. If a noon lunch is provided, additional individual equipment will be required.
|
1 Perfection blue-flame stove (two-flame) |
$15.00 |
|
1 Two-burner oven |
4.50 |
|
1 Coal-oil can |
.50 |
|
1 Dish-pan |
1.15 |
|
1 Tea-kettle |
1.50 |
|
1 Large sauce-pan and cover |
.75 |
|
2 Medium sauce-pans and covers, 30c each |
.60 |
|
2 Small sauce-pans and covers, 25c each |
.50 |
|
2 Small sauce-pans and covers, 25c each |
.50 |
|
2 Pudding bake-dishes, 50c ea. |
1.00 |
|
2 Muffin pans (12 rings, each 30c) |
.60 |
|
1 Soap-dish |
.25 |
|
4 Small mixing bowls, 16c ea. |
.64 |
|
2 Pitchers, 55c ea. |
1.10 |
|
3 Casseroles, 20c, 25c, 30c |
.75 |
|
6 Measuring cups, 10c ea. |
.60 |
|
6 Custard cups, 90c doz. |
.45 |
|
6 White plates, $1.45 doz. |
.73 |
|
6 Supply jars, 90c doz. |
.45 |
|
2 Vegetable brushes, 5c ea. |
.10 |
|
1 Grater |
.20 |
|
2 Egg-beaters, 10c ea. |
.20 |
|
12 Forks |
2.25 |
|
12 Teaspoons |
1.20 |
|
6 Tablespoons, $2.85 doz. |
1.43 |
|
6 Vegetable knives, 25c ea. |
1.50 |
|
6 Case knives, $3.00 doz. |
1.50 |
|
2 Strainers, 20c ea. |
.40 |
|
1 Spatula |
.40 |
|
1 Bread knife |
.50 |
|
1 Can-opener |
.10 |
|
1 French knife |
.45 |
|
2 Water pails, $1.15 ea. |
2.30 |
|
6 Dish-towels, 25c ea. |
1.50 |
|
3 Dish-cloths, 10c ea |
.30 |
|
3 Rinsing cloths, 10c ea. |
.30 |
|
1 yd. oil-cloth |
.45 |
|
5 yards cheesecloth |
.35 |
The equipment included in the Cabinet and Cupboard shown in Figure 27, page 154, is as follows:
|
1 Cupboard |
$15.00 |
3 Pie plates |
$0.15 | |
|
1 Cabinet table |
10.00 |
3 Measuring cups (tin) |
.30 | |
|
1 Three-burner oil-stove |
21.00 |
1 Measuring cup (glass) |
.15 | |
|
1 Portable oven |
2.20 |
1 Double boiler |
.85 | |
|
1 Storage tin |
1.35 |
3 Baking-dishes |
.38 | |
|
2 Dish-pans |
1.30 |
2 Cake tins |
.30 | |
|
2 Draining pans |
.90 |
3 Toasters |
.30 | |
|
2 Scrub basins |
.80 |
1 Tea-pot |
.25 | |
|
2 Soap-dishes |
.40 |
1 Coffee-pot |
.35 | |
|
1 Pail |
.55 |
1 Pitcher (2 quarts) |
.18 | |
|
2 Pails |
1.80 |
1 " (1 pint) |
.10 | |
|
2 Dippers |
.70 |
5 Bowls |
.60 | |
|
2 Tea-kettles |
2.00 |
6 Custard cups |
.60 | |
|
3 Kneading boards |
.90 |
1 Butter crock |
.30 | |
|
3 Rolling-pins |
.45 |
1 Covered pail (1 pint) |
.15 | |
|
1 Oil-can |
1.10 |
2 Trays |
.20 | |
|
1 Stove mitt |
.20 |
1 Grater |
.10 | |
|
1 Dust-pan |
.10 |
1 Potato masher |
.10 | |
|
1 Whisk |
.15 |
1 Can-opener |
.10 | |
|
2 Scrub-brushes |
.30 |
1 French knife |
.35 | |
|
3 Vegetable brushes |
.15 |
1 Bread " |
.35 | |
|
3 Stew pans |
1.05 |
3 Egg-beaters |
.15 | |
|
2 Sauce-pans |
.50 |
1 Dover egg-beater |
.10 | |
|
3 Frying-pans |
.75 |
3 Wooden spoons |
.15 | |
|
3 Strainers |
.39 |
6 Paring knives |
.90 |
|
1 Cupboard |
$15.00 |
1 Portable oven |
$2.20 | |
|
1 Cabinet table |
10.00 |
1 Storage tin |
1.35 | |
|
1 Collapsible table |
5.00 |
2 Dish-pans |
1.30 | |
|
1 Three-burner oil-stove |
21.00 |
2 Draining pans |
.90 | |
|
1 One-burner oil-stove |
6.50 |
4 Scrub basins |
1.60 | |
| 175
2 Soap-dishes |
0.40 |
4 Baking-dishes |
.50 | |
|
1 Pail |
.55 |
2 Cake tins |
.30 | |
|
2 Pails |
1.80 |
4 Toasters |
.40 | |
|
2 Dippers |
.70 |
1 Tea-pot |
.25 | |
|
3 Tea-kettles |
3.00 |
1 Coffee-pot |
.35 | |
|
4 Kneading boards |
1.20 |
2 Pitchers (2 quarts) |
.35 | |
|
4 Rolling-pins |
.60 |
1 Pitcher (1 quart) |
.10 | |
|
1 Oil-can |
1.10 |
6 Bowls |
.72 | |
|
1 Stove mitt |
.20 |
6 Custard cups |
.60 | |
|
1 Dust-pan |
.10 |
1 Butter crock |
.30 | |
|
1 Whisk |
.15 |
1 Covered pail (1 pint) |
.15 | |
|
4 Scrub brushes |
.60 |
2 Trays |
.20 | |
|
4 Vegetable brushes |
.20 |
1 Grater |
.10 | |
|
4 Stew-pans |
1.40 |
1 Potato masher |
.10 | |
|
2 Sauce-pans |
.50 |
1 Can-opener |
.10 | |
|
4 Frying-pans |
1.00 |
1 French knife |
.35 | |
|
4 Strainers |
.52 |
1 Bread " |
.35 | |
|
4 Pie plates |
.20 |
4 Egg-beaters |
.20 | |
|
4 Measuring cups (tin) |
.40 |
1 Dover egg-beater |
.10 | |
|
1 Measuring cup (glass) |
.15 |
4 Wooden spoons |
.20 | |
|
1 Double boiler |
.85 |
6 Paring knives |
.90 |
|
1 Cupboard |
$15.00 |
2 Stove mitts |
.40 | |
|
1 Cabinet table |
10.00 |
1 Dust-pan |
.10 | |
|
1 Collapsible table |
5.00 |
1 Whisk |
.15 | |
|
2 Three-burner oil-stoves |
42.00 |
6 Scrub brushes |
.90 | |
|
1 Portable oven |
2.20 |
6 Vegetable brushes |
.30 | |
|
1 storage tin |
1.35 |
6 Stew pans |
2.10 | |
|
3 Dish-pans |
1.95 |
3 Sauce-pans |
.75 | |
|
3 Draining-pans |
1.35 |
6 Frying-pans |
1.50 | |
|
6 Scrub basins |
2.40 |
6 Strainers |
.78 | |
|
3 Soap-dishes |
.60 |
6 Pie plates |
.30 | |
|
1 Pail |
.55 |
6 Measuring cups (tin) |
.60 | |
|
2 Pails |
1.80 |
1 Measuring cup (glass) |
.15 | |
|
2 Dippers |
.70 |
1 Double boiler |
.85 | |
|
3 Tea-kettles |
3.00 |
6 Baking-dishes |
.75 | |
|
6 Kneading boards |
1.80 |
3 Cake tins |
.45 | |
|
6 Rolling-pins |
.90 |
6 Toasters |
.60 | |
|
1 Oil-can |
1.10 |
1 Tea-pot |
.25 | |
| 176
1 Coffee-pot |
0.35 |
1 Potato masher |
0.10 | |
|
2 Pitchers (2 qt.) |
.35 |
1 Can-opener |
0.10 | |
|
2 " (1 qt.) |
.20 |
1 French knife |
.35 | |
|
8 Bowls |
.96 |
1 Bread " |
.35 | |
|
6 Custard cups |
.60 |
6 Egg-beaters |
.30 | |
|
1 Butter crock |
.30 |
3 Dover egg-beaters |
.30 | |
|
1 Covered pail (1 pt.) |
.15 |
6 Wooden spoons |
.30 | |
|
2 Trays |
.20 |
12 Paring knives |
1.80 | |
|
1 Grater |
.10 |
In the equipment for twelve pupils, three one-burner oil-stoves at $6.50 each might be used in place of the second large stove. In this case extra provision must be made for storing the stoves when not in use, as the cabinet shown does not provide space for more than one large stove. Care should be taken in using the one-burner stove to avoid upsetting it while it is in use. The equipment given above is generous, and reductions may be made if necessary. In any case it is not advisable that the whole equipment should be purchased at once; only sufficient to make a beginning should be secured, and further utensils may be added as the necessity for their use arises.
If a hot dish is served at the noon lunch, as is most desirable, the following will be needed in addition, in order to serve twenty-four pupils:
|
24 Knives |
$2.40 |
|
24 Forks |
1.20 |
|
24 Teaspoons |
.40 |
|
12 Tablespoons |
.60 |
|
6 Salt and pepper shakers |
1.50 |
|
24 Glasses |
1.50 |
|
24 Plates |
2.20 |
|
4 Plates (large) |
.50 |
|
24 Cups and saucers |
4.20 |
|
24 Fruit and vegetable dishes |
1.50 |
The hectograph is a device for making copies of written work. Teachers whose schools have limited black-board space will find it of great service. Recipes and other rules for work may be copied and distributed to the pupils, and thus kept in a permanent form. Many other uses in connection with the general work of the school will suggest themselves.
The following are the directions for making:
Soak 1½ ounces of white glue in three ounces of water until it is well softened. Cook in a double boiler until the whole mass is smooth. Remove from the fire and add six ounces of glycerine. Mix well, re-heat, skim, and pour into a shallow pan or on a slate. Prick the bubbles as soon as they show. Allow the mixture to stand for twenty-four hours, and it is then ready for use.
Write the material to be copied, in hectograph ink, on a sheet of the same size as that on which the copy is to be made. Write clearly and space carefully. Wipe the hectograph with a damp cloth. Lay a sheet of unglazed paper on the hectograph, rub it carefully, and take off at once. This removes any drops of water, but leaves the surface moist. Lay the written side of the sheet on the hectograph and rub it carefully over its whole surface with a soft cloth, so that every particle of the writing comes in contact with the surface of the hectograph. Leave it there for four or five minutes. Lift one corner and peel off carefully. Lay a plain sheet on the hectograph and rub as before. Take off as before. If the copy is not clear, leave the next sheet on a little longer. When sufficient copies have been made, wash the hectograph with a wet cloth before putting it away. Keep in a cool, dry place.
The best method of approach to Household Science in the rural school is through the medium of the hot noon-day lunch or the preparation of one or two hot dishes to supplement the lunch brought from home. Owing to the fact that many pupils live far from the school, it is impossible for them to go home for the mid-day meal, and they are thus dependent upon lunches which they bring with them. Very frequently the pupils are allowed to eat their lunches where and how they please, and the method chosen is conducive neither to comfort nor to health. In fine weather they do not wish to lose any time from their games, and so they eat their food while playing, or they bolt it, in order that they may get to their play more quickly. In severe weather they crowd round the steps or the stove and do not hesitate to scatter crumbs and crusts. In one case even a teacher has been seen holding a sandwich in one hand and writing on the black-board with the other.
In many cases the lunch does not attract the pupil. It is often carried, without proper wrapping, in a tin pail, and it then absorbs the taste of the tin; again, it is often wrapped in a newspaper and is flavoured with printer's ink; occasionally, it is wrapped in cloth not too clean. Conditions such as these are not fair to the pupils. They come a long way to school, often over poor roads; and it is necessary, for both their physical and their mental development, that they should receive adequate nourishment served as attractively as possible. Many of the defects found among school children can be traced, to a greater or less extent, to lack of nutrition. The United States military 179draft shows that the number of those physically defective is from seven to twenty per cent. higher in rural districts than in towns and cities, and this difference is not peculiar to that country. May we not reasonably suppose that many of these defects are caused by mal-nutrition, and that this mal-nutrition is in part due to the poor noon-day lunch? As these defects hinder mental as well as physical development, the question of proper nutrition through the medium of the school lunch becomes an educational one.
With proper care in the selection of food, the packing of the lunch box, and rational methods of consumption, there is no reason why the box lunch should not be nourishing, attractive, and possess an educational value.
It may be laid down as an axiom that every school lunch should be supervised by the teacher and hap-hazard methods of eating the lunch should be prohibited. Those schools that are fortunate enough to possess a large table can approximate somewhat to the best home conditions, and have the table set in the proper manner, as shown in Lesson VI, page 18. The pupils should sit round the table, at the head of which is the teacher, and the lunch may be made to partake of the nature of a family party. If rightly managed, the meal, even under the unusual difficulties presented in the rural school, may offer the most favourable opportunities to inculcate habits of cleanliness and neatness and to cultivate good manners. The pupils will learn something about the proper selection of food and the importance of thorough mastication. Clean hands and faces and tidy hair should be insisted upon, and individual drinking cups should be encouraged. As a 180manual training exercise, each pupil may be taught to make his own drinking cup from heavy waxed paper. Grace may be said by the older pupils in turn.
The table should be made to look as attractive as possible. The pupils, in turn, might undertake to have the table-cloth washed at home or, in place of a linen cloth, a covering of white oil-cloth may be used. In some cases the school garden will be able to supply flowers or a growing plant for a centrepiece. Three or four of the larger pupils, either boys or girls, may set the table in ten minutes, while the others are washing their hands and faces and tidying their hair. Some such plan as this will add palatability and cheer to the monotony of the everyday cold and often unattractive lunch and will create a spirit of true and healthy sociability among the pupils.
In schools that do not possess tables large enough to be used as suggested above, each pupil should be required to set one place at his own desk, as shown in the illustration on page 20. A paper napkin may be used for a table-cloth, if a small piece of white oil-cloth is not procurable. Each pupil retains his place until all have finished; he should then dispose of the crumbs and leave his desk tidy. From twenty minutes to half an hour is generally found sufficient for the meal. There should be cheerful conversation and restrained laughter throughout the meal, and acts of courtesy and generosity should be encouraged. At seasons when there are no flies, and on days when the weather is favourable, it is a pleasant change to serve lunch out-of-doors.
The lunch is provided by the home, but the teacher may give some useful lessons in Household Science by talks on the contents of the lunch box and the proper methods of packing the same, so that the food will keep in 181good condition until the time for its consumption arrives. It is the duty of the school authorities to provide a suitable storage place for the lunch boxes. These boxes should be kept free from dust or flies and in a place where the food will not freeze in winter. Open shelves, so often seen, are not suitable and a properly ventilated cupboard in the school-room should be provided.
The whole question of the box lunch presents a serious problem, when we consider the large number of children who must depend upon it for their noon-day meal. This meal should be so constituted as to make it a real meal and not a makeshift. The same principles which govern the preparation of the meal should govern the preparation of the lunch box. It is said that the school lunch should consist of "something starchy and something meaty, something fat and something fibrous, something sweet and something savoury".
With so many varieties of breads, meats, cheese, jams, etc., innumerable kinds of sandwiches may be made. For example, there are brown, graham, rye, raisin, nut, and date breads, and equally many kinds of meat. Such variety makes it quite unnecessary to have an egg sandwich or hard-boiled eggs in the lunch box each day. While eggs are very valuable in the diet, a lunch with hard-boiled eggs five times each week becomes monotonous, and the appetite of the consumer flags. With skill and thought one can make little scraps of meat or other "left-overs" into attractive sandwiches. Ends of meat, ground and mixed with salad dressing or cream, make delicious sandwich fillings.
The bread should be cut evenly.
The thickness of the slice should vary with the appetite of the consumer.
The crust should not be removed.
The butter should be creamed for spreading.
Both slices should be buttered, in order to prevent the absorption of the filling.
The filling should be carefully placed between the slices.
The sandwiches should be wrapped in waxed paper, to prevent drying.
| 1. Egg and ham: | |
|
Three eggs hard boiled and chopped fine or ground |
|
|
An equal amount of chopped or boiled ham |
|
|
Salad dressing |
|
|
Mix and spread. |
|
|
|
|
|
2. Raisin filling: |
|
|
One cup of raisins ground or chopped |
|
|
One half-cup of water |
|
|
One half-cup of sugar |
|
|
One tablespoonful of flour into the same quantity of vinegar |
|
|
Juice and grated rind of one lemon |
|
|
Cook in a double boiler until thick. |
|
|
|
|
| 3. Fig filling: | |
|
Remove the stems and chop the figs fine. |
|
|
Add a small quantity of water. |
|
| 183
Cook in a double boiler until a paste is formed. |
|
|
Add a few drops of lemon juice. |
|
|
Chopped peanuts may be added. |
|
|
|
|
| 4. Egg: | |
|
Chop a hard-cooked egg. |
|
|
Mix with salad dressing or melted butter, to a spreading consistency. |
|
|
5. Equal parts of finely-cut nuts and grated cheese, with salad dressing |
|
|
6. Equal parts of grated cheese and chopped olives |
|
|
7. Sardines with lemon juice or a little dressing |
|
|
8. Chopped dates with a little cream. Nuts may be added. |
|
|
9. Thinly sliced tomatoes (seasonal) |
|
|
10. Sliced cucumbers |
|
|
11. Marmalade. Chopped nuts may be added. |
|
In selecting the food the following suggestions may prove helpful:
|
Protein—Sandwiches of fish, meat, egg, cheese, nuts, dish of cottage cheese |
|
|
For the older pupils, baked beans |
|
|
Carbohydrates—Bread, cake, cookies, jam, honey, dates, figs, raisins, prunes, candy |
|
|
Fats—Butter, cream, peanut-butter |
|
|
Note.—When possible, a bottle of clean sweet milk should form part of every lunch. |
|
|
Cup custards of various flavours |
|
Cookies with nuts and fruits |
|
Cakes—not too rich |
|
Pies well made and with good filling |
|
Candy—plain home-made |
|
Preserves |
|
Fresh fruits |
As often as possible, a surprise should be included, generally in the form of a dessert of which the pupil is fond. A surprise adds to the pupil's pleasure in eating and, indirectly, aids digestion.
Much of the attractiveness of a lunch depends upon the manner of packing. We must consider the fact that the foods must be packed together closely and must remain so packed for several hours. This makes careful packing a necessity.
|
1. Be sure that the box is absolutely clean. |
|
2. Line it with fresh paper every time it is used. |
|
3. Wrap each article of food in wax paper. |
|
4. Place in the box neatly, the food that is to be used last in the bottom of the box, unless it is easily crushed. |
|
5. Lay a neatly folded napkin on the top. |
|
Lunch box |
|
Waxed paper |
|
Paper napkin |
|
Drinking cup |
|
Knife, fork, and spoon |
|
Thermos bottle or jar for milk or other liquid |
The box itself should be of odourless material, permanent, and light in weight, admitting of safe means of ventilation. Paper bags should never be used for food containers, as it is impossible to pack the lunch in them firmly and well and there is danger of their being torn or of insects or flies creeping into them. Boxes of fibre, tin, basket weave, or other material, may be used. The box will require scrubbing, and should be frequently dried and aired well. Many types of lunch boxes have compartments provided for the various kinds of food.
Waxed paper and paper napkins, or the somewhat heavier paper towels of much the same size, are very useful for packing lunches, and may be obtained at a low price, particularly if bought in large quantities. An extra napkin, either of paper or cloth, should be put in the basket, to be spread over the school desk when the lunch is eaten. Napkins can be made out of cotton crêpe at a cost of a very few cents each. The crêpe may be bought by the yard and should be cut into squares and fringed. Such napkins have the advantage of not needing to be ironed.
Paper cups, jelly tumblers with covers which can now be bought in several sizes, and bottles with screw tops, such as those in which candy and other foods are sold, may 186all be used for packing jellies, jams, honey, etc. The thermos bottle may be used for carrying milk, or, if this is too expensive, a glass jar with a tight cover may be substituted. If the thermos bottle is used, hot drinks may also be carried.
The serving of a hot lunch or of one hot dish need be neither an elaborate nor an expensive matter. Many rural schools in the United States, some of them working under conditions worse than any of ours, are serving at least one hot dish to supplement the lunch brought from home. The advantages of this plan are:
|
1. It enables the pupils to do better work in the afternoon. |
|
2. It adds interest to the school work and makes the pupils more ready to go to school in bad weather. |
|
3. It gives some practical training and paves the way toward definite instruction in Household Science. |
|
4. It gives a better balance to meals, and as compared with a cold lunch it aids digestion. |
|
5. It teaches neatness. |
|
6. It gives opportunity to teach table manners. |
|
7. It strengthens the relationship between the home and the school. |
The teacher should have a meeting of the school trustees and of the mothers of the pupils and outline the method of procedure. It is only in this way that the co-operation of all can be secured, and without this co-operation there can be no success. This meeting should be addressed by the Public School Inspector; and after 187the consent of the parents and the trustees has been secured, the scheme may be put into operation. Some thought will have to be given to the organization, in order that the plan may work smoothly. If properly organized, there need be little or no interruption to the ordinary routine of the school.
The pupils, both boys and girls, should be arranged in groups, each group taking the work in turn. Even the smallest pupils should be allowed to take part, as there are many duties which they can perform successfully. If each group is composed of five or six pupils, the work may be arranged as follows: two will prepare the dish, two will get the table or the desks ready (or each pupil may prepare his own desk), and the others will wash the dishes.
The furnishing of supplies is a problem which each teacher will have to solve for herself, according to the conditions which exist in the community. Supplies which can be stored are best purchased by the school trustees; while the mothers of the pupils should furnish the perishable articles, such as milk and butter. As often as possible, the pupils may be asked to bring various articles, such as a potato, an apple, a carrot, an egg, etc. These may be combined and prepared in quantities. The school garden should be relied upon to supply many vegetables in season, thus adding interest and life to both the garden work and the lunch. In some districts the neighbourhood is canvassed for subscriptions in order to provide funds to purchase supplies for the term lunches. Some schools give a concert or entertainment in order to raise funds for this purpose, and in others all the supplies have been purchased by the school trustees.
The pupils who are to prepare the hot dish may make the necessary preparations before school or at recess, and 188they must so time the cooking that the dish will be ready when required. They should be allowed to leave their desks during school hours to give it attention if necessary. In schools where this method is adopted, it has been found that the privilege has never been abused, nor have the other pupils been less attentive on account of it. However, most of the recipes suggested later require little or no attention while cooking.
At twelve o'clock the assigned pupils get the dish ready for serving and set the table. The others wash their hands, tidy their hair, and get their lunch boxes. All pass to their places. The pupils who have prepared the dish may serve it, using trays to carry each pupil's supply, or the pupils may pass in line before the serving table and to their places, time being thus saved. When the meal is finished, the pupils rise and bring their dishes to the serving table and stack them with the other dishes. Two remain behind to clear up and wash the dishes, while the others go to play. If the desks are used, each pupil is responsible for leaving his own desk clean.
The pupils may be required to keep an account of the cost of the food and to calculate the cost per head per day or per week. A schedule of the market prices of food should be posted in a conspicuous place, and the pupils may take turns in keeping these prices up to date. A separate black-board may be used for this purpose.
The dish chosen should be as simple as possible—a vegetable or cream soup, cocoa, baked potatoes, baked apples, white sauce with potatoes or other vegetables, apple sauce, rice pudding, etc. It may be well, in some cases, to have plans made on Friday for the following week. As a rule, each day a little before or after four o'clock, the recipe for the following day should be discussed, the quantities 189worked out to suit the number of pupils, and the supplies arranged for. The element of surprise should be made use of occasionally, the pupils not being allowed to know the dish until they take their places.
The following are some suggested menus in which the food brought from home is supplemented by one hot dish. (The name of the hot dish is printed in italics.)
1. Potato soup, meat sandwiches, orange, sponge cake
2. Cream of tomato soup, bread and butter sandwiches, stuffed egg, pear, oatmeal cookies
3. Apple cooked with bacon, bread and butter sandwiches, gingerbread, milk
4. Cocoa, date sandwiches, celery, graham crackers, apple
5. Stewed apples, egg sandwiches, plain cake, prunes stuffed with cottage cheese
6. Custard, brown bread sandwiches, apple, raisins, sauce, molasses cookies
7. Baked beans, bread and butter sandwiches, fruit, sauce, molasses cookies
| First week | Second week | |
| Monday | Potato soup | Rice and milk |
| Tuesday | Cocoa | Tomato soup |
| Wednesday | Coddled eggs | Egg broth |
| Thursday | Creamed potatoes | Chocolate custard |
| Friday | Soft custard | Rice and tomato |
| 190 Third week | Fourth week | |
| Monday | Macaroni and cheese | Rice soup |
| Tuesday | Creamed eggs | Cocoa |
| Wednesday | Cheese soup | Boiled rice and milk |
| Thursday | Apple sauce | Soft-cooked eggs |
| Friday | Cheese | Wheat pudding |
| First week | Second week | |
| Monday | Rice soup | Macaroni and cheese |
| Tuesday | Cocoa | Apple sauce |
| Wednesday | Baked apples | Shirred eggs |
| Thursday | Custard | Cheese soup |
| Friday | Baked eggs | Apple custard |
| Third week | Fourth week | |
| Monday | Potato soup | Rice and tomato |
| Tuesday | Tapioca cream | Apple custard |
| Wednesday | Cocoa | Tomato soup |
| Thursday | Creamed potatoes | Cracker pudding |
| Friday | Soft custard | Cocoa |
All the recipes given have been used with success in preparing rural school lunches. The number that the recipe will serve is generally stated and, where this number does not coincide with the number of pupils in any particular school, the quantities required may be obtained by division or multiplication. The recipes given in the lessons on cooking may also be used in preparing the school lunch, as each recipe states the number it will serve.
|
1 c. milk |
½ tbsp. butter |
|
|
2 tbsp. flour |
¼ tsp. salt |
|
| ⅛ tsp. white pepper | ||
|
6 tbsp. (18 tsp.) cocoa |
6 c. milk |
|
|
6 tbsp. (18 tsp.) sugar |
6 c. boiling water |
|
| ½ tsp. salt | ||
|
1 qt. peeled potatoes cut in thin slices |
4 tbsp. flour |
|
|
3 qt. milk |
⅛ tsp. black pepper |
|
|
2 tsp. salt |
1 small onion |
|
|
4 tsp. butter |
½ tsp. celery seed or a stock of celery |
|
1 can peas or 1 qt. fresh peas |
2 tbsp. flour |
|
|
1 pt. milk |
1 tsp. salt |
|
|
2 tbsp. butter |
¼ tsp. pepper |
|
1 pt. or 1 can tomatoes |
1 qt. milk |
|
|
2 tbsp. butter |
Sprig of parsley |
|
|
3 tbsp. flour |
¼ tsp. white pepper |
|
|
1 tsp. sugar |
½ tsp. soda |
|
| 1 tsp. salt | ||
|
2 pt. cans corn |
2 slices onion |
|
|
1 pt. cold water |
2 qt. of thin white sauce |
|
| Seasonings | ||
|
1 c. Lima beans |
3 tbsp. butter |
|
|
2 qt. water |
2 tbsp. flour |
|
|
2 whole cloves |
3 tbsp. minced onion |
|
|
1 bay leaf |
1 tbsp. " carrot |
|
|
1 tsp. salt |
1 tbsp. " celery |
|
| ¼ tsp. pepper | ||
|
4 c. milk |
1⅓ c. grated cheese |
|
|
2 tbsp. flour |
Salt and pepper to taste |
|
4 tbsp. rice |
½ small onion |
|
|
4 c. milk |
4 stalks celery |
|
|
3 tbsp. butter |
½ bay leaf |
|
| Salt and pepper to taste | ||
|
3 c. rice |
2 c. sugar |
|
|
6 c. water |
4 eggs |
|
|
6 c. milk |
2 tsp. salt |
|
| 3 c. fruit (chopped raisins) if desired | ||
|
2 c. rice |
4 qt. milk |
|
|
1 c. raisins |
1 c. sugar |
|
|
1 tsp. salt |
1 tsp. cinnamon |
|
1½ c. cream of wheat |
1½ tsp. salt |
|
|
10 c. boiling water |
1½ c. dates (chopped) |
|
9 eggs |
2 tbsp. butter |
|
|
1 c. milk |
1 tsp. salt |
|
| Pepper | ||
|
6 hard-cooked eggs |
2 c. milk |
|
|
4 tbsp. butter |
4 tbsp. flour |
|
| Salt and pepper | ||
|
6 eggs |
1 c. hot milk |
|
|
6 tbsp. sugar |
Few grains salt |
|
| Vanilla or nutmeg | ||
|
White sauce (medium consistency) |
3 tbsp. butter |
|
|
3 tbsp. flour |
1½ c. milk |
|
| Salt and pepper | ||
| 1 tsp. butter |
| 1 or more tbsp. hot milk |
| ¼ tsp. salt |
|
3 c. macaroni (2 pieces) |
3 qt. boiling water |
|
|
3 tsp. salt |
6 c. white sauce (medium) |
|
1 qt. milk |
½ tsp. salt |
|
|
¾ c. cornstarch |
¾ c. sugar |
|
| Vanilla | ||
|
9 tart apples |
6 whole cloves (if desired) |
|
|
¾ c. water |
¾ c. sugar |
|
| Piece of lemon rind (if desired) | ||
|
¾ lb. fruit (about) |
⅓ c. sugar |
|
|
1½ pt. of water |
1 or 2 slices lemon or |
|
| a few cloves and a piece of cinnamon stick | ||
|
2 c. milk |
2 eggs |
|
|
6 tbsp. sugar |
½ tsp. vanilla |
|
| A few grains of salt | ||
|
3 c. scalded milk |
4 tbsp. pearl, or minute, tapioca |
|
|
2 eggs slightly beaten |
6 tbsp. sugar |
|
|
2 tbsp. butter |
A few grains of salt |
| 2 c. cooked rice |
| 2 tbsp. butter |
| 2 tbsp. flour |
| 2 c. unstrained or 1 c. strained tomato |
| 1 slice of onion minced |
| Salt and pepper |
|
6 soda crackers |
3 eggs |
|
|
3 c. milk |
6 tbsp. sugar |
|
| ½ tsp. salt | ||
200A large number of recipes have been given, in order that a selection may be made according to season, community conditions, and market prices, and so that sufficient variety may be secured from day to day.
Attention given to this matter will be well repaid by the improved health of the pupils, the greater interest taken in the school by the parents, and the better afternoon work accomplished. It has been well said: "The school lunch is not a departure from the principle of the obligation assumed by educational authorities toward the child, but an intensive application of the measures adopted for the physical nurture of the child, to the end of securing in adult years the highest efficiency of the citizen".
The Rural School Luncheon: Department of Education, Saskatchewan
The Box Luncheon: New York State College of Agriculture, Cornell University
Hints to Housewives: Issued by Mayor Mitchell's Food Supply Committee, New York City
Home Economics in Village and Rural Schools: Kansas State Agricultural College
Home-made Fireless Cookers and Their Use: Farmers' Bulletin, United States Department of Agriculture
Hot Lunches for Rural Schools: Parts I and II, Iowa State College of Agriculture and Mechanic Arts
Rural School Lunches: University of Idaho, Agricultural Extension Department
The Rural School Lunch: University of Illinois College of Agriculture
The School Luncheon: Oregon Agricultural College
There is no school so unhappily situated or so poorly equipped that it is unable to teach effectively the lessons previously outlined in the "Care of the Home" and "Sewing". Now that a grant in aid is provided by the Department of Education any rural school may procure one of the sets of equipment for cooking suggested or some modification thereof. As a stepping-stone to the provision of that equipment and as a means of educating the people of the district in regard to the advantages of teaching this branch of Household Science, it may be advisable or even necessary, in some cases, to attempt practical work, even where no equipment is installed by the school authorities.
It should be remembered that the present position of Manual Training and Household Science in urban schools is entirely owing to private initiative and demonstration, by which the people were shown how and why these subjects should be included in the curriculum of the schools. It is reasonable to suppose that the same results will follow if somewhat the same methods are tried in the case of the rural schools, which form such a large part of our educational system. Two methods of giving instruction of this character have, in the United States, been followed by successful results.
In the first of these, the teacher spends the last thirty or forty minutes, generally on Friday afternoons, in the description and discussion of some practical cooking problem 202which may be performed in the homes of the pupils. Before this plan is adopted, it should be discussed with the pupils who are to take the work. They should be required to promise that they will practise at home; and the consent and co-operation of the parents should be secured, as the success of this home work depends, in the first place, on the willingness of the pupil to accept responsibility, and, in the second place, on the honest and hearty co-operation of the parents.
A meeting of the mothers should be called, in order that the plan may be laid before them and their suggestions received. At this meeting afternoon tea might be served. The teacher should plan the lessons, but occasionally, particularly at festive seasons, the pupils themselves should be allowed to decide what shall be made. When it is possible, the food prepared at home should be brought by the pupil to the school, in order that it may be compared with that made by other pupils and be judged by the teacher. In other cases, the mother might be asked to fill up a previously prepared form, certifying to the amount and character of the work done at home by the pupil each week.
The instructions placed on the black-board should be clear and concise and give adequate information concerning materials, quantities, and methods. They should be arranged in such a way as to appeal to the eye and thus assist the memory. Connected composition should not be attempted, but the matter should be arranged in a series of numbered steps, somewhat as follows:
|
Carrots |
Salt and pepper |
|
|
Boiling water |
Butter |
|
1. Scrub, scrape, and rinse the carrots. |
|
2. Cut them into pieces by dicing them. |
|
3. Place the pieces in a sauce-pan. |
|
4. Set over the fire and cover with boiling water. |
|
5. Cook until the pieces are soft at the centre when pierced with a fork. |
|
6. Serve in a hot vegetable dish. |
After being thoroughly explained, these directions are placed in a note-book, for the guidance of the pupil in her home practice. In some cases, the directions are placed on properly punched cards, so that at the end of the year every pupil will have a collection of useful recipes and plans, each one of which she understands and has worked out. In many lessons of this type demonstrations may be given by the teacher and, if the food cannot be cooked on the school stove, it may be taken home to be cooked by one of the pupils.
Lessons given according to this method, by which the theory is given in school and the practice acquired at home, need not be restricted to cookery. Any of the lessons prescribed in the curriculum for Form III, Junior, may be treated in the same way. Lessons on the daily care of a bed-room, weekly sweeping, care and cleaning of metals, washing dishes, washing clothes, ironing a blouse and, in fact, on all subjects pertaining to the general care and management of the home, may be given in this way.
Each lesson should conclude with a carefully prepared black-board summary, which should be neatly copied into the note-books, to be periodically examined by the teacher. The black-board work of many teachers leaves much to be desired, and time spent in improving this will be well repaid. Examples of summaries of the kind referred to 204are to be found in the Ontario Teachers' Manual on Household Management. These instructions may be type-written or hectographed by the teacher and given to the pupils, thus saving the time spent in note-taking.
The second of the plans referred to is a modification of what is known as the "Crete" plan of Household Science, so called from the name of the place in Nebraska, U.S.A., where it was first put into operation. By this plan, definite instruction is given in the home kitchens of certain women in the district, under the supervision of the educational authorities. It was adopted, at first, in connection with the high schools of the small towns in that State but, with certain modifications, it is suitable to our rural school conditions.
In every community there are women who are known to be skilful in certain lines of cookery, and the plan makes use of such women for giving the required instruction. They become actually a part of the staff of the school, giving instruction in Household Science, and using the resources of their households as an integral part of the school equipment.
In order to put this plan into operation, a meeting of women interested in the school should be called and if, after the plan has been laid before them and fully discussed, enough women are willing to open their homes and act as instructors, then it is safe to proceed. The subjects should be divided, and a scheme somewhat as follows may be arranged:
|
Mrs. A. bread and biscuits |
|
Mrs. B. pies and cakes |
| 205
Mrs. C. canning and preserving |
|
Mrs. D. gems and corn bread |
|
Mrs. E. desserts and salads |
|
Mrs. F. cookies and doughnuts |
|
Mrs. G. vegetables. |
Six has been found a convenient number for a class, though ten is better, if the homes can accommodate that number. Half-past three is a good time for the classes to meet, as they then may be concluded by five o'clock, thus leaving the housewife free to prepare her evening meal. The day of the week should be chosen to suit the convenience of the instructor. The classes may meet once a week.
Arriving at the home of the instructor at half-past three, the pupils are seated in the most convenient room, and the lesson is given. During this talk the pupils are given not only the recipe, but details as to materials, the preparation thereof, the degree of heat required, the common causes of failure and, in fact, everything that in the mind of a practical cook would be helpful to the class. Notes are taken, and afterwards properly written out and examined by the teacher of the school.
The instructors prepare the food for cooking, and sometimes, as in the case of rolls and so on, they cook the food in the presence of the pupils. When white bread is to be baked, the pupils are asked to call, a few minutes after school, at the home of the instructor, to watch the first step—setting the sponge—and again the next morning before school to see the next step—mixing the bread—and again, about half-past eleven or twelve, to see the bread ready for the oven and, finally, on the way back to school, to see the result—a fine loaf of well-cooked bread.
206The pupils try the recipe carefully in their own homes, not varying its terms until they are able to make the dish successfully. When they can do this, they are free to experiment with modifications, and there should be no objection to receiving help from any source; in fact, it is a good thing for the daughter to get her mother to criticize her and offer suggestions in the many little details familiar to every housekeeper, but which cannot always be given by an instructor in one lesson.
By this method the pupils learn in their own homes and handle real cooking utensils on a real stove heated by the usual fire of that home. If it is a good thing—and no one doubts it—to learn Household Science in a school where everything that invention and skill can provide for the pupils is readily at hand, is it not worth while to enter the field of actual life and, with cruder implements, win a fair degree of success?
At the end of five or six months, after the pupils have had an opportunity to become skilful in making some of the dishes which have been taught, it may be well to have an exhibition of their work. Each pupil may, on Saturday afternoon, bring one or more of the dishes she has learned to prepare to the school-house, where they may be arranged on tables for the inspection of the judges. The dishes exhibited should be certified to as being the work of the pupil with no help or suggestion from anybody. Of course, work of this kind cannot be undertaken by the "suit case" teacher. The teacher who packs her bag on Friday at noon, carries it to school with her, and rushes to catch a train or car at four o'clock, not returning to the district until Monday morning, has no time for this kind of service.
207Occasionally the entire class may meet with their instructors in the school-room. An oil-stove and the necessary equipment may be obtained, and a demonstration may be given by one of the instructors. By this means much valuable instruction will be given that is not included in the regular course. At this time also many things may be discussed that pertain to the growth of the movement and the general well-being of the pupils.
The plan is flexible and may be modified easily to suit different localities. It calls for no outlay on the part of the school trustees; nor are the instructors necessarily put to any expense, as the articles prepared in giving the lessons may be used in their own homes.
By the adoption of one of the plans outlined, or such modifications of them as the peculiar requirements of the district may demand, every rural school may do something, not only toward giving a real knowledge of some phases of Household Science, but also toward developing the community spirit and arousing an interest in the school, which will benefit all concerned.
At the present time there is urgent need for thrift and economy in all that pertains to the management of the household—particularly in food and fuel. In the average home much fuel could be saved by the proper use of what is known as the fireless cooker. The scientific principle applied has long been known and is, briefly, as follows: If a hot body is protected by a suitable covering, the heat in it will be retained for a long time, instead of being lost by radiation or conduction. This is why a cosy is placed over a tea-pot.
In using a fireless cooker, the food is first heated on the stove until the cooking has begun, and then it is placed in the fireless cooker—a tight receptacle in which the food is completely surrounded by some insulating substance to prevent the rapid escape of the heat, which in this way is retained in the food in sufficient quantity to complete the cooking. Sometimes, when a higher cooking temperature is desired, an additional source of heat, in the form of a hot soapstone or brick or an iron plate such as a stove lid, is put into the cooker with the food.
The same principle is also employed in cookery in other ways. For example, in camp life beans are often baked by burying the pots overnight in hot stones and ashes, the whole being covered with earth; and in the "clam bakes" on the Atlantic Coast, the damp seaweed spread over the embers on the clams prevents the escape of the heat during cooking. The peasants in some parts of Europe are said to begin the cooking of their dinners and then to put them into hay boxes or between feather beds, so that the cooking may be completed while the family is absent in the fields.
209The chief advantages in the use of the fireless cooker are these:
1. It saves fuel, especially where gas, oil, or electric stoves are used. Where coal or wood is the fuel, the fire in the range is often kept up most of the day, and the saving of fuel is not so great. In summer, or when the kitchen fire is not needed for heating purposes, the dinner can be started in the stove early in the morning, and then placed in the fireless cooker, the fire in the range being allowed to go out. During the hot weather, the use of a kerosene or other liquid-fuel stove and a fireless cooker is a great convenience, since it not only accomplishes a saving in fuel, but helps to keep the kitchen cooler. The saving in fuel resulting from the use of a fireless cooker is greatest in the preparation of foods such as stews, which require long and slow cooking.
2. It saves time. Foods cooked in this way do not require watching, and may be left, without danger from fires or of over-cooking, while other duties are being performed or the family is away from home.
3. It conserves the flavour of the food and makes it easier to utilize the cheaper cuts of meat which, although not having so fine a texture or flavour, are fully as nutritious, pound for pound, as the more expensive cuts. Long cooking at a relatively low temperature, such as is given to foods in the fireless cooker, improves the flavour and texture of these tougher cuts of meat. Most people do not cook cereals long enough. By this method, the cereal may be prepared at night, cooked on the stove for about fifteen minutes, and then put in the fireless cooker. In the morning it will be cooked and ready to be served.
The fireless cooker may be used to advantage in preparing the following: soups; pot roasts; beef stew; Irish 210stew; lamb stew; corned beef and cabbage; boiled ham; baked beans; chicken fricassee; vegetables, such as turnips, carrots, parsnips, beets; dried vegetables, such as peas and beans; and dried fruits, such as peaches, apples, apricots, and prunes; cereals; and puddings.
The fireless cookers described in the following pages are not experiments. They have all been tested and found to be most practical.
While there are many good fireless cookers on the market which cost from five to twenty-two dollars, according to size and make, it is possible to construct a home-made cooker which will give very satisfactory results and will be considerably cheaper than one which is purchased in the shops.
Materials required: A box or some other outside container; some good insulating or packing material; an inside container for the kettle, or a lining for the nest in which the kettle is placed; a kettle for holding the food; and a cushion, or pad, of insulating material, to cover the top of the kettle.
For the outside container a tightly built wooden box, such as that shown in Figure 39, is satisfactory. The walls should be thick and of some non-conducting material. An old trunk, a small barrel, or a large butter or lard firkin or tin will serve the purpose. Another possibility is a galvanized iron bucket with a closely fitting cover (this has the advantage of being fire-proof). A shoe box 15 by 15 by 28 inches is convenient in size, since it may be divided into two compartments.
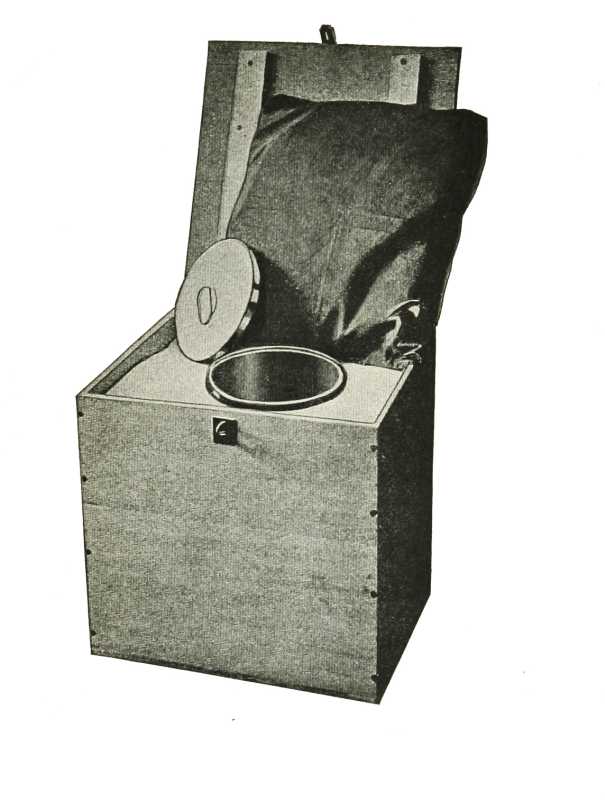
It should have a hinged cover and, at the front, a hook and staple, or212some other device to hold down the cover tightly; an ordinary clamp window fastener answers this purpose very well. The size of the container, which depends upon the size of the kettle used, should be large enough to allow for at least four inches of packing material all round the nest in which the kettle is placed.
For packing or insulating material a variety of substances may be used. Asbestos and mineral wool are the best, and have the additional advantage that they cannot burn. Ground cork (used in packing Malaga grapes), hay, excelsior, Spanish moss, wool, and crumpled paper may also be used satisfactorily. Of these materials crumpled paper is probably the best, as it is clean and odourless and, if properly packed, will hold the heat better than the others. It is wise to line the box with one thickness of heavy paper or with several thicknesses of newspaper, to make it as air-tight as possible. Asbestos sheeting may be used instead. To pack the container with paper, crush single sheets of newspaper between the hands and pack a layer at least four inches deep over the bottom of the outside container, pounding it in with a heavy stick of wood.
Place the inside container for the cooking kettle or the lining for the inside of the nest in the centre of this layer, and pack more crushed paper about it as solidly as possible. The method of packing with paper is shown in Figure 40. If other material is used it should be packed in a similar way.
Where an extra source of heat is to be used, it is much safer to use some non-inflammable material such as asbestos or mineral wool. A cheap substitute and one which is easily obtained are the small cinders sifted from coal 213ashes, preferably those from soft coal. However, the cinders from hard coal burned in the kitchen range will do. If a fire-proof packing material is not used, a heavy pad of asbestos should be placed at the bottom of the metal lining, and a sheet or two of this paper should be placed between the lining of the nest and the packing material. Whatever is used should come to the top of the inside container, and the box should be filled to within about four inches of the top.
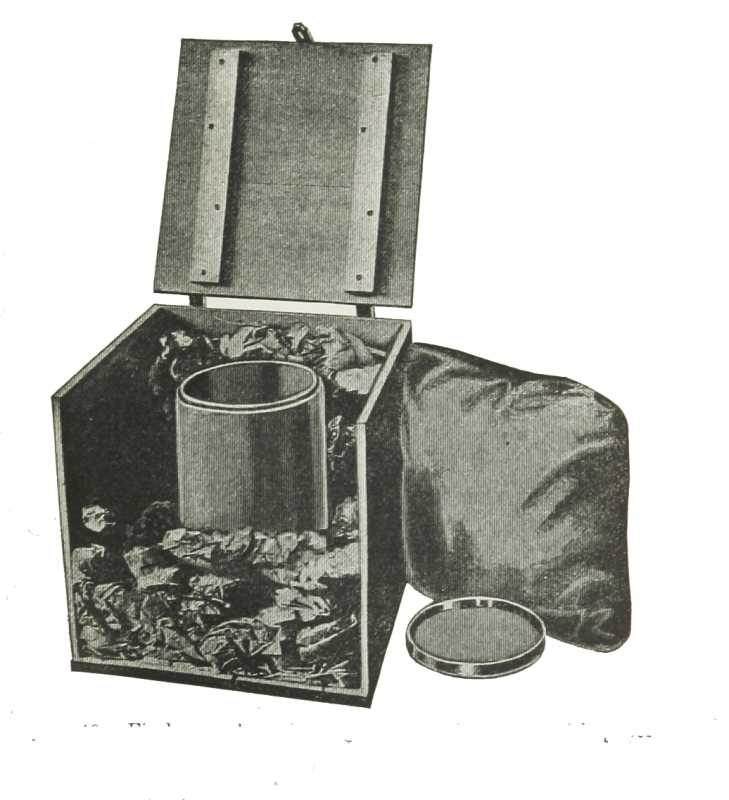
214The inside container for the cooking kettle or the lining for the nest in which it is to be placed should be cylindrical in shape, should be deep enough to hold the cooking kettle and stone, if one is used, and should fit as snugly as possible to the cooking kettle, but at the same time should allow the latter to be moved in and out freely. For this purpose a galvanized iron or other metal bucket may be used, or, better still, a tinsmith may make a lining of galvanized iron or zinc which can be provided with a rim to cover the packing material, as shown in Figure 41. In case no hot stone or plate is to be used, the lining may be made of strong cardboard.
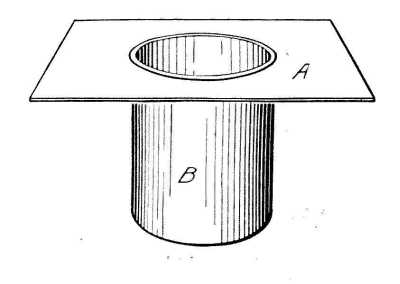
The kettle to be used for cooking should be durable and free from seams or crevices which are hard to clean. It should have perpendicular sides, and the cover should be 215as flat as possible and be provided with a deep lid fitting well down into the kettle, in order to retain the steam. A kettle holding about six quarts is a convenient size for general use. Tinned iron kettles should not be used in a fireless cooker, for, although cheap, they are very apt to rust from the confined moisture. Enamelware kettles are satisfactory.
Fireless cookers are adapted to a much wider range of cooking if they are provided with an extra source of heat in the form of a soapstone, brick, or an iron plate which is heated and placed underneath the cooking kettle. This introduces a possible danger from fire, in case the hot stove plate should come into direct contact with inflammable packing material such as excelsior or paper. To avoid this danger, a metal lining must be provided for the nest in which the cooking vessels and stone are to be placed.
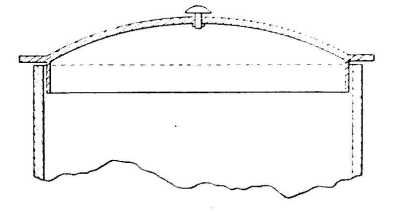
A cushion, or pad, must be provided, to fill completely the space between the top of the packing material and the 216cover of the box after the kettle is in place. This should be made of some heavy goods, such as denim, and stuffed with cotton, crumpled paper, or excelsior. Hay may be used, but it will be found more or less odorous. Figure 43 shows the vertical cross-section of a home-made fireless cooker.
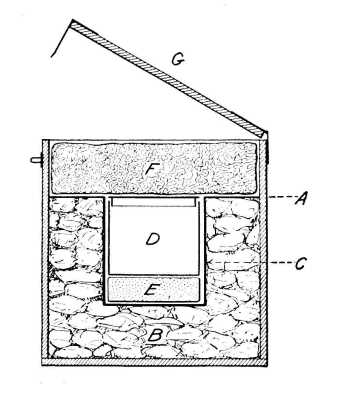
Materials required: Galvanized iron can, No. 3, with a cover; some sawdust; a covered agate pail (to be used as a cooking pail): and two yards of denim; any old linen, cotton, or woollen material may be used instead of denim.
Place loose sawdust in the bottom of the can to a depth of about three inches. Measure the depth of the cooking pail. Turn a fold two inches greater than this depth the entire length of the denim or other material and make a long bag. Lay the bag flat on the table and fill it with an even layer of sawdust, so that when completed it will still be half an inch wider than the depth of the pail. Roll the bag around the cooking pail, so that a smooth, firm nest is formed when the bag is placed upright in the can on the top of the sawdust. From the remaining denim or other material make a round, flat bag (the material will have to be pieced for this). Fill this bag with sawdust and use it on top of the cooking pail. The bags must be made and fitted into the can in such a way that there will be no open spaces whatever between the sides of the cooking pail and the can, or between the top of the cooking pail and the cover of the can, through which the heat might escape.
Materials required: One long box and two square boxes; the long box must be large enough to hold the other two and still leave two inches of space all around them; 218five and one-quarter yards of sheet asbestos one yard wide; two covered agate pails to be used as cooking pails; and about one yard of denim or other material.
Line the bottoms and sides of all three boxes with sheet asbestos. In the bottom of the long box lay newspapers flat to a depth of about half an inch. Put two inches of sawdust on top of this layer of newspapers. Place the two square boxes inside the long one, leaving at least two inches of space between them. Fill all the spaces between the boxes with sawdust. Tack strips of denim or other material so that they will cover all the spaces that are filled with sawdust.
The outside box must have a hinged lid, which must be fastened down with a clasp. Line the lid with the sheet asbestos to within half an inch of the edge. Put a layer of sawdust one inch deep on top of the asbestos. Tack a piece of denim or other material over the sawdust, still leaving the edge free and clear so that the cover may fit tightly; or the lid may be lined with asbestos and a denim pillow filled with sawdust made to fit tightly into the top of the box.
The fireless cooker should prove very useful in the lunch equipment of rural schools, as its use should mean economy of fuel, utensils, time, and effort. It might be made by the pupils and would afford an excellent manual training exercise.
219Many of the dishes in the recipes given may be cooked in this way, but more time must be allowed for cooking, as there is a fall of temperature in placing the food in the cooker. When the vessel is being transferred from the stove to the cooker, the latter should be in a convenient position, and the transfer should be made, and the cushion placed in position, very quickly, so that the food will continue boiling. If the quantity of food is small, it should be placed in a smaller tightly covered pail, set on an inverted pan in the larger pail, and surrounded with boiling water. When there is an air space above the food in the cooking dish, there is greater loss of heat, as air gives off heat more readily than water.
The following are examples of the foods that may be cooked in a Fireless Cooker:
Apple sauce—Bring to boiling temperature and place in the cooker, leave two hours.
Apple compote—Cut the apples in halves or quarters so that they need not be turned. Leave them in the cooker about three hours.
Dried fruits—Soak overnight, bring to the boiling-point, and leave in the cooker at least three hours.
Cream of wheat—Boil until thick, place in the cooker, leave overnight and, if necessary, re-heat in double boiler before using.
Rolled oats—Boil five minutes, then place in the cooker. Leave at least three hours and longer if possible.
Macaroni—Boil, then place in the cooker for two hours.
Rice—Boil, then place in the cooker for one hour.
220All vegetables may be cooked in the cooker. They must be given time according to their age. A safe rule for all green vegetables is to allow two and a half times as long as if boiled on the stove.
In the home, where the cooking is much greater in amount than it can be in the school, the saving in fuel, by the judicious use of the properly made fireless cooker, is correspondingly much larger. For example: in soups, from 2½ to 3½ hours use of fuel is made unnecessary; pot roast 2½ hours; beef stew 2½ hours; lamb stew 1½ hours; corn beef and cabbage 2½ hours; baked beans 5½ to 7½ hours; chicken fricassee 2 hours; dried peas, beans, and lentils 3 hours; dried fruits 3 hours; rice pudding 1½ hours.
(1) The Board of a rural or a village school which is unable to comply with the provisions of the General Regulations, but which maintains classes in Manual Training as applied to the work of the Farm or in Household Science suitable to the requirements of the rural districts, which employs a teacher qualified as below, and which provides accommodations and equipment and a course of study approved by the Minister before the classes are established, will be paid by the Minister the sums provided in the scheme below, out of the grants appropriated therefor: said grants to be expended on the accommodations, equipment, and supplies for Manual Training and Household Science. In no year, however, will the Departmental grants exceed the total expenditure of the Board for these classes.
(2) On the report of the Inspector of Manual Training and Household Science that the organization and the teaching of the classes in Manual Training or Household Science maintained as provided above are satisfactory, an annual grant will be paid by the Minister out of the Grant appropriated according to the following scheme:
(a) (i) When the teacher holds a Second Class certificate but is not specially certificated in Manual Training or Household Science—
Initial Grant to board, $40; to teacher, $15. Subsequent Grant: to board, $20; to teacher, $15.
222(ii) When the teacher holds a Second Class certificate and has satisfactorily completed the work of one Summer Course in Manual Training or Household Science, provided by the Department, and undertakes to complete Part II the following year, or receives permission from the Minister to postpone said part—
Initial Grant: to board, $40: to teacher, $20. Subsequent Grant: to board, $20: to teacher, $20.
(b) (i) When the teacher holds a Second Class certificate and in addition the Elementary certificate in Manual Training or Household Science—
Initial Grant: to board, $75; to teacher, $40. Subsequent Grant: to board, $30; to teacher, $40.
(ii) When the teacher holds a Second Class certificate and in addition the Ordinary certificate in Manual Training or Household Science—
Initial Grant: to board, $75; to teacher, $50. Subsequent Grant: to board, $30; to teacher, $50.
(c) When a school taking up Household Science provides at least one hot dish for the pupils staying to lunch from November 1st to March 31st, the above grants to the teacher of Household Science will be increased $10.
End of the Project Gutenberg EBook of Ontario Teachers' Manuals: Household
Science in Rural Schools, by Ministry of Education Ontario

*** END OF THIS PROJECT GUTENBERG EBOOK ONTARIO TEACHERS' MANUALS ***

***** This file should be named 20557-h.htm or 20557-h.zip *****
This and all associated files of various formats will be found in:
        http://www.gutenberg.org/2/0/5/5/20557/

Produced by Sigal Alon, Turgut Dincer and the Online
Distributed Proofreading Team at http://www.pgdp.net (This
file was produced from images generously made available
by The Internet Archive/Canadian Libraries)


Updated editions will replace the previous one--the old editions
will be renamed.

Creating the works from public domain print editions means that no
one owns a United States copyright in these works, so the Foundation
(and you!) can copy and distribute it in the United States without
permission and without paying copyright royalties.  Special rules,
set forth in the General Terms of Use part of this license, apply to
copying and distributing Project Gutenberg-tm electronic works to
protect the PROJECT GUTENBERG-tm concept and trademark.  Project
Gutenberg is a registered trademark, and may not be used if you
charge for the eBooks, unless you receive specific permission.  If you
do not charge anything for copies of this eBook, complying with the
rules is very easy.  You may use this eBook for nearly any purpose
such as creation of derivative works, reports, performances and
research.  They may be modified and printed and given away--you may do
practically ANYTHING with public domain eBooks.  Redistribution is
subject to the trademark license, especially commercial
redistribution.


*** START: FULL LICENSE ***

THE FULL PROJECT GUTENBERG LICENSE
PLEASE READ THIS BEFORE YOU DISTRIBUTE OR USE THIS WORK

To protect the Project Gutenberg-tm mission of promoting the free
distribution of electronic works, by using or distributing this work
(or any other work associated in any way with the phrase "Project
Gutenberg"), you agree to comply with all the terms of the Full Project
Gutenberg-tm License (available with this file or online at
http://gutenberg.org/license).


Section 1.  General Terms of Use and Redistributing Project Gutenberg-tm
electronic works

1.A.  By reading or using any part of this Project Gutenberg-tm
electronic work, you indicate that you have read, understand, agree to
and accept all the terms of this license and intellectual property
(trademark/copyright) agreement.  If you do not agree to abide by all
the terms of this agreement, you must cease using and return or destroy
all copies of Project Gutenberg-tm electronic works in your possession.
If you paid a fee for obtaining a copy of or access to a Project
Gutenberg-tm electronic work and you do not agree to be bound by the
terms of this agreement, you may obtain a refund from the person or
entity to whom you paid the fee as set forth in paragraph 1.E.8.

1.B.  "Project Gutenberg" is a registered trademark.  It may only be
used on or associated in any way with an electronic work by people who
agree to be bound by the terms of this agreement.  There are a few
things that you can do with most Project Gutenberg-tm electronic works
even without complying with the full terms of this agreement.  See
paragraph 1.C below.  There are a lot of things you can do with Project
Gutenberg-tm electronic works if you follow the terms of this agreement
and help preserve free future access to Project Gutenberg-tm electronic
works.  See paragraph 1.E below.

1.C.  The Project Gutenberg Literary Archive Foundation ("the Foundation"
or PGLAF), owns a compilation copyright in the collection of Project
Gutenberg-tm electronic works.  Nearly all the individual works in the
collection are in the public domain in the United States.  If an
individual work is in the public domain in the United States and you are
located in the United States, we do not claim a right to prevent you from
copying, distributing, performing, displaying or creating derivative
works based on the work as long as all references to Project Gutenberg
are removed.  Of course, we hope that you will support the Project
Gutenberg-tm mission of promoting free access to electronic works by
freely sharing Project Gutenberg-tm works in compliance with the terms of
this agreement for keeping the Project Gutenberg-tm name associated with
the work.  You can easily comply with the terms of this agreement by
keeping this work in the same format with its attached full Project
Gutenberg-tm License when you share it without charge with others.

1.D.  The copyright laws of the place where you are located also govern
what you can do with this work.  Copyright laws in most countries are in
a constant state of change.  If you are outside the United States, check
the laws of your country in addition to the terms of this agreement
before downloading, copying, displaying, performing, distributing or
creating derivative works based on this work or any other Project
Gutenberg-tm work.  The Foundation makes no representations concerning
the copyright status of any work in any country outside the United
States.

1.E.  Unless you have removed all references to Project Gutenberg:

1.E.1.  The following sentence, with active links to, or other immediate
access to, the full Project Gutenberg-tm License must appear prominently
whenever any copy of a Project Gutenberg-tm work (any work on which the
phrase "Project Gutenberg" appears, or with which the phrase "Project
Gutenberg" is associated) is accessed, displayed, performed, viewed,
copied or distributed:

This eBook is for the use of anyone anywhere at no cost and with
almost no restrictions whatsoever.  You may copy it, give it away or
re-use it under the terms of the Project Gutenberg License included
with this eBook or online at www.gutenberg.org

1.E.2.  If an individual Project Gutenberg-tm electronic work is derived
from the public domain (does not contain a notice indicating that it is
posted with permission of the copyright holder), the work can be copied
and distributed to anyone in the United States without paying any fees
or charges.  If you are redistributing or providing access to a work
with the phrase "Project Gutenberg" associated with or appearing on the
work, you must comply either with the requirements of paragraphs 1.E.1
through 1.E.7 or obtain permission for the use of the work and the
Project Gutenberg-tm trademark as set forth in paragraphs 1.E.8 or
1.E.9.

1.E.3.  If an individual Project Gutenberg-tm electronic work is posted
with the permission of the copyright holder, your use and distribution
must comply with both paragraphs 1.E.1 through 1.E.7 and any additional
terms imposed by the copyright holder.  Additional terms will be linked
to the Project Gutenberg-tm License for all works posted with the
permission of the copyright holder found at the beginning of this work.

1.E.4.  Do not unlink or detach or remove the full Project Gutenberg-tm
License terms from this work, or any files containing a part of this
work or any other work associated with Project Gutenberg-tm.

1.E.5.  Do not copy, display, perform, distribute or redistribute this
electronic work, or any part of this electronic work, without
prominently displaying the sentence set forth in paragraph 1.E.1 with
active links or immediate access to the full terms of the Project
Gutenberg-tm License.

1.E.6.  You may convert to and distribute this work in any binary,
compressed, marked up, nonproprietary or proprietary form, including any
word processing or hypertext form.  However, if you provide access to or
distribute copies of a Project Gutenberg-tm work in a format other than
"Plain Vanilla ASCII" or other format used in the official version
posted on the official Project Gutenberg-tm web site (www.gutenberg.org),
you must, at no additional cost, fee or expense to the user, provide a
copy, a means of exporting a copy, or a means of obtaining a copy upon
request, of the work in its original "Plain Vanilla ASCII" or other
form.  Any alternate format must include the full Project Gutenberg-tm
License as specified in paragraph 1.E.1.

1.E.7.  Do not charge a fee for access to, viewing, displaying,
performing, copying or distributing any Project Gutenberg-tm works
unless you comply with paragraph 1.E.8 or 1.E.9.

1.E.8.  You may charge a reasonable fee for copies of or providing
access to or distributing Project Gutenberg-tm electronic works provided
that

- You pay a royalty fee of 20% of the gross profits you derive from
     the use of Project Gutenberg-tm works calculated using the method
     you already use to calculate your applicable taxes.  The fee is
     owed to the owner of the Project Gutenberg-tm trademark, but he
     has agreed to donate royalties under this paragraph to the
     Project Gutenberg Literary Archive Foundation.  Royalty payments
     must be paid within 60 days following each date on which you
     prepare (or are legally required to prepare) your periodic tax
     returns.  Royalty payments should be clearly marked as such and
     sent to the Project Gutenberg Literary Archive Foundation at the
     address specified in Section 4, "Information about donations to
     the Project Gutenberg Literary Archive Foundation."

- You provide a full refund of any money paid by a user who notifies
     you in writing (or by e-mail) within 30 days of receipt that s/he
     does not agree to the terms of the full Project Gutenberg-tm
     License.  You must require such a user to return or
     destroy all copies of the works possessed in a physical medium
     and discontinue all use of and all access to other copies of
     Project Gutenberg-tm works.

- You provide, in accordance with paragraph 1.F.3, a full refund of any
     money paid for a work or a replacement copy, if a defect in the
     electronic work is discovered and reported to you within 90 days
     of receipt of the work.

- You comply with all other terms of this agreement for free
     distribution of Project Gutenberg-tm works.

1.E.9.  If you wish to charge a fee or distribute a Project Gutenberg-tm
electronic work or group of works on different terms than are set
forth in this agreement, you must obtain permission in writing from
both the Project Gutenberg Literary Archive Foundation and Michael
Hart, the owner of the Project Gutenberg-tm trademark.  Contact the
Foundation as set forth in Section 3 below.

1.F.

1.F.1.  Project Gutenberg volunteers and employees expend considerable
effort to identify, do copyright research on, transcribe and proofread
public domain works in creating the Project Gutenberg-tm
collection.  Despite these efforts, Project Gutenberg-tm electronic
works, and the medium on which they may be stored, may contain
"Defects," such as, but not limited to, incomplete, inaccurate or
corrupt data, transcription errors, a copyright or other intellectual
property infringement, a defective or damaged disk or other medium, a
computer virus, or computer codes that damage or cannot be read by
your equipment.

1.F.2.  LIMITED WARRANTY, DISCLAIMER OF DAMAGES - Except for the "Right
of Replacement or Refund" described in paragraph 1.F.3, the Project
Gutenberg Literary Archive Foundation, the owner of the Project
Gutenberg-tm trademark, and any other party distributing a Project
Gutenberg-tm electronic work under this agreement, disclaim all
liability to you for damages, costs and expenses, including legal
fees.  YOU AGREE THAT YOU HAVE NO REMEDIES FOR NEGLIGENCE, STRICT
LIABILITY, BREACH OF WARRANTY OR BREACH OF CONTRACT EXCEPT THOSE
PROVIDED IN PARAGRAPH F3.  YOU AGREE THAT THE FOUNDATION, THE
TRADEMARK OWNER, AND ANY DISTRIBUTOR UNDER THIS AGREEMENT WILL NOT BE
LIABLE TO YOU FOR ACTUAL, DIRECT, INDIRECT, CONSEQUENTIAL, PUNITIVE OR
INCIDENTAL DAMAGES EVEN IF YOU GIVE NOTICE OF THE POSSIBILITY OF SUCH
DAMAGE.

1.F.3.  LIMITED RIGHT OF REPLACEMENT OR REFUND - If you discover a
defect in this electronic work within 90 days of receiving it, you can
receive a refund of the money (if any) you paid for it by sending a
written explanation to the person you received the work from.  If you
received the work on a physical medium, you must return the medium with
your written explanation.  The person or entity that provided you with
the defective work may elect to provide a replacement copy in lieu of a
refund.  If you received the work electronically, the person or entity
providing it to you may choose to give you a second opportunity to
receive the work electronically in lieu of a refund.  If the second copy
is also defective, you may demand a refund in writing without further
opportunities to fix the problem.

1.F.4.  Except for the limited right of replacement or refund set forth
in paragraph 1.F.3, this work is provided to you 'AS-IS' WITH NO OTHER
WARRANTIES OF ANY KIND, EXPRESS OR IMPLIED, INCLUDING BUT NOT LIMITED TO
WARRANTIES OF MERCHANTIBILITY OR FITNESS FOR ANY PURPOSE.

1.F.5.  Some states do not allow disclaimers of certain implied
warranties or the exclusion or limitation of certain types of damages.
If any disclaimer or limitation set forth in this agreement violates the
law of the state applicable to this agreement, the agreement shall be
interpreted to make the maximum disclaimer or limitation permitted by
the applicable state law.  The invalidity or unenforceability of any
provision of this agreement shall not void the remaining provisions.

1.F.6.  INDEMNITY - You agree to indemnify and hold the Foundation, the
trademark owner, any agent or employee of the Foundation, anyone
providing copies of Project Gutenberg-tm electronic works in accordance
with this agreement, and any volunteers associated with the production,
promotion and distribution of Project Gutenberg-tm electronic works,
harmless from all liability, costs and expenses, including legal fees,
that arise directly or indirectly from any of the following which you do
or cause to occur: (a) distribution of this or any Project Gutenberg-tm
work, (b) alteration, modification, or additions or deletions to any
Project Gutenberg-tm work, and (c) any Defect you cause.


Section  2.  Information about the Mission of Project Gutenberg-tm

Project Gutenberg-tm is synonymous with the free distribution of
electronic works in formats readable by the widest variety of computers
including obsolete, old, middle-aged and new computers.  It exists
because of the efforts of hundreds of volunteers and donations from
people in all walks of life.

Volunteers and financial support to provide volunteers with the
assistance they need, is critical to reaching Project Gutenberg-tm's
goals and ensuring that the Project Gutenberg-tm collection will
remain freely available for generations to come.  In 2001, the Project
Gutenberg Literary Archive Foundation was created to provide a secure
and permanent future for Project Gutenberg-tm and future generations.
To learn more about the Project Gutenberg Literary Archive Foundation
and how your efforts and donations can help, see Sections 3 and 4
and the Foundation web page at http://www.pglaf.org.


Section 3.  Information about the Project Gutenberg Literary Archive
Foundation

The Project Gutenberg Literary Archive Foundation is a non profit
501(c)(3) educational corporation organized under the laws of the
state of Mississippi and granted tax exempt status by the Internal
Revenue Service.  The Foundation's EIN or federal tax identification
number is 64-6221541.  Its 501(c)(3) letter is posted at
http://pglaf.org/fundraising.  Contributions to the Project Gutenberg
Literary Archive Foundation are tax deductible to the full extent
permitted by U.S. federal laws and your state's laws.

The Foundation's principal office is located at 4557 Melan Dr. S.
Fairbanks, AK, 99712., but its volunteers and employees are scattered
throughout numerous locations.  Its business office is located at
809 North 1500 West, Salt Lake City, UT 84116, (801) 596-1887, email
business@pglaf.org.  Email contact links and up to date contact
information can be found at the Foundation's web site and official
page at http://pglaf.org

For additional contact information:
     Dr. Gregory B. Newby
     Chief Executive and Director
     gbnewby@pglaf.org


Section 4.  Information about Donations to the Project Gutenberg
Literary Archive Foundation

Project Gutenberg-tm depends upon and cannot survive without wide
spread public support and donations to carry out its mission of
increasing the number of public domain and licensed works that can be
freely distributed in machine readable form accessible by the widest
array of equipment including outdated equipment.  Many small donations
($1 to $5,000) are particularly important to maintaining tax exempt
status with the IRS.

The Foundation is committed to complying with the laws regulating
charities and charitable donations in all 50 states of the United
States.  Compliance requirements are not uniform and it takes a
considerable effort, much paperwork and many fees to meet and keep up
with these requirements.  We do not solicit donations in locations
where we have not received written confirmation of compliance.  To
SEND DONATIONS or determine the status of compliance for any
particular state visit http://pglaf.org

While we cannot and do not solicit contributions from states where we
have not met the solicitation requirements, we know of no prohibition
against accepting unsolicited donations from donors in such states who
approach us with offers to donate.

International donations are gratefully accepted, but we cannot make
any statements concerning tax treatment of donations received from
outside the United States.  U.S. laws alone swamp our small staff.

Please check the Project Gutenberg Web pages for current donation
methods and addresses.  Donations are accepted in a number of other
ways including checks, online payments and credit card donations.
To donate, please visit: http://pglaf.org/donate


Section 5.  General Information About Project Gutenberg-tm electronic
works.

Professor Michael S. Hart is the originator of the Project Gutenberg-tm
concept of a library of electronic works that could be freely shared
with anyone.  For thirty years, he produced and distributed Project
Gutenberg-tm eBooks with only a loose network of volunteer support.


Project Gutenberg-tm eBooks are often created from several printed
editions, all of which are confirmed as Public Domain in the U.S.
unless a copyright notice is included.  Thus, we do not necessarily
keep eBooks in compliance with any particular paper edition.


Most people start at our Web site which has the main PG search facility:

     http://www.gutenberg.org

This Web site includes information about Project Gutenberg-tm,
including how to make donations to the Project Gutenberg Literary
Archive Foundation, how to help produce our new eBooks, and how to
subscribe to our email newsletter to hear about new eBooks.